Embed Size (px)
Citation preview


Evelina Buiciag
HTML5 APPLICATIONS DEVELOPMENT MANUAL
Iași Romania
2016ISBN: 978-973-0-24454-0
The use of this material is reserved only for private use. It is forbidden andmay be caught and multiplication law public use because constitutes aviolation of copyright law. Copywriting @ 2017 Evelina Buiciag,AnySolution. All rights reserved.
Table of contentTABLE OF CONTENT1 - INTRODUCTION TO HTML5 APPLICATION2 - UNDERSTAND THE PLATFORM FUNDAMENTALS
3 - CREATING APPS4 - PACKAGING AND THE RUNTIME ENVIRONMENT5 - APPLICATION STATE
6 - TOUCH INTERFACES AND GESTURES7 - DEBUGGING AND TESTING8 - VALIDATING HTML5 CODE
9 - PUBLISHING AN APPLICATION10 - HTML ESSENTIALS11 - ORGANIZE CONTENT12 - INPUT AND VALIDATION
13 - CSS INTRODUCTION14 - CSS SINTAX15 - MANAGING CONTENT
16 – LAYOUTS17 - MANAGING TEXT FLOW18 - MANAGING THE GRAPHICAL INTERFACE
19 - BUILDING INTERACTIVE APPLICATIONS20 - CREATING AND USING FUNCTIONS AND VARIABLES IN JAVASCRIPT21 - JQUERY AND OTHER THIRD-PARTY LIBRARIES22 - OBJECTS IN JAVASCRIPT
23 - DOCUMENT OBJECT MODEL (DOM)24 - LOCATING AND ACCESSING ELEMENTS25 - LISTENING AND RESPONDING TO EVENTS
26 - CHANGING, ADDING AND DELETING ELEMENTS
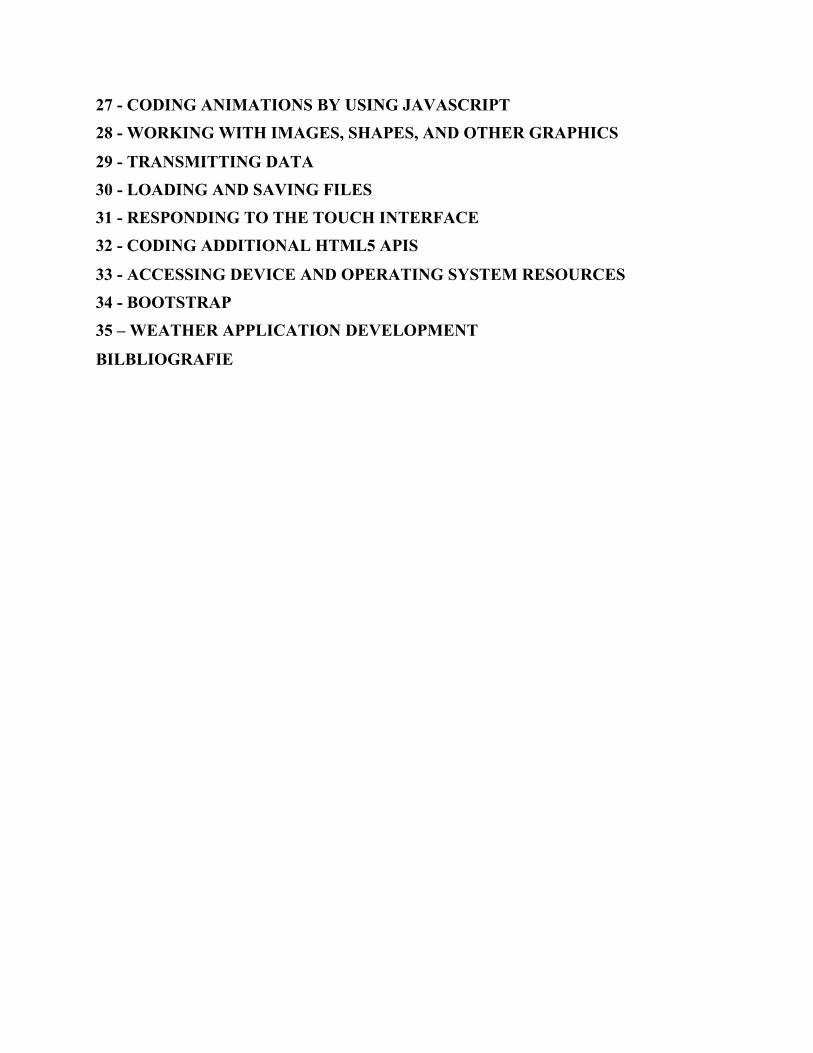
27 - CODING ANIMATIONS BY USING JAVASCRIPT28 - WORKING WITH IMAGES, SHAPES, AND OTHER GRAPHICS
29 - TRANSMITTING DATA30 - LOADING AND SAVING FILES31 - RESPONDING TO THE TOUCH INTERFACE32 - CODING ADDITIONAL HTML5 APIS
33 - ACCESSING DEVICE AND OPERATING SYSTEM RESOURCES34 - BOOTSTRAP35 – WEATHER APPLICATION DEVELOPMENT
BILBLIOGRAFIE
1 - Introduction to HTML5 Application
Hi, my name it is AnySolution and I will be yourmentor throughout this HTML5 APPLICATIONS DEVELOPMENTMANUAL.
HTML5 is the latest HTML standard and a family of technologies thatincludes HTML, CSS, and JavaScript. Although the HTML5 standard won’tbe finalized for a few years, most modern Web browsers already supportHTML5 elements. HTML5 app development for Web and mobile devicebrowsers is well underway.
Hyper Text Markup Language(HTML) is the language with whichthe content of a website is made (paragraphs, images, text, etc.).
Cascade Style Sheet(CSS) is the language used to design a website(colors, fonts, backgrounds, etc.).
JavaScript is a scripting language (a programming language that usesscripts and requires no compiler) that adds interactivity to Web pages.Although you can use HTML5, CSS3, and JavaScript to create Web pages,you can also use the combination to develop client applications (apps) thatrun-on touch-enabled devices like PCs, slates, tablets, and smartphones.Essentially, the same technologies developers use to build Web pages are
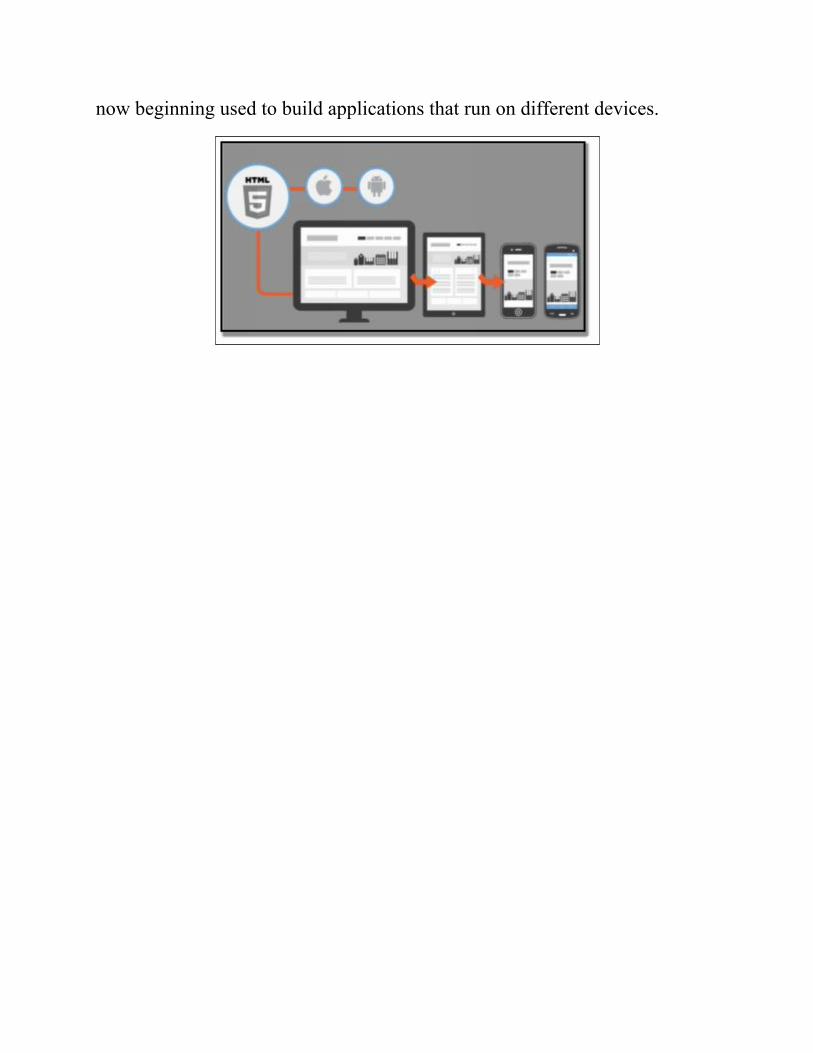
now beginning used to build applications that run on different devices.
2 - Understand the platform fundamentalsAlthough HTML5 is HTML, it has been developed by the W3C to
work directly with CSS3 and JavaScript to allow developers and designersthe ability to create web applications that will also work on touch-enableddevices and easily adapt to smaller screens. In addition, HTML5, CSS3, andJavaScript are all considered platform-independent technologies andtherefore can run regardless of the operating system if the operating systemhas a web browser.
For example, Windows 8 and Windows Phone 8 have the InternetExplorer browser, Mac OS and iPhone have the Safari browser, Linux OShas the Firefox browser and Android phones have the Google Chromebrowser. Each of these browsers can run HTML5, CSS3, and JavaScript.However, browsers also have versions, so if the browser being used is thenewest version then most HTML5 and CSS3 features will be supported.
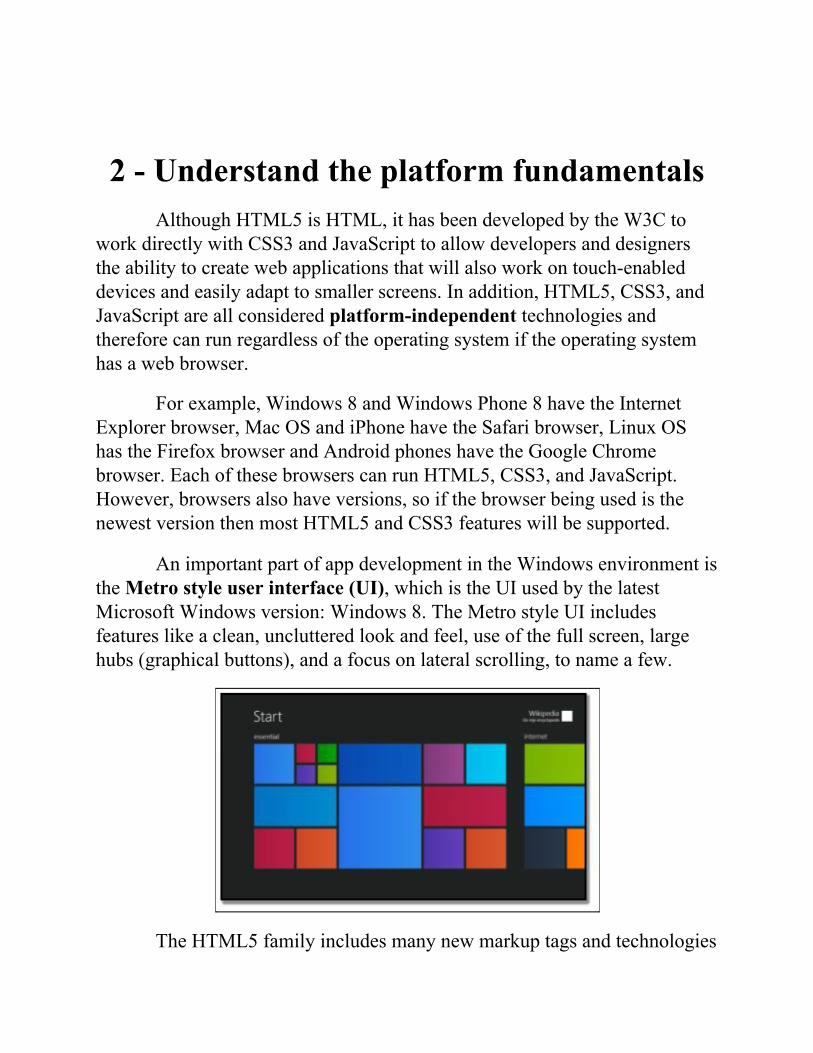
An important part of app development in the Windows environment isthe Metro style user interface (UI), which is the UI used by the latestMicrosoft Windows version: Windows 8. The Metro style UI includesfeatures like a clean, uncluttered look and feel, use of the full screen, largehubs (graphical buttons), and a focus on lateral scrolling, to name a few.
The HTML5 family includes many new markup tags and technologies
like media queries, geolocation, Modernizr, and much more. Thesetechnologies add a lot of functionality to HTML-based apps and help makethe finished product more stylish.
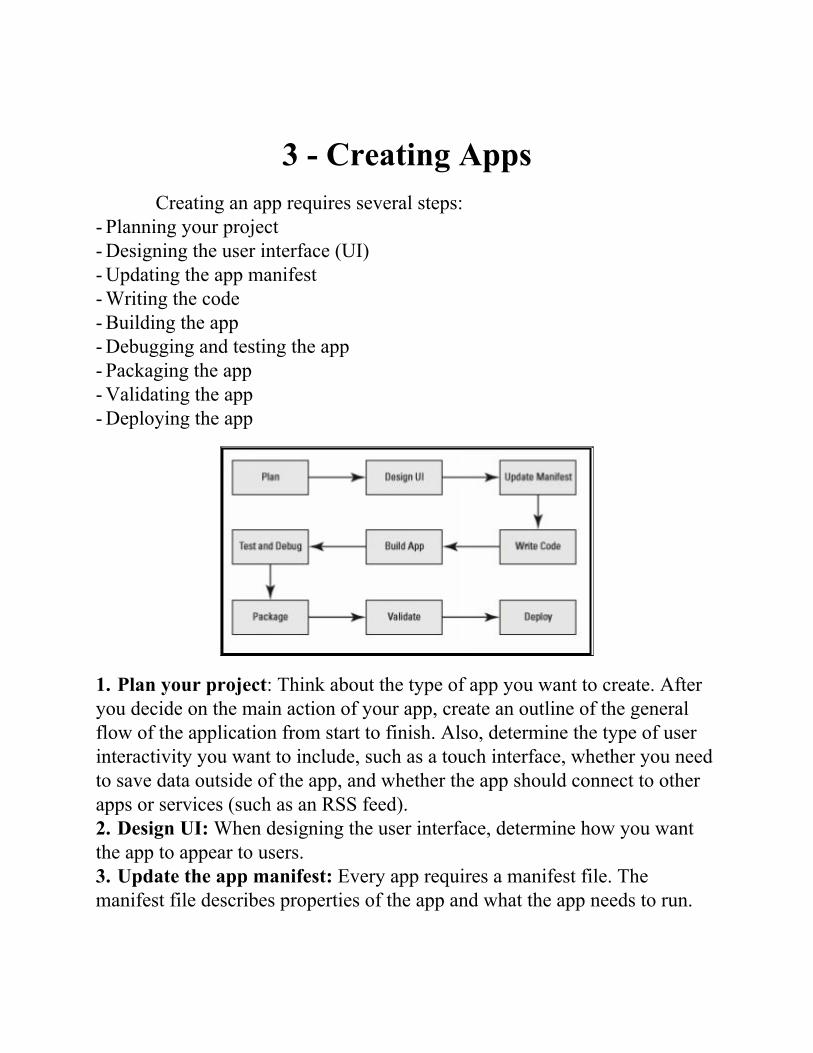
3 - Creating AppsCreating an app requires several steps:
- Planning your project- Designing the user interface (UI)- Updating the app manifest- Writing the code- Building the app- Debugging and testing the app- Packaging the app- Validating the app- Deploying the app
1. Plan your project: Think about the type of app you want to create. Afteryou decide on the main action of your app, create an outline of the generalflow of the application from start to finish. Also, determine the type of userinteractivity you want to include, such as a touch interface, whether you needto save data outside of the app, and whether the app should connect to otherapps or services (such as an RSS feed).2. Design UI: When designing the user interface, determine how you wantthe app to appear to users.3. Update the app manifest: Every app requires a manifest file. Themanifest file describes properties of the app and what the app needs to run.

4. Write code: During this phase, you compose the code for yourapplication, which might include a combination of HTML, CSS, andJavaScript.
5. Build the app: Using an app development tool such as Visual Studio,convert your code and other resources into an actual application.
6. Debug and test: You must test your app thoroughly and fix anyproblems that appear. If the app uses a touch interface, it’s highly importantto test the app on a touch device or use a touch emulator.
7. Package: Packaging an app creates a container that holds all thevarious files required by the app, such as JavaScript, images, and so on.
8. Validate: Validating your app means running it through a validationprogram to ensure nothing is missing.
9. Deploy: Upload your app to a marketplace such as the WindowsStore.
4 - Packaging and the RuntimeEnvironment
Application packaging is the process of bundling an application andits resources into an archive format for distribution and deployment.
The App Container• When a Web app executes, it does so in a contained environment
- An app container is a separate memory space• The purpose of an app container is to prevent apps from corruptingthe operating system
Permissions are grouped into permission sets, and every assembly isassigned a set. The .NET Framework defines some standard permission setssuch as FullTrust (implies all permissions) and Execution (permission toaccess the CPU only).
Each user account is assigned a level of access (credentials). They canbe set to use Windows Authentication, database authentication, noauthentication, or custom authentication.
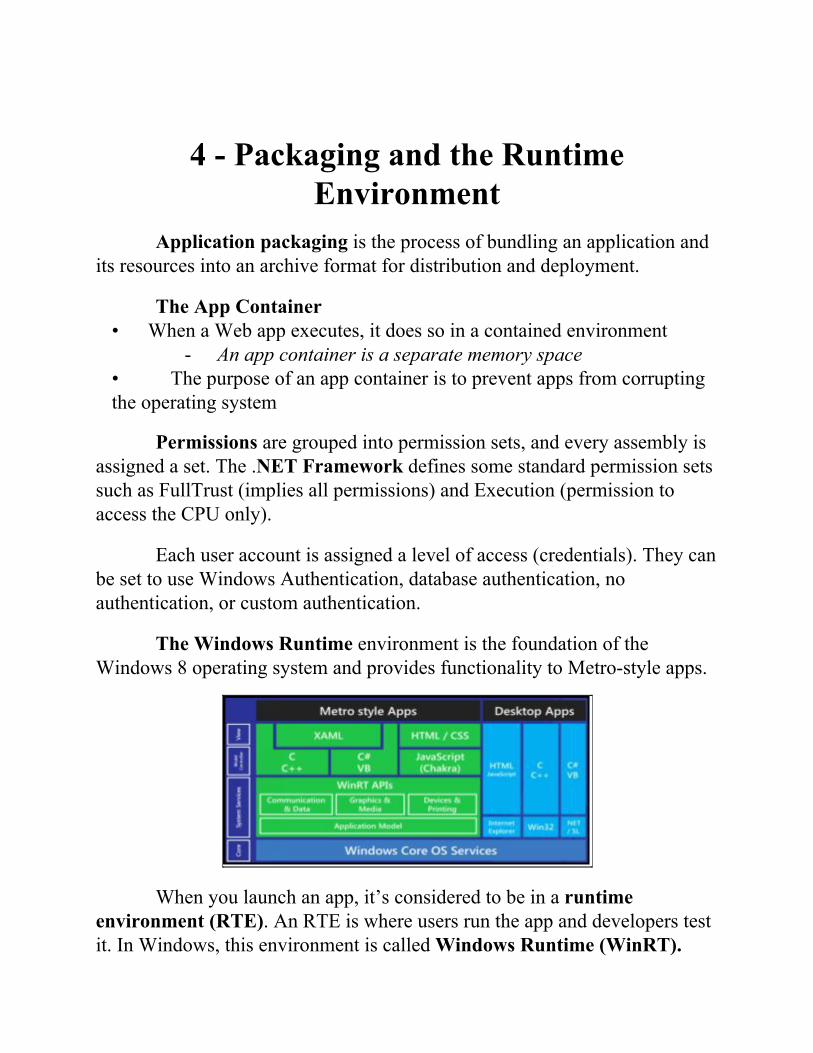
The Windows Runtime environment is the foundation of theWindows 8 operating system and provides functionality to Metro-style apps.
When you launch an app, it’s considered to be in a runtimeenvironment (RTE). An RTE is where users run the app and developers testit. In Windows, this environment is called Windows Runtime (WinRT).
The WinRT works with C#, C++, Visual Basic, and JavaScript. Youcan build Metro style apps with the WinRT and Windows Library forJavaScript APIs. An application programming interface (API) is simply alist of instructions letting a program communicate with another program. In aWeb app, an API enables a Web browser or a Web server to communicatewith other programs. There are hundreds of APIs available for many differentuses.
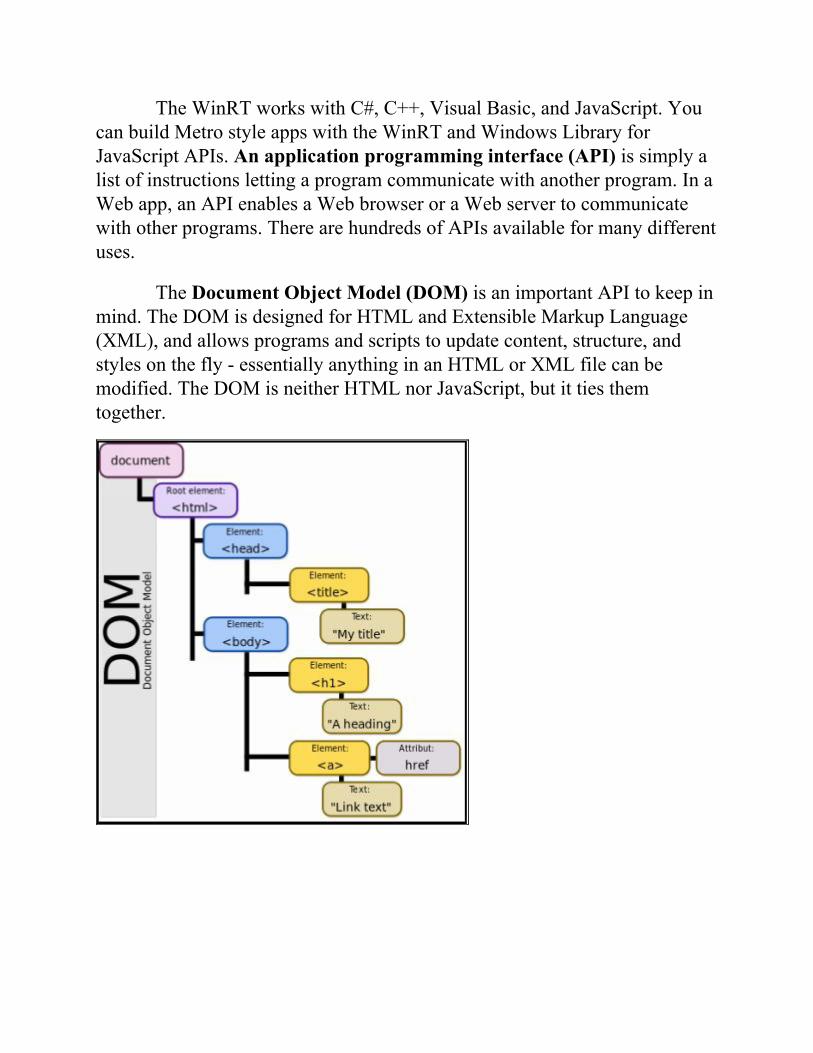
The Document Object Model (DOM) is an important API to keep inmind. The DOM is designed for HTML and Extensible Markup Language(XML), and allows programs and scripts to update content, structure, andstyles on the fly - essentially anything in an HTML or XML file can bemodified. The DOM is neither HTML nor JavaScript, but it ties themtogether.
5 - Application StateA session state is created when a user first requests access to an
application, and it ends when the session closes, such as when a user logs off.
An application state exists from the time a Web browser requests aWeb page until the browser closes. Persistent state information is data thatexists after a session ends. In HTML5, developers can use the localStorageand sessionStorage JavaScript methods to deal efficiently with state data. Inaddition, AppCache enables a user to load data ordinarily stored on a servereven when the user is offline.
Storing State Data Using Local and Session Storage
When we enter a uniform resource locator (URL) into the addressbar of a browser, the browser sends an HTTP request to a Web server for aWeb page.
HTTP is short for Hypertext Transport Protocol. HTTP is astateless protocol, which means that it doesn’t retain data from session tosession.
Therefore, when we close a Web browser after using an application,data is not automatically saved.
To work around the limitations of HTTP protocol, developershistorically have used cookies, which are small files that contain informationabout the user and the Web site visited and are saved on the user’s computer.When a user returns to a visited site, the browser sends the cookies back tothe Web server. Cookies help a Web server “remember” a user and customizethe user’s experience on that site.
However, cookies have proven to be a security risk. In addition, iflarge amounts of data are involved, all the data gets sent between the browserand server upon every request, which would cause a noticeable performancedecrease to the user.
In HTML5, developers can use the Web storage instead, which offersmore flexibility, larger data sets, and better performance. The localStoragemethod allows users to save larger amounts of data from session to s ession(persistent data), and there’s no time limit as to how long the data exists.
The SessionStorage method keeps data only for one session (until thebrowser is closed), which is also referred to as “per-tab storage.” Using thesemethods, specific data is transferred only when requested, so it’s possible tostore a relatively large amount of data without slowing down the connectionor site.
Appcache for offline files
Another way to use Web storage is to store data locally when a user isoffline. The Application Cache, or AppCache, stores resources like images,HTML pages, CSS files, and JavaScript - data that would ordinarily be storedon a server. Because the resources are stored on the client’s hard disk ordevice, the resources load faster when requested.
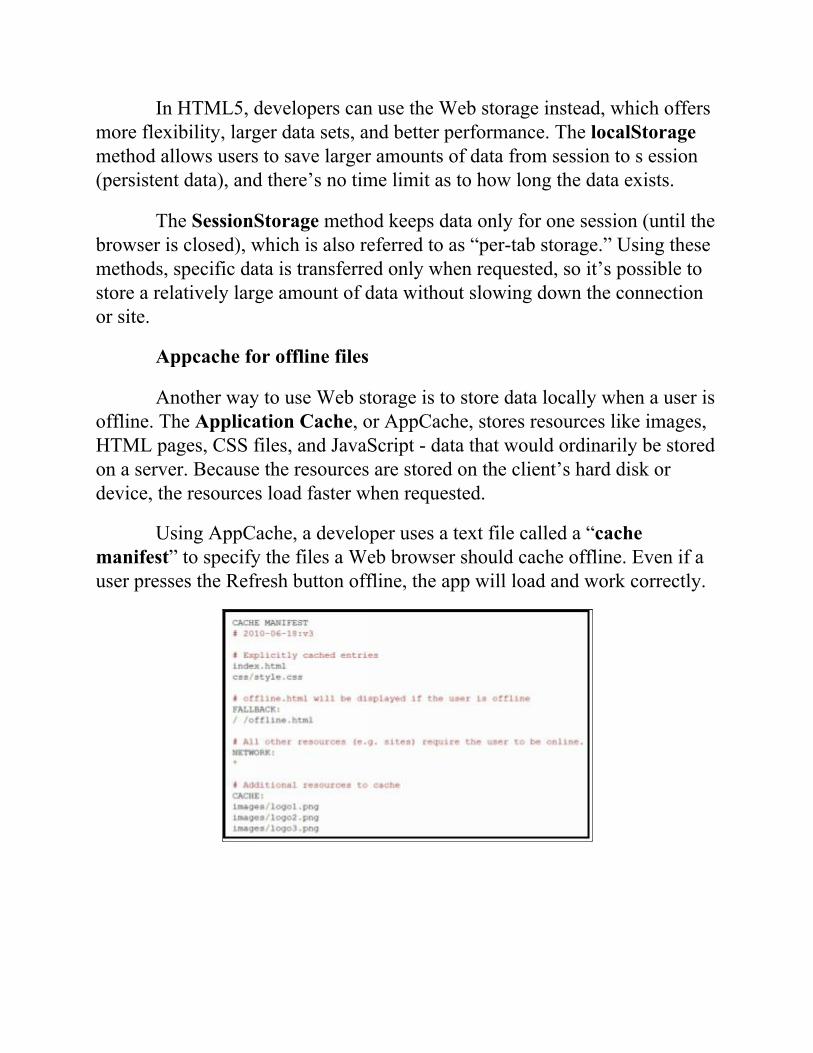
Using AppCache, a developer uses a text file called a “cachemanifest” to specify the files a Web browser should cache offline. Even if auser presses the Refresh button offline, the app will load and work correctly.
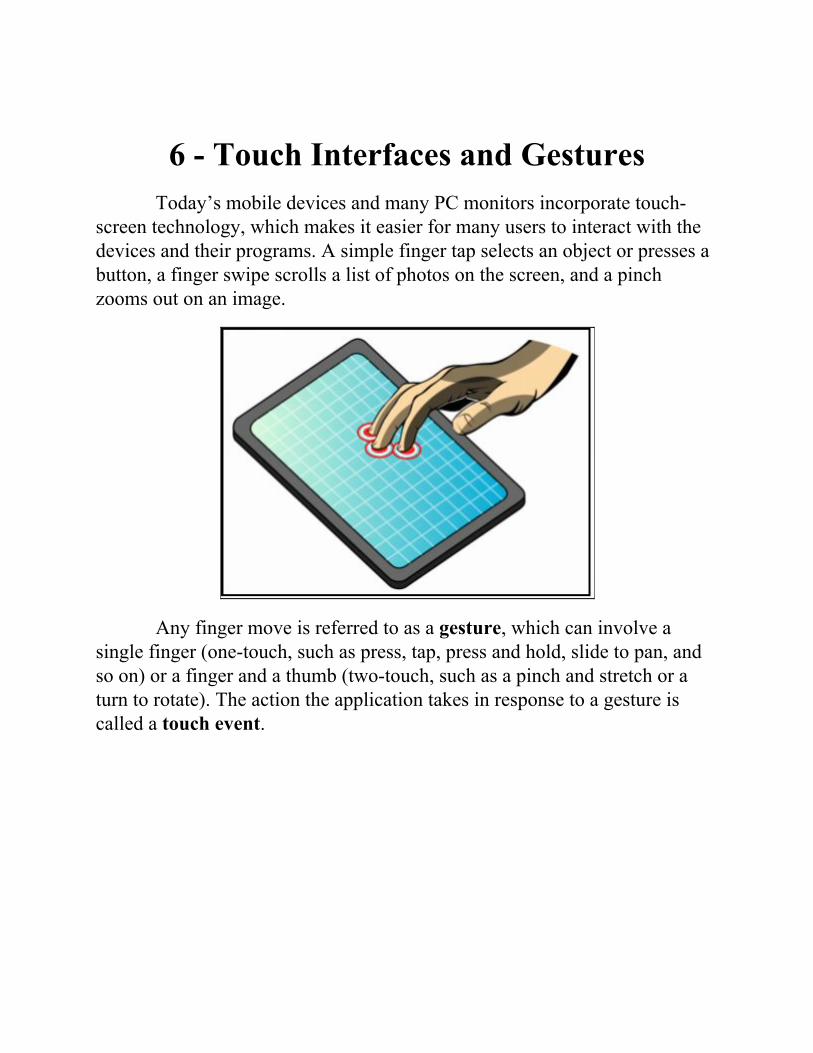
6 - Touch Interfaces and GesturesToday’s mobile devices and many PC monitors incorporate touch-
screen technology, which makes it easier for many users to interact with thedevices and their programs. A simple finger tap selects an object or presses abutton, a finger swipe scrolls a list of photos on the screen, and a pinchzooms out on an image.
Any finger move is referred to as a gesture, which can involve asingle finger (one-touch, such as press, tap, press and hold, slide to pan, andso on) or a finger and a thumb (two-touch, such as a pinch and stretch or aturn to rotate). The action the application takes in response to a gesture iscalled a touch event.
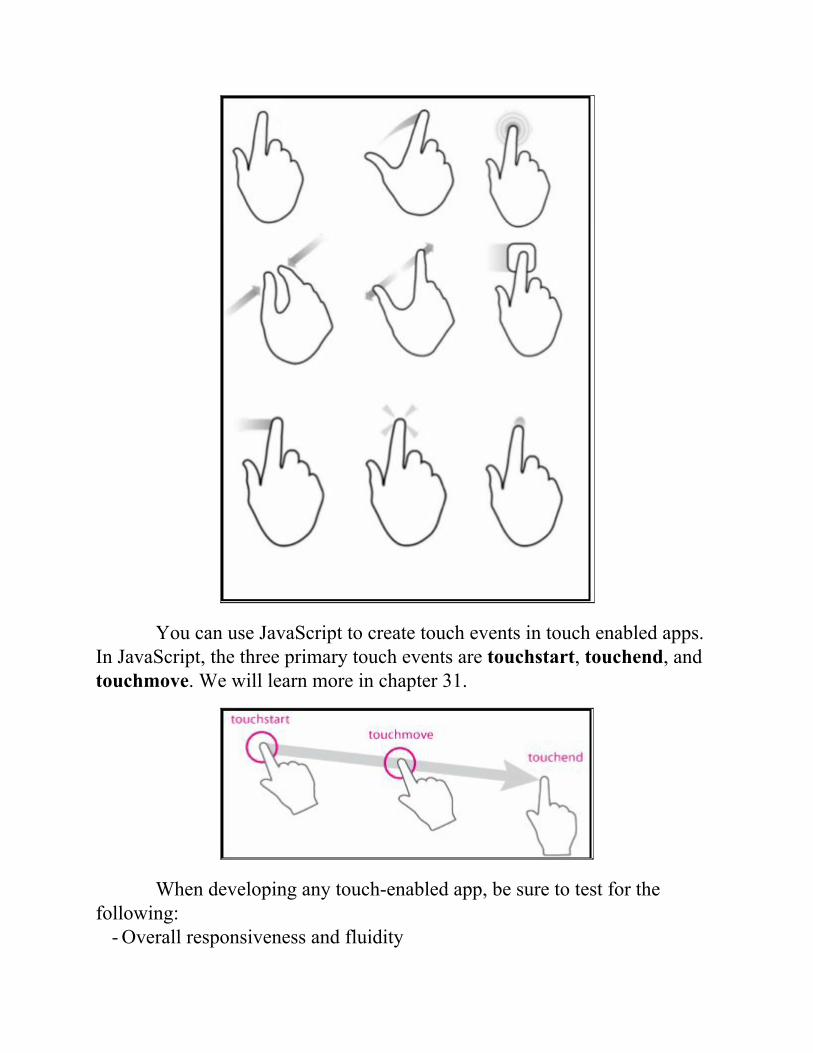
You can use JavaScript to create touch events in touch enabled apps.In JavaScript, the three primary touch events are touchstart, touchend, andtouchmove. We will learn more in chapter 31.
When developing any touch-enabled app, be sure to test for thefollowing:
- Overall responsiveness and fluidity
- Tapping, pinching, rotating, and other common gestures- Controlled scrolling- Controlled panning- Ability to disabled scrolling and panning- Accuracy of snap points- Unintended zooming or scrolling, especially in a multi-touch environment- Proper touch event reaction, especially in a multi-touch environment
Designing and developing well-formed touch-enabled apps takespractice, and a lot of testing. If you don’t have a touch-screen device, you canuse MouseTouch events and a touch-screen emulator or simulator. TryMicrosoft Surface SDK and Runtime for Windows 7, or the WindowsSimulator tool in Visual Studio 11. A touch-screen simulator or emulatorimitates a system that only has touch capabilities. Several free emulators areavailable online.
7 - Debugging and TestingAll apps must be thoroughly tested and debugged to ensure they run
reliably and as error free as possible before distribution and deployment.
Debugging is the process of detecting, finding, and correcting errorsin logic and syntax
- Logic errors prevent the app from behaving as expected- Syntax errors are typos in code which prevent Web apps from running
Testing and debugging code is a standard part of app development,and most tools like Visual Studio have debugging features built in to thesoftware. Some errors are easy to detect and fix, whereas others can requirehours or even days to resolve, depending on the complexity of theapplication.
8 - Validating HTML5 CodeAn important aspect of debugging and testing is to validate code to
ensure it is properly interpreted by browsers.
We can use a validator to test code for inaccuracies and syntaxerrors.
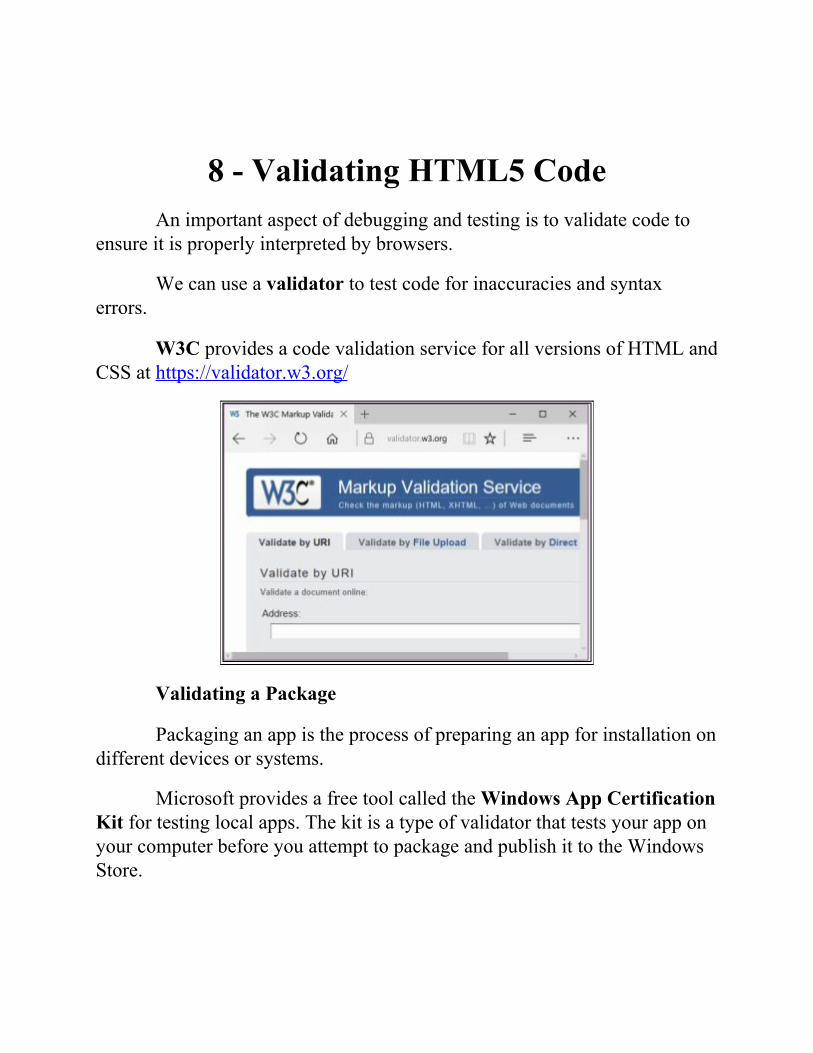
W3C provides a code validation service for all versions of HTML andCSS at https://validator.w3.org/
Validating a Package
Packaging an app is the process of preparing an app for installation ondifferent devices or systems.
Microsoft provides a free tool called the Windows App CertificationKit for testing local apps. The kit is a type of validator that tests your app onyour computer before you attempt to package and publish it to the WindowsStore.

9 - Publishing an ApplicationAfter you test, debug, and validate your code, it will be ready for
upload to a marketplace for apps. If the app was built for Windows, then themarketplace will be the Windows Store.
Publishing your app to a public marketplace like the Windows Storeis the pinnacle of all your planning, designing, coding, and testing. TheWindows Store is an online global marketplace for Metro style apps.Publishing your app for distribution through the store can possibly turn agood idea into a lucrative venture.
Before publishing an app to the Windows Store, you must:- Sign up and pay for a developer account- Go through the app submission checklist- Capture screenshots of unique features in your app- Have other users test your app on multiple devices and platforms- Include a privacy statement if your app gathers personal information orcopyrighted software

10 - HTML EssentialsHyperText Markup Language (HTML) is the standard markup
language for creating web pages and web applications.
HTML markup consists of several key components, including thosecalled tags (and their attributes), character-based data types, characterreferences and entity references. HTML tags most commonly come in pairslike <h1> and </h1> , although some represent empty elementsand so areunpaired, for example <img> . The first tag in such a pair is the start tag, andthe second is the end tag (they are also called opening tags and closing tags).
Basic Markup and Page Structure
Using Attributes
Tags are used in combination with attributes to describe how datashould be rendered on a Web page. In other words, attributes can be used toprovide additional information that tags cannot provide alone. Each elementhas a specific set of attributes that can be used with it.
HTML5 includes global attributes, which can be used with anyelement.
Attributes are added to tags using the following syntax:
Nesting Elements
Creating awesome web pages requires you to combine elements, theirattributes, and engaging contentWhen two or more elements apply to the same block of content, then youmust nest the tag pairs.
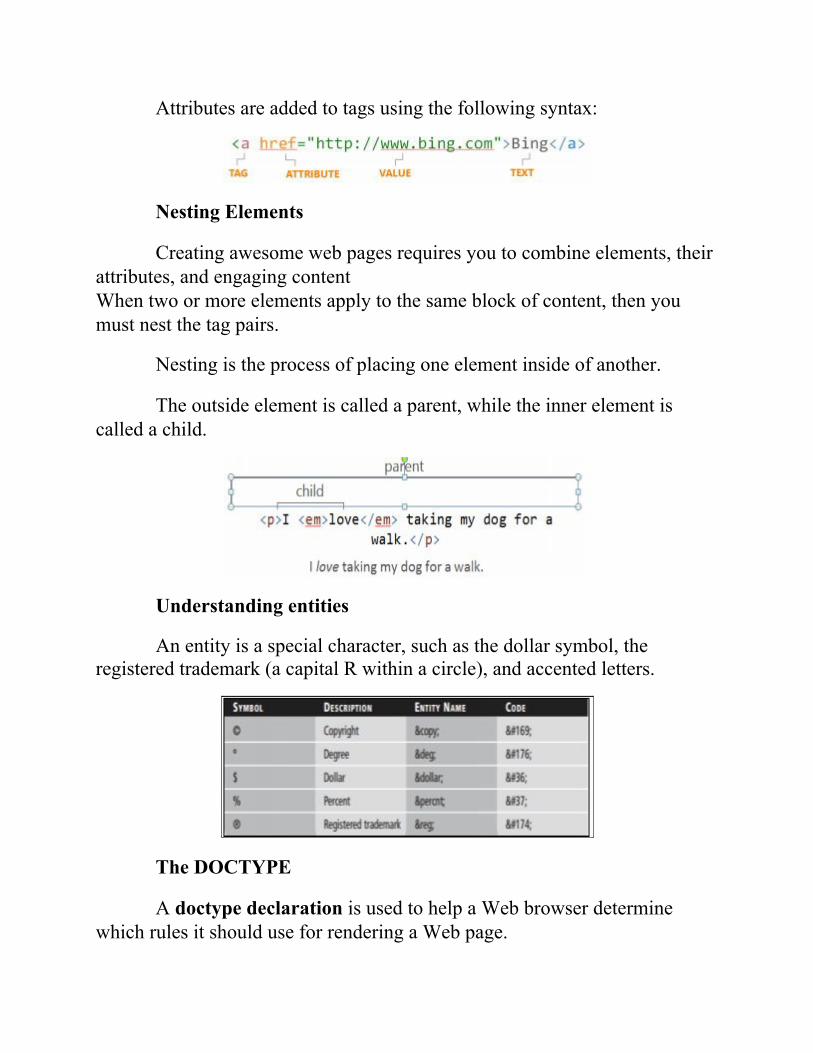
Nesting is the process of placing one element inside of another.
The outside element is called a parent, while the inner element iscalled a child.
Understanding entities
An entity is a special character, such as the dollar symbol, theregistered trademark (a capital R within a circle), and accented letters.
The DOCTYPE
A doctype declaration is used to help a Web browser determinewhich rules it should use for rendering a Web page.
In HTML 4, doctype declarations require a reference to a DocumentType Definition (DTD) and looks quite complex.
In HTML5, the doctype declaration is simpler, as shown below.
<!doctype html>
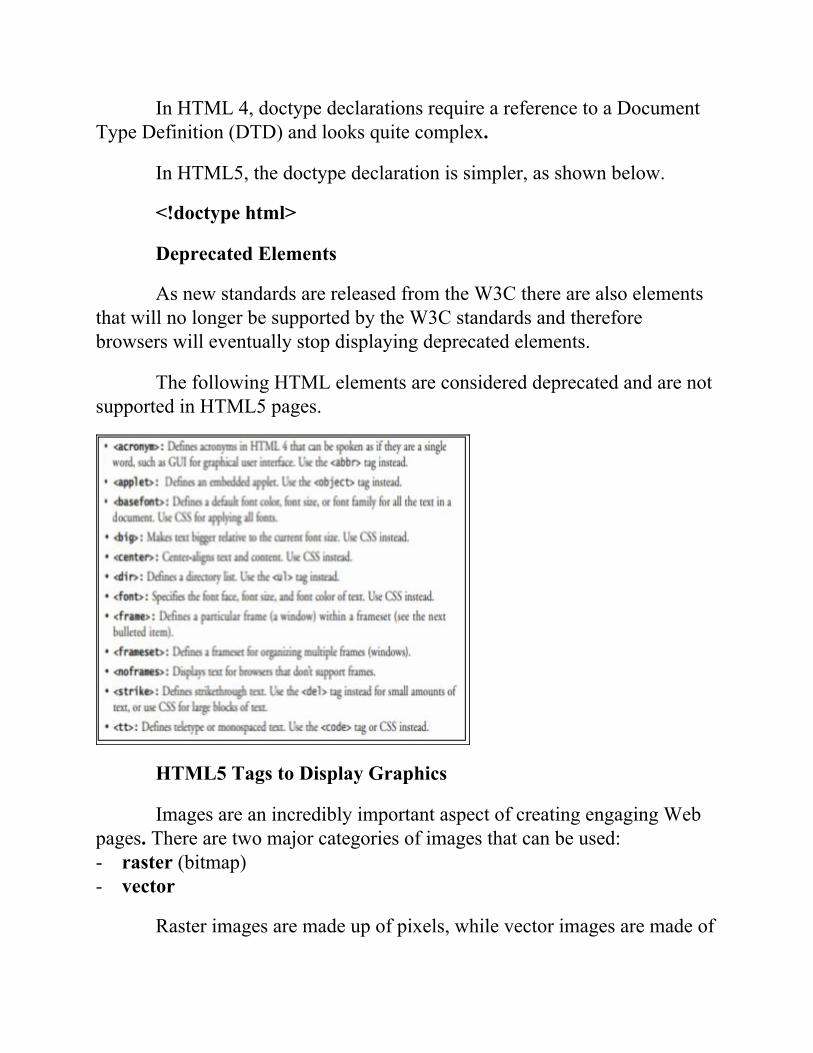
Deprecated Elements
As new standards are released from the W3C there are also elementsthat will no longer be supported by the W3C standards and thereforebrowsers will eventually stop displaying deprecated elements.
The following HTML elements are considered deprecated and are notsupported in HTML5 pages.
HTML5 Tags to Display Graphics
Images are an incredibly important aspect of creating engaging Webpages. There are two major categories of images that can be used:- raster (bitmap)- vector
Raster images are made up of pixels, while vector images are made of
lines and curves.
The primary way to add images to an HTML document is with theimg element.
<img src="img_path" alt="alt_atribute" height="42" width="42">
The <img> tag requires the use of the src and alt attributes:- src stands for source (src defines the pathway for the image file)- alt stands for alternative (the value of the alt attribute makes textaccessible to people with disabilities)
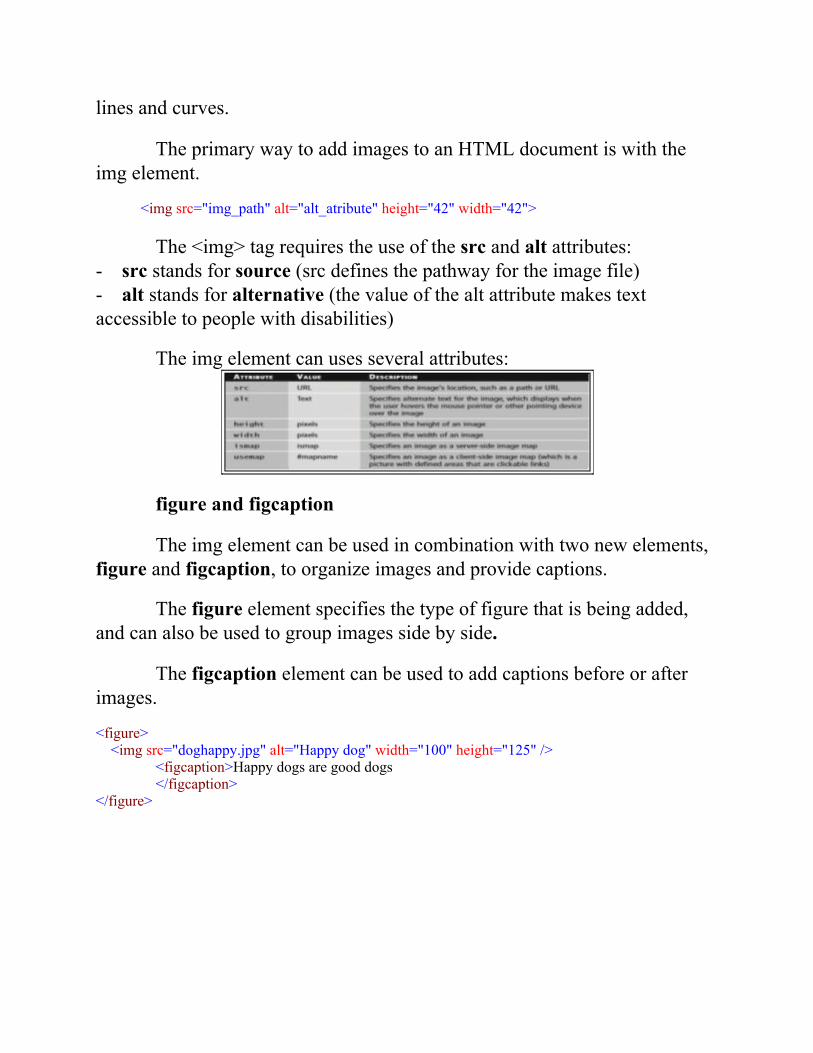
The img element can uses several attributes:
figure and figcaption
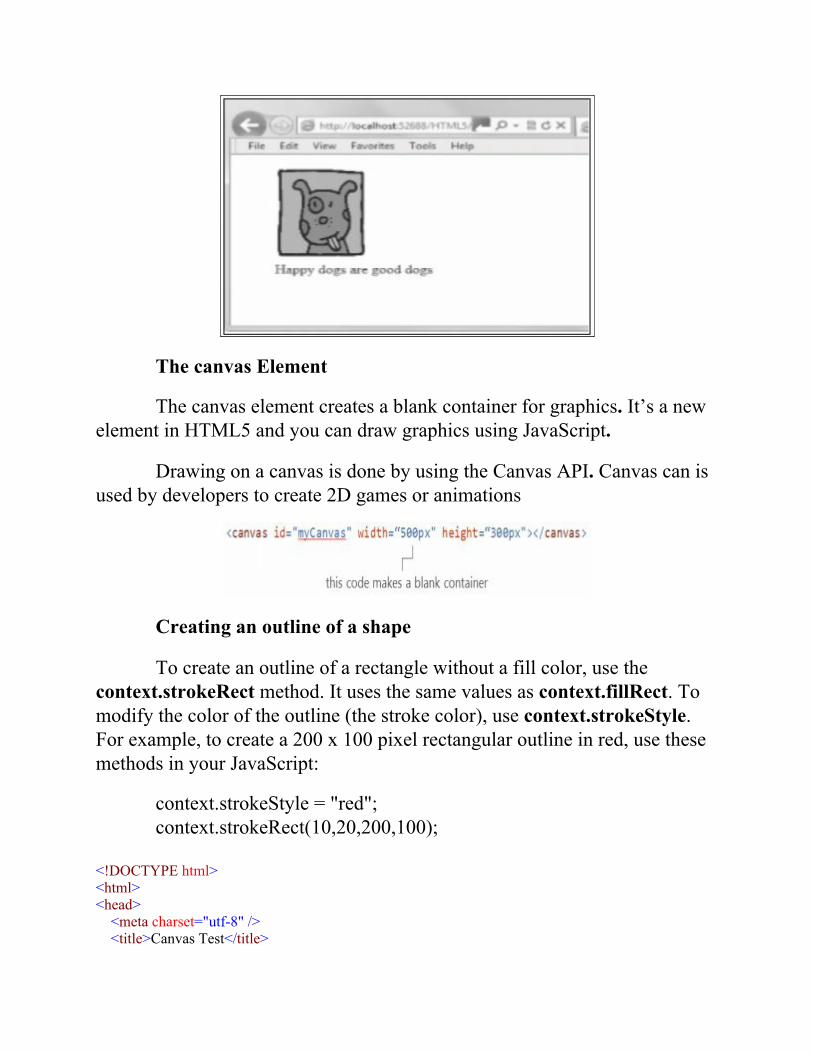
The img element can be used in combination with two new elements,figure and figcaption, to organize images and provide captions.
The figure element specifies the type of figure that is being added,and can also be used to group images side by side.
The figcaption element can be used to add captions before or afterimages.
<figure> <img src="doghappy.jpg" alt="Happy dog" width="100" height="125" />
<figcaption>Happy dogs are good dogs</figcaption>
</figure>
The canvas Element
The canvas element creates a blank container for graphics. It’s a newelement in HTML5 and you can draw graphics using JavaScript.
Drawing on a canvas is done by using the Canvas API. Canvas can isused by developers to create 2D games or animations
Creating an outline of a shape
To create an outline of a rectangle without a fill color, use thecontext.strokeRect method. It uses the same values as context.fillRect. Tomodify the color of the outline (the stroke color), use context.strokeStyle.For example, to create a 200 x 100 pixel rectangular outline in red, use thesemethods in your JavaScript:
context.strokeStyle = "red";context.strokeRect(10,20,200,100);
<!DOCTYPE html><html><head> <meta charset="utf-8" /> <title>Canvas Test</title>

<script> function f1() {var canvas =document.getElementById("smlRectangle"); context = canvas.getContext("2d"); context.strokeStyle = "red"; context.strokeRect(10,20,200,100); } </script></head><body onload="f1();"> <canvas id="smlRectangle"> </canvas></body></html>
Some older browsers cannot render canvas drawings or animation.Therefore, you should add an image, text, or some other HTML contentwithin the canvas element that will display if the drawing cannot.
Scalable Vector Graphics
Scalable Vector Graphics (SVG) is a language for describing 2Dgraphics in XML. With SVG, you provide drawing instructions within yourcode versus using the src attribute to point to a file. Unlike other image types,graphics created using the svg element are scalable. The quality of the imagewill not change if it shrinks or is enlarged.
<!DOCTYPE html><html><head>
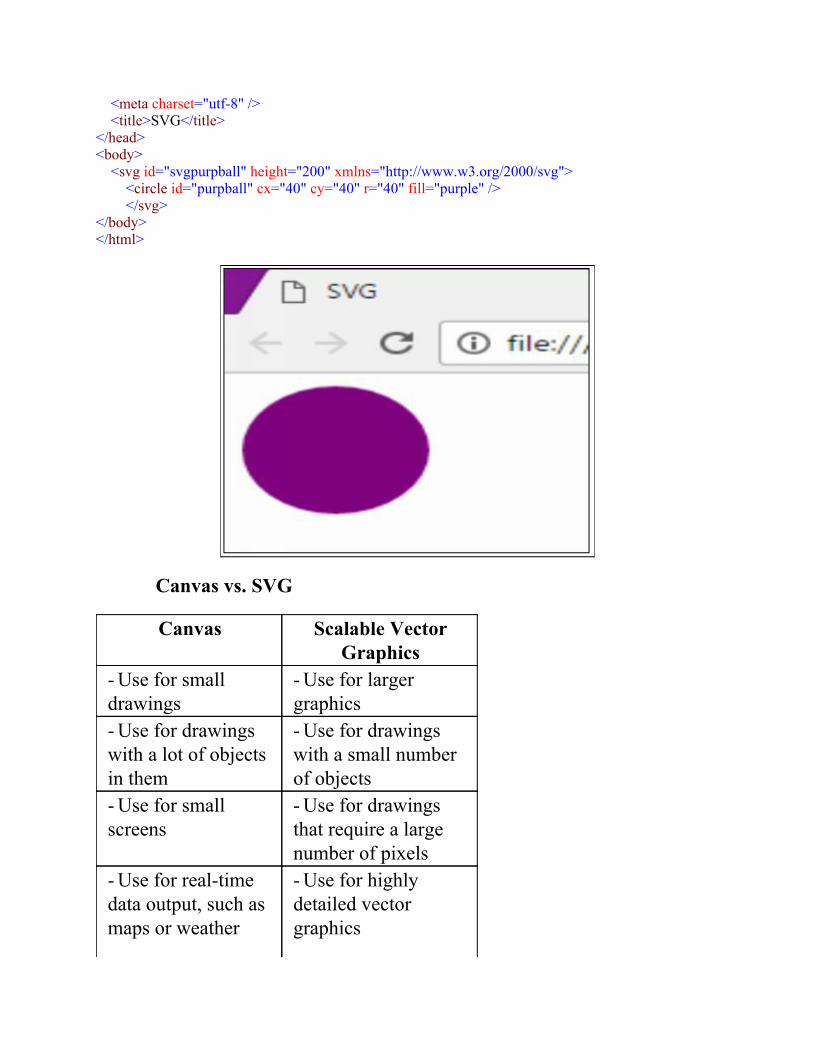
<meta charset="utf-8" /> <title>SVG</title></head><body> <svg id="svgpurpball" height="200" xmlns="http://www.w3.org/2000/svg"> <circle id="purpball" cx="40" cy="40" r="40" fill="purple" /> </svg></body></html>
Canvas vs. SVG
Canvas Scalable VectorGraphics
- Use for smalldrawings
- Use for largergraphics
- Use for drawingswith a lot of objectsin them
- Use for drawingswith a small numberof objects
- Use for smallscreens
- Use for drawingsthat require a largenumber of pixels
- Use for real-timedata output, such asmaps or weather
- Use for highlydetailed vectorgraphics
data
HTML5 Tags to Play Media
HTML5 introduces the audio and video elements, which do awaywith the need for plug-ins or media players to listen to music or watch videosvia a Web browser.
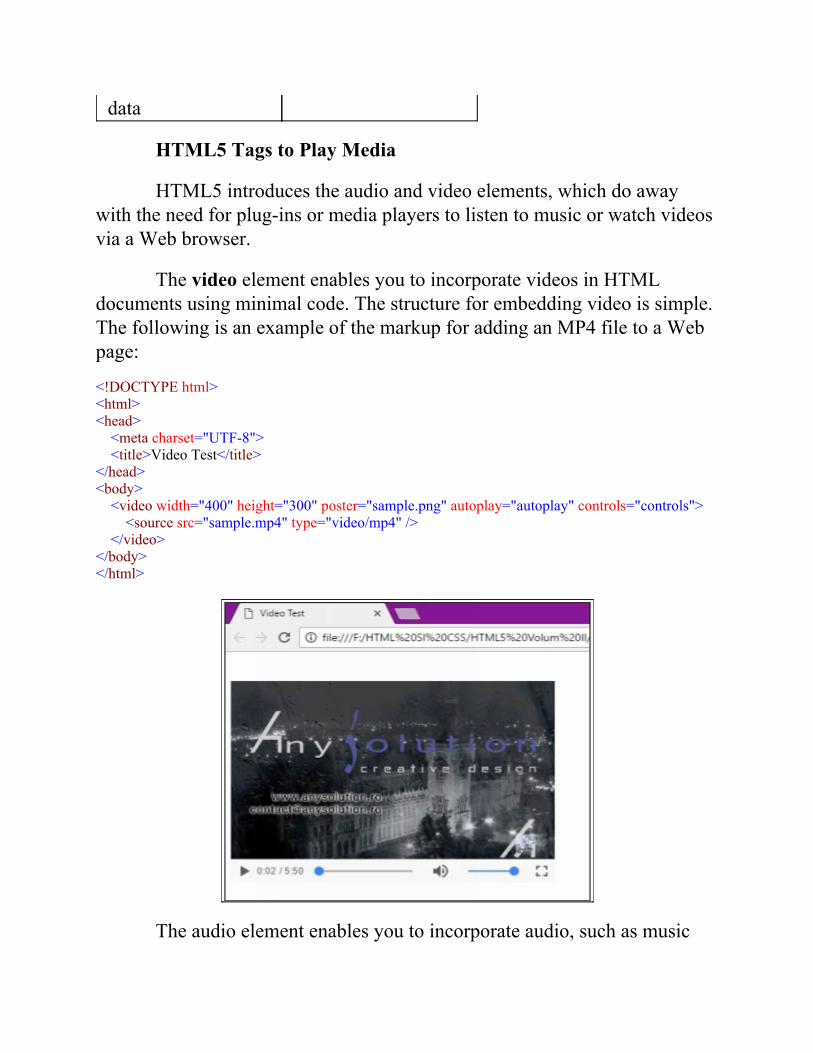
The video element enables you to incorporate videos in HTMLdocuments using minimal code. The structure for embedding video is simple.The following is an example of the markup for adding an MP4 file to a Webpage:
<!DOCTYPE html><html><head> <meta charset="UTF-8"> <title>Video Test</title></head><body> <video width="400" height="300" poster="sample.png" autoplay="autoplay" controls="controls"> <source src="sample.mp4" type="video/mp4" /> </video></body></html>
The audio element enables you to incorporate audio, such as music
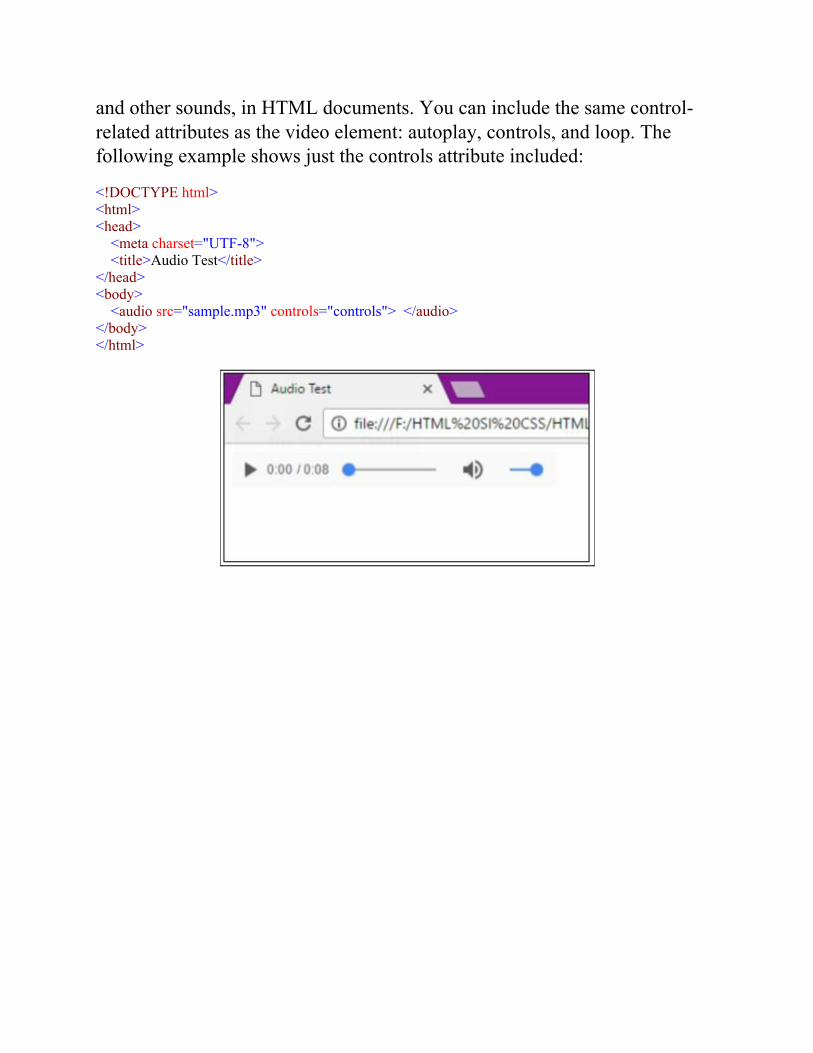
and other sounds, in HTML documents. You can include the same control-related attributes as the video element: autoplay, controls, and loop. Thefollowing example shows just the controls attribute included:
<!DOCTYPE html><html><head> <meta charset="UTF-8"> <title>Audio Test</title></head><body> <audio src="sample.mp3" controls="controls"> </audio></body></html>
11 - Organize ContentTo improve the structure of your web pages, you need HTML5’s new
semantic elements. The names of these tags are representative of semanticmarkup.
In HTML 4.01 and before, developers had to rely on the use of the<div> tag to perform a variety of functions. The <div> tag often includes aclass or id attribute, which may also include CSS styles such as background-color, height, and width.
- class and id are global attributes, which means that they can be used withall HTML elements- class is used to identify a group of elements- id is used to identify individual elements
A simple example of a <div> tag is: <div id="header"> This is a header </div>
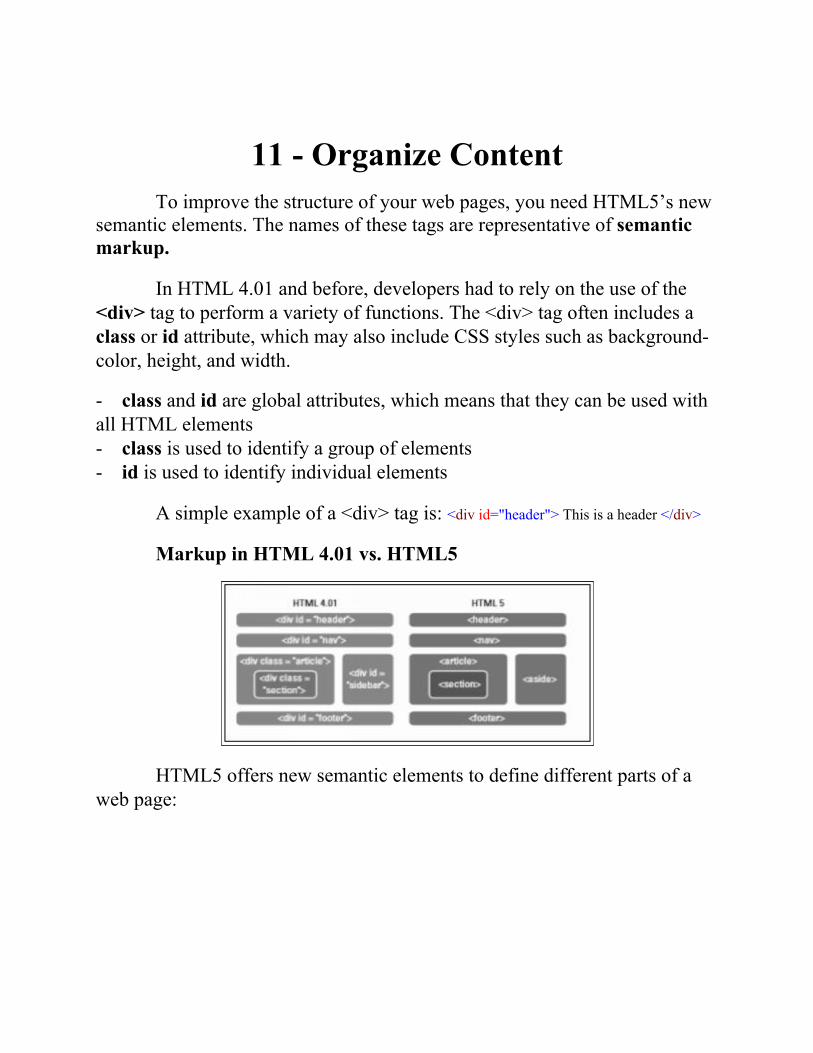
Markup in HTML 4.01 vs. HTML5
HTML5 offers new semantic elements to define different parts of aweb page:
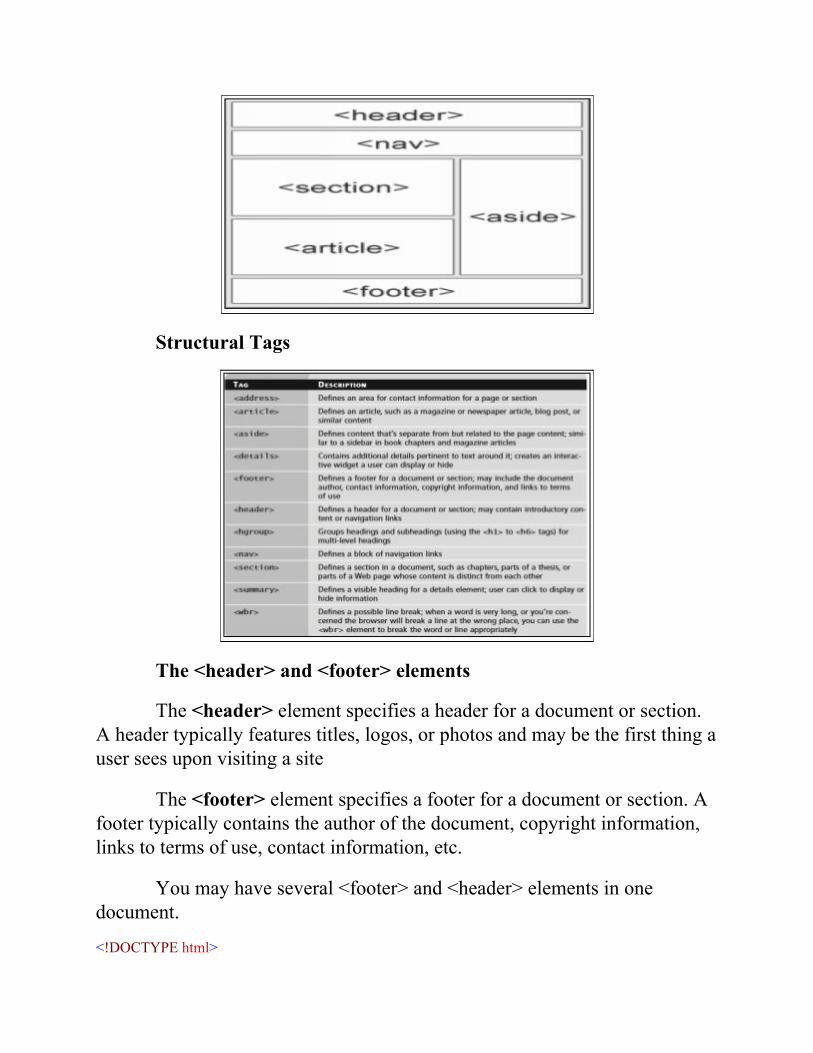
Structural Tags
The <header> and <footer> elements
The <header> element specifies a header for a document or section.A header typically features titles, logos, or photos and may be the first thing auser sees upon visiting a site
The <footer> element specifies a footer for a document or section. Afooter typically contains the author of the document, copyright information,links to terms of use, contact information, etc.
You may have several <footer> and <header> elements in onedocument.
<!DOCTYPE html>
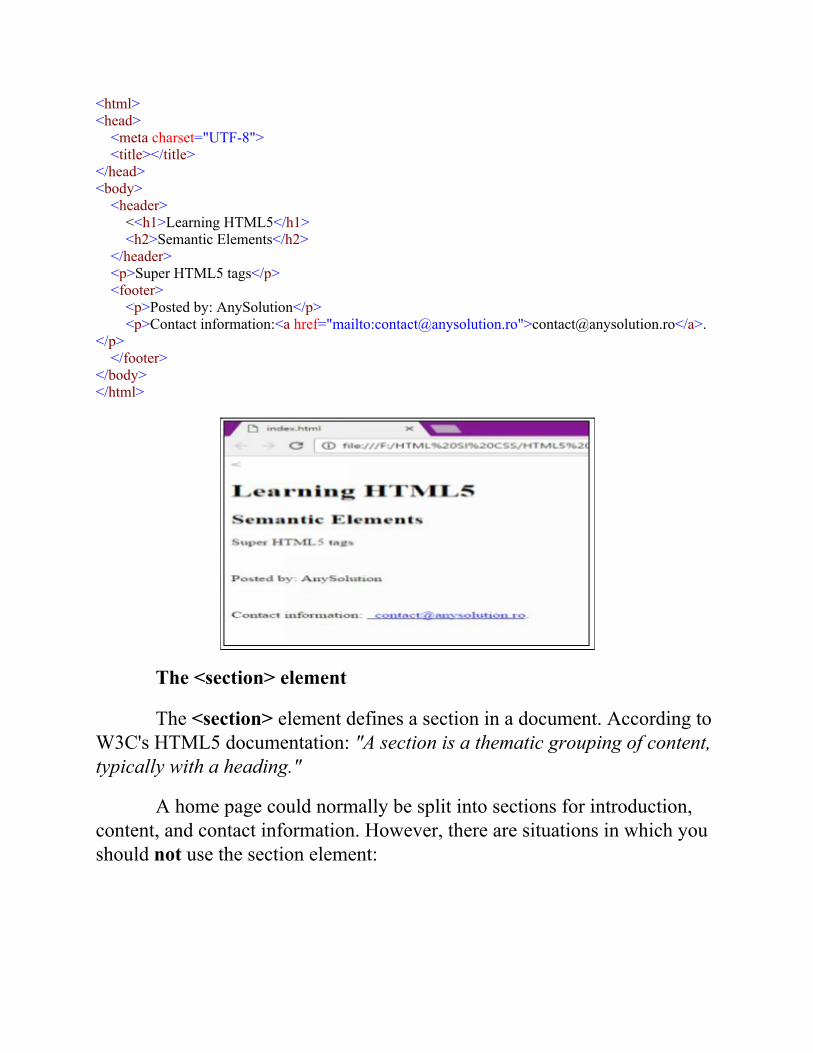
<html><head> <meta charset="UTF-8"> <title></title></head><body> <header> <<h1>Learning HTML5</h1> <h2>Semantic Elements</h2> </header> <p>Super HTML5 tags</p> <footer> <p>Posted by: AnySolution</p> <p>Contact information:<a href="mailto:[email protected]">[email protected]</a>.</p> </footer></body></html>
The <section> element
The <section> element defines a section in a document. According toW3C's HTML5 documentation: "A section is a thematic grouping of content,typically with a heading."
A home page could normally be split into sections for introduction,content, and contact information. However, there are situations in which youshould not use the section element:
The <hgroup> element
The <hgroup> element is used to group headings. This allows you toorganize heading tags, but won’t impact the way things look on a web page.
<section> <hgroup> <h1>HTML5</h1> <h3>Structuring a Web page</h3> </hgroup> <article> <p>With semantic tags, structuring a web page is easier!</p> </article></section>
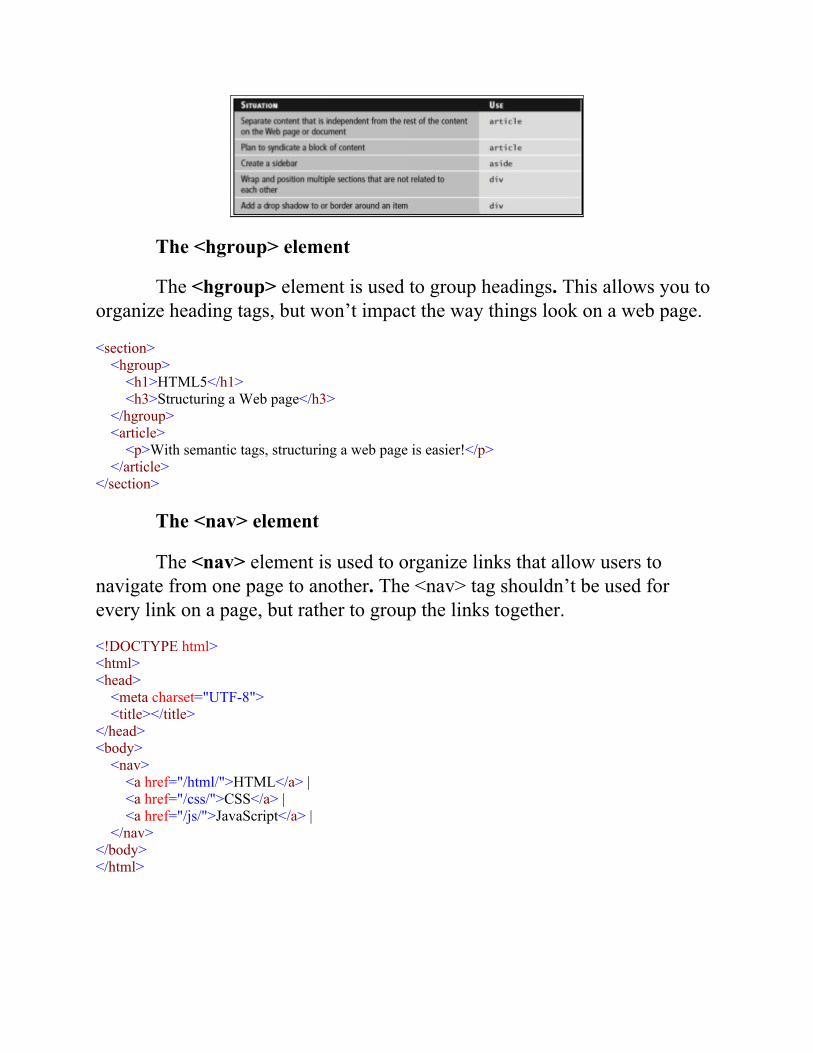
The <nav> element
The <nav> element is used to organize links that allow users tonavigate from one page to another. The <nav> tag shouldn’t be used forevery link on a page, but rather to group the links together.
<!DOCTYPE html><html><head> <meta charset="UTF-8"> <title></title></head><body> <nav> <a href="/html/">HTML</a> | <a href="/css/">CSS</a> | <a href="/js/">JavaScript</a> | </nav></body></html>
The <article> and <aside> elements
The <article> element specifies independent, self-contained content.An article should make sense on its own, and it should be possible to read itindependently from the rest of the web site.
Examples of where <article> can be used:- Forum post- Blog post- Newspaper article
The <aside> element defines some content aside from the content it isplaced in (like a sidebar). The aside content should be related to thesurrounding content.
Tables and Lists
An HTML table is defined with the <table> tag. Each table row isdefined with the <tr> tag. A table header is defined with the <th> tag. Bydefault, table headings are bold and centered. A table data/cell is defined withthe <td> tag.
<!DOCTYPE html><html><head> <meta charset="UTF-8"> <title></title></head><body>
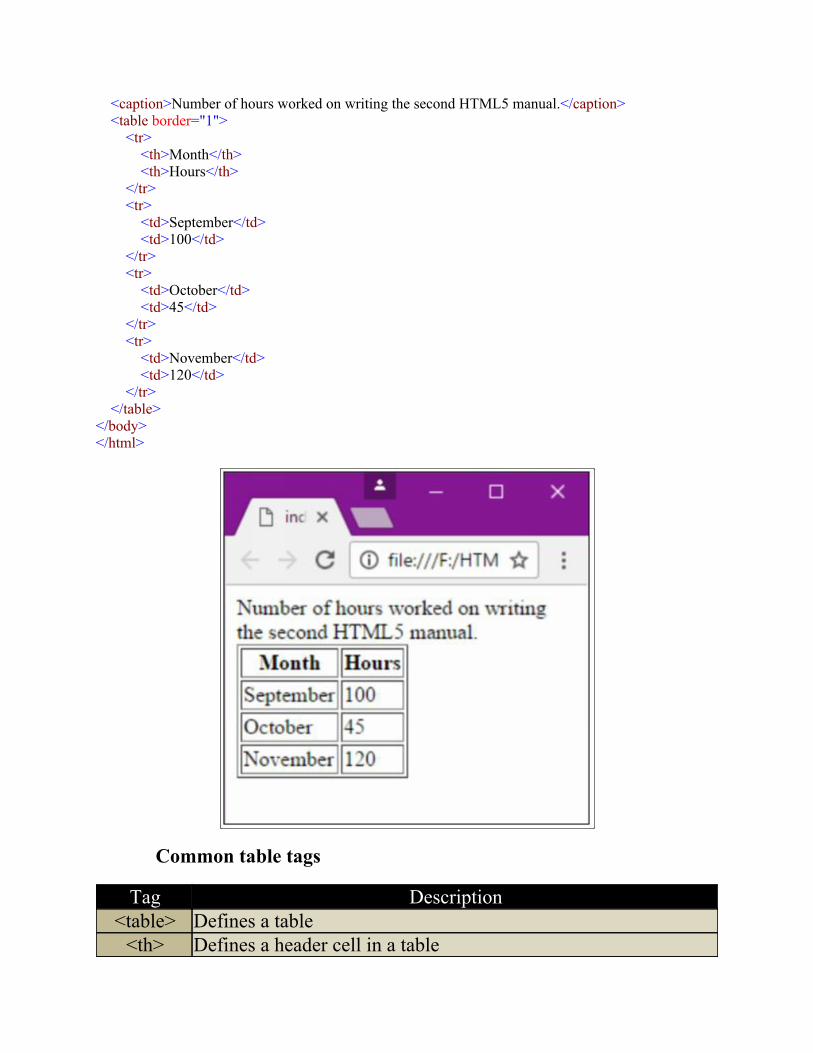
<caption>Number of hours worked on writing the second HTML5 manual.</caption> <table border="1"> <tr> <th>Month</th> <th>Hours</th> </tr> <tr> <td>September</td> <td>100</td> </tr> <tr> <td>October</td> <td>45</td> </tr> <tr> <td>November</td> <td>120</td> </tr> </table></body></html>
Common table tags
Tag Description<table> Defines a table
<th> Defines a header cell in a table
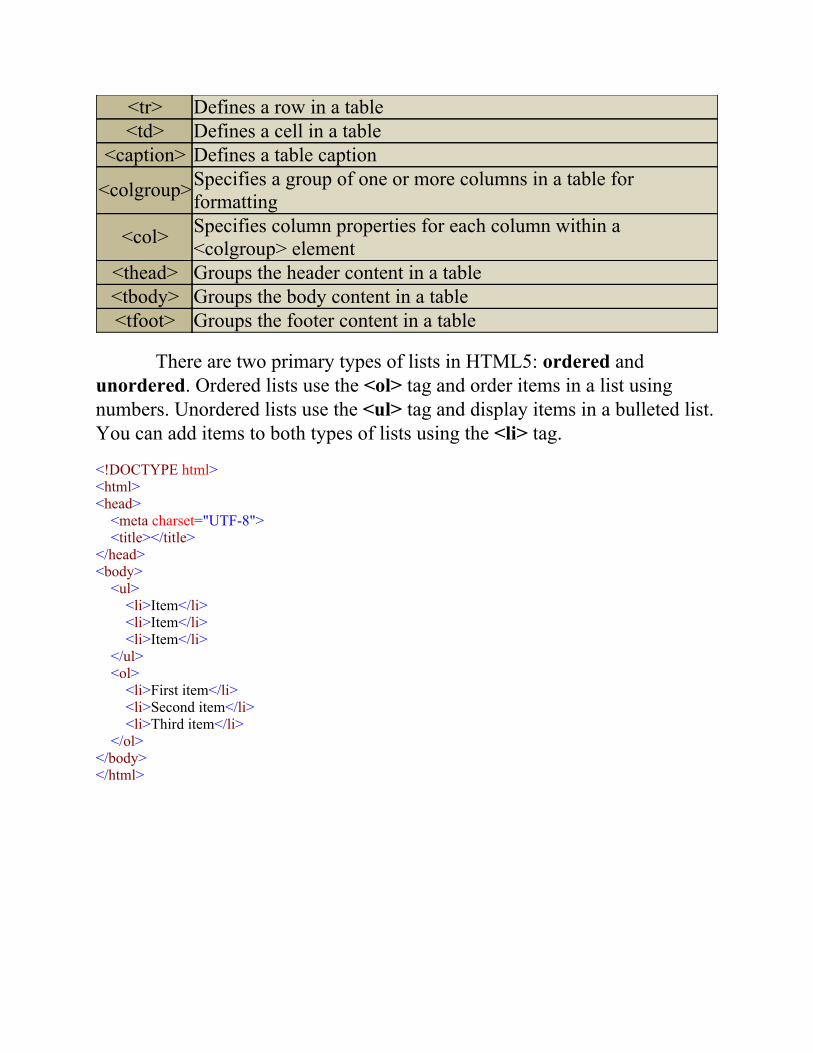
<tr> Defines a row in a table<td> Defines a cell in a table
<caption> Defines a table caption
<colgroup>Specifies a group of one or more columns in a table forformatting
<col> Specifies column properties for each column within a<colgroup> element
<thead> Groups the header content in a table<tbody> Groups the body content in a table<tfoot> Groups the footer content in a table
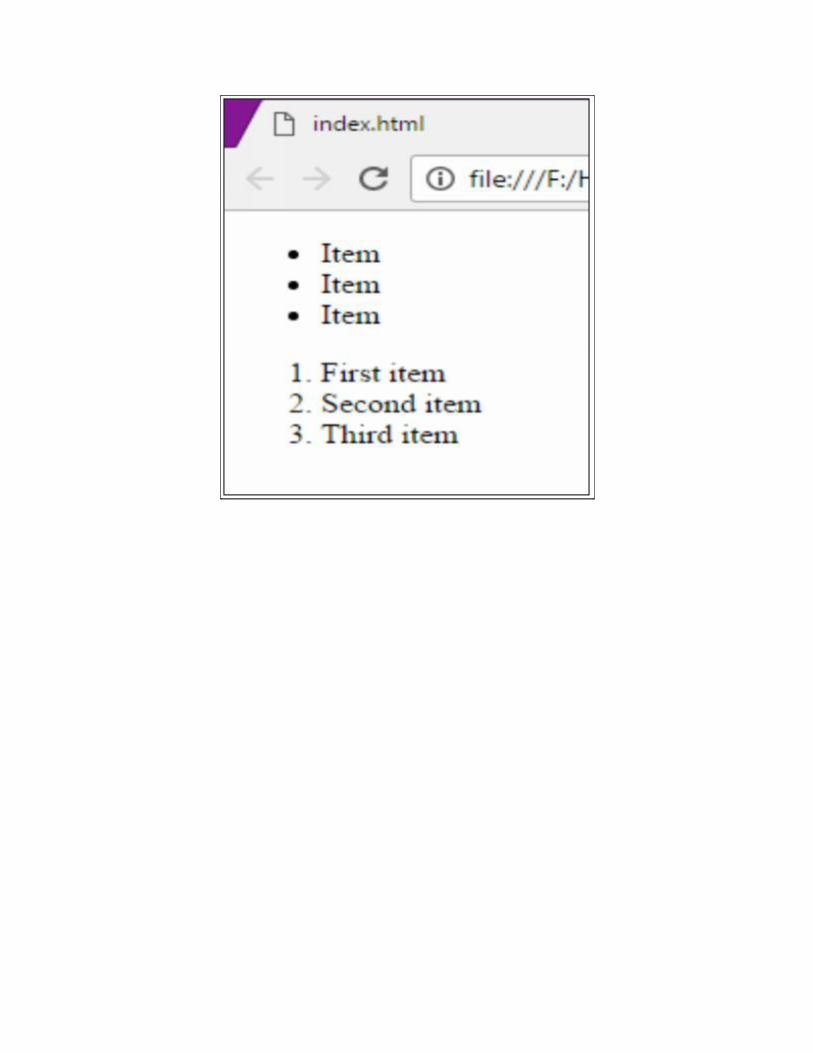
There are two primary types of lists in HTML5: ordered andunordered. Ordered lists use the <ol> tag and order items in a list usingnumbers. Unordered lists use the <ul> tag and display items in a bulleted list.You can add items to both types of lists using the <li> tag.
<!DOCTYPE html><html><head> <meta charset="UTF-8"> <title></title></head><body> <ul> <li>Item</li> <li>Item</li> <li>Item</li> </ul> <ol> <li>First item</li> <li>Second item</li> <li>Third item</li> </ol></body></html>
12 - Input and ValidationDevelopers use Web forms as the interface to collect information
from Web site and client application users. HTML input elements serve tobuild a form’s interface and ensure that information is collected from usersconsistently. Validation ensures that the entered information is in the correctformat and usable before sending the data to the server.
In HTML, input and validation apply to forms.
Web Forms
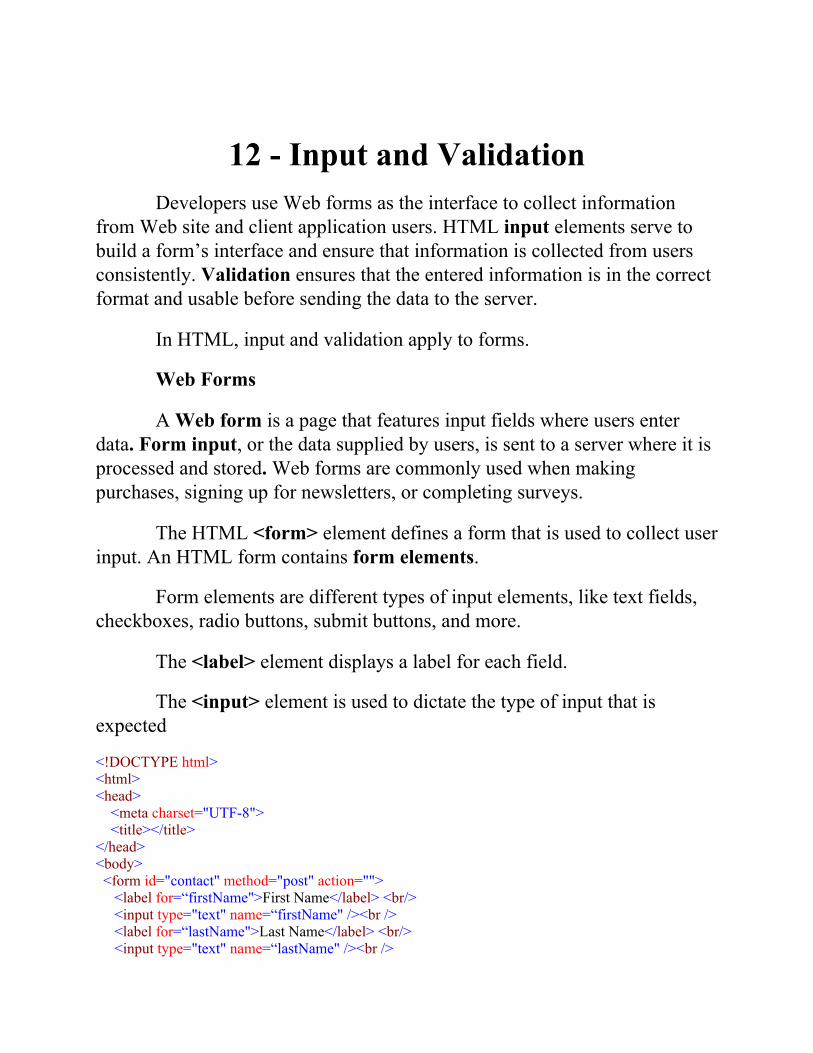
A Web form is a page that features input fields where users enterdata. Form input, or the data supplied by users, is sent to a server where it isprocessed and stored. Web forms are commonly used when makingpurchases, signing up for newsletters, or completing surveys.
The HTML <form> element defines a form that is used to collect userinput. An HTML form contains form elements.
Form elements are different types of input elements, like text fields,checkboxes, radio buttons, submit buttons, and more.
The <label> element displays a label for each field.
The <input> element is used to dictate the type of input that isexpected
<!DOCTYPE html><html><head> <meta charset="UTF-8"> <title></title></head><body> <form id="contact" method="post" action=""> <label for=“firstName">First Name</label> <br/> <input type="text" name=“firstName" /><br /> <label for=“lastName">Last Name</label> <br/> <input type="text" name=“lastName" /><br />
<label for="email">Email</label> <br /> <input type="email" name="email" /><br /> </form></body></html>
Input Attributes
There are several attributes that can be used with the <input> elementto enhance Web forms:- the autofocus attribute to point the focus to a specific input field when aweb page loads- the required attribute when a field is required- the placeholder attribute to add text to a field that will help users knowwhat to enter- value attribute specifies the initial value for an input field- readonly attribute specifies that the input field is read only (cannot bechanged)- disabled attribute specifies that the input field is disabled- size attribute specifies the size (in characters) for the input field- maxlength attribute specifies the maximum allowed length for the inputfield
<!DOCTYPE html><html>
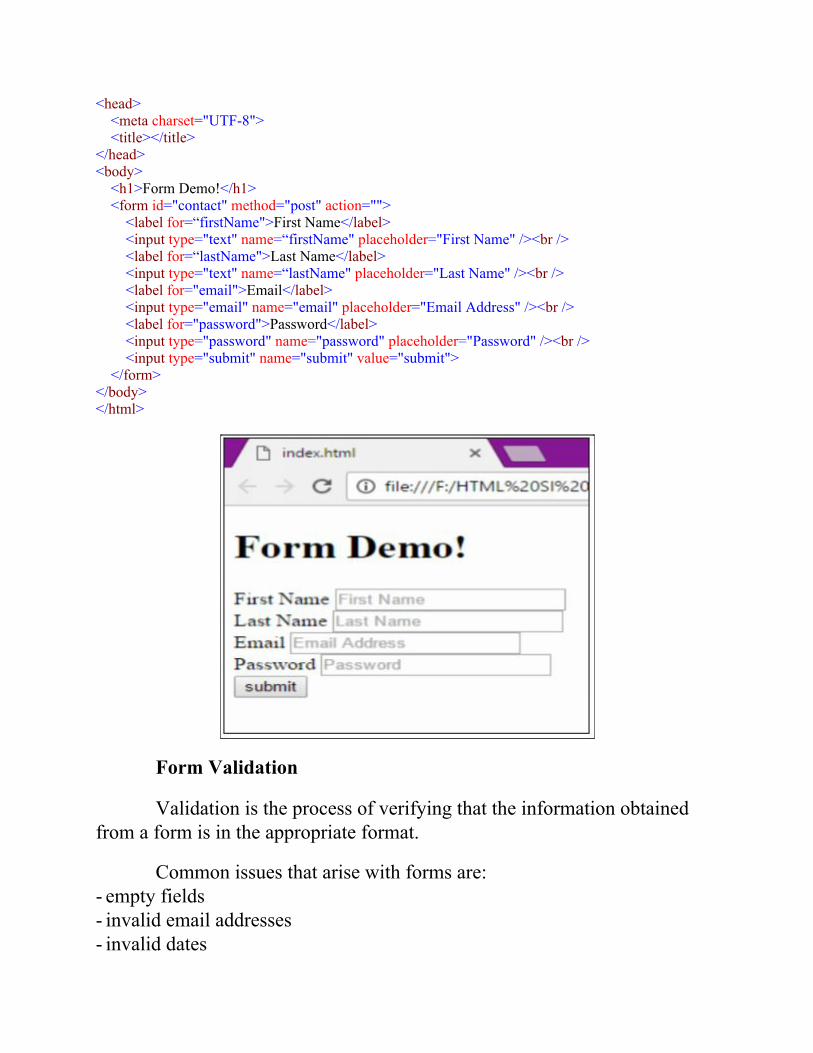
<head> <meta charset="UTF-8"> <title></title></head><body> <h1>Form Demo!</h1> <form id="contact" method="post" action=""> <label for=“firstName">First Name</label> <input type="text" name=“firstName" placeholder="First Name" /><br /> <label for=“lastName">Last Name</label> <input type="text" name=“lastName" placeholder="Last Name" /><br /> <label for="email">Email</label> <input type="email" name="email" placeholder="Email Address" /><br /> <label for="password">Password</label> <input type="password" name="password" placeholder="Password" /><br /> <input type="submit" name="submit" value="submit"> </form></body></html>
Form Validation
Validation is the process of verifying that the information obtainedfrom a form is in the appropriate format.
Common issues that arise with forms are:- empty fields- invalid email addresses- invalid dates
- text vs. numbers and vice versa
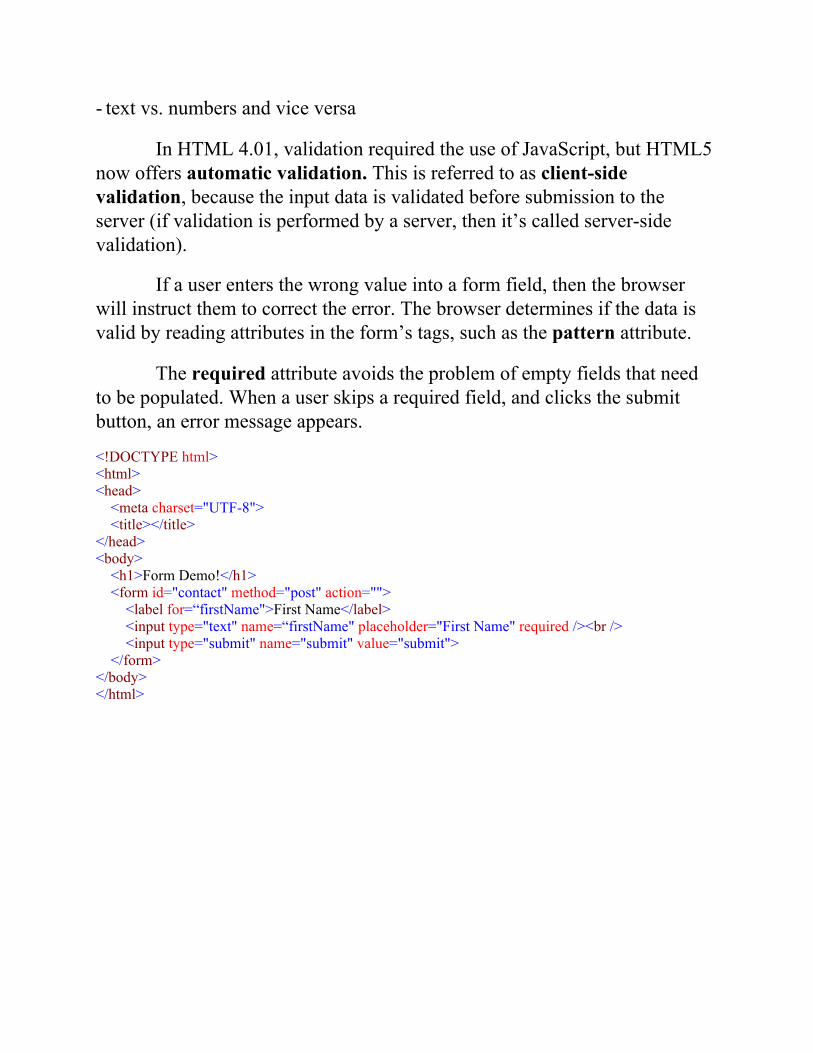
In HTML 4.01, validation required the use of JavaScript, but HTML5now offers automatic validation. This is referred to as client-sidevalidation, because the input data is validated before submission to theserver (if validation is performed by a server, then it’s called server-sidevalidation).
If a user enters the wrong value into a form field, then the browserwill instruct them to correct the error. The browser determines if the data isvalid by reading attributes in the form’s tags, such as the pattern attribute.
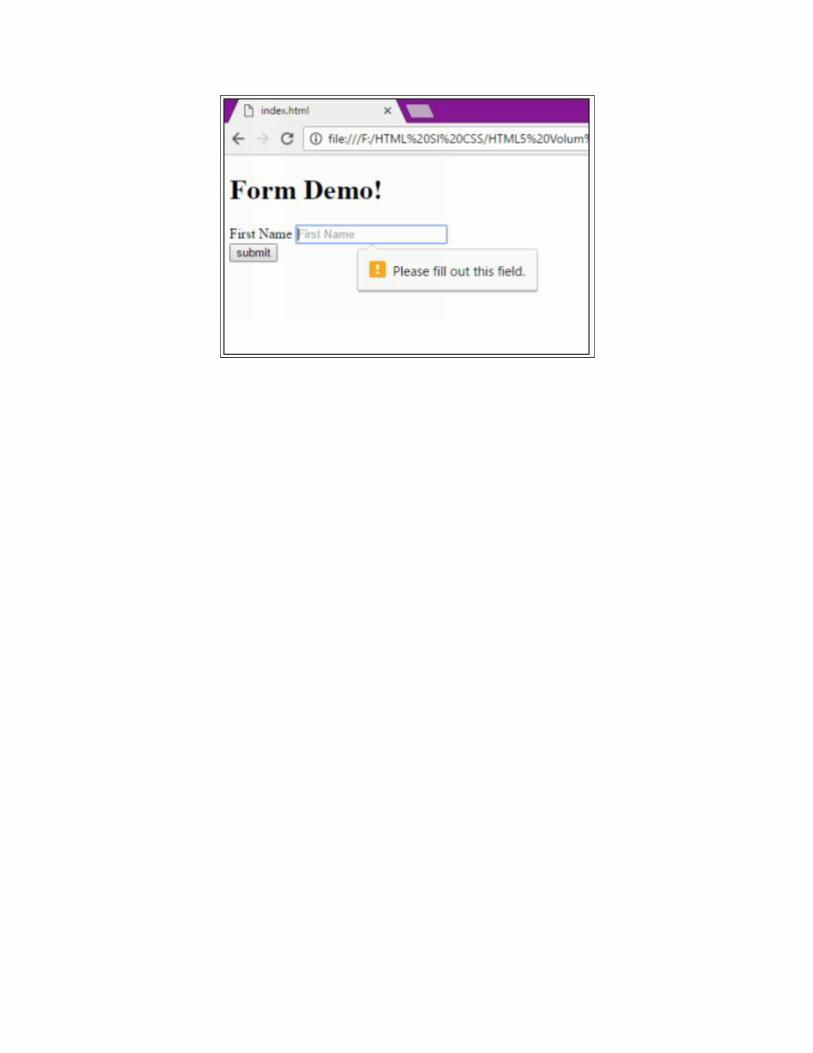
The required attribute avoids the problem of empty fields that needto be populated. When a user skips a required field, and clicks the submitbutton, an error message appears.
<!DOCTYPE html><html><head> <meta charset="UTF-8"> <title></title></head><body> <h1>Form Demo!</h1> <form id="contact" method="post" action=""> <label for=“firstName">First Name</label> <input type="text" name=“firstName" placeholder="First Name" required /><br /> <input type="submit" name="submit" value="submit"> </form></body></html>
13 - CSS IntroductionCSS comes from Cascade Style Sheets. It is the language used to
format web pages (text, background or layout, etc.).
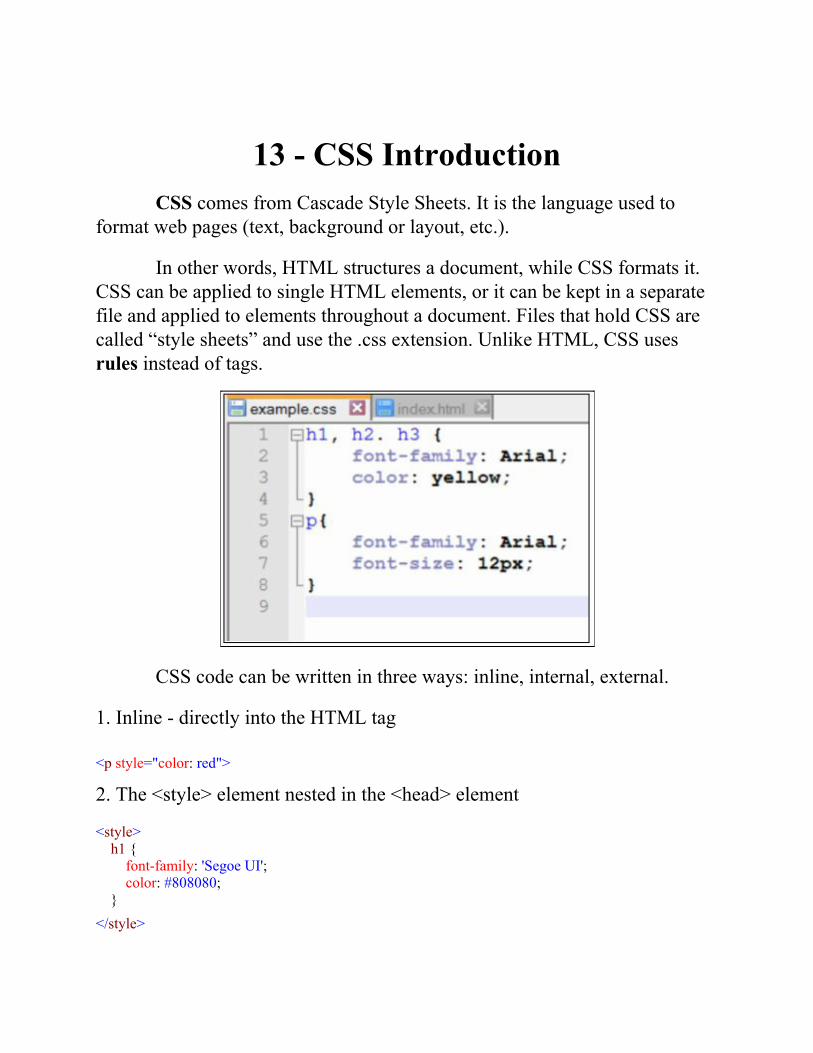
In other words, HTML structures a document, while CSS formats it.CSS can be applied to single HTML elements, or it can be kept in a separatefile and applied to elements throughout a document. Files that hold CSS arecalled “style sheets” and use the .css extension. Unlike HTML, CSS usesrules instead of tags.
CSS code can be written in three ways: inline, internal, external.
1. Inline - directly into the HTML tag
<p style="color: red">
2. The <style> element nested in the <head> element
<style> h1 { font-family: 'Segoe UI'; color: #808080; }</style>
3. The <link> element and a separate CSS file
<link href="StyleSheet.css” rel="stylesheet" type="text/css">
Placing CSS in a separate file has a lot of advantages:- A style change can apply to an entire document- Teams working on Web projects can separate responsibilities
CSS files are linked to HTML files using the <link> element. The hrefattribute points to the location of the CSS file. It’s extremely important thatthe file name and location are correct or none of the style will be applied. Therel attribute should be set as “stylesheet”, while the type attribute should beset as “text/css”.
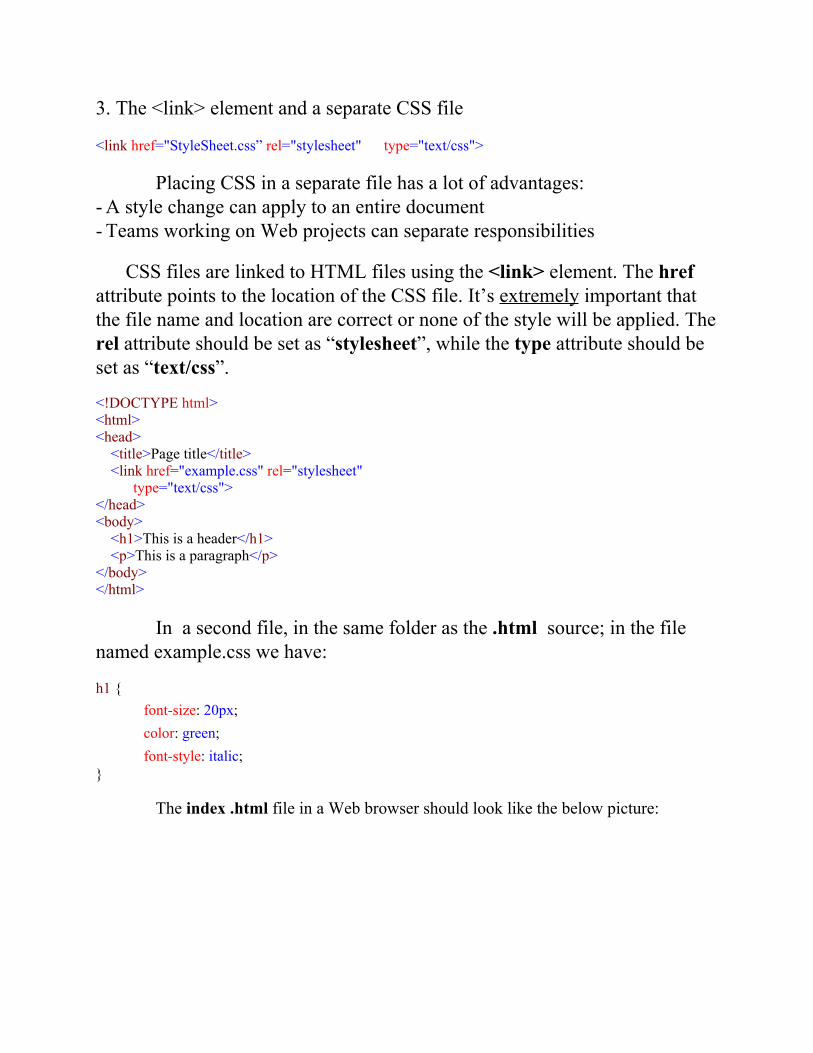
<!DOCTYPE html><html><head> <title>Page title</title> <link href="example.css" rel="stylesheet" type="text/css"></head><body> <h1>This is a header</h1> <p>This is a paragraph</p></body></html>
In a second file, in the same folder as the .html source; in the filenamed example.css we have:
h1 {font-size: 20px;color: green;font-style: italic;
}
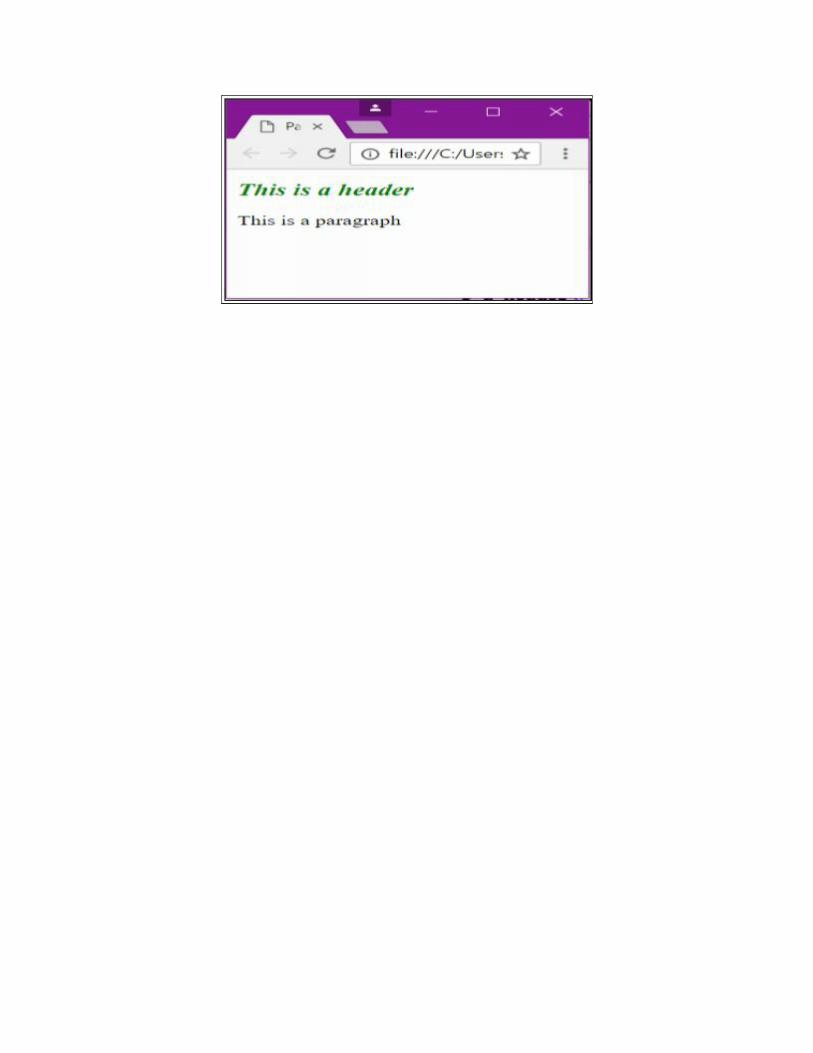
The index .html file in a Web browser should look like the below picture:
14 - CSS SintaxThere are two parts to a CSS rule:
- selectors- declarations
The selector is usually the HTML element you want to style.
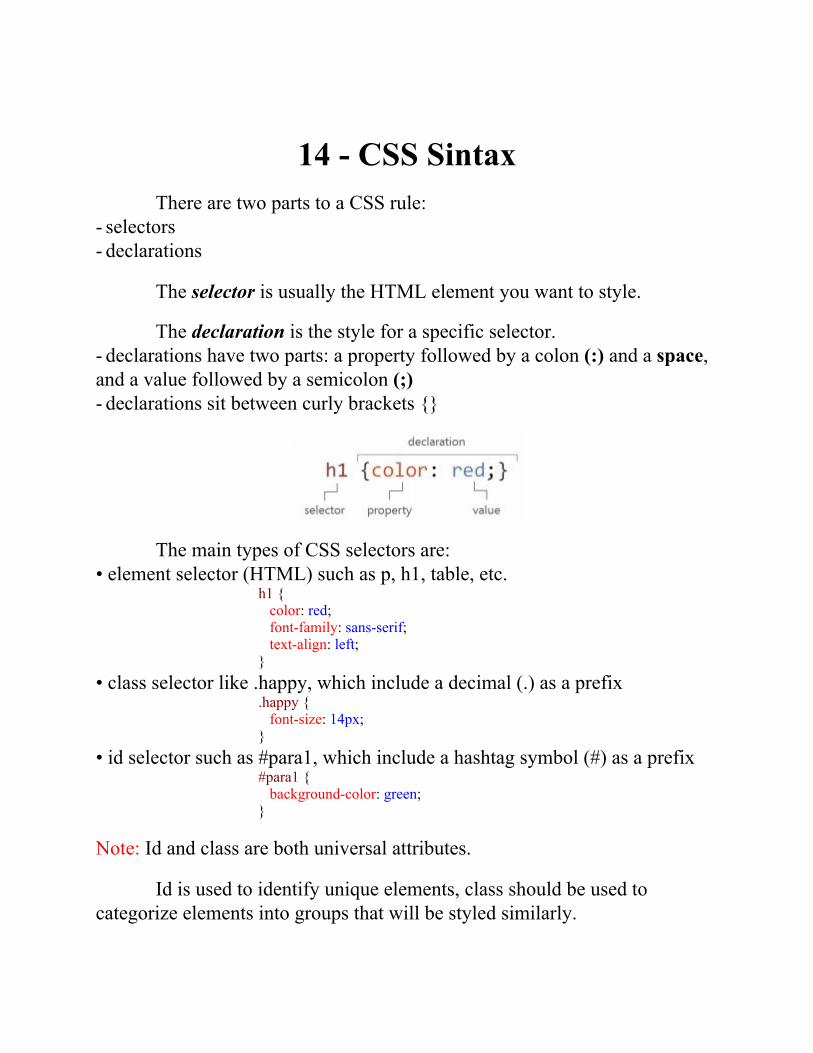
The declaration is the style for a specific selector.- declarations have two parts: a property followed by a colon (:) and a space,and a value followed by a semicolon (;)- declarations sit between curly brackets {}
The main types of CSS selectors are:• element selector (HTML) such as p, h1, table, etc.
h1 { color: red; font-family: sans-serif; text-align: left;}
• class selector like .happy, which include a decimal (.) as a prefix.happy { font-size: 14px;}
• id selector such as #para1, which include a hashtag symbol (#) as a prefix#para1 { background-color: green;}
Note: Id and class are both universal attributes.
Id is used to identify unique elements, class should be used tocategorize elements into groups that will be styled similarly.
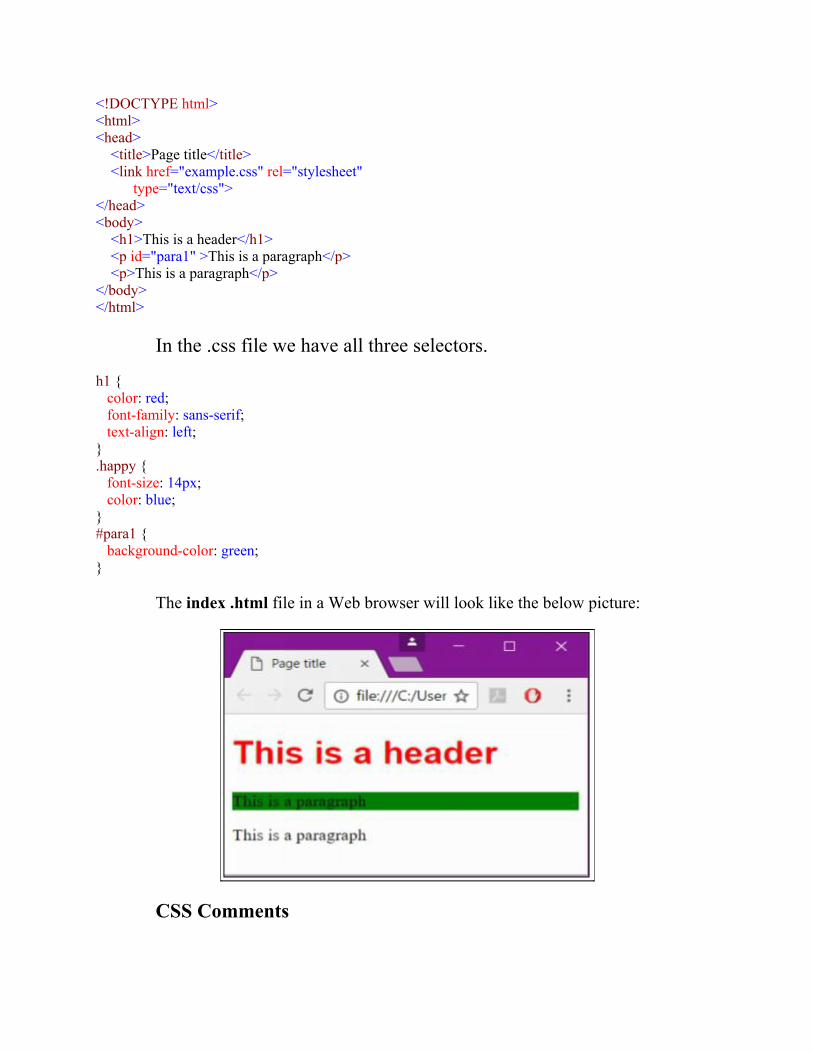
<!DOCTYPE html><html><head> <title>Page title</title> <link href="example.css" rel="stylesheet" type="text/css"></head><body> <h1>This is a header</h1> <p id="para1" >This is a paragraph</p> <p>This is a paragraph</p></body></html>
In the .css file we have all three selectors.
h1 { color: red; font-family: sans-serif; text-align: left;}.happy { font-size: 14px; color: blue;}#para1 { background-color: green;}
The index .html file in a Web browser will look like the below picture:
CSS Comments
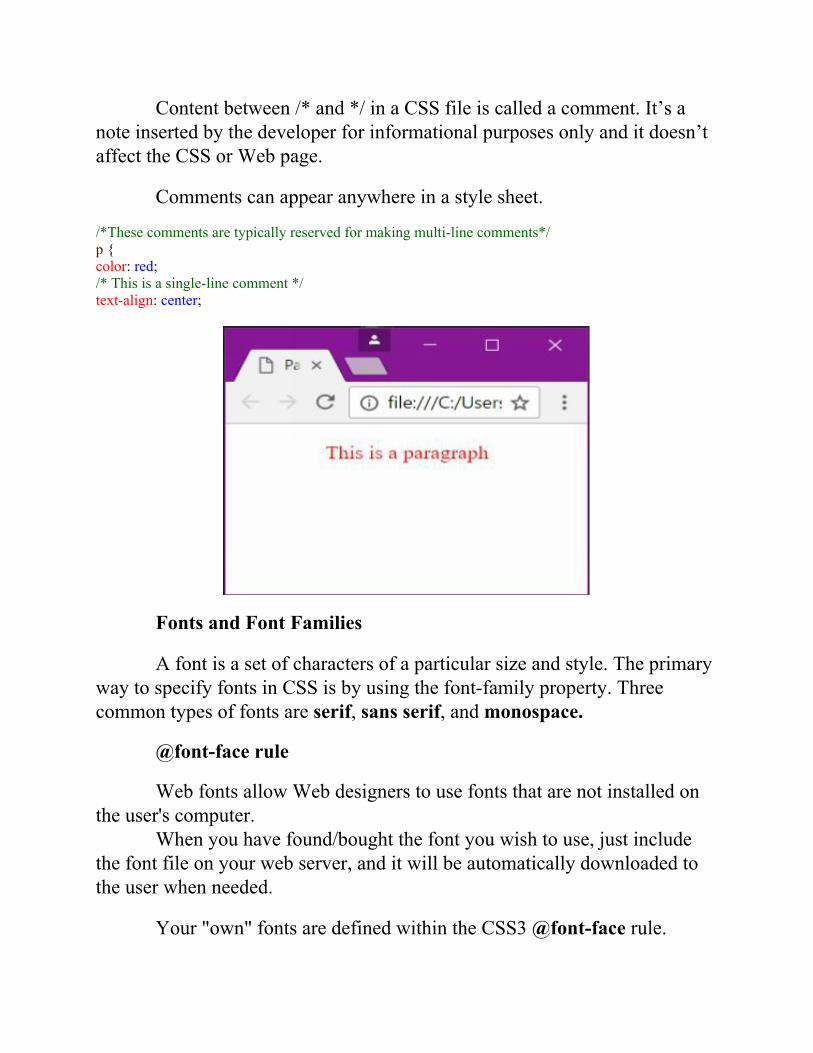
Content between /* and */ in a CSS file is called a comment. It’s anote inserted by the developer for informational purposes only and it doesn’taffect the CSS or Web page.
Comments can appear anywhere in a style sheet.
/*These comments are typically reserved for making multi-line comments*/p {color: red;/* This is a single-line comment */text-align: center;
Fonts and Font Families
A font is a set of characters of a particular size and style. The primaryway to specify fonts in CSS is by using the font-family property. Threecommon types of fonts are serif, sans serif, and monospace.
@font-face rule
Web fonts allow Web designers to use fonts that are not installed onthe user's computer.
When you have found/bought the font you wish to use, just includethe font file on your web server, and it will be automatically downloaded tothe user when needed.
Your "own" fonts are defined within the CSS3 @font-face rule.
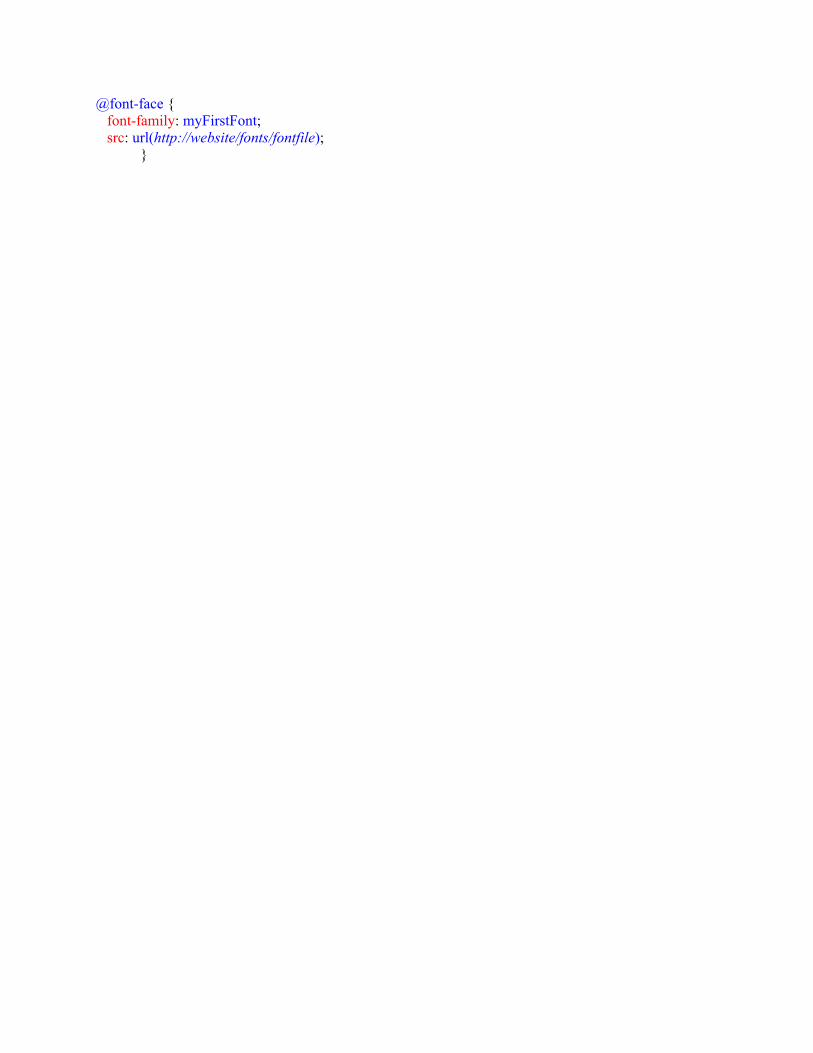
@font-face { font-family: myFirstFont; src: url(http://website/fonts/fontfile);
}
15 - Managing ContentContent Flow
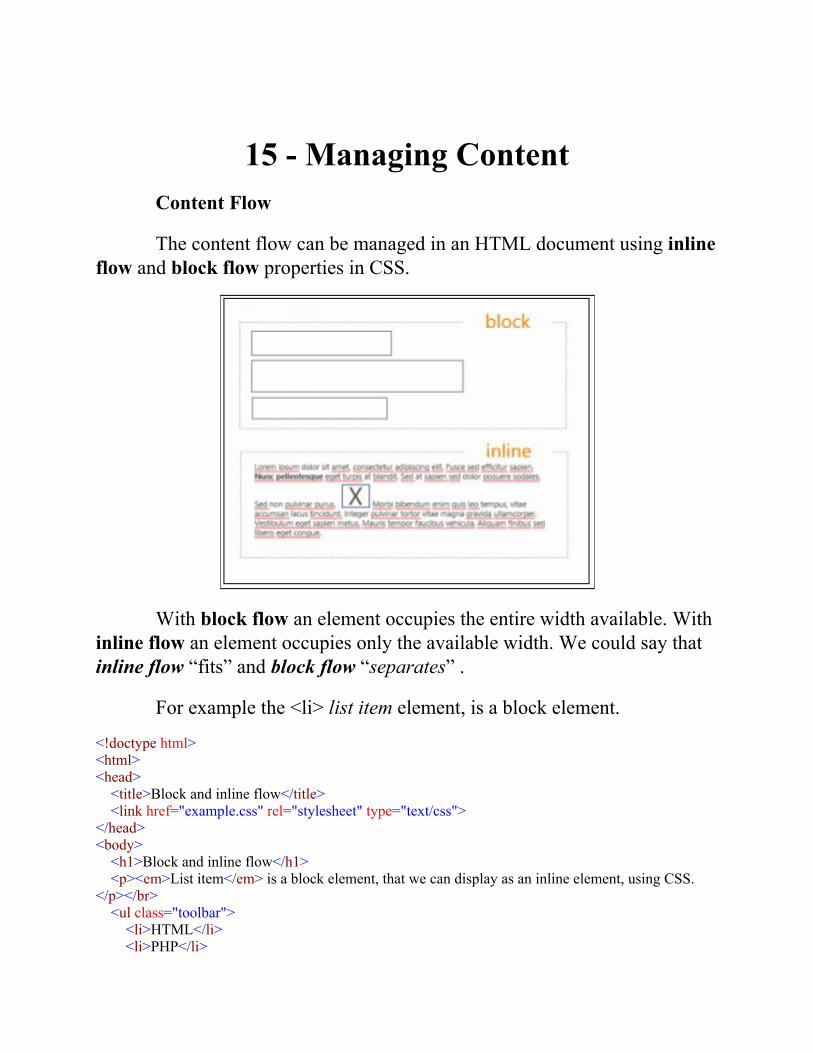
The content flow can be managed in an HTML document using inlineflow and block flow properties in CSS.
With block flow an element occupies the entire width available. Withinline flow an element occupies only the available width. We could say thatinline flow “fits” and block flow “separates” .
For example the <li> list item element, is a block element.
<!doctype html><html><head> <title>Block and inline flow</title> <link href="example.css" rel="stylesheet" type="text/css"></head><body> <h1>Block and inline flow</h1> <p><em>List item</em> is a block element, that we can display as an inline element, using CSS.</p></br> <ul class="toolbar"> <li>HTML</li> <li>PHP</li>
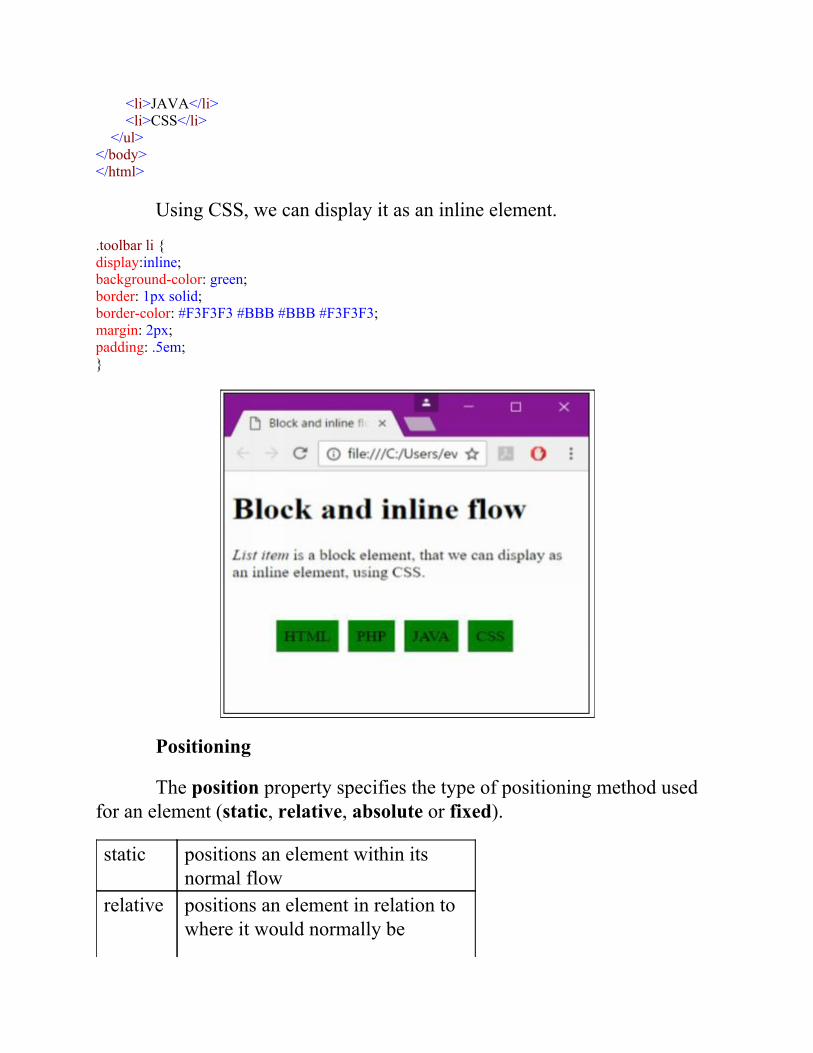
<li>JAVA</li> <li>CSS</li> </ul></body></html>
Using CSS, we can display it as an inline element.
.toolbar li {display:inline;background-color: green;border: 1px solid;border-color: #F3F3F3 #BBB #BBB #F3F3F3;margin: 2px;padding: .5em;}
Positioning
The position property specifies the type of positioning method usedfor an element (static, relative, absolute or fixed).
static positions an element within itsnormal flow
relative positions an element in relation towhere it would normally be
positioned in the flow of contentabsolute ensures that the positioning of an
element doesn’t impact othercontent
fixed positions an element in relation tothe browser window and stays inthe same place
initial sets this property to its defaultvalue
inherit inherits this property from itsparent element
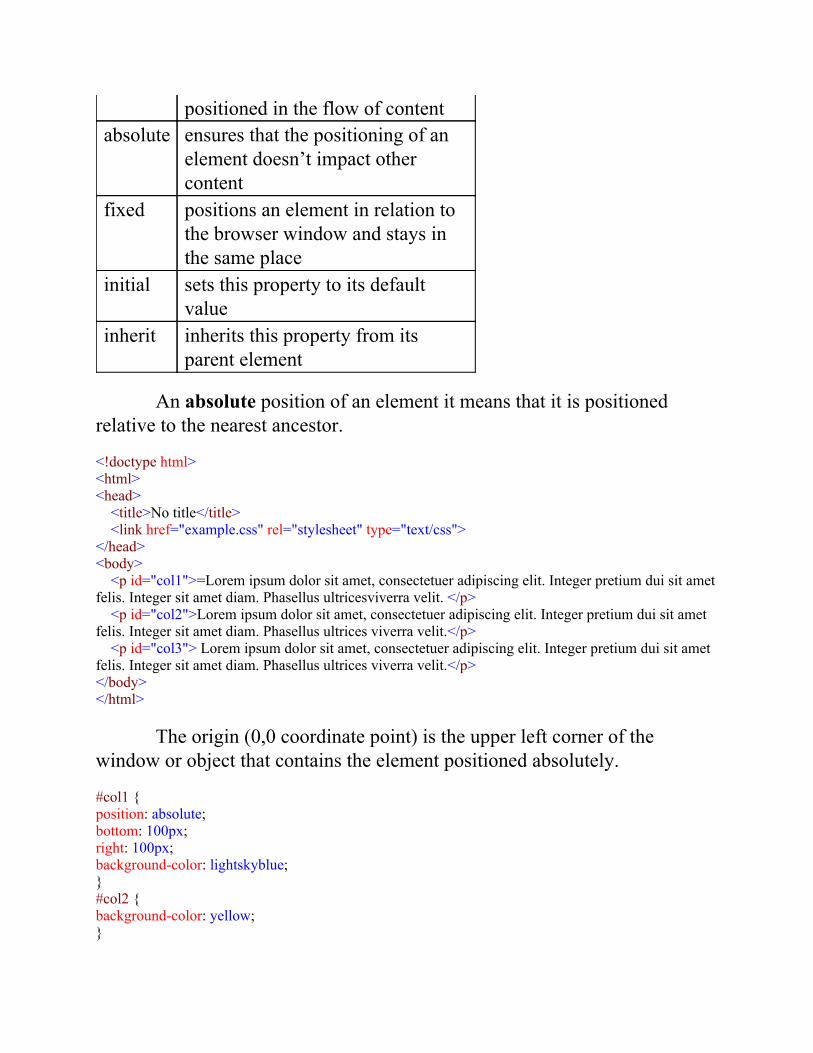
An absolute position of an element it means that it is positionedrelative to the nearest ancestor.
<!doctype html><html><head> <title>No title</title> <link href="example.css" rel="stylesheet" type="text/css"></head><body> <p id="col1">=Lorem ipsum dolor sit amet, consectetuer adipiscing elit. Integer pretium dui sit ametfelis. Integer sit amet diam. Phasellus ultricesviverra velit. </p> <p id="col2">Lorem ipsum dolor sit amet, consectetuer adipiscing elit. Integer pretium dui sit ametfelis. Integer sit amet diam. Phasellus ultrices viverra velit.</p> <p id="col3"> Lorem ipsum dolor sit amet, consectetuer adipiscing elit. Integer pretium dui sit ametfelis. Integer sit amet diam. Phasellus ultrices viverra velit.</p></body></html>
The origin (0,0 coordinate point) is the upper left corner of thewindow or object that contains the element positioned absolutely.
#col1 {position: absolute;bottom: 100px;right: 100px;background-color: lightskyblue;}#col2 {background-color: yellow;}
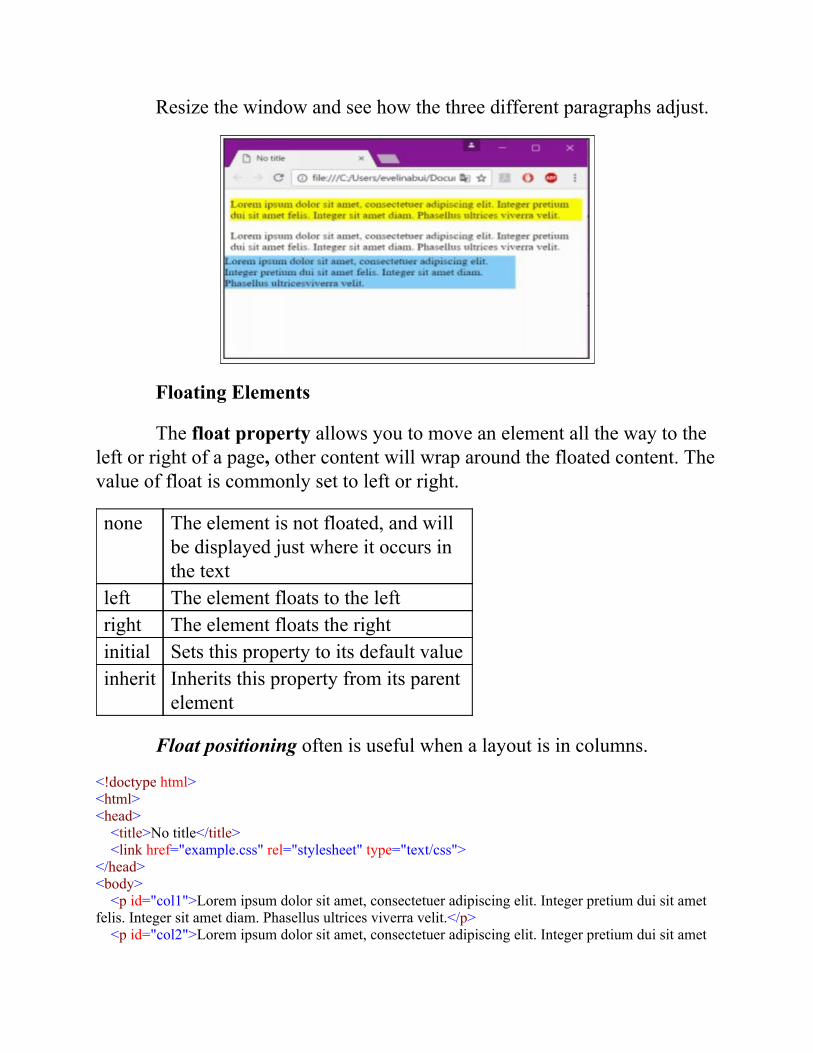
Resize the window and see how the three different paragraphs adjust.
Floating Elements
The float property allows you to move an element all the way to theleft or right of a page, other content will wrap around the floated content. Thevalue of float is commonly set to left or right.
none The element is not floated, and willbe displayed just where it occurs inthe text
left The element floats to the leftright The element floats the rightinitial Sets this property to its default valueinherit Inherits this property from its parent
element
Float positioning often is useful when a layout is in columns.
<!doctype html><html><head> <title>No title</title> <link href="example.css" rel="stylesheet" type="text/css"></head><body> <p id="col1">Lorem ipsum dolor sit amet, consectetuer adipiscing elit. Integer pretium dui sit ametfelis. Integer sit amet diam. Phasellus ultrices viverra velit.</p> <p id="col2">Lorem ipsum dolor sit amet, consectetuer adipiscing elit. Integer pretium dui sit amet
felis. Integer sit amet diam. Phasellus ultrices viverra velit.</p> <p id="col3">Lorem ipsum dolor sit amet, consectetuer adipiscing elit. Integer pretium dui sit ametfelis. Integer sit amet diam. Phasellus ultrices viverra velit.</p></body></html>
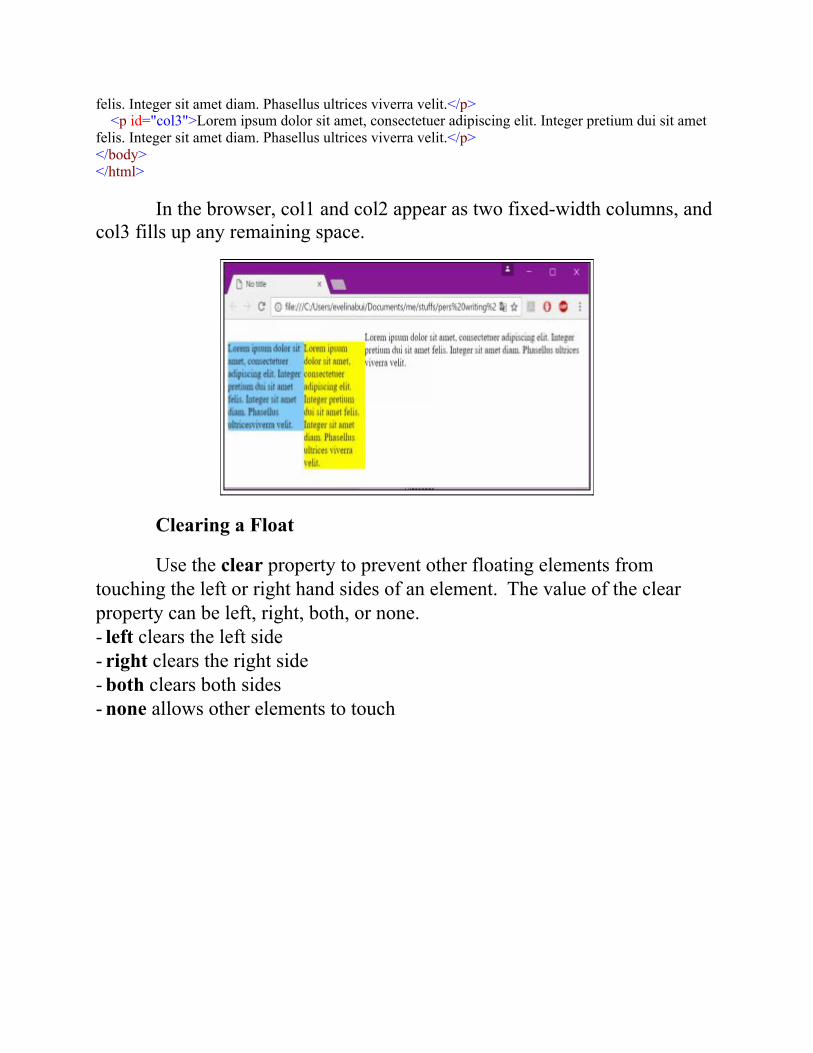
In the browser, col1 and col2 appear as two fixed-width columns, andcol3 fills up any remaining space.
Clearing a Float
Use the clear property to prevent other floating elements fromtouching the left or right hand sides of an element. The value of the clearproperty can be left, right, both, or none.- left clears the left side- right clears the right side- both clears both sides- none allows other elements to touch
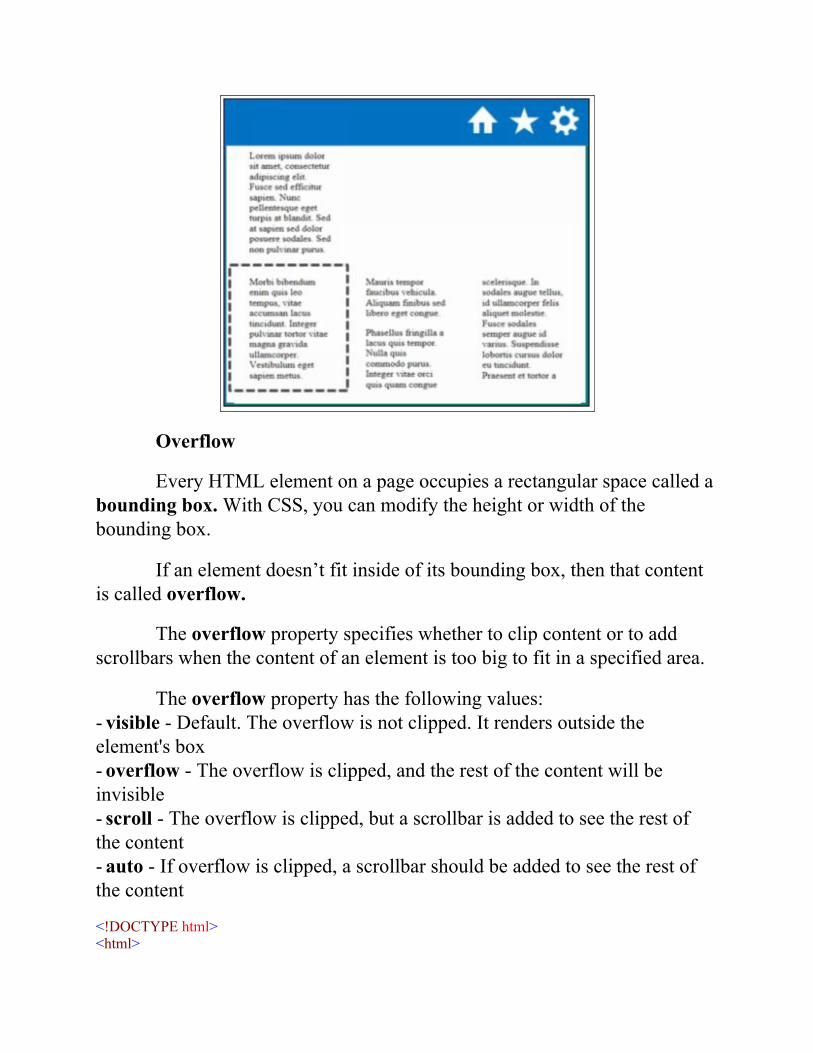
Overflow
Every HTML element on a page occupies a rectangular space called abounding box. With CSS, you can modify the height or width of thebounding box.
If an element doesn’t fit inside of its bounding box, then that contentis called overflow.
The overflow property specifies whether to clip content or to addscrollbars when the content of an element is too big to fit in a specified area.
The overflow property has the following values:- visible - Default. The overflow is not clipped. It renders outside theelement's box- overflow - The overflow is clipped, and the rest of the content will beinvisible- scroll - The overflow is clipped, but a scrollbar is added to see the rest ofthe content- auto - If overflow is clipped, a scrollbar should be added to see the rest ofthe content
<!DOCTYPE html><html>
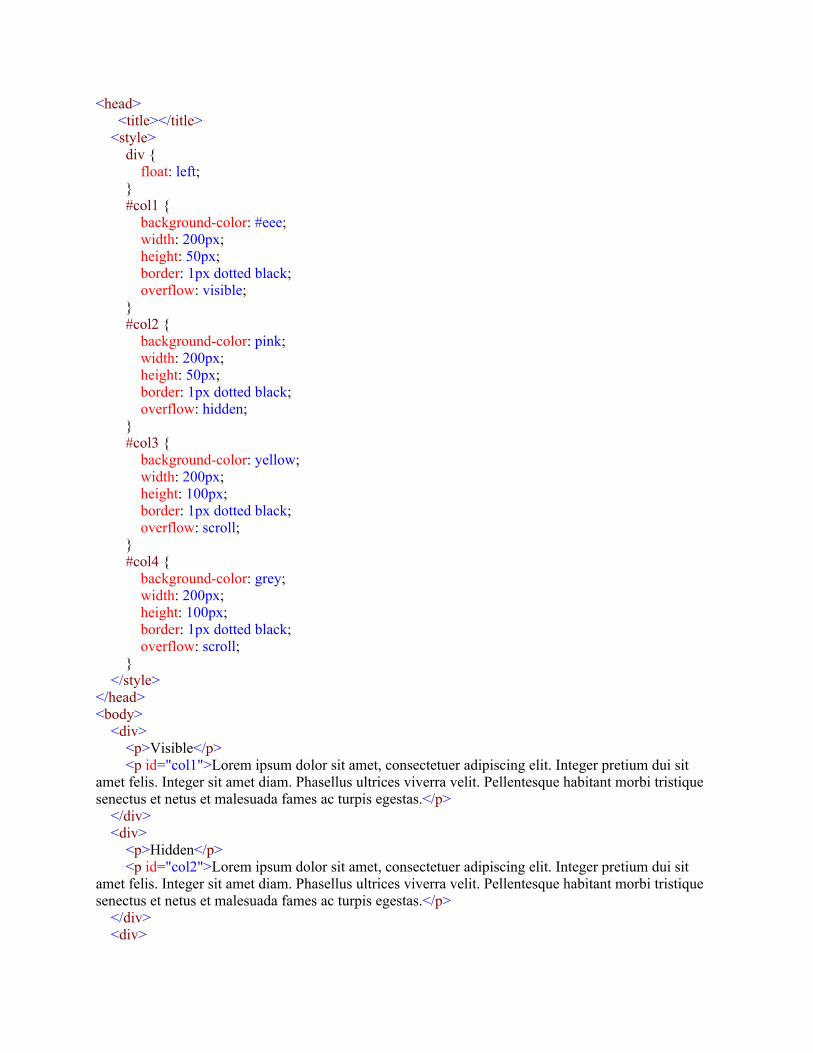
<head> <title></title> <style> div { float: left; } #col1 { background-color: #eee; width: 200px; height: 50px; border: 1px dotted black; overflow: visible; } #col2 { background-color: pink; width: 200px; height: 50px; border: 1px dotted black; overflow: hidden; } #col3 { background-color: yellow; width: 200px; height: 100px; border: 1px dotted black; overflow: scroll; } #col4 { background-color: grey; width: 200px; height: 100px; border: 1px dotted black; overflow: scroll; } </style></head><body> <div> <p>Visible</p> <p id="col1">Lorem ipsum dolor sit amet, consectetuer adipiscing elit. Integer pretium dui sitamet felis. Integer sit amet diam. Phasellus ultrices viverra velit. Pellentesque habitant morbi tristiquesenectus et netus et malesuada fames ac turpis egestas.</p> </div> <div> <p>Hidden</p> <p id="col2">Lorem ipsum dolor sit amet, consectetuer adipiscing elit. Integer pretium dui sitamet felis. Integer sit amet diam. Phasellus ultrices viverra velit. Pellentesque habitant morbi tristiquesenectus et netus et malesuada fames ac turpis egestas.</p> </div> <div>
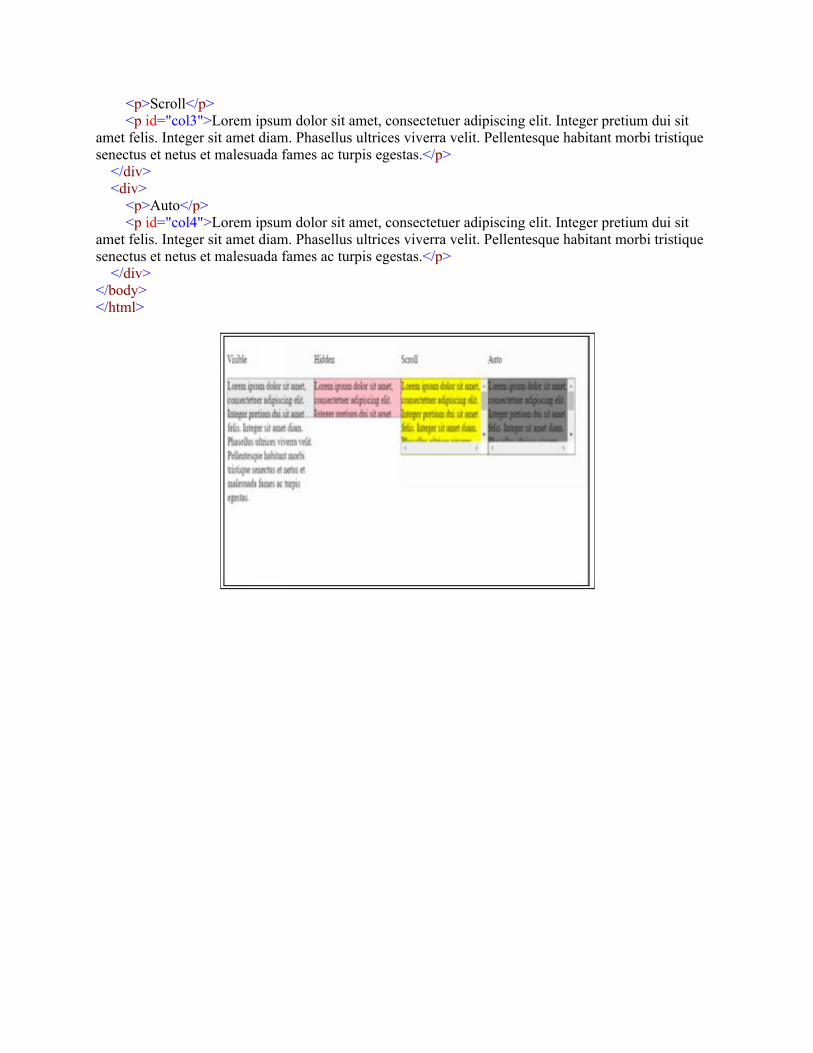
<p>Scroll</p> <p id="col3">Lorem ipsum dolor sit amet, consectetuer adipiscing elit. Integer pretium dui sitamet felis. Integer sit amet diam. Phasellus ultrices viverra velit. Pellentesque habitant morbi tristiquesenectus et netus et malesuada fames ac turpis egestas.</p> </div> <div> <p>Auto</p> <p id="col4">Lorem ipsum dolor sit amet, consectetuer adipiscing elit. Integer pretium dui sitamet felis. Integer sit amet diam. Phasellus ultrices viverra velit. Pellentesque habitant morbi tristiquesenectus et netus et malesuada fames ac turpis egestas.</p> </div></body></html>
16 - LayoutsThe User Interface (UI)
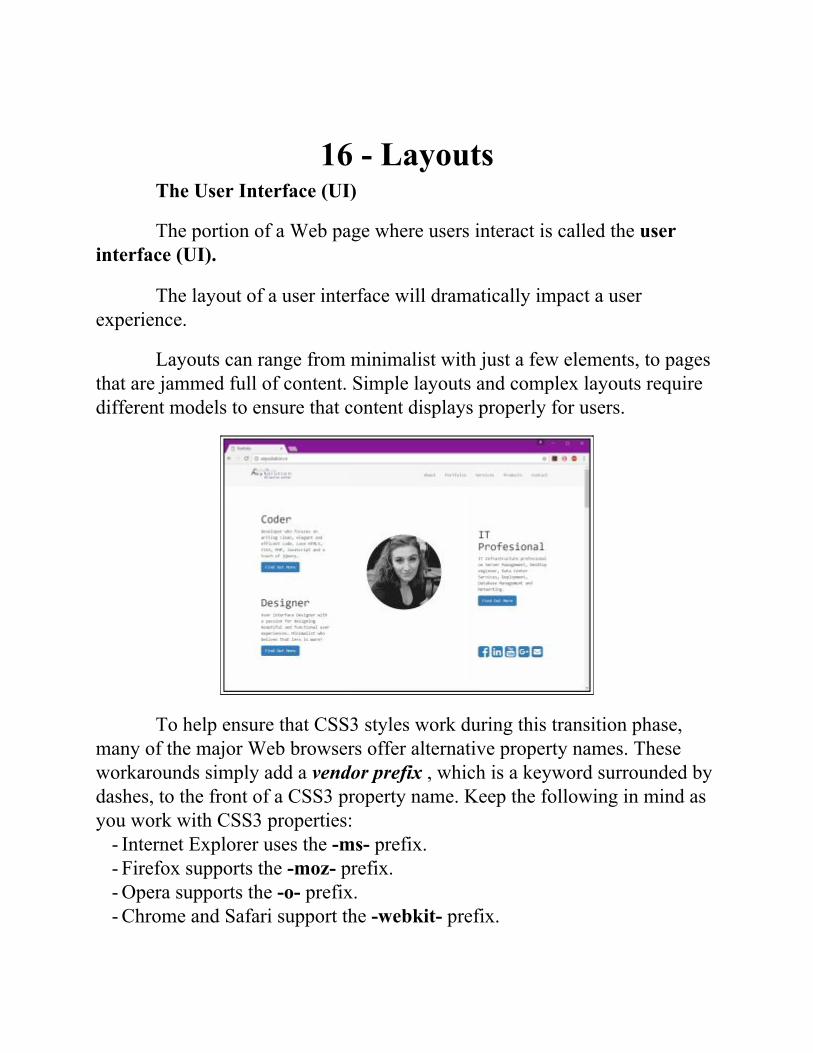
The portion of a Web page where users interact is called the userinterface (UI).
The layout of a user interface will dramatically impact a userexperience.
Layouts can range from minimalist with just a few elements, to pagesthat are jammed full of content. Simple layouts and complex layouts requiredifferent models to ensure that content displays properly for users.
To help ensure that CSS3 styles work during this transition phase,many of the major Web browsers offer alternative property names. Theseworkarounds simply add a vendor prefix , which is a keyword surrounded bydashes, to the front of a CSS3 property name. Keep the following in mind asyou work with CSS3 properties:
- Internet Explorer uses the -ms- prefix.- Firefox supports the -moz- prefix.- Opera supports the -o- prefix.- Chrome and Safari support the -webkit- prefix.
For example, to apply the flexbox style to elements in a
browser, like Chrome, you simply add the -webkit-flexbox property to your
CSS.
The traditional CSS Box model
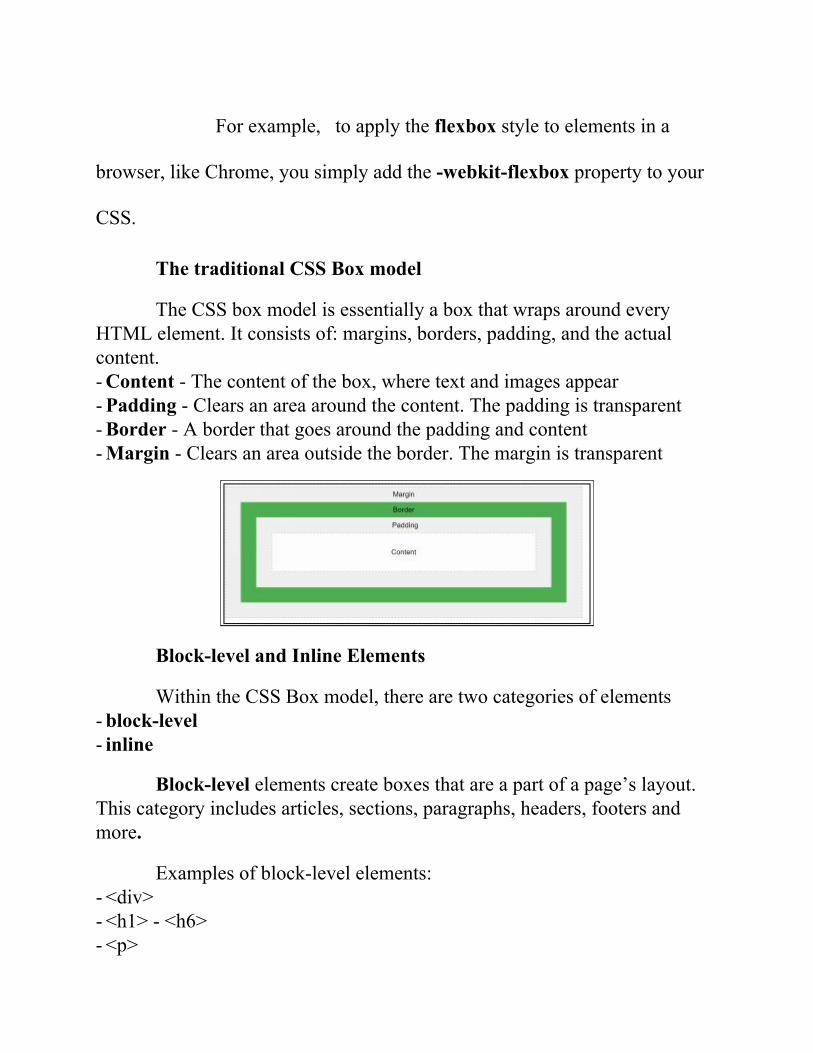
The CSS box model is essentially a box that wraps around everyHTML element. It consists of: margins, borders, padding, and the actualcontent.- Content - The content of the box, where text and images appear- Padding - Clears an area around the content. The padding is transparent- Border - A border that goes around the padding and content- Margin - Clears an area outside the border. The margin is transparent
Block-level and Inline Elements
Within the CSS Box model, there are two categories of elements- block-level- inline
Block-level elements create boxes that are a part of a page’s layout.This category includes articles, sections, paragraphs, headers, footers andmore.
Examples of block-level elements:- <div>- <h1> - <h6>- <p>
- <form>
Inline elements are used to format contentthis category includes emphasis and boldface.
Examples of inline elements:- <span>- <a>- <img>
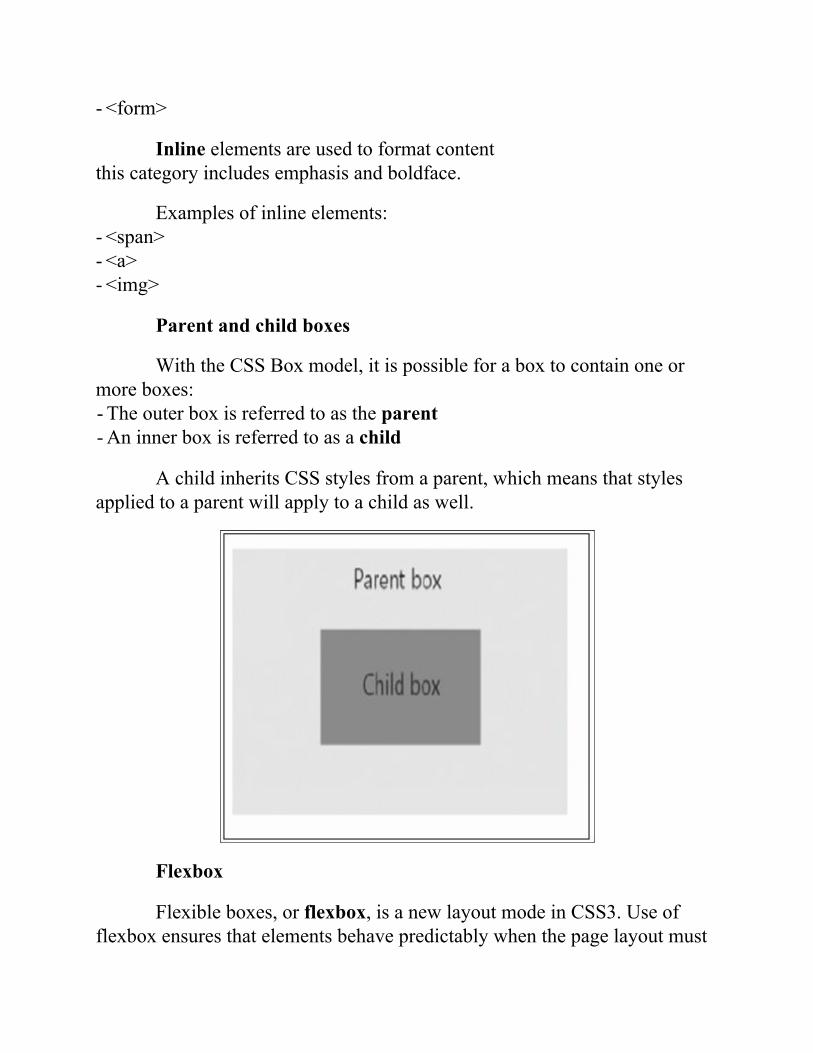
Parent and child boxes
With the CSS Box model, it is possible for a box to contain one ormore boxes:- The outer box is referred to as the parent- An inner box is referred to as a child
A child inherits CSS styles from a parent, which means that stylesapplied to a parent will apply to a child as well.
Flexbox
Flexible boxes, or flexbox, is a new layout mode in CSS3. Use offlexbox ensures that elements behave predictably when the page layout must
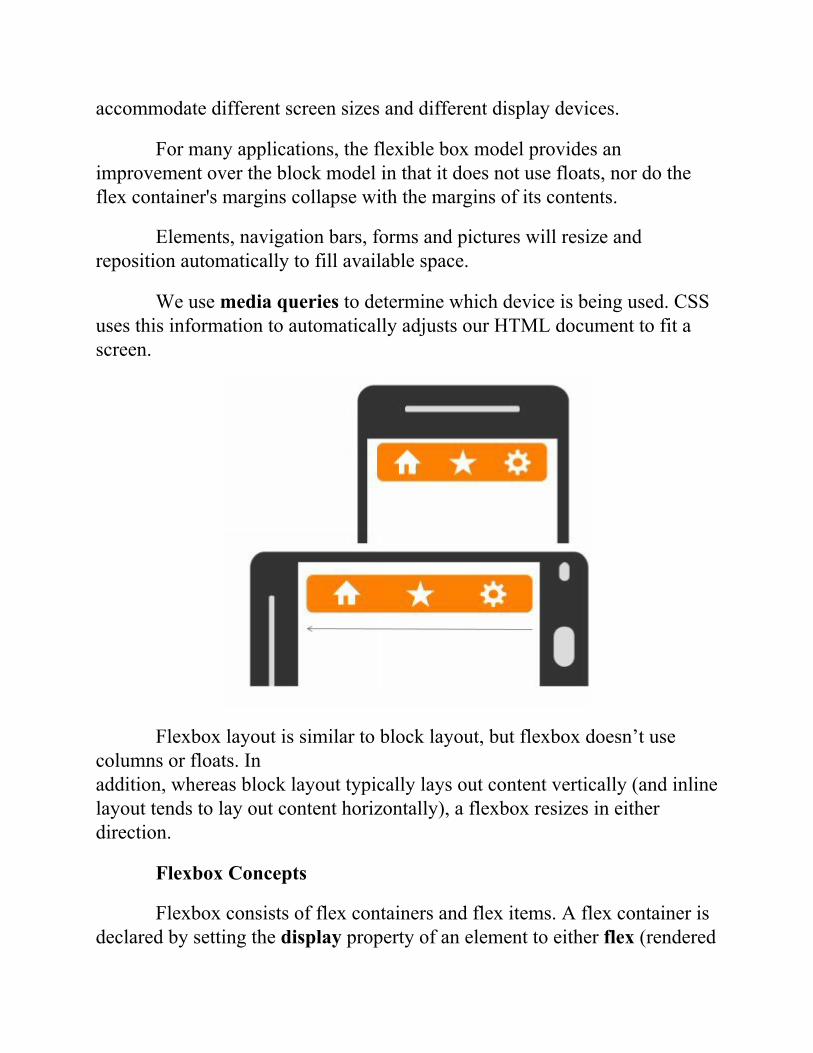
accommodate different screen sizes and different display devices.
For many applications, the flexible box model provides animprovement over the block model in that it does not use floats, nor do theflex container's margins collapse with the margins of its contents.
Elements, navigation bars, forms and pictures will resize andreposition automatically to fill available space.
We use media queries to determine which device is being used. CSSuses this information to automatically adjusts our HTML document to fit ascreen.
Flexbox layout is similar to block layout, but flexbox doesn’t usecolumns or floats. Inaddition, whereas block layout typically lays out content vertically (and inlinelayout tends to lay out content horizontally), a flexbox resizes in eitherdirection.
Flexbox Concepts
Flexbox consists of flex containers and flex items. A flex container isdeclared by setting the display property of an element to either flex (rendered
as a block) or inline-flex (rendered as inline).
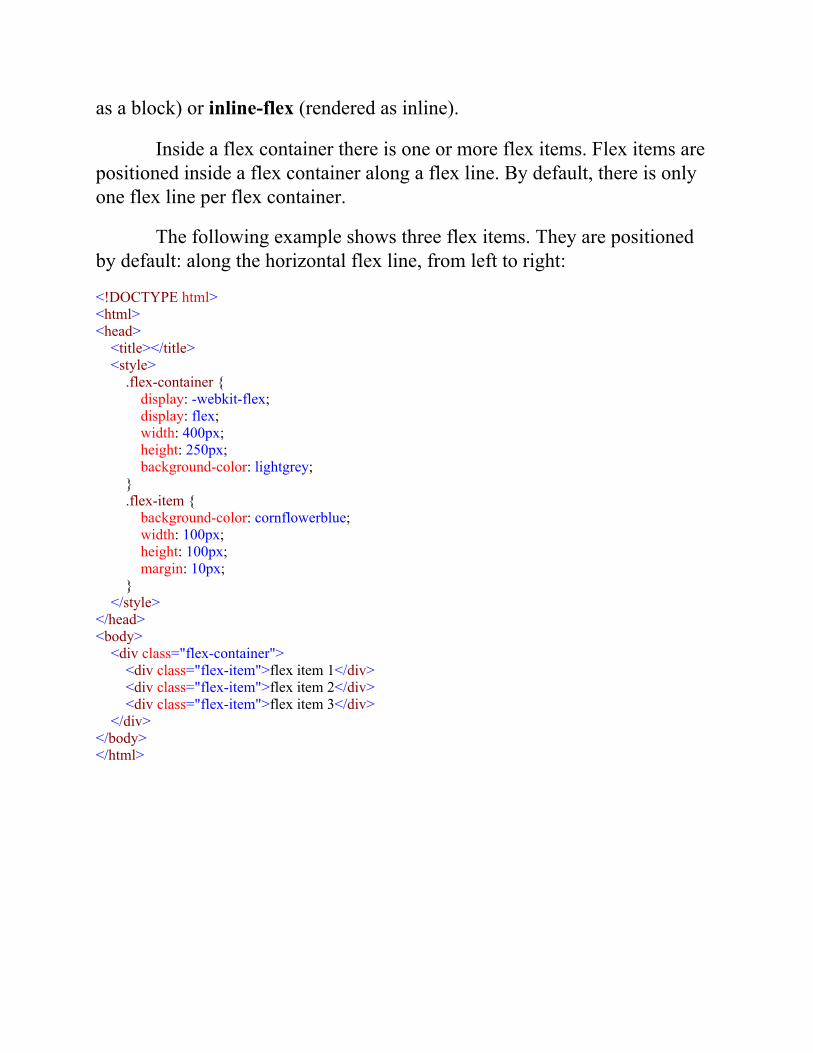
Inside a flex container there is one or more flex items. Flex items arepositioned inside a flex container along a flex line. By default, there is onlyone flex line per flex container.
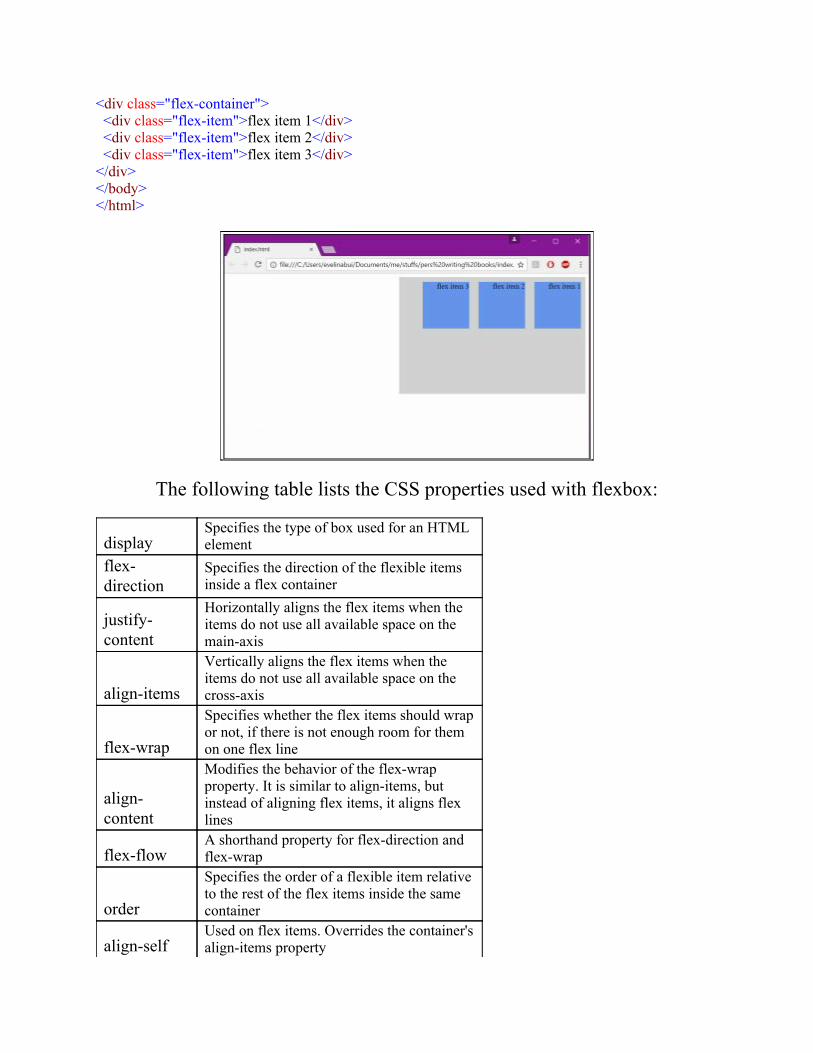
The following example shows three flex items. They are positionedby default: along the horizontal flex line, from left to right:
<!DOCTYPE html><html><head> <title></title> <style> .flex-container { display: -webkit-flex; display: flex; width: 400px; height: 250px; background-color: lightgrey; } .flex-item { background-color: cornflowerblue; width: 100px; height: 100px; margin: 10px; } </style></head><body> <div class="flex-container"> <div class="flex-item">flex item 1</div> <div class="flex-item">flex item 2</div> <div class="flex-item">flex item 3</div> </div></body></html>
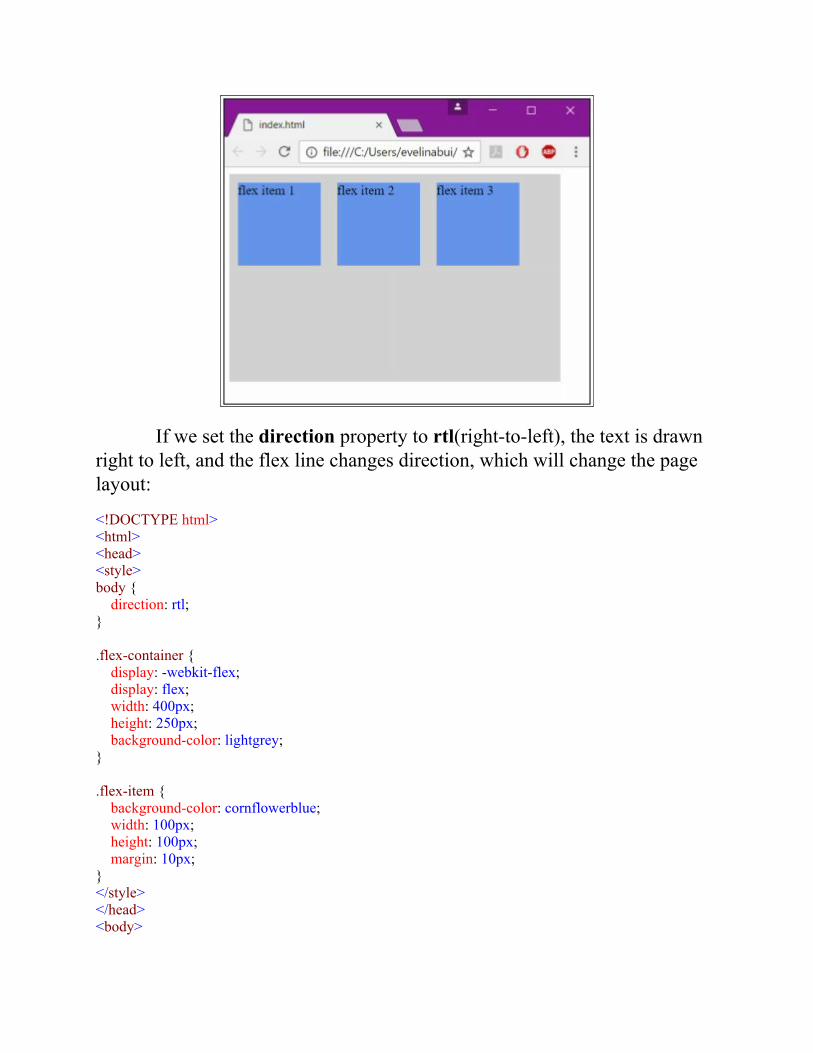
If we set the direction property to rtl(right-to-left), the text is drawnright to left, and the flex line changes direction, which will change the pagelayout:
<!DOCTYPE html><html><head><style>body { direction: rtl;} .flex-container { display: -webkit-flex; display: flex; width: 400px; height: 250px; background-color: lightgrey;} .flex-item { background-color: cornflowerblue; width: 100px; height: 100px; margin: 10px;}</style></head><body>
<div class="flex-container"> <div class="flex-item">flex item 1</div> <div class="flex-item">flex item 2</div> <div class="flex-item">flex item 3</div> </div></body></html>
The following table lists the CSS properties used with flexbox:
displaySpecifies the type of box used for an HTMLelement
flex-direction
Specifies the direction of the flexible itemsinside a flex container
justify-content
Horizontally aligns the flex items when theitems do not use all available space on themain-axis
align-items
Vertically aligns the flex items when theitems do not use all available space on thecross-axis
flex-wrap
Specifies whether the flex items should wrapor not, if there is not enough room for themon one flex line
align-content
Modifies the behavior of the flex-wrapproperty. It is similar to align-items, butinstead of aligning flex items, it aligns flexlines
flex-flowA shorthand property for flex-direction andflex-wrap
order
Specifies the order of a flexible item relativeto the rest of the flex items inside the samecontainer
align-selfUsed on flex items. Overrides the container'salign-items property
flex
Specifies the length of a flex item, relative tothe rest of the flex items inside the samecontainer
Changing the Direction of Child Items
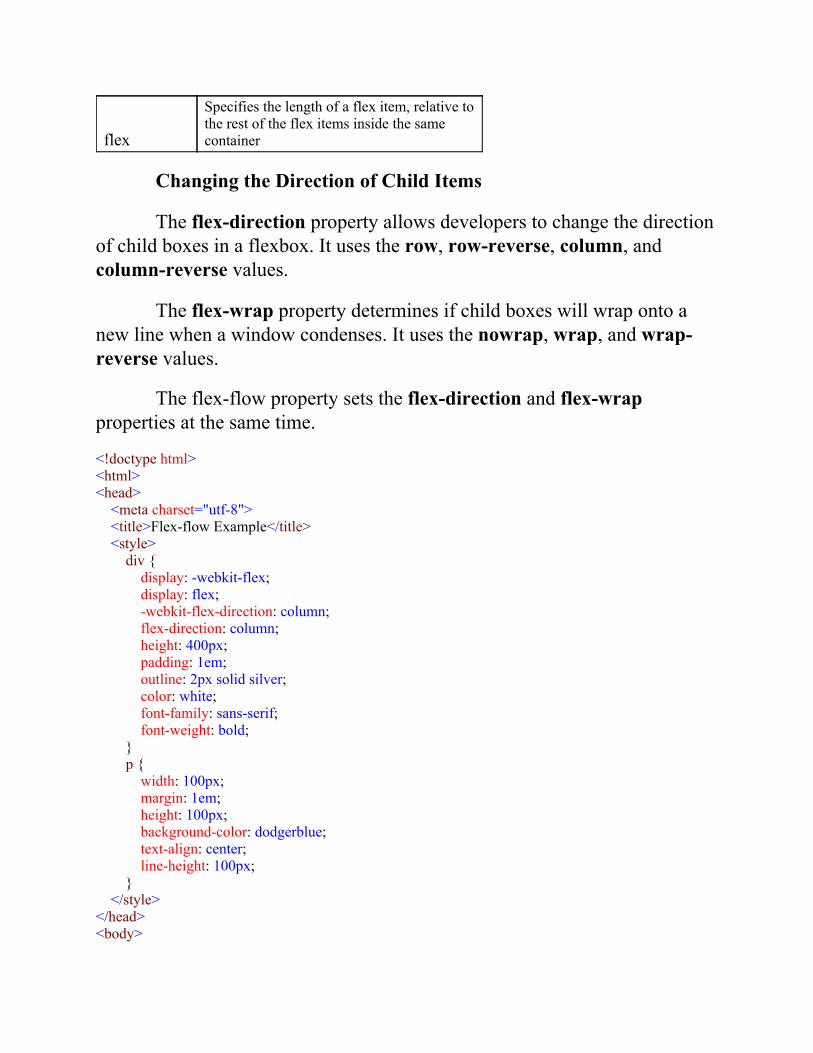
The flex-direction property allows developers to change the directionof child boxes in a flexbox. It uses the row, row-reverse, column, andcolumn-reverse values.
The flex-wrap property determines if child boxes will wrap onto anew line when a window condenses. It uses the nowrap, wrap, and wrap-reverse values.
The flex-flow property sets the flex-direction and flex-wrapproperties at the same time.
<!doctype html><html><head> <meta charset="utf-8"> <title>Flex-flow Example</title> <style> div { display: -webkit-flex; display: flex; -webkit-flex-direction: column; flex-direction: column; height: 400px; padding: 1em; outline: 2px solid silver; color: white; font-family: sans-serif; font-weight: bold; } p { width: 100px; margin: 1em; height: 100px; background-color: dodgerblue; text-align: center; line-height: 100px; } </style></head><body>
<div> <p>Child1</p> <p>Child2</p> <p>Child3</p> </div></body></html>
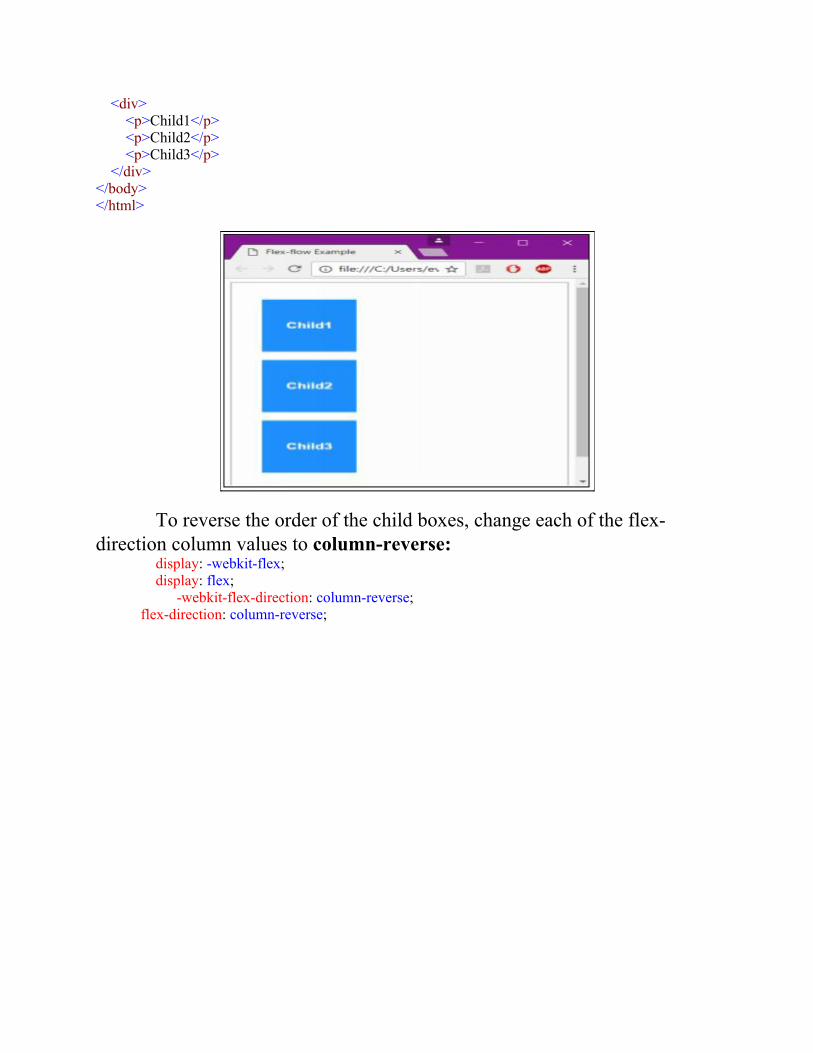
To reverse the order of the child boxes, change each of the flex-direction column values to column-reverse:
display: -webkit-flex;display: flex;
-webkit-flex-direction: column-reverse;flex-direction: column-reverse;
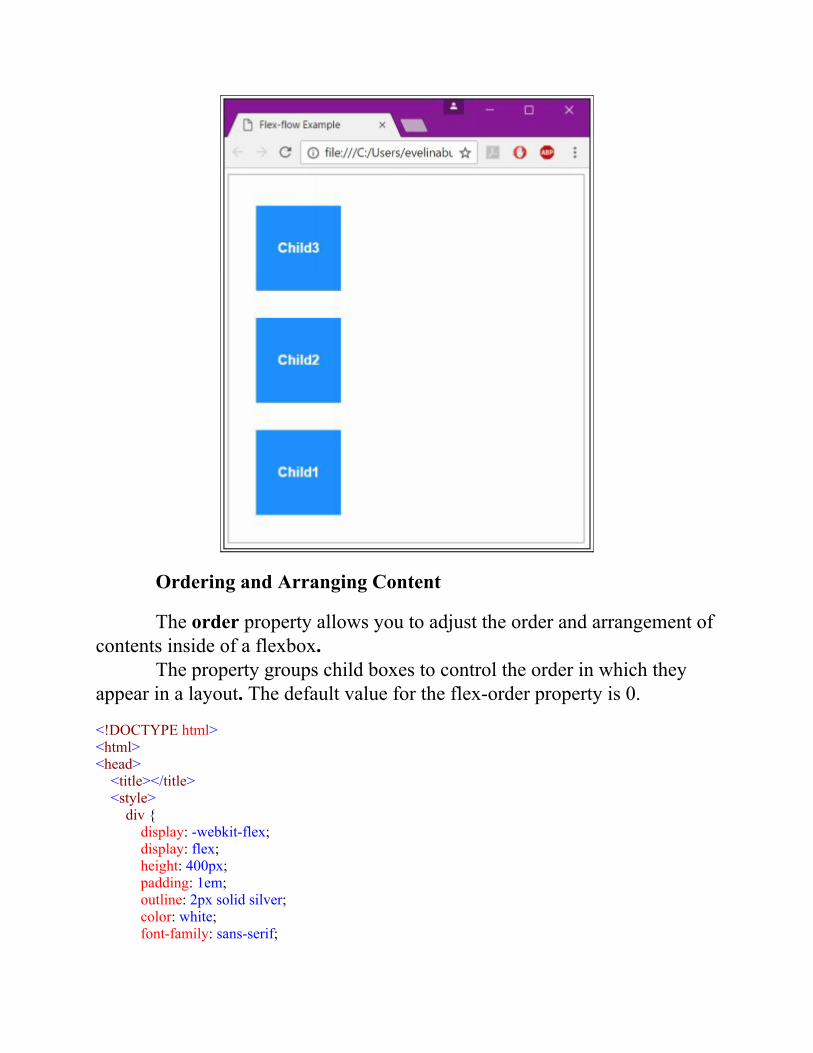
Ordering and Arranging Content
The order property allows you to adjust the order and arrangement ofcontents inside of a flexbox.
The property groups child boxes to control the order in which theyappear in a layout. The default value for the flex-order property is 0.
<!DOCTYPE html><html><head> <title></title> <style> div { display: -webkit-flex; display: flex; height: 400px; padding: 1em; outline: 2px solid silver; color: white; font-family: sans-serif;
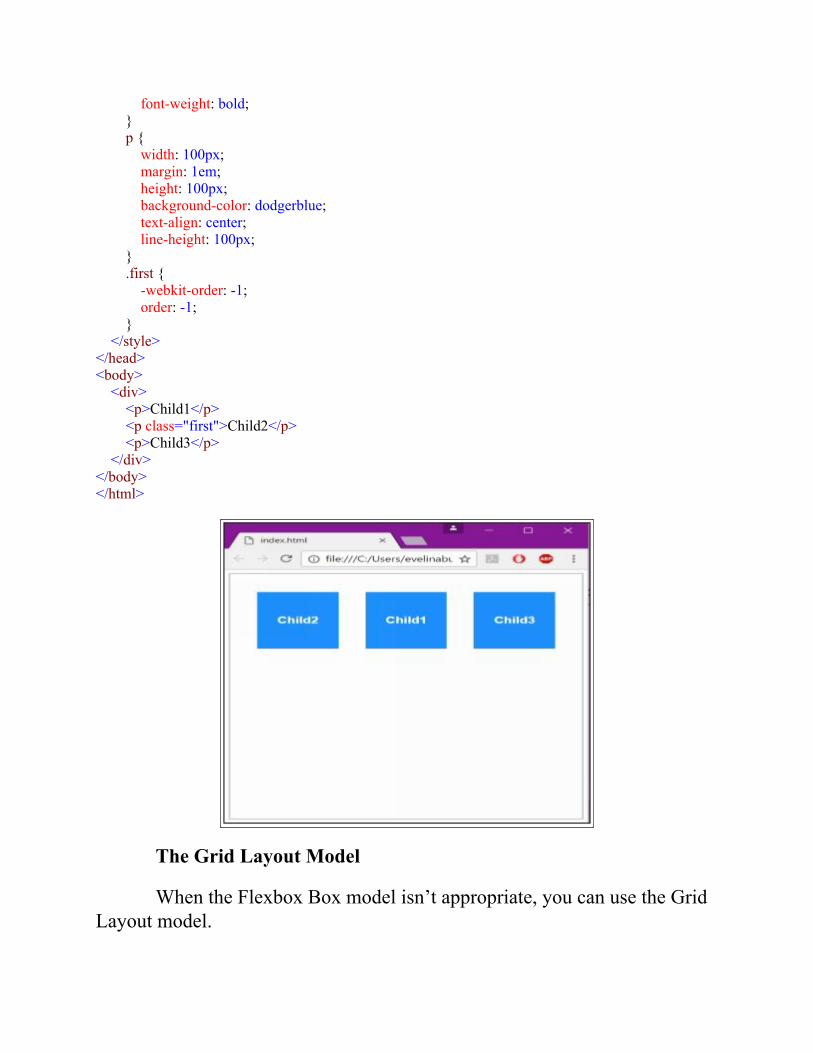
font-weight: bold; } p { width: 100px; margin: 1em; height: 100px; background-color: dodgerblue; text-align: center; line-height: 100px; } .first { -webkit-order: -1; order: -1; } </style></head><body> <div> <p>Child1</p> <p class="first">Child2</p> <p>Child3</p> </div></body></html>
The Grid Layout Model
When the Flexbox Box model isn’t appropriate, you can use the GridLayout model.
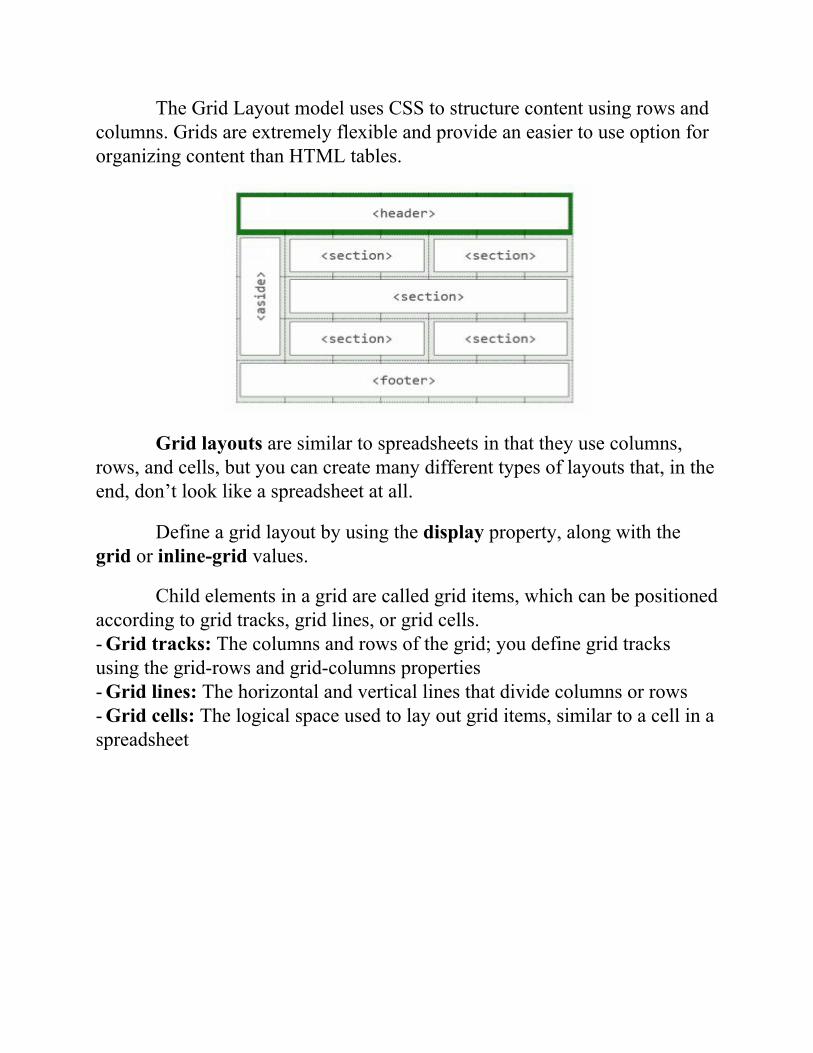
The Grid Layout model uses CSS to structure content using rows andcolumns. Grids are extremely flexible and provide an easier to use option fororganizing content than HTML tables.
Grid layouts are similar to spreadsheets in that they use columns,rows, and cells, but you can create many different types of layouts that, in theend, don’t look like a spreadsheet at all.
Define a grid layout by using the display property, along with thegrid or inline-grid values.
Child elements in a grid are called grid items, which can be positionedaccording to grid tracks, grid lines, or grid cells.- Grid tracks: The columns and rows of the grid; you define grid tracksusing the grid-rows and grid-columns properties- Grid lines: The horizontal and vertical lines that divide columns or rows- Grid cells: The logical space used to lay out grid items, similar to a cell in aspreadsheet

<!doctype html><html><head> <meta charset="utf-8"> <title>Grid Example</title> <style> #gridded { display: grid; grid-columns: 10px 250px 10px 250px 10px 250px 10px 250px 10px; grid-rows: 1fr; } #item1 { background: orange; grid-row: 1; grid-column: 1; } #item2 { background: purple; grid-row: 2; grid-column: 2; color: white; } </style></head><body> <div> <div id="gridded"> <div id="item1">Logo</div> <div id="item2">Item</div> </div> </div></body>
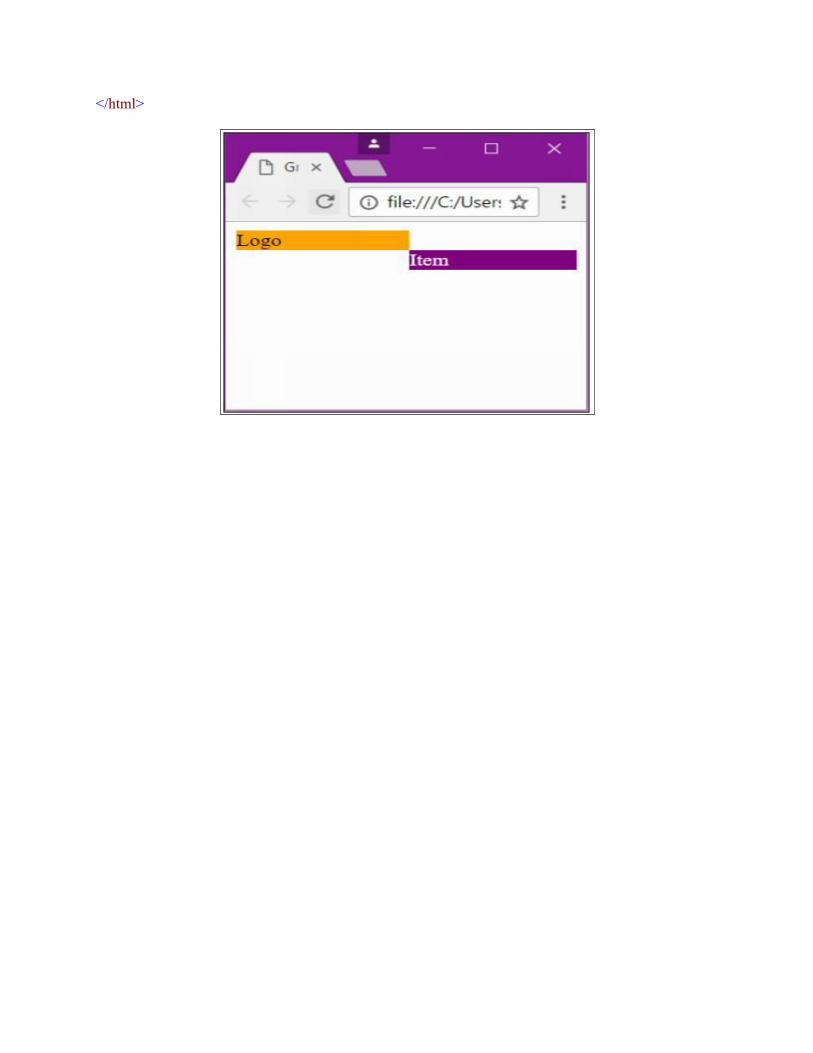
</html>
17 - Managing Text FlowCSS Regions
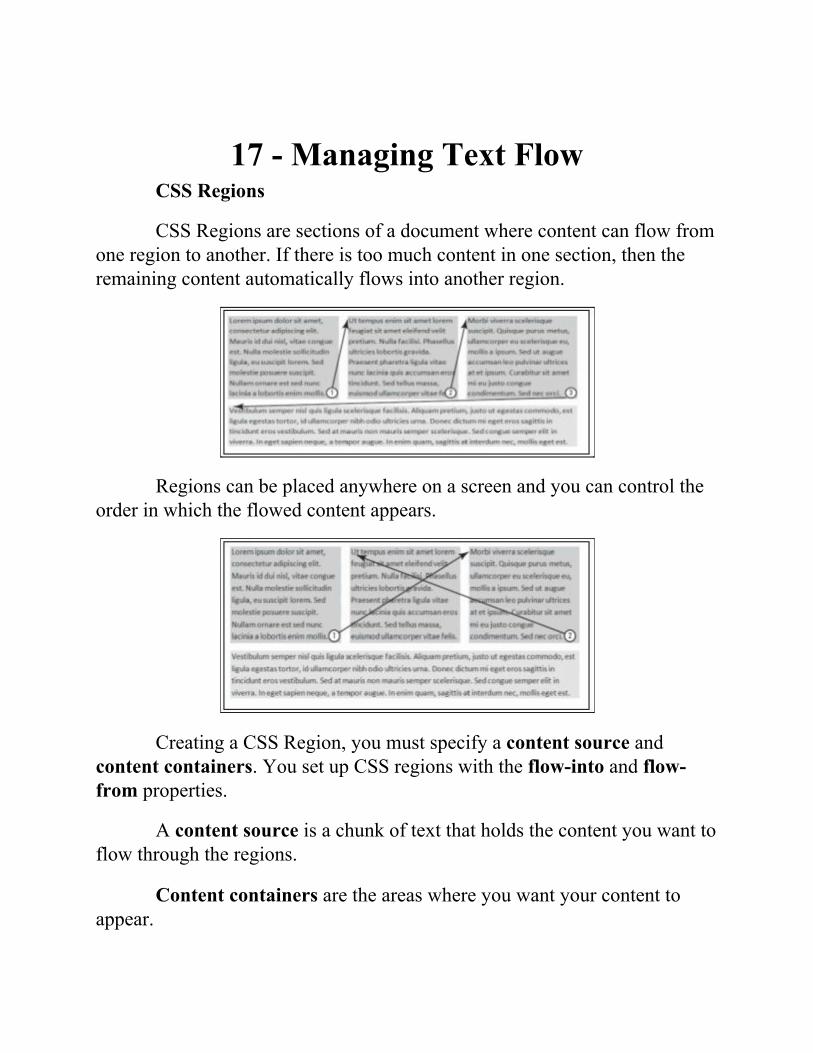
CSS Regions are sections of a document where content can flow fromone region to another. If there is too much content in one section, then theremaining content automatically flows into another region.
Regions can be placed anywhere on a screen and you can control theorder in which the flowed content appears.
Creating a CSS Region, you must specify a content source andcontent containers. You set up CSS regions with the flow-into and flow-from properties.
A content source is a chunk of text that holds the content you want toflow through the regions.
Content containers are the areas where you want your content toappear.
<div id="content" src="content.html"></div><div id="region1" class="region"></div><div id="region2" class="region"></div><div id="region3" class="region"></div>
Using an id as a selector, identify the content source using the mainvalue of the flow-into property. This content will require content containersto appear on a Web page. With a specific class as the selector, use the samevalue used with the flow-into property for the value of the flow-fromproperty to place content into a container. This is how the source and contentcontainers are associated.
#content { -ms-flow-into: main; } .region { -ms-flow-from: main; background: #9ACD32; width: 150px; height: 200px; float: left; margin: 20px; }
Overflowing Text
The height of a region won’t automatically adjust to fit all content.Height of regions must be defined.
If there is content available after all regions have been filled, then thelast region will:- be cut off- visibly overflow- overflow and be hidden
The overflow and region-fragment properties can be used to controlhow overflow content is treated.- set region-fragment to auto or break- set overflow to visible or hidden
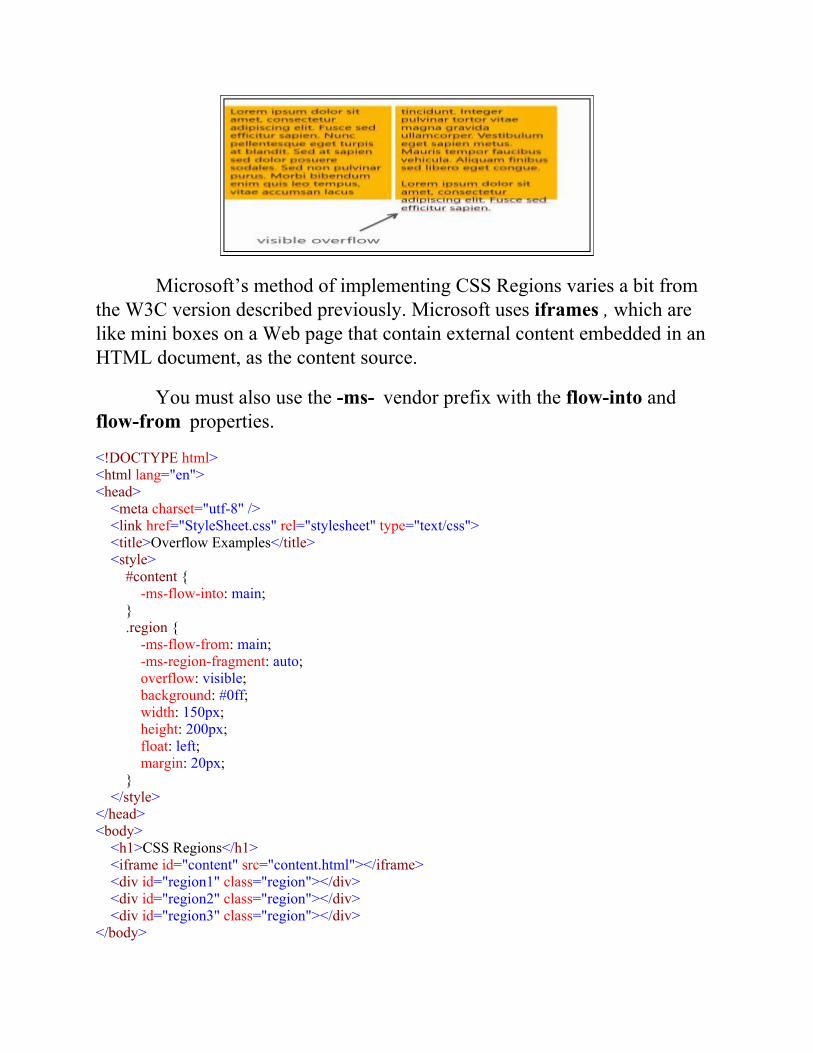
Microsoft’s method of implementing CSS Regions varies a bit fromthe W3C version described previously. Microsoft uses iframes , which arelike mini boxes on a Web page that contain external content embedded in anHTML document, as the content source.
You must also use the -ms- vendor prefix with the flow-into andflow-from properties.
<!DOCTYPE html><html lang="en"><head> <meta charset="utf-8" /> <link href="StyleSheet.css" rel="stylesheet" type="text/css"> <title>Overflow Examples</title> <style> #content { -ms-flow-into: main; } .region { -ms-flow-from: main; -ms-region-fragment: auto; overflow: visible; background: #0ff; width: 150px; height: 200px; float: left; margin: 20px; } </style></head><body> <h1>CSS Regions</h1> <iframe id="content" src="content.html"></iframe> <div id="region1" class="region"></div> <div id="region2" class="region"></div> <div id="region3" class="region"></div></body>
</html><!--The code for content.html is located below --> <!DOCTYPE html><html lang="en"><head> <meta charset="utf-8" /> <title></title></head><body> <p>Lorem ipsum dolor sit amet, consectetur adipiscing elit. Fusce sed efficitur sapien. Nuncpellentesque eget turpis at blandit. Sed at sapien sed dolor posuere sodales. Sed non pulvinar purus.Morbi bibendum enim quis leo tempus, vitae accumsan lacus tincidunt. Integer pulvinar tortor vitaemagna gravida ullamcorper. Vestibulum eget sapien metus. Mauris tempor faucibus vehicula. Aliquamfinibus sed libero eget congue.</p> <p>Phasellus fringilla a lacus quis tempor. Nulla quis commodo purus. Integer vitae orci quis quamcongue scelerisque. In sodales augue tellus, id ullamcorper felis aliquet molestie. Fusce sodales semperaugue id varius. Suspendisse lobortis cursus dolor eu tincidunt. Praesent et tortor a quam auctortincidunt non ac odio. In varius, felis et molestie eleifend, ante justo rhoncus dui, vel aliquet enim ligulavel dui. Sed at efficitur tortor. Praesent interdum cursus ex vel ullamcorper.</p></body></html>
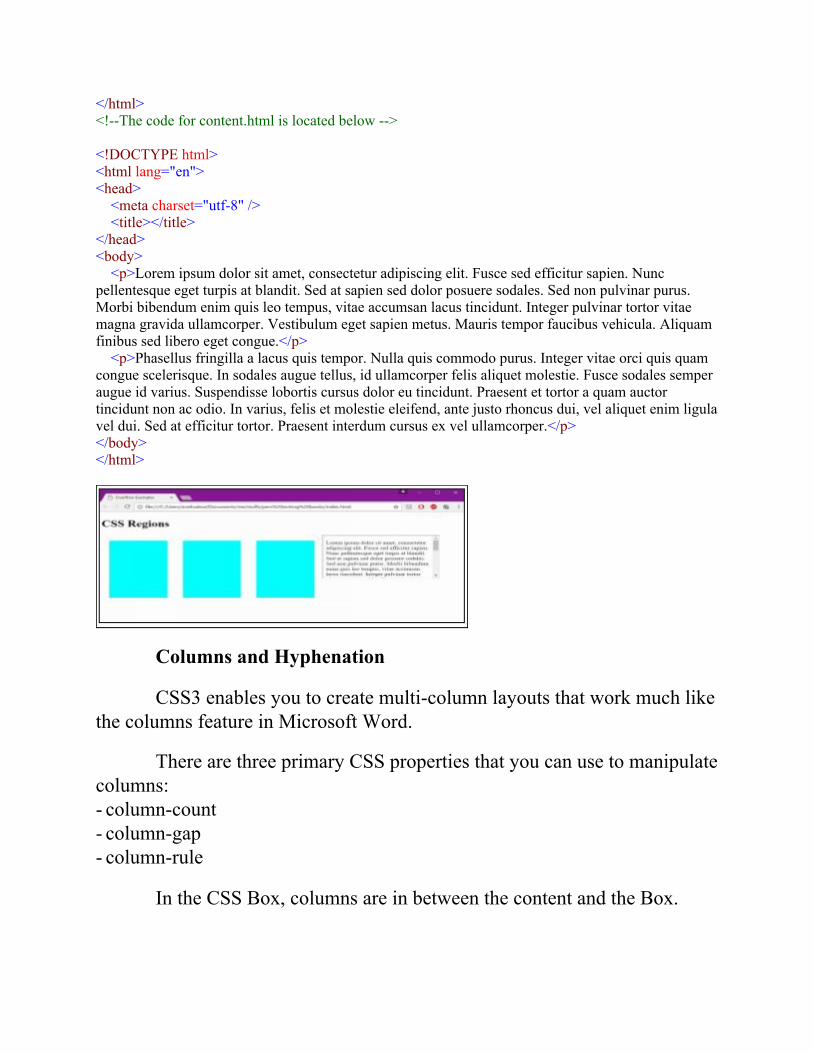
Columns and Hyphenation
CSS3 enables you to create multi-column layouts that work much likethe columns feature in Microsoft Word.
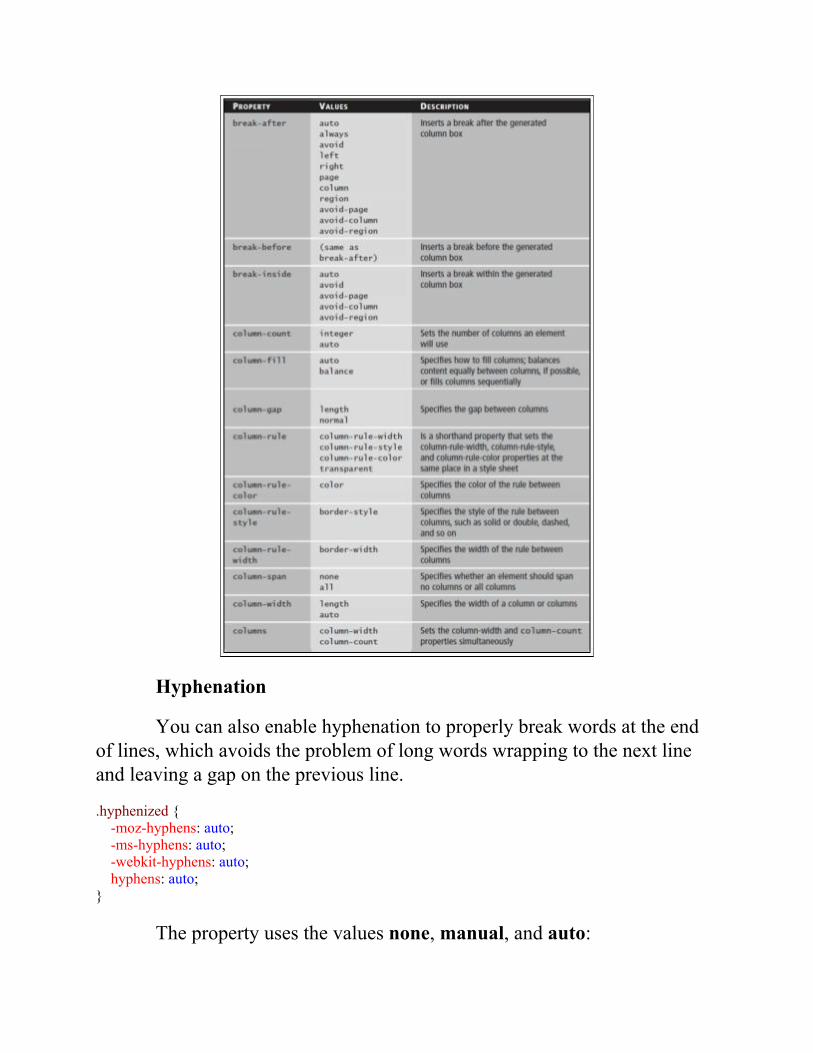
There are three primary CSS properties that you can use to manipulatecolumns:- column-count- column-gap- column-rule
In the CSS Box, columns are in between the content and the Box.
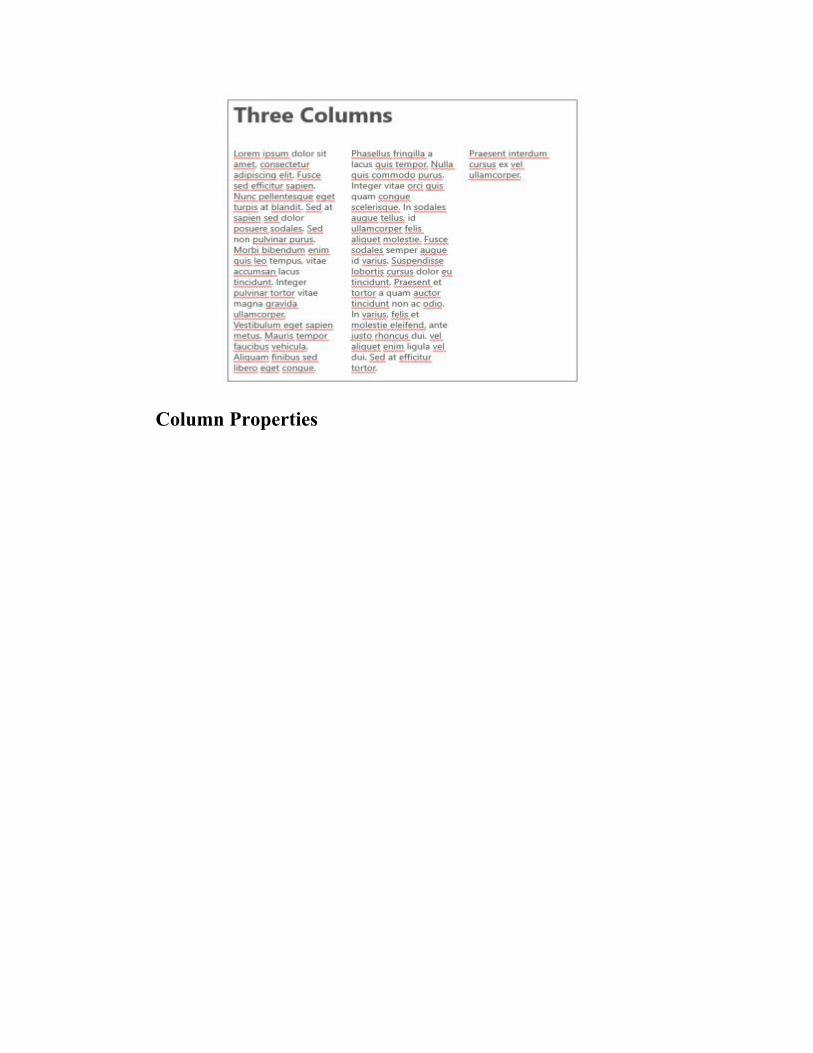
Column Properties
Hyphenation
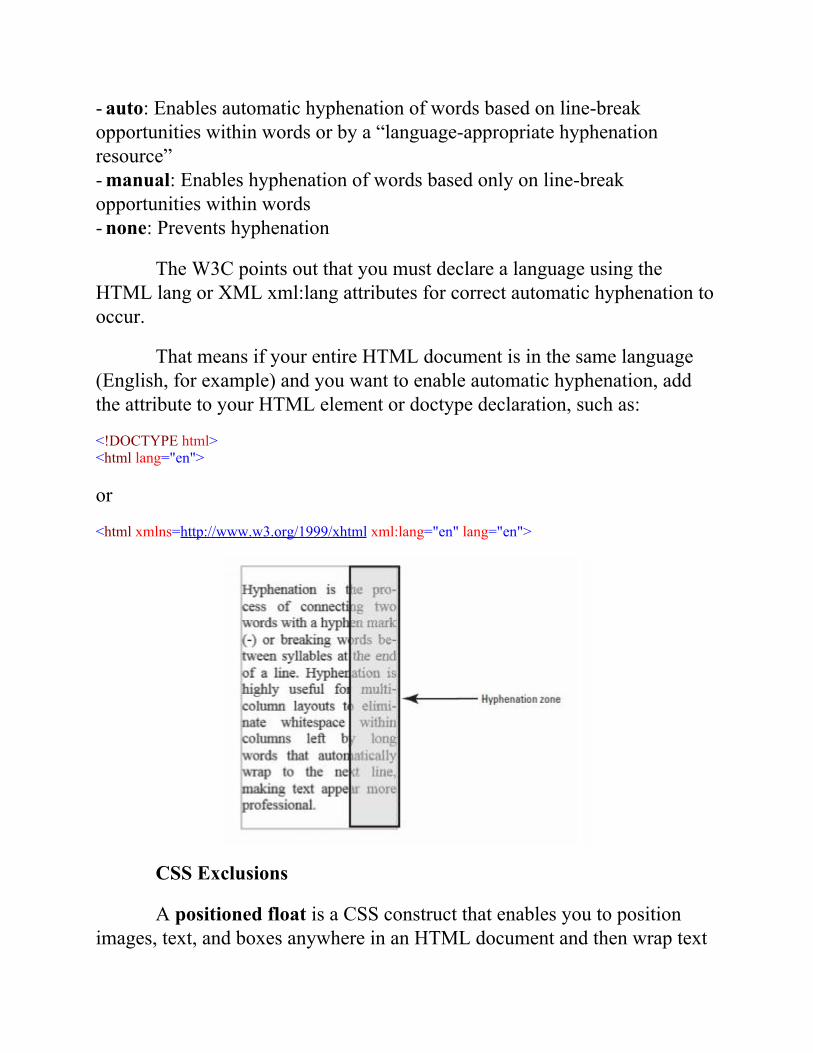
You can also enable hyphenation to properly break words at the endof lines, which avoids the problem of long words wrapping to the next lineand leaving a gap on the previous line.
.hyphenized { -moz-hyphens: auto; -ms-hyphens: auto; -webkit-hyphens: auto; hyphens: auto;}
The property uses the values none, manual, and auto:
- auto: Enables automatic hyphenation of words based on line-breakopportunities within words or by a “language-appropriate hyphenationresource”- manual: Enables hyphenation of words based only on line-breakopportunities within words- none: Prevents hyphenation
The W3C points out that you must declare a language using theHTML lang or XML xml:lang attributes for correct automatic hyphenation tooccur.
That means if your entire HTML document is in the same language(English, for example) and you want to enable automatic hyphenation, addthe attribute to your HTML element or doctype declaration, such as:
<!DOCTYPE html><html lang="en">
or
<html xmlns=http://www.w3.org/1999/xhtml xml:lang="en" lang="en">
CSS Exclusions
A positioned float is a CSS construct that enables you to positionimages, text, and boxes anywhere in an HTML document and then wrap text
completely around these elements. Positioned floats are called CSSExclusions in the latest W3C specification.
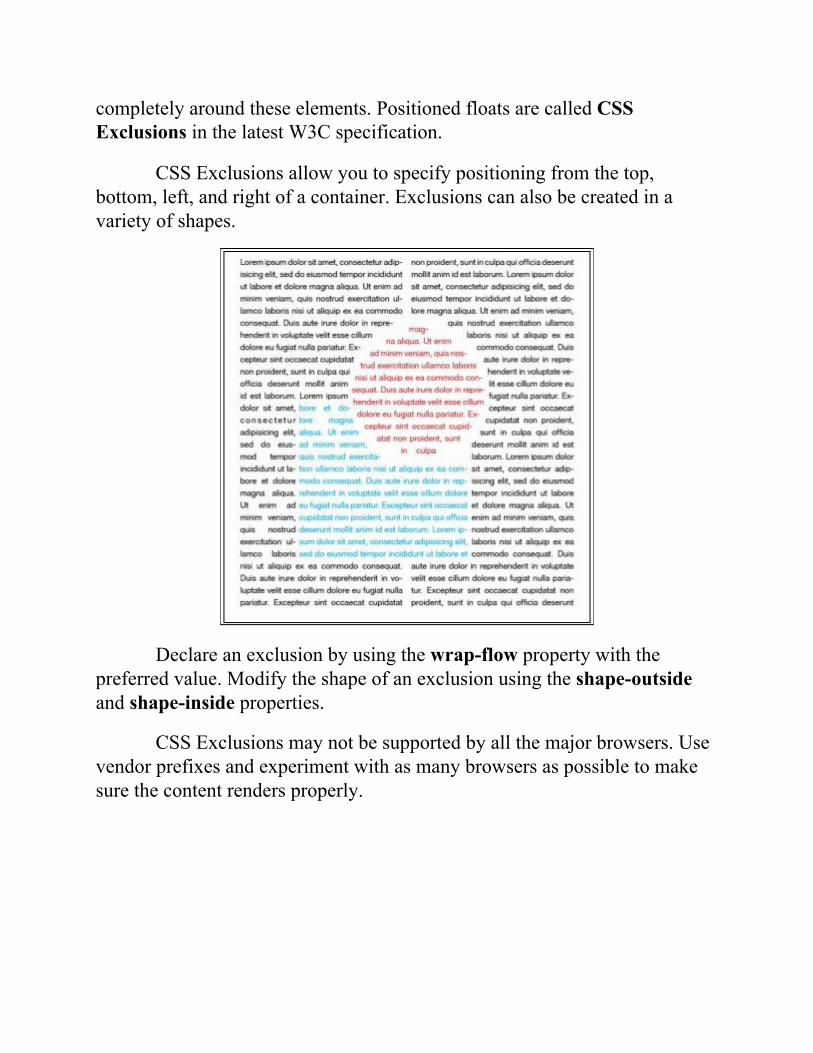
CSS Exclusions allow you to specify positioning from the top,bottom, left, and right of a container. Exclusions can also be created in avariety of shapes.
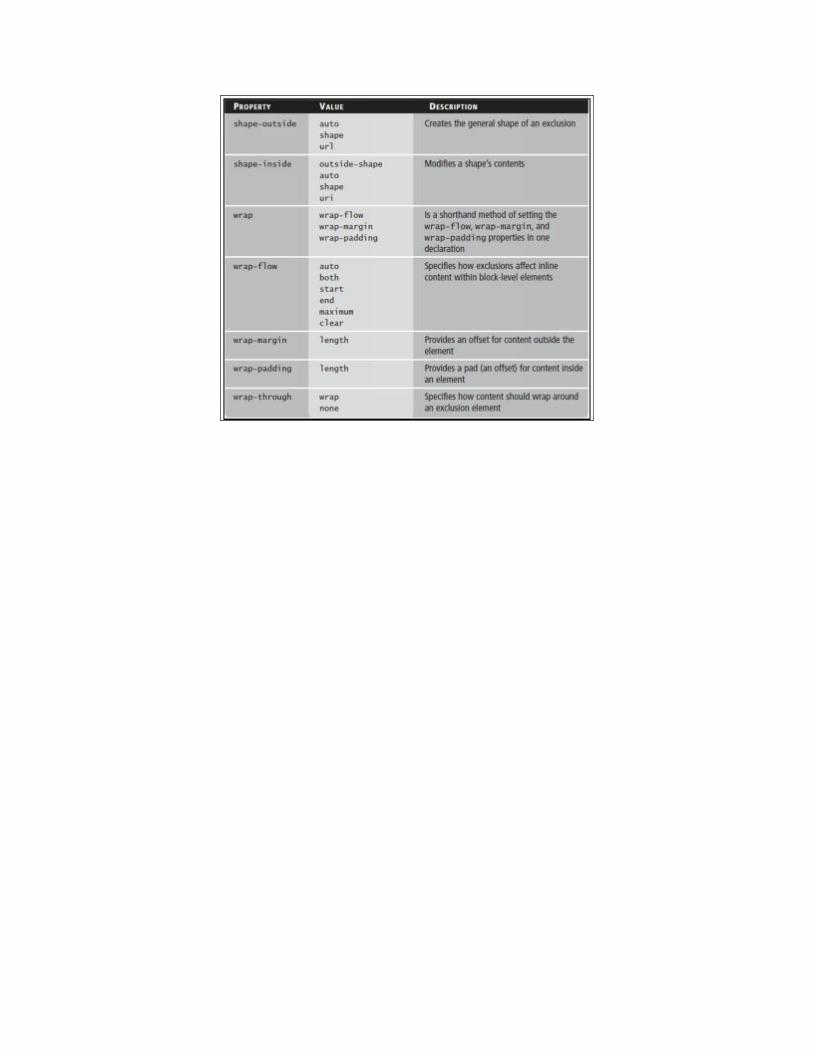
Declare an exclusion by using the wrap-flow property with thepreferred value. Modify the shape of an exclusion using the shape-outsideand shape-inside properties.
CSS Exclusions may not be supported by all the major browsers. Usevendor prefixes and experiment with as many browsers as possible to makesure the content renders properly.
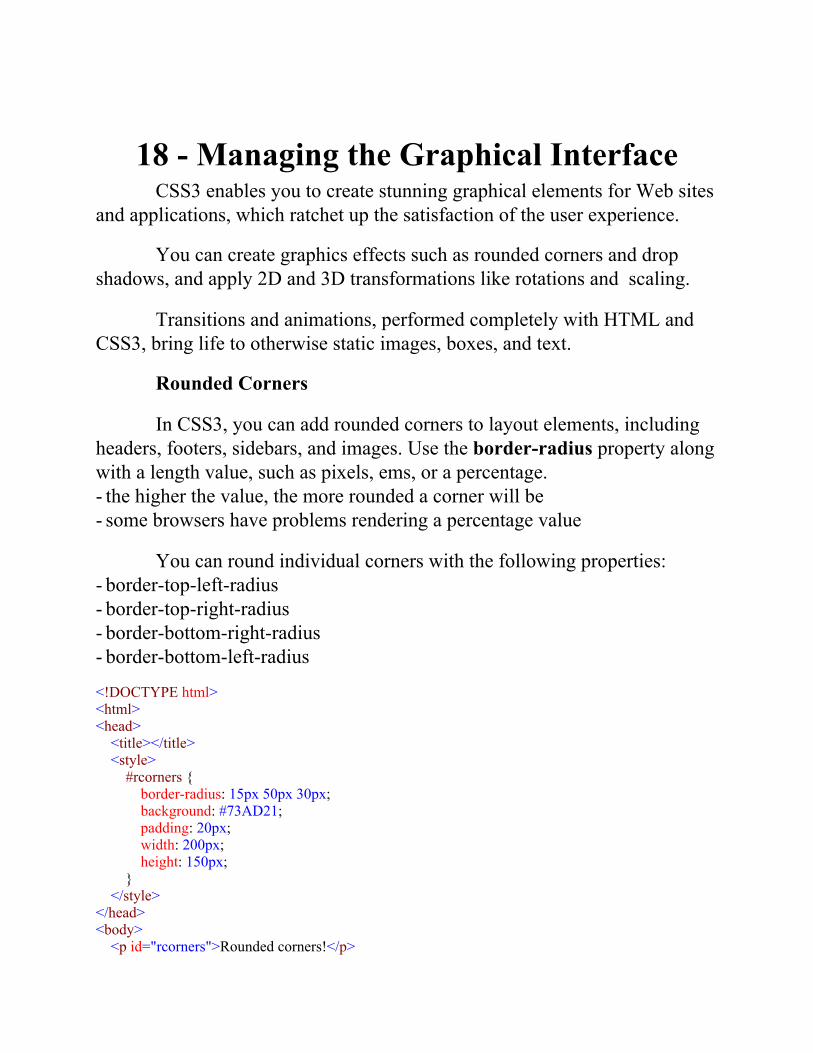
18 - Managing the Graphical InterfaceCSS3 enables you to create stunning graphical elements for Web sites
and applications, which ratchet up the satisfaction of the user experience.
You can create graphics effects such as rounded corners and dropshadows, and apply 2D and 3D transformations like rotations and7scaling.
Transitions and animations, performed completely with HTML andCSS3, bring life to otherwise static images, boxes, and text.
Rounded Corners
In CSS3, you can add rounded corners to layout elements, includingheaders, footers, sidebars, and images. Use the border-radius property alongwith a length value, such as pixels, ems, or a percentage.- the higher the value, the more rounded a corner will be- some browsers have problems rendering a percentage value
You can round individual corners with the following properties:- border-top-left-radius- border-top-right-radius- border-bottom-right-radius- border-bottom-left-radius
<!DOCTYPE html><html><head> <title></title> <style> #rcorners { border-radius: 15px 50px 30px; background: #73AD21; padding: 20px; width: 200px; height: 150px; } </style></head><body> <p id="rcorners">Rounded corners!</p>
</body></html>
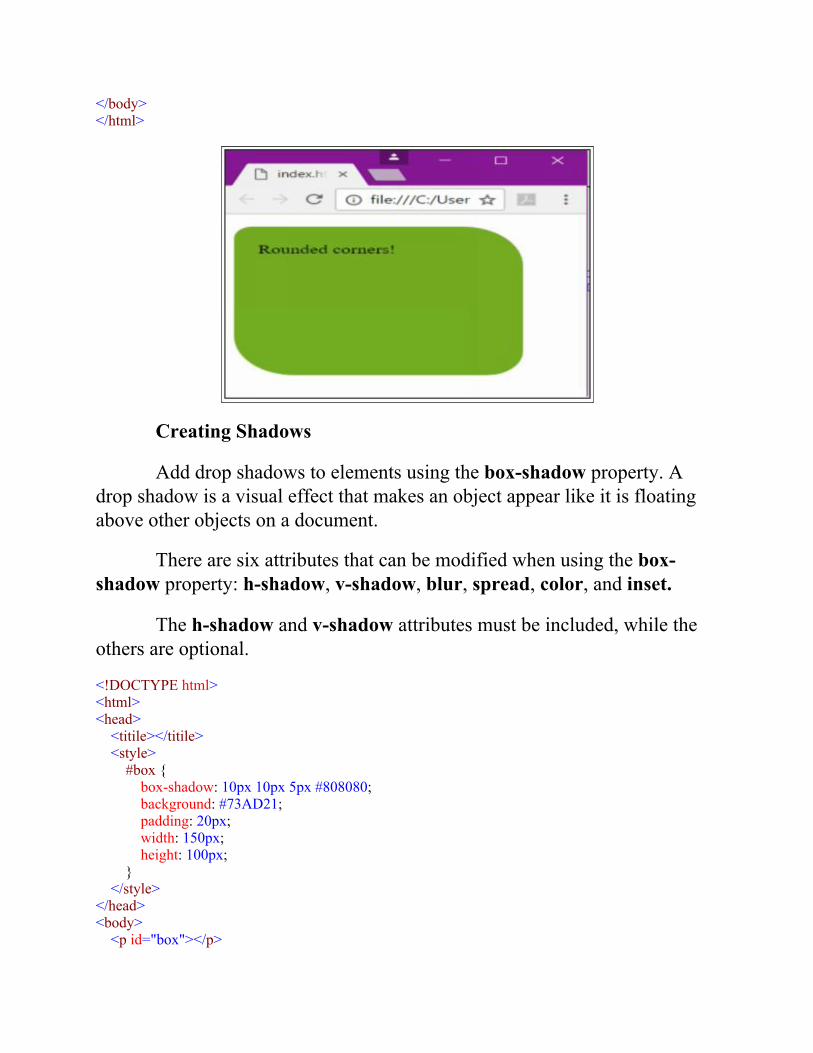
Creating Shadows
Add drop shadows to elements using the box-shadow property. Adrop shadow is a visual effect that makes an object appear like it is floatingabove other objects on a document.
There are six attributes that can be modified when using the box-shadow property: h-shadow, v-shadow, blur, spread, color, and inset.
The h-shadow and v-shadow attributes must be included, while theothers are optional.
<!DOCTYPE html><html><head> <titile></titile> <style> #box { box-shadow: 10px 10px 5px #808080; background: #73AD21; padding: 20px; width: 150px; height: 100px; } </style></head><body> <p id="box"></p>

</body></html>
box-shadow Attributes
Value Description
none Default value. No shadow isdisplayed
h-shadow
Required. The position of thehorizontal shadow. Negativevalues are allowed
v-shadow
Required. The position of thevertical shadow. Negative valuesare allowed
blur Optional. The blur distance
spread Optional. The size of shadow.Negative values are allowedOptional. The color of the shadow.The default value is black. Look
colorat CSS Color Values for acomplete list of possible colorvalues.Note: In Safari (on PC) the colorparameter is required. If you donot specify the color, the shadowis not displayed at all.
insetOptional. Changes the shadowfrom an outer shadow (outset) toan inner shadow
initial Sets this property to its defaultvalue. Read about initial
inherit Inherits this property from itsparent element. Read about inherit
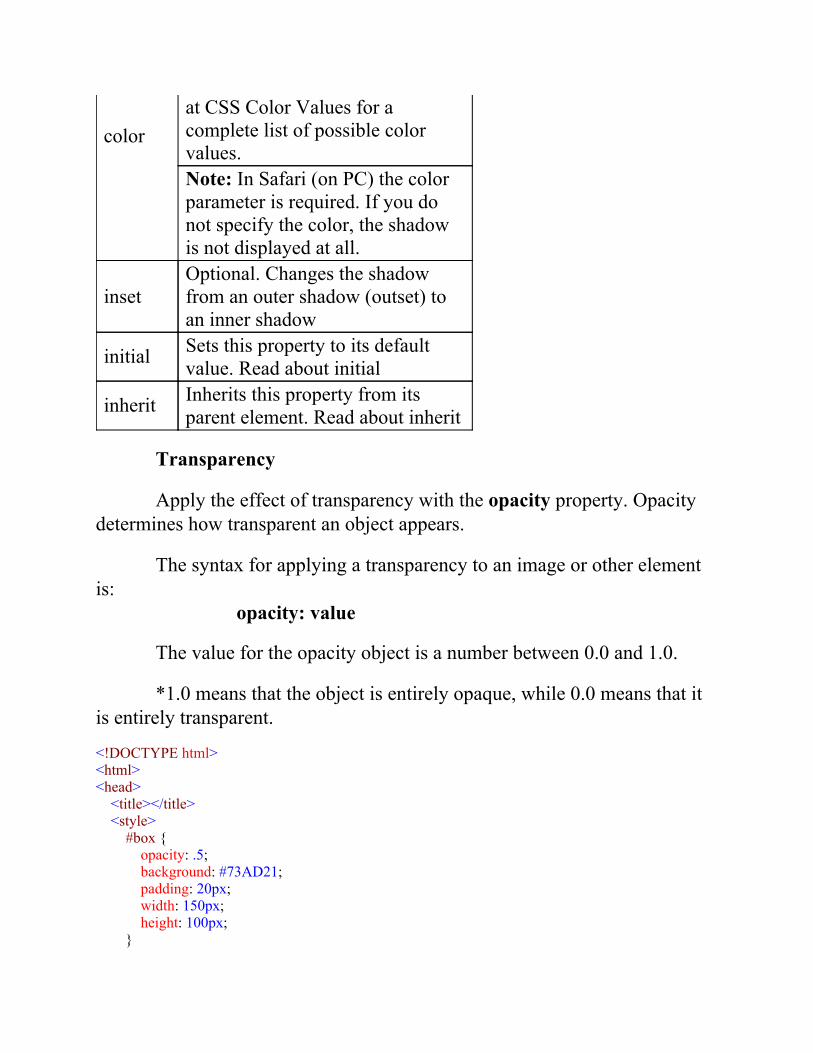
Transparency
Apply the effect of transparency with the opacity property. Opacitydetermines how transparent an object appears.
The syntax for applying a transparency to an image or other elementis:
opacity: value
The value for the opacity object is a number between 0.0 and 1.0.
*1.0 means that the object is entirely opaque, while 0.0 means that itis entirely transparent.
<!DOCTYPE html><html><head> <title></title> <style> #box { opacity: .5; background: #73AD21; padding: 20px; width: 150px; height: 100px; }
</style></head><body> <p id="box"></p></body></html>
Background Gradients
A gradient is a smooth transition from one color to another.
In CSS3, you can apply gradients to a number of objects, such asheaders, footers, buttons, and more.
Gradients are applied through the background property with one ofthe methods:- linear-gradient: Creates a gradient from top to bottom or vice versa, orfrom corner to corner- radial-gradient: Creates a gradient that radiates out from a central point- repeating-linear-gradient: Creates a repeating linear gradient, whichresults in straight bands of gradient color- repeating-radial-gradient: Creates a repeating radial gradient, whichresults in circular bands of gradient color
Linear Gradients
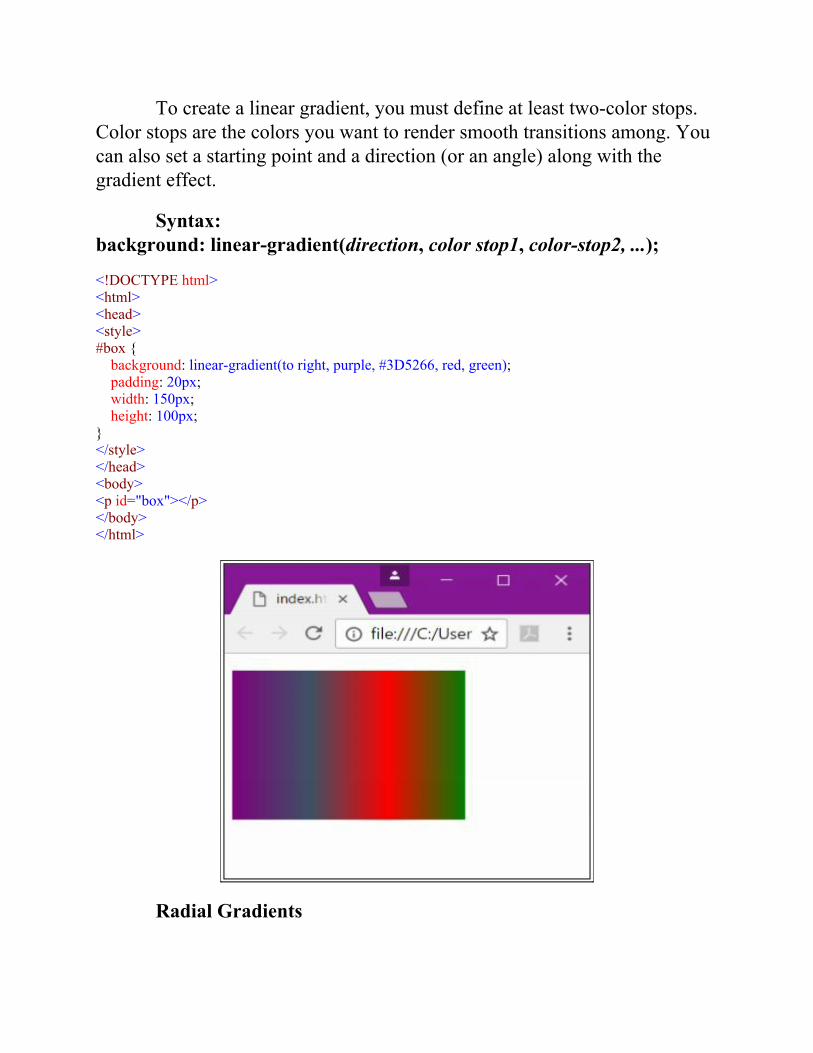
To create a linear gradient, you must define at least two-color stops.Color stops are the colors you want to render smooth transitions among. Youcan also set a starting point and a direction (or an angle) along with thegradient effect.
Syntax:background: linear-gradient(direction, color stop1, color-stop2, ...);
<!DOCTYPE html><html><head><style>#box { background: linear-gradient(to right, purple, #3D5266, red, green); padding: 20px; width: 150px; height: 100px; }</style></head><body><p id="box"></p></body></html>
Radial Gradients
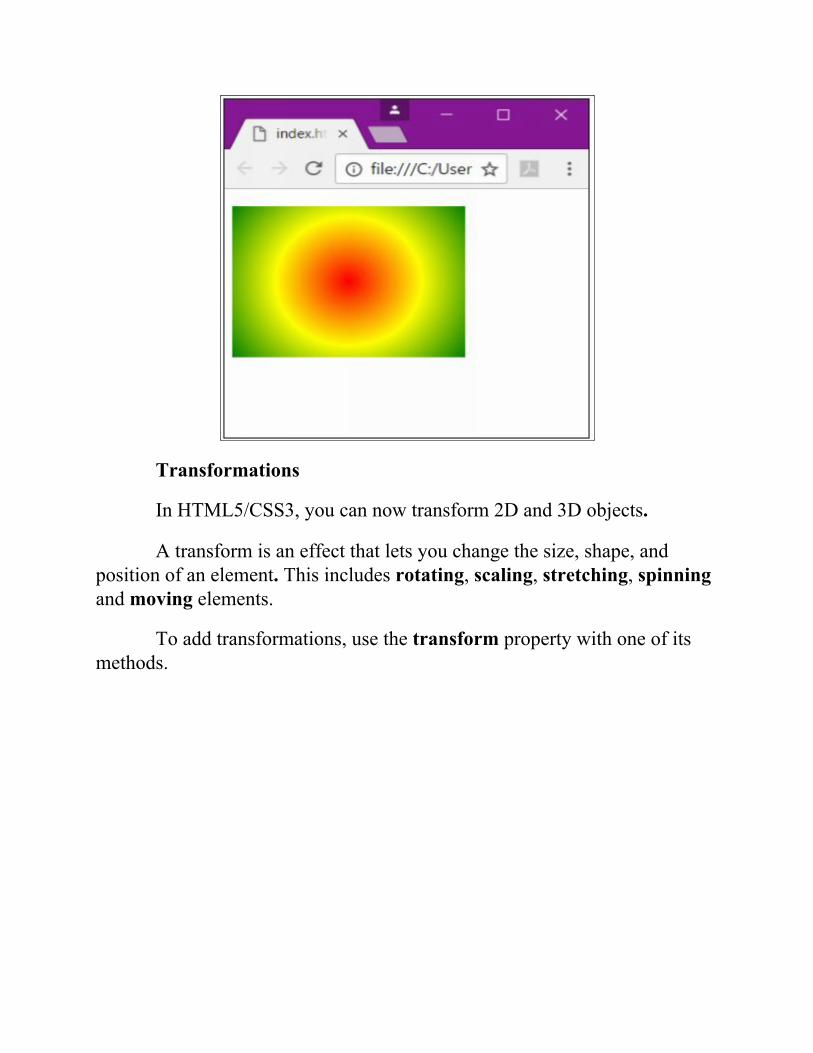
A radial gradient is defined by its center. To create a radial gradient,you must also define at least two color stops.
Syntaxbackground: radial-gradient(shape size at position, start-color, ..., last-color);
By default, shape is ellipse, size is farthest-corner, and position iscenter.
<!DOCTYPE html><html><head> <title></title> <style> #box { background: radial-gradient(circle, red, yellow, green); padding: 20px; width: 150px; height: 100px; } </style></head><body> <p id="box"></p></body></html>
Transformations
In HTML5/CSS3, you can now transform 2D and 3D objects.
A transform is an effect that lets you change the size, shape, andposition of an element. This includes rotating, scaling, stretching, spinningand moving elements.
To add transformations, use the transform property with one of itsmethods.
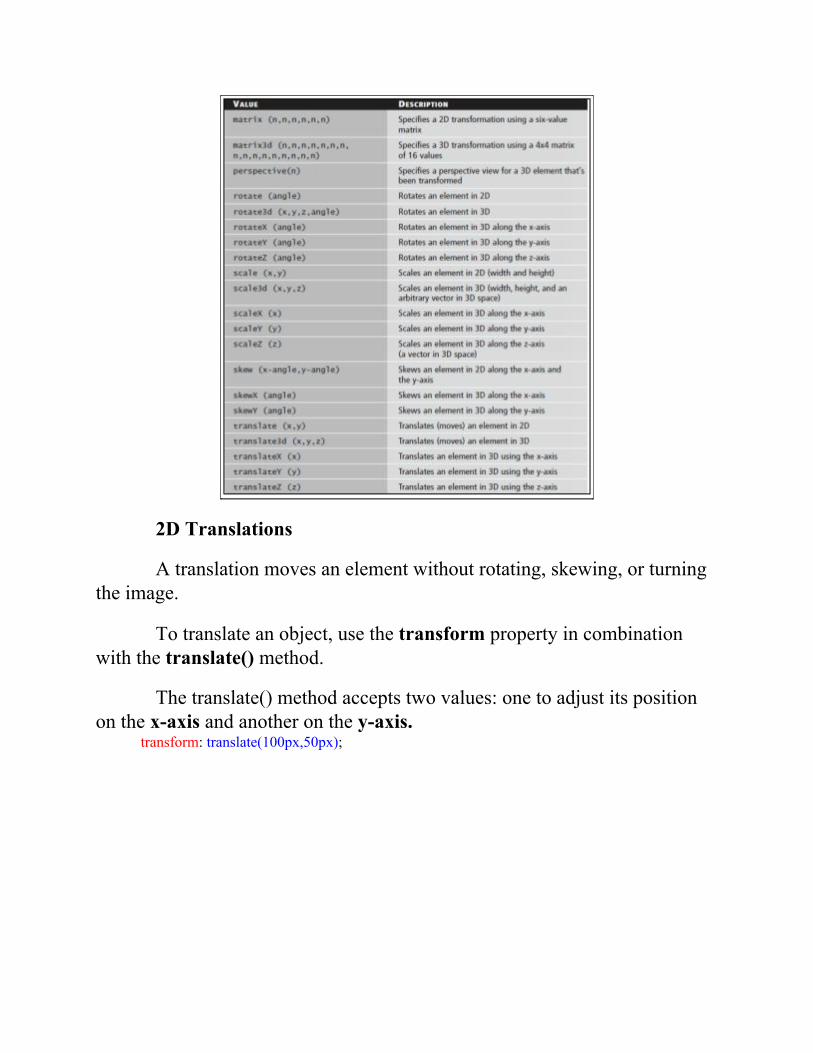
2D Translations
A translation moves an element without rotating, skewing, or turningthe image.
To translate an object, use the transform property in combinationwith the translate() method.
The translate() method accepts two values: one to adjust its positionon the x-axis and another on the y-axis.
transform: translate(100px,50px);
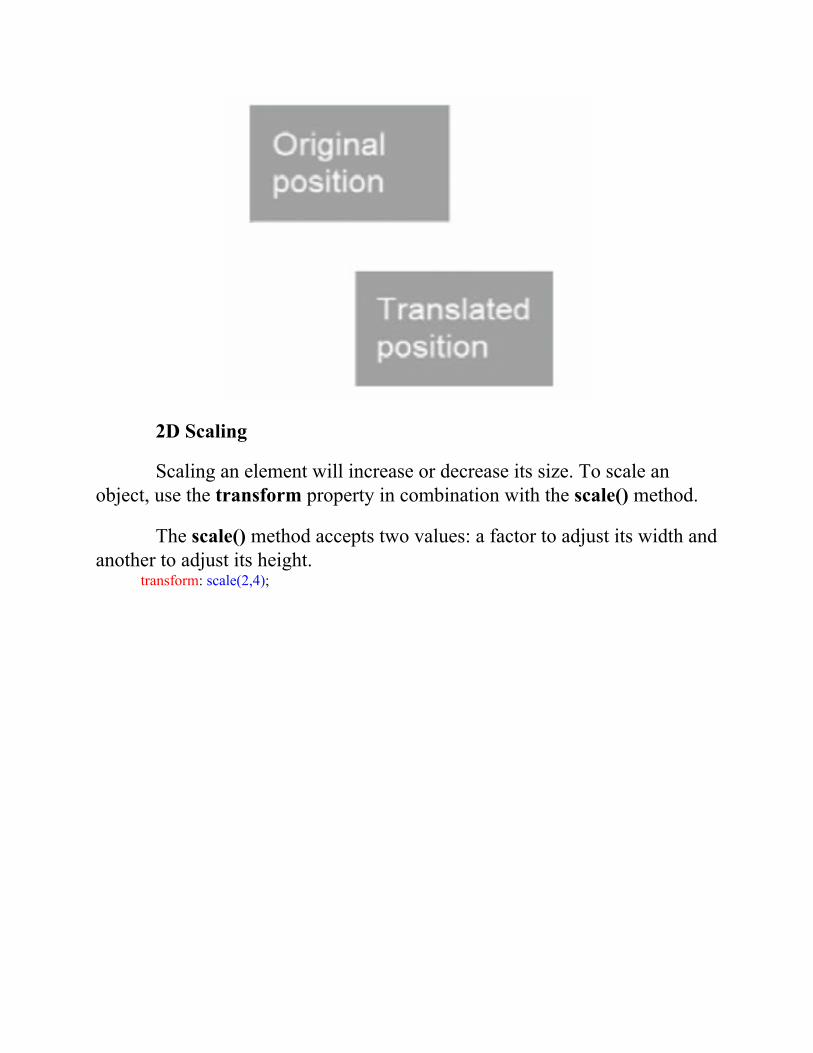
2D Scaling
Scaling an element will increase or decrease its size. To scale anobject, use the transform property in combination with the scale() method.
The scale() method accepts two values: a factor to adjust its width andanother to adjust its height.
transform: scale(2,4);
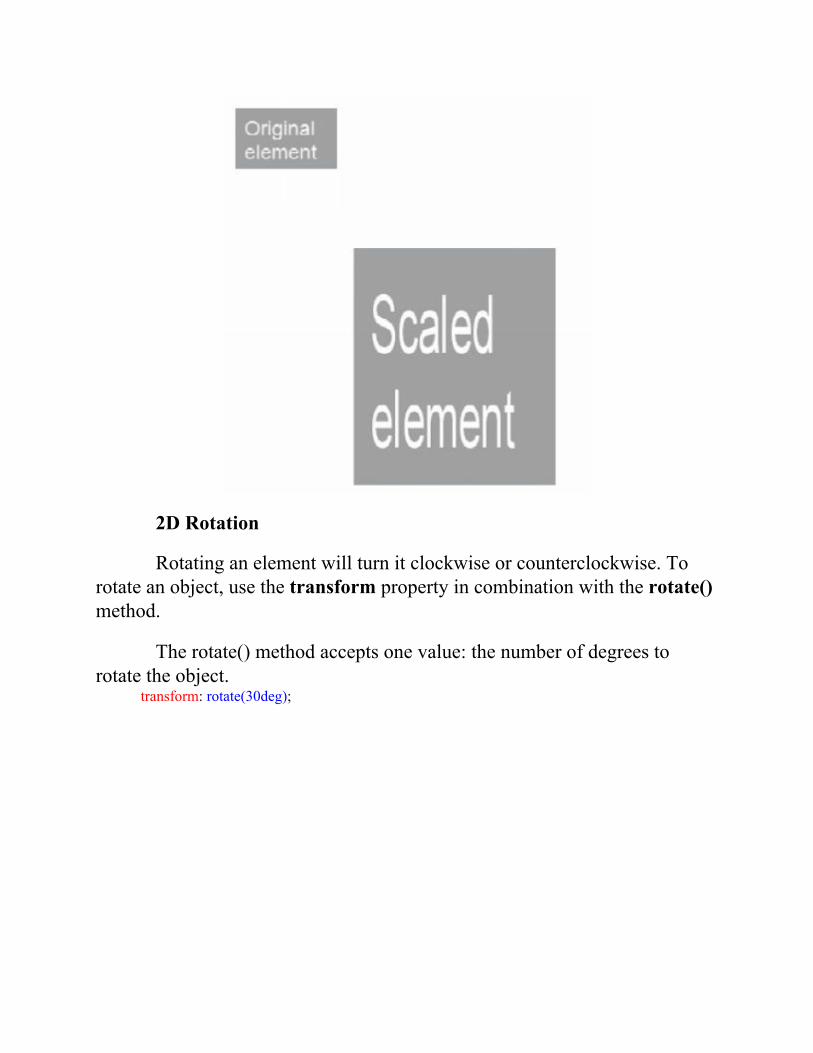
2D Rotation
Rotating an element will turn it clockwise or counterclockwise. Torotate an object, use the transform property in combination with the rotate()method.
The rotate() method accepts one value: the number of degrees torotate the object.
transform: rotate(30deg);
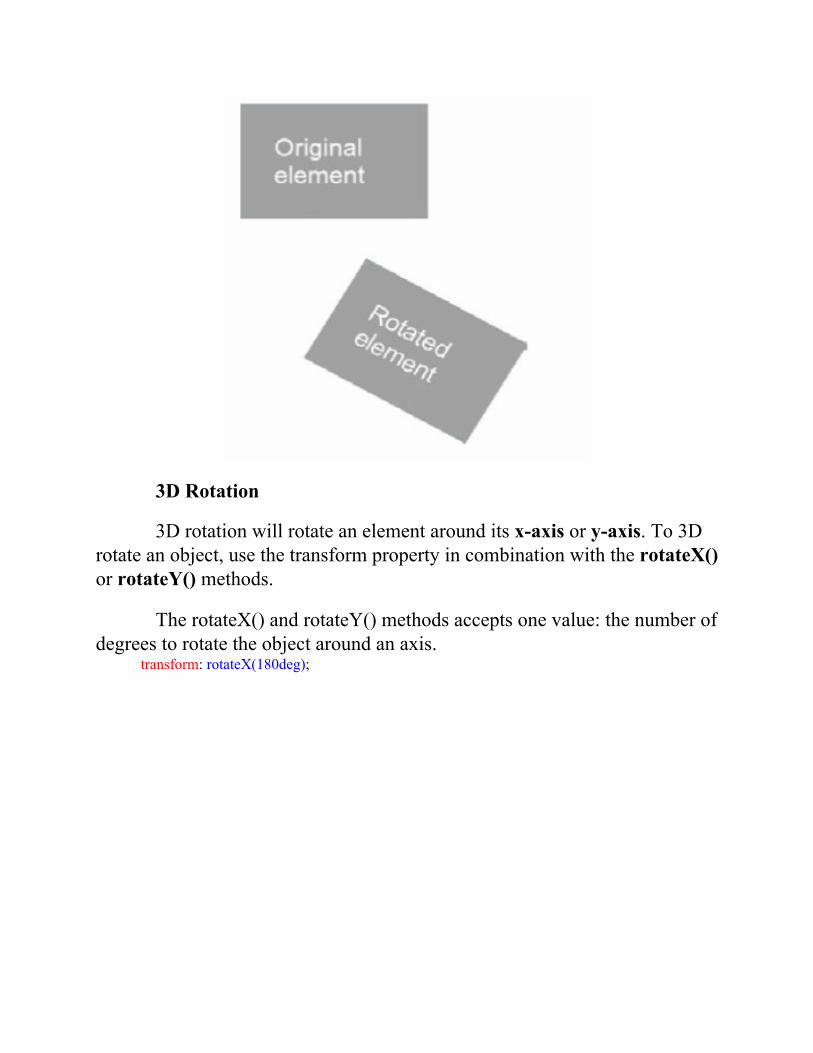
3D Rotation
3D rotation will rotate an element around its x-axis or y-axis. To 3Drotate an object, use the transform property in combination with the rotateX()or rotateY() methods.
The rotateX() and rotateY() methods accepts one value: the number ofdegrees to rotate the object around an axis.
transform: rotateX(180deg);
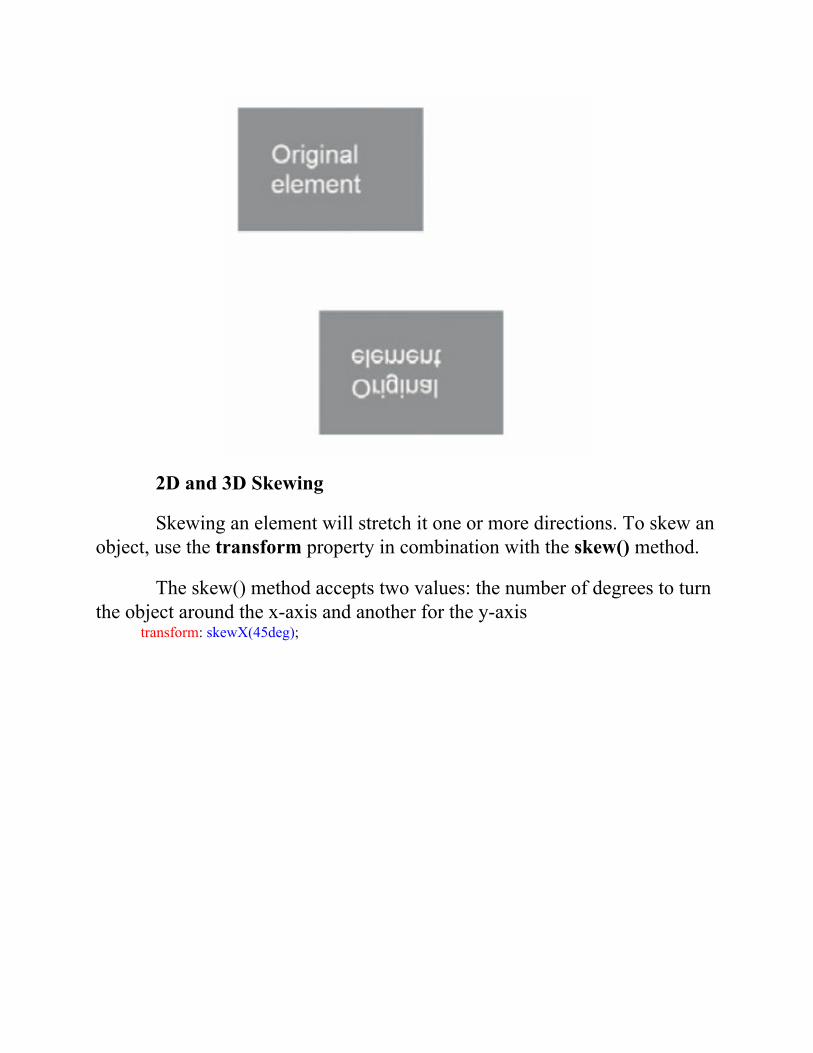
2D and 3D Skewing
Skewing an element will stretch it one or more directions. To skew anobject, use the transform property in combination with the skew() method.
The skew() method accepts two values: the number of degrees to turnthe object around the x-axis and another for the y-axis
transform: skewX(45deg);
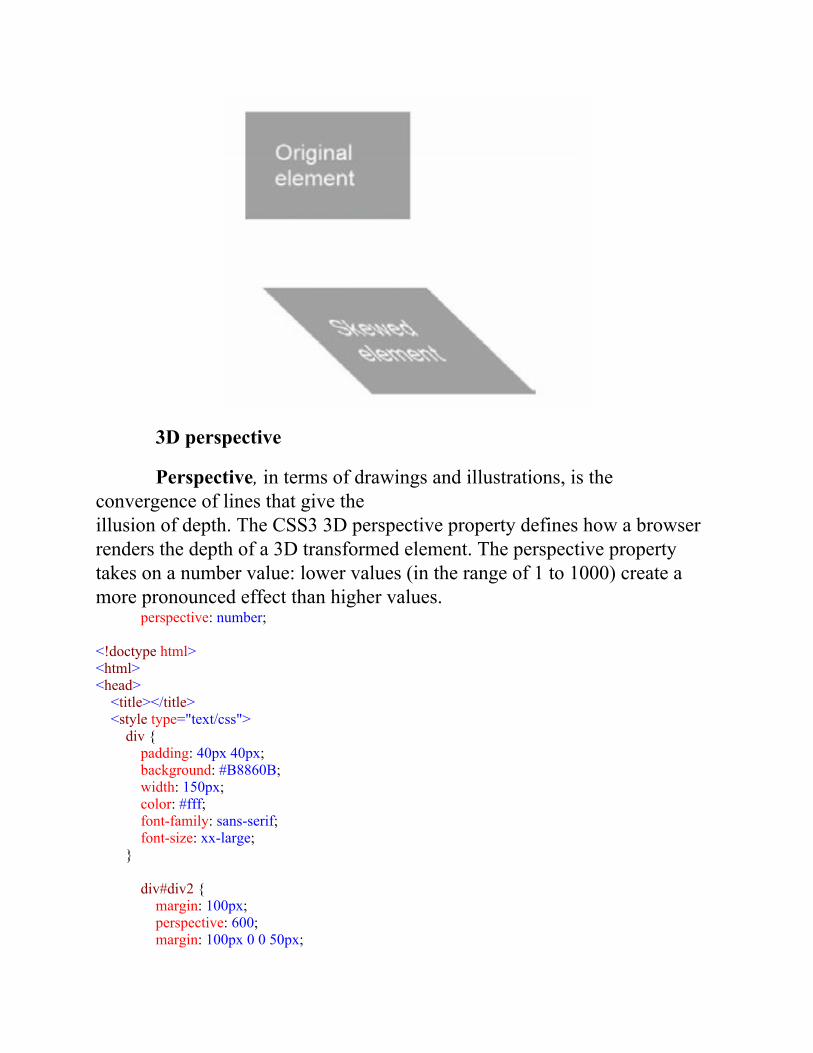
3D perspective
Perspective, in terms of drawings and illustrations, is theconvergence of lines that give theillusion of depth. The CSS3 3D perspective property defines how a browserrenders the depth of a 3D transformed element. The perspective propertytakes on a number value: lower values (in the range of 1 to 1000) create amore pronounced effect than higher values.
perspective: number;
<!doctype html><html><head> <title></title> <style type="text/css"> div { padding: 40px 40px; background: #B8860B; width: 150px; color: #fff; font-family: sans-serif; font-size: xx-large; } div#div2 { margin: 100px; perspective: 600; margin: 100px 0 0 50px;
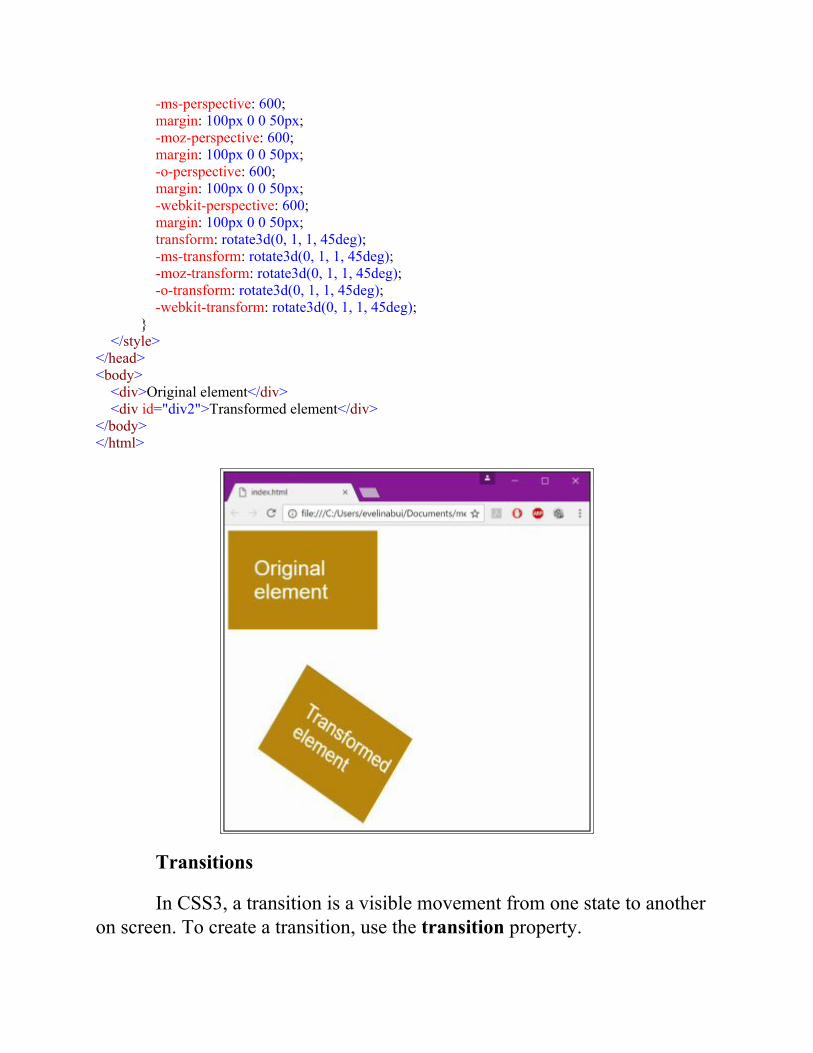
-ms-perspective: 600; margin: 100px 0 0 50px; -moz-perspective: 600; margin: 100px 0 0 50px; -o-perspective: 600; margin: 100px 0 0 50px; -webkit-perspective: 600; margin: 100px 0 0 50px; transform: rotate3d(0, 1, 1, 45deg); -ms-transform: rotate3d(0, 1, 1, 45deg); -moz-transform: rotate3d(0, 1, 1, 45deg); -o-transform: rotate3d(0, 1, 1, 45deg); -webkit-transform: rotate3d(0, 1, 1, 45deg); } </style></head><body> <div>Original element</div> <div id="div2">Transformed element</div></body></html>
Transitions
In CSS3, a transition is a visible movement from one state to anotheron screen. To create a transition, use the transition property.
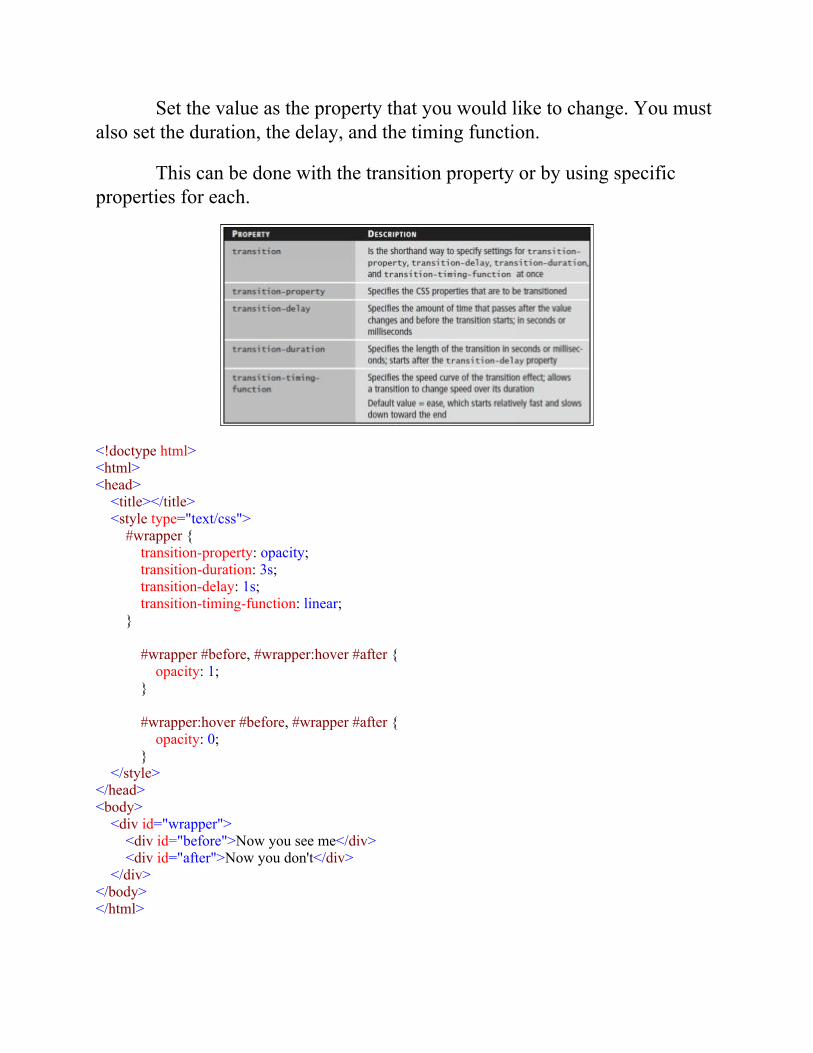
Set the value as the property that you would like to change. You mustalso set the duration, the delay, and the timing function.
This can be done with the transition property or by using specificproperties for each.
<!doctype html><html><head> <title></title> <style type="text/css"> #wrapper { transition-property: opacity; transition-duration: 3s; transition-delay: 1s; transition-timing-function: linear; } #wrapper #before, #wrapper:hover #after { opacity: 1; } #wrapper:hover #before, #wrapper #after { opacity: 0; } </style></head><body> <div id="wrapper"> <div id="before">Now you see me</div> <div id="after">Now you don't</div> </div></body></html>
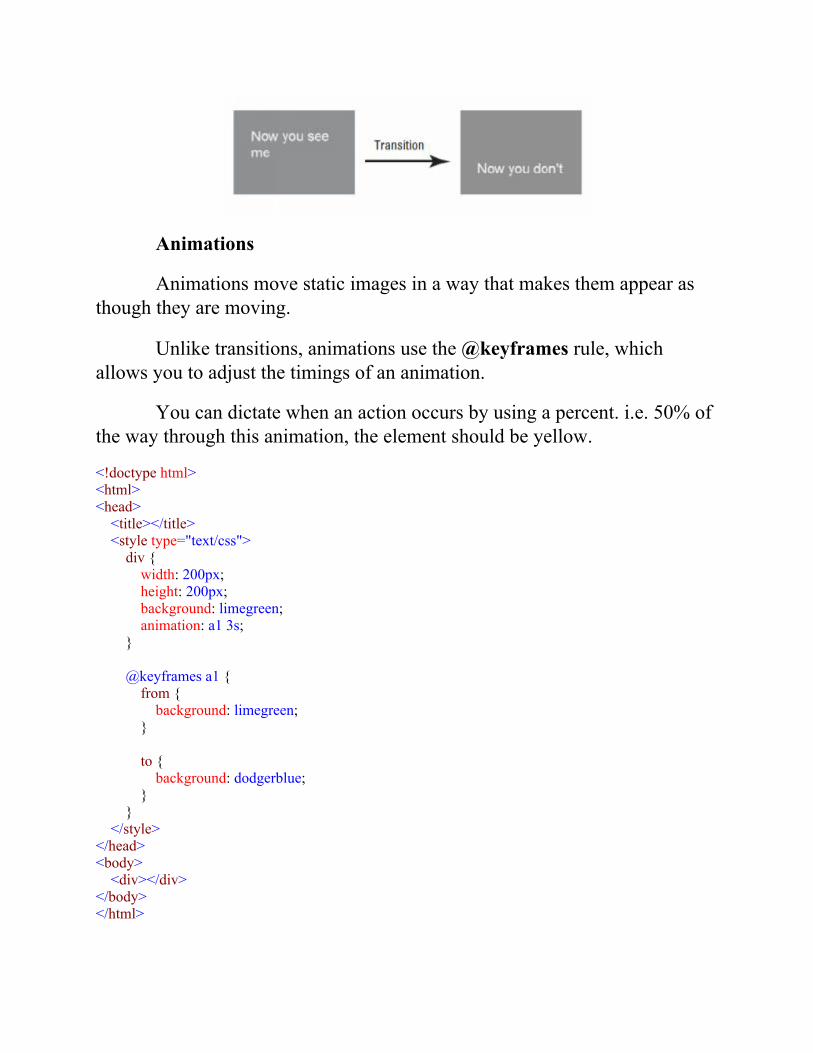
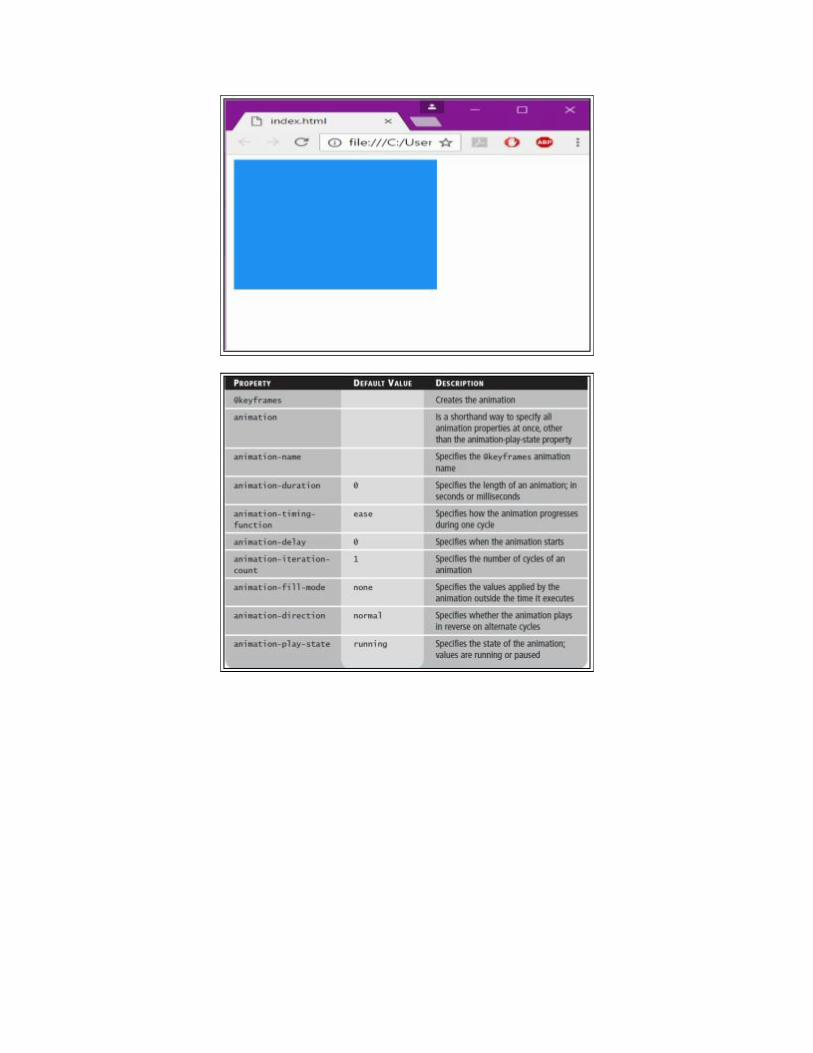
Animations
Animations move static images in a way that makes them appear asthough they are moving.
Unlike transitions, animations use the @keyframes rule, whichallows you to adjust the timings of an animation.
You can dictate when an action occurs by using a percent. i.e. 50% ofthe way through this animation, the element should be yellow.
<!doctype html><html><head> <title></title> <style type="text/css"> div { width: 200px; height: 200px; background: limegreen; animation: a1 3s; } @keyframes a1 { from { background: limegreen; } to { background: dodgerblue; } } </style></head><body> <div></div></body></html>
19 - Building Interactive ApplicationsHTML5 and CSS3 are awesome for creating beautiful websites.
However, today’s users want an interactive Web experience.
Interactivity allows a user to take an action and receive a response.
Implementing interactivity requires a programming language, such asJavaScript.
JavaScript is a loosely-typed scripting language that is interpreted bya browser. It changes how elements in an HTML document act and respondto user input.
We create scripts with JavaScript. Scripts are step-by-stepinstructions that tell a browser how to respond to events, such as a userclicking a button. The file extension for a script is .js .
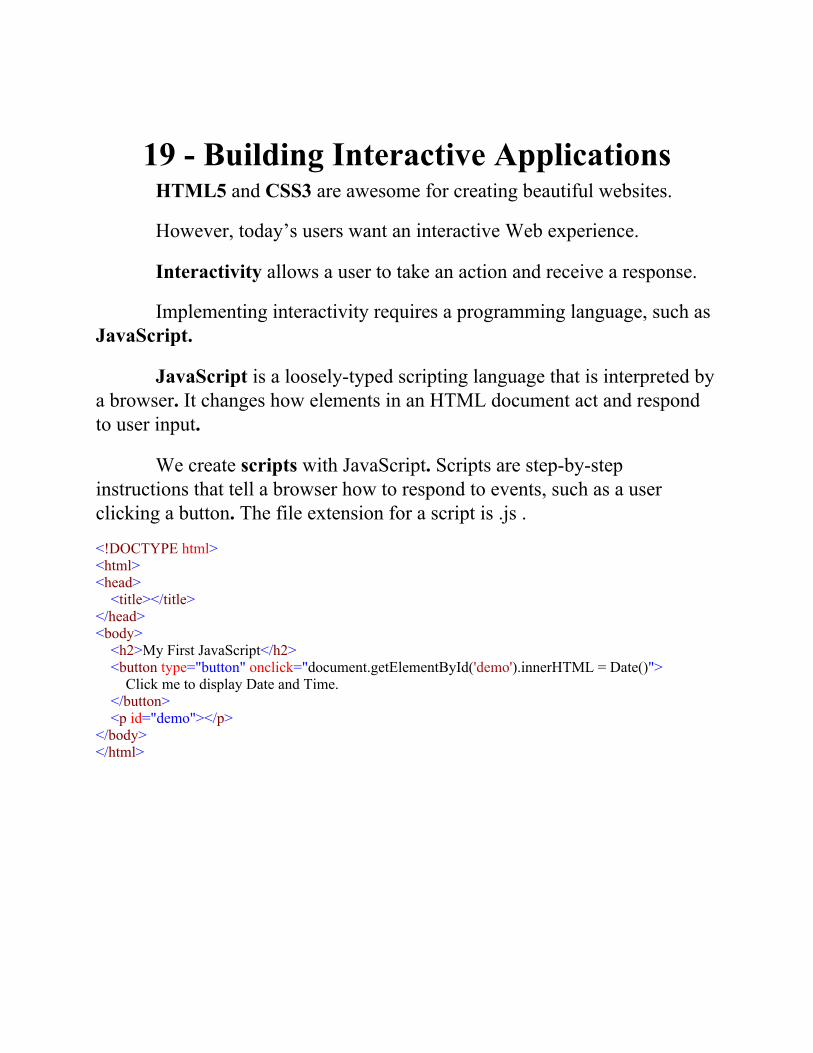
<!DOCTYPE html><html><head> <title></title></head><body> <h2>My First JavaScript</h2> <button type="button" onclick="document.getElementById('demo').innerHTML = Date()"> Click me to display Date and Time. </button> <p id="demo"></p></body></html>
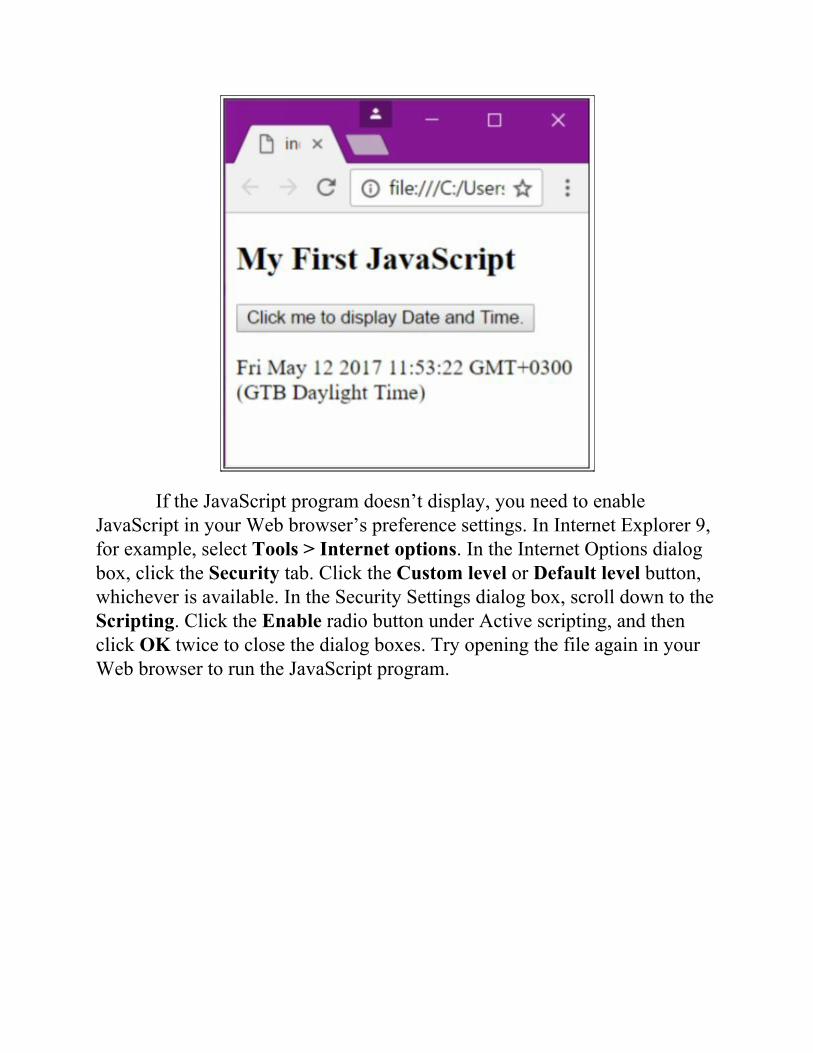
If the JavaScript program doesn’t display, you need to enableJavaScript in your Web browser’s preference settings. In Internet Explorer 9,for example, select Tools > Internet options. In the Internet Options dialogbox, click the Security tab. Click the Custom level or Default level button,whichever is available. In the Security Settings dialog box, scroll down to theScripting. Click the Enable radio button under Active scripting, and thenclick OK twice to close the dialog boxes. Try opening the file again in yourWeb browser to run the JavaScript program.
What JavaScript can do
1. JavaScript Can Change HTML ContentOne of many JavaScript HTML methods is getElementById().
This example uses the method to "find" an HTML element (withid="demo") and changes the element content (innerHTML) to "HelloJavaScript":
<!DOCTYPE html><html><head> <title></title></head><body> <h2>What Can JavaScript Do?</h2> <p id="demo">JavaScript can change HTML content.</p> <button type="button" onclick='document.getElementById("demo").innerHTML = "HelloJavaScript!"'>Click Me!</button></body></html>
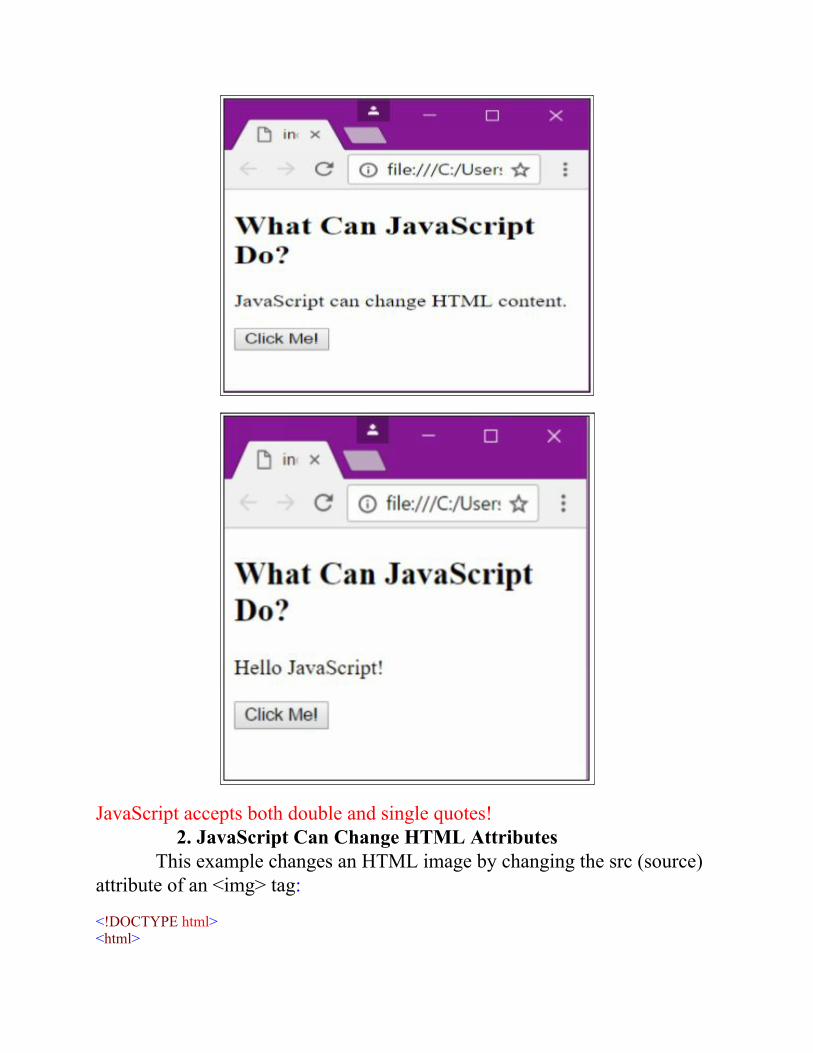
JavaScript accepts both double and single quotes!2. JavaScript Can Change HTML Attributes
This example changes an HTML image by changing the src (source)attribute of an <img> tag:
<!DOCTYPE html><html>
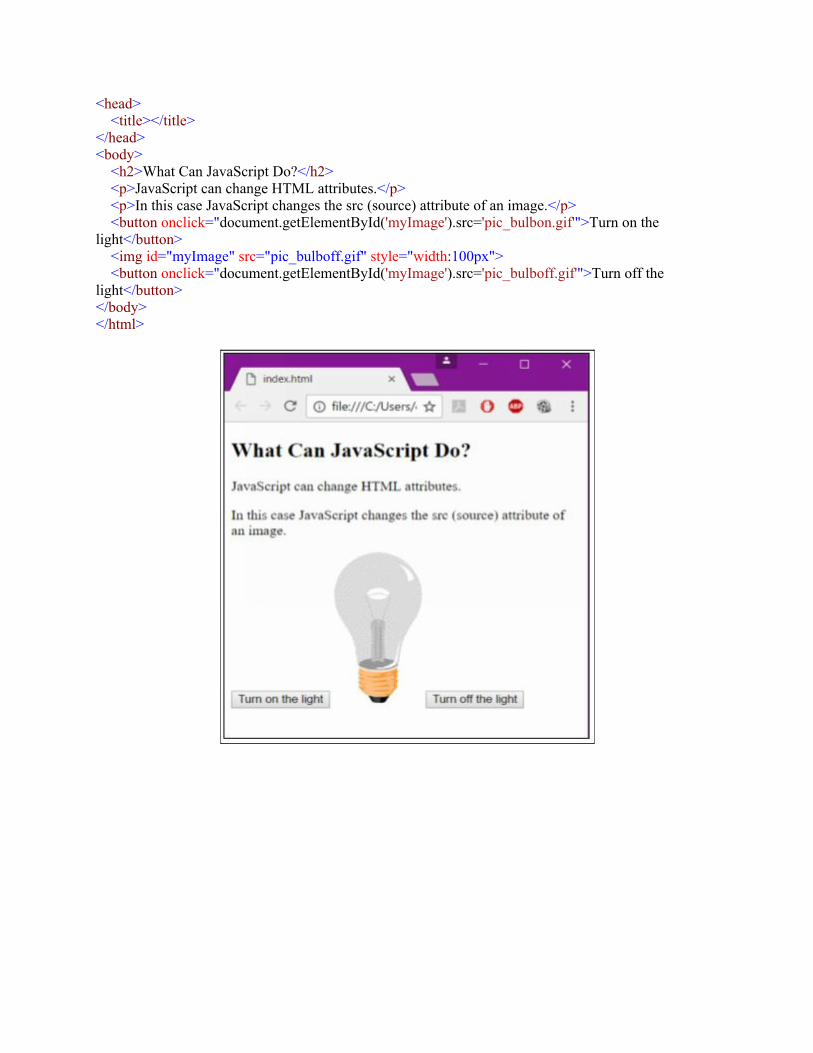
<head> <title></title></head><body> <h2>What Can JavaScript Do?</h2> <p>JavaScript can change HTML attributes.</p> <p>In this case JavaScript changes the src (source) attribute of an image.</p> <button onclick="document.getElementById('myImage').src='pic_bulbon.gif'">Turn on thelight</button> <img id="myImage" src="pic_bulboff.gif" style="width:100px"> <button onclick="document.getElementById('myImage').src='pic_bulboff.gif'">Turn off thelight</button></body></html>
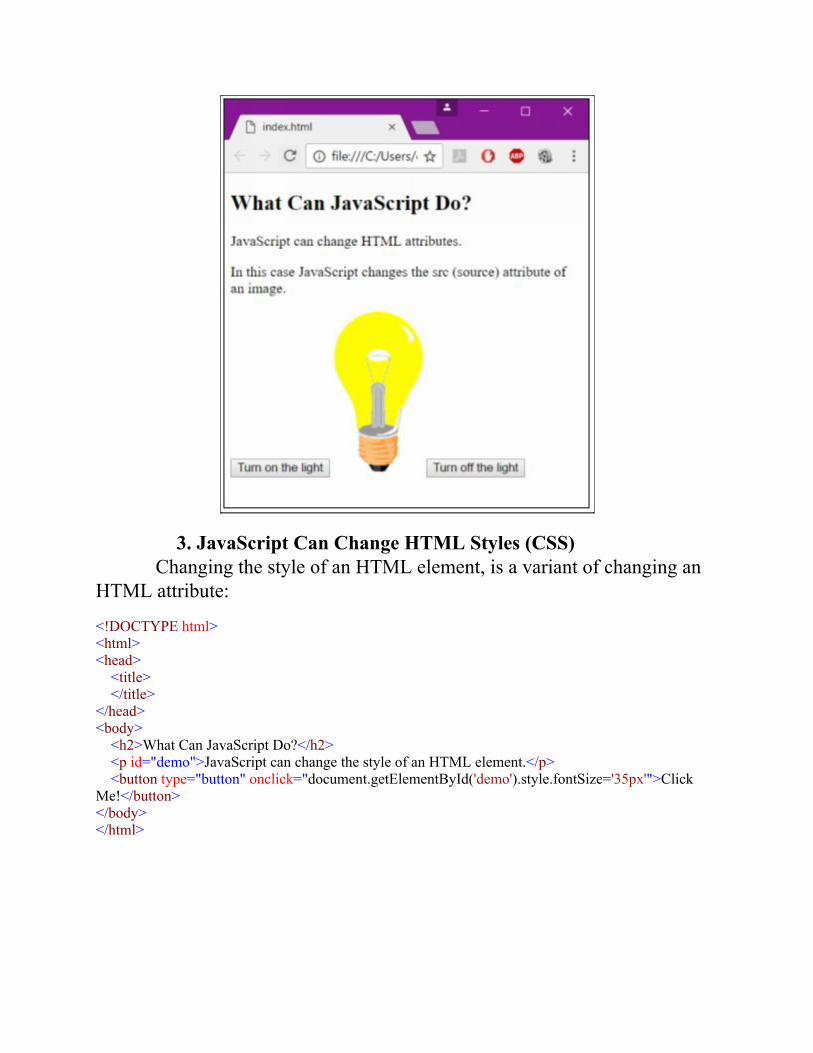
3. JavaScript Can Change HTML Styles (CSS)Changing the style of an HTML element, is a variant of changing an
HTML attribute:
<!DOCTYPE html><html><head> <title> </title></head><body> <h2>What Can JavaScript Do?</h2> <p id="demo">JavaScript can change the style of an HTML element.</p> <button type="button" onclick="document.getElementById('demo').style.fontSize='35px'">ClickMe!</button></body></html>

4. JavaScript Can Hide HTML ElementsHiding HTML elements can be done by changing the display style:
<!DOCTYPE html><html>
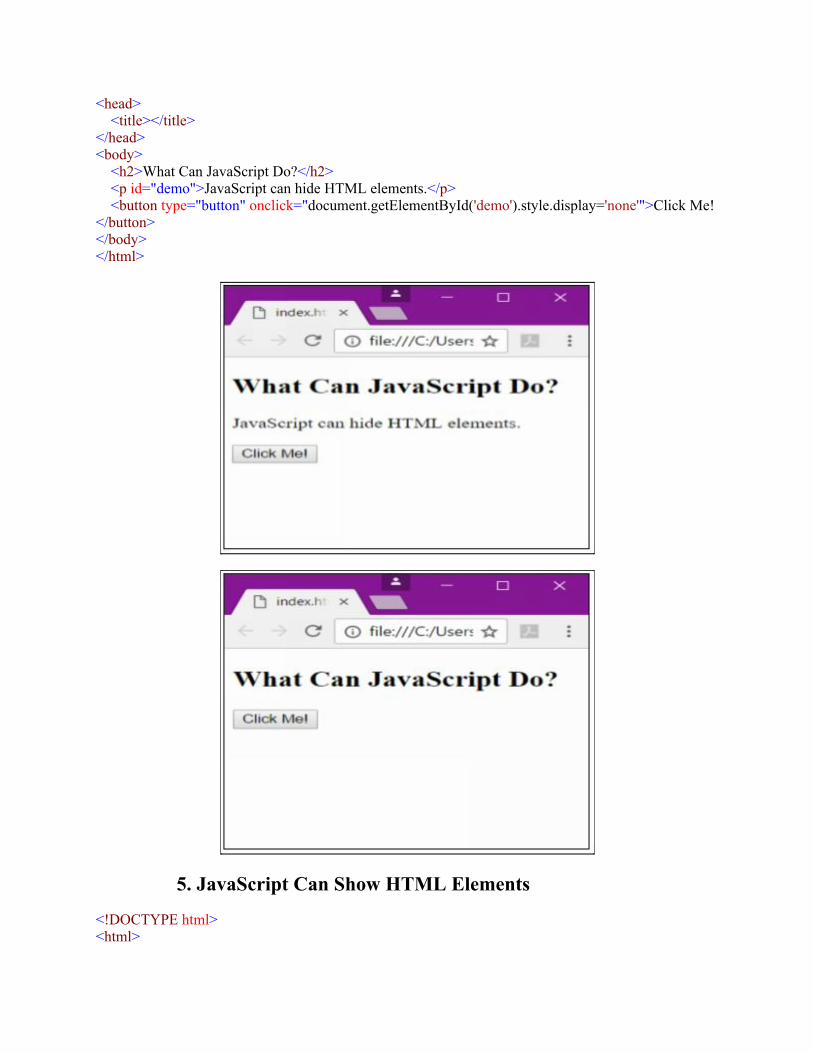
<head> <title></title></head><body> <h2>What Can JavaScript Do?</h2> <p id="demo">JavaScript can hide HTML elements.</p> <button type="button" onclick="document.getElementById('demo').style.display='none'">Click Me!</button></body></html>
5. JavaScript Can Show HTML Elements
<!DOCTYPE html><html>
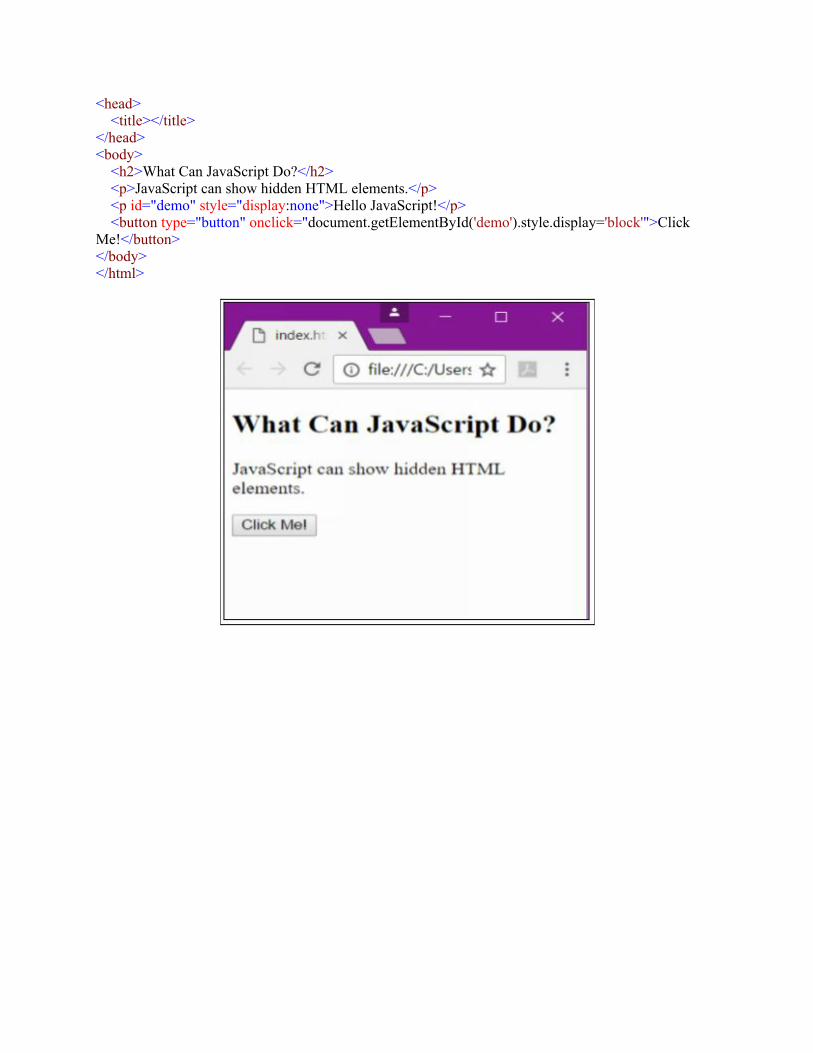
<head> <title></title></head><body> <h2>What Can JavaScript Do?</h2> <p>JavaScript can show hidden HTML elements.</p> <p id="demo" style="display:none">Hello JavaScript!</p> <button type="button" onclick="document.getElementById('demo').style.display='block'">ClickMe!</button></body></html>
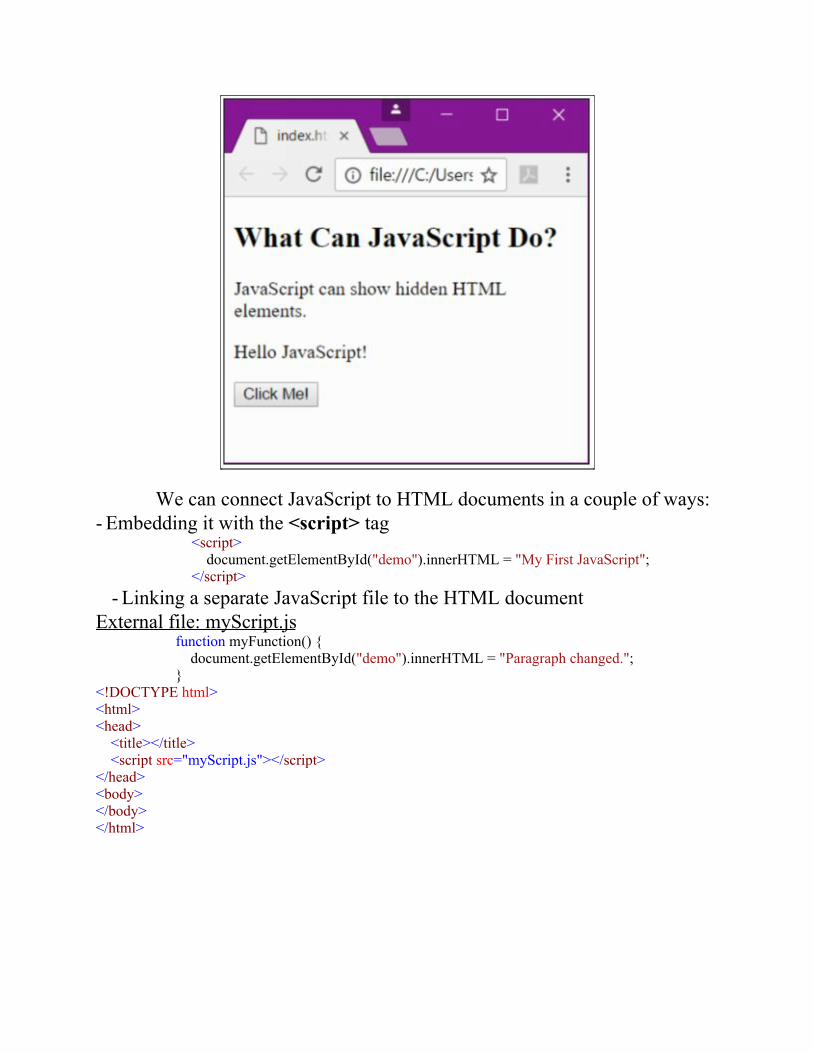
We can connect JavaScript to HTML documents in a couple of ways:- Embedding it with the <script> tag
<script> document.getElementById("demo").innerHTML = "My First JavaScript";</script>
- Linking a separate JavaScript file to the HTML documentExternal file: myScript.js
function myFunction() { document.getElementById("demo").innerHTML = "Paragraph changed.";}
<!DOCTYPE html><html><head> <title></title> <script src="myScript.js"></script></head><body></body></html>
20 - Creating and Using Functions andVariables in JavaScript
A function is a group of statements that are combined to perform aspecific task.
A statement is a line of code that performs an action. Statementsshould end with a semicolon (;).
If different parts of a script repeat the same task, then you can reuse afunction instead of repeating the same statements.
A JavaScript function is executed when "something" invokes it (callsit).
A JavaScript function is defined with the function keyword, followedby a name, followed by parentheses ().
Function names can contain letters, digits, underscores, and dollarsigns (same rules as variables).
The parentheses may include parameter names separated by commas:(parameter1, parameter2, ...).
The code to be executed, by the function, is placed inside curlybrackets: {}
Function parameters are the names listed in the function definition.
Function arguments are the real values received by the functionwhen it is invoked.
Inside the function, the arguments (the parameters) behave as localvariables.
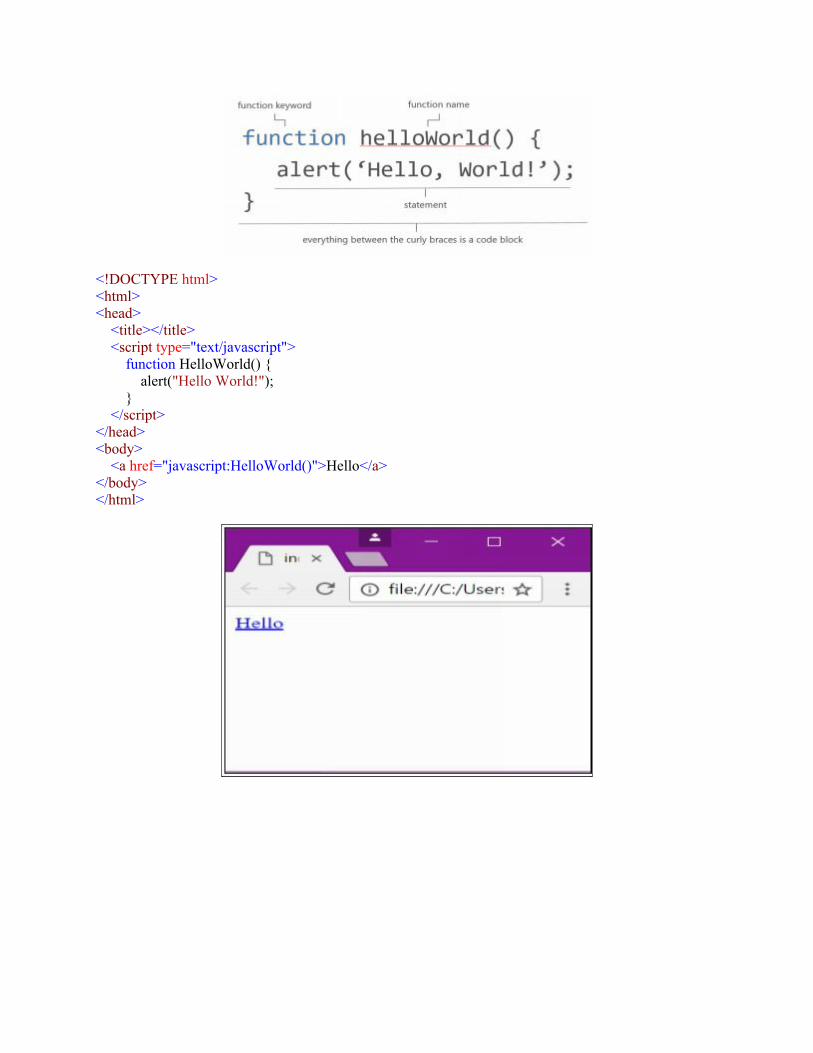
<!DOCTYPE html><html><head> <title></title> <script type="text/javascript"> function HelloWorld() { alert("Hello World!"); } </script></head><body> <a href="javascript:HelloWorld()">Hello</a></body></html>
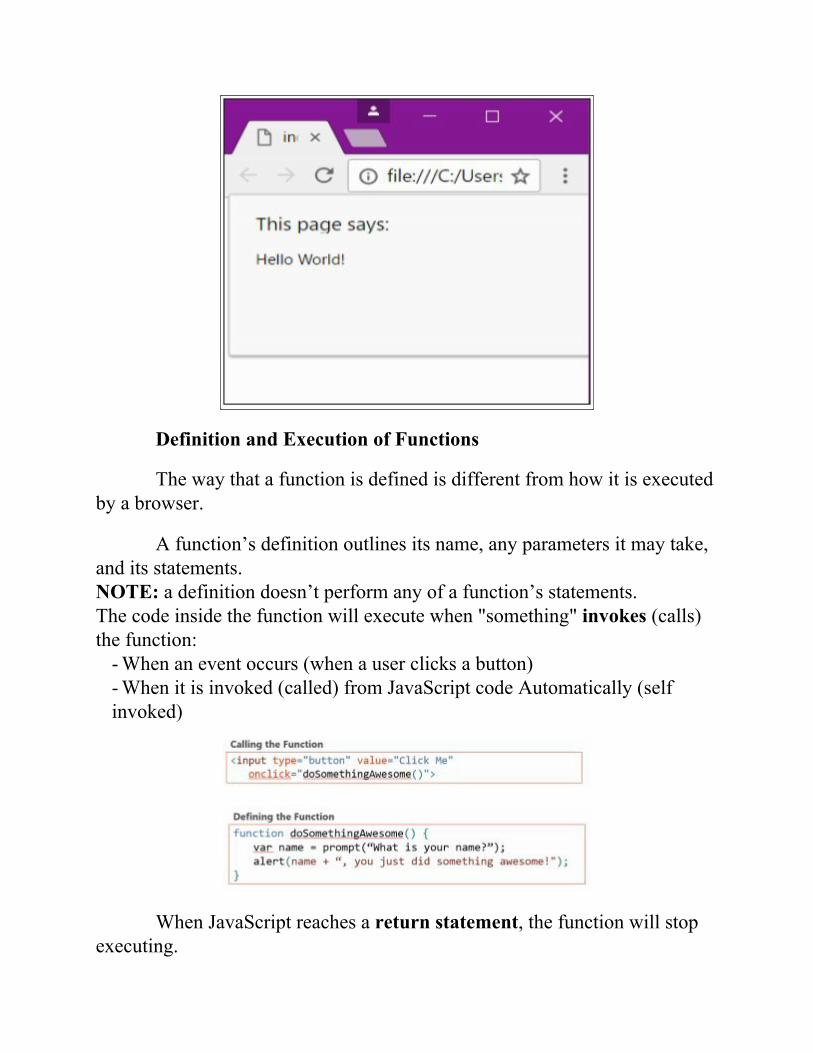
Definition and Execution of Functions
The way that a function is defined is different from how it is executedby a browser.
A function’s definition outlines its name, any parameters it may take,and its statements.NOTE: a definition doesn’t perform any of a function’s statements.The code inside the function will execute when "something" invokes (calls)the function:
- When an event occurs (when a user clicks a button)- When it is invoked (called) from JavaScript code Automatically (selfinvoked)
When JavaScript reaches a return statement, the function will stopexecuting.
If the function was invoked from a statement, JavaScript will "return"to execute the code after the invoking statement.
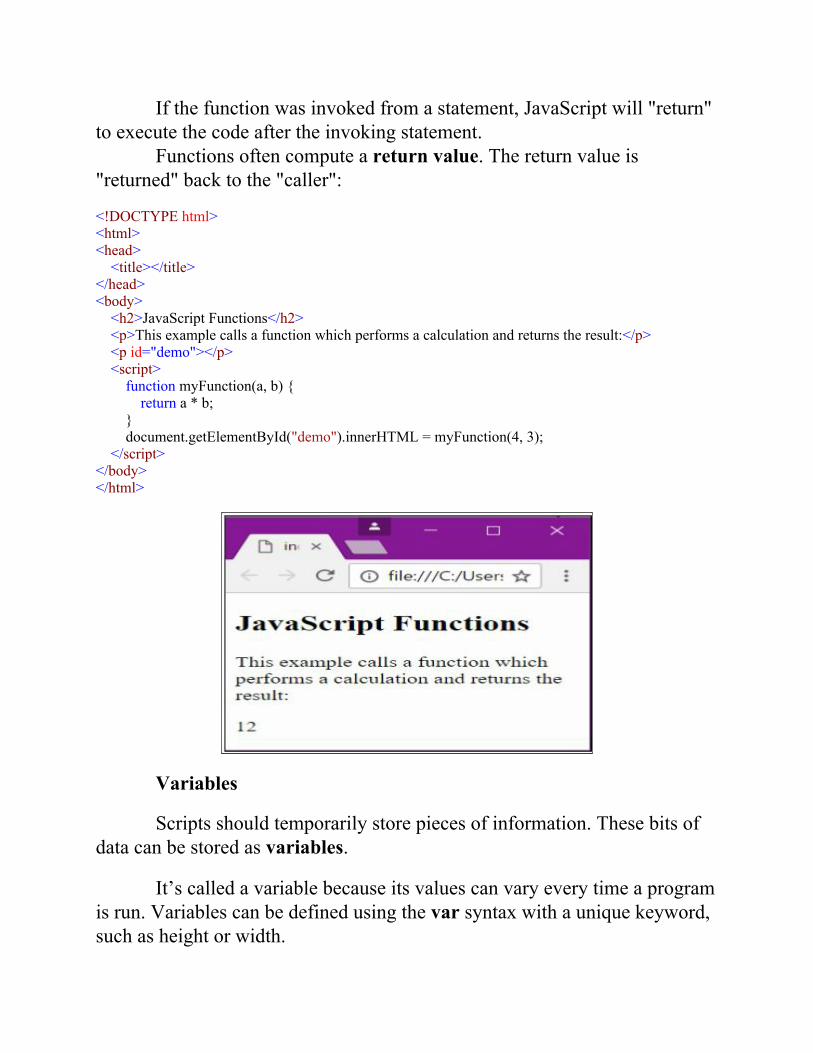
Functions often compute a return value. The return value is"returned" back to the "caller":
<!DOCTYPE html><html><head> <title></title></head><body> <h2>JavaScript Functions</h2> <p>This example calls a function which performs a calculation and returns the result:</p> <p id="demo"></p> <script> function myFunction(a, b) { return a * b; } document.getElementById("demo").innerHTML = myFunction(4, 3); </script></body></html>
Variables
Scripts should temporarily store pieces of information. These bits ofdata can be stored as variables.
It’s called a variable because its values can vary every time a programis run. Variables can be defined using the var syntax with a unique keyword,such as height or width.
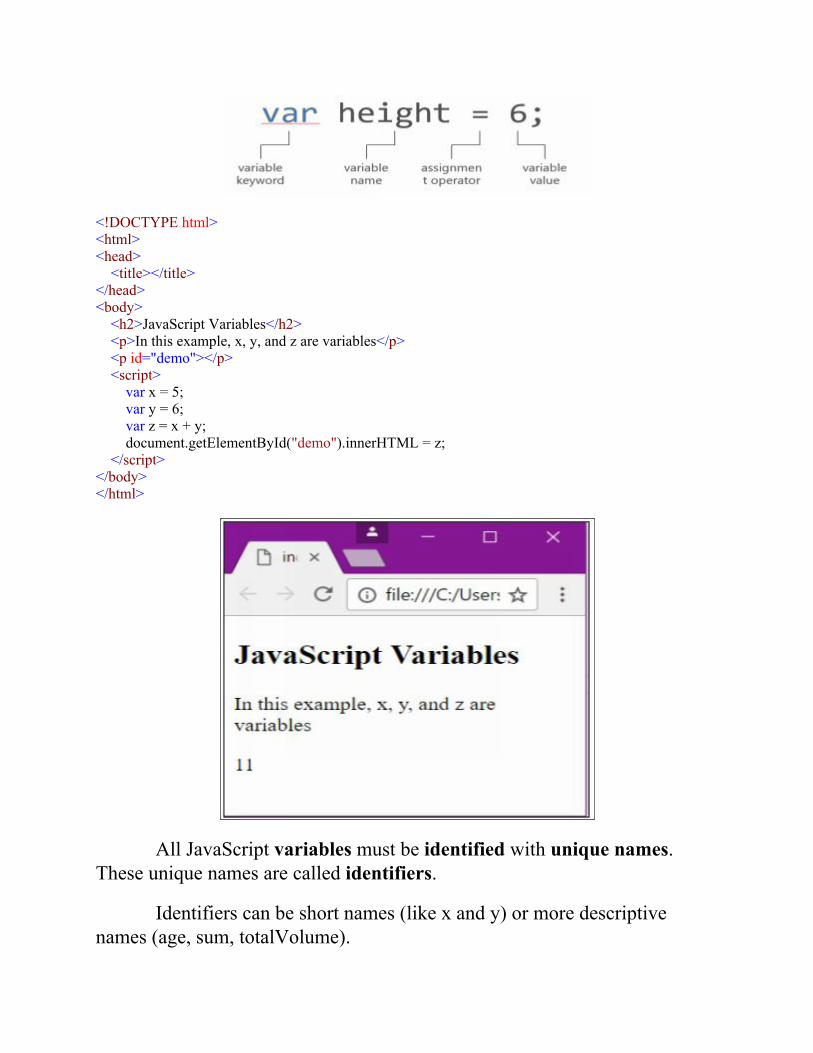
<!DOCTYPE html><html><head> <title></title></head><body> <h2>JavaScript Variables</h2> <p>In this example, x, y, and z are variables</p> <p id="demo"></p> <script> var x = 5; var y = 6; var z = x + y; document.getElementById("demo").innerHTML = z; </script></body></html>
All JavaScript variables must be identified with unique names.These unique names are called identifiers.
Identifiers can be short names (like x and y) or more descriptivenames (age, sum, totalVolume).
The general rules for constructing names for variables (uniqueidentifiers) are:- Names can contain letters, digits, underscores, and dollar signs.- Names must begin with a letter- Names can also begin with $ and _ (but we will not use it in this tutorial)- Names are case sensitive (y and Y are different variables)- Reserved words (like JavaScript keywords) cannot be used as names- JavaScript identifiers are case-sensitive.
Types of Data
- Numbers à 1, 2, 3var length = 16;
- Strings à ‘Zombies freak me out!’ Must always be surrounded by quote marks
var lastName = "Johnson";- Boolean à true, false
var x = true; var y = false;- Objects
var x = { firstName:"John", lastName:"Doe" };- Arrays
var cars = ["Saab", "Volvo", "BMW"];
Comments
Add comments to your script to explain what it does. It will also makeyour code easier for others to read and understand.
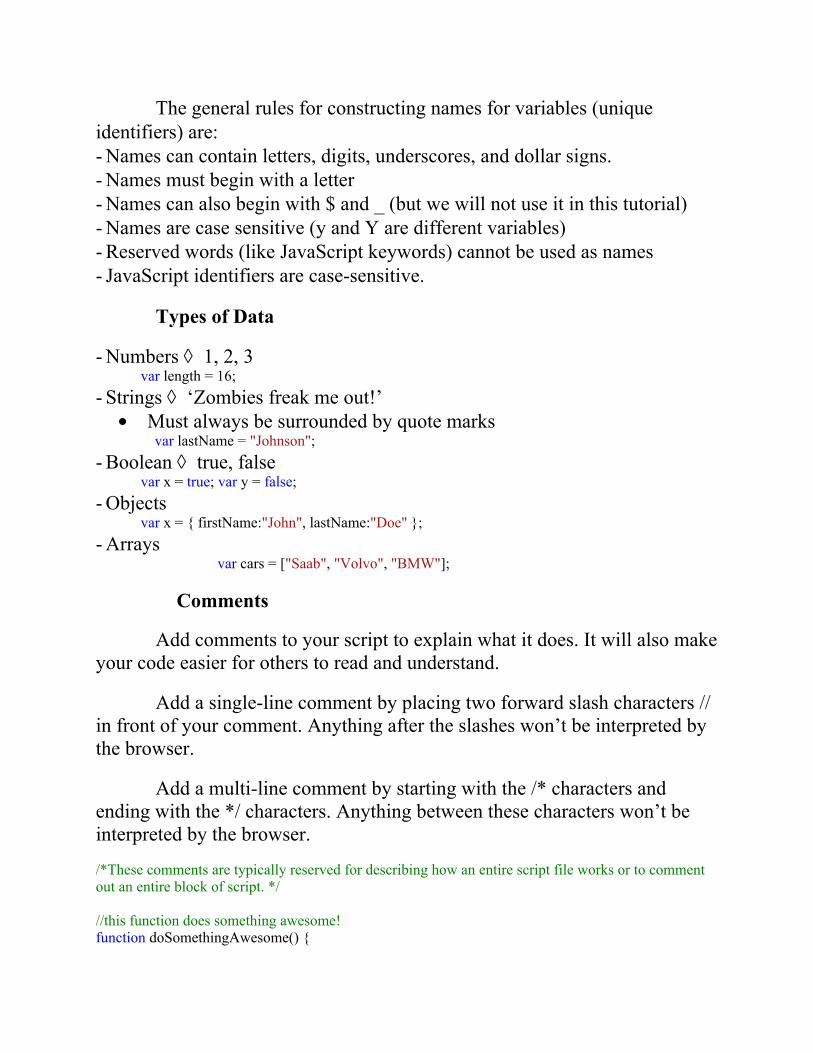
Add a single-line comment by placing two forward slash characters //in front of your comment. Anything after the slashes won’t be interpreted bythe browser.
Add a multi-line comment by starting with the /* characters andending with the */ characters. Anything between these characters won’t beinterpreted by the browser.
/*These comments are typically reserved for describing how an entire script file works or to commentout an entire block of script. */ //this function does something awesome!function doSomethingAwesome() {
var name = prompt(“What is your name?”); alert(name + “, you just did something awesome!");}
21 - jQuery and Other Third-PartyLibraries
JavaScript Libraries
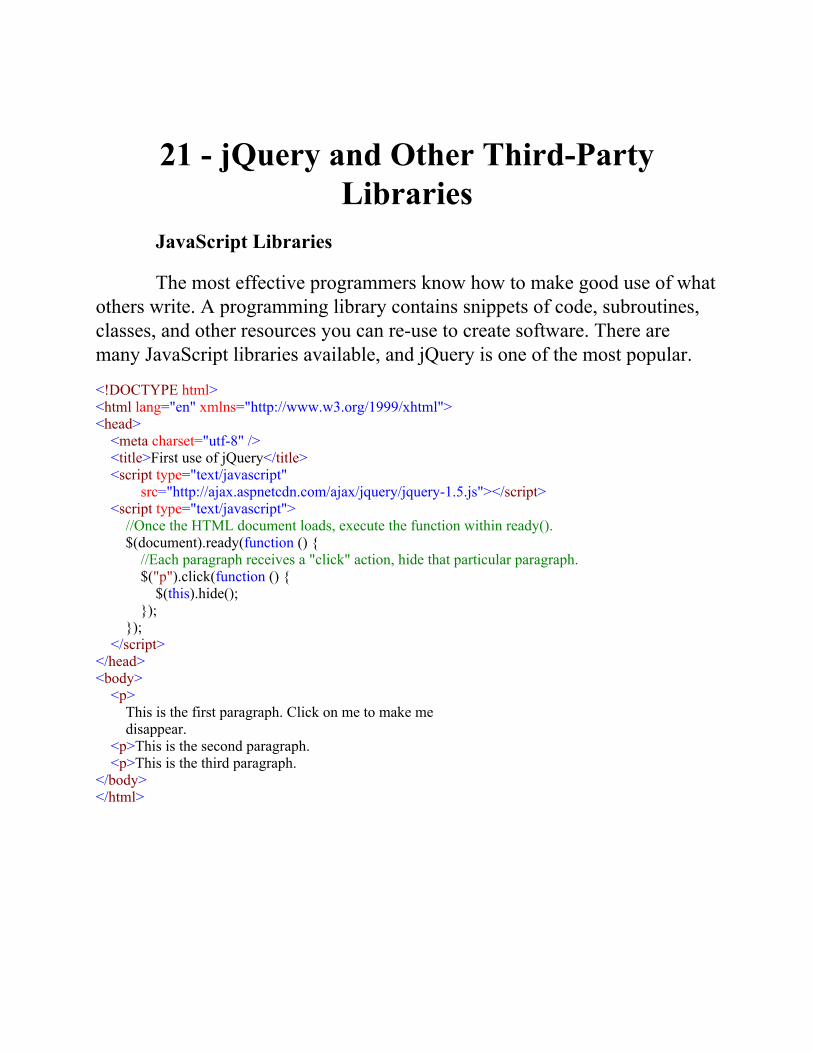
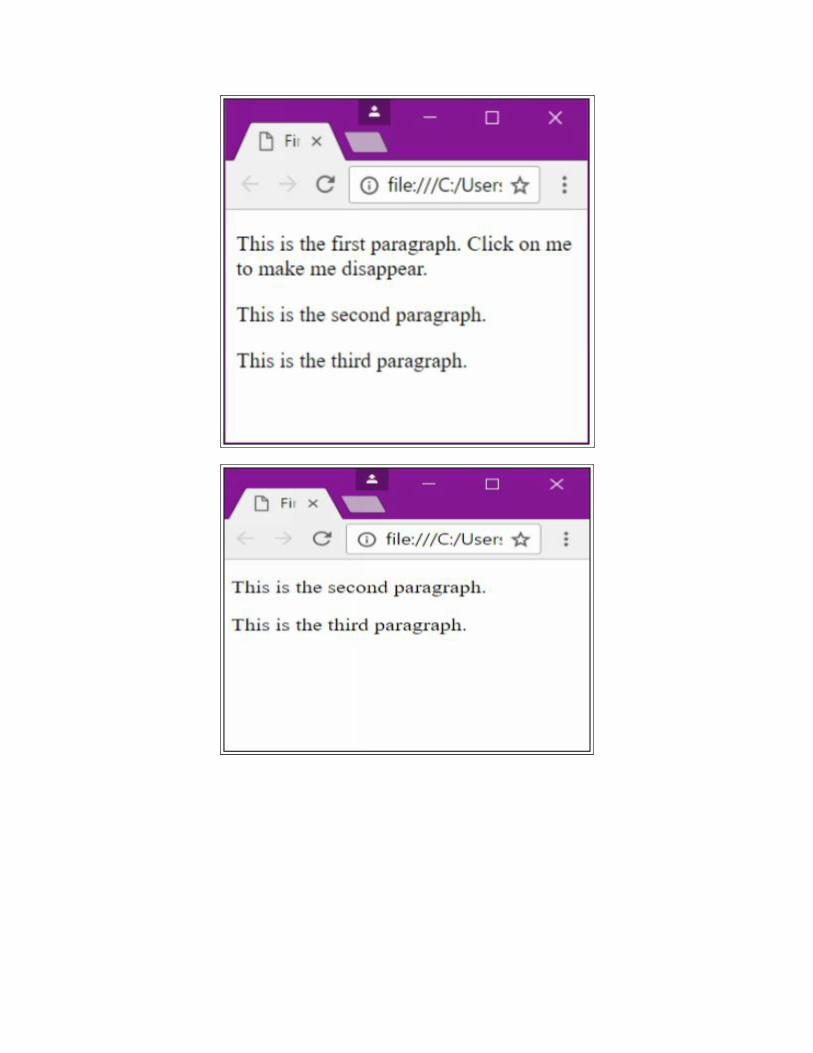
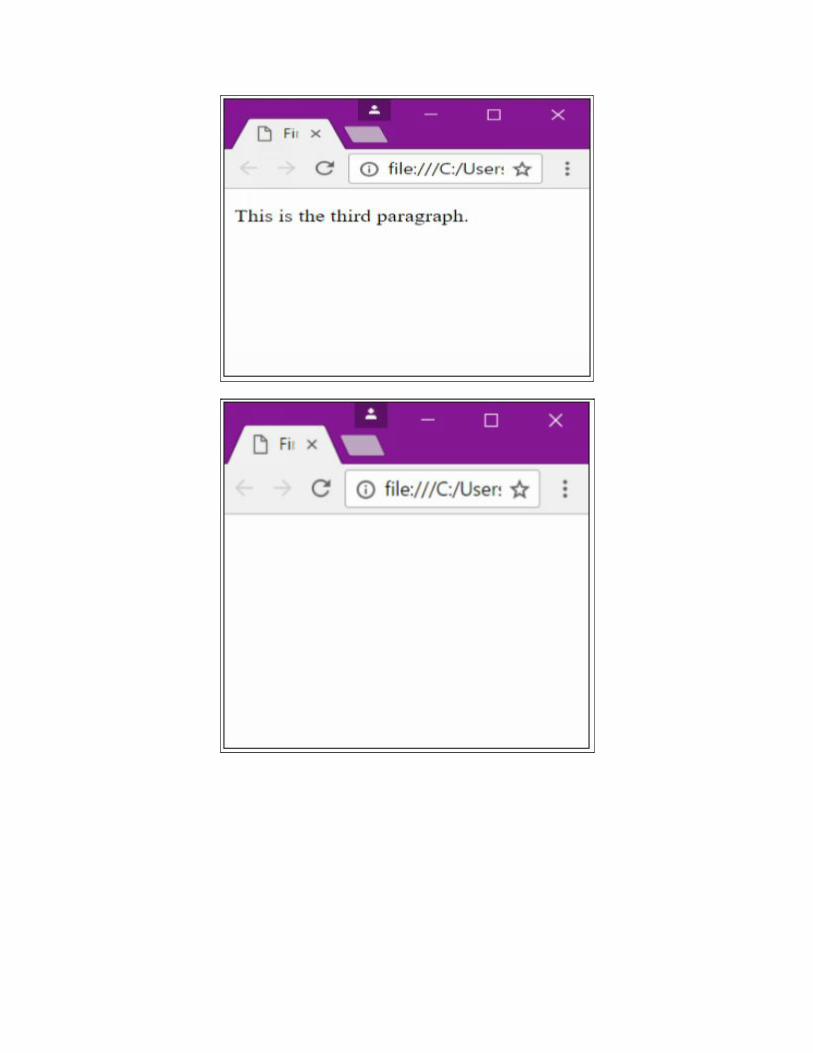
The most effective programmers know how to make good use of whatothers write. A programming library contains snippets of code, subroutines,classes, and other resources you can re-use to create software. There aremany JavaScript libraries available, and jQuery is one of the most popular.
<!DOCTYPE html><html lang="en" xmlns="http://www.w3.org/1999/xhtml"><head> <meta charset="utf-8" /> <title>First use of jQuery</title> <script type="text/javascript" src="http://ajax.aspnetcdn.com/ajax/jquery/jquery-1.5.js"></script> <script type="text/javascript"> //Once the HTML document loads, execute the function within ready(). $(document).ready(function () { //Each paragraph receives a "click" action, hide that particular paragraph. $("p").click(function () { $(this).hide(); }); }); </script></head><body> <p> This is the first paragraph. Click on me to make me disappear. <p>This is the second paragraph. <p>This is the third paragraph.</body></html>
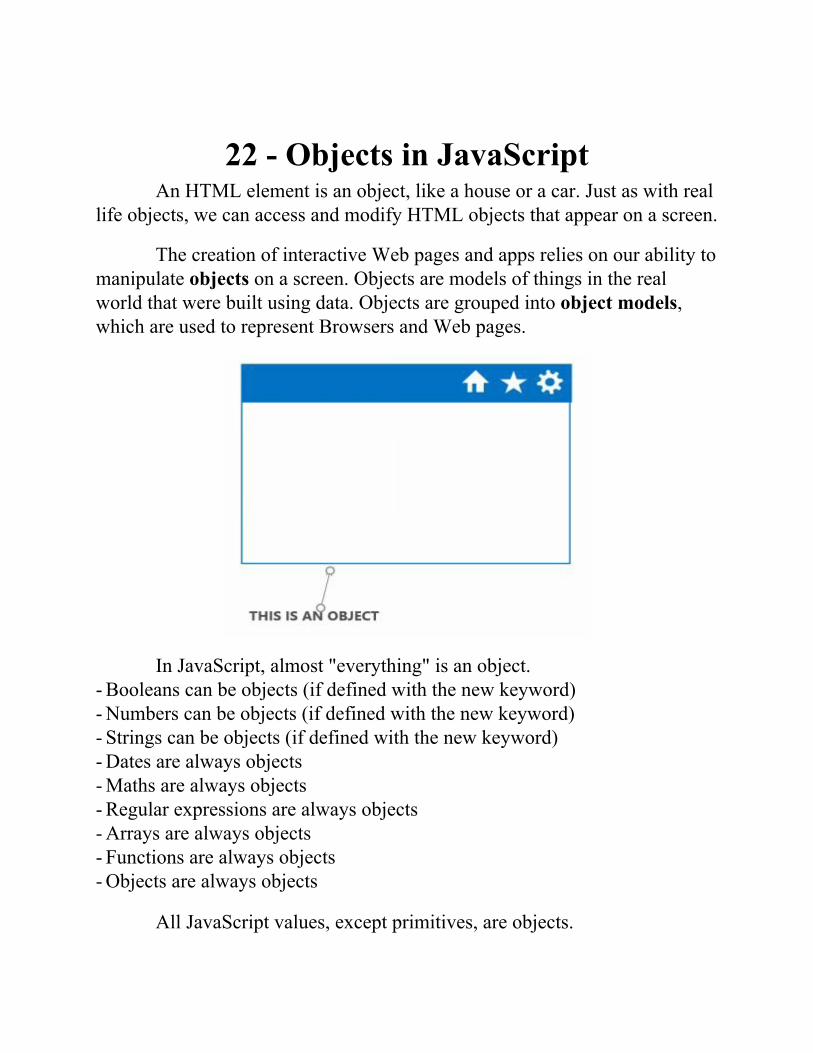
22 - Objects in JavaScriptAn HTML element is an object, like a house or a car. Just as with real
life objects, we can access and modify HTML objects that appear on a screen.
The creation of interactive Web pages and apps relies on our ability tomanipulate objects on a screen. Objects are models of things in the realworld that were built using data. Objects are grouped into object models,which are used to represent Browsers and Web pages.
In JavaScript, almost "everything" is an object.- Booleans can be objects (if defined with the new keyword)- Numbers can be objects (if defined with the new keyword)- Strings can be objects (if defined with the new keyword)- Dates are always objects- Maths are always objects- Regular expressions are always objects- Arrays are always objects- Functions are always objects- Objects are always objects
All JavaScript values, except primitives, are objects.
JavaScript Primitives
A primitive value is a value that has no properties or methods.
A primitive data type is data that has a primitive value.
JavaScript defines 5 types of primitive data types:- string- number- boolean- null- undefined
Primitive values are immutable (they are hardcoded and thereforecannot be changed).
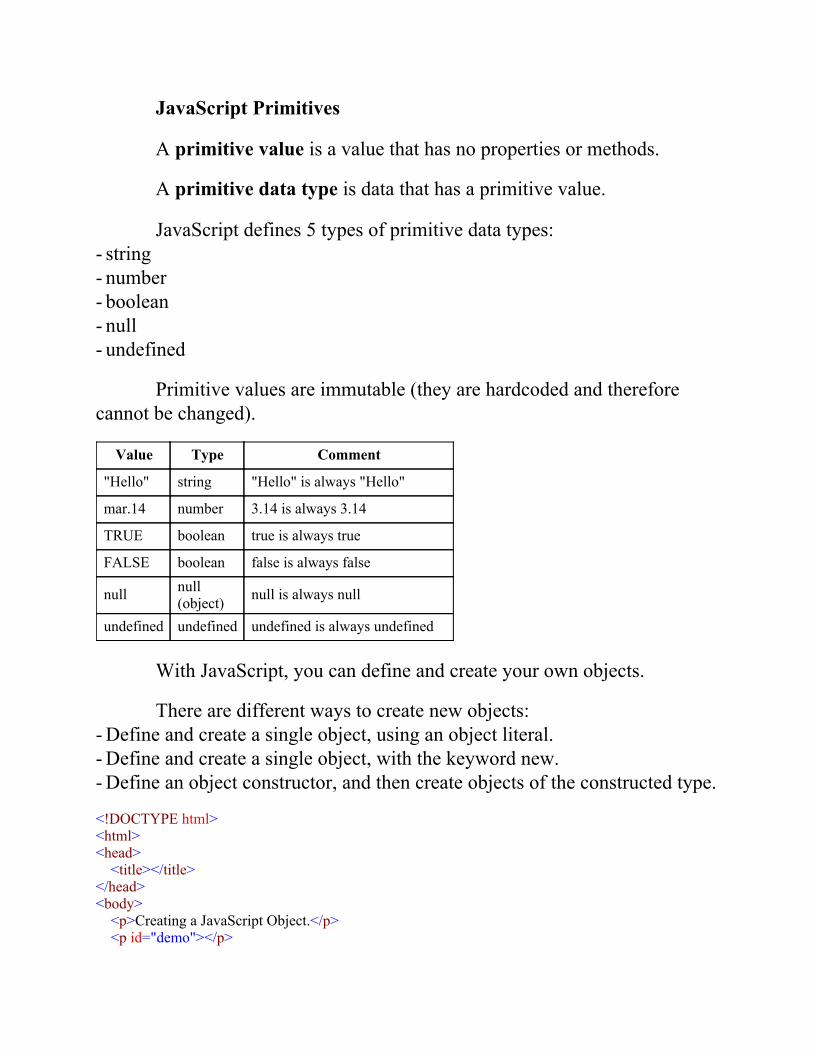
Value Type Comment
"Hello" string "Hello" is always "Hello"
mar.14 number 3.14 is always 3.14
TRUE boolean true is always true
FALSE boolean false is always false
null null(object) null is always null
undefined undefined undefined is always undefined
With JavaScript, you can define and create your own objects.
There are different ways to create new objects:- Define and create a single object, using an object literal.- Define and create a single object, with the keyword new.- Define an object constructor, and then create objects of the constructed type.
<!DOCTYPE html><html><head> <title></title></head><body> <p>Creating a JavaScript Object.</p> <p id="demo"></p>
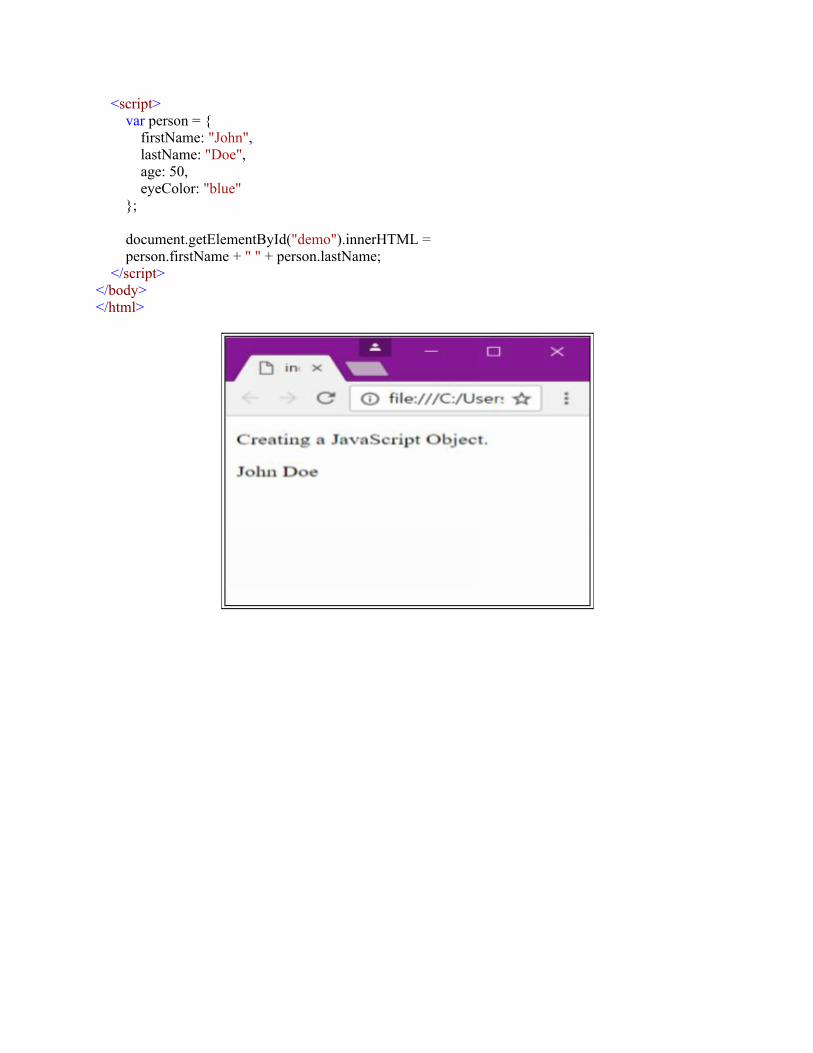
<script> var person = { firstName: "John", lastName: "Doe", age: 50, eyeColor: "blue" }; document.getElementById("demo").innerHTML = person.firstName + " " + person.lastName; </script></body></html>
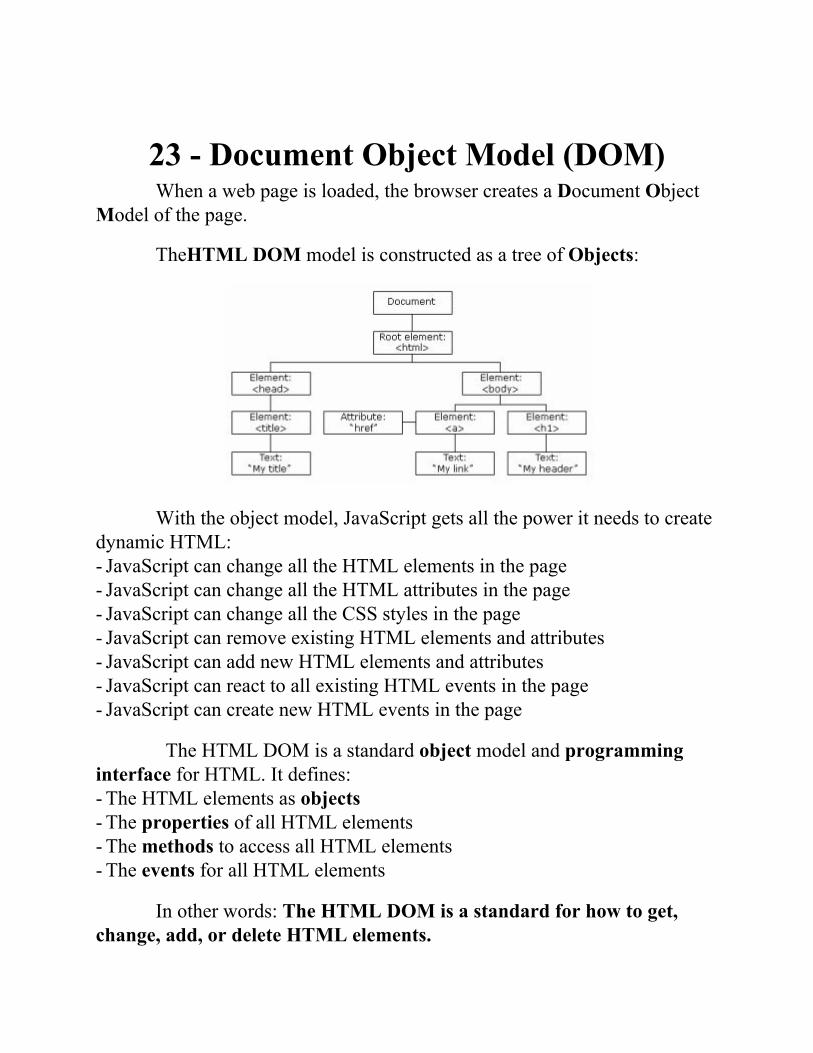
23 - Document Object Model (DOM)When a web page is loaded, the browser creates a Document Object
Model of the page.
TheHTML DOM model is constructed as a tree of Objects:
With the object model, JavaScript gets all the power it needs to createdynamic HTML:- JavaScript can change all the HTML elements in the page- JavaScript can change all the HTML attributes in the page- JavaScript can change all the CSS styles in the page- JavaScript can remove existing HTML elements and attributes- JavaScript can add new HTML elements and attributes- JavaScript can react to all existing HTML events in the page- JavaScript can create new HTML events in the page
The HTML DOM is a standard object model and programminginterface for HTML. It defines:- The HTML elements as objects- The properties of all HTML elements- The methods to access all HTML elements- The events for all HTML elements
In other words: The HTML DOM is a standard for how to get,change, add, or delete HTML elements.
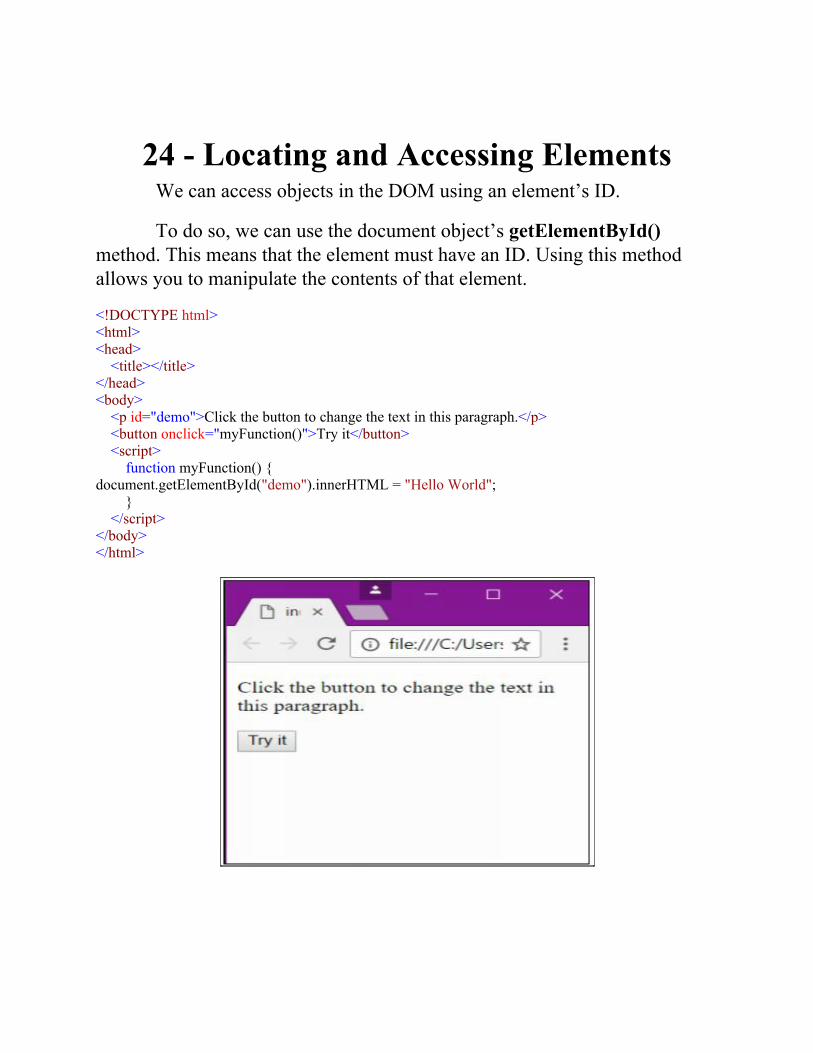
24 - Locating and Accessing ElementsWe can access objects in the DOM using an element’s ID.
To do so, we can use the document object’s getElementById()method. This means that the element must have an ID. Using this methodallows you to manipulate the contents of that element.
<!DOCTYPE html><html><head> <title></title></head><body> <p id="demo">Click the button to change the text in this paragraph.</p> <button onclick="myFunction()">Try it</button> <script> function myFunction() {document.getElementById("demo").innerHTML = "Hello World"; } </script></body></html>
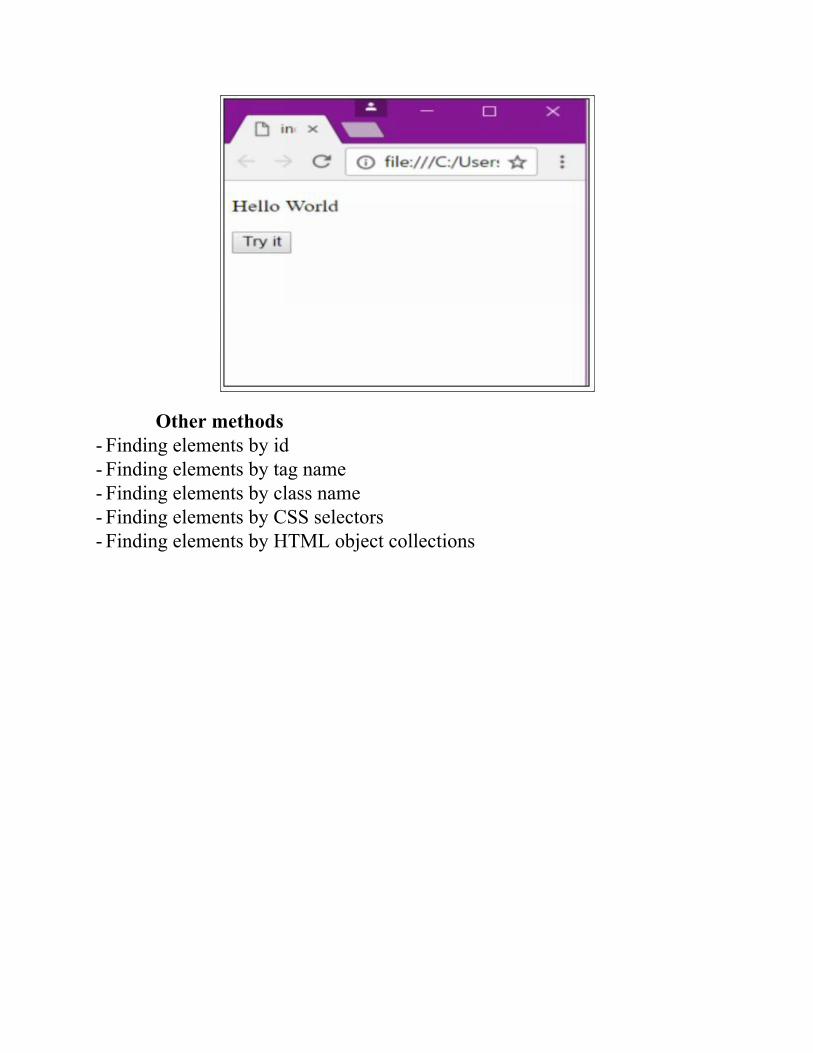
Other methods- Finding elements by id- Finding elements by tag name- Finding elements by class name- Finding elements by CSS selectors- Finding elements by HTML object collections

25 - Listening and Responding to EventsEvents in Programming
Events are actions that a user takes. JavaScript features eventhandlers, which respond to specific user events.
For example, the onClick event handler responds to clicks on screen.Event handlers respond by executing functions.
Examples of HTML events:- When a user clicks the mouse- When a web page has loaded- When an image has been loaded- When the mouse moves over an element- When an input field is changed- When an HTML form is submitted- When a user strokes a key
onsubmit form submissiononkeydown
keystrokesonkeypressonkeyuponclick
mouse or touchpadclicksonmousedown
onmouseuponload page loading/unloadingonunloadonselect item selection
<!DOCTYPE html><html><head> <title></title></head><body> <p>Select some of the text:<input type="text" value="Hello, World!" onselect="myFunction()">
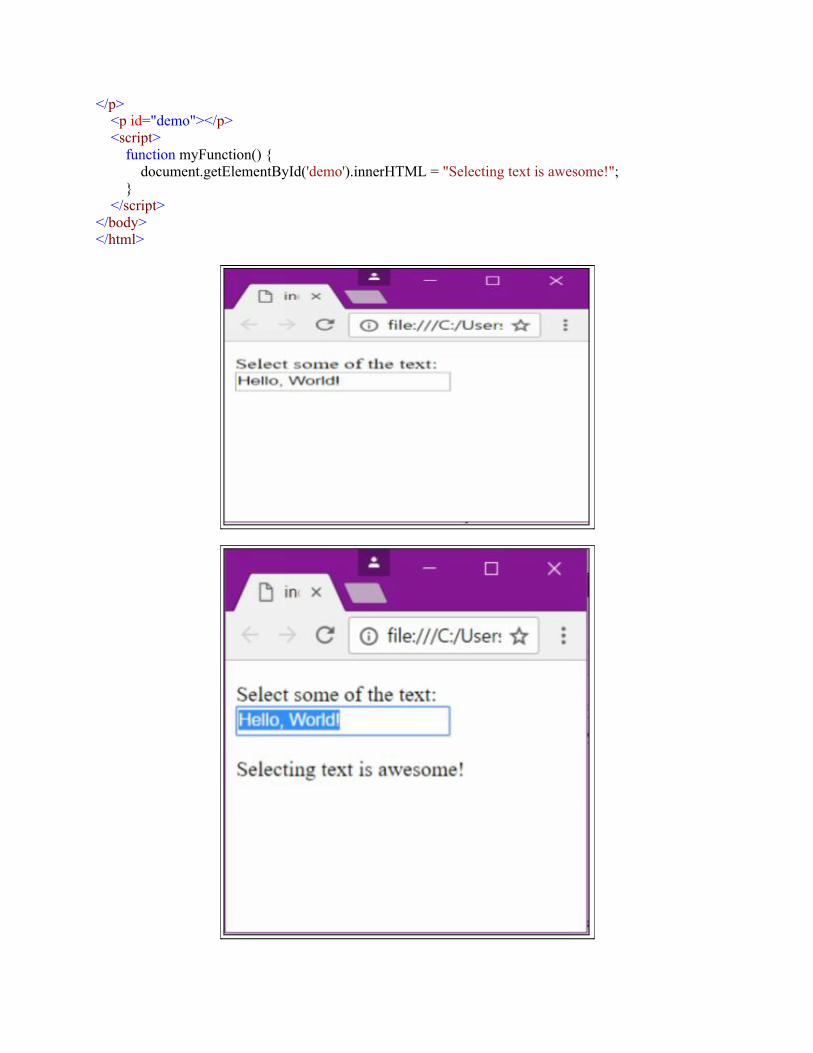
</p> <p id="demo"></p> <script> function myFunction() { document.getElementById('demo').innerHTML = "Selecting text is awesome!"; } </script></body></html>
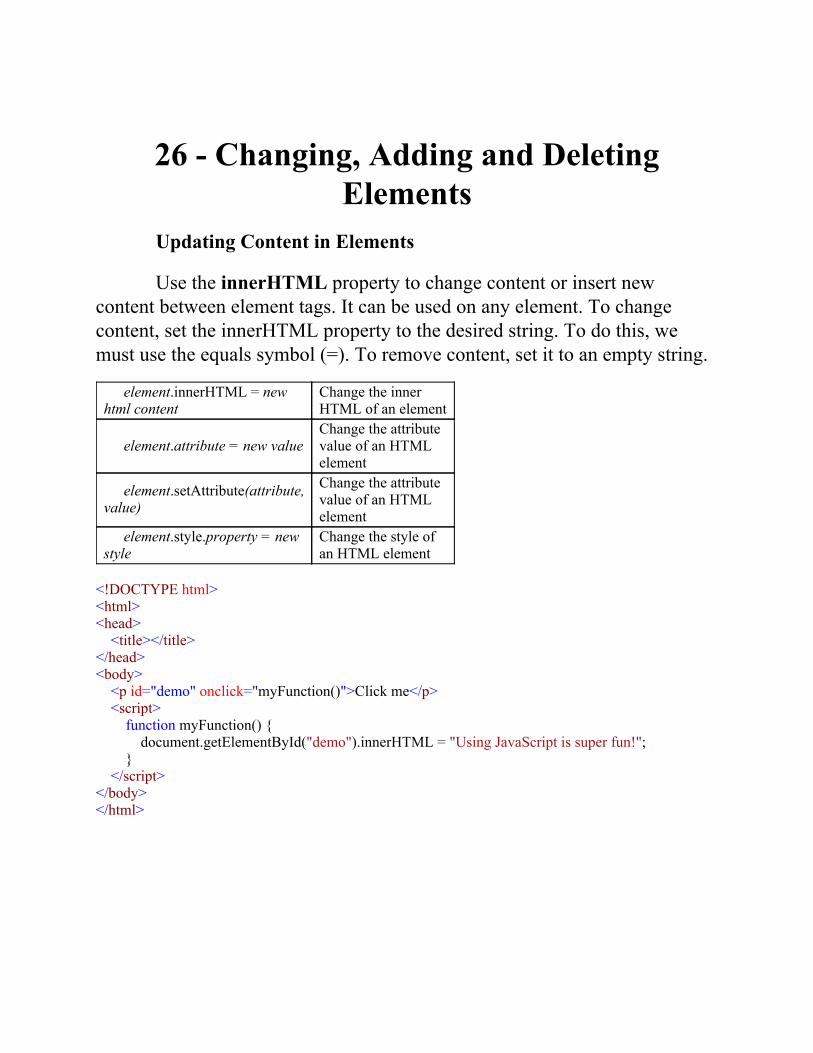
26 - Changing, Adding and DeletingElements
Updating Content in Elements
Use the innerHTML property to change content or insert newcontent between element tags. It can be used on any element. To changecontent, set the innerHTML property to the desired string. To do this, wemust use the equals symbol (=). To remove content, set it to an empty string.
element.innerHTML = newhtml content
Change the innerHTML of an element
element.attribute = new valueChange the attributevalue of an HTMLelement
element.setAttribute(attribute,value)
Change the attributevalue of an HTMLelement
element.style.property = newstyle
Change the style ofan HTML element
<!DOCTYPE html><html><head> <title></title></head><body> <p id="demo" onclick="myFunction()">Click me</p> <script> function myFunction() { document.getElementById("demo").innerHTML = "Using JavaScript is super fun!"; } </script></body></html>
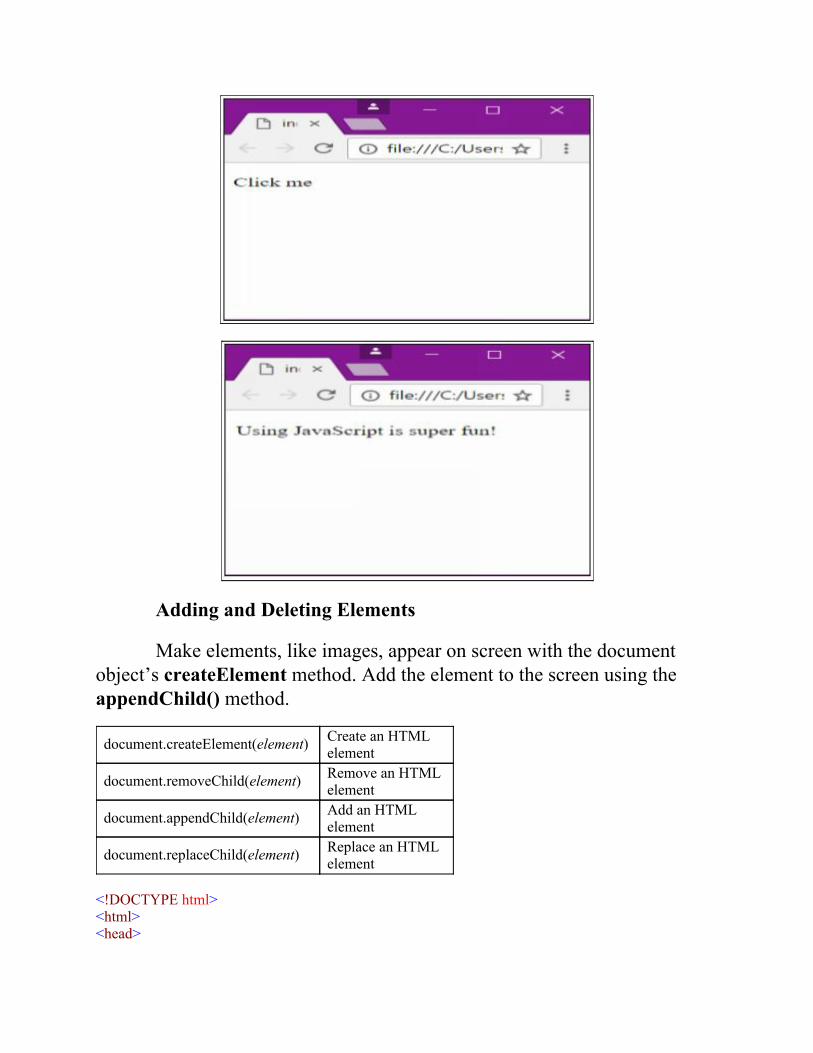
Adding and Deleting Elements
Make elements, like images, appear on screen with the documentobject’s createElement method. Add the element to the screen using theappendChild() method.
document.createElement(element) Create an HTMLelement
document.removeChild(element) Remove an HTMLelement
document.appendChild(element) Add an HTMLelement
document.replaceChild(element) Replace an HTMLelement
<!DOCTYPE html><html><head>
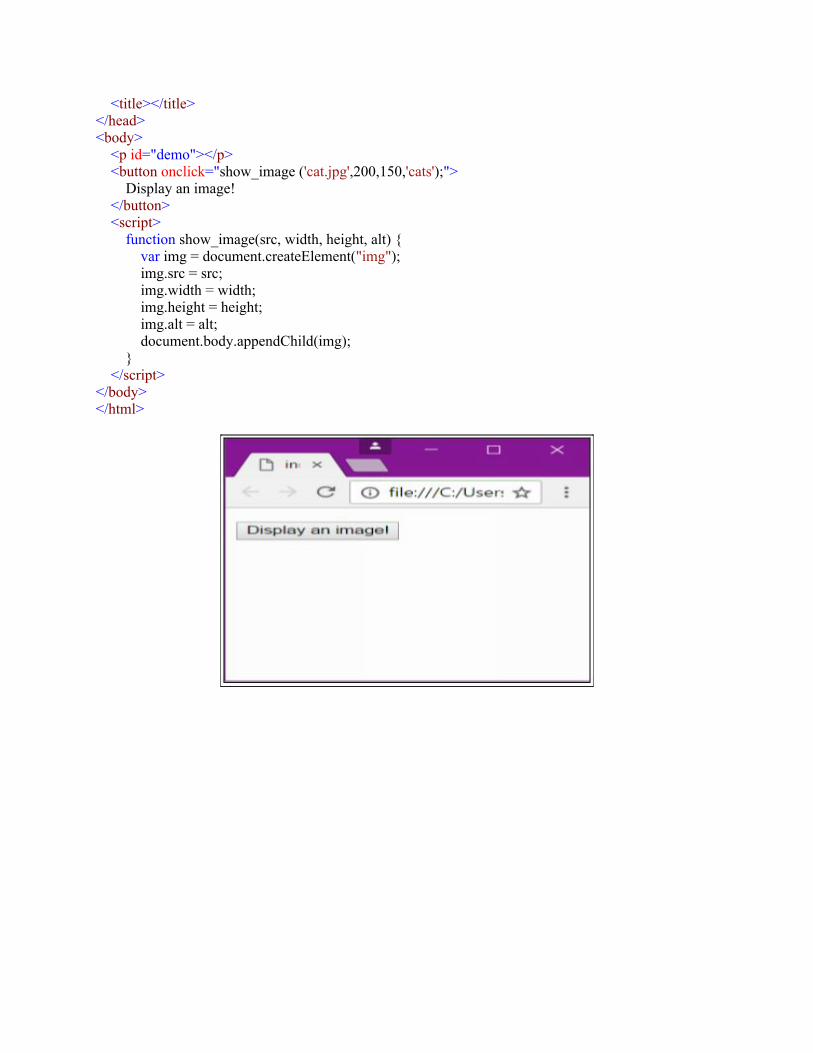
<title></title></head><body> <p id="demo"></p> <button onclick="show_image ('cat.jpg',200,150,'cats');"> Display an image! </button> <script> function show_image(src, width, height, alt) { var img = document.createElement("img"); img.src = src; img.width = width; img.height = height; img.alt = alt; document.body.appendChild(img); } </script></body></html>
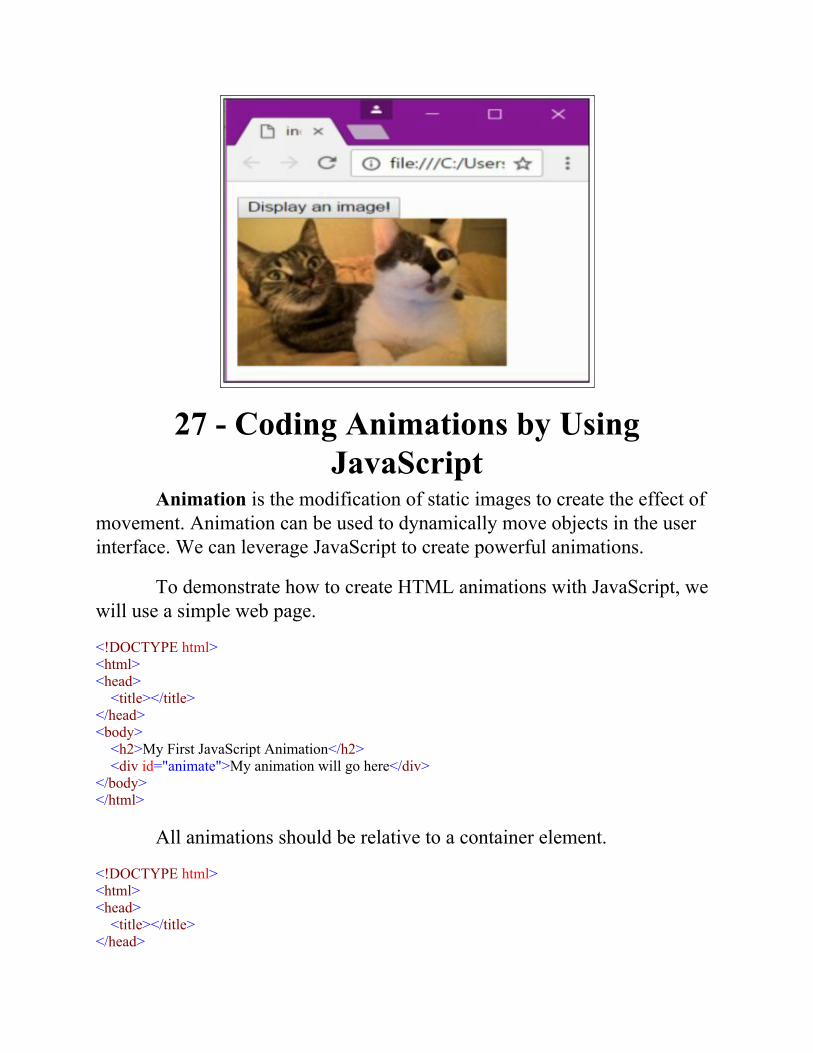
27 - Coding Animations by UsingJavaScript
Animation is the modification of static images to create the effect ofmovement. Animation can be used to dynamically move objects in the userinterface. We can leverage JavaScript to create powerful animations.
To demonstrate how to create HTML animations with JavaScript, wewill use a simple web page.
<!DOCTYPE html><html><head> <title></title></head><body> <h2>My First JavaScript Animation</h2> <div id="animate">My animation will go here</div></body></html>
All animations should be relative to a container element.
<!DOCTYPE html><html><head> <title></title></head>
<body> <h2>My First JavaScript Animation</h2> <div id="container"> <div id="animate">My animation will go here</div> </div></body></html>
The container element should be created with style = "position:relative".
The animation element should be created with style = "position:absolute".
<!DOCTYPE html><html><head> <title></title> <style> #container { width: 400px; height: 400px; position: relative; background: yellow; } #animate { width: 50px; height: 50px; position: absolute; background: red; } </style></head><body> <h2>My First JavaScript Animation</h2> <div id="container"> <div id="animate">My animation will go here</div> </div></body></html>
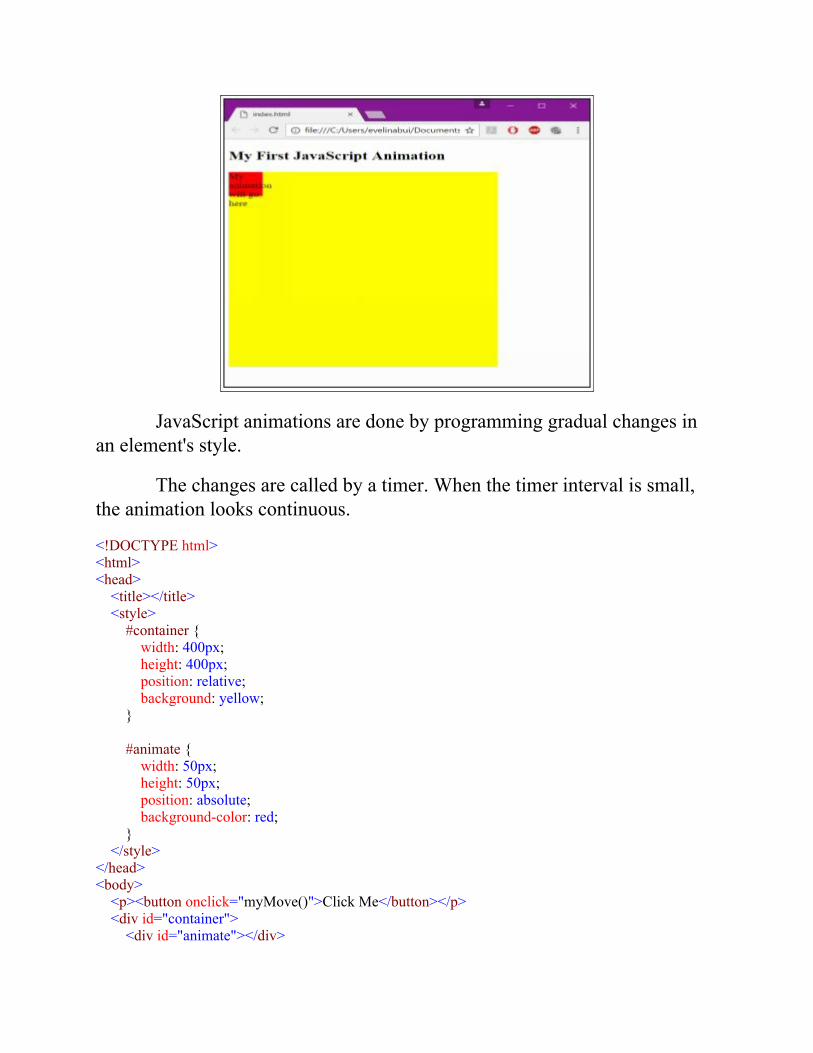
JavaScript animations are done by programming gradual changes inan element's style.
The changes are called by a timer. When the timer interval is small,the animation looks continuous.
<!DOCTYPE html><html><head> <title></title> <style> #container { width: 400px; height: 400px; position: relative; background: yellow; } #animate { width: 50px; height: 50px; position: absolute; background-color: red; } </style></head><body> <p><button onclick="myMove()">Click Me</button></p> <div id="container"> <div id="animate"></div>
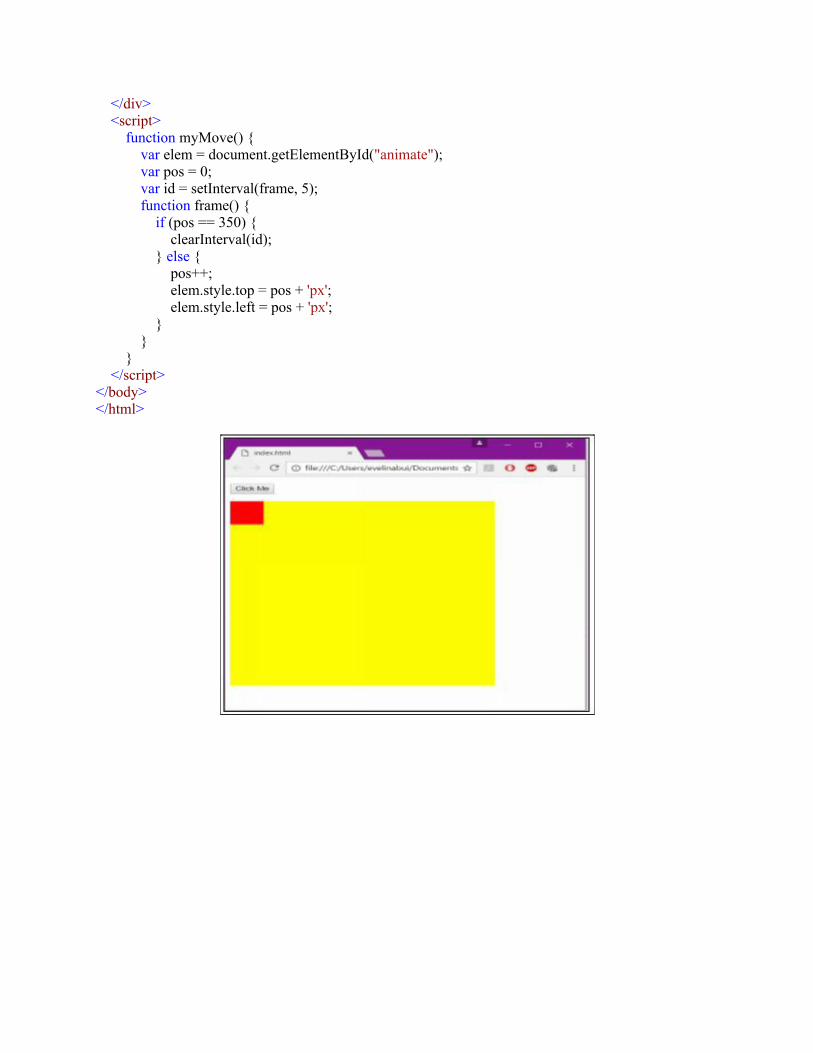
</div> <script> function myMove() { var elem = document.getElementById("animate"); var pos = 0; var id = setInterval(frame, 5); function frame() { if (pos == 350) { clearInterval(id); } else { pos++; elem.style.top = pos + 'px'; elem.style.left = pos + 'px'; } } } </script></body></html>
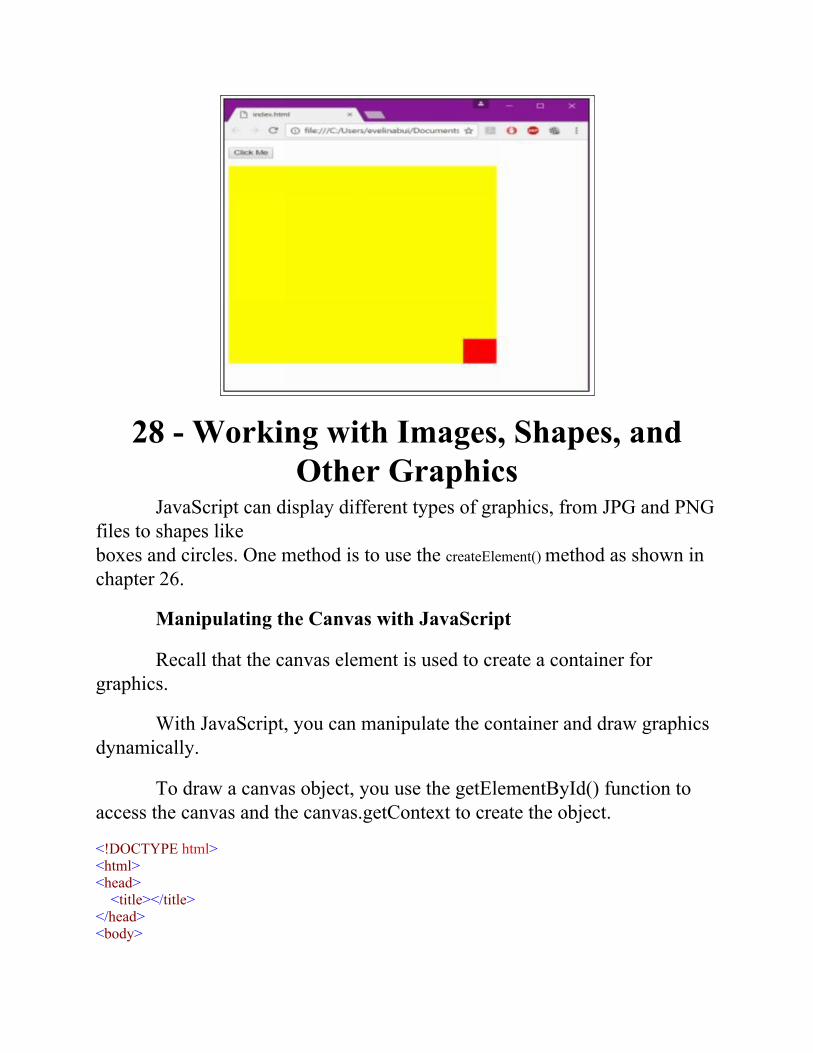
28 - Working with Images, Shapes, andOther Graphics
JavaScript can display different types of graphics, from JPG and PNGfiles to shapes likeboxes and circles. One method is to use the createElement() method as shown inchapter 26.
Manipulating the Canvas with JavaScript
Recall that the canvas element is used to create a container forgraphics.
With JavaScript, you can manipulate the container and draw graphicsdynamically.
To draw a canvas object, you use the getElementById() function toaccess the canvas and the canvas.getContext to create the object.
<!DOCTYPE html><html><head> <title></title></head><body>
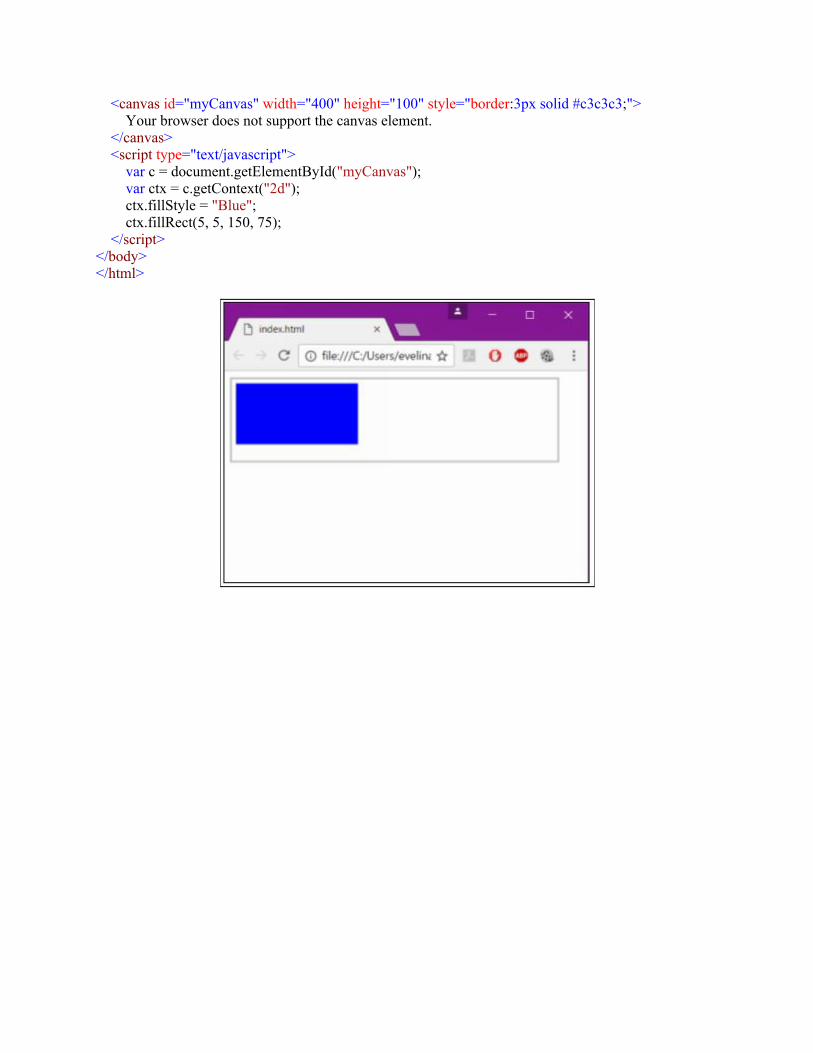
<canvas id="myCanvas" width="400" height="100" style="border:3px solid #c3c3c3;"> Your browser does not support the canvas element. </canvas> <script type="text/javascript"> var c = document.getElementById("myCanvas"); var ctx = c.getContext("2d"); ctx.fillStyle = "Blue"; ctx.fillRect(5, 5, 150, 75); </script></body></html>
29 - Transmitting DataCreating robust interactive applications requires the ability to send
and receive data.
For this to happen, mobile applications and HTML Web pages haveto communicate with servers where data is stored.
A user’s computer is commonly called a “client”.
JavaScript makes the creation of such programs possible.
One of the most essential techniques for data transfer involves theXMLHttpRequest API (sometimes abbreviated as XHR).XMLHttpRequest enables you to use JavaScript to pass data in the form oftext strings between a client and a server. The general syntax might look likethe following:
function load(url, data, callback) { var xhr = new XMLHttpRequest(); xhr.open("GET", url, true); xhr.onload = function () { callback(xhr.responseText); } xhr.send(data); }
The XMLHttpRequest object creates a call to the server. The openmethod specifies the HTTP method for contacting the server and provides theserver’s Web address. The callback function gets a response from the server.Finally, xhr.send(data) sends the data.
<!doctype html><html>
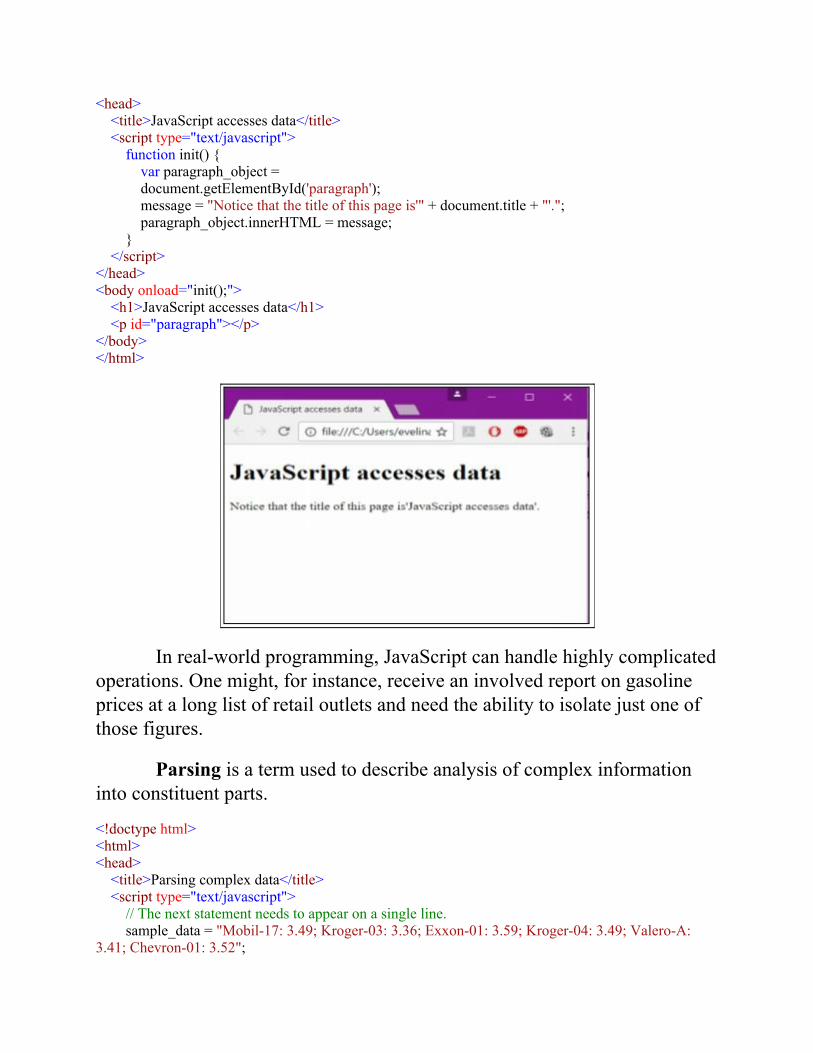
<head> <title>JavaScript accesses data</title> <script type="text/javascript"> function init() { var paragraph_object = document.getElementById('paragraph'); message = "Notice that the title of this page is'" + document.title + "'."; paragraph_object.innerHTML = message; } </script></head><body onload="init();"> <h1>JavaScript accesses data</h1> <p id="paragraph"></p></body></html>
In real-world programming, JavaScript can handle highly complicatedoperations. One might, for instance, receive an involved report on gasolineprices at a long list of retail outlets and need the ability to isolate just one ofthose figures.
Parsing is a term used to describe analysis of complex informationinto constituent parts.
<!doctype html><html><head> <title>Parsing complex data</title> <script type="text/javascript"> // The next statement needs to appear on a single line. sample_data = "Mobil-17: 3.49; Kroger-03: 3.36; Exxon-01: 3.59; Kroger-04: 3.49; Valero-A:3.41; Chevron-01: 3.52";
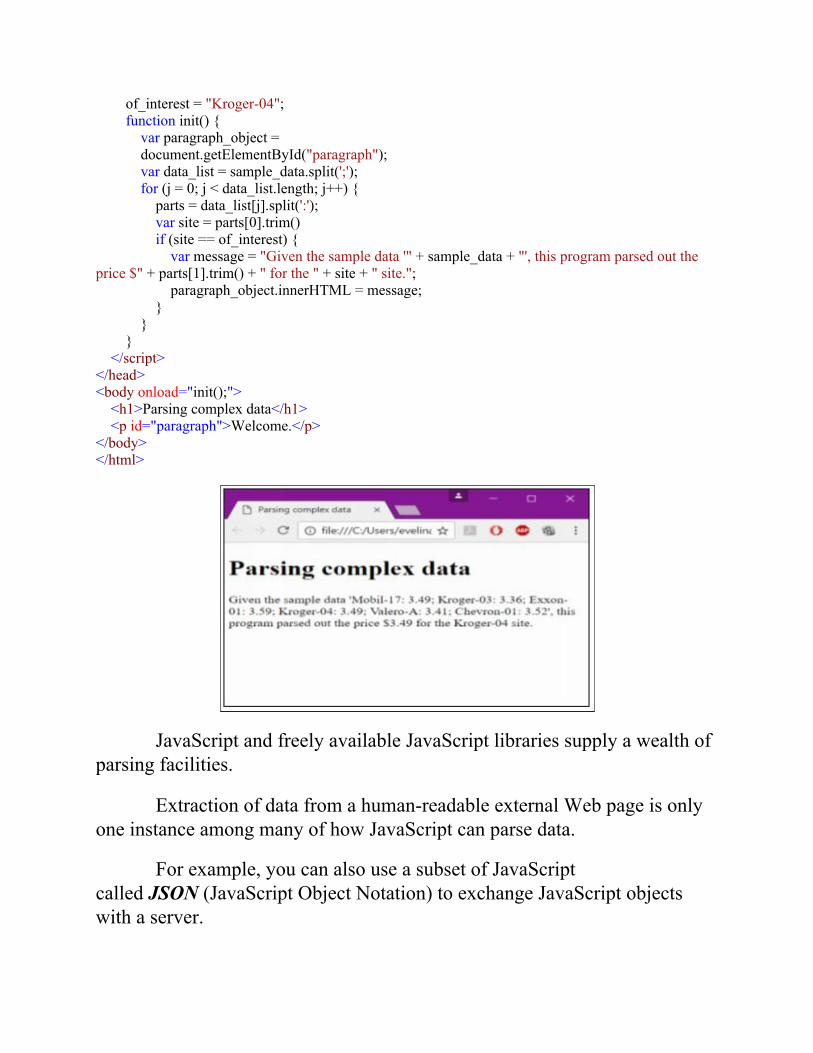
of_interest = "Kroger-04"; function init() { var paragraph_object = document.getElementById("paragraph"); var data_list = sample_data.split(';'); for (j = 0; j < data_list.length; j++) { parts = data_list[j].split(':'); var site = parts[0].trim() if (site == of_interest) { var message = "Given the sample data '" + sample_data + "', this program parsed out theprice $" + parts[1].trim() + " for the " + site + " site."; paragraph_object.innerHTML = message; } } } </script></head><body onload="init();"> <h1>Parsing complex data</h1> <p id="paragraph">Welcome.</p></body></html>
JavaScript and freely available JavaScript libraries supply a wealth ofparsing facilities.
Extraction of data from a human-readable external Web page is onlyone instance among many of how JavaScript can parse data.
For example, you can also use a subset of JavaScriptcalled JSON (JavaScript Object Notation) to exchange JavaScript objectswith a server.

It features two APIs: JSON.parse and JSON.stringify. When data isreceived from a server, the .parse API is used to read the data. When data issent by a client, the .stringify API is used to turn data into text strings.
JSON is built on two structures:- A collection of name/value pairs. In various languages, this is realized as anobject, record, struct, dictionary, hash table, keyed list, or associative array.- An ordered list of values. In most languages, this is realized as an array,vector, list, or sequence.
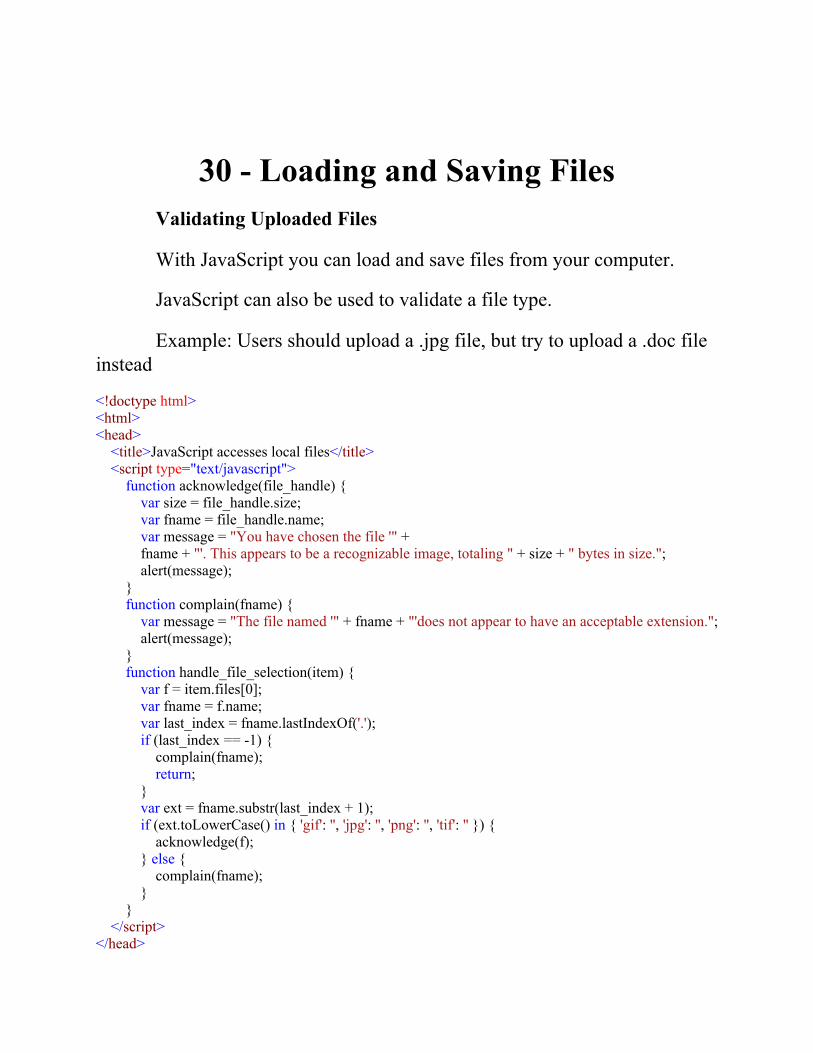
30 - Loading and Saving FilesValidating Uploaded Files
With JavaScript you can load and save files from your computer.
JavaScript can also be used to validate a file type.
Example: Users should upload a .jpg file, but try to upload a .doc fileinstead
<!doctype html><html><head> <title>JavaScript accesses local files</title> <script type="text/javascript"> function acknowledge(file_handle) { var size = file_handle.size; var fname = file_handle.name; var message = "You have chosen the file '" + fname + "'. This appears to be a recognizable image, totaling " + size + " bytes in size."; alert(message); } function complain(fname) { var message = "The file named '" + fname + "'does not appear to have an acceptable extension."; alert(message); } function handle_file_selection(item) { var f = item.files[0]; var fname = f.name; var last_index = fname.lastIndexOf('.'); if (last_index == -1) { complain(fname); return; } var ext = fname.substr(last_index + 1); if (ext.toLowerCase() in { 'gif': '', 'jpg': '', 'png': '', 'tif': '' }) { acknowledge(f); } else { complain(fname); } } </script></head>
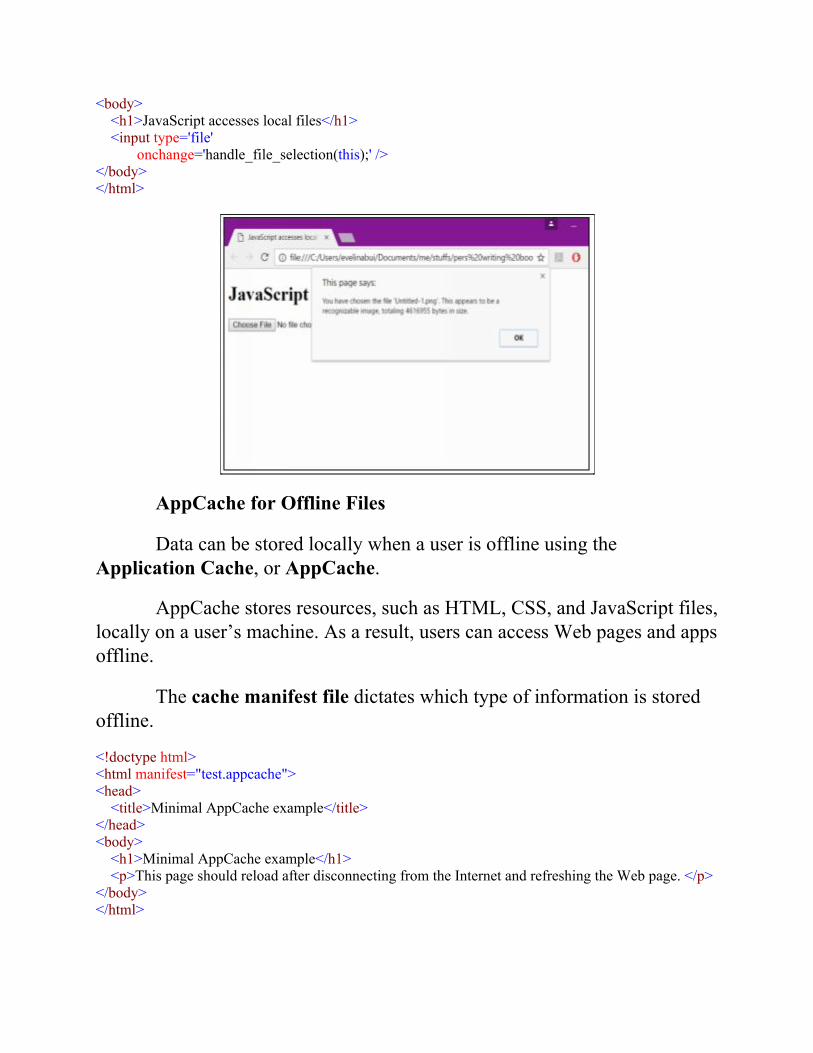
<body> <h1>JavaScript accesses local files</h1> <input type='file' onchange='handle_file_selection(this);' /></body></html>
AppCache for Offline Files
Data can be stored locally when a user is offline using theApplication Cache, or AppCache.
AppCache stores resources, such as HTML, CSS, and JavaScript files,locally on a user’s machine. As a result, users can access Web pages and appsoffline.
The cache manifest file dictates which type of information is storedoffline.
<!doctype html><html manifest="test.appcache"><head> <title>Minimal AppCache example</title></head><body> <h1>Minimal AppCache example</h1> <p>This page should reload after disconnecting from the Internet and refreshing the Web page. </p></body></html>
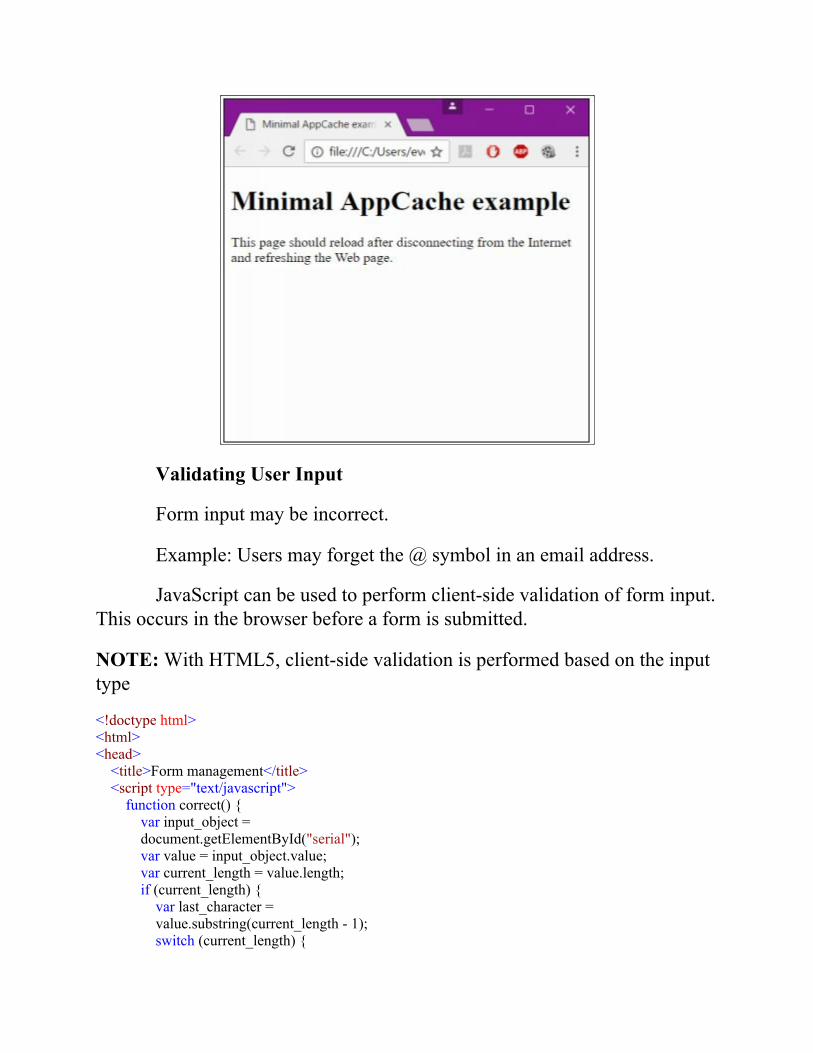
Validating User Input
Form input may be incorrect.
Example: Users may forget the @ symbol in an email address.
JavaScript can be used to perform client-side validation of form input.This occurs in the browser before a form is submitted.
NOTE: With HTML5, client-side validation is performed based on the inputtype
<!doctype html><html><head> <title>Form management</title> <script type="text/javascript"> function correct() { var input_object = document.getElementById("serial"); var value = input_object.value; var current_length = value.length; if (current_length) { var last_character = value.substring(current_length - 1); switch (current_length) {
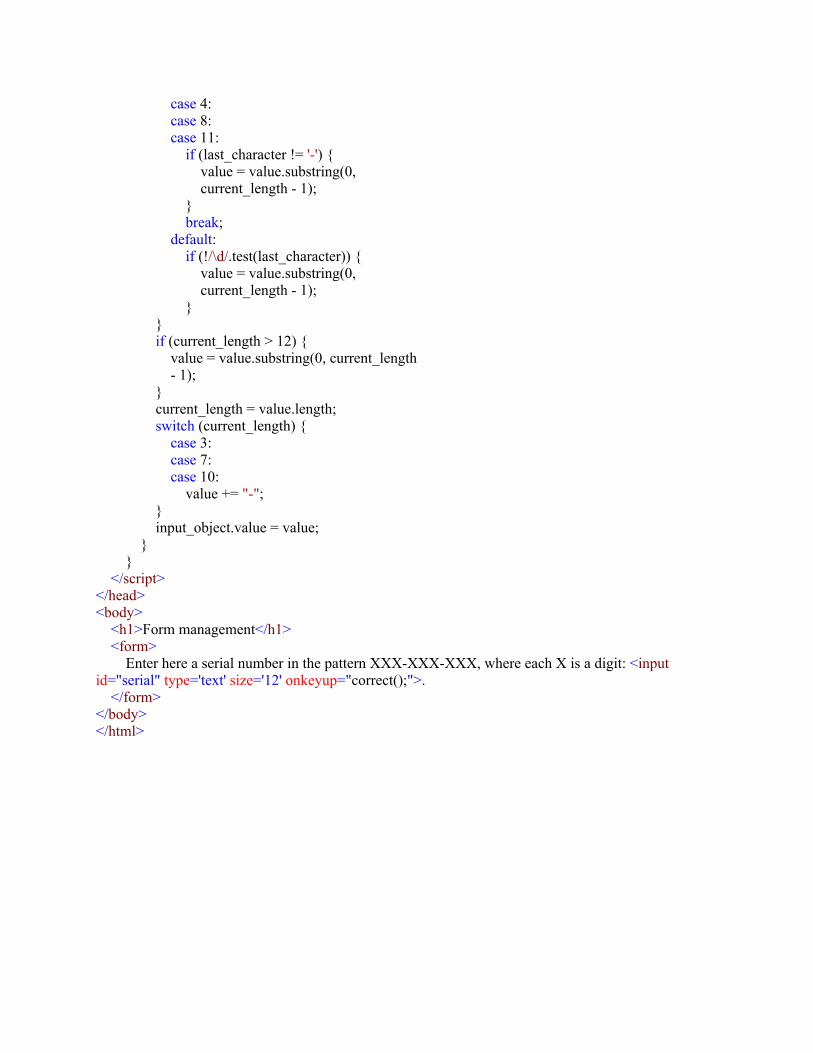
case 4: case 8: case 11: if (last_character != '-') { value = value.substring(0, current_length - 1); } break; default: if (!/\d/.test(last_character)) { value = value.substring(0, current_length - 1); } } if (current_length > 12) { value = value.substring(0, current_length - 1); } current_length = value.length; switch (current_length) { case 3: case 7: case 10: value += "-"; } input_object.value = value; } } </script></head><body> <h1>Form management</h1> <form> Enter here a serial number in the pattern XXX-XXX-XXX, where each X is a digit: <inputid="serial" type='text' size='12' onkeyup="correct();">. </form></body></html>
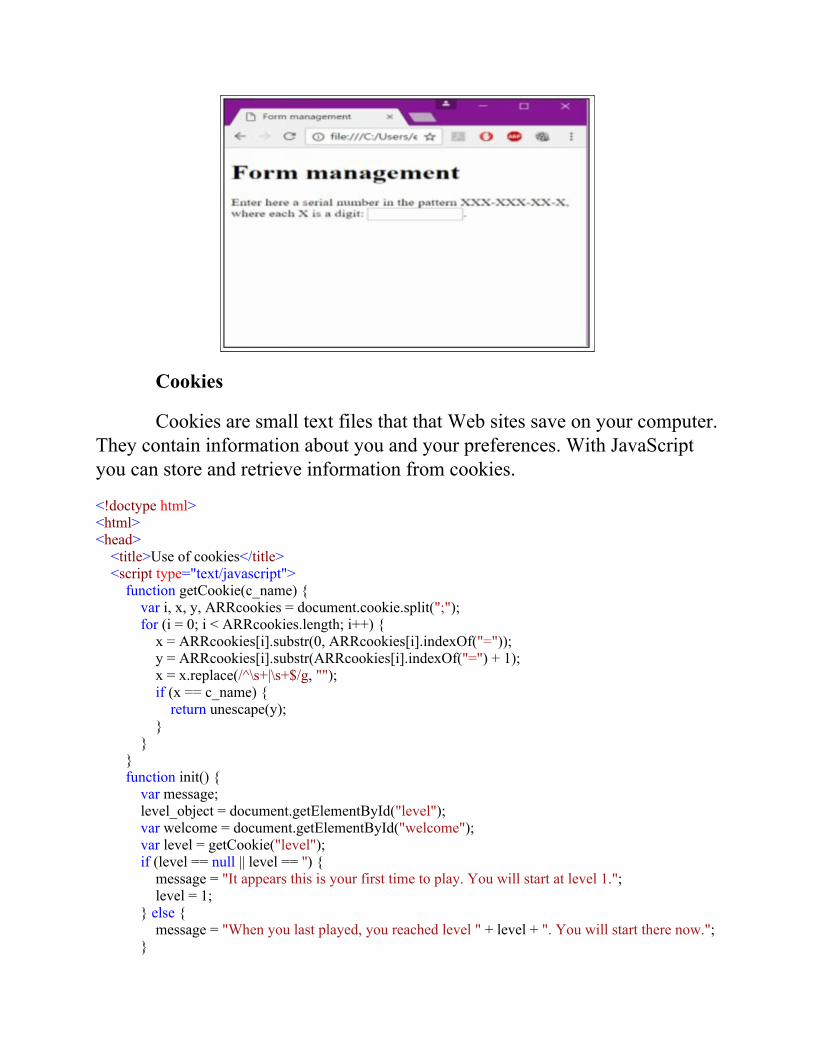
Cookies
Cookies are small text files that that Web sites save on your computer.They contain information about you and your preferences. With JavaScriptyou can store and retrieve information from cookies.
<!doctype html><html><head> <title>Use of cookies</title> <script type="text/javascript"> function getCookie(c_name) { var i, x, y, ARRcookies = document.cookie.split(";"); for (i = 0; i < ARRcookies.length; i++) { x = ARRcookies[i].substr(0, ARRcookies[i].indexOf("=")); y = ARRcookies[i].substr(ARRcookies[i].indexOf("=") + 1); x = x.replace(/^\s+|\s+$/g, ""); if (x == c_name) { return unescape(y); } } } function init() { var message; level_object = document.getElementById("level"); var welcome = document.getElementById("welcome"); var level = getCookie("level"); if (level == null || level == '') { message = "It appears this is your first time to play. You will start at level 1."; level = 1; } else { message = "When you last played, you reached level " + level + ". You will start there now."; }
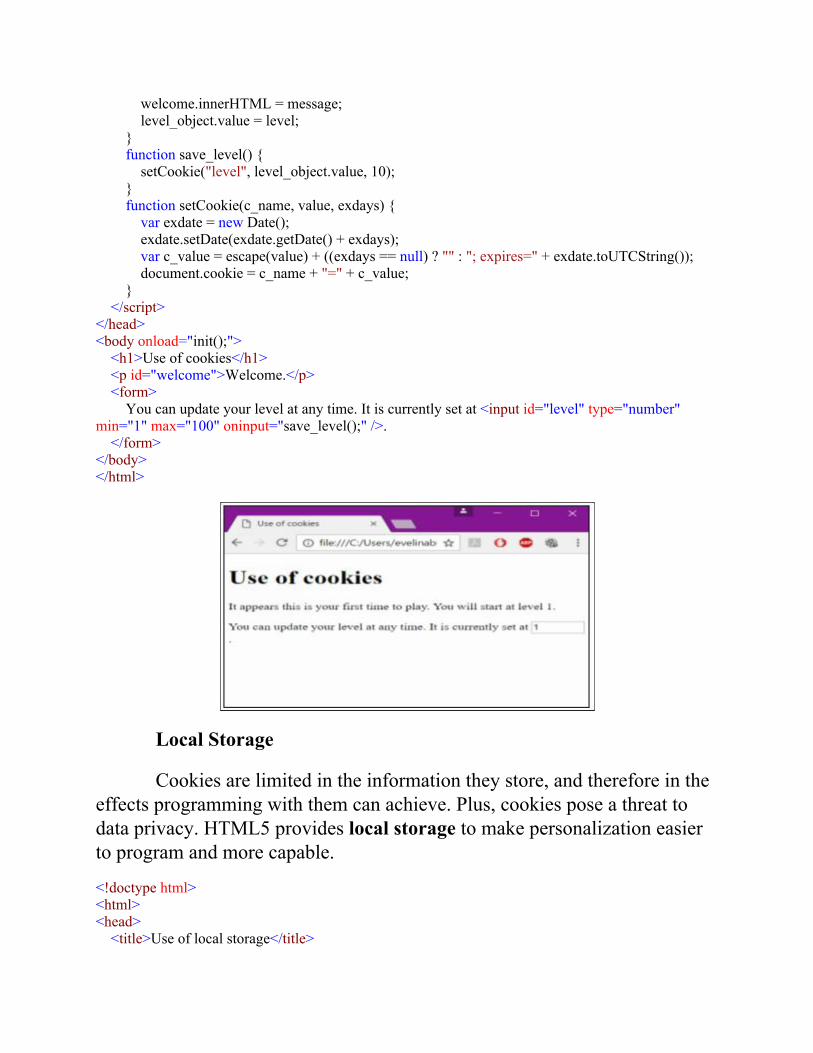
welcome.innerHTML = message; level_object.value = level; } function save_level() { setCookie("level", level_object.value, 10); } function setCookie(c_name, value, exdays) { var exdate = new Date(); exdate.setDate(exdate.getDate() + exdays); var c_value = escape(value) + ((exdays == null) ? "" : "; expires=" + exdate.toUTCString()); document.cookie = c_name + "=" + c_value; } </script></head><body onload="init();"> <h1>Use of cookies</h1> <p id="welcome">Welcome.</p> <form> You can update your level at any time. It is currently set at <input id="level" type="number"min="1" max="100" oninput="save_level();" />. </form></body></html>
Local Storage
Cookies are limited in the information they store, and therefore in theeffects programming with them can achieve. Plus, cookies pose a threat todata privacy. HTML5 provides local storage to make personalization easierto program and more capable.
<!doctype html><html><head> <title>Use of local storage</title>

<script type="text/javascript"> function init() { var message; level_object = document.getElementById("level"); var welcome = document.getElementById("welcome"); var level = localStorage.level; if (level == null || level == '') { message = "It appears this is your first time to play. You will start at level 1."; level = 1; } else { message = "When you last played, you reached level " + level + ". You will start there now."; } welcome.innerHTML = message; level_object.value = level; } function save_level() { localStorage.level = level_object.value; } </script></head><body onload="init();"> <h1>Use of local storage</h1> <p id="welcome">Welcome.</p> <form> You can update your level at any time. It is currently set at <input id="level" type="number"min="1" max="100" oninput="save_level();" />. </form></body></html>
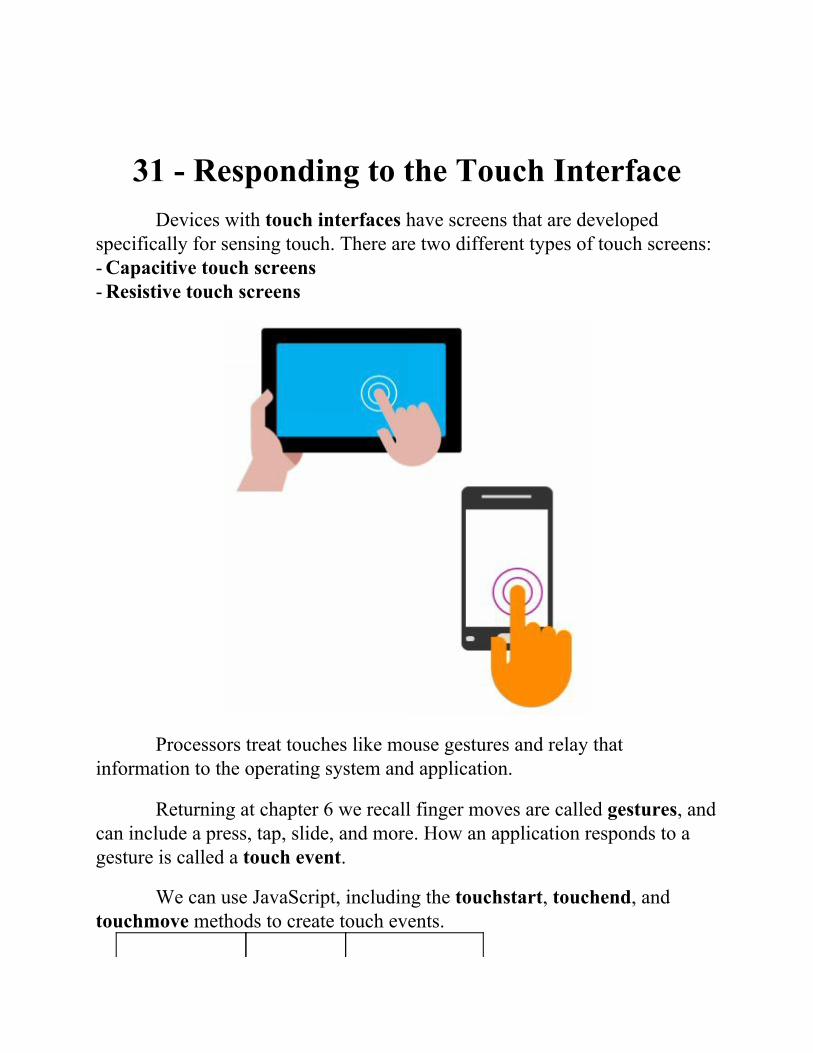
31 - Responding to the Touch InterfaceDevices with touch interfaces have screens that are developed
specifically for sensing touch. There are two different types of touch screens:- Capacitive touch screens- Resistive touch screens
Processors treat touches like mouse gestures and relay thatinformation to the operating system and application.
Returning at chapter 6 we recall finger moves are called gestures, andcan include a press, tap, slide, and more. How an application responds to agesture is called a touch event.
We can use JavaScript, including the touchstart, touchend, andtouchmove methods to create touch events.
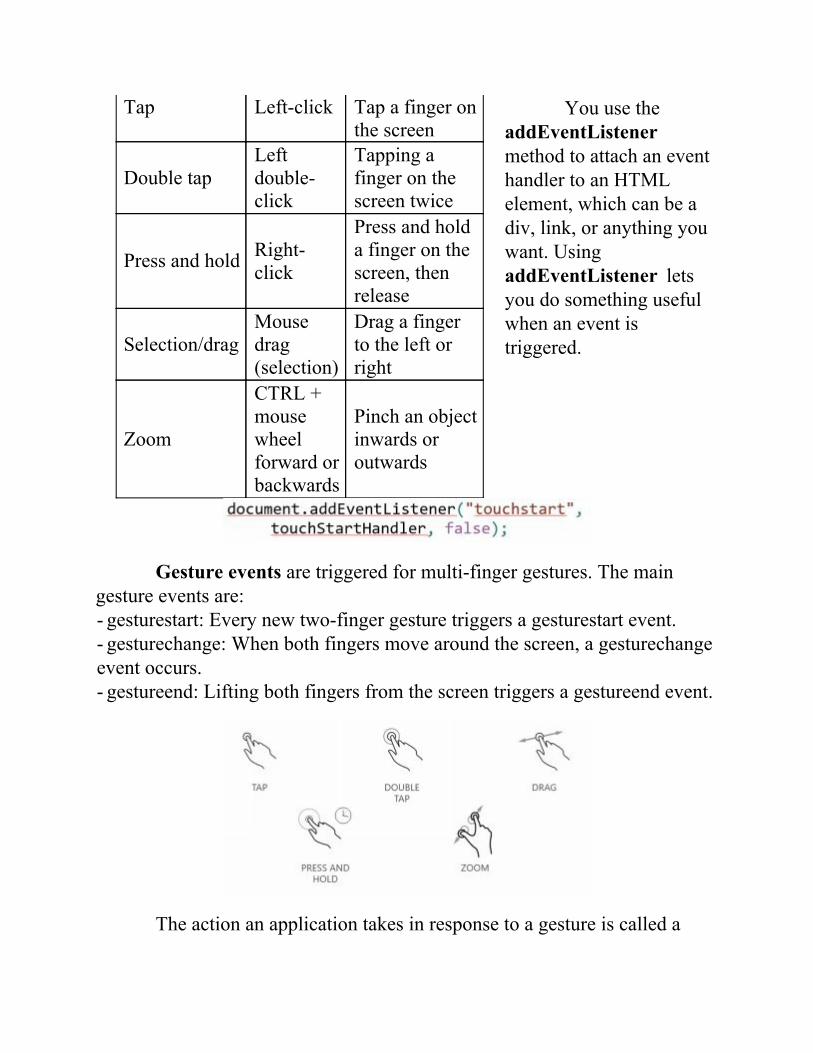
Tap Left-click Tap a finger onthe screen
Double tapLeftdouble-click
Tapping afinger on thescreen twice
Press and hold Right-click
Press and holda finger on thescreen, thenrelease
Selection/dragMousedrag(selection)
Drag a fingerto the left orright
Zoom
CTRL +mousewheelforward orbackwards
Pinch an objectinwards oroutwards
You use theaddEventListenermethod to attach an eventhandler to an HTMLelement, which can be adiv, link, or anything youwant. UsingaddEventListener letsyou do something usefulwhen an event istriggered.
Gesture events are triggered for multi-finger gestures. The maingesture events are:- gesturestart: Every new two-finger gesture triggers a gesturestart event.- gesturechange: When both fingers move around the screen, a gesturechangeevent occurs.- gestureend: Lifting both fingers from the screen triggers a gestureend event.
The action an application takes in response to a gesture is called a
touch event. You can use JavaScript to create touch events in touch-enabledapps. Developers can draw from a large set of input application programminginterfaces (APIs) that work with touch screen data.
The primary JavaScript touch events are:• touchstart: Every new finger touch triggers a touchstart event.• touchmove: When a finger moves around the surface of the screen, atouchmove event occurs, which tracks the finger movement.• touchend: Lifting the finger from the screen triggers a touchend event.• touchcancel: The touchcancel event is triggered when the device launchesanother application.
In JavaScript, the touch object detects input from touch-enableddevices. You reference touch objects in the touchlist, which includes all ofthe points of contact with a touch screen.
A single tap has one entry in the touchlist, whereas a three-fingergesture would have a total of three entries. Touch objects are read-only andhave the following properties:- identifier: A unique identifier for the touch- target: The HTML element that the touch affected- clientx: Horizontal position, relative to browser window- clienty: Vertical position, relative to browser window- pagex: Horizontal position, relative to HTML document- pagex: Vertical position, relative to HTML document- screenx: Horizontal position, relative to the screen- screeny: Vertical position, relative to the screen- rotation: Indicates the amount of two-finger rotation that occurred. Thevalue of the rotation is in degrees; positive values are clockwise, and negativevalues are counterclockwise.
Each touch event includes three different touchlists:- touches: A list of all touch points currently in contact with the screen- targetTouches: A list of touch points currently in contact with the screenand whose touchstart event occurred within the same node (inside the sametarget element as the current target element)- changedTouches: A list of touch points that caused the current event to be
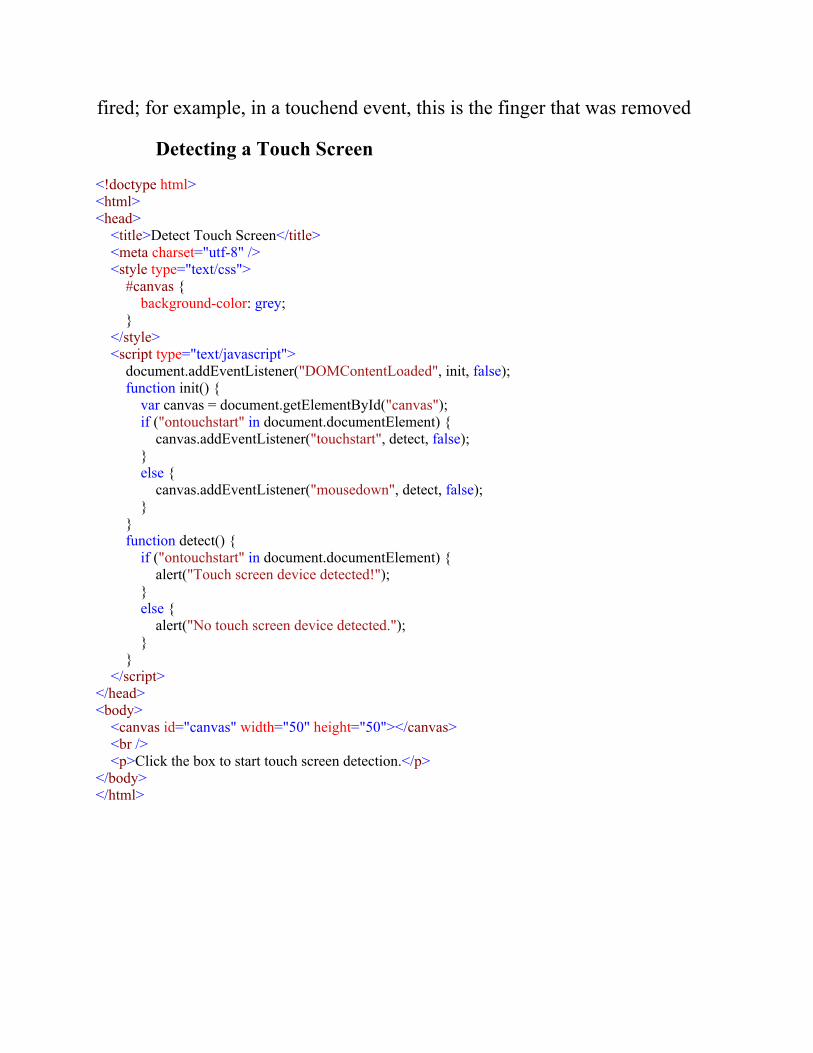
fired; for example, in a touchend event, this is the finger that was removed
Detecting a Touch Screen
<!doctype html><html><head> <title>Detect Touch Screen</title> <meta charset="utf-8" /> <style type="text/css"> #canvas { background-color: grey; } </style> <script type="text/javascript"> document.addEventListener("DOMContentLoaded", init, false); function init() { var canvas = document.getElementById("canvas"); if ("ontouchstart" in document.documentElement) { canvas.addEventListener("touchstart", detect, false); } else { canvas.addEventListener("mousedown", detect, false); } } function detect() { if ("ontouchstart" in document.documentElement) { alert("Touch screen device detected!"); } else { alert("No touch screen device detected."); } } </script></head><body> <canvas id="canvas" width="50" height="50"></canvas> <br /> <p>Click the box to start touch screen detection.</p></body></html>
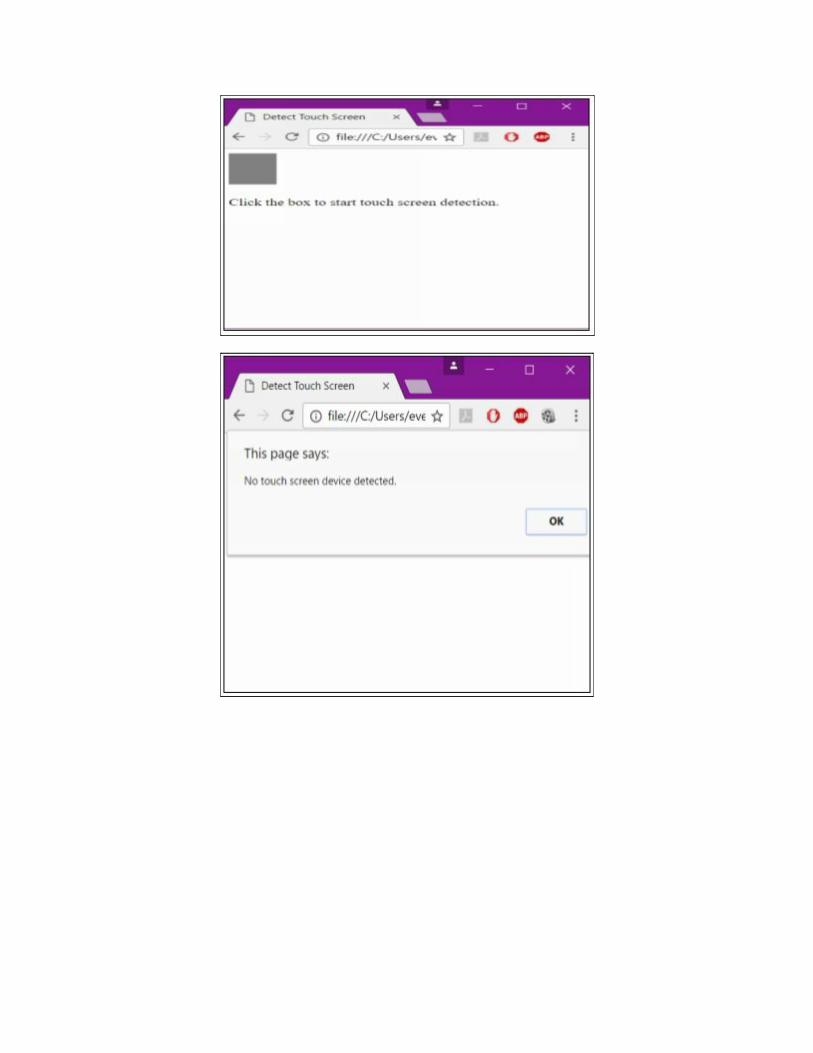
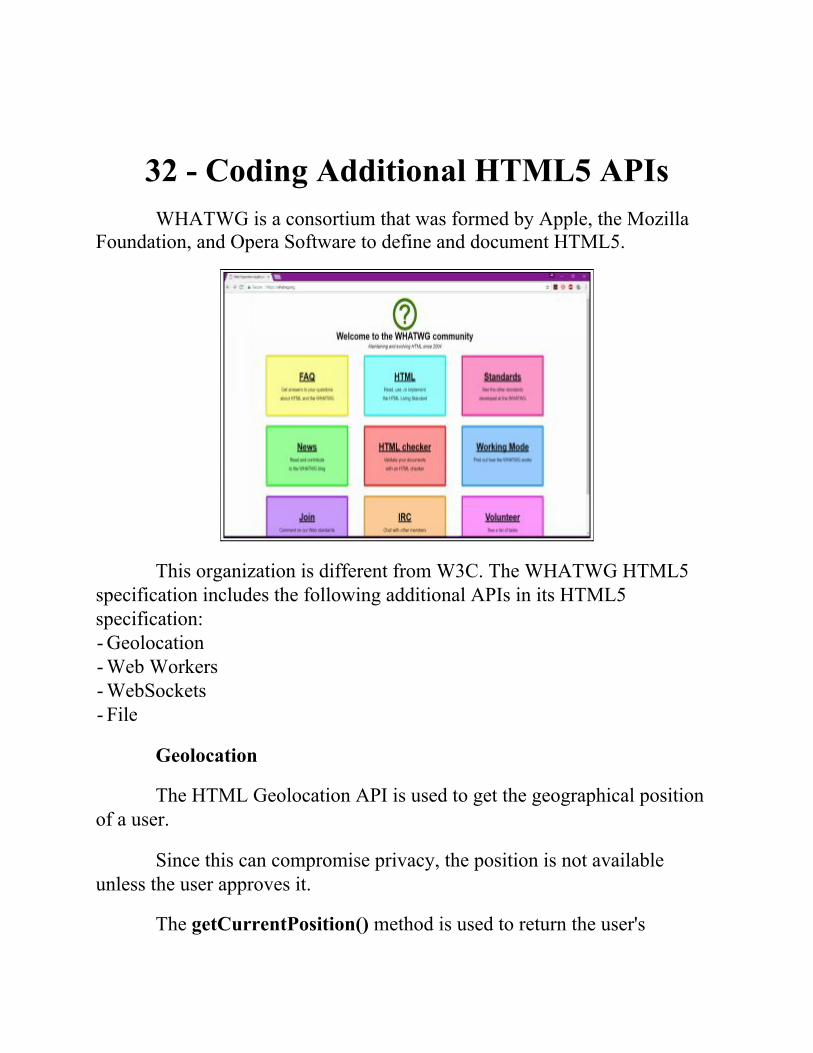
32 - Coding Additional HTML5 APIsWHATWG is a consortium that was formed by Apple, the Mozilla
Foundation, and Opera Software to define and document HTML5.
This organization is different from W3C. The WHATWG HTML5specification includes the following additional APIs in its HTML5specification:- Geolocation- Web Workers- WebSockets- File
Geolocation
The HTML Geolocation API is used to get the geographical positionof a user.
Since this can compromise privacy, the position is not availableunless the user approves it.
The getCurrentPosition() method is used to return the user's
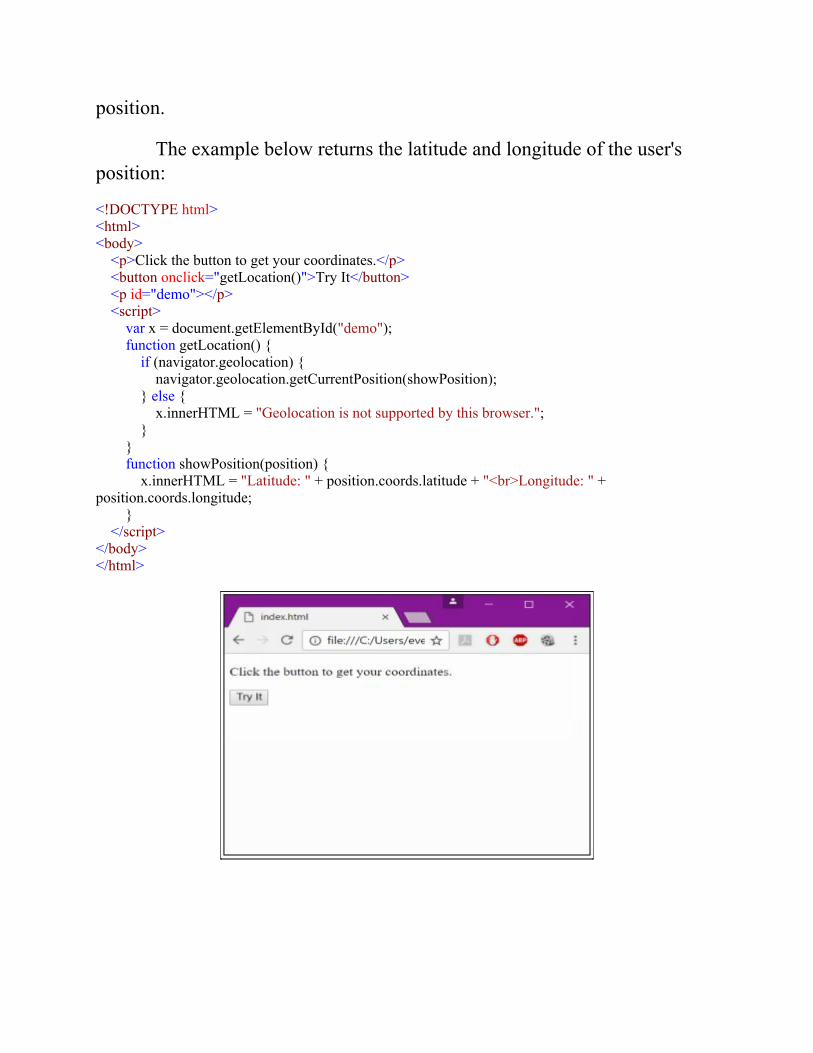
position.
The example below returns the latitude and longitude of the user'sposition:
<!DOCTYPE html><html><body> <p>Click the button to get your coordinates.</p> <button onclick="getLocation()">Try It</button> <p id="demo"></p> <script> var x = document.getElementById("demo"); function getLocation() { if (navigator.geolocation) { navigator.geolocation.getCurrentPosition(showPosition); } else { x.innerHTML = "Geolocation is not supported by this browser."; } } function showPosition(position) { x.innerHTML = "Latitude: " + position.coords.latitude + "<br>Longitude: " +position.coords.longitude; } </script></body></html>
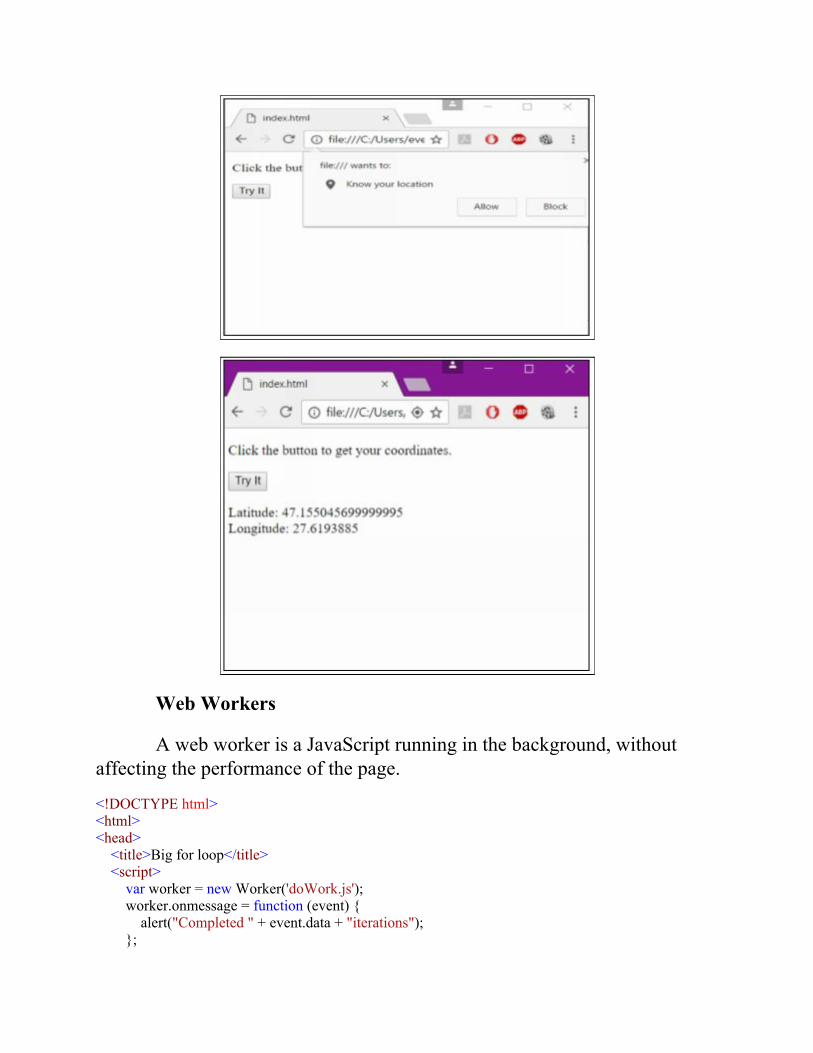
Web Workers
A web worker is a JavaScript running in the background, withoutaffecting the performance of the page.
<!DOCTYPE html><html><head> <title>Big for loop</title> <script> var worker = new Worker('doWork.js'); worker.onmessage = function (event) { alert("Completed " + event.data + "iterations"); };
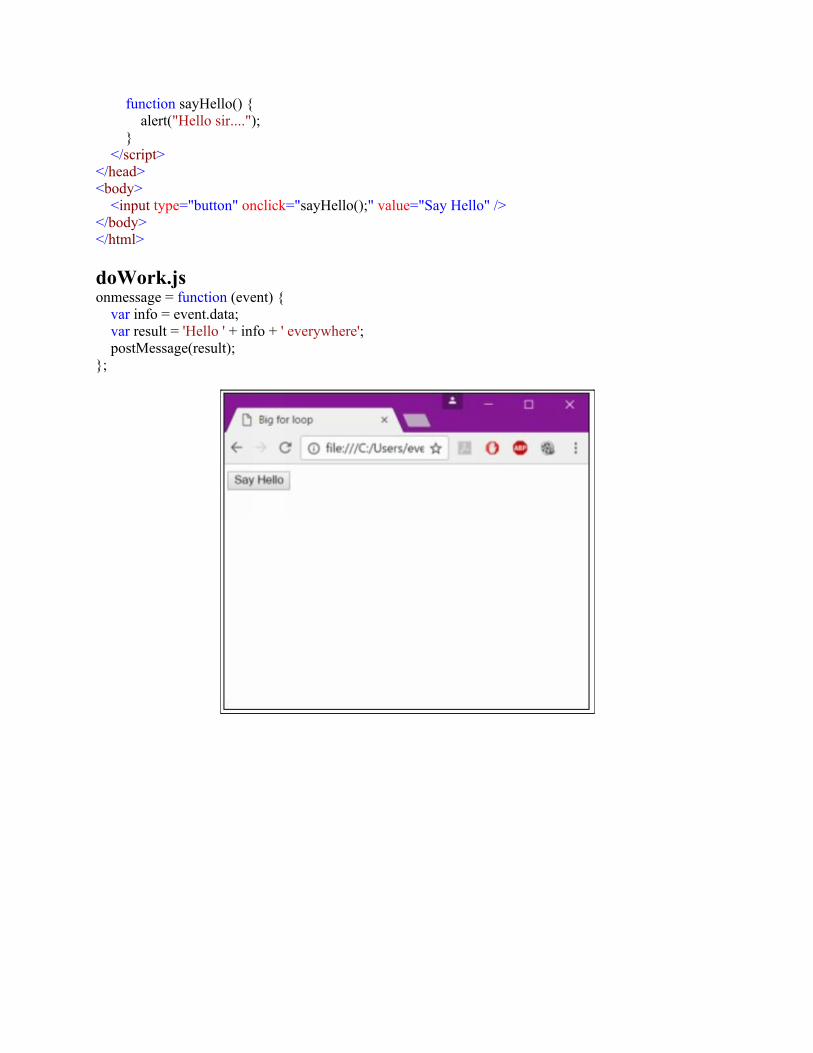
function sayHello() { alert("Hello sir...."); } </script></head><body> <input type="button" onclick="sayHello();" value="Say Hello" /></body></html>
doWork.jsonmessage = function (event) { var info = event.data; var result = 'Hello ' + info + ' everywhere'; postMessage(result);};
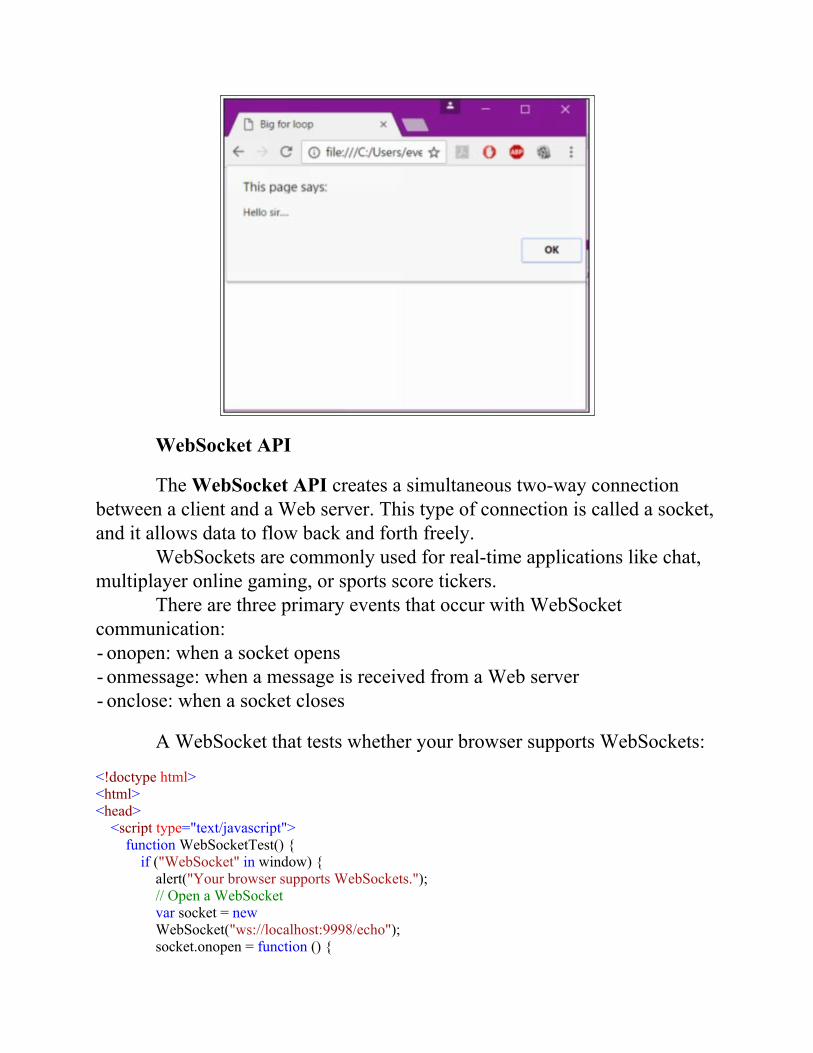
WebSocket API
The WebSocket API creates a simultaneous two-way connectionbetween a client and a Web server. This type of connection is called a socket,and it allows data to flow back and forth freely.
WebSockets are commonly used for real-time applications like chat,multiplayer online gaming, or sports score tickers.
There are three primary events that occur with WebSocketcommunication:- onopen: when a socket opens- onmessage: when a message is received from a Web server- onclose: when a socket closes
A WebSocket that tests whether your browser supports WebSockets:
<!doctype html><html><head> <script type="text/javascript"> function WebSocketTest() { if ("WebSocket" in window) { alert("Your browser supports WebSockets."); // Open a WebSocket var socket = new WebSocket("ws://localhost:9998/echo"); socket.onopen = function () {
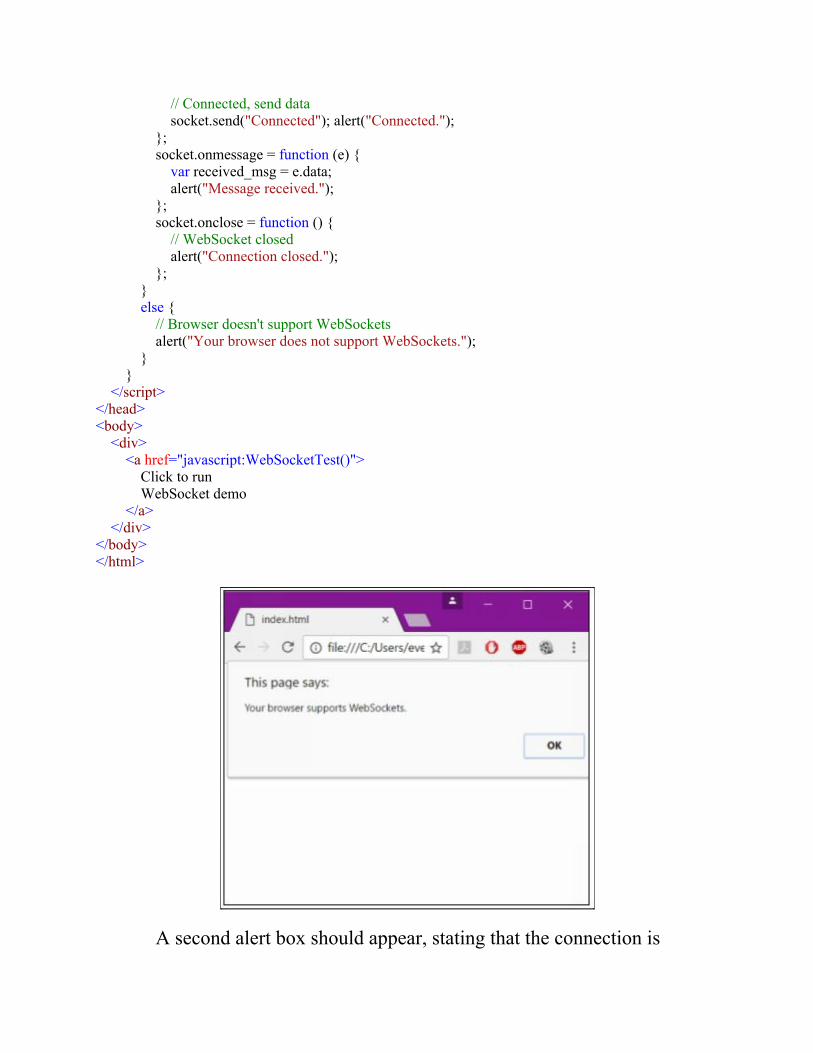
// Connected, send data socket.send("Connected"); alert("Connected."); }; socket.onmessage = function (e) { var received_msg = e.data; alert("Message received."); }; socket.onclose = function () { // WebSocket closed alert("Connection closed."); }; } else { // Browser doesn't support WebSockets alert("Your browser does not support WebSockets."); } } </script></head><body> <div> <a href="javascript:WebSocketTest()"> Click to run WebSocket demo </a> </div></body></html>
A second alert box should appear, stating that the connection is
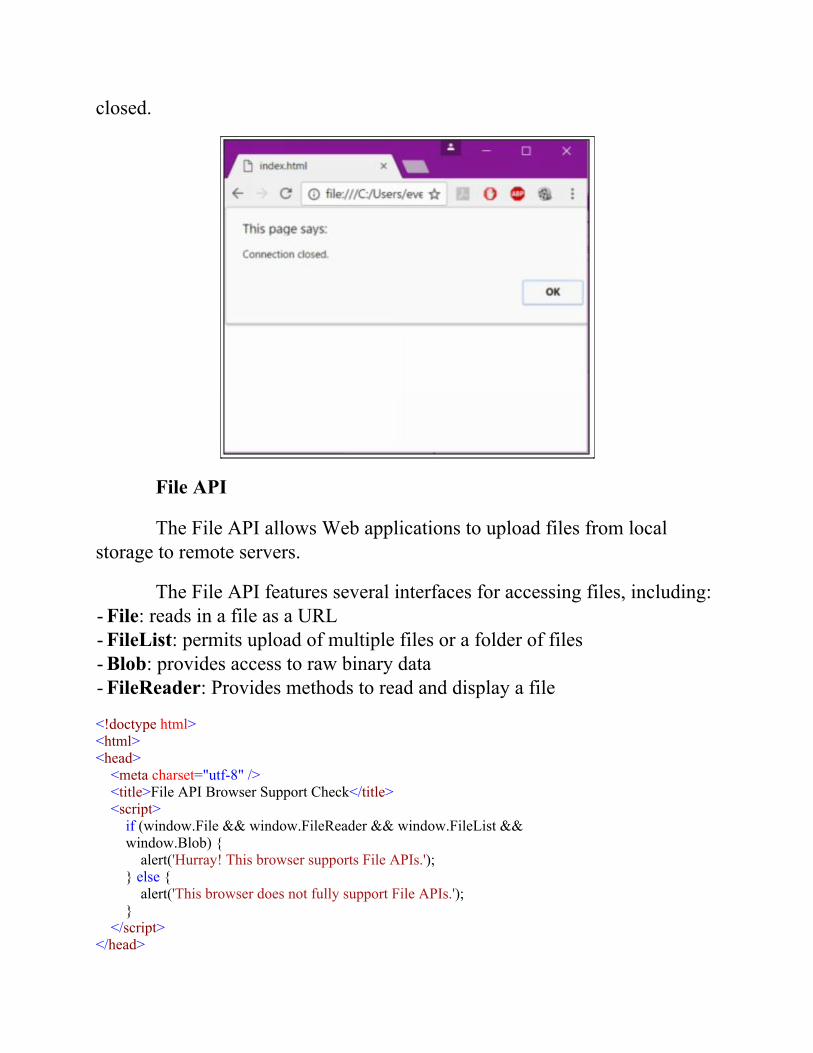
closed.
File API
The File API allows Web applications to upload files from localstorage to remote servers.
The File API features several interfaces for accessing files, including:- File: reads in a file as a URL- FileList: permits upload of multiple files or a folder of files- Blob: provides access to raw binary data- FileReader: Provides methods to read and display a file
<!doctype html><html><head> <meta charset="utf-8" /> <title>File API Browser Support Check</title> <script> if (window.File && window.FileReader && window.FileList && window.Blob) { alert('Hurray! This browser supports File APIs.'); } else { alert('This browser does not fully support File APIs.'); } </script></head>
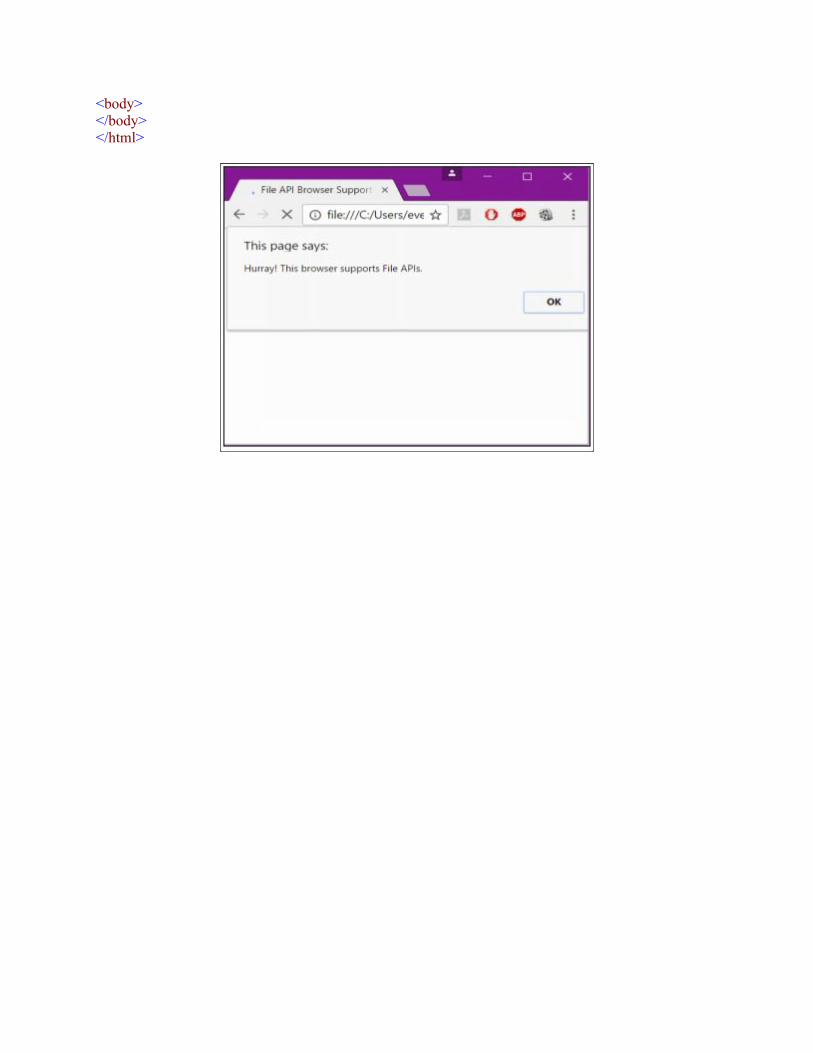
<body></body></html>
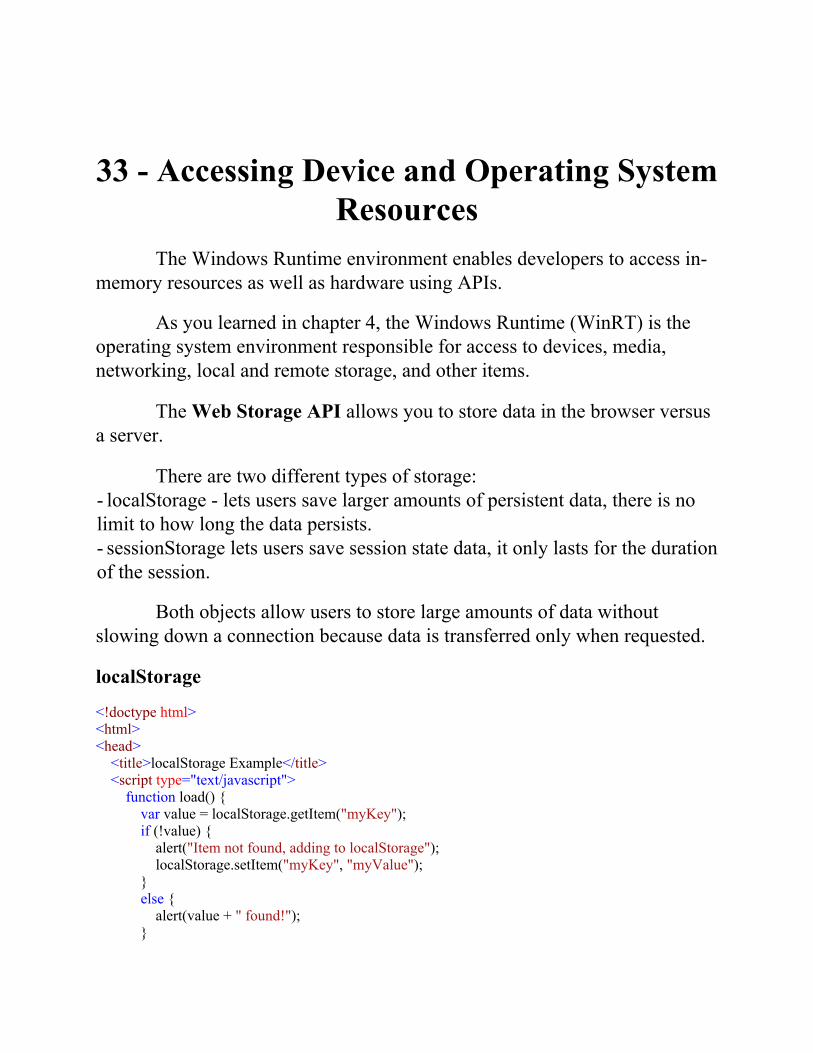
33 - Accessing Device and Operating SystemResources
The Windows Runtime environment enables developers to access in-memory resources as well as hardware using APIs.
As you learned in chapter 4, the Windows Runtime (WinRT) is theoperating system environment responsible for access to devices, media,networking, local and remote storage, and other items.
The Web Storage API allows you to store data in the browser versusa server.
There are two different types of storage:- localStorage - lets users save larger amounts of persistent data, there is nolimit to how long the data persists.- sessionStorage lets users save session state data, it only lasts for the durationof the session.
Both objects allow users to store large amounts of data withoutslowing down a connection because data is transferred only when requested.
localStorage
<!doctype html><html><head> <title>localStorage Example</title> <script type="text/javascript"> function load() { var value = localStorage.getItem("myKey"); if (!value) { alert("Item not found, adding to localStorage"); localStorage.setItem("myKey", "myValue"); } else { alert(value + " found!"); }
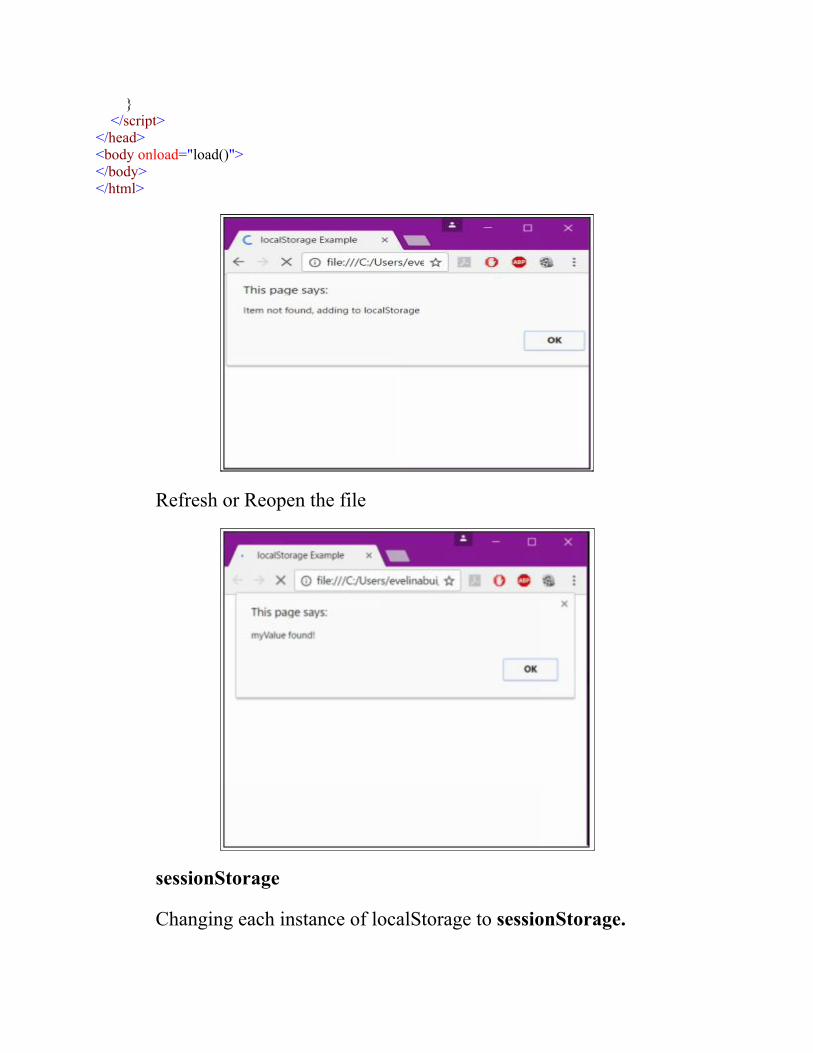
} </script></head><body onload="load()"></body></html>
Refresh or Reopen the file
sessionStorage
Changing each instance of localStorage to sessionStorage.
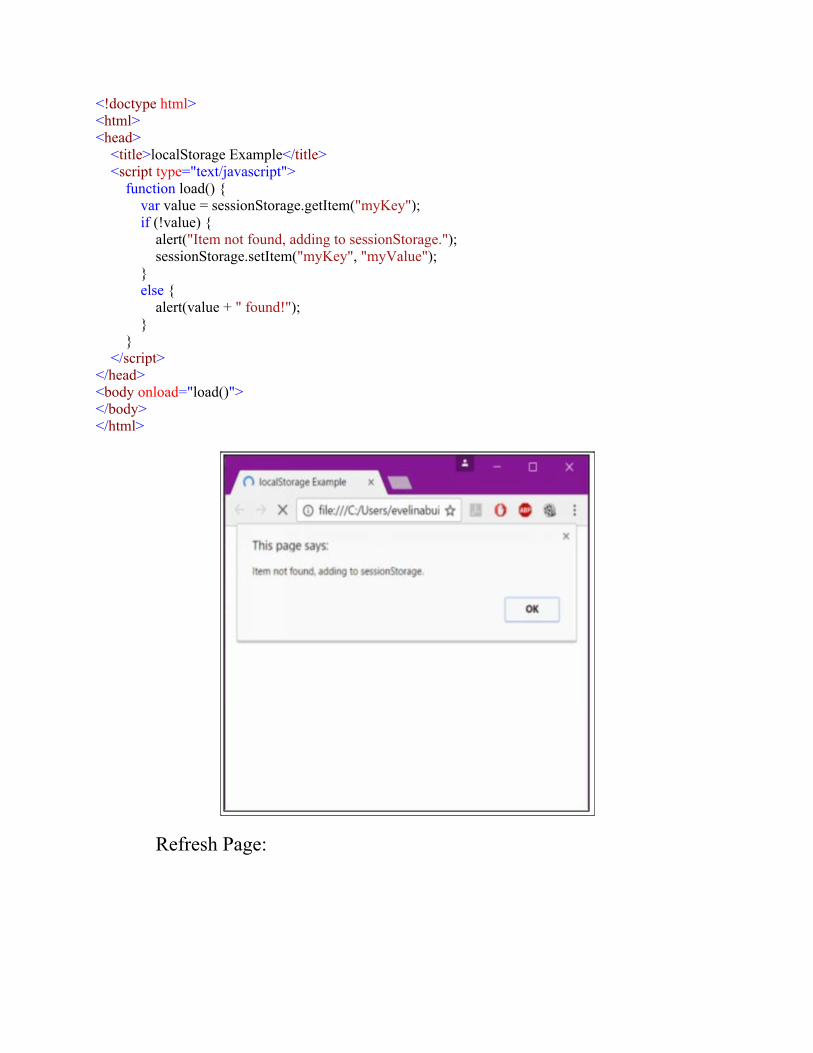
<!doctype html><html><head> <title>localStorage Example</title> <script type="text/javascript"> function load() { var value = sessionStorage.getItem("myKey"); if (!value) { alert("Item not found, adding to sessionStorage."); sessionStorage.setItem("myKey", "myValue"); } else { alert(value + " found!"); } } </script></head><body onload="load()"></body></html>
Refresh Page:
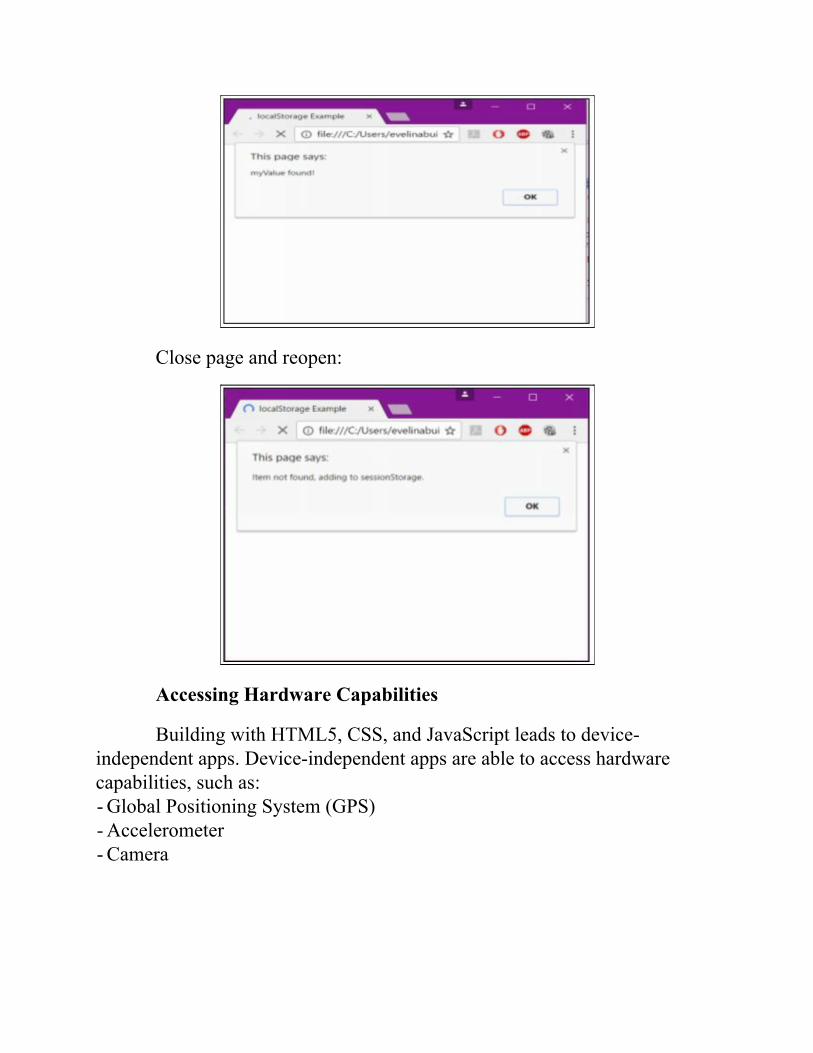
Close page and reopen:
Accessing Hardware Capabilities
Building with HTML5, CSS, and JavaScript leads to device-independent apps. Device-independent apps are able to access hardwarecapabilities, such as:- Global Positioning System (GPS)- Accelerometer- Camera
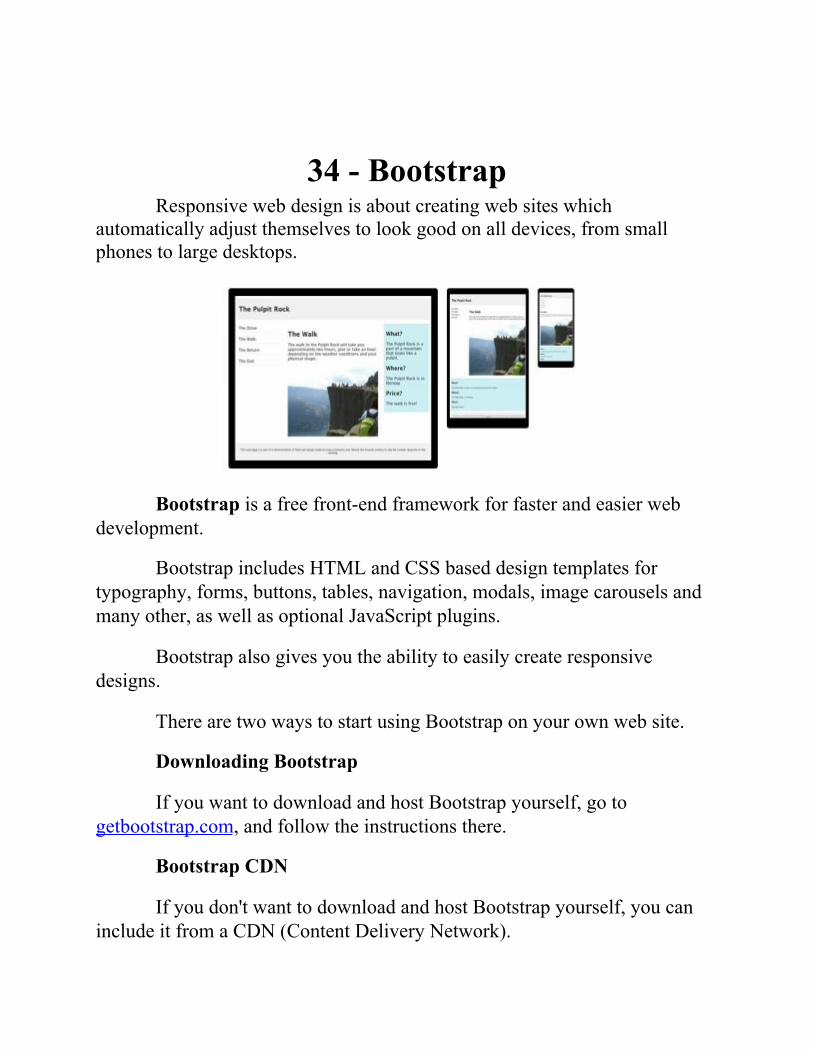
34 - BootstrapResponsive web design is about creating web sites which
automatically adjust themselves to look good on all devices, from smallphones to large desktops.
Bootstrap is a free front-end framework for faster and easier webdevelopment.
Bootstrap includes HTML and CSS based design templates fortypography, forms, buttons, tables, navigation, modals, image carousels andmany other, as well as optional JavaScript plugins.
Bootstrap also gives you the ability to easily create responsivedesigns.
There are two ways to start using Bootstrap on your own web site.
Downloading Bootstrap
If you want to download and host Bootstrap yourself, go togetbootstrap.com, and follow the instructions there.
Bootstrap CDN
If you don't want to download and host Bootstrap yourself, you caninclude it from a CDN (Content Delivery Network).
MaxCDN provides CDN support for Bootstrap's CSS and JavaScript.You must also include jQuery.
<!-- Latest compiled and minified CSS --> <link rel="stylesheet"href="https://maxcdn.bootstrapcdn.com/bootstrap/3.3.7/css/bootstrap.min.css"> <!-- jQuery library --> <script src="https://ajax.googleapis.com/ajax/libs/jquery/3.2.1/jquery.min.js"></script> <!-- Latest compiled JavaScript --> <script src="https://maxcdn.bootstrapcdn.com/bootstrap/3.3.7/js/bootstrap.min.js"></script>
Bootstrap 3 is designed to be responsive to mobile devices. Mobile-first styles are part of the core framework.
To ensure proper rendering and touch zooming, add the following<meta> tag inside the <head> element:
<meta name="viewport" content="width=device-width, initial-scale=1">
The width=device-width part sets the width of the page to follow thescreen-width of the device (which will vary depending on the device).
The initial-scale=1 part sets the initial zoom level when the page isfirst loaded by the browser.
Bootstrap also requires a containing element to wrap site contents.
The .container class provides a responsive fixed width container
The .container-fluid class provides a full width container, spanningthe entire width of the viewport
In the next chapter, you will see how we will use bootstrap in ourapplication.
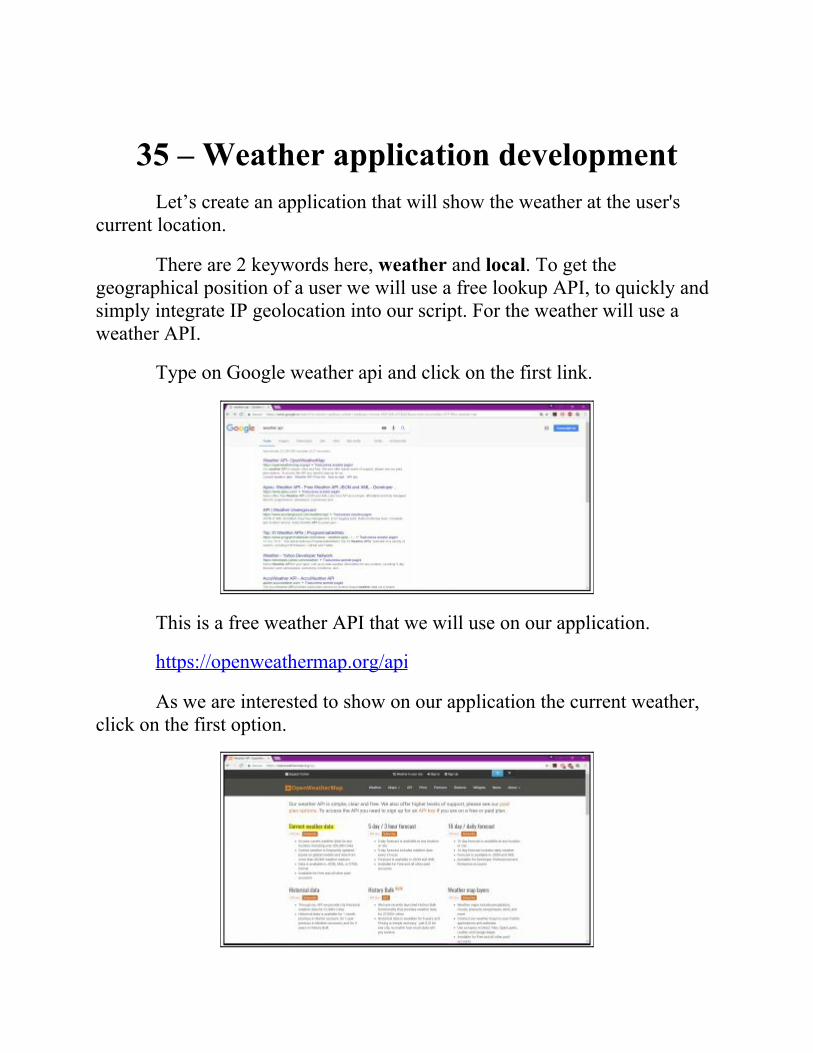
35 – Weather application developmentLet’s create an application that will show the weather at the user's
current location.
There are 2 keywords here, weather and local. To get thegeographical position of a user we will use a free lookup API, to quickly andsimply integrate IP geolocation into our script. For the weather will use aweather API.
Type on Google weather api and click on the first link.
This is a free weather API that we will use on our application.
https://openweathermap.org/api
As we are interested to show on our application the current weather,click on the first option.

On the right at the page we can see, that we can access the currentweather data of one location, after geographic coordinates.
If we open the example provided we can see the url and the argumentsthat will be read by the api server when we will call it.
As we see, we will need the latitude, longitude and another argumentcalled appid.
As we will use https://openweathermap.org/api for our weather app,in order to access the API freely we need to sign up for an API key, as theyare sayng on their documentation. This API key is in fact the appidargument.
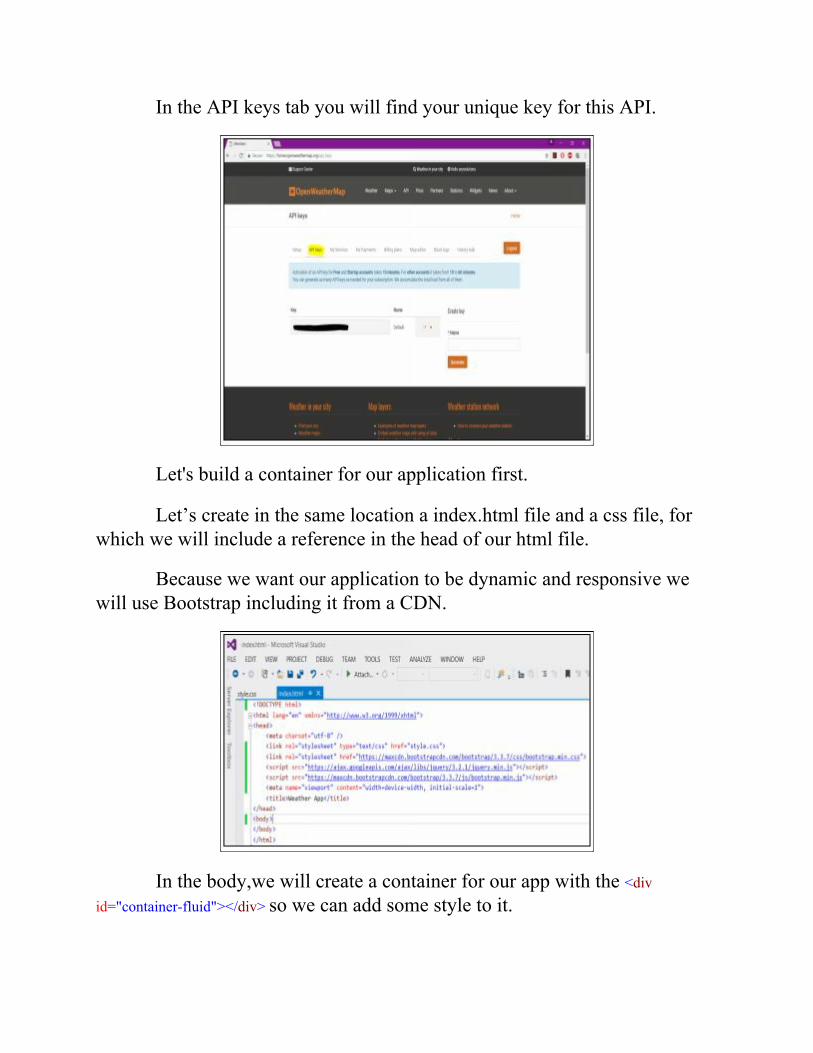
In the API keys tab you will find your unique key for this API.
Let's build a container for our application first.
Let’s create in the same location a index.html file and a css file, forwhich we will include a reference in the head of our html file.
Because we want our application to be dynamic and responsive wewill use Bootstrap including it from a CDN.
In the body,we will create a container for our app with the <divid="container-fluid"></div> so we can add some style to it.
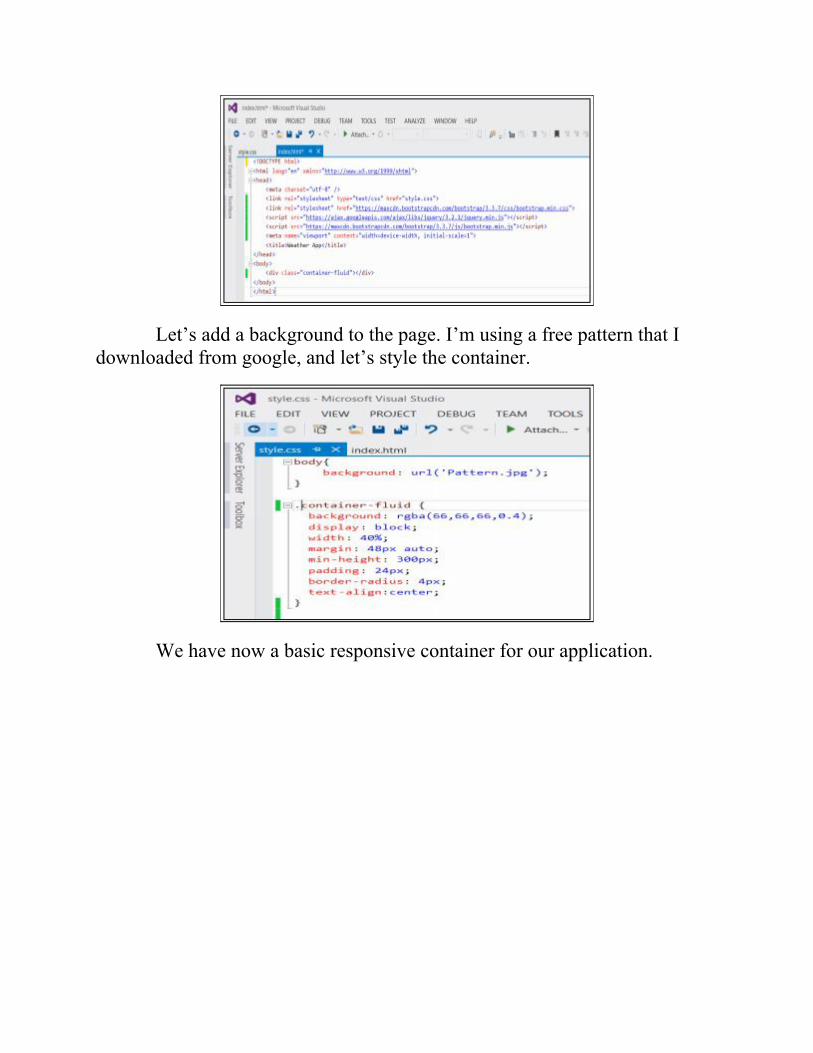
Let’s add a background to the page. I’m using a free pattern that Idownloaded from google, and let’s style the container.
We have now a basic responsive container for our application.
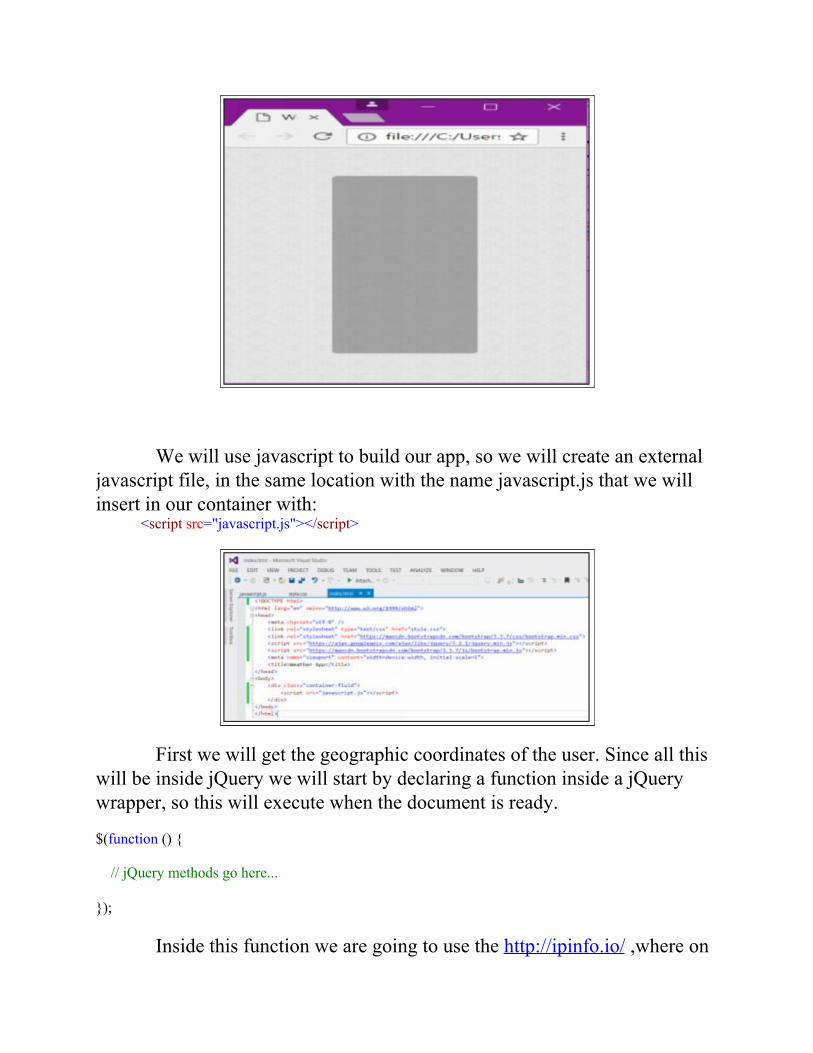
We will use javascript to build our app, so we will create an externaljavascript file, in the same location with the name javascript.js that we willinsert in our container with:
<script src="javascript.js"></script>
First we will get the geographic coordinates of the user. Since all thiswill be inside jQuery we will start by declaring a function inside a jQuerywrapper, so this will execute when the document is ready.
$(function () { // jQuery methods go here... });
Inside this function we are going to use the http://ipinfo.io/ ,where on

Developers tab, we have a section for jQuery, to get the user’s geolocation.
If we run our app in the browser, on the Inspect element console, wecan see the application is retrieving our location.
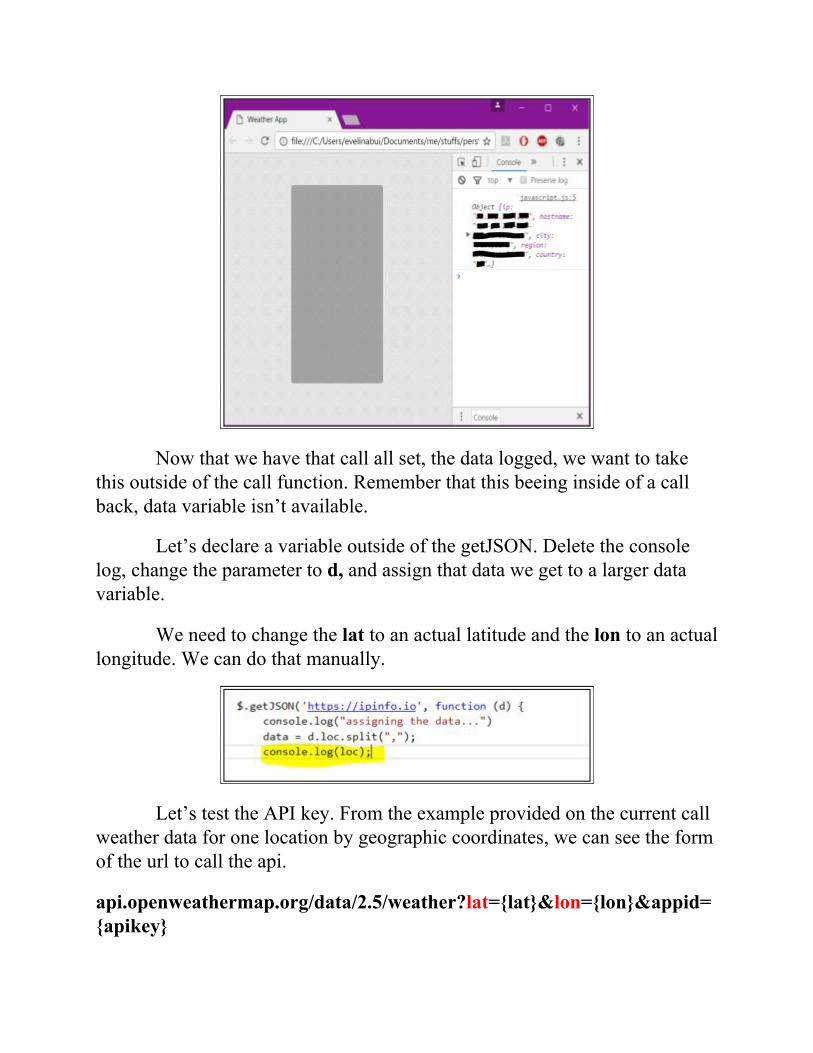
Now that we have that call all set, the data logged, we want to takethis outside of the call function. Remember that this beeing inside of a callback, data variable isn’t available.
Let’s declare a variable outside of the getJSON. Delete the consolelog, change the parameter to d, and assign that data we get to a larger datavariable.
We need to change the lat to an actual latitude and the lon to an actuallongitude. We can do that manually.
Let’s test the API key. From the example provided on the current callweather data for one location by geographic coordinates, we can see the formof the url to call the api.
api.openweathermap.org/data/2.5/weather?lat={lat}&lon={lon}&appid={apikey}
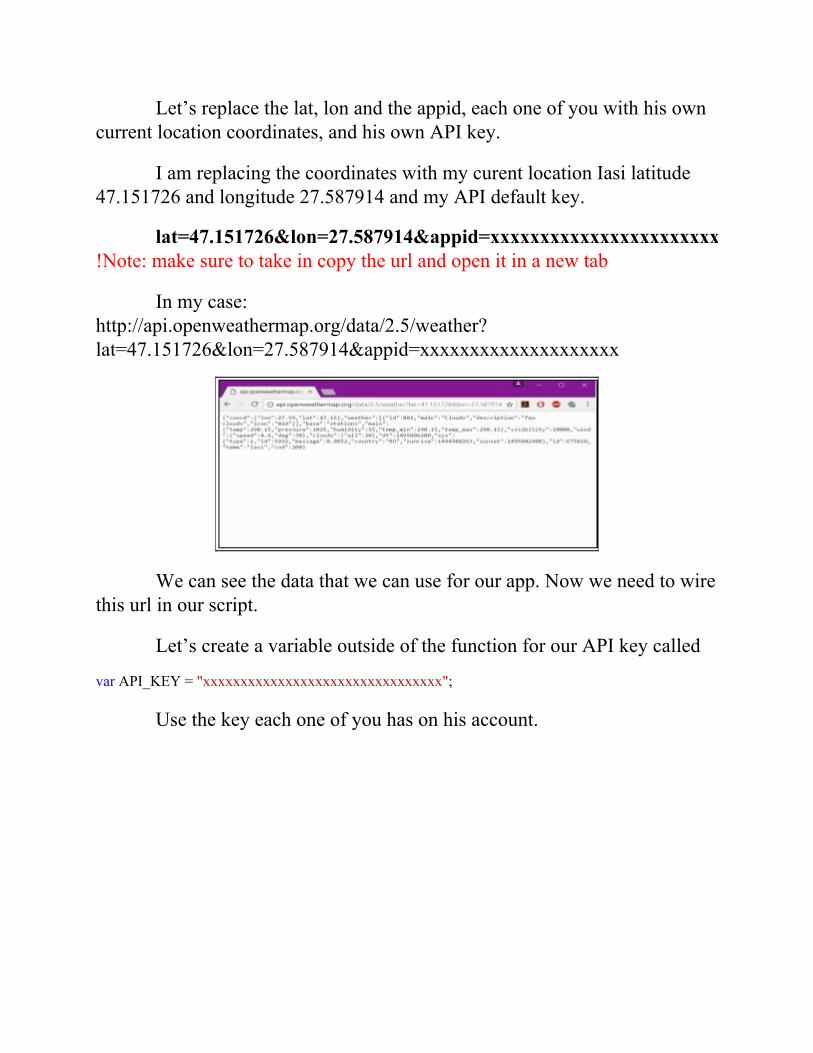
Let’s replace the lat, lon and the appid, each one of you with his owncurrent location coordinates, and his own API key.
I am replacing the coordinates with my curent location Iasi latitude 47.151726 and longitude 27.587914 and my API default key.
lat=47.151726&lon=27.587914&appid=xxxxxxxxxxxxxxxxxxxxxxxxx!Note: make sure to take in copy the url and open it in a new tab
In my case:http://api.openweathermap.org/data/2.5/weather?lat=47.151726&lon=27.587914&appid=xxxxxxxxxxxxxxxxxxxx
We can see the data that we can use for our app. Now we need to wirethis url in our script.
Let’s create a variable outside of the function for our API key called
var API_KEY = "xxxxxxxxxxxxxxxxxxxxxxxxxxxxxxxx";
Use the key each one of you has on his account.
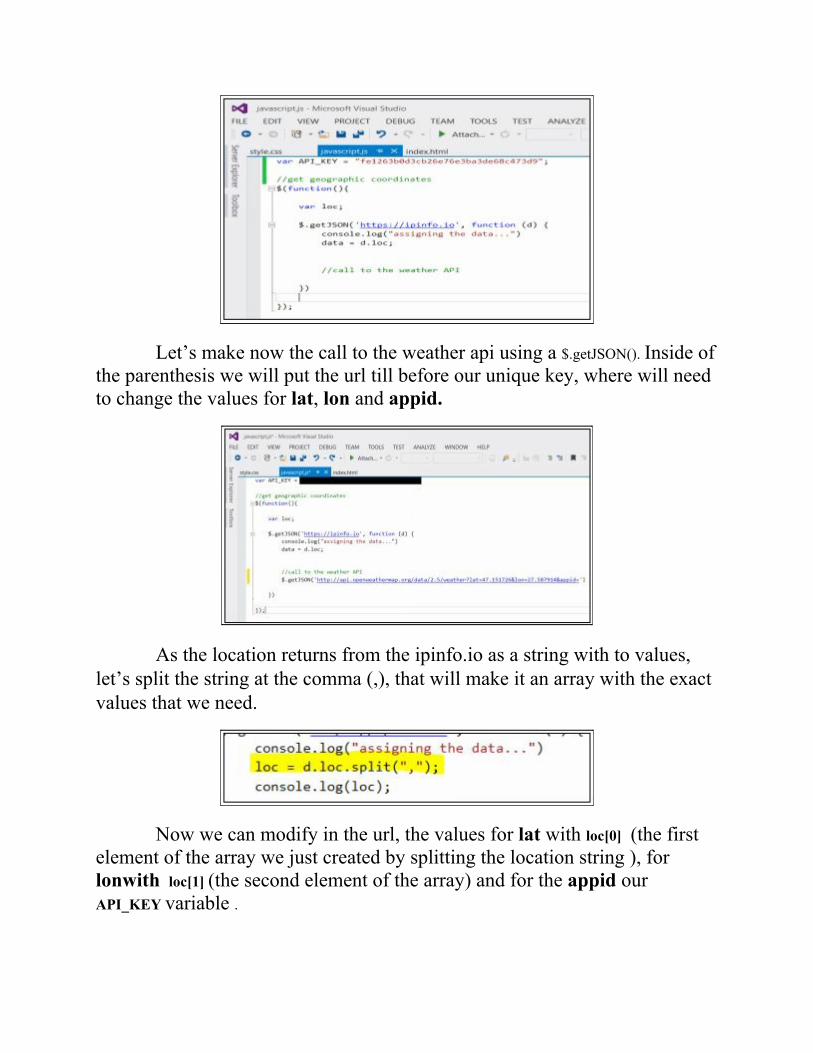
Let’s make now the call to the weather api using a $.getJSON(). Inside ofthe parenthesis we will put the url till before our unique key, where will needto change the values for lat, lon and appid.
As the location returns from the ipinfo.io as a string with to values,let’s split the string at the comma (,), that will make it an array with the exactvalues that we need.
Now we can modify in the url, the values for lat with loc[0] (the firstelement of the array we just created by splitting the location string ), forlonwith loc[1] (the second element of the array) and for the appid ourAPI_KEY variable .
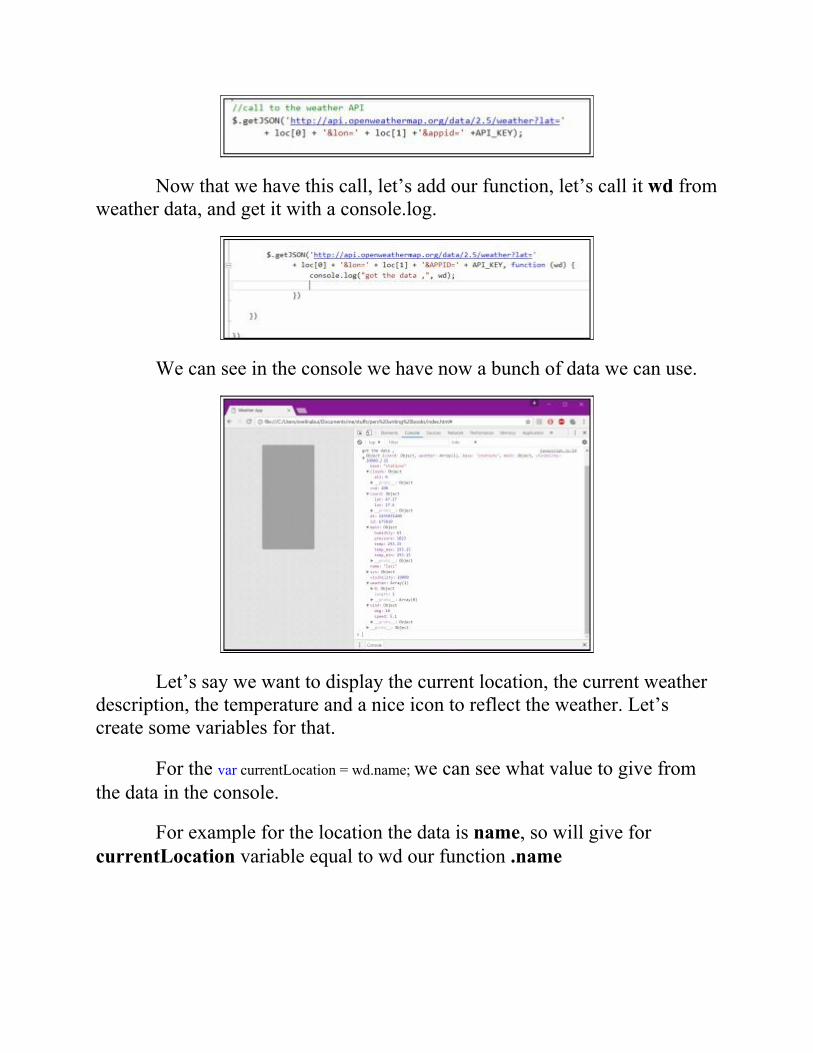
Now that we have this call, let’s add our function, let’s call it wd fromweather data, and get it with a console.log.
We can see in the console we have now a bunch of data we can use.
Let’s say we want to display the current location, the current weatherdescription, the temperature and a nice icon to reflect the weather. Let’screate some variables for that.
For the var currentLocation = wd.name; we can see what value to give fromthe data in the console.
For example for the location the data is name, so will give forcurrentLocation variable equal to wd our function .name
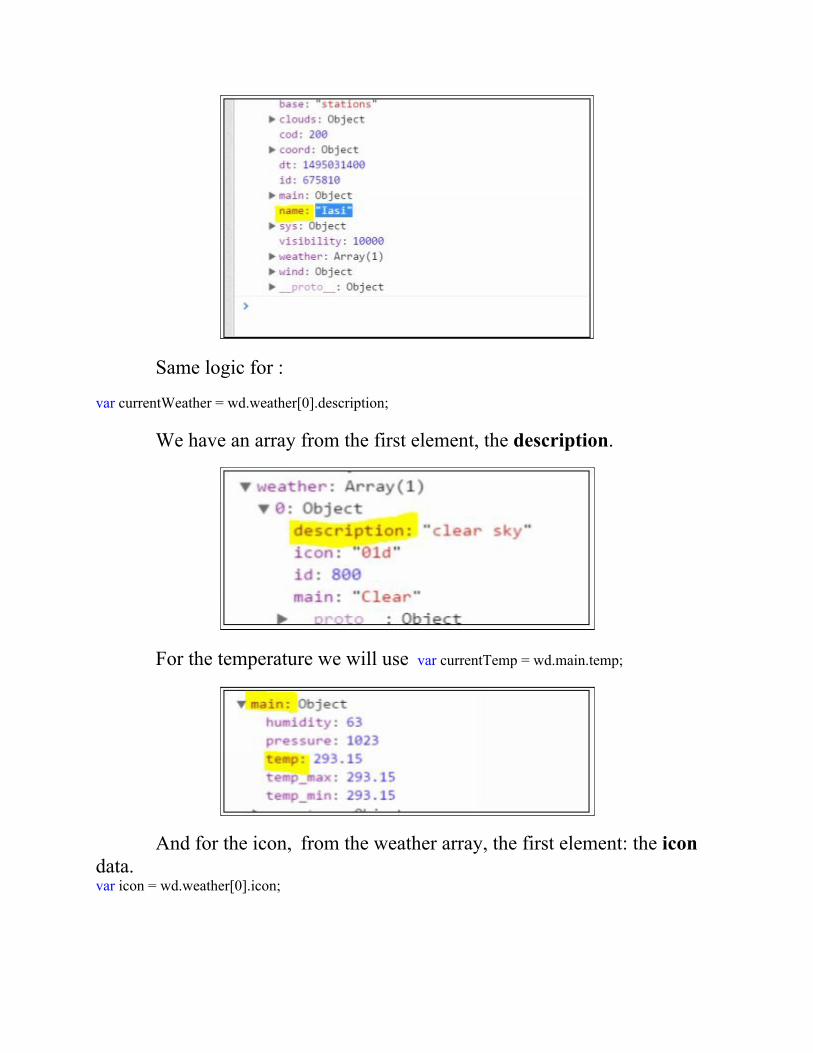
Same logic for :
var currentWeather = wd.weather[0].description;
We have an array from the first element, the description.
For the temperature we will use var currentTemp = wd.main.temp;
And for the icon, from the weather array, the first element: the icondata.var icon = wd.weather[0].icon;
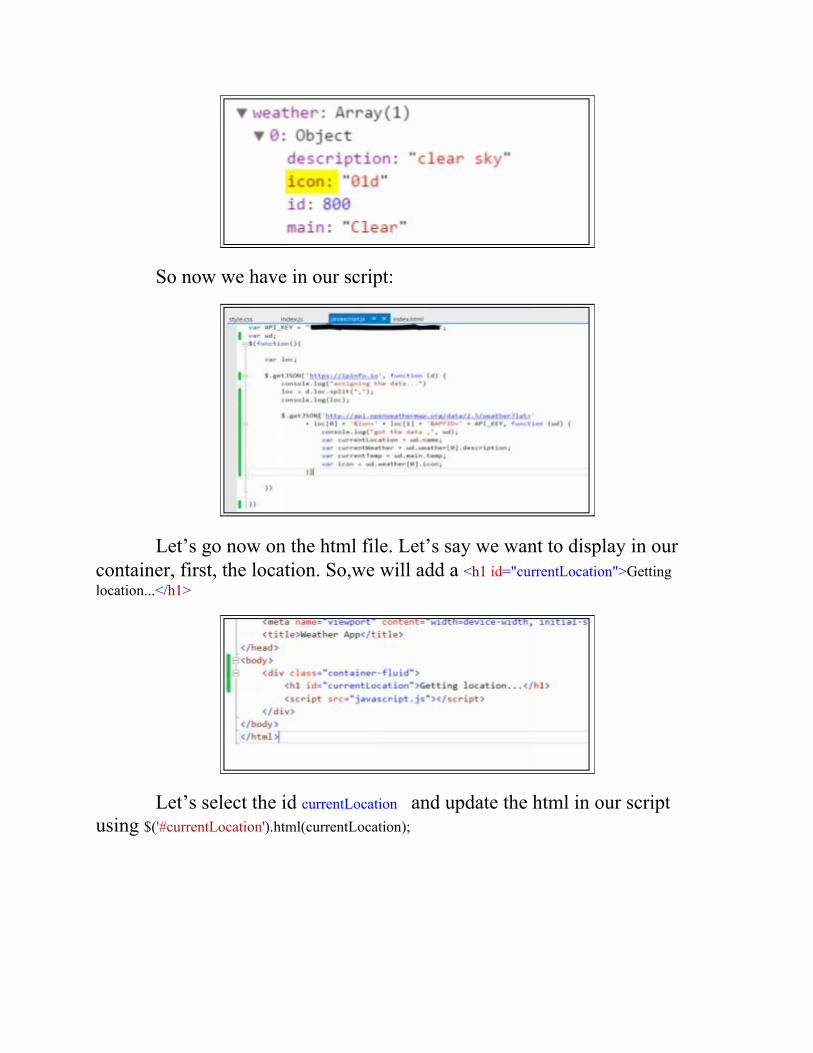
So now we have in our script:
Let’s go now on the html file. Let’s say we want to display in ourcontainer, first, the location. So,we will add a <h1 id="currentLocation">Gettinglocation...</h1>
Let’s select the id currentLocation and update the html in our scriptusing $('#currentLocation').html(currentLocation);
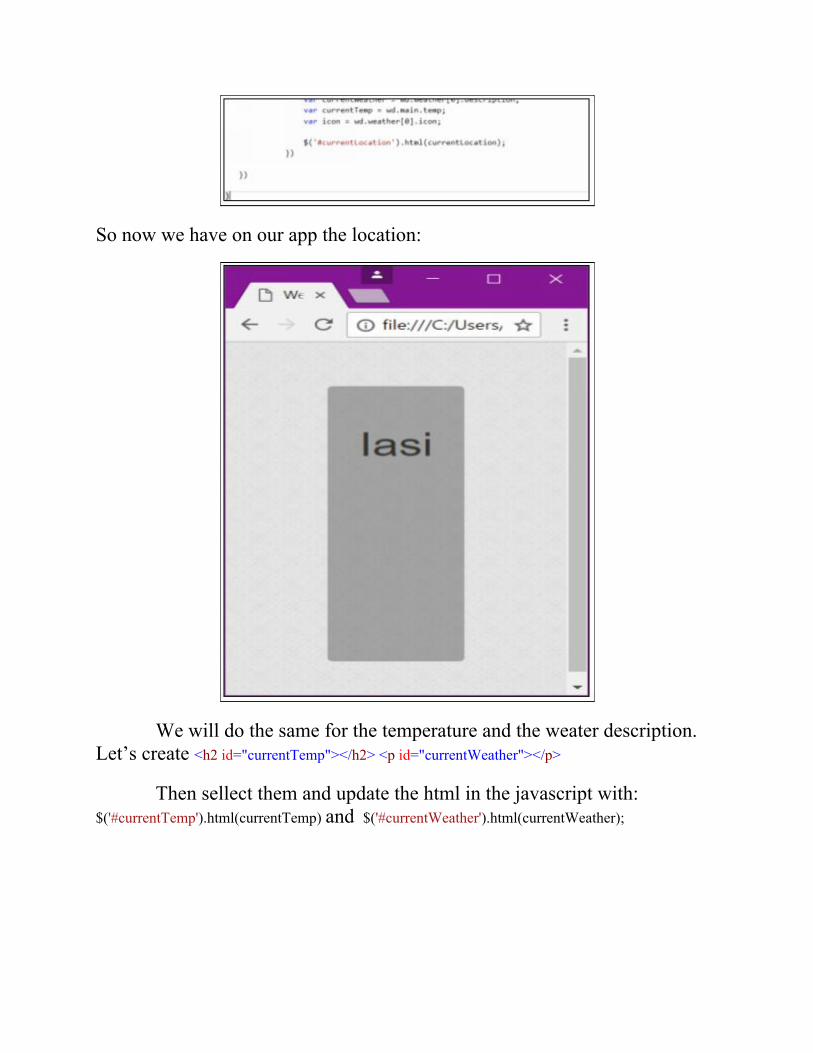
So now we have on our app the location:
We will do the same for the temperature and the weater description.Let’s create <h2 id="currentTemp"></h2> <p id="currentWeather"></p>
Then sellect them and update the html in the javascript with:$('#currentTemp').html(currentTemp) and $('#currentWeather').html(currentWeather);
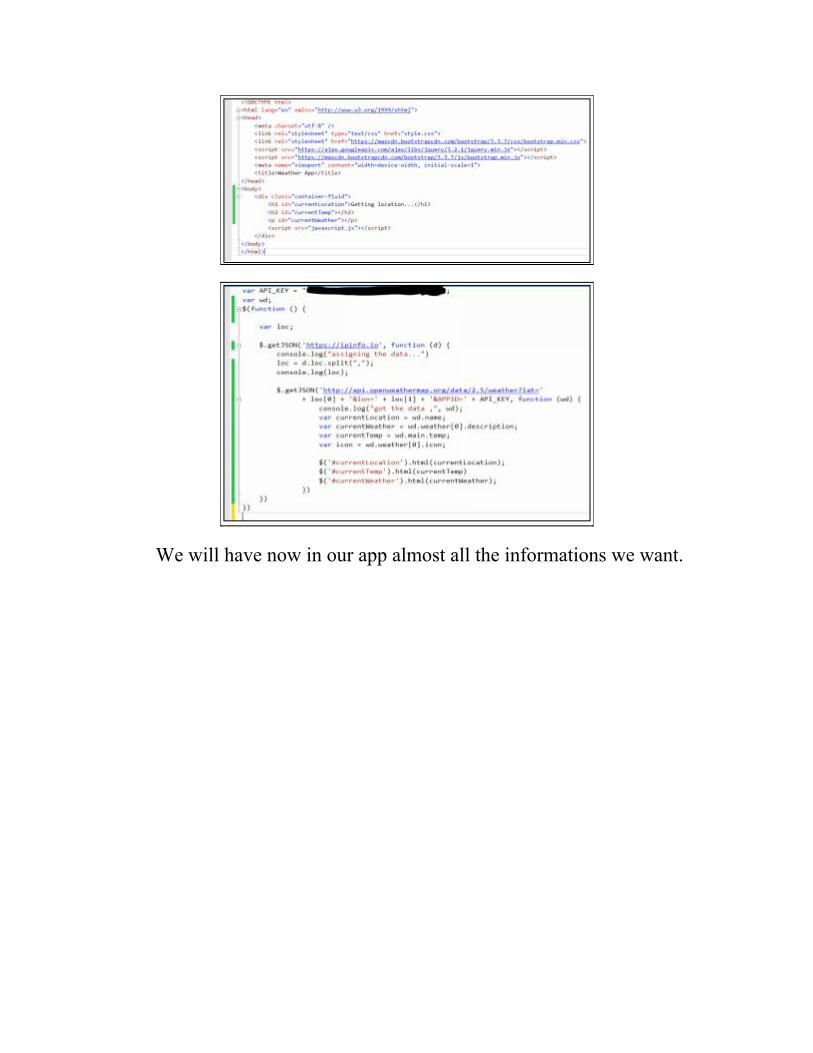
We will have now in our app almost all the informations we want.
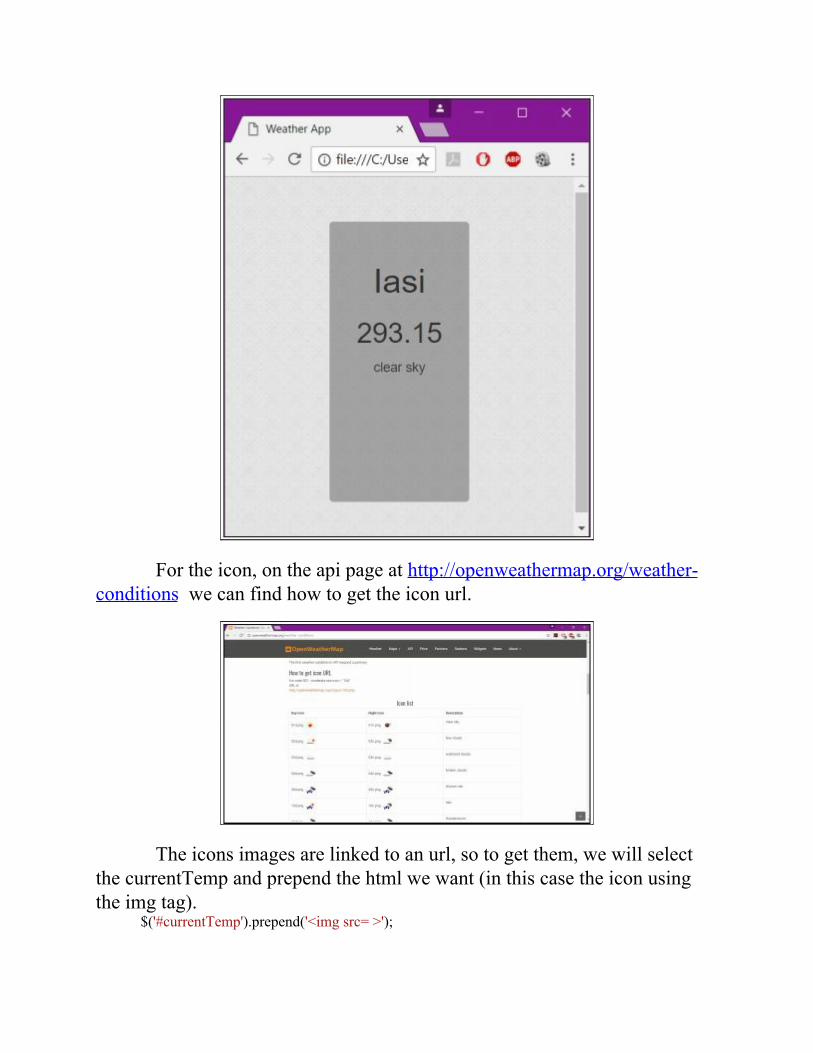
For the icon, on the api page at http://openweathermap.org/weather-conditions we can find how to get the icon url.
The icons images are linked to an url, so to get them, we will selectthe currentTemp and prepend the html we want (in this case the icon usingthe img tag).
$('#currentTemp').prepend('<img src= >');
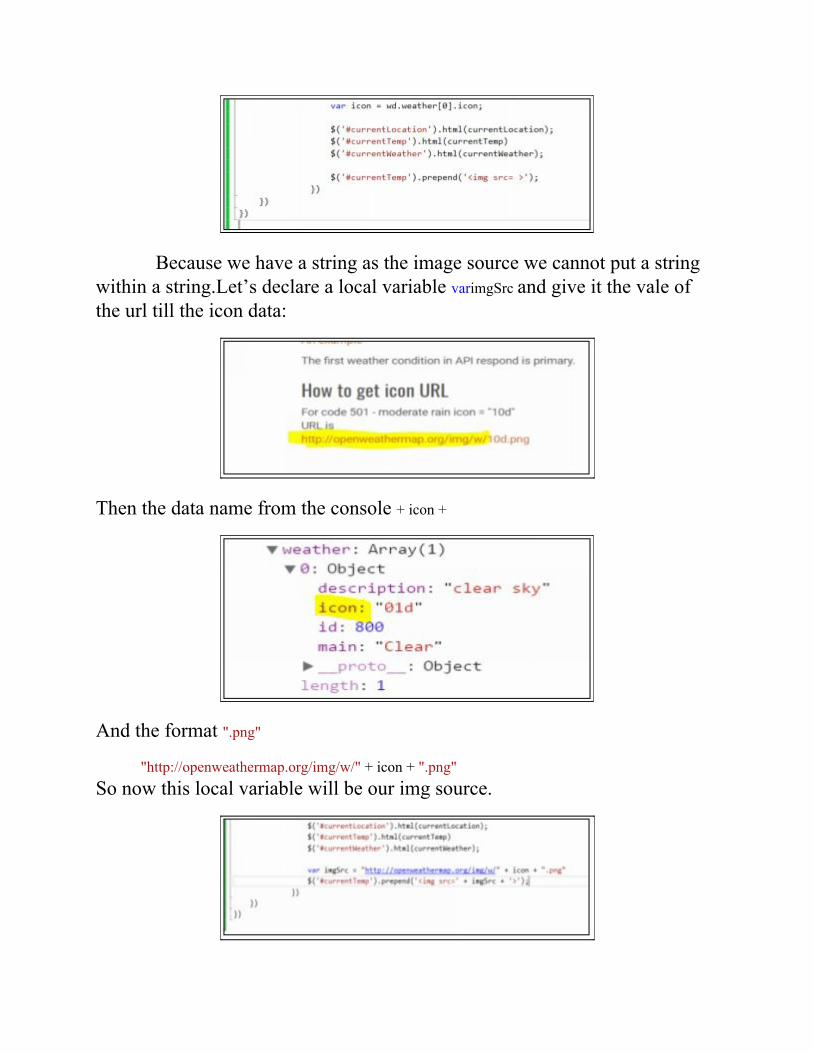
Because we have a string as the image source we cannot put a stringwithin a string.Let’s declare a local variable varimgSrc and give it the vale ofthe url till the icon data:
Then the data name from the console + icon +
And the format ".png"
"http://openweathermap.org/img/w/" + icon + ".png"So now this local variable will be our img source.
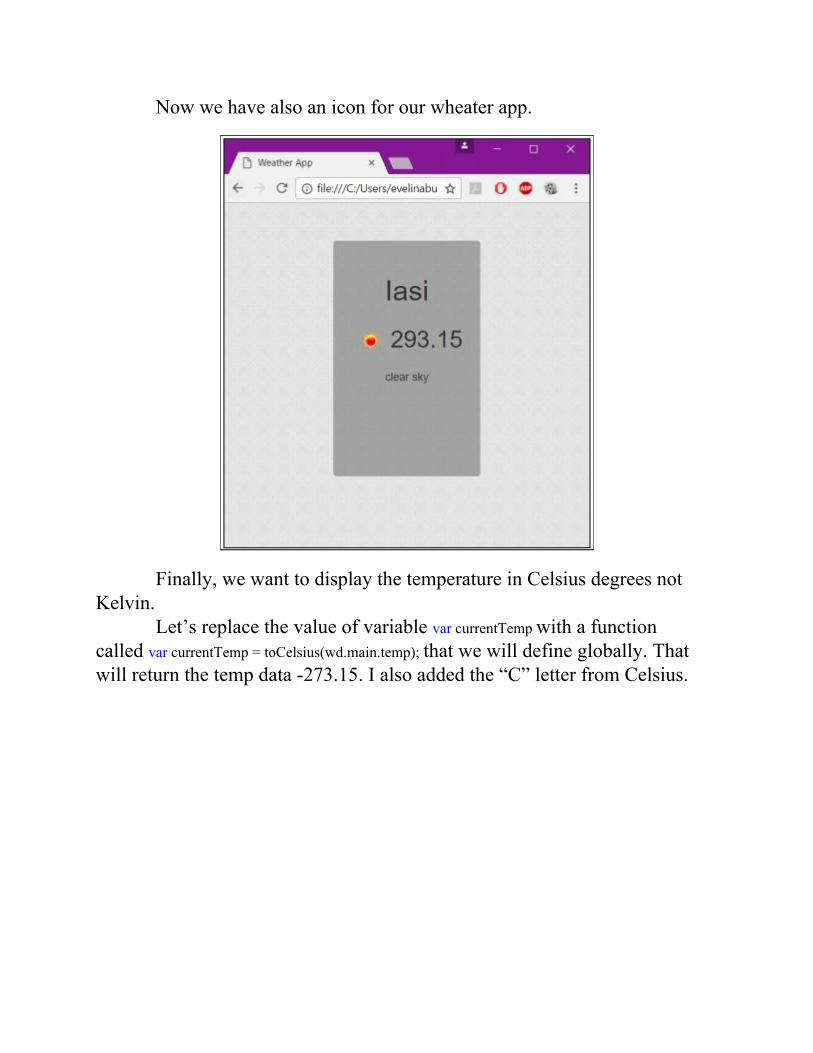
Now we have also an icon for our wheater app.
Finally, we want to display the temperature in Celsius degrees notKelvin.
Let’s replace the value of variable var currentTemp with a functioncalled var currentTemp = toCelsius(wd.main.temp); that we will define globally. Thatwill return the temp data -273.15. I also added the “C” letter from Celsius.
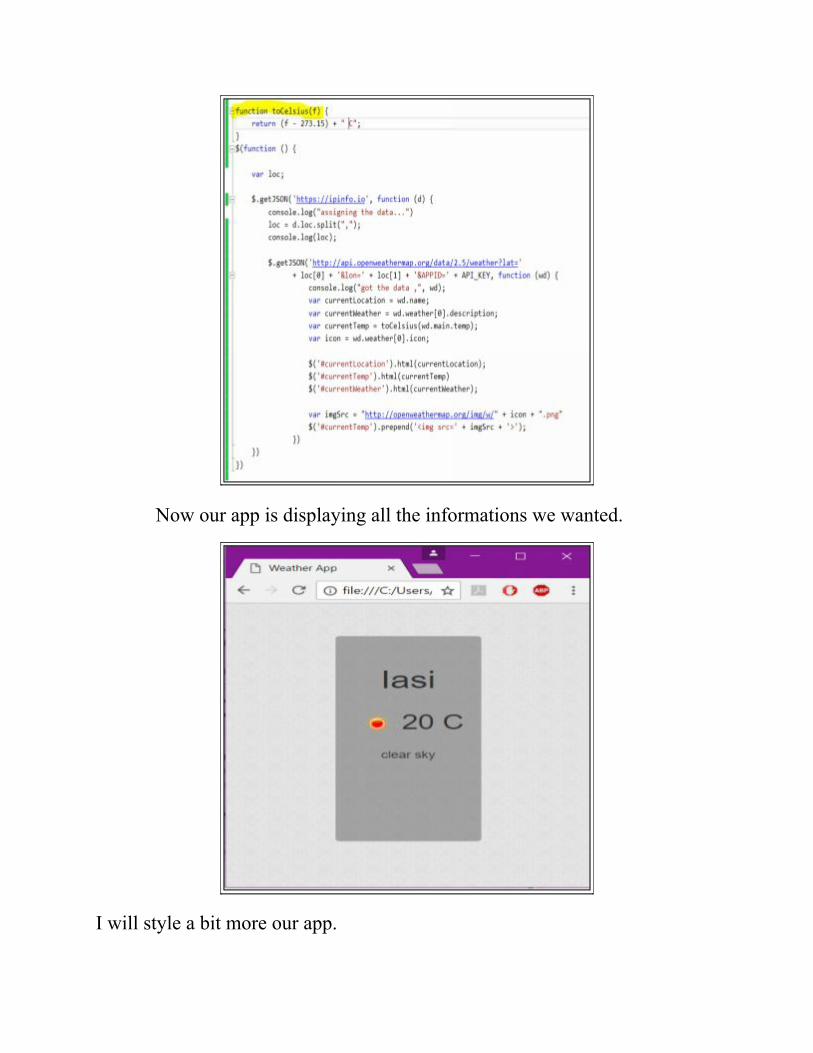
Now our app is displaying all the informations we wanted.
I will style a bit more our app.
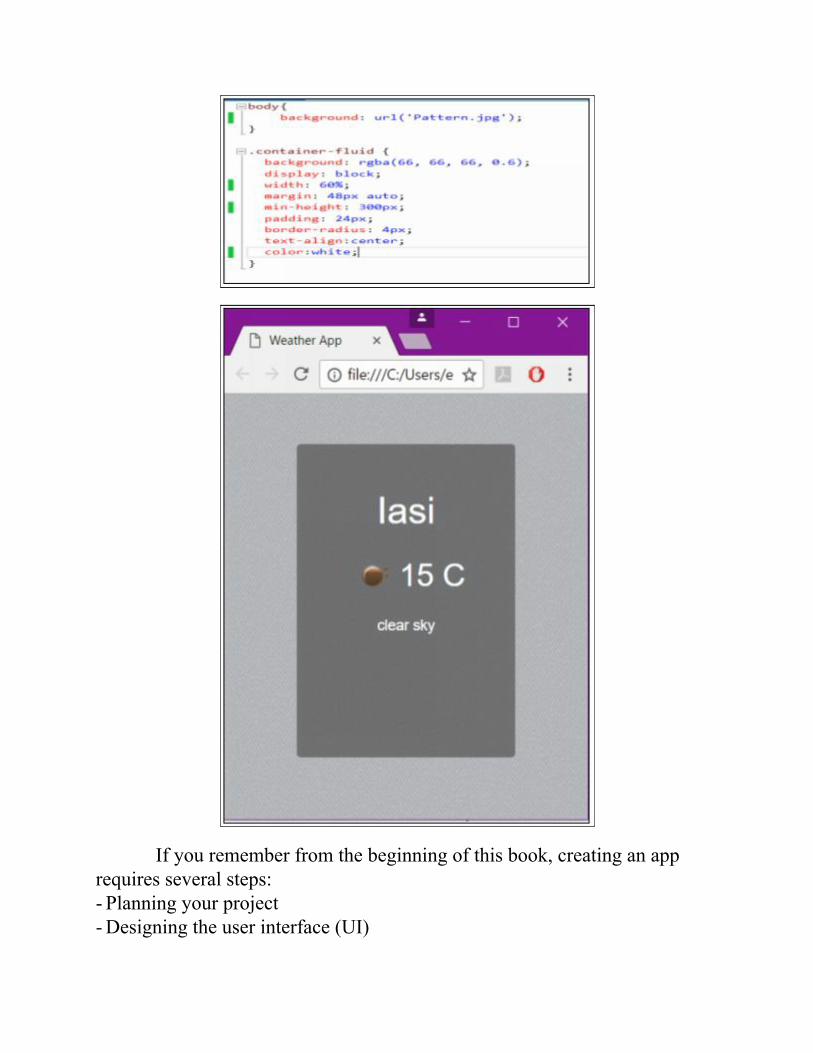
If you remember from the beginning of this book, creating an apprequires several steps:- Planning your project- Designing the user interface (UI)
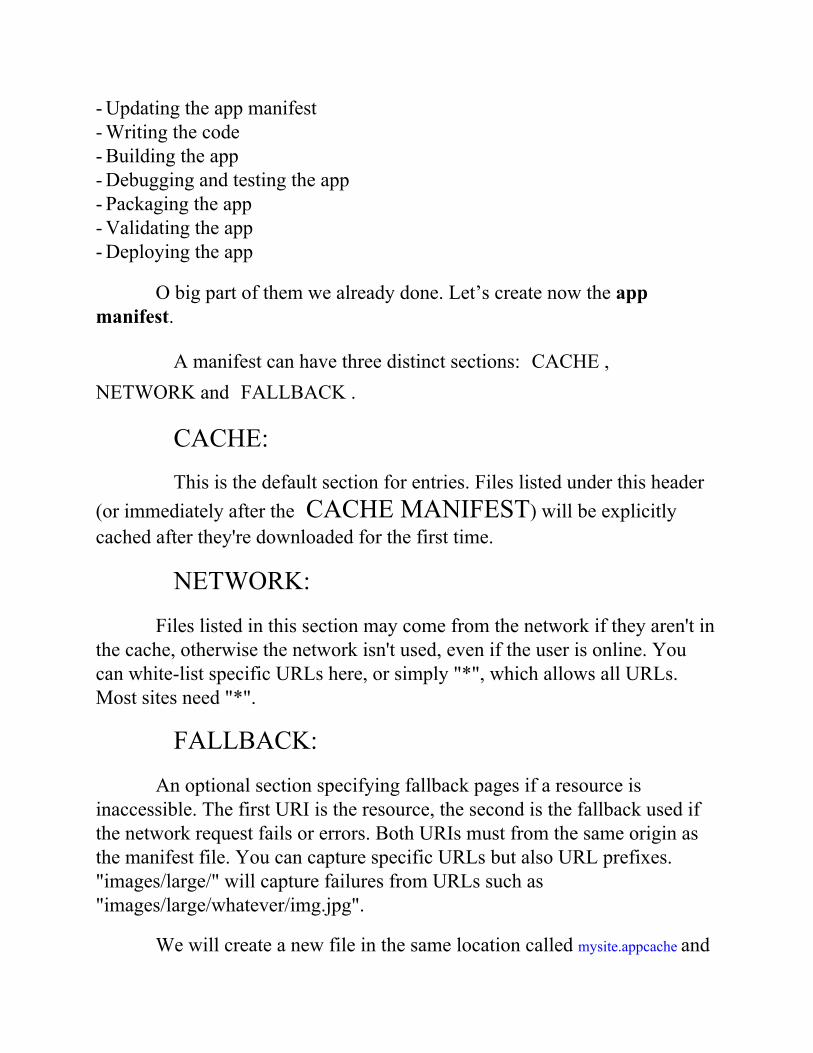
- Updating the app manifest- Writing the code- Building the app- Debugging and testing the app- Packaging the app- Validating the app- Deploying the app
O big part of them we already done. Let’s create now the appmanifest.
A manifest can have three distinct sections: CACHE ,NETWORK and FALLBACK .
CACHE:This is the default section for entries. Files listed under this header
(or immediately after the CACHE MANIFEST) will be explicitlycached after they're downloaded for the first time.
NETWORK:Files listed in this section may come from the network if they aren't in
the cache, otherwise the network isn't used, even if the user is online. Youcan white-list specific URLs here, or simply "*", which allows all URLs.Most sites need "*".
FALLBACK:An optional section specifying fallback pages if a resource is
inaccessible. The first URI is the resource, the second is the fallback used ifthe network request fails or errors. Both URIs must from the same origin asthe manifest file. You can capture specific URLs but also URL prefixes."images/large/" will capture failures from URLs such as"images/large/whatever/img.jpg".
We will create a new file in the same location called mysite.appcache and
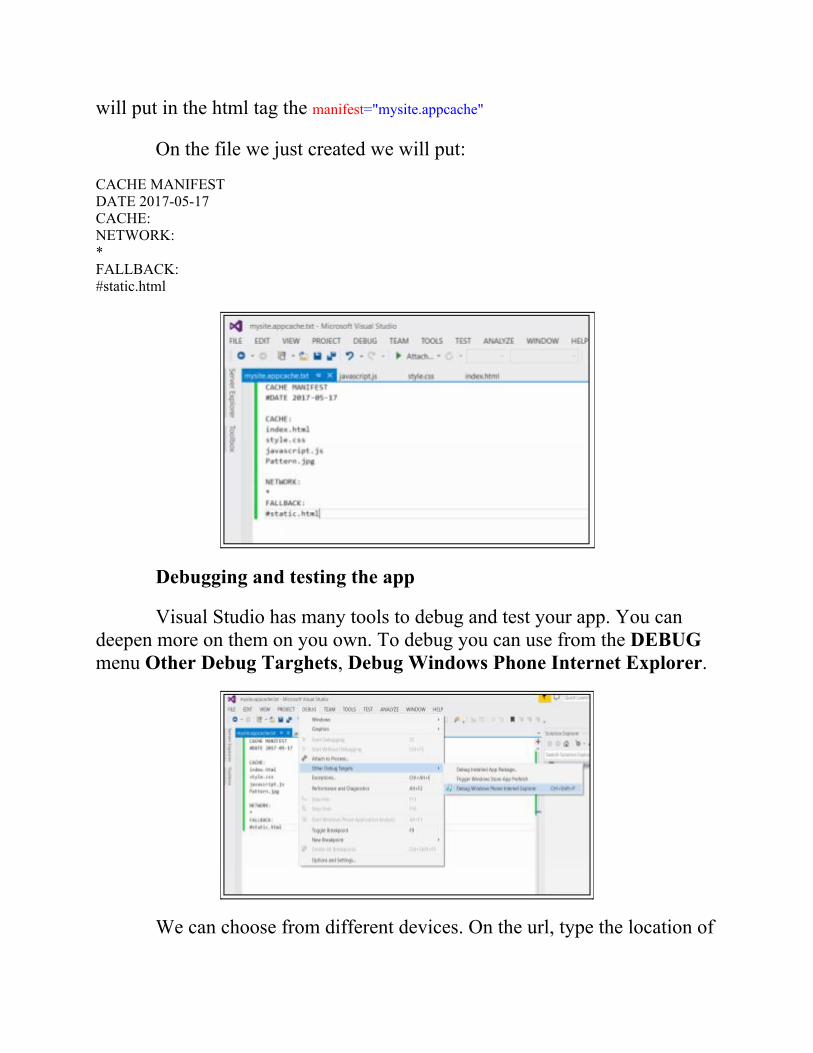
will put in the html tag the manifest="mysite.appcache"
On the file we just created we will put:
CACHE MANIFESTDATE 2017-05-17CACHE:NETWORK:*FALLBACK:#static.html
Debugging and testing the app
Visual Studio has many tools to debug and test your app. You candeepen more on them on you own. To debug you can use from the DEBUGmenu Other Debug Targhets, Debug Windows Phone Internet Explorer.
We can choose from different devices. On the url, type the location of
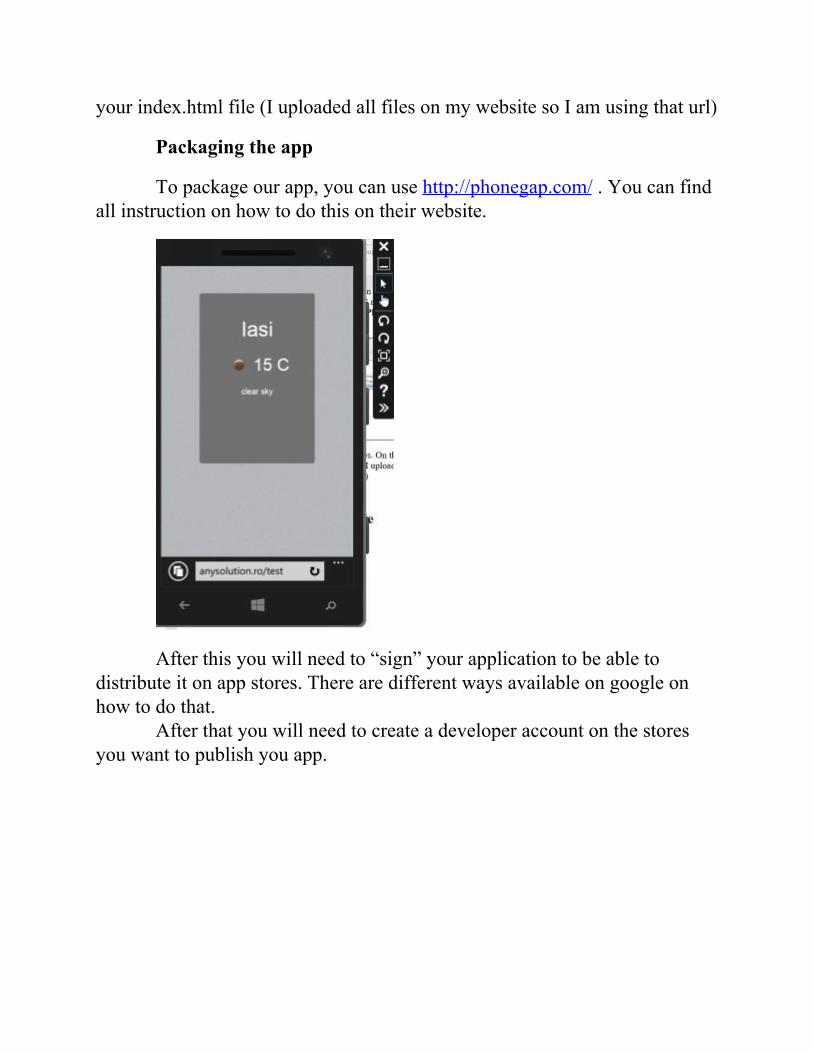
your index.html file (I uploaded all files on my website so I am using that url)
Packaging the app
To package our app, you can use http://phonegap.com/ . You can findall instruction on how to do this on their website.
After this you will need to “sign” your application to be able todistribute it on app stores. There are different ways available on google onhow to do that.
After that you will need to create a developer account on the storesyou want to publish you app.

Bibliographyhttps://app.pluralsight.com/library/http://www.w3schools.com/Microsoft Academy