Embed Size (px)
Citation preview
Chapter 2
HTML and XHTMLPart-3
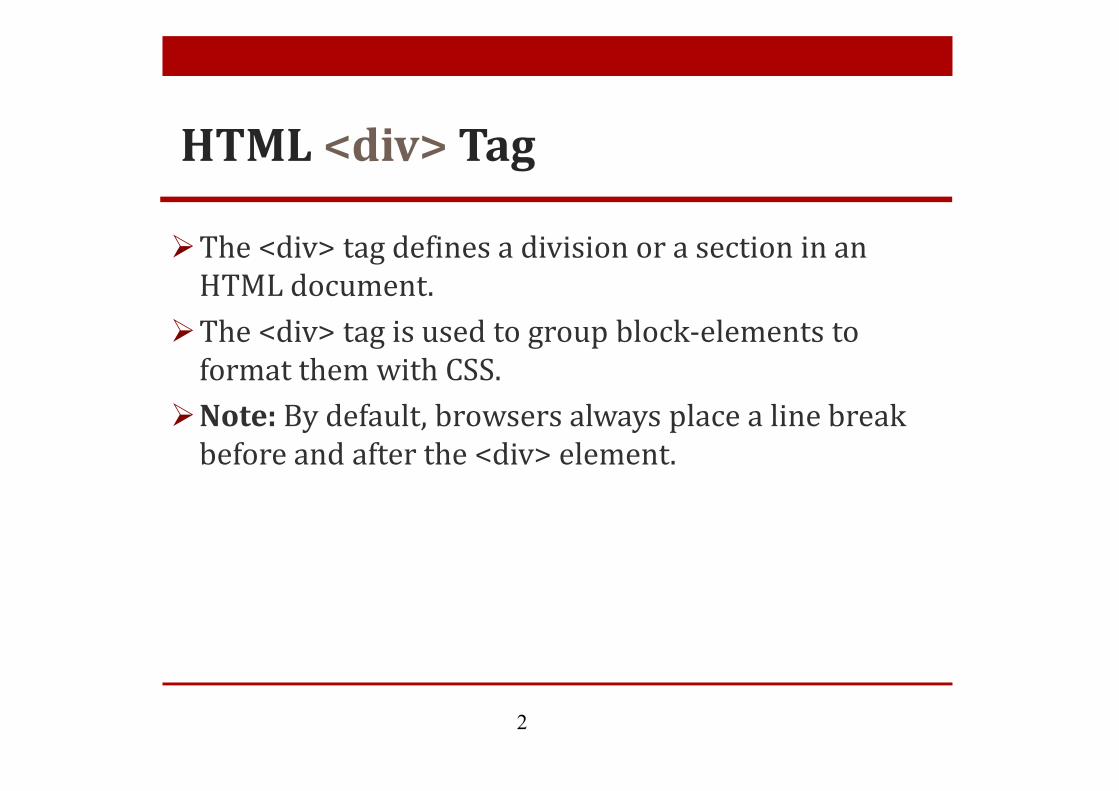
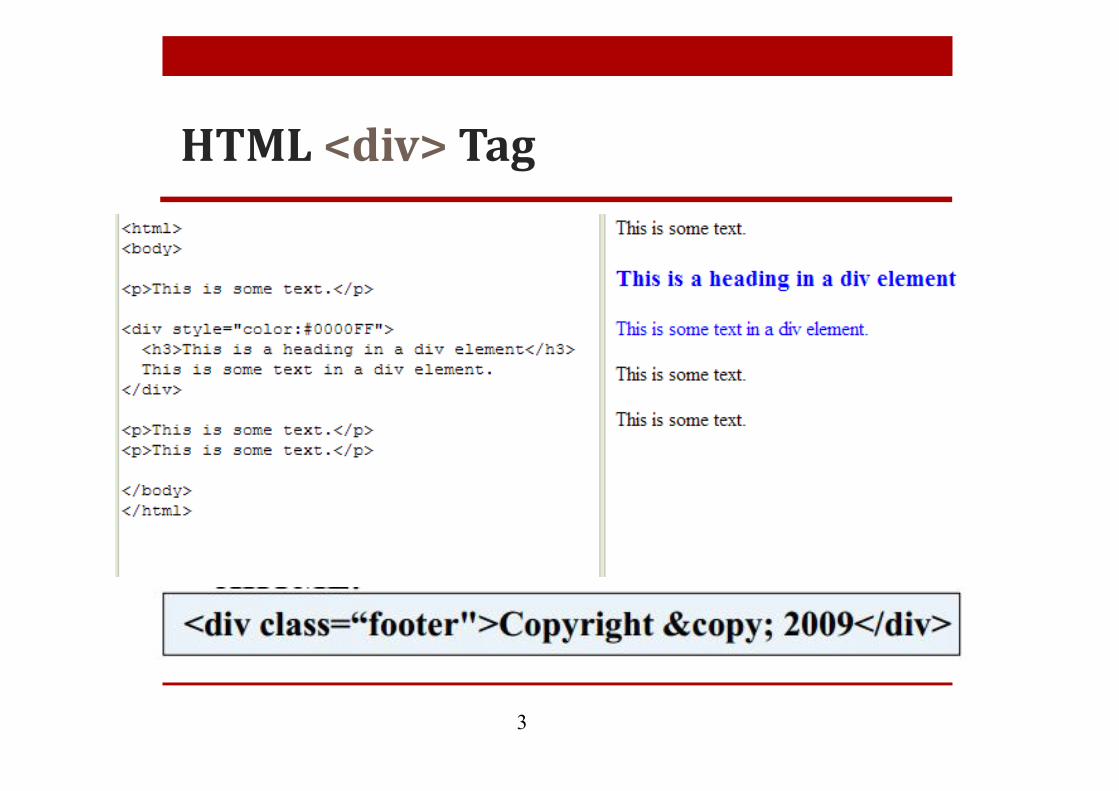
The <div> tag defines a division or a section in an HTML document.
The <div> tag is used to group block-elements to format them with CSS.
Note: By default, browsers always place a line break before and after the <div> element.
2
HTML <div> Tag
3
HTML <div> Tag
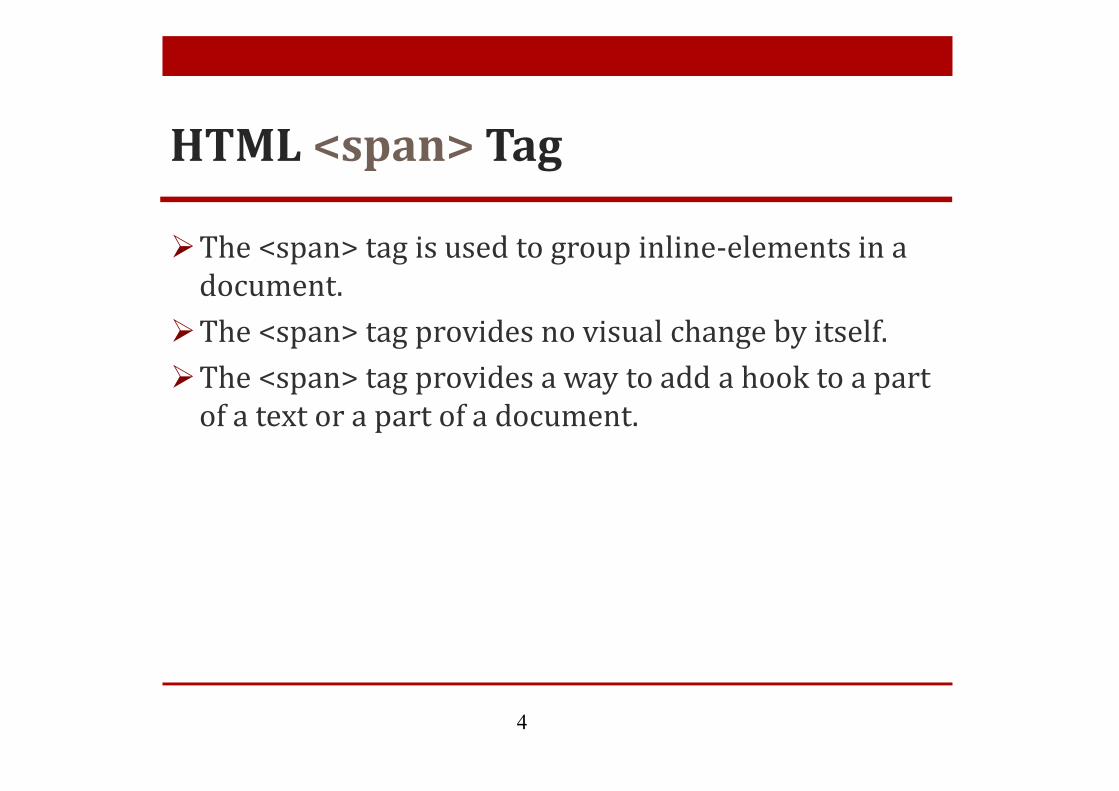
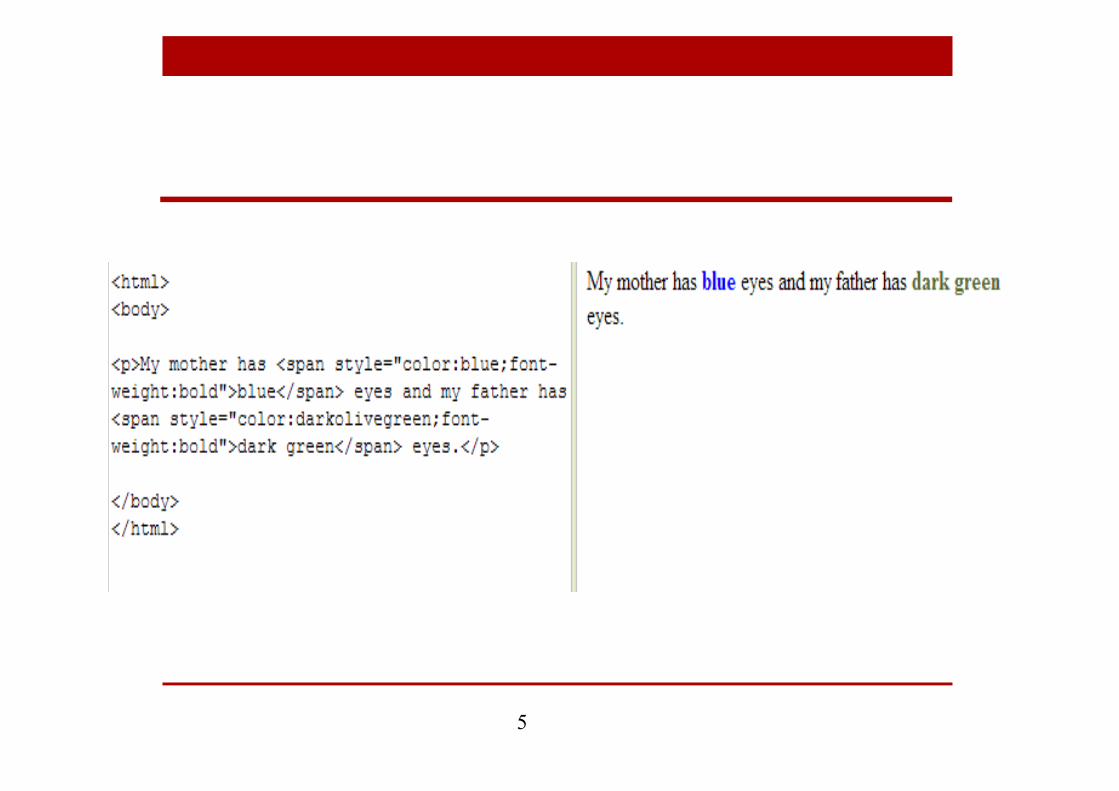
The <span> tag is used to group inline-elements in a document.
The <span> tag provides no visual change by itself.The <span> tag provides a way to add a hook to a part
of a text or a part of a document.
4
HTML <span> Tag
5
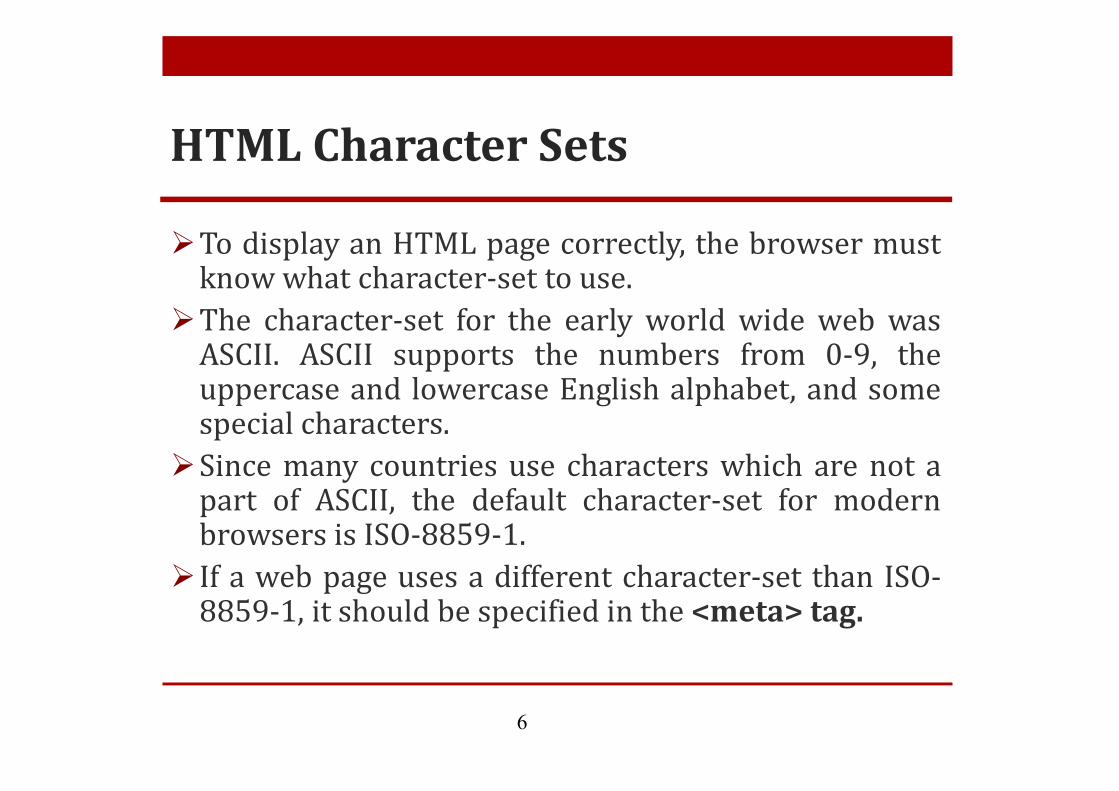
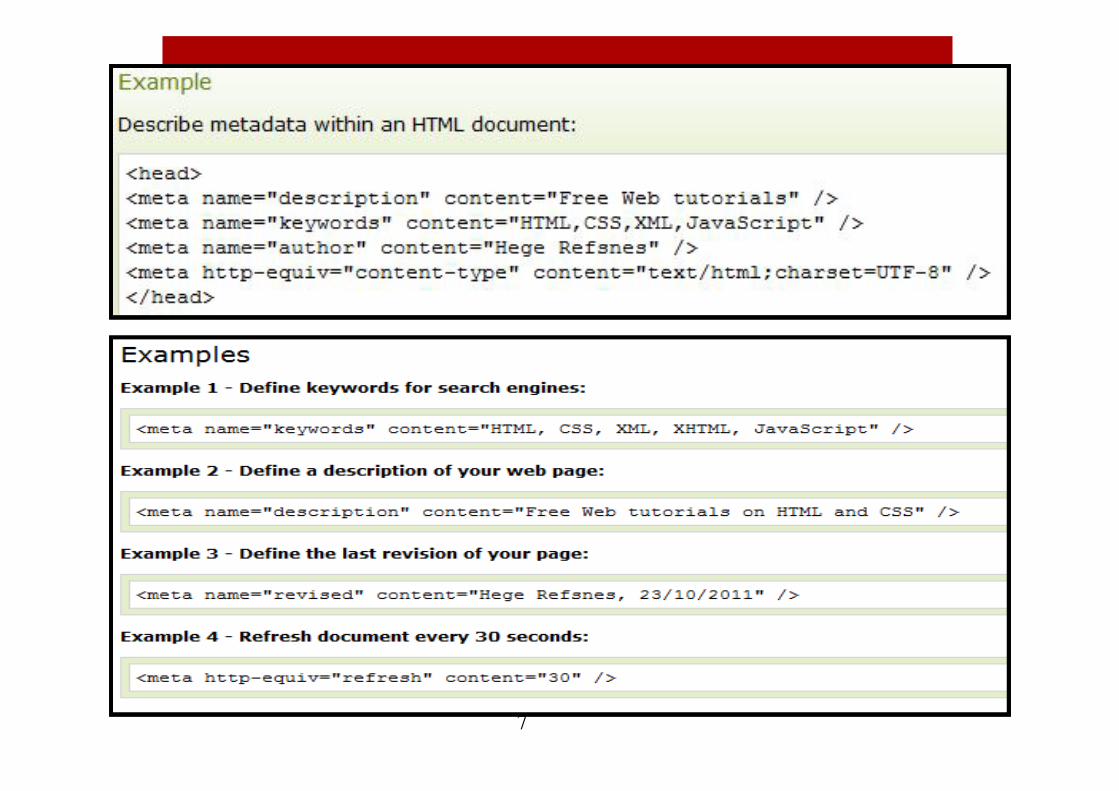
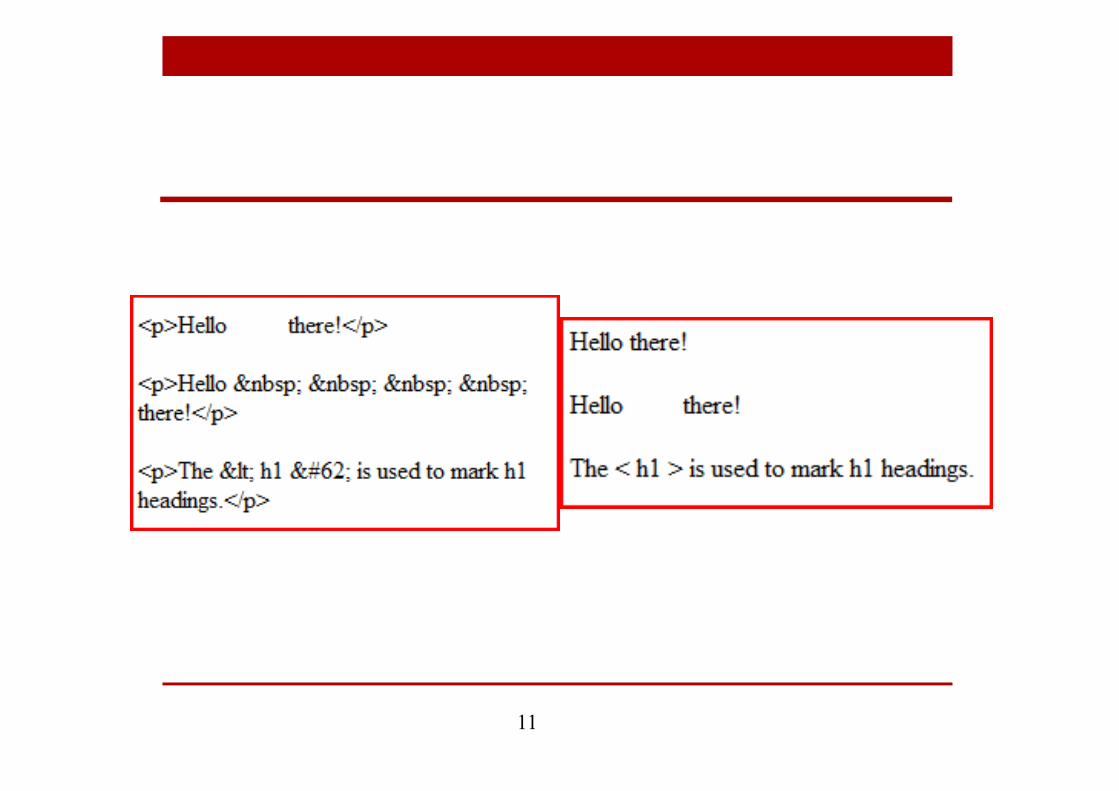
To display an HTML page correctly, the browser mustknow what character-set to use.
The character-set for the early world wide web wasASCII. ASCII supports the numbers from 0-9, theuppercase and lowercase English alphabet, and somespecial characters.
Since many countries use characters which are not apart of ASCII, the default character-set for modernbrowsers is ISO-8859-1.
If a web page uses a different character-set than ISO-8859-1, it should be specified in the <meta> tag.
6
HTML Character Sets
7
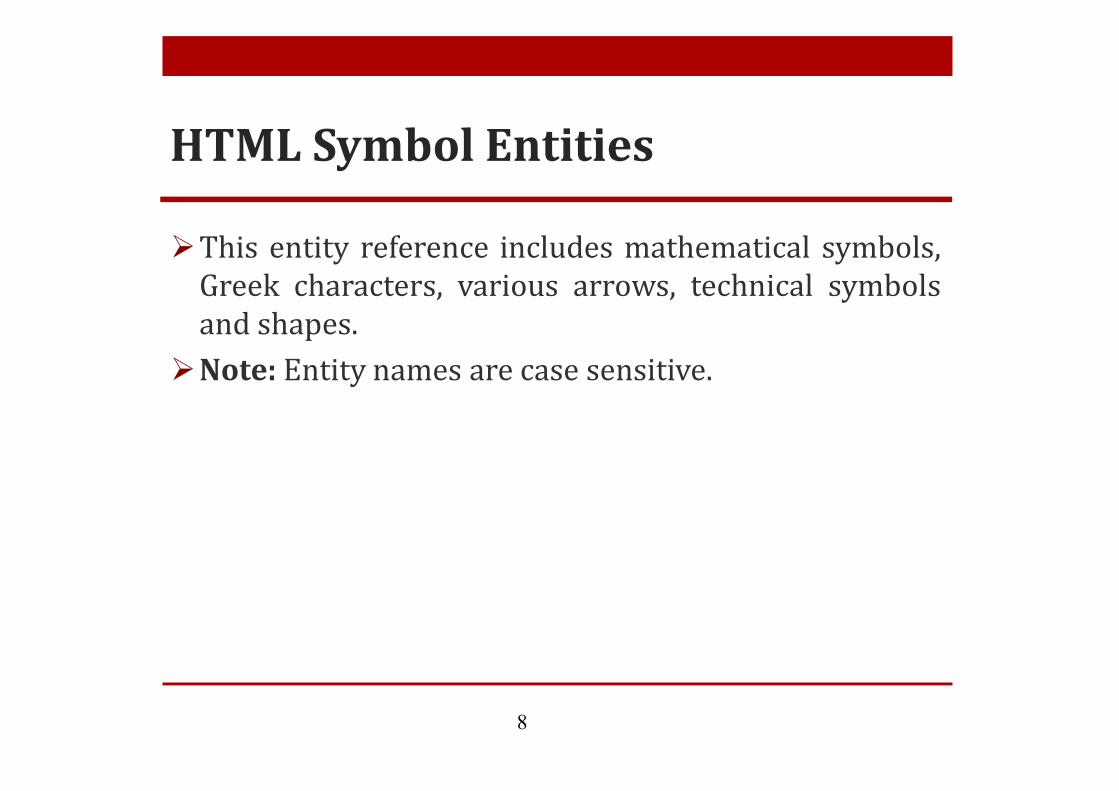
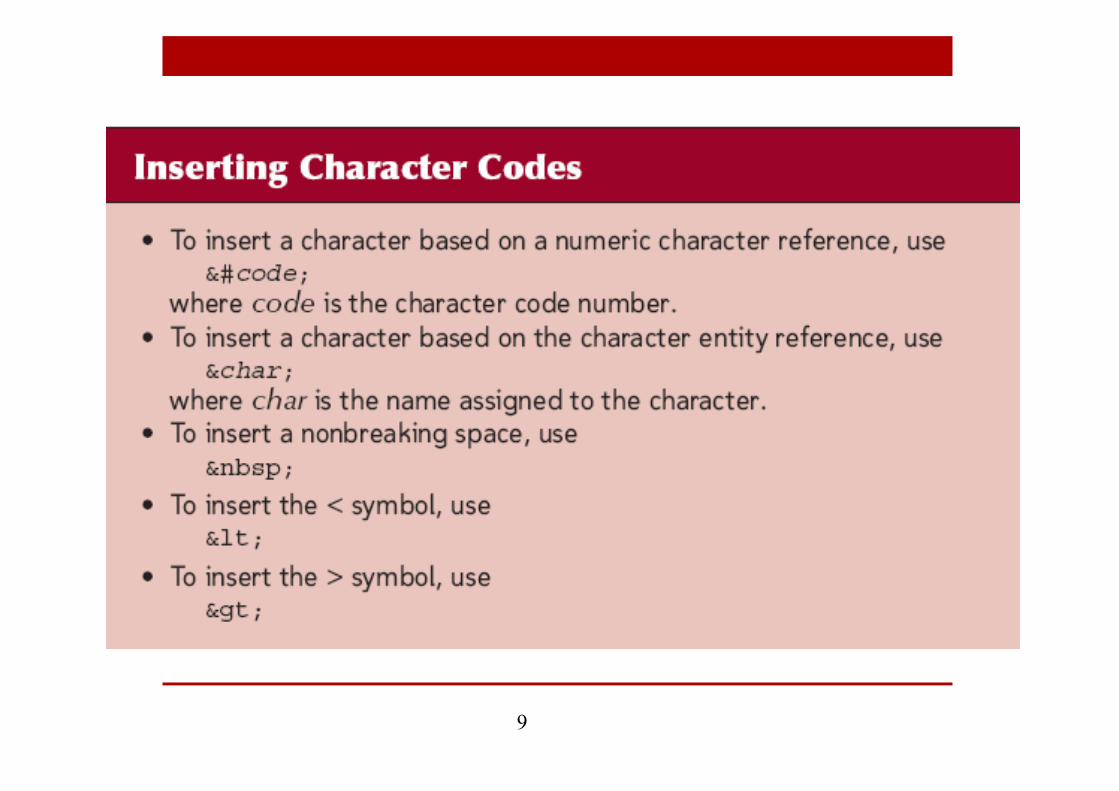
This entity reference includes mathematical symbols,Greek characters, various arrows, technical symbolsand shapes.
Note: Entity names are case sensitive.
8
HTML Symbol Entities
9
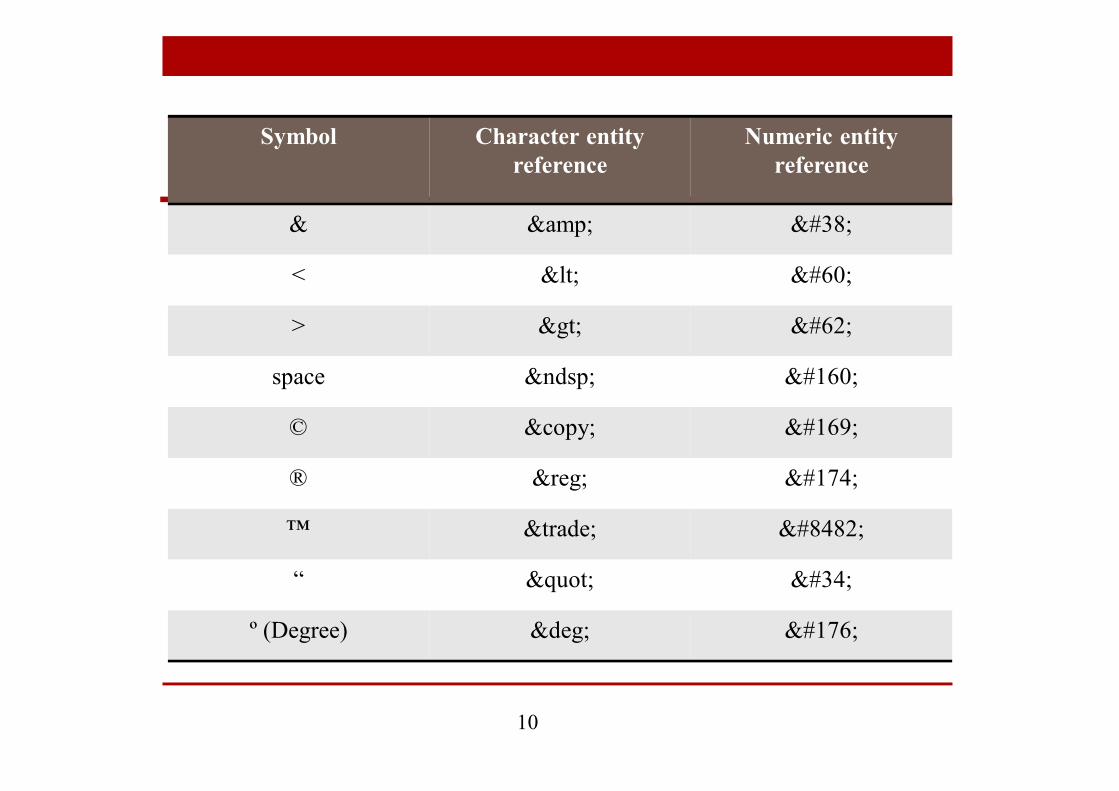
10
Numeric entity reference
Character entity reference
Symbol
&&&
<<<
>>>
 &ndsp;space
©©©
®®®
™™™
""“
°°º (Degree)
11
Specifies a hyperlink reference (href) to a file• Text between the <a> and </a> is displayed on the web
page.<a href="contact.html">Contact Us</a>
href Attribute• Indicates the file name or URL Web page document,
photo, pdf, etc.
12
The anchor element: <a> tag
Absolute link• Link to other Web sites
<a href="http://yahoo.com">Yahoo</a>Relative link• Link to pages on your own site
<a href="index.htm">Home</a>
13
<a> tag
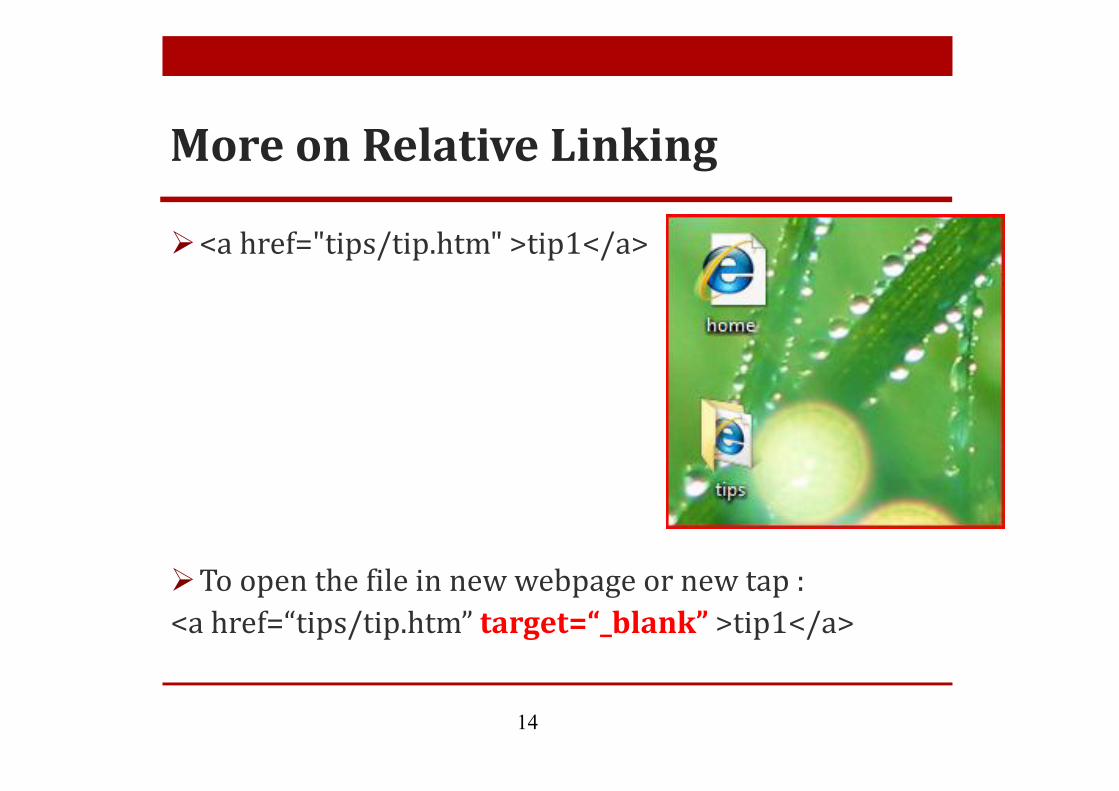
<a href="tips/tip.htm" >tip1</a>
To open the file in new webpage or new tap :<a href=“tips/tip.htm” target=“_blank” >tip1</a>
14
More on Relative Linking
15
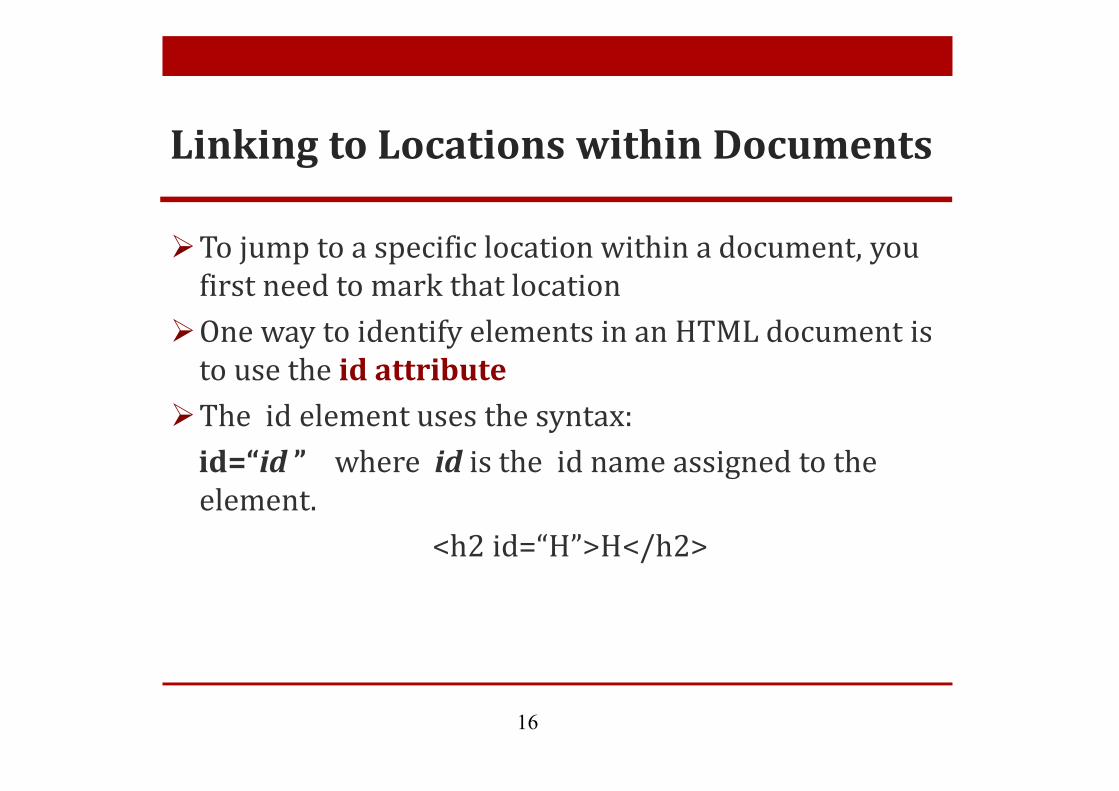
To jump to a specific location within a document, you first need to mark that location
One way to identify elements in an HTML document is to use the id attribute
The id element uses the syntax:id=“id ” where id is the id name assigned to the element.
<h2 id=“H”>H</h2>
16
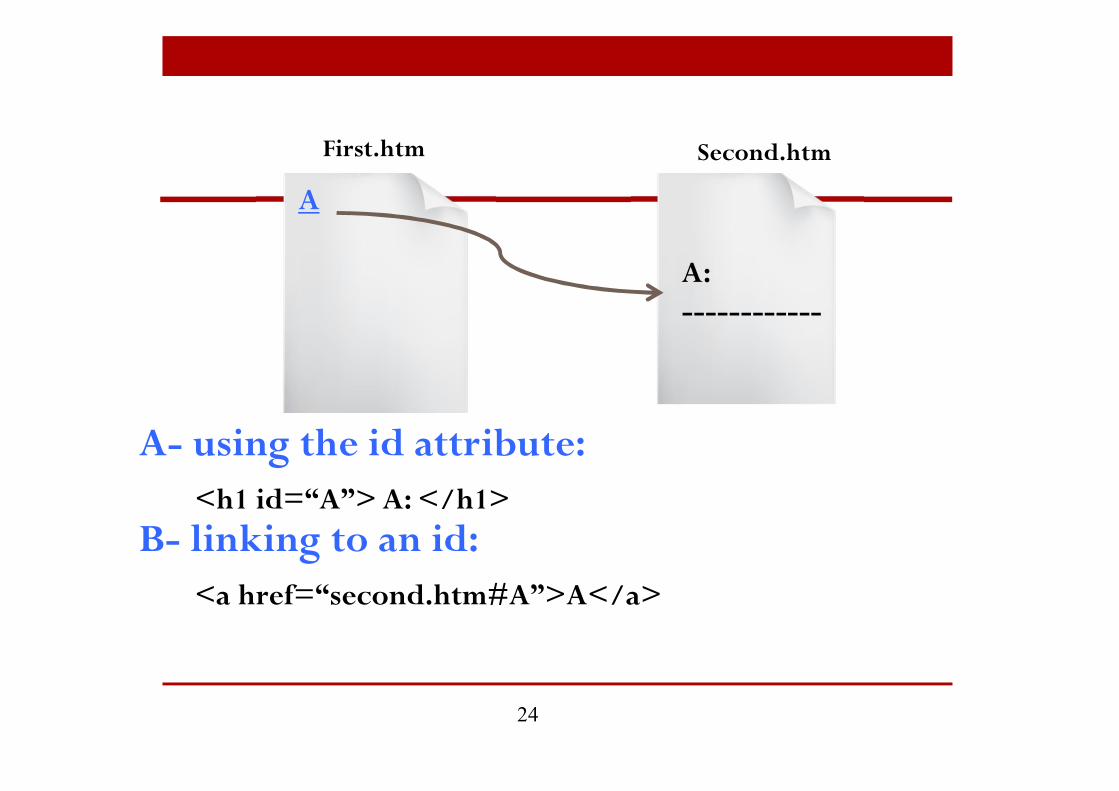
Linking to Locations within Documents
17
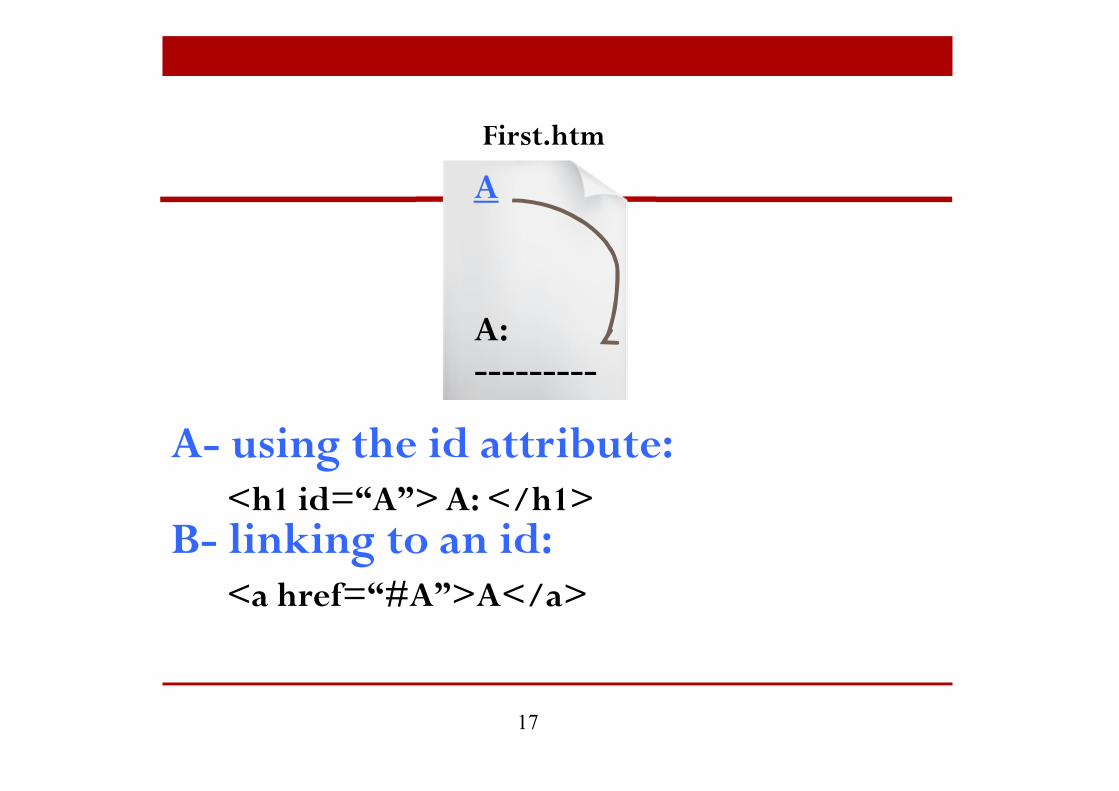
<h1 id=“A”> A: </h1>
AFirst.htm
A:---------
A- using the id attribute:
B- linking to an id:<a href=“#A”>A</a>
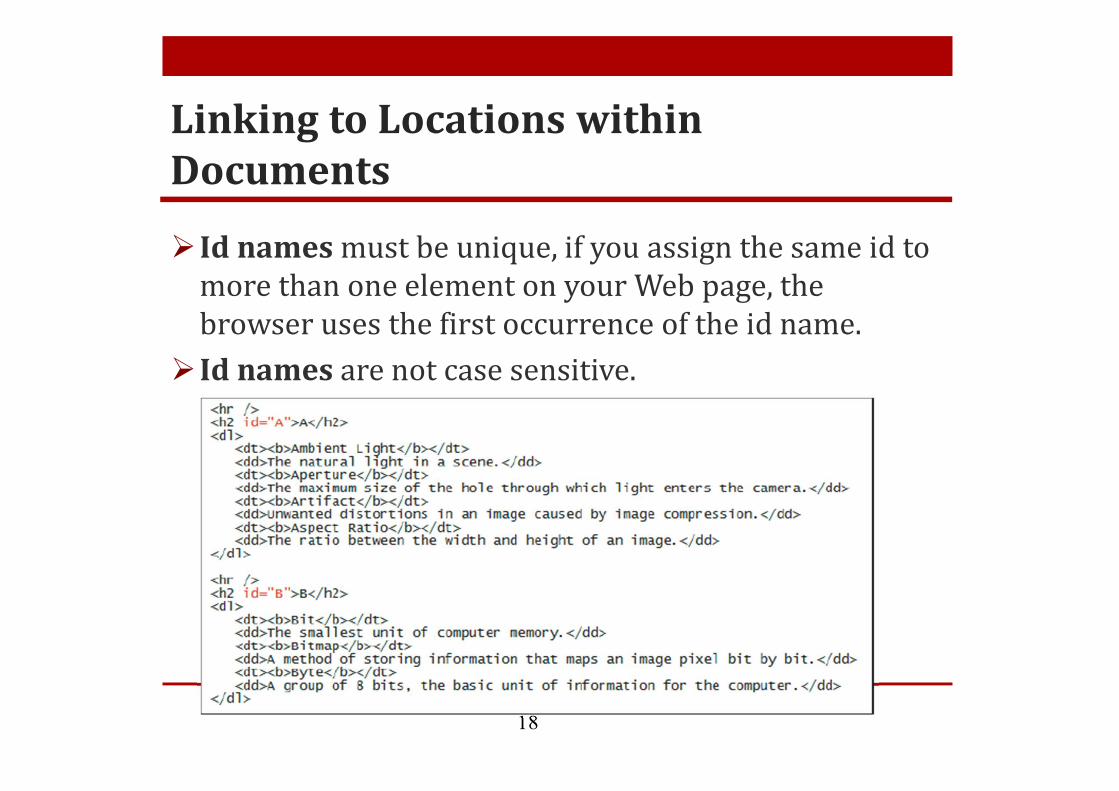
Id names must be unique, if you assign the same id to more than one element on your Web page, the browser uses the first occurrence of the id name.
Id names are not case sensitive.
18
Linking to Locations within Documents

Once you’ve marked an element using the id attribute, you can create a hypertext link to that element using the hypertext link
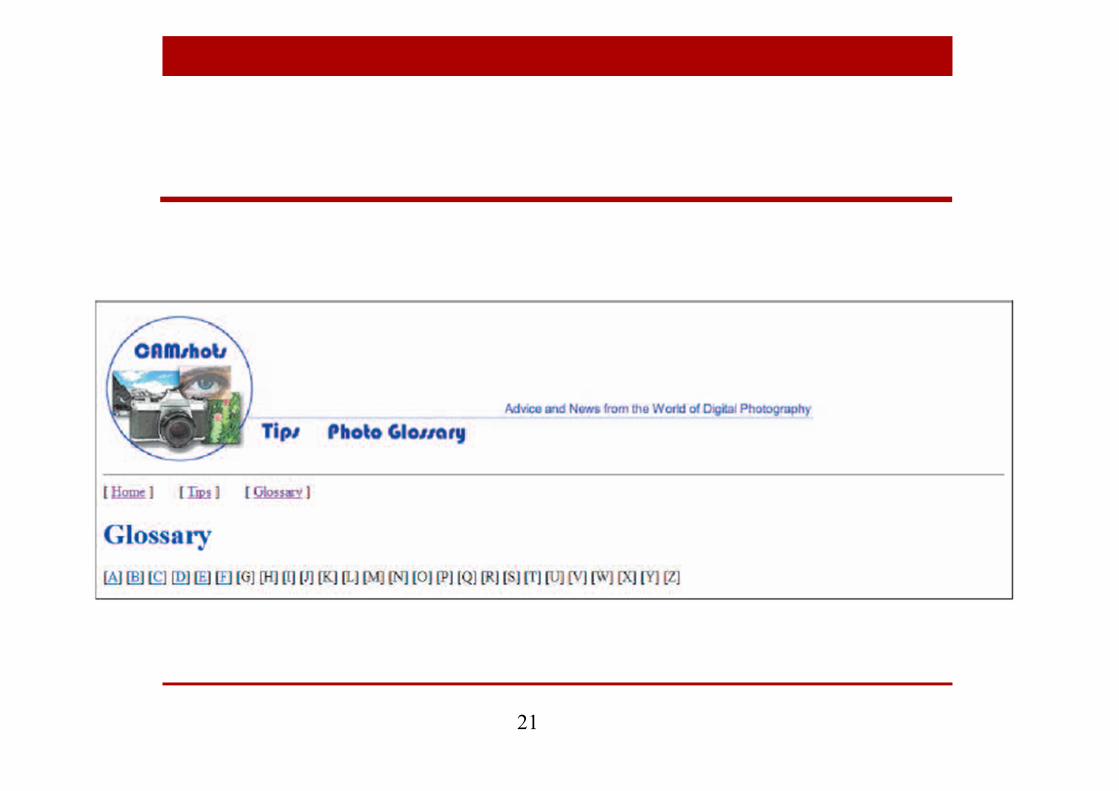
<a href = “#id”>content </a>For example to create a link to h2 heading for the letter
A in the glossary document, you would enter the following code:
<a href=“#A”>A</a>
19
Linking to Locations within Documents

<h1 style="color: blue">Glossary</h1><p>
[<a href="#A">A</a>] [<a href="#B">B</a>] [<a href="#C">C</a>][<a href="#D">D</a>] [<a href="#E">E</a>] [<a
href="#F">F</a>] [G] [H] [I] [J] [K] [L][M] [N] [O] [P] [Q] [R] [S] [T] [U][V] [W] [X][Y] [Z]
</p>
20
Linking to Locations within Documents
21
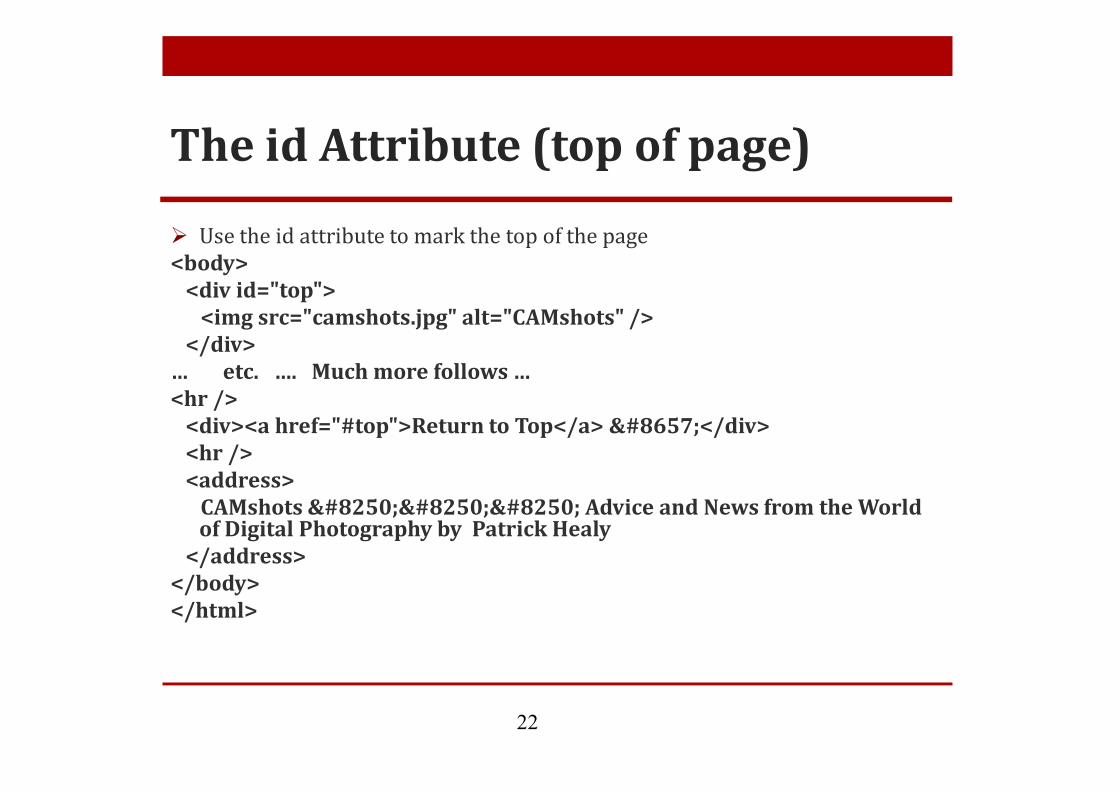
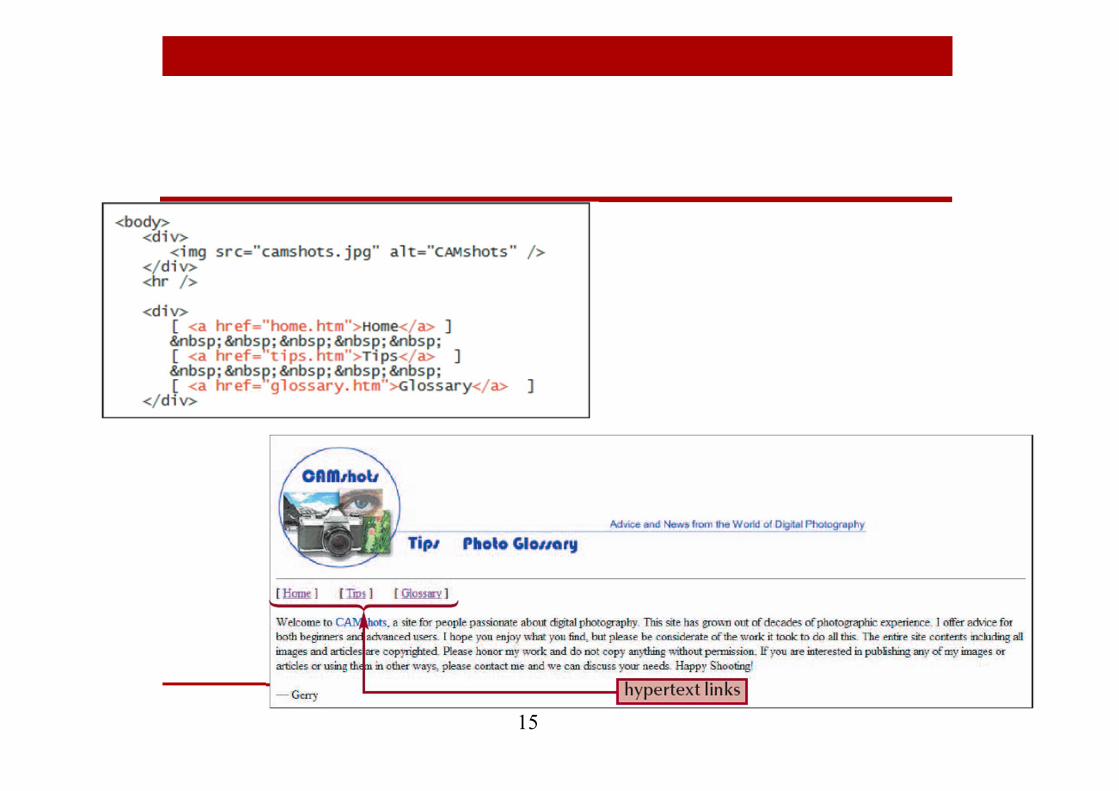
Use the id attribute to mark the top of the page<body>
<div id="top"><img src="camshots.jpg" alt="CAMshots" />
</div>… etc. …. Much more follows …<hr />
<div><a href="#top">Return to Top</a> ⇑</div><hr /><address>
CAMshots ››› Advice and News from the World of Digital Photography by Patrick Healy
</address></body></html>
22
The id Attribute (top of page)
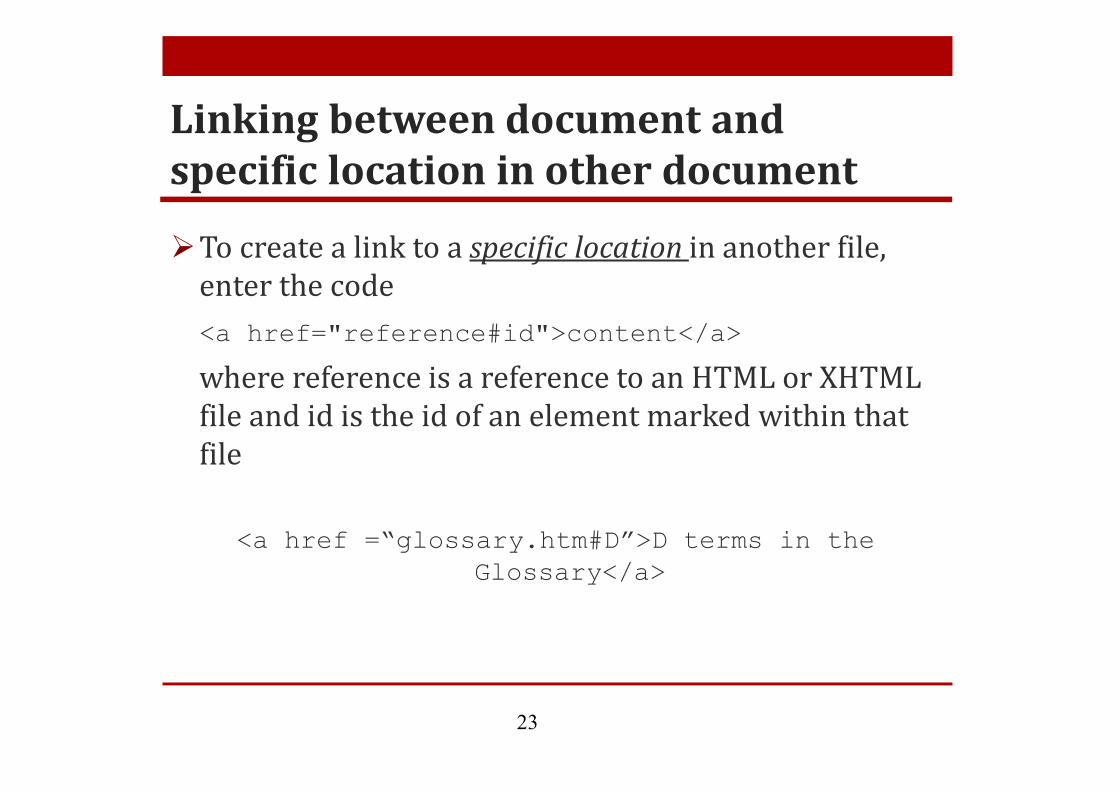
To create a link to a specific location in another file, enter the code<a href="reference#id">content</a>
where reference is a reference to an HTML or XHTML file and id is the id of an element marked within that file
<a href =“glossary.htm#D”>D terms in the Glossary</a>
23
Linking between document and specific location in other document
24
<h1 id=“A”> A: </h1>
A
First.htm
A- using the id attribute:
B- linking to an id:<a href=“second.htm#A”>A</a>
Second.htm
A:------------
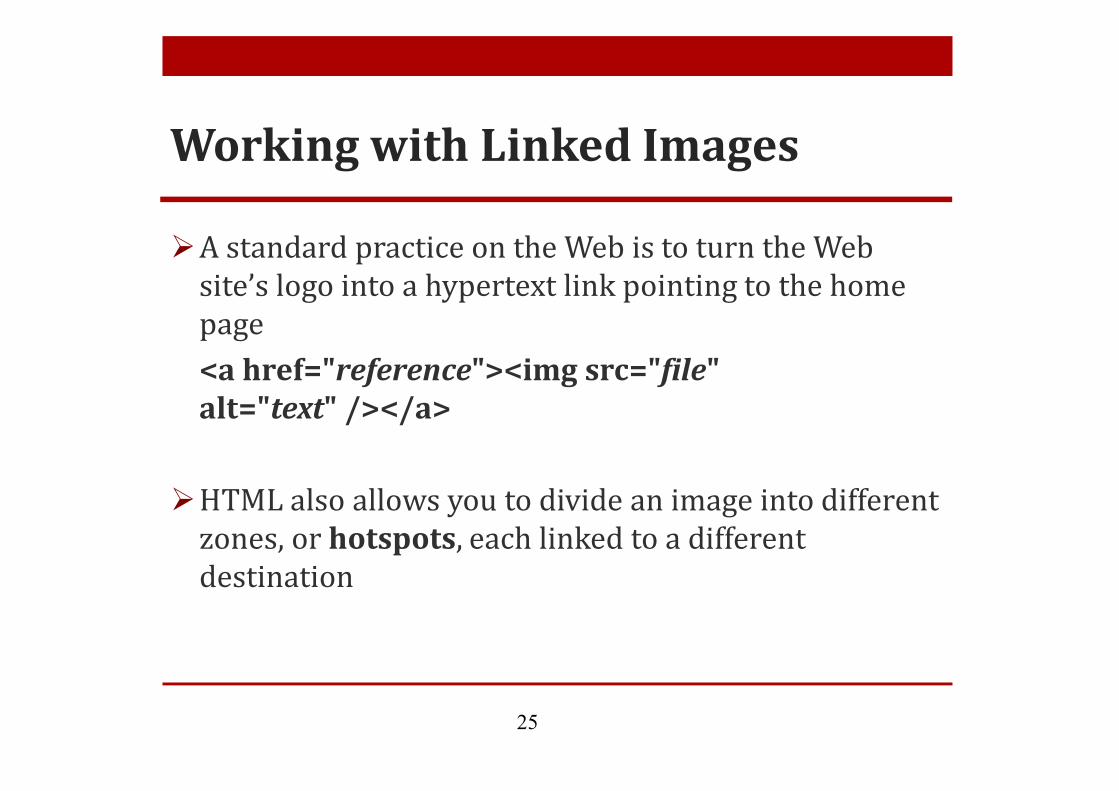
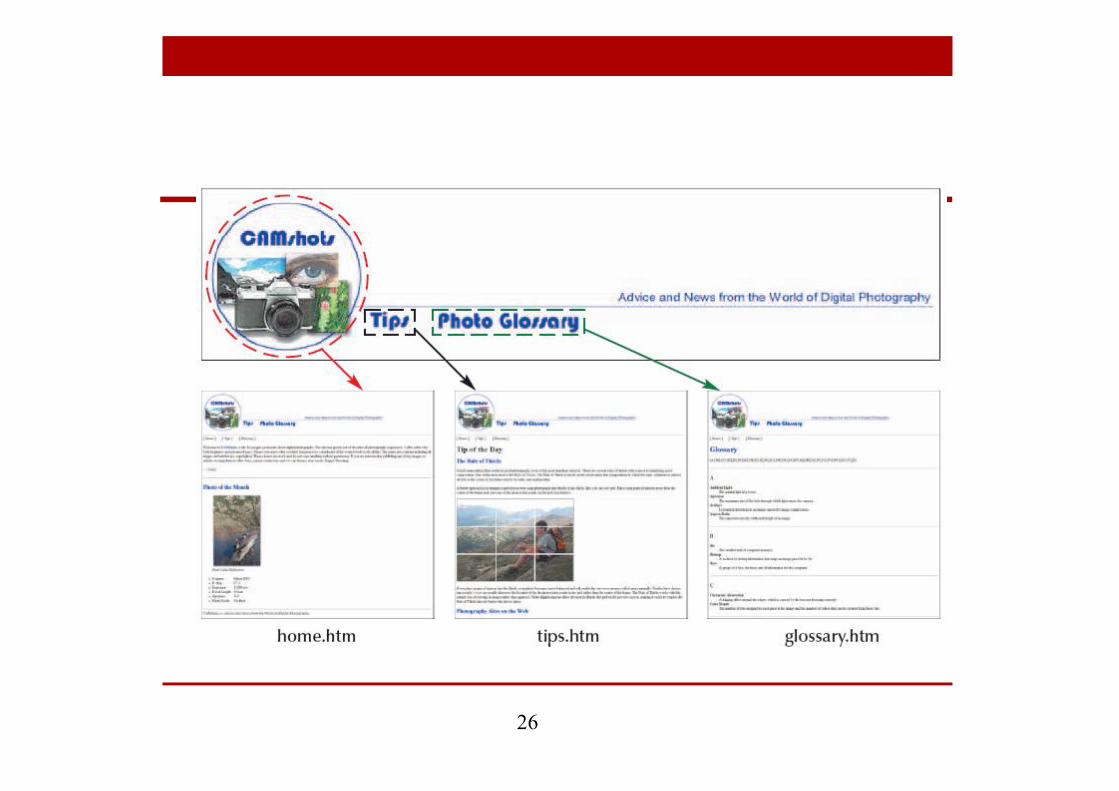
A standard practice on the Web is to turn the Web site’s logo into a hypertext link pointing to the home page<a href="reference"><img src="file" alt="text" /></a>
HTML also allows you to divide an image into different zones, or hotspots, each linked to a different destination
25
Working with Linked Images
26
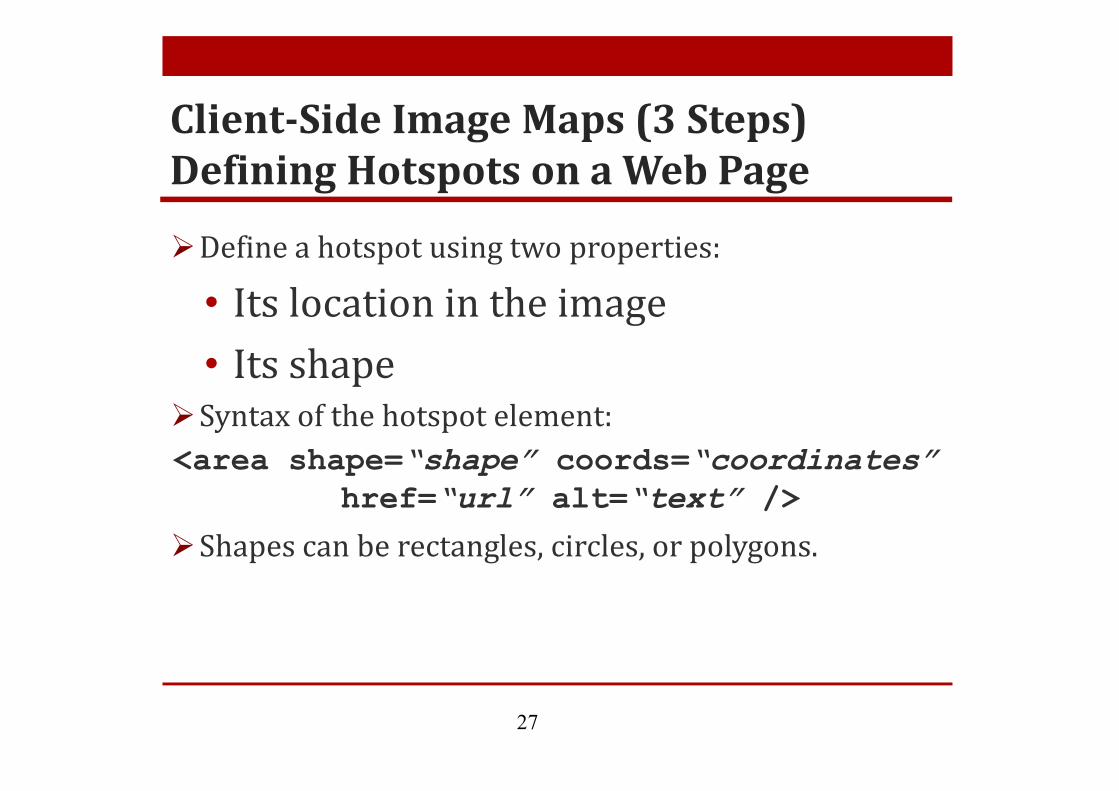
Define a hotspot using two properties:
• Its location in the image• Its shape
Syntax of the hotspot element:<area shape=“shape” coords=“coordinates”
href=“url” alt=“text” />
Shapes can be rectangles, circles, or polygons.
27
Client-Side Image Maps (3 Steps)Defining Hotspots on a Web Page
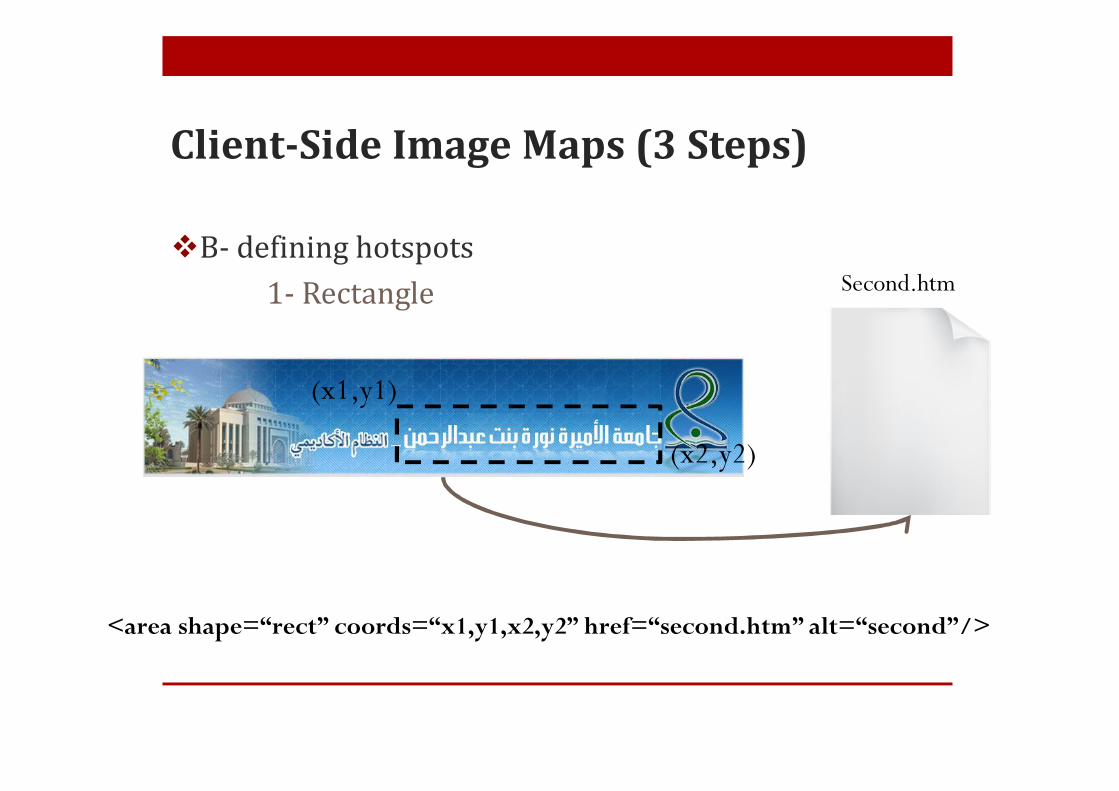
B- defining hotspots1- Rectangle
<area shape=“rect” coords=“x1,y1,x2,y2” href=“second.htm” alt=“second”/>
Second.htm
(x1,y1)
(x2,y2)
Client-Side Image Maps (3 Steps)
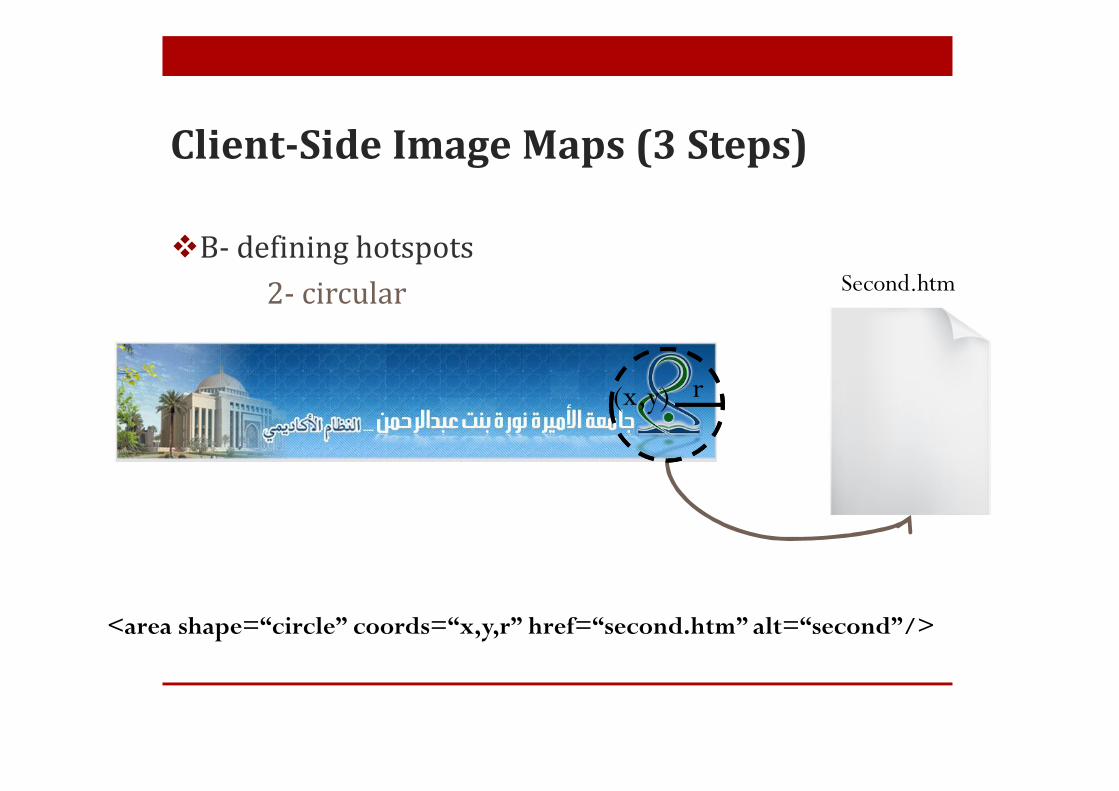
B- defining hotspots2- circular
<area shape=“circle” coords=“x,y,r” href=“second.htm” alt=“second”/>
Second.htm
(x,y) r
Client-Side Image Maps (3 Steps)
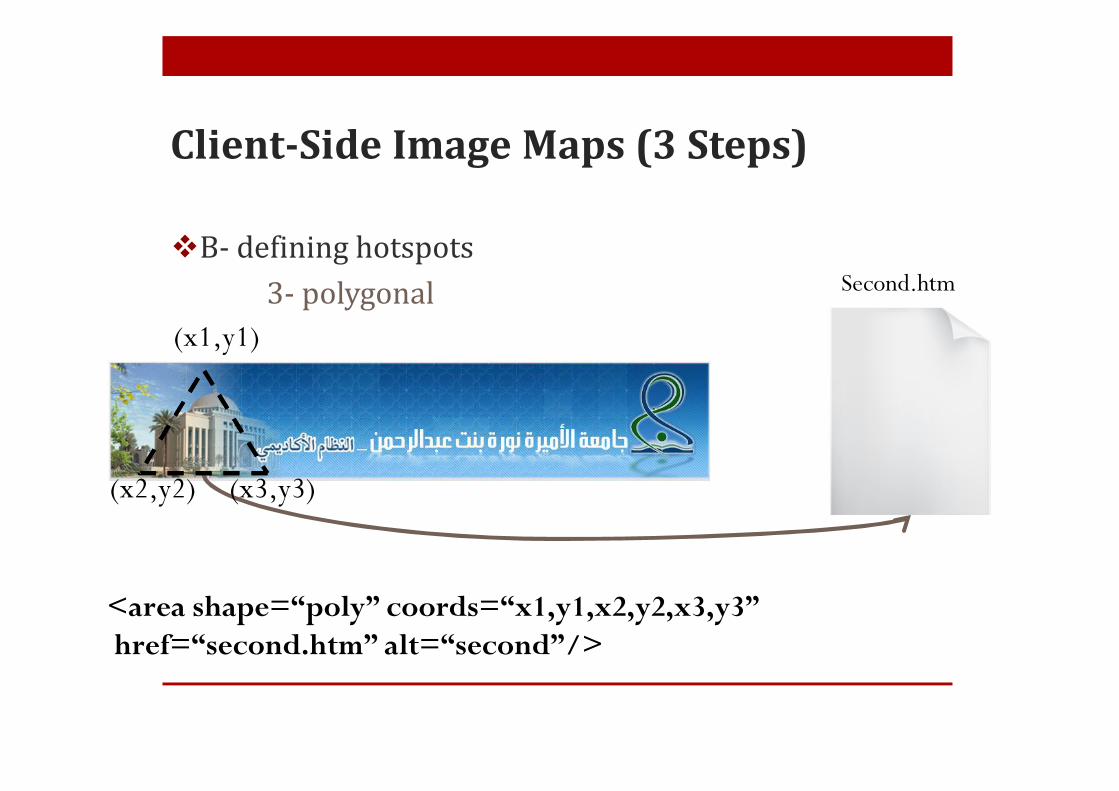
B- defining hotspots3- polygonal
<area shape=“poly” coords=“x1,y1,x2,y2,x3,y3” href=“second.htm” alt=“second”/>
Second.htm
(x1,y1)
(x2,y2) (x3,y3)
Client-Side Image Maps (3 Steps)
C- To apply an image map to an image, add the usemap attribute to the inline image’s <img> tag. The syntax is :
<img scr=“filename” alt=“text” usemap=“#map”/>
Client-Side Image Maps (3 Steps)
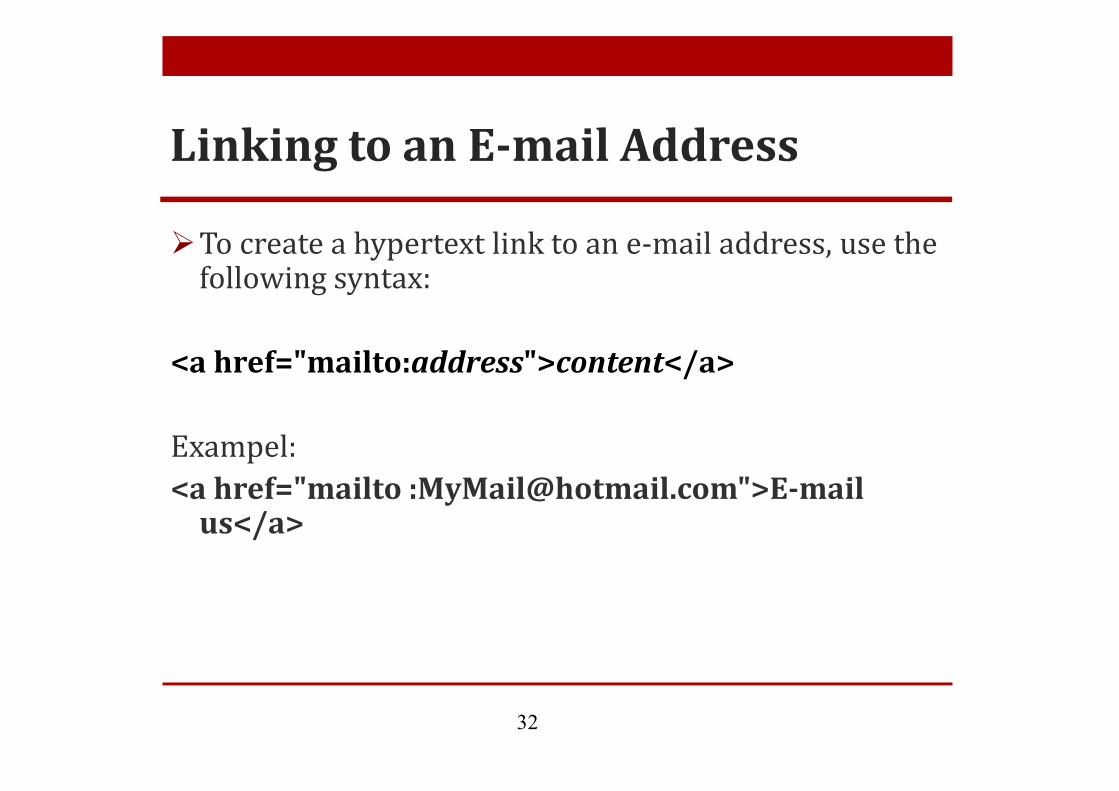
To create a hypertext link to an e-mail address, use the following syntax:
<a href="mailto:address">content</a>
Exampel:<a href="mailto :[email protected]">E-mail
us</a>
32
Linking to an E-mail Address
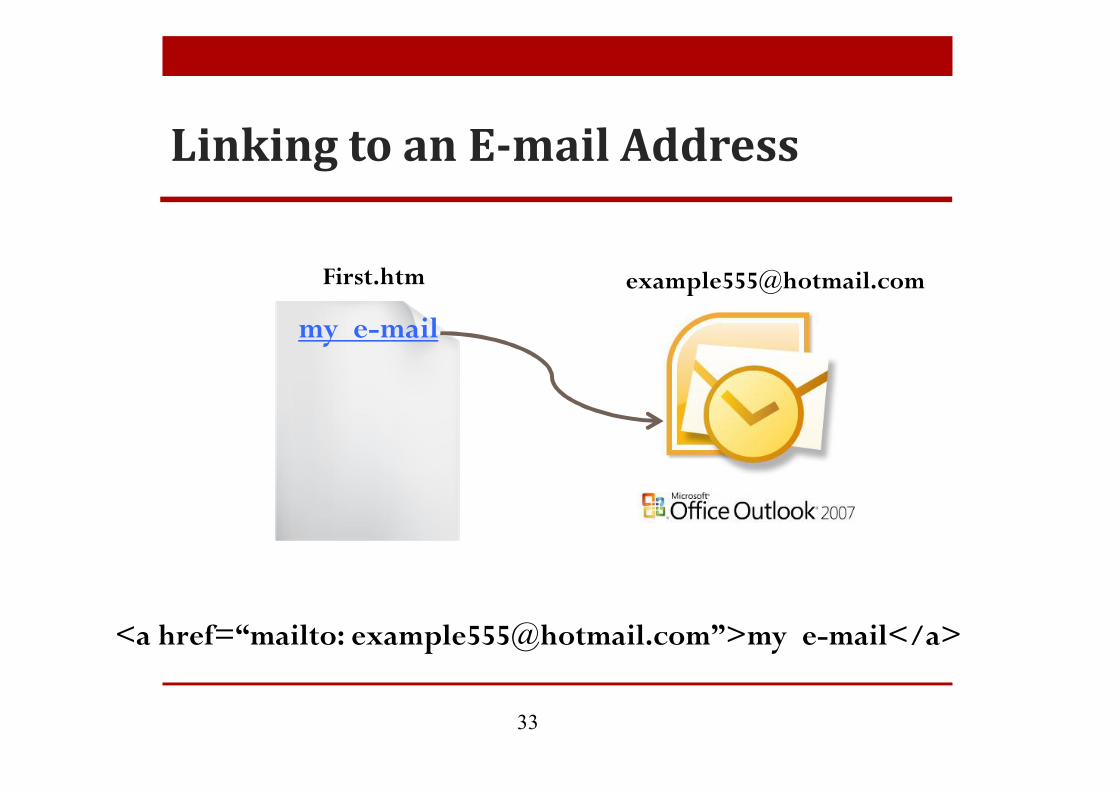
33
Linking to an E-mail Address
my e-mail
First.htm
<a href=“mailto: [email protected]”>my e-mail</a>
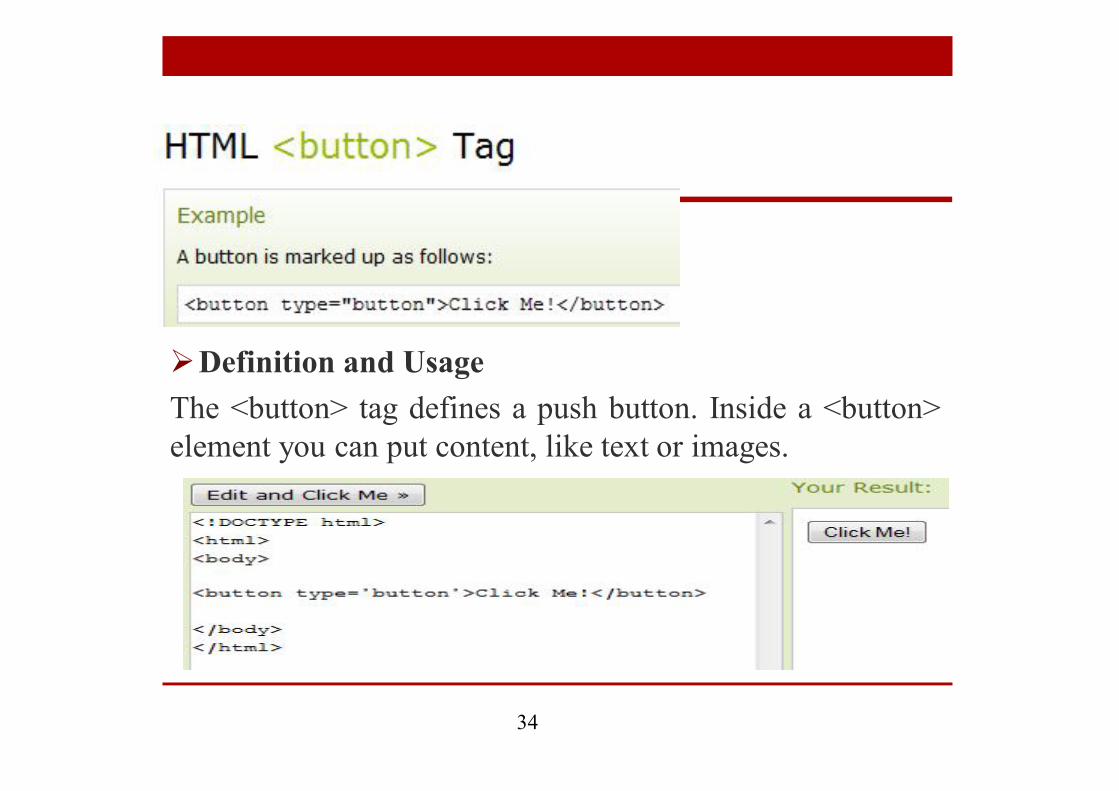
Definition and UsageThe <button> tag defines a push button. Inside a <button>element you can put content, like text or images.
34
Tables are commonly used on Web pages in two ways:• To organize information• To format the layout of an entire Web page
35
Table
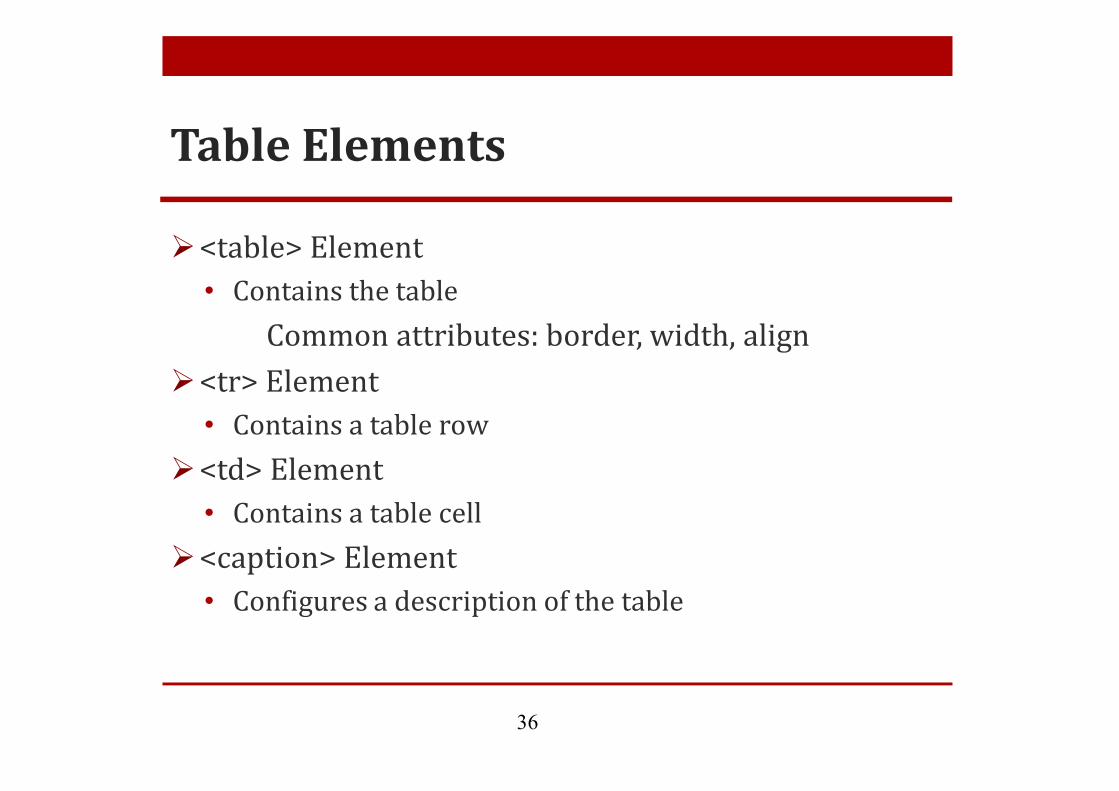
<table> Element• Contains the table
Common attributes: border, width, align<tr> Element• Contains a table row
<td> Element• Contains a table cell
<caption> Element• Configures a description of the table
36
Table Elements
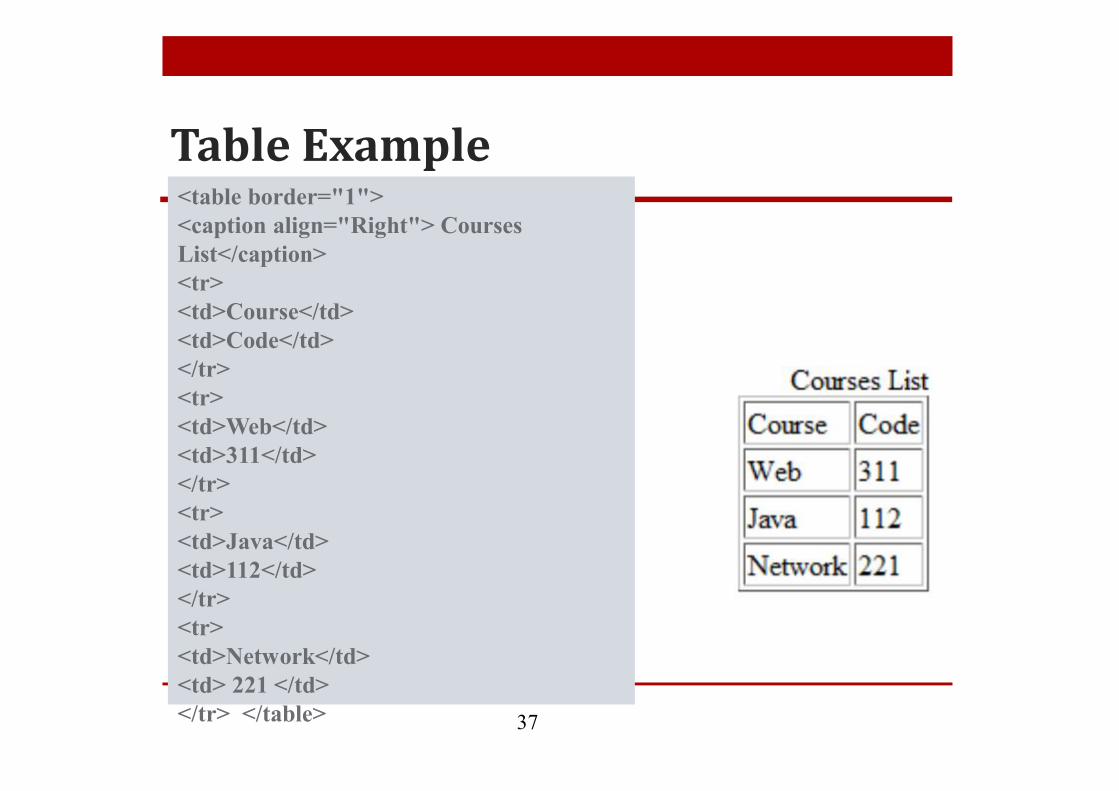
<table border="1"><caption align="Right"> Courses List</caption><tr><td>Course</td><td>Code</td></tr><tr><td>Web</td><td>311</td></tr><tr><td>Java</td><td>112</td></tr><tr><td>Network</td><td> 221 </td></tr> </table> 37
Table Example
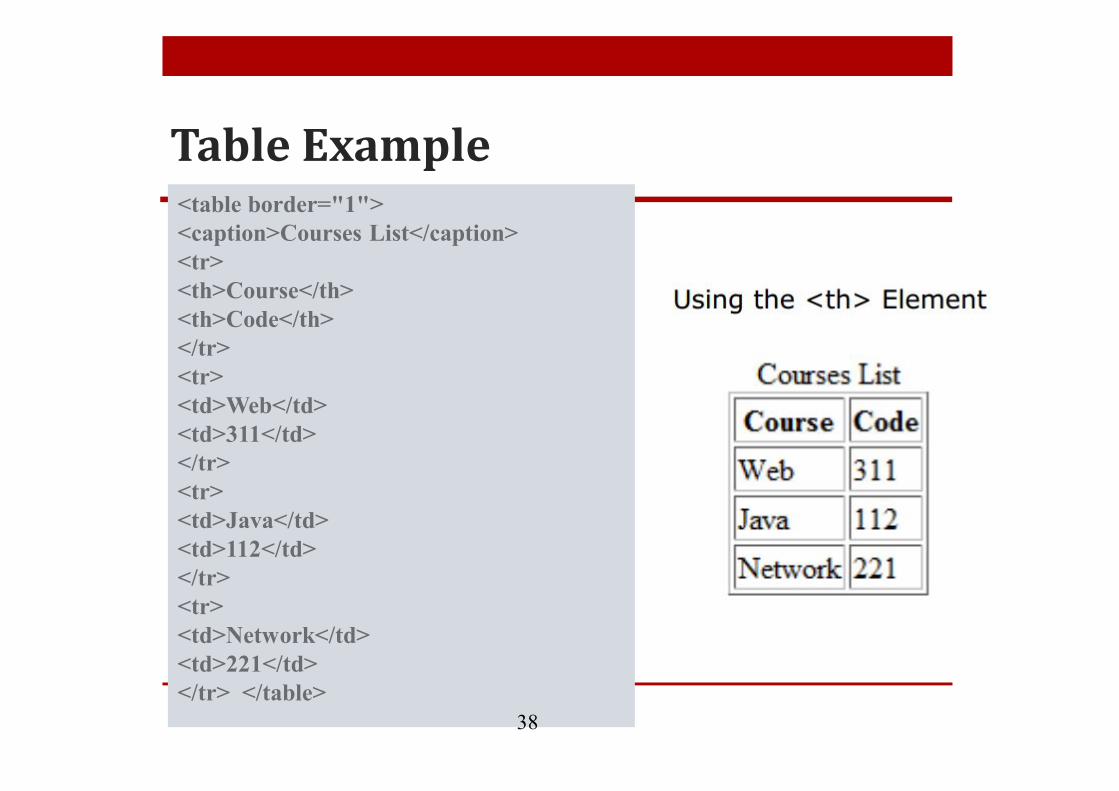
<table border="1"><caption>Courses List</caption><tr><th>Course</th><th>Code</th></tr><tr><td>Web</td><td>311</td></tr><tr><td>Java</td><td>112</td></tr><tr><td>Network</td><td>221</td></tr> </table>
38
Table Example
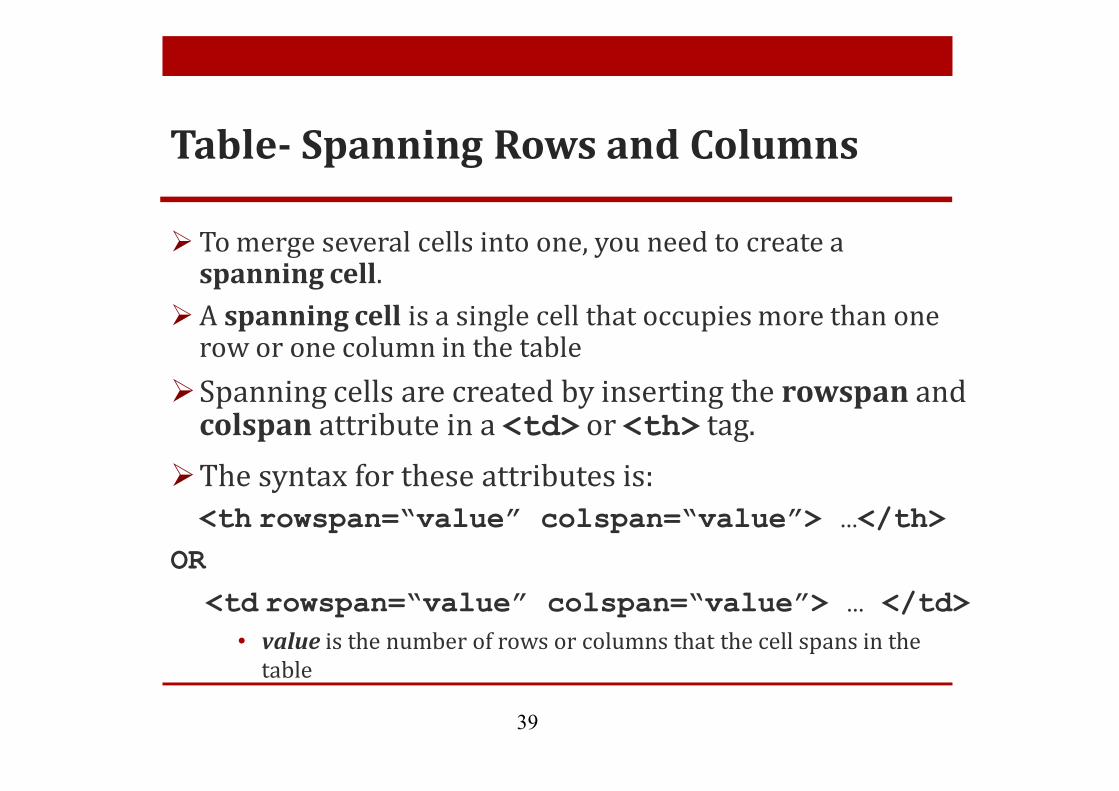
To merge several cells into one, you need to create a spanning cell.
A spanning cell is a single cell that occupies more than one row or one column in the table
Spanning cells are created by inserting the rowspan and colspan attribute in a <td> or <th> tag.
The syntax for these attributes is: <th rowspan=“value” colspan=“value”> …</th>
OR<td rowspan=“value” colspan=“value”> … </td>
• value is the number of rows or columns that the cell spans in the table
39
Table- Spanning Rows and Columns
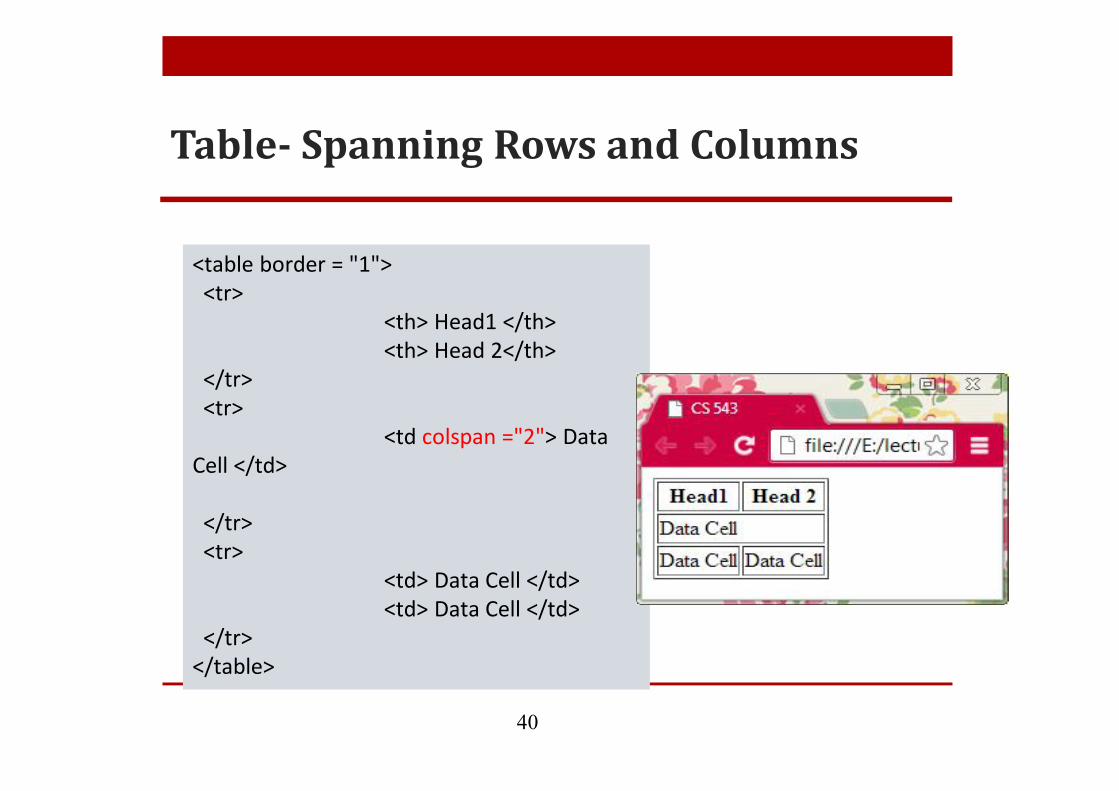
40
Table- Spanning Rows and Columns
<table border = "1"><tr>
<th> Head1 </th><th> Head 2</th>
</tr><tr>
<td colspan ="2"> Data Cell </td>
</tr><tr>
<td> Data Cell </td><td> Data Cell </td>
</tr></table>
41
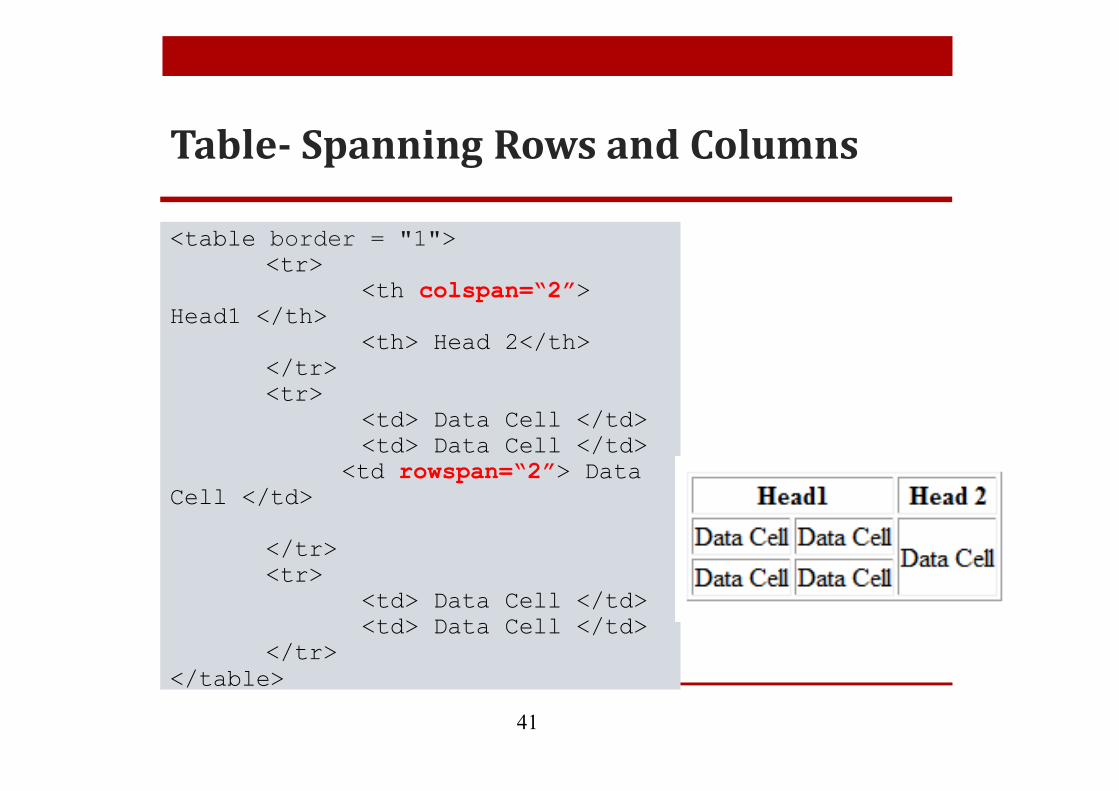
Table- Spanning Rows and Columns
<table border = "1"><tr>
<th colspan=“2”> Head1 </th>
<th> Head 2</th></tr><tr>
<td> Data Cell </td><td> Data Cell </td>
<td rowspan=“2”> Data Cell </td>
</tr><tr>
<td> Data Cell </td><td> Data Cell </td>
</tr></table>
42
HTML code
resulting table
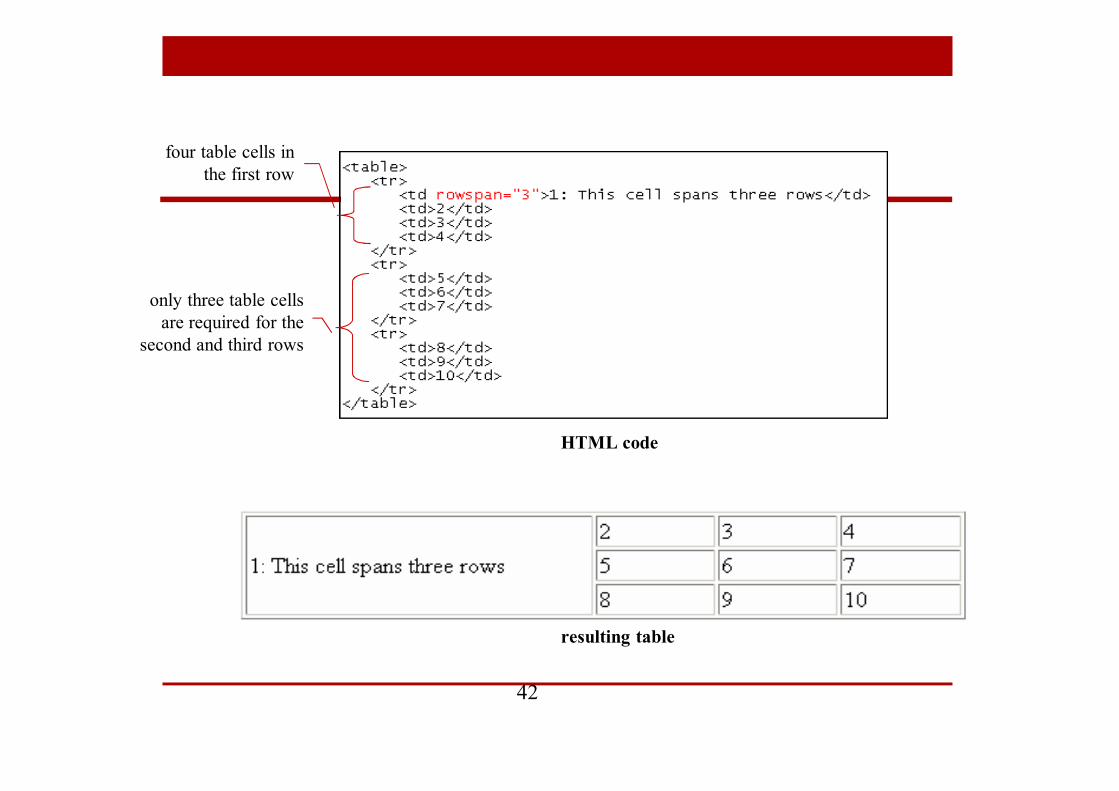
four table cells in the first row
only three table cells are required for the
second and third rows
Formatting Tables with HTML Attributes
٤٣
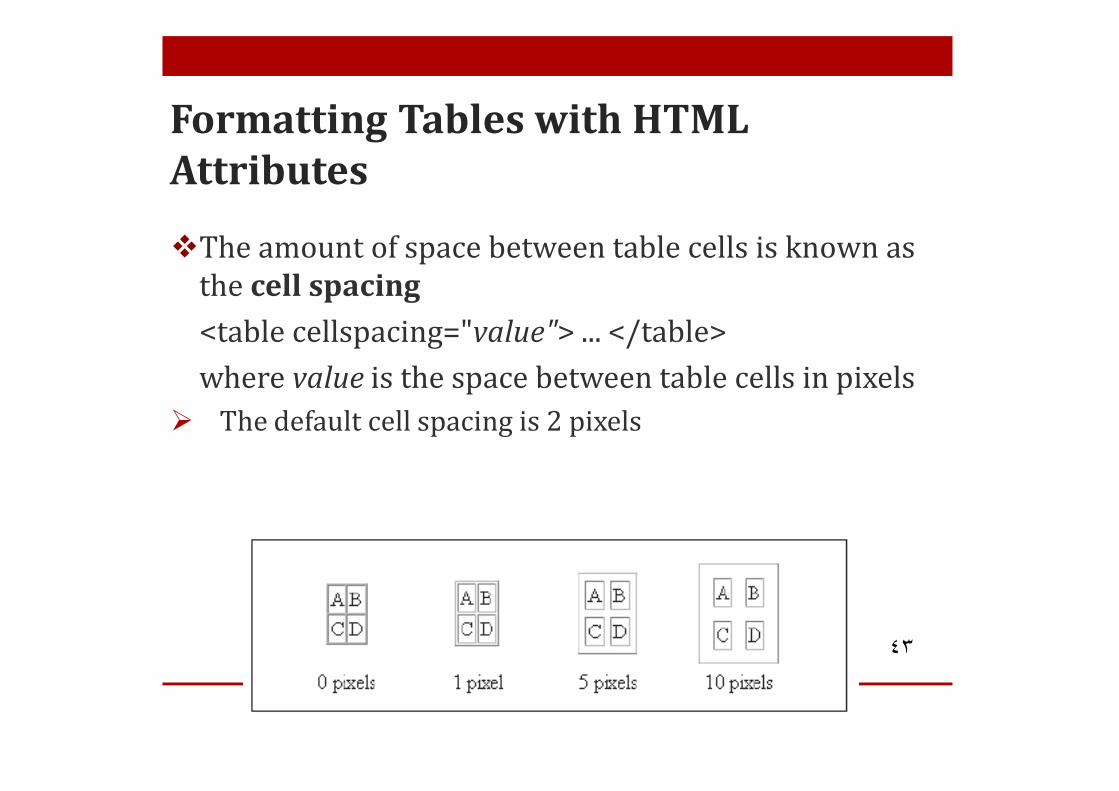
The amount of space between table cells is known as the cell spacing<table cellspacing="value"> ... </table>where value is the space between table cells in pixels
The default cell spacing is 2 pixels
Formatting Tables with HTML Attributes
٤٤
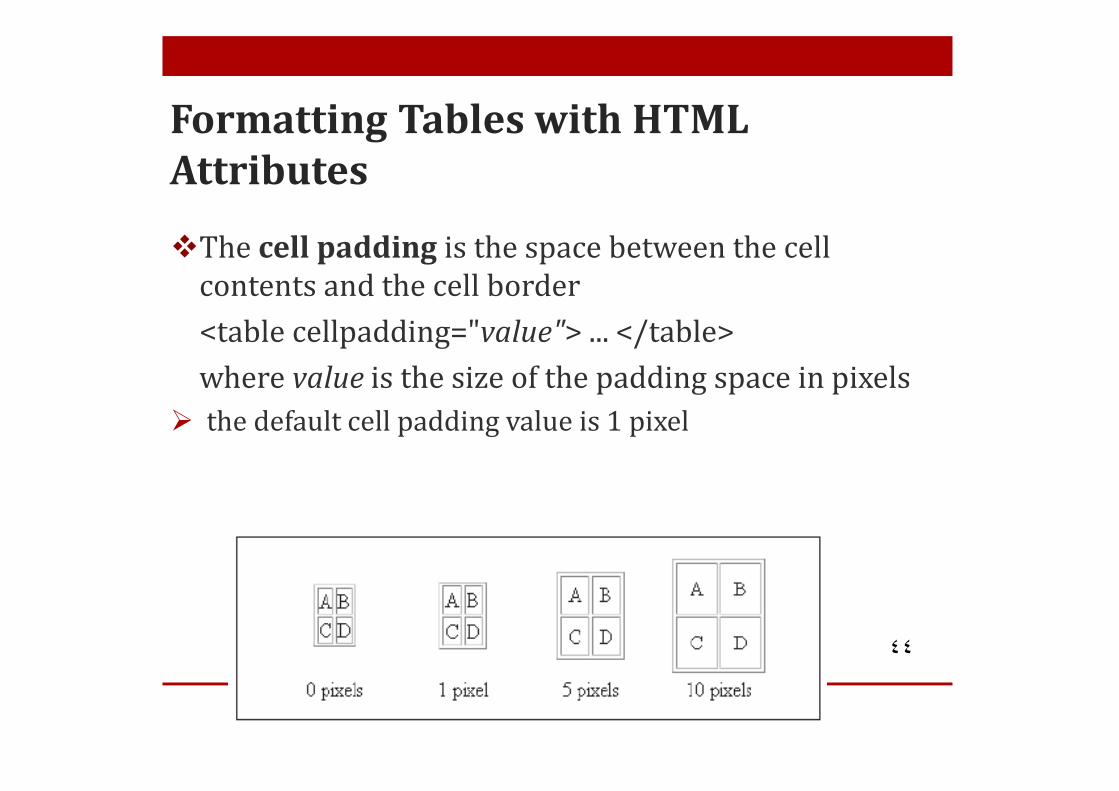
The cell padding is the space between the cell contents and the cell border<table cellpadding="value"> ... </table>where value is the size of the padding space in pixels
the default cell padding value is 1 pixel
Cell Spacing & Cell Padding:
٤٥
Example :
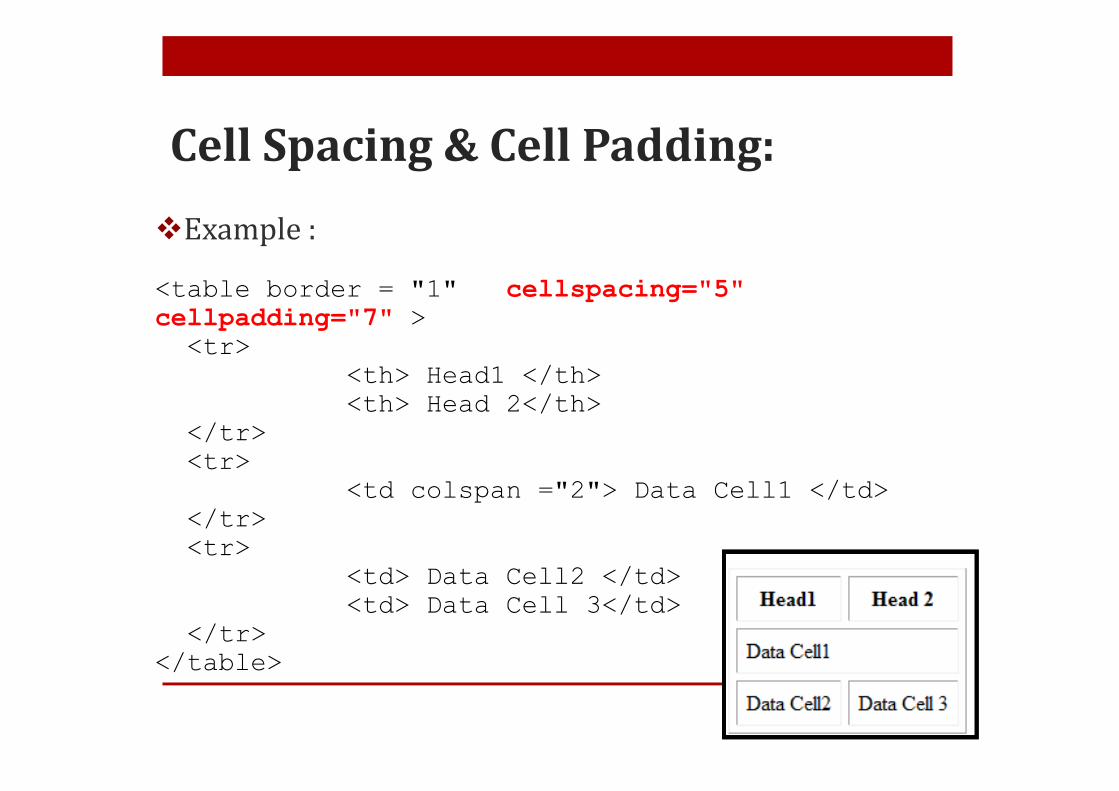
<table border = "1" cellspacing="5" cellpadding="7" >
<tr><th> Head1 </th><th> Head 2</th>
</tr><tr>
<td colspan ="2"> Data Cell1 </td></tr><tr>
<td> Data Cell2 </td><td> Data Cell 3</td>
</tr></table>