Embed Size (px)
Citation preview
Copyright© 1996Hewlett-Packard Co.Printed in USA 12/96
Manual Part No.C3166-90969
HP LaserJet 5Si/5Si MX/5Si NXPrinter Getting Started Guide
Printed onRecycled Paper
English
Getting Started Guide
HP LaserJet 5Si / 5Si MX / 5Si NX Printer
© Copyright Hewlett-PackardCompany, 1996
All Rights Reserved.Reproduction, adaptation, ortranslation without prior writtenpermission is prohibited, exceptas allowed under the copyrightlaws.
Publication numberC3166-90969
First edition, December 1996
WarrantyThe information contained inthis document is subject tochange without notice.
Hewlett-Packard makes nowarranty of any kind withregard to this material,including, but not limited to,the implied warranties ormerchantability and fitness fora particular purpose.
Hewlett-Packard shall not beliable for errors contained hereinor for incidental orconsequential damages inconnection with the furnishing,performance, or use of thismaterial.
TrademarksAdobe , PostScript , andAdobe PostScript aretrademarks of Adobe SystemsIncorporated which may beregistered in certainjurisdictions. Arial®, TimesNew Roman®, and Monotype®are resigtered trademarks of theMonotype Corporation. Helvetica and Univers aretrademarks of Linotype AGand/or its subsidiaries in theU.S. and other countries.Macintosh computer is a productof Apple Computer, Inc.Microsoft® is a U.S. registeredtrademark of MicrosoftCorporation. TrueType is atrademark of Apple Computer,Inc. Lotus® 1-2-3® areregistered trademarks of LotusDevelopment Corporation.Compuserve is a U.S.trademark of CompuServe, Inc.
Hewlett-Packard Company11311 Chinden BoulevardBoise, Idaho 83714
Installation Checklist
Congratulations on your purchase of the HP LaserJet 5Si/5Si MX/5Si NX printer!
This Getting Started Guide will help you set up and install your newprinter. Complete, in order, the steps in the checklist. Each step isdetailed on the following pages with easy-to-follow directions.
Step 1. Preparing a Location for the Printer . . . . . . . . . . 4Step 2. Removing the Internal Packaging . . . . . . . . . . . 5Step 3. Checking the Package Contents . . . . . . . . . . . . 6Step 4. Installing the Power Cord . . . . . . . . . . . . . . . . 7Step 5. Installing the Toner Cartridge . . . . . . . . . . . . . . 9Step 6. Changing or Installing the Control Panel Overlay . . . 11Step 7. Configuring the Display Language (Optional) . . . . . 12Step 8. Loading the Paper Trays . . . . . . . . . . . . . . . . 13Step 9. Setting Power Save (Optional) . . . . . . . . . . . . . 16Step 10. Testing Printer Operation . . . . . . . . . . . . . . . 17Step 11. Testing Printer Operation (PostScript) . . . . . . . . 18Step 12. Selecting Bi-Tronics Parallel or NetworkConnection . . . . . . . . . . . . . . . . . . . . . . . . . . . 19Step 13. Selecting Bi-Tronics Parallel Interface . . . . . . . . 20Step 14. Installing a Bi-Tronics Parallel Cable . . . . . . . . . 21Step 15. Verifying Communication with a Bi-TronicsConnection . . . . . . . . . . . . . . . . . . . . . . . . . . . 22Step 16. Connecting the Printer to the Network . . . . . . . . 23Step 17. Optional Network Configuration . . . . . . . . . . . 25Step 18. Disabling Network Protocols (Optional) . . . . . . . 29Step 19. Network Security (Optional) . . . . . . . . . . . . . 31Step 20. Installing the Software Drivers . . . . . . . . . . . . 33
For information on problem solving, see the followingpages.Troubleshooting Checklist . . . . . . . . . . . . . . . . . . . . . . 41For Additional Assistance... . . . . . . . . . . . . . . . . . . . . . . 42
EN Getting Started Guide - 3
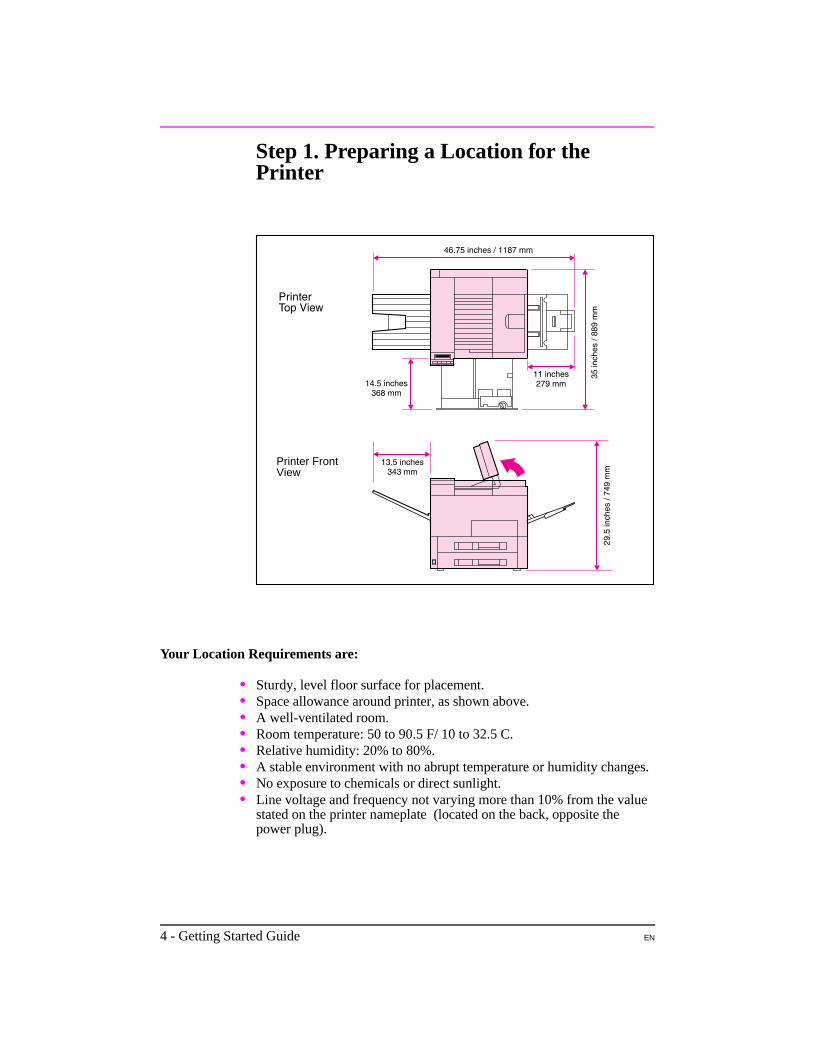
Step 1. Preparing a Location for thePrinter
Your Location Requirements are:
•• Sturdy, level floor surface for placement.•• Space allowance around printer, as shown above.•• A well-ventilated room.•• Room temperature: 50 to 90.5 F/ 10 to 32.5 C.•• Relative humidity: 20% to 80%.•• A stable environment with no abrupt temperature or humidity changes.•• No exposure to chemicals or direct sunlight.•• Line voltage and frequency not varying more than 10% from the value
stated on the printer nameplate (located on the back, opposite thepower plug).
Printer FrontView
4 - Getting Started Guide EN
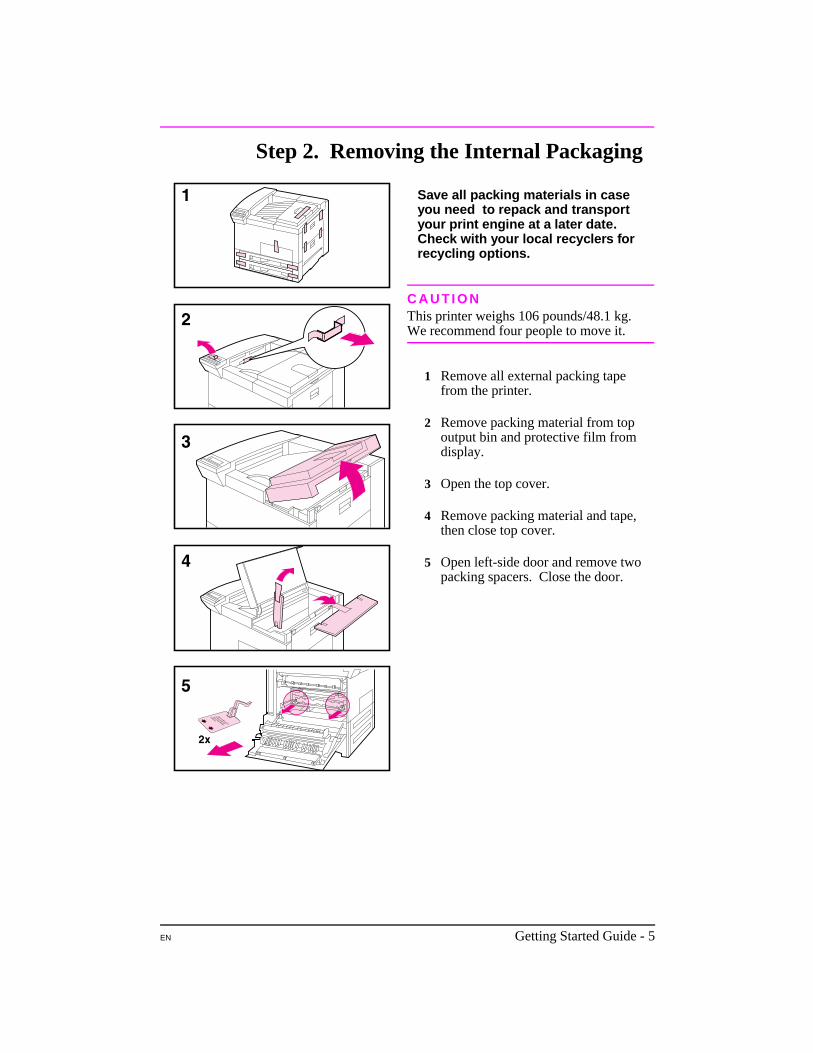
Step 2. Removing the Internal Packaging
C A U T I O NThis printer weighs 106 pounds/48.1 kg.We recommend four people to move it.
1 Remove all external packing tapefrom the printer.
2 Remove packing material from topoutput bin and protective film fromdisplay.
3 Open the top cover.
4 Remove packing material and tape,then close top cover.
5 Open left-side door and remove twopacking spacers. Close the door.
Save all packing materials in caseyou need to repack and transportyour print engine at a later date.Check with your local recyclers forrecycling options.
EN Getting Started Guide - 5
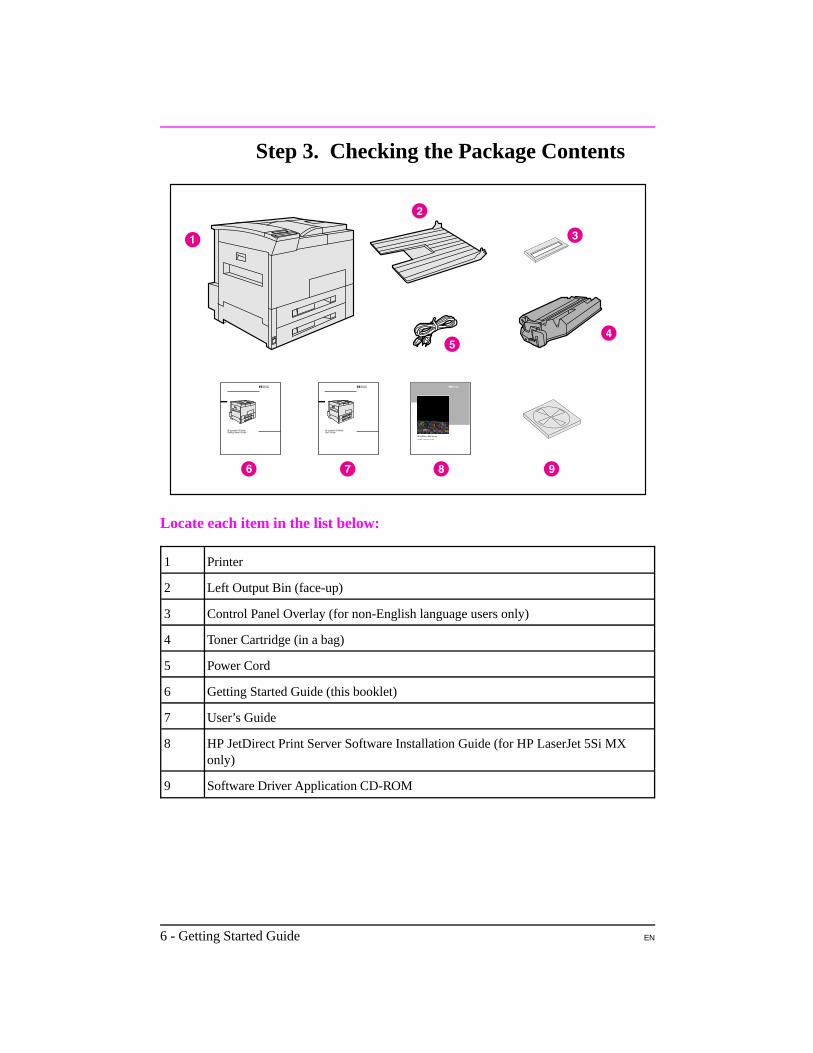
Step 3. Checking the Package Contents
Locate each item in the list below:
1 Printer
2 Left Output Bin (face-up)
3 Control Panel Overlay (for non-English language users only)
4 Toner Cartridge (in a bag)
5 Power Cord
6 Getting Started Guide (this booklet)
7 User’s Guide
8 HP JetDirect Print Server Software Installation Guide (for HP LaserJet 5Si MXonly)
9 Software Driver Application CD-ROM
6 - Getting Started Guide EN
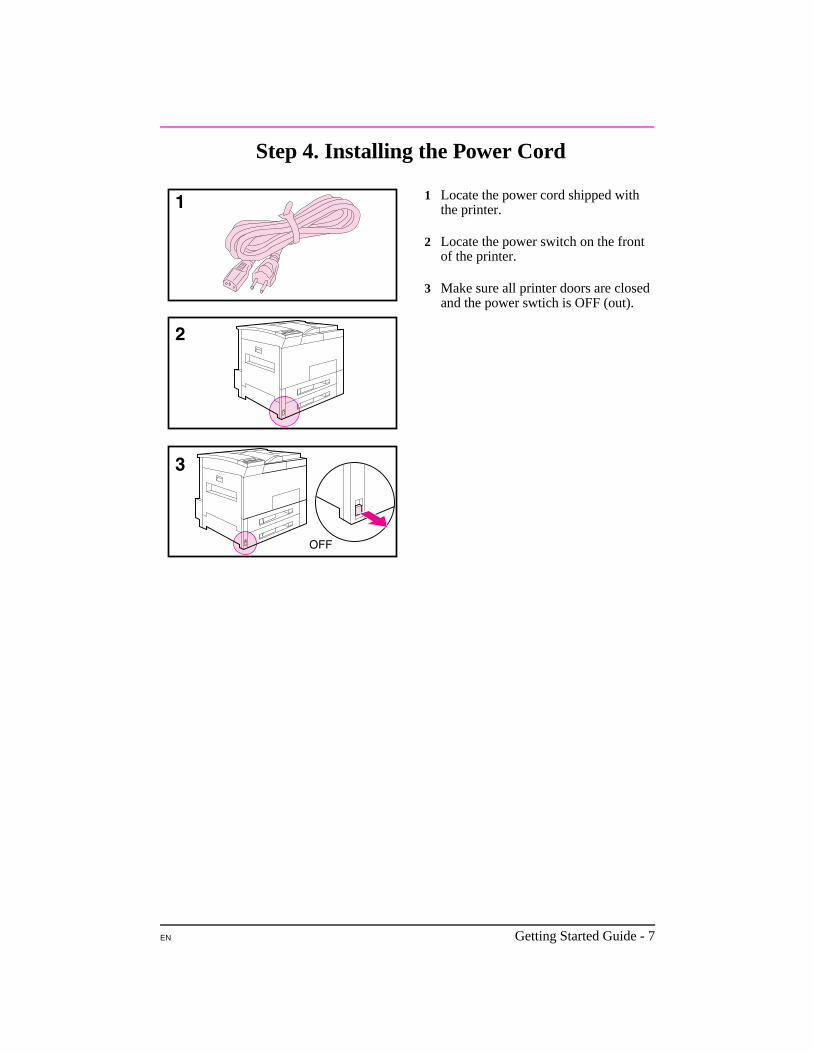
Step 4. Installing the Power Cord
1 Locate the power cord shipped withthe printer.
2 Locate the power switch on the frontof the printer.
3 Make sure all printer doors are closedand the power swtich is OFF (out).
EN Getting Started Guide - 7
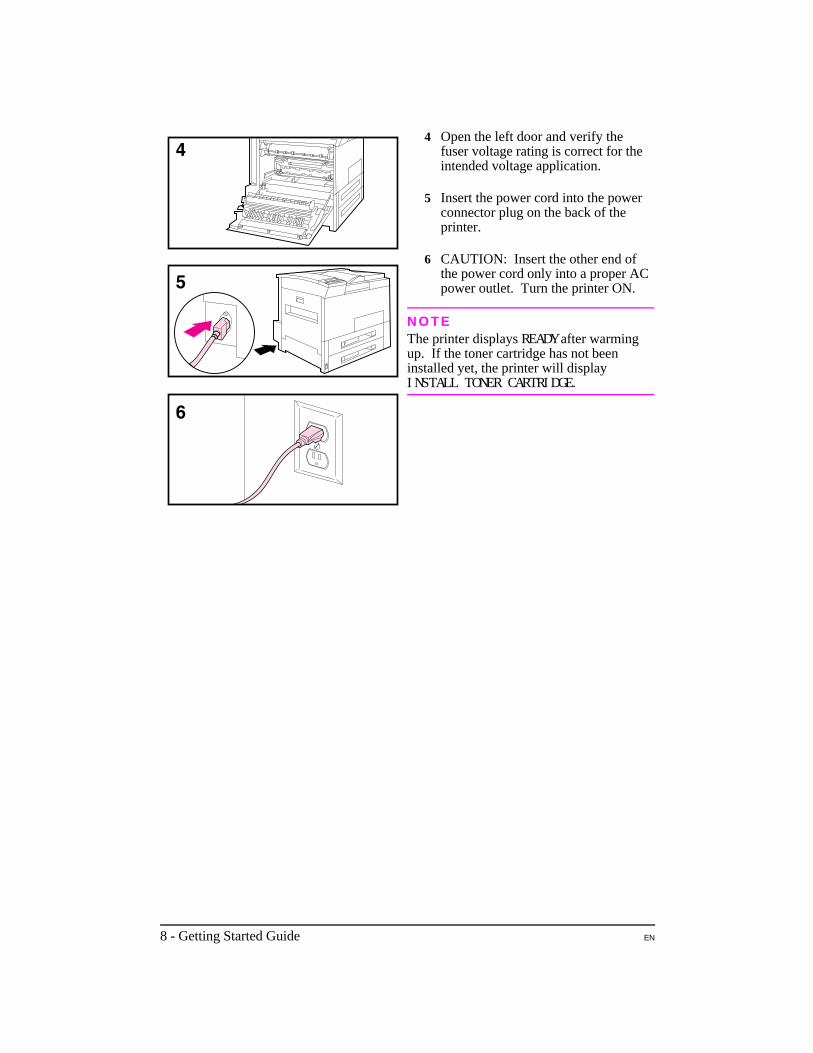
4 Open the left door and verify thefuser voltage rating is correct for theintended voltage application.
5 Insert the power cord into the powerconnector plug on the back of theprinter.
6 CAUTION: Insert the other end ofthe power cord only into a proper ACpower outlet. Turn the printer ON.
N O T EThe printer displays READY after warmingup. If the toner cartridge has not beeninstalled yet, the printer will displayINSTALL TONER CARTRIDGE.
8 - Getting Started Guide EN
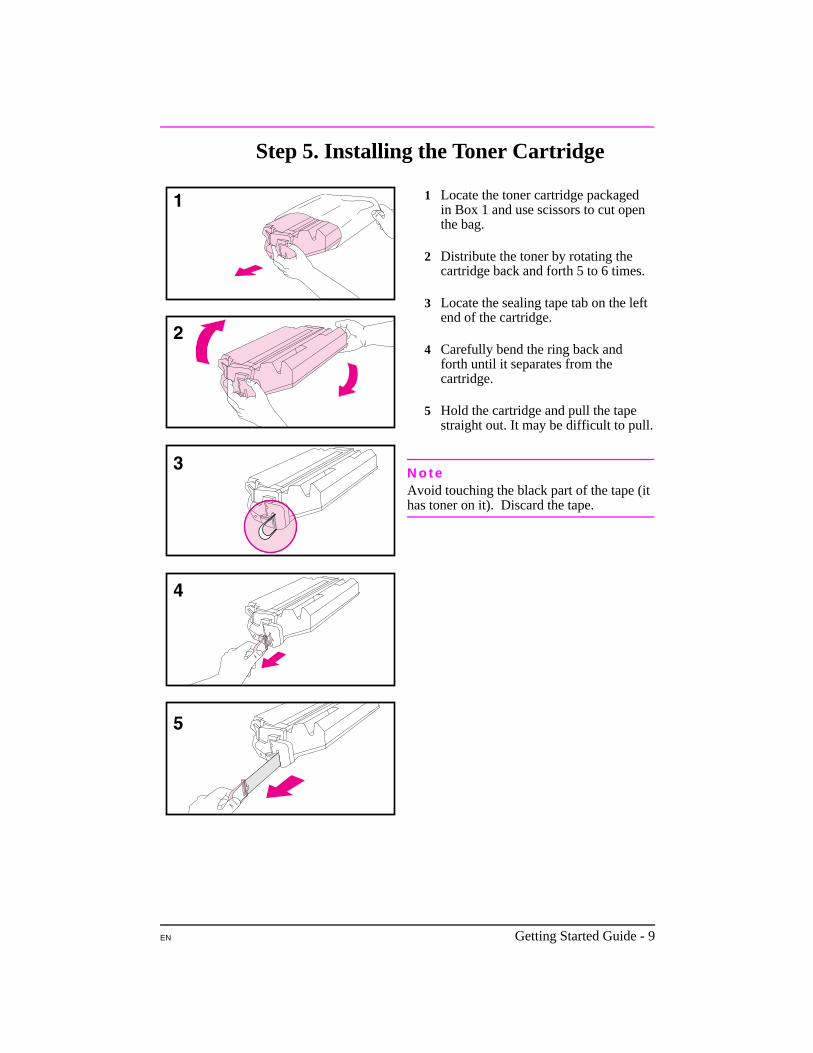
Step 5. Installing the Toner Cartridge
1 Locate the toner cartridge packagedin Box 1 and use scissors to cut openthe bag.
2 Distribute the toner by rotating thecartridge back and forth 5 to 6 times.
3 Locate the sealing tape tab on the left end of the cartridge.
4 Carefully bend the ring back andforth until it separates from thecartridge.
5 Hold the cartridge and pull the tapestraight out. It may be difficult to pull.
N o t eAvoid touching the black part of the tape (ithas toner on it). Discard the tape.
EN Getting Started Guide - 9
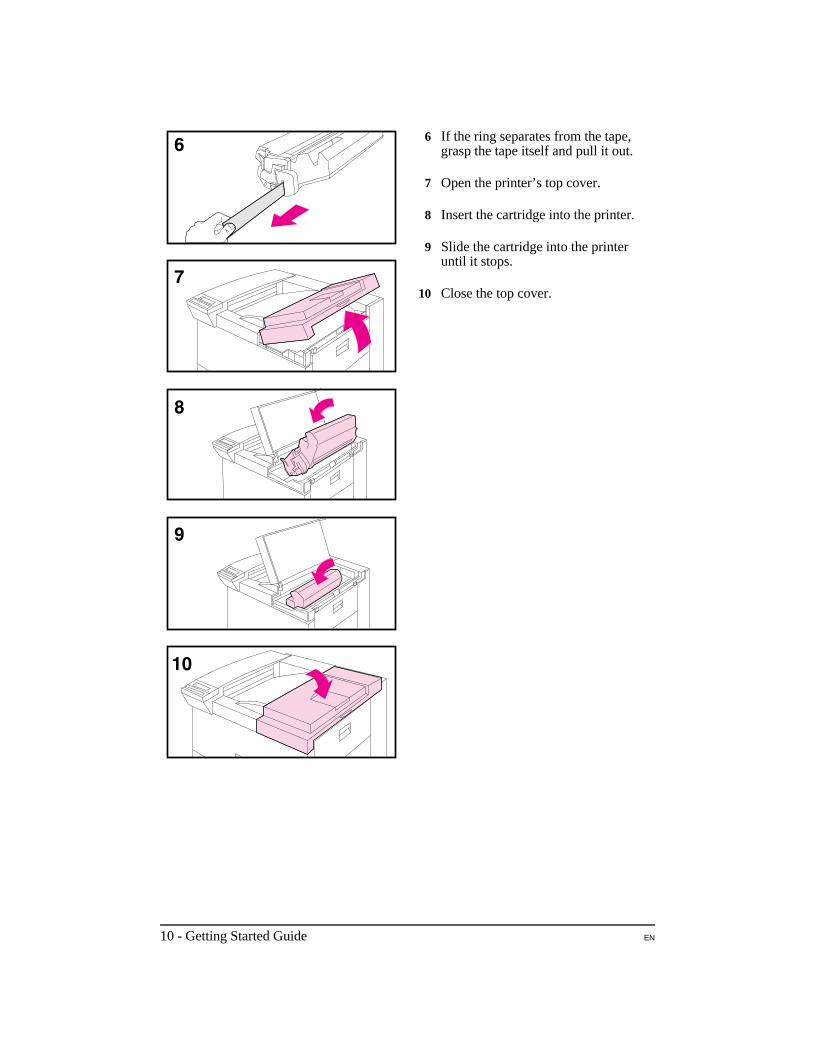
6 If the ring separates from the tape,grasp the tape itself and pull it out.
7 Open the printer’s top cover.
8 Insert the cartridge into the printer.
9 Slide the cartridge into the printeruntil it stops.
10 Close the top cover.
10 - Getting Started Guide EN
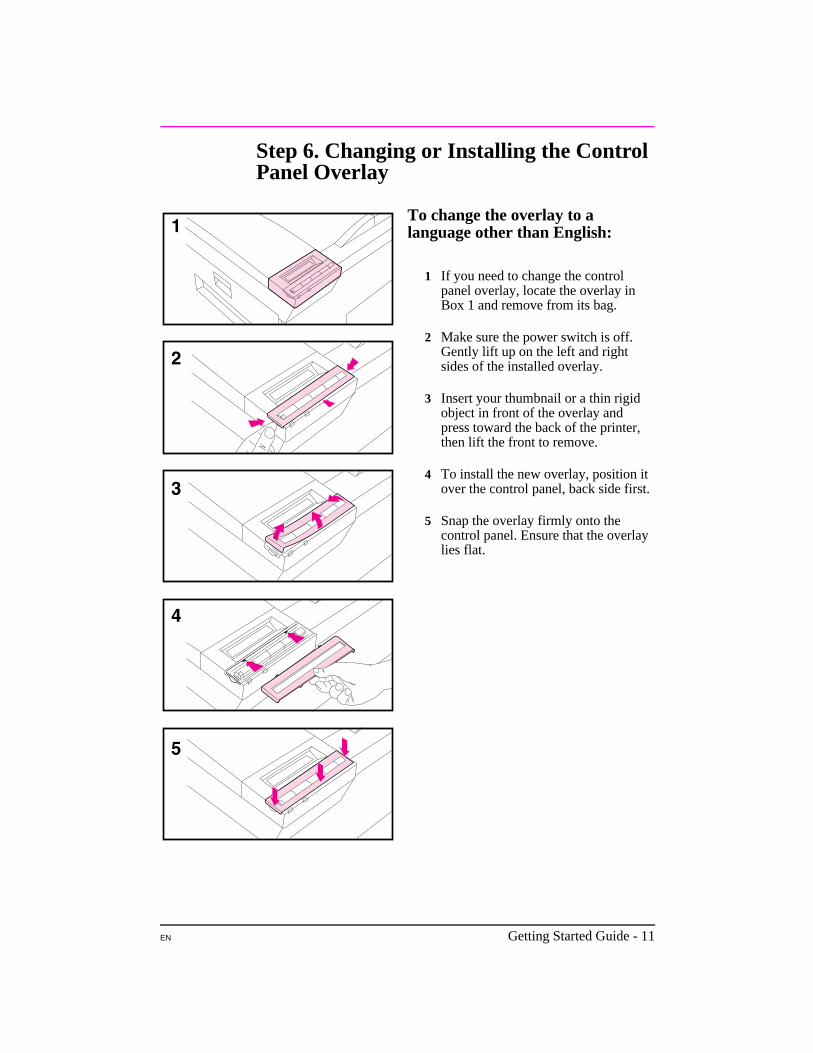
Step 6. Changing or Installing the ControlPanel Overlay
To change the overlay to alanguage other than English:
1 If you need to change the controlpanel overlay, locate the overlay inBox 1 and remove from its bag.
2 Make sure the power switch is off.Gently lift up on the left and rightsides of the installed overlay.
3 Insert your thumbnail or a thin rigidobject in front of the overlay andpress toward the back of the printer,then lift the front to remove.
4 To install the new overlay, position itover the control panel, back side first.
5 Snap the overlay firmly onto thecontrol panel. Ensure that the overlaylies flat.
EN Getting Started Guide - 11
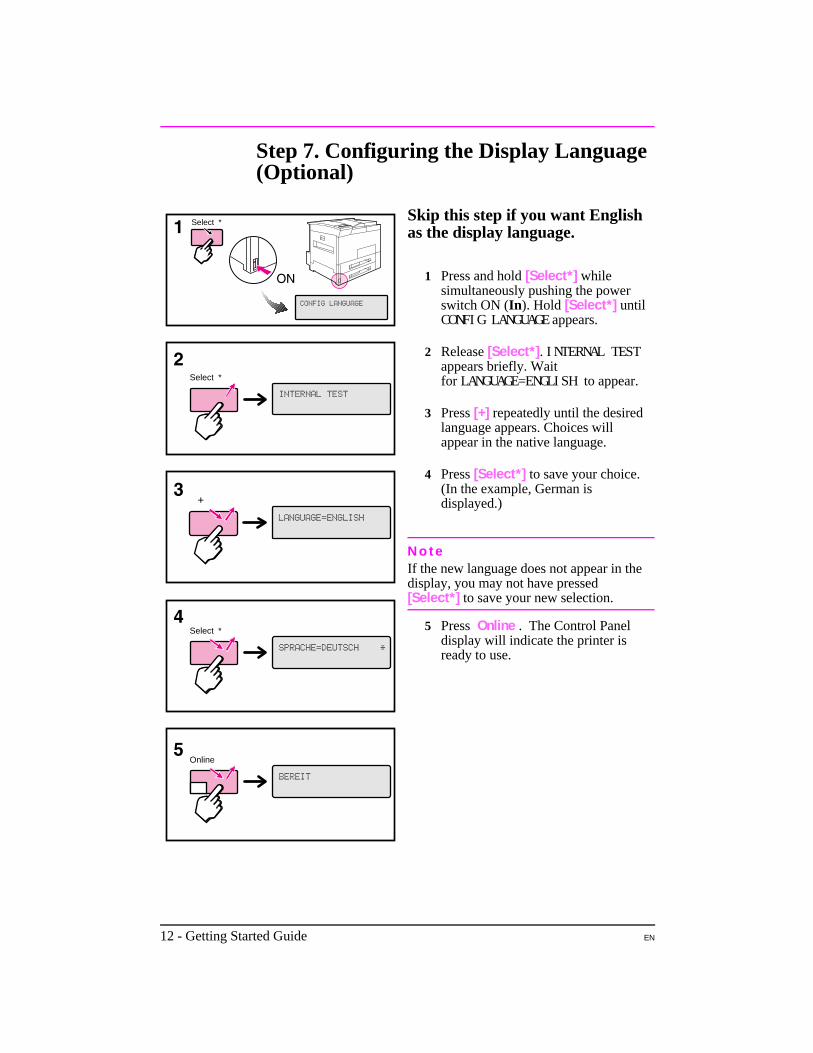
Step 7. Configuring the Display Language(Optional)
Skip this step if you want Englishas the display language.
1 Press and hold [Select*] whilesimultaneously pushing the powerswitch ON (In ). Hold [Select*] untilCONFIG LANGUAGE appears.
2 Release [Select*]. INTERNAL TESTappears briefly. Waitfor LANGUAGE=ENGLISH to appear.
3 Press [+] repeatedly until the desiredlanguage appears. Choices willappear in the native language.
4 Press [Select*] to save your choice.(In the example, German isdisplayed.)
N o t eIf the new language does not appear in thedisplay, you may not have pressed[Select*] to save your new selection.
5 Press Online . The Control Paneldisplay will indicate the printer isready to use.
+
Online
Select *
Select *
Select *
12 - Getting Started Guide EN
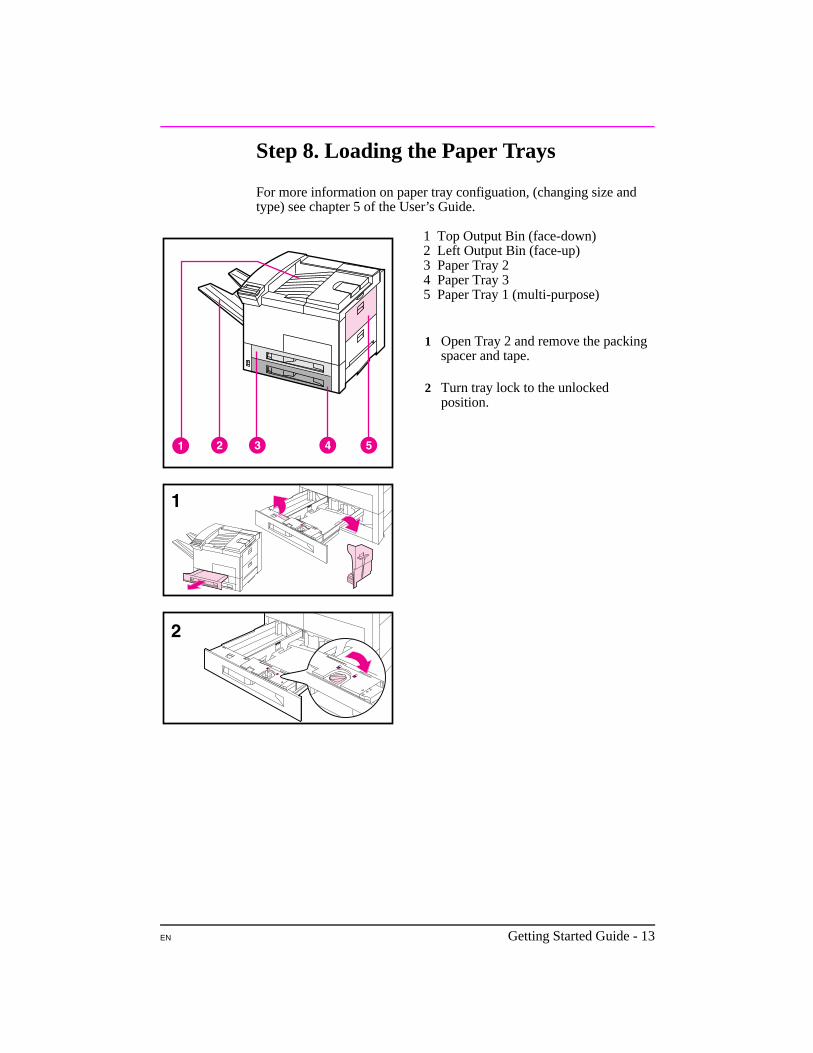
Step 8. Loading the Paper Trays
For more information on paper tray configuation, (changing size andtype) see chapter 5 of the User’s Guide.
1 Top Output Bin (face-down)2 Left Output Bin (face-up)3 Paper Tray 24 Paper Tray 35 Paper Tray 1 (multi-purpose)
1 Open Tray 2 and remove the packingspacer and tape.
2 Turn tray lock to the unlockedposition.
EN Getting Started Guide - 13
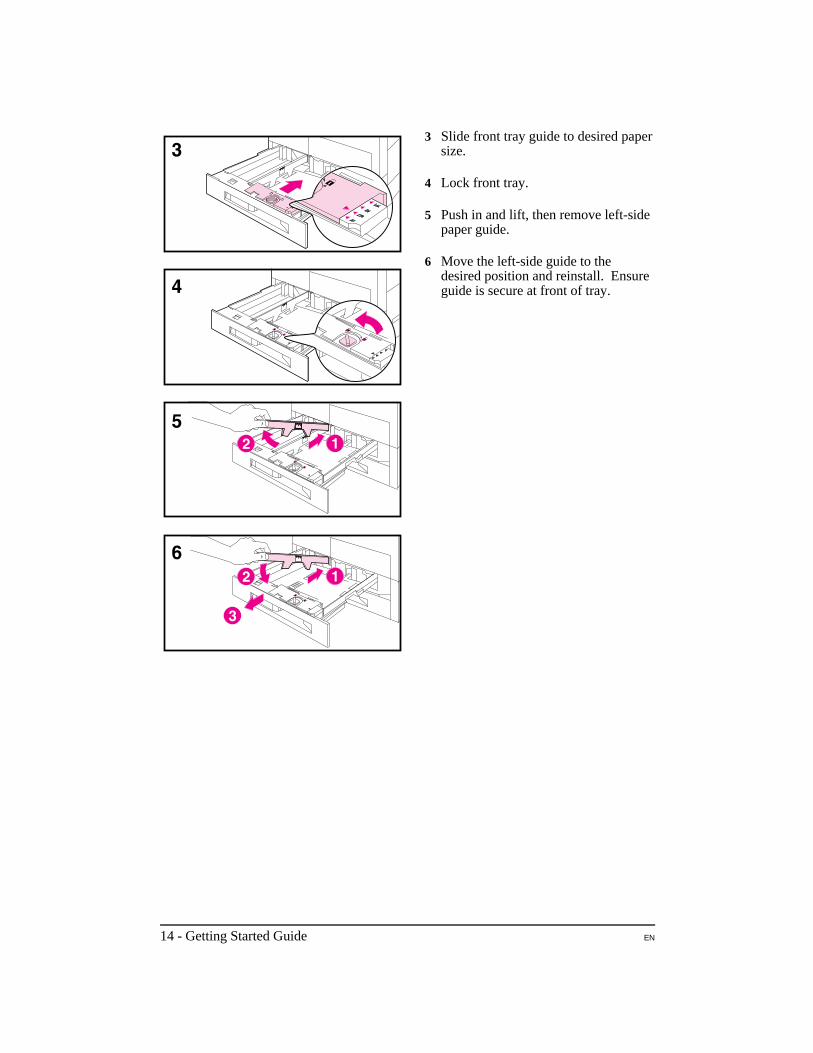
3 Slide front tray guide to desired papersize.
4 Lock front tray.
5 Push in and lift, then remove left-sidepaper guide.
6 Move the left-side guide to thedesired position and reinstall. Ensureguide is secure at front of tray.
14 - Getting Started Guide EN
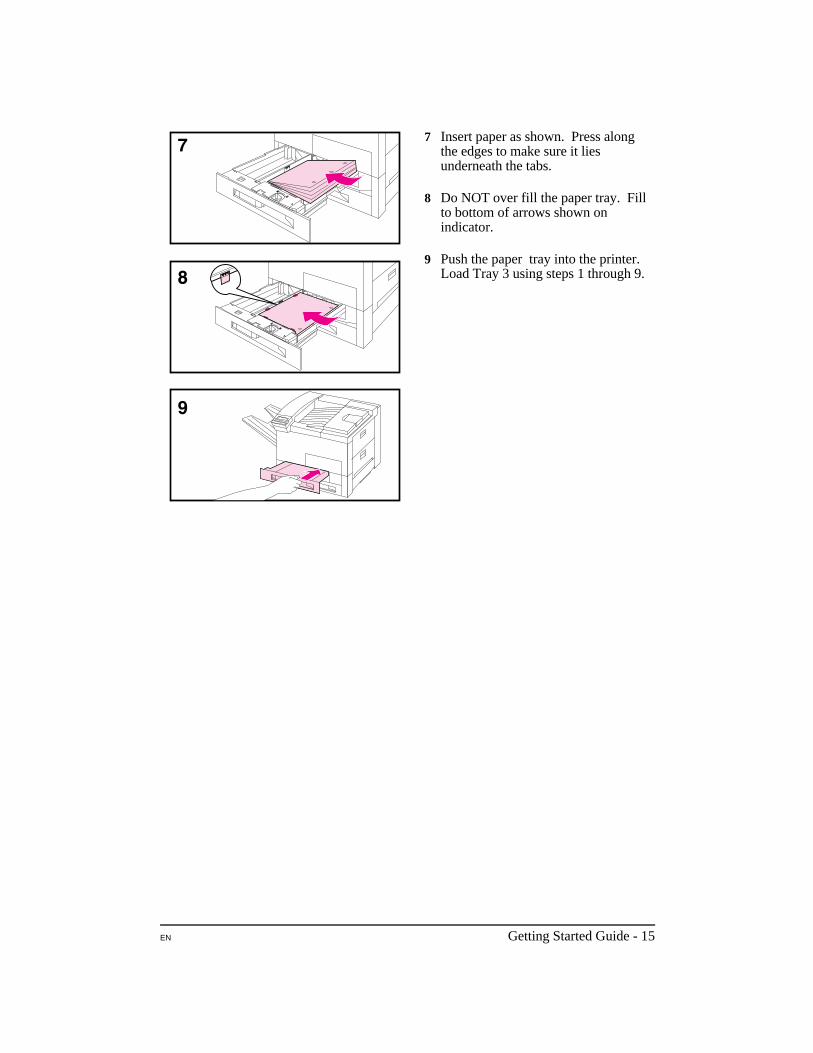
7 Insert paper as shown. Press alongthe edges to make sure it liesunderneath the tabs.
8 Do NOT over fill the paper tray. Fillto bottom of arrows shown onindicator.
9 Push the paper tray into the printer.Load Tray 3 using steps 1 through 9.
EN Getting Started Guide - 15
Step 9. Setting Power Save (Optional)
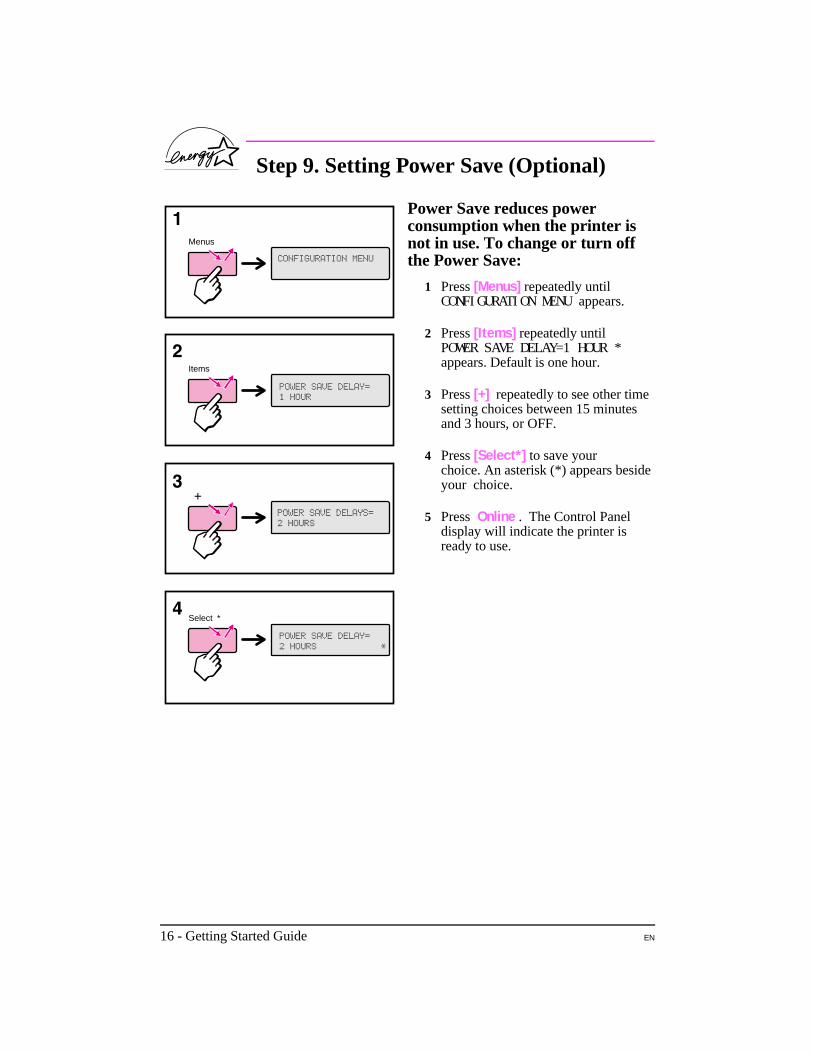
Power Save reduces powerconsumption when the printer isnot in use. To change or turn offthe Power Save:
1 Press [Menus] repeatedly until CONFIGURATION MENU appears.
2 Press [Items] repeatedly untilPOWER SAVE DELAY=1 HOUR *appears. Default is one hour.
3 Press [+] repeatedly to see other timesetting choices between 15 minutesand 3 hours, or OFF.
4 Press [Select*] to save yourchoice. An asterisk (*) appears besideyour choice.
5 Press Online . The Control Paneldisplay will indicate the printer isready to use.
Items
Select *
+
Menus
16 - Getting Started Guide EN
Step 10. Testing Printer Operation
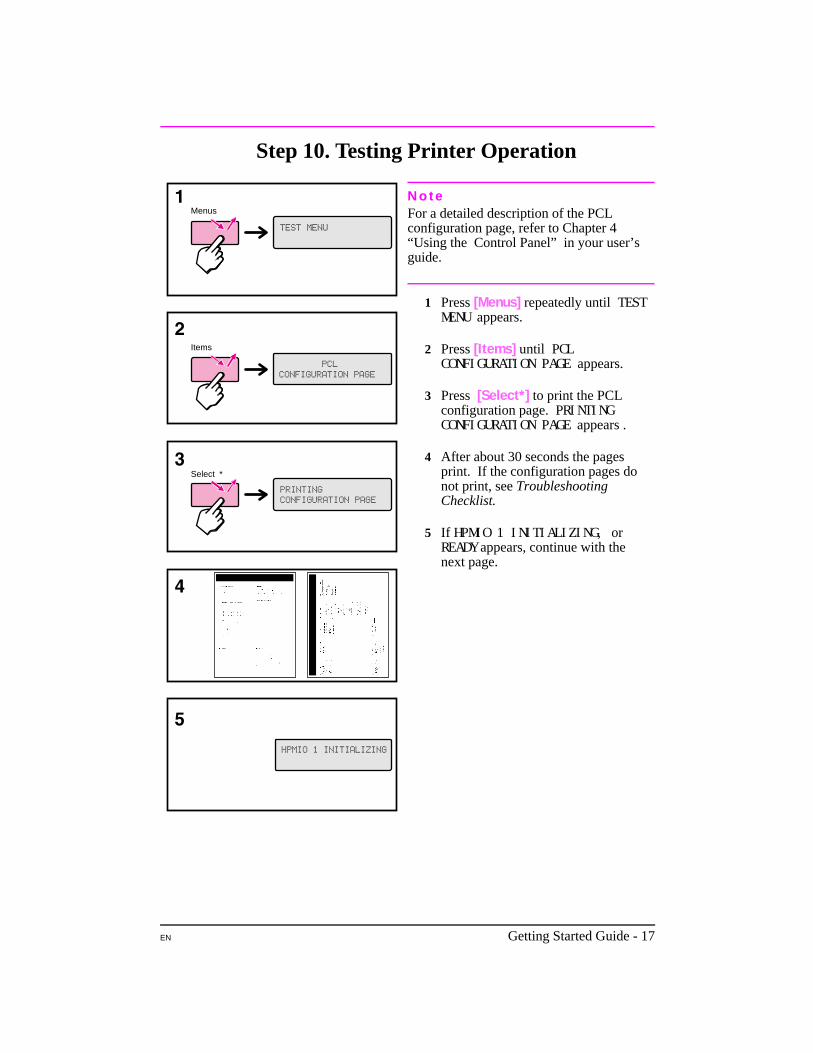
N o t eFor a detailed description of the PCLconfiguration page, refer to Chapter 4“Using the Control Panel” in your user’sguide.
1 Press [Menus] repeatedly until TESTMENU appears.
2 Press [Items] until PCLCONFIGURATION PAGE appears.
3 Press [Select*] to print the PCLconfiguration page. PRINTINGCONFIGURATION PAGE appears .
4 After about 30 seconds the pagesprint. If the configuration pages donot print, see TroubleshootingChecklist.
5 If HPMIO 1 INITIALIZING, orREADY appears, continue with thenext page.
Items
Select *
Menus
EN Getting Started Guide - 17
Step 11. Testing Printer Operation(PostScript)
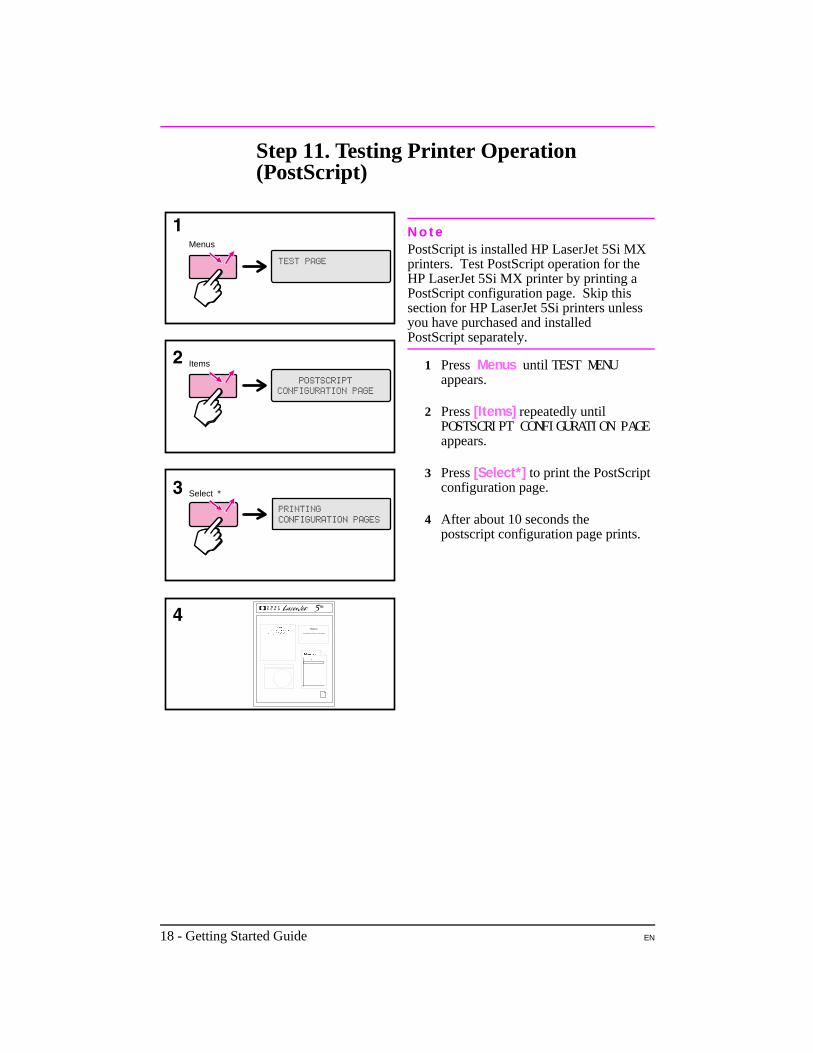
N o t ePostScript is installed HP LaserJet 5Si MXprinters. Test PostScript operation for theHP LaserJet 5Si MX printer by printing aPostScript configuration page. Skip thissection for HP LaserJet 5Si printers unlessyou have purchased and installedPostScript separately.
1 Press Menus until TEST MENUappears.
2 Press [Items] repeatedly untilPOSTSCRIPT CONFIGURATION PAGE
appears.
3 Press [Select*] to print the PostScriptconfiguration page.
4 After about 10 seconds thepostscript configuration page prints.
Items
Select *
Menus
Memory
Total Memory Installed: 12288 Kbytes
18 - Getting Started Guide EN
Step 12. Selecting Bi-Tronics Parallel orNetwork Connection
HP LaserJet 5Si, 5Si MX, and 5Si NX Printers
Both the HP LaserJet 5Si, 5Si MX, and 5Si NX printers come with aBi-Tronics parallel port. Bi-Tronics parallel is a standard port on mostDOS-based systems.
For information about configuring your printer with:
•• Bi-Tronics parallel (HP parallel cable part number 24542D), go to Step17.
N O T E The cable used to connect the printer to the computer or LAN is notprovided with the printer. It must be purchased separately.
HP LaserJet 5Si MX Printers
The HP LaserJet 5Si MX/5Si NX printer comes with a Bi-Tronics portand an HP JetDirect print server. Your HP LaserJet 5Si MX printer canbe configured with:
•• EtherTalk/LocalTalk
•• LAN Manager
•• LAN Server
•• Novell NetWare
•• HP-UX
•• Solaris
•• SunOS
•• Windows for Workgroups
•• Windows NT
N O T E If you wish to install a different interface card, refer to thedocumentation that came with the interface card or call themanufacturer of the interface card for assistance.
EN Getting Started Guide - 19
Step 13. Selecting Bi-Tronics ParallelInterface
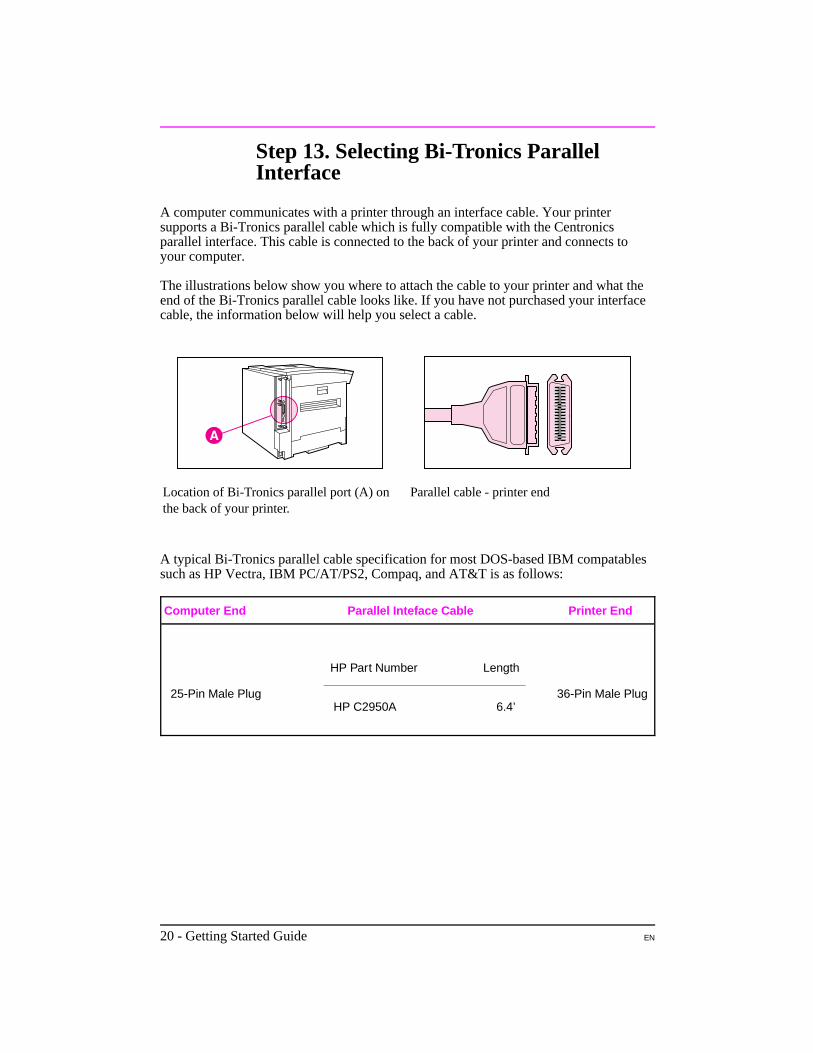
A computer communicates with a printer through an interface cable. Your printersupports a Bi-Tronics parallel cable which is fully compatible with the Centronicsparallel interface. This cable is connected to the back of your printer and connects toyour computer.
The illustrations below show you where to attach the cable to your printer and what theend of the Bi-Tronics parallel cable looks like. If you have not purchased your interfacecable, the information below will help you select a cable.
Location of Bi-Tronics parallel port (A) onthe back of your printer.
Parallel cable - printer end
A typical Bi-Tronics parallel cable specification for most DOS-based IBM compatablessuch as HP Vectra, IBM PC/AT/PS2, Compaq, and AT&T is as follows:
Computer End Parallel Inteface Cable Printer End
HP Part Number Length
25-Pin Male Plug 36-Pin Male Plug HP C2950A 6.4’
20 - Getting Started Guide EN
Step 14. Installing a Bi-Tronics ParallelCable
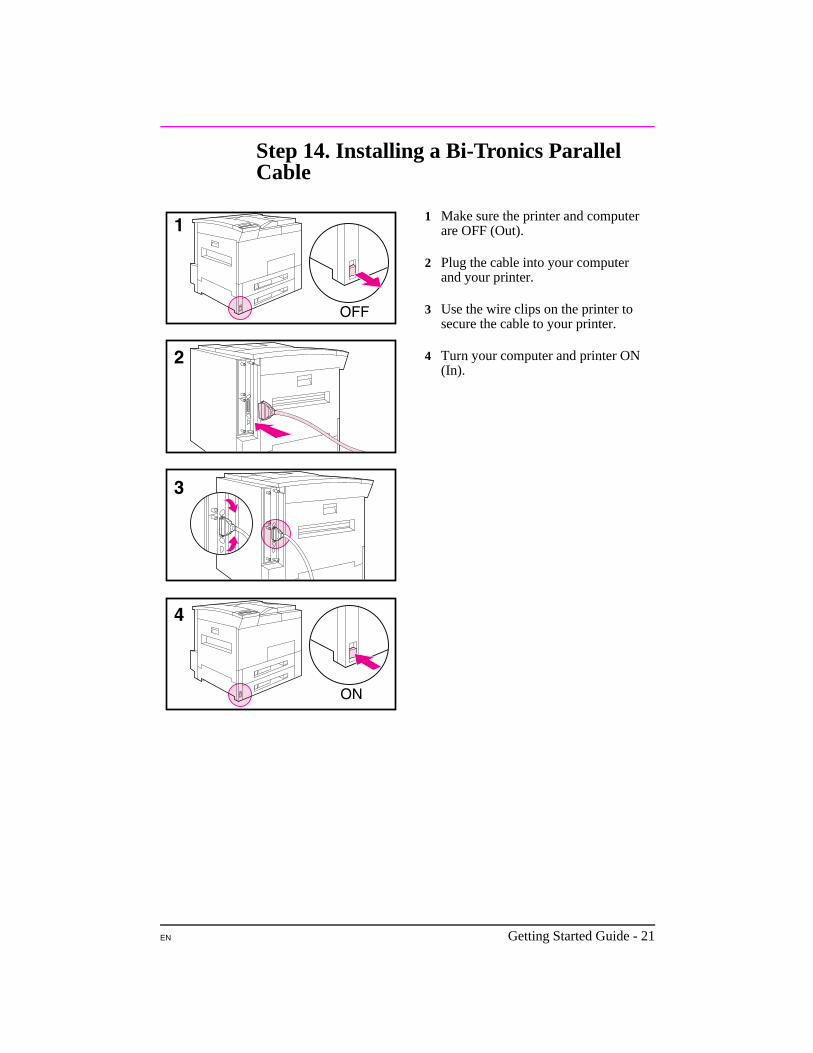
1 Make sure the printer and computerare OFF (Out).
2 Plug the cable into your computerand your printer.
3 Use the wire clips on the printer tosecure the cable to your printer.
4 Turn your computer and printer ON(In).
EN Getting Started Guide - 21
Step 15. Verifying Communication with aBi-Tronics Connection
To make sure your printer and computer are set up correctly tocommunicate to each other, print out a directory list.
1 Make sure your computer and printer are ON, and your printer isonline. (Online indicator is lit.)
2 At the DOS root directory (A:\> or C:\>) type DIR>LPT1 and press [Return].
N ot eIf you are using a UNIX environment, use the equivalent commands.
3 If the Data light on the Control Panel display stays ON perform thefollowing steps. Otherwise, continue to step 4.
a Press [Menus] until JOB CONTROL MENU appears.
b Press Items until PRESS SELECT TO FORMFEED appears.
c Press [Select* to print the page.
4 If the directory list prints, printer setup is complete. Now you can setup your software to work with your new HP LaserJet printer.
5 If the printer does not print the directory list, and the printer’s controlpanel does not display an error message, read through theTroubleshooting Checklist for help in solving the problem.
6 If an error message appears in the printer control panel display, referto the Troubleshooting chapter (Chapter 7) in your printer user’sguide for information.
22 - Getting Started Guide EN

Step 16. Connecting the Printer to theNetwork
A computer communicates with your printer through an interfacecable. Your HP LaserJet 5Si MX/5Si NX printer supports up to fourdifferent interface cables: BNC (ThinLAN), 10Base-T (RJ-45), DIN-8(LocalTalk), and Bi-Tronics parallel. Select the appropriate interfaceport from those shown below for your system and connect the cable orcables to the printer.
A BNC connector, a BNC "T" connector, or a 50 Ohm terminator arenot provided with the printer. If needed, they must be purchasedseparately.
N O T EYou may attach either a ThinLAN cable or a 10Base-T cable, but notboth at the same time.
A DIN-8 (LocalTalk) Connector
B 10Base-T Connector
C BNC Connector
BNC Interface
1 Attach one section of your ThinLANcable to the BNC “T” connector.
2 Attach another ThinLAN cablesection (see A1) or a 50 Ohmterminator (see A2) to the other sideof the BNC “T”connector. If you are attaching theprinter to the end of your networkyou must connect a 50 Ohmterminator.
3 Connect the BNC "T" to the BNCport of your HP JetDirect printserver.
4 If you are not connecting othernetwork cables, go to Step 18.
Location of interfaces
BNC Interface Connection
EN Getting Started Guide - 23
Connecting the Printer to the Network(continued)
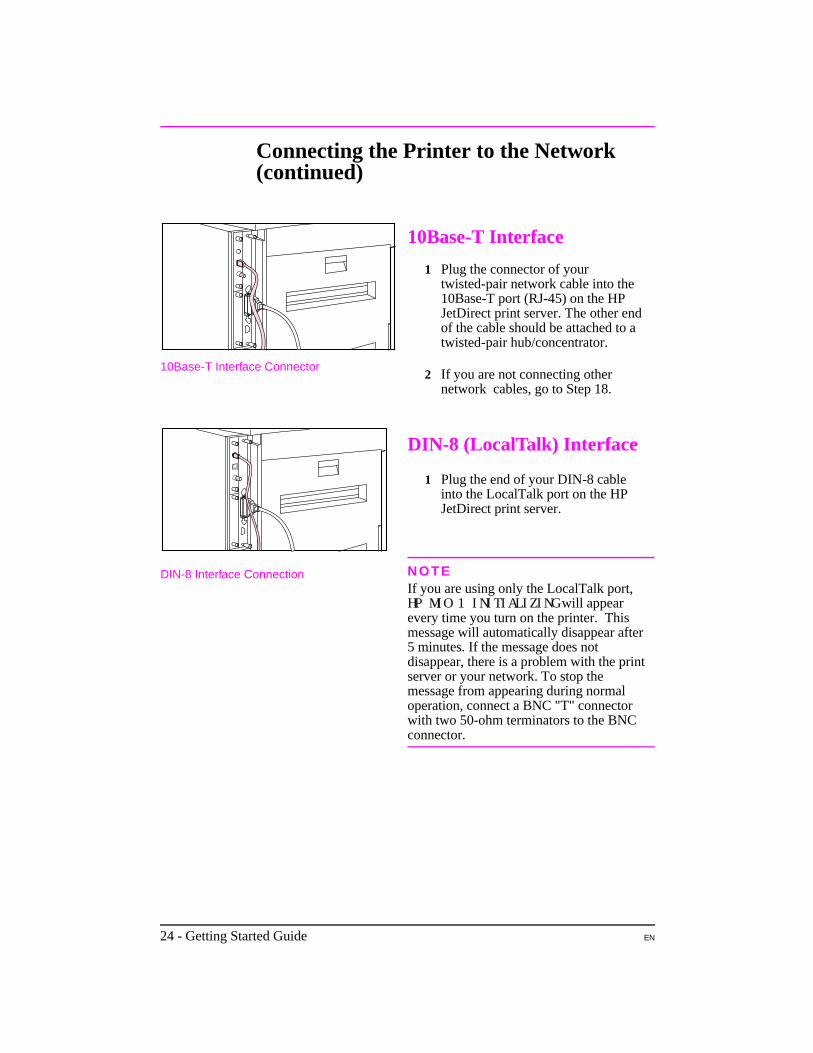
10Base-T Interface
1 Plug the connector of yourtwisted-pair network cable into the10Base-T port (RJ-45) on the HPJetDirect print server. The other endof the cable should be attached to atwisted-pair hub/concentrator.
2 If you are not connecting othernetwork cables, go to Step 18.
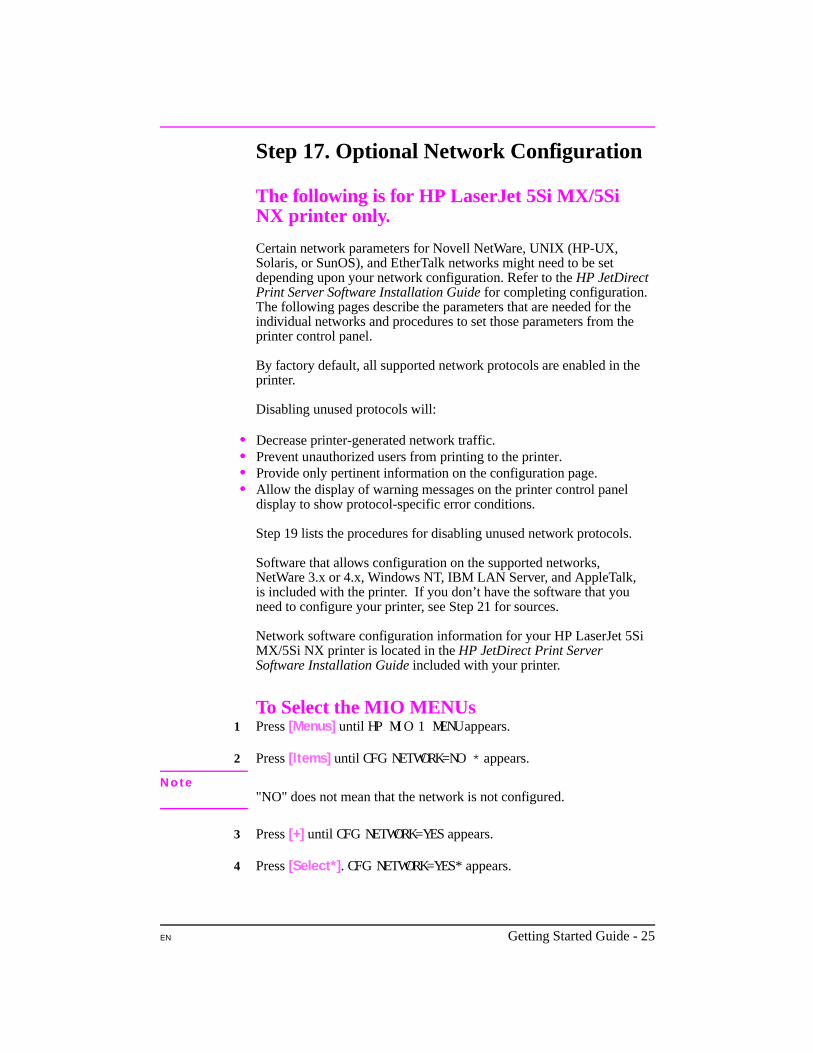
DIN-8 (LocalTalk) Interface
1 Plug the end of your DIN-8 cableinto the LocalTalk port on the HPJetDirect print server.
N O T EIf you are using only the LocalTalk port,HP MIO 1 INITIALIZING will appearevery time you turn on the printer. Thismessage will automatically disappear after5 minutes. If the message does notdisappear, there is a problem with the printserver or your network. To stop themessage from appearing during normaloperation, connect a BNC "T" connectorwith two 50-ohm terminators to the BNCconnector.
10Base-T Interface Connector
DIN-8 Interface Connection
24 - Getting Started Guide EN
Step 17. Optional Network Configuration
The following is for HP LaserJet 5Si MX/5SiNX printer only.
Certain network parameters for Novell NetWare, UNIX (HP-UX,Solaris, or SunOS), and EtherTalk networks might need to be setdepending upon your network configuration. Refer to the HP JetDirectPrint Server Software Installation Guide for completing configuration.The following pages describe the parameters that are needed for theindividual networks and procedures to set those parameters from theprinter control panel.
By factory default, all supported network protocols are enabled in theprinter.
Disabling unused protocols will:
•• Decrease printer-generated network traffic.•• Prevent unauthorized users from printing to the printer.•• Provide only pertinent information on the configuration page.•• Allow the display of warning messages on the printer control panel
display to show protocol-specific error conditions.
Step 19 lists the procedures for disabling unused network protocols.
Software that allows configuration on the supported networks,NetWare 3.x or 4.x, Windows NT, IBM LAN Server, and AppleTalk,is included with the printer. If you don’t have the software that youneed to configure your printer, see Step 21 for sources.
Network software configuration information for your HP LaserJet 5SiMX/5Si NX printer is located in the HP JetDirect Print ServerSoftware Installation Guide included with your printer.
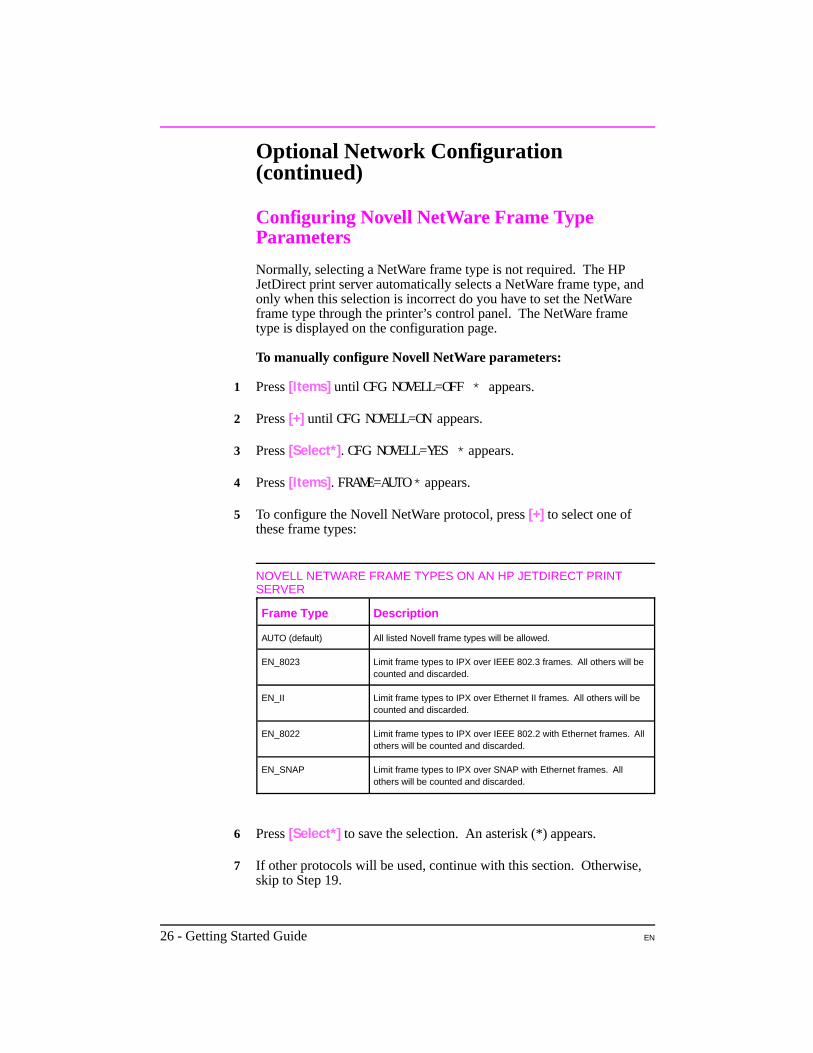
To Select the MIO MENUs1 Press [Menus] until HP MIO 1 MENU appears.
2 Press [Items] until CFG NETWORK=NO * appears.
N o t e "NO" does not mean that the network is not configured.
3 Press [+] until CFG NETWORK=YES appears.
4 Press [Select*]. CFG NETWORK=YES* appears.
EN Getting Started Guide - 25
Optional Network Configuration(continued)
Configuring Novell NetWare Frame TypeParameters
Normally, selecting a NetWare frame type is not required. The HPJetDirect print server automatically selects a NetWare frame type, andonly when this selection is incorrect do you have to set the NetWareframe type through the printer’s control panel. The NetWare frametype is displayed on the configuration page.
To manually configure Novell NetWare parameters:
1 Press [Items] until CFG NOVELL=OFF * appears.
2 Press [+] until CFG NOVELL=ON appears.
3 Press [Select*]. CFG NOVELL=YES * appears.
4 Press [Items]. FRAME=AUTO * appears.
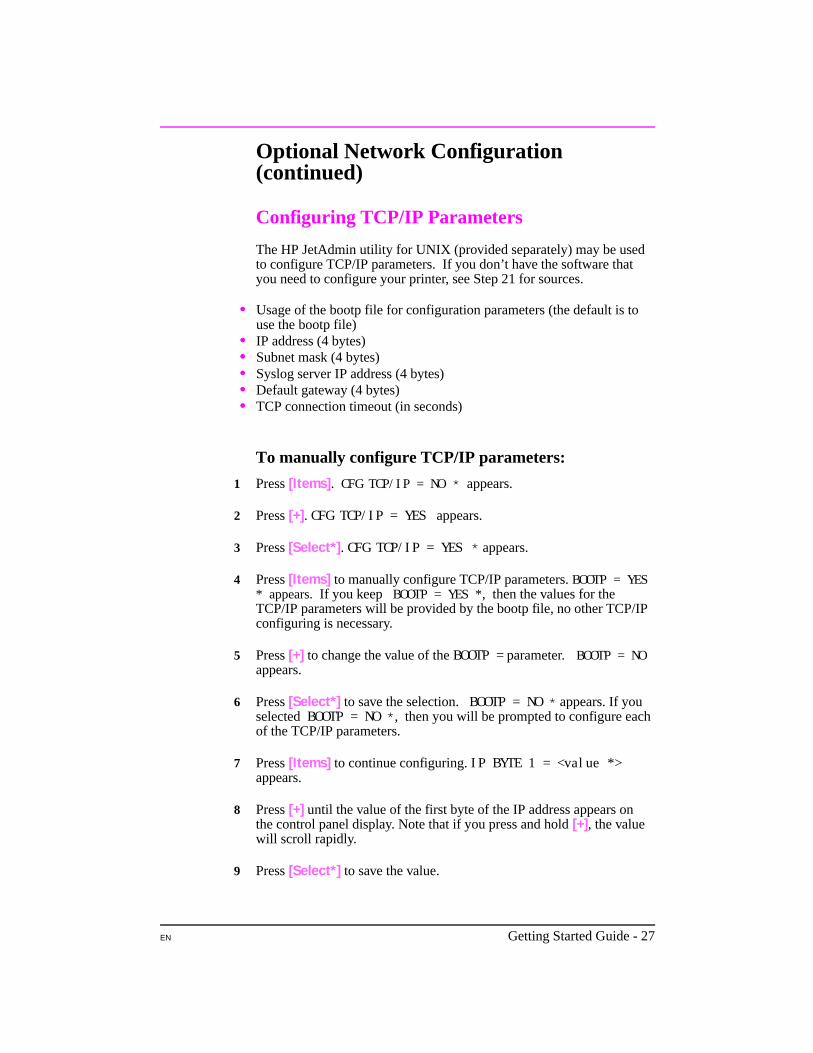
5 To configure the Novell NetWare protocol, press [+] to select one ofthese frame types:
NOVELL NETWARE FRAME TYPES ON AN HP JETDIRECT PRINTSERVER
Frame Type Description
AUTO (default) All listed Novell frame types will be allowed.
EN_8023 Limit frame types to IPX over IEEE 802.3 frames. All others will becounted and discarded.
EN_II Limit frame types to IPX over Ethernet II frames. All others will becounted and discarded.
EN_8022 Limit frame types to IPX over IEEE 802.2 with Ethernet frames. Allothers will be counted and discarded.
EN_SNAP Limit frame types to IPX over SNAP with Ethernet frames. Allothers will be counted and discarded.
6 Press [Select*] to save the selection. An asterisk (*) appears.
7 If other protocols will be used, continue with this section. Otherwise,skip to Step 19.
26 - Getting Started Guide EN
Optional Network Configuration(continued)
Configuring TCP/IP Parameters
The HP JetAdmin utility for UNIX (provided separately) may be usedto configure TCP/IP parameters. If you don’t have the software thatyou need to configure your printer, see Step 21 for sources.
•• Usage of the bootp file for configuration parameters (the default is touse the bootp file)
•• IP address (4 bytes) •• Subnet mask (4 bytes)•• Syslog server IP address (4 bytes)•• Default gateway (4 bytes)•• TCP connection timeout (in seconds)
To manually configure TCP/IP parameters:
1 Press [Items]. CFG TCP/IP = NO * appears.
2 Press [+]. CFG TCP/IP = YES appears.
3 Press [Select*]. CFG TCP/IP = YES * appears.
4 Press [Items] to manually configure TCP/IP parameters. BOOTP = YES* appears. If you keep BOOTP = YES *, then the values for theTCP/IP parameters will be provided by the bootp file, no other TCP/IPconfiguring is necessary.
5 Press [+] to change the value of the BOOTP = parameter. BOOTP = NOappears.
6 Press [Select*] to save the selection. BOOTP = NO * appears. If youselected BOOTP = NO * , then you will be prompted to configure eachof the TCP/IP parameters.
7 Press [Items] to continue configuring. IP BYTE 1 = <value *> appears.
8 Press [+] until the value of the first byte of the IP address appears onthe control panel display. Note that if you press and hold [+], the valuewill scroll rapidly.
9 Press [Select*] to save the value.
EN Getting Started Guide - 27
Optional Network Configuration(continued)
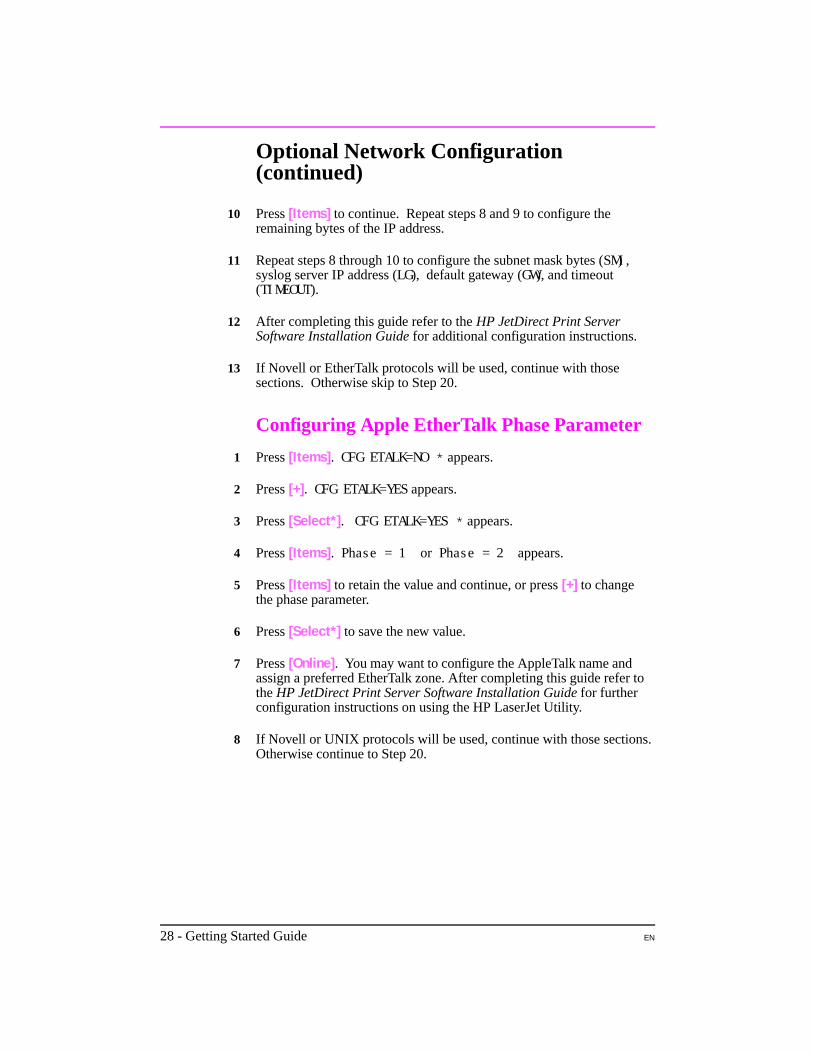
10 Press [Items] to continue. Repeat steps 8 and 9 to configure theremaining bytes of the IP address.
11 Repeat steps 8 through 10 to configure the subnet mask bytes (SM) ,syslog server IP address (LG), default gateway (GW), and timeout(TIMEOUT).
12 After completing this guide refer to the HP JetDirect Print ServerSoftware Installation Guide for additional configuration instructions.
13 If Novell or EtherTalk protocols will be used, continue with thosesections. Otherwise skip to Step 20.
Configuring Apple EtherTalk Phase Parameter
1 Press [Items]. CFG ETALK=NO * appears.
2 Press [+]. CFG ETALK=YES appears.
3 Press [Select*]. CFG ETALK=YES * appears.
4 Press [Items]. Phase = 1 or Phase = 2 appears.
5 Press [Items] to retain the value and continue, or press [+] to changethe phase parameter.
6 Press [Select*] to save the new value.
7 Press [Online]. You may want to configure the AppleTalk name andassign a preferred EtherTalk zone. After completing this guide refer tothe HP JetDirect Print Server Software Installation Guide for furtherconfiguration instructions on using the HP LaserJet Utility.
8 If Novell or UNIX protocols will be used, continue with those sections.Otherwise continue to Step 20.
28 - Getting Started Guide EN
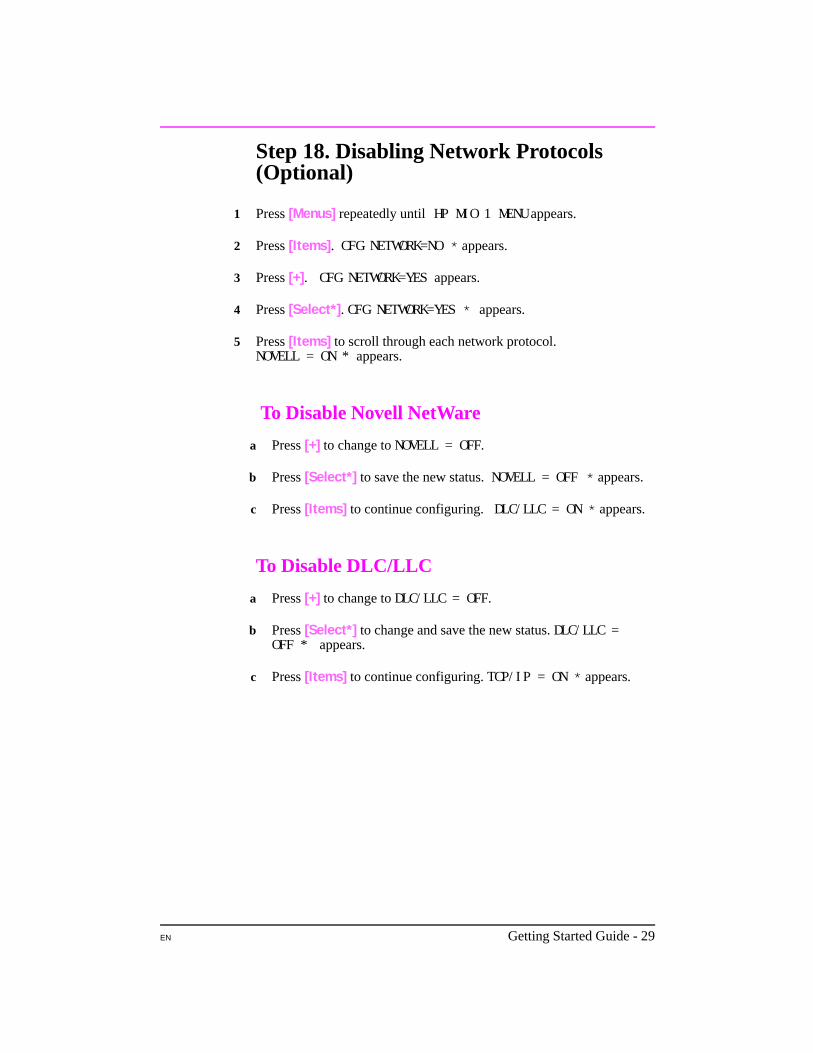
Step 18. Disabling Network Protocols(Optional)
1 Press [Menus] repeatedly until HP MIO 1 MENU appears.
2 Press [Items]. CFG NETWORK=NO * appears.
3 Press [+]. CFG NETWORK=YES appears.
4 Press [Select*]. CFG NETWORK=YES * appears.
5 Press [Items] to scroll through each network protocol. NOVELL = ON * appears.
To Disable Novell NetWare
a Press [+] to change to NOVELL = OFF.
b Press [Select*] to save the new status. NOVELL = OFF * appears.
c Press [Items] to continue configuring. DLC/LLC = ON * appears.
To Disable DLC/LLC
a Press [+] to change to DLC/LLC = OFF.
b Press [Select*] to change and save the new status. DLC/LLC =
OFF * appears.
c Press [Items] to continue configuring. TCP/IP = ON * appears.
EN Getting Started Guide - 29
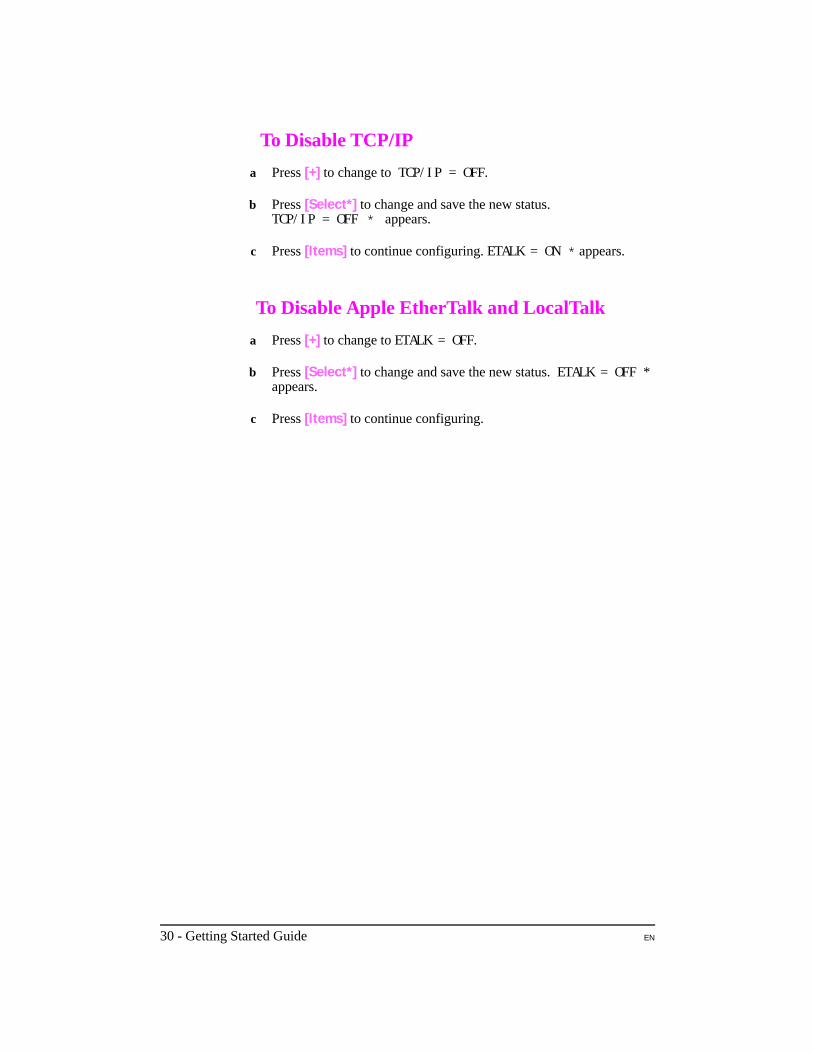
To Disable TCP/IP
a Press [+] to change to TCP/IP = OFF.
b Press [Select*] to change and save the new status.
TCP/IP = OFF * appears.
c Press [Items] to continue configuring. ETALK = ON * appears.
To Disable Apple EtherTalk and LocalTalk
a Press [+] to change to ETALK = OFF.
b Press [Select*] to change and save the new status. ETALK = OFF *
appears.
c Press [Items] to continue configuring.
30 - Getting Started Guide EN
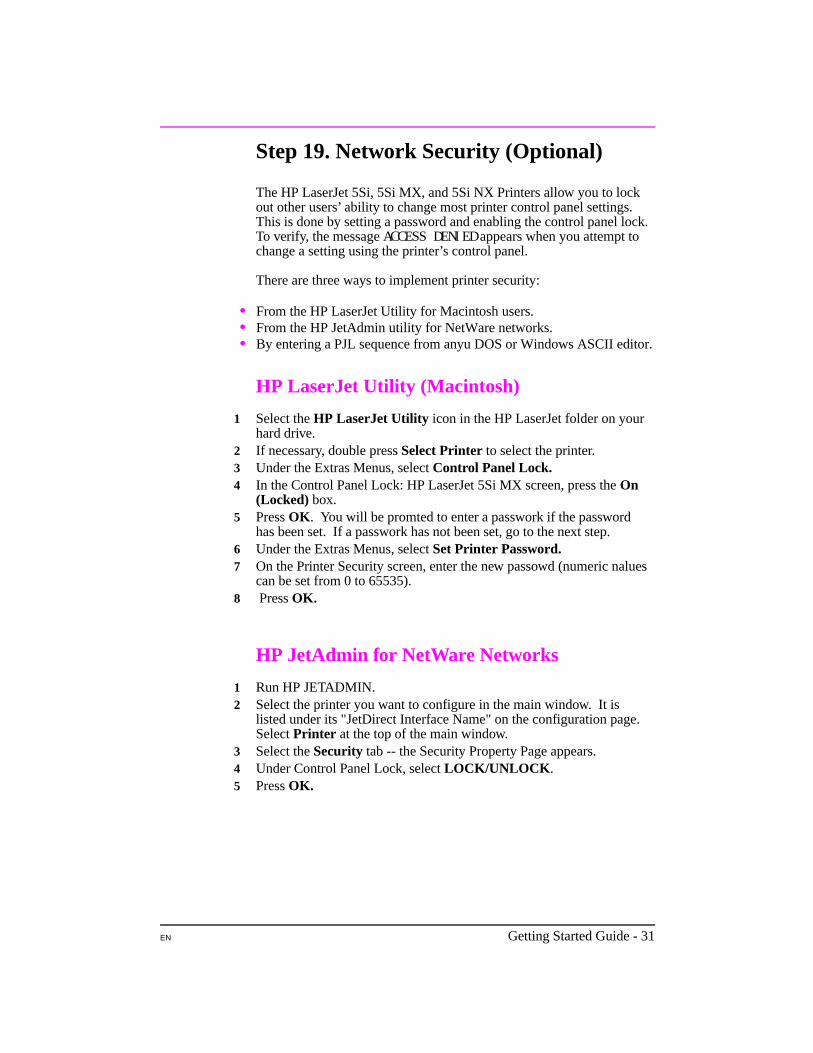
Step 19. Network Security (Optional)
The HP LaserJet 5Si, 5Si MX, and 5Si NX Printers allow you to lockout other users’ ability to change most printer control panel settings.This is done by setting a password and enabling the control panel lock.To verify, the message ACCESS DENIED appears when you attempt tochange a setting using the printer’s control panel.
There are three ways to implement printer security:
•• From the HP LaserJet Utility for Macintosh users.•• From the HP JetAdmin utility for NetWare networks.•• By entering a PJL sequence from anyu DOS or Windows ASCII editor.
HP LaserJet Utility (Macintosh)
1 Select the HP LaserJet Utility icon in the HP LaserJet folder on yourhard drive.
2 If necessary, double press Select Printer to select the printer.3 Under the Extras Menus, select Control Panel Lock.4 In the Control Panel Lock: HP LaserJet 5Si MX screen, press the On
(Locked) box.5 Press OK . You will be promted to enter a passwork if the password
has been set. If a passwork has not been set, go to the next step.6 Under the Extras Menus, select Set Printer Password.7 On the Printer Security screen, enter the new passowd (numeric nalues
can be set from 0 to 65535).8 Press OK.
HP JetAdmin for NetWare Networks
1 Run HP JETADMIN.2 Select the printer you want to configure in the main window. It is
listed under its "JetDirect Interface Name" on the configuration page.Select Printer at the top of the main window.
3 Select the Security tab -- the Security Property Page appears.4 Under Control Panel Lock, select LOCK/UNLOCK .5 Press OK.
EN Getting Started Guide - 31
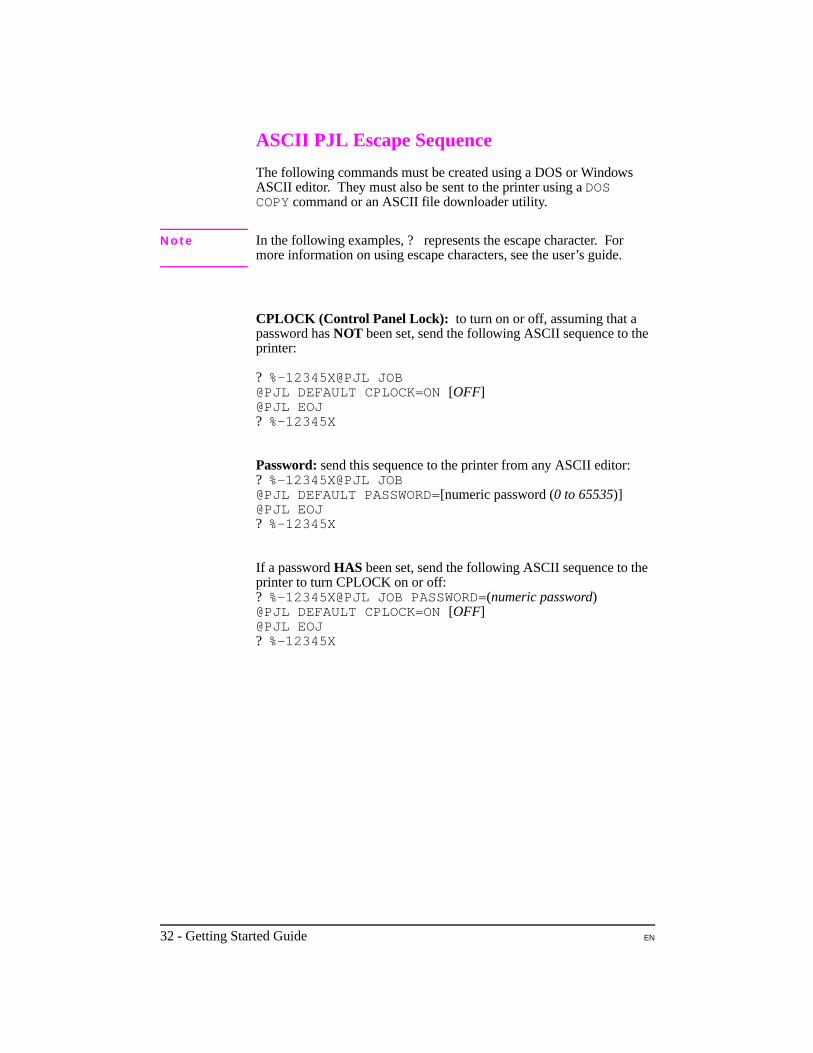
ASCII PJL Escape Sequence
The following commands must be created using a DOS or WindowsASCII editor. They must also be sent to the printer using a DOSCOPY command or an ASCII file downloader utility.
N o t e In the following examples, ? represents the escape character. Formore information on using escape characters, see the user’s guide.
CPLOCK (Control Panel Lock): to turn on or off, assuming that apassword has NOT been set, send the following ASCII sequence to theprinter:
?%-12345X@PJL JOB@PJL DEFAULT CPLOCK=ON [OFF]@PJL EOJ?%-12345X
Password: send this sequence to the printer from any ASCII editor:?%-12345X@PJL JOB@PJL DEFAULT PASSWORD=[numeric password (0 to 65535)]@PJL EOJ?%-12345X
If a password HAS been set, send the following ASCII sequence to theprinter to turn CPLOCK on or off:?%-12345X@PJL JOB PASSWORD=(numeric password)@PJL DEFAULT CPLOCK=ON [OFF]@PJL EOJ?%-12345X
32 - Getting Started Guide EN

Step 20. Installing the Software Drivers
Before you use this printer with your software applications, you mustinstall printing software. The HP LaserJet 5Si MX Printer software isincluded with the printer on CD-ROM and contains the software forrunning the printer in various environments. Instructions for installingthe printer software follow.
The CD-ROM includes software designed for end users operating inthe following environments:
•• Windows 3.1•• Windows 95•• Windows for Workgroups 3.11•• Windows NT 3.51 and 4.0•• IBM OS/2 version 2.0 or greater•• Macintosh System 7 or greater (Only appears in the CD-ROM
directory when viewing in a Macintosh environment.)
The printing software also includes software for networkadministrators using the following network operating systems:
•• Novell NetWare 3.x or 4.x•• Windows NT 3.51 and 4.0•• IBM LAN Server for OS/2 3.0 or greater•• Apple AppleTalk
N o t e A table of the CD-ROM directory structure is located on page 37. Ifyou want to install software or a language other than the default, usethis table to find the path for the operating system and language forwhich you want to install printing software.
Windows
If you are operating in a Windows environment, the setup software willdetect the version of the operating system that you are running. Thesoftware will be installed in the language that you have selected in yourWindows Control Panel.
To begin the setup installation for Windows, perform the followinginstructions.
1 Close all applications. Turn off virus checkers and terminate stayresident (TSR) programs. After installation, these programs can beturned back on.
2 Exit and restart Windows.3 Log onto your workstation with Supervisor or Admin privileges and
insert the CD-ROM into the CD-ROM drive.
EN Getting Started Guide - 33
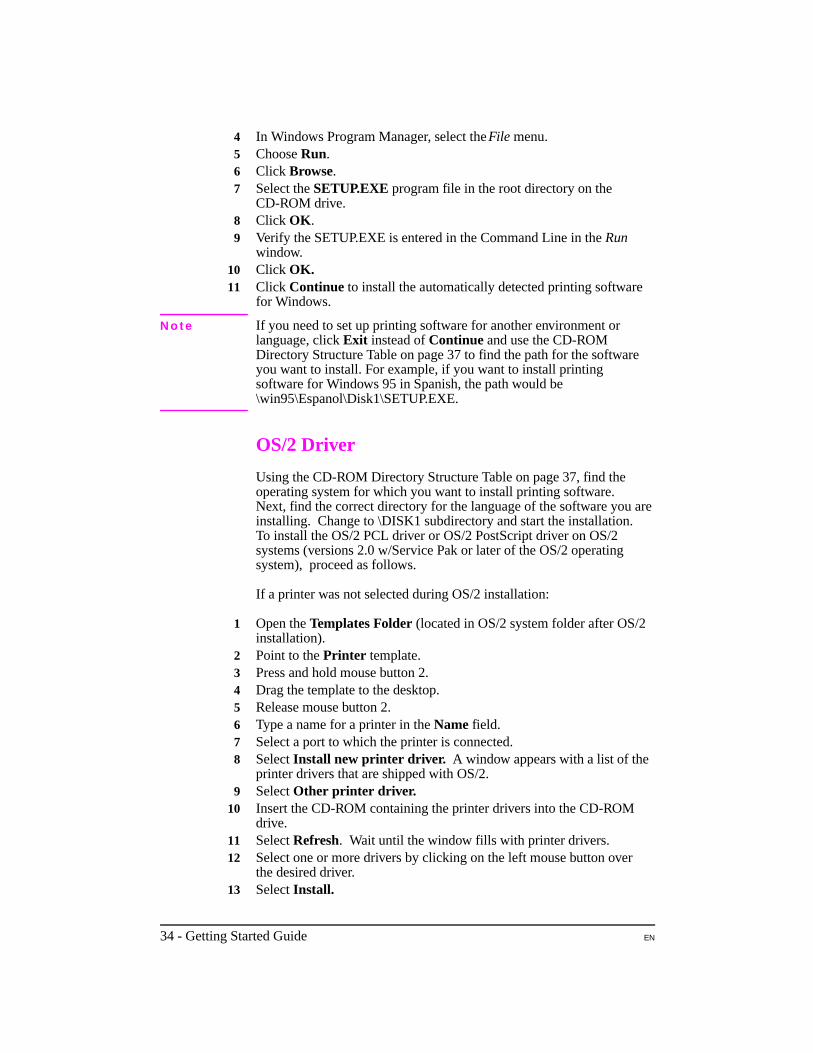
4 In Windows Program Manager, select the File menu.5 Choose Run.6 Click Browse. 7 Select the SETUP.EXE program file in the root directory on the
CD-ROM drive. 8 Click OK .9 Verify the SETUP.EXE is entered in the Command Line in the Run
window.10 Click OK. 11 Click Continue to install the automatically detected printing software
for Windows.
N o t e If you need to set up printing software for another environment orlanguage, click Exit instead of Continue and use the CD-ROMDirectory Structure Table on page 37 to find the path for the softwareyou want to install. For example, if you want to install printingsoftware for Windows 95 in Spanish, the path would be\win95\Espanol\Disk1\SETUP.EXE.
OS/2 Driver
Using the CD-ROM Directory Structure Table on page 37, find theoperating system for which you want to install printing software.Next, find the correct directory for the language of the software you areinstalling. Change to \DISK1 subdirectory and start the installation.To install the OS/2 PCL driver or OS/2 PostScript driver on OS/2systems (versions 2.0 w/Service Pak or later of the OS/2 operatingsystem), proceed as follows.
If a printer was not selected during OS/2 installation:
1 Open the Templates Folder (located in OS/2 system folder after OS/2installation).
2 Point to the Printer template.3 Press and hold mouse button 2.4 Drag the template to the desktop.5 Release mouse button 2.6 Type a name for a printer in the Name field.7 Select a port to which the printer is connected.8 Select Install new printer driver. A window appears with a list of the
printer drivers that are shipped with OS/2.9 Select Other printer driver.
10 Insert the CD-ROM containing the printer drivers into the CD-ROMdrive.
11 Select Refresh. Wait until the window fills with printer drivers.12 Select one or more drivers by clicking on the left mouse button over
the desired driver.13 Select Install.
34 - Getting Started Guide EN
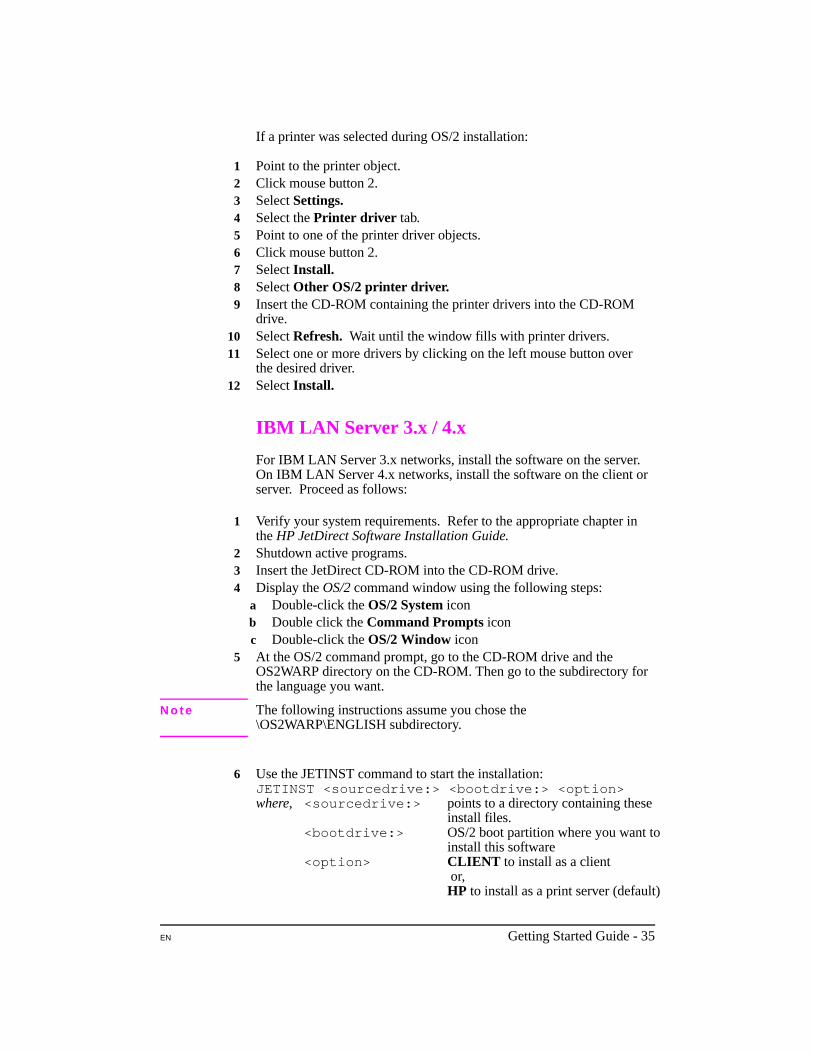
If a printer was selected during OS/2 installation:
1 Point to the printer object.2 Click mouse button 2.3 Select Settings.4 Select the Printer driver tab.5 Point to one of the printer driver objects.6 Click mouse button 2.7 Select Install.8 Select Other OS/2 printer driver.9 Insert the CD-ROM containing the printer drivers into the CD-ROM
drive.10 Select Refresh. Wait until the window fills with printer drivers.11 Select one or more drivers by clicking on the left mouse button over
the desired driver.12 Select Install.
IBM LAN Server 3.x / 4.x
For IBM LAN Server 3.x networks, install the software on the server.On IBM LAN Server 4.x networks, install the software on the client orserver. Proceed as follows:
1 Verify your system requirements. Refer to the appropriate chapter inthe HP JetDirect Software Installation Guide.
2 Shutdown active programs.3 Insert the JetDirect CD-ROM into the CD-ROM drive.4 Display the OS/2 command window using the following steps:
a Double-click the OS/2 System iconb Double click the Command Prompts iconc Double-click the OS/2 Window icon
5 At the OS/2 command prompt, go to the CD-ROM drive and theOS2WARP directory on the CD-ROM. Then go to the subdirectory forthe language you want.
N o t e The following instructions assume you chose the\OS2WARP\ENGLISH subdirectory.
6 Use the JETINST command to start the installation:JETINST <sourcedrive:> <bootdrive:> <option>where, <sourcedrive:> points to a directory containing these
install files. <bootdrive:> OS/2 boot partition where you want to install this software
<option> CLIENT to install as a client or,HP to install as a print server (default)
EN Getting Started Guide - 35
For example, from the [E:\OS2WARP\ENGLISH] prompt, enter:JETINST E: C: HP
Wait for the system to respond. Read and follow the instructionsprovided.
N o t e PMSPL.DLL must be a version dated May 4, 1995 or later.
7 Installation is complete. Refer to the HP JetDirect SoftwareInstallation Guide to configure your printers.
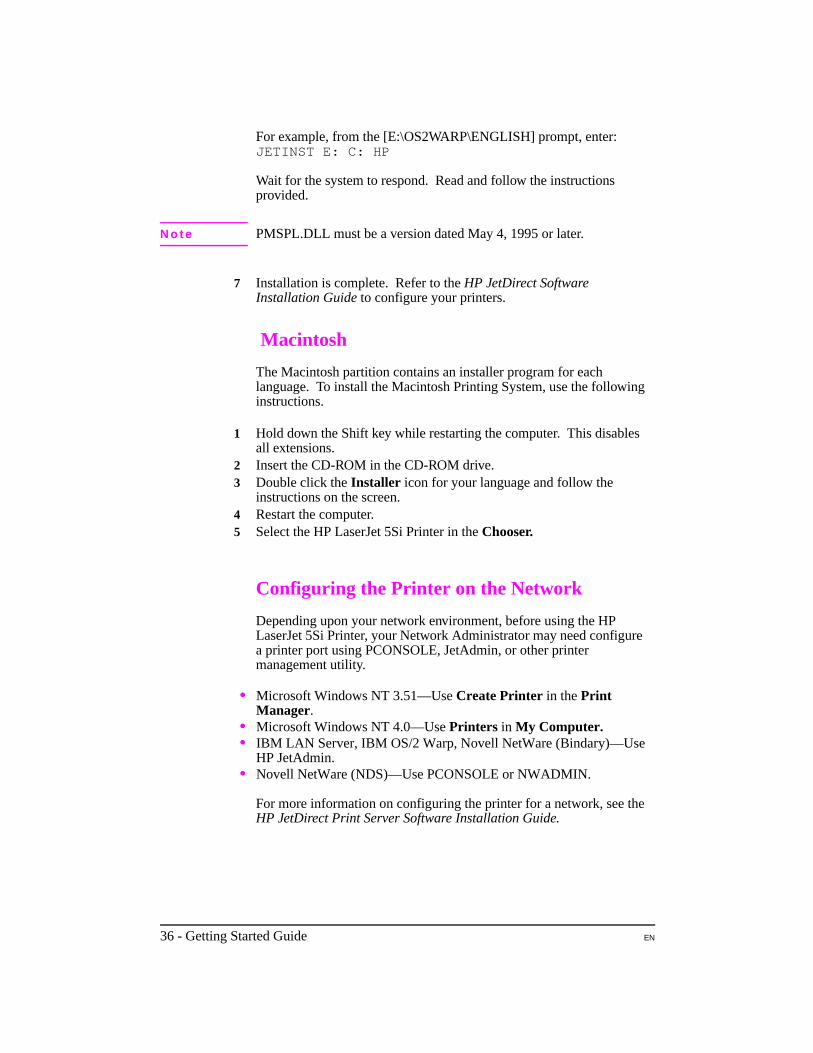
Macintosh
The Macintosh partition contains an installer program for eachlanguage. To install the Macintosh Printing System, use the followinginstructions.
1 Hold down the Shift key while restarting the computer. This disablesall extensions.
2 Insert the CD-ROM in the CD-ROM drive.3 Double click the Installer icon for your language and follow the
instructions on the screen.4 Restart the computer.5 Select the HP LaserJet 5Si Printer in the Chooser.
Configuring the Printer on the Network
Depending upon your network environment, before using the HPLaserJet 5Si Printer, your Network Administrator may need configurea printer port using PCONSOLE, JetAdmin, or other printermanagement utility.
•• Microsoft Windows NT 3.51—Use Create Printer in the PrintManager.
•• Microsoft Windows NT 4.0—Use Printers in My Computer.•• IBM LAN Server, IBM OS/2 Warp, Novell NetWare (Bindary)—Use
HP JetAdmin.•• Novell NetWare (NDS)—Use PCONSOLE or NWADMIN.
For more information on configuring the printer for a network, see theHP JetDirect Print Server Software Installation Guide.
36 - Getting Started Guide EN
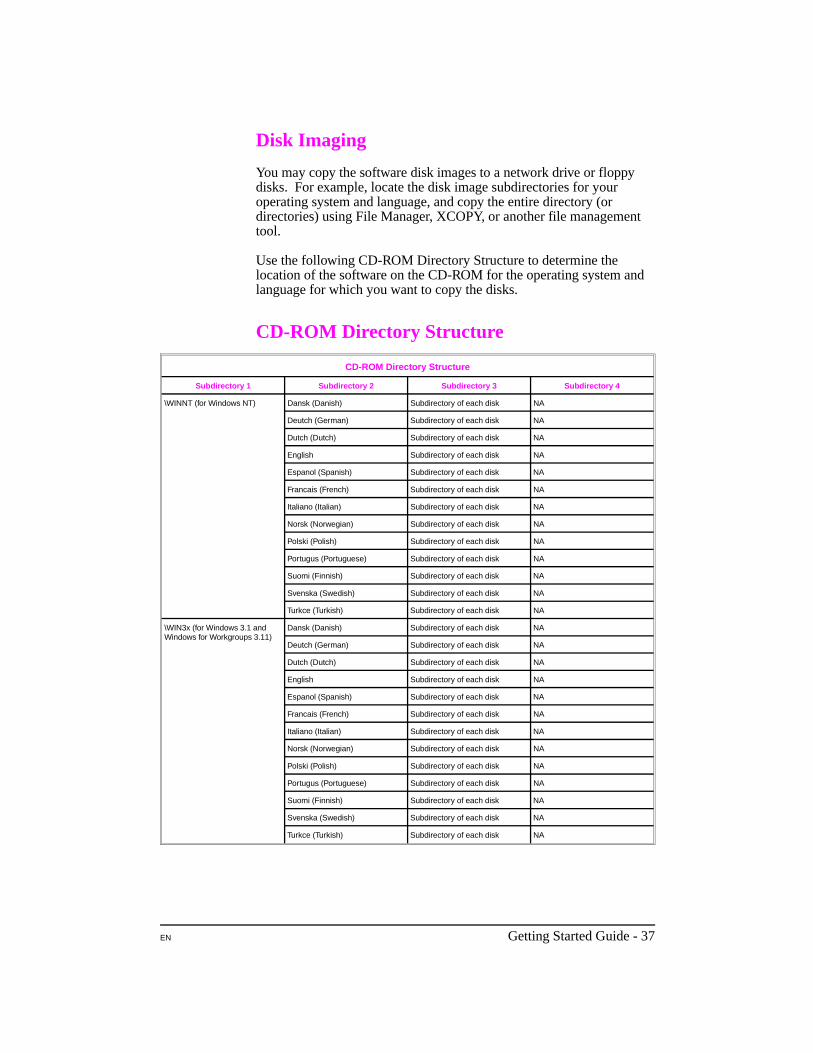
Disk Imaging
You may copy the software disk images to a network drive or floppydisks. For example, locate the disk image subdirectories for youroperating system and language, and copy the entire directory (ordirectories) using File Manager, XCOPY, or another file managementtool.
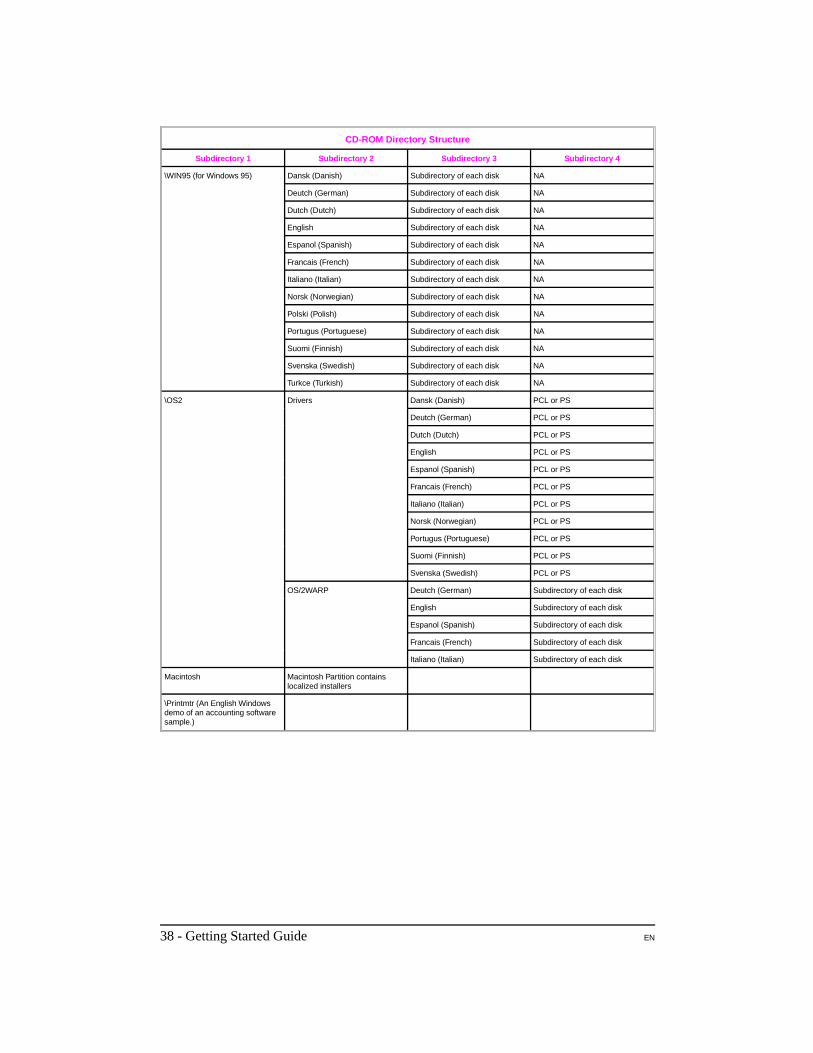
Use the following CD-ROM Directory Structure to determine thelocation of the software on the CD-ROM for the operating system andlanguage for which you want to copy the disks.
CD-ROM Directory Structure
CD-ROM Directory Structure
Subdirectory 1 Subdirectory 2 Subdirectory 3 Subdirectory 4
\WINNT (for Windows NT) Dansk (Danish) Subdirectory of each disk NA
Deutch (German) Subdirectory of each disk NA
Dutch (Dutch) Subdirectory of each disk NA
English Subdirectory of each disk NA
Espanol (Spanish) Subdirectory of each disk NA
Francais (French) Subdirectory of each disk NA
Italiano (Italian) Subdirectory of each disk NA
Norsk (Norwegian) Subdirectory of each disk NA
Polski (Polish) Subdirectory of each disk NA
Portugus (Portuguese) Subdirectory of each disk NA
Suomi (Finnish) Subdirectory of each disk NA
Svenska (Swedish) Subdirectory of each disk NA
Turkce (Turkish) Subdirectory of each disk NA
\WIN3x (for Windows 3.1 andWindows for Workgroups 3.11)
Dansk (Danish) Subdirectory of each disk NA
Deutch (German) Subdirectory of each disk NA
Dutch (Dutch) Subdirectory of each disk NA
English Subdirectory of each disk NA
Espanol (Spanish) Subdirectory of each disk NA
Francais (French) Subdirectory of each disk NA
Italiano (Italian) Subdirectory of each disk NA
Norsk (Norwegian) Subdirectory of each disk NA
Polski (Polish) Subdirectory of each disk NA
Portugus (Portuguese) Subdirectory of each disk NA
Suomi (Finnish) Subdirectory of each disk NA
Svenska (Swedish) Subdirectory of each disk NA
Turkce (Turkish) Subdirectory of each disk NA
EN Getting Started Guide - 37
CD-ROM Directory Structure
Subdirectory 1 Subdirectory 2 Subdirectory 3 Subdirectory 4
\WIN95 (for Windows 95) Dansk (Danish) Subdirectory of each disk NA
Deutch (German) Subdirectory of each disk NA
Dutch (Dutch) Subdirectory of each disk NA
English Subdirectory of each disk NA
Espanol (Spanish) Subdirectory of each disk NA
Francais (French) Subdirectory of each disk NA
Italiano (Italian) Subdirectory of each disk NA
Norsk (Norwegian) Subdirectory of each disk NA
Polski (Polish) Subdirectory of each disk NA
Portugus (Portuguese) Subdirectory of each disk NA
Suomi (Finnish) Subdirectory of each disk NA
Svenska (Swedish) Subdirectory of each disk NA
Turkce (Turkish) Subdirectory of each disk NA
\OS2 Drivers Dansk (Danish) PCL or PS
Deutch (German) PCL or PS
Dutch (Dutch) PCL or PS
English PCL or PS
Espanol (Spanish) PCL or PS
Francais (French) PCL or PS
Italiano (Italian) PCL or PS
Norsk (Norwegian) PCL or PS
Portugus (Portuguese) PCL or PS
Suomi (Finnish) PCL or PS
Svenska (Swedish) PCL or PS
OS/2WARP Deutch (German) Subdirectory of each disk
English Subdirectory of each disk
Espanol (Spanish) Subdirectory of each disk
Francais (French) Subdirectory of each disk
Italiano (Italian) Subdirectory of each disk
Macintosh Macintosh Partition containslocalized installers
\Printmtr (An English Windowsdemo of an accounting softwaresample.)
38 - Getting Started Guide EN
To Obtain Software Not Included With ThisPrinter
The following operating systems are supported by the HP LaserJet 5SiPrinter, but the software must be ordered separately:
•• Microsoft LAN Manager for OS/2, v. 2.1•• Microsoft Windows NT, v. 1.0•• HP-UX v. 3.0, 9.0, 10•• SunOS v. 4.1.1, 4.1.2, 4.1.3•• SCO UNIX V/386 v. 3.2.2, 3.2.4•• Solaris v. 2.1, 2.2, 2.3, 2.4•• IBM/AIX v. 3.2.5
Your software vendor Many application vendors have software available for this printer. You may contact yoursoftware vendor to order an updated printer software disk for your printer.
CompuServe You can receive software for HP printers by downloading it to your computer from the HPForum (GO HP) on CompuServe.
World-Wide Web The address for downloading HP printer software from the World Wide Web is URL http://www.hp.com/go/cposupport
HP Distribution To order software for HP printers by phone, call HP Distribution at (970) 339-7009. US Only.
HP Bulletin BoardService(BBS)
There is 24-hour access to HP software and technical support information for HPcomputers and peripheral products. Call (208) 344-1691, and set your communicationsoftware to N,8,1.
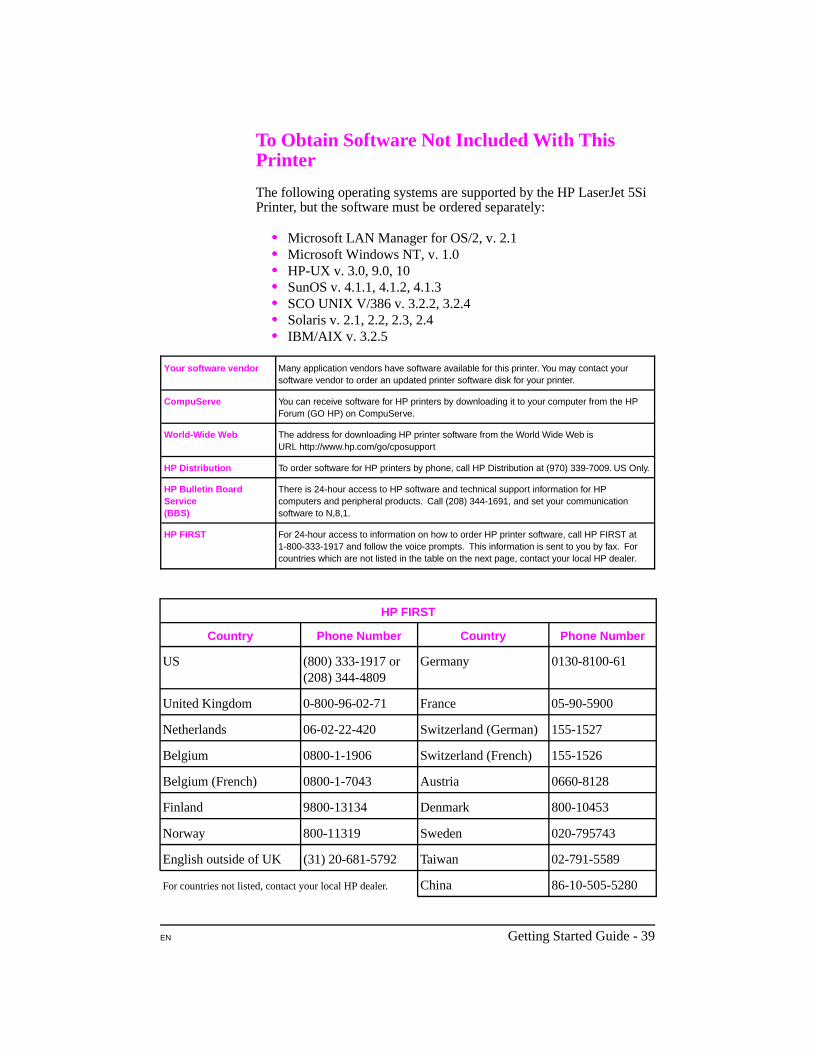
HP FIRST For 24-hour access to information on how to order HP printer software, call HP FIRST at1-800-333-1917 and follow the voice prompts. This information is sent to you by fax. Forcountries which are not listed in the table on the next page, contact your local HP dealer.
HP FIRST
Country Phone Number Country Phone Number
US (800) 333-1917 or(208) 344-4809
Germany 0130-8100-61
United Kingdom 0-800-96-02-71 France 05-90-5900
Netherlands 06-02-22-420 Switzerland (German) 155-1527
Belgium 0800-1-1906 Switzerland (French) 155-1526
Belgium (French) 0800-1-7043 Austria 0660-8128
Finland 9800-13134 Denmark 800-10453
Norway 800-11319 Sweden 020-795743
English outside of UK (31) 20-681-5792 Taiwan 02-791-5589
For countries not listed, contact your local HP dealer. China 86-10-505-5280
EN Getting Started Guide - 39

What if I have problems with my software?
•• If your CD-ROM is damaged or lost, or you need disks, call the HPDistribution at (970) 339-7009. US Only.
•• For 24-hour automated support answers to common problemsregarding HP software, call HP Audio Tips at (800) 333-1917. USOnly.
•• For assistance with technical questions regarding HP printer software,call the HP Customer Support Center. For the US and Canada call(208) 323-2551 from 6 a.m. to 6 p.m. (MT) Monday through Friday.For other countries, refer to the flyer in the printer box for a list of theEuropean Customer Support Center phone numbers.
40 - Getting Started Guide EN
Troubleshooting Checklist
•• Is the control panel blank?Make sure all power cables are securely attached and plugged into agrounded power outlet. Make sure the printer power switch is ON.
•• Does the control panel display OFFLINE ? Press [Online].
•• Does the control panel display HP MIO 1 INITIALIZING ? No cable, a bad cable, or only a LocalTalk cable is attached to the HPJetDirect print server. Check the cable connection. For LocalTalkconnections, the message will disappear after 5 minutes. The HPJetDirect print server may be improperly installed. Reinstall the printserver. A network problem may exist. Refer to the HP JetDirect PrintServer Software Installation Guide for troubleshooting information.Also see section N for addition of terminators, if necessary.
•• You cannot print from the computer using a parallel cable? Remove the interface cable and reconnect it, making sure it is securelyfastened. Try another parallel cable under 10 feet/3 meters in length.Replace the parallel cable, if used, with an HP C2950A cable orequivalent. The wrong port may be selected or rerouted. Check theMODE statement in the AUTOEXEC.BAT file. There may be a badport on the computer or printer. Try using a different port, or ifpossible, a different computer or printer to help isolate the source ofthe problem.
•• You cannot print using a sharing device?Test the printer using a cable connected directly from the computer tothe printer. Contact the vendor for the sharing device fortroubleshooting steps.
•• Do random garbage characters print? The interface cable may be bad or loose. Check the cable and theconnection. If you are using a parallel cable, ensure the cable is notover 10 feet/3 meters in length.
•• Does the control panel display 13.X PAPER JAM ?Open the printer and clear the paper jam according to the instructionsin the user’s guide.
•• Does the control panel display an error message?Turn the printer off then back on. If the message does not clear, referto the printer user’s guide.
EN Getting Started Guide - 41

For Additional Assistance...
Consult your user’sguide.
Call the HP Dealer fromwhom you purchasedyour printer.
Call the Hewlett-PackardCustomer Support Center.
Write your HP dealer’s telephone number here:
42 - Getting Started Guide EN