Embed Size (px)
Citation preview
How To #6 Make Arduino Tones Louder
©2014 by LearnCSE.com | Computer Science and Engineering|
This work is licensed under a Creative Commons Attribution NonCommercial 4.0 International License
v. 062214 1
The Arduino can generate what can be called a passable tone using the function tone(). This How To shows how a few inexpensive parts can be used to make these tones dramatically louder than those heard when a
speaker is connected directly to an Arduino output pin.
Background:
The Arduino can make sounds, but they aren’t loud. Many Arduino tutorials, including those on our home site LearnCSE.com, have a lesson that uses the Arduino function tone() to generate a sound. Typically a speaker is connected to an Arduino pin, either by a coupling capacitor or a resistor.
While this connection works well for teaching the use of the function, it has the disadvantage of producing a low-volume tone. Many of us, particularly when we want to add sound effects to something we’ve made that is powered by an Arduino, want a much louder sound.
A linear audio amplifier can make them louder, but at the expense of several parts. An audio amplifier, such as the ubiquitous LM386, can be added but at the cost of the integrated circuit and all its supporting components, including up to four capacitors, a resistor, and some sort of potentiometer if volume control is desired.
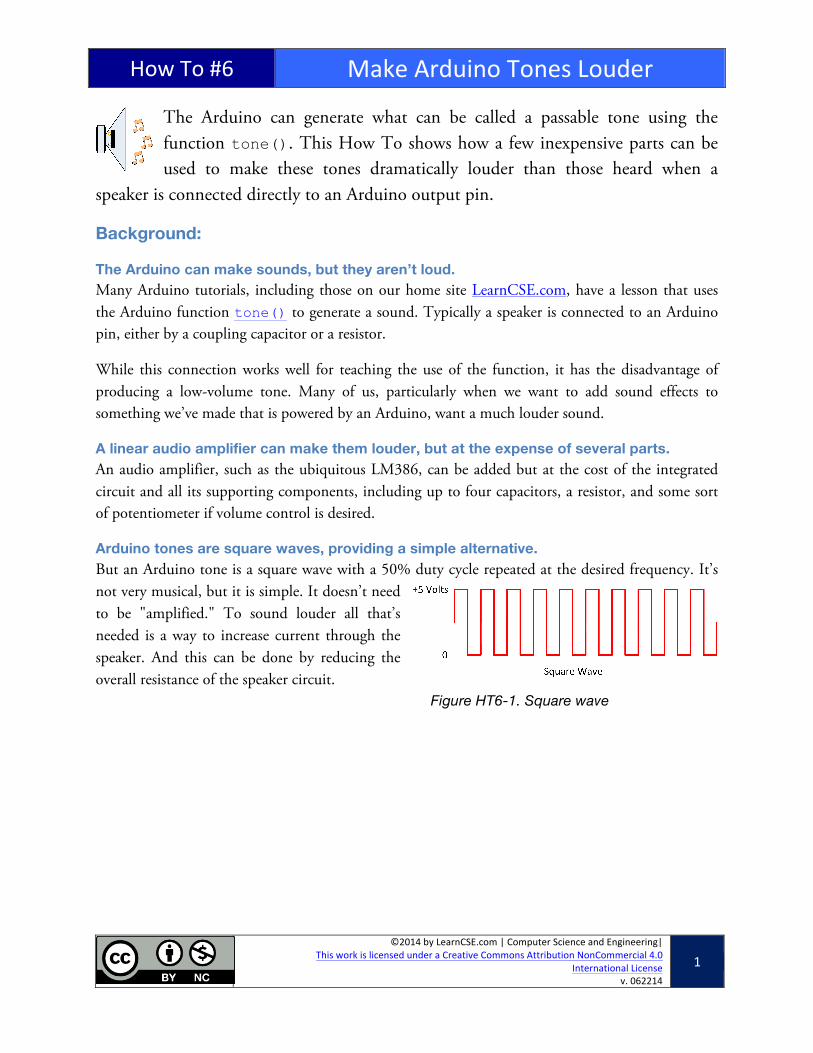
Arduino tones are square waves, providing a simple alternative. But an Arduino tone is a square wave with a 50% duty cycle repeated at the desired frequency. It’s not very musical, but it is simple. It doesn’t need to be "amplified." To sound louder all that’s needed is a way to increase current through the speaker. And this can be done by reducing the overall resistance of the speaker circuit. Figure HT6-1. Square wave
How To #6 Make Arduino Tones Louder
©2014 by LearnCSE.com | Computer Science and Engineering|
This work is licensed under a Creative Commons Attribution NonCommercial 4.0 International License
v. 062214 2
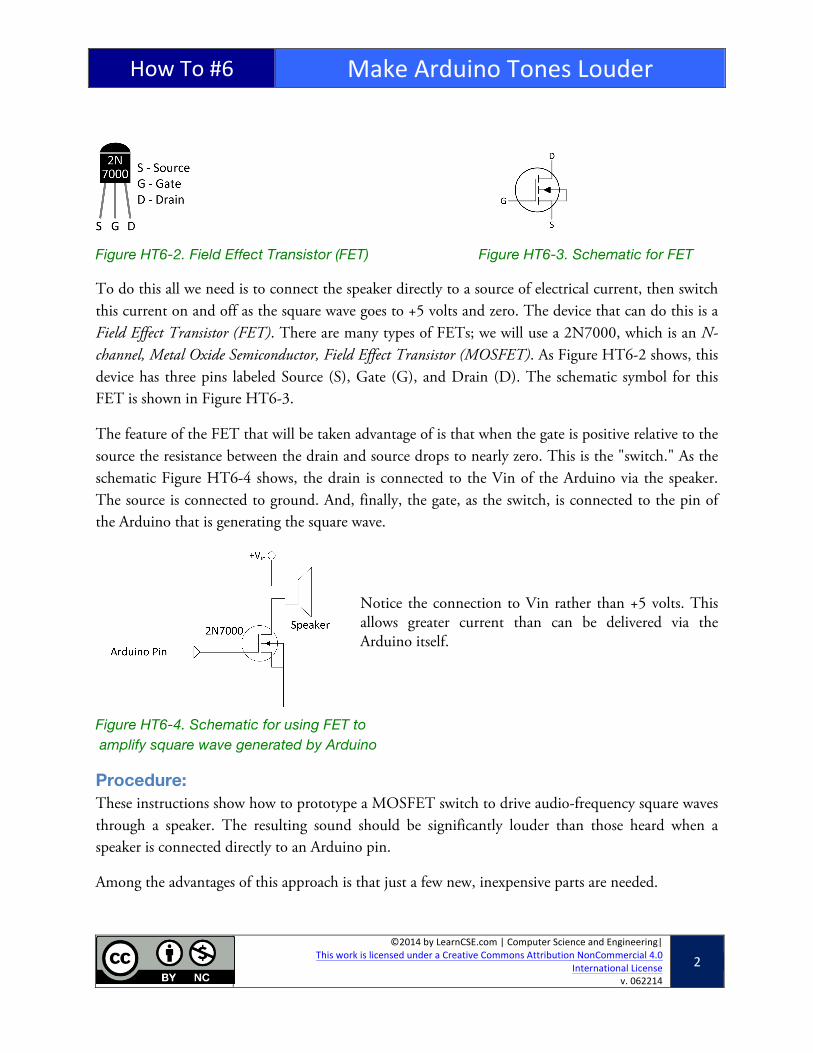
Figure HT6-2. Field Effect Transistor (FET) Figure HT6-3. Schematic for FET
To do this all we need is to connect the speaker directly to a source of electrical current, then switch this current on and off as the square wave goes to +5 volts and zero. The device that can do this is a Field Effect Transistor (FET). There are many types of FETs; we will use a 2N7000, which is an N-channel, Metal Oxide Semiconductor, Field Effect Transistor (MOSFET). As Figure HT6-2 shows, this device has three pins labeled Source (S), Gate (G), and Drain (D). The schematic symbol for this FET is shown in Figure HT6-3.
The feature of the FET that will be taken advantage of is that when the gate is positive relative to the source the resistance between the drain and source drops to nearly zero. This is the "switch." As the schematic Figure HT6-4 shows, the drain is connected to the Vin of the Arduino via the speaker. The source is connected to ground. And, finally, the gate, as the switch, is connected to the pin of the Arduino that is generating the square wave.
Notice the connection to Vin rather than +5 volts. This allows greater current than can be delivered via the Arduino itself.
Figure HT6-4. Schematic for using FET to amplify square wave generated by Arduino
Procedure: These instructions show how to prototype a MOSFET switch to drive audio-frequency square waves through a speaker. The resulting sound should be significantly louder than those heard when a speaker is connected directly to an Arduino pin.
Among the advantages of this approach is that just a few new, inexpensive parts are needed.
How To #6 Make Arduino Tones Louder
©2014 by LearnCSE.com | Computer Science and Engineering|
This work is licensed under a Creative Commons Attribution NonCommercial 4.0 International License
v. 062214 3
Materials: Quantity Part Description Catalog
Number Image
1 2N7000 N-channel, MOSFET.
1305
1 Magnet speaker 4, 8, or 16 ohm. 3119
1 Arduino Uno Single-board
computer. 3102
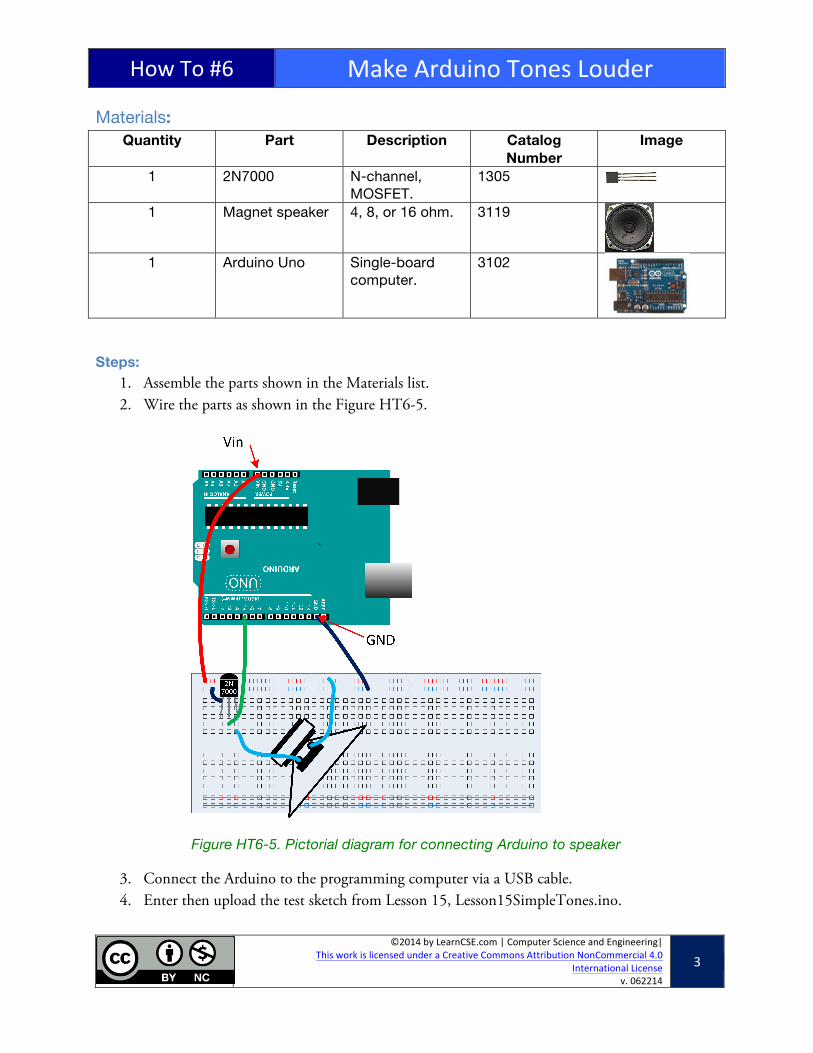
Steps: 1. Assemble the parts shown in the Materials list. 2. Wire the parts as shown in the Figure HT6-5.
Figure HT6-5. Pictorial diagram for connecting Arduino to speaker
3. Connect the Arduino to the programming computer via a USB cable. 4. Enter then upload the test sketch from Lesson 15, Lesson15SimpleTones.ino.
How To #6 Make Arduino Tones Louder
©2014 by LearnCSE.com | Computer Science and Engineering|
This work is licensed under a Creative Commons Attribution NonCommercial 4.0 International License
v. 062214 4
The louder sounds should now be obvious.
About piezo speakers The speaker shown in this "How To" is a common induction speaker that works by running an electrical current through a coil. The magnetic field created by this current interacts with the field of a strong permanent magnet, causing the coil to move.
A piezo speaker is different. It is a crystal that deforms when presented with a change in electric field. But it also presents a high impedance to the flow of current, thus defeating the purpose of the FET. This can be offset by placing a 2.2k ohm resistor (red, red, red) in parallel with the speaker.
These speakers do not have a wide frequency range; their advantage is their very small size.