Embed Size (px)
Citation preview
How to – Add Users
DOCUMENT SUMMARY SHEET
Document Type: How To
Document Title: Add Users
Document Summary: This is the Adaxa HowTo Template which is used for the creation of HowTo documents. Proposals, white papers, reports, etc. will use the Adaxa Report Template
File Name:
Created on: Wednesday, 11 April 2012
Created by:
Last Modified on:
Last Modified by:
NOTES
1. Responsibility is disclaimed for any loss or damage (including but not limited to damage resulting from the use by the client of the document) suffered by any other person for any reason at all including but not limited to negligence by ADAXA Pty Ltd (ADAXA).
2. Whilst this document is accurate to the best of our knowledge and belief, ADAXA cannot guarantee the completeness or accuracy of any description or conclusions based on the supplied information.
3. The recommendations contained in the document are advisory and ADAXA has no responsibility for the management or operation of any recommendations that may be implemented by the client.
4. This document is licensed under the terms shown at http://creativecommons.org/licenses/by-nc-nd/3.0/au/legalcode.
© 2010 Adaxa Pty Ltd Page 1
Table of Contents1 Overview
2 The Process Steps
2.1 Log in to ADempiere..................................................................................................... iv
2.2 The Business Partner Window..................................................................................... iv
2.3 The Employee Tab........................................................................................................v
2.4 The User Window......................................................................................................... vi
2.5 Role Definition............................................................................................................. vii
2.6 New User logs on for first time....................................................................................vii
2.7 Setting the New User's Password................................................................................ ix
2.8 The Password Reset Fields.........................................................................................x
3 System Email Configuration
3.1 Client Settings to enable ADempiere to send email.....................................................xii
Adaxa's Offices and Contacts
4.1 Australia.................................................................................................................... xiv
4.2 New Zealand.............................................................................................................. xiv
4.3 United States of America............................................................................................xiv
© 2010 Adaxa Pty Ltd Page 2
1 1 Overview
This document shows the screens that are accessed to:
Allow a high level user to add a new ADempiere user
allocate a role to the new user
change the new user's initial password to one of the user’s choosing
allow the new user to logon and select a role using their new credentials
Also shown is the window that needs to be maintained by a system’s administrator so that ADempiere can connect to the email system used by your organisation and allow Users to send emails from within ADempiere.
The screen shots included in section 3 and later sections of this document were taken from a system running Compiere. The ADempiere screens are the same. Note that The term “Tenant” in later versions of Compiere has identical meaning to the word “Client” which was used in earlier version of Compiere and most version of ADempiere.
© 2010 Adaxa Pty Ltd Page 3
2 2 The Process Steps
2.1 Log in to ADempiere
Logon to ADempiere with a role that allows access to the USER window. The GardenWorldexample is the Role of GardenAdmin. Open the Business Partner wimdow.
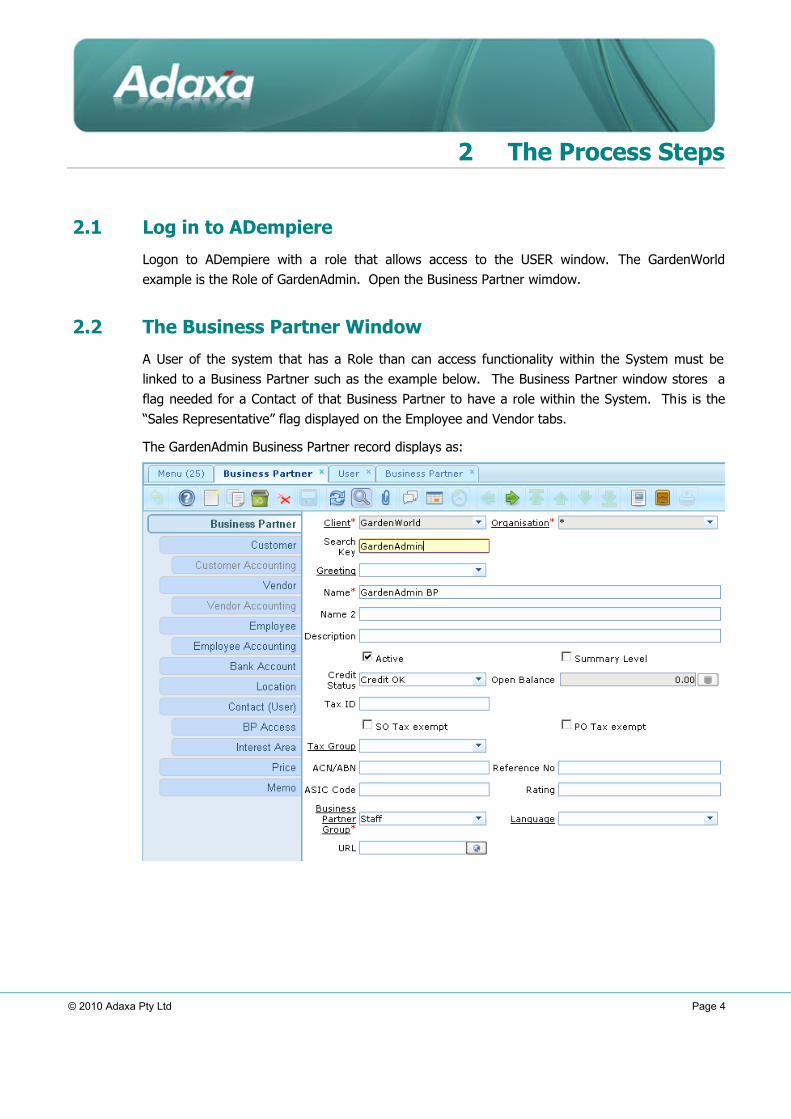
2.2 The Business Partner Window
A User of the system that has a Role than can access functionality within the System must belinked to a Business Partner such as the example below. The Business Partner window stores aflag needed for a Contact of that Business Partner to have a role within the System. This is the“Sales Representative” flag displayed on the Employee and Vendor tabs.
The GardenAdmin Business Partner record displays as:
© 2010 Adaxa Pty Ltd Page 4
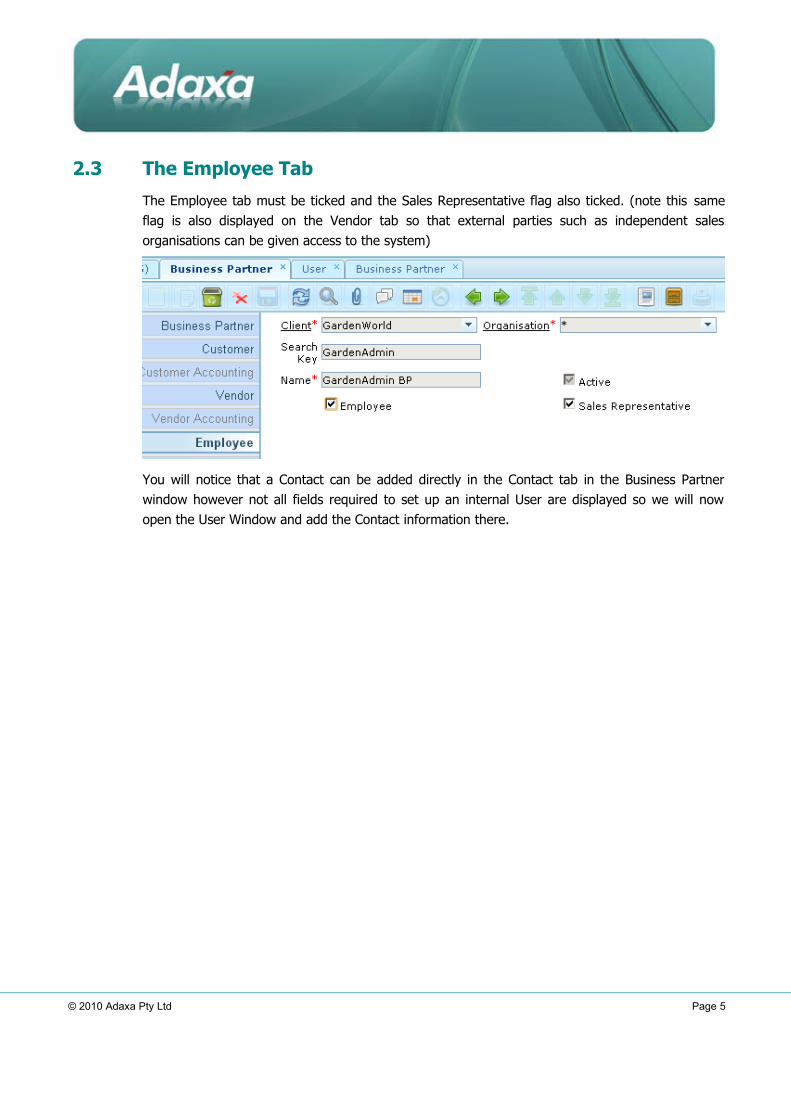
2.3 The Employee Tab
The Employee tab must be ticked and the Sales Representative flag also ticked. (note this sameflag is also displayed on the Vendor tab so that external parties such as independent salesorganisations can be given access to the system)
You will notice that a Contact can be added directly in the Contact tab in the Business Partnerwindow however not all fields required to set up an internal User are displayed so we will nowopen the User Window and add the Contact information there.
© 2010 Adaxa Pty Ltd Page 5
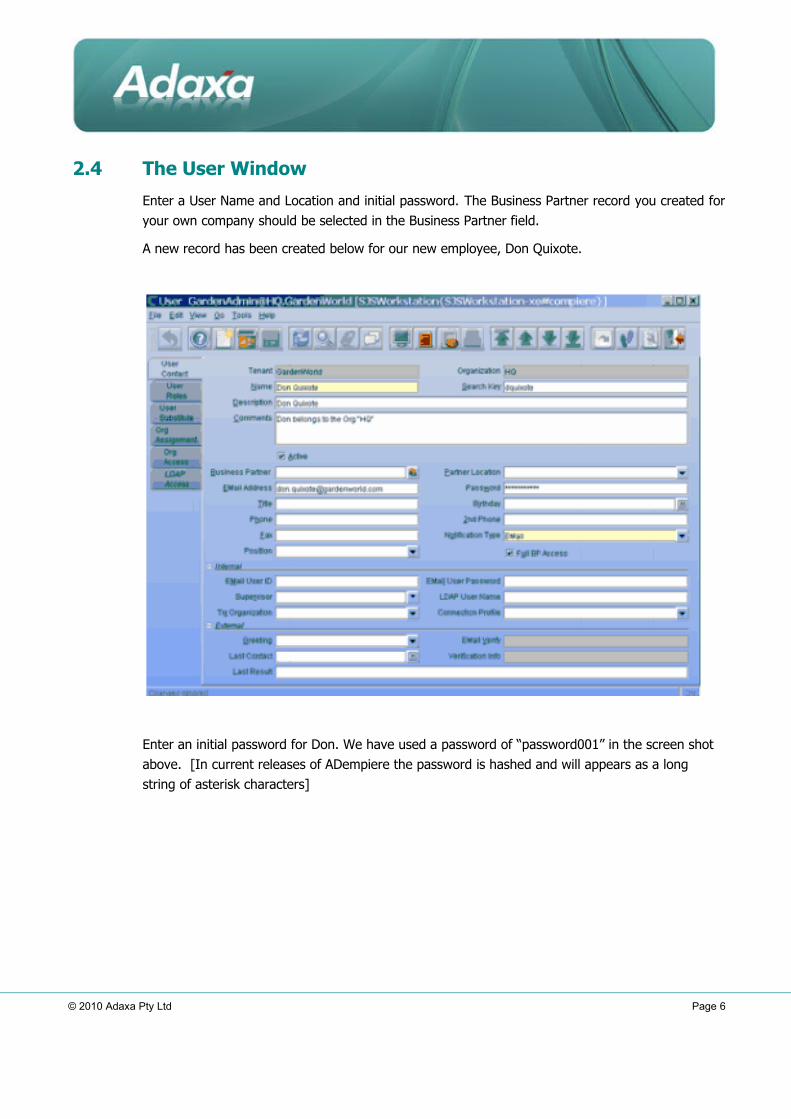
2.4 The User Window
Enter a User Name and Location and initial password. The Business Partner record you created foryour own company should be selected in the Business Partner field.
A new record has been created below for our new employee, Don Quixote.
Enter an initial password for Don. We have used a password of “password001” in the screen shot above. [In current releases of ADempiere the password is hashed and will appears as a long string of asterisk characters]
© 2010 Adaxa Pty Ltd Page 6
Add the Roles that the new User, Don Quixote, will have by creating one record for each such role.
2.5 Role Definition
The definition of roles is a separate issue not covered here, just select the appropriate role from the dropdown list. The role chosen will also define the Organisations that Don can access and what he is able to do within those Organisations.
As noted above, Don Quixote can have multiple roles and each of his roles is available for him to select when he logs in.
Don Quixote can now test his log-on to the system.
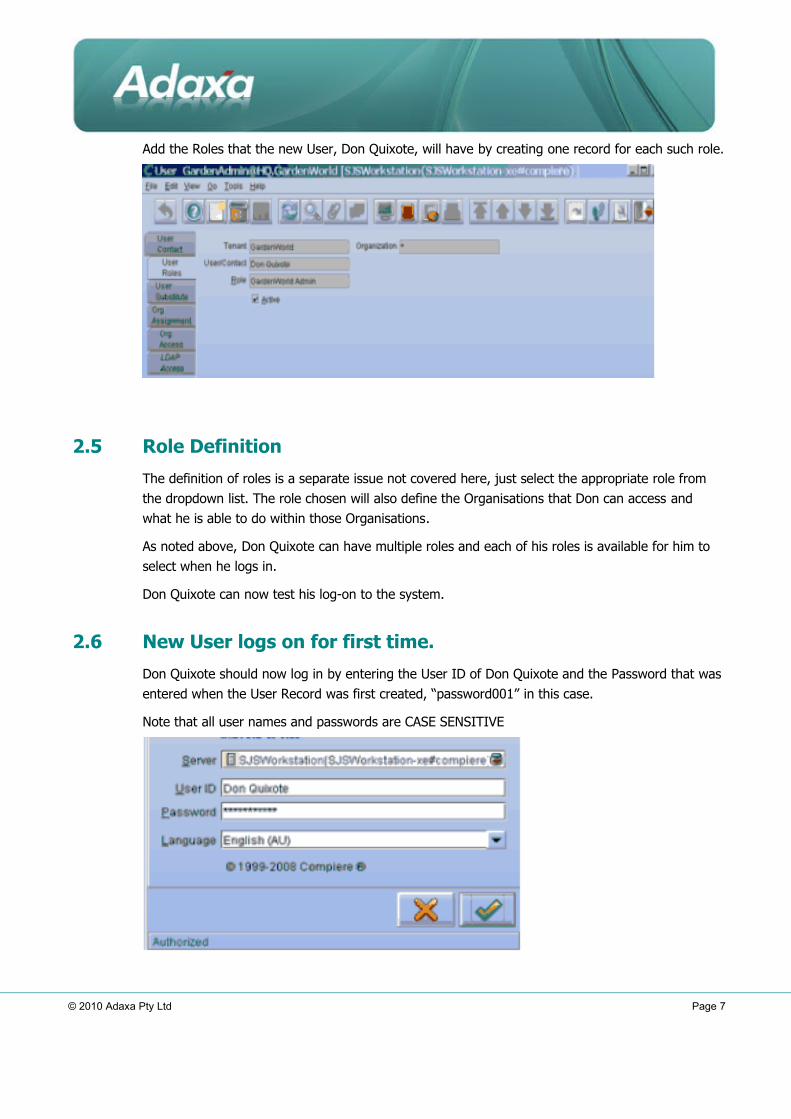
2.6 New User logs on for first time.
Don Quixote should now log in by entering the User ID of Don Quixote and the Password that wasentered when the User Record was first created, “password001” in this case.
Note that all user names and passwords are CASE SENSITIVE
© 2010 Adaxa Pty Ltd Page 7
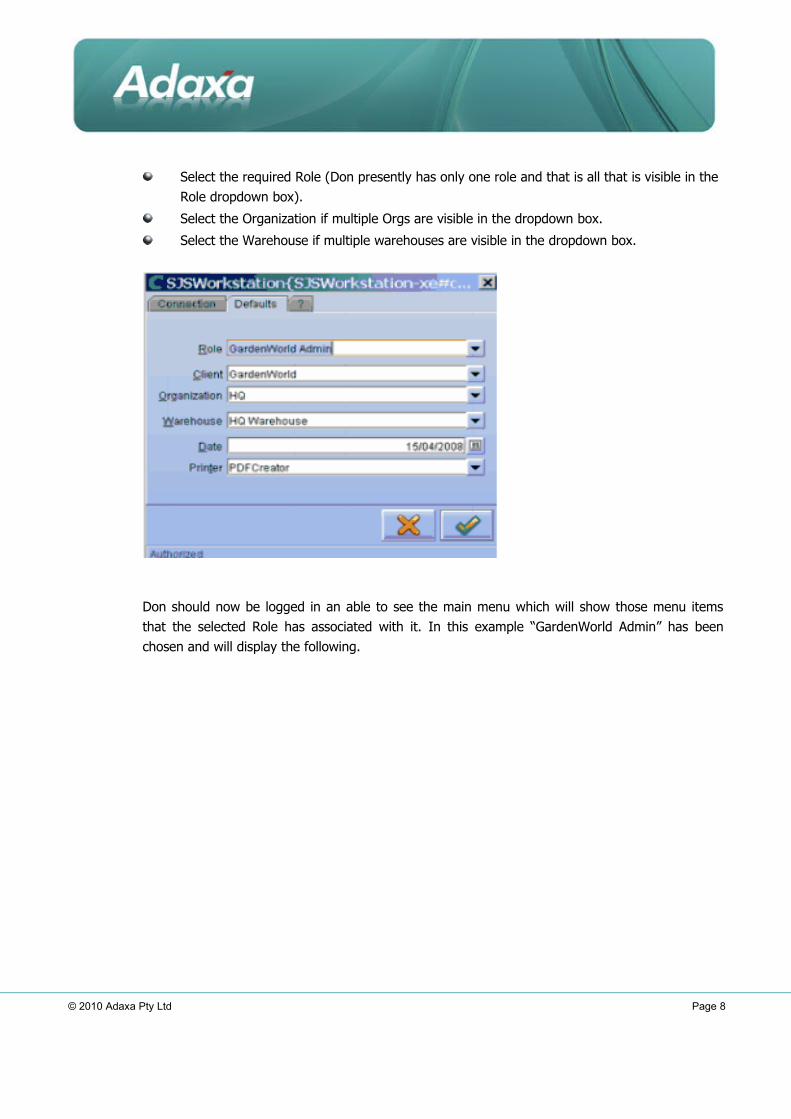
Select the required Role (Don presently has only one role and that is all that is visible in the Role dropdown box).
Select the Organization if multiple Orgs are visible in the dropdown box.
Select the Warehouse if multiple warehouses are visible in the dropdown box.
Don should now be logged in an able to see the main menu which will show those menu itemsthat the selected Role has associated with it. In this example “GardenWorld Admin” has beenchosen and will display the following.
© 2010 Adaxa Pty Ltd Page 8
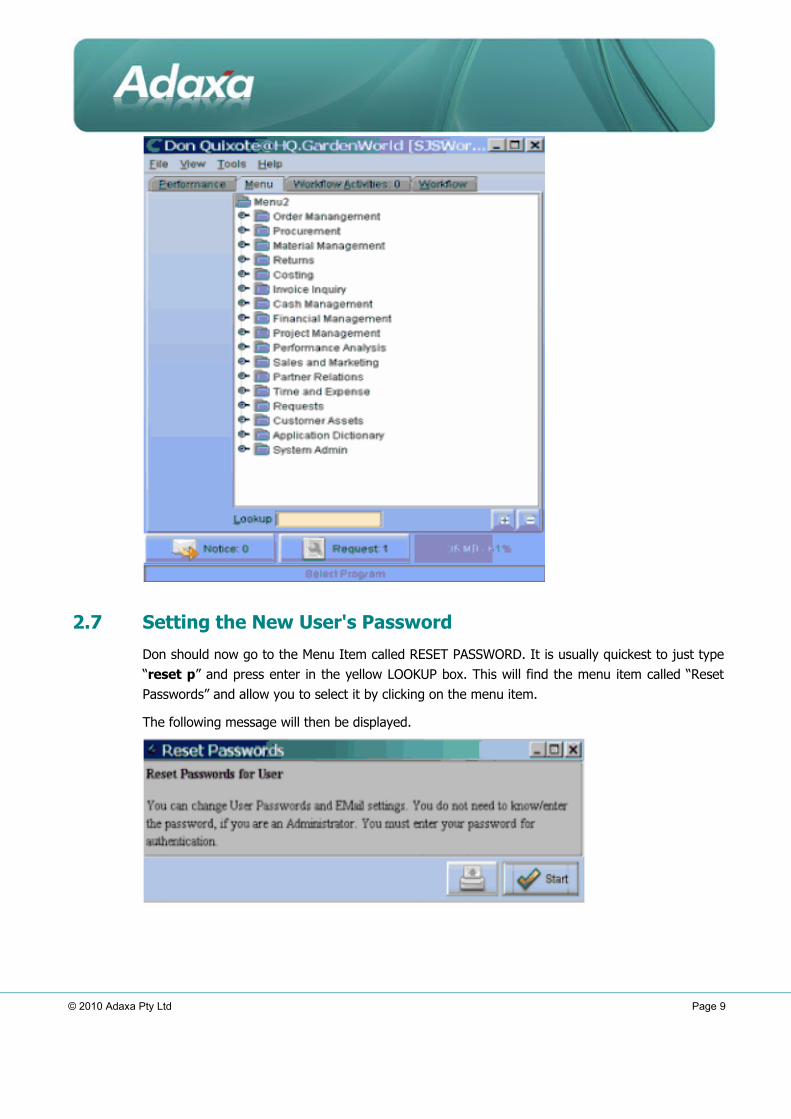
2.7 Setting the New User's Password
Don should now go to the Menu Item called RESET PASSWORD. It is usually quickest to just type“reset p” and press enter in the yellow LOOKUP box. This will find the menu item called “ResetPasswords” and allow you to select it by clicking on the menu item.
The following message will then be displayed.
© 2010 Adaxa Pty Ltd Page 9
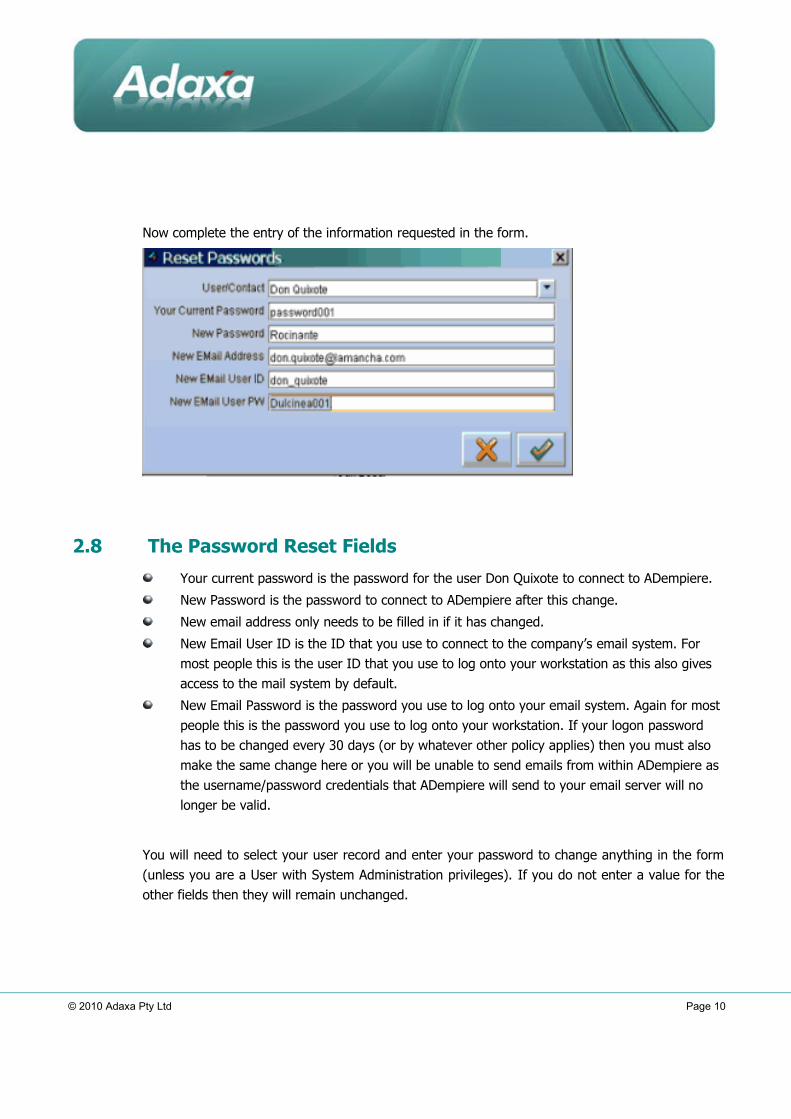
Now complete the entry of the information requested in the form.
2.8 The Password Reset Fields
Your current password is the password for the user Don Quixote to connect to ADempiere.
New Password is the password to connect to ADempiere after this change.
New email address only needs to be filled in if it has changed.
New Email User ID is the ID that you use to connect to the company’s email system. For most people this is the user ID that you use to log onto your workstation as this also gives access to the mail system by default.
New Email Password is the password you use to log onto your email system. Again for most people this is the password you use to log onto your workstation. If your logon password has to be changed every 30 days (or by whatever other policy applies) then you must also make the same change here or you will be unable to send emails from within ADempiere as the username/password credentials that ADempiere will send to your email server will no longer be valid.
You will need to select your user record and enter your password to change anything in the form(unless you are a User with System Administration privileges). If you do not enter a value for theother fields then they will remain unchanged.
© 2010 Adaxa Pty Ltd Page 10
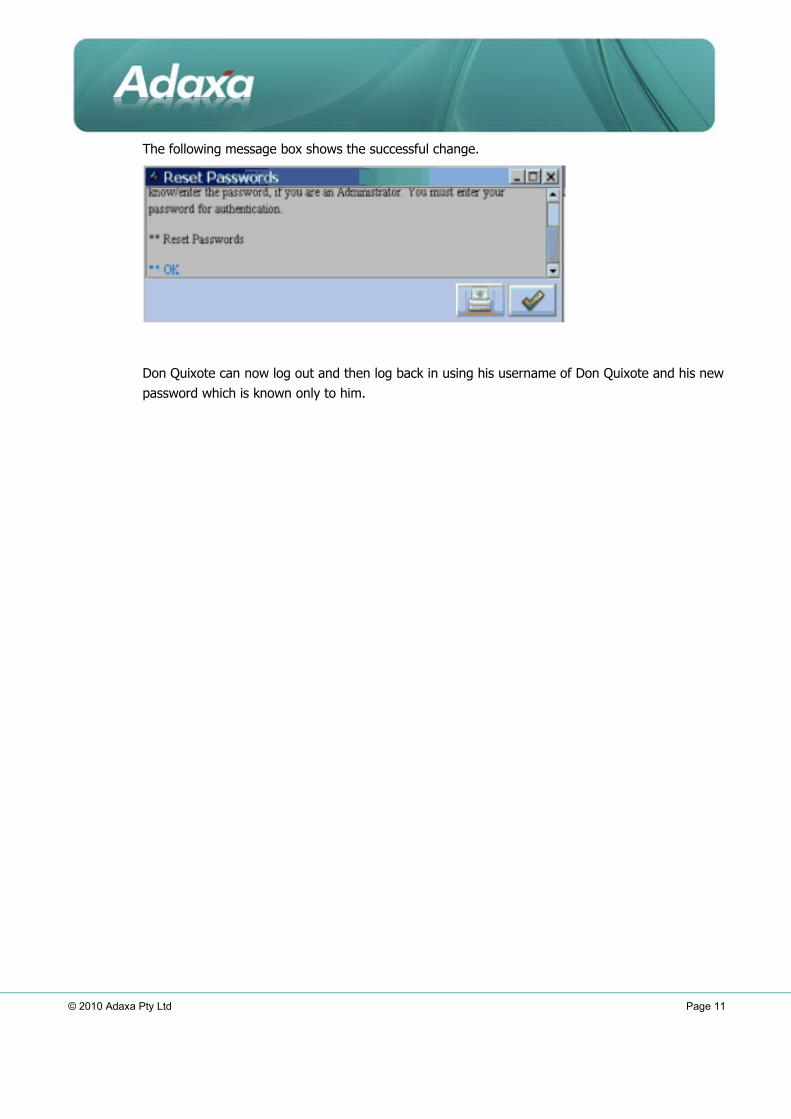
The following message box shows the successful change.
Don Quixote can now log out and then log back in using his username of Don Quixote and his newpassword which is known only to him.
© 2010 Adaxa Pty Ltd Page 11
3 3 System Email Configuration
3.1 Client Settings to enable ADempiere to send email
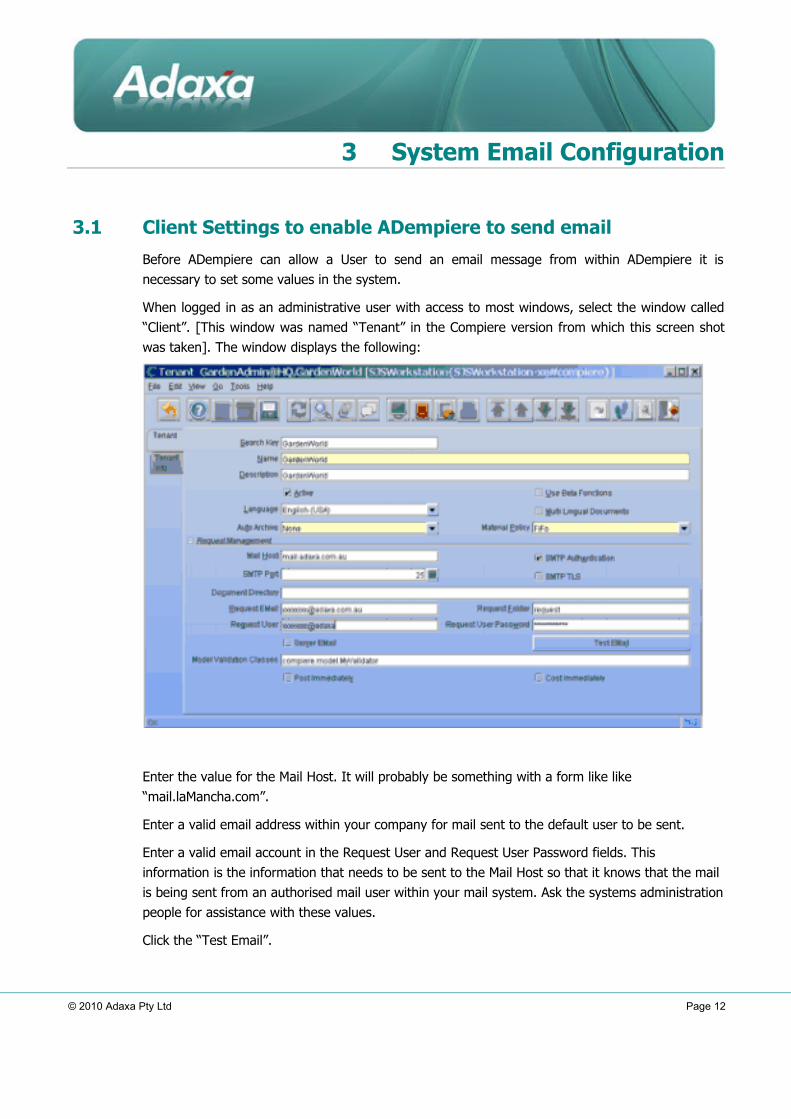
Before ADempiere can allow a User to send an email message from within ADempiere it isnecessary to set some values in the system.
When logged in as an administrative user with access to most windows, select the window called“Client”. [This window was named “Tenant” in the Compiere version from which this screen shotwas taken]. The window displays the following:
Enter the value for the Mail Host. It will probably be something with a form like like “mail.laMancha.com”.
Enter a valid email address within your company for mail sent to the default user to be sent.
Enter a valid email account in the Request User and Request User Password fields. This information is the information that needs to be sent to the Mail Host so that it knows that the mail is being sent from an authorised mail user within your mail system. Ask the systems administrationpeople for assistance with these values.
Click the “Test Email”.
© 2010 Adaxa Pty Ltd Page 12
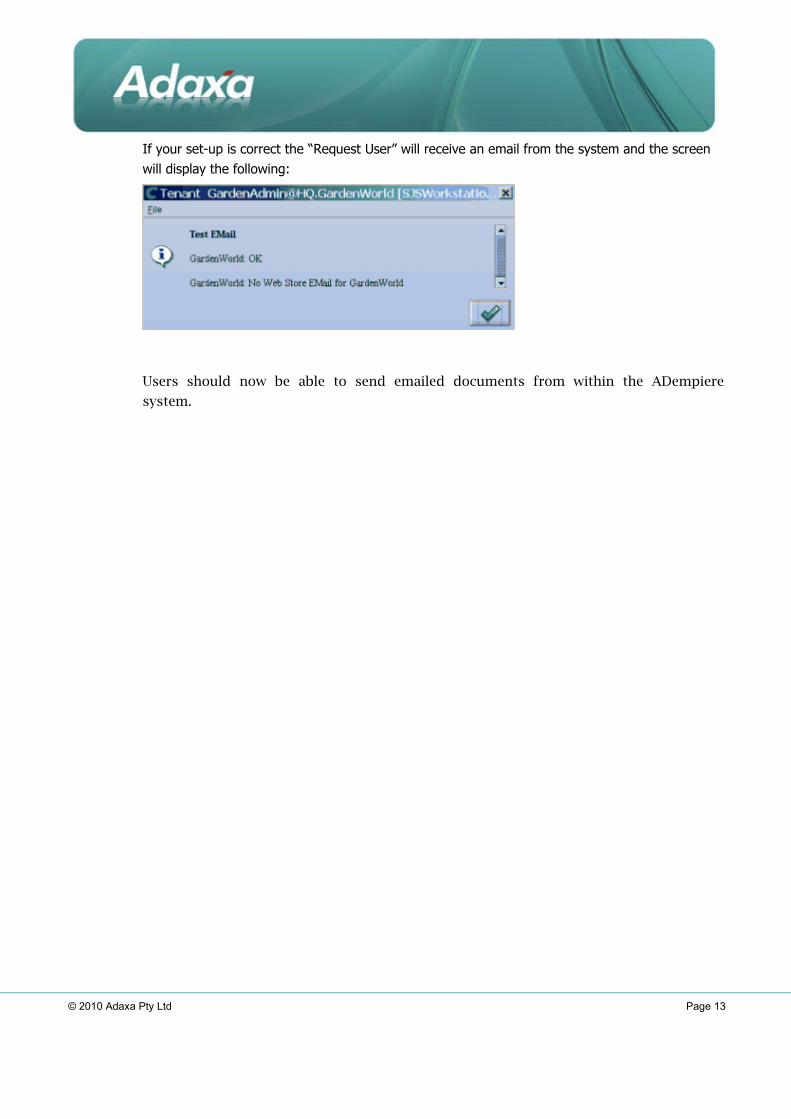
If your set-up is correct the “Request User” will receive an email from the system and the screen will display the following:
Users should now be able to send emailed documents from within the ADempiere
system.
© 2010 Adaxa Pty Ltd Page 13
4 Adaxa's Offices and Contacts
Information of a general nature about Adaxa and its services can be found at www.adaxa.com or obtained bysending an email to [email protected] with a description of the information that you would like to receive. Ifyou are an existing client and wish to initiate a request for software support please send an email [email protected] with as much detail as possible about the nature of your support request.
For all other information please contact the Adaxa office nearest to you.
4.1 Australia
Address: 10 Kylie Place, Melbourne, Victoria, 3192, Australia
Contacts: Office
• 1300 990 120 (Within Australia)• +613 9510 4788 (Outside of Australia)
4.2 New Zealand
Address: 73 Boston Road, Mt Eden, Auckland, 1023, New Zealand
Contacts: Office
• 0800 232 922 (Within New Zealand)• +649 9744 600 (Outside of New Zealand)
4.3 United States of America
Address: 4400 NE 77th Ave, Suite 275, Vancouver, WA 98662, USA
Contacts: Office
• +1 760 576 5115
© 2010 Adaxa Pty Ltd Page 14