Embed Size (px)
Citation preview
How to Move a JSP Web Application
From Development PC/MAC to Other Development PC/MAC
– OR —
From Zip File Sample Code to Your PC/MAC
You can’t just store your Web Application Project on a flash drive and open it from a
different computer because the Web App must be deployed to the destination computer.
NetBeans does all this for you (deploys a Web App) when you create a new Web App
Project on a PC/MAC. So, here’s how you move a Web Application from one
Development PC/MAC to another. (It’s also how you can install my sample code onto
your PC/MAC.)
1. Zip up your Web App Project (on the source PC/MAC). You’ll find a folder (under
“NetBeans Projects” under “My Docs”) named the same as your project. Or, you can start
out with one of my Sample Web Apps that has been zipped and published in Blackboard.
On a PC, right click from File Manager and select “Send to Zipped/Compressed File”.
On a MAC, right click from the Finder and select “Send to Zipped/Compressed File”.
2. In NetBeans (on the destination PC/MAC) create a new Web App Project.
3. On the destination PC, unzip all the files of the project you are trying to move.
On a PC, double click to open the zip file and select “Extract All”. This should create a folder with
the same name as the zip file (and it’s location should be just next to the zip file).
On a MAC, open the zip file and it should automatically create a folder with the same name as the
zip file.
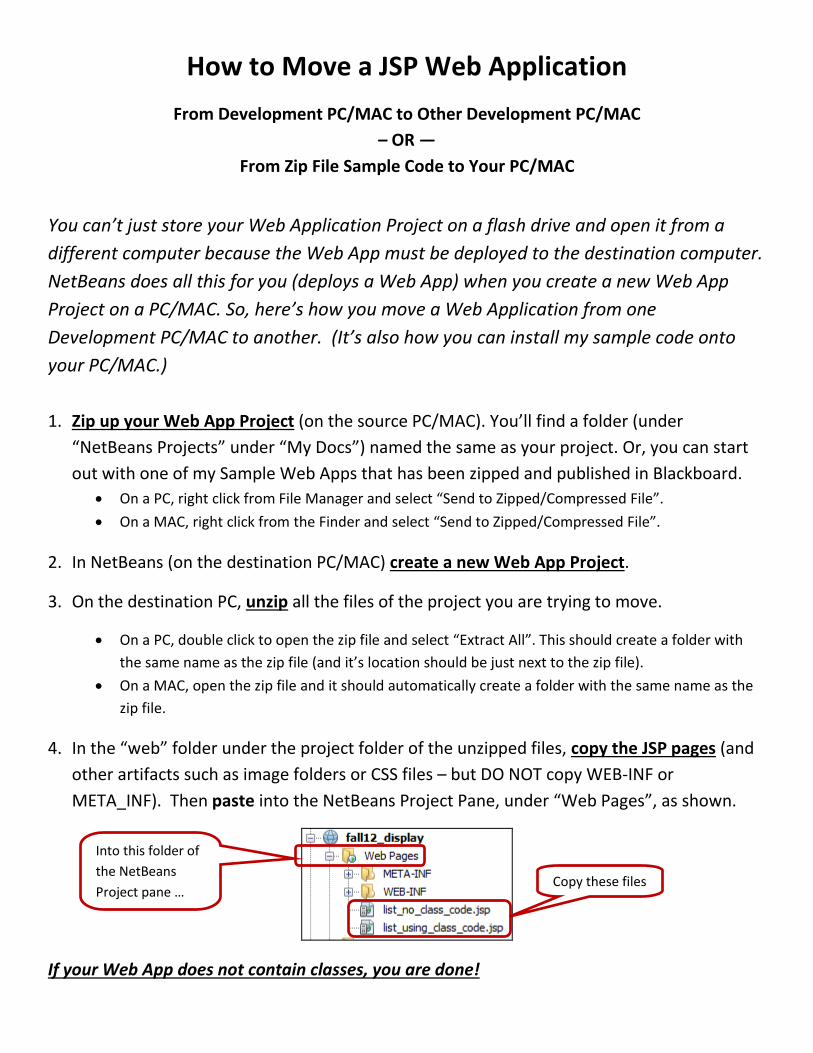
4. In the “web” folder under the project folder of the unzipped files, copy the JSP pages (and
other artifacts such as image folders or CSS files – but DO NOT copy WEB-INF or
META_INF). Then paste into the NetBeans Project Pane, under “Web Pages”, as shown.
If your Web App does not contain classes, you are done!
Copy these files
Into this folder of
the NetBeans
Project pane …
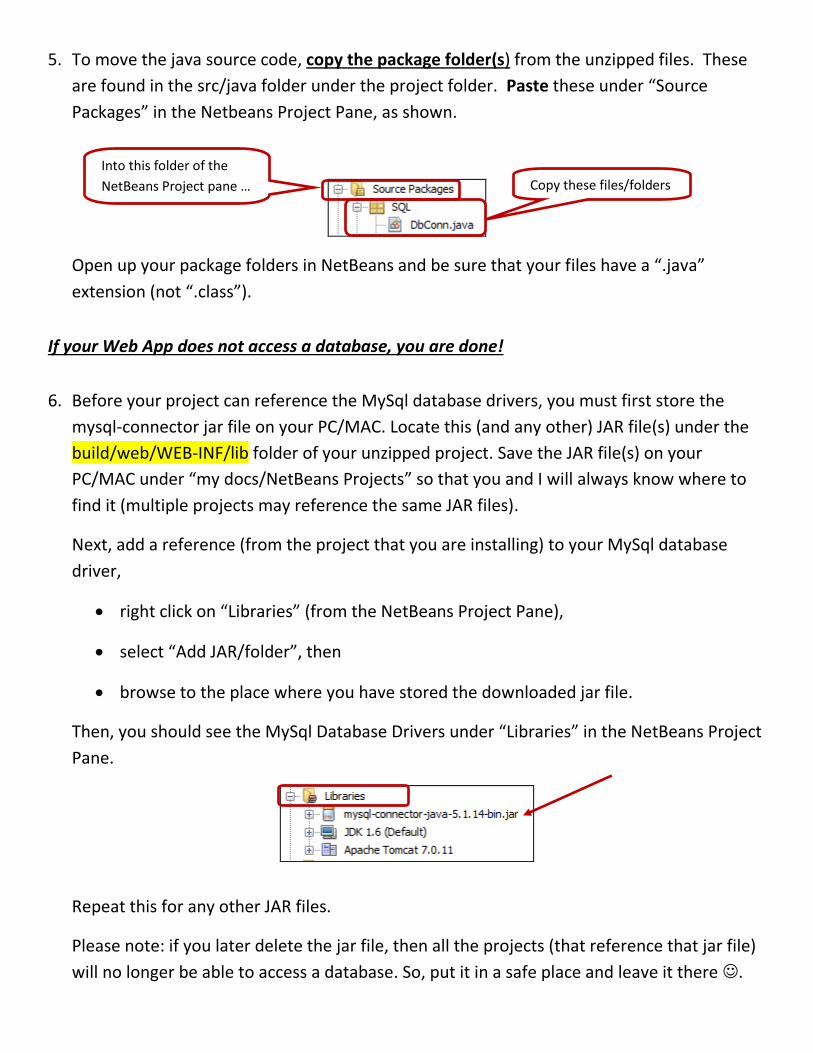
5. To move the java source code, copy the package folder(s) from the unzipped files. These
are found in the src/java folder under the project folder. Paste these under “Source
Packages” in the Netbeans Project Pane, as shown.
Open up your package folders in NetBeans and be sure that your files have a “.java”
extension (not “.class”).
If your Web App does not access a database, you are done!
6. Before your project can reference the MySql database drivers, you must first store the
mysql-connector jar file on your PC/MAC. Locate this (and any other) JAR file(s) under the
build/web/WEB-INF/lib folder of your unzipped project. Save the JAR file(s) on your
PC/MAC under “my docs/NetBeans Projects” so that you and I will always know where to
find it (multiple projects may reference the same JAR files).
Next, add a reference (from the project that you are installing) to your MySql database
driver,
right click on “Libraries” (from the NetBeans Project Pane),
select “Add JAR/folder”, then
browse to the place where you have stored the downloaded jar file.
Then, you should see the MySql Database Drivers under “Libraries” in the NetBeans Project
Pane.
Repeat this for any other JAR files.
Please note: if you later delete the jar file, then all the projects (that reference that jar file)
will no longer be able to access a database. So, put it in a safe place and leave it there .
Into this folder of the
NetBeans Project pane … Copy these files/folders


![JSP 471 Defence Nuclear Emergency Response Part 1: Directive · ^}(^[ W }o] Ç^ u v ii JSP 471 Pt 1 (V2.1 Dec 18) Preface How to use this JSP 1. JSP 471 sets Ministry of Defence (MOD)](https://img.pdfslide.us/doc/110x75/5e733d23467d6302710782e7/jsp-471-defence-nuclear-emergency-response-part-1-directive-w-o-u-v.jpg)