Embed Size (px)
Citation preview
How to migrate from Forex Tester 2 to Forex Tester 3
This instruction will help you to transfer all of your historical data, projects and
templates from Forex Tester 2 to Forex Tester 3 easily.
How to migrate from Forex Tester 2 to Forex Tester 3 ............................................................................ 1
The main differences between Forex Tester 2 and Forex Tester 3 ........................................................... 3
How to install Forex Tester 3 ................................................................................................................... 4
How to get a registration key of Forex Tester 3? ..................................................................................... 7
How to register Forex Tester 3? .............................................................................................................. 8
What to do if you purchased an upgrade but did not receive a registration key? ................................... 10
How to start a new test in Forex Tester 3 .............................................................................................. 11
How to transfer projects, templates and historical data from Forex Tester 2 to Forex Tester 3 .............. 15

The main differences between Forex Tester 2 and Forex
Tester 3
Thank you for purchasing an upgrade from Forex Tester 2 to Forex Tester 3!
Among the most important changes that were incorporated into Forex Tester 3
are the following:
1. In Forex Tester 3, you no longer need to switch from the History mode to
the Testing mode.
2. The tick generation is done automatically.
3. The project has become a cornerstone part of the software. You just
establish the settings while creating a project and then forget about the
settings once and for all concentrating on the backtesting itself.
4. The process of data downloading became much faster:
4.1. You can download any number of symbols at a time
4.2. Software allows downloading the data in multiple streams
5. The Smart Profit chart gained more features for analysis and behaves as
any other chart
6. Valuable tools that have been added
6.1. Renko bars
6.2. New graphical elements
6.3. 20 most popular custom indicators
7. Multiple monitor support (move any chart to its dedicated monitor easily)
8. Many others useful changes that will simplify your backtesting
To sum up, Forex Tester 3 has become much faster, simpler and more accurate.
To see the full list of 26 additional features please visit our site:
http://www.forextester.com/ft3
How to install Forex Tester 3
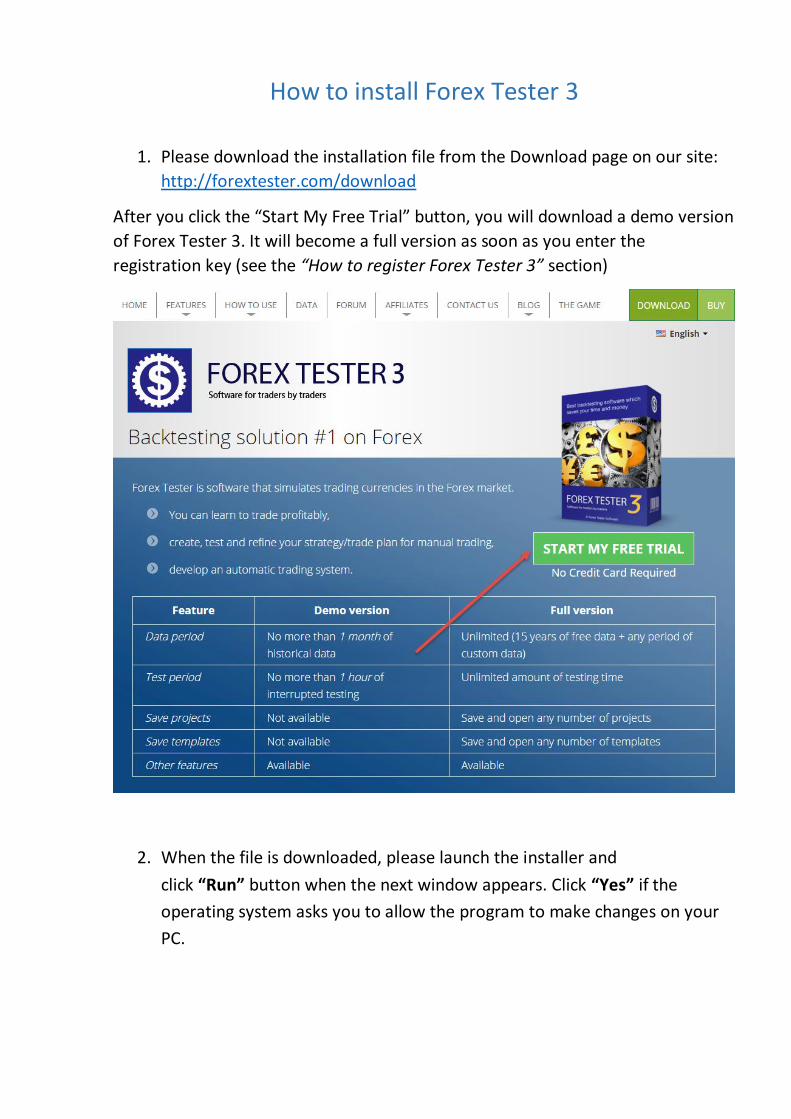
1. Please download the installation file from the Download page on our site:
http://forextester.com/download
After you click the “Start My Free Trial” button, you will download a demo version
of Forex Tester 3. It will become a full version as soon as you enter the
registration key (see the “How to register Forex Tester 3” section)
2. When the file is downloaded, please launch the installer and
click “Run” button when the next window appears. Click “Yes” if the
operating system asks you to allow the program to make changes on your
PC.
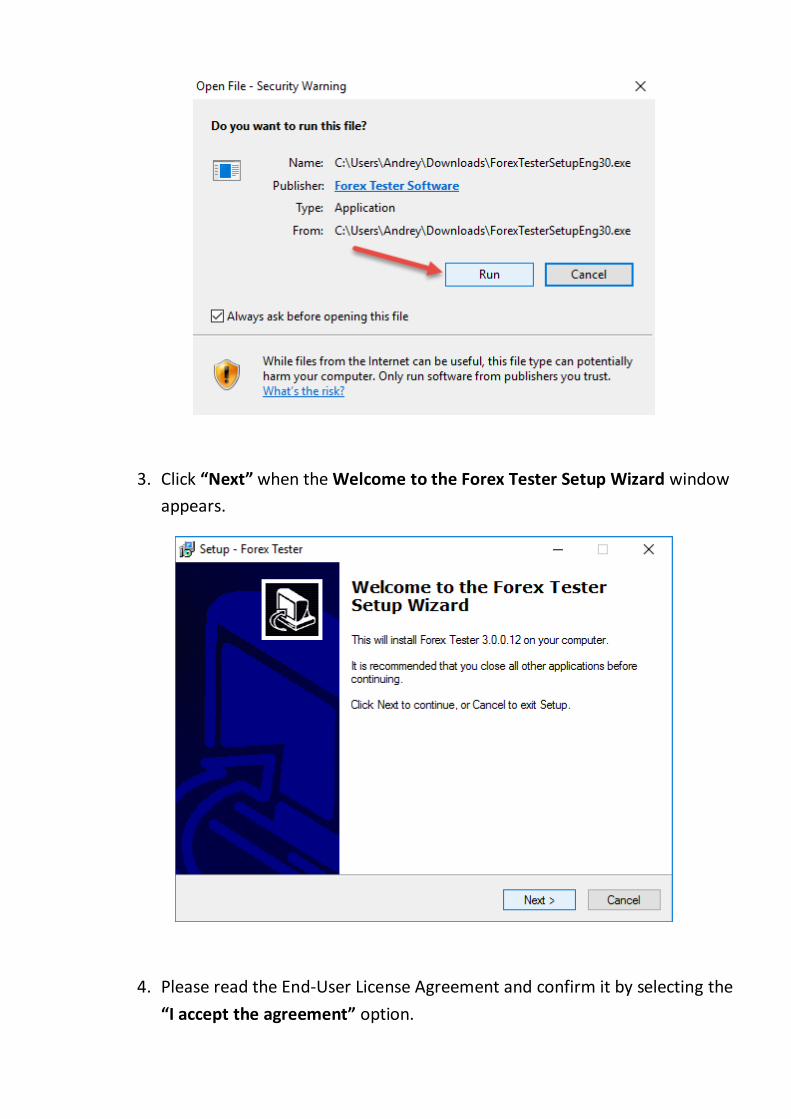
3. Click “Next” when the Welcome to the Forex Tester Setup Wizard window
appears.
4. Please read the End-User License Agreement and confirm it by selecting the
“I accept the agreement” option.
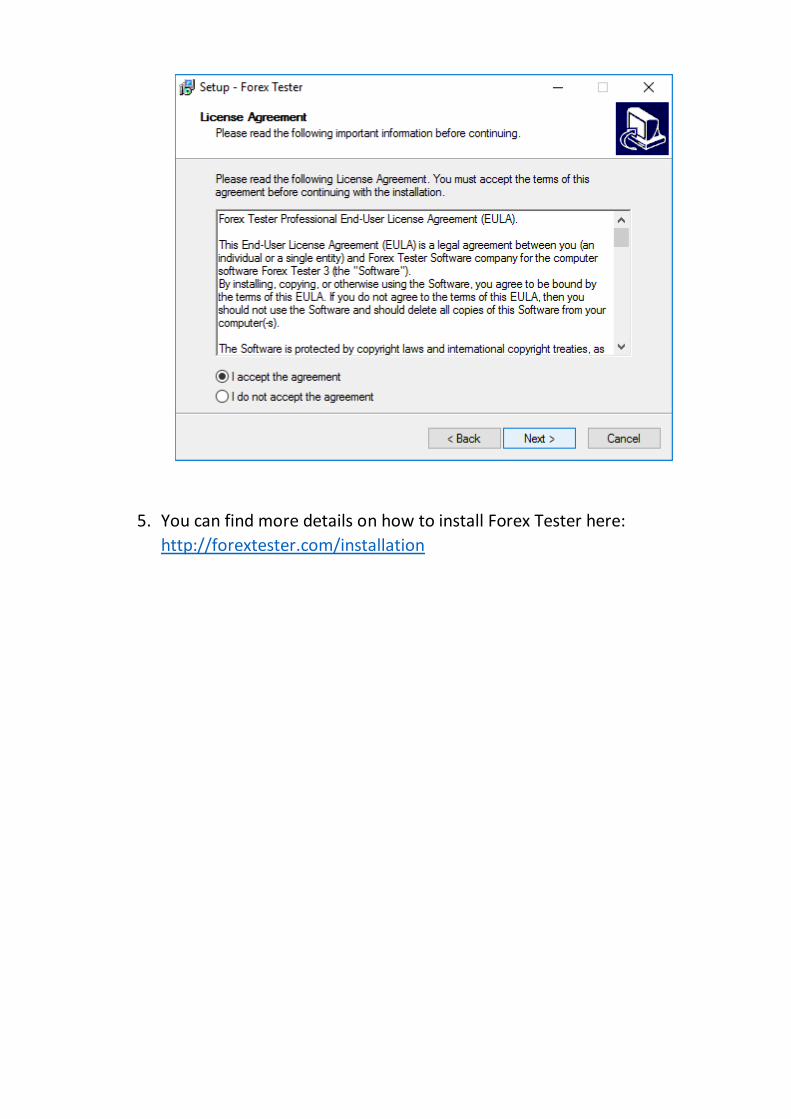
5. You can find more details on how to install Forex Tester here:
http://forextester.com/installation

How to get a registration key of Forex Tester 3?
1. To get a Forex Tester 3 license you need to purchase an upgrade. You can
do it here: www.forextester.com/order
2. After the purchase, we will ask you to fill a very easy form that will help us
to find your previous Forex Tester 2 license. Finally, you will receive an
email with your registration key.
Note. Only those users can upgrade to Forex Tester 3 who own either Forex
Tester 2 or Forex Tester Lite / Pro.
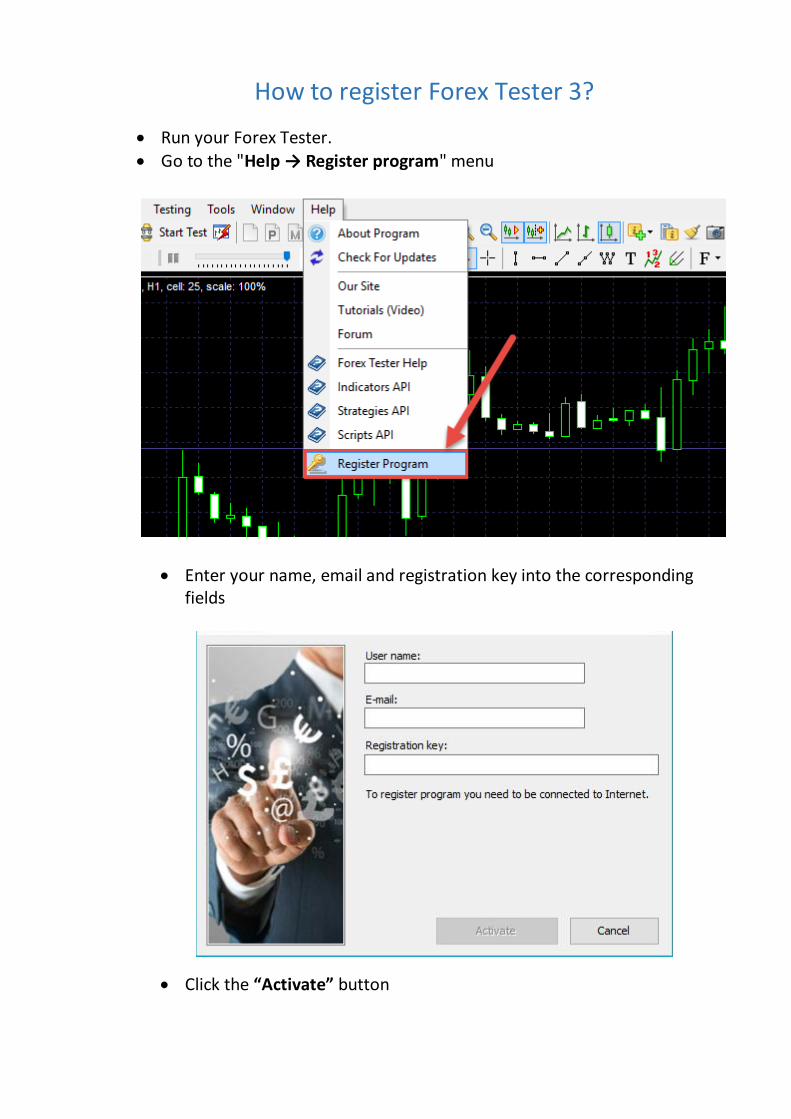
How to register Forex Tester 3?
Run your Forex Tester.
Go to the "Help → Register program" menu
Enter your name, email and registration key into the corresponding fields
Click the “Activate” button
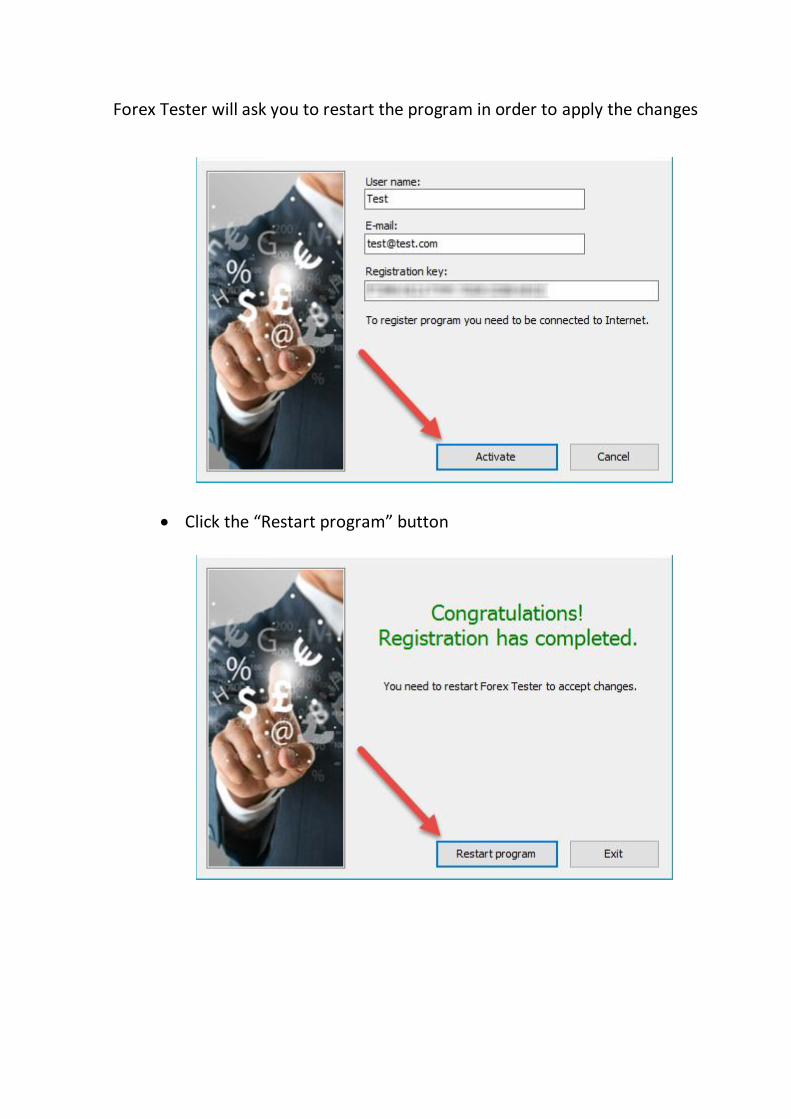
Forex Tester will ask you to restart the program in order to apply the changes
Click the “Restart program” button
What to do if you purchased an upgrade but did not
receive a registration key? If you have not received an email with the necessary information, please follow
this instruction:
1. Check whether your order has been processed by your bank
2. Check the “Spam” folder, the message might be there
3. Fill the form at this page on our site:
http://forextester.com/requestupgrade
4. If it is not, then please send us an email to [email protected] with
the following personal data of yours:
First name
Last name
Email that you used while purchasing
Order number
We will process your request and send you an email with the registration key
within 24 hours.
If you have any questions related to the program then you can:
Find an answer on an FAQ page on our site http://forextester.com/faq
Ask your question here: http://forextester.com/contacts
Contact us at [email protected]
Make use of our live chat, which is available from any page of our site
Find the necessary information in one of the text tutorials:
http://forextester.com/howtouse
Watch one of the video tutorials: http://forextester.com/video
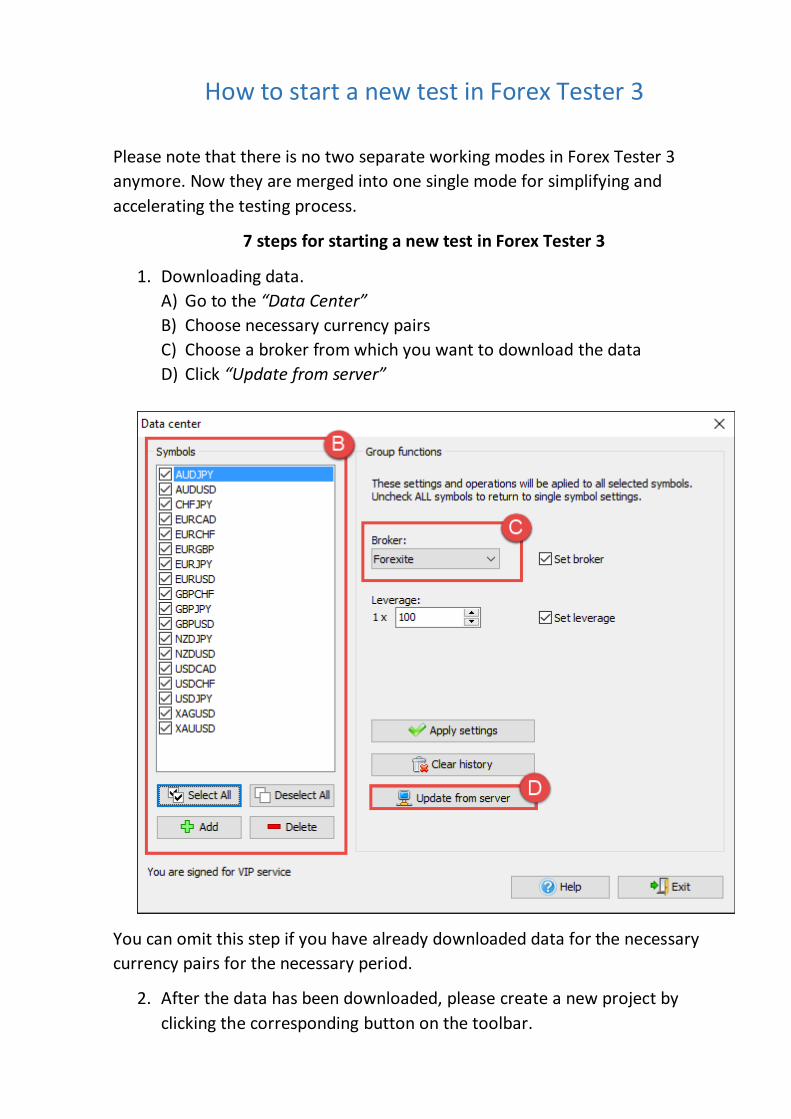
How to start a new test in Forex Tester 3
Please note that there is no two separate working modes in Forex Tester 3
anymore. Now they are merged into one single mode for simplifying and
accelerating the testing process.
7 steps for starting a new test in Forex Tester 3
1. Downloading data.
A) Go to the “Data Center”
B) Choose necessary currency pairs
C) Choose a broker from which you want to download the data
D) Click “Update from server”
You can omit this step if you have already downloaded data for the necessary
currency pairs for the necessary period.
2. After the data has been downloaded, please create a new project by
clicking the corresponding button on the toolbar.

3. Then set the name of the project, set your initial deposit and click “Next”
4. After this please do next:
a) Choose necessary currency pairs (make sure that you have
downloaded the historical data for them)
b) Set the testing period (should match the period that you set while
downloading the data)
c) Set the testing quality (you can see more information about tick
generation methods here: http://forextester.com/newproject
d) Click “Next”

5. You can adjust your time zone and set start testing data on the next stage.
After that click “Create”
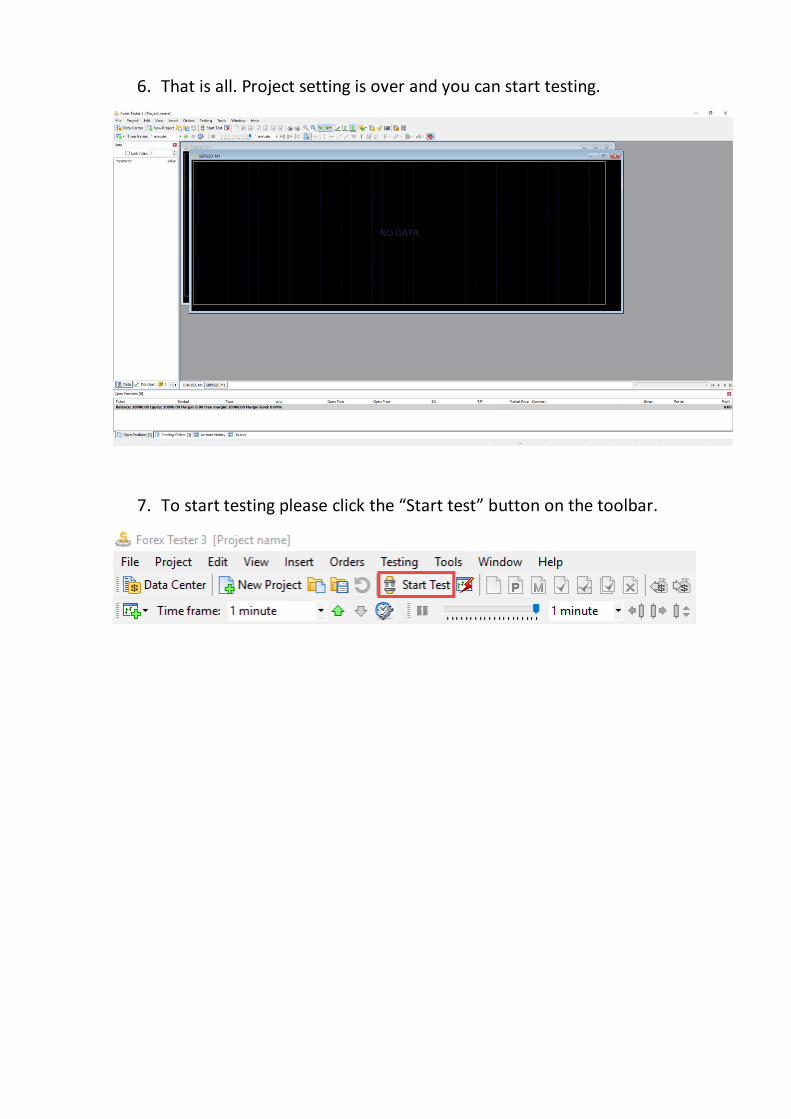
6. That is all. Project setting is over and you can start testing.
7. To start testing please click the “Start test” button on the toolbar.
How to transfer projects, templates and historical data
from Forex Tester 2 to Forex Tester 3
To ease up this process we created the program, which will make this transfer
automatic. Please do these steps to move your projects and templates from Forex
Tester 2 to Forex Tester 3:
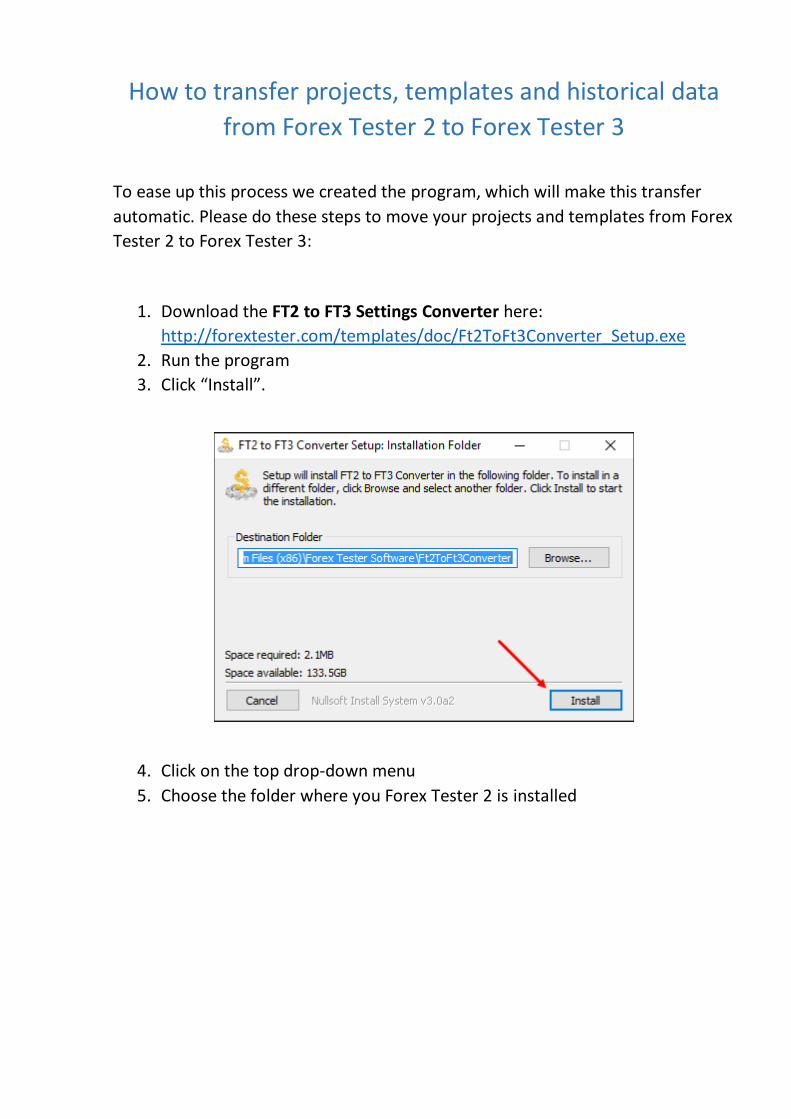
1. Download the FT2 to FT3 Settings Converter here:
http://forextester.com/templates/doc/Ft2ToFt3Converter_Setup.exe
2. Run the program
3. Click “Install”.
4. Click on the top drop-down menu
5. Choose the folder where you Forex Tester 2 is installed
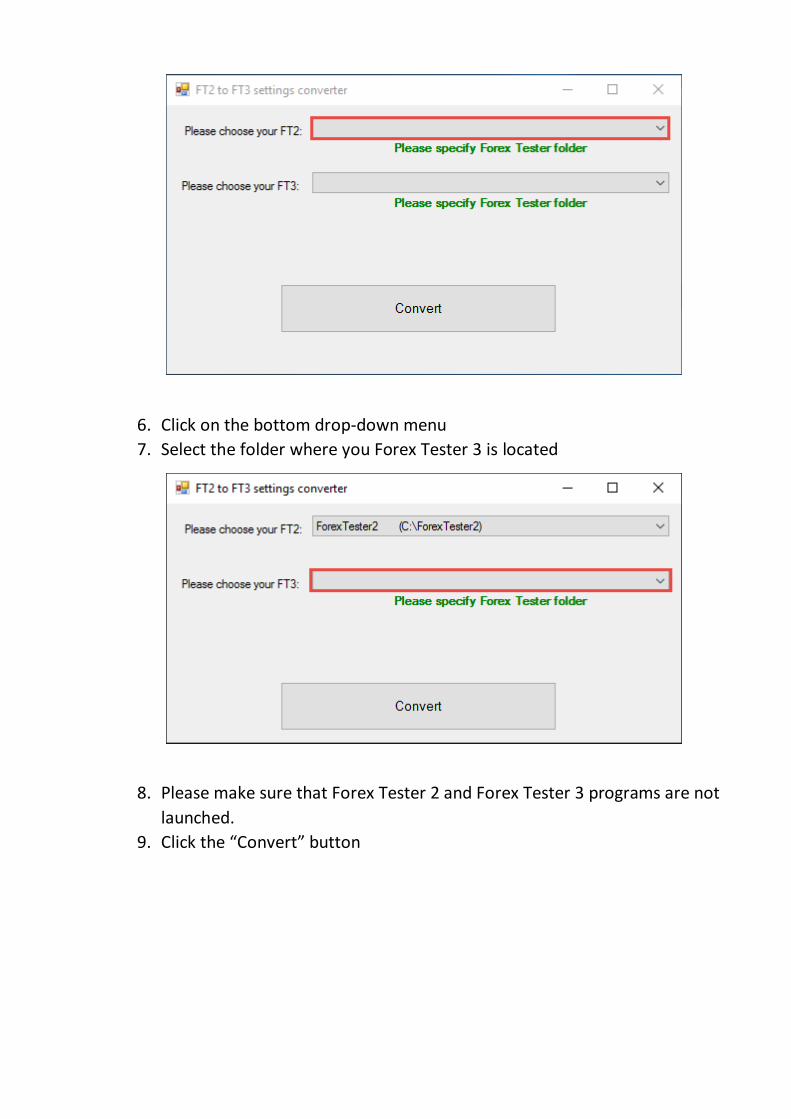
6. Click on the bottom drop-down menu
7. Select the folder where you Forex Tester 3 is located
8. Please make sure that Forex Tester 2 and Forex Tester 3 programs are not
launched.
9. Click the “Convert” button
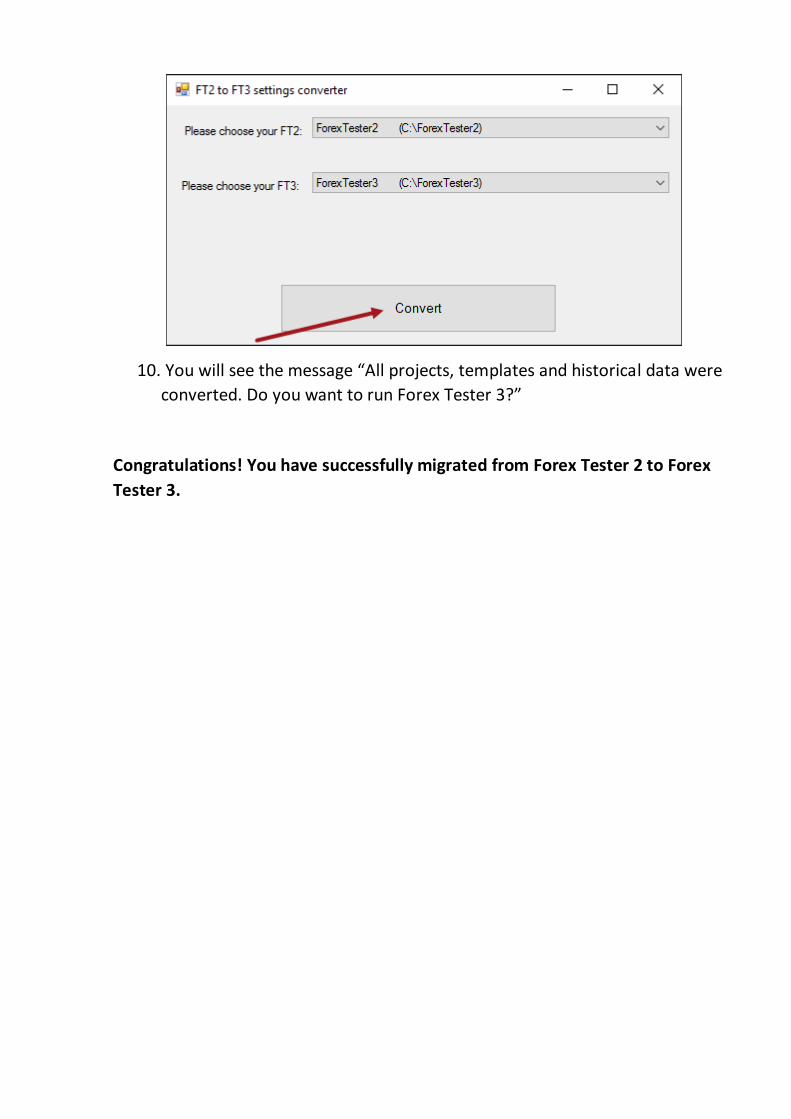
10. You will see the message “All projects, templates and historical data were
converted. Do you want to run Forex Tester 3?”
Congratulations! You have successfully migrated from Forex Tester 2 to Forex
Tester 3.