Embed Size (px)
Citation preview
We hope that you will be able to sourceyour materials using recycled items. Theinstructions provided are for a quite longknife (29cm) and using 2mm plain vegetabletanned leather,they can be adapted so thatyou will be able to make your own uniquesheath. You will need a sharp craft knife, anawl, heavy needles, a hole punch and strongwaxed thread.
Some simple rules to follow: Leather can mark very easily always makesure that your work surfaces, tools, andhands are clean and free of grease.
1. Draw a line on a plain sheet of paper and layyour knife along it so that the top of theblade is running parallel to your line.
2. Gentle roll the knife away keeping the pointin contact with the line, hold in position andtrace along the edge.
3. Add 1cm to line drawn.
4. Fold in half along the straight line.
5. Cut out following the outer line, this will givean even shape, it will be known as the“template”.
6. Wrap the template around your blade andcheck the fit you should be able tocomfortably pinch the paper together aroundthe handle, if necessary repeat the processadding more in the areas required.
7. Trim the top so that it overlaps the handle, ifyou have a knife with a ferrule guard trim justbelow the guard. Lay the template flat thiswill determine what size of leather you willneed to buy or find.
How to make your own leather sheathStep-by-step instructions
1
2
3
4
5
7
6
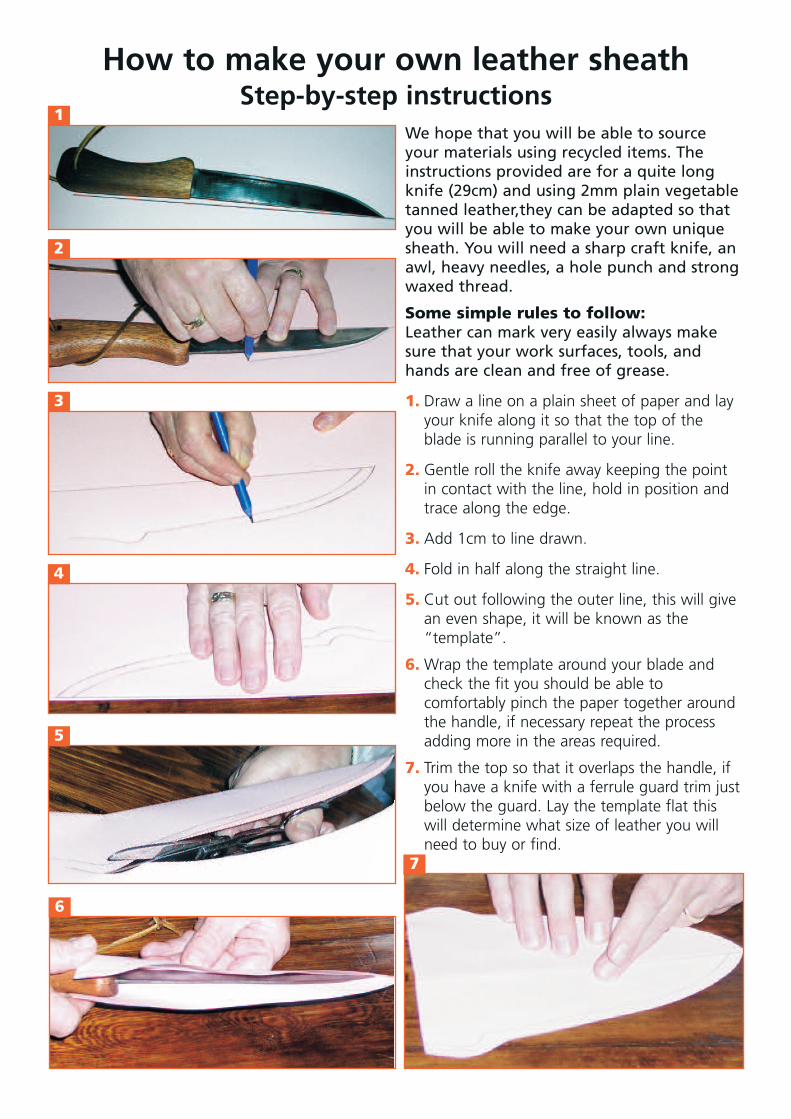
8. Lay the template down on your leather(leather used: plain 2mm vegetable tanned- obtained easily via the internet - do notforget to order enough for your strap)draw around and cut our the shape using avery sharp craft knife, do not let the bladestray from your line.
9. Wrap around your knife the piece of cutleather to make sure of the fit. Mark thecentre line on the inside.
10. Return to your template, it is now time tomark your stitching points, draw a secondline parallel to the outer edge and mark offin 3mm spaces with your pencil point. Dothis on one side of you template.
11. Lay your template back on the leather andprick through with and awl or a very finesharpened bradawl. Turn the template overand repeat the process on the other side,using this method will ensure that you willhave the same number of stitching pointsin identical positions. (That's the theory)
12. It is necessary to prick through the holes asecond time this will make the stitchingprocess much easier.
13. Turn the leather over and gently remove atleast 1mm thickness of leather from theback at the knife point end, this will allowthe leather to close properly whenstitching.
8
9
10
11
12 13
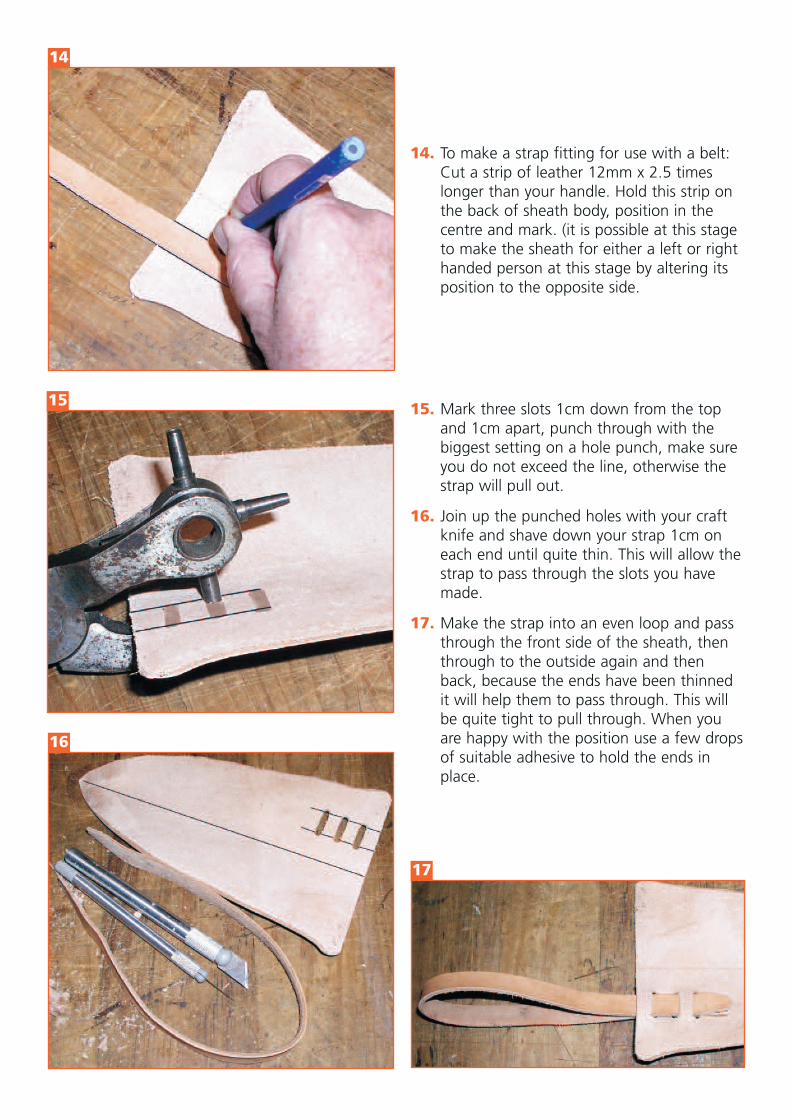
14. To make a strap fitting for use with a belt:Cut a strip of leather 12mm x 2.5 timeslonger than your handle. Hold this strip onthe back of sheath body, position in thecentre and mark. (it is possible at this stageto make the sheath for either a left or righthanded person at this stage by altering itsposition to the opposite side.
15. Mark three slots 1cm down from the topand 1cm apart, punch through with thebiggest setting on a hole punch, make sureyou do not exceed the line, otherwise thestrap will pull out.
16. Join up the punched holes with your craftknife and shave down your strap 1cm oneach end until quite thin. This will allow thestrap to pass through the slots you havemade.
17. Make the strap into an even loop and passthrough the front side of the sheath, thenthrough to the outside again and thenback, because the ends have been thinnedit will help them to pass through. This willbe quite tight to pull through. When youare happy with the position use a few dropsof suitable adhesive to hold the ends inplace.
14
15
16
17
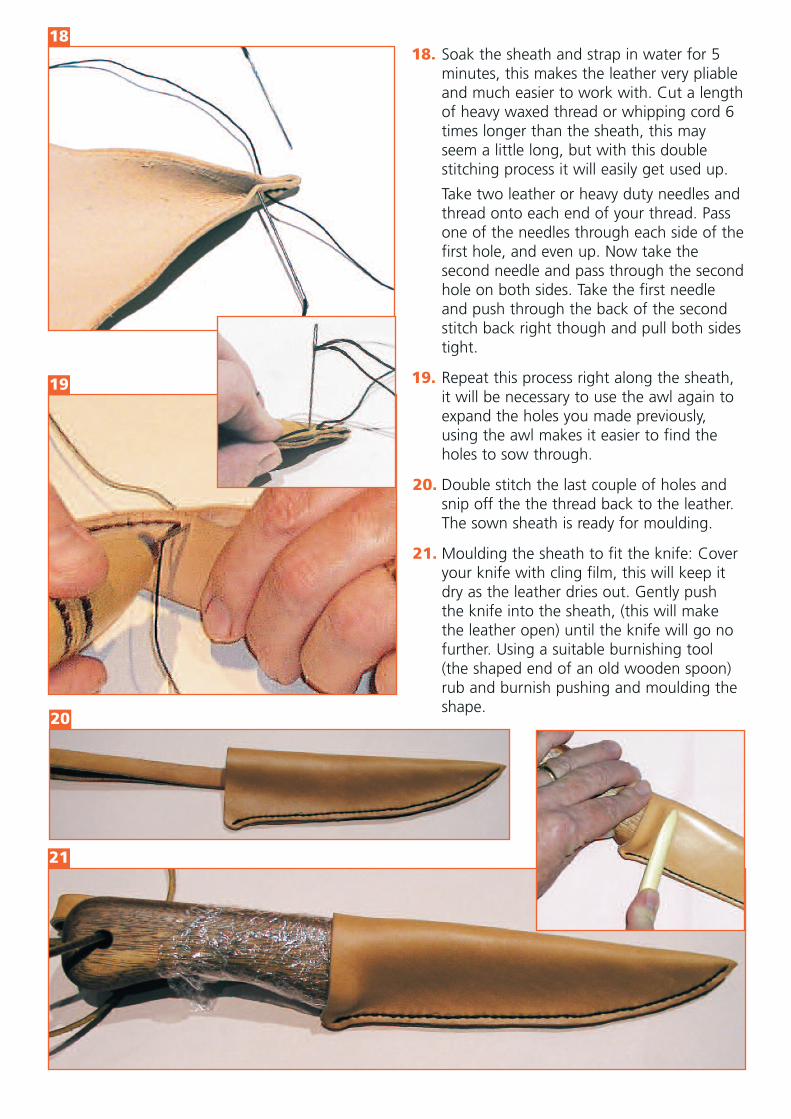
18. Soak the sheath and strap in water for 5minutes, this makes the leather very pliableand much easier to work with. Cut a lengthof heavy waxed thread or whipping cord 6times longer than the sheath, this mayseem a little long, but with this doublestitching process it will easily get used up.
Take two leather or heavy duty needles andthread onto each end of your thread. Passone of the needles through each side of thefirst hole, and even up. Now take thesecond needle and pass through the secondhole on both sides. Take the first needleand push through the back of the secondstitch back right though and pull both sidestight.
19. Repeat this process right along the sheath,it will be necessary to use the awl again toexpand the holes you made previously,using the awl makes it easier to find theholes to sow through.
20. Double stitch the last couple of holes andsnip off the the thread back to the leather.The sown sheath is ready for moulding.
21. Moulding the sheath to fit the knife: Coveryour knife with cling film, this will keep itdry as the leather dries out. Gently pushthe knife into the sheath, (this will makethe leather open) until the knife will go nofurther. Using a suitable burnishing tool(the shaped end of an old wooden spoon)rub and burnish pushing and moulding theshape.
18
19
20
21
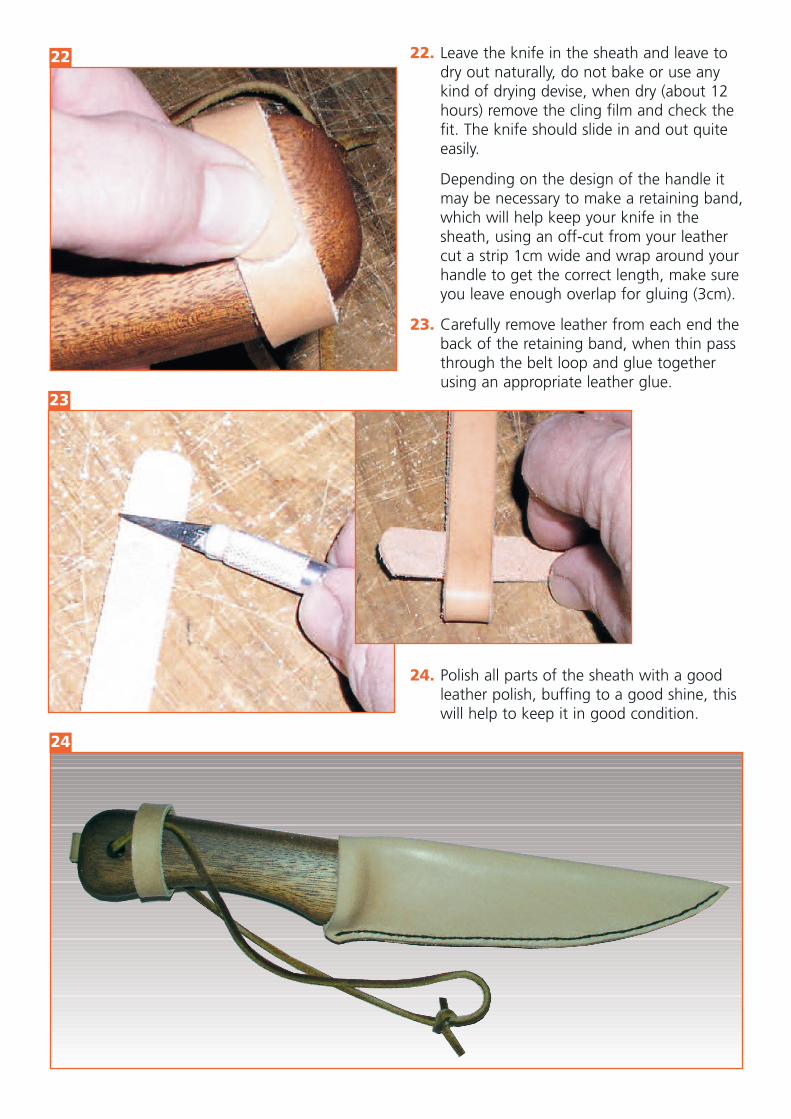
22. Leave the knife in the sheath and leave todry out naturally, do not bake or use anykind of drying devise, when dry (about 12hours) remove the cling film and check thefit. The knife should slide in and out quiteeasily.
Depending on the design of the handle itmay be necessary to make a retaining band,which will help keep your knife in thesheath, using an off-cut from your leathercut a strip 1cm wide and wrap around yourhandle to get the correct length, make sureyou leave enough overlap for gluing (3cm).
23. Carefully remove leather from each end theback of the retaining band, when thin passthrough the belt loop and glue togetherusing an appropriate leather glue.
24. Polish all parts of the sheath with a goodleather polish, buffing to a good shine, thiswill help to keep it in good condition.
22
23
24