Embed Size (px)
Citation preview

How to Integrate Zoom with HubSpot Requirements: Hubspot:
Product: HubSpot Marketing Subscription: Basic, Professional & Enterprise
Zoom:
Pro Account with Webinar License Admin access to your Zoom Account.
Setting up the Integration: 1. Configure the HubSpot API Key on Zoom
a. Login to your HubSpot account and from the HubSpot Dashboard, choose Account Menu > Integrations
b. On the left panel, click on “Get Your HubSpot API Key”
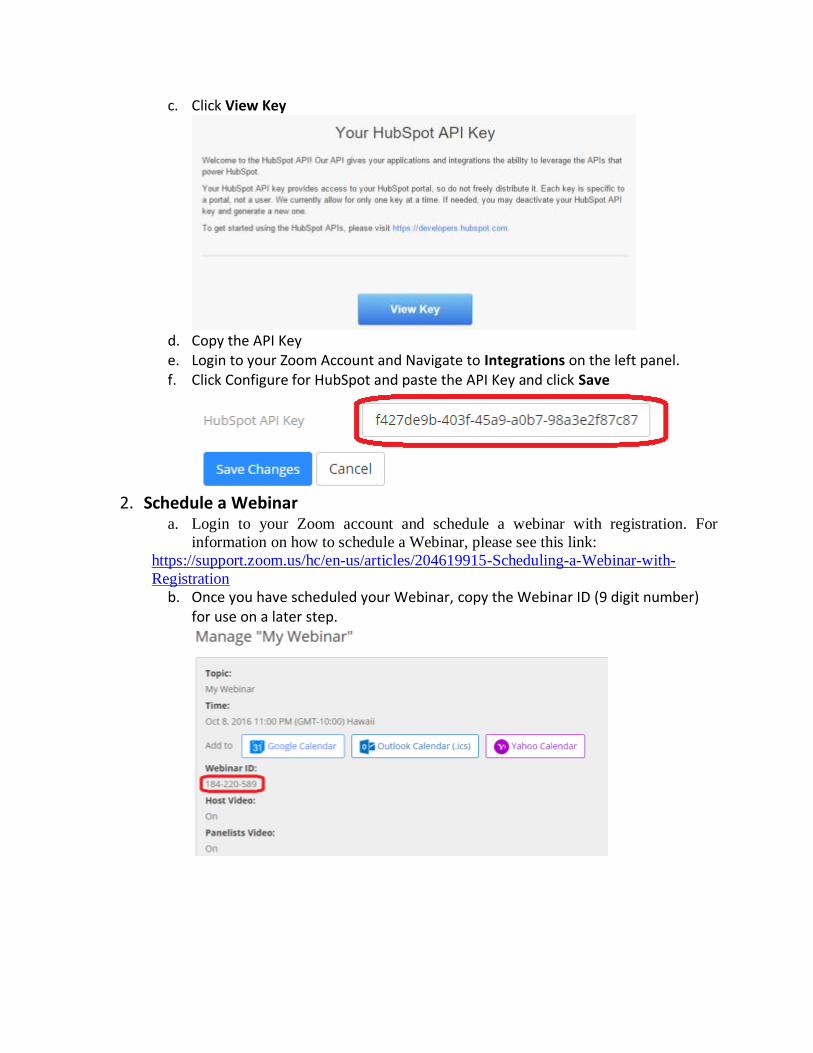
c. Click View Key
d. Copy the API Key e. Login to your Zoom Account and Navigate to Integrations on the left panel. f. Click Configure for HubSpot and paste the API Key and click Save
2. Schedule a Webinar
a. Login to your Zoom account and schedule a webinar with registration. For
information on how to schedule a Webinar, please see this link:
https://support.zoom.us/hc/en-us/articles/204619915-Scheduling-a-Webinar-with-
Registration
b. Once you have scheduled your Webinar, copy the Webinar ID (9 digit number) for use on a later step.
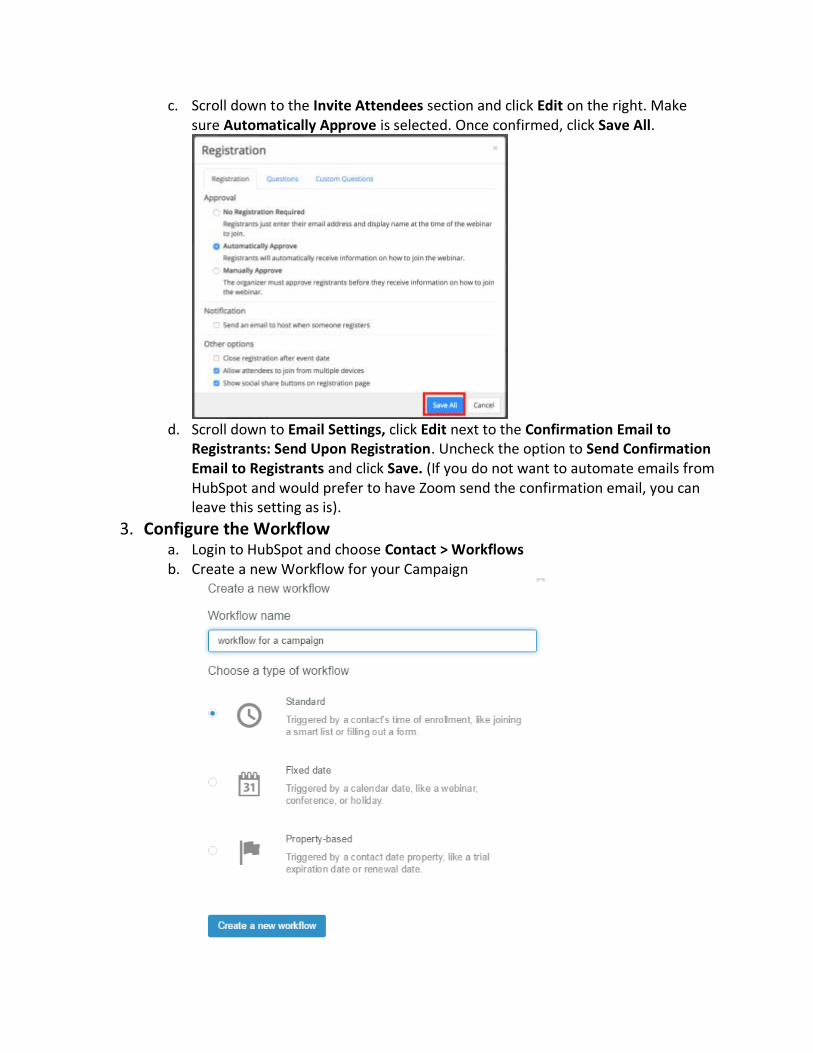
c. Scroll down to the Invite Attendees section and click Edit on the right. Make sure Automatically Approve is selected. Once confirmed, click Save All.
d. Scroll down to Email Settings, click Edit next to the Confirmation Email to
Registrants: Send Upon Registration. Uncheck the option to Send Confirmation Email to Registrants and click Save. (If you do not want to automate emails from HubSpot and would prefer to have Zoom send the confirmation email, you can leave this setting as is).
3. Configure the Workflow a. Login to HubSpot and choose Contact > Workflows b. Create a new Workflow for your Campaign
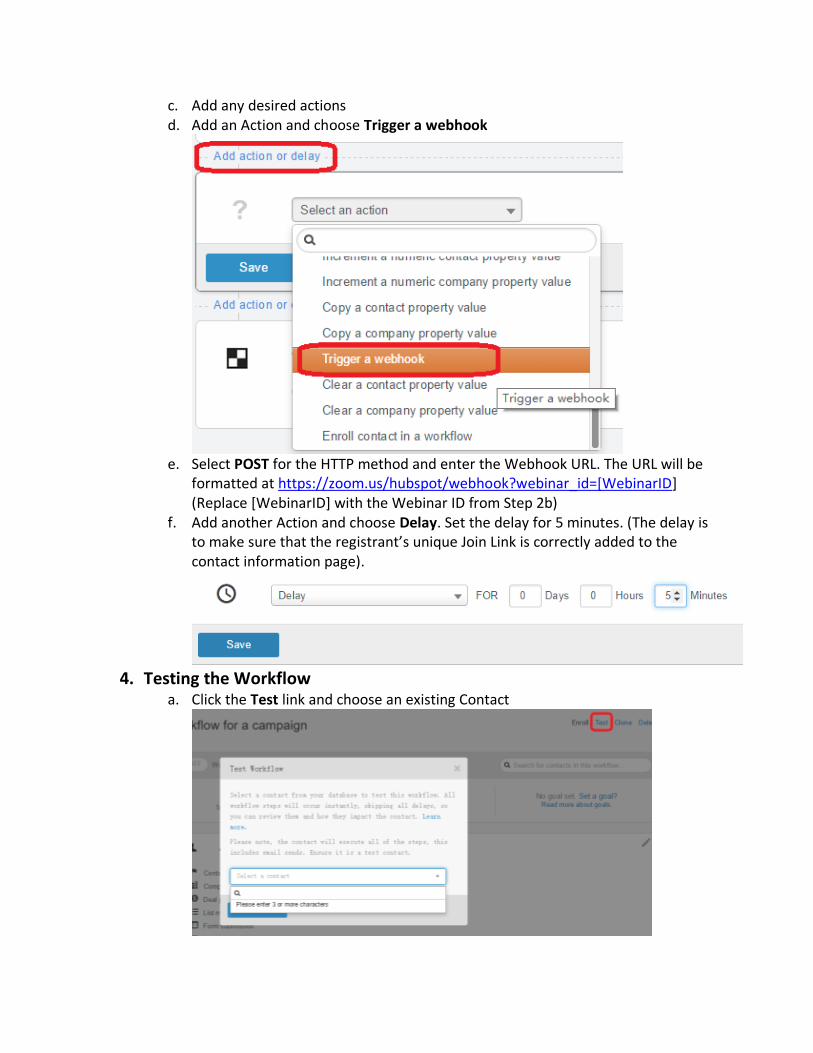
c. Add any desired actions d. Add an Action and choose Trigger a webhook
e. Select POST for the HTTP method and enter the Webhook URL. The URL will be
formatted at https://zoom.us/hubspot/webhook?webinar_id=[WebinarID] (Replace [WebinarID] with the Webinar ID from Step 2b)
f. Add another Action and choose Delay. Set the delay for 5 minutes. (The delay is to make sure that the registrant’s unique Join Link is correctly added to the contact information page).
4. Testing the Workflow
a. Click the Test link and choose an existing Contact

b. Go back to your Zoom Account and navigate to the Webinar you setup. Scroll down to the Manage Attendees section and verify that the registrant appears.
c. Return to HubSpot and view the Contact’s information. d. Click on View All Properties and scroll down to Webinar Join Link. Make sure this
is populated with the unique join link.
5. Sending Custom Confirmation Emails
a. Create an Email in Hubspot to send out to registrants. In the main body of the email, click Insert > Personalization Token
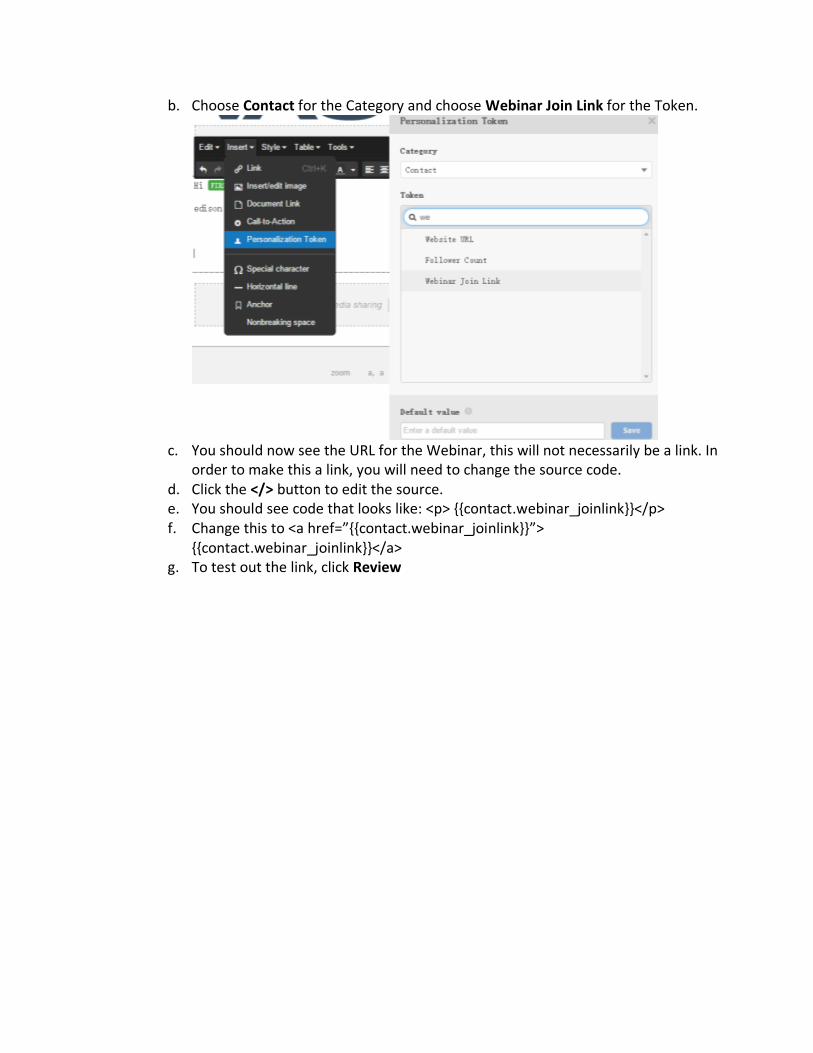
b. Choose Contact for the Category and choose Webinar Join Link for the Token.
c. You should now see the URL for the Webinar, this will not necessarily be a link. In
order to make this a link, you will need to change the source code. d. Click the </> button to edit the source. e. You should see code that looks like: <p> {{contact.webinar_joinlink}}</p> f. Change this to <a href=”{{contact.webinar_joinlink}}”>
{{contact.webinar_joinlink}}</a> g. To test out the link, click Review