Embed Size (px)
Citation preview

Start a coding club or introduce coding to your classroom.
HOW-TO GUIDEFOR BEGINNERS

TABLE OF CONTENTS
Welcome 2
What is Canada Learning Code? 3
Teachers Learning Code 4
Why Teach Coding? 5
Learning Objectives 7
How to Host a Lesson 9
Setting the Tone 11
Key Programming Concepts 13
Getting Started with Scratch 14
Intro to Scratch 15
Scratch Editor Basics 16
Debugging Scratch 18
Contingency Planning 19
Other Resources 21
Printables 22

2
WELCOME
We want to inspire Canadians through coding education to
become empowered digital citizens who can understand,
participate and shape our country and the world as creators
and innovators of technology.
Whether you are a teacher in a classroom, a program coordinator at a community centre, a home-schooling parent or a Girl Guide troop leader – we’ve put together this guide to help you teach anyone to code in your community.
After running programs for several years, we have learned a thing or two about teaching people to code. In this guide, we share many of our tips and tricks to get started, resources to familiarize yourself with code, plus lots of easy-to-follow and even easier to implement coding activities to empower and teach the future generation of technologists across Canada.
This guide is your jumping off point and includes resources, lessons, examples, and links to resources to keep learning – where you choose to take your program is the fun part and entirely up to you!
We encourage you to use as much or as little of the guide as you like, to remix the lessons we’ve created or create new ones and share them with our community.
Technology is creative – have fun!

3
WHAT IS CANADA LEARNING CODE?
Canada Learning Code is a charitable initiative advancing digital literacy for all Canadians.
Our mission is to design, deliver, and partner on technology
education programs that ensure Canadians are prepared to
thrive in a digital world.
Canada Learning Code was founded by the team behind
Ladies Learning Code who have delivered over a thousand
coding workshops across Canada since 2011.
Our Programs Include:
canadalearningcode.ca
4
Using technology to change the world through teamwork, creativity, and of course, code.
Canada Learning Code is supported by our program for educators, Teachers Learning Code.
It’s a program which is focused on inspiring kids to be builders – not just consumers – of technology through
coding activities and challenges.
Teachers Learning Code is an approach to introducing coding that can be scaled back or expanded
depending on the needs of your group of learners. Our programming can be facilitated by non-technical or
technical educators and youth program managers within schools and existing community groups.
This ‘how-to’ guide and our coding challenges are designed for learners in elementary school but we’ve had
younger and older learners use them as well. They were all created with the core elements and features that
our programs are known and loved for.
teacherslearningcode.com
TEACHERS LEARNING CODE
5
WHY TEACH CODING?
Technology is everywhere and it’s not going anywhere. Science, technology, engineering and math (STEM), especially when integrated with other disciplines, are the skills of the future. We want to equip Canadian youth with the critical skills they need to navigate the world we live in today and thrive in the future.
But why teach code?According to the Information and Communications Technology Council of Canada, there will be an
estimated shortage of more than 200,000 ICT workers in Canada by 2020. Learning to code can lead
to rewarding and lucrative careers for our youth. But, teaching kids to code is about more than just
helping children understand the technology they are using and secure employment in the future. At a
fundamental level, it improves problem-solving and thinking skills and allows them to understand the
world around them.
We think it’s important for youth to learn to code for a few reasons:
• Coding is a superpower. Learning to code let’s kids build – not just consume the technology around them like video games, websites, robots and more.
• Coding helps kids develop new ways of thinking. Learning to code helps kids develop other crucial and transferable skills – like computational thinking – allowing them to tackle problems, outside the realm of coding, in new and innovative ways.
• Coding helps kids understand the world around them better. If we teach biology and mathematics in order to understand the world around them, then knowing the basics of how computers communicate and how to engage with them should be a given.
• Coding can help change the world. Empower kids to use technology as a creative tool to build solutions for problems or challenges people face everyday.
• Coding is fun! We want kids to experience the satisfaction and thrill of building something of their very own.

6
TIPS FOR INTRODUCING CODING
Have a clear vision for what you want to accomplish and find a champion
in your school to co-teach with you – it’s all about integrated learning!
Be creative, don’t be
afraid to fail and most
importantly, have fun!
Ensure you are familiar with the
tool but don’t worry about not
being the ‘expert’ – allow your
students to teach one another!
Have a growth mindset and use tech failures as an opportunity for learning.
It’s a great example for the popular developer concept of ‘debugging’!
Bring outside experts
in. Invite guest speakers
and volunteers from the
community to lead mini
lessons and be there as
extra coding support.
Let the students and their creativity
be your guide – what do they want
to explore more and learn?
1 2
3
6
5
4

7
Coding is really about how you solve a problem, rather than learning a specific language or tool like Java or Scratch. Programming languages evolve and change all of the time but at the core, the fundamentals of how you approach problem solving with computers doesn’t change.
Computational thinking, or process for solving problems, can be taught even without learning a specific
programming language. The code is just the tool that facilitates solving a challenge in a particular way.
This is important to remember as educators – you don’t need to know all the syntax of a language to
teach it – you just need to understand the logic of solving problems – logic that you’ve already likely
developed in your journey as an educator. Now, it’s time to apply that logic to teaching code.
By teaching code, we’re teaching:
Computational Thinking
• Logical reasoning
• Critical thinking
• Pattern recognition
• Solving complex problems by breaking them down into simpler parts
• Debugging problems
• Developing ideas from initial concepts to a final project
Concepts About Computers
• Computer programs are created by humans and they tell the computer exactly what to do
• Computers aren’t that bright or intuitive – they don’t understand things the way humans do. You need to be exact and precise with your instructions to computers and instruct them step-by-step.
• You don’t have to be an expert to write code - you just need clear and careful thinking
LEARNING OBJECTIVES
8
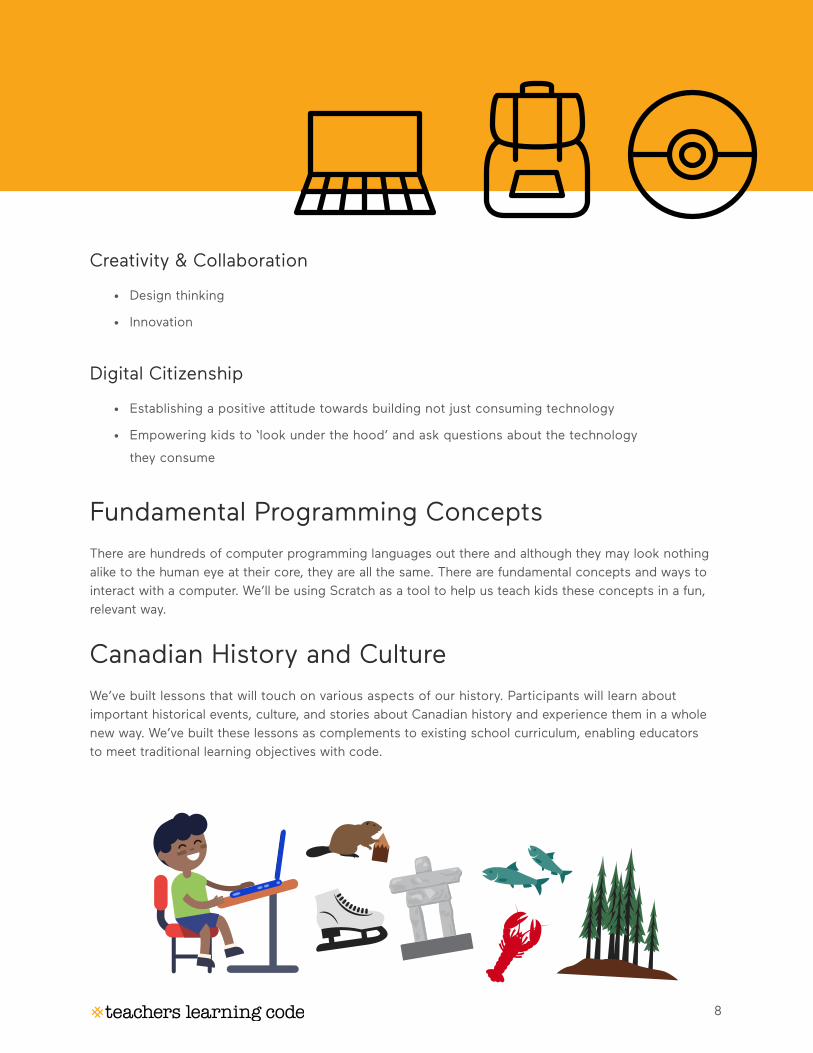
Creativity & Collaboration
• Design thinking
• Innovation
Digital Citizenship
• Establishing a positive attitude towards building not just consuming technology
• Empowering kids to ‘look under the hood’ and ask questions about the technology
they consume
Fundamental Programming ConceptsThere are hundreds of computer programming languages out there and although they may look nothing alike to the human eye at their core, they are all the same. There are fundamental concepts and ways to interact with a computer. We’ll be using Scratch as a tool to help us teach kids these concepts in a fun, relevant way.
Canadian History and CultureWe’ve built lessons that will touch on various aspects of our history. Participants will learn about important historical events, culture, and stories about Canadian history and experience them in a whole new way. We’ve built these lessons as complements to existing school curriculum, enabling educators to meet traditional learning objectives with code.
9
HOW TO HOST A LESSONYou’ll Need:
5 An Educator
To supervise learners and facilitate coding challenges.
5 Volunteer Mentors
Optional, but highly recommended. More on recruiting and training mentors under
the ‘Collaborative Teaching’ section.
5 Learners
We’ve included a poster in the ‘Printables’ section that you can use to help
promote!
5 Access to Hardware
Laptop or desktop computers • Projector + Projector Screen (or another way to
display your screen to learners).
5 Lesson Plan
On our website, you’ll be able to access lesson plans, onboarding resourcing, and
a series of planning tools, tips and tricks!
Collaborative TeachingOne of the biggest reasons our programs have become so popular across the country is because of a group of remarkable people we call mentors.
Mentors are volunteers who support our programs and help create a social and collaborative approach to learning. Whether you’re technical or not, we highly recommend taking a collaborative teaching approach to introducing coding to your classroom. Whether you engage another teacher to co-lead your first coding class with you, engage a classroom of older learners to mentor in your class or find external volunteers, mentors really make all of the difference for the learners and for you as an educator to have that little bit of extra support.

10
RECRUITING MENTORSThe roleWhile our Lead Instructors (educators) are front and centre leading, volunteer mentors are scattered throughout the room working with a group of learners. Mentors really are the magic. Mentors work with learners collaboratively which allows us to create a social and rewarding educational experience for everyone.
What it means to be a mentor• You are either technical or have a passion for technology and learning
• You want to learn alongside the kids and help them with their projects
• You are prepared to assist kids in finding the answers to their questions
• You encourage an open, flexible learning environment
• You maintain an optimistic view of technology
• You empower kids to become confident, inspired creators
Benefits of mentoring• Experience that “warm and fuzzy” feeling!
• Network with other mentors
• Learn a new tool or language for your own personal benefit
• Develop leadership and communication skills
• Gain teaching experience
• Give back to the community
We recommend finding mentors a few ways• Reach out to an experienced classroom teacher, older grade level or local high school or college/
university to find learners who can mentor.
• Connect with any existing volunteers you have for other programs and encourage them to review the material and mentor.
• Reach out to local technology companies.
• You can find a poster in the ‘Printables’ section that you can put up or email to help you recruit volunteers.
11
SETTING THE TONE
Before diving into the lesson plan, it’s important to set the tone for learners by going over a few key concepts and values to guide their learning. We like to encourage and instill a growth mindset or ‘fail-forward’ approach in learners. Acknowledging upfront that technology fails and that’s part of the learning process is critical in setting this tone. Encourage exploration, trial and error and collaborative problem solving. And among all else? Patience. Learning to code is like learning a new language and that takes time, patience and lots of practice.
Here are some common things we like to address in all of our programs:
Technology Fails
If a computer isn’t working the way it should and a learner is feeling frustrated, acknowledge that this is common. Try to troubleshoot the problem together. Ask what they would do if this happened at home. Would they quit and reopen the program? Restart the computer? If the problem does not resolve itself, try using Google as a resource! It is important to show the learner how to be resourceful for the future.
Learner-Driven Problem Solving
Encourage your learners to ask others for help first, before coming to you. Often other learners can troubleshoot many of the tech challenges and it’s a great opportunity to empower them as leaders. You can also consider creating a troubleshooting checklist with your learners. And when all else fails? Google is your friend! Resourcefulness and learning to access information on the Internet is an extremely valuable skill for everyone to learn and it’s strongly encouraged.
Inquiry-Based Learning
We’ve developed many challenges to introduce fundamental programming concepts to youth but we stress that these are just starting points. Allowing learners to run with their ideas and questions is an important part of the learning experience.

12
It’s a fact that the technology industry has a diversity problem. We’ve developed our program and lesson plans with diversity in mind. Engaging and supporting a diverse group of learners in technology is critical if we want to close the diversity gap.
Tips for engaging everyone:
DIVERSITY MATTERS
Connect coding and technology to meaningful and creative projects
Choose and/or adjust challenges that resonate with your girls’ interests – do they like music? Art? Animals? Philanthropy?
Connect coding and technology to meaningful and creative career paths
Technology jobs aren’t just one job – there are thousands of jobs. Developers work on movies, games, medical devices and more. Sharing these diverse and creative roles can help broaden their understanding of the industry.
Maintain a social and collaborative learning environment
Encourage group work, peer-to-peer mentoring and recognition and demonstration of work and accomplishments. Facilitate ice-breaker activities and games to develop bonding among the participants.
Maintain a strong female mentorship presence
Consider recruiting volunteers or inviting women in the industry as guest speakers and mentors.
Focus on why, not just how
Looping back lessons to why coding matters – not just how to code. Girls really resonate with how what they are working on can have an impact and change the world.
Be aware of unconscious bias
Keeping biases in check is important. We often unintentionally guide boys towards ‘boy’ things and girls toward ‘girl’ things. There are subtle biases in society that affect students like ‘girls aren’t good at math’.
Be aware of imposter syndrome
Imposter syndrome is strong for women and girls and often associated with high achieving students. These are feelings of not being smart, successful or a good student and instead that you are only imposing as such. We have to work extra hard to reinforce girls’ skills and aptitude especially for subjects like math, science and technology.

13
It’s a fact that the technology industry has a diversity problem. We’ve developed our program and lesson plans with diversity in mind. Engaging and supporting a diverse group of learners in technology is critical if we want to close the diversity gap.
KEY PROGRAMMING CONCEPTS
Variablestores a piece of information i.e. score of a game that increases by 1 value for each goal
Arrayallows you to store more than just one piece of information
Functiona type of procedure or routine that performs a distinct operation. There are often ‘canned’ functions that exist already like the ‘jump’ block.
Sequence identifying a series of steps for a task. Computers and Scratch read and perform commands in order from top to bottom.
Eventsone thing causing another thing to happen i.e. ‘when clicked’ block
Conditionalsmaking decisions based on conditions i.e. if some condition is met do something, else do nothing or something else
Loopsrunning the same sequence multiple times i.e. repeat or forever blocks Boolean Logic and, or, not are examples of boolean logic. They are values that can be either true or false.
Parallelismmaking things happen at the same time
Operatorsmathematical and logical expressions i.e. X+X block
Debuggingfinding problems in code and solving them
Remixingtaking an existing project or idea and making it new by changing or adding to it
Modularizingexploring connections between the whole and the parts
Syntaxthe spelling or grammar of a programming language. Scratch’s blockly structure removes the need or syntax.
Algorithma step-by-step set of operations to be performed to help solve a problem
States‘state’ in a programming sense is just the same as ‘state’ in a non-programming sense. i.e. the TV is on or off. Variables have states, values don’t. For example 42 is 42 and there’s nothing you can change about it.
14
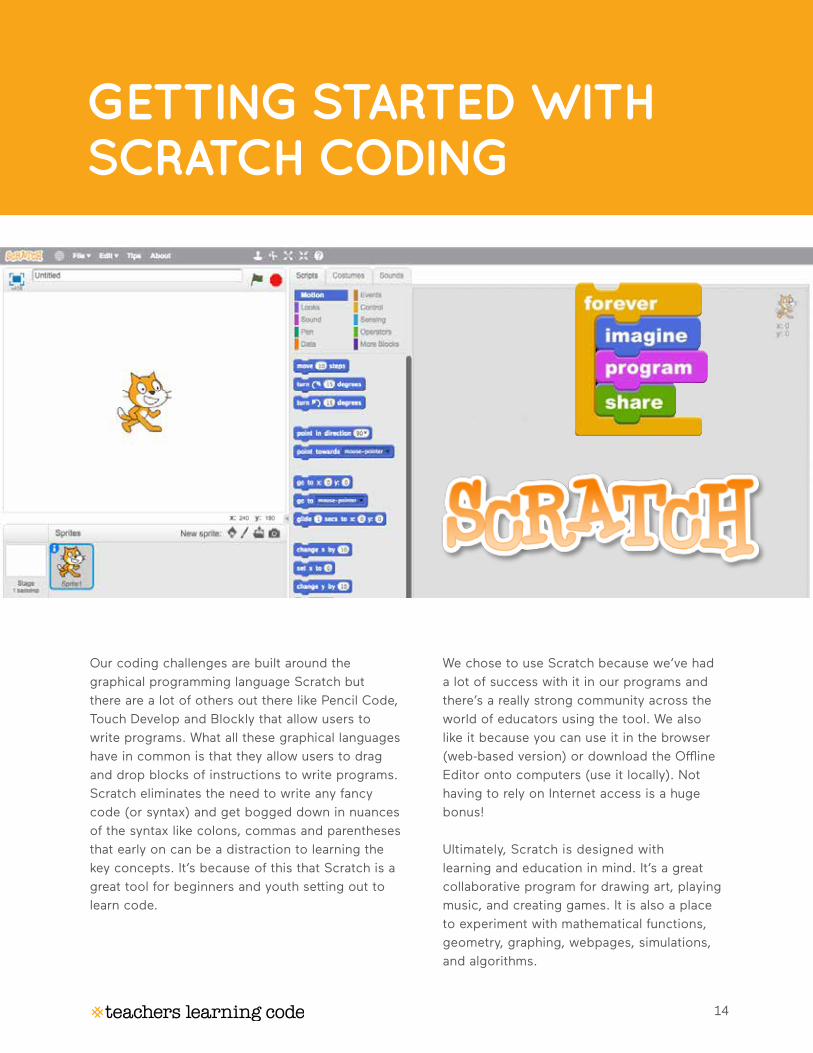
GETTING STARTED WITH SCRATCH CODING
Our coding challenges are built around the graphical programming language Scratch but there are a lot of others out there like Pencil Code, Touch Develop and Blockly that allow users to write programs. What all these graphical languages have in common is that they allow users to drag and drop blocks of instructions to write programs. Scratch eliminates the need to write any fancy code (or syntax) and get bogged down in nuances of the syntax like colons, commas and parentheses that early on can be a distraction to learning the key concepts. It’s because of this that Scratch is a great tool for beginners and youth setting out to learn code.
We chose to use Scratch because we’ve had a lot of success with it in our programs and there’s a really strong community across the world of educators using the tool. We also like it because you can use it in the browser (web-based version) or download the Offline Editor onto computers (use it locally). Not having to rely on Internet access is a huge bonus!
Ultimately, Scratch is designed with learning and education in mind. It’s a great collaborative program for drawing art, playing music, and creating games. It is also a place to experiment with mathematical functions, geometry, graphing, webpages, simulations, and algorithms.

15
INTRO TO SCRATCH
Learning Outcomes
• Familiarize yourself with how to
access Scratch, create a new
project and use the editor.
What to Prep
5 Scratch online accounts
require an email address –
plan in advance if each
student will be creating their
own or if you will create one
account for your class that
each student will use.
5 Consider printing and posting
login details. See ‘Printables’
section for a template.
Extensions & Modifications
• Consider walking through
this process with students
step-by-step.
• If students are quick to catch
on, give them 10 minutes to
explore and make something
happen to the Scratch cat.
• Encourage students to work
together, ask each other for
help, and share what they are
discovering.
The LessonIn this challenge, we will introduce Scratch, how to start a new project and the key features.
1. Visit scratch.mit.edu
2. On the homepage, click on ‘Join Scratch’ (if you already have an account, click on ‘Sign In’).
3. Once you’re signed in, click on ‘Create’ to start a new project.
4. Time to explore! Drag and drop blocks (scripts) into the Scripts Area and see what happens.
5. Don’t forget to save your work. There’s also tips and tricks available from Scratch under ‘Tips’.
Stage
Sprite
Scripts
Scripts Area
Create a new sprite
Rename project

16
SCRATCH EDITOR BASICS
Stage
Sprite
Scripts
Scripts Area
Quick Tip! You can double click a block at anytime to run the code
Key components of the Scratch editor:
Sprites
Each object in Scratch is called a Sprite. You can add sprites by choosing from the library, painting your own, uploading an image or taking a picture from webcam.
Stage
This is where you can preview what your code does. You can add backdrops to your stage. You can ‘Start’ and ‘Stop’ the preview at any time using the green flag or red stop symbol at the top of the stage.
Scripts
Scripts are commands. This is how the magic happens. Students will use scripts to instruct their Sprite to do what they want it to do. From moving forward, to saying ‘Hello’, scripts are arranged in a logical sequence to ‘program’ the sprite. We’ll cover each of these in more detail as you work through challenges.
Scripts Area
All of the coding happens here. You can drag and drop Scripts into this area. By dragging scripts out of the area you can delete them.

17
SCRATCH EDITOR BASICS
It is critical that students notice the “hat” (i.e., the round surface) on
the top of this block. Other blocks can be connected on both sides
but this block is required to be on top. This type of block allows a set
of actions to be taken at the dawn of some event.
Blocks are the tools of Scratch programming. You can drag them from
their home in toolbox into your script area to interact with them and
connect them to each other. You can also change the value in many
blocks by clicking the number and typing a new one. Blocks will only
snap together when it makes logical or pragmatic sense to do so.
This block is seemingly meaningless on its own but other blocks can
be placed inside of it. The small arrow on the bottom is a hint to its
function, alluding to the fact that when the blocks contained within
have been executed one by one and the bottom is reached, the
program flow returns to the top.
Blocks in blocks in blocks. For example, you can place
Operator blocks inside of Motion blocks to create more
sophisticated commands like making your sprite move a
random number of steps each time.
Making decisions with if. As students complete more complicated
challenges and build more sophisticated projects conditional blocks
like if<>then will be really important. This block tells the sprite to do
something if a certain condition is met otherwise, do something else.
Note: Each script block is explained in more detail in the Scratch Editor itself under ‘Tips’ ‘Blocks’ with examples of how to use it.

18
DEBUGGING SCRATCH
Learning to debug code is an important part of a learners (and educators) coding journey. Here are some common issues we come across in Scratch to help you get started.
How do I delete my blocks?You can drag the code blocks away off your scripts area. If you want to delete a Sprite or backdrop you can right click on the object you want to delete.
I lost all of my code!This is a common one when you start working with multiple sprites. Make sure you’ve clicked on the sprite in the ‘Sprites’ area that you’re working on. Your code could be hidden in another sprite. And always remember to save, save, save. Saving periodically while you’re coding helps prevent any lost work.
My code won’t workCode is complex and problems are complex. An important part of computational thinking and coding is breaking down problems into smaller more manageable steps like we might break down a book report into different sections.
My sprite walked off the screen and now I can’t get it back, help?After we break problems into smaller parts, abstraction helps us decide what’s important and what’s not. It helps manage complexity like a math problem where we decide what information we need to help solve an equation.
The best way to prevent errors and silly mistakes is to have neat, organized code and test your code many times throughout. Spotting errors early can save you lots of time and trouble later!

19
CONTINGENCY PLANNINGThe reality is that technology fails – the Internet goes down, computers crash, work is lost – and often this feels like failure – not a feeling any teacher likes. And to be honest, neither do students but there are ways to mitigate and be prepared!
Plan AheadThe more you can plan ahead for potential tech hiccups – the more confident you will be when class starts.
5 Can you set up computers ahead of time?
5 Write logins and passwords on the board. See ‘Printables’ section for template.
5 Use one universal login versus one per student
5 Charge laptops before class
5 Can students partner and work together?
Problem Solving & DebuggingWe’ve developed many challenges to introduce fundamental programming concepts to youth but we stress that these are just starting points. Allowing students to run with their ideas and questions is an important part of the learning experience.
Know the basics. There are a few problems that generally account for most of the downtime we have in class. The top two: If the computer won’t start, check to see if it’s plugged in. If power isn’t the problem, restart the computer.
Google the problem. Google is your friend! If there’s something wrong with wifi, a keyboard, or Scratch itself – put the issue into Google and see if there’s a solution. More often than not there will be.
Ask your students. Students are very tech savvy and can often help to troubleshoot one another’s problems – it can also turn into a great problem solving activity for the entire class!
Paper-Based ActivitiesYou don’t need to use a computer to teach coding! There are a lot of ways to teach fundamental programming concepts like our Ruby Robot Challenge.
20
NEXT STEPS
Congratulations on completing your first coding lesson! Take a minute to reflect on your experience and note how this might influence how you introduce coding to your learners.
• What problems or obstacles did you encounter? How did you solve these problems?
• What obstacles do you anticipate that your learners might experience?
• How can you prepare ahead of time to better ensure learner success with these introductory challenges?
• What questions could you ask to help learners connect what they’re learning to the real world?
• What resources will you have available to help learners who get “stuck” on a challenge?
EvaluationIn our programs, we take the focus away from evaluation and prioritize creativity, building and the
process. With that said, there are a few ways you can evaluate a learner as they work through these
challenges.
Programming Concepts• Did the learner show an understanding of programming concepts and use appropriate blocks
in their solution?
• Is the learner’s project or completed code organized, logical and debugged?
Process• Did the learner plan their work?
• Did the learner use their time wisely?
• Did the learner finish the challenges or complete additional challenges?
Subject Matter & Content• Did the learner make connections between subject concepts and their project?

21
OTHER RESOURCESScratch Offline Editor scratch.mit.edu/scratch2download
ScratchEd scratched.gse.harvard.edu
ScratchJr scratchjr.org
Debugging Scratch wiki.scratch.mit.edu/wiki/Debugging_Scripts
Scratch Wiki wiki.scratch.mit.edu
Scratch Card scratch.mit.edu/help/cards
Scratch FAQ scratch.mit.edu/info/faq
Teachers Learning Code website teacherslearningcode.com
Harvard’s CS50 Intro to Computational Thinking + Scratch
Video One: http://bit.ly/CS50part1
Video Two: http://bit.ly/CS50part2

PRINTABLESOver the next several pages you’ll find resources created specifically for you to print that will help you promote and run your lesson. Feel free to print out any or all of this guide as a resource, too!
Printables include:
1. Promotional Poster for Learners
2. Fillable Scratch Login Details Handout
3. Do the Robot Offline Lesson
4. Certificate of Completion
TEACHERSLEARNINGCODE.COM


TEACHERSLEARNINGCODE.COM

GETTING STARTED
NOT WORKING?
Double-click on the Google Chrome icon to open your browser1
Go to:
Follow the steps:Create a NEW username and password (click “next”)Select your birth month, birth year, gender, and country (click “next”)Select “Go to class” then click on “Create” in the top menu
WE
’RE
ON
TRA
CK
Take a deep breath *IN* and *OUT*
Is your project frozen?
Click on the “refresh” icon at the top of your browser
Still not working? Ask your elbow partner or the mentor at your tableClick on “Tips” in the top menu, and look under the “How-To” or “Blocks” tab
Can’t figure it out?Put up your hand and wait for the facilitator to come and help
23
TEACHERSLEARNINGCODE.COM
27
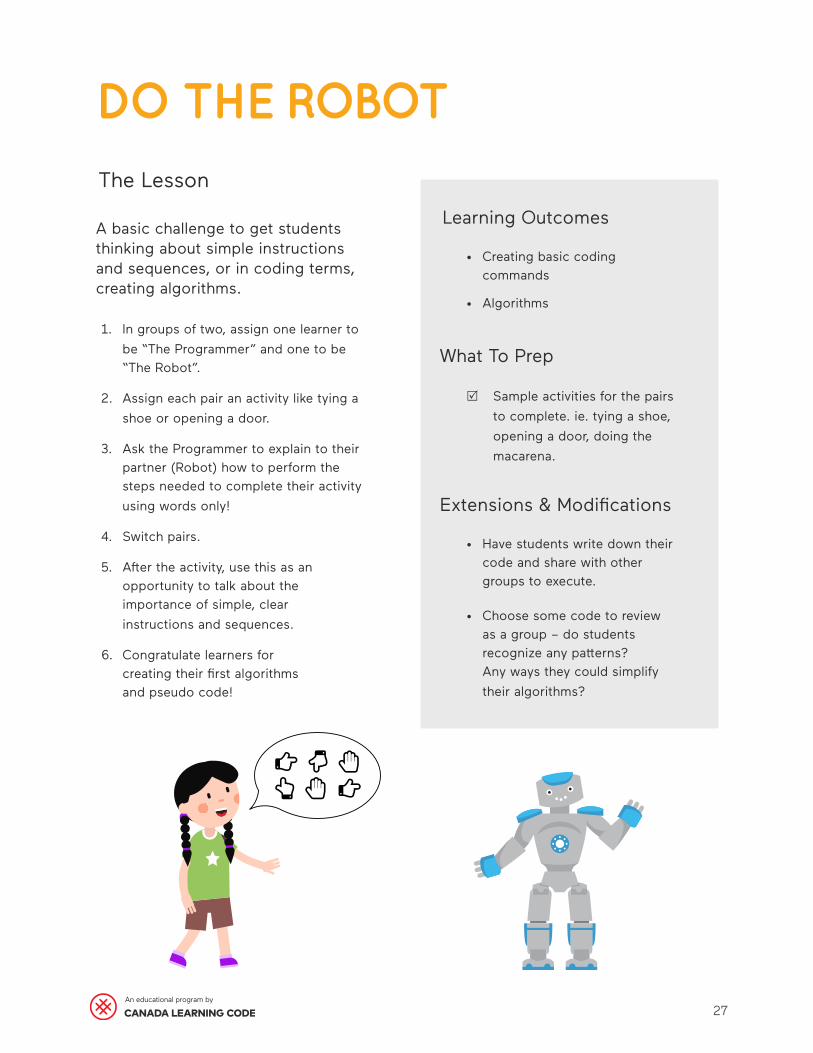
DO THE ROBOTThe Lesson
A basic challenge to get students thinking about simple instructions and sequences, or in coding terms, creating algorithms.
1. In groups of two, assign one learner to be “The Programmer” and one to be “The Robot”.
2. Assign each pair an activity like tying a shoe or opening a door.
3. Ask the Programmer to explain to their partner (Robot) how to perform the steps needed to complete their activity using words only!
4. Switch pairs.
5. After the activity, use this as an opportunity to talk about the importance of simple, clear instructions and sequences.
6. Congratulate learners for creating their first algorithms and pseudo code!
Learning Outcomes
• Creating basic coding commands
• Algorithms
What To Prep
5 Sample activities for the pairs to complete. ie. tying a shoe, opening a door, doing the macarena.
Extensions & Modifications
• Have students write down their code and share with other groups to execute.
• Choose some code to review as a group – do students recognize any patterns? Any ways they could simplify their algorithms?

TEACHERSLEARNINGCODE.COM


THANK YOU!Get in Touch
Teachers Learning Code 501, 129 Spadina Avenue
Toronto, Ontario M5V 2L3
[email protected] canadalearningcode.ca