Embed Size (px)
Citation preview
NUVICO Connecting Video Anywhere 1
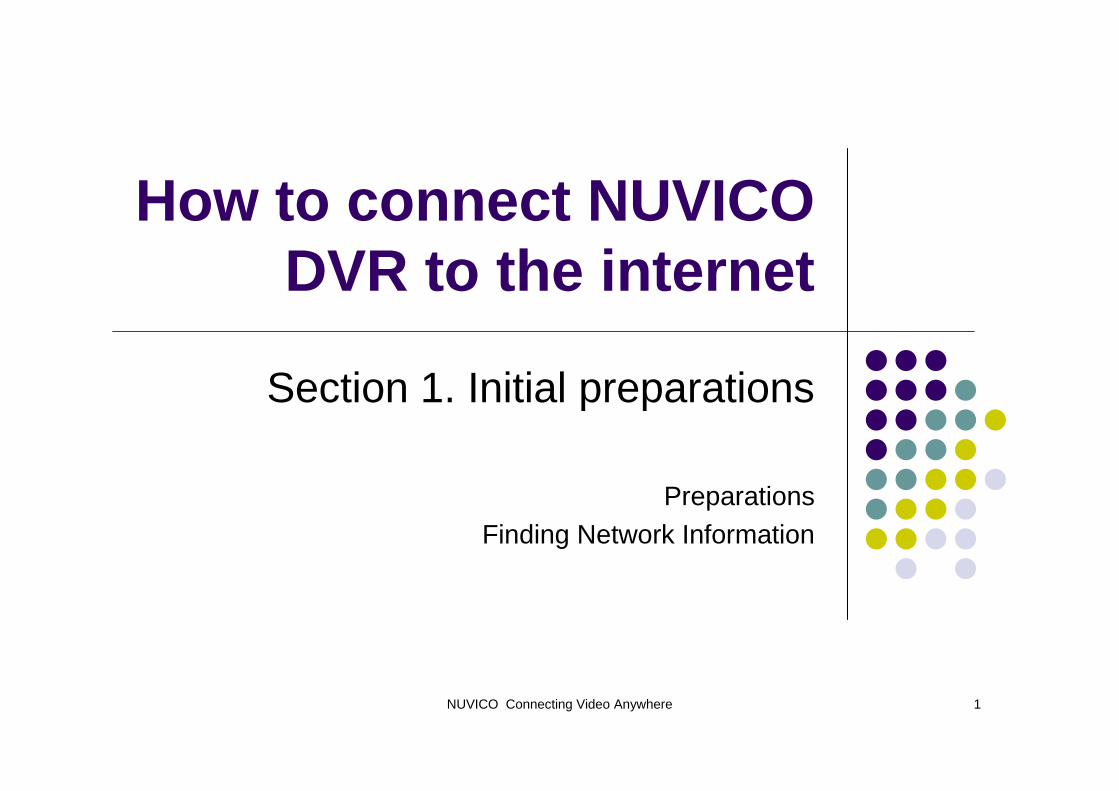
How to connect NUVICO DVR to the internet
Section 1. Initial preparations
PreparationsFinding Network Information

NUVICO Connecting Video Anywhere 2
Preparations
� Is the Internet service up and running at the Job site ( )
� Name of the internet service provider ( )
� How many computers? ( )
� What is the Model Number of the Router? ( )
NUVICO Connecting Video Anywhere 3
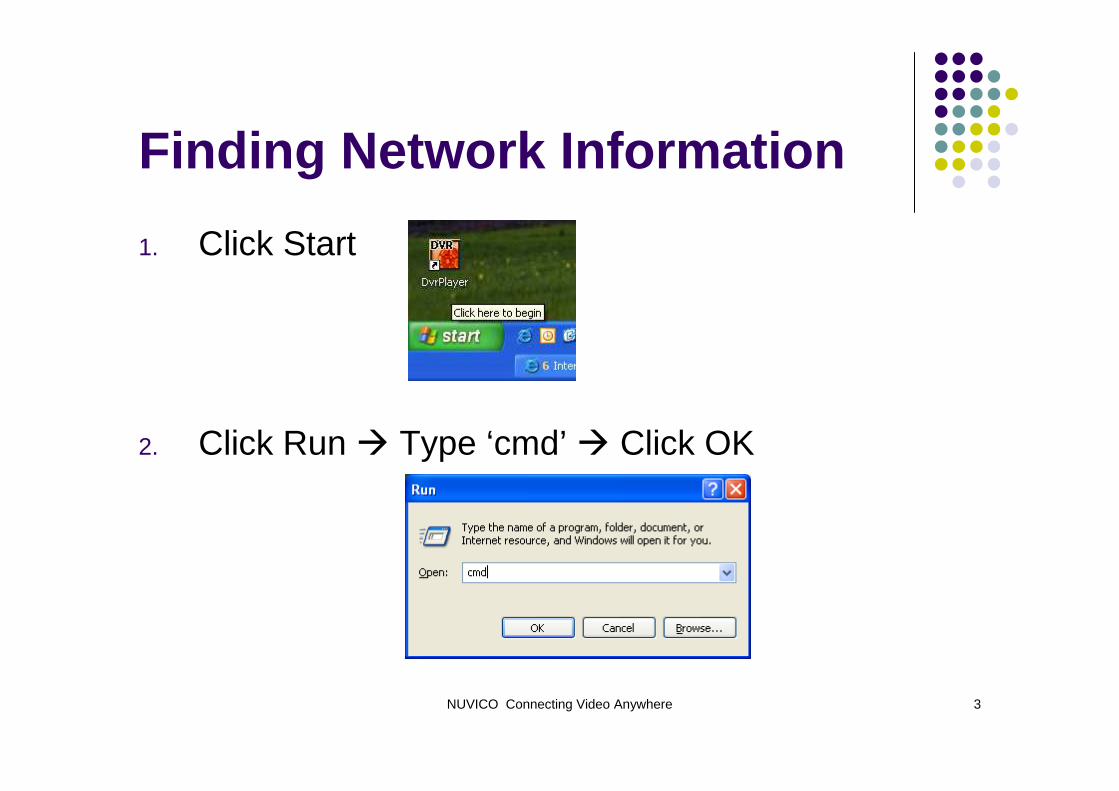
Finding Network Information
1. Click Start
2. Click Run � Type ‘cmd’ � Click OK
NUVICO Connecting Video Anywhere 4
Finding Network Information
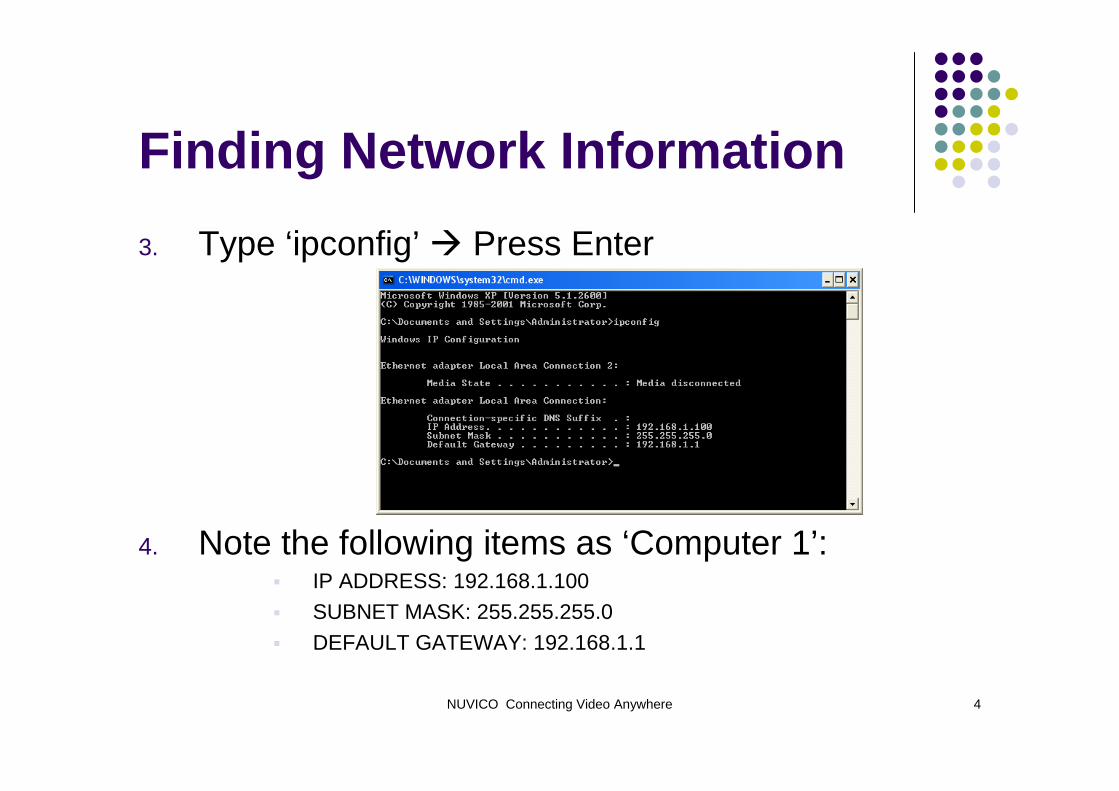
3. Type ‘ipconfig’ � Press Enter
4. Note the following items as ‘Computer 1’: � IP ADDRESS: 192.168.1.100
� SUBNET MASK: 255.255.255.0
� DEFAULT GATEWAY: 192.168.1.1

NUVICO Connecting Video Anywhere 5
Finding Network Information
5. Add 5 to the forth value of the IP ADDRESS section and note it as ‘DVR1’ :
� IP ADDRESS: 192.168.1.105� SUBNET MASK: 255.255.255.0� DEFAULT GATEWAY: 192.168.1.1

NUVICO Connecting Video Anywhere 6
How to connect NUVICO DVR to the internet
Section 2. DVR configuration
Assigning an IP address to a DVRTesting Local Configuration
NUVICO Connecting Video Anywhere 7
Assigning an IP address for a DVR
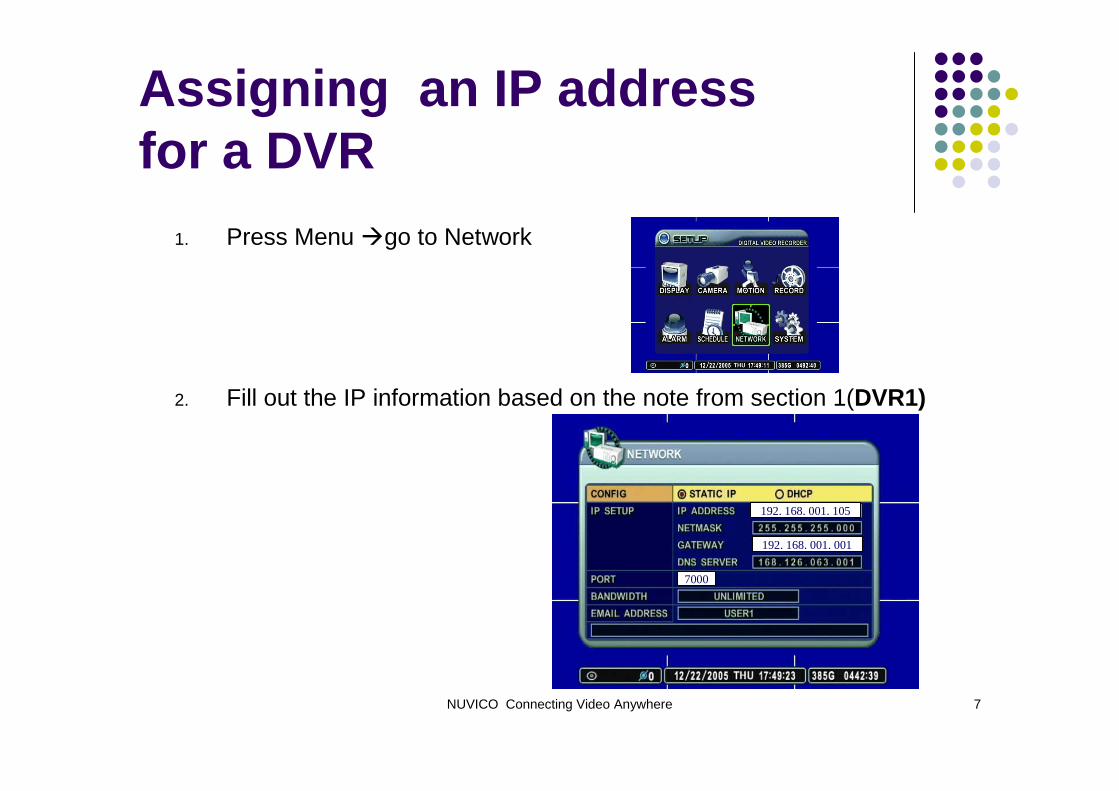
1. Press Menu �go to Network
2. Fill out the IP information based on the note from section 1(DVR1)
192. 168. 001. 105
192. 168. 001. 001
7000
NUVICO Connecting Video Anywhere 8
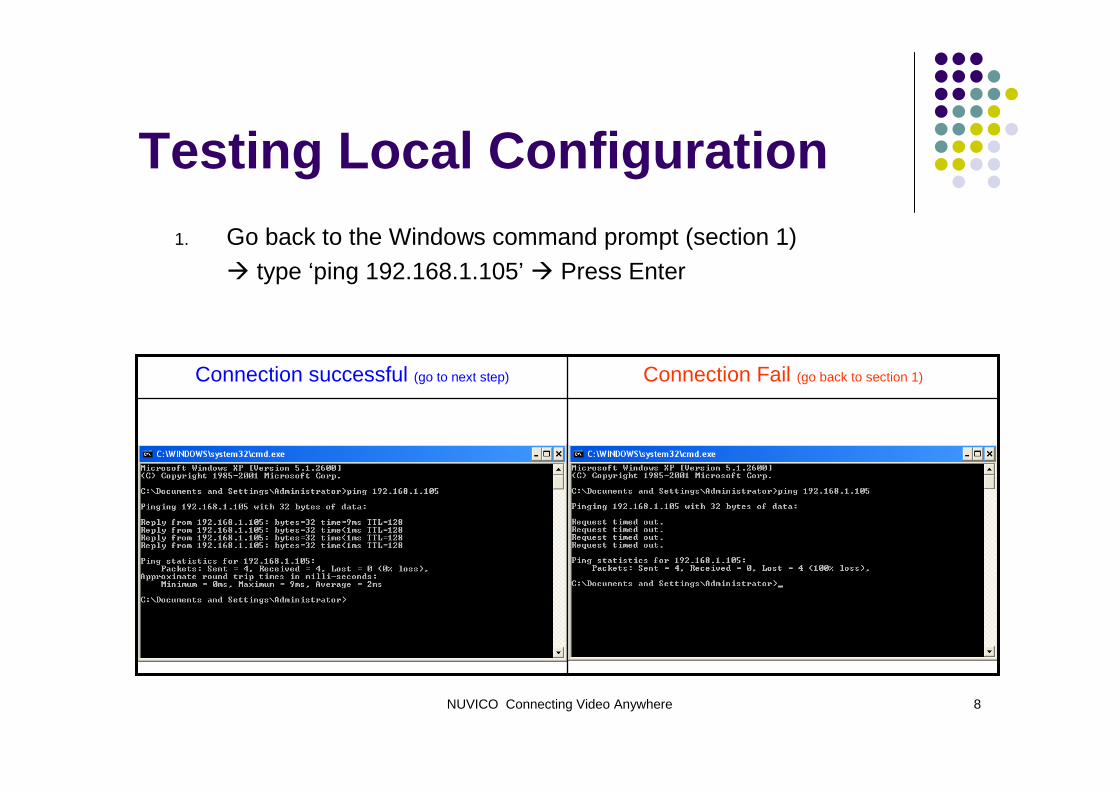
Testing Local Configuration1. Go back to the Windows command prompt (section 1)
� type ‘ping 192.168.1.105’ � Press Enter
Connection Fail (go back to section 1)Connection successful (go to next step)
NUVICO Connecting Video Anywhere 9
Testing Local Configuration
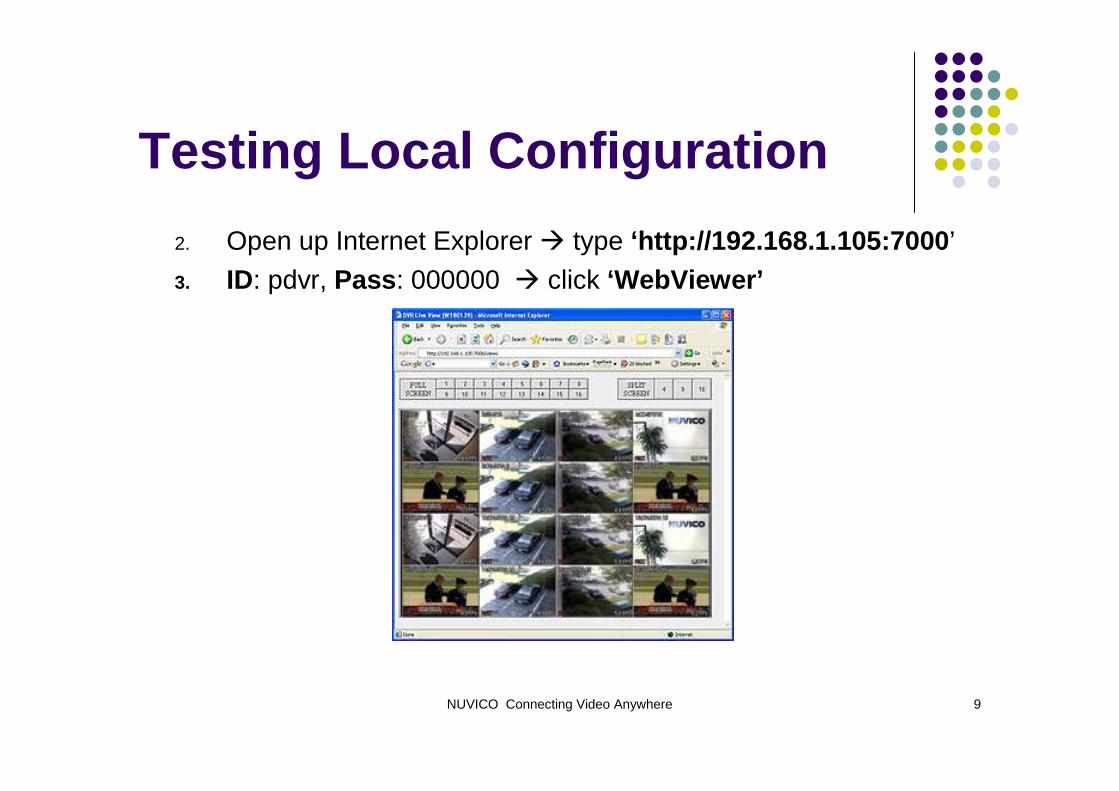
2. Open up Internet Explorer � type ‘http://192.168.1.105:7000 ’
3. ID: pdvr, Pass : 000000 � click ‘WebViewer’
NUVICO Connecting Video Anywhere 10
How to connect NUVICO DVR to the internet
Section 3. Router Configuration
Configuring Linksys BEFSR41 V4 RouterExtra Router Configurations
Finding Port Forwarding Tips
NUVICO Connecting Video Anywhere 11
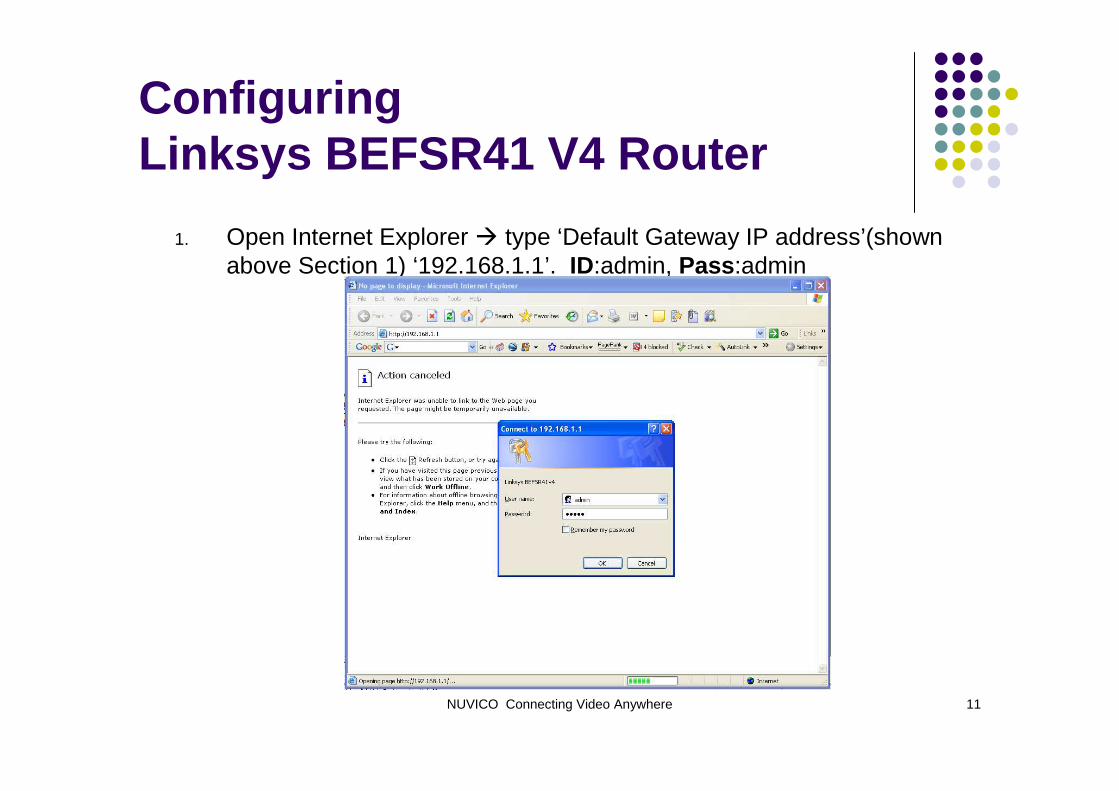
Configuring Linksys BEFSR41 V4 Router
1. Open Internet Explorer � type ‘Default Gateway IP address’(shownabove Section 1) ‘192.168.1.1’. ID:admin, Pass :admin
NUVICO Connecting Video Anywhere 12
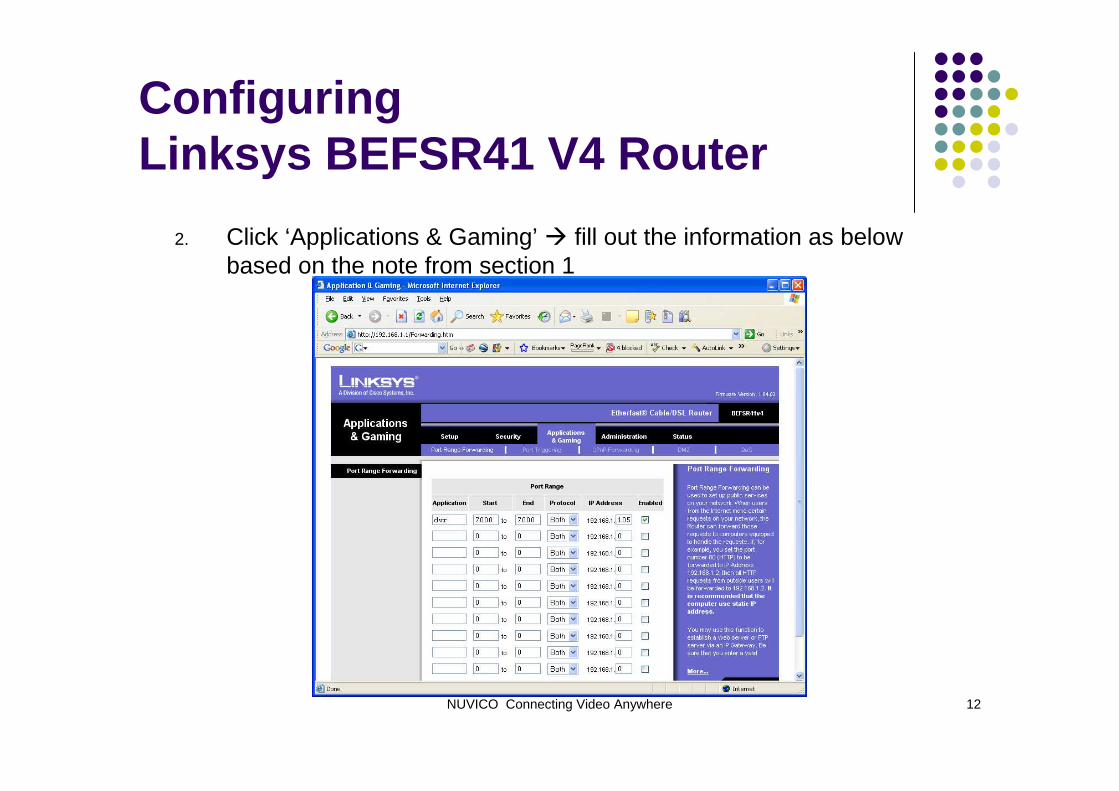
Configuring Linksys BEFSR41 V4 Router
2. Click ‘Applications & Gaming’ � fill out the information as below based on the note from section 1
NUVICO Connecting Video Anywhere 13
Configuring Linksys BEFSR41 V4 Router
2. Click ‘Save Settings’3. Most of the time you should be able to login to your DVR from remote
location. However, let’s take the steps below to make sure that your DVR is always on-line.
NUVICO Connecting Video Anywhere 14
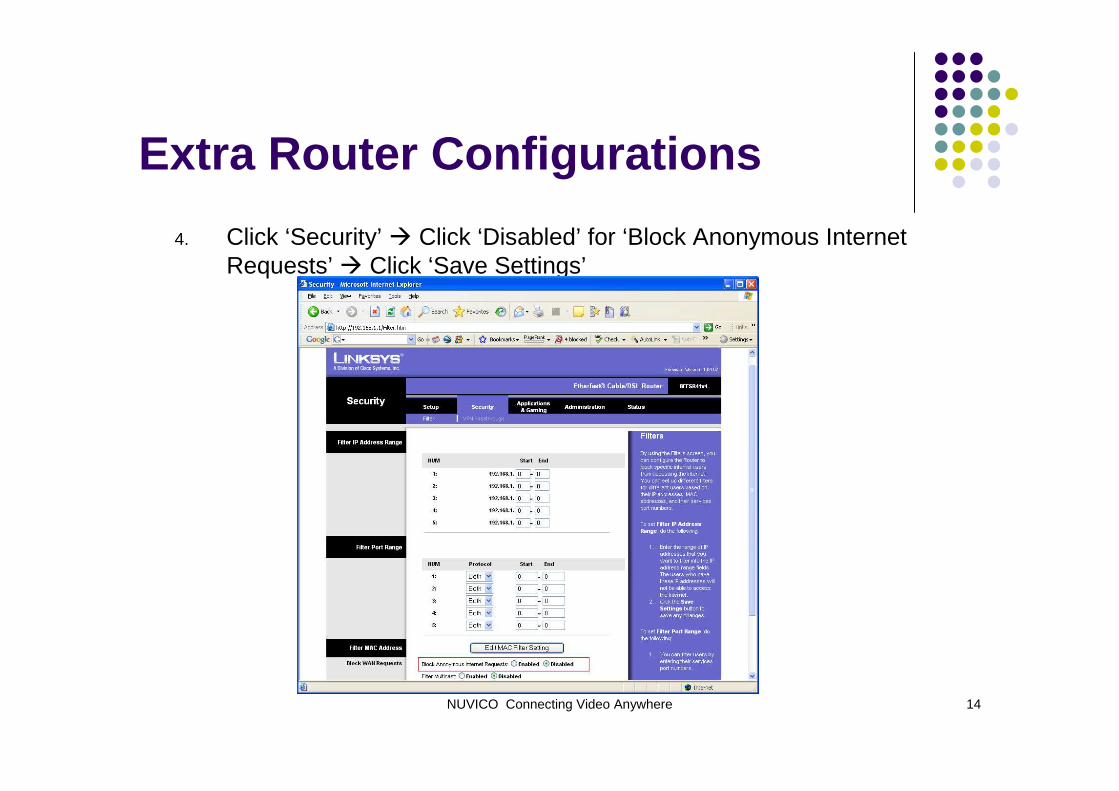
Extra Router Configurations
4. Click ‘Security’ � Click ‘Disabled’ for ‘Block Anonymous Internet Requests’ � Click ‘Save Settings’
NUVICO Connecting Video Anywhere 15
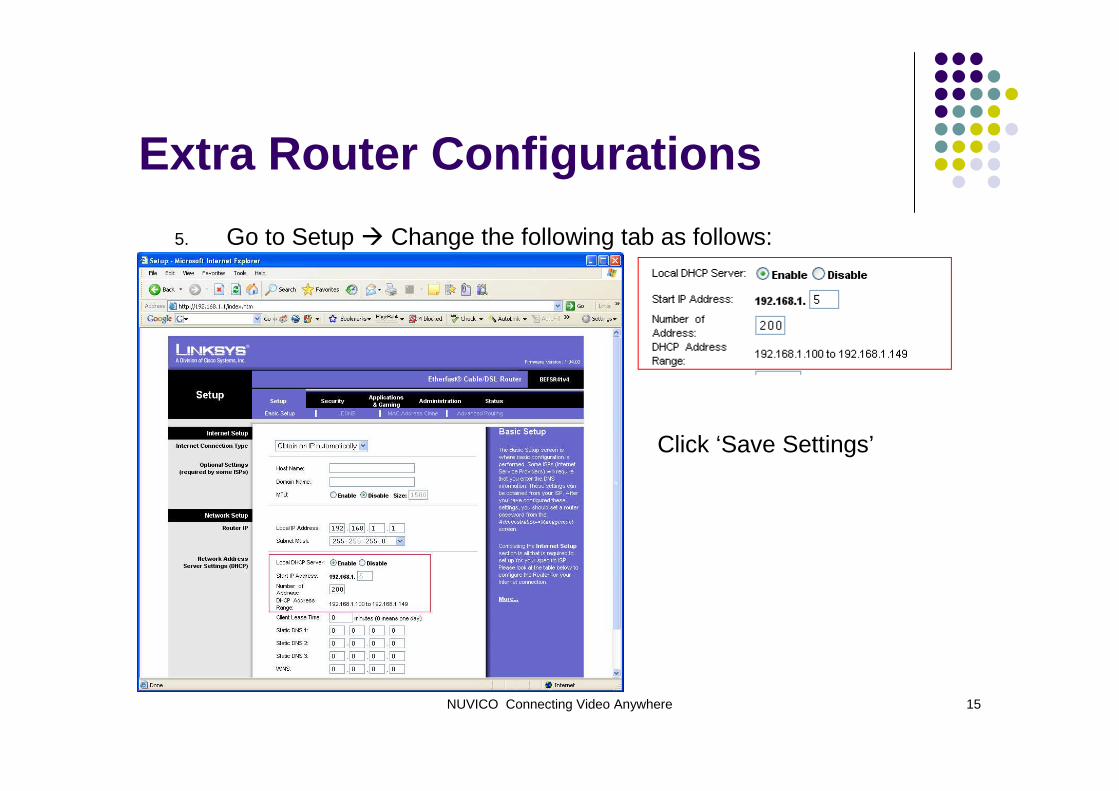
Extra Router Configurations
5. Go to Setup � Change the following tab as follows:
Click ‘Save Settings’
NUVICO Connecting Video Anywhere 16
Finding Port Forwarding Tips
6. You could find useful Port forwarding tips per different manufactures and model numbers from the following web sites.
� www.portforward.com1. Click on “Forwarding”2. Locate and click on the specific manufacturer and model number of the router.3. Click on ‘Default Guide’
� www.linksys.com : Linksys router� www.netgear.com : NetGear router� www.dlink.com : D-Link� www.2wire.com : 2Wire router
NUVICO Connecting Video Anywhere 17
How to connect NUVICO DVR to the internet
Section 4. DVR Client Software
Finding NUVICO DDNS HostnameViewing with Internet Explorer
Viewing with the CMS(DVR player) installable program
NUVICO Connecting Video Anywhere 18
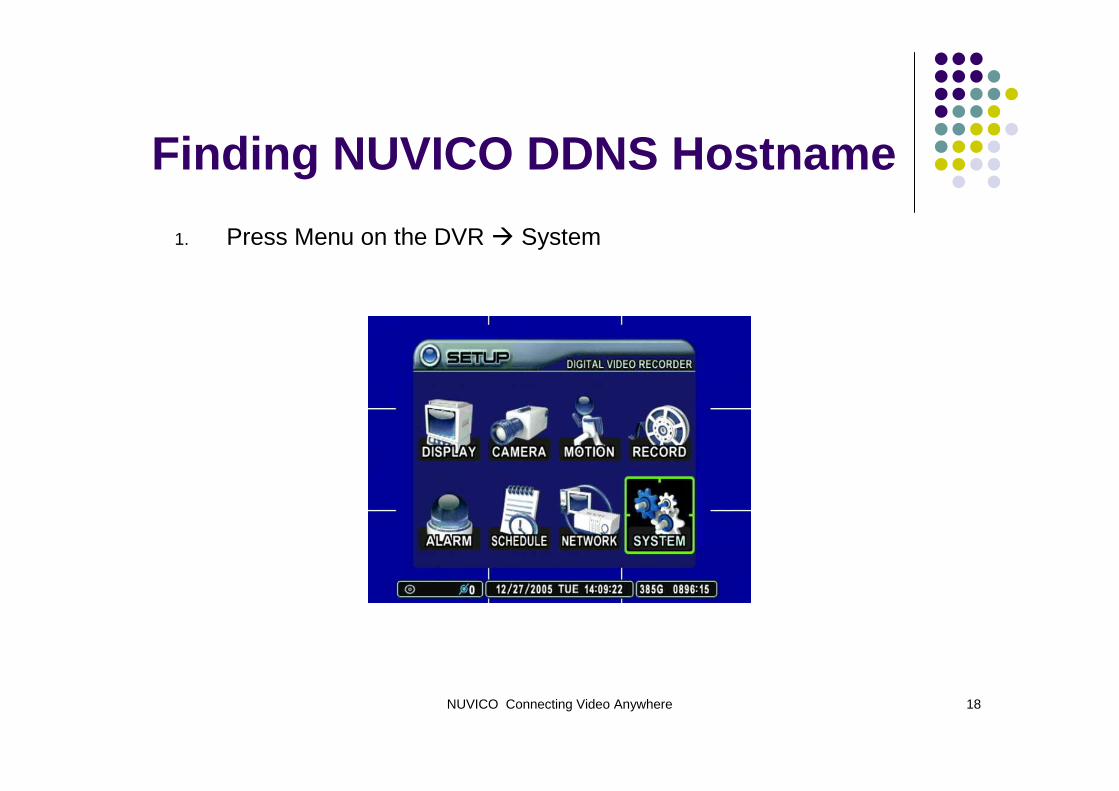
Finding NUVICO DDNS Hostname
1. Press Menu on the DVR � System
NUVICO Connecting Video Anywhere 19
Finding NUVICO DDNS Hostname
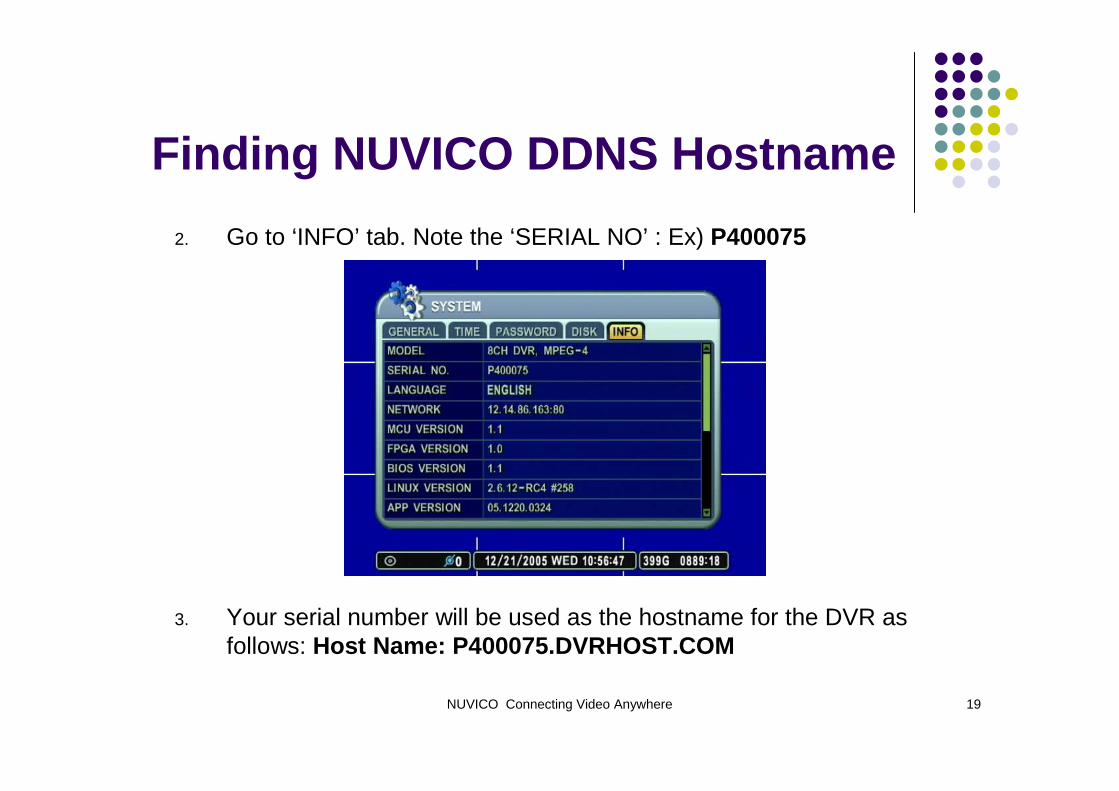
2. Go to ‘INFO’ tab. Note the ‘SERIAL NO’ : Ex) P400075
3. Your serial number will be used as the hostname for the DVR as follows: Host Name: P400075.DVRHOST.COM
NUVICO Connecting Video Anywhere 20
Viewing with Internet Explorer
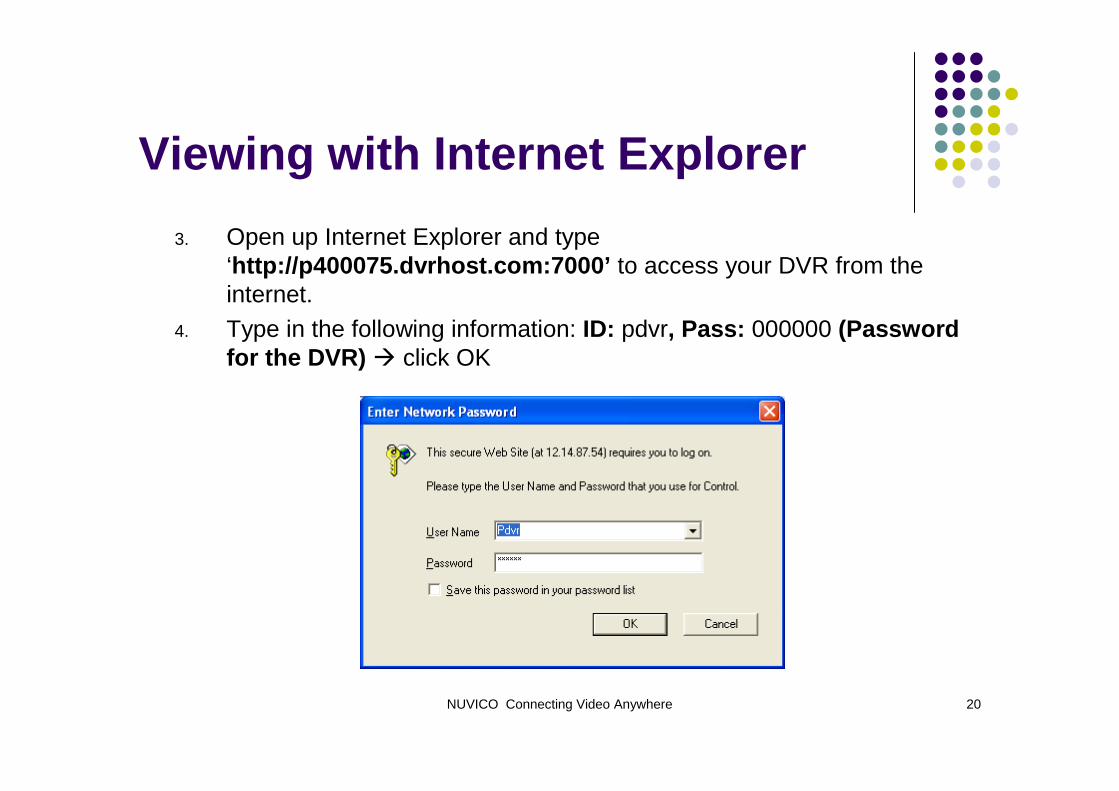
3. Open up Internet Explorer and type ‘http://p400075.dvrhost.com:7000’ to access your DVR from the internet.
4. Type in the following information: ID: pdvr, Pass: 000000 (Password for the DVR) � click OK
NUVICO Connecting Video Anywhere 21
Viewing with Internet Explorer
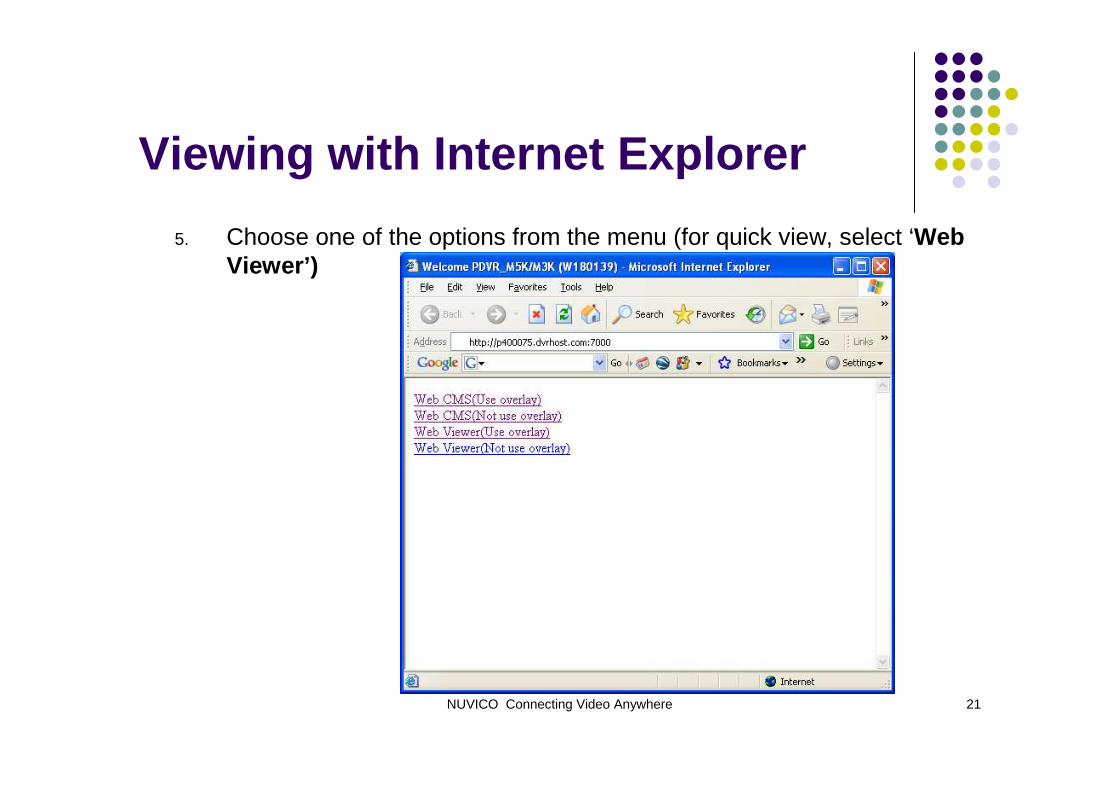
5. Choose one of the options from the menu (for quick view, select ‘Web Viewer’)
NUVICO Connecting Video Anywhere 22
Viewing with Internet Explorer
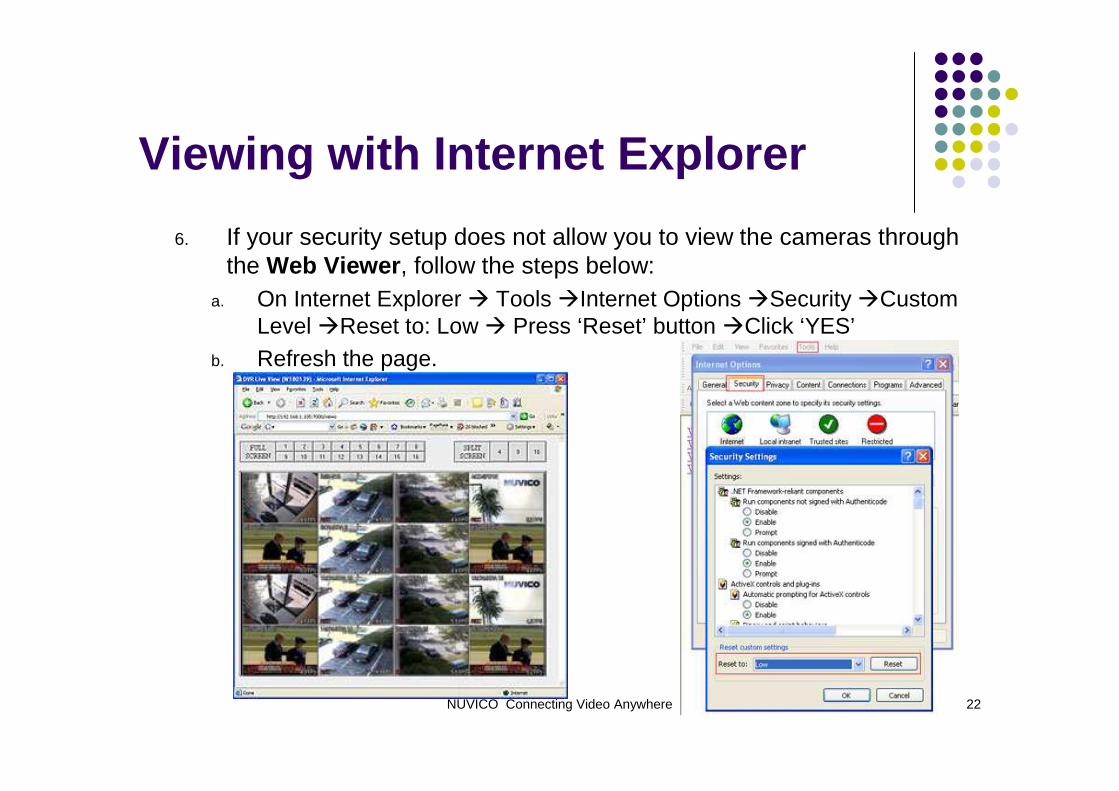
6. If your security setup does not allow you to view the cameras through the Web Viewer , follow the steps below:
a. On Internet Explorer � Tools �Internet Options �Security �Custom Level �Reset to: Low � Press ‘Reset’ button �Click ‘YES’
b. Refresh the page.
NUVICO Connecting Video Anywhere 23
Viewing with the CMS(DVR player) installable program
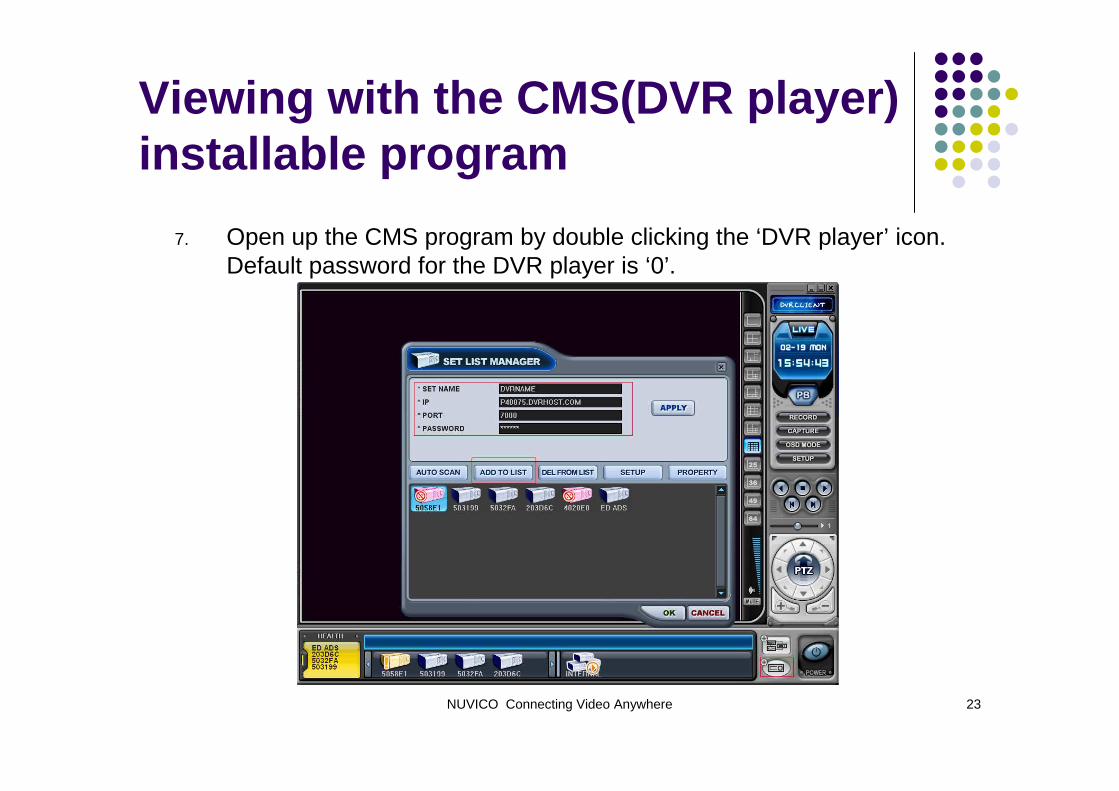
7. Open up the CMS program by double clicking the ‘DVR player’ icon. Default password for the DVR player is ‘0’.
NUVICO Connecting Video Anywhere 24
Viewing with the CMS(DVR player) installable program
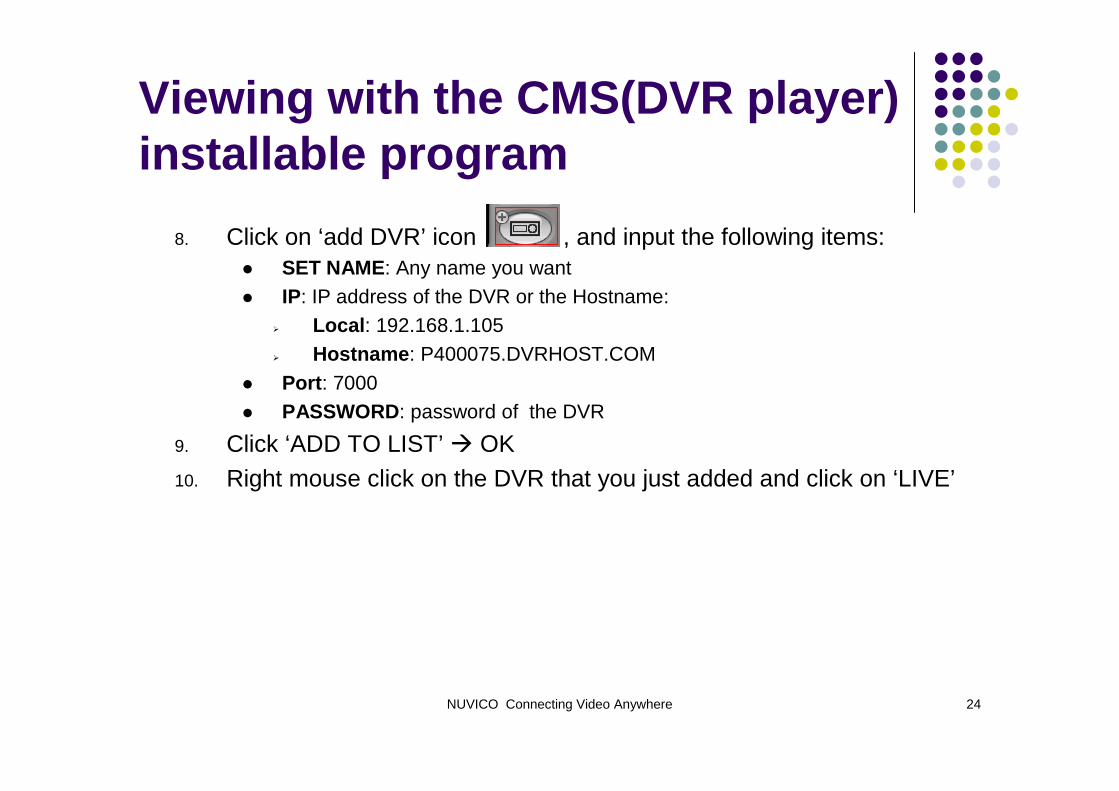
8. Click on ‘add DVR’ icon , and input the following items:� SET NAME: Any name you want� IP: IP address of the DVR or the Hostname:
� Local : 192.168.1.105� Hostname : P400075.DVRHOST.COM
� Port : 7000� PASSWORD: password of the DVR
9. Click ‘ADD TO LIST’ � OK
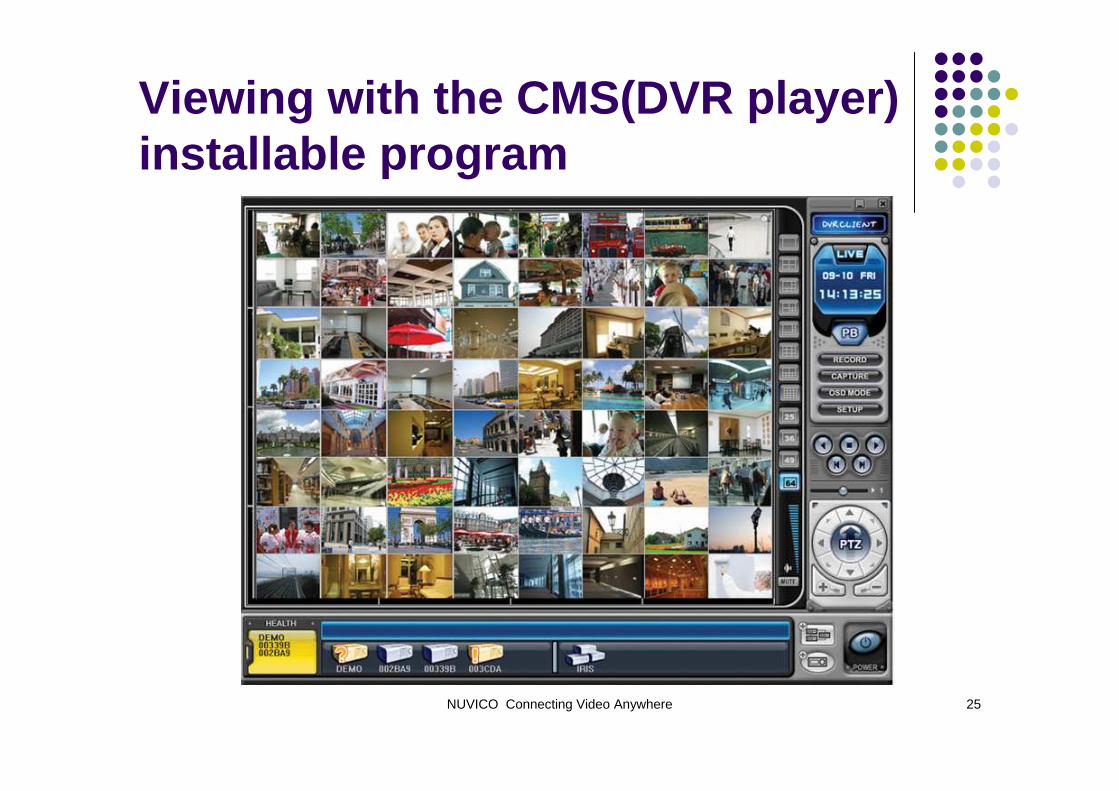
10. Right mouse click on the DVR that you just added and click on ‘LIVE’
NUVICO Connecting Video Anywhere 25
Viewing with the CMS(DVR player) installable program