Embed Size (px)
Citation preview

Cloud Access Manager 8.1.3
How to Configure as an Identity Provider
Copyright 2017 One Identity LLC.
ALL RIGHTS RESERVED.This guide contains proprietary information protected by copyright. The software described in this guide is furnished under a software license or nondisclosure agreement. This software may be used or copied only in accordance with the terms of the applicable agreement. No part of this guide may be reproduced or transmitted in any form or by any means, electronic or mechanical, including photocopying and recording for any purpose other than the purchaser’s personal use without the written permission of One Identity LLC .The information in this document is provided in connection with One Identity products. No license, express or implied, by estoppel or otherwise, to any intellectual property right is granted by this document or in connection with the sale of One Identity LLC products. EXCEPT AS SET FORTH IN THE TERMS AND CONDITIONS AS SPECIFIED IN THE LICENSE AGREEMENT FOR THIS PRODUCT, ONE IDENTITY ASSUMES NO LIABILITY WHATSOEVER AND DISCLAIMS ANY EXPRESS, IMPLIED OR STATUTORY WARRANTY RELATING TO ITS PRODUCTS INCLUDING, BUT NOT LIMITED TO, THE IMPLIED WARRANTY OF MERCHANTABILITY, FITNESS FOR A PARTICULAR PURPOSE, OR NON-INFRINGEMENT. IN NO EVENT SHALL ONE IDENTITY BE LIABLE FOR ANY DIRECT, INDIRECT, CONSEQUENTIAL, PUNITIVE, SPECIAL OR INCIDENTAL DAMAGES (INCLUDING, WITHOUT LIMITATION, DAMAGES FOR LOSS OF PROFITS, BUSINESS INTERRUPTION OR LOSS OF INFORMATION) ARISING OUT OF THE USE OR INABILITY TO USE THIS DOCUMENT, EVEN IF ONE IDENTITY HAVE BEEN ADVISED OF THE POSSIBILITY OF SUCH DAMAGES. One Identity make no representations or warranties with respect to the accuracy or completeness of the contents of this document and reserves the right to make changes to specifications and product descriptions at any time without notice. One Identity do not make any commitment to update the information contained in this document.If you have any questions regarding your potential use of this material, contact:One Identity LLC.Attn: LEGAL Dept4 Polaris WayAliso Viejo, CA 92656Refer to our Web site (http://www.OneIdentity.com) for regional and international office information.
PatentsOne Identity is proud of our advanced technology. Patents and pending patents may apply to this product. For the most current information about applicable patents for this product, please visit our website at http://www.OneIdentity.com/legal/patents.aspx.
TrademarksOne Identity and the One Identity logo are trademarks and registered trademarks of One Identity LLC. in the U.S.A. and other countries. For a complete list of One Identity trademarks, please visit our website at www.OneIdentity.com/legal. All other trademarks are the property of their respective owners.
Legend
WARNING: A WARNING icon indicates a potential for property damage, personal injury, or death.
CAUTION: A CAUTION icon indicates potential damage to hardware or loss of data if instructions are not followed.
IMPORTANT, NOTE, TIP, MOBILE, or VIDEO: An information icon indicates supporting information.
Cloud Access Manager How to Configure as an Identity ProviderUpdated - October 2017Version - 8.1.3
Contents
Introduction 4
Prerequisites 4
Configuration 5
Configuring the SAML application on idp-cam.partner.local 5
Setting up the front-end authenticator in sp-cam.demo.local 9
Testing your configuration 11
About us 12
Contacting us 12
Technical support resources 12
Cloud Access Manager 8.1.3 How to Configure as an IdentityProvider 3
Introduction
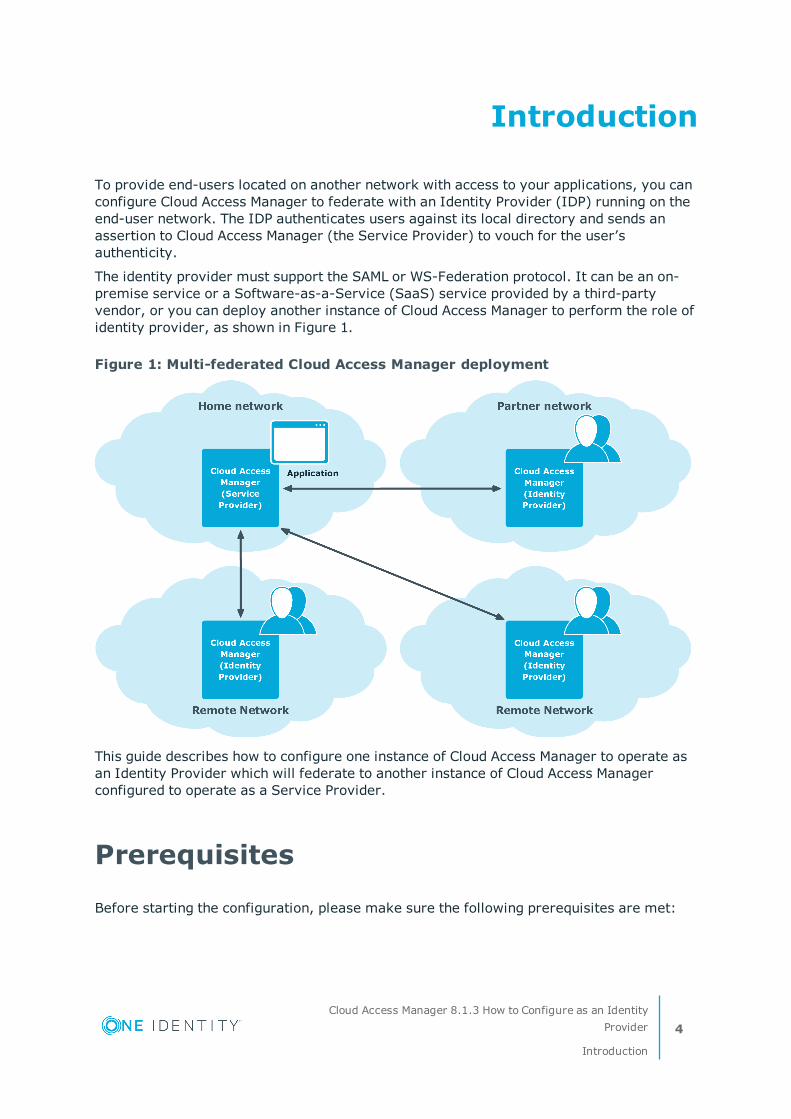
To provide end-users located on another network with access to your applications, you can configure Cloud Access Manager to federate with an Identity Provider (IDP) running on the end-user network. The IDP authenticates users against its local directory and sends an assertion to Cloud Access Manager (the Service Provider) to vouch for the user’s authenticity.
The identity provider must support the SAML or WS-Federation protocol. It can be an on-premise service or a Software-as-a-Service (SaaS) service provided by a third-party vendor, or you can deploy another instance of Cloud Access Manager to perform the role of identity provider, as shown in Figure 1.
Figure 1: Multi-federated Cloud Access Manager deployment
This guide describes how to configure one instance of Cloud Access Manager to operate as an Identity Provider which will federate to another instance of Cloud Access Manager configured to operate as a Service Provider.
Prerequisites
Before starting the configuration, please make sure the following prerequisites are met:
Cloud Access Manager 8.1.3 How to Configure as an IdentityProvider
Introduction
4
l Two member servers, sp-cam.demo.local and idp-cam.partner.local, are each located in their own Active Directory forest
l A Cloud Access Manager Proof-of-Concept installation exists on each server
l A front-end authenticator is configured on idp-cam.partner.local to connect to the local Active Directory
Configuration
l Configuring the SAML application on idp-cam.partner.local
describes how to configure the Identity Provider (IDP) Cloud Access Manager instance (on idp-cam.partner.local) with a SAML application to define the service provider (SP) Cloud Access Manager instance (on sp-cam.demo.local).
l Setting up the front-end authenticator in sp-cam.demo.local
describes how to configure the SP Cloud Access Manager instance (on sp-cam.demo.local) with a front-end authenticator (FEA) definition for the IDP Cloud Access Manager instance (on idp-cam.partner.local).
l Testing your configuration
describes how to test a federated logon to the SP Cloud Access Manager instance authenticating against the IDP Cloud Access Manager instance.
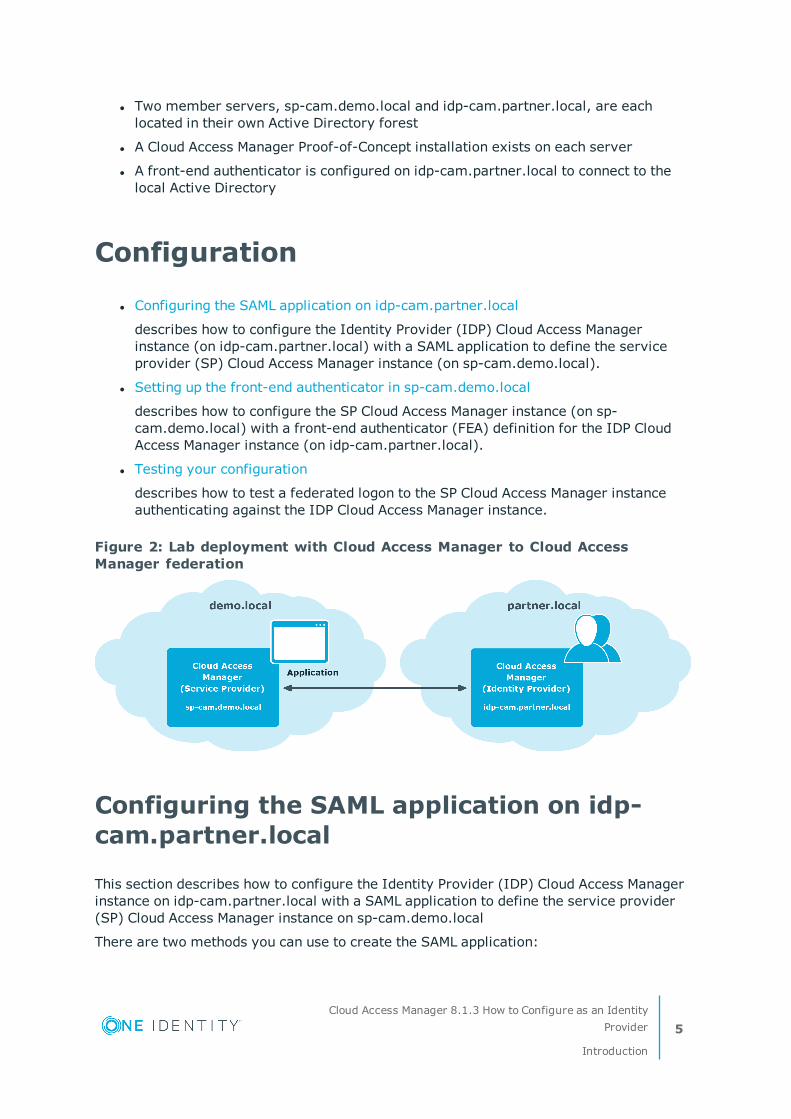
Figure 2: Lab deployment with Cloud Access Manager to Cloud Access Manager federation
Configuring the SAML application on idp-cam.partner.local
This section describes how to configure the Identity Provider (IDP) Cloud Access Manager instance on idp-cam.partner.local with a SAML application to define the service provider (SP) Cloud Access Manager instance on sp-cam.demo.local
There are two methods you can use to create the SAML application:
Cloud Access Manager 8.1.3 How to Configure as an IdentityProvider
Introduction
5

l Using the template provided
l Configuring the application manually
In addition you can:
l Configure the Cloud Access Manager roles to be returned
To configure the SAML application using the template
1. Log in as a fallback administrator to the Cloud Access Manager instance on idp-cam.partner.local.
2. From the main menu in the Applications section click + Add New.
3. In the Create an Application Using a Template section select the One Identity Cloud Access Manager template.
4. On the Settings forCloud Access Manager enter sp-cam.demo.local as the Cloud Access Manager hostname and then click Save & Next.
5. On the Subject Mapping page click Derive the username from an attribute.
6. In the Take the username from the following attribute field enter sAMAccountName.
7. Click Next.
8. The Permissions page is displayed. Here you can grant or deny access to the application based on role membership. Select Allow Role Access to specify which roles will have access to Cloud Access Manager.
9. Enter a name for this application configuration.
10. Click Next.
11. The Application Portal configuration screen allows you to determine how the app link to the Cloud Access Manager SP instance is presented on the local Application Portal. For this example, users will navigate directly to the Cloud Access Manager SP Application Portal. This means that the URL to the local Cloud Access Manager IDP Application Portal will not be published, and therefore the settings here are not important. Leave all settings as they are and click Finish.
12. The Federation Settings page provides you with information that you may need to configure your Service Provider. In this example, we will generate metadata to set up our Service Provider. Click Download Metadata and transfer the downloaded file to your sp-cam.demo.local machine.
Configuring the SAML application manually
1. Log in as a fallback administrator to the Cloud Access Manager instance on idp-cam.partner.local.
2. From the main menu, in the Applications section, click + Add New.
3. The Create New Application page is displayed. Click Configure Manually.
4. The Back-end SSO Method page is displayed. Select SAML and then click Next.
5. On the Federation Settings screen, enter the Recipient and the Audience / SP
Cloud Access Manager 8.1.3 How to Configure as an IdentityProvider
Introduction
6

Identity as follows:
Recipient:
https://sp-cam.demo.local/CloudAccessManager/RPSTS/Saml2/Default.aspx
Audience/SP Identity:
urn:sp-cam.demo.local/CloudAccessManager/RPSTS
Application Logout URL:
https://sp-cam.demo.local/CloudAccessManager/RPSTS/Saml2/Logout.aspx
6. On the Subject Mapping page, click Derive the username from an attribute.
7. In the Take the username from the following attribute field, enter sAMAccountName.
8. Click Next.
9. Click Next to advance to the External Access page. This asks you whether the application should be proxied for situations where external users are required to access applications on your internal network. When Cloud Access Manager is operating as an IDP, the application (SP) does not run on your internal network and therefore this is not required. Select Do not proxy this application.
10. Click Next.
11. The Permissions page is displayed. Here you can grant or deny access to the application based on role membership. Select Allow Role Access to specify which roles will have access toCloud Access Manager.
12. Now enter a name for this application configuration.
Cloud Access Manager 8.1.3 How to Configure as an IdentityProvider
Introduction
7

13. Click Next.
14. The Application Portal configuration screen allows you to determine how the app link to the Cloud Access Manager SP instance is presented on the local Application Portal. Since in this example users will navigate directly to the Cloud Access Manager SP Application Portal, the URL to the local Cloud Access Manager IDP Application Portal will not be published, so the settings here are not important. Select IDP-Initiated under SSO Mode and click Finish.
15. The Federation Settings page provides you with information you may need to configure your Service Provider. In this example, we will generate metadata to set up our Service Provider. Click Download Metadata and transfer the downloaded file to your sp-cam.demo.local machine.
Configuring Cloud Access Manager roles to be returned
To configure the IDP instance to return the Cloud Access Manager roles that users belong to, use the following steps. You can then employ these roles in the SP instance to control user access to applications.
1. Log in as a fallback administrator to the Cloud Access Manager instance on idp-cam.partner.local
2. From the main menu, in the Applications section, click View and Edit.
3. Select the One Identity Cloud Access Manager application that you created in the previous sections.
4. Select the Claim Mapping section.
Cloud Access Manager 8.1.3 How to Configure as an IdentityProvider
Introduction
8
5. Select the Send Cloud Access Manager role claim checkbox.
6. Click Finish.
Setting up the front-end authenticator in sp-cam.demo.local
To set up the front-end authenticator in sp-cam.demo.local
1. Log in to the Cloud Access Manager instance on sp-cam.demo.local as the fallback administrator.
2. From the main menu in the Front-end Authentication section, click + Add New.
3. On the Authenticator Type page choose SAML Federated.
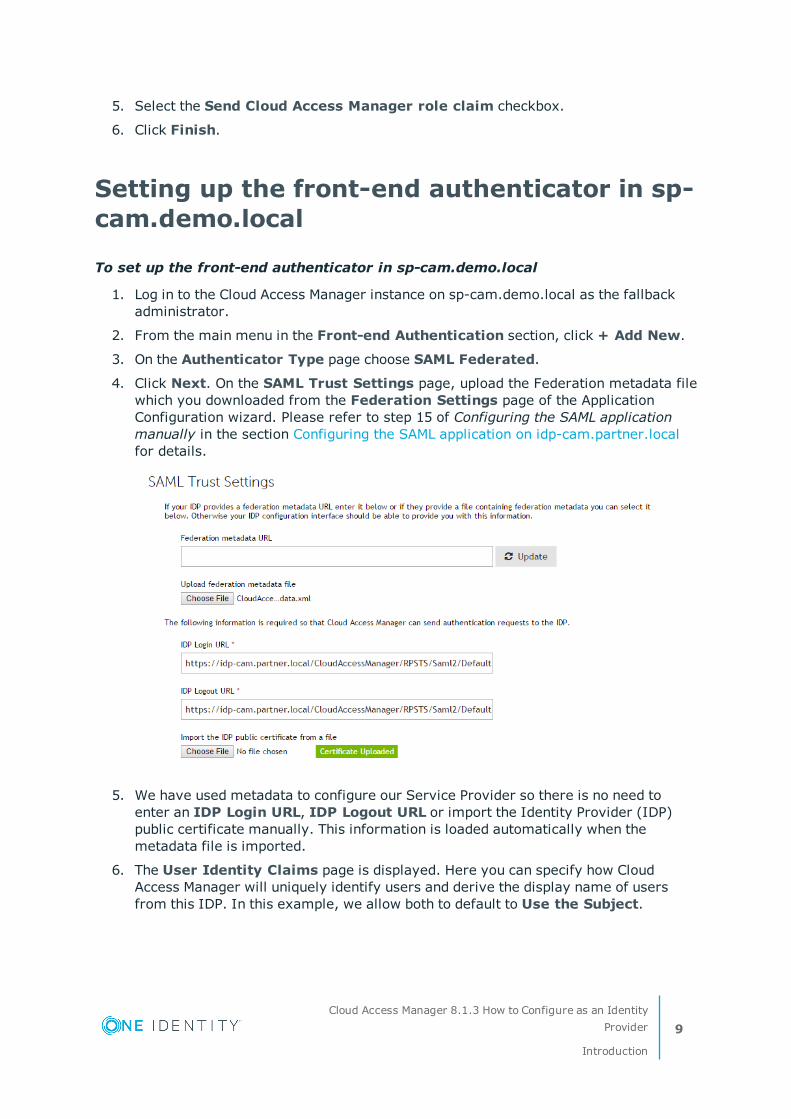
4. Click Next. On the SAML Trust Settings page, upload the Federation metadata file which you downloaded from the Federation Settings page of the Application Configuration wizard. Please refer to step 15 of Configuring the SAML application manually in the section Configuring the SAML application on idp-cam.partner.local for details.
5. We have used metadata to configure our Service Provider so there is no need to enter an IDP Login URL, IDP Logout URL or import the Identity Provider (IDP) public certificate manually. This information is loaded automatically when the metadata file is imported.
6. The User Identity Claims page is displayed. Here you can specify how Cloud Access Manager will uniquely identify users and derive the display name of users from this IDP. In this example, we allow both to default to Use the Subject.
Cloud Access Manager 8.1.3 How to Configure as an IdentityProvider
Introduction
9

7. In the Authenticator Name field enter CAM IDP.
8. Click Finish.
9. The federation settings for the Service Provider are displayed.
10. The Cloud Access Manager Identity Provider is now configured. You may want to configure the roles for the FEA at this point to control user access to applications. If so, click Edit Roles and carry out the remaining steps, otherwise click Finish.
11. If you have followed the instructions in the section Configuring Cloud Access Manager roles to be returned then the roles from the IDP will be available when logging in using the newly created FEA. The Admin and Users roles will work automatically, any other roles you have created on the IDP you will have to add manually. To start, click Add Role.
12. In the Edit Role section enter a name and description for the role.
13. Click Add User.
14. Select the new FEA from the User’s Authenticator list if it is not already selected.
15. Edit the Include users with a claim named field to contain urn:cam/sso/role. This is the claim type for roles returned from the IDP.
16. In the Having value field enter the name of the role as defined in the IDP roles, for example if you have created a role on the IDP with the name Sales, then you should enter Sales here.
17. Click Save.
Cloud Access Manager 8.1.3 How to Configure as an IdentityProvider
Introduction
10
18. Repeat steps 11 to 17 for any additional roles that are required.
Testing your configuration
You have now configured both Cloud Access Manager instances. When users attempt to access sp-cam.demo.local they are redirected to idp-cam.partner.local for authentication.
To test the configuration
1. Log onto any machine in the idp-cam.partner.local forest.
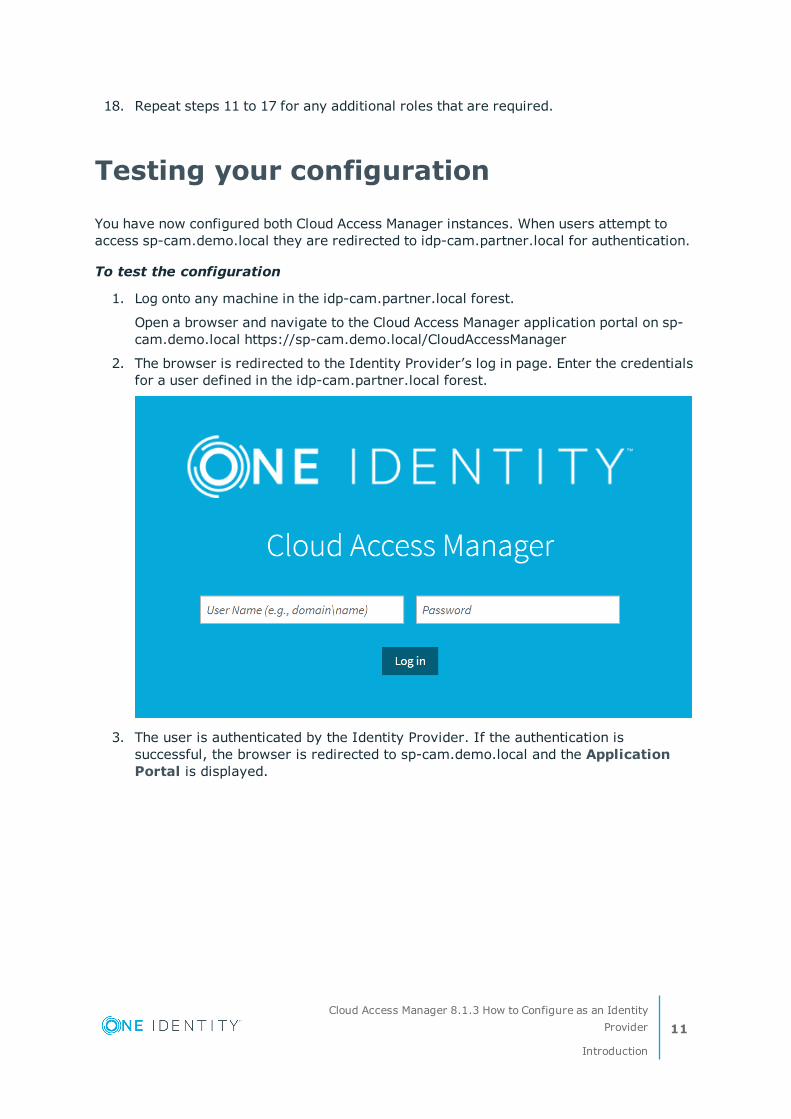
Open a browser and navigate to the Cloud Access Manager application portal on sp-cam.demo.local https://sp-cam.demo.local/CloudAccessManager
2. The browser is redirected to the Identity Provider’s log in page. Enter the credentials for a user defined in the idp-cam.partner.local forest.
3. The user is authenticated by the Identity Provider. If the authentication is successful, the browser is redirected to sp-cam.demo.local and the Application Portal is displayed.
Cloud Access Manager 8.1.3 How to Configure as an IdentityProvider
Introduction
11
About us
About us
Contacting us
For sales or other inquiries, visit https://www.oneidentity.com/company/contact-us.aspx or call +1-800-306-9329.
Technical support resources
Technical support is available to One Identity customers with a valid maintenance contract and customers who have trial versions. You can access the Support Portal at https://support.oneidentity.com/.
The Support Portal provides self-help tools you can use to solve problems quickly and independently, 24 hours a day, 365 days a year. The Support Portal enables you to:
l Submit and manage a Service Request
l View Knowledge Base articles
l Sign up for product notifications
l Download software and technical documentation
l View how-to-videos
l Engage in community discussions
l Chat with support engineers online
l View services to assist you with your product
Cloud Access Manager 8.1.3 How to Configure as an IdentityProvider
About us
12


![DR Series System Command Line Reference Guide - Questsupport-public.cfm.quest.com/39283_CLIGuidePublication=8=PDF_A4... · stats --fc [--iostat] ... [verify_data | verify_rda_metadata](https://img.pdfslide.us/doc/110x75/5ad57f837f8b9a075a8cf82f/dr-series-system-command-line-reference-guide-questsupport-8pdfa4stats-fc.jpg)