Embed Size (px)
Citation preview

Holiday Gift Box By Jean Bernard
Please read the entire lesson before you begin to gather your supplies. The supply list holds exactly what I
used to create this project. You may not have a particular item in your studio but there are alternatives which I have listed for you in the body of this lesson. May I suggest that you practice the painting technique on a scrap
piece of cardboard, wood, tin etc., sealed with gesso until you get the hang of my painting style or best of all discover your
own personalized technique.
Supply List: * Gift Box * Golden Fiber Paste * Paint Brushes * White Gesso * Acrylic Paints ~ Black, Metallic: Emperors Gold (bright gold), Metallic: Venetian Gold (bronze), Dark Green, Dark Brown * Glossy Varnish (sealer) * Colorful Napkins * Mod Podge * Ribbon * Twigs * Clear Micro Marbles * Gold Micro Marbles with Gold
Glass Shards * Toothpicks * Aluminum Foil * Scissors * Black Felt (optional)
This particular package was created for someone who loves the great outdoors. I chose earth tone colors and added a bit of glitz using the metallic paints.
Paint the outside of the box and lid with one coat of gesso. Let dry.
Please note: I will not put too much paint where the lid meets the box. Too much paint in that area will not
allow the lid to fit properly.
Place the lid onto the box.
I wanted to create the illusion of a woodland scene using texture. This was achieved using the Golden Fiber Paste. The fiber paste creates beautiful textures and dries very hard.
If you do not have the Golden Fiber Paste think of ways to create your own texture medium. Fine sand mixed
Page 1

with a gel medium works well. Micro beads and fibers mixed with Mod Podge is an idea. Test your concoction on a scrap piece of paper to see how well it accepts paint.
Scoop up some fiber paste from a container with a toothpick and place the paste onto the box. Try different techniques when applying the paste. I will strategically place the paste on the box or lid as well as roll the
toothpick over the surface of the box creating random textures. The less I plan the more I like the effects. Try different techniques… smear the paste on with a dry paintbrush, toothbrush, old rag, splatter it on, the
possibilities are endless. Simply play and have fun. Allow the Fiber Paste to dry completely.
Page 2

Lets paint My painting style is very unconventional to say the least. I was afraid to paint until my friend and mentor gave me “permission” to cut loose and find my own style. Since then I continue
to “find myself” in various painting techniques that I love. Not all are immediately successful but they do push me to explore new ideas until the final outcome is a success!
You may or may not like the following steps but I urge you to explore and find what you love as well.
Place a drop of the paints side by side on a sheet of aluminum foil.
Page 3

The following steps are time sensitive. We do not want the paints to dry too quickly between coats. Have a clean bowl of water nearby. Place a straight edge paintbrush into the water. Remove excess water from
the paintbrush by blotting it on a dry paper towel. Pickup some gold paint on ONE edge of the paint brush. Pick up some green on the other edge of the
paintbrush. Barely dip the edge of the paintbrush into the water.
Place the edge of the paintbrush onto the corner of the box/lid. Press and pull the paintbrush down the length of the box.
Page 4

Page 5

I do not clean my paintbrush between paint color changes. Dip one edge of the paintbrush into the brown and the other edge into the green.
Barely dip the tip of the paintbrush into the water.
Place the side of the paintbrush against the previously laid paint overlapping slightly. Press and pull the paintbrush down the length of the box.
Page 6

Slightly dip the tip of the paintbrush into the water. Place the tip of the paintbrush on the corner of the box where you laid your paintbrush previously. Press and pull down the paintbrush. When the brush meets the
Fiber Paste gently wiggle the brush from side to side covering the area with paint and continue down the box. Please note: The brush strokes are vertical without any breaks in the strokes.
Paint the remainder of the lid using the metallic gold paint and the techniques outlined above. Let dry. You have finished the first layer of paint. Doesn’t look like much but it will with the other layers of paint
Page 7

The first layer of paint has dried. We will add a few more layers of paint. Dip one edge of the paintbrush into the dark brown paint. Dip the other edge in the Metallic Gold paint.
Continue the steps outlined above. Overlapping the colors, incorporating new colors adds depth and richness to the gift box. Don’t be afraid! Just
have fun. You can always add more paint or simply start over using gesso.
.
The final layer is the gold metallic paint. I will wash my paintbrush, blot off excess moisture. Load the edge with the gold paint and barely dip the tip in water. Paint over the dried paint with a light painting motion. This creates a translucent finish allowing all the gorgeous colors below to shine thru the finish. You may omit this
step but give it a whirl. You might like it !
Page 8

Once the bottom and sides are painted we are ready to seal the entire box with varnish. One coat is sufficient. I used black felt on the bottom of the box so it could be displayed on a dresser without fear of scratching the
furniture. Simply paint glue on the bottom of the box, apply the felt and trim to fit.
Page 9

Page 10
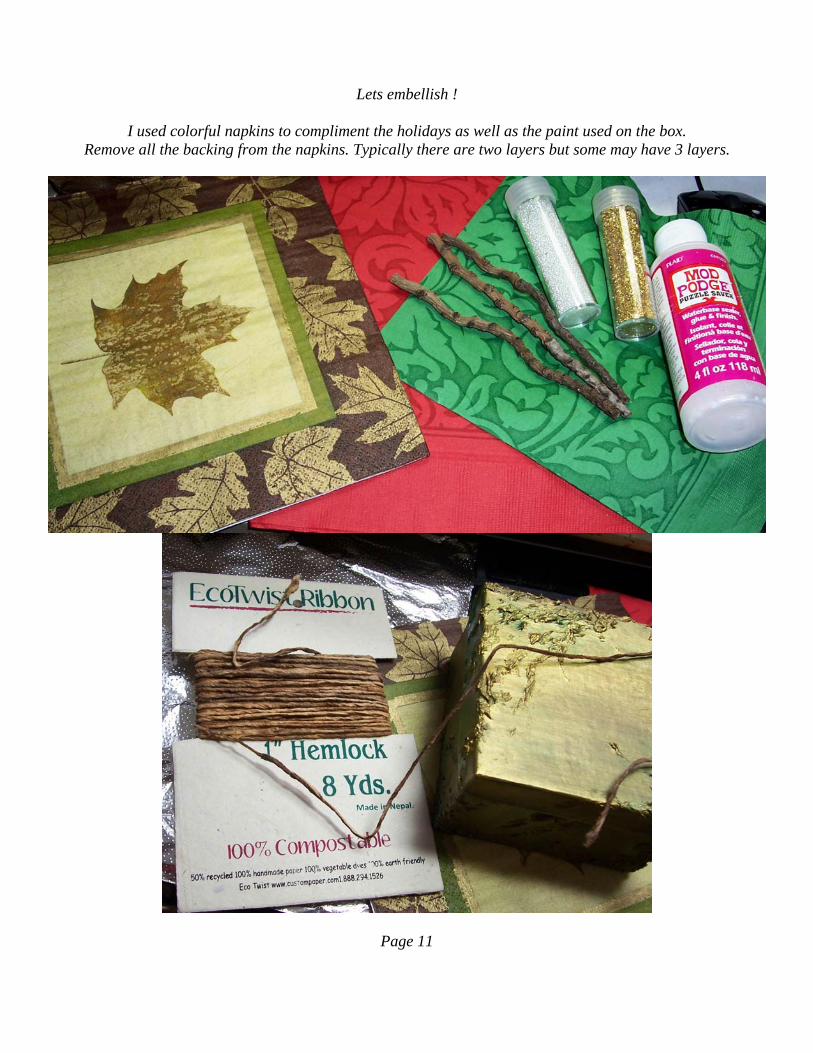
Lets embellish !
I used colorful napkins to compliment the holidays as well as the paint used on the box. Remove all the backing from the napkins. Typically there are two layers but some may have 3 layers.
Page 11
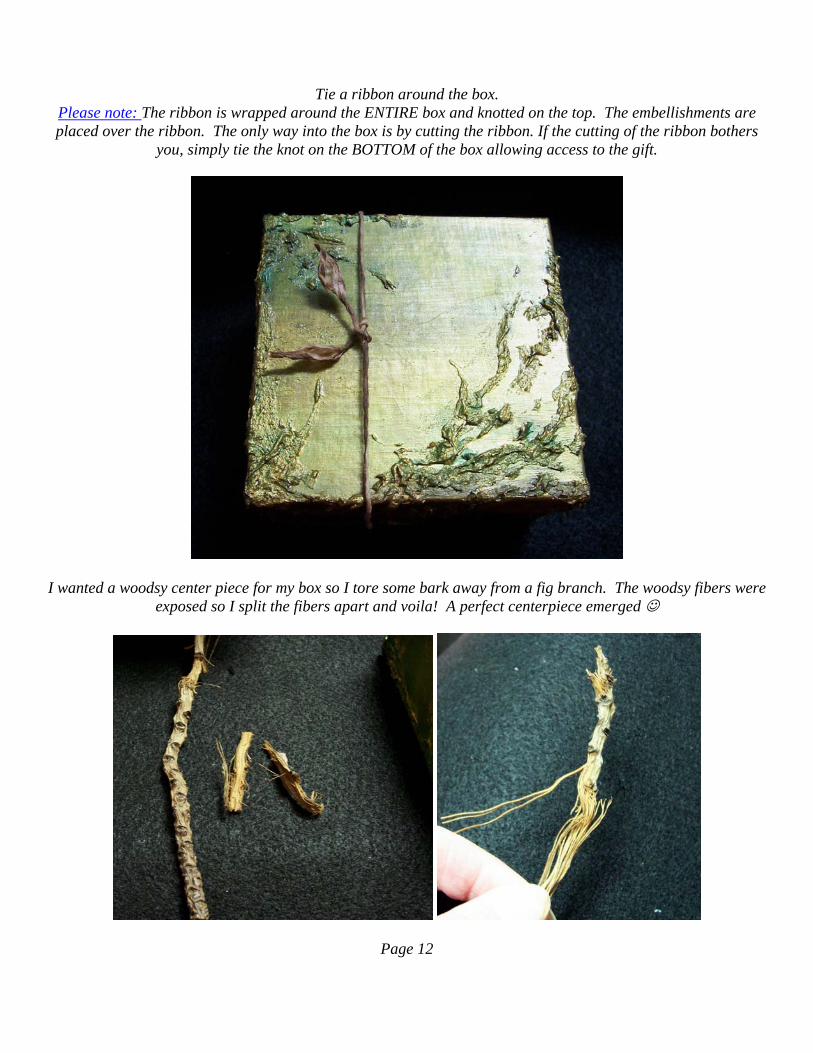
Tie a ribbon around the box. Please note: The ribbon is wrapped around the ENTIRE box and knotted on the top. The embellishments are placed over the ribbon. The only way into the box is by cutting the ribbon. If the cutting of the ribbon bothers
you, simply tie the knot on the BOTTOM of the box allowing access to the gift.
I wanted a woodsy center piece for my box so I tore some bark away from a fig branch. The woodsy fibers were exposed so I split the fibers apart and voila! A perfect centerpiece emerged
Page 12

Prepare your work space. Tear the napkins into small pieces about the size of a matchbook. Pour ModPodge onto a solid surface. I like to use plastic plates or large study plastic lids. Pour the clear micro marbles and
gold micro marbles with shards next to the Mod Podge. Have two toothpicks on hand.
Page 13

I’m going to share a quick trick with you then I will shut up lol Have you ever worked with thin paper like napkins only to soak up way too much ModPodge or other liquids resulting in a blob of pasty looking goop?
Well, I have. Here’s me trick….. I gently lay the paper onto the ModPodge.
The ModPodge will automatically adhere to the paper. See photo below. This is what you want. Less is best in this regard. Now we are ready to play
Page 14

Place a piece of torn napkin onto the Mod Podge. Using a toothpick lift the piece of napkin off the ModPodge and place on a hard surface.
Gently move the napkin from side to side with a toothpick. This motion distributes the Modpodge evenly under the napkin. Roll your toothpick thru the micro marbles and place them on top of the napkin.
Tear a small section of napkin away using a toothpick. Using two toothpick bring the ends of the napkin together creating a rosette.
May seem clumsy at first but it wont take you long to get the hang of it. You can also press the tip of a toothpick onto the end of the napkin and swirl the napkin.
Play with it. You’ll find your rhythm
Page 15

Place the rosette onto the box and ribbon. We are now anchoring the fig branch centerpiece to the box. Continue to add more foliage and flowers until the fig branch centerpiece is secured to the box.
Don’t forget to add some stray foliage and flowers “here” and “there” to add dimension. Add the micro marbles over the rest of the box for more sparkle.
Page 16

Page 17

Page 18

Page 19

I hope you had fun! If you have any questions feel free to contact me.
Jean [email protected] www.JeanBernardArt.com
Page 20
THE END