Embed Size (px)
Citation preview
HOLIDAY 350SE & 400SE TRAILER TENT
We highly recommend that your trailer tent is insured againsttheft and storm or accidental damage. Storm or accidentaldamage is not covered under the warranty.
Before going away with your trailer tent, ensure that you arefamiliar with the pitching of the trailer tent and that all partsare present. You should familiarise yourself with the trailertent including any limitations it may have for your particularuse. A trailer tent is a portable structure, which, under mostcircumstances, will provide comfortable shelter against theelements. There are however extremes of weather for whichallowance should be made. DON’T BLAME THE TRAILER TENT.
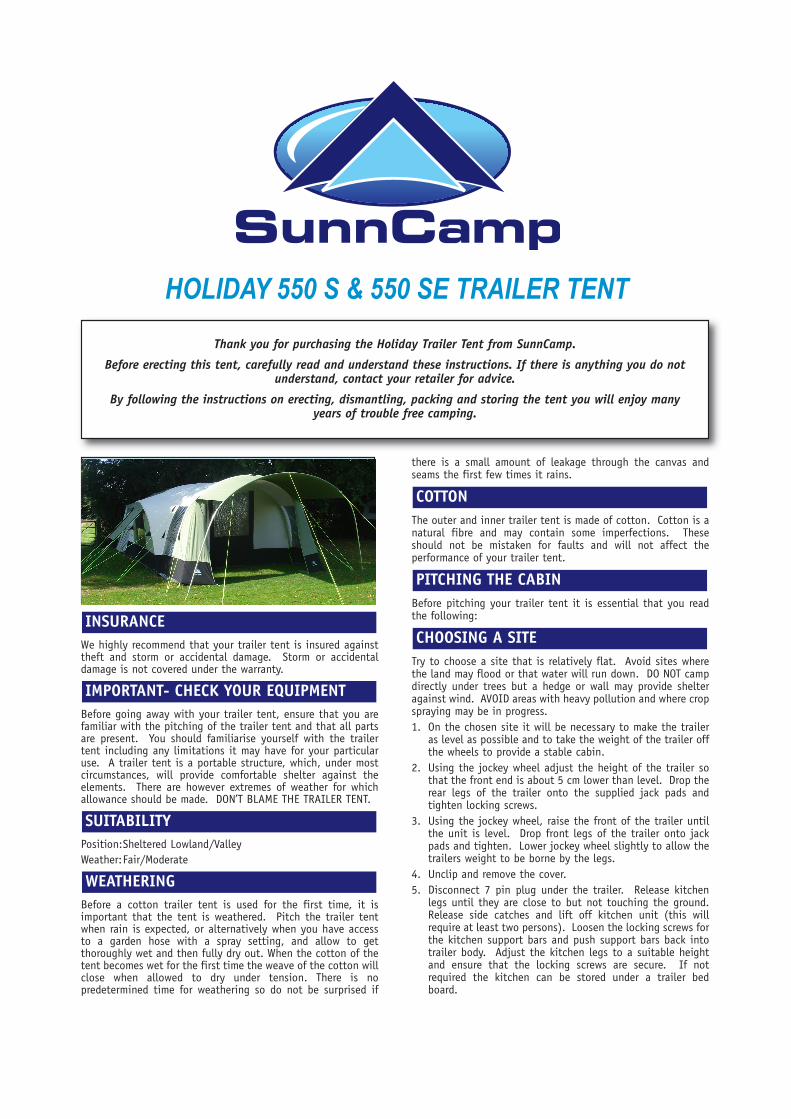
Position:Sheltered Lowland/ValleyWeather:Fair/Moderate
Before a cotton trailer tent is used for the first time, it isimportant that the tent is weathered. Pitch the trailer tentwhen rain is expected, or alternatively when you have accessto a garden hose with a spray setting, and allow to getthoroughly wet and then fully dry out. When the cotton of thetent becomes wet for the first time the weave of the cotton willclose when allowed to dry under tension. There is nopredetermined time for weathering so do not be surprised if
there is a small amount of leakage through the canvas andseams the first few times it rains.
The outer and inner trailer tent is made of cotton. Cotton is anatural fibre and may contain some imperfections. Theseshould not be mistaken for faults and will not affect theperformance of your trailer tent.
Before pitching your trailer tent it is essential that you readthe following:
Try to choose a site that is relatively flat. Avoid sites wherethe land may flood or that water will run down. DO NOT campdirectly under trees but a hedge or wall may provide shelteragainst wind. AVOID areas with heavy pollution and where cropspraying may be in progress.1. On the chosen site it will be necessary to make the trailer
as level as possible and to take the weight of the trailer offthe wheels to provide a stable cabin.
2. Using the jockey wheel adjust the height of the trailer sothat the front end is about 5 cm lower than level. Drop therear legs of the trailer onto the supplied jack pads andtighten locking screws.
3. Using the jockey wheel, raise the front of the trailer untilthe unit is level. Drop front legs of the trailer onto jackpads and tighten. Lower jockey wheel slightly to allow thetrailers weight to be borne by the legs.
4. Unclip and remove the cover.5. Disconnect 7 pin plug under the trailer. Release kitchen
legs until they are close to but not touching the ground.Release side catches and lift off kitchen unit (this willrequire at least two persons). Loosen the locking screws forthe kitchen support bars and push support bars back intotrailer body. Adjust the kitchen legs to a suitable heightand ensure that the locking screws are secure. If notrequired the kitchen can be stored under a trailer bedboard.
CHOOSING A SITE
PITCHING THE CABIN
COTTON
WEATHERING
SUITABILITY
INSURANCE
IMPORTANT- CHECK YOUR EQUIPMENT
Thank you for purchasing the Holiday Trailer Tent from SunnCamp.
Before erecting this tent, carefully read and understand these instructions. If there is anything you do notunderstand, contact your retailer for advice.
By following the instructions on erecting, dismantling, packing and storing the tent you will enjoy manyyears of trouble free camping.
HOLIDAY 550 S & 550 SE TRAILER TENT
1. Peg the trailer tent in the following sequence ensuring that the awning groundsheet and canvas are both securely pegged:a) Close all doors and other zipsb) First, peg one rear corner. Peg in line with the seaminserting the peg at an angle of 45°.c) Go to other rear corner and stretch the rear of the trailertent. The canvas will become taut without any creases.Once again, peg in line with the seam as before.d) Go to the front corners and repeat this procedure butthis time pulling the front leg forward and out with thecanvas, making sure that there are as few creases aspossible in front and side of the trailer tent canvas.ANY DOORS OR EXTERIOR ZIPS MUST BE CLOSED TO THE BOTTOM TO SUCCESSFULLY PEG YOUR TRAILER TENT.e) Working from the rear centre pegging points, continueto peg your trailer tent. The canvas should always betaut with no creases and the pegs should all be in linewith each other. It is not necessary to pull the canvastoo far out - a straight line is preferable from corner tocorner. Cross peg all doorways to avoid excess tensionon zips and to prevent them from working their wayopen.f) When you are finished, the trailer tent canvas should betaut on the frame with no “flapping canvas”. Each sideshould be pegged neatly and in as straight a line aspossible. Where possible, pegs should be in line withthe seam.PLEASE TAKE EXTREME CARE WHEN PITCHING YOUR TRAILER TENT IN WINDY CONDITIONS AND ENSURE THAT YOU HAVE ADEQUATE HELP
1. Zip the awning canvas onto cabin using the two heavy duty zips and ensuring the zip covers are in place. Fold the awning canvas over the top of the cabin to expose the cabin’s front wall.2. Lay the PVC groundsheet out in place in front of the cabin with the velcro tabs securing them together. Slot together two of the large hooped poles and the two smaller hoop poles (ensuring each has the short adjustable poles with flat feet fitted either end) as well as the curved cross bar. Lay these in place on the groundsheet.3. Pull the canvas forward off the cabin and onto the groundsheet, secure the canvas and groundsheet together with the heavy duty zips.4. Open the front doors of the awning canvas and lift the front hooped pole into position and zip the internal sleeving around the pole5. Enter the awning and repeat with the remaining poles and finally fit the remaining two hooped poles with spiked feet to the outside porch and if required the sun canopy (Ensuring you use the hooped pole with the small holes to fit the canvas hooks to).
It will be necessary at first use to fit the inner tents. This isa simple procedure and involves inserting the mattress into the base of the inner tent and clipping the top of the inner to the cabin frame. The seat cushions also fit within the inner tent to enlarge the bed. Once fitted the inner tents need only be unclipped from the frame before folding. Then, along with the mattresses are secured when folding by the retaining straps. DO NOT PUT TOO MUCH STRESS ONTO THE INNER TENT SUSPENSION POINTS.
The trailer tent should be guyed using the guying points supplied on the trailer tent. Please note that guying is only reliable if the correct tent peg is used and the peg is inserted correctly (see following section).
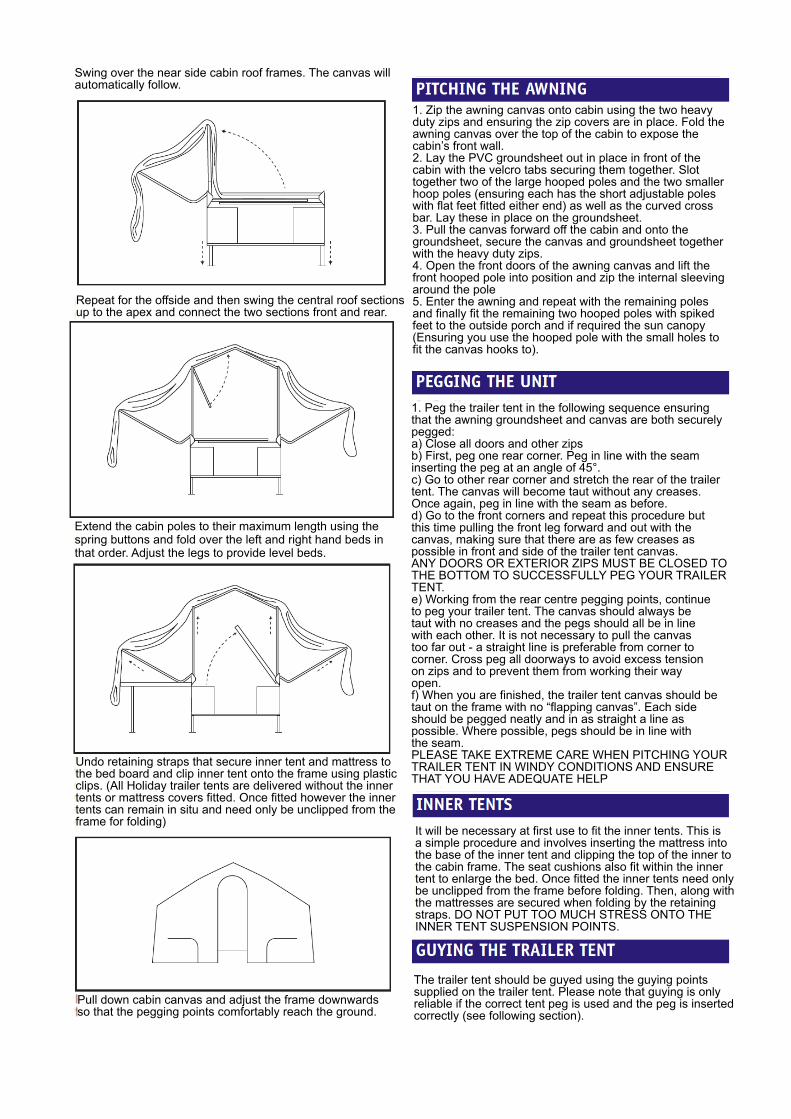
Pull down cabin canvas and adjust the frame downwards so that the pegging points comfortably reach the ground.
Undo retaining straps that secure inner tent and mattress tothe bed board and clip inner tent onto the frame using plasticclips. (All Holiday trailer tents are delivered without the innertents or mattress covers fitted. Once fitted however the innertents can remain in situ and need only be unclipped from theframe for folding)
Extend the cabin poles to their maximum length using thespring buttons and fold over the left and right hand beds inthat order. Adjust the legs to provide level beds.
Repeat for the offside and then swing the central roof sectionsup to the apex and connect the two sections front and rear.
Swing over the near side cabin roof frames. The canvas will automatically follow.

General purpose pegs are supplied with this trailer tent and aresuitable in many instances. There are many types of pegsavailable and it is up to you to choose the correct peg for thejob. Your sunncamp dealer will be able to give you advice.
The mudwall is located on the inside of the trailer tent awningand a groundsheet can be laid on top of it in the living area.
These should be clipped on the curtain track and retained bythe curtain tape. Pack curtains separately if they are wet oreven slightly damp to avoid any possibility of colour transfer.
If possible, this should be done when the trailer tent iscompletely dry. Reverse the erection procedure rememberingto unclip the inner tents before folding. Take care to fold bedsand cabin frame in the correct order - failure to do this willresult in damage.PLEASE TAKE EXTREME CARE WHEN TAKING DOWN YOUR TRAILER TENT IN WINDY CONDITIONS. DO NOT TRY TO TAKE YOUR TRAILER TENT DOWN ON YOUR OWN - GET SOMEBODY TO HELP YOU.
FIRE PRECAUTIONS - REMEMBER, YOUR TRAILER TENT CANBURN. CAMP SAFETY - FOLLOW THESE COMMON SENSE RULES• When siting, ensure a minimum distance of 6 metres isbetween trailer tents• Do not place cooking, heating or lighting appliances nearthe sides or the roof• Always observe the safety instructions for the appliances• Keep exits clear• Make sure that you learn the fire arrangements on the site• Never allow children to play near lighted appliancesTRAILERThe sunncamp trailer is designed to be as maintenance free as possible. The chassis and trailer frame are galvanised toprovide superb corrosion resistance. It is however quite normal for the finish to dull - this will not affect the performance or durability of the trailer.SERVICINGThe following service procedures should be carried out at either the recommend mileage interval or according to time(whichever occurs first)Pre DeliveryCheck all wheel nutsCheck ball hitch connectionCheck road lightingCheck brake operation (if fitted)20 MilesCheck all wheel nutsEvery 500 Miles or 3 Months and Before Each JourneyCheck all wheel nutsCheck condition of tyresLubricate jockey wheelLubricate tow hitchCheck condition of safety cableCheck road light operationTYRES/WHEELSThis trailer is fitted with 145 x 10 wheels and tyres. It isessential for correct operation that the tyre pressures arechecked when cold. Tyres pressures will be found on the trailer chassis plate. We recommend that the spare wheel is carried at all times.LOADINGCheck the chassis plate for the actual weights for your trailer.Do not exceed the MGW and ensure that the load is equallydistributed on the trailer. This trailer is designed to be noseheavy so improving the towing characteristics. Check the nose weight against the recommended nose weight for your towing vehicle. Ensure that the trailer is not loaded too heavily at the rear.STORAGEDuring long periods of inactivity and during the winter months, it is essential that all canvas parts, mattresses, curtains, etc. are removed from the trailer and stored in a warm dry environment. Failure to do this may result in mildew damage to these parts. If these parts are left attached to the trailer we recommend frequent checks and airing of the unit to prevent damage from mildew. The cabin canvas is easily removed from the cabin frame.If possible garage your trailer body whenever possible. Ifstored outside protect the unit, especially the transit cover.Beware of condensation forming either under any protectivecover or under the transit cover itself.If possible, raise the tyres off the ground to prevent damage to tyres but do not support the weight on the corner legs. Protect the 7 pin plugs and socket with a liberal coating of petroleum jelly.CLEANINGCabin Canvas/Awning Canvas:Clean only with pure water and a soft cloth or brush
Inner Tents/covers/curtains/linings:Dry clean only
Trailer:Non abrasive automotive cleaners
Stainless steel kitchen unit:Non abrasive household cleaner
MUDWALL
CANVASThis should always be packed away and stored completely dry. If you have to take your trailer tent down wet then, at the first possible opportunity, PITCH THE TRAILER TENT TO DRY IT. DO NOT LEAVE IT PACKED WET. Damp storage will cause mildew and may result in colour run. IMPORTANT: If your trailer tent is wet do not pack curtains with canvas as this may result in colour transfer.NEVER clean your trailer tent with anything other than purewater and a soft brush. NEVER USE detergents, petrol, turps etc.It may be necessary to re-proof your canvas at sometime. The time will vary according to the amount of use and theprevailing conditions. There are many good waterproofingagents available - see your sunncamp dealer for details. NEVER use aerosols or other chemicals close to your trailer tent canvas.
FRAMETake care not to put excess strain on your frame. Whenerecting or dismantling, make sure that you do not over extend the spring links. Should this happen, your sunncamp dealer will be able to supply replacements. Should your frame require any lubrication of moving parts we advise the use of a silicon spray, DO NOT USE ANY OIL BASED PRODUCT!
KITCHEN (SE Models only)Ensure that the legs of the kitchen are securely tightened. The front panel of the kitchen should be removed by lifting upwards with the kitchen lid/s open. The Holiday has a split kitchen top. Only use the gas cooker with both lids open.
GAS CONNECTION (SE Models only)The double burner & grill are designed to operate from eitherbutane or propane using regulators of the following operatingpressures:Butane - 28 mbarPropane - 37 mbarThe kitchen has a push on gas hose fitting and the gas hose(not supplied) should be fastened using a suitable hose clip.Connect and operate the regulator according to themanufacturer’s instructions.