Embed Size (px)
Citation preview

HOL7552
Migration to the Oracle Open Cloud Infrastructure
Simon COTER
Director of Product Management – Oracle VM & VirtualBox

2
CONTENTS
Introduction .............................................................................................................................................. 4
Preparation (done before LAB) ................................................................................................................ 5
Summary of the Lab steps ....................................................................................................................... 6
Global picture ........................................................................................................................................... 6
Detailed instructions for the Lab .............................................................................................................. 7
Start the two servers .................................................................................................................................. 7
Connect to the Oracle VM Manager 3.4.4 console.................................................................................... 8
Verify that the Oracle VM environment correctly started ........................................................................... 9
Create a Virtual Machine from the Appliance .......................................................................................... 12
Verify and start the Oracle VM virtual machine ....................................................................................... 13
Upgrade virtual machine OS, remove VMware tools and switch to Oracle Linux ................................... 17
Keep in sync source (VMware) and target (Oracle VM) virtual machines............................................... 20
Summary ................................................................................................................................................ 25
Appendix A: preparing the environment to run the lab from your home or office .................................. 26
Find a Suitable Machine .......................................................................................................................... 26
Download required binaries ..................................................................................................................... 27
Install Oracle VM VirtualBox .................................................................................................................... 28
Install Oracle VM Server .......................................................................................................................... 29
Export the vmware guest in ova format ................................................................................................... 30
Install Oracle VM Manager ...................................................................................................................... 31
CONFIGURE the ORACLE VM ENVIRONMENT ................................................................................... 34
Appendix B: References ........................................................................................................................ 39
About the Author .................................................................................................................................... 39
Acknowledgments .................................................................................................................................. 39
1 References: .................................................................................................................................... 40
1.1 Oracle VM 3.4 Documentation........................................................................................................ 40
1.2 Oracle VM 3.4 Windows PV Driver ................................................................................................. 40
1.3 This document ................................................................................................................................ 40

3
Last update: September 18th, 2017 Author : Simon COTER Special thanks to : Christophe Pauliat, Simon Hayler

4
INTRODUCTION
This document details all actions that were done during Oracle Open World 2017 session Hands-On Lab 7552. This hands-on lab takes you through the best practices for migrating an existing Oracle Database workload from VMware to Oracle VM. It also walks you through how to migrate to Oracle Linux a Red Hat Enterprise Linux 6 guest exported from VMware by downloading Oracle’s Unbreakable Enterprise Kernel from Oracle’s public yum server. Oracle VM is a free-license product, and it’s the only virtualization x86 software solution certified for all Oracle products. This lab showcases the Open Virtualization Assembly(OVA) format, a free-of-charge service supplied by Oracle’s public yum server (http://public-yum.oracle.com)with which Oracle Linux and Oracle VM can be maintained without a subscription. By performing the steps in this lab, you will obtain a fully supported and certified configuration for Oracle Database (whereas on VMware, Oracle Database is only supported, not certified). During this lab at Oracle Open World, we used a demo environment built on a single x86 laptop (using Oracle VM VirtualBox), which contained three virtual servers and one Oracle VM Server guest: - Oracle VM Server - Oracle VM Manager - Oracle VM guest imported as an assembly
Note: You can also run this lab at your home or office on anx86 server, desktop, or laptop.

5
PREPARATION (DONE BEFORE LAB) To save time and fit in the one-hour slot of Oracle Open World labs, the following actions were performed before the actual lab.
o Install Oracle Linux 7.4 (64 bits) on all the laptops. o Install Oracle VM VirtualBox 5.1.28 plus extensions on all the laptops. o Disable the Oracle VM VirtualBox DHCP server (the default is for it to be enabled). o Install and configure an Oracle VM Manager 3.4.4 server in an Oracle VM VirtualBox virtual
machine. o Install and configure an Oracle VM Server 3.4.4 server in an Oracle VM VirtualBox virtual
machine. o Configure the network and VNICs (Virtual Network Interface Cards). o Create an Oracle VM repository based on the assembly size. o Export from a third-party virtualization solution (such as VMware) a guest in OVA format (that is,
as an assembly). o Configure the default HTTP server on Oracle VM Manager (port 80). o Prepare an Oracle yum server based on http://public-yum.oracle.com.
Note: To run this lab from your home or office, perform the tasks in Appendix A first to prepare your environment before you run the lab.

6
SUMMARY OF THE LAB STEPS In this lab, you will execute the following steps in Oracle Enterprise Manager Cloud Control 12c:
1) Start the two servers (Oracle VM Server and Oracle VM Manager). 2) Connect to Oracle VM Manager and become familiar with the product. 3) Verify that the Oracle VM environment started correctly. 4) Import an assembly that has Oracle Database on top and was exported from VMware. 5) Create an Oracle VM Template based on the VMware assembly. 6) Edit the Oracle VM Template that was created. 7) Create a guest based on the Oracle VM Template that was created. 8) Verify and then start the Oracle VM guest that was created. 9) Manually modify the guest configuration and remove VMware tools. 10) Switch from the Red Hat kernel to Oracle’s Unbreakable Enterprise Kernel for free. 11) Keep in sync source VM and target VM using utilities like “rsync”.
GLOBAL PICTURE Figure 1 shows all the components (Oracle VM VirtualBox and Oracle VM virtual machines) with their names and configuration (memory, IP addresses, and so on).
Figure 1.Diagram of all the components and their configuration.

7
DETAILED INSTRUCTIONS FOR THE LAB
START THE THREE SERVERS As previously explained, we will use Oracle VM VirtualBox to host the two servers (Oracle VM Server and Oracle VM Manager) on a single x86 physical machine.
a) If it has not been started yet, start the Oracle VM VirtualBox console by clicking the icon.
In the console, you should see the two VMs we will use in this lab.
Figure 2. Oracle VM VirtualBox console.
b) Select the VM called hol7552_ovm_mgr and click the icon to start it.
c) Select the VM called hol7552_ovm_srv and click the icon to start it.
d) Select the VM called hol7552_vm_demo and click the icon to start it. e) Wait for the three VMs to be ready:
o Wait for the desktop started prompt on the hol7552_ovm_mgr VM console.
o When this prompt is displayed, all VMs are ready (since Oracle VM Manager takes the longest to start).

8
CONNECT TO THE ORACLE VM MANAGER 3.4.4 CONSOLE
• On your x86 physical machine, open a Firefox browser and connect to the Oracle VM Manager 3.4.4 console using URL https://192.168.56.100:7002/ovm/console.
Note: Firefox might raise a security warning (for example, This Connection is Untrusted)
since the SSL certificates are self-signed. If so, ignore the warning (expand I understand the Risks, then click Add Exception, and then click Confirm Security Exception).
You should get the login window shown in Figure 3:
Figure 3. Login window.
• Log in using the following credentials: o Login: admin (default Oracle VM Manager administrator) o Password: Welcome1 (W is uppercase)

9
VERIFY THAT THE ORACLE VM ENVIRONMENT
CORRECTLY STARTED 1. Once you are logged in to the Oracle VM Manager console, go to the Servers and VMs tab and
verify the status of the Oracle VM pool and server; everything should look like Figure 4.
Figure 4. Status of the Oracle VM pool and server in the Servers and VMs tab.
2. Click the Networking tab and verify that the existing network is usable by guests. You should see a checkmark under Virtual Machines, as shown in Figure 5.
Figure 5. Networking tab.
4. Click Servers and VMs, expand the pool named ovm-pool.oow.local, click the server named ovm-srv.oow.local, and select the Physical Disks perspective in the right pane.
Figure 6. Displaying the physical disks.
5. Select the physical disk named SATA_VBOX_HARDDISK and click Refresh Physical Disk.

10
Figure 7. Selecting a physical disk.
6. Confirm the refresh of the physical disk by clicking OK. 7. Click the Repositories tab and select Show All repositories.
Figure 8. Showing all repositories.
8. Expand Repositories, click the repository named repo01, and click the Present/Unpresent icon.
Figure 9. Selecting the Present/Unpresent.
11. In the new window named “Present this repository to server(s),” move to the right the server-pool named ovm-pool.oow.local and click OK.

11
Figure 10. Presenting the repository to the server pool.
12. Select the repo01 repository and click the Refresh Selected Repository icon.
Figure 11. Refreshing the repository.
13. Click the Virtual Appliances folder, select the appliance named repo01_<code>, and click the Refresh selected VM Assembly icon.
Figure 12. Refreshing the Virtual appliance.

12
CREATE A VIRTUAL MACHINE FROM THE APPLIANCE
This section will show how to create a guest from a virtual appliance (in our case, the virtual appliance had been already imported).
1. Click the Repository tab, expand repository repo01, select “Virtual Appliance” folder, select
appliance named repo01_<code> and click the Create New Virtual Machine button ( ).
Figure 13. Creating virtual machine from appliance.
2. In the Create Virtual Machine window, choose the server pool “oow-pool.oow.local” and click
“OK” to confirm the virtual machine creation.
Figure 14. Specifying the Oracle VM Pool.

13
3. Verify that the creation job completed successfully.
Figure 15. Verifying that the job completed successfully.
VERIFY AND START THE ORACLE VM VIRTUAL MACHINE
Our guest is ready but, before we start it, we need to verify that everything was accomplished. This section will show how to verify a virtual machine and start it.
1. Click the Servers and VMs tab, expand Server Pools, and select the server-pool named ovm-pool.oow.local with the perspective (on the right) “Virtual Machine”.
Figure 16. Get virtual machine created.
2. Select the virtual machine “repo01_xxxxx” and move it to the Oracle VM Server named ovm-
srv.oow.local; to complete this step, just select the “Migrate or Move…” button as in the figure below.
Figure 17. Move the virtual machine on server.

14
3. Select the guest named repo01_xxxxxx and click the Edit icon( ).
Figure 18. Edit virtual machine.
4. In the “Edit Virtual Machine” window, verify the following details:
Configuration tab: Name: vmdb01 Operating System: Red Hat Enterprise Linux 6 Domain Type: XEN PVM Max. Memory(MB): 2048 Memory(MB): 2048 Max. Processors: 1 Processors: 1 Priority: 50 Processor Cap %: 100
Figure 19. Verifying the virtual machine configuration.

15
Networks tab: Network: 192.168.56.0
Figure 20. Verifying the virtual machine network configuration.
Diskstab: For Slot 0, the Disk Type is Virtual Disk (no change). For Slot 1, the Disk Type is Empty (changed from CD/DVD to Empty).
Figure 21. Verifying the virtual machine disk configuration.
Click OK.

16
5. Start the virtual machine vmdb01 by clicking the icon.
Figure 22. Starting the virtual machine.
6. Verify that the job completed successfully; you can evaluate the result in the Job Summary
section at the bottom of the window and also in the Status column.
Figure 23. Getting details for the job.
So now you have the same virtual machine running on VirtualBox (hol7552_vm_demo) and on Oracle VM (vmdb01); obviously these two virtual machines have different IP addresses:
• hol7552_vm_demo: 192.168.56.200
• vmdb01: 192.168.56.111 So, while the virtual machine running on VirtualBox emulate the source (VMware vSphere), the virtual machine running on Oracle VM, created by the OVA imported from VMware, emulate the target. Obviously the creation of the virtual machine on Oracle VM is managed while the database service continues to run on VMware (emulated by VirtualBox here).

17
UPGRADE VIRTUAL MACHINE OS, REMOVE VMWARE
TOOLS AND SWITCH TO ORACLE LINUX The virtual machine named “vmdb01”, our target for the migration, is based on an old Red Hat 6.4 release and, as best practices suggests, it’s always important to keep the OS updated to get all the security and bug fixes available. At the same time, while migrating from VMware to Oracle VM, it’s also possible to switch from Red Hat Linux to Oracle Linux. This section will show how-to migrate and, at the same time, update your virtual machine to the actual latest Oracle Linux 6.9 with kernel UEK4 (Unbreakable Kernel).
1. Open a terminal on your host environment and connect, by “ssh” to the “vmdb01” virtual machine.
• Access by user “root” with password “ovsroot” and IP address “192.168.56.111”. # ssh [email protected]
Figure 24. Connecting to the virtual machine “vmdb01”.
2. Uninstall the VMware-tools by executing following command
• # vmware-uninstall-tools.pl
Figure 25. Uninstalling the VMware tools.
3. Under the path “/etc/yum.repos.d” execute following operations to configure “yum” pointing to
Oracle Linux repository.
• # cd /etc/yum.repos.d
• # mkdir old
• # mv *.repo old/
4. Create new “yum” repo configuration file (ol69.repo) for Oracle Linux 6.9 using following content:
18
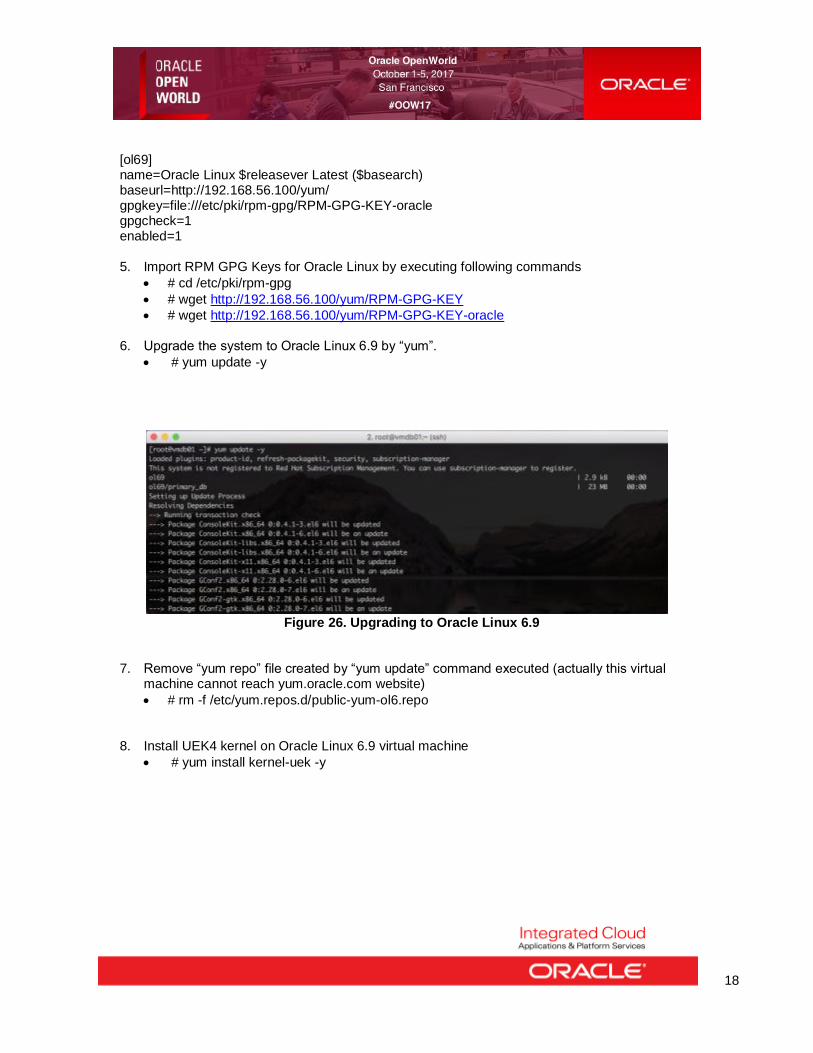
[ol69] name=Oracle Linux $releasever Latest ($basearch) baseurl=http://192.168.56.100/yum/ gpgkey=file:///etc/pki/rpm-gpg/RPM-GPG-KEY-oracle gpgcheck=1 enabled=1
5. Import RPM GPG Keys for Oracle Linux by executing following commands
• # cd /etc/pki/rpm-gpg
• # wget http://192.168.56.100/yum/RPM-GPG-KEY
• # wget http://192.168.56.100/yum/RPM-GPG-KEY-oracle
6. Upgrade the system to Oracle Linux 6.9 by “yum”.
• # yum update -y
Figure 26. Upgrading to Oracle Linux 6.9
7. Remove “yum repo” file created by “yum update” command executed (actually this virtual machine cannot reach yum.oracle.com website)
• # rm -f /etc/yum.repos.d/public-yum-ol6.repo
8. Install UEK4 kernel on Oracle Linux 6.9 virtual machine
• # yum install kernel-uek -y

19
Figure 27. Installing UEK4 kernel on Oracle Linux 6
9. Verify the UEK4 kernel is the default one into grub configuration; following command will change
a possible wrong value:
• # sed -i "s/default=1/default=0/" /boot/grub/grub.conf
10. Remove “kdump” option for this virtual machine (due to a known bug this cannot be enabled on a virtual machine running in paravirtualized mode).
• # sed -i "s/crashkernel=auto//g" /boot/grub/grub.conf
11. Reboot your virtual machine by using Oracle VM Manager web interface (confirm with OK).
Figure 28. Restart virtual machine “vmdb01”.
12. Once the virtual machine has completed the reboot, verify the running kernel and Oracle Linux release.
• # uname –a
• # cat /etc/oracle-release
20
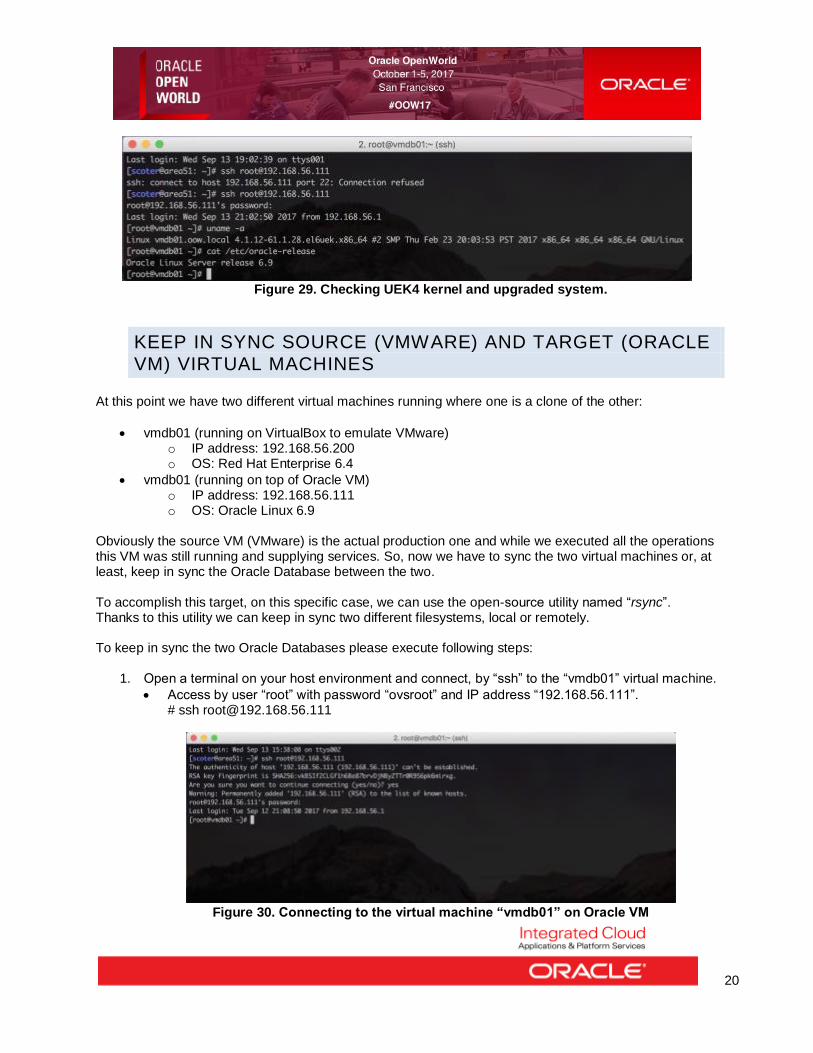
Figure 29. Checking UEK4 kernel and upgraded system.
KEEP IN SYNC SOURCE (VMWARE) AND TARGET (ORACLE
VM) VIRTUAL MACHINES At this point we have two different virtual machines running where one is a clone of the other:
• vmdb01 (running on VirtualBox to emulate VMware) o IP address: 192.168.56.200 o OS: Red Hat Enterprise 6.4
• vmdb01 (running on top of Oracle VM) o IP address: 192.168.56.111 o OS: Oracle Linux 6.9
Obviously the source VM (VMware) is the actual production one and while we executed all the operations this VM was still running and supplying services. So, now we have to sync the two virtual machines or, at least, keep in sync the Oracle Database between the two. To accomplish this target, on this specific case, we can use the open-source utility named “rsync”. Thanks to this utility we can keep in sync two different filesystems, local or remotely. To keep in sync the two Oracle Databases please execute following steps:
1. Open a terminal on your host environment and connect, by “ssh” to the “vmdb01” virtual machine.
• Access by user “root” with password “ovsroot” and IP address “192.168.56.111”. # ssh [email protected]
Figure 30. Connecting to the virtual machine “vmdb01” on Oracle VM

21
2. From the terminal, connected to the target “vmdb01” running on Oracle VM, stop the Oracle Database running.
• # service oraOOWDB stop
Figure 31. Stopping Oracle Database on vmdb01 running on Oracle VM.
3. From the terminal, connected to the target “vmdb01” running on Oracle VM, execute the first
synchronization process from “vmdb01” still running.
• # rsync -avz -e ssh [email protected]:/u01/ /u01/
Figure 32. Syncing process from source (VMware) - first
4. Open one new terminal and connect to the source-vm (vmdb01 running on source).
• Access by user “root” with password “ovsroot” and IP address “192.168.56.200”. # ssh [email protected]
Figure 33. Connecting to the source “vmdb01” (VMware)

22
5. From the terminal, connected to the source “vmdb01” simulate some database operations.
• Copy and paste on the terminal following commands
su - oracl e
sql pl us / as sysdba << EOF
creat e tabl espace OOWHOL7552 dat afile '/u01/ oow01. dbf' size 512m;
creat e user oow7552 i dentified by oow7552 default tabl espace OOWHOL7552;
grant connect, resource to oow7552;
conn oow7552/ oow7552
creat e tabl e TEST (na me varchar2(4000));
i nsert i nt o TEST val ues (' OOW2017 -- Best ever' );
commit;
quit
EOF
exit
Figure 34. Simulating database activity on source (VMware)

23
6. From the terminal, connected to the target “vmdb01” running on Oracle VM (so IP address 192.168.56.111), execute the second synchronization process from “vmdb01” still running on VMware.
• # rsync -avz -e ssh [email protected]:/u01/ /u01/
Figure 35. Syncing process from source (VMware) - second
As you can see from the Figure 32, the database file created on source (oow01.dbf) is also in place on our target environment running on Oracle VM Server.
7. From the terminal, connected to the source “vmdb01” (so IP address 192.168.56.200), stop the
database service; this step simulate the “switchover” process from VMware to Oracle VM.
• # service oraOOWDB stop
Figure 36. Stopping Oracle Database on vmdb01 running on VMware.
8. From the terminal, connected to the target “vmdb01” running on Oracle VM (so IP address 192.168.56.111), execute the third and final synchronization process from “vmdb01” still running on VMware but with the Oracle Database service stopped.
• # rsync -avz -e ssh [email protected]:/u01/ /u01/

24
Figure 37. Syncing process from source (VMware) – third and final
9. From the terminal, connected to the target “vmdb01” running on Oracle VM (so IP address
192.168.56.111), start the Oracle Database service.
• # service oraOOWDB start
Figure 38. Starting Oracle Database on vmdb01 running on Oracle VM.
10. From the terminal, connected to the “vmdb01” running on Oracle VM (192.168.56.111) verify that
you have latest data into the Oracle Database -- added on step (5).
• Copy and paste on the terminal following commands
su - oracl e
sql pl us / as sysdba << EOF
sel ect * from oow7552.t est;
quit
EOF
exit

25
Figure 39. Checking target database is synchronized.
SUMMARY Congratulations! You have successfully completed this Hands on Lab. You can now master your knowledge by following the white-paper dedicated to this kind of activities: Oracle VM 3: Migrate Virtual Machines from VMware to Oracle VM Note: other solutions are also available. Cloudbase, an Oracle partner for Oracle Linux and Oracle VM, already created a solution, named Coriolis, able to automate all the steps required to migrate from VMware to Oracle VM and/or Oracle Cloud.

26
APPENDIX A: PREPARING THE ENVIRONMENT TO RUN THE LAB FROM YOUR HOME OR OFFICE
FIND A SUITABLE MACHINE This appendix explains how to prepare the environment if you want to run this lab from your home or office. The first step is to find an x86 machine (server, desktop, or laptop) that has the required resources:
• At least 16 GB of RAM
• An x86 64-bit CPU (Intel or AMD) with at least four CPU threads and with virtualization extensions (Intel VT or AMD-V)—only Parallel Virtual Machine (PVM) guests are allowed on top of this architecture
• An OS supported by Oracle VM VirtualBox (Microsoft Windows, various Linux distributions, Oracle Solaris 10 or 11, or Apple Mac OSX)
• 100 GB of disk space Then you download the required binaries, install Oracle VM VirtualBox on the machine, and install the following two servers (two Oracle VM VirtualBox virtual machines, in fact), as described in the next sections:
o Oracle VM Server o Oracle VM Manager

27
DOWNLOAD REQUIRED BINARIES This section lists the required binaries and explains how to download them. 1. Download the files for your x86 machine:
Oracle VM VirtualBox binaries (version 5.1.28 during writing of this document) Download the version for your OS from https://www.virtualbox.org/wiki/Downloads.
Oracle VM VirtualBox extension Pack 5.1.28 Download this from https://www.virtualbox.org/wiki/Downloads (the same file is used for all operating systems).
2. Download the file for Oracle VM Server:
VirtualBox template for Oracle VM Server 3.4.4 Download this from http://www.oracle.com/technetwork/server-storage/vm/template-1482544.html
Filename: OracleVMServer.3.4.4-b525.ova (size 1.3 GB)
3. Download the file for Oracle VM Manager:
VirtualBox template for Oracle VM Manager 3.4.4 Download this from http://www.oracle.com/technetwork/server-storage/vm/template-1482544.html
Filename: Oracle VMManager.3.4.4-b524.ova (size 10.5 GB)

28
INSTALL ORACLE VM VIRTUALBOX
1. On your chosen x86 machine,install the JRE you downloaded.
2. Install the Oracle VM VirtualBox 5.1.x binaries on your x86 machine.
3. Start the Oracle VM VirtualBox console.
4. If it has not already been created, go to File-> Preferences-> Network and create a host-only network in Oracle VM VirtualBox using the default IP information (IPv4 address 192.168.56.1 and netmask 255.255.255.0 for your x86 machine). Also disable the default Oracle VM VirtualBox DHCP server. After these changes, reboot your x86 machine.
5. Go to File-> Preferences-> General-> Default Machine Folder and choose the folder you want to use to store the virtual machines files.
6. Go to File-> Preferences-> Extensions and install the Oracle VM VirtualBox extension Pack you downloaded.

29
INSTALL ORACLE VM SERVER
1. In the Oracle VM VirtualBox console, import the VM from the Oracle VM Server template:
- Select File-> Import Appliance. - Select the OracleVMServer.3.4.4-b525.ova file you downloaded.
- Click Next. - Change the name of Virtual System 1 from Oracle VM Server 3.4.4-b525 to
hol7552_ovm_srv.
- Click Import.
2. Modify the settings of the virtual machine hol7552_ovm_srv:
- Set Amount of Memory to 6144MB(System). - Configure the network by going to Network and clicking the Adapter 1 tab. From the
Attached to list, select Host-only Adapter.
- Configure storage by removing the second 20GB disk and adding a new 60 GB disk (or a bigger disk, based on the size of the guest you will export from VMware).
3. Start the virtual machine hol7552_ovm_srv.
4. Configure the virtual machine (in the VM console):
a. Configure the network: ▪ IP address: 192.168.56.101 ▪ Netmask: 255.255.255.0 ▪ Gateway: 192.168.56.1 ▪ DNS server: 192.168.56.1
(we will not use DNS, but we have to give an IP address here) ▪ Hostname: ovm-srv.oow.local
b. Wait for the boot to complete.
5. If your x86 machine runs a UNIX or Linux OS, open a terminal window and connect to the VM using ssh. If your machine runs Microsoft Windows, use PuTTY instead.
Note: The password is ovsroot.
$ ssh [email protected]
6. Add the following lines to the /etc/hosts file:
192.168.56.100 ovm-mgr.oow.local ovm-mgr
192.168.56.101 ovm-srv.oow.local ovm-srv

30
EXPORT THE VMWARE GUEST IN OVA FORMAT
In this lab, we create more than one guest and an Oracle VM Template starting from a Red Hat Enterprise Linux 6guest exported from VMware. The guest exported for this lab during Oracle Open World was as follows:
• OS: Red Hat Enterprise Linux 6.4 x86-64
• vCPUs: Two
• vRAM: 8192 MB
• Disks: One disk of 30 GB
• Applications: Oracle Database Enterprise Edition 11.2.0.3 There is more than one method for exporting a guest into OVA format. The method used in this lab is text mode using a tool named OVF Tool. To export your own Red Hat Linux guest using OVF Tool, use syntax such as the following: # ovftool /app/vmware/RH_Linux_6_x86-64/rhel_6_64-bit.vmx /app/rhel-64-oracle-rdbms.ova
You can put the .ova file on the Oracle VM Manager server at the following path:
/var/www/html/ovas
For example:
scp /app/rhel-64-oracle-rdbms.ova 192.168.56.100:/var/www/html/ovas
Alternatively, you can put the .ova file on your own web server; be sure to note the path where you put
the file, because you will need this information during the lab. Export methods using other VMware products are reported at these public links:
• vSphere 4
• vSphere 5
• PowerCLITool Note: If you are instead going to export a Microsoft Windows guest from VMware,you could encounter a known problem: the BSOD (blue screen of death) on the first run of your guest on Oracle VM.To sort out this problem, you have two options you can follow before exporting the guest:
• Connect to your Windows guest and extract driver.cab files already present in the Microsoft
Windows distribution.The files are downloadable here.
31
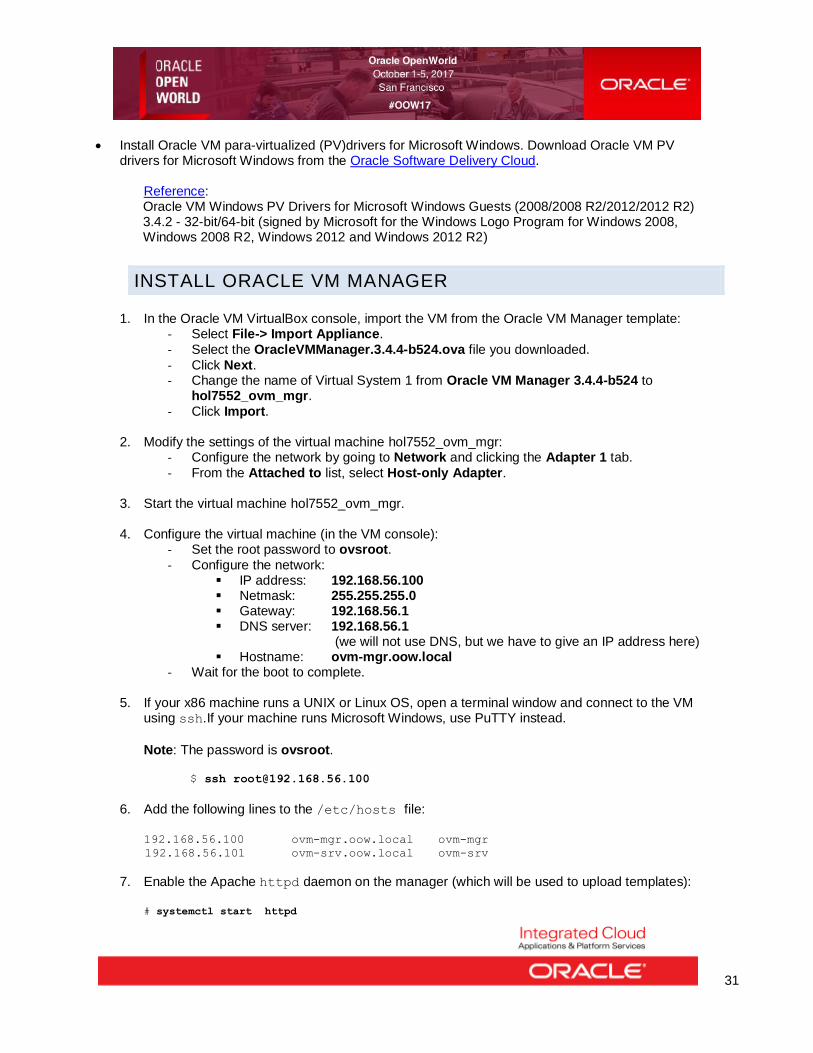
• Install Oracle VM para-virtualized (PV)drivers for Microsoft Windows. Download Oracle VM PV drivers for Microsoft Windows from the Oracle Software Delivery Cloud.
Reference: Oracle VM Windows PV Drivers for Microsoft Windows Guests (2008/2008 R2/2012/2012 R2) 3.4.2 - 32-bit/64-bit (signed by Microsoft for the Windows Logo Program for Windows 2008, Windows 2008 R2, Windows 2012 and Windows 2012 R2)
INSTALL ORACLE VM MANAGER
1. In the Oracle VM VirtualBox console, import the VM from the Oracle VM Manager template: - Select File-> Import Appliance.
- Select the OracleVMManager.3.4.4-b524.ova file you downloaded.
- Click Next. - Change the name of Virtual System 1 from Oracle VM Manager 3.4.4-b524 to
hol7552_ovm_mgr.
- Click Import.
2. Modify the settings of the virtual machine hol7552_ovm_mgr: - Configure the network by going to Network and clicking the Adapter 1 tab.
- From the Attached to list, select Host-only Adapter.
3. Start the virtual machine hol7552_ovm_mgr.
4. Configure the virtual machine (in the VM console): - Set the root password to ovsroot.
- Configure the network: ▪ IP address: 192.168.56.100 ▪ Netmask: 255.255.255.0 ▪ Gateway: 192.168.56.1 ▪ DNS server: 192.168.56.1
(we will not use DNS, but we have to give an IP address here) ▪ Hostname: ovm-mgr.oow.local
- Wait for the boot to complete.
5. If your x86 machine runs a UNIX or Linux OS, open a terminal window and connect to the VM using ssh.If your machine runs Microsoft Windows, use PuTTY instead.
Note: The password is ovsroot. $ ssh [email protected]
6. Add the following lines to the /etc/hosts file:
192.168.56.100 ovm-mgr.oow.local ovm-mgr
192.168.56.101 ovm-srv.oow.local ovm-srv
7. Enable the Apache httpd daemon on the manager (which will be used to upload templates):
# systemctl start httpd

32
# systemctl enable httpd
8. Configure directories that will support the httpd daemon used for .ova files and the yum
server. # mkdir –p /web/ovas
# mkdir –p /web/yum
# cd /var/www/html; ln –s /web/ovas .; ln –s /web/yum .
9. Copy the .ova file you exported from VMware to the new directory created in the previous step.
You should then obtain output similar to this if you list the contents of the directory: [root@ovm-mgr]# ls -l
-rwxr-xr-x 1 ovmovm 9900220416 Aug 19 13:02 rhel-64-oracle-rdbms.ova [root@ovm-mgr]# pwd
/web/ovas
10. Prepare a yum repository for Oracle Linux 6 based on http://public-yum.oracle.com. (The Oracle VM Manager guest will need internet access, so you have to temporarily modify your network connection.) a. Download the public yum repository file to install new packages: # cd /etc/yum.repos.d
# wget https://public-yum.oracle.com/public-yum-el5.repo
b. Install the tools needed to build your local yum repository: # yum install yum-utils createrepo
c. Download the public yum repository file for Oracle Linux 7 (the target release of our guest on top of Oracle VM in this lab) and remove the older repo files (which was used to install the packages above). # rm –f /etc/yum.repos.d/*
# cd /etc/yum.repos.d
# wget https://public-yum.oracle.com/public-yum-ol7.repo
d. Create the local repository on the Oracle VM Manager machine. Note: It might take many hours, depending on your internet connection, because it will download about 27GB; if you don’t have much time, see the alternative option below. # /usr/bin/reposync --repoid=ol6_latest --repoid=ol6_UEK_latest –repoid=ol6_addons -p
/web/yum # /usr/bin/createrepo /web/yum/ol6_latest/getPackage/
# /usr/bin/createrepo /web/yum/ol6_UEK_latest/getPackage/
# /usr/bin/createrepo /web/yum/ol6_addons/getPackage/
An alternative option is to directly use http://public-yum.oracle.com in this lab; to implement this alternative, you will need to have internet access and, at the same time, configure your Oracle VM Manager guest to reach external sites. e. Prepare the .repo fileto use on your future Oracle VM guest (with Oracle Linux 6 x86-64):
[local_ol7_latest]

33
name=Oracle Linux $releasever Latest ($basearch)
baseurl=http://192.168.56.100/yum/OracleLinux/OL7/latest/$basearch/
gpgkey=http://192.168.56.100/RPM-GPG-KEY-oracle
gpgcheck=0
enabled=1
[local_ol6_UEK_latest]
name=Latest Unbreakable Enterprise Kernel for Oracle Linux $releasever ($basearch)
baseurl=http://192.168.56.100/yum/OracleLinux/OL7/UEK/latest/$basearch/
gpgkey=http://192.168.56.100/RPM-GPG-KEY-oracle-ol7
gpgcheck=0
enabled=1
11. Install and implement a DHCP server on Oracle VM Manager; we need this function to supply IP
addresses on the guest that will be created on our Oracle VM Server: # wget http://public-yum.oracle.com/repo/OracleLinux/OL7/latest/x86_64/dhcp-3.0.5-
31.el5_8.1.x86_64.rpm
# chkconfigdhcpd on
# servicedhcpd start
Here is an example of a dhcpd.conf file you can implement (/etc/dhcpd.conf):
# DHCP Server Configuration file.
# see /usr/share/doc/dhcp*/dhcpd.conf.sample
#
ddns-update-style interim;
ignore client-updates;
subnet 192.168.56.0 netmask 255.255.255.0 {
option routers 192.168.56.1;
option subnet-mask 255.255.255.0;
option nis-domain "oow.local";
option domain-name "oow.local";
option domain-name-servers 192.168.56.1;
range dynamic-bootp 192.168.56.250 192.168.56.254;
default-lease-time 86400;
max-lease-time 86400;
}

34
CONFIGURE THE ORACLE VM ENVIRONMENT 1. Connect to the Oracle VM Manager web console:
a. On your x86 physical machine, open a Firefox browser and connect to the Oracle VM Manager console using URL https://192.168.56.100:7002/ovm/console.
b. Log in using user admin and password Welcome1.
You should now see the Oracle VM Manager console:
Figure 85. Oracle VM console.
2. Discover the Oracle VM Server:
a. Click the icon. b. Leave 8899 for the Oracle VM Agent port. c. Enter ovsroot for the Oracle VM Agent password. d. Enter 192.168.56.101 for the IP address. e. Click OK to launch the discovery. f. Wait a few seconds. You should now see the server, named ovm-srv.oow.local, under Unassigned Servers. g. Under Unassigned Servers, click the server to see server information (CPU, memory, and so on).

35
3. Modify the network configuration: Oracle VM has a number of network channels: Server Management, Live Migrate, Cluster Heartbeat, Virtual Machine, and Storage. The Server Management, Live Migrate, and Cluster Heartbeat roles are automatically assigned to the management network when you discover Oracle VM Server. For simplicity, we will use a single network for all roles by assigning the Virtual Machine and Storage roles to the default network.
a. Click the Networking tab.
b. Select network 192.168.56.0 and click the icon to edit its properties. c. In the network channels list, select the checkboxes Virtual Machine and Storage.
Figure 86. Assigning roles to the default network. d. Leave all other parameters as the default values by clicking Next three times. Then click Finish.

36
5. Create a server pool using the Oracle VM server:
Note: A server pool contains a group of Oracle VM servers, which as a group perform virtual machine management tasks, such as providing high availability (HA), implementing resource and power management policies, and providing access to networking, storage, and repositories. The virtual machines running on a server can be “live migrated” to another server in the same pool. Of course, you need to have a shared storage system (NFS, iSCSI, or FC) between all the servers of the pool. The pool is called clustered in this case. Here, for simplicity, we will create a non-clustered server pool with a single server and will use a local hard disk drive(HDD). (Actually, it is a file on the machine that is seen by Oracle VM VirtualBox as an HDD.)
a. In Oracle VM Manager, go back totheServers and VMstab.
b. Click the third icon from the left ( ) to create a new server pool:
Figure 88.Preparing to create a server pool.
c. Enter the following information: - Server pool name: ovm-pool.oow.local - Virtual IP address for the pool: leave blank Note: The Virtual IP address of the pool is assigned to one server in the pool, called the master server. Several actions are executed by this master server. d. Deselect Clustered Server Pool. e. Click Next.

37
Figure 89.Creating the server pool.
f. In the next window, click the icon to add all servers (here, only one server) to the pool, and finally click Finish. g. Once the pool is created, you should see the pool and our Oracle VM server,
ovm-srv, in it. Click the icon to expand.
Figure 90. The created server pool and server.
6. Create the storage repository:
Before creating VMs hosted on the server pool, we need to create at least one storage repository in which to store the VMs’ files. Note: Only unused and un-partitioned local HDDs can be used.

38
a. Click the Repositories tab.
b. Click the icon to create a new storage repository.
c. For Repository Name, enterrepo01.
d. For Repository Location, select Physical Disk (this is used for local HDDs, iSCSI, and FC
LUNs).
e. Select the right server pool (there is only one choice for mypool here).
f. Click the icon to select the local HDD.
Figure 91.Creating the storage repository. g. Click Next.
h. Click the icon to present this repository to all servers (here, there is only one), and finally, click Finish.
i. Wait a few seconds for the repository to be created.
Note: For non-NFS storage (which is our case here), an OCFS2 (Oracle Cluster File System 2) filesystem is created on the repository.

39
j. You should now see the new repository. Click the icon to expand it.
Figure 92. The newly created repository.
APPENDIX B: REFERENCES
Oracle VM Documentation: http://www.oracle.com/technetwork/server-storage/vm/documentation/index.html
In addition, this hands-on-lab document is available at the following site: https://blogs.oracle.com/scoter/entry/oow2017-hol7552
ABOUT THE AUTHOR Simon Coter is Director of Product Management for Oarcle VM and VirtualBox.
ACKNOWLEDGMENTS Special thanks to Christophe Pauliat ans Simon Hayler for their contributions

40
1 REFERENCES:
1.1 ORACLE VM 3.4 DOCUMENTATION http://docs.oracle.com/cd/E64076_01/
1.2 ORACLE VM 3.4 WINDOWS PV DRIVER http://docs.oracle.com/cd/E88077_01/index.html
1.3 THIS DOCUMENT
This document can be found on https://blogs.oracle.com/scoter