Embed Size (px)
Citation preview

8/10/2019 HK-91,SR9,93,94,SP89
http://slidepdf.com/reader/full/hk-91sr99394sp89 1/3
EASY CONVERSION OF HK SEMI-AUTO FIREARMS (Models 91, SR9, 93, 94 ,SP89, etc.) TOSELECT FIRE
USING A STANDARD MILITARY FULL-AUTO BOLT CARRIER AND GRIP FRAME ASSEMBLY
- AND WITHOUT MODIFICATION TO THE SEMI-AUTO RECEIVER!
Step #1
Field strip the semi-auto firearm by removing the GRIP FRAME and BOLT CARRIER groups.
Step #2
Remove the complete FIRE CONTROL BOX from a Full-Auto GRIP FRAME by rotating the Selector Lever to the 12:00 positionand pushing the Selector to the left of the GRIP FRAME to remove. Lift the FIRE CONTROL BOX out of the GRIP FRAME andalign the BOX against the bottom edge of the Semi-Auto Receiver. (Disassembly of the FIRE CONTROL BOX is not necessary forthis conversion!) An approximately .200” by .100” portion of the front bottom edge of the BOX will need to be removed so as toallow the GRIP FRAME & BOX to be installed on the Semi-Auto firearm. Scribe a line on the BOX at a point just above where theBOX butts up against the milled block welded onto the rear bottom of the Receiver Magazine Well. This mark will beapproximately .200” up from the bottom front edge of the BOX. Measure back from the front bottom edge of the BOX
approximately .100” and scribe a vertical line on each side of BOX (see illustration). These marks indicate the small portion thatwill need to be removed from the BOX by hacksawing, grinding, filing, or milling. After the indicated portion of metal is removedfrom the BOX it can now be pushed over the top edge of the above mentioned milled block when aligned with the bottom edge ofthe Receiver. The fit of the BOX to the Receiver should be free, but not too loose.
Step #3
The various Plastic S-E-F Custom Full-Auto GRIP FRAMES that have been modified to fit on the semi-auto weapons and that areavailable from various HK repair shops can be used to mount the above modified FULL-AUTO FIRE CONTROL BOX Assembly toyour particular firearm. If a Steel S-E-F GRIP FRAME is used then cut off the front 2 mounting ears of the GRIP FRAME flush withthe front edge of the FRAME (see below illustration). With the FIRE CONTROL BOX now modified and installed in one of theabove mentioned modified GRIP FRAMES it is ready for installation on the firearm. When installed on the firearm the GRIPFRAME Assembly should butt flush against the rear surface of the Magazine Well and the Buttstock Assembly should be able tobe installed and retained with both Push Pins. If it will not fit flush enough to allow the Push Pins to be inserted remove a littlemore metal from the FIRE CONTROL BOX so the GRIP FRAME Assembly will fit flush to the Receiver Magazine Well.
Step #4
Replace the Semi-Auto BOLT CARRIER with the corresponding Full-Auto military BOLT CARRIER for your particularly firearm -e.g.
MP5K Carrier in Model SP89MP5 Carrier in Model 94
G3 Carrier in Models 91, SR9, SAR8, XG3S
Step #5
Dry cycle the completely assembled weapon and check that the gun will now function in Safe, Semi, and Full-Auto (S-E-F). Prudently test fire the weapon in a safe and reasonable manner and location.
8/10/2019 HK-91,SR9,93,94,SP89
http://slidepdf.com/reader/full/hk-91sr99394sp89 2/3
Assembly Order of HK Semi Auto
FIRE CONTROL HOUSING:1. Insert SPACER into Semi Auto Sear SPRING.
2. Place SPACER/SPRING assembly inside forward part of Semi-Auto type FIRE
CONTROL HOUSING with Roller part of Spring to the rear. Insert PIVOT PIN thru
Housing and into Spacer/Spring assembly.
3. Install TRIGGER with SPRING into underside of HOUSING, but leave tail ofSpring hanging down loose. Insert Trigger PIVOT PIN only through one side of
Trigger.
4. Now from top install SEAR into Trigger and push Trigger Pivot Pin all the way
through Trigger & Sear to hold both in place. Install hook curved end of Trigger
Spring onto Hammer Pivot Pin BUSHING that is permanently fixed to left side of
Fire Control Housing. Lift Trigger Spring tail into retaining groove of Trigger.
5. Install HAMMER and it's PIVOT PIN.
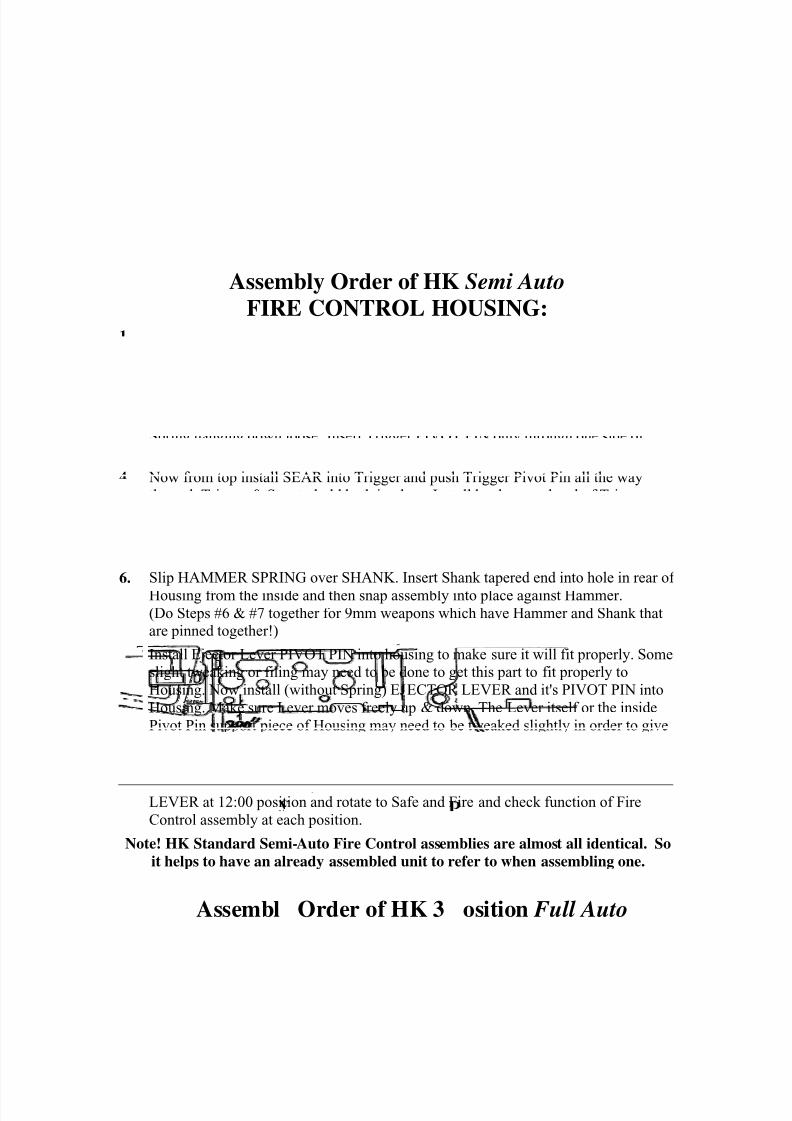
6. Slip HAMMER SPRING over SHANK. Insert Shank tapered end into hole in rear of
Housing from the inside and then snap assembly into place against Hammer.
(Do Steps #6 & #7 together for 9mm weapons which have Hammer and Shank thatare pinned together!)
7. Install Ejector Lever PIVOT PIN into housing to make sure it will fit properly. Someslight tweaking or filing may need to be done to get this part to fit properly to
Housing. Now install (without Spring) EJECTOR LEVER and it's PIVOT PIN into
Housing. Make sure Lever moves freely up & down. The Lever itself or the inside
Pivot Pin support piece of Housing may need to be tweaked slightly in order to givefree movement to Lever. If all parts fit and move properly install SPRING,
EJECTOR LEVER and PIVOT PIN.
8. Insert HOUSING assembly into GRIP FRAME and install SAFETY/SELECTORLEVER at 12:00 position and rotate to Safe and Fire and check function of Fire
Control assembly at each position.
Note! HK Standard Semi-Auto Fire Control assemblies are almost all identical. So
it helps to have an already assembled unit to refer to when assembling one.
Assembl Order of HK 3 osition Full Auto

8/10/2019 HK-91,SR9,93,94,SP89
http://slidepdf.com/reader/full/hk-91sr99394sp89 3/3