Embed Size (px)
Citation preview
::::::
HANDSTAND “Training Manual”
By the Tapp Brothers
© 2011-2014 All Rights ReservedFirst Edition, Reserved 2014
Handstand Training Manual by the Tapp Brothers © 2011-2014 All Rights Reserved
:::1:::
This is the training manual you will be following to get your Handstand. It will cover the technique, show you progression steps, and lay out a simple schedule to follow with a combination of added exercises to ensure you get this move down as fast as possible without injury and without confusion. I encourage you to check out the two videos that came with this program before you get started. These videos go into greater detail over the technique, progressions, and exercises.
The information and schedule you will follow in this course is based off of years of research in fitness and training under professional cirque instructors, soccer coaches, and Hollywood stunt men. My brother and I were very fortunate to have a wide range of amazing guides and coaches throughout our life and training. These are the training methods I personally learned through my experiences with Fanny Kerwich (8th generation French circus performer, and owner of LoneStar Circus in Dallas, TX) and Jason Chu (Cirque Du Soliel performer, Hollywood stuntman, member of the Blue 8 group, and Olympic level gymnast and instructor). I can't thank them enough for all they have taught my brother and I.
The Handstand is a move that takes time and dedication to master, so make sure you stay consistent with your training. Some may see amazing gains in just a few weeks, however, for most it will take weeks or months to see dramatic changes and years to reach mastery.
Also, ALWAYS consult a physician before you start any new workout regime. You always want to make sure you are in good health. Sometimes people can suffer from severe injuries that could have easily been avoided if they would have had a physical or checked with their doctor first!
Train safe,
Thomas
Handstand Training Manual by the Tapp Brothers © 2011-2014 All Rights Reserved
:::2:::
SECTION 1: TECHNIQUE AND PROGRESSIONS
Handstand Training Manual by the Tapp Brothers © 2011-2014 All Rights Reserved
:::3:::
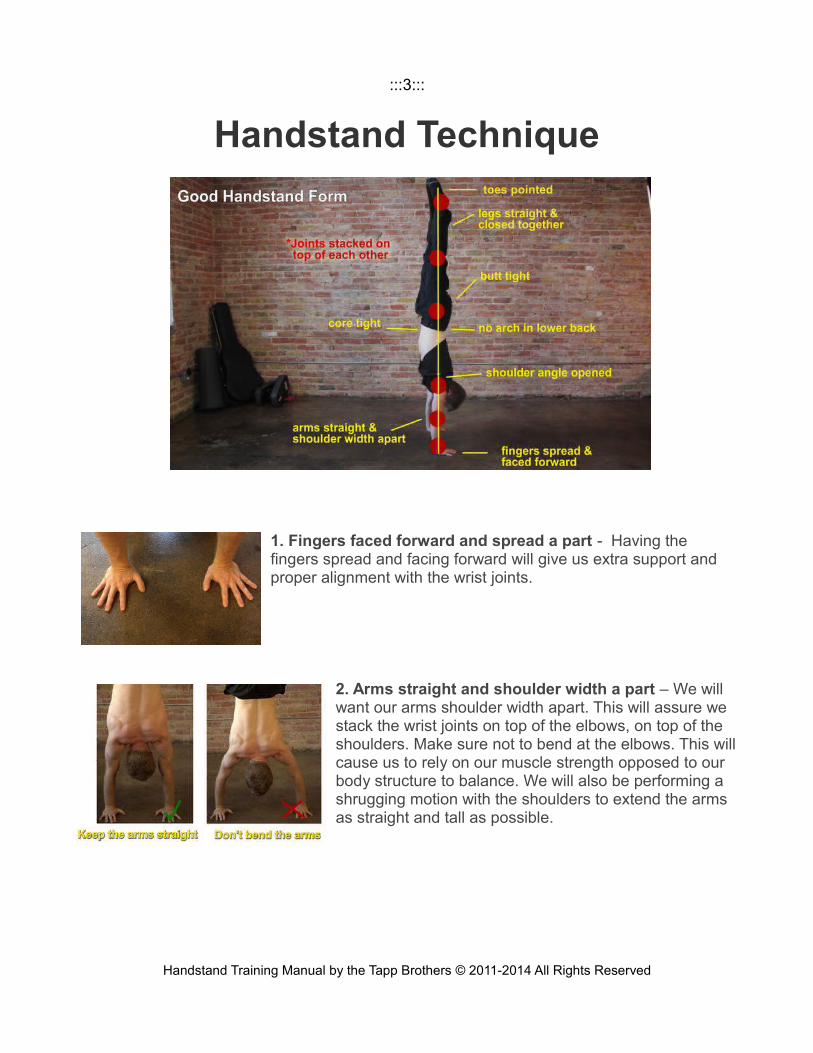
Handstand Technique
1. Fingers faced forward and spread a part - Having the fingers spread and facing forward will give us extra support and proper alignment with the wrist joints.
2. Arms straight and shoulder width a part – We will want our arms shoulder width apart. This will assure we stack the wrist joints on top of the elbows, on top of the shoulders. Make sure not to bend at the elbows. This willcause us to rely on our muscle strength opposed to our body structure to balance. We will also be performing a shrugging motion with the shoulders to extend the arms as straight and tall as possible.
Handstand Training Manual by the Tapp Brothers © 2011-2014 All Rights Reserved
:::4:::
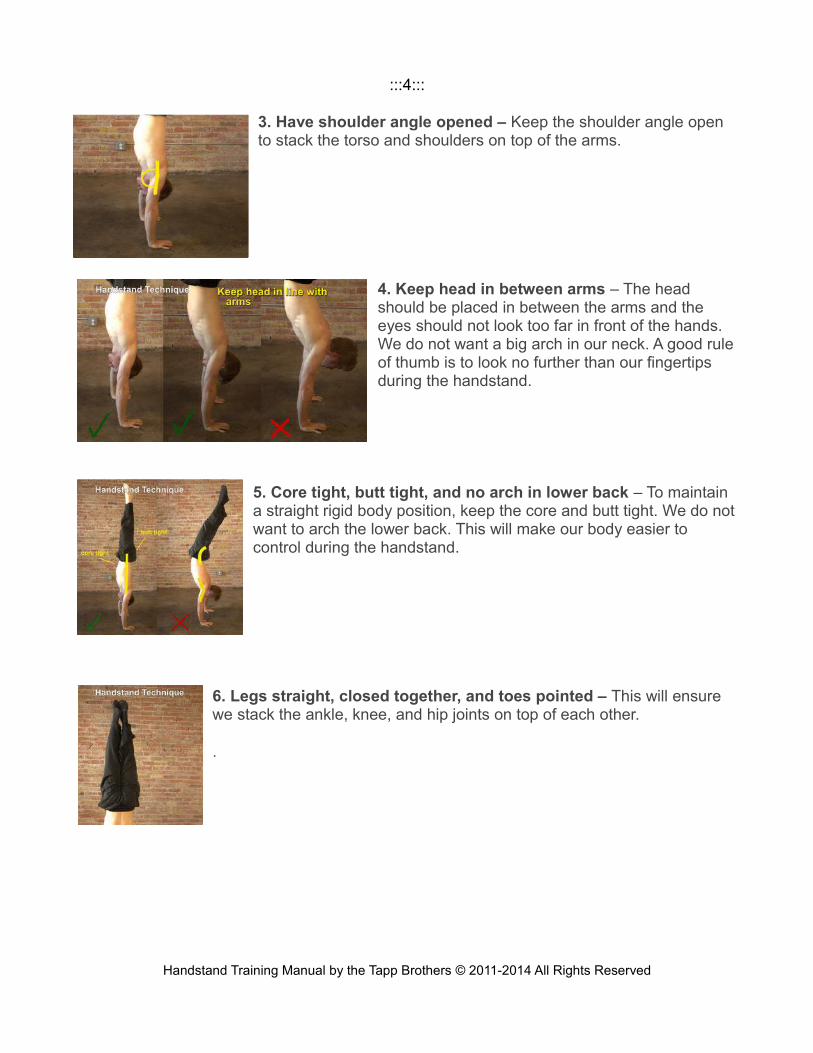
3. Have shoulder angle opened – Keep the shoulder angle open to stack the torso and shoulders on top of the arms.
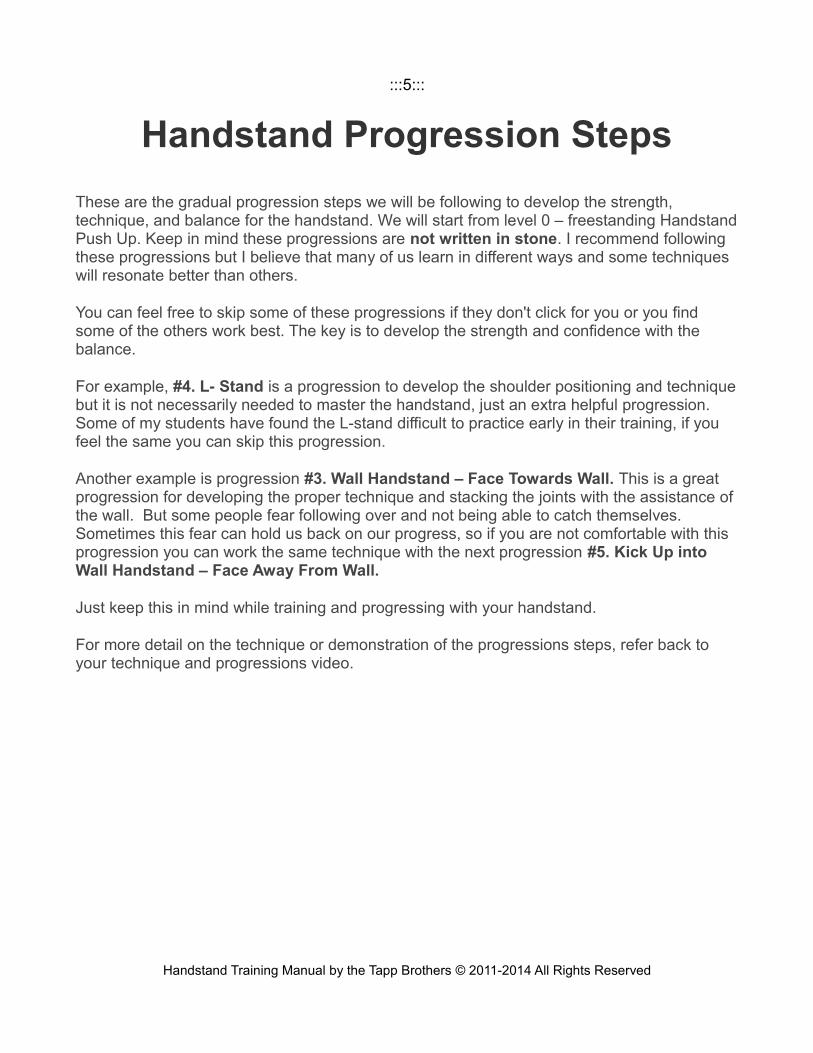
4. Keep head in between arms – The head should be placed in between the arms and the eyes should not look too far in front of the hands. We do not want a big arch in our neck. A good rule of thumb is to look no further than our fingertips during the handstand.
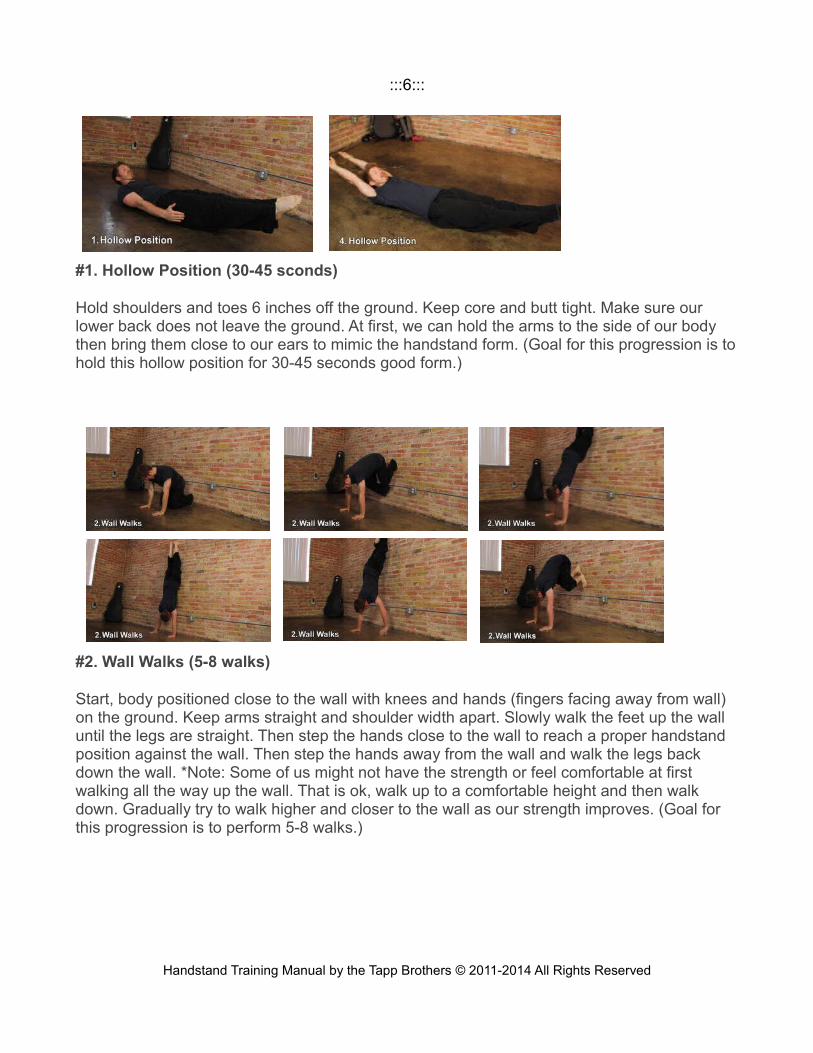
5. Core tight, butt tight, and no arch in lower back – To maintain a straight rigid body position, keep the core and butt tight. We do notwant to arch the lower back. This will make our body easier to control during the handstand.
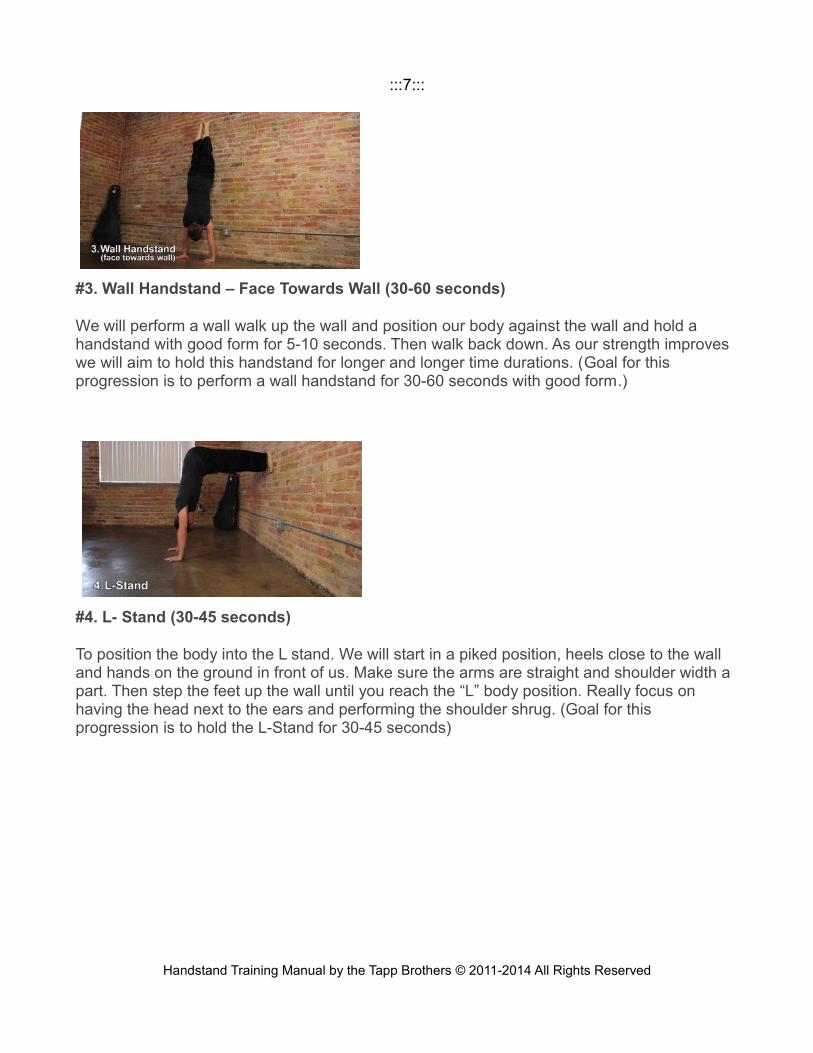
6. Legs straight, closed together, and toes pointed – This will ensure we stack the ankle, knee, and hip joints on top of each other.
.
Handstand Training Manual by the Tapp Brothers © 2011-2014 All Rights Reserved
:::5:::
Handstand Progression Steps
These are the gradual progression steps we will be following to develop the strength, technique, and balance for the handstand. We will start from level 0 – freestanding HandstandPush Up. Keep in mind these progressions are not written in stone. I recommend following these progressions but I believe that many of us learn in different ways and some techniques will resonate better than others.
You can feel free to skip some of these progressions if they don't click for you or you find some of the others work best. The key is to develop the strength and confidence with the balance.
For example, #4. L- Stand is a progression to develop the shoulder positioning and techniquebut it is not necessarily needed to master the handstand, just an extra helpful progression. Some of my students have found the L-stand difficult to practice early in their training, if you feel the same you can skip this progression.
Another example is progression #3. Wall Handstand – Face Towards Wall. This is a great progression for developing the proper technique and stacking the joints with the assistance of the wall. But some people fear following over and not being able to catch themselves. Sometimes this fear can hold us back on our progress, so if you are not comfortable with this progression you can work the same technique with the next progression #5. Kick Up into Wall Handstand – Face Away From Wall.
Just keep this in mind while training and progressing with your handstand.
For more detail on the technique or demonstration of the progressions steps, refer back to your technique and progressions video.
Handstand Training Manual by the Tapp Brothers © 2011-2014 All Rights Reserved
:::6:::
#1. Hollow Position (30-45 sconds)
Hold shoulders and toes 6 inches off the ground. Keep core and butt tight. Make sure our lower back does not leave the ground. At first, we can hold the arms to the side of our body then bring them close to our ears to mimic the handstand form. (Goal for this progression is tohold this hollow position for 30-45 seconds good form.)
#2. Wall Walks (5-8 walks)
Start, body positioned close to the wall with knees and hands (fingers facing away from wall) on the ground. Keep arms straight and shoulder width apart. Slowly walk the feet up the wall until the legs are straight. Then step the hands close to the wall to reach a proper handstand position against the wall. Then step the hands away from the wall and walk the legs back down the wall. *Note: Some of us might not have the strength or feel comfortable at first walking all the way up the wall. That is ok, walk up to a comfortable height and then walk down. Gradually try to walk higher and closer to the wall as our strength improves. (Goal for this progression is to perform 5-8 walks.)
Handstand Training Manual by the Tapp Brothers © 2011-2014 All Rights Reserved
:::7:::
#3. Wall Handstand – Face Towards Wall (30-60 seconds)
We will perform a wall walk up the wall and position our body against the wall and hold a handstand with good form for 5-10 seconds. Then walk back down. As our strength improves we will aim to hold this handstand for longer and longer time durations. (Goal for this progression is to perform a wall handstand for 30-60 seconds with good form.)
#4. L- Stand (30-45 seconds)
To position the body into the L stand. We will start in a piked position, heels close to the wall and hands on the ground in front of us. Make sure the arms are straight and shoulder width a part. Then step the feet up the wall until you reach the “L” body position. Really focus on having the head next to the ears and performing the shoulder shrug. (Goal for this progression is to hold the L-Stand for 30-45 seconds)
Handstand Training Manual by the Tapp Brothers © 2011-2014 All Rights Reserved
:::8:::
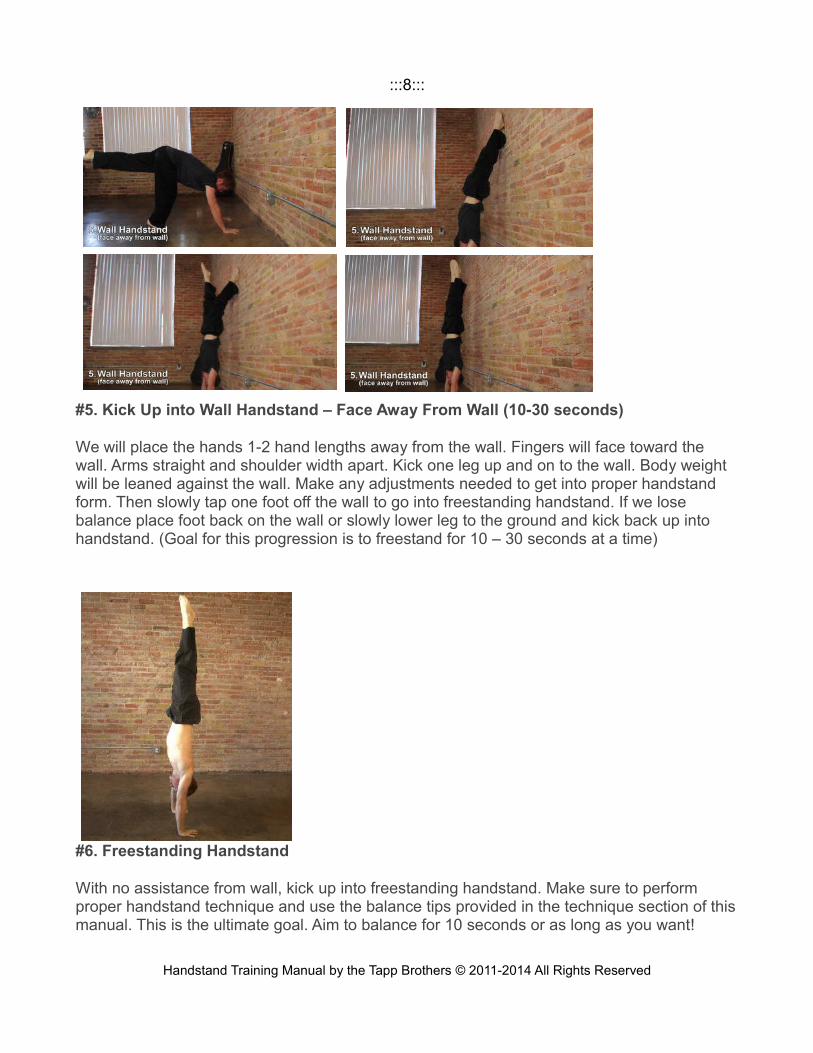
#5. Kick Up into Wall Handstand – Face Away From Wall (10-30 seconds)
We will place the hands 1-2 hand lengths away from the wall. Fingers will face toward the wall. Arms straight and shoulder width apart. Kick one leg up and on to the wall. Body weight will be leaned against the wall. Make any adjustments needed to get into proper handstand form. Then slowly tap one foot off the wall to go into freestanding handstand. If we lose balance place foot back on the wall or slowly lower leg to the ground and kick back up into handstand. (Goal for this progression is to freestand for 10 – 30 seconds at a time)
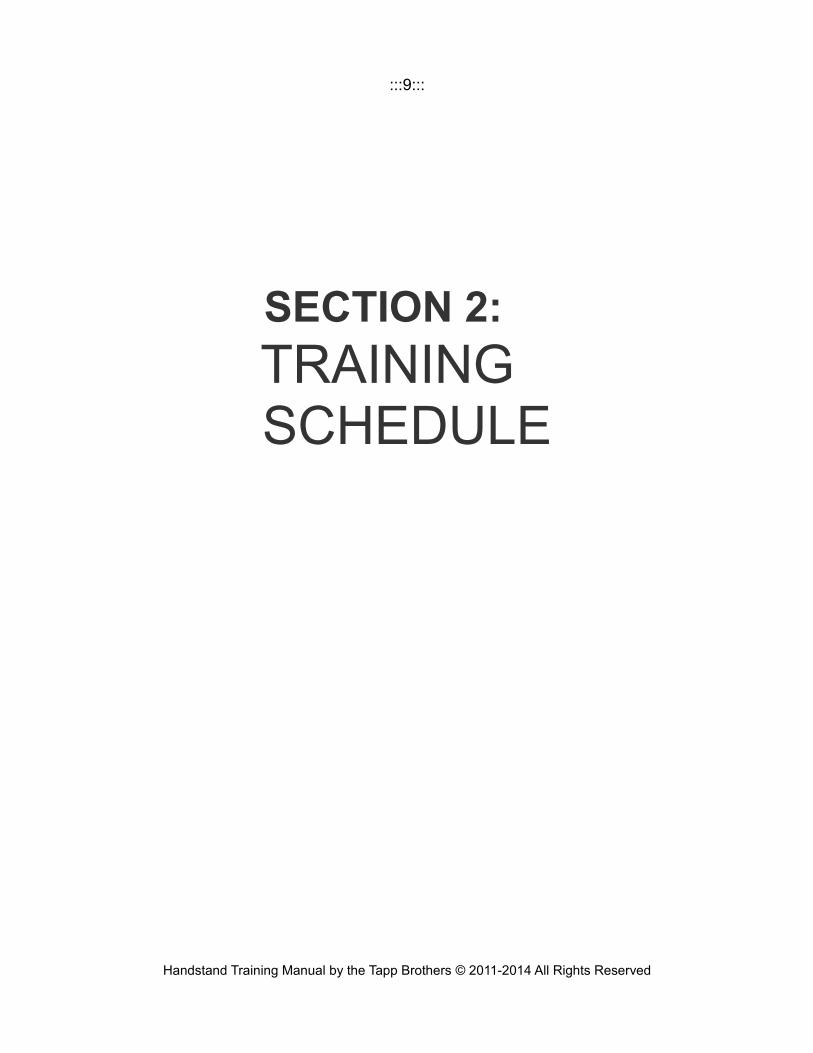
#6. Freestanding Handstand
With no assistance from wall, kick up into freestanding handstand. Make sure to perform proper handstand technique and use the balance tips provided in the technique section of thismanual. This is the ultimate goal. Aim to balance for 10 seconds or as long as you want!
Handstand Training Manual by the Tapp Brothers © 2011-2014 All Rights Reserved
:::9:::
SECTION 2: TRAINING
SCHEDULE
Handstand Training Manual by the Tapp Brothers © 2011-2014 All Rights Reserved
:::10:::
We are going to train the progressions and exercises with 3 workouts a week. We will
repeat these workouts each week. Every 4th week we are going to take off to allow our bodiesto get adequate rest and prepare to level up in our training. Some of the exercises given will focus on different types of muscle contractions. This will help the muscles grow faster and increase the efficiency of our nervous system which is key for recruiting muscle fibers for increasing strength and performing the move.
Most of these workouts will focus on core, upper-body strength, and balance . The reps given in the schedule are a guide and a good goal to aim for. When starting out you may not be able to perform all the reps. That's fine, stop the exercise and move to the rest period when ever your form starts to get sloppy.
With these exercises it's important that you always listen to your body. Train hard but don't over do it. The goal is to push the body and muscles so they rebuild stronger, we don't want to push them to the point of injury. It won't take much to see gradual improvement. It's allabout staying consistent.
Refer to the exercise video to see visual demonstrations and a detailed breakdown of each exercise.
The Handstand requires strength as well as flexibility (particularly shoulder flexibility. Make sure you are performing the stretches given in the stretching video 5 to 6 days a week to ensure you are acquiring the the flexibility needed for this move.
Handstand Training Manual by the Tapp Brothers © 2011-2014 All Rights Reserved
:::11:::
Workout Day #1 Warm up5-15 mins. (refer to video example)
Workout-3 sets of your Progression step you are on. If you master the goal for the progression you areon move to the next progression on the next set. (2 min rest between each set.)Rest 2 min-3 sets of Hollow Holds. (60 seconds for each set. 1 min rest between each set.)Rest 2 min-2 sets of Wrist Lifts. (20 reps for each set. 1 min rest between each set.)Rest 2 min-2 sets of Wrist Lifts Fingers faced opposite direction (20 reps for each set. 1 min rest between each set.)Rest 2 min-2 sets of Frog Holds. (20 seconds for each set. 1 min rest between each set.)Rest 2 min-3 sets of Push-Ups. (30 reps for each set. 1 min rest between each set.)Rest 2 min-3 sets of Superman Raises. (30 reps for each set. 1 min rest between each set.)Rest 2 min-3 sets of Pull-Ups or modified Pull-Ups. (15 reps for each set. 1 min rest between each set)Rest 2 min-3 sets of Lunge Kick-Ups. (10 reps for each set. 1 min rest between each set)Rest 2 min-3 sets of Arm Extensions. (12 reps for each set. 1 min rest between each set)Rest 2 min-3 sets of your progression down a level. (1 min rest between each set)
Cool Down/Stretch5-15 mins. (refer to video example)
For the progressions in this workout you are going to perform the progression step that you are currently at and feel comfortable with. You will want to go down a progression or maybe 2 for the final progression exercise due to your muscles being tired.
Refer to the exercise video to see visual demonstrations and a detailed breakdown of each exercise.
Handstand Training Manual by the Tapp Brothers © 2011-2014 All Rights Reserved
:::12:::
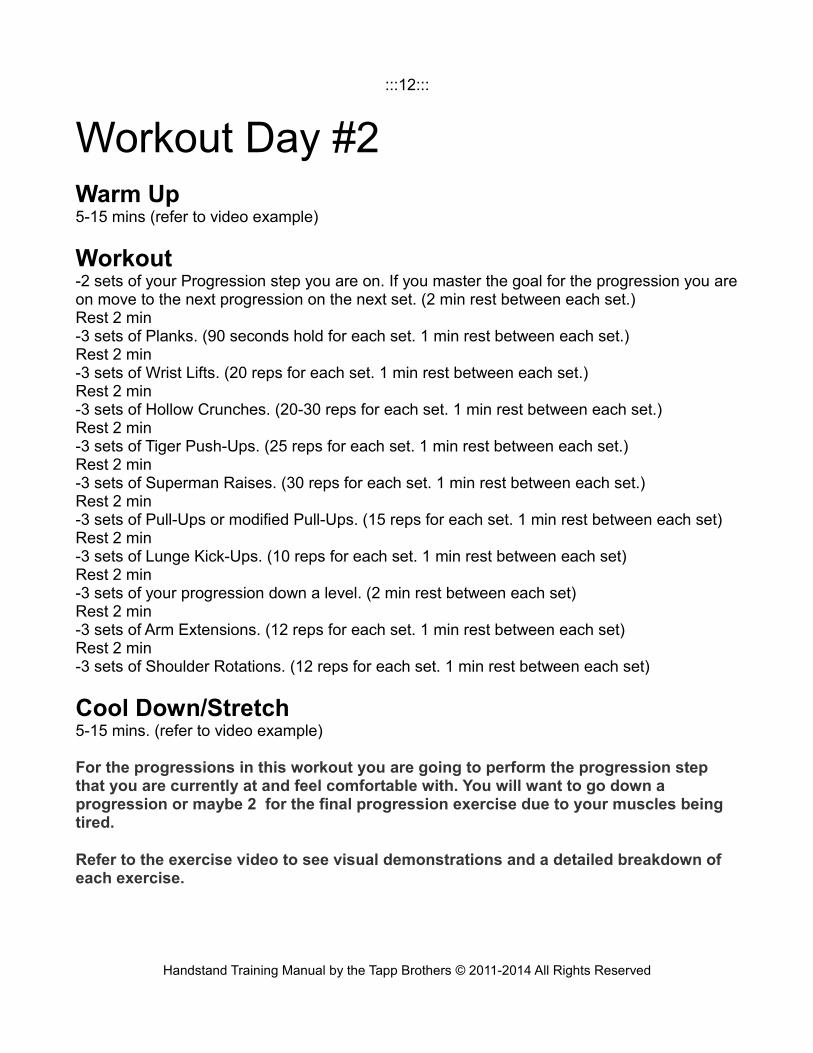
Workout Day #2 Warm Up5-15 mins (refer to video example)
Workout-2 sets of your Progression step you are on. If you master the goal for the progression you areon move to the next progression on the next set. (2 min rest between each set.)Rest 2 min-3 sets of Planks. (90 seconds hold for each set. 1 min rest between each set.)Rest 2 min-3 sets of Wrist Lifts. (20 reps for each set. 1 min rest between each set.)Rest 2 min-3 sets of Hollow Crunches. (20-30 reps for each set. 1 min rest between each set.)Rest 2 min-3 sets of Tiger Push-Ups. (25 reps for each set. 1 min rest between each set.)Rest 2 min-3 sets of Superman Raises. (30 reps for each set. 1 min rest between each set.)Rest 2 min-3 sets of Pull-Ups or modified Pull-Ups. (15 reps for each set. 1 min rest between each set)Rest 2 min-3 sets of Lunge Kick-Ups. (10 reps for each set. 1 min rest between each set)Rest 2 min-3 sets of your progression down a level. (2 min rest between each set)Rest 2 min-3 sets of Arm Extensions. (12 reps for each set. 1 min rest between each set)Rest 2 min-3 sets of Shoulder Rotations. (12 reps for each set. 1 min rest between each set)
Cool Down/Stretch5-15 mins. (refer to video example)
For the progressions in this workout you are going to perform the progression step that you are currently at and feel comfortable with. You will want to go down a progression or maybe 2 for the final progression exercise due to your muscles being tired.
Refer to the exercise video to see visual demonstrations and a detailed breakdown of each exercise.
Handstand Training Manual by the Tapp Brothers © 2011-2014 All Rights Reserved
:::13:::
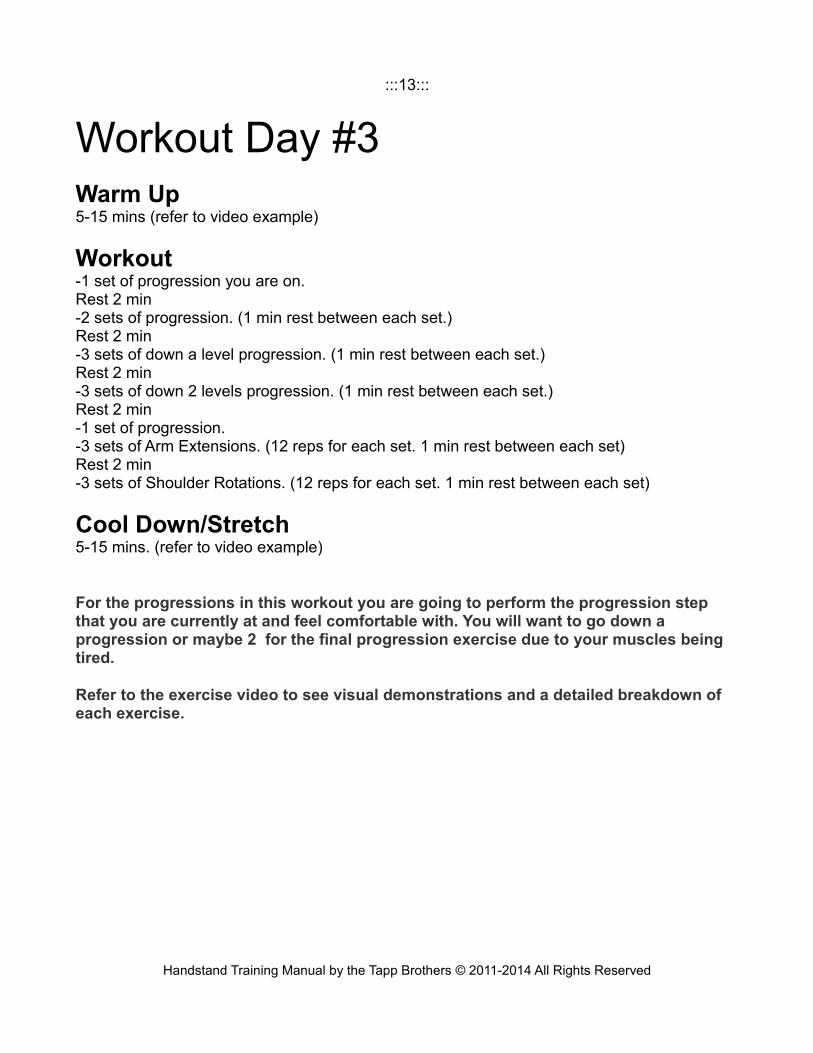
Workout Day #3 Warm Up5-15 mins (refer to video example)
Workout-1 set of progression you are on.Rest 2 min-2 sets of progression. (1 min rest between each set.)Rest 2 min-3 sets of down a level progression. (1 min rest between each set.)Rest 2 min-3 sets of down 2 levels progression. (1 min rest between each set.)Rest 2 min-1 set of progression. -3 sets of Arm Extensions. (12 reps for each set. 1 min rest between each set)Rest 2 min-3 sets of Shoulder Rotations. (12 reps for each set. 1 min rest between each set)
Cool Down/Stretch5-15 mins. (refer to video example)
For the progressions in this workout you are going to perform the progression step that you are currently at and feel comfortable with. You will want to go down a progression or maybe 2 for the final progression exercise due to your muscles being tired.
Refer to the exercise video to see visual demonstrations and a detailed breakdown of each exercise.
Handstand Training Manual by the Tapp Brothers © 2011-2014 All Rights Reserved
:::14:::
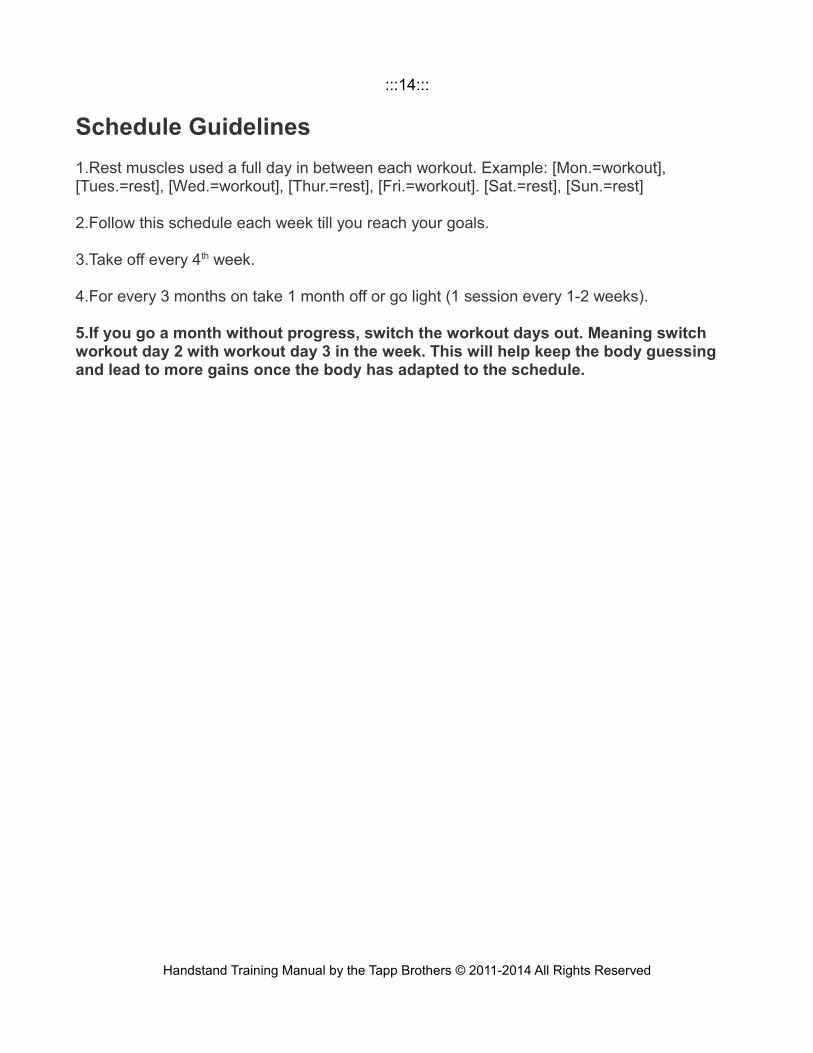
Schedule Guidelines
1.Rest muscles used a full day in between each workout. Example: [Mon.=workout], [Tues.=rest], [Wed.=workout], [Thur.=rest], [Fri.=workout]. [Sat.=rest], [Sun.=rest]
2.Follow this schedule each week till you reach your goals.
3.Take off every 4th week.
4.For every 3 months on take 1 month off or go light (1 session every 1-2 weeks).
5.If you go a month without progress, switch the workout days out. Meaning switch workout day 2 with workout day 3 in the week. This will help keep the body guessing and lead to more gains once the body has adapted to the schedule.
Handstand Training Manual by the Tapp Brothers © 2011-2014 All Rights Reserved