Embed Size (px)
Citation preview
1
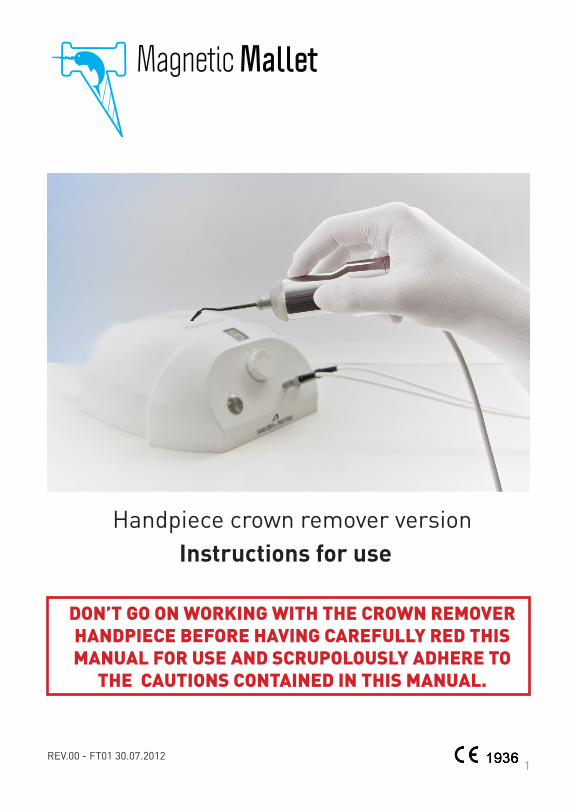
Handpiece crown remover versionInstructions for use
REV.00 - FT01 30.07.2012
DON’T GO ON WORKING WITH THE CROWN REMOVER HANDPIECE BEFORE HAVING CAREFULLY RED THIS MANUAL FOR USE AND SCRUPOLOUSLY ADHERE TO
THE CAUTIONS CONTAINED IN THIS MANUAL.
libretto_levacorone_eng_03_08_12.indd 1 05/09/2012 10.01.57
2
355677779
1010101011
0.0. RELEVANT INFORMATION FOR THE USER1.0. DEVICE ILLUSTRATIONS
1.1. Handpiece parts2.0. INTENDED USE
2.0. Standard supply3.0.INSTRUCTIONS FOR USE
3.1. Crown remover hook insertion on the handpiece CROWN REMOVER function3.2. Release of the crown remover hook
4.0.STERILIZATION INSTRUCTIONS5.0. MAINTENANCE AND REPAIRS6.0 DISPOSAL OF WASTE
6.1 Responsibility6.2. Warranty6.3. Technical Literature
ATTENTION:
This operating manual was made to help you to properly use the Magnetic Mallet CROWN REMOVER handpiece. All the useful details for a proper use of this device are contained in this manual.You should read it very carefully and store it in its slipcase in a dry and clean place in order to gather any useful information in the future.
© copyright Meta Ergonomica di Merlo Mario
All rights reserved . Meta Ergonomica di Merlo Mario retains all copyright in any text, graphic images and images owned by Meta Ergonomica. You may not mirror, modify or otherwise alter any file for re-broad, print or exploit the information contained therein without written permission of Meta Ergonomica.
TABLE OF CONTENTS
libretto_levacorone_eng_03_08_12.indd 2 05/09/2012 10.01.57
3
The removal of definitive cast crowns is always challenging. In fact breaking the retention cement used to fix crowns and bridges to the abutment always implies a very careful assessment of the patient and of the status of the teeth by the clinician. With the permanent cements the crown retention, having to last for a long time, is always very effective. That’s why a mechanical action to get the loosening of the crown is always traumatic, even if it’s carried out by means of effective and targeted mechanicals. In fact none of the available systems are universally applicable.This entails that it’s always mandatory for the clinician to previously assess the alveolar root firmness which could vary from one abutment to the other one in relation with a variation going from about 10 Newton to hundreds of Newton.Furthermore the intrinsic difficulty in decementation must take into consideration the shaping of the abutment and the tilt angle degrees. Inadequate tooth preparation could bring to a failure in treatment.In fact if the tilt angle degree goes from 3° to 6° the operation will be easier, while if the abutment shaping didn’t take care about the tilt angle degree the operation will be harder.This is the reason why the clinician assessment is always though and subtle and mandatory to determine if the crown should be removed by a mechanical pulse or if it’s better to consider to section the crown. Anyhow in this kind of operation some complication always arise and the pratictioner should always consider that this kind of operation can easily cause the abutment fracture or removal.
If the need is to remove a crown from a metal implant the surgeon should always remember that this one is normally small-sized in comparison with an abutment and that it has a mechanically predetermined tilt angle. This means that removing a crown from a metal implant is easier and more convenient. Provided that the screw in the meantime didn’t cause perimplantisis.
The only effective system to get a crown removal is to convey a pulse/force right on the crown with an acceleration equivalent or even higher than some hundreds “g” (whereas “g” is 9,8 m/s2), being able to run out in some millions of seconds. This is what you can obtain using our Magnetic Mallet with the crown-remover handpiece and in this way the pratictioner shall be able to enjoy the maximum in this technique.
The designers of the Magnetic Mallet in the crown remover version went by studies about dynamics referring to firmness, mass and quality of the retention cements normally used in crown retention. Thanks to those studies they obtained a device allowing to get the plastic deformation and the breaking of the retention
0.0. RELEVANT INFORMATION FOR THE USER
libretto_levacorone_eng_03_08_12.indd 3 05/09/2012 10.01.57
4
cement with the consequent loosening of the crown or of the bridge. The Magnetic Mallet crown remover handpiece develops a mechanical and adjustable pulse in 4 different levels which is able to keep the timing of the pulse unchanged, increasing or decreasing the force in the extraction direction. This will induce the destruction of the retention cement.
It follows that the Magnetic Mallet in the crown remover version, properly used and with a prior careful clinic assessment by the clinician , according to the laboratory tests is a great and effective help in the crown removal technique.
Therefore, in the event that the clinician determines the feasibility of the surgery, the Magnetic Mallet in crown remover version will allow the surgeon to use a more effective device in comparison with the manual technique and the automatic devices of the state of the art.
Furthermore it’s nice to consider that the manual technique based on sliding hammers can be always considered traumatic irrespective of the ability of the practitioner.
In order to understand why it’s nice to consider that in the manual practice with the sliding hammer the force is applied in thousands of seconds while with Magnetic Mallet this timing is of millions of seconds.
In addition you should take into consideration the “g” acceleration; with the sliding hammer this acceleration is about some “g” and with the Magnetic Mallet about some thousands of “g”.
libretto_levacorone_eng_03_08_12.indd 4 05/09/2012 10.01.57
5
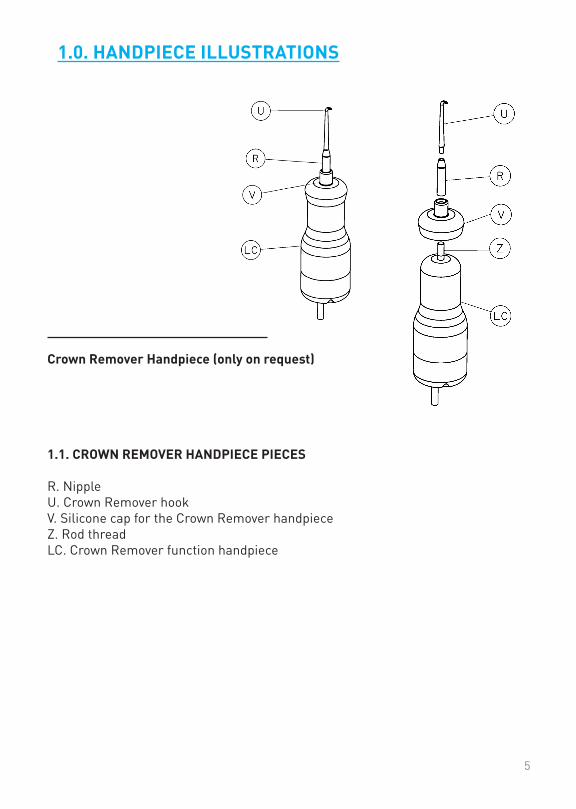
Crown Remover Handpiece (only on request)
1.0. HANDPIECE ILLUSTRATIONS
1.1. CROWN REMOVER HANDPIECE PIECES
R. NippleU. Crown Remover hookV. Silicone cap for the Crown Remover handpieceZ. Rod threadLC. Crown Remover function handpiece
libretto_levacorone_eng_03_08_12.indd 5 05/09/2012 10.01.58
6
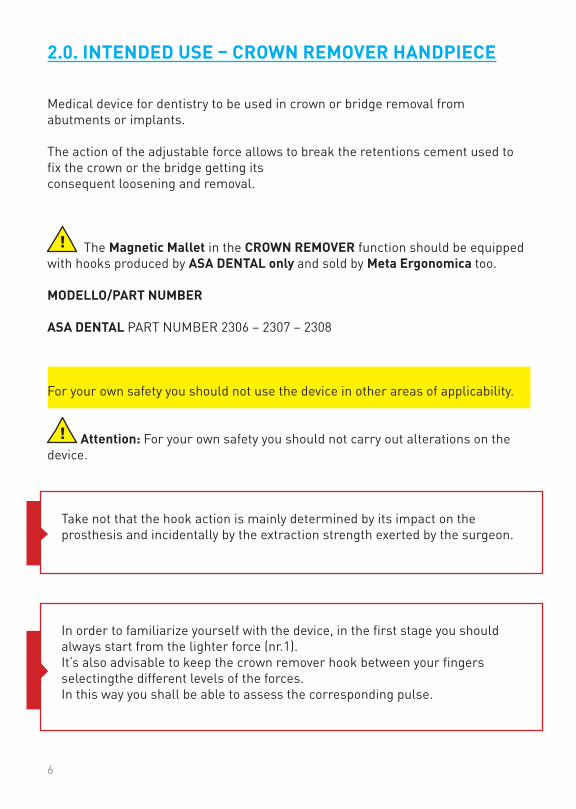
2.0. INTENDED USE – CROWN REMOVER HANDPIECE
Take not that the hook action is mainly determined by its impact on the prosthesis and incidentally by the extraction strength exerted by the surgeon.
In order to familiarize yourself with the device, in the first stage you should always start from the lighter force (nr.1). It’s also advisable to keep the crown remover hook between your fingers selectingthe different levels of the forces.In this way you shall be able to assess the corresponding pulse.
Medical device for dentistry to be used in crown or bridge removal from abutments or implants.
The action of the adjustable force allows to break the retentions cement used to fix the crown or the bridge getting itsconsequent loosening and removal.
The Magnetic Mallet in the CROWN REMOVER function should be equipped with hooks produced by ASA DENTAL only and sold by Meta Ergonomica too.
MODELLO/PART NUMBER
ASA DENTAL PART NUMBER 2306 – 2307 – 2308
For your own safety you should not use the device in other areas of applicability.
Attention: For your own safety you should not carry out alterations on the device.
libretto_levacorone_eng_03_08_12.indd 6 05/09/2012 10.01.58
7
2.1. STANDARD SUPPLY:
1 Handpiece with joint – crown remover function3 Hooks2 Silicone protective caps1 Spare join
3.0. INSTRUCTIONS FOR USE
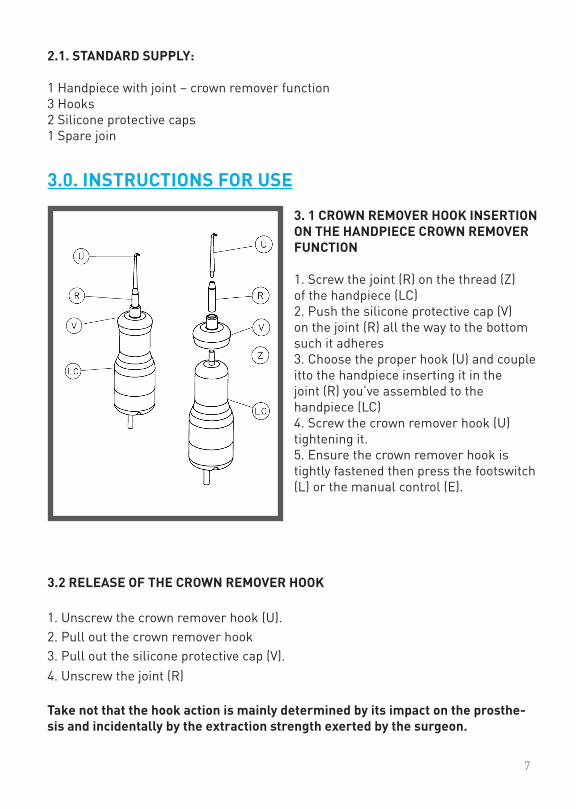
3. 1 CROWN REMOVER HOOK INSERTION ON THE HANDPIECE CROWN REMOVER FUNCTION
1. Screw the joint (R) on the thread (Z)of the handpiece (LC)2. Push the silicone protective cap (V)on the joint (R) all the way to the bottomsuch it adheres3. Choose the proper hook (U) and couple itto the handpiece inserting it in the joint (R) you’ve assembled to the handpiece (LC)4. Screw the crown remover hook (U)tightening it.5. Ensure the crown remover hook istightly fastened then press the footswitch (L) or the manual control (E).
3.2 RELEASE OF THE CROWN REMOVER HOOK 1. Unscrew the crown remover hook (U).2. Pull out the crown remover hook3. Pull out the silicone protective cap (V).4. Unscrew the joint (R) Take not that the hook action is mainly determined by its impact on the prosthe-sis and incidentally by the extraction strength exerted by the surgeon.
libretto_levacorone_eng_03_08_12.indd 7 05/09/2012 10.01.58
8
Nota: It’s up to the surgeon to determine the more suitable force to be applied by the hook to the prosthesis in order to achieve the desired result. The surgeon should always provide an axial pull (the axial pull is related to the abut-ment position) in order to avoid breaking.
PRECAUTIONS: The removal of prosthesis always presents a risk of dam-age to the prosthesis itself as well as the patients’ hard, soft and anchorage tissues.
Take appropriate measures to prevent swalling and/or aspiration of loosen parts and substances during treatment.
Crown and bridges that are cemented into place with a special genre of cementscannot be possible or at increase risk.
The practice performed with the Magnetic Mallet and its CROWN-REMOVERhandpiece is very gentle. Nevertheless the stability of the root should be care-fully verified in case of advanced periodontiis in order to prevent extraction ofthe root.
Pay close attention in determining whenever the Magnetic Mallet is suitable forthe treatment you have to perform.
IT’S UP TO THE SURGEON TO OPERATE WITH GREAT CARE. SPECIAL ATTENTION SHOULD BE GIVEN IN VERIFYING THE FITNESS OF THE MAGNETIC MALLET IN THE SURGERY.
libretto_levacorone_eng_03_08_12.indd 8 05/09/2012 10.01.59
9
4.0. INSTRUCTIONS FOR THE STERILIZATION
STERILIZATION BY AUTOCLAVE OF THE HANDPIECE (LC) WITH ITS CORDSET AND CONNECTOR (M) JOINT, SILICONE CAP ( V) AND CROWN REMOVER HOOK (U).
The handpiece (O/LC) with its cordet and connector (M), and the crown remover hook (U) should be sterilized by autoclave before its first use as they’re non-steri-lized supplied.
The handpiece (O/LC) with its cordset and connector (M) should be always steri-lized by autoclave before any practice/treatment
After having uncoupled the parts, (see the sections 3.1 and 3.2 ) you should carryout the cleaning process. Brush off under flowing tap water then proceed with thesterilization by autoclave
AUTOCLAVE DIRECTIONS FOR USE :
Achievement of the dewpoint through the proper combination of temperature andpressure values which should be the following ones :
• 121 °C per 1 Bar
• 135 °C per 2 Bars
N.B. THE HANDPIECE MUST BE SUBMITTED TO AN INSPECTION AFTER 3 YEARSFROM ITS FIRST USE. THE USER, AFTER THAT PERIOD, MUST SEND THE HAND-PIECE TO THE DISTRIBUTOR/MANUFACTURER FOR THE NECESSARY CHECK WHICH WILL BE HANDLED BY THE MANUFACTURER SERVICE REPAIR.
libretto_levacorone_eng_03_08_12.indd 9 05/09/2012 10.01.59
10
5.0. MAINTENANCE AND REPAIRS
6.0. DISPOSAL OF WASTE
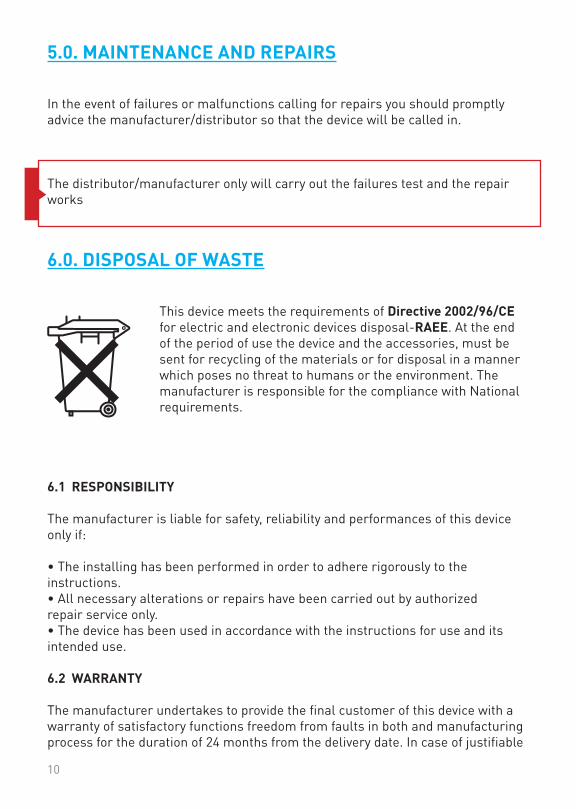
This device meets the requirements of Directive 2002/96/CE for electric and electronic devices disposal-RAEE. At the end of the period of use the device and the accessories, must be sent for recycling of the materials or for disposal in a manner which poses no threat to humans or the environment. The manufacturer is responsible for the compliance with National requirements.
6.1 RESPONSIBILITY
The manufacturer is liable for safety, reliability and performances of this deviceonly if:
• The installing has been performed in order to adhere rigorously to the instructions.• All necessary alterations or repairs have been carried out by authorizedrepair service only.• The device has been used in accordance with the instructions for use and itsintended use.
6.2 WARRANTY
The manufacturer undertakes to provide the final customer of this device with awarranty of satisfactory functions freedom from faults in both and manufacturingprocess for the duration of 24 months from the delivery date. In case of justifiable
In the event of failures or malfunctions calling for repairs you should promptly advice the manufacturer/distributor so that the device will be called in.
The distributor/manufacturer only will carry out the failures test and the repair works
libretto_levacorone_eng_03_08_12.indd 10 05/09/2012 10.01.59
11
complaints the manufacturer will provide repairs and/or spare parts free ofcharge. Nevertheless the manufacturer will charge the final customer with shipment costs and it is not accountable for risks arising from the shipment itself.For other instances the manufacturer will refers to the warranty indicated in thetrade general conditions.Any opening, repair or alteration carried out by un-authorized persons relievesthe manufacturer of all responsibility concerning the safe working of thedevice and nullifies the warranty.
6.3 TECHNICAL LITERATURE
The manufacturer will furnish on request circuit diagram, the component list, alldescriptions and information useful to the technical assistance in order to carrythe authorized repairs.
libretto_levacorone_eng_03_08_12.indd 11 05/09/2012 10.01.59
12
Via Monte Nero, 19 - 20029 TURBIGO (MI) - ITALYTel/F
Email: [email protected]
META ERGONOMICA di Merlo Mario
ax +39 331.890280
Sole Distributor for(Italy, Japan, Portugal, Spain and Turkey):
SWEDEN & MARTINA SPAVia Veneto 10
35020 Due Carrare (PD)Italy
Tel : +39 [email protected]
Technical Assistance:
libretto_levacorone_eng_03_08_12.indd 12 05/09/2012 10.01.59