Embed Size (px)
Citation preview

Halloween BeadsTutorial
by Lori Peterson
1
Happy Halloween beads for you to make! Learn
techniques that make sculpting glass easy, even for the “Ican’t do cute” crowd. Have fun!
Halloween BeadsTutorial
by Lori Peterson
2
This tutorial is meant for the beadmaker who has experienceworking with molten glass and knows about all the precau-tions one should take. Please make sure you have properventilation and didymium lenses to protect your eyes and allthat other safety stuff you learn in beadmaking classes.
I am not responsible for any damages or injuries caused byusing this tutorial.
Please contact me if you have any questions about the infor-mation contained in this tutorial or if you just need help figur-ing something out. I’m happy to help!
Please print this tutorial out for yourself but do not distributeit to anyone else. It is for your personal use only.
Want to make these beads to sell? You have my completeand total blessing to do so. Go forth and make and sellthem as much as you want. I don’t own these designs.Don’t tell anyone, but I copied them from mother nature,popular culture and various trips around the block while trickor treating with the kids. :0)
Have fun and THANK YOU so much!!!Love, Lori Petersonlorijp@pacbell.netwww.loribeads.comwww.loribeads.etsy.com
Halloween BeadsTutorial
by Lori Peterson
3
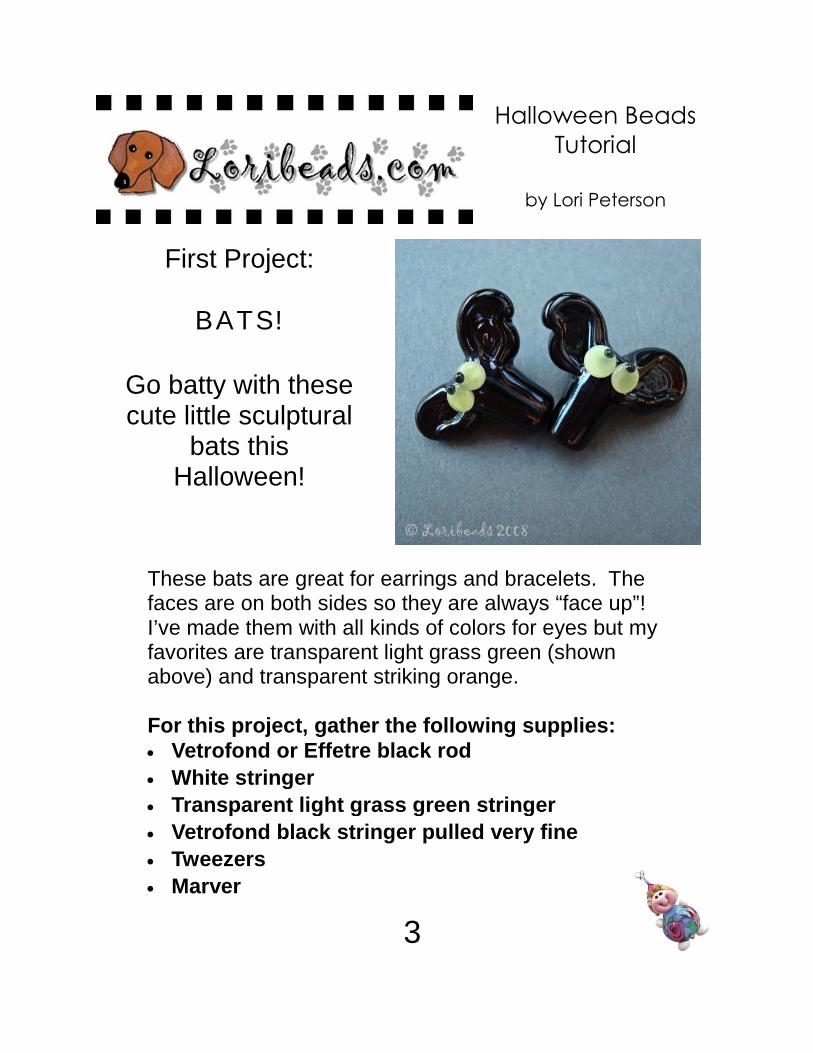
First Project:
BATS!
Go batty with thesecute little sculptural
bats thisHalloween!
These bats are great for earrings and bracelets. Thefaces are on both sides so they are always “face up”!I’ve made them with all kinds of colors for eyes but myfavorites are transparent light grass green (shownabove) and transparent striking orange.
For this project, gather the following supplies: Vetrofond or Effetre black rod
White stringer
Transparent light grass green stringer
Vetrofond black stringer pulled very fine
Tweezers
Marver

Halloween BeadsTutorial
by Lori Peterson
4
Apply two dots, one on each sideof the upper part of the tube asshown.
Make a tube of black.
Can be done using a marver ofany variety but I used a marverfrom Stacy Russom.
The tube length can be adjustedto any length, depending on if youwant the bats to be earring sizedor pendant sized.
Make sure those ends are niceand puckered!
If you have a pointy end just wrapa tiny bit of black around that end,heat gently and marver again.
Halloween BeadsTutorial
by Lori Peterson
5
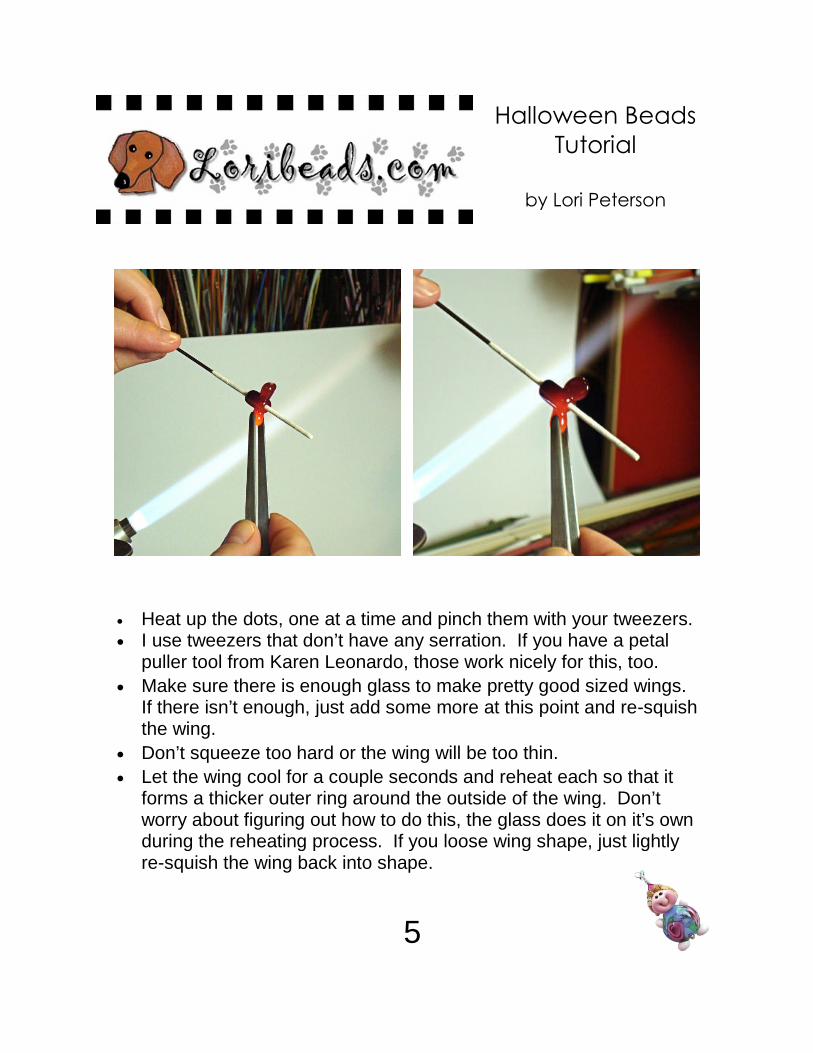
Heat up the dots, one at a time and pinch them with your tweezers. I use tweezers that don’t have any serration. If you have a petal
puller tool from Karen Leonardo, those work nicely for this, too.
Make sure there is enough glass to make pretty good sized wings.If there isn’t enough, just add some more at this point and re-squishthe wing.
Don’t squeeze too hard or the wing will be too thin.
Let the wing cool for a couple seconds and reheat each so that itforms a thicker outer ring around the outside of the wing. Don’tworry about figuring out how to do this, the glass does it on it’s ownduring the reheating process. If you loose wing shape, just lightlyre-squish the wing back into shape.

Halloween BeadsTutorial
by Lori Peterson
6
Spot heat half way up the wing
Push upward and inward on wingwith razor tool as shown
Repeat process for other wing
Don’t forget to keep everythingwarm by flashing both sides in theflame
Spot heat at the base of one ofthe wings
In the bat’s “armpit” push upwardwith a razor tool as shown.
Halloween BeadsTutorial
by Lori Peterson
7
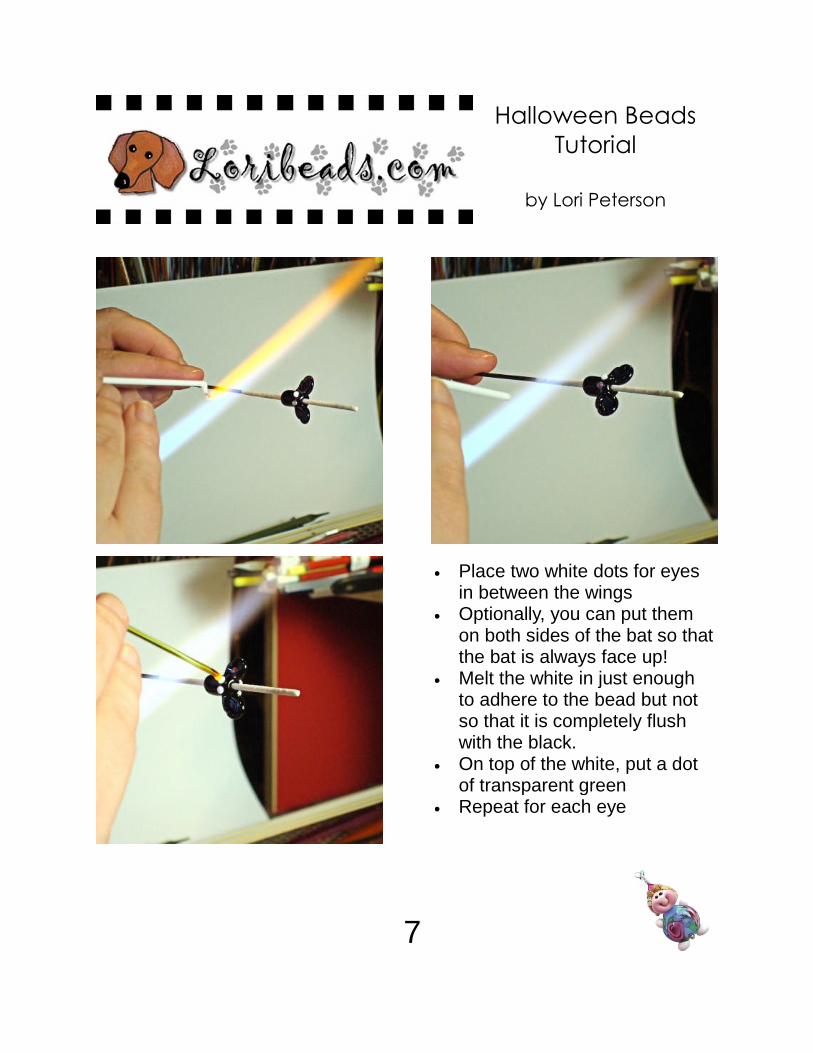
Place two white dots for eyesin between the wings
Optionally, you can put themon both sides of the bat so thatthe bat is always face up!
Melt the white in just enoughto adhere to the bead but notso that it is completely flushwith the black.
On top of the white, put a dotof transparent green
Repeat for each eye

Halloween BeadsTutorial
by Lori Peterson
8
Heat up each eye and flat-ten it slightly (or a lot, if youprefer)
I used the side of mytweezers but you can alsouse a marver or just aboutanything flat
On each eye, place a tiny,black eye dot.
I use vetrofond black pulledinto a very thin stringer.
If you want to get fancy youcan use intense black but Ifind that it doesn’t ‘stick’ aswell and is very finicky—there is a small window be-tween adhered and bleedingall over the place.

Halloween BeadsTutorial
by Lori Peterson
9
After all the black eye dots are applied, give the entirebead a good warming up in the back part of the flame(also known as “insurance heat”) and put it into thekiln.
Hints and Tips:
Try other colors for the eyes such as transparent red,orange, blue, aqua, brown or even rubino oro!
Take a rod of intense black, encase it in Vetrofondblack and pull thin stringers for super-black eye dotsthat don’t bleed all over the place and stick easier.
Effetre black tends to look purple when the dots arethis small.

Halloween BeadsTutorial
by Lori Peterson
10
Second Project:
SKULLS!
Whimsical little skulls forlots of fun this
Halloween!
I just love these cute little skulls and they make great earrings!Again, they have faces on both sides so they are always “faceup”. Add a pink bow and *presto* it’s a girl skull!
For this project, gather the following supplies: Vetrofond or Effetre ivory rod
Pink stringer (for bow) - optional
Various pokers—
Fine point (for nose)
1/8” blunt point (for eyes)
Xacto knife
Tweezers
Marver
Lentil or Straight sided lentil press (optional)
Parallel mashers (instead of lentil press)
Halloween BeadsTutorial
by Lori Peterson
11
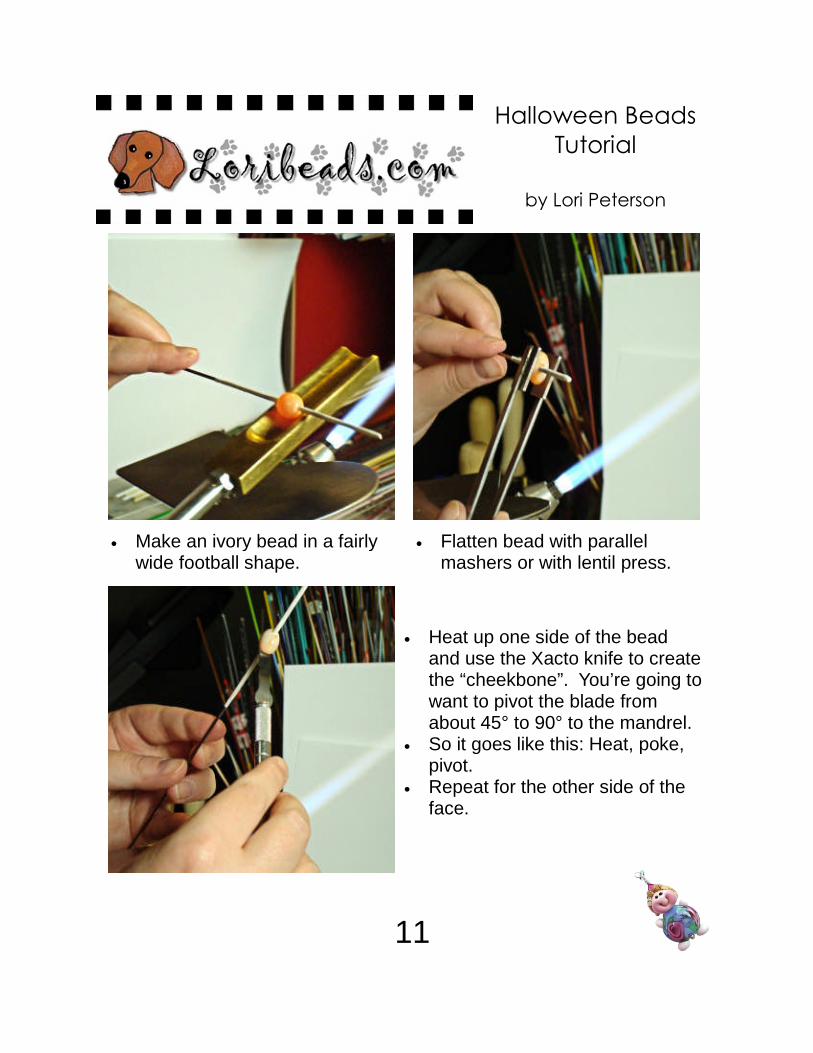
Make an ivory bead in a fairlywide football shape.
Flatten bead with parallelmashers or with lentil press.
Heat up one side of the beadand use the Xacto knife to createthe “cheekbone”. You’re going towant to pivot the blade fromabout 45° to 90° to the mandrel.
So it goes like this: Heat, poke,pivot.
Repeat for the other side of theface.

Halloween BeadsTutorial
by Lori Peterson
12
Here’s the basic shape aftercreating the cheekbones.
Heat up the bottom half of thebead and make the teeth withan Xacto knife by putting threelines at the chin end. Repeaton the other side of the bead ifyou want it to be reversible.
Heat up the top half of the skulland poke the eyes with a bluntpoker. Repeat on both sides ofthe bead to make it reversible.
Halloween BeadsTutorial
by Lori Peterson
13
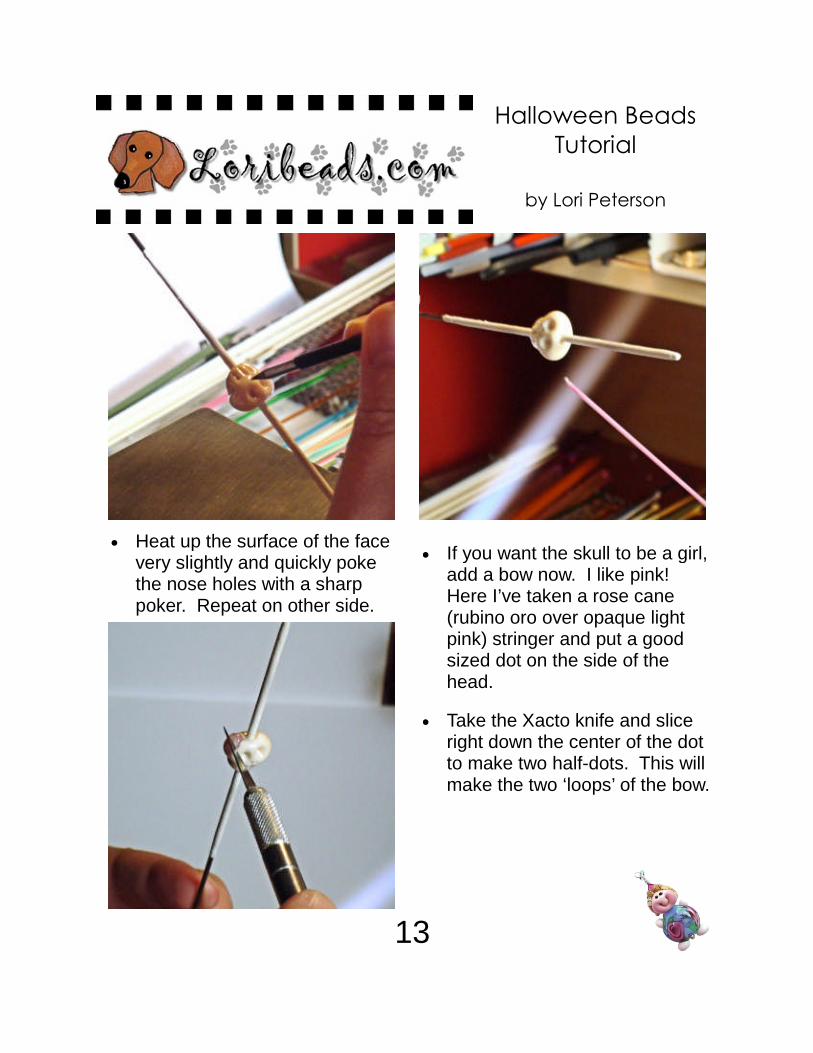
Heat up the surface of the facevery slightly and quickly pokethe nose holes with a sharppoker. Repeat on other side.
If you want the skull to be a girl,add a bow now. I like pink!Here I’ve taken a rose cane(rubino oro over opaque lightpink) stringer and put a goodsized dot on the side of thehead.
Take the Xacto knife and sliceright down the center of the dotto make two half-dots. This willmake the two ‘loops’ of the bow.
Halloween BeadsTutorial
by Lori Peterson
14
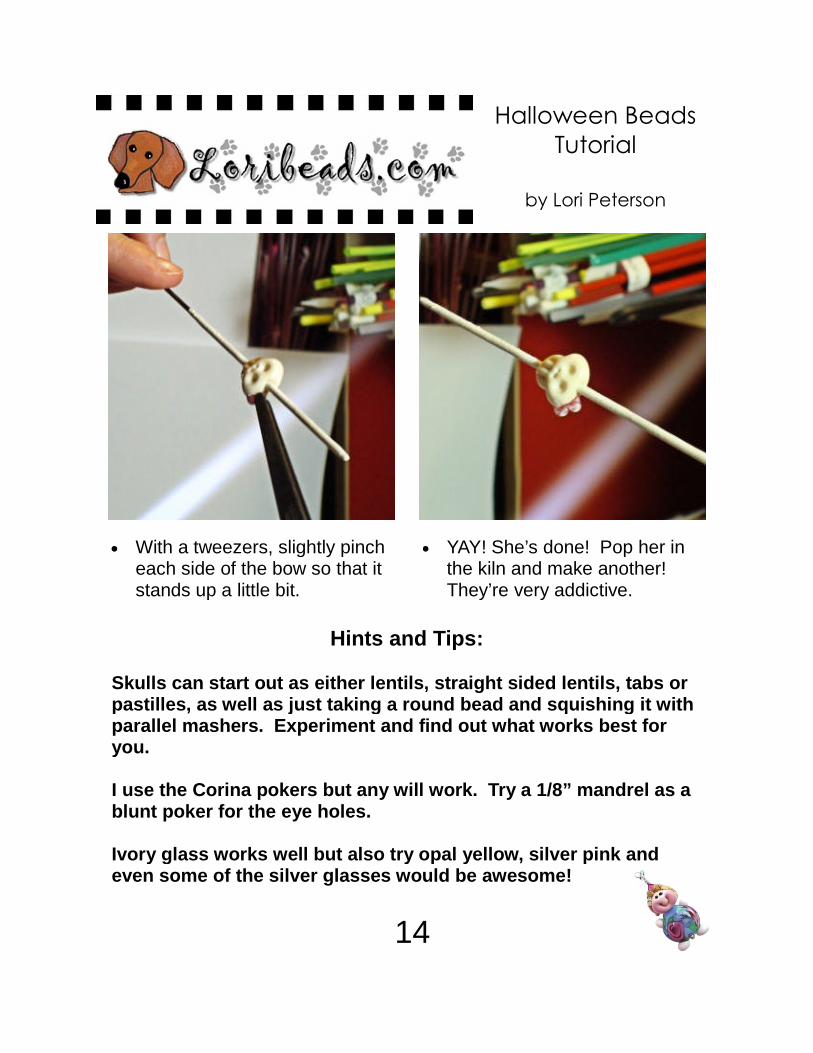
With a tweezers, slightly pincheach side of the bow so that itstands up a little bit.
YAY! She’s done! Pop her inthe kiln and make another!They’re very addictive.
Hints and Tips:
Skulls can start out as either lentils, straight sided lentils, tabs orpastilles, as well as just taking a round bead and squishing it withparallel mashers. Experiment and find out what works best foryou.
I use the Corina pokers but any will work. Try a 1/8” mandrel as ablunt poker for the eye holes.
Ivory glass works well but also try opal yellow, silver pink andeven some of the silver glasses would be awesome!
Halloween BeadsTutorial
by Lori Peterson
15
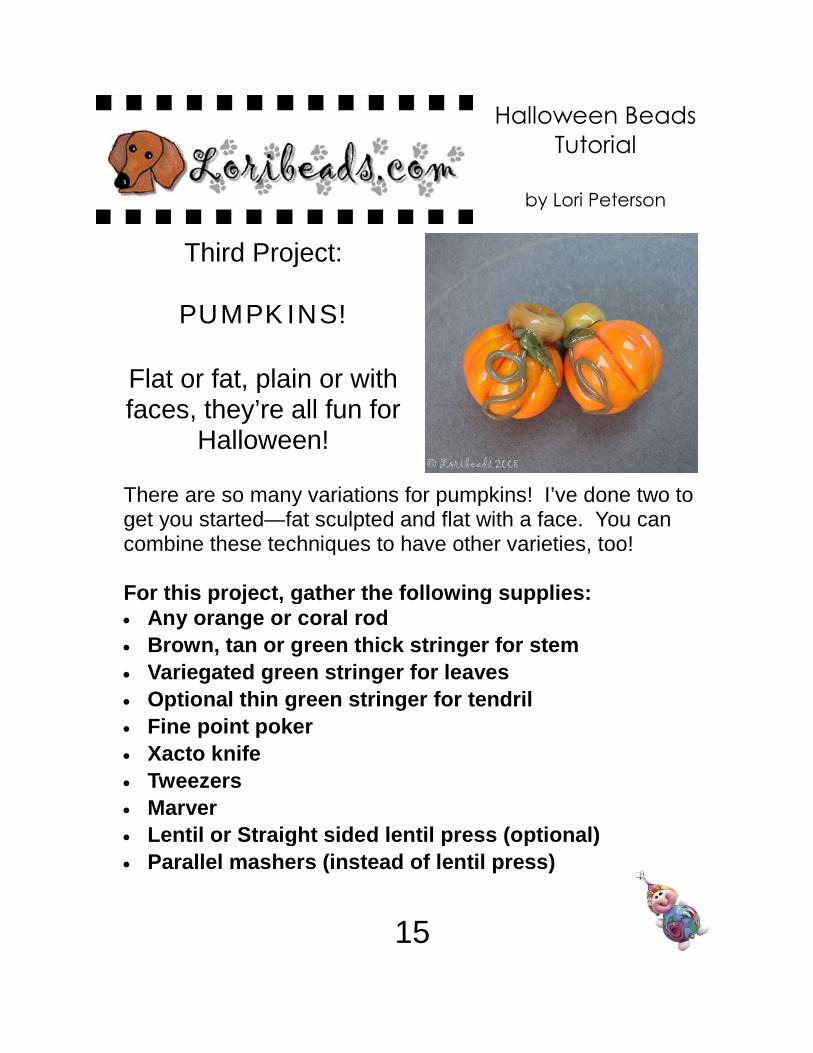
Third Project:
PUMPKINS!
Flat or fat, plain or withfaces, they’re all fun for
Halloween!
There are so many variations for pumpkins! I’ve done two toget you started—fat sculpted and flat with a face. You cancombine these techniques to have other varieties, too!
For this project, gather the following supplies: Any orange or coral rod
Brown, tan or green thick stringer for stem
Variegated green stringer for leaves
Optional thin green stringer for tendril
Fine point poker
Xacto knife
Tweezers
Marver
Lentil or Straight sided lentil press (optional)
Parallel mashers (instead of lentil press)
Halloween BeadsTutorial
by Lori Peterson
16
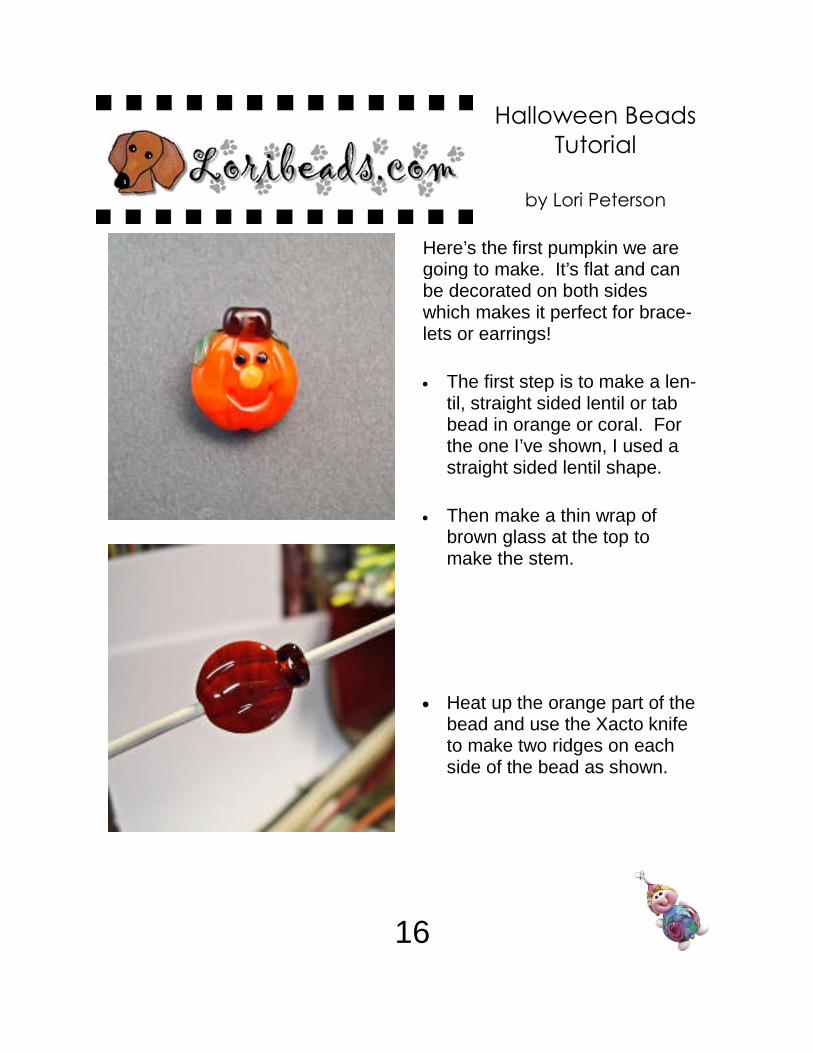
Here’s the first pumpkin we aregoing to make. It’s flat and canbe decorated on both sideswhich makes it perfect for brace-lets or earrings!
The first step is to make a len-til, straight sided lentil or tabbead in orange or coral. Forthe one I’ve shown, I used astraight sided lentil shape.
Then make a thin wrap ofbrown glass at the top tomake the stem.
Heat up the orange part of thebead and use the Xacto knifeto make two ridges on eachside of the bead as shown.

Halloween BeadsTutorial
by Lori Peterson
17
Use fine point poker to put twoeyes on each side of the bead.
Add a tiny dot of orange for thenose.
Use Xacto knife to cut a slit forthe mouth.
Halloween BeadsTutorial
by Lori Peterson
18
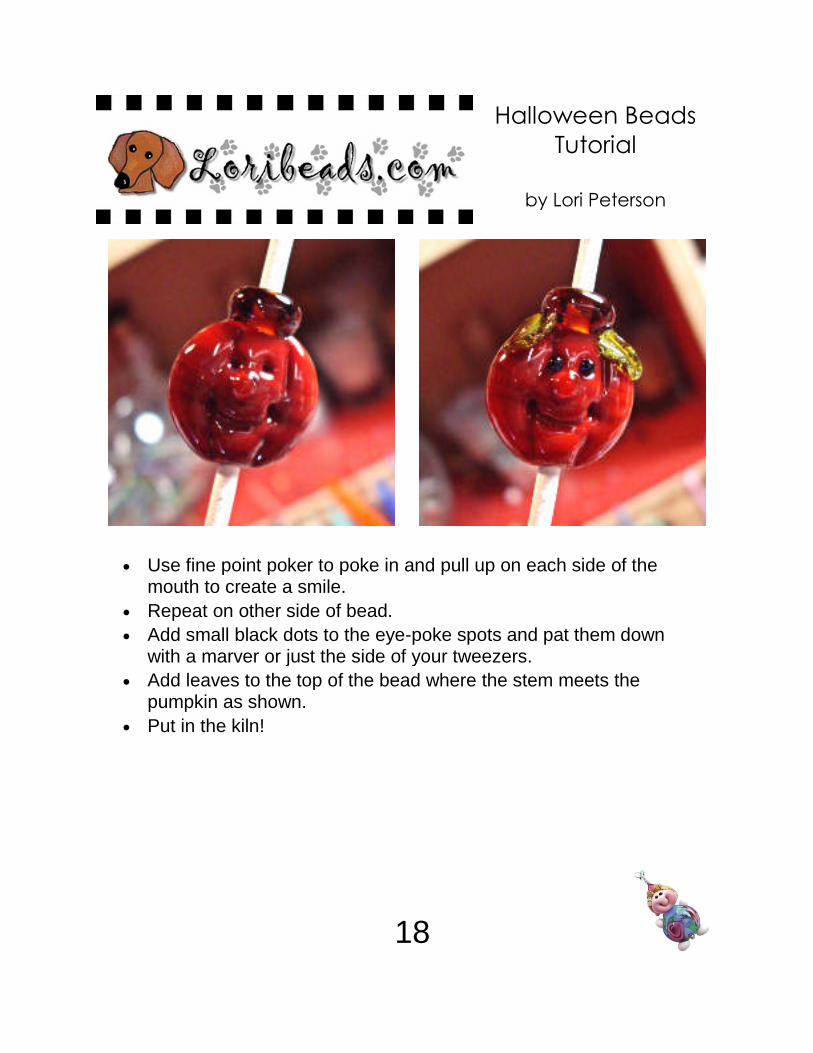
Use fine point poker to poke in and pull up on each side of themouth to create a smile.
Repeat on other side of bead.
Add small black dots to the eye-poke spots and pat them downwith a marver or just the side of your tweezers.
Add leaves to the top of the bead where the stem meets thepumpkin as shown.
Put in the kiln!
Halloween BeadsTutorial
by Lori Peterson
19
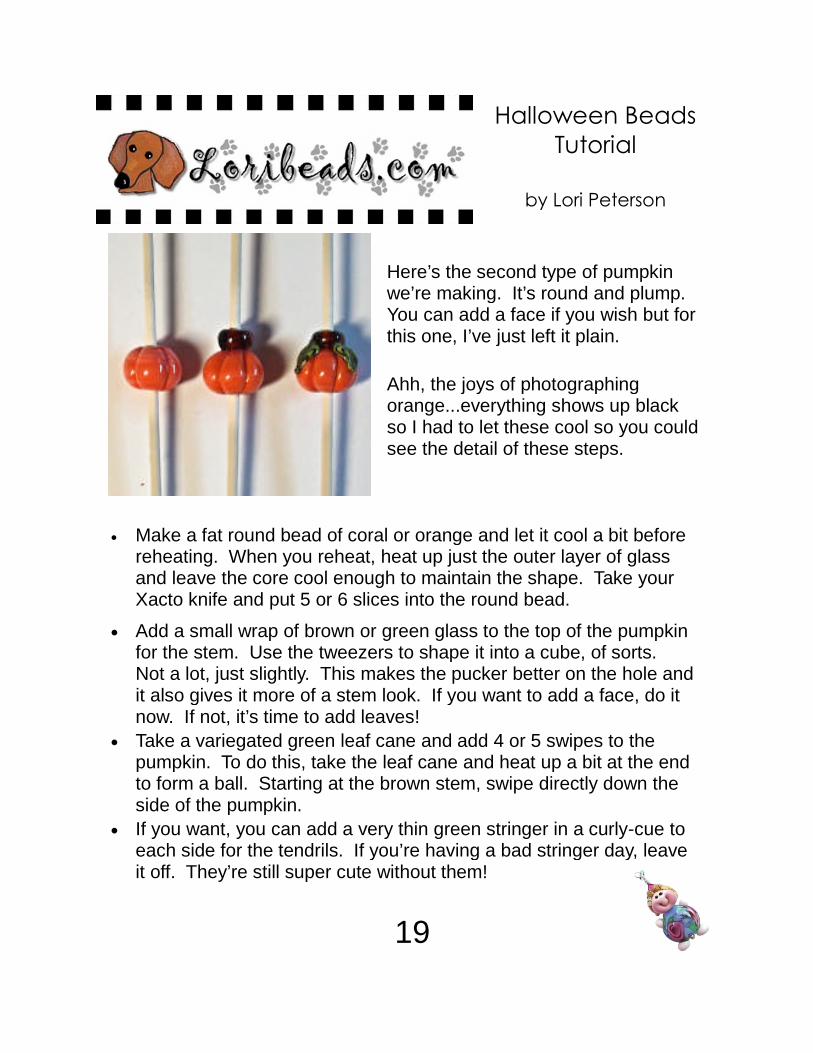
Make a fat round bead of coral or orange and let it cool a bit beforereheating. When you reheat, heat up just the outer layer of glassand leave the core cool enough to maintain the shape. Take yourXacto knife and put 5 or 6 slices into the round bead.
Add a small wrap of brown or green glass to the top of the pumpkinfor the stem. Use the tweezers to shape it into a cube, of sorts.Not a lot, just slightly. This makes the pucker better on the hole andit also gives it more of a stem look. If you want to add a face, do itnow. If not, it’s time to add leaves!
Take a variegated green leaf cane and add 4 or 5 swipes to thepumpkin. To do this, take the leaf cane and heat up a bit at the endto form a ball. Starting at the brown stem, swipe directly down theside of the pumpkin.
If you want, you can add a very thin green stringer in a curly-cue toeach side for the tendrils. If you’re having a bad stringer day, leaveit off. They’re still super cute without them!
Here’s the second type of pumpkinwe’re making. It’s round and plump.You can add a face if you wish but forthis one, I’ve just left it plain.
Ahh, the joys of photographingorange...everything shows up blackso I had to let these cool so you couldsee the detail of these steps.
Halloween BeadsTutorial
by Lori Peterson
20
Hints and Tips:
To make variegated leaf cane, take an opaque green rod andswipe 4 or 5 black stripes about an inch down the side of therod. Encase that part of the rod in a transparent green. Heat upthe whole inch to molten and pull a thick stringer out of it.
Pumpkins look great etched so if you’re braver than I and wantto etch them, go right ahead! If they have a face, you can al-ways dab a little white glue or clear nail polish on the eyes tokeep them shiny black.
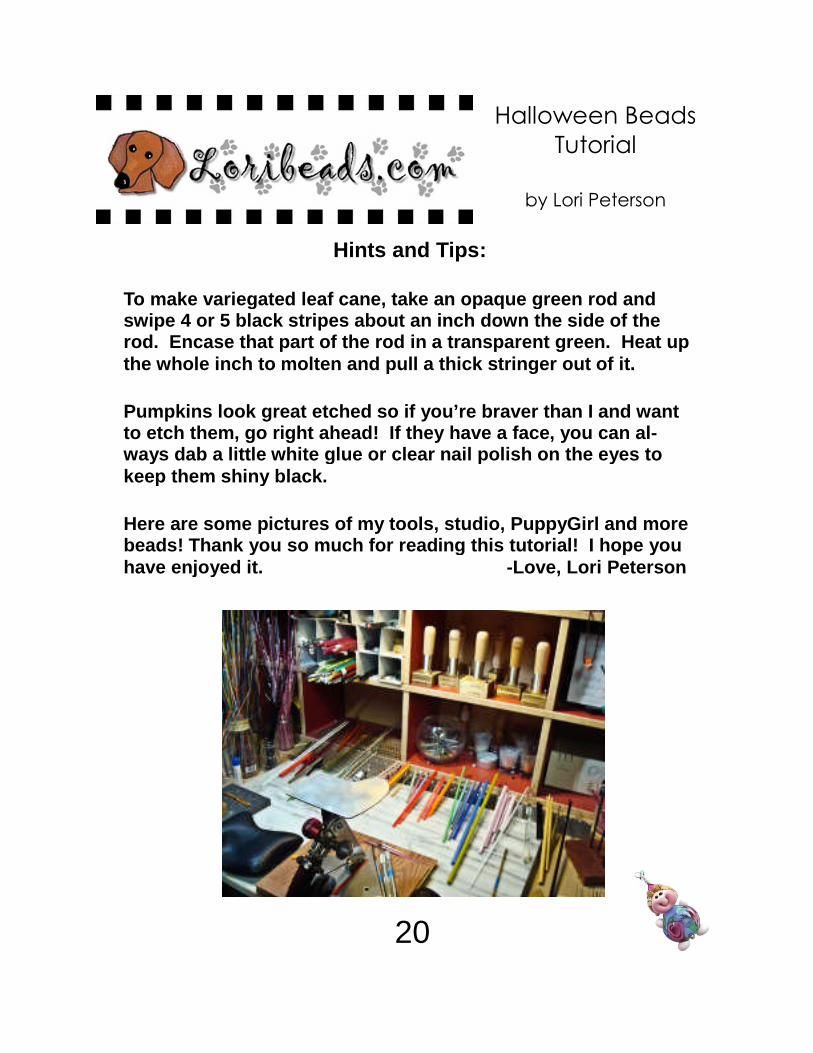
Here are some pictures of my tools, studio, PuppyGirl and morebeads! Thank you so much for reading this tutorial! I hope youhave enjoyed it. -Love, Lori Peterson

Halloween BeadsTutorial
by Lori Peterson
21
Happy Halloween!