Embed Size (px)
Citation preview

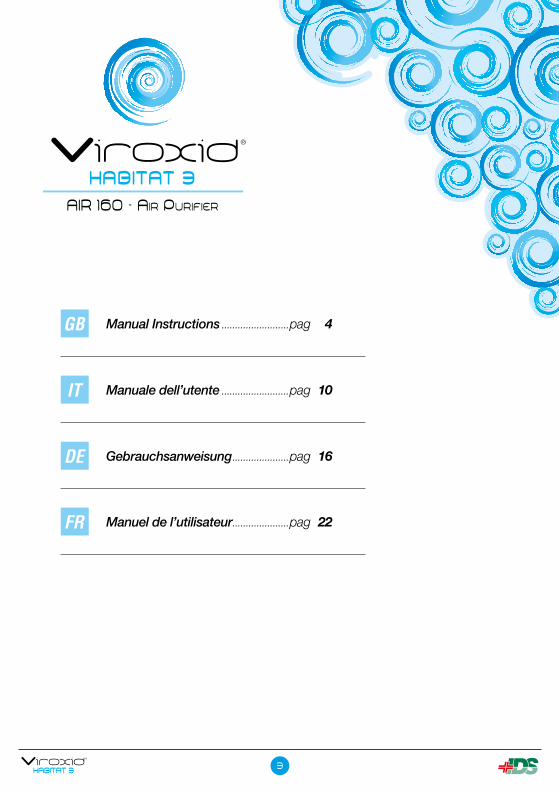
HABITAT 3
AIR 160 - AIR PURIFIER
viroxid®

HABITAT 3
AIR 160 - AIR PURIFIER
viroxid®
Manual Instructions .........................pag 4
Manuale dell’utente .........................pag 10
Gebrauchsanweisung .....................pag 16
Manuel de l’utilisateur .....................pag 22
GB
IT
DE
FR
3viroxid®
HABITAT 3

4Manual Instructionsviroxid®
HABITAT 3GB
I
H
K
F
L
D
E
C
B
M1
A

5Manual Instructionsviroxid®
HABITAT 3GB
A
A
D
G
F H
F
2
4
6
3
5C
ente
r to
cent
er -
435
mm

6Manual Instructionsviroxid®
HABITAT 3GB
Congratulations on your purchase of your Viroxid® Habitat 3.The Viroxid® Habitat 3 is based on existing air disinfection methods that are already being used to purify the air in hospital operating theatres. Three successful methods have now combined into a single device that is suitable for smaller areas up to 100 m3. These three methods are: air ionization, filtration and UV-C disinfection.
Purifying the air you breathe is no longer a superfluous luxury. An in-creasing number of micro-organisms can be found in the air, including viruses, bacteria and moulds, and these make our air less healthy to breath. We are increasingly made aware of how dangerous these mi-cro-organisms could become for human beings.
As these micro-organisms cannot be seen with the naked eye and are spreading through the air, this hazard becomes even more pro-nounced.
Research indicates that the air quality in enclosed spaces can be very poor indeed. Office areas, children’s day-care centres, classrooms, old people’s homes and family doctors’ or dentists’ surgeries are examples of areas where many people come together, and where the risk of infection through the air is correspondingly higher.
Our houses are also much better insulated than they used to be, with the result that natural ventilation is steadily reduced. The quality of the air inside is therefore often poorer than we think. Poor air quality at home is not only responsible for diseases, but can also be the cause of headaches, respiratory irritation, insomnia and allergies.
With an Viroxid® Habitat 3 device, you can disinfect the air up to 99,99% in areas up to 100 m3. In the case of larger areas, you can install sev-eral devices. Viruses, bacteria, moulds and other micro-organisms that are present in the air are rendered harmless by the device and are removed from the air, together with pollen, dust and odours.
You will quickly notice how the quality of the air has improved, and will feel fitter and more comfortable. Your Viroxid® Habitat 3 is the ideal tool to keep the air around you safe and healthy.
OperationThe air is drawn into the underside of the device using a ventilator, thereby creating air circulation in the room.The ventilator circulates 50 m3 of air through the unit per hour.
Depending on the size of the room, the ventilator can be set to the “low” position (25 m3 air per hour / noise level 15 decibels) or to the “high” position (50 m3 air per hour / noise level 19 decibels). By setting a starting and a finishing time with the digital timer, you can set the positions and the timing as you wish.
For the best results, it is recommended to keep your unit running 24 hours a day. If you place the unit in your bedroom, for example, you could use the “low” position, which is at the same time the setting for a reduced noise level.The air that is drawn into the unit first flows through the“3M High Air Flow (HAF) Filter with Antimicrobial”.
This high-quality filter is also used in hospitals, among other areas. The 3M filter removes larger particles from the air.
This special filter has an antimicrobial film that prevents the development of micro-organisms on the filter. The antimicrobial film also reduces clogging of the filter and increases the filter’s service life.
After passing through the filter, the air is treated with UV-C radiation. The special Philips UV-C lamp in the unit generates an ultraviolet radiation with a wavelength of 253.7 nanometres. The UV-C light destroys viruses, bacteria, moulds and other primitive organisms. The radiation damages the DNA structure of micro-organisms and prevents their reproduction.
The special aluminium interior of the housing provides additional re-flection of the UV-C radiation, thereby increasing the efficiency of the UV-C radiation up to 50%. The reflection ensures optimum operation by completely exposing micro-organisms to the eliminating UV-C ra-diation from all sides. After the UV-C treatment, the ionizer launches 8.5 million negative ions per cubic centimetre into the air. The large number of negative ions in the air improves the resistance of the body, and may even promote healing processes.
Outside air contains between 1,500 and 4,000 negative ions on aver-age. This figure is much lower in enclosed areas, between 0 and 50 ions per cubic centimetre. Poor air contains a lot of positive ions. Micro-or-ganisms easily spread through the air using positive ions, and this also applies to dust and pollen.
The negative ions that are introduced into the air form a compound with the positive ions. These compounds are too heavy to float in the air; they sink to the ground or are stopped by the filter.
The integrated timer keeps an accurate record of the number of oper-ating hours of the lamp. This will tell you precisely when to replace the lamp and the filter. In areas where more dust is present, the filter must be replaced more often. The air that is blown out from the outlet at the top of the unit has been filtered to 99,99%, and has been ionized and disinfected.
Clean air in your living environment is better for your health. Pure air not only increases the resistance of the body against diseases, but also reduces respiratory problems, or could prevent such problems com-pletely. Anxiety and depression are reduced, or disappear completely. But the major effect is the prevention of diseases.
Advantages of the Viroxid® Habitat 3:• Disinfects and purifies the air up to 99,99%• Eliminates micro-organisms that are present in the air• Provides protection against diseases• Improves the quality of the air and promotes a comfortable feeling• Purifies the air in enclosed areas• Has a positive effect on your health• Strengthens the resistance of the body against diseases• Inhalation allergies are reduced or disappear• Anxiety and depression can be reduced, or disappear.• Diseases can be prevented
Please read carefully through these instructions for use before installing this device.
User manual - Viroxid® Habitat 3 AIR 160Get rid of viruses, bacteria and molds. Disinfect the air you breathe.
7Manual Instructionsviroxid®
HABITAT 3GB
Properties of the Viroxid® Habitat 3:• Suitable for areas up to 100 m3
• Adjustable to 25 m3 or 50 m3 air per hour• Reduced noise level• Replacement of the UV-C lamp and filter once a year• The unit indicates when the lamp and filter should be replaced• Up to 50% more UV-C yield as a result of reflection in the aluminium housing• Simple installation and maintenance• Stand-alone system and immediately ready-for-use through “plug and play”• 2-year guarantee on manufacturing faults
The Viroxid® Habitat 3 is effective against:• Viruses • Bacteria • Moulds• House-dust mites • Dust and particulates • Pollen• Cigarette smoke • Harmful gases • Odours
The Viroxid® Habitat 3 is recommended for the following areas:• Schools • Day-care centres • Old people’s homes• Nursing homes • Hotels • Offices• Copying areas • Doctor’s surgeries • Dental surgeries• Veterinaries • Animal shelters • Kennels• Lounges • Bedrooms • Hobby rooms• Computer rooms • Studies • Play rooms• Holiday homes • Caravans • Boats• Fitness areas • Smoking areas • Restaurants• Hairdressers • Beauty parlours • Public toilets• Pubs • Meeting rooms • Dressing rooms
SafetyThis device produces harmful radiation. Direct contact could impair the eyes and skin. Only check the operation of the UV-C lamp throughthe air vents at the top of the unit. The openings will light up blue ifthe lamp is on.• When switching on the device for the first time, you may notice a
burning smell from the UV-C lamp for a short time. This odour is similar to the odour you notice when using a sun bed, and will disappear after a short time.
• Always comply with the electricity company’s regulations with re-gard to any permanent connection to the mains. If there is any doubt regarding the connection, consult a recognized electrician or the electricity company. Always work with an earth leakage current cir-cuit-breaker (residual current trip).
• Always remove the plug from the socket before carrying out any maintenance or repair work on the unit. Never insert the plug / pull the plug from the socket when you are standing in water or if your hands are wet.
• Never submerge this device in water.• Never install the unit in an area subject to full sunlight.• Keep children away from this device and from the cable.• The cable of the device cannot be replaced. The complete unit
must be replaced if there is any damage to the power cable. Nev-er remove the plug, but always leave the electrical unit intact. An electrical unit with the plug removed will no longer be covered by the guarantee.
• Once the device has been switched off, the lamp will remain hot for approximately 10 minutes.
• Do not use the device if any of the components are damaged.• This product can only be used according to the guidelines described
in these instructions for use.
Installation of the deviceDetermine where the device will be installed. When selecting a location for the device, please bear in mind that the unit must be able to circulate the air in the room freely and without obstructions. Also ensure that there is a power socket near the selected location.Install the device in a dry place. Ideally, the unit should be mounted in the vertical position, with a free space of at least 50 cm underneath for carrying out maintenance and for the replacement of the filter and/or UV lamp.1. Remove the clips (A) (see Drawing 2) from the AIR160 by unscrewing
the cover (M) (see drawing 5) and position the clips (A) at the select-ed location so that you can mark where the clips should be fitted onto the solid back wall.
2. Fix the clips at the selected location with suitable screws and/or plugs (see Drawing 2).
3. Place the AIR 160 in the fixed clips in the hinge and place the brack-ets into its place (see Drawing 3, 4). Finally screw the cover on the clips (see drawing 5).
4. Insert the plug into the socket and check the operation of the UV-C lamp (H) - only do this through the air vents at the top of the unit! Blue light can be seen through the air vents of the lid (I) if the lamp is on (see Drawing 1).
5. Check the operation of the ventilator (K) by holding your hand un-derneath the filter grid (C). If you feel an air flow, the ventilator (K) is working (see Drawing 1).
Keys
press briefly
press for 3 sec.
wait 5 sec.
selection confirmed
lamp operating time
real-time clock
test
air circulation, low position
air circulation, high position
set clock
reset
fail
5sec

8Manual Instructionsviroxid®
HABITAT 3GB
Setting the digital displayThe Viroxid® Habitat 3 can be set using the display on the front of the device. The display can be easily operated with just the one button. Drawing 7 of these instructions for use shows how to navigate through the menu. Details on each setting can be found below.
After the start-up, the validity of the time will be tested first. When you switch the device on for the first time, the software will automatically take you to the ‘clock set mode’. You can set the current time here.
You can set the hours by pressing the button briefly. The time is dis-played in a 24-hour format. After the hours have been correctly set, you can jump to the minute setting by pressing the button for 3 sec-onds. You can now set the minutes by briefly pressing the button as many times as necessary. As soon as the time has been correctly set, wait 5 seconds. The software will automatically save the time, and the dot next to the second digit will blink every second.
‘8000.’: If you press the button once in the rest position, the operating hours will be displayed. The display will automatically start from the fac-tory setting of the timer, i.e. 8,000 hours.The UV-C lamp operates at 100% radiation for up to 8,000 hours. After 8,000 operating hours, the UV-C radiation will weaken, and may be insufficient to obtain the desired results. If the device is switched off and then on again, the hour counter will start counting backwards from the value it had when it was switched off.
‘t-LO’: If you press the button twice in the rest position, the indication ‘t-LO’ will appear. This means: The low position of the air circulation. The ventilator is hereby set for an air circulation of 25 m3 per hour, and the device is virtually silent. The low air circulation can be set by pressing and holding the button for 3 seconds while the ‘t-LO’ indication is visi-ble on the display. When the hour digits start blinking, you can set the hour at which the device should switch to the low position. The hours will start counting upwards as soon as the button is pressed. You can set the desired hour by briefly pressing the button again. The minutes will start blinking 5 seconds after you have released the button, and you can then set the minutes. The settings will be saved, and the current time will be displayed after 5 seconds.
‘t-HI’: The ‘t-HI’ indication will appear if you press the button three times in the rest position. This means: The high position of the air circulation. The ventilator hereby is set for an air circulation of 50 m3 per hour. The high air circulation can be set by pressing and holding the button for 3 seconds when the indication ‘t-HI’ is visible on the display. When the digits for the hours start blinking, you can set the hour at which the device should switch to the high position. The hours will start count-ing upwards as soon as the button is pressed. You can set the desired hour by briefly pressing the button again. The minutes will start blinking 5 seconds after you have released the button, and you can then set the minutes. The settings will be saved, and the current time will be displayed after 5 seconds.
‘SEt’: The ‘SEt’ indication will appear if you press the button four times in the rest position. This means: Set clock. The real time clock is hereby set. The clock can be set by pressing and holding the button for 3 seconds when the ‘SEt’ indication is visible on the display. You can set the hours when the digits for the hours start blinking. The hours will start counting upwards as soon as the button is pressed. You can set the desired hour by briefly pressing the button again. The minutes will start blinking 5 sec-onds after you have released the button, and you can then set the
minutes. The settings will be saved, and the current time will be displayed after 5 seconds.
‘rSt’: The ‘rSt’ indication will appear if you press the button five times in the rest position. This means: Reset. This option is used to reset the timer. After you have replaced the lamp and the filter, you can reset the timer to 8,000 hours. The timer can be reset to 8,000 hours by pressing and holding the but-ton for 3 seconds while the ‘rSt’ indication is visible on the display. The settings will be saved, and the current time will be displayed after 5 seconds.
‘0000.’: The display will indicate 0000 when the 8,000 operating hours of the lamp have expired. The actual time will blink in the display, alter-nating with four blinking zeros. The filter and the UV-C lamp must now be replaced. See item ‘rSt’ for resetting the timer.
‘FAIL’: The software stops if there is a problem with the real time clock or with the ventilator connection. As soon as the device is switched on, the program will carry out a self-test to check the proper operation of the product. The units that are checked are the real time clock and the ventilator connection. Any problems with these items will be indicated on the display.
Switching off the display illuminationThe display illumination can be switched off by pressing and holding down the display button for 10 seconds. This will not switch the device off, and the settings will be retained. The display illumination is switched on again by briefly pressing the display button once.
Switching off the deviceIt is not necessary to switch off the device during the day because it has been designed to operate 24 hours a day to avoid the formation of new micro-organisms. You can switch the device off by removing the plug from the socket.
Dismantling / MaintenanceDuring maintenance work, or when dismantling the device, always switch off the power supply by removing the plug from the socket. The device must be cleaned at least once a year.
If dust deposits on the filter more quickly, the filter should be replaced more than once a year. The special lamp must be replaced after 8,000 operat-ing hours at the latest. Clean the aluminium interior with a soft cloth.1. Unscrew the Viroxid® Habitat 3 + cover the clips (see Drawing 4)
openand remove the Viroxid® Habitat 3 from the clips (A).2. Using a screwdriver, unscrew the 2 screws (B) from the filtergrid (C) on
the underside of the device.3. Loosen the filter grid (C) and remove the filter (E) from thefilter holder (D).4. Carefully pull the UV-C lamp (F) from the lamp fitting (H), thenturn it
by a quarter-turn to enable you to easily remove theUV-C lamp (F) from the lamp clip (G) of the device.
5. Clean the interior of the aluminium housing (L) with a soft cloth.6. Carefully insert the (new) UV-C lamp (F) into the lamp clip (G) in
a vertical position, pushing the UV-C lamp (F) through until italmost reaches the lamp fitting (H). Turn the lamp by a quarter-turn to fix it more tightly into the lamp clip (G), and thencarefully push the lamp into the lamp fitting (H) (see Drawing 6).

9Manual Instructionsviroxid®
HABITAT 3GB
ATTENTION:The lamp (F) will only fit into the lamp fitting (H) in one way(see Drawing 6).
7. Place the (new) 3M High Air Flow (HAF) filter (E) into the filter holder (D).
8. You can now reinsert the filter grid (C) into the filter holder (D) and tighten it with the 2 screws (B).
9. Insert the plug into the socket and check the operation of the UV-C lamp (H) - only do this through the air vents at the top of the unit! Blue light can be seen through the air vents of the lid (I) if the lamp is on (see Drawing 1).
10. Check the operation of the ventilator (K) by holding your hand un-derneath the filter grid (C). If you feel an air flow, the ventilator (K) is working (see Drawing 1).
Technical specifications• Viroxid® Habitat 3 ................................65 Watt• Philips PL-L 60W/4P HO lamp .............60 Watt• UV-C Dose ............................................4.23 mJ/cm2 (air flow 50 m3/hr)• UV-C (W) output ..................................19.0 Watt• UV-C (%) after 8,000 hours .................85 %• Filter (HAF) ............................................3MTM High Air Flow Air Filter• Ventilator .............................................12 Volt• Max. area capacity ............................100 m3
• Max. throughput .................................50 m3 of air per hour• Dimensions of the device ..................60 x 17 x 15 cm
Type of UV-C systemArticle number: 680102 Viroxid® Habitat 3 100 m³ / 60 Watt (230V/120V; 50/60 Hz)Replacement articlesArticle number: 680104 - UV-C Lamp Viroxid Habitat 3680105 - HAFE Filter Viroxid Habitat 3
Terms of guaranteeThe guarantee for this product covers manufacturing faults for a period of 24 months following the date of purchase. The lamp is not included in this guarantee.
Claims under the guarantee can only be considered if the product is returned post-paid together with a guarantee registration form and a valid purchase receipt.
Repairs under the guarantee may only be carried out by the supplier. Guarantee claims that are caused by errors in the installation or in the operation of the device will not be considered.
Defects originating from poor maintenance are also excluded from the guarantee. The supplier will not be held responsible in any way whatsoever for any damage caused by the incorrect operation of the product.
The supplier will not be liable for any consequential damage caused by the breakdown of the device. Complaints regarding transport dam-age will only be considered if the damage was established or con-firmed on delivery by the carrier or the postal authorities.
A claim can only be made against the carrier or the postal authorities if this has been done.
5sec
5sec
5sec
5sec
5sec
5sec
5sec
5sec
7Display off
Display on
10Manuale dell’utenteviroxid®
HABITAT 3IT
I
H
K
F
L
D
E
C
B
M1
A

11Manuale dell’utenteviroxid®
HABITAT 3IT
A
A
D
G
F H
F
2
4
6
3
5D
a ce
ntro
a c
entro
- 4
35 m
m

12Manuale dell’utenteviroxid®
HABITAT 3IT
Congratulazioni per avere acquistato Viroxid® Habitat 3.Viroxid® HABITAT 3 si basa su metodi di disinfezione esistenti già utilizzati per purificare l’aria nelle sale operatorie ospedaliere. Tre metodi effica-ci sono combinati in un singolo dispositivo adatto ad aree di dimensioni fino a 100 m3. Questi tre metodi consistono in: ionizzazione dell’aria, filtraggio e disinfezione tramite raggi UV-C.
Purificare l’aria che respiriamo non può più essere considerato un lusso superfluo. Un crescente numero di microrganismi presenti nell’aria, in-clusi virus, batteri e muffe rendono l’aria che respiriamo meno salutare. Siamo sempre più consapevoli di quanto questi microrganismi possano diventare pericolosi per gli esseri umani.
Dato che tali microrganismi non possono essere visti ad occhio nudo e che si diffondono nell’aria, i pericoli ad essi connessi diventano sempre più consistenti.
La ricerca suggerisce che la qualità dell’aria negli spazi confinati può essere piuttosto povera. Uffici, strutture per bambini, classi, residenze per anziani, studi di medici di famiglia e dentistici sono esempi di aree dove si riuniscono molte persone e dove il rischio di infezione attraverso l’aria è proporzionalmente più alto.
Le nostre case sono meglio isolate di quanto lo fossero nel passato con il risultato che la ventilazione naturale è decisamente ridotta. La qualità dell’aria all’interno quindi è spesso più povera di quanto immaginiamo. Una scarsa qualità dell’aria a casa non è solamente causa di malattie, ma può anche provocare mal di testa, irritazioni respiratorie, insonnia ed allergie.
Con un dispositivo Viroxid® HABITAT 3, si può disinfettare l’aria fino al 99,99% in aree di dimensioni fino a 100 m3. In caso di aree più estese, si possono installare più dispositivi. Virus, batteri, muffe ed altri micror-ganismi presenti nell’aria vengono neutralizzati e rimossi dal dispositivo, insieme con pollini, polveri ed odori.
Noterete immediatamente come la qualità dell’aria migliori, e vi sen-tirete più in forma e più a vostro agio. Il vostro Viroxid® HABITAT 3 è lo strumento ideale per mantenere l’aria attorno a voi salutare e sicura.
FunzionamentoL’aria viene attirata verso la parte inferiore del dispositivo per mezzo di un ventilatore, creando quindi una circolazione della stessa nell’am-biente. Il ventilatore permette la circolazione di 50 m3 di aria all’ora attraverso l’unità.A seconda delle dimensioni della stanza, il ventilatore può essere po-sizionato sulla funzione “basso” (25 m3 di aria all’ora / livello rumore 15 decibel) o sulla funzione “alto” (50 m3 di aria all’ora / livello rumore 19 decibel). Impostando un’ora di inizio e di termine sul timer digitale, è possibile stabilire funzione e durata a proprio piacimento. Per un risultato ideale, si suggerisce di mantenere l’unità in funzione per 24 ore al giorno. Se si posiziona l’unità nella camera da letto, ad esempio, si può utilizzare la funzione “basso” che corrisponde, contem-poraneamente, all’impostazione di un livello di rumore ridotto. L’aria che viene attirata all’interno dell’unità, scorre inizialmente attra-verso il filtro “3M ad alto flusso d’aria (HAF) con antimicrobico”.
Questo filtro di alta qualità viene anche utilizzato negli ospedali, oltre ad altre aree.
Il filtro 3M rimuove le particelle più grandi dall’aria. Inoltre, esso dispone di una pellicola antimicrobica che previene lo sviluppo di microrganismi sul filtro. La pellicola antimicrobica, inoltre, reduce l’otturazione del filtro e ne aumenta la vita utile.
Dopo essere passata attraverso il filtro, l’aria viene trattata con radia-zioni UV-C. La speciale lampada UV-C Philips presente nell’unità gene-ra una radiazione ultravioletta con una lunghezza d’onda di 253,7 na-nometri. La luce UV-C distrugge virus, batteri, muffe ed altri organismi primitivi. Le radiazioni danneggiano la struttura DNA dei microrganismi prevenendone la riproduzione
La speciale parte interna in alluminio dell’alloggiamento fornisce una rifrazione addizionale delle radiazioni UV-C, aumentandone quindi l’ef-ficienza fino al 50%. La rifrazione garantisce il funzionamento ideale, perché espone i microrganismi alle radiazioni UV-C da tutti i lati, per-mettendone l’annientamento. Dopo il trattamento UV-C, lo ionizzatore lancia 8,5 milioni di ioni negativi per centimetro cubo nell’aria. Il consi-stente numero di ioni negativi nell’aria migliora la resistenza del corpo e potrebbe favorire il processo di guarigione.
L’aria all’esterno contiene in media tra i 1.500 ed i 4.000 ioni negativi. Questo ammontare diminuisce considerevolmente negli spazi chiusi, fino ad arrivare a quantità comprese tra gli 0 ed i 50 ioni per centime-tro cubo. Un’aria di scarsa qualità contiene molti ioni positivi. I micror-ganismi si diffondono facilmente attraverso l’aria per mezzo degli ioni positivi, e ciò si applica anche a polveri e pollini.
Gli ioni negativi che vengono introdotti nell’aria formano composti con gli ioni positivi. Tali composti sono troppo pesanti per fluttuare nell’aria; essi infatti precipitano al suolo o vengono trattenuti dal filtro.
Il timer integrato conserva un’accurata registrazione delle ore di fun-zionamento della lampada. Ciò permette di monitorare il momento in cui lampada e filtro andranno sostituiti. In aree dove sono presenti notevoli quantità di polveri, il filtro dovrà essere sostituito più frequente-mente. L’aria che viene espulsa dalla bocchetta nella parte superiore dell’unità è stata filtrata al 99,99%, nonché ionizzata e disinfettata.
Un’aria pulita nell’ambiente in cui viviamo è importante per la nostra salute. L’aria pura non soltanto migliora la resistenza del corpo contro le malattie, ma riduce anche i problemi respiratori e potrebbe addirittura prevenire del tutto l’insorgenza di tali problemi. Anche ansia e depres-sione possono essere ridotte o eliminate completamente. L’effetto prin-cipale, comunque, è quello che riguarda la prevenzione di malattie.
Vantaggi di Viroxid® HABITAT 3 - AIR 160:• Disinfetta e purifica l’aria fino al 99,99%• Elimina i microrganismi presenti nell’aria• Fornisce protezione contro le malattie• Migliora la qualità dell’aria e favorisce una sensazione di benesere• Purifica l’aria negli ambienti confinati• Ha effetti positivi sulla salute• Rinforza la resistenza del corpo contro le malattie• Le allergie da inalazione sono ridotte o eliminate • Ansia e depressione possono essere ridotte o eliminate.• Si possono prevenire le malattie
Leggere attentamente le presenti istruzioni prima di installare questo dispositivo.
Viroxid® Habitat 3 AIR 160 - Manuale dell’utente Purificatore d’aria. Elimina virus, batteri e muffe. Disinfetta l’aria che respiri.

13Manuale dell’utenteviroxid®
HABITAT 3IT
Proprietà di Viroxid® Habitat 3 AIR 160:• Adatto ad aree fino a 100 m3
• Regolabile a 25 m3 o 50 m3 di aria all’ora• Livelli di rumore ridotti• Sostituzione di filtro e lampada UV-C una volta all’anno• L’unità indica quando lampada e filtro devono essere sostituiti• Fino al 50% rendimento extra delle radiazioni UV-C grazie alla rifrazione dell’alloggiamento in alluminio• Semplice installazione e manutenzione• Sistema autonomo e pronto all’uso “connessione ed uso”• Garanzia di 2 anni contro eventuali difetti di fabbrica
Viroxid® Habitat 3è efficace contro:• Virus • Batteri • Muffe• Acari della polvere • Polveri e particolati • Pollini• Fumo di sigaretta • Gas nocivi • Odori
Viroxid® Habitat 3 è consigliato per le seguenti strutture:• Scuole • Centri di accoglienza diurni • Case di riposo• Case di cura • Hotel • Uffici • Aree comuni • Studi medici • Studi dentistici• Veterinari • Canili • Rifugi per animali • Salotti • Camere da letto • Sale hobby • Sale computer • Studi • Sale gioco• Case vacanza • Roulotte • Barche• Aree fitness • Zone fumo • Ristoranti • Parrucchieri • Saloni di bellezza • Bagni pubblici • Pub • Sale riunioni • Spogliatoi
SicurezzaQuesto dispositivo emette radiazioni pericolose. Il contatto diretto po-trebbe danneggiare occhi e cute. Controllare il funzionamento della lampada UV-C esclusivamente attraverso le prese d’aria nella parte superiore dell’unità. Le aperture si illuminano di una luce blu se la lam-pada è accesa.• Alla prima accensione del dispositivo, si potrebbe notare un odore
di bruciato proveniente dalla lampada UV-C per un breve periodo di tempo. Tale odore è simile all’odore che si può percepire quando si utilizza un lettino solare, e scomparirà dopo un breve periodo di tempo.
• Occorre attenersi sempre ai regolamenti del fornitore di energia elettrica per quanto riguarda la connessione permanente alla rete. In caso di dubbi riguardanti la connessione, occorre consultare un elettricista professionista o il fornitore di energia elettrica. Utilizzare sempre un interruttore di dispersione a terra (differenziale).
• Rimuovere sempre il connettore a spina dalla presa prima di effet-tuare qualsiasi lavoro di manutenzione o riparazione sull’unità. Non inserire/rimuovere il connettore a spina dalla presa se si è nell’acqua o con le mani bagnate.
• Non immergere mai il dispositivo in acqua.• Non installare mai in una zona esposta alla piena luce del sole.• Tenere i bambini lontani dal dispositivo e dal cavo.• Il cavo del dispositivo non può essere sostituito. L’unità completa do-
vrà essere sostituita in caso di danni al cavo elettrico. Non rimuovere mai il connettore a spina, ma lasciare sempre l’unità intatta. Un’uni-tà elettrica con una spina sostituita non sarà coperta da garanzia.
• Una volta che il dispositivo viene spento, la lampada rimane calda per circa 10 minuti.
• Non utilizzare il dispositivo nel caso in cui i componenti siano danneg-giati.
• Il presente prodotto può essere utilizzato esclusivamente secondo le linee guida incluse nel presente manuale d’utilizzo.
Installazione del dispositivoDeterminare la zona dove il dispositivo verrà installato.Quando si seleziona una posizione per il dispositivo occorre tenere a mente che l’unità deve essere in grado di far circolare l’aria liberamente nella stanza senza ostruzioni. Occorre anche assicurarsi che vi sia una connessione alla rete elettrica nelle vicinanze della zona scelta. Installare il dispositivo in un’area asciutta. Idealmente, l’unità dovreb-be essere montata in posizione verticale, con uno spazio libero di al-meno 50 cm nella parte inferiore per permettere la manutenzione e la sostituzione del filtro e/o della lampada UV.1. Rimuovere i morsetti (A) (vedi figura 2) dal Viroxid HABITAT 3 svitando
il coperchio (M) (vedi figura 5) e posizionare i morsetti (A) nella zona prescelta in modo da poter contrassegnare dove i morsetti devono essere fissati alla parete di sostegno posteriore.
2. Fissare i morsetti nell’area selezionata con viti e/o ancoraggi ade-guati (vedi figura 2).
3. Posizionare il Viroxid HABITAT 3 nei morsetti una volta montati nelle guide e inserire le staffe in posizione (vedi figure 3, 4). Infine, avvitare il coperchio ai morsetti (vedi figura 5).
4. Inserire il connettore a spina nella presa e controllare il funzionamen-to della lampada UV-C (H) – eseguire questa operazione esclusiva-mente tramite le prese d’aria nella parte superiore dell’unità! Tramite queste si potrà scorgere una luce blu (I) se la lampada è accesa (vedi figura 1).
5. Controllare il funzionamento del ventilatore (K) posizionando la mano al di sotto della griglia del filtro (C). Se si percepisce un flusso d’aria, il ventilatore (K) sta funzionando (vedi figura 1).
Tasti
Premere brevemente
Premere per 3 secondi
Attendere per 5 secondi
Selezione confermata
Tempo lavoro lampada
Ora corrente
Test
Circolazione aria, bassa
Circolazione aria, alta
Impostazione ora
Resettaggio
Errore
5sec

14Manuale dell’utenteviroxid®
HABITAT 3IT
Impostazione del display digitaleIl dispositivo Viroxid® HABITAT 3 può essere impostato utilizzando il di-splay presente nella parte anteriore. Il display può essere facilmente azionato con un solo pulsante. La figura 7 delle presenti istruzioni ci mo-stra come scorrere il menu. I dettagli relativi a ciascuna impostazione sono illustrati in seguito.
Dopo l’avvio, verrà innanzitutto testata la corretta impostazione del tempo. Quando si accende il dispositivo per la prima volta, il software vi condurrà automaticamente in modalità “clock set” (impostazione orologio). Potrete quindi regolare l’ora corrente.
Potrete impostare l’ora premendo brevemente il pulsante. L’ora viene mostrata in formato 24 ore. Dopo che l’ora è stata impostata corret-tamente, si può procedere alla regolazione dei minuti premendo il pulsante per 3 secondi. Si possono quindi impostare i minuti premendo brevemente il pulsante tante volte quante necessarie. Una volta impo-stata correttamente l’ora corrente, attendere per 5 secondi. Il software salverà automaticamente l’ora ed il punto che si trova accanto al se-condo numero inizierà a lampeggiare ogni secondo.
‘8000.’: Premendo il pulsante una volta nella posizione iniziale, verran-no mostrate le ore di funzionamento. Il display fornisce automatica-mente le impostazioni di fabbrica del timer, ovvero 8.000 ore. La lampada UV-C funziona al 100% delle radiazioni fino ad un massimo di 8.000 ore. Dopo 8.000 ore di funzionamento, le radiazioni UV-C si indeboliscono, e potrebbero risultare insufficienti ad ottenere i risultati desiderati. Nel caso in cui il dispositivo venga spento e riacceso nuo-vamente, il contatore inizierà un conto alla rovescia rispetto al valore indicato al momento dello spegnimento.
‘t-LO’: Premendo il pulsante due volte nella posizione iniziale, apparirà l’indicazione ‘t-LO’. Ciò indica: il valore basso della circolazione dell’aria. Il ventilatore viene in questo caso impostato per una circolazione di 25 m3 all’ora, ed il dispositivo è praticamente silenzioso. Il valore basso di cir-colazione dell’aria può essere impostato premendo e tenendo premuto il pulsante per 3 secondi mentre l’indicazione ‘t-LO’ appare sul display. Quando le cifre che fanno riferimento all’ora iniziano a lampeggiare, si può impostare l’ora alla quale il dispositivo dovrà posizionarsi nella fun-zione di bassa circolazione. Lo scorrimento delle ore inizierà non appena il pulsante verrà premuto. Si può impostare l’ora desiderata premendo nuovamente il pulsante per un breve periodo di tempo. L’indicazione dei minuti comincerà a lampeggiare per 5 secondi dopo che il pulsante viene rilasciato, e così si potranno impostare i minuti. Le impostazioni ver-ranno salvate, e l’ora corrente verrà mostrata sul display dopo 5 secondi.
‘t-HI’: L’indicazione ‘t-HI’ appare quando si preme il pulsante tre volte nella posizione iniziale. Ciò indica: il valore alto di circolazione dell’aria. Il ventilatore viene quindi impostato per una circolazione dell’aria di 50 m3 all’ora. L’alta circolazione dell’aria può essere impostata premen-do e tenendo premuto il pulsante per 3 secondi quando l’indicatore ‘t-HI’ è visibile sul display. Quando le cifre che fanno riferimento alle ore iniziano a lampeggiare, si può impostare l’ora alla quale il dispositivo dovrà posizionarsi nella funzione di alta circolazione. Lo scorrimento delle ore inizierà non appena il pulsante verrà premuto. Si può impostare l’ora desiderata premendo nuovamente il pulsante per un breve periodo di tempo. L’indicazione dei minuti comincerà a lampeggiare per 5 secondi dopo che il pulsante viene rilasciato, e così si potranno impostare i minuti. Le impostazioni verranno salvate, e l’ora corrente verrà mostrata sul display dopo 5 secondi.
‘SEt’: L’indicazione ‘SEt’ appare quando si preme il pulsante quattro volte nella posizione iniziale. Ciò indica: impostazione orologio. Viene quindi impostata l’ora corrente. L’orologio può essere impostato premendo e tenendo premuto il pulsante per 3 secondi quando il di-splay indica la funzione ‘SEt’.
Si può impostare l’ora quando i numeri relativi alle ore cominciano a lampeggiare. Lo scorrimento delle ore inizierà non appena il pulsante verrà premuto. Si può impostare l’ora desiderata premendo nuovamente il pulsante per un breve periodo di tempo. L’indicatore dei minuti inizierà a lampeggiare 5 secondi dopo che il pulsante viene rilasciato, e si potranno allora impostare i minuti. Le impostazioni verranno salvate e il display mostrerà l’ora corrente dopo 5 secondi.
‘rSt’: L’indicatore ‘rSt’ appare dopo avere premuto il pulsante per 5 volte nella posizione iniziale. Ciò significa: Resettaggio. Questa opzione viene utilizzata per resettare il timer. Dopo avere sostituito lampada e filtro, si può resettare il timer ad 8.000 ore. Il timer può essere resettato ad 8.000 ore premendo e tenendo premuto il pulsante per 3 secondi mentre l’indicatore ‘rSt’ è visibile sul display. Le impostazioni verranno salvate ed il display mostrerà l’ora corrente dopo 5 secondi.
‘0000.’: Il display indica 0000 quando le 8.000 ore di operatività sono state raggiunte. L’ora corrente lampeggerà sul display, alternandosi a quattro zeri che lampeggiano. Il filtro e la lampada UV-C dovranno quindi essere sostituiti. Vedere la voce ‘rSt’ per il resettaggio del timer.
‘FAIL’ (errore): Il software si arresta nel caso in cui si presenti un pro-blema rispetto all’ora corrente o alla connessione del ventilatore. Non appena il dispositivo viene accesso, il programma esegue un test dia-gnostico per controllare che il prodotto funzioni correttamente. Le parti controllate sono l’ora corrente e la connessione del ventilatore. Qual-siasi problema riscontrato con questi elementi sarà indicato sul display.
Spegnimento illuminazione del displayL’illuminazione del display può essere spenta premendo e tenendo premuto il pulsante del display per 10 secondi. Questo non comporta lo spegnimento del dispositivo, e le impostazioni verranno mantenute. L’illuminazione del display viene accesa nuovamente premendo una volta e per un breve periodo di tempo il pulsante del display.
Spegnimento del dispositivoNon è necessario spegnere il dispositivo durante il giorno, in quanto esso è stato progettato per funzionare per 24 ore al giorno in modo da evitare la formazione di nuovi microrganismi. Il dispositivo può essere spento rimuovendo il connettore a spina dalla presa.
Smontaggio / ManutenzioneDurante la manutenzione, o quando si smonta il dispositivo, occorre sem-pre isolare la connessione elettrica, rimuovendo il connettore a spina dalla presa. Il dispositivo deve essere pulito almeno una volta all’anno. Nel caso la polvere si depositi sul filtro velocemente, quest’ultimo dovrà essere sostituito più frequentemente di una volta all’anno. La lampa-da speciale dovrà essere sostituita dopo 8.000 ore di funzionamento al massimo. Mantenere pulito l’interno in alluminio con un panno.1. Svitare il coperchio del Viroxid HABITAT 3 (vedi figura 4) aprire e ri-
muovere Viroxid HABITAT 3 dai morsetti (A).2. Utilizzando un cacciavite, svitare le 2 viti (B) dalla griglia del filtro (C)
nella parte inferiore del dispositivo.3. Allentare la griglia del filtro (C) e rimuovere il filtro (E) dalla guida (D).4. Estrarre delicatamente la lampada UV-C (F) dall’alloggiamento del-
la lampada (H), ruotare di un quarto per permettere la facile rimozio-ne della lampada UV-C (F) dalla guida (G) del dispositivo.
5. Pulire la parte interna dell’alloggiamento in alluminio (L) con un pan-no morbido.
6. Inserire delicatamente la (nuova) lampada UV-C (F) nella guida del-la lampada (G) in posizione verticale, inserendo la lampada UV-C (F) finché non raggiunge l’alloggiamento (H). Girare la lampada per un quarto di giro in modo da fissarla alla guida (G), in seguito inserire attentamente la lampada nell’alloggiamento (H) (vedi figura 6).

15Manuale dell’utenteviroxid®
HABITAT 3IT
ATTENZIONE:La lampada (F) si inserisce nell’alloggiamento (H) in un unico modo (vedi figura 6).
1. Posizionare il (nuovo) filtro 3M ad alto flusso d’aria (HAF) (E) nel rela-tivo alloggiamento (D).
2. Si può ora reinserire la griglia del filtro (C) nell’alloggiamento (D) ed assicurarla per mezzo delle 2 viti (B).
3. Inserire il connettore a spina nella presa e controllare il funziona-mento della lampada UV-C (H) – questa operazione deve essere effettuata esclusivamente tramite le prese d’aria situate nella parte superiore dell’unità! Una luce blu apparirà attraverso le prese d’aria sul coperchio (I) se la lampada è accesa (vedi figura 1).
4. Controllare il funzionamento del ventilatore (K) posizionando la mano al di sotto della griglia del filtro (C). Se si percepisce un flusso d’aria, il ventilatore (K) funziona (vedi figura 1).
Specifiche tecniche• Viroxid® Habitat 3 ................................65 Watt• Lampada Philips PL-L 60W/4P HO ........60 Watt• Quantità UV-C .....................................4,23 mJ/cm2 (flusso aria 50 m3/ora)• Emissione UV-C (W) ..............................19.0 Watt• (%) UV-C dopo 8.000 ore .................... 85 %• Filtro (HAF) ............................................3MTM Filtro aria alto flusso• Ventilatore ............................................12 Volt• Area capacità massima .....................100 m3
• Massima circolazione ..........................50 m3 di aria all’ora• Dimensioni dispositivo ..........................60 x 17 x 15 cm
Tipo di sistema UV-CNumero articolo: 680102 Viroxid® Habitat 3 100 m³ / 60 Watt (230V/120V; 50/60 Hz)Articoli di ricambio:Numero articolo: 680104 - Lampada UV-C Viroxid Habitat 3680105 - Filtro HAFE Viroxid Habitat 3
Termini garanziaLa garanzia per il presente prodotto copre i dif-etti di fabbricazione per un periodo fino a 24 mesi dalla data dell’acquisto. La lampada non è inclusa nella garanzia.
Le richieste di indennizzo riguardo alla presente garanzia saranno prese in considerazione es-clusivamente se il prodotto verrà restituito a spese del mittente insieme con il modello di registrazione della garanzia ed una ricevuta d’acquisto valida.
Secondo la presente garanzia le riparazioni potranno essere effettuate esclusivamente dal fornitore. Le richieste di indennizzo secondo questa garanzia causate da errori nell’installazione o nell’utilizzo del dispositivo non saranno prese in considerazione.
Anche i difetti dovuti ad una manutenzione inadeguata sono da considerarsi esclusi dalla garanzia. Il fornitore non sarà da considerarsi responsabile di qualsivoglia danno causato da un utilizzo errato del prodotto.
Il fornitore non sarà da considerarsi responsabile neppure per eventuali danni causati da eventuali guasti al dispositivo. Qualsiasi reclamo rela-tivo a danni verificatisi durante il trasporto sarà preso in considerazione esclusivamente nel caso in cui il danno venga appurato o confermato al momento della consegna da parte del trasportatore o degli uffici postali.
Si potrà inoltrare un reclamo nei confronti del trasportatore o degli uf-fici postali solamente se si è proceduto ad effettuare quanto sopra esposto.
5sec
5sec
5sec
5sec
5sec
5sec
5sec
5sec
7Display off
Display on

16Gebrauchsanweisungviroxid®
HABITAT 3DE
I
H
K
F
L
D
E
C
B
M1
A
17Gebrauchsanweisungviroxid®
HABITAT 3DE
A
A
D
G
F H
F
2
4
6
3
5M
itte
zu m
itte
- 43
5 m
m

18Gebrauchsanweisungviroxid®
HABITAT 3DE
Herzlichen Glückwunsch zum Kauf von Viroxid® Habitat 3.Viroxid® HABITAT 3 basiert auf existierenden Desinfektionsmethoden, die in Krankenhäusern bereits zur Luftreinigung in Operationssälen eingesetzt wer-den. Drei wirksame Methoden werden in einem einzigen Gerät kombiniert, das sich für Räume bis zu 100 m3 Größe eignet. Diese drei Methoden be-stehen aus: Luftionisation, Filtration und Desinfektion durch UV-C-Strahlen.
Eine Reinigung der von uns eingeatmeten Luft kann nicht länger als unnö-tiger Luxus angesehen werden. Die von uns eingeatmete Raumluft enthält eine zunehmende Anzahl an Mikroorganismen, darunter Viren, Bakterien und Schimmelpilze, was für die Gesundheit nicht gerade förderlich ist. Wir sind uns immer mehr bewusst, wie gefährlich diese Mikroorganismen für den Menschen werden können.
Da diese Mikroorganismen mit dem bloßen Auge nicht zu sehen sind und sich über die Luft verbreiten, nehmen die mit ihnen verbundenen Gefahren einen immer größeren Stellenwert an.
Untersuchungen deuten darauf hin, dass die Luftqualität gerade in kleinen Räumen recht schlecht sein kann. Büros, Kindereinrichtungen, Klassenzim-mer, Altenheime, Hausarzt- und Zahnarztpraxen sind Beispiele für Bereiche, in denen viele Menschen zusammenkommen und in denen das Risiko einer Ansteckung über die Luft proportional höher ist.
Gebäude sind heutzutage besser isoliert als früher, mit dem Ergebnis, dass die natürliche Belüftung wesentlich geringer ausfällt. Die Luftqualität im Ge-bäudeinneren ist daher oft schlechter als wir denken. Schlechte Luftquali-tät im Haus ist nicht nur eine Ursache für Krankheiten, sondern kann auch Kopfschmerzen, eine Reizung der Atemwege, Schlaflosigkeit und Allergien verursachen.
Mit einem Gerät wie Viroxid® HABITAT 3 lässt sich die Luft in bis zu 100 m3
großen Räumen bis zu 99,99% desinfizieren. In größeren Räumen können mehrere Geräte installiert werden. Viren, Bakterien, Schimmel und andere in der Luft befindliche Mikroorganismen werden vom Gerät neutralisiert und entfernt, ebenso wie Pollen, Staub und Gerüche.
Sie werden sofort feststellen, dass die Luftqualität besser ist, und sich fitter und wohler fühlen. Ihr Viroxid® HABITAT 3 ist die ideale Lösung, damit die Luft um Sie herum gesund und sicher bleibt.
FunktionsweiseDie Luft wird durch einen Ventilator in Richtung Geräteboden angesaugt, wodurch im Raum Zirkulation entsteht.
Der Ventilator lässt 50 m3 Luft pro Stunde durch die Einheit zirkulieren.Je nach Raumgröße kann der Ventilator auf die Funktion „niedrig“ (25 m3 Luft pro Stunde / Geräuschpegel 15 Dezibel) oder auf die Funktion „hoch“ (50 m3 Luft pro Stunde / Geräuschpegel 19 Dezibel) gestellt werden. Durch das Einstellen einer Start- und Endzeit am digitalen Timer können Sie die Be-triebsart und Dauer ganz nach Wunsch regulieren.
Um ein ideales Ergebnis zu erzielen, wird empfohlen, die Einheit 24 Stunden am Tag laufen zu lassen. Wenn Sie das Gerät z.B. im Schlafzimmer aufstellen, können Sie die Funktion „niedrig“ verwenden, was der gleichzeitigen Einstel-lung eines geringen Geräuschpegels entspricht.
Die Luft, die in die Einheit gesaugt wird, strömt zunächst durch den „3M High Air Flow (HAF) Filter mit antimikrobiellem Wirkstoff“.
Dieser qualitativ hochwertige Filter wird unter ande-rem auch in Krankenhäusern eingesetzt. Der 3M Filter entfernt die größeren Partikel aus der Raumluft. Darüber hinaus verfügt er über eine antimikrobielle Schicht, die eine Entwick-lung von Mikroorganismen auf dem Filter verhindert. Die antimikrobielle Schicht verringert auch die Verstopfung des Filters und erhöht seine Lebensdauer.
Nach dem Durchgang durch den Filter wird die Luft UV-C-Strahlungen aus-gesetzt. Die in der Einheit befindliche UV-C-Speziallampe von Philips erzeugt ultraviolette Strahlung mit einer Wellenlänge von 253,7 Nanometern. UV-C-Licht tötet Viren, Bakterien, Schimmelpilze und andere primitive Organismen ab. Die Strahlung schädigt die DNA-Struktur der Mikroorganismen und ver-hindert so deren Vermehrung.
Das Gehäuse weist einen besonderen Innenteil aus Aluminium auf, der für eine zusätzliche Brechung der UV-C-Strahlung sorgt und damit die Effizienz um bis zu 50% erhöht. Durch die Brechung der Strahlung wird eine geradezu ideale Funktionsweise erreicht, da die Mikroorganismen somit von allen Sei-ten der UV-C-Strahlung aussetzt sind und abgetötet werden können. Nach der UV-C-Behandlung schleudert der Ionisator 8,5 Millionen negative Ionen pro Kubikzentimeter in die Luft. Die große Anzahl negativer Ionen in der Luft verbessert die Widerstandskraft des Körpers und kann Heilungsprozesse för-dern.
Außenluft enthält im Durchschnitt zwischen 1.500 und 4.000 negative Ionen. Diese Menge nimmt in geschlossenen Räumen erheblich ab und liegt zwi-schen 0 und 50 Ionen pro Kubikzentimeter. Schlechte Luft enthält hingegen viele positive Ionen. Mikroorganismen verbreiten sich mittels positiver Ionen leicht in der Luft, was auch für Staub und Pollen gilt.
Die in die Luft geblasenen negativen Ionen verbinden sich mit den positiven Ionen. Die so entstandenen Verbindungen sind zu schwer, um in der Luft zu schweben; sie fallen auf den Boden oder werden vom Filter zurückgehalten.
Der integrierte Timer zeichnet die präzise Anzahl der Betriebsstunden der Lampe auf. So wissen Sie genau, wann Lampe und Filter ausgewechselt werden müssen. In Bereichen bzw. Räumen, in denen große Mengen Staub anfallen, muss der Filter häufiger gewechselt werden. Die Luft, die aus der Düse an der Oberseite des Geräts ausgestoßen wird, wurde zu 99,99% ge-filtert, ionisiert und desinfiziert.
Saubere Raumluft ist wichtig für unsere Gesundheit. Saubere Luft verbessert nicht nur die Widerstandskraft des Körpers gegen Krankheiten, sondern ver-ringert auch Atembeschwerden und könnte sogar das Entstehen derartiger Probleme ganz verhindern. Sogar Ängste und Depressionen können redu-ziert oder ganz beseitigt werden. Der Haupteffekt ist jedoch die Prävention von Krankheiten.
Die Vorzüge von Viroxid® HABITAT 3 - AIR 160:• Desinfiziert und reinigt die Luft bis zu einem Grad von 99,99%• Beseitigt in der Luft vorhandene Mikroorganismen• Bietet Schutz vor Krankheiten• Verbessert die Luftqualität und fördert das Wohlbefinden• Reinigt die Luft in geschlossenen Räumen• Hat positive Auswirkungen auf die Gesundheit• Stärkt die Widerstandskraft des Körpers gegen Krankheiten• Inhalationsallergien werden reduziert oder ganz beseitigt • Ängste und Depressionen können reduziert oder ganz beseitigt werden• Krankheiten lassen sich vorbeugen
Bitte lesen Sie diese Anweisungen sorgfältig durch, bevor Sie das Gerät installieren
Viroxid® Habitat 3 AIR 160 - Gebrauchsanweisung Luftreiniger. Beseitigt Viren, Bakterien und Schimmelpilze. Desinfizieren Sie die Luft, die Sie atmen.

19Gebrauchsanweisungviroxid®
HABITAT 3DE
Die Produktmerkmale von Viroxid® Habitat 3 - AIR 160:• Für bis zu 100 m3 große Bereiche geeignet • Auf einen Luftdurchsatz von 25 m3 oder 50 m3 pro Stunde einstellbar• Geringes Geräuschniveau• Filter und UV-C-Lampe werden einmal pro Jahr gewechselt• Die Einheit zeigt an, wann Lampe und Filter auszuwechseln sind• Bis zu 50% mehr Effizienz der UV-C-Strahlung dank der Strahlenbrechung durch das Aluminiumgehäuse• Einfache Installation und Wartung• Eigenständiges und betriebsbereites System, „Anschluss und Betrieb“• 2 Jahre Garantie auf eventuelle Herstellungsfehler
Viroxid® Habitat 3 - AIR 160 ist wirksam gegen:• Viren • Bakterien • Schimmelpilze• Hausstaubmilben • Staub und Schwebstoffe • Pollen• Zigarettenrauch • gesundheitsschädliche Gase • Gerüche
Viroxid® Habitat 3 - AIR 160 wird für die folgenden Einrichtungen empfohlen• Schulen • Tagesstätten • Altenheime • Pflegeheime • Hotels • Büro • Gemeinschaftsräume • Arztpraxen • Zahnarztpraxen • Tierarztpraxen • Hundezwinger• Tierheime • Wohnzimmer • Schlafzimmer• Hobbyräume • Informatikräume • Arbeitszimmer• Spielotheken • Ferienwohnungen • Wohnwagen• Boote • Fitnessräume • Raucherecken• Restaurants • Friseure • Schönheitssalons• Öffentliche Toiletten • Pubs / Kneipen • Tagungsräume • UmkleideräumeSicherheitDieses Gerät sendet gefährliche Strahlung aus. Ein direkter Kontakt kann Augen und Haut schädigen. Prüfen Sie den Betrieb der UV-C-Lampe nur durch die Lüftungsöffnungen an der Oberseite des Geräts. Die Öffnungen leuchten bläulich, wenn die Lampe eingeschaltet ist.• Wenn das Gerät zum ersten Mal eingeschaltet wird, können Sie für
kurze Zeit einen leichten Brandgeruch wahrnehmen, der von der UV-C-Lampe stammt. Dieser Geruch ähnelt dem Geruch, den man bei der Benutzung einer Sonnenbank wahrnehmen kann; der Geruch verschwindet aber nach kurzer Zeit wieder.
• Was den dauerhaften Anschluss an das Stromnetz betrifft, befolgen Sie stets die Vorschriften Ihres Stromversorgers. Wenn Sie Zweifel im Hinblick auf den Anschluss haben, sollten Sie sich an einen professio-nellen Elektriker oder an Ihren Stromversorger wenden. Verwenden Sie immer einen Fehlerstromschutzschalter (Differenzstrom-Schutz-schalter).
• Ziehen Sie immer den Stecker aus der Steckdose, bevor Sie War-tungs- oder Reparaturarbeiten am Gerät durchführen. Stecken Sie den Stecker nicht in die Steckdose oder ziehen sie ihn nicht heraus, wenn Sie sich im Wasser befinden oder nasse Hände haben.
• Das Gerät niemals in Wasser tauchen.• Installieren Sie das Gerät niemals in einem Bereich, der direktem Son-
nenlicht ausgesetzt ist.• Das Gerät und das Kabel von Kindern fernhalten.• Das Netzkabel kann nicht ersetzt werden. Wenn das Kabel beschä-
digt sein sollte, muss die komplette Einheit ausgewechselt werden. Entfernen Sie niemals den Steckverbinder, sondern lassen Sie das Ge-rät immer intakt. Eine elektrische Einheit mit einem ausgetauschten Stecker wird nicht mehr von der Garantie abgedeckt.
• Nachdem das Gerät ausgeschaltet wurde, bleibt die Lampe noch etwa 10 Minuten lang heiß.
• Das Gerät nicht betreiben, wenn irgendeine Komponente beschä-digt ist.
• Dieses Produkt darf nur in Übereinstimmung mit den in diesem Be-nutzerhandbuch enthaltenen Anweisungen betrieben werden.
Installation des GerätsWählen Sie den Bereich aus, in dem das Gerät aufgestellt werden soll. Beachten Sie bei der Wahl des Aufstellungsortes, dass das Gerät in der Lage sein muss, die Luft ungehindert im Raum zirkulieren zu lassen. Sie müssen auch sicherstellen, dass es in der Nähe des Aufstellungsortes eine Steckdose zum Anschluss ans Stromnetz geben muss.
Das Gerät in einem trockenen Raum installieren. Idealerweise sollte die Einheit vertikal montiert werden, mit einem Abstand von mindestens 50 cm zum Boden, um die Wartung und den Austausch des Filters und/oder der UV-Lampe zu ermöglichen.
1.Entfernen Sie die Klammern (A) (siehe Abb. 2) von Viroxid HABITAT 3, hierzu die Abdeckung (M) abschrauben (siehe Abb. 5), dann die Klammern (A) am gewählten Aufstellungsort in Position bringen, so dass Sie markieren können, auf welcher Höhe die Klammern an der Wand angebracht werden sollen.
2.Befestigen Sie die Klammern mit geeigneten Schrauben und/oder Dübeln im gewählten Aufstellungsbereich (siehe Abb. 2).
3.Viroxid HABITAT 3 in den Klammern in Position bringen, nachdem die Führungen entsprechend angebracht wurden, dann die Bügel in Position bringen (siehe Abb. 3 und 4). Abschließend die Abdeckung an dem Klammern festschrauben (siehe Abb. 5).
4.Stecken Sie den Stecker in die Steckdose und prüfen Sie, ob die UV-C-Lampe (H) funktioniert - tun Sie dies nur über die Lüftungsöffnun-gen an der Oberseite des Gerätes! Ein bläuliches Licht (I) ist durch die Öffnungen hindurch sichtbar, wenn die Lampe eingeschaltet ist (siehe Abb. 1).
5.Prüfen Sie die Funktion des Ventilators (K), indem Sie Ihre Hand unter das Filtergitter (C) halten. Wenn Sie einen Luftstrom spüren, läuft der Ventilator (K) (siehe Abb. 1).
TastenKurz drücken
3 Sekunden drücken
5 Sekunden abwarten
Auswahl bestätigt
Betriebsdauer der Lampe
Aktuelle Uhrzeit
Test
Luftzirkulation, niedrig
Luftzirkulation, hoch
Uhrzeit einstellen
Reset
Fehler
5sec
20Gebrauchsanweisungviroxid®
HABITAT 3DE
Einstellung des digitalen DisplaysDas Gerät Viroxid® HABITAT 3 kann mithilfe des digitalen und sich an der Vor-derseite befindlichen Displays eingestellt werden. Das Display lässt sich mit einer einzigen Taste einfach bedienen. Abbildung 7 dieser Anleitung zeigt uns, wie man das Menü durchläuft. Die Details für jede Einstellung sind an-schließend aufgeführt.
Nach der Inbetriebnahme wird zunächst die korrekte Zeiteinstellung ge-prüft. Wenn Sie das Gerät zum ersten Mal einschalten, geht die Software automatisch in den Uhr-Einstellmodus über. Nun können Sie die aktuelle Uhrzeit einstellen.
Durch ein kurzes Drücken der Taste können Sie die Uhrzeit einstellen. Die Uhr-zeit erscheint im 24-Stunden-Format. Nachdem Sie die Stunden eingestellt haben, können Sie zum Einstellen der Minuten übergehen, hierzu die Taste 3 Sekunden lang gedrückt halten. Nun können Sie die Minuten einstellen, indem Sie die Taste so oft wie nötig kurz drücken. Nachdem die aktuelle Zeit korrekt eingestellt wurde, 5 Sekunden abwarten. Die Software speichert die Uhrzeit automatisch ab und der Punkt, der sich neben der zweiten Zahl befindet, beginnt im Sekundentakt zu blinken.
‘8000.’: durch ein einmaliges Drücken der Taste in der Grundstellung werden die Betriebsstunden angezeigt. Das Display zeigt automatisch die Werksein-stellungen des Timers an, d.h. 8.000 Stunden. Die UV-C-Lampe arbeitet maximal 8.000 Stunden lang mit 100% der Strah-lungskraft. Nach 8.000 Betriebsstunden wird die UV-C-Strahlung schwächer und kann nicht mehr ausreichend sein, um die gewünschten Ergebnisse zu erzielen. Wenn das Gerät aus- und wieder eingeschaltet wird, beginnt der Zähler mit seinem Countdown bei dem Wert, der beim Ausschalten ange-zeigt wurde.
‘t-LO’: durch zweimaliges Drücken der Taste in der Grundstellung wird ‚t-LO‘ angezeigt. Dies entspricht dem niedrigsten Wert der Luftzirkulation. Der Venti-lator ist in diesem Fall auf einen Luftdurchsatz von 25 m3 pro Stunde eingestellt, und das Gerät ist praktisch geräuschlos. Zum Einstellen des niedrigen Luft-durchsatzes die Taste 3 Sekunden lang gedrückt haben, während ‚t-LO‘ auf dem Display erscheint. Wenn die Stundenziffern zu blinken beginnen, können Sie die Zeit einstellen, zu der das Gerät auf den geringen Luftdurchsatz über-gehen soll. Das Scrollen der Stunden beginnt, sobald die Taste gedrückt wird. Durch erneutes kurzes Drücken der Taste können Sie die gewünschte Uhrzeit in Stunden einstellen. Die Minutenanzeige beginnt nach dem Loslassen der Taste 5 Sekunden lang zu blinken, jetzt können die Minuten eingestellt wer-den. Die Einstellungen werden gespeichert und nach 5 Sekunden erscheint die aktuelle Uhrzeit auf dem Display.
‘t-HI’: die Anzeige ‚t-HI‘ erscheint, wenn die Taste dreimal in ihrer Grund-stellung gedrückt wird. Dies entspricht dem höchsten Wert der Luftzirkula-tion. Der Ventilator wird so auf einen Luftdurchsatz von 50 m3 pro Stunde eingestellt. Zum Einstellen des hohen Luftdurchsatzes die Taste 3 Sekunden lang gedrückt haben, während ‚t-HI‘ auf dem Display erscheint. Wenn die Stundenziffern zu blinken beginnen, können Sie die Zeit einstellen, zu der das Gerät auf den hohen Luftdurchsatz übergehen soll. Das Scrollen der Stunden beginnt, sobald die Taste gedrückt wird. Durch erneutes kurzes Drücken der Taste können Sie die gewünschte Uhrzeit in Stunden einstellen. Die Minutenanzeige beginnt nach dem Loslassen der Taste 5 Sekunden lang zu blinken, jetzt können die Minuten eingestellt wer-den. Die Einstellungen werden gespeichert und nach 5 Sekunden erscheint die aktuelle Uhrzeit auf dem Display.
‘SEt’: die Anzeige ‚SEt‘ erscheint, wenn die Taste viermal in ihrer Grundstel-lung gedrückt wird. Dies bedeutet: Einstellung der Uhr. Auf diese Weise wird die aktuelle Uhrzeit eingestellt. Die Uhr kann durch Drücken und Halten der Taste für 3 Sekunden eingestellt werden, wenn auf dem Display die Funktion ‚SEt‘ angezeigt wird. Die Uhrzeit kann eingestellt werden, wenn die Stundenzahlen zu blinken be-ginnen. Das Scrollen der Stunden beginnt, sobald die Taste gedrückt wird.
Durch erneutes kurzes Drücken der Taste können Sie die gewünschte Uhrzeit in Stunden einstellen. Die Minutenanzeige beginnt nach dem Loslassen der Taste 5 Sekunden lang zu blinken, jetzt können die Minuten eingestellt werden. Die Einstellungen werden gespeichert und das Display zeigt nach 5 Sekunden die aktuelle Zeit an.
‘rSt’: die Anzeige ‚rSt‘ erscheint nach 5-maligem Drücken der Tastein der Grundstellung. Dies bedeutet: Reset. Diese Option dient zum Resetten des Timers. Nachdem man Lampe und Filter ausgewechselt hat, kann man den Timer auf 8.000 Stunden zurücksetzen. Zum Resetten des Ti-mers die Taste 3 Sekunden lang gedrückt haben, während ‚rSt‘ auf dem Display erscheint. Die Einstellungen werden gespeichert und das Display zeigt nach 5 Sekunden die aktuelle Zeit an.
‘0000.’: das Display zeigt 0000 an, wenn die 8.000 Betriebsstunden erreicht wurden. Auf dem Display blinken abwechselnd die aktuelle Uhrzeit und die vier Nullen. Filter und UV-C-Lampe müssen jetzt ausgewechselt werden. Sie-he den Abschnitt ‚rSt‘ zum Resetten des Timers.
‘FAIL’ (Fehler): die Software wird blockiert, wenn es ein Problem mit der aktuellen Uhrzeit oder dem Ventilatoranschluss gibt. Sobald das Gerät ein-geschaltet wird, führt das Programm einen Diagnosetest durch, um zu über-prüfen, ob das Produkt korrekt funktioniert. Dabei werden die aktuelle Uhr-zeit und der Anschluss des Ventilators kontrolliert. Jedes mit diesen beiden Elementen zusammenhängende Problem wird auf dem Display angezeigt.
Ausschalten der Display-BeleuchtungDie Displaybeleuchtung kann ausgeschaltet werden, hierzu die Displaytas-te 10 Sekunden lang gedrückt halten. Dadurch schaltet sich das Gerät aber nicht aus und die Einstellungen bleiben erhalten. Die Displaybeleuchtung wird durch einmaliges kurzes Drücken der Displaytaste wieder eingeschal-tet.
Ausschalten des GerätsEs ist nicht notwendig, das Gerät während des Tages auszuschalten, da es für einen 24-Stunden-Betrieb ausgelegt ist, um die Bildung neuer Mikroorga-nismen zu verhindern. Das Gerät kann durch das Herausziehen des Steckers aus der Steckdose abgeschaltet werden.
Auseinanderbau / WartungTrennen Sie das Gerät bei Wartungsarbeiten oder beim Auseinanderbau immer von seiner Stromversorgung, indem Sie den Stecker aus der Steck-dose ziehen. Das Gerät muss mindestens einmal pro Jahr gereinigt werden. Wenn sich auf dem Filter schnell Staub ablagert, muss er häufiger als ein-mal pro Jahr ausgetauscht werden. Die Speziallampe muss nach spätestens 8.000 Betriebsstunden ausgetauscht werden. Die Geräteinnenseite aus Alu-minium mit einem Lappen sauber halten.
1. Die Abdeckung von Viroxid® HABITAT 3 abschrauben (siehe Abb. 4) und Viroxid HABITAT 3 aus den Klammern (A) herausnehmen.
2. Mithilfe eines Schraubendrehers die 2 Schrauben (B) vom Filtergitter (C) an der Unterseite des Geräts losschrauben.
3. Lösen Sie das Filtergitter (C) und nehmen Sie den Filter (E) aus seiner Füh-rung (D) heraus.
4. Ziehen Sie vorsichtig die UV-C-Lampe (F) aus ihrem Sitz (H) heraus; die UV-C-Lampe (F) um eine Viertelrunde drehen, damit sie sich leichter aus der Führung (G) des Geräts herausnehmen lässt.
5. Den Innenteil des Alugehäuses (L) mit einem weichen Lappen reinigen.6. Die (neue) UV-C-Lampe (F) vorsichtig und vertikal in die Lampenführung
(G) einsetzen und die UV-C-Lampe (F) so weit schieben, bis sie ihren Sitz (H) erreicht hat. Die Lampe um eine Viertelrunde drehen, sodass sie fest an der Führung (G) anliegt, anschließend die Lampe in ihren Sitz (H) ein-setzen (siehe Abbildung 6).

21Gebrauchsanweisungviroxid®
HABITAT 3DE
ACHTUNG: Die Lampe (F) kann nur auf eine einzige Art und Weise in ihren Sitz (H) eingesetzt werden (siehe Abb. 6).
1. Den (neuen) Filter von 3M für hohen Luftdurchsatz (HAF) (E) in seinen Sitz einsetzen (D).
2. Sie können nun das Filtergitter (C) wieder ins Gehäuse (D) einsetzen und mit den 2 Klemmschrauben (B) festmachen.
3. Stecken Sie den Stecker in die Steckdose und prüfen Sie, ob die UV-C-Lampe (H) funktioniert - dies darf nur per externer Sichtkontrolle über die Lüftungsöffnungen an der Oberseite des Gerätes geschehen! Bei einge-schalteter Lampe scheint ein bläuliches Licht durch die Lüftungsöffnun-gen am Deckel (I) hindurch (siehe Abb. 1).
4. Prüfen Sie die Funktion des Ventilators (K), indem Sie Ihre Hand unter das Filtergitter (C) halten. Wenn Sie einen Luftstrom spüren, läuft der Ventilator (K) (siehe Abb. 1).
Technische Daten• Viroxid® Habitat 3 .....................65 Watt• Lampe Philips PL-L 60W/4P HO ....60 Watt • UV-C Menge ....................................4,23 mJ/cm2 (Luftdurchsatz 50 m3/Stunde)• UV-C Emission (W) .....................19.0 Watt• (%) UV-C nach 8.000 Stunden 85 %• Filter (HAF) .................................3MTM Filter für hohen • Ventilator ...................................12 Volt• Maximales Raumvolumen .......100 m3
• Maximaler Luftdurchsatz .........50 m3 pro Stunde• Geräteabmessungen ...............60 x 17 x 15 cm
Typ des UV-C-SystemsArtikelnummer: 680102 Viroxid® Habitat 3 100 m³ / 60 Watt (230V/120V; 50/60 Hz)Ersatzteile:Artikelnummer: 680104 - Philips PL-L 60/4P HO (60 Watt)680105 - Filter 3M AIR 160
GarantiebedingungenDie Garantie für dieses Produkt deckt ab demKaufdatum Herstellungsfehler für einen Zeitraum von bis zu 24 Monaten ab. Die Lampe fällt nicht unter die Garantie.
Im Rahmen dieser Garantie erhobene Schadensersatzansprüche werden nur dann berücksichtigt, wenn das Produkt zusammen mit dem Garantieregistrierungsformular und einem gültigen Kaufbeleg aufKosten des Absenders zurückgeschickt wird.
Reparaturen im Rahmen dieser Garantie dürfen nur vom Lieferanten durchgeführt werden. Ansprüche im Rahmen dieser Garantie, die durch Fehler bei der Installation oder Verwendung des Geräts verur-sacht wurden, werden nicht berücksichtigt. Defekte aufgrund unzureichender Wartung sind ebenfalls von der Garantie ausgeschlossen. Der Lieferant haftet nicht für Schäden, die durch einen unsachgemäßen Gebrauch des Produkts entstehen.
Der Lieferant haftet auch nicht für Schäden, die durch eventuelle Defekte des Gerätes entstehen. Ein Anspruch aufgrund von Transport-schäden wird nur dann berücksichtigt, wenn der Schaden zum Zeit-punkt der Zustellung durch den Spediteur oder die Post festgestellt oder bestätigt wird.
5sec
5sec
5sec
5sec
5sec
5sec
5sec
5sec
7Anzeige ein
Anzeige aus

22Manuel de l’utilisateurviroxid®
HABITAT 3FR
I
H
K
F
L
D
E
C
B
M1
A

23Manuel de l’utilisateurviroxid®
HABITAT 3FR
A
A
D
G
F H
F
2
4
6
3
5D
a ce
ntre
a c
entre
- 4
35 m
m

24Manuel de l’utilisateurviroxid®
HABITAT 3FR
Félicitations, vous avez acheté Viroxid® Habitat 3.Viroxid® HABITAT 3 se base sur des méthodes de désinfection existantes, qui sont déjà utilisées pour purifier l’air dans les blocs opératoires hos-pitaliers. Trois méthodes efficaces sont associées en un seul dispositif adapté aux espaces allant jusqu’à 100 m3. Ces trois méthodes sont les suivantes : ionisation de l’air, filtrage et désinfection aux rayons UV-C.
Purifier l’air que nous respirons ne peut plus être considéré comme un luxe superflu. Un nombre croissant de micro-organismes portés par l’air, y compris les virus, bactéries et moisissures, rend l’air que nous respirons moins salutaire. Nous sommes de plus en plus conscients de combien ces micro-organismes peuvent devenir dangereux pour l’être humain.
Ces micro-organismes sont invisibles à l’œil nu et se répandent dans l’air, c’est pourquoi les risques qui y sont liés sont de plus en plus élevés.
La recherche suggère que la qualité de l’air des espaces confinés peut être relativement faible. Les bureaux, établissements pour les en-fants, salles de classe, résidences pour personnes âgées, cabinets des médecins généralistes et dentistes sont des lieux où de nombreuses personnes se rassemblent et où le risque d’infection par l’air est propor-tionnellement plus élevé.
Nos logements sont mieux isolés que par le passé, ce qui réduit lar-gement l’aération naturelle. La qualité de l’air à l’intérieur est donc souvent plus faible que nous le pensons. Une mauvaise qualité de l’air à la maison n’est pas seulement source de maladies, mais elle peut également provoquer des maux de tête, irritations respiratoires, insom-nies et allergies.
Avec un dispositif Viroxid® HABITAT 3, vous pouvez désinfecter l’air jusqu’à 99,99 % dans les espaces jusqu’à 100 m3. Dans les espaces plus vastes, plusieurs dispositifs peuvent être installés. Virus, bactéries, moisis-sures et autres micro-organismes de l’air sont neutralisés et éliminés par le dispositif, ainsi que les pollens, poussières et odeurs.
Vous remarquerez immédiatement que la qualité de l’air est meilleure, et vous serez plus en forme et à l’aise. Votre Viroxid® HABITAT 3 est l’ins-trument idéal pour garder l’air qui vous entoure salutaire et sûr.
FonctionnementL’air est attiré vers le bas du dispositif au moyen d’un ventilateur, ce qui génère sa circulation dans l’espace. Le ventilateur permet de faire circuler 50 m3 d’air par heure à travers l’unité.
Selon la taille de la pièce, le ventilateur peut être placé sur la fonction « faible » (25 m3 d’air par heure/niveau de bruit 15 décibel) ou sur la fonction « élevé » (50 m3 d’air par heure/niveau de bruit 19 décibel). En réglant une heure de début et une heure de fin sur le temporisateur numérique, vous pouvez définir la fonction et la durée comme vous le voulez.
Pour un résultat idéal, nous vous conseillons de garder l’unité en fonc-tion 24 heures sur 24. Si vous placez l’unité dans la chambre à coucher par exemple, vous pouvez utiliser la fonction « faible » qui correspond également au réglage d’un niveau de bruit réduit.
L’air est attiré dans l’unité et passe d’abord à travers le filtre « 3M à flux d’air élevé (HAF) avec antimicrobien ».
Ce filtre de grande qualité est également utilisé dans les hôpitaux et d’autres environnements.Le filtre 3M élimine les plus grandes particules de l’air. De plus, il dispose d’une pellicule antimicrobienne qui prévient le déve-loppement de micro-organismes sur le filtre. La pellicule antimicrobienne réduit également l’obturation du filtre et augmente sa durée de vie.
Après avoir traversé le filtre, l’air est traité par des rayons UV-C. La lampe spéciale UV-C Philips de l’unité génère un rayonnement ul-traviolet de 253,7 nanomètres de longueur d’onde. La lumière UV-C détruit les virus, bactéries, moisissures et autres organismes primitifs. Le rayonnement endommage la structure de l’ADN des micro-orga-nismes et prévient donc leur reproduction.
La partie interne spéciale en aluminium du logement fournit une ré-fraction supplémentaire du rayonnement UV-C, ce qui augmente l’ef-ficacité de 50 %. La réfraction garantit un fonctionnement idéal, car elle expose les micro-organismes aux rayons UV-C de tous les côtés, ce qui permet de les anéantir. Après le traitement aux UV-C, l’ioniseur lance dans l’air 8,5 millions d’ions négatifs par centimètre cube. Le grand nombre d’ions négatifs dans l’air améliore la résistance du corps et pourrait favoriser le processus de guérison.
L’air extérieur contient en moyenne de 1500 à 4000 ions négatifs. Cette quantité diminue largement dans les espaces clos, jusqu’à arriver à une quantité comprise entre 0 et 50 ions par centimètre cube. Un air de mauvaise qualité contient un grand nombre d’ions positifs. Les micro-or-ganismes se répandent très facilement dans l’air au moyen des ions positifs et cela est également valable pour les poussières et les pollens.
Les ions négatifs qui sont introduits dans l’air forment des composés avec les ions positifs. Ces composés sont trop lourds pour flotter dans l’air et se précipitent au sol ou sont retenus par le filtre.
Le temporisateur intégré enregistre précisément les heures de fonc-tionnement de la lampe, ce qui permet de surveiller le moment où la lampe et le filtre devront être remplacés. Dans les espaces qui contiennent de grandes quantités de poussières, le filtre devra être remplacé plus souvent. L’air qui est expulsé par la buse de la partie supérieure de l’unité a été filtré à 99,99 %, ionisé et désinfecté.
Il est important pour notre santé que l’air de l’environnement dans le-quel nous vivons soit propre. L’air pur améliore la résistance du corps contre les maladies, mais réduit également les problèmes respiratoires et pourrait même prévenir l’apparition de ces problèmes. L’anxiété et la dépression peuvent également être réduites ou entièrement élimi-nées. Mais l’effet principal est lié à la prévention des maladies.
Les avantages de Viroxid® HABITAT 3 - AIR 160 :• Désinfecte et purifie l’air jusqu’à 99,99 %• Élimine les micro-organismes de l’air• Assure la protection contre les maladies• Améliore la qualité de l’air et favorise une sensation de bien-être• Purifie l’air dans les espaces confinés• A un effet positif sur la santé• Renforce la résistance du corps contre les maladies• Les allergies par inhalation sont réduites ou éliminées • L’anxiété et la dépression peuvent être réduites ou éliminées• Les maladies peuvent être évitées
Veuillez lire attentivement les instructions présentes avant d’installer ce dispositif.
Viroxid® Habitat 3 AIR 160 - Manuel de l’utilisateur Purificateur d’air. Élimine les virus, les bactéries et les moisissures. Désinfectez l’air que vous respirez.

25Manuel de l’utilisateurviroxid®
HABITAT 3FR
Les propriétés de Viroxid® Habitat 3 AIR 160:• Adapté aux espaces jusqu’à 100 m3• Réglable à 25 m3 ou 50 m3 d’air par heure• Niveau de bruit réduit• Remplacement du filtre et de la lampe UV-C une fois par an• L’unité indique quand la lampe et le filtre doivent être remplacés• Jusqu’à 50 % de rendement supplémentaire des rayons UV-C grâce à la réfraction du logement en aluminium• Facilité d’installation et d’entretien• Système autonome et prêt à l’emploi « connexion et utilisation »• 2 ans de garantie contre les éventuels défauts de fabrication
Viroxid® Habitat 3 - AIR 160 est efficace contre :• Virus • Bactéries • Moisissures• Acariens de la poussière • Poussières et particules • Pollens• Fumée de cigarette • Gaz nocifs • Odeurs
Viroxid® Habitat 3 - AIR 160 est conseillé pour les structures suivantes :• Écoles • Centre d’accueil de jour• Maisons de repos • Maisons de retraite • Hôtels • Bureaux • Espaces communs • Cabinets médicaux • Cabinets dentaires • Vétérinaires • Chenils• Refuges pour animaux • Salons • Chambres à coucher• Salles de distraction • Salles d’ordinateurs • Cabinets• Salles de jeu • Maisons de vacances • Caravanes• Bateaux • Espaces de fitness • Espaces fumeurs• Restaurants • Coiffeurs • Salons de beauté• Toilettes publiques • Bars • Salles de réunion • Vestiaires
SécuritéCe dispositif émet des rayonnements dangereux. Le contact direct pourrait endommager les yeux et la peau. Vérifier le fonctionnement de la lampe UV-C exclusivement à travers la prise d’air située sur la par-tie supérieure de l’unité. Lorsque la lampe est allumée, les ouvertures sont éclairées par une lumière bleue.• Au premier démarrage du dispositif, une odeur de brûlé provenant
de la lampe UV-C pourrait être relevée pendant une courte durée. Cette odeur ressemble à celle que l’on peut percevoir durant l’utili-sation d’un lit solaire et elle disparaîtra rapidement.
• Pour le branchement permanent au secteur, toujours suivre les rè-glementations du fournisseur d’énergie électrique. En cas de doute concernant le branchement, consulter un électricien professionnel ou le fournisseur d’énergie électrique. Toujours utiliser un interrupteur de dispersion à la terre (différentiel).
• Toujours débrancher le connecteur à broche de la prise avant d’ef-fectuer toute opération d’entretien ou de réparation de l’unité. Ne pas brancher/débrancher le connecteur à broche de la prise si l’on se tient dans l’eau ou que l’on a les mains mouillées.
• Ne jamais immerger le dispositif dans l’eau.• Ne jamais installer dans un lieu exposé à la lumière directe du soleil.• Garder les enfants à distance du dispositif et du câble.• Le câble du dispositif ne peut pas être remplacé. Si le câble élec-
trique est endommagé, l’ensemble de l’unité devra être remplacé. Ne jamais débrancher le connecteur à broche et toujours laisser l’unité intacte. Une unité électrique dont la broche a été remplacée ne sera pas couverte par la garantie.
• Lorsque le dispositif est éteint, la lampe reste chaude pendant 10 minutes environ.
• Ne pas utiliser le dispositif si des composants sont endommagés.• Le produit présent peut être utilisé exclusivement selon les lignes di-
rectrices indiquées dans le manuel d’utilisation présent.
Installation du dispositifIdentifier la zone dans laquelle le dispositif sera installé. Lors du choix de l’emplacement du dispositif, tenir compte du fait que l’unité doit pouvoir faire circuler librement l’air dans la pièce, sans obstacle.Veiller également à ce qu’une prise secteur soit présente à proximité de l’emplacement choisi.Installer le dispositif dans un endroit sec. La situation idéale consisterait à monter l’unité à la verticale, avec un espace libre de 50 cm au moins au niveau de la partie inférieure afin de pouvoir y accéder pour les opérations d’entretien et de remplace-ment du filtre ou de la lampe UV.1. Retirer le bornes (A) (voir figure 2) du Viroxid HABITAT 3 en dévissant le
couvercle (M) (voir figure 5) et placer les bornes (A) à l’endroit choisi afin de pouvoir marquer le point de fixation des bornes sur la paroi de support arrière.
2. Fixer les bornes au point choisi à l’aide des vis ou des ancrages adé-quats (voir figure 2).
3. Placer le Viroxid HABITAT 3 dans les bornes lorsque celles-ci sont mon-tées dans les guides et mettre les étriers en place (voir figures 3 et 4). Enfin, visser le couvercle aux bornes (voir figure 5).
4. Insérer le connecteur à broche dans la prise et vérifier le fonctionne-ment de la lampe UV-C (H) – n’effectuer cette opération qu’à tra-vers les prises d’air situées sur la partie supérieure de l’unité ! Celles-ci permettent de voir la lumière bleue (I) si la lampe est allumée (voir figure 1).
5. Vérifier le fonctionnement du ventilateur (K) en posant la main sous la grille du filtre (C). Si un flux d’air est perceptible, le ventilateur (K) fonctionne (voir figure 1).
Touches
Appuyer rapidement
Appuyer pendant 3 secondes
Attendre 5 secondes
Sélection confirmée
Temps de travail de la lampe
Heure actuelle
Test
Circulation d’air, faible
Circulation d’aire, élevée
Réglage de l’heure
Réinitialisation
Erreur
5sec
Purificateur d’air. Élimine les virus, les bactéries et les moisissures. Désinfectez l’air que vous respirez.

26Manuel de l’utilisateurviroxid®
HABITAT 3FR
Réglage de l’écran numériqueLe dispositif Viroxid® HABITAT 3 peut être paramétré à l’aide de l’écran situé sur l’avant. L’écran est facile à actionner, à l’aide d’un seul bou-ton. La figure 7 des instructions présentes nous montre comment faire défiler le menu. Les détails de chaque paramètre sont illustrés ci-après.Après le démarrage, le bon réglage du temps sera testé. Lorsque le dispositif est allumé pour la première fois, le logiciel vous amènera au-tomatiquement au mode « clock set » (réglage de la montre). Vous pourrez y régler l’heure actuelle.Pour régler l’heure, appuyez rapidement sur le bouton. Les heures sont indiquées en format 24 heures. Après avoir réglé l’heure, vous pouvez régler les minutes en appuyant sur le bouton pendant 3 secondes. Pour régler les minutes, appuyez rapidement sur le bouton le nombre de fois nécessaire. Après avoir réglé l’heure, attendez 5 secondes. Le logiciel sauvegardera automatiquement l’heure et le point qui figure après le deuxième chiffre commencera à clignoter chaque seconde.
« 8000. » : En position initiale, appuyez une fois sur le bouton pour affi-cher les heures de fonctionnement. L’écran fournit automatiquement les paramètres d’usine du temporisateur, c’est-à-dire 8000 heures. La lampe UV-C fonctionne à 100 % du rayonnement pendant 8000 heures maximum. Au bout de 8000 heures de fonctionnement, le rayonnement UV-C s’affaiblit et il pourrait ne pas suffire à obtenir les résultats escomptés. Si le dispositif est éteint et rallumé, le compteur commencera un compte à rebours à partir de la valeur indiquée au moment de l’arrêt.
« t-LO » : En position initiale, appuyez deux fois sur le bouton pour afficher l’indication « t-LO ». Elle indique que la valeur de circulation de l’air est faible. Dans ce cas, le ventilateur est réglé pour une circulation de 25 m3 par heure et le dispositif est pratiquement silencieux. Pour régler la valeur de circulation d’air faible, garder le bouton enfoncé pendant 3 secondes pendant que l’indication « t-LO » est affichée à l’écran. Lorsque les chiffres qui font référence à l’heure commencent à clignoter, vous pouvez régler l’heure à laquelle le dispositif devra lancer la fonction de circulation faible. Les heures commenceront à défiler dès que le bouton sera enfoncé. Pour régler l’heure voulue, appuyez une nouvelle fois rapidement sur le bouton. L’indication des minutes commencera à clignoter pendant 5 se-condes lorsque le bouton sera relâché et les minutes pourront alors être réglées. Les réglages seront sauvegardés et l’heure actuelle sera affichée à l’écran au bout de 5 secondes.
« t-HI » : En position initiale, appuyez trois fois sur le bouton pour afficher l’indication « t-HI ». Elle indique que la valeur de circulation de l’air est élevée. Le ventilateur est alors réglé pour une circulation d’air de 50 m3 par heure. Pour régler la valeur de circulation d’air élevée, garder le bouton enfoncé pendant 3 secondes pendant que l’indication « t-HI » est affichée à l’écran. Lorsque les chiffres qui font référence à l’heure commencent à clignoter, vous pouvez régler l’heure à laquelle le dis-positif devra lancer la fonction de circulation élevée. Les heures com-menceront à défiler dès que le bouton sera enfoncé. Pour régler l’heure voulue, appuyez une nouvelle fois rapidement sur le bouton. L’indication des minutes commencera à clignoter pendant 5 secondes lorsque le bouton sera relâché et les minutes pourront alors être réglées. Les réglages seront sauvegardés et l’heure actuelle sera affichée à l’écran au bout de 5 secondes.
« SEt » : En position initiale, appuyez quatre fois sur le bouton pour af-ficher l’indication « SEt ». Elle indique le réglage de la montre. L’heure actuelle est alors réglée. Pour régler la montre, gardez le bouton en-foncé pendant 3 secondes pendant que la fonction « SEt » est affichée à l’écran. L’heure peut être réglée lorsque les chiffres indiquant les heures commencent à clignoter. Les heures commenceront à défiler dès que le bouton sera enfoncé. Pour régler l’heure voulue, appuyez une nouvelle fois rapidement sur le bouton.
L’indicateur des minutes commencera à clignoter pendant 5 secondes lorsque le bouton sera relâché et les minutes pourront alors être réglées. Les réglages seront sauvegardés et l’heure actuelle sera affichée à l’écran au bout de 5 secondes.
« rSt » : En position initiale, appuyez sur le bouton pendant 5 secondes pour afficher l’indicateur « rSt » . Il indique la réinitialisation. Cette option est utilisée pour réinitialiser le temporisateur. Après avoir remplacé la lampe et le filtre, le tempori-sateur peut être réinitialisé à 8000 heures. Pour réinitialiser le tempori-sateur à 8000 heures, garder le bouton enfoncé pendant 3 secondes pendant que l’indicateur « rSt » est affiché à l’écran. Les réglages se-ront sauvegardés et l’heure actuelle sera affichée à l’écran au bout de 5 secondes.
« 0000. » : L’écran affiche 0000 lorsque les 8000 heures de fonction-nement ont été atteintes. L’heure actuelle commencera à clignoter à l’écran, en alternance avec les quatre zéros clignotants. Le filtre et la lampe UV-C devront alors être remplacés. Pour la réinitialisation du temporisateur, voir le paragraphe « rSt ».
« FAIL » (erreur) : Si un problème se produit au niveau de l’heure ac-tuelle ou du branchement du ventilateur, le logiciel s’arrête. Dès que le dispositif est allumé, le programme effectue un test diagnostique afin de vérifier que le produit fonctionne correctement. Les éléments véri-fiés sont l’heure actuelle et le branchement du ventilateur. Tout pro-blème relevé quant à ces éléments sera affiché à l’écran.
Arrêt de l’éclairage de l’écranL’éclairage de l’écran peut être éteint en gardant le bouton de l’écran enfoncé pendant 10 secondes. Cela ne provoque pas l’arrêt du dispositif et les paramètres seront maintenus. Pour rallumer l’éclai-rage de l’écran, appuyer rapidement une fois sur le bouton de l’écran.
Arrêt du dispositifIl n’est pas nécessaire d’éteindre le dispositif pendant la journée, car il a été conçu pour fonctionner 24 heures sur 24 afin d’éviter la formation de nouveaux micro-organismes. Pour éteindre le dispositif, détacher le connecteur à broche de la prise.
Démontage/EntretienDurant l’entretien ou le démontage du dispositif, le branchement élec-trique doit toujours être déconnecté en détachant le connecteur à bro-che de la prise. Le dispositif doit être nettoyé au moins une fois par an.
Si de la poussière se dépose rapidement sur le filtre, celui-ci devra être remplacé plus souvent. La lampe spéciale devra être remplacée au bout de 8000 heures de fonctionnement au maximum. Garder l’intérieur en aluminium propre en le nettoyant à l’aide d’un chiffon.
1. Dévisser le couvercle du Viroxid® HABITAT 3 (voir figure 4), ouvrir et détacher Viroxid® HABITAT 3 des bornes (A).
2. À l’aide d’un tournevis, dévisser les 2 vis (B) de la grille du filtre (C) situé sur la partie inférieure du dispositif.
3. Desserrer la grille du filtre (C) et retirer le filtre (E) du guide (D).4. Extraire délicatement la lampe UV-C (F) du logement de la lampe
(H), faire tourner d’un quart de tour afin de pouvoir détacher facile-ment la lampe UV-C (F) du guide (G) du dispositif.
5. Nettoyer la partie interne du logement en aluminium (L) à l’aide d’un linge souple.
6. Introduire délicatement la (nouvelle) lampe UV-C (F) dans le guide de la lampe (G) à la verticale, en introduisant la lampe UV-C (F) jusqu’à ce qu’elle atteigne le logement (H). Faire tourner la lampe d’un quart de tour afin de la fixer dans le guide (G), puis insérer avec précaution la lampe dans le logement (H) (voir figure 6).

27Manuel de l’utilisateurviroxid®
HABITAT 3FR
ATTENTION : La lampe (F) ne s’insère dans le logement (H) que d’une manière (voir figure 6).
1. Placer le (nouveau) filtre 3M à flux d’air élevé (HAF) (E) dans son logement (D).
2. La grille du filtre (C) peut à présent être remise en place dans le logement (D) et fixée à l’aide des 2 vis (B).
3. Insérer le connecteur à broche dans la prise et vérifier le fonction-nement de la lampe UV-C (H) – n’effectuer cette opération qu’à travers les prises d’air situées sur la partie supérieure de l’unité ! Une lumière bleue apparaîtra à travers les prises d’air du couvercle (I) si la lampe est allumée (voir figure 1).
4. Vérifier le fonctionnement du ventilateur (K) en posant la main sous la grille du filtre (C). Si un flux d’air est perceptible, le ventilateur (K) fonctionne (voir figure 1).
Caractéristiques techniques• Viroxid® Habitat 3 ............................65 Watt• Lampe Philips PL-L 60W/4P HO .........60 Watt• Quantité UV-C ....................................4,23 mJ/cm2 (flux d’air 50 m3/heure)• Émissions UV-C (W) ...........................19,0 Watt• (%) UV-C après 8000 heures ...........85 %• Filtre (HAF) ........................................3MTM Filtre d’air flux élevé• Ventilateur .......................................12 Volt• Capacité de volume maximum ....100 m3
• Circulation maximum ......................50 m3 d’air par heure• Encombrement du dispositif ...........60 x 17 x 15 cm
Type de système UV-CNuméro article : 680102 Viroxid® Habitat 3 100 m³ / 60 Watt (230V/120V; 50/60 Hz)Articles de rechange :Numéro article : 680104 - Philips PL-L 60/4P HO (60 Watt)680105 - Filtre 3M AIR 160
GarantieLa garantie du produit présent couvre les défauts de fabrication pendant 24 mois à compter de la date d’achat. La lampe n’est pas couverte par la garantie.
Les demandes d’indemnisation en vertu de la garantie présente seront prises en considération exclusivement si le produit sera retourné aux frais de l’expéditeur et accompagné du formulaire d’enregistrement de la garantie ainsi que d’un reçu d’achat valable.
Selon la garantie présente, les réparations pourront exclusivement être effectuées par le fournisseur. Les demandes d’indemnisation en vertu de la garantie présente dues à des erreurs d’installation ou d’utilisation du dispositif ne seront pas prises en considération.
Les défauts liés à un entretien inadapté ne sont pas couverts par la garantie. Le fournisseur ne pourra en aucun cas être tenu pour res-ponsable en cas de dommage provoqué par une utilisation erronée du produit.
Le fournisseur ne pourra en aucun cas être tenu pour responsable en cas de dommage provoqué par d’éventuelles pannes du dispositif. Toute réclamation liée à des dommages qui se seraient produits durant le transport sera prise en considération uniquement si les dommages sont notés ou confirmés au moment de la livraison par le transporteur ou les services postaux.
Une réclamation pourra être adressée au transporteur ou aux services postaux uniquement après l’application des dispositions ci-dessus.
5sec
5sec
5sec
5sec
5sec
5sec
5sec
5sec
7Affichage activé
Affichagedésactivé

IDS Spa17100 Savona
Via Valletta San Cristoforo, 28/10Tel. 019 862080 - Fax 019 2304865
email: [email protected]
email telefono web
email telefono web
email telefono web