Embed Size (px)
Citation preview

Guides iOSDocument current as of 10/17/2017 03:13 PM.
Installation
In order to build your app on a SmartDeviceLink (SDL) Core, the SDL software
development kit (SDK) must be installed in your app. The following steps will
guide you through adding the SDL SDK to your workspace and configuring the
environment.
Install SDL SDK
We have provided three different ways to install the SDL SDK in your project:
CocoaPods, Carthage, or manually.
1. Xcode should be closed for the following steps.2. Open the terminal app on your Mac.
COCOAPODS INSTALLATION

3. Make sure you have the latest version of CocoaPods installed. For more
information on installing CocoaPods on your system please consult:
https://cocoapods.org.
1. Navigate to the root directory of your app. Make sure your current folder
contains the .xcodeproj file2. Create a new Podfile.
1. In the Podfile, add the following text. This tells CocoaPods to install SDL
SDK for iOS.
sudo gem install cocoapods
pod init
target ‘<#Your Project Name#>’ do pod ‘SmartDeviceLink-iOS’, ‘~> <#SDL Version#>’end
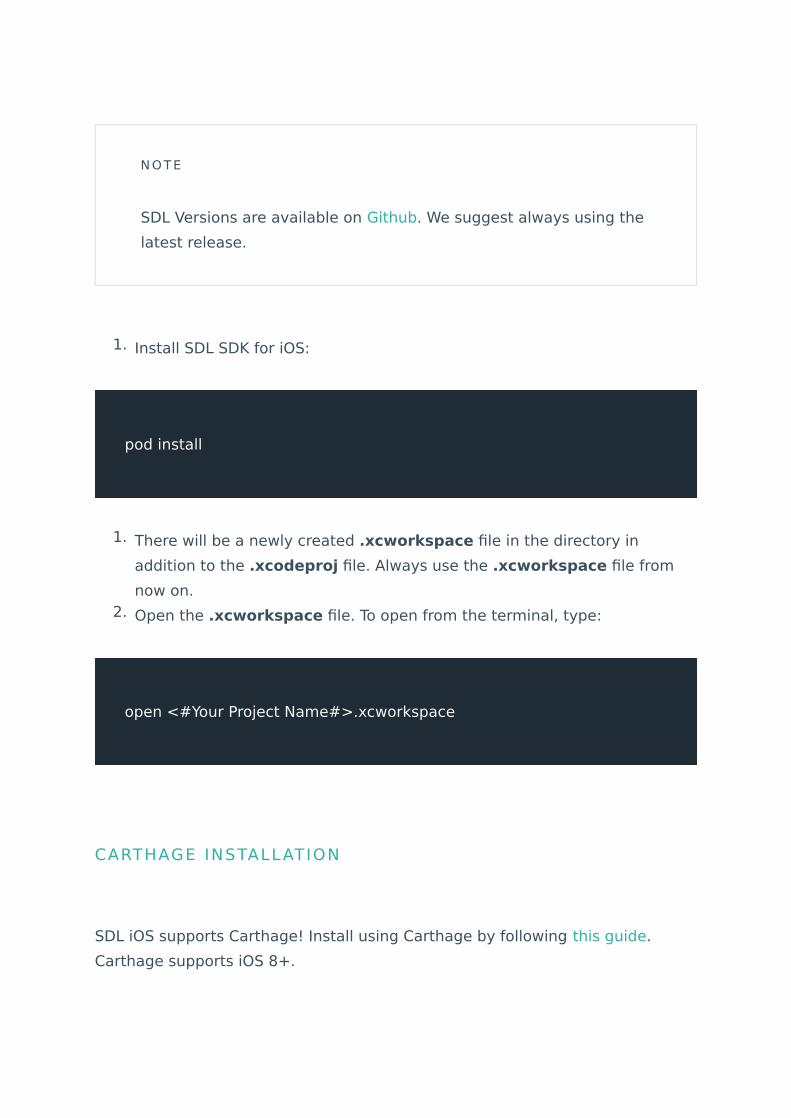
1. Install SDL SDK for iOS:
1. There will be a newly created .xcworkspace file in the directory in
addition to the .xcodeproj file. Always use the .xcworkspace file from
now on.2. Open the .xcworkspace file. To open from the terminal, type:
SDL iOS supports Carthage! Install using Carthage by following this guide.
Carthage supports iOS 8+.
N O T E
SDL Versions are available on Github. We suggest always using the
latest release.
pod install
open <#Your Project Name#>.xcworkspace
CARTHAGE INSTALLATION

Tagged to our releases is a dynamic framework file that can be drag-and-
dropped into the application. Dynamic frameworks are supported on iOS 8+.
Please Note: You cannot submit your app to the app store with the
framework as is. You MUST strip the simulator part of the framework
first. Use a script such as Carthage's to accomplish this.
SDK Configuration
1. Get a SDL Core
If you do not have a SDL enabled head unit for testing, you should build the
sdl_core project. The sdl_core project is an emulator that lets you simulate
sending and receiving remote procedure calls between a smartphone app and a
SDL Core.
2. Enable Background Capabilities
Your application must be able to maintain a connection to the SDL Core even
when it is in the background. This capability must be explicitly enabled for your
application (available for iOS 5+). To enable the feature, select your
application's build target, go to Capabilities, Background Modes, and select
External accessory communication mode.
3. Add SDL Protocol Strings
Your application must support a set of SDL protocol strings in order to be
connected to SDL enabled head units. Go to your application's .plist file and
add the following code under the top level dictionary.
MANUAL INSTALLATION

N O T E
This is only required for USB and Bluetooth enabled head units. It is
not necessary during development using SDL Core.
<key>UISupportedExternalAccessoryProtocols</key><array><string>com.smartdevicelink.prot29</string><string>com.smartdevicelink.prot28</string><string>com.smartdevicelink.prot27</string><string>com.smartdevicelink.prot26</string><string>com.smartdevicelink.prot25</string><string>com.smartdevicelink.prot24</string><string>com.smartdevicelink.prot23</string><string>com.smartdevicelink.prot22</string><string>com.smartdevicelink.prot21</string><string>com.smartdevicelink.prot20</string><string>com.smartdevicelink.prot19</string><string>com.smartdevicelink.prot18</string><string>com.smartdevicelink.prot17</string><string>com.smartdevicelink.prot16</string><string>com.smartdevicelink.prot15</string><string>com.smartdevicelink.prot14</string><string>com.smartdevicelink.prot13</string><string>com.smartdevicelink.prot12</string><string>com.smartdevicelink.prot11</string><string>com.smartdevicelink.prot10</string><string>com.smartdevicelink.prot9</string><string>com.smartdevicelink.prot8</string><string>com.smartdevicelink.prot7</string><string>com.smartdevicelink.prot6</string><string>com.smartdevicelink.prot5</string><string>com.smartdevicelink.prot4</string><string>com.smartdevicelink.prot3</string><string>com.smartdevicelink.prot2</string><string>com.smartdevicelink.prot1</string><string>com.smartdevicelink.prot0</string><string>com.smartdevicelink.multisession</string><string>com.ford.sync.prot0</string></array>

4. Access the Documentation
You can find the latest reference documentation on CocoaDocs.
D O W N LOA D T H E D O C U M E N TAT I O N
Install this documentation to Dash or to Xcode by using Docs for Xcode. On the
SDL Docs page, click the upload icon located in the upper right hand corner of
the screen and add the documentation to Dash or Xcode.
5. Get an App Id
An app id is required for production level apps. The app id gives your app
special permissions to access vehicle data. If your app does not need to access
vehicle data, a dummy app id (i.e. create a fake id like "1234") is sufficient
during the development stage. However, you must get an app id before
releasing the app to the public.
To obtain an app id, sign up at smartdevicelink.com.
Integration Basics
How SDL Works
SmartDeviceLink works by sending remote procedure calls (RPCs) back and
forth between a smartphone application and the SDL Core. These RPCs allow
you to build the user interface, detect button presses, play audio, and get

vehicle data, among other things. You will use the SDL library to build your app
on the SDL Core.
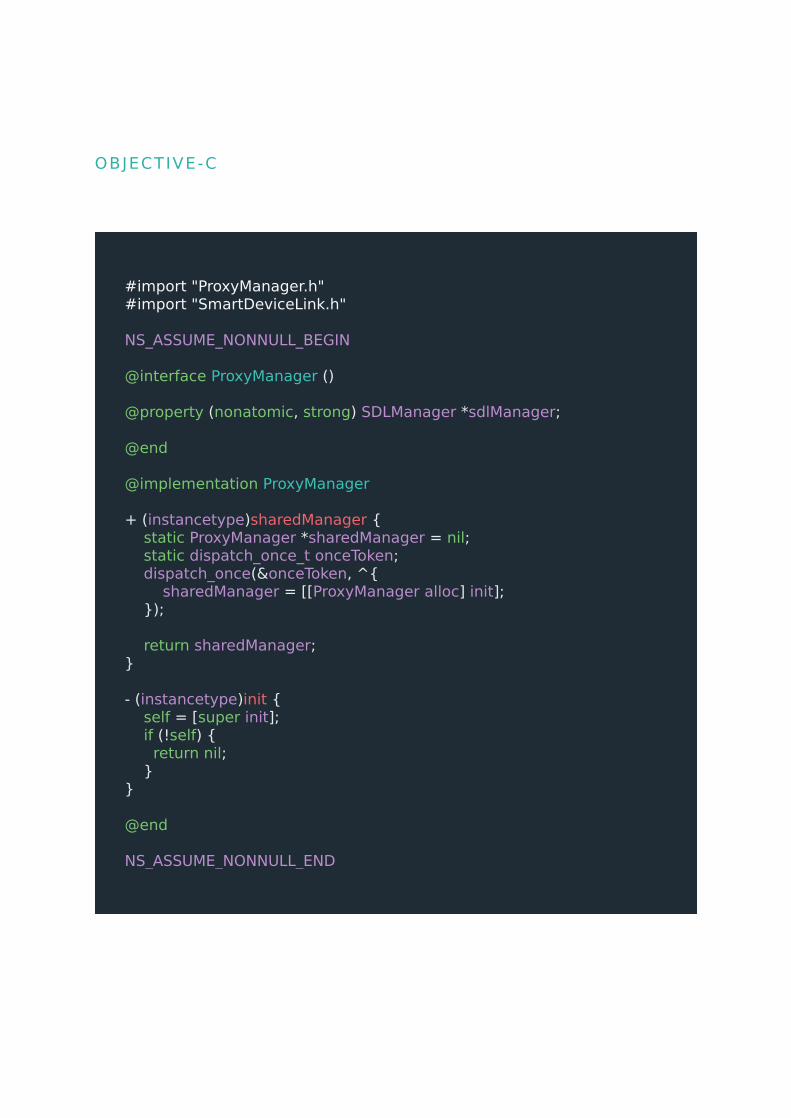
Set Up a Proxy Manager Class
You will need a class that manages the RPCs sent back and forth between your
app and SDL Core. Since there should be only one active connection to the SDL
Core, you may wish to implement this proxy class using the singleton pattern.
ProxyManager.h
ProxyManager.m
OBJECTIVE-C
#import <Foundation/Foundation.h>
NS_ASSUME_NONNULL_BEGIN
@interface SDLMananger : NSObject
+ (instancetype)sharedManager;
@end
NS_ASSUME_NONNULL_END

#import "ProxyManager.h"
NS_ASSUME_NONNULL_BEGIN
@interface ProxyManager ()
@end
@implementation ProxyManager
+ (instancetype)sharedManager { static ProxyManager* sharedManager = nil; static dispatch_once_t onceToken; dispatch_once(&onceToken, ^{ sharedManager = [[ProxyManager alloc] init]; });
return sharedManager;}
- (instancetype)init { self = [super init]; if (!self) { return nil; }}
@end
NS_ASSUME_NONNULL_END

Your app should always start passively watching for a connection with a SDL
Core as soon as the app launches. The easy way to do this is by instantiating
the ProxyManager class in the didFinishLaunchingWithOptions() method in
your AppDelegate class.
The connect method will be implemented later. To see a full example, navigate
to the bottom of this page.
SWIFT
class ProxyManager: NSObject { // Singleton static let sharedManager = ProxyManager()
private override init() { super.init() }}
OBJECTIVE-C
@implementation AppDelegate
- (BOOL)application:(UIApplication *)application didFinishLaunchingWithOptions:(NSDictionary *)launchOptions { // Initialize and start the proxy [[ProxyManager sharedManager] connect];}
@end
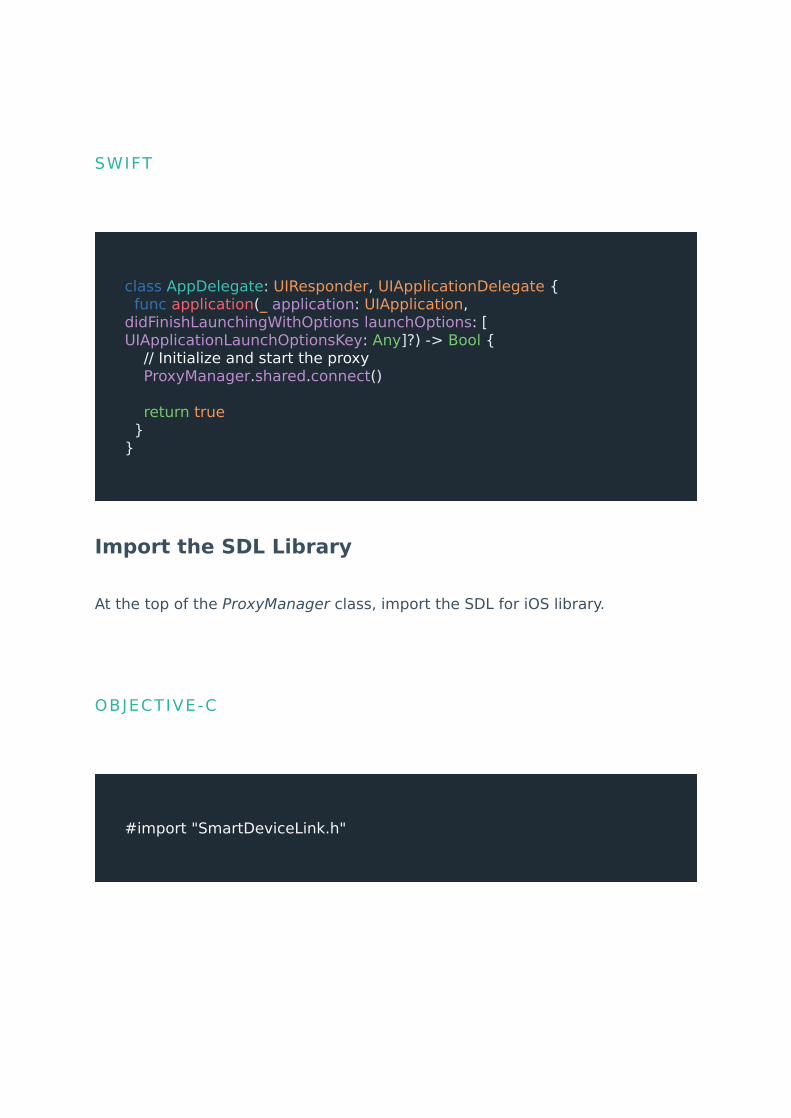
Import the SDL Library
At the top of the ProxyManager class, import the SDL for iOS library.
SWIFT
class AppDelegate: UIResponder, UIApplicationDelegate { func application(_ application: UIApplication, didFinishLaunchingWithOptions launchOptions: [UIApplicationLaunchOptionsKey: Any]?) -> Bool { // Initialize and start the proxy ProxyManager.shared.connect()
return true }}
OBJECTIVE-C
#import "SmartDeviceLink.h"

Implement the SDL Manager
The SDLManager is a helper class that will handle setting up the initial
connection with the SDL Core. It will also help you upload images and send
RPCs.
SWIFT
import SmartDeviceLink_iOS
OBJECTIVE-C
#import "ProxyManager.h"#import "SmartDeviceLink.h"
NS_ASSUME_NONNULL_BEGIN
@interface ProxyManager ()
@property (nonatomic, strong) SDLManager *sdlManager;
@end
@implementation ProxyManager
+ (instancetype)sharedManager { static ProxyManager *sharedManager = nil; static dispatch_once_t onceToken; dispatch_once(&onceToken, ^{ sharedManager = [[ProxyManager alloc] init]; });
return sharedManager;}
- (instancetype)init { self = [super init]; if (!self) { return nil; }}
@end
NS_ASSUME_NONNULL_END

1. Create a Lifecycle Configuration
In order to instantiate the SDLManager class, you must first configure an
SDLLifecycleConfiguration instance with the application name and application
id. During the development stage, a dummy app id is usually sufficient. For
more information about obtaining an application id, please consult the SDK
Configuration section of this guide. You must also decide which network
configuration to use to connect the app to the SDL Core. Optional, but
recommended, configuration properties include short app name, app icon, and
app type.
There are two different ways to connect your app to a SDL Core: with a TCP
(Wifi) network connection or with an iAP (USB) network connection. Use TCP for
debugging and use iAP for production level apps.
SWIFT
class ProxyManager: NSObject { // Manager fileprivate let sdlManager: SDLManager
// Singleton static let sharedManager = ProxyManager()
private override init() { super.init() }}
NETWORK CONNECTION TYPE

IAP
OBJECTIVE-C
SDLLifecycleConfiguration* lifecycleConfiguration = [SDLLifecycleConfiguration defaultConfigurationWithAppName:@"<#App Name#>" appId:@"<#App Id#>"];
SWIFT
let lifecycleConfiguration = SDLLifecycleConfiguration.defaultConfiguration(withAppName:"<#App Name#>", appId: "<#App Id#>")

TCP
OBJECTIVE-C
SDLLifecycleConfiguration* lifecycleConfiguration = [SDLLifecycleConfiguration debugConfigurationWithAppName:@"<#App Name#>" appId:@"<#App Id#>" ipAddress:@"<#IP Address#>" port:<#Port#>];
SWIFT
let lifecycleConfiguration = SDLLifecycleConfiguration.debugConfiguration(withAppName: "<#App Name#>", appId: "<#App Id#>", ipAddress: "<#IP Address#>", port: <#Port#>))
N O T E
If you are using an emulator, the IP address is your computer or
virtual machine’s IP address, and the port number is usually 12345.
If these values are not correct, or emulator is not running, your app
with not run, as TCP connections occur on the main thread.

2. Short app name (optional)
This is a shortened version of your app name that is substituted when the full
app name will not be visible due to character count constraints
N O T E
If you are using a head unit or TDK, and are using the relay app for
debugging, the IP address and port number should be set to the
same IP address and port number as the app. This information
appears in the relay app once the server is turned on in the relay
app. Also be sure that the device is on the same network as your
app.
OBJECTIVE-C
lifecycleConfiguration.shortAppName = @"<#Shortened App Name#>";

3. App Icon
This is a custom icon for your application. Please refer to Uploading Files and
Graphics for icon sizes.
SWIFT
lifecycleConfiguration.shortAppName = "<#Shortened App Name#>"
OBJECTIVE-C
UIImage* appImage = [UIImage imageNamed:@"<#AppIcon Name#>"];if (appImage) { SDLArtwork* appIcon = [SDLArtwork persistentArtworkWithImage:appImage name:@"<#Name to Upload As#>" asImageFormat:SDLArtworkImageFormatJPG /* or SDLArtworkImageFormatPNG */]; lifecycleConfiguration.appIcon = appIcon; }

4. App Type (optional)
The app type is used by car manufacturers to decide how to categorize your
app. Each car manufacturer has different categorization system. For example, if
you set your app type as media, your app will also show up in the audio tab as
well as the apps tab of Ford’s SYNC3 head unit. The app type options are:
SWIFT
if let appImage = UIImage(named: "<#AppIcon Name#>") else { let appIcon = SDLArtwork.persistentArtwork(with: appImage, name: "<#Name to Upload As#>", as: .JPG /* or .PNG */) lifecycleConfiguration.appIcon = appIcon }
N O T E
We recommend using SDLArtwork when building an image.
Persistent files are used when the image ought to remain on the
remote system between ignition cycles. This is commonly used for
menu artwork and app icons

default, communication, media (i.e. music/podcasts/radio), messaging,
navigation, information, and social.
2. Set the Configuration
The SDLConfiguration class is used to set the lifecycle and lock screen
configurations for the app. Use the lifecycle configuration settings above to
instantiate a SDLConfiguration instance.
OBJECTIVE-C
lifecycleConfiguration.appType = SDLAppHMIType.MEDIA;
SWIFT
lifecycleConfiguration.appType = .media()

3. Lock screen
A lock screen is used to prevent the user from interacting with the app on the
smartphone while they are driving. When the vehicle starts moving, the lock
screen is activated. Similarly, when the vehicle stops moving, the lock screen is
removed. You must implement the lock screen in your app for safety reasons.
Any application without a lock screen will not get approval for release to the
public.
The SDL SDK takes care of the lock screen implementation for you, and even
includes the resources for a default lock screen, as well as using the app icon
you set, and a connected vehicle's logo. If you do not want to use the default
lock screen, you can implement your own custom lock screen.
OBJECTIVE-C
SDLConfiguration* configuration = [SDLConfiguration configurationWithLifecycle:lifecycleConfiguration lockScreen:[SDLLockScreenConfiguration enabledConfiguration]];
SWIFT
let configuration = SDLConfiguration(lifecycle: lifecycleConfiguration, lockScreen: .enabled())

For more information, please refer to the Adding the Lock Screen section, for
this guide we will be using SDLLockScreenConfiguration 's
enabledConfiguration .
4. Create a SDLManager
Now you can use the SDLConfiguration instance to instantiate the
SDLManager .
OBJECTIVE-C
[SDLLockScreenConfiguration enabledConfiguration]
SWIFT
SDLLockScreenConfiguration.enabled()

5. Start the SDLManager
The manager should be started as soon as possible in your application's
lifecycle. We suggest doing this in the didFinishLaunchingWithOptions()
method in your AppDelegate class. Once the manager has been initialized, it
will immediately start watching for a connection with the remote system. The
manager will passively search for a connection with a SDL Core during the
OBJECTIVE-C
self.sdlManager = [[SDLManager alloc] initWithConfiguration:configuration delegate:self];
SWIFT**
sdlManager = SDLManager(configuration: configuration, delegate: self)

entire lifespan of the app. If the manager detects a connection with a SDL Core,
the startWithReadyHandler will be called.
OBJECTIVE-C
[self.sdlManager startWithReadyHandler:^(BOOL success, NSError * _Nullable error) { if (success) { // Your app has successfully connected with the SDL Core. }}];
SWIFT
sdlManager.start(readyHandler { (success, error) in if success { // Your app has successfully connected with the SDL Core. }})
N O T E
In production, your app will be watching for connections using iAP,
which will not use any additional battery power than normal.
If the connection is successful, you can start sending RPCs to the SDL Core.
However, some RPCs can only be sent when the HMI is in the FULL or LIMITED
state. If the SDL Core's HMI is not ready to accept these RPCs, your requests
will be ignored. If you want to make sure that the SDL Core will not ignore your
RPCs, use the SDLManagerDelegate methods in the next section.
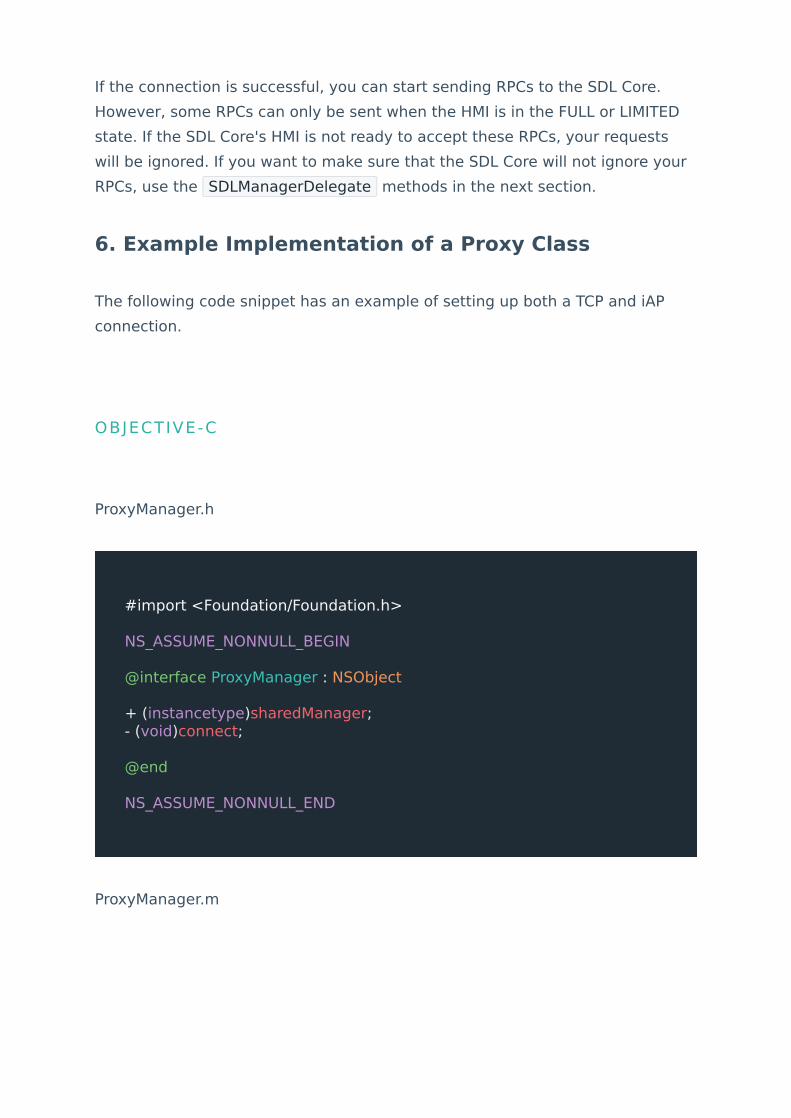
6. Example Implementation of a Proxy Class
The following code snippet has an example of setting up both a TCP and iAP
connection.
ProxyManager.h
ProxyManager.m
OBJECTIVE-C
#import <Foundation/Foundation.h>
NS_ASSUME_NONNULL_BEGIN
@interface ProxyManager : NSObject
+ (instancetype)sharedManager;- (void)connect;
@end
NS_ASSUME_NONNULL_END

#import "SmartDeviceLink.h"
NS_ASSUME_NONNULL_BEGIN
static NSString* const AppName = @"<#App Name#>";static NSString* const AppId = @"<#App Id#>";@interface ProxyManager () <SDLManagerDelegate>
@property (nonatomic, strong) SDLManager* sdlManager;
@end
@implementation ProxyManager
+ (instancetype)sharedManager { static ProxyManager *sharedManager = nil; static dispatch_once_t onceToken; dispatch_once(&onceToken, ^{ sharedManager = [[ProxyManager alloc] init]; });
return sharedManager;}
- (instancetype)init { self = [super init]; if (!self) { return nil; }
// Used for USB Connection SDLLifecycleConfiguration* lifecycleConfiguration = [SDLLifecycleConfiguration defaultConfigurationWithAppName:AppName appId:AppId];
// Used for TCP/IP Connection// SDLLifecycleConfiguration* lifecycleConfiguration = [SDLLifecycleConfiguration debugConfigurationWithAppName:AppName appId:AppId ipAddress:@"<#IP Address#>" port:<#Port#>];
UIImage* appImage = [UIImage imageNamed:@"<#AppIcon Name#>"]; if (appImage) { SDLArtwork* appIcon = [SDLArtwork persistentArtworkWithImage:appImage name:@"<#Name to Upload As#>" asImageFormat:SDLArtworkImageFormatJPG /* or SDLArtworkImageFormatPNG */]; lifecycleConfiguration.appIcon = appIcon; }

lifecycleConfiguration.shortAppName = @"<#Shortened App Name#>"; lifecycleConfiguration.appType = [SDLAppHMIType MEDIA];
SDLConfiguration* configuration = [SDLConfiguration configurationWithLifecycle:lifecycleConfiguration lockScreen:[SDLLockScreenConfiguration enabledConfiguration]];
self.sdlManager = [[SDLManager alloc] initWithConfiguration:configuration delegate:self];
return self;}
- (void)connect { [self.sdlManager startWithReadyHandler:^(BOOL success, NSError * _Nullable error) { if (success) { // Your app has successfully connected with the SDL Core } }];}
#pragma mark SDLManagerDelegate- (void)managerDidDisconnect { NSLog(@"Manager disconnected!");}
- (void)hmiLevel:(SDLHMILevel *)oldLevel didChangeToLevel:(SDLHMILevel *)newLevel { NSLog(@"Went from HMI level %@ to HMI Level %@", oldLevel, newLevel);}
@end
NS_ASSUME_NONNULL_END

SWIFT

import SmartDeviceLink_iOS
class ProxyManager: NSObject { private let appName = "<#App Name#>" private let appId = "<#App Id#>"
// Manager fileprivate let sdlManager: SDLManager
// Singleton static let sharedManager = ProxyManager()
private override init( ) {
// Used for USB Connection let lifecycleConfiguration = SDLLifecycleConfiguration.defaultConfiguration(withAppName: appName, appId: appId)
// Used for TCP/IP Connection// let lifecycleConfiguration = SDLLifecycleConfiguration.debugConfiguration(withAppName: appName, appId: appId, ipAddress: "<#IP Address#>", port: <#Port#>)
// App icon image if let appImage = UIImage(named: "<#AppIcon Name#>") { let appIcon = SDLArtwork.persistentArtwork(with: appImage, name: "<#Name to Upload As#>", as: .JPG /* or .PNG */) lifecycleConfiguration.appIcon = appIcon }
lifecycleConfiguration.shortAppName = "<#Shortened App Name#>" lifecycleConfiguration.appType = .media()
let configuration = SDLConfiguration(lifecycle: lifecycleConfiguration, lockScreen: .enabled())
sdlManager = SDLManager(configuration: configuration, delegate: nil)
super.init()
sdlManager.delegate = self }
func connect() { // Start watching for a connection with a SDL Core

Implement the SDL Manager Delegate
The ProxyManager class should conform to the SDLManagerDelegate protocol.
This means that the Proxy class must implement the following required
functions:
1. managerDidDisconnect() This function is called only once, when the proxy
disconnects from the SDL Core. Do any cleanup you need to do in this
function.2. hmiLevel(oldLevel: SDLHMILevel!, didChangeToLevel newLevel:
SDLHMILevel!) This function is called when the HMI level changes for the
app. The HMI level can be FULL, LIMITED, BACKGROUND, or NONE. It is
important to note that most RPCs sent while the HMI is in BACKGROUND
or NONE mode will be ignored by the SDL Core.
The Different HMI Levels:
Please refer to Knowing the In-Car UI Status for information about HMI levels.
sdlManager.start { (success, error) in if success { // Your app has successfully connected with the SDL Core } } }}
//MARK: SDLManagerDelegateextension ProxyManager: SDLManagerDelegate { func managerDidDisconnect() { print("Manager disconnected!") }
func hmiLevel(_ oldLevel: SDLHMILevel, didChangeTo newLevel: SDLHMILevel) { print("Went from HMI level \(oldLevel) to HMI level \(newLevel)") }}

Connecting to a SDL Core
Connect with an Emulator
To connect to a SDL Core emulator, make sure to implement a TCP connection.
The emulator and app should be on the same network (i.e. remember to set the
correct IP address and port number in the SDLLifecycleConfiguration ). The IP
will most likely be the IP address of the operating system running the SDL Core
emulator. The port will most likely be 12345 .
Connect with a Vehicle Head Unit or a Technical
Development Kit (TDK)
To connect your iOS device directly to a vehicle head unit or TDK, make sure to
implement an iAP ( default ) connection in the SDLLifecycleConfiguration .
Then connect the iOS device to the head unit or TDK using a USB cord.
N O T E
Known issues:
• When app is in the background mode, the app will be unable tocommunicate with SDL Core. This will work on IAP connections.
• Audio will not play on the SDL Core. Only IAP connections arecurrently able to play audio.
PRODUCTION

If you are testing with a vehicle head unit or TDK and want to see debug logs in
Xcode while the app is running, you must use another app called the relay app
to help you connect to the device. When using the relay app, make sure to
implement a TCP connection. Please see the guide for the relay app to learn
how to setup the connection between the device, the relay app and your app.
Designing a User Interface
Designing for Different User Interfaces
Each car manufacturer has different user interface style guidelines, so the
number of lines of text, buttons, and images supported will vary between
different types of head units. When the app first connects to the SDL Core, a
RegisterAppInterface RPC will be sent by the SDL Core containing the
displayCapability properties. You can use this information to determine how to
layout the user interface.
DEBUGGING
N O T E
The same issues apply when connecting the Relay app with a TDK
or head unit as do when connecting to SDL Core. Please see the
issues above, under the Connect with an Emulator heading.

Register App Interface RPC
The RegisterAppInterface response contains information about the display
type, the type of images supported, the number of text fields supported, the
HMI display language, and a lot of other useful properties. For a full list of
displayCapability properties returned by the RegisterAppInterface response,
please consult the SDLRegisterAppInterfaceResponse.h file. The table below
has a list of all possible properties that can be returned by the
RegisterAppInterface response. Each property is optional, so you may not get
information for all the parameters in the table.

PA R A M E T E R S D E S C R I P T I O N N O T E S
syncMsgVersion
Specifies the versionnumber of the SDL V4interface. This is used byboth the application andSDL to declare whatinterface version each isusing.
CheckSDLSyncMsgVersion.hfor more information
languageThe currently active voice-recognition and text-to-speech language on Sync.
Check SDLLanguage.hfor more information
hmiDisplayLanguage The currently activedisplay language on Sync.
Check SDLLanguage.hfor more information
displayCapabilities
Information about theSync display. This includesinformation aboutavailable templates,whether or not graphicsare supported, and a listof all text fields and themax number of charactersallowed in each text field.
CheckSDLRPCMessage.h formore information
buttonCapabilities
A list of available buttonsand whether the buttonssupport long, short andup-down presses.
CheckSDLButtonCapabilities.hfor more information
softButtonCapabilities
A list of available softbuttons and whether thebutton support images.Also information aboutwhether the buttonsupports long, short andup-down presses.
CheckSDLSoftButtonCapabilities.h for moreinformation
presetBankCapabilitiesIf returned, the platformsupports custom on-screen presets.
CheckSDLPresetBankCapabilities.h for moreinformation
hmiZoneCapabilities
Specifies HMI Zones in thevehicle. There may be aHMI available for backseat passengers as well asfront seat passengers.
CheckSDLHMIZoneCapabilities.h for more information
speechCapabilities
Contains informationabout TTS capabilities onthe SDL platform.Platforms may supporttext, SAPI phonemes, LHPLUS phonemes, pre-recorded speech, andsilence.
CheckSDLSpeechCapabilities.hfor more information
prerecordedSpeech
A list of pre-recordedsounds you can use inyour app. Sounds mayinclude a help, initial,listen, positive, or anegative jingle.
CheckSDLPrerecordedSpeech.h for more information
vrCapabilities
The voice-recognitioncapabilities of theconnected SDL platform.The platform may be ableto recognize spoken textin the current language.
CheckSDLVRCapabilities.h formore information

PA R A M E T E R S D E S C R I P T I O N N O T E S
Templates
Each car manufacturer supports a set of templates for the user interface. These
templates determine the position and size of the text, images, and buttons on
the screen. A list of supported templates is sent with RegisterAppInterface
response.
To change a template at any time, send a SDLSetDisplayLayout RPC to the
SDL Core. If you want to ensure that the new template is used, wait for a
response from the SDL Core before sending any more user interface RPCs.
audioPassThruCapabilities
Describes the samplingrate, bits per sample, andaudio types available.
CheckSDLAudioPassThruCapabilities.h for moreinformation
vehicleTypeThe make, model, year,and the trim of thevehicle.
Check SDLVehicleType.hfor more information
supportedDiagModes
Specifies the white-list ofsupported diagnosticmodes (0x00-0xFF)capable forDiagnosticMessagerequests. If a modeoutside this list isrequested, it will berejected.
CheckSDLDiagnosticMessage.h for more information
hmiCapabilities
Returns whether or notthe app can support built-in navigation and phonecalls.
CheckSDLHMICapabilities.h formore information
sdlVersion The SmartDeviceLinkversion String
systemSoftwareVersion
The software version ofthe system thatimplements theSmartDeviceLink core
String

Available Templates
There are fifteen standard templates to choose from, however some head units
may only support a subset of these templates. Please check the
OBJECTIVE-C
SDLSetDisplayLayout* display = [[SDLSetDisplayLayout alloc] initWithPredefinedLayout:SDLPredefinedLayout.GRAPHIC_WITH_TEXT];[self.sdlManager sendRequest:display withResponseHandler:^(SDLRPCRequest *request, SDLRPCResponse *response, NSError *error) { if ([response.resultCode isEqualToEnum:SDLResult.SUCCESS]) { // The template has been set successfully }}];
SWIFT
let display = SDLSetDisplayLayout(predefinedLayout: .graphic_WITH_TEXT())!sdlManager.send(display) { (request, response, error) in if response?.resultCode == .success() { // The template has been set successfully }}

RegisterAppInterface response for the supported templates. The following
examples show how templates will appear on the generic head unit.
F O R D H M I
1. MEDIA - WITH AND WITHOUT PROGRESS BAR
2. NON-MEDIA - WITH AND WITHOUT SOFT BUTTONS

F O R D H M I
3. GRAPHIC_WITH_TEXT

F O R D H M I
F O R D H M I
4. TEXT_WITH_GRAPHIC
5. T ILES_ONLY

F O R D H M I
F O R D H M I
6. GRAPHIC_WITH_TILES
7. T ILES_WITH_GRAPHIC

F O R D H M I
F O R D H M I
8. GRAPHIC_WITH_TEXT_AND_SOFTBUTTONS
9. TEXT_AND_SOFTBUTTONS_WITH_GRAPHIC

F O R D H M I
F O R D H M I
10. GRAPHIC_WITH_TEXTBUTTONS
11. DOUBLE_GRAPHIC_SOFTBUTTONS

F O R D H M I
F O R D H M I
12. TEXTBUTTONS_WITH_GRAPHIC
13. TEXTBUTTONS_ONLY

F O R D H M I
F O R D H M I
14. LARGE_GRAPHIC_WITH_SOFTBUTTONS
15. LARGE_GRAPHIC_ONLY

F O R D H M I
Text, Images, and Buttons
All text, images, and buttons on the HMI screen must be sent as part of a
SDLShow RPC. Subscribe buttons are sent as part of a SDLSubscribeButton
RPC.
Text
A maximum of four lines of text can be set in SDLShow RPC, however, some
templates may only support 1, 2, or 3 lines of text. If all four lines of text are

set in the SDLShow RPC, but the template only supports three lines of text,
then the fourth line will simply be ignored.
OBJECTIVE-C
SDLShow* show = [[SDLShow alloc] initWithMainField1:@"<Line 1 of Text#>" mainField2:@"<Line 2 of Text#>" mainField3:@"<Line 3 of Text#>" mainField4:@"<Line 4 of Text#>" alignment:SDLTextAlignment.CENTERED()];self.sdlManager sendRequest:show withResponseHandler:^(SDLRPCRequest *request, SDLRPCResponse *response, NSError *error) { if ([response.resultCode isEqualToEnum:SDLResult.SUCCESS]) { // The text has been set successfully }}];
SWIFT
let show = SDLShow(mainField1: "<#Line 1 of Text#>", mainField2: "<#Line 2 of Text#>", mainField3: "<#Line 3 of Text#>", mainField4: "<#Line 4 of Text#>", alignment: .centered())sdlManager.send(show) { (request, response, error) in guard let response = response else { return } if response.resultCode.isEqual(to: SDLResult.success()) { // The text has been set successfully }}

Images
The position and size of images on the screen is determined by the currently
set template. All images must first be uploaded to the remote system using the
SDLManager’s file manager before being used in a SDLShow RPC. Once the
image has been successfully uploaded, the app will be notified in the upload
method's completion handler. For information relating to how to upload images,
go to the Uploading Files and Graphics section.
Once the image has been uploaded to the head unit, you can show the image
on the user interface. To send the image, create a SDLImage , and send it
using the SDLShow RPC. The value property should be set to the same value
used in the name property of the uploaded SDLArtwork . Since you are
N O T E
Some head units you may be connected to may not support images
at all. Please consult the graphicsSupported property in the
display capabilities property of the RegisterAppInterface
response.
SHOW THE IMAGE ON A HEAD UNIT

uploading your own image, the imageType property should be set to
dynamic .
OBJECTIVE-C
SDLImage* image = [[SDLImage alloc] initWithName:@"<#Uploaded As Name#>" ofType:SDLImageType.DYNAMIC];
SDLShow* show = [[SDLShow alloc] init];show.graphic = image;
self.sdlManager sendRequest:show withResponseHandler:^(SDLRPCRequest *request, SDLRPCResponse *response, NSError *error) { if ([response.resultCode isEqualToEnum:SDLResult.SUCCESS]) { // The text has been set successfully }}];
SWIFT
let sdlImage = SDLImage(name: "<#Uploaded As Name", of: .dynamic())
let show = SDLShow()show.graphic = image
sdlManager.send(show) { (request, response, error) in guard let response = response else { return } if response.resultCode.isEqual(to: SDLResult.success()) { // Success }}

Soft & Subscribe Buttons
Buttons on the HMI screen are referred to as soft buttons to distinguish them
from hard buttons, which are physical buttons on the head unit. Don’t confuse
soft buttons with subscribe buttons, which are buttons that can detect user
selection on hard buttons (or built-in soft buttons).
Soft buttons can be created with text, images or both text and images. The
location, size, and number of soft buttons visible on the screen depends on the
template. If the button has an image, remember to upload the image first to
the head unit before setting the image in the SDLSoftButton instance.
SOFT BUTTONS
N O T E
If a button type is set to image or both but no image is stored
on the head unit, the button might not show up on the HMI screen.

OBJECTIVE-C

SDLSoftButton* softButton = [[SDLSoftButton alloc] init];
// Button IdsoftButton.softButtonID = @(<#Unique Button Id#>);
// Button handler - This is called when user presses the buttonsoftButton.handler = ^(SDLRPCNotification *notification) { if ([notification isKindOfClass:[SDLOnButtonPress class]]) { SDLOnButtonPress *onButtonPress = (SDLOnButtonPress*)notification; if ([onButtonPress.buttonPressMode isEqualToEnum:SDLButtonPressMode.SHORT]) { // Short button press } else if ([onButtonPress.buttonPressMode isEqualToEnum:SDLButtonPressMode.LONG]) { // Long button press } } else if ([notification isKindOfClass:[SDLOnButtonEvent class]]) { SDLOnButtonEvent *onButtonEvent = (SDLOnButtonEvent*)notification; if ([onButtonEvent.buttonEventMode isEqualToEnum:SDLButtonEventMode.BUTTONUP]) { // Button up } else if ([onButtonEvent.buttonEventMode isEqualToEnum:SDLButtonEventMode.BUTTONDOWN]) { // Button down } }};
// Button type can be text, image, or both text and imagesoftButton.type = SDLSoftButtonType.BOTH;
// Button textsoftButton.text = @"<#Button Text#>";
// Button imagesoftButton.image = [[SDLImage alloc] initWithName:@"<#Save As Name#>" ofType: SDLImageType.DYNAMIC];
SDLShow *show = [[SDLShow alloc] init];
// The buttons are set as part of an arrayshow.softButtons = [NSMutableArray arrayWithObject:softButton]
// Send the request[self.sdlManager sendRequest:show withResponseHandler:^(SDLRPCRequest *request, SDLRPCResponse *response, NSError *error)

{ if ([response.resultCode isEqualToEnum:SDLResult.SUCCESS]) { // The button was created successfully }}];

SWIFT

let softButton = SDLSoftButton()!
// Button IdsoftButton.softButtonID = <#Unique Button Id#>
// Button handler - This is called when user presses the buttonsoftButton.handler = { (notification) in if let onButtonPress = notification as? SDLOnButtonPress { if onButtonPress.buttonPressMode.isEqual(to: SDLButtonPressMode.short()) { // Short button press } else if onButtonPress.buttonPressMode.isEqual(to: SDLButtonPressMode.long()) { // Long button press } } else if let onButtonEvent = notification as? SDLOnButtonEvent { if onButtonEvent.buttonEventMode.isEqual(to: SDLButtonEventMode.buttonup()) { // Button up } else if onButtonEvent.buttonEventMode.isEqual(to: SDLButtonEventMode.buttondown()) { // Button down } }}
// Button type can be text, image, or both text and imagesoftButton.type = .both()
// Button textsoftButton.text = "<#Button Text#>"
// Button imagesoftButton.image = SDLImage(name: "<#Save As Name#>", of: .dynamic())
let show = SDLShow()!
// The buttons are set as part of an arrayshow.softButtons = [softButton]
// Send the requestsdlManager.send(show) { (request, response, error) in guard let response = response else { return } if response.resultCode.isEqual(to: SDLResult.success()) { // The button was created successfully }}

Subscribe buttons are used to detect changes to hard buttons. You can
subscribe to the following hard buttons:
B U T T O N T E M P L AT E B U T T O N T Y P E
Audio buttons like the OK (i.e. the play/pause button), seek left, seek right,
tune up, and tune down buttons can only be used with a media template. The
OK, seek left, and seek right buttons will also show up on the screen in a
predefined location dictated by the media template on touchscreens. The app
will be notified when the user selects the subscribe button on the screen or
when the user manipulates the corresponding hard button.
SUBSCRIBE BUTTONS
Ok (play/pause) media template only soft button and hardbutton
Seek left media template only soft button and hardbutton
Seek right media template only soft button and hardbutton
Tune up media template only hard button
Tune down media template only hard button
Preset 0-9 any template hard button
Search any template hard button
Custom any template hard button

Menus
You have two different options when creating menus. One is to simply add
items to the default menu available in every template. The other is to create a
custom menu that pops up when needed.
Default Menu
N O T E
You will automatically be assigned the media template if you set
your configuration app type as MEDIA .

F O R D H M I
Every template has a default menu button. The position of this button varies
between templates, and can not be removed from the template. The default
menu is initially empty except for an "Exit Your App Name" button. Items can be

added to the menu at the root level or to a submenu. It is important to note
that a submenu can only be one level deep.
Menu Structure
The SDLAddCommand RPC can be used to add items to the root menu or to a
submenu. Each SDLAddCommand RPC must be sent with a unique id, a voice-
recognition command, and a set of menu parameters. The menu parameters
include the menu name, the position of the item in the menu, and the id of the
menu item’s parent. If the menu item is being added to the root menu, then the
ADD MENU ITEMS

parent id is 0. If it is being added to a submenu, then the parent id is the
submenu’s id.
OBJECTIVE-C
// Create the menu parameters// The parent id is 0 if adding to the root menu// If adding to a submenu, the parent id is the submenu's idSDLMenuParams* menuParameters = [[SDLMenuParams alloc] initWithMenuName:@"Menu Item Name" parentId:0 position:0];
// For menu items, be sure to use unique ids.SDLAddCommand* menuItem = [[SDLAddCommand alloc] initWithId:<#Unique Id#> vrCommands:@[@"<#Voice Recognition Command#>"] handler:^(SDLRPCNotification *notification) { if (![notification isKindOfClass:SDLOnCommand.class]) { return; }
SDLOnCommand* onCommand = (SDLOnCommand*)notification;
if ([onCommand.triggerSource isEqualToEnum:SDLTriggerSource.MENU]) { // Menu Item Was Selected }}];
// Set the menu parametersmenuItem.menuParams = menuParameters;
[self.sdlManager sendRequest:menuItem withResponseHandler:^(SDLRPCRequest *request, SDLRPCResponse *response, NSError *error) { if ([response.resultCode isEqualToEnum:SDLResult.SUCCESS]) { // The menuItem was created successfully }}];
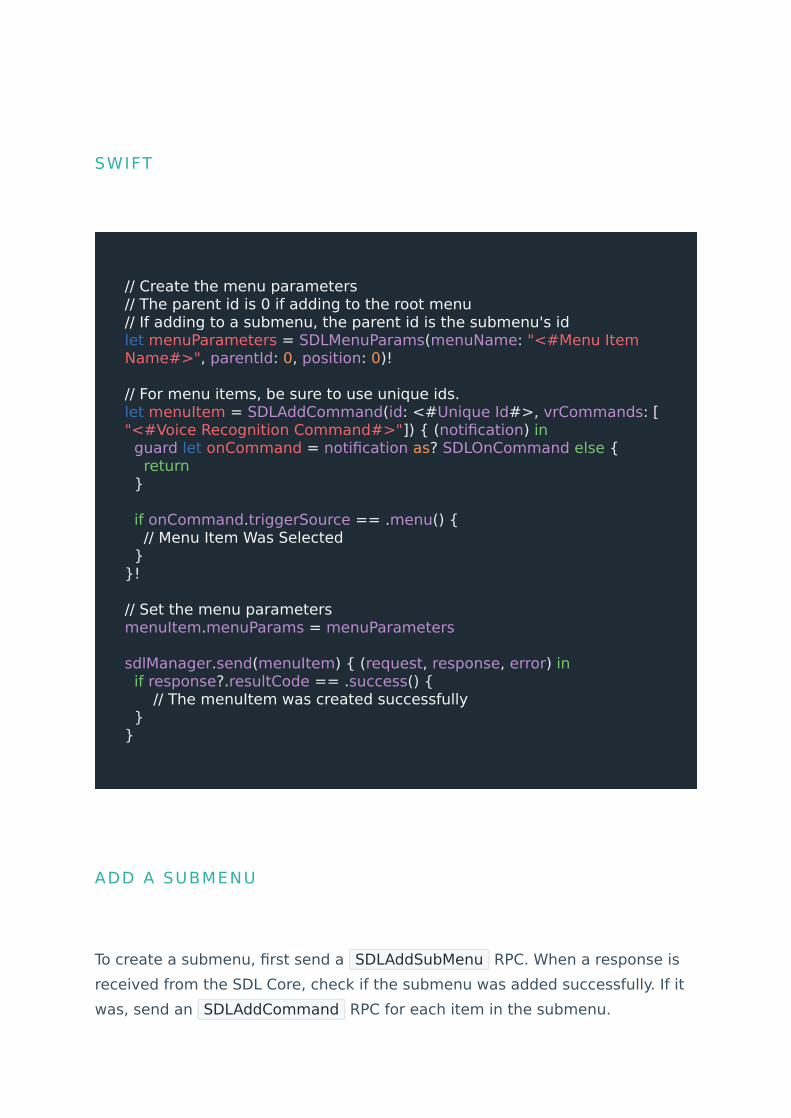
To create a submenu, first send a SDLAddSubMenu RPC. When a response is
received from the SDL Core, check if the submenu was added successfully. If it
was, send an SDLAddCommand RPC for each item in the submenu.
SWIFT
// Create the menu parameters// The parent id is 0 if adding to the root menu// If adding to a submenu, the parent id is the submenu's idlet menuParameters = SDLMenuParams(menuName: "<#Menu Item Name#>", parentId: 0, position: 0)!
// For menu items, be sure to use unique ids.let menuItem = SDLAddCommand(id: <#Unique Id#>, vrCommands: ["<#Voice Recognition Command#>"]) { (notification) in guard let onCommand = notification as? SDLOnCommand else { return }
if onCommand.triggerSource == .menu() { // Menu Item Was Selected }}!
// Set the menu parametersmenuItem.menuParams = menuParameters
sdlManager.send(menuItem) { (request, response, error) in if response?.resultCode == .success() { // The menuItem was created successfully }}
ADD A SUBMENU

OBJECTIVE-C
SDLAddSubMenu* subMenu = [[SDLAddSubMenu alloc] initWithId:<#Unique Id#> menuName:@"<#SubMenu Item Name#>"];
[self.sdlManager sendRequest:subMenu withResponseHandler:^(SDLRPCRequest *request, SDLRPCResponse *response, NSError *error) { if ([response.resultCode isEqualToEnum:SDLResult.SUCCESS]) { // The submenu was created successfully, start adding the submenu items }}];
SWIFT
let subMenu = SDLAddSubMenu(id: <#Unique Id#>, menuName: "<#SubMenu Item Name#>")!
sdlManager.send(subMenu) { (request, response, error) in if response?.resultCode == .success() { // The submenu was created successfully, start adding the submenu items }})
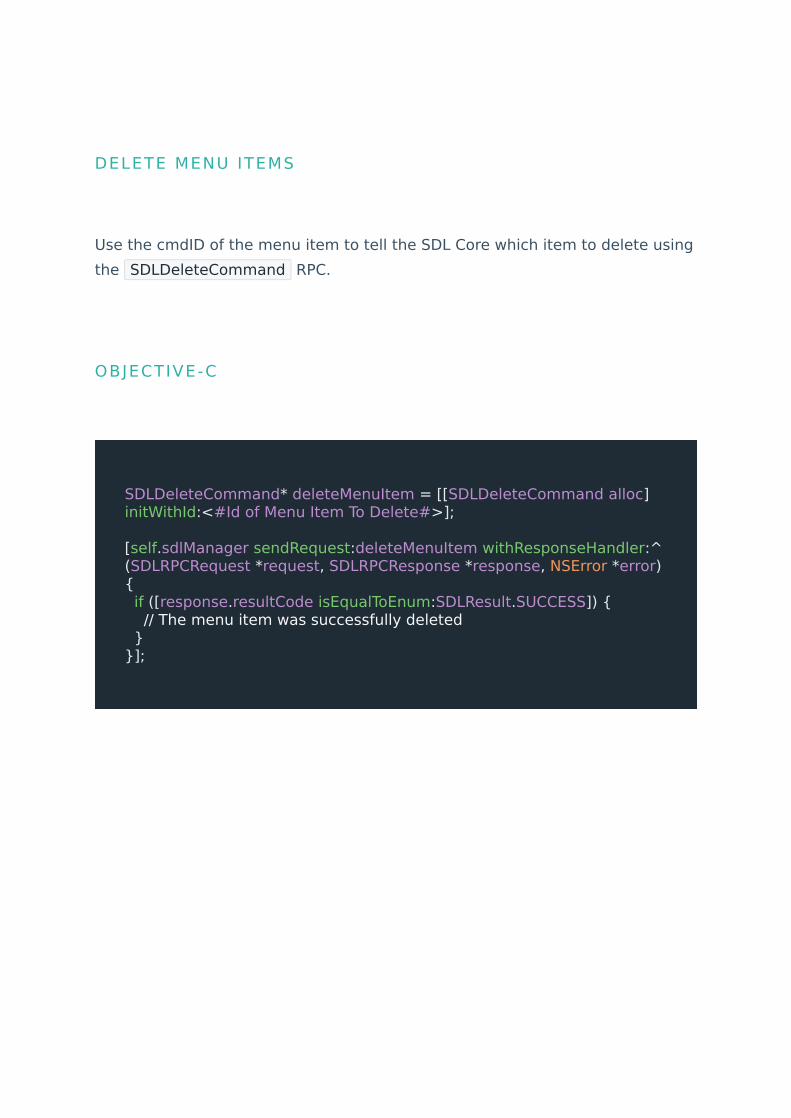
Use the cmdID of the menu item to tell the SDL Core which item to delete using
the SDLDeleteCommand RPC.
DELETE MENU ITEMS
OBJECTIVE-C
SDLDeleteCommand* deleteMenuItem = [[SDLDeleteCommand alloc] initWithId:<#Id of Menu Item To Delete#>];
[self.sdlManager sendRequest:deleteMenuItem withResponseHandler:^(SDLRPCRequest *request, SDLRPCResponse *response, NSError *error) { if ([response.resultCode isEqualToEnum:SDLResult.SUCCESS]) { // The menu item was successfully deleted }}];

Use the menuID to tell the SDLCore which item to delete using the
SDLDeleteSubMenu RPC.
SWIFT
let deleteMenuItem = SDLDeleteCommand(id: <#Id of Menu Item To Delete#>)!
sdlManager.send(deleteMenuItem) { (request, response, error) in if response?.resultCode == .success() { // The menu item was successfully deleted }}
DELETE SUBMENUS

OBJECTIVE-C
SDLDeleteSubMenu* deleteSubMenu = [[SDLDeleteSubMenu alloc] initWithId:<#Id of Sub Menu Item to Delete#>];
[self.sdlManager sendRequest:deleteSubMenu withResponseHandler:^(SDLRPCRequest *request, SDLRPCResponse *response, NSError *error) { if ([response.resultCode isEqualToEnum:SDLResult.SUCCESS]) { // The sub menu was successfully deleted }}];
SWIFT
let deleteSubMenu = SDLDeleteSubMenu(id: <#Id of Sub Menu Item to Delete#>)!
sdlManager.send(deleteSubMenu) { (request, response, error) in if response?.resultCode == .success() { // The sub menu was successfully deleted }}

Custom Menus
Custom menus, called perform interactions, are one level deep, however,
you can create submenus by triggering another perform interaction when the
user selects a row in a menu. Perform interactions can be set up to recognize
speech, so a user can select an item in the menu by speaking their preference
rather than physically selecting the item.
Perform interactions are created by sending two different RPCs. First a
SDLCreateInteractionChoiceSet RPC must be sent. This RPC sends a list of
items that will show up in the menu. When the request has been registered
successfully, then a SDLPerformInteraction RPC is sent. The

SDLPerformInteraction RPC sends the formatting requirements, the voice-
recognition commands, and a timeout command.
Each menu item choice defined in SDLChoice should be assigned a unique id.
The choice set in SDLCreateInteractionChoiceSet should also have its own
unique id.
CREATE A SET OF CUSTOM MENU ITEMS
OBJECTIVE-C
SDLChoice* choice = [[SDLChoice alloc] initWithId:<#Unique Id#> menuName:@"<#Menu Title#>" vrCommands:@[@"<#Menu Commands#>"]];
SDLCreateInteractionChoiceSet* createRequest = [[SDLCreateInteractionChoiceSet alloc] initWithId:<#Unique Id#> choiceSet:@[choice]];
[self.sdlManager sendRequest:createRequest withResponseHandler:^(SDLRPCRequest *request, SDLRPCResponse *response, NSError *error) { if ([response.resultCode isEqualToEnum:SDLResult.SUCCESS]) { // The request was successful, now send the SDLPerformInteraction RPC }}];

Once the set of menu items has been sent to SDL Core, send a
SDLPerformInteraction RPC to get the items to show up on the HMI screen.
SWIFT
let choice = SDLChoice(id: <#Unique Id#>, menuName: "<#Menu Title#>", vrCommands: ["<#Menu Command#>"])!
let createRequest = SDLCreateInteractionChoiceSet(id: <#Unique Id#>, choiceSet: [choice])!
sdlManager.send(createRequest) { (request, response, error) in if response?.resultCode == .success() { // The request was successful, now send the SDLPerformInteraction RPC }}
FORMAT THE SET OF CUSTOM MENU ITEMS
OBJECTIVE-C
SDLPerformInteraction* performInteraction = [[SDLPerformInteraction alloc] initWithInitialPrompt:nil initialText:@"<#Text Displayed When Shown#>" interactionChoiceSetID:<#SDLCreateInteractionChoiceSet id#>];

The interaction mode specifies the way the user is prompted to make a section
and the way in which the user’s selection is recorded.
I N T E R A C T I O N M O D E D E S C R I P T I O N
SWIFT
let performInteraction = SDLPerformInteraction(initialPrompt: nil, initialText: "<#Text Displayed When Shown#>", interactionChoiceSetID: <#SDLCreateInteractionChoiceSet id#>)!
INTERACTION MODE
Manual only Interactions occur only through thedisplay
VR only Interactions occur only through text-to-speech and voice recognition
Both Interactions can occur both manually orthrough VR
OBJECTIVE-C
performInteraction.interactionMode = SDLInteractionMode.MANUAL_ONLY;

F O R D H M I
SWIFT
performInteraction.interactionMode = .manual_ONLY()
VR INTERACTION MODE

F O R D H M I
The items in the perform interaction can be shown as a grid of buttons (with
optional images) or as a list of choices.
MANUAL INTERACTION MODE
INTERACTION LAYOUT

L AYO U T M O D E F O R M AT T I N G D E S C R I P T I O N
Icon only A grid of buttons with images
Icon with search A grid of buttons with images along witha search field in the HMI
List only A vertical list of text
List with search A vertical list of text with a search field inthe HMI
Keyboard A keyboard shows up immediately in theHMI
N O T E
Keyboard is currently only supported for the navigation app type.
OBJECTIVE-C
performInteraction.interactionLayout = SDLLayoutMode.LIST_ONLY;

F O R D H M I
SWIFT
performInteraction.interactionLayout = .list_ONLY()
ICON ONLY INTERACTION LAYOUT
LIST ONLY INTERACTION LAYOUT

F O R D H M I
F O R D H M I
L IST WITH SEARCH INTERACTION LAYOUT

A text-to-speech chunk is a text phrase or prerecorded sound that will be
spoken by the head unit. The text parameter specifies the text to be spoken or
the name of the pre-recorded sound. Use the type parameter to define the type
of information in the text parameter. The SDLPerformInteraction request can
have a initial, timeout, and a help prompt.
TEXT-TO-SPEECH (TTS)
OBJECTIVE-C
SDLTTSChunk* ttsChunk = [[SDLTTSChunk alloc] initWithText:@"<#Text to Speak#>" type:SDLSpeechCapabilities.TEXT];performInteraction.initialPrompt = [NSMutableArray arrayWithObject:ttsChunk];
// or - more easily
performInteraction.initialPrompt = [SDLTTSChunk textChunksFromString:@"<#Text to Speak#>"];

The timeout parameter defines the amount of time the menu will appear on the
screen before the menu is dismissed automatically by the HMI.
SWIFT
let ttsChunk = SDLTTSChunk(text: "<#Text to Speak#>", type: .text())performInteraction.initialPrompt = NSMutableArray(array: [prompt!])
// or - more easily
performInteraction.initialPrompt = SDLTTSChunk.textChunks(from: "<#Text to Speak#>")
TIMEOUT
OBJECTIVE-C
performInteraction.timeout = @30000; // 30 seconds

SWIFT
performInteraction.timeout = 30000 // 30 seconds
SEND THE REQUEST
OBJECTIVE-C
[self.sdlManager sendRequest:performInteraction withResponseHandler:^(SDLRPCRequest *request, SDLRPCResponse *response, NSError *error) { if (![response isKindOfClass:SDLPerformInteractionResponse.class]) { return; } SDLPerformInteractionResponse* performInteractionResponse = (SDLPerformInteractionResponse*)response;
if ([performInteractionResponse.resultCode isEqualToEnum:SDLResult.TIMED_OUT]) { // The custom menu timed out before the user could select an item } else if ([performInteractionResponse.resultCode isEqualToEnum:SDLResult.SUCCESS]) { NSNumber* choiceId = performInteractionResponse.choiceID; // The user selected an item in the custom menu }}];

If the information in the menu is dynamic, then the old interaction choice set
needs to be deleted with a SDLDeleteInteractionChoiceSet RPC before the
SWIFT
sdlManager.send(performInteraction) { (request, response, error) in guard let performInteractionResponse = response as? SDLPerformInteractionResponse else { return; }
// Wait for user's selection or for timeout if performInteractionResponse.resultCode == .timed_OUT() { // The custom menu timed out before the user could select an item } else if performInteractionResponse.resultCode == .success() { let choiceId = performInteractionResponse.choiceID // The user selected an item in the custom menu }}
DELETE THE CUSTOM MENU

new information can be added to the menu. Use the interaction choice set id to
delete the menu.
OBJECTIVE-C
SDLDeleteInteractionChoiceSet* deleteRequest = [[SDLDeleteInteractionChoiceSet alloc] initWithId:<#SDLCreateInteractionChoiceSet id#>];
[self.sdlManager sendRequest:deleteRequest withResponseHandler:^(SDLRPCRequest *request, SDLRPCResponse *response, NSError *error) { if ([response.resultCode isEqualToEnum:SDLResult.SUCCESS]) { // The custom menu was deleted successfully }}];
SWIFT
let deleteRequest = SDLDeleteInteractionChoiceSet(id: <#SDLCreateInteractionChoiceSet id#>)!
sdlManager.send(deleteRequest) { (request, response, error) in if response?.resultCode == .success() { // The custom menu was deleted successfully }}

Alerts
An alert is a pop-up window with some lines of text and optional soft buttons.
When an alert is activated, it will abort any SDL operation that is in-progress,
except the already-in-progress alert. If an alert is issued while another alert is
still in progress, the newest alert will simply be ignored.
Dismissing the Alert
The alert will persist on the screen until the timeout has elapsed, or the user
dismisses the alert by selecting a button. There is no way to dismiss the alert
programmatically other than to set the timeout length.
Alert UI
Depending the platform, an alert can have up to three lines of text, a progress
indicator (e.g. a spinning wheel or hourglass), and up to four soft buttons.
ALERT WITHOUT SOFT BUTTONS

F O R D H M I
F O R D H M I
Alert TTS
The alert can also be formatted to speak a prompt when the alert appears on
the screen. Do this by setting the ttsChunks parameter. To play the alert tone
before the text-to-speech is spoken, set playTone to true .
ALERT WITH SOFT BUTTONS

Example
OBJECTIVE-C

SDLAlert *alert = [[SDLAlert alloc] initWithAlertText1:@"<#Line 1#>" alertText2:@"<#Line 2#>" alertText3:@"<#Line 3#>"];
// Maximum time alert appears before being dismissed// Timeouts are must be between 3-10 seconds// Timeouts may not work when soft buttons are also used in the alertalert.duration = @5000;
// A progress indicator (e.g. spinning wheel or hourglass)// Not all head units support the progress indicatoralert.progressIndicator = @YES;
// Text-to-speechalert.ttsChunks = [SDLTTSChunk textChunksFromString:@"<#Text to speak#>"];
// Special tone played before the tts is spokenalert.playTone = @YES;
// Soft buttonsSDLSoftButton *okButton = [[SDLSoftButton alloc] init];okButton.text = @"OK";okButton.type = SDLSoftButtonType.TEXT;okButton.softButtonID = @<#Soft Button Id#>;okButton.handler = ^(SDLRPCNotification *notification) { if (![notification isKindOfClass:SDLOnButtonPress.class]) { return; } SDLOnButtonPress *onButtonPress = (SDLOnButtonPress*)notification; NSNumber *buttonId = onButtonPress.customButtonID; // create a custom action for the selected button};alert.softButtons = [NSMutableArray arrayWithObject:okButton];
// Send the alert[self.sdlManager sendRequest:alert withResponseHandler:^(SDLRPCRequest *request, SDLRPCResponse *response, NSError *error) { if ([response.resultCode isEqualToEnum:SDLResult.SUCCESS]) { // alert was dismissed successfully }}];

SWIFT
let alert = SDLAlert(alertText1: "<#Line 1#>", alertText2: "<#Line 2#>", alertText3: "<#Line 3#>")!
// Maximum time alert appears before being dismissed// Timeouts are must be between 3-10 seconds// Timeouts may not work when soft buttons are also used in the alertalert.duration = 5000
// A progress indicator (e.g. spinning wheel or hourglass)// Not all head units support the progress indicatoralert.progressIndicator = true
// Text-to-speechalert.ttsChunks = SDLTTSChunk.textChunks(from: "<#Text to speak#>")
// Special tone played before the tts is spokenalert.playTone = true
// Soft buttonslet okButton = SDLSoftButton()!okButton.text = "OK"okButton.type = .text()okButton.softButtonID = <#Soft Button Id#>okButton.handler = { (notification) in guard let notification = notification as? SDLOnButtonPress else { return } guard let id = notification.customButtonID else { return } // create a custom action for the selected button}alert.softButtons = [okButton]
// Send the alertsdlManager.send(alert) { (request, response, error) in if response?.resultCode == .success() { // alert was dismissed successfully }}

Uploading Files and Graphics
Graphics allows for you to better customize what you would like to have your
users see, and provide a better User Interface.
To learn how to use these graphics once they are uploaded, please see
Displaying Information > Text, Images, and Buttons.
When developing an application using SmartDeviceLink, two things must
always be remembered when using graphics:
1. You may be connected to a head unit that does not display graphics.2. You must upload them from your mobile device to Core before using them.
Detecting if Graphics are Supported
Being able to know if graphics are supported is a very important feature of your
application, as this avoids you uploading unneccessary images to the head
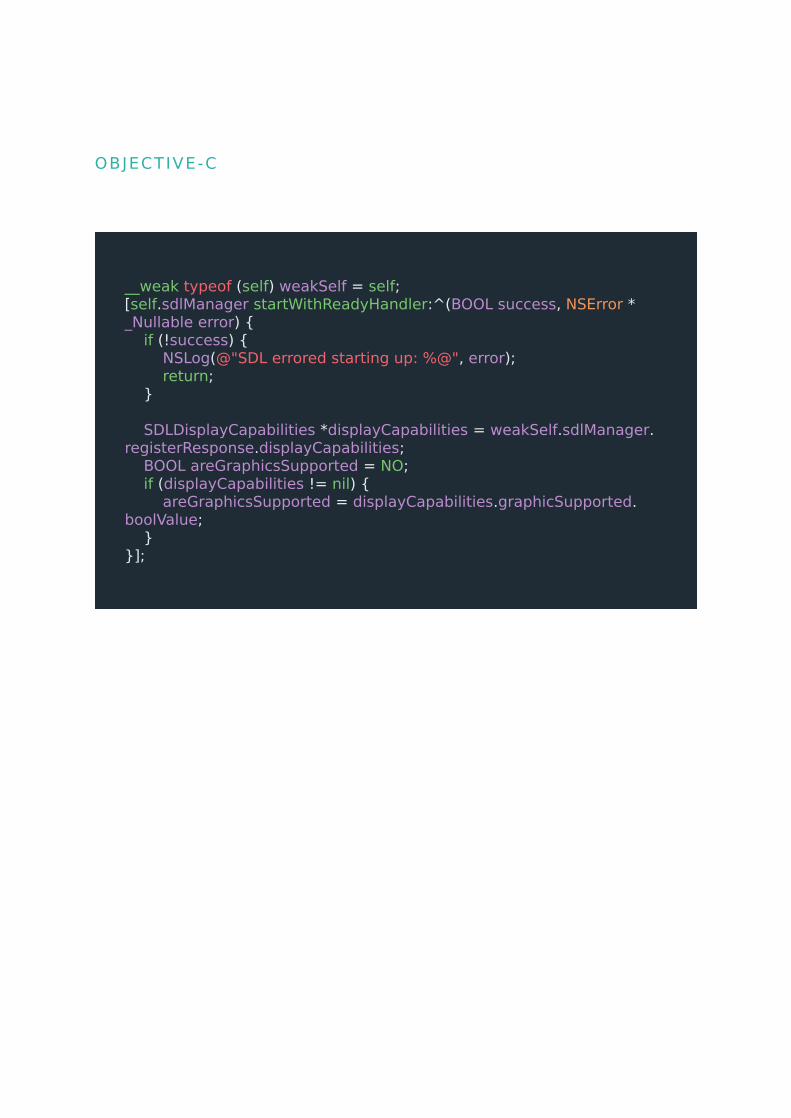
unit. In order to see if graphics are supported, take a look at SDLManager 's
registerResponse property once in the completion handler for
startWithReadyHandler .
N O T E
If you need to know how to create and setup SDLManager , please
see Getting Started > Integration Basics.
OBJECTIVE-C
__weak typeof (self) weakSelf = self;[self.sdlManager startWithReadyHandler:^(BOOL success, NSError * _Nullable error) { if (!success) { NSLog(@"SDL errored starting up: %@", error); return; }
SDLDisplayCapabilities *displayCapabilities = weakSelf.sdlManager.registerResponse.displayCapabilities; BOOL areGraphicsSupported = NO; if (displayCapabilities != nil) { areGraphicsSupported = displayCapabilities.graphicSupported.boolValue; } }];

Uploading a File using SDLFileManager
As of SDL 4.3, we have provided a class that makes managing files easier.
SDLFileManager handles uploading files, like images, and keeping track of
what already exists and what does not. To assist, there are two classes:
SDLFile and SDLArtwork . SDLFile is the base class for file uploads and
handles pulling data from local NSURL s and NSData . SDLArtwork is
SWIFT
sdlManager.start { (success, error) in if success == false { print("SDL errored starting up: \(error)") return }
var areGraphicsSupported = false if let displayCapabilities = self.sdlManager.registerResponse?.displayCapabilities { areGraphicsSupported = displayCapabilities.graphicSupported.boolValue }}

subclass of this, and provides additional functionality such as creating a file
from a UIImage .
OBJECTIVE-C
UIImage* image = [UIImage imageNamed:@"<#Image Name#>"];if (!image) { NSLog(@"Error reading from Assets"); return; }
SDLArtwork* file = [SDLArtwork artworkWithImage:image name:@"<#Name to Upload As#>" asImageFormat:SDLArtworkImageFormatJPG /* or SDLArtworkImageFormatPNG */];
[self.sdlManager.fileManager uploadFile:file completionHandler:^(BOOL success, NSUInteger bytesAvailable, NSError * _Nullable error) { if (error) { if (error.code == SDLFileManagerErrorCannotOverwrite) { // Attempting to replace a file, but failed due to settings in SDLArtwork. } else { // Error uploading } return; }
// Successfully uploaded.}];

File Naming
The file name can only consist of letters (a-Z) and numbers (0-9), otherwise the
SDL Core may fail to find the uploaded file (even if it was uploaded
successfully).
File Persistance
SDLFile , and it's subclass SDLArtwork , support uploading persistant images,
i.e. images that do not become deleted when your application disconnects.
SWIFT
guard let image = UIImage(named: "<#Image Name#>") else { print("Error reading from Assets") return}let file = SDLArtwork.artwork(with: image, name: "<#Name to Upload As#>", as: .JPG /* or .PNG */)
sdlManager.fileManager.uploadFile(file) { (success, bytesAvailable, error) in if let error = error as? NSError { if error.code == SDLFileManagerError.cannotOverwrite.rawValue { // Attempting to replace a file, but failed due to settings in SDLArtwork. } else { // Error uploading } return; }
// Successfully uploaded}
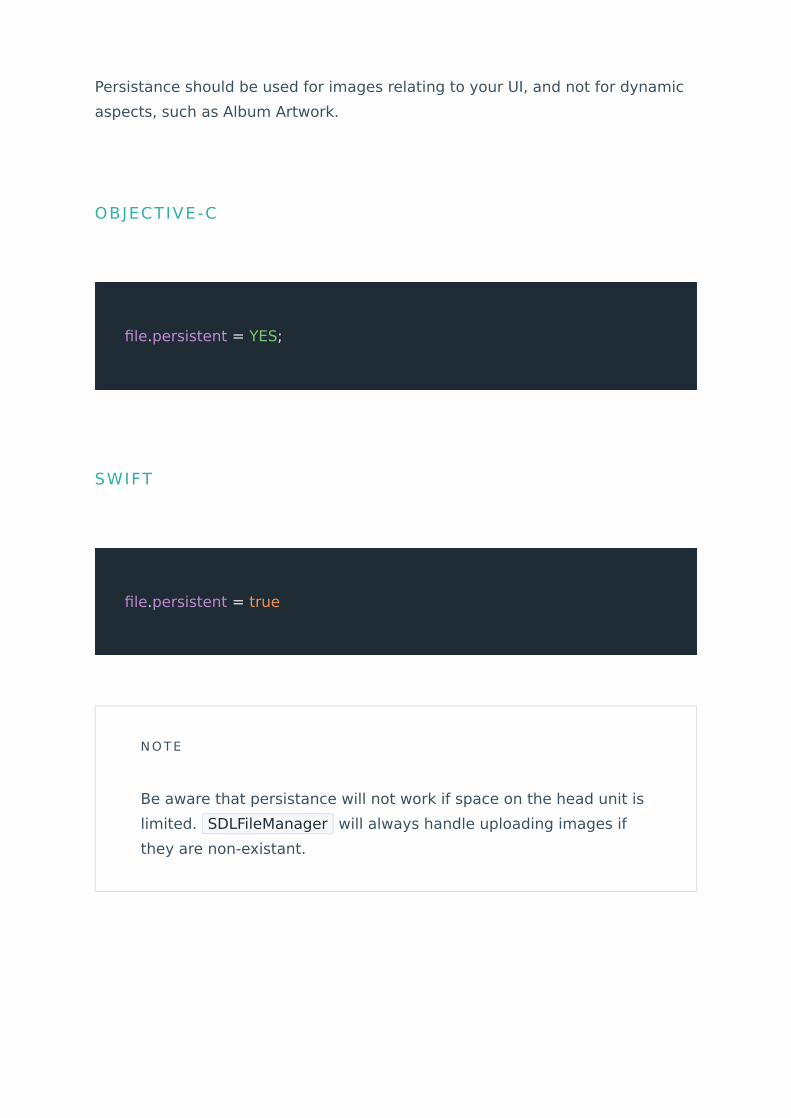
Persistance should be used for images relating to your UI, and not for dynamic
aspects, such as Album Artwork.
OBJECTIVE-C
file.persistent = YES;
SWIFT
file.persistent = true
N O T E
Be aware that persistance will not work if space on the head unit is
limited. SDLFileManager will always handle uploading images if
they are non-existant.

Overwrite Stored Files
If a file being uploaded has the same name as an already uploaded image, the
new image will be ignored. To override this setting, set the SDLFile ’s
overwrite property to true.
Check the Amount of File Storage
To find the amount of file storage left on the head unit, use the
SDLFileManager ’s bytesAvailable property.
OBJECTIVE-C
file.overwrite = YES;
SWIFT
file.overwrite = true

Check if a File Has Already Been Uploaded
Although the file manager will return with an error if you attempt to upload a
file of the same name that already exists, you may still be able to find out the
currently uploaded images via SDLFileManager 's remoteFileNames property.
OBJECTIVE-C
NSUInteger bytesAvailable = self.sdlManager.fileManager.bytesAvailable;
SWIFT
let bytesAvailable = sdlManager.fileManager.bytesAvailable
OBJECTIVE-C
BOOL isFileOnHeadUnit = [self.sdlManager.fileManager.remoteFileNames containsObject:@"<#Name Uploaded As#>"];

Delete Stored Files
Use the file manager’s delete request to delete a file associated with a file
name.
SWIFT
let isFileOnHeadUnit = sdlManager.fileManager.remoteFileNames.contains("<#Name Uploaded As#>")
OBJECTIVE-C
[self.sdlManager.fileManager deleteRemoteFileWithName:@"<#Save As Name#>" completionHandler:^(BOOL success, NSUInteger bytesAvailable, NSError *error) { if (success) { // Image was deleted successfully }}];

Image Specifics
Image File Type
Images may be formatted as PNG, JPEG, or BMP. Check the displayCapability
properties to find out what image formats the head unit supports.
Image Sizes
If an image is uploaded that is larger than the supported size, that image will
be scaled down to accomodate. All image sizes are available from the
SWIFT
sdlManager.fileManager.deleteRemoteFileWithName("<#Save As Name#>") { (success, bytesAvailable, error) in if success { // Image was deleted successfully }}

SDLManager 's registerResponse property once in the completion handler for
startWithReadyHandler .

I M A G EN A M E
U S E D I NR P C
D E TA I L S H E I G H T W I D T H T Y P E
IMAGE SPECIF ICATIONS
softButtonImage
Show
Will beshown onsoftbuttons on thebasescreen
70px 70pxpng,jpg,bmp
choiceImage
CreateInteractionChoiceSet
Will beshown inthemanualpart of anperformInteractioneither big(ICON_ONLY) orsmall(LIST_ONLY)
70px 70pxpng,jpg,bmp
choiceSecondaryImage
CreateInteractionChoiceSet
Will beshown onthe rightside of anentry in(LIST_ONLY)performInteraction
35px 35pxpng,jpg,bmp
vrHelpItem
SetGlobalProperties
Will beshownduringvoiceinteraction
35px 35pxpng,jpg,bmp
menuIcon
SetGlobalProperties
Will beshown onthe“More…”button
35px 35pxpng,jpg,bmp
cmdIcon
AddCommand
Will beshown forcommands in the"More…"menu
35px 35pxpng,jpg,bmp
appIcon SetAppIcon
Will beshown asIcon inthe"MobileApps"menu
70px 70pxpng,jpg,bmp
graphic Show
Will beshown onthebasescreen ascover art
185px 185pxpng,jpg,bmp

Knowing the In-Car UI Status
Once your app is connected to Core, most of the interaction you will be doing
requires knowledge of the current In-Car UI, or HMI, Status. For a refresher on
how to get your app integrated with SDL, and to connect to Core, head to
Getting Started > Integration Basics. The HMI Status informs you of where the
user is within the head unit in a general sense.
Refer to the table below of all possible HMI States:
H M I S TAT E W H AT D O E S T H I S M E A N ?
Monitoring HMI Status
Monitoring HMI Status is provided through a required delegate callback of
SDLManagerDelegate . The function hmiLevel:didChangeToLevel: will give
NONEThe user has not been opened your app,or it has been Exited via the "Menu"button.
BACKGROUND
The user has opened your app, but iscurrently in another part of the HeadUnit. If you have a Media app, this meansthat another Media app has beenselected.
LIMITEDFor Media apps, this means that a userhas opened your app, but is in anotherpart of the Head Unit.
FULL Your app is currently in focus on thescreen.
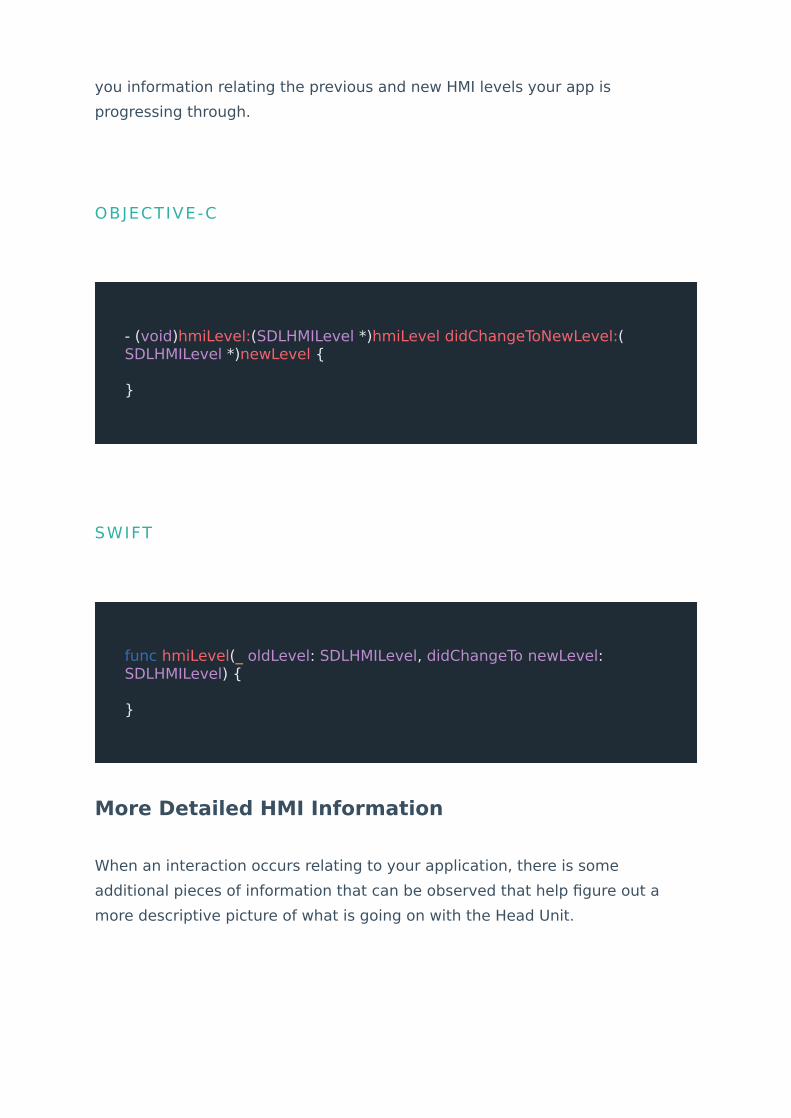
you information relating the previous and new HMI levels your app is
progressing through.
More Detailed HMI Information
When an interaction occurs relating to your application, there is some
additional pieces of information that can be observed that help figure out a
more descriptive picture of what is going on with the Head Unit.
OBJECTIVE-C
- (void)hmiLevel:(SDLHMILevel *)hmiLevel didChangeToNewLevel:(SDLHMILevel *)newLevel {
}
SWIFT
func hmiLevel(_ oldLevel: SDLHMILevel, didChangeTo newLevel: SDLHMILevel) {
}

From the documentation, Audio Streaming State informs your app whether any
currently streaming audio is audible to user (AUDIBLE) or not (NOT_AUDIBLE). A
value of NOT_AUDIBLE means that either the application's audio will not be
audible to the user, or that the application's audio should not be audible to the
user (i.e. some other application on the mobile device may be streaming audio
and the application's audio would be blended with that other audio).
You will see this come in for things such as Alert, PerformAudioPassThru,
Speaks, etc.
AU D I O S T R E A M I N G S TAT E W H AT D O E S T H I S M E A N ?
System Context informs your app if there is potentially a blocking HMI
component while your app is still visible. An example of this would be if your
application is open, and you display an Alert. Your app will receive a System
Context of ALERT while it is presented on the screen, followed by MAIN when it
is dismissed.
AUDIO STREAMING STATE
AUDIBLE Any audio you are streaming will beaudible to the user.
ATTENUATED
Some kind of audio mixing is occuringbetween what you are streaming, ifanything, and some system level sound.This can be visible is displaying an Alertwith playTone set to true.
NOT_AUDIBLEYour streaming audio is not audible. Thiscould occur during a VRSESSSIONSystem Context.
SYSTEM CONTEXT

S Y S T E M C O N T E X T S TAT E W H AT D O E S T H I S M E A N ?
Monitoring Audio Streaming State and System
Context
Monitoring these two properties is quite easy using the provided
SDLDidChangeHMIStatusNotification notification.
First, observe the notification:
MAIN No user interaction is in progress thatcould be blocking your app's visibility.
VRSESSION Voice Recognition is currently inprogress.
MENU A menu interaction is currently in-progress.
HMI_OBSCUREDThe app's display HMI is being blockedby either a system or other app's overlay(another app's Alert, for instance).
ALERT An alert that you have sent is currentlyvisible (Other apps will not receive this).
OBJECTIVE-C
[[NSNotificationCenter defaultCenter] addObserver:self selector:@selector(hmiStatusChanged:) name:SDLDidChangeHMIStatusNotification object:nil];

Next, handle the notification:
SWIFT
NotificationCenter.default.addObserver(self, selector: #selector(hmiStatusChanged(_:)), name: .SDLDidChangeHMIStatus, object: nil)
OBJECTIVE-C
- (void)hmiStatusChanged:(SDLRPCNotificationNotification *)notification { if (![notification.notification isKindOfClass:SDLOnHMIStatus.class]) { return; }
SDLOnHMIStatus *onHMIStatus = (SDLOnHMIStatus *)notification.notification; SDLAudioStreamingState *audioStreamingState = onHMIStatus.audioStreamingState; SDLSystemContext *systemContext = onHMIStatus.systemContext;}

Adding the Lock Screen
The lock screen is a vital part of SmartDeviceLink, as this does not allow the
user to use your application while the vehicle is in motion. Prior to SDL 4.3,
creating and maintaining the lock screen was up to the developer to do. Now,
SDL takes care of the lock screen for you. It still allows you to use your own
view controller if you prefer your own look, but still want the recommended
logic that SDL provides for free.
A benefit to using the provided Lock Screen, is that we also handle support for
retrieving a lock screen icon for versions of Core that support it, so that you do
not have to be concerned with what car manufacturer you are connected to.
If you would not like to use any of the following code, you may use the
SDLLockScreenConfiguration class function disabledConfiguration , and
manage the entire lifecycle of the lock screen yourself.
SWIFT
func hmiStatusChanged(_ notification: SDLRPCNotificationNotification) { guard let onHMIStatus = notification.notification as? SDLOnHMIStatus else { return }
let audioStreamingState = onHMIStatus.audioStreamingState let systemContext = onHMIStatus.systemContext}

To see where the SDLLockScreenConfiguration is used, refer to the Getting
Started > Integration Basics.
Using the Provided Lock Screen
Using the default lock screen is simple. Using the lock screen this way will
automatically load an automaker's logo, if supported, to show alongside your
logo. If it is not, the default lock screen will show your logo alone.
To do this, instantiate a new SDLLockScreenConfiguration :
OBJECTIVE-C
SDLLockScreenConfiguration *lockScreenConfiguration = [SDLLockScreenConfiguration enabledConfiguration];

Swift
Customizing the Provided Lock Screen
If you would like to use the provided lock screen, however would like to add
your own appearance to it, we provide that as well.
SDLLockScreenConfiguration allows you to customize the background color as
well as your app's icon. If the app icon is not included, we will use the SDL logo.
let lockScreenConfiguration = SDLLockScreenConfiguration.enabled()

Using Your Own Lock Screen
If you would like to use your own lock screen instead of the provided SDL one,
but still use the logic we provide, you can use a new initializer within
SDLLockScreenConfiguration :
OBJECTIVE-C
UIImage *appIcon = <# Retreive App Icon #>UIColor *backgroundColor = <# Desired Background Color #>SDLLockScreenConfiguration *lockScreenConfiguration = [SDLLockScreenConfiguration enabledConfigurationWithAppIcon:appIcon backgroundColor:backgroundColor];
SWIFT
let appIcon = <# Retrieve App Icon #>let backgroundColor = <# Desired Background Color #>let lockScreenConfiguration = SDLLockScreenConfiguration.enabledConfiguration(withAppIcon: appIcon, backgroundColor: backgroundColor)

Retrieving Make and Model
If you have decided to create your own lock screen, a best practice is to display
the OEM you are connect to's logo, as this adds a more personal touch for the
end user.
OBJECTIVE-C
UIViewController *lockScreenViewController = <# Initialize Your View Controller #>;SDLLockScreenConfiguration *lockScreenConfiguration = [SDLLockScreenConfiguration enabledConfigurationWithViewController:lockScreenViewController];
SWIFT
let lockScreenViewController = <# Initialize Your View Controller #>let lockScreenConfiguration = SDLLockScreenConfiguration.enabledConfiguration(with: lockScreenViewController)

OBJECTIVE-C
__weak typeof (self) weakSelf = self;[self.sdlManager startWithReadyHandler:^(BOOL success, NSError * _Nullable error) { if (!success) { NSLog(@"SDL errored starting up: %@", error); return; }
SDLVehicleType *vehicleType = weakSelf.sdlManager.registerResponse.vehicleType; NSString *make = vehicleType.make; NSString *model = vehicleType.model;}];
SWIFT
sdlManager.start { (success, error) in if success == false { print("SDL errored starting up: \(error)") return }
guard let vehicleType = self.sdlManager.registerResponse?.vehicleType, let make = vehicleType.make, let model = vehicleType.model else { // No make/model found. return } }

Retrieving Lock Screen URL
A newer feature that some OEMs may adapt is the ability for the head unit to
provide SDLManager a URL for a logo to display on the Lock Screen. If you are
creating your own lock screen, it is a best practice to utilize this feature. This
notifcation comes through after we have downloaded the icon for you, and sent
it in the SDLDidReceiveLockScreenIcon notification.
First, register for the SDLDidReceiveLockScreenIcon Notification:
Then, act on the notification:
OBJECTIVE-C
[[NSNotificationCenter defaultCenter] addObserver:self selector:@selector(lockScreenIconReceived:) name:SDLDidReceiveLockScreenIcon object:nil];
SWIFT
NotificationCenter.default.addObserver(self, selector: #selector(lockScreenIconReceived(_:)), name: SDLDidReceiveLockScreenIcon, object: nil)

OBJECTIVE-C
- (void)lockScreenIconReceived:(NSNotification *)notification { if (![notification.userInfo[SDLNotificationUserInfoObject] isKindOfClass:[UIImage class]]) { return; }
UIImage *icon = notification.userInfo[SDLNotificationUserInfoObject];}
SWIFT
func lockScreenIconReceived(_ notification: NSNotification) { guard let image = notification.userInfo[SDLNotificationUserInfoObject] as? UIImage else { return }}

Get Vehicle Data
Use the SDLGetVehicleData RPC call to get vehicle data. The HMI level must be
FULL, LIMITED, or BACKGROUND in order to get data.
Each vehicle manufacturer decides which data it will expose. Please check the
SDLRPCResponse RPC to find out which data you will have access to in your
head unit.
N O T E
You may only ask for vehicle data that is available to your
appName & appId combination. These will be specified by each
OEM separately.

V E H I C L E D ATA PA R A M E T E R N A M E D E S C R I P T I O N
GPS gps
Longitude and latitude,current time in UTC,degree of precision,altitude, heading, speed,satellite data vs deadreckoning, andsupported dimensions ofthe GPS
Speed speed Speed in KPH
RPM rpmThe number ofrevolutions per minuteof the engine
Fuel level fuelLevel The fuel level in the tank(percentage)
Fuel level state fuelLevel_State
The fuel level state:unknown, normal, low,fault, alert, or notsupported
Instant fuel consumption instantFuelConsumptionThe instantaneous fuelconsumption inmicrolitres
External temperature externalTemperatureThe externaltemperature in degreescelsius
VIN vin The VehicleIdentification Number
PRNDL prndl
The selected gear thecar is in: park, reverse,neutral, drive, sport, lowgear, first, second, third,fourth, fifth, sixth,seventh or eighth gear,unknown, or fault
Tire pressure tirePressure
Tire status of eachwheel in the vehicle:normal, low, fault, alert,or not supported.Warning light status forthe tire pressure: off, on,flash, or not used
Odometer odometer Odometer reading in km
Belt status beltStatus
The status of each of theseat belts: no, yes, notsupported, fault, or noevent
Body information bodyInformation
Door ajar status for eachdoor. The Ignition status.The ignition stablestatus. The park brakeactive status.

V E H I C L E D ATA PA R A M E T E R N A M E D E S C R I P T I O N
Device status deviceStatus
Contains informationabout the smartphonedevice. Is voicerecognition on or off,has a bluetoothconnection beenestablished, is a callactive, is the phone inroaming mode, is a textmessage available, thebattery level, the statusof the mono and stereooutput channels, thesignal level, the primaryaudio source, whether ornot an emergency call iscurrently taking place
Driver braking driverBrakingThe status of the brakepedal: yes, no, no event,fault, not supported
Wiper status wiperStatus
The status of the wipers:off, automatic off, offmoving, manualinteraction off, manualinteraction on, manuallow, manual high,manual flick, wash,automatic low,automatic high, courtesywipe, automatic adjust,stalled, no data exists
Head lamp status headLampStatus
Status of the headlamps: whether or notthe low and high beamsare on or off. Theambient light sensorstatus: night, twilight 1,twilight 2, twilight 3,twilight 4, day,unknown, invalid
Engine torque engineTorqueTorque value for engine(in Nm) on non-dieselvariants
Acceleration pedalposition accPedalPosition
Accelerator pedalposition (percentagedepressed)
Steering wheel angle steeringWheelAngleCurrent angle of thesteering wheel (indegrees)
E-Call infomation eCallInfoInformation about thestatus of an emergencycall
Airbag status airbagStatus
Status of each of theairbags in the vehicle:yes, no, no event, notsupported, fault

V E H I C L E D ATA PA R A M E T E R N A M E D E S C R I P T I O N
Single Time Vehicle Data Retrieval
Using SDLGetVehicleData , we can ask for vehicle data a single time, if
needed.
Emergency event emergencyEvent
The type of emergency:frontal, side, rear,rollover, no event, notsupported, fault. Fuelcutoff status: normaloperation, fuel is cut off,fault. The roll overstatus: yes, no, noevent, not supported,fault. The maximumchange in velocity.Whether or not multipleemergency events haveoccurred
Cluster mode status clusterModeStatus
Whether or not thepower mode is active.The power modequalification status:power mode undefined,power mode evaluationin progress, not defined,power mode ok. The carmode status: normal,factory, transport, orcrash. The power modestatus: key out, keyrecently out, keyapproved, postaccessory, accessory,post ignition, ignition on,running, crank
My key myKey
Information aboutwhether or not theemergency 911 overridehas been activated

OBJECTIVE-C
SDLGetVehicleData *getVehicleData = [[SDLGetVehicleData alloc] init];getVehicleData.prndl = @YES;[self.sdlManager sendRequest:getVehicleData withResponseHandler:^(__kindof SDLRPCRequest * _Nullable request, __kindof SDLRPCResponse * _Nullable response, NSError * _Nullable error) { if (error) { NSLog(@"Encountered Error sending GetVehicleData: %@", error); return; }
if (![response isKindOfClass:SDLGetVehicleDataResponse.class]) { return; }
SDLGetVehicleDataResponse* getVehicleDataResponse = (SDLGetVehicleDataResponse *)response; SDLResult *resultCode = getVehicleDataResponse.resultCode; if (![resultCode isEqualToEnum:SDLResult.SUCCESS]) { if ([resultCode isEqualToEnum:SDLResult.REJECTED]) { NSLog(@"GetVehicleData was rejected. Are you in an appropriate HMI?"); } else if ([resultCode isEqualToEnum:SDLResult.DISALLOWED]) { NSLog(@"Your app is not allowed to use GetVehicleData"); } else { NSLog(@"Some unknown error has occured!"); } return; }
SDLPRNDL *prndl = getVehicleDataResponse.prndl;}];
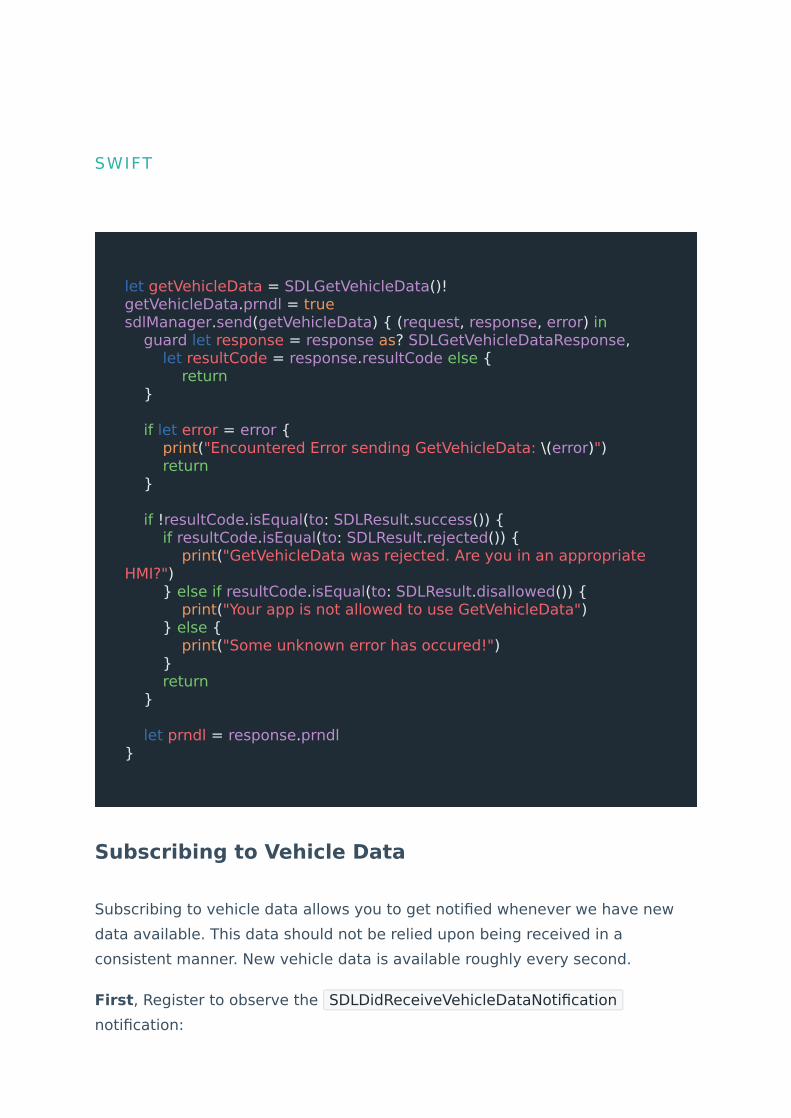
Subscribing to Vehicle Data
Subscribing to vehicle data allows you to get notified whenever we have new
data available. This data should not be relied upon being received in a
consistent manner. New vehicle data is available roughly every second.
First, Register to observe the SDLDidReceiveVehicleDataNotification
notification:
SWIFT
let getVehicleData = SDLGetVehicleData()!getVehicleData.prndl = truesdlManager.send(getVehicleData) { (request, response, error) in guard let response = response as? SDLGetVehicleDataResponse, let resultCode = response.resultCode else { return }
if let error = error { print("Encountered Error sending GetVehicleData: \(error)") return }
if !resultCode.isEqual(to: SDLResult.success()) { if resultCode.isEqual(to: SDLResult.rejected()) { print("GetVehicleData was rejected. Are you in an appropriate HMI?") } else if resultCode.isEqual(to: SDLResult.disallowed()) { print("Your app is not allowed to use GetVehicleData") } else { print("Some unknown error has occured!") } return }
let prndl = response.prndl}
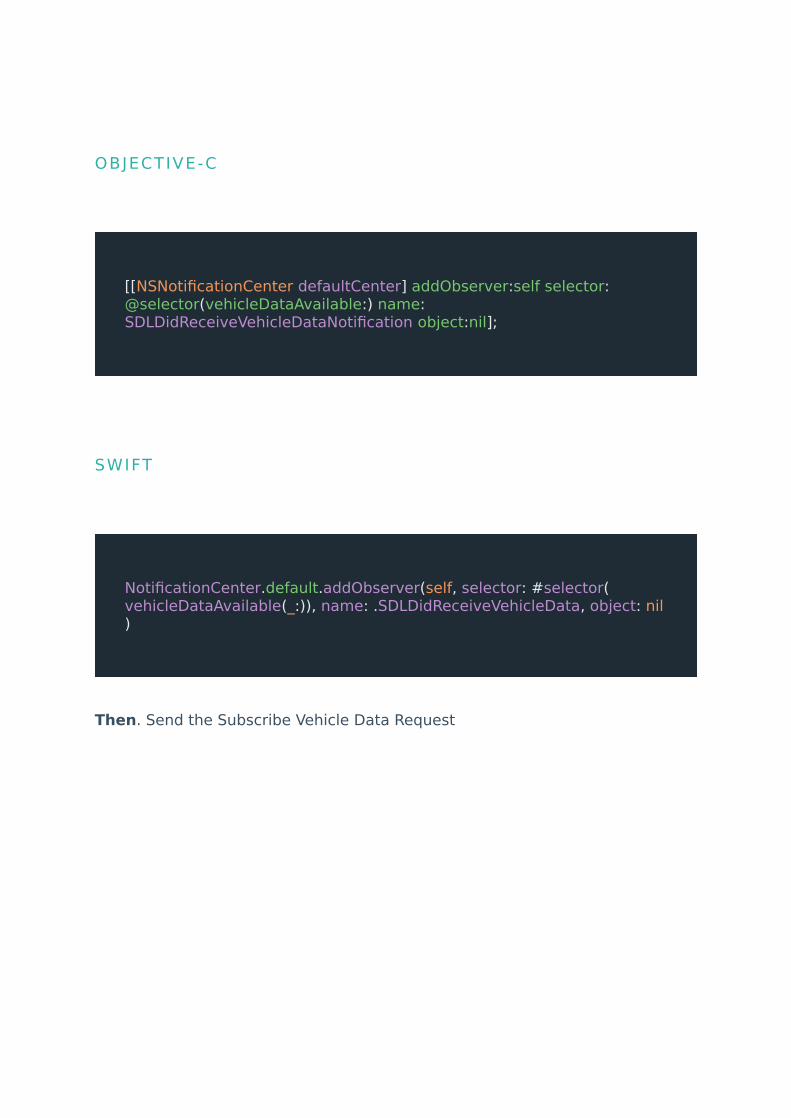
Then. Send the Subscribe Vehicle Data Request
OBJECTIVE-C
[[NSNotificationCenter defaultCenter] addObserver:self selector:@selector(vehicleDataAvailable:) name:SDLDidReceiveVehicleDataNotification object:nil];
SWIFT
NotificationCenter.default.addObserver(self, selector: #selector(vehicleDataAvailable(_:)), name: .SDLDidReceiveVehicleData, object: nil)

OBJECTIVE-C

SDLSubscribeVehicleData *subscribeVehicleData = [[SDLSubscribeVehicleData alloc] init];subscribeVehicleData.prndl = @YES;
[self.sdlManager sendRequest:subscribeVehicleData withResponseHandler:^(__kindof SDLRPCRequest * _Nullable request, __kindof SDLRPCResponse * _Nullable response, NSError * _Nullable error) { if (![response isKindOfClass:[SDLSubscribeVehicleDataResponse class]]) { return; }
if (!response.success.boolValue) { SDLSubscribeVehicleDataResponse *subscribeVehicleDataResponse = (SDLSubscribeVehicleDataResponse*)response; SDLVehicleDataResult *prndlData = subscribeVehicleDataResponse.prndl;
if ([response.resultCode isEqualToEnum:SDLResult.DISALLOWED]) { // Not allowed to register for this vehicle data. } else if ([response.resultCode isEqualToEnum:SDLResult.USER_DISALLOWED]) { // User disabled the ability to give you this vehicle data } else if ([response.resultCode isEqualToEnum:SDLResult.IGNORED]) { if ([prndlData.resultCode isEqualToEnum:SDLVehicleDataResultCode.DATA_ALREADY_SUBSCRIBED]) { // You have access to this data item, and you are already subscribed to this item so we are ignoring. } else if ([prndlData.resultCode isEqualToEnum:SDLVehicleDataResultCode.VEHICLE_DATA_NOT_AVAILABLE]) { // You have access to this data item, but the vehicle you are connected to does not provide it. } else { NSLog(@"Unknown reason for being ignored: %@", prndlData.resultCode.value); } } else if (error) { NSLog(@"Encountered Error sending SubscribeVehicleData: %@", error); }
return; }

if (![response isKindOfClass:SDLSubscribeVehicleDataResponse.class]) { return; }
// Successfully subscribed}];

SWIFT
let subscribeVehicleData = SDLSubscribeVehicleData()!subscribeVehicleData.prndl = true
sdlManager.send(subscribeVehicleData) { (request, response, error) in guard let response = response as? SDLSubscribeVehicleDataResponse else { return }
guard response.success.boolValue == true else { if response.resultCode.isEqual(to: SDLResult.disallowed()) { // Not allowed to register for this vehicle data. } else if response.resultCode.isEqual(to: SDLResult.user_DISALLOWED()) { // User disabled the ability to give you this vehicle data } else if response.resultCode.isEqual(to: SDLResult.ignored()) { if let prndlData = response.prndl { if prndlData.resultCode.isEqual(to: SDLVehicleDataResultCode.data_ALREADY_SUBSCRIBED()) { // You have access to this data item, and you are already subscribed to this item so we are ignoring. } else if prndlData.resultCode.isEqual(to: SDLVehicleDataResultCode.vehicle_DATA_NOT_AVAILABLE()) { // You have access to this data item, but the vehicle you are connected to does not provide it. } else { print("Unknown reason for being ignored: \(prndlData.resultCode.value)") } } else { print("Unknown reason for being ignored: \(response.info)") } } else if let error = error { print("Encountered Error sending SubscribeVehicleData: \(error)") } return }
// Successfully subscribed}

Finally, react to notification when Vehicle Data is received:
OBJECTIVE-C
- (void)vehicleDataAvailable:(SDLRPCNotificationNotification *)notification { if (![notification.notification isKindOfClass:SDLOnVehicleData.class]) { return; }
SDLOnVehicleData *onVehicleData = (SDLOnVehicleData *)notification.notification;
SDLPRNDL *prndl = onVehicleData.prndl;}
SWIFT
func vehicleDataAvailable(_ notification: SDLRPCNotificationNotification) { guard let onVehicleData = notification.notification as? SDLOnVehicleData else { return }
let prndl = onVehicleData.prndl}

Unsubscribing from Vehicle Data
Sometimes you may not always need all of the vehicle data you are listening
to. We suggest that you only are subscribing when the vehicle data is needed.

To stop listening to specific vehicle data items, utilize
SDLUnsubscribeVehicleData .

OBJECTIVE-C

SDLUnsubscribeVehicleData *unsubscribeVehicleData = [[SDLUnsubscribeVehicleData alloc] init];unsubscribeVehicleData.prndl = @YES;
[self.sdlManager sendRequest:unsubscribeVehicleData withResponseHandler:^(__kindof SDLRPCRequest * _Nullable request, __kindof SDLRPCResponse * _Nullable response, NSError * _Nullable error) { if (![response isKindOfClass:[SDLUnsubscribeVehicleDataResponse class]]) { return; }
if (!response.success.boolValue) { SDLUnsubscribeVehicleDataResponse *unsubscribeVehicleDataResponse = (SDLUnsubscribeVehicleDataResponse*)response; SDLVehicleDataResult *prndlData = unsubscribeVehicleDataResponse.prndl;
if ([response.resultCode isEqualToEnum:SDLResult.DISALLOWED]) { // Not allowed to register for this vehicle data, so unsubscribe also will not work. } else if ([response.resultCode isEqualToEnum:SDLResult.USER_DISALLOWED]) { // User disabled the ability to give you this vehicle data, so unsubscribe also will not work. } else if ([response.resultCode isEqualToEnum:SDLResult.IGNORED]) { if ([prndlData.resultCode isEqualToEnum:SDLVehicleDataResultCode.DATA_NOT_SUBSCRIBED]) { // You have access to this data item, but it was never subscribed to so we ignored it. } else { NSLog(@"Unknown reason for being ignored: %@", prndlData.resultCode.value); } } else if (error) { NSLog(@"Encountered Error sending UnsubscribeVehicleData: %@", error); } return; }
// Successfully unsubscribed}];

SWIFT
let unsubscribeVehicleData = SDLUnsubscribeVehicleData()!unsubscribeVehicleData.prndl = true
sdlManager.send(unsubscribeVehicleData) { (request, response, error) in guard let response = response as? SDLUnsubscribeVehicleDataResponse else { return }
guard response.success == true else { if response.resultCode.isEqual(to: SDLResult.disallowed()) {
} else if response.resultCode.isEqual(to: SDLResult.user_DISALLOWED()) {
} else if response.resultCode.isEqual(to: SDLResult.ignored()) { if let prndlData = response.prndl { if prndlData.resultCode.isEqual(to: SDLVehicleDataResultCode.data_ALREADY_SUBSCRIBED()) { // You have access to this data item, and you are already unsubscribed to this item so we are ignoring. } else if prndlData.resultCode.isEqual(to: SDLVehicleDataResultCode.vehicle_DATA_NOT_AVAILABLE()) { // You have access to this data item, but the vehicle you are connected to does not provide it. } else { print("Unknown reason for being ignored: \(prndlData.resultCode.value)") } } else { print("Unknown reason for being ignored: \(response.info)") } } else if let error = error { print("Encountered Error sending UnsubscribeVehicleData: \(error)") } return }
// Successfully unsubscribed}

Getting In-Car Audio
Capturing in-car audio allows developers to interact with users via raw audio
data provided to them from the car's microphones. In order to gather the raw
audio from the vehicle, we must leverage the SDLPerformAudioPassThru RPC.
Starting Audio Capture
To initiate audio capture, we must construct an SDLPerformAudioPassThru
object. The properties we will set in this object's constructor relate to how we
wish to gather the audio data from the vehicle we are connected to.
N O T E
PerformAudioPassThru does not support automatic speech
cancellation detection, so if this feature is desired, it is up to the
developer to implement.

OBJECTIVE-C
SDLPerformAudioPassThru *audioPassThru = [[SDLPerformAudioPassThru alloc] initWithInitialPrompt:@"Talk to me." audioPassThruDisplayText1:@"Ask me \"What's the weather?\"" audioPassThruDisplayText2:@"or \"What is 1 + 2?\"" samplingRate:SDLSamplingRate._16KHZ bitsPerSample:SDLBitsPerSample._16_BIT audioType:SDLAudioType.PCM maxDuration:1000000 muteAudio:YES];
[self.sdlManager sendRequest:audioPassThru];
SWIFT
let audioPassThru = SDLPerformAudioPassThru(initialPrompt: "Talk to me.", audioPassThruDisplayText1: "Ask me \"What's the weather?\"", audioPassThruDisplayText2: "or \"What is 1 + 2?\"", samplingRate: ._16KHZ(), bitsPerSample: ._8_BIT(), audioType: .pcm(), maxDuration: 1000000, muteAudio: true)!
sdlManager.send(audioPassThru)

In order to know the currently supported audio capture capabilities of the
connected head unit, please refer to the SDLRegisterAppInterfaceResponse ,
which contains a property audioPassThruCapabilities .
Gathering Audio Data
SDL provides audio data as fast as it can gather it, and sends it to the
developer in chunks. In order to retrieve this audio data, the developer must:
FORD HMI
N O T E
Currently, Ford's SYNC 3 vehicles only support Sampling Rates of
16 khz and Bit Rates of 16 bit.

First, register to observe the SDLDidReceiveAudioPassThruNotification
notification:
Then, react to notification when Audio Data is received:
OBJECTIVE-C
[[NSNotificationCenter defaultCenter] addObserver:self selector:@selector(onAudioPassThru:) name:SDLDidReceiveAudioPassThruNotification object:nil];
SWIFT
NotificationCenter.default.addObserver(self, selector: #selector(onAudioPassThru(_:)), name: .SDLDidReceiveAudioPassThru, object: nil)

OBJECTIVE-C
- (void)onAudioPassThru:(SDLRPCNotificationNotification *)notification { if (![notification.notification isKindOfClass:SDLOnAudioPassThru.class]) { return; }
SDLOnAudioPassThru *onAudioPassThru = (SDLOnAudioPassThru *)notification.notification;
// Do something with current audio data. NSData *audioData = onAudioPassThru.bulkData;}
SWIFT
func onAudioPassThru(_ notification: SDLRPCNotificationNotification) { guard let onAudioPassThru = notification.notification as? SDLOnAudioPassThru else { return }
// Do something with current audio data. let audioData = onAudioPassThru.bulkData}

Ending Audio Capture
Perform Audio Pass Thru is a request that works in a different way when
compared to other RPCs. For most RPCs, and request is followed by an
immediate response, with whether that RPC was successful or not. This RPC,
however, will only send out the response when the Perform Audio Pass Thru is
ended.
Audio Capture can be ended in 4 ways:
1. Audio Pass Thru has timed out.
If the audio passthrough has proceeded longer than the requested timeout
duration, Core will end this request with a resultCode of SUCCESS . You
should expect to handle this audio passthrough as though it was
successful.2. Audio Pass Thru was closed due to user pressing "Cancel".
If the audio passthrough was displayed, and the user pressed the "Cancel"
button, you will receive a resultCode of ABORTED . You should expect to
ignore this audio pass through.3. Audio Pass Thru was closed due to user pressing "Done".
If the audio passthrough was displayed, and the user pressed the "Done"
button, you will receive a resultCode of SUCCESS . You should expect to
handle this audio passthrough as though it was successful.4. Audio Pass Thru was ended due to the developer ending the request.
N O T E
This audio data is only the current audio data, so the developer
must be in charge of managing previously retrieved audio data.

If the audio passthrough was displayed, but you have established on your
own that you no longer need to capture audio data, you can send an
SDLEndAudioPassThru RPC.
You will receive a resultCode of SUCCESS , and should expect to handle this
audio passthrough as though it was successful.
Handling the Response
To process the response that we received from an ended audio capture, we use
the withResponseHandler property in SDLManager 's send(_ :) function.
OBJECTIVE-C
SDLEndAudioPassThru *endAudioPassThru = [[SDLEndAudioPassThru alloc] init];[self.sdlManager sendRequest:endAudioPassThru];
SWIFT
let endAudioPassThru = SDLEndAudioPassThru()!sdlManager.send(endAudioPassThru)

OBJECTIVE-C
[self.sdlManager sendRequest:performAudioPassThru withResponseHandler:^(__kindof SDLRPCRequest * _Nullable request, __kindof SDLRPCResponse * _Nullable response, NSError * _Nullable error) { if (error) { NSLog(@"Encountered Error sending Perform Audio Pass Thru: %@", error); return; }
if (![response isKindOfClass:SDLPerformAudioPassThruResponse.class]) { return; }
SDLPerformAudioPassThruResponse *audioPassThru = (SDLPerformAudioPassThruResponse *)response; SDLResult *resultCode = sendLocation.resultCode; if ([resultCode isEqualToEnum:SDLResult.SUCCESS]) { // Process audio data } else { // Cancel any usage of the audio data }}];

Setting the Navigation Destination
Setting a Navigation Destination allows you to send a GPS location that you
would like to prompt that user to navigate to using their embedded navigation.
When using the SendLocation RPC, you will not receive a callback about how
the user interacted with this location, only if it was successfully sent to Core
and received. It will be handled by Core from that point on using the embedded
navigation system.
SWIFT
sdlManager.send(performAudioPassThru) { (request, response, error) in guard let response = response, let resultCode = response.resultCode else { return }
if resultCode.isEqual(to: SDLResult.success()) { // Process audio data } else { // Cancel any usage of the audio data. }}

Determining the Result of SendLocation
SendLocation has 3 possible results that you should expect:
1. SUCCESS - SendLocation was successfully sent.2. INVALID_DATA - The request you sent contains invalid data and was
rejected.3. DISALLOWED - Your app does not have permission to use SendLocation.
Detecting if SendLocation is Available
SendLocation is a newer RPC, so there is a possibility that not all head units
will support it, especially if you are connected to a head unit that does not have
an embedded navigation. To see if SendLocation is supported, you may look at
SDLManager 's registerResponse property after the ready handler is called.
Or, you may use SDLManager 's permissionManager property to ask for the
permission status of SendLocation .
N O T E
This currently is only supported for Embedded Navigation. This
does not work with Mobile Navigation Apps at this time.
N O T E
SendLocation is an RPC that is usually restricted by OEMs. As a
result, the OEM you are connecting to may limit app functionality if
not approved for usage.

N O T E
If you need to know how to create and setup SDLManager , please
see Getting Started > Integration Basics.
OBJECTIVE-C
__weak typeof (self) weakSelf = self;[self.sdlManager startWithReadyHandler:^(BOOL success, NSError * _Nullable error) { if (!success) { NSLog(@"SDL errored starting up: %@", error); return; }
SDLHMICapabilities *hmiCapabilities = weakSelf.sdlManager.registerResponse.hmiCapabilities; BOOL isNavigationSupported = NO; if (hmiCapabilities != nil) { isNavigationSupported = hmiCapabilities.navigation.boolValue; } }];

Using Send Location
To use SendLocation, you must at least include the Longitude and Latitude of
the location.
SWIFT
sdlManager.start { (success, error) in if success == false { print("SDL errored starting up: \(error)") return }
var isNavigationSupported = false if let hmiCapabilities = self.sdlManager.registerResponse?.hmiCapabilities { isNavigationSupported = hmiCapabilities.navigation.boolValue }}

OBJECTIVE-C
SDLSendLocation *sendLocation = [[SDLSendLocation alloc] initWithLongitude:-97.380967 latitude:42.877737 locationName:@"The Center" locationDescription:@"Center of the United States" address:@[@"900 Whiting Dr", @"Yankton, SD 57078"] phoneNumber:nil image:nil];[self.sdlManager sendRequest:sendLocation withResponseHandler:^(__kindof SDLRPCRequest * _Nullable request, __kindof SDLRPCResponse * _Nullable response, NSError * _Nullable error) { if (error) { NSLog(@"Encountered Error sending SendLocation: %@", error); return; }
if (![response isKindOfClass:SDLSendLocationResponse.class]) { return; }
SDLSendLocationResponse *sendLocation = (SDLSendLocationResponse *)response; SDLResult *resultCode = sendLocation.resultCode; if (![resultCode isEqualToEnum:SDLResult.SUCCESS]) { if ([resultCode isEqualToEnum:SDLResult.INVALID_DATA]) { NSLog(@"SendLocation was rejected. The request contained invalid data."); } else if ([resultCode isEqualToEnum:SDLResult.DISALLOWED]) { NSLog(@"Your app is not allowed to use SendLocation"); } else { NSLog(@"Some unknown error has occured!"); } return; }
// Successfully sent!}];
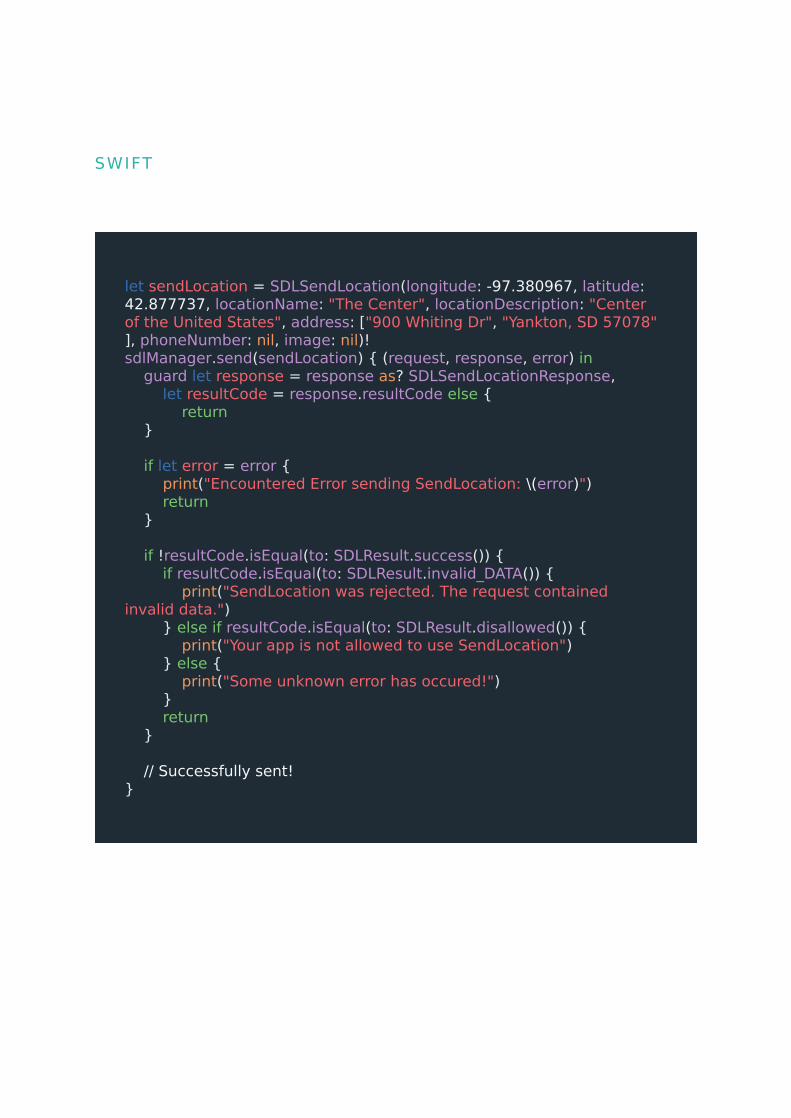
SWIFT
let sendLocation = SDLSendLocation(longitude: -97.380967, latitude: 42.877737, locationName: "The Center", locationDescription: "Center of the United States", address: ["900 Whiting Dr", "Yankton, SD 57078"], phoneNumber: nil, image: nil)!sdlManager.send(sendLocation) { (request, response, error) in guard let response = response as? SDLSendLocationResponse, let resultCode = response.resultCode else { return }
if let error = error { print("Encountered Error sending SendLocation: \(error)") return }
if !resultCode.isEqual(to: SDLResult.success()) { if resultCode.isEqual(to: SDLResult.invalid_DATA()) { print("SendLocation was rejected. The request contained invalid data.") } else if resultCode.isEqual(to: SDLResult.disallowed()) { print("Your app is not allowed to use SendLocation") } else { print("Some unknown error has occured!") } return }
// Successfully sent!}

Calling a Phone Number
Dialing a Phone Number allows you to send a phone number to dial on the
user's phone. Regardless of platform (Android or iOS), you must be sure that a
device is connected via Bluetooth (even if using iOS/USB) for this RPC to work.
If it is not connected, you will receive a REJECTED resultCode .
Determining the Result of DialNumber
DialNumber has 3 possible results that you should expect:
1. SUCCESS - DialNumber was successfully sent, and a phone call was
initiated by the user.2. REJECTED - DialNumber was sent, and a phone call was cancelled by the
user. Also, this could mean that there is no phone connected via
Bluetooth.3. DISALLOWED - Your app does not have permission to use DialNumber.
Detecting is DialNumber is Available
DialNumber is a newer RPC, so there is a possibility that not all head units will
support it. To see if DialNumber is supported, you may look at SDLManager 's
registerResponse property after the ready handler is called.
N O T E
DialNumber is an RPC that is usually restricted by OEMs. As a
result, the OEM you are connecting to may limit app functionality if
not approved for usage.

N O T E
If you need to know how to create and setup SDLManager , please
see Getting Started > Integration Basics.
OBJECTIVE-C
__weak typeof (self) weakSelf = self;[self.sdlManager startWithReadyHandler:^(BOOL success, NSError * _Nullable error) { if (!success) { NSLog(@"SDL errored starting up: %@", error); return; }
SDLHMICapabilities *hmiCapabilities = weakSelf.sdlManager.registerResponse.hmiCapabilities; BOOL isPhoneCallSupported = NO; if (hmiCapabilities != nil) { isPhoneCallSupported = hmiCapabilities.phoneCall.boolValue; } }];

How to Use
SWIFT
sdlManager.start { (success, error) in if success == false { print("SDL errored starting up: \(error)") return }
var isPhoneCallSupported = false if let hmiCapabilities = self.sdlManager.registerResponse?.hmiCapabilities { isPhoneCallSupported = hmiCapabilities.phoneCall.boolValue }}
N O T E
For DialNumber, all characters are stripped except for 0 - 9 , * ,
# , , , ; , and +

OBJECTIVE-C
SDLDialNumber *dialNumber = [[SDLDialNumber alloc] init];dialNumber.number = @"1238675309";
[self.sdlManager sendRequest:dialNumber withResponseHandler:^(__kindof SDLRPCRequest * _Nullable request, __kindof SDLRPCResponse * _Nullable response, NSError * _Nullable error) { if (error) { NSLog(@"Encountered Error sending DialNumber: %@", error); return; }
if (![response isKindOfClass:SDLDialNumberResponse.class]) { return; }
SDLDialNumberResponse* dialNumber = (SDLDialNumberResponse *)response; SDLResult *resultCode = dialNumber.resultCode; if (![resultCode isEqualToEnum:SDLResult.SUCCESS]) { if ([resultCode isEqualToEnum:SDLResult.REJECTED]) { NSLog(@"DialNumber was rejected. Either the call was sent and cancelled or there is no device connected"); } else if ([resultCode isEqualToEnum:SDLResult.DISALLOWED]) { NSLog(@"Your app is not allowed to use DialNumber"); } else { NSLog(@"Some unknown error has occured!"); } return; }
// Successfully sent!}];

SWIFT
let dialNumber = SDLDialNumber()!dialNumber.number = "1238675309"
sdlManager.send(dialNumber) { (request, response, error) in guard let response = response as? SDLDialNumberResponse, let resultCode = response.resultCode else { return }
if let error = error { print("Encountered Error sending DialNumber: \(error)") return }
if !resultCode.isEqual(to: SDLResult.success()) { if resultCode.isEqual(to: SDLResult.rejected()) { print("DialNumber was rejected. Either the call was sent and cancelled or there is no device connected") } else if resultCode.isEqual(to: SDLResult.disallowed()) { print("Your app is not allowed to use DialNumber") } else { print("Some unknown error has occured!") } return }
// Successfully sent!}

Mobile Navigation
Mobile Navigation allows map partners to bring their applications into the car
and display their maps and turn by turn easily for the user. This feature has a
different behavior on the head unit than normal applications. The main
differences are:
• Navigation Apps don't use base screen templates. Their main view is the
video stream sent from the device• Navigation Apps can send audio via a binary stream. This will attenuate
the current audio source and should be used for navigation commands• Navigation Apps can receive touch events from the video stream
Connecting an app
The basic connection is the similar for all apps. Please follow Getting Started >
Integration Basics for more information.
The first difference for a navigation app is the appHMIType of Navigation that
has to be set in the SDLLifecycleConfiguration . Navigation apps are also non-
media apps.
The second difference is a property called securityManagers that needs to be
set in the SDLLifecycleConfiguration if connecting to a version of Core that
requires secure video & audio streaming. This property requires an array of
N O T E
In order to use SDL's Mobile Navigation feature, the app must have
a minimum requirement of iOS 8.0. This is due to using iOS's
provided video encoder.

classes of Security Managers, which will conform to the SDLSecurityType
protocol. These security libraries are provided by the OEMs themselves, and will
only work for that OEM. There is not a general catch-all security library.
OBJECTIVE-C
SDLLifecycleConfiguration* lifecycleConfig = [SDLLifecycleConfiguration defaultConfigurationWithAppName:@"<#App Name#>" appId:@"<#App Id#>"];lifecycleConfig.appType = SDLAppHMIType.NAVIGATION;lifecycleConfig.securityManagers = @[OEMSecurityManager.class];
SWIFT
let lifecycleConfig = SDLLifecycleConfiguration.defaultConfiguration(withAppName: "<#App Name#>", appId: "<#App Id#>")lifecycleConfig.appType = .navigation()lifecycleConfig.securityManagers = [OEMSecurityManager.self]
N O T E
When compiling, you must make sure to include all possible OEM's
security managers that you wish to support.

After being registered, the app will start receiving callbacks. One important
callback is hmiLevel:didChangeToLevel: , which informs the app about the
currently visible application on the head unit. Right after registering, the
hmiLevel will be NONE or BACKGROUND . Streaming should commence
once the hmiLevel has been set to LIMITED by the head unit.
Moving Forward
Currently, the maintanence of knowing your phone's state, the head unit's
state, and the streaming state, is all up to the developer. This has been noted
by the maintainers of SDL, and strides have been moving forward to
implementing all of this internally to SDL, so the developer no longer needs to
worry about these states, and we can have users expect a consistent
experience across all mobile navigation applications.
You can track the current proposal on SDL Evolution.
And the work-in-progress code on the sdl_ios repository.
Video Streaming
In order to stream video from a SDL app, we focus on the
SDLStreamingMediaManager class. A reference to this class is available from
SDLManager .
Video Stream Lifecycle
Currently, the lifecycle of the video stream must be maintained by the
developer. Below is a set of guidelines for when a device should stream frames,
and when it should not. The main players in whether or not we should be
streaming are HMI State, and your app's state. Due to an iOS limitation of
VideoToolbox 's encoder and openGL , we must stop streaming when the
device moves to the background state.

H M I S TAT E A P P S TAT EC A N O P E NV I D E O S T R E A M
S H O U L DC LO S E V I D E OS T R E A M
NONE Background No Yes
NONE Regaining Active No Yes
NONE Foreground No Yes
NONE Resigning Active No Yes
BACKGROUND Background No Yes
BACKGROUND Regaining Active No Yes
BACKGROUND Foreground No Yes
BACKGROUND Resigning Active No Yes
LIMITED Background No No
LIMITED Regaining Active Yes Yes
LIMITED Foreground Yes No
LIMITED Resigning Active No No
FULL Background No No
FULL Regaining Active Yes Yes
FULL Foreground Yes No
FULL Resigning Active No No

Starting the Stream
In order to start a video stream, an app must have an HMI state of at least
LIMITED , and the app must be in the foreground. It is also notable that you
should only start one video stream per session. You may observe HMI state
changes from SDLManager 's protocol callback hmiLevel:didChangeToLevel: .
The flags SDLEncryptionFlagAuthenticateOnly or
SDLEncryptionFlagAuthenticateAndEncrypt should be used if a security
N O T E
For occurences of "Can Open Video Stream" and "Should Close
Video Stream" both being Yes, this means that the stream should
be closed, and then opened (restarted).

manager was provided when setting up the SDLLifecycleConfiguration . An
example of starting a video stream can be seen below:

SWIFT
func hmiLevel(_ oldLevel: SDLHMILevel, didChangeTo newLevel: SDLHMILevel) { // Code for starting video stream if newLevel.isEqual(to: SDLHMILevel.limited()) || newLevel.isEqual(to: SDLHMILevel.full()) { startVideoSession() } else { stopVideoSession() }}
private func stopVideoSession() { guard let streamManager = self.sdlManager.streamManager, streamManager.videoSessionConnected else { return }
streamManager.stopVideoSession()}
private func startVideoSession() { guard let streamManager = self.sdlManager.streamManager, streamManager.videoSessionConnected, UIApplication.shared.applicationState != .active else { return } streamManager.startVideoSession(withTLS: .authenticateAndEncrypt) { (success, encryption, error) in if !success { if let error = error { NSLog("Error starting video session. \(error.localizedDescription)") } } else { if encryption { // Video will be encrypted } else { // Video will not be encrypted }
} }}

OBJECTIVE-C
- (void)hmiLevel:(SDLHMILevel*)oldLevel didChangeToLevel:(SDLHMILevel*)newLevel { // Code for starting video stream if ([newLevel isEqualToEnum:SDLHMILevel.FULL] || [newLevel isEqualToEnum:SDLHMILevel.LIMITED]) { [self startVideoSession]; } else { [self stopVideoSession]; }}
- (void)stopVideoSession { if (!self.sdlManager.streamManager.videoSessionConnected) { return; } [self.sdlManager.streamManager stopVideoSession];}
- (void)startVideoSession { if (!self.sdlManager.streamManager.videoSessionConnected || [UIApplication sharedApplication].applicationState != UIApplicationStateActive) { return; } [self.sdlManager.streamManager startVideoSessionWithTLS:SDLEncryptionFlagAuthenticateAndEncrypt startBlock:^(BOOL success, BOOL encryption, NSError * _Nullable error) { if (!success) { if (error) { NSLog(@"Error starting video session. %@", error.localizedDescription); } } else { if (encryption) { // Video will be encrypted } else { // Video will not be encrypted } }
}];}

Sending Data to the Stream
Sending video data to the head unit must be provided to
SDLStreamingMediaManager as a CVImageBufferRef (Apple documentation
here). Once the video stream has started, you will not see video appear until a
few frames have been received. To send a frame, refer to the snippet below:
N O T E
You should also cache the HMI Level, and when the device state
changes, be sure to handle closing/opening the session.
OBJECTIVE-C
CVPixelBufferRef imageBuffer = <#Acquire Image Buffer#>;
if ([self.sdlManager.streamManager sendVideoData:imageBuffer] == NO) { NSLog(@"Could not send Video Data");}

Best Practices
• A constant stream of map frames is not necessary to maintain an image
on the screen. Because of this, we advise that a batch of frames are only
sent on map movement or location movement. This will keep the
application's memory consumption lower.• For an ideal user experience, we recommend sending 30 frames per
second.
Audio Streaming
Navigation apps are allowed to stream raw audio to be played by the head unit.
The audio received this way is played immediately, and the current audio
source will be attenuated. The raw audio has to be played with the following
parameters:
• Format: PCM
SWIFT
let imageBuffer = <#Acquire Image Buffer#>;
guard let streamManager = self.sdlManager.streamManager, streamManager.videoSessionConnected else { return}
if streamManager.sendVideoData(imageBuffer) == false { print("Could not send Video Data")}

• Sample Rate: 16k• Number of Channels: 1• Bits Per Second (BPS): 16 bits per sample / 2 bytes per sample
In order to stream audio from a SDL app, we focus on the
SDLStreamingMediaManager class. A reference to this class is available from
an SDLProxy property streamingMediaManager .
Currently, the lifecycle of the audio stream must be maintained by the
developer. Below is a set of guidelines for when a device should stream frames,
and when it should not. The main player in whether or not we should be
streaming are HMI State. The audio stream may be opened in any application
state.
H M I S TAT EC A N O P E N AU D I OS T R E A M
S H O U L D C LO S EAU D I O S T R E A M
In order to start an audio stream, an app must have an HMI state of at least
HMI_LIMITED . It is also notable that you should only start one audio stream
per session. You may observe HMI state changes from SDLProxyListener 's
AUDIO STREAM LIFECYCLE
NONE No Yes
BACKGROUND No Yes
LIMITED Yes No
FULL Yes No
STARTING THE STREAM

protocol callback onOnHMIStatus: . An example of starting an audio stream
can be seen below:

SWIFT
func hmiLevel(_ oldLevel: SDLHMILevel, didChangeTo newLevel: SDLHMILevel) { // Code for starting video stream if newLevel.isEqual(to: SDLHMILevel.limited()) || newLevel.isEqual(to: SDLHMILevel.full()) { startAudioSession() } else { stopAudioSession() }}
private func stopAudioSession() { guard let streamManager = self.sdlManager.streamManager, streamManager.audioSessionConnected else { return }
streamManager.stopAudioSession()}
private func startAudioSession() { guard let streamManager = self.sdlManager.streamManager, streamManager.audioSessionConnected else { return }
streamManager.startAudioSession(withTLS: .authenticateAndEncrypt) { (success, encryption, error) in if !success { if let error = error { NSLog("Error starting audio session. \(error.localizedDescription)") } } else { if encryption { // Audio will be encrypted } else { // Audio will not be encrypted } } }}

OBJECTIVE-C
- (void)hmiLevel:(SDLHMILevel*)oldLevel didChangeToLevel:(SDLHMILevel*)newLevel { // Code for starting video stream if ([newLevel isEqualToEnum:SDLHMILevel.FULL] || [newLevel isEqualToEnum:SDLHMILevel.LIMITED]) { [self startAudioSession]; } else { [self stopAudioSession]; }}
- (void)stopAudioSession { if (!self.sdlManager.streamManager.audioSessionConnected) { return; } [self.sdlManager.streamManager stopAudioSession];}
- (void)startAudioSession { if (!self.sdlManager.streamManager.audioSessionConnected) { return; } [self.sdlManager.streamManager startAudioSessionWithTLS:SDLEncryptionFlagAuthenticateAndEncrypt startBlock:^(BOOL success, BOOL encryption, NSError * _Nullable error) { if (!success) { if (error) { NSLog(@"Error starting video session. %@", error.localizedDescription); } } else { if (encryption) { // Audio will be encrypted } else { // Audio will not be encrypted } } }];}

Once the audio stream is connected, data may be easily passed to the Head
Unit. The function sendAudioData: provides us with whether or not the PCM
Audio Data was successfully transferred to the Head Unit.
SENDING DATA TO THE STREAM
OBJECTIVE-C
NSData* audioData = <#Acquire Audio Data#>;
if ([self.sdlManager.streamManager sendAudioData:imageBuffer] == NO) { NSLog(@"Could not send Audio Data");}

Touch Input
Navigation applications have support for touch events, including both single
and multitouch events. This includes interactions such as panning and pinch. A
developer may use the included SDLTouchManager class, or yourself by
listening to the SDLDidReceiveTouchEventNotification notification.
1. Using SDLTouchManager
SDLTouchManager has multiple callbacks that will ease the implementation of
touch events. The following callbacks are provided:
SWIFT
let audioData = <#Acquire Audio Data#>;
guard let streamManager = self.sdlManager.streamManager, streamManager.audioSessionConnected else { return}
if streamManager.sendAudioData(imageBuffer) == false { print("Could not send Audio Data")}

SWIFT
optional public func touchManager(_ manager: SDLTouchManager, didReceiveSingleTapAt point: CGPoint)optional public func touchManager(_ manager: SDLTouchManager, didReceiveDoubleTapAt point: CGPoint)
optional public func touchManager(_ manager: SDLTouchManager, panningDidStartAt point: CGPoint)optional public func touchManager(_ manager: SDLTouchManager, didReceivePanningFrom fromPoint: CGPoint, to toPoint: CGPoint)optional public func touchManager(_ manager: SDLTouchManager, panningDidEndAt point: CGPoint)
optional public func touchManager(_ manager: SDLTouchManager, pinchDidStartAtCenter point: CGPoint)optional public func touchManager(_ manager: SDLTouchManager, didReceivePinchAtCenter point: CGPoint, withScale scale: CGFloat)optional public func touchManager(_ manager: SDLTouchManager, pinchDidEndAtCenter point: CGPoint)

OBJECTIVE-C
- (void)touchManager:(SDLTouchManager*)manager didReceiveSingleTapAtPoint:(CGPoint)point;- (void)touchManager:(SDLTouchManager*)manager didReceiveDoubleTapAtPoint:(CGPoint)point;
- (void)touchManager:(SDLTouchManager *)manager panningDidStartAtPoint:(CGPoint)point;- (void)touchManager:(SDLTouchManager*)manager didReceivePanningFromPoint:(CGPoint)fromPoint toPoint:(CGPoint)toPoint;- (void)touchManager:(SDLTouchManager*)manager panningDidEndAtPoint:(CGPoint)point;
- (void)touchManager:(SDLTouchManager *)manager pinchDidStartAtCenterPoint:(CGPoint)point;- (void)touchManager:(SDLTouchManager*)manager didReceivePinchAtCenterPoint:(CGPoint)point withScale:(CGFloat)scale;- (void)touchManager:(SDLTouchManager *)manager pinchDidEndAtCenterPoint:(CGPoint)point;
N O T E
Points that are provided via these callbacks are in the head unit's
coordinate space.

2. Self Implementation of onTouchEvent
If apps want to have access to the raw touch data, the
SDLDidReceiveTouchEventNotification notification can be evaluated. This
callback will be fired for every touch of the user and contains the following
data:
BEGIN
Sent for the first touch event
MOVE
Sent if the touch moved
END
Sent when the touch is lifted
touchEventId
Unique ID of the touch. Increases for multiple touches (0, 1, 2, ...)
timeStamp
Timestamp of the head unit time. Can be used to compare time passedbetween touches
TYPE
EVENT

coord
X and Y coordinates in the head unit coordinate system. (0, 0) is thetop left
EXAMPLE
SWIFT
// To RegisterNotificationCenter.default.addObserver(self, selector: #selector(touchEventAvailable(_:)), name: .SDLDidReceiveTouchEvent, object: nil)
// On Receive@objc private func touchEventAvailable(_ notification: SDLRPCNotificationNotification) { guard let touchEvent = notification.notification as? SDLOnTouchEvent else { print("Error retrieving onTouchEvent object") return }
// Grab something like type let type = touchEvent.type}

Keyboard Input
Keyboard input is available via the SDLPerformInteraction RPC. For a general
understanding of how this RPC works, reference the Displaying Information >
Menus. As opposed to the normal process for using SDLPerformInteraction
with a required SDLCreateInteractionChoiceSet , using the keyboard requires
no interaction choice sets to be created beforehand. It does, however, require
an empty array to be passed in. To show the perform interaction as a keyboard,
we modify the interactionLayout property to be KEYBOARD . Note that while
the vehicle is in motion, keyboard input will be unavailable (resulting in a
grayed out keyboard).
OBJECTIVE-C
[[NSNotificationCenter defaultCenter] addObserver:self selector:@selector(touchEventAvailable:) name:SDLDidReceiveTouchEventNotification object:nil];
- (void)touchEventAvailable:(SDLRPCNotificationNotification *)notification { if (![notification.notification isKindOfClass:SDLOnTouchEvent.class]) { return; } SDLOnTouchEvent* touchEvent = (SDLOnTouchEvent *)notification.notification;
// Grab something like type SDLTouchType* type = touchEvent.type;}

SWIFT
let performInteraction = SDLPerformInteraction()!performInteraction.initialText = "Find Location"performInteraction.interactionChoiceSetIDList = []performInteraction.timeout = 100000performInteraction.interactionMode = .manual_ONLY()performInteraction.interactionLayout = .keyboard()sdlManager.send(performInteraction) { (request, response, error) in if response?.resultCode.isEqual(to: SDLResult.success()) == false { print("Error sending perform interaction.") return }
guard let performInteractionResponse = response as? SDLPerformInteractionResponse, let textEntry = performInteractionResponse.manualTextEntry else { return }
// text entered}

OBJECTIVE-C
SDLPerformInteraction* performInteraction = [[SDLPerformInteraction alloc] init];performInteraction.initialText = @"Find Location";performInteraction.interactionChoiceSetIDList = [@[] mutableCopy];performInteraction.timeout = @(100000);performInteraction.interactionMode = SDLInteractionMode.MANUAL_ONLY;performInteraction.interactionLayout = SDLLayoutMode.KEYBOARD;[self.sdlManager sendRequest:performInteraction withResponseHandler:^(SDLRPCRequest *request, SDLRPCResponse *response, NSError *error) { if (![response.resultCode isEqualToEnum:SDLResult.SUCCESS]) { NSLog(@"Error sending perform interaction."); return; } else if (![response isKindOfClass:SDLPerformInteractionResponse.class]) { return; }
SDLPerformInteractionResponse* performInteractionResponse = (SDLPerformInteractionResponse*)response;
if (performInteractionResponse.manualTextEntry.length) { // text entered }}];
N O T E
In Ford's current SYNC 3 implementation of SmartDeviceLink, there
is a bug resulting in the need for an interaction choice array to be
set in the RPC call.

Displaying Turn By Turn Advices
Currently, to display a Turn by Turn advice, a combination of the
SDLShowConstantTBT and SDLAlertManeuver RPCs must be used. The
SDLShowConstantTBT RPC involves the data that will be shown on the head
unit. The main properties of this object to set are navigationText1 ,
navigationText2 , and turnIcon . A best practice for navigation applications is
to use the navigationText1 as the advice to give (Turn Right) and
navigationText2 to provide the distance to that advice (3 mi). When an
SDLAlertManeuver is sent, you may also include accompanying text that you
would like the head unit to speak when an advice is displayed on screen (In 3
miles turn right.).
N O T E
If the connected device has received a phone call in the vehicle,
the Alert Maneuver is the only way for your app to inform the user.

SWIFT
// Create SDLImage object for turnIcon.let turnIcon = <#Create SDLImage#>
let turnByTurn = SDLShowConstantTBT()!turnByTurn.navigationText1 = "Turn Right"turnByTurn.navigationText2 = "3 mi"turnByTurn.turnIcon = turnIcon
sdlManager.send(turnByTurn) { (request, response, error) in if response?.resultCode.isEqual(to: SDLResult.success()) == false { print("Error sending TBT.") return }
let alertManeuver = SDLAlertManeuver(tts: "In 3 miles turn right", softButtons: nil)! self.sdlManager.send(alertManeuver) { (request, response, error) in if response?.resultCode.isEqual(to: SDLResult.success()) == false { print("Error sending AlertManeuver.") return } }}

Remember when sending a SDLImage, that the image must first be
uploaded to the head unit via a PutFile RPC.
To clear a navigation advice from the screen, we send an
SDLShowConstantTBT with the maneuverComplete property as YES . This
specific RPC does not require an accompanying SDLAlertManeuver .
OBJECTIVE-C
// Create SDLImage object for turnIcon.SDLImage* turnIcon = <#Create SDLImage#>;
SDLShowConstantTBT* turnByTurn = [[SDLShowConstantTBT alloc] init];turnByTurn.navigationText1 = @"Turn Right";turnByTurn.navigationText2 = @"3 mi";turnByTurn.turnIcon = turnIcon;
__weak typeof(self) weakSelf = self;[self.sdlManager sendRequest:turnByTurn withResponseHandler:^(SDLRPCRequest *request, SDLRPCResponse *response, NSError *error) { if (![response.resultCode isEqualToEnum:SDLResult.SUCCESS]) { NSLog(@"Error sending TBT."); return; }
typeof(weakSelf) strongSelf = weakSelf; SDLAlertManeuver* alertManeuver = [[SDLAlertManeuver alloc] initWithTTS:@"In 3 miles turn right" softButtons:nil]; [strongSelf.sdlManager sendRequest:alertManeuver withResponseHandler:^(SDLRPCRequest *request, SDLRPCResponse *response, NSError *error) { if (![response.resultCode isEqualToEnum:SDLResult.SUCCESS]) { NSLog(@"Error sending AlertManeuver."); return; } }];}];

SWIFT
let turnByTurn = SDLShowConstantTBT()!turnByTurn.maneuverComplete = true
sdlManager.send(turnByTurn) { (request, response, error) in if response?.resultCode.isEqual(to: SDLResult.success()) == false { print("Error sending TBT.") return }}
OBJECTIVE-C
SDLShowConstantTBT* turnByTurn = [[SDLShowConstantTBT alloc] init];turnByTurn.maneuverComplete = @(YES);
[self.sdlManager sendRequest:turnByTurn withResponseHandler:^(SDLRPCRequest *request, SDLRPCResponse *response, NSError *error) { if (![response.resultCode isEqualToEnum:SDLResult.SUCCESS]) { NSLog(@"Error sending TBT."); return; }
// Successfully cleared}];

SmartDeviceLink (SDL) iOS Relay
The SmartDeviceLink (SDL) iOS Relay app is a debugging tool for developers
building iOS applications that communicate with a SDL Core via a USB cable.
Testing is done over a TCP/IP connection. During testing developers can easily
see logs of in-going/out-going remote procedure calls (RPCs) in Xcode's debug
console, thus making debugging easier and faster.
Necessary Tools
In order to use the Relay app, you must have the following tools
1. A SDL Core enabled vehicle head unit or a test development kit (TDK)2. An iOS device with the SDL iOS Relay app installed3. A USB cable to connect the iOS device to the head unit or TDK
N O T E
Make sure that both the SDL iOS Relay app and the app being
tested are connected to the same wifi network.

4. Xcode with the app being tested running in Xcode's iOS Simulator app
Examples
Example: Connecting the RPC Builder iOS app
This example shows you how to use the RPC Builder app in conjunction with the
Relay app. For a tutorial on how to connect a custom app, please see the
example below.
1. Download the RPC Builder app from GitHub. The RPC Builder app is a free
tool designed to help developers understand how RPCs work.2. Download the Relay app from GitHub and install it on an iOS device.
1. Launch the Relay app on an iOS device. If the Relay app is not connected
to any hardware running SDL Core via USB, the app's screen will not show
any active connections.

Initial app startup. This state is visible when the app is not connected to
hardware running SDL Core via USB.2. Connect the iOS device to the SDL Core using a USB cable.
N O T E
You may have to change the bundle identifier name of the app
before Xcode will allow installation of the Relay app on your device.
In order to change the name, go to Relay > General > Bundle
Identifier and change the bundle identifier name to anything you
want as long as it is unique. A bundle identifier is not unique if
anyone has registered an app with the same bundle identifier with
Apple.

3. When the iOS device is connected to the SDL Core, the status under USB
Connection should change from Disconnected to Connected. Wait for the
the status of the EASession to change to Connected

When Relay is initially connected via USB, but the connection isn't
complete.

When the Relay is fully connected via USB, and ready for server start. 4. Once the USB Connection and EASession are both set to Connected, the
app is fully connected and ready for server start. Toggle the switch under
Server to on. When the status of the server changes to Available, the IP
address and port number of the wifi network the Relay app is connected
to will appear under Server.

Server is now started, and awating connection.5. Open the RPC Builder app in Xcode and click on the run button to launch
the app in Xcode's iOS Simulator. Enter the IP address and port number
from the Relay app into the RPC Builder app and click on Next. On the
next page of the RPC Builder app, click on Send.6. Once the RPC Builder app is running on the Simulator, the status of SDL in
the Relay app should change to Connected.

Application is correctly connected to Relay, and messages can now be
sent and received. 7. The RPC Builder app is now connected to Relay, and messages can be
sent and received. Debug logs will appear in Xcode's debug area.
Example: Connecting Your Custom App
This example shows you how to connect a custom app with the Relay app.
1. First, follow steps 2 through 7 in the example above called Connecting the
RPC Builder iOS app.2. It is very important to make sure that the Relay app and the app you are
testing are connected to the same wifi network. Make sure to set the
proxy's TCP/IP initializer with the same IP address and port number used
by the Relay app. To do this, set the proxy builder's TCP/IP initializer in the
app being tested.

SDLProxy* proxy = [SDLProxyFactory
buildSDLProxyWithListener:sdlProxyListenerDelegate
tcpIPAddress:@"1.2.3.4" port:@"2776"];3. Start the app being tested on Xcode's simulator.4. Once the app is running on the simulator, the status of SDL in the Relay
app should change to Connected.

Application is correctly connected to Relay, and messages can now be
sent and received. 5. The app is now connected to Relay, and messages can be sent and
received. Debug logs will appear in Xcode's debug area.
Need Help?
If you need general assistance, or have other questions, you can sign up for the
SDL Slack and chat with other developers and the maintainers of the project.
Found a Bug?
If you see a bug, feel free to post an issue.
N O T E
The relay app should always be connected to the SDL Core before
starting your app, otherwise the setup will not work

Want to Help?
If you want to help add more features, please file a pull request.
RPC Builder v1.2.2
Introduction
The SmartDeviceLink (SDL) RPC Builder app is a free iOS app designed to help
developers understand the SDL interface and how remote procedure calls
(RPCs) work. Use the app to send and receive RPCs with a SDL Core without
writing any code.
N O T E
In order for the RPC Builder app to work correctly, all commands
must be executed in proper sequence. For example, when building
a custom menu, a performInteraction call will only be successful if
sent after a createInteractionChoiceSet call. To find more
information about how to properly set up a sequence of commands,
please reference the SDL App Developer Documentation.

Getting Started
In order to begin using RPC Builder, the SDL iOS library must be added to the
project. There is already support for CocoaPods in this project, so to install the
library, simply navigate to the RPC Builder folder in a terminal and then install:
After the SDL iOS library has been installed, the RPC Builder app can be
deployed on an iOS device.
RPC Builder Interface
Settings Page

On the settings page, select a RPC spec file. The default Mobile_API.xml file will
generate all possible RPCs available for the app. To use a custom RPC spec file,
add a new file via iTunes file sharing to the SpecXMLs directory. The file can
also be added via a remote URL.
Also on the settings page, set the transport layer to TCP/IP or iAP.
Once the spec file and transport layer have been set, click on Next. The next
page is the Register App Interface (RAI) screen. This page contains information
for registering the app the first time it connects with the SDL Core. Simply click
on Send to use the default settings. If the properties on the RAI screen are
modified, they will be cached for subsequent launches.
cd RPC\ Builder/pod install


Main RPCs Table

The main RPC table is create at runtime by the app from the spec XML file. If
there is additional information provided about the RPC call, an information
button will appear next to the RPC name in the table. Click on the information
button to learn more about the RPC call.

Send A RPC
To send an RPC to the SDL Core select the RPC from the table, fill out the RPC
parameters and click Send.

N O T E
Once Send is pressed, the app will not continue until a successful
connection is achieved and RAI response is received.

After selecting an RPC from the table, a view will appear with all possible
parameters for this RPC. To find out more information about an argument, tap
and hold the argument name to reveal the information.

Required data will have a red asterisk next to the argument name.
If a parameter is a struct or array, an arrow will appear to the right of the
parameter name. More parameter information for the array or struct can be
PARAMETER INFORMATION
REQUIRED PARAMETERS
STRUCT OR ARRAY PARAMETERS

entered by clicking on the parameter table cell. A new view will appear where
more information about the parameter can be entered.
There are three different ways to send an RPC argument.
1. Send with data.
◦ To send an argument with data just add the information next to the
arguments name.
2. Send without data
◦ To send an argument with an empty string, leave the field next to the
argument name empty
3. Don't send the argument
◦ To disable the argument from being included in the RPC, tap once on
the argument's name. The argument will be grayed out and not
included in the request. In the picture below mainField1 will not be
included in the RPC Request, but mainField2 will be included with an
empty string.

Modules
The purpose of modules is to allow developers to create more advanced testing
scenarios. A module can contain multiple RPCs. It can also define capabilities
not provided in the RPC spec file.

PARAMETER DATA

There are a few requirements for building Modules:
1. All Modules must be subclasses of RBModuleViewController, and all class
functions labeled as Required must be overridden.
◦ These properties will allow other developers to easily understand
what the Module will be testing and will also include the iOS version
required in order to use Module.◦ Any Module with an iOS version other than 6 as the requirement will
be listed.◦ Although other class functions such as moduleImageName/
moduleImage are optional, it is encouraged to add these functions.
2. All Modules must use the provided SDLProxy, SDLManager, and
RBSettingsManager that are provided to subclasses of
RBModuleViewController.3. All Modules must be added to the Modules.storyboard storyboard in order
to correctly load.
◦ When designing your view controller, use 8px for the vertical and
horizontal displacement between views to create a consistent user
experience.
4. All Modules must not interact with any other Module.5. All Modules must be added to RBModuleViewController's class function
moduleClassNames. The new Module should be added to this list in
alphabetical order. For an example of how to add this see below:
BUILDING NEW MODULES

1. Streaming
◦ Allows for testing of video and audio streaming of camera / video
files as well as audio files respectively.
2. Audio Capture
◦ Allows for saving of audio data via AudioPassThru RPCs. Properties of
this RPC can be modified to test the robustness of the RPC. This
audio data may be retrieved via iTunes File Sharing.
Console Log
The console log shows a simplified output of sent and received requests.

+ (NSArray*)moduleClassNames { if (!moduleClassNames) { moduleClassNames = @[ [RBStreamingModuleViewController classString], // Streaming [RBNewModuleViewController classString] // Module Name ]; } return moduleClassNames;}
DEFAULT MODULES

The console logs are color coded for quick identification.
1. White - Used for logs with no additional data.2. Blue - Used for requests sent to the SDL Core.3. Green - Used for responses from the SDL Core. There are three possible
response types:
◦ Successful: these response types are colored green.◦ Aborted, Timed-Out, or Warnings: these response types are colored
yellow.◦ Miscellaneous: these response types are colored red.
4. Yellow - Used for notifications sent from the SDL Core.
Tapping once on a RPC call in the console will reveal the JSON associated with
that RPC call, if applicable.

A Special Note About Putfile
Putfile is the RPC responsible for sending binary data from our mobile libraries
to the SDL Core. The RPC Builder app provides support for adding any type of
file: either from the camera roll (for images) or iTunes shared storage for any
other kind of files. Similar to adding custom RPC spec files, any file located
within the BulkData directory will be present in local storage and be usable for
upload.
CONSOLE COLOR CODES
RPC JSON

Need Help?
If you need general assistance, or have other questions, you can sign up for the
SDL Slack and chat with other developers and the maintainers of the project.
Found a Bug?
If you see a bug, feel free to post an issue.
Want to Help?
If you want to help add more features, please file a pull request.