Embed Size (px)
Citation preview
THE CHALLENGECustom design your own race course or create multiple course options based on time and terrain. Then design a car that will be launched with CO2 fuel canisters. Engineer your car to master a single course or go for the ultimate challenge and design an all-course winner!
Safety Messages Please read this instruction manualcarefully before you begin. • Adult supervision and assistance are required. • This kit contains small parts, intended for children ages 8 and up. • Wood carving tools required (not included). Adult supervision required when using tools.• Never insert CO2 canisters while carving wood block.• Never insert CO2 canisters before the race event.• Never alter the pre-drilled CO2 canister space.ContentsWood Block with canister hole Wheels (4) Axle Screws (4)Axle Tool Eyelets (2)
SUGGESTED RACE COURSESDOWNHILL This course combines gravity with the burst of the fuel canister to speed cars down to the finish line.Terrain: Downward slope; hard-packed, gravel-free surface Distance:100–200 feetScoring Options:Heat Winner - fastest head-to-head moves to next round (good for shorter tracks)Distance – car that travels longest distance (good for longer tracks). (mark Scout’s name next to distance)Car Design—Consider:Engineering Principle – Gravity PullOverall Weight – Medium to HeavyWeight Distribution – Heavier Toward FrontWood Profile Advantage – Wide Body
GRAVITY BATTLEThis course uses aerodynamics to defy gravity.Terrain: Sharp, upward slope; hard-packed, gravel-free surfaceDistance: Up to 50 feetScoring:Distance – car that travels longest distance – (mark Scout’s name next to distance)Car Design—Consider:Engineering Principle – Defy GravityOverall Weight – LightWeight Distribution – Heavier Toward BackWood Profile Advantage – Narrow Dragster
ALL-TERRAINThis design distributes the course equally across loose, hard, and rolling terrainsTerrain:Anything goes as long as course is equal for each laneDistance:The more challenging the terrain, the shorter the track
Scoring Options:Heat Winner - Fastest head-to-head winner moves to next round (good for shorter tracks)Distance – car that travels longest distance – (mark Scout’s name next to distance) (good for longer tracks)Car Design:Engineering Principle – Reduce FrictionOverall Weight – MediumWeight Distribution – Equal Front to BackWood Profile Advantage – Wide Body
SPRINT SPEEDThis course is flat and smooth for speed.Terrain:Flat, smooth, hard-packed, gravel-free surface Distance: 50-75 feet (Think: “shorter = faster”)Scoring:Head-to-head winner moves to next heat in multi-run formatCar Design:Engineering Principle – Light and AerodynamicOverall Weight – Extra LightWeight Distribution – Equal Front to BackWood Profile Advantage – Dragster
DESIGN CAR KITYour Engineering Design ProcessA great racer begins with a great design! Follow these design steps to success:• Sketch an idea• Design and lay out a profile• Construct a car• Do a trial test• Make modifications• Finish the details
Think It OverEngineering principles to consider (check bullets to indicate the right choices for your car and course styles): ________________________
Overall Weight ❍ Extra Light❍ Light❍ Medium❍ Heavy
Weight Distribution ❍ Toward Front❍ Toward Back❍ Evenly Distributed
Wood Profile ❍ Dragster❍ Wide Body
Choose the ProfileEach wood block has a pre-drilled CO2 canister hole in back of block.Lay wood block on short side to create a Drag Racer or on long side for Wide Body Racer.
Identify Depth of CO2 Canister HolePrepare and cut out graphs. Tape to the sides of the block and use as a guide for location and depth of CO2 canister hole. Carve desired design allowing ½˝ wood around CO2 canister hole.
Wheel AlignmentWheel alignment is a critical variable in racing. Consistent wheel height and balanced axle insertion make all the difference!!To ensure the most accurate wheel alignment:
1. Measure and mark all axle locations and pre-drill prior to carving.2. Axle locations should be between 1/8˝ and 3/8˝ abovebottom of car. Any higher on the car and it will be too low to fit on race line.3. All axle locations should be at an equal height (all wheels should make contact with surface).4. Axle screws are self-tapping and will cut the hole. A 3/32˝ pilot hole can be used for pinpoint placement.
Cut, Carve, Shape Your VehicleWood block can be shaped with hand or power tools. Make the most of your woodcarving by reviewing the following merit badge requirements…. Merit Badge – Woodcarving Merit Badge – Woodworking Merit Badge – Model Design and Building
Color! Add-ons!Unlimited possibilities… wood may be stained, primed, painted, decaled, stenciled, or wrapped. BlastcarTM Rules and Regulations prohibit the use of add-ons such as springs, ball bearings, etc.
Axle Screw PreparationRacing axle screws were developed just for BSA®
BlastcarTM. The unique design allows wheels to be placed anywhere on the car (racer- or wide-body-style). Smooth shaft near axle screw head can be polished but screw threads should not be altered since they are already designed for easy insertion into wood block. No pilot hole is required as the axle screw has a tap-in feature.
What’s going on here?INERTIAProperty of matter by which an object remains at rest unless acted upon by some external force.Car with lower mass (weight) will accelerate faster.
BLAS T CA R ™ Racing
GUIDELINES AND INSTRUCTIONSHOW TO GET STARTED…The first thing to do is form an Event Committee. The purpose of the committee is to plan the date, time, length, and courses for your troop’s BlastcarTM Racing Event.
THINGS TO CONSIDER... QUESTIONS TO ASKTimingThe number of courses selected and the number of heats run will determine the time needed for the event.TerrainWhat kind of terrain is available? Inside • Slick gym floor? • Carpet? • Length? Outside • Incline (steep or gradual)? • Surface (paved, gravel, packed, or loose dirt)?
Number of Fuel CanistersEstimate the number of fuel canisters needed for the event by multiplying the number of Scouts by the number of heats; factor in 10% extra canisters for re-runs.
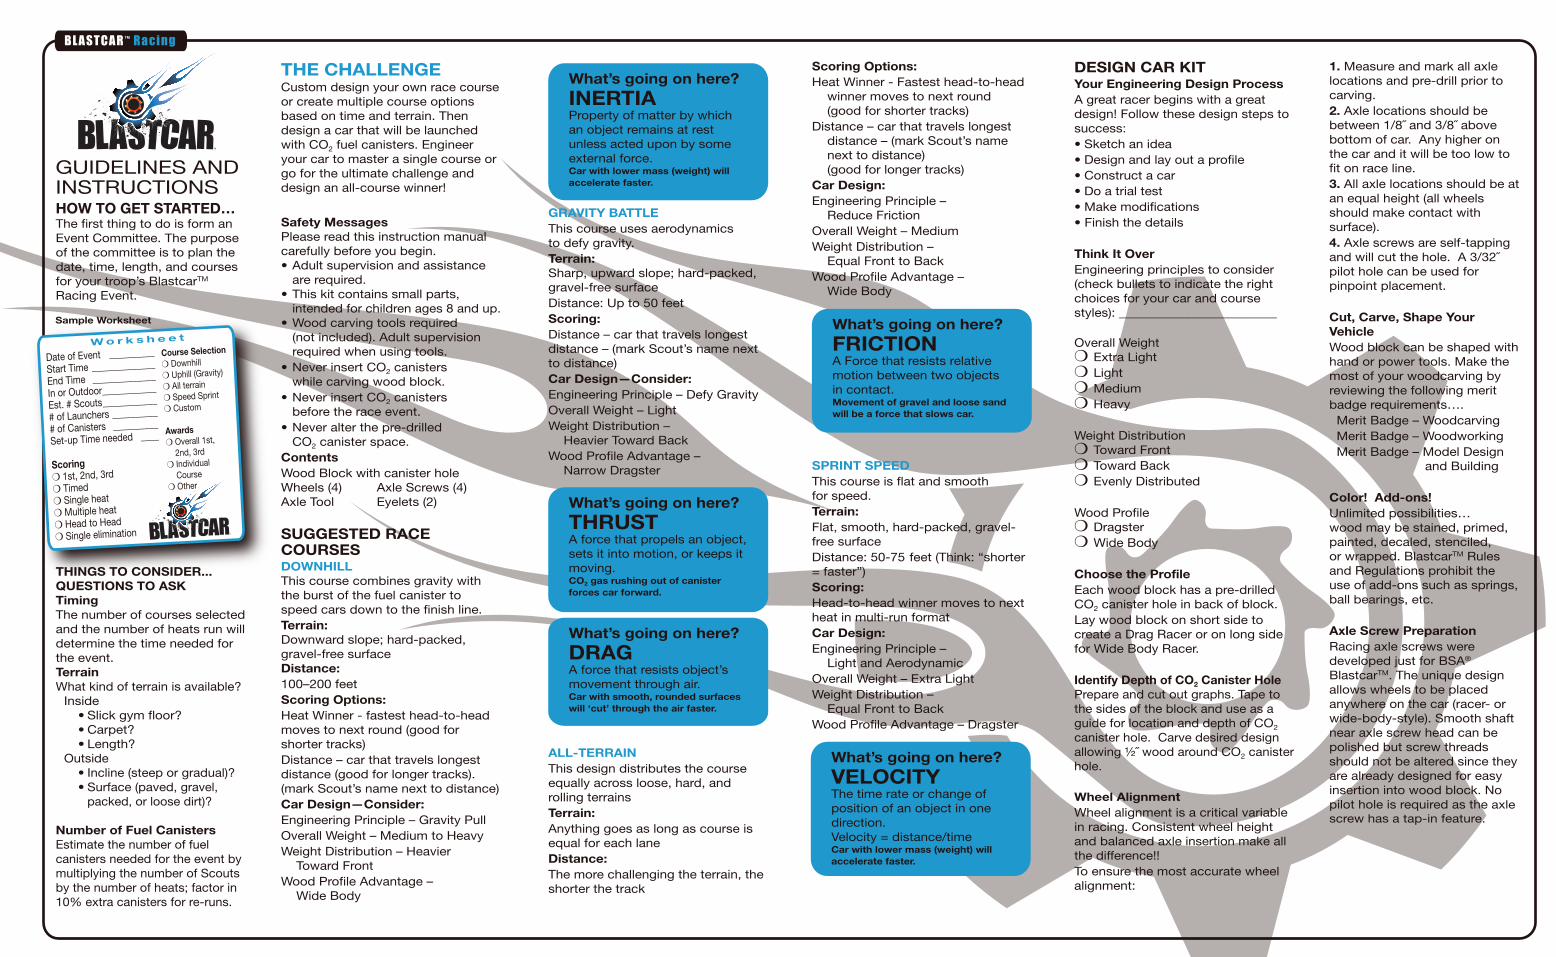
Sample Worksheet
Date of Event __________
Start Time ______________
End Time ______________
In or Outdoor____________
Est. # Scouts____________
# of Launchers __________
# of Canisters __________
Set-up Time needed ____
Scoring❍ 1st, 2nd, 3rd❍ Timed❍ Single heat❍ Multiple heat❍ Head to Head❍ Single elimination
W o r k s h e e t
What’s going on here?THRUSTA force that propels an object, sets it into motion, or keeps it moving.CO2 gas rushing out of canister forces car forward.
What’s going on here?DRAGA force that resists object’s movement through air.Car with smooth, rounded surfaces will ‘cut’ through the air faster.
What’s going on here?FRICTIONA Force that resists relative motion between two objects in contact.Movement of gravel and loose sand will be a force that slows car.
What’s going on here?VELOCITYThe time rate or change of position of an object in one direction. Velocity = distance/timeCar with lower mass (weight) will accelerate faster.
RULES OF THE EVENTBlastcarTM is intended for Boy Scouts only —Tenderfoot to Eagle ranks. Additional racers may be added to the event at the discretion of the troop.Car ConstructionThe car is to be constructed from the materials in the BSA® BlastcarTM Car Kit. The original axle screws in the kit must be used for the axles. Only weights, paint, and other purely decorative items may be added to the racer.Car DimensionsThe total overall length must not exceed 10˝. The eyelets must have ¼˝ clearance to the race surface.Car WeightThe total weight of the car without CO2 canister must not be less than five ounces as determined on the official weight scale. Any added weight must be solid in form (no liquid or moveable weight) and everything must be firmly attached to the racer.Axle PlacementAxle placement may be anywhere on the car. By turning the wood block on its side, a drag-style racer or a wide-body racer can be created.Axle screws are screwed into the wood block, backed out, wheel is attached, then screwed in for final placement.Car LubricationOnly dry lubricants such as graphite may be used. No liquids may be present when the car is checked in. Scouts may lubricate cars between heats and in the designated areas.ProhibitedAny type of spring, wheel bearings, bushings, or washers are not allowed. The car must be freewheeling.Pre-Race TestingGravity testing is recommended to test all cars prior to the race. Create a ramp using cardboard, wood, or sloped surface. Check for car alignment, freewheeling, and loose parts on the car.Car InspectionEach car must pass inspection by the race judge on the day of the
race. See Car Inspection Guide at the end of this guide. The judge has the right to disqualify any car that does not meet the outlined criteria. Cars are checked in, given a race number, and entered on the heat schedule. Each Scout is responsible for bringing his car to the “Car Show”. Cars are returned to the table if they are moving onto another heat. If the car needs repair, the Scout will be allowed to repair the car in the official designated area. Any necessary repairs must be made in a timely manner.AttendanceThe Boy Scout must be present to enter his car in the event. Each Scout is responsible for placing his car on the race line, inserting the CO2 canister, and then backing his car into the launcher.SportsmanshipPoor sportsmanship will result in disqualification of the Boy Scout. Boy Scouts are expected to be dignified whether winning or losing.Previous Year‘s Cars A Scout cannot race a car built in a previous year. A new car is to be built from a BlastcarTM kit.Fuel CanistersOnly Official BSA® CO2 canisters may be used in the BlastcarTM event. See CO2 Canister Safety Rules.
SETTING UP THE TRACKStart LineScrew pegs into start line plate. Secure start line plate to race area with duct tape. Make sure start pegs are firmly in place. Make overhand knot in race line (50# test line) and trim excess to ½˝. Loop around start peg and place pencil, pen, or stick into race line spool. Carefully walk to designated finish line, unreeling line cleanly. Make another overhand knot at about 1´ beyond finish. Tighten and trim end of knot to ½˝ tail. Stretch line taut and loop around finish line peg. Now use duct tape to secure finish line plate to race surface. Repeat for second lane.See race line test at end of guide.
Finish LinePlace cushion just past finish line and before the finish line plate. This will stop the cars before hitting the pegs. Race track length must be a minimum of 66´. Race line should be discarded at the end of the event. A clean, fresh race line should be used at each new event.Car EntryCars are brought to the start line plate. Cars are secured to the race lane via the two eyelets screwed into the bottom of the car. No car is allowed to race without being secured to the race line.
RUNNING THE RACEEach inspected car is numbered and entered into a Heat Schedule for racing. As each heat is called, Scouts retrieve their cars from the “Car Show” table and bring them to the start line. Starter instructs them as to lane assignment. The boys secure their cars into their assigned lanes by threading the race line through eyelets under their cars. CO2 canisters are then inserted by the Scout once in the race lane. Each car is then backed into the launcher. Car is disqualified if the CO2 canister protrudes from the wood block and can be seen when backed into launcher. Start command is a troop- agreed-upon feature based on course scoring. Visual versus electronic technique will determine the method of start command. Never touch or remove the CO2 canister from the car until the car has reached the finish line. Cars are removed from the race line at the end of the finish line or walked back to the start line for another heat. Race results are communicated to the heat scheduler. Additional heats can be set up by the program committee as needed.Race Safety Regulations• All race participants and spectators must maintain a 10´ clearance around the launcher and race lanes. • Only BSA® 8-gram CO2 canisters may be used in cars. • There is to be no alteration of the pre-drilled canister hole in the wood block.
• The launcher is to be activated by a BSA leader. All cars are to be tethered to the race line during all races and on all courses.CO2 Canister SafetyCO2 canisters add an element of excitement to the older boys’ programs, but Scouts must also use care and follow guidelines for safety. • Each kit includes a template showing the location of the pre-drilled hole. • Canisters must be kept in an environment under 140 degrees.• Canisters are never to be used in the car design or construction phase.• Power tools and sharp hand tools are never to be used around CO2 canisters. • Add canisters at the event. • Adult supervision is required for this program.
CO2 CAR INSPECTION GUIDENote: All inspections are done without CO2 canisters in place.Outer Dimensions/Weight• Maximum Length: 10˝• Maximum Width: 4¼˝• Maximum Height: no restriction• Minimum Weight: 5 ounces• Maximum Weight: no restrictionOfficial BSA® Components Allowed• BSA® Official BlastcarTM wheels (Slick, ATV, Monster)• BSA Axle Screws • Wood Block with unaltered canister hole• Eyelets—two secured under carriage, centered (race line run front to back)Prohibited Items• Liquids • Moveable Weights• Moveable Parts • Loose PartsAcceptable Items• Dry Lubricant • Weights• Paint • Decals
RACE LINE TESTRace line is 50# test monofila-ment line. This monofilament line will secure tightly and stretch to allow for racing. Race line should be used for one event only, then properly discarded. Clean, fresh line should be used for the next race day event. Test the race line by first securing the two lines to the start and finish pegs with equal tension. Standing halfway between the start and finish lines, raise both lines 4´ in the air to check the security of start and finish pegs. Next, standing 10´ before the finish line, raise both lines 2´ in the air to check the security of the finish line pegs. Tighten lines as needed by re-tying knots at finish line.
Visit www.scoutstuff.org for instructions in Spanish.
Visita www.scoutstuff.org para obtener las instrucciones en español.
THE EVENTCars are fueled by CO2. CO2 canisters are steel cylinders filled with compressed CO2 fuel. The CO2 is removed from the air at the factory and then released at the race event—no new CO2 is created or added to the atmosphere. This is called a ‘zero’ event. BlastcarTM cars are designed using principles outlined previously. The launcher kit has the base launcher, start/finish plates, and race line for tethered head-to-head racing. Set up is easy and fun. Races may be run on a variety of courses.
SAFETY ALONG THE WAY! • Check race surfaces before using nails, tape, or adhesive with start/finish plates.• Use only BSA® CO2 canisters.• Never insert CO2 canisters to racer or launcher before assembling and tethering to race line.
PRE-EVENT PLANNINGMaterials required – minimum items needed to run a BlastcarTM event:• Launcher Kit • Weight Scale• Car Kit—One per Scout • Duct Tape• CO2 Canisters—10-pack • 150-foot Measuring Tape
Additional recommended items:• Heat Schedule for head-to-head racing• Cushions, pillows, or towels to stop cars at finish line • Hi-Speed GraphiteHeat scheduling will determine the number of CO2 canisters needed to run all races. You should add 10% above that number to allow for disputes or re-run heats.
Course Selection
❍ Downhill❍ Uphill (Gravity)
❍ All terrain❍ Speed Sprint
❍ Custom
Awards❍ Overall 1st,
2nd, 3rd❍ Individual Course❍ Other
THE CHALLENGECustom design your own race course or create multiple course options based on time and terrain. Then design a car that will be launched with CO2 fuel canisters. Engineer your car to master a single course or go for the ultimate challenge and design an all-course winner!
Safety Messages Please read this instruction manualcarefully before you begin. • Adult supervision and assistance are required. • This kit contains small parts, intended for children ages 8 and up. • Wood carving tools required (not included). Adult supervision required when using tools.• Never insert CO2 canisters while carving wood block.• Never insert CO2 canisters before the race event.• Never alter the pre-drilled CO2 canister space.ContentsWood Block with canister hole Wheels (4) Axle Screws (4)Axle Tool Eyelets (2)
SUGGESTED RACE COURSESDOWNHILL This course combines gravity with the burst of the fuel canister to speed cars down to the finish line.Terrain: Downward slope; hard-packed, gravel-free surface Distance:100–200 feetScoring Options:Heat Winner - fastest head-to-head moves to next round (good for shorter tracks)Distance – car that travels longest distance (good for longer tracks). (mark Scout’s name next to distance)Car Design—Consider:Engineering Principle – Gravity PullOverall Weight – Medium to HeavyWeight Distribution – Heavier Toward FrontWood Profile Advantage – Wide Body
GRAVITY BATTLEThis course uses aerodynamics to defy gravity.Terrain: Sharp, upward slope; hard-packed, gravel-free surfaceDistance: Up to 50 feetScoring:Distance – car that travels longest distance – (mark Scout’s name next to distance)Car Design—Consider:Engineering Principle – Defy GravityOverall Weight – LightWeight Distribution – Heavier Toward BackWood Profile Advantage – Narrow Dragster
ALL-TERRAINThis design distributes the course equally across loose, hard, and rolling terrainsTerrain:Anything goes as long as course is equal for each laneDistance:The more challenging the terrain, the shorter the track
Scoring Options:Heat Winner - Fastest head-to-head winner moves to next round (good for shorter tracks)Distance – car that travels longest distance – (mark Scout’s name next to distance) (good for longer tracks)Car Design:Engineering Principle – Reduce FrictionOverall Weight – MediumWeight Distribution – Equal Front to BackWood Profile Advantage – Wide Body
SPRINT SPEEDThis course is flat and smooth for speed.Terrain:Flat, smooth, hard-packed, gravel-free surface Distance: 50-75 feet (Think: “shorter = faster”)Scoring:Head-to-head winner moves to next heat in multi-run formatCar Design:Engineering Principle – Light and AerodynamicOverall Weight – Extra LightWeight Distribution – Equal Front to BackWood Profile Advantage – Dragster
DESIGN CAR KITYour Engineering Design ProcessA great racer begins with a great design! Follow these design steps to success:• Sketch an idea• Design and lay out a profile• Construct a car• Do a trial test• Make modifications• Finish the details
Think It OverEngineering principles to consider (check bullets to indicate the right choices for your car and course styles): ________________________
Overall Weight ❍ Extra Light❍ Light❍ Medium❍ Heavy
Weight Distribution ❍ Toward Front❍ Toward Back❍ Evenly Distributed
Wood Profile ❍ Dragster❍ Wide Body
Choose the ProfileEach wood block has a pre-drilled CO2 canister hole in back of block.Lay wood block on short side to create a Drag Racer or on long side for Wide Body Racer.
Identify Depth of CO2 Canister HolePrepare and cut out graphs. Tape to the sides of the block and use as a guide for location and depth of CO2 canister hole. Carve desired design allowing ½˝ wood around CO2 canister hole.
Wheel AlignmentWheel alignment is a critical variable in racing. Consistent wheel height and balanced axle insertion make all the difference!!To ensure the most accurate wheel alignment:
1. Measure and mark all axle locations and pre-drill prior to carving.2. Axle locations should be between 1/8˝ and 3/8˝ abovebottom of car. Any higher on the car and it will be too low to fit on race line.3. All axle locations should be at an equal height (all wheels should make contact with surface).4. Axle screws are self-tapping and will cut the hole. A 3/32˝ pilot hole can be used for pinpoint placement.
Cut, Carve, Shape Your VehicleWood block can be shaped with hand or power tools. Make the most of your woodcarving by reviewing the following merit badge requirements…. Merit Badge – Woodcarving Merit Badge – Woodworking Merit Badge – Model Design and Building
Color! Add-ons!Unlimited possibilities… wood may be stained, primed, painted, decaled, stenciled, or wrapped. BlastcarTM Rules and Regulations prohibit the use of add-ons such as springs, ball bearings, etc.
Axle Screw PreparationRacing axle screws were developed just for BSA®
BlastcarTM. The unique design allows wheels to be placed anywhere on the car (racer- or wide-body-style). Smooth shaft near axle screw head can be polished but screw threads should not be altered since they are already designed for easy insertion into wood block. No pilot hole is required as the axle screw has a tap-in feature.
RULES OF THE EVENTBlastcarTM is intended for Boy Scouts only —Tenderfoot to Eagle ranks. Additional racers may be added to the event at the discretion of the troop.Car ConstructionThe car is to be constructed from the materials in the BSA® BlastcarTM Car Kit. The original axle screws in the kit must be used for the axles. Only weights, paint, and other purely decorative items may be added to the racer.Car DimensionsThe total overall length must not exceed 10˝. The eyelets must have ¼˝ clearance to the race surface.Car WeightThe total weight of the car without CO2 canister must not be less than five ounces as determined on the official weight scale. Any added weight must be solid in form (no liquid or moveable weight) and everything must be firmly attached to the racer.Axle PlacementAxle placement may be anywhere on the car. By turning the wood block on its side, a drag-style racer or a wide-body racer can be created.Axle screws are screwed into the wood block, backed out, wheel is attached, then screwed in for final placement.Car LubricationOnly dry lubricants such as graphite may be used. No liquids may be present when the car is checked in. Scouts may lubricate cars between heats and in the designated areas.ProhibitedAny type of spring, wheel bearings, bushings, or washers are not allowed. The car must be freewheeling.Pre-Race TestingGravity testing is recommended to test all cars prior to the race. Create a ramp using cardboard, wood, or sloped surface. Check for car alignment, freewheeling, and loose parts on the car.Car InspectionEach car must pass inspection by the race judge on the day of the
race. See Car Inspection Guide at the end of this guide. The judge has the right to disqualify any car that does not meet the outlined criteria. Cars are checked in, given a race number, and entered on the heat schedule. Each Scout is responsible for bringing his car to the “Car Show”. Cars are returned to the table if they are moving onto another heat. If the car needs repair, the Scout will be allowed to repair the car in the official designated area. Any necessary repairs must be made in a timely manner.AttendanceThe Boy Scout must be present to enter his car in the event. Each Scout is responsible for placing his car on the race line, inserting the CO2 canister, and then backing his car into the launcher.SportsmanshipPoor sportsmanship will result in disqualification of the Boy Scout. Boy Scouts are expected to be dignified whether winning or losing.Previous Year‘s Cars A Scout cannot race a car built in a previous year. A new car is to be built from a BlastcarTM kit.Fuel CanistersOnly Official BSA® CO2 canisters may be used in the BlastcarTM event. See CO2 Canister Safety Rules.
SETTING UP THE TRACKStart LineScrew pegs into start line plate. Secure start line plate to race area with duct tape. Make sure start pegs are firmly in place. Make overhand knot in race line (50# test line) and trim excess to ½˝. Loop around start peg and place pencil, pen, or stick into race line spool. Carefully walk to designated finish line, unreeling line cleanly. Make another overhand knot at about 1´ beyond finish. Tighten and trim end of knot to ½˝ tail. Stretch line taut and loop around finish line peg. Now use duct tape to secure finish line plate to race surface. Repeat for second lane.See race line test at end of guide.
Finish LinePlace cushion just past finish line and before the finish line plate. This will stop the cars before hitting the pegs. Race track length must be a minimum of 66´. Race line should be discarded at the end of the event. A clean, fresh race line should be used at each new event.Car EntryCars are brought to the start line plate. Cars are secured to the race lane via the two eyelets screwed into the bottom of the car. No car is allowed to race without being secured to the race line.
RUNNING THE RACEEach inspected car is numbered and entered into a Heat Schedule for racing. As each heat is called, Scouts retrieve their cars from the “Car Show” table and bring them to the start line. Starter instructs them as to lane assignment. The boys secure their cars into their assigned lanes by threading the race line through eyelets under their cars. CO2 canisters are then inserted by the Scout once in the race lane. Each car is then backed into the launcher. Car is disqualified if the CO2 canister protrudes from the wood block and can be seen when backed into launcher. Start command is a troop- agreed-upon feature based on course scoring. Visual versus electronic technique will determine the method of start command. Never touch or remove the CO2 canister from the car until the car has reached the finish line. Cars are removed from the race line at the end of the finish line or walked back to the start line for another heat. Race results are communicated to the heat scheduler. Additional heats can be set up by the program committee as needed.Race Safety Regulations• All race participants and spectators must maintain a 10´ clearance around the launcher and race lanes. • Only BSA® 8-gram CO2 canisters may be used in cars. • There is to be no alteration of the pre-drilled canister hole in the wood block.
• The launcher is to be activated by a BSA leader. All cars are to be tethered to the race line during all races and on all courses.CO2 Canister SafetyCO2 canisters add an element of excitement to the older boys’ programs, but Scouts must also use care and follow guidelines for safety. • Each kit includes a template showing the location of the pre-drilled hole. • Canisters must be kept in an environment under 140 degrees.• Canisters are never to be used in the car design or construction phase.• Power tools and sharp hand tools are never to be used around CO2 canisters. • Add canisters at the event. • Adult supervision is required for this program.
CO2 CAR INSPECTION GUIDENote: All inspections are done without CO2 canisters in place.Outer Dimensions/Weight• Maximum Length: 10˝• Maximum Width: 4¼˝• Maximum Height: no restriction• Minimum Weight: 5 ounces• Maximum Weight: no restrictionOfficial BSA® Components Allowed• BSA® Official BlastcarTM wheels (Slick, ATV, Monster)• BSA Axle Screws • Wood Block with unaltered canister hole• Eyelets—two secured under carriage, centered (race line run front to back)Prohibited Items• Liquids • Moveable Weights• Moveable Parts • Loose PartsAcceptable Items• Dry Lubricant • Weights• Paint • Decals
RACE LINE TESTRace line is 50# test monofila-ment line. This monofilament line will secure tightly and stretch to allow for racing. Race line should be used for one event only, then properly discarded. Clean, fresh line should be used for the next race day event. Test the race line by first securing the two lines to the start and finish pegs with equal tension. Standing halfway between the start and finish lines, raise both lines 4´ in the air to check the security of start and finish pegs. Next, standing 10´ before the finish line, raise both lines 2´ in the air to check the security of the finish line pegs. Tighten lines as needed by re-tying knots at finish line.
Visit www.scoutstuff.org for instructions in Spanish.
Visita www.scoutstuff.org para obtener las instrucciones en español.
THE EVENTCars are fueled by CO2. CO2 canisters are steel cylinders filled with compressed CO2 fuel. The CO2 is removed from the air at the factory and then released at the race event—no new CO2 is created or added to the atmosphere. This is called a ‘zero’ event. BlastcarTM cars are designed using principles outlined previously. The launcher kit has the base launcher, start/finish plates, and race line for tethered head-to-head racing. Set up is easy and fun. Races may be run on a variety of courses.
SAFETY ALONG THE WAY! • Check race surfaces before using nails, tape, or adhesive with start/finish plates.• Use only BSA® CO2 canisters.• Never insert CO2 canisters to racer or launcher before assembling and tethering to race line.
PRE-EVENT PLANNINGMaterials required – minimum items needed to run a BlastcarTM event:• Launcher Kit • Weight Scale• Car Kit—One per Scout • Duct Tape• CO2 Canisters—10-pack • 150-foot Measuring Tape
Additional recommended items:• Heat Schedule for head-to-head racing• Cushions, pillows, or towels to stop cars at finish line • Hi-Speed GraphiteHeat scheduling will determine the number of CO2 canisters needed to run all races. You should add 10% above that number to allow for disputes or re-run heats.
What’s going on here?SPECIFICATIONDetailed description of requirements, dimensions, and materials.Car will be weighed and measured at the event for fairness and safety.
What’s going on here?TOLERANCEPermissible range of variance in a dimension of an object.Car weight tolerance is a minimum of five ounces with no restriction on maximum weight.