Embed Size (px)
Citation preview
GST Computer Systems Limited
68K/ OS User Manual
68K/OS
OPERATING SYSTEM
USER MANUAL
1 9992 .1 GST 35 /1. 09

GSI Computer Systems Limited
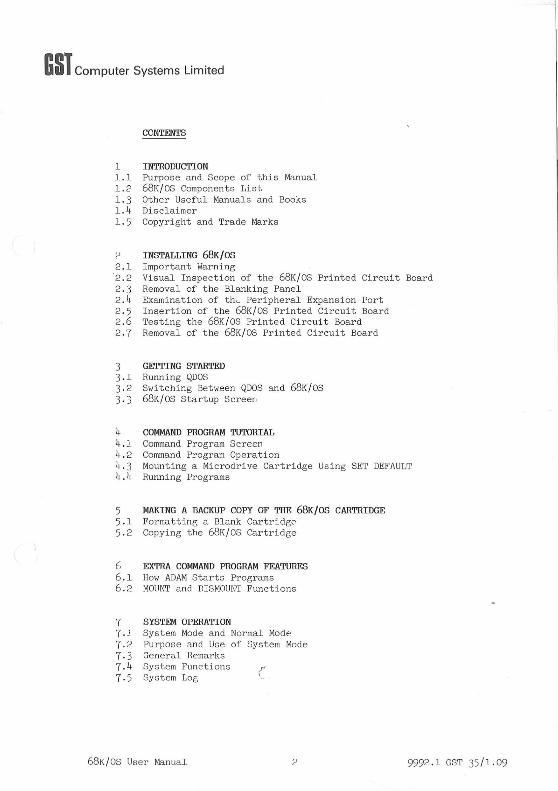
CONTENTS
1 INTRODUCTION 1.1 Purpose and Scope of this Manual 1.2 68K /OS Components List 1.3 Other Useful Manuals and Books 1. 4 Disclaimer 1.5 Copyright and Trade Marks
" INSTALLING 68K/OS 2 .1 Important Warning
'2 . 2 Visual Inspection of the 68K/OS Printed Circuit Board 2 .3 Removal of the Blanking Panel 2 .4 Examination of th~ Peripheral Expansion Port 2 . 5 Insertion of t he 68K /OS Printed Circuit Board 2 .6 Testing the 68K /OS Printed Circuit Board 2 .7 Removal of the 68K/OS Printed Circuit Board
3 GETTING STARTED 3.1 Running QDOS 3.2 Switching Between QDOS and 68K/OS 3 . 3 68K/OS Startup Screen
4 COMMAND PROGRAM TUTORIAL 4.1 Command Program Screen 4.2 Command Program Operation 4.3 Mounting a Microdrive Cartridge Using SET DEFAULT 4.4 Running Programs
5 5·1 5 · 2
f, 6 . 1 6.2
7 7 . .! 7.2 7 · 3 7 . 4 7.)
MAKING A BACKUP COPY OF THE 68K/OS CARTRIDGE Formatting a Blank Cartridge Copying the 68K/OS Cartridge
EXTRA COMMAND PROGRAM FEATURES How ADAM Starts Programs MOUNT and DISMOUNT Functions
SYSTEM OPERATION System Mode and Normal Mode Purpose and Use of System Mode Gener&.l Remarks System Functions System Log (
68K/OS User Manual 9992.1 GST 35/1.09
GST Computer Systems Limited
8 PATH NAMES 8.1 General 8 . 2 Syntax 8.3 Path Name Defaults 8.4 Wild Cards
9 DEVICES 9.1 Devices Available 9 . 2 Keyboard Driver 9 . 3 Screen Driver 9.4 Microdrive Filing System 9.5 RS232 Output Driver 9 . 6 RS232 Input Driver 9 .7 Pipe Driver 9 .8 ROM Driver 9.9 Loadable Device Drivers
10 THE MENU HANDLER
APPENDIX UTILITY PROGRAMS A.l BAUD - set serial line speeds A.2 COLOUR - print copy of screen (in colour) P, . 3 COpy - copy files A.4 DELETE - delete files P. . 5 DRAW - draw pictures A.6 DUMP - print copy of screen (monochrome) P..7 EDIT - the text editor A.S FORMAT - prepare a cartridge A.9 IOSSMENU - low level I/O interface A.10 MEMMAP - display state of memory A.ll CRLF - filter a file for an ASCII printer A.12 RENAME - rename a file A.13 SLIDES - produce a slide show A.14 SPACE - report on microdrive file space A. l) TIME - set date and time
68K/ OS User Manua l 3 9992.1 GST '~ / 1 . 09
GST Computer Systems Limited Introduction
1 INTRODUCTION
1. 1 Purpose and Scope of this Manual
The bBK / OS User Manual provides an easy-to-use introduction to the i nstallation and operation of the 6BK/OS ope r ating system and its utility programs on the Sinclair QL. I t tells you :
,. how to install 6BK/OS in your Sinclair QL
* how to make a backup copy of t he 6BK / OS microdrive
\ ,. how to operate the system
* how to load and run 6BK / OS programs
* how to operate the 6BK/ OS utility programs
* useful tips and warnings
This manual does not tell you how to write programs for 6BK / OS, in particular :
* how to write M6Booo programs
,. how to use the 6BK / ASM assembler
* how to call 6BK/OS system routines
These topics are described in detail in other manuals and publications which are either i.ncluded with 68K / OS or available separ ately from GST (see paragraph 1.3).
1.2 68K/OS Components List
Your 6BK/OS kit is supplied with the following components:
a printed circuit board cont aining two 68K/OS EPROMs and two spare EPROM sockets . This plugs into your QL and allows you t.o switch between QDOS and 68K/ OS by operating t.he on-board switch.
a microdri ve cartridge containing the 68K/OS utility programs and demonstration software.
* an A5 ring binder containing :
a 6BK/OS User Manual a 68K/ OS Programmer's Reference Manual a 68K / OS licence form g1v1ng your 6BK/OS seri al number a 68K / OS products order form
Please check your kit carefully to ensure t.hat all your components are present. Sto r e your licencE' form in a safe placE' because the serial number must be quoted in WJ. correspondence with GST.
68K/OS User Manual 4 9992.1 GST 35 / 1 .09
GSI Computer Systems Limited Introduction
1 . 3 Other Useful Manuals and Books
The manuals included in the ring binder w'ith your 68K/ OS kit are:
9992.1 GST 13 9992.1 GST 35
68K/OS Programmer's Reference Manual 68K/OS User Manual
For details of the 68K/ ASM assembler you will need a separate manual supplied with t he 68K / OS a.ssembler software:
8290.6 GST 68 68K/ASM Assembler User Manual
For full details of the Motorola M68000 series processor architecture and i nstruction set we recommend the offic ial Motorola. handbook:
M68oooUM(AD4 ) M68000 Programmer's Reference Manual (Motorola )
An excellent programming primer (which also gives details of t he M68000 archi tecture a.nd in s truction set), sui table for the inexperienced assembler programmer and also valuable for experienced programmers who have r.ot used the M68000 before, is :
Addison-Wesley Programming the M68000 (Tim King and Brian Knight)
For the experienced M68000 programmer, detail s of advanced 68K/OS systems programming including internal dat8. structures, systenl traps and int er-program communication, are given i.n:
9992.1 Gs'r 54 . Systems Programmer's Reference Manual
All these manuals and books are available from GST by mail order.
1. ~ Disclaimer
Under no circumstances will GST Computer Systems Limited be liable for any di.rect , indirect , incidental or con se quential damage or los s Including but not limited to loss of use, s tored data , profit or contracts which may arise from an.' error, defect or failu r e of 68K/ OS hardware or software either during installation or eperation .
CST Computer Systems Limited has a policy of constant development and improvement of their products. We reserve the right to change manuals, hardwa r e, software and firmwa r e at. any time a nd without notice.
] . 5 Copyright and Trade Marks
The 68K / OS 0perat.ing system software held in EPROM and on microdrive cartridge, together with the 68K /OS User Manual and 68K/ OS Programmer 's Reference Manual are Copyright © 1984, GST Computer Systems Limited.
68K / OS and 68K / ASM are trade marks of GST Computer Systems Limited .
QL , QDOS and Microdrive are trade marks of Sinclair Research Limited .
68K /OS User Manual 9992 . 1 GST 35/1 . 09
GST Computer Systems Limited Installing 68K/ OS
2 INSTALLING 68K/OS
2. 1 Important Warning
Please read this entire section through carefully before installation and always ensure that the QI. is disconriected from mains power s upply "he n installing or removing the 68K/OS printed circuit board.
Your QL and the 68K/OS printed circuit board are electronic devices which must be handled with care a t all times . A clumsy or cavali er approach to installation is likely to prove expensive.
2.2 Visual Inspection of the 68K/OS Printed Circuit Board
After unpacking you r 68K /OS kit you should check foy' any obvious physical damage to the printed circuit board that may have occurred in tra ns it. If you suspect that the board is damaged, have it checke d by your retailer (or GST if you purchased by mail order). Under no circumstances should you a ttempt to i nstall it in your QL.
2 .3 Removal of the Blanking Panel
'['he 68K/OS printed circuit board is mounted i n the peripheral expansion port on the l eft hand side of the QL as viewed from the normal typing position. Before inserting the print ed circuit board, the plastic blanking panel that prot ects the expansion port must. be removed.
There is a small tab at the top of the blanking panel (which lies directly underneath the protruding lip of the keyboard), this shoula be pulled outwards' from the QL to remove the panel.
If the blanking panel proves stubborn to remove , you should carefully lever it off using a thin blade such as a. penknife or screwdriver.
2.4 Examination of the Peripheral Expansion Port
After removing the blanking panel, examine the 64-way male connector ins ide t he QL peripheral expans i on slot to ensure that none of t he pins are mi ss ing or bent . If you discove r any bent or missing pins then your QL will have t.o be repairec. before you can plug a ny device into the peripheral expansion port.
Examine the right-angled metal plate that extends from the base of the keyboard inside the QL tc the inner front of the machine , together with the plastic card guides moulded on both s i des of the inner base of the machine just. i ns ide the expansion port.. These will guide the print~d
circuit board into position.
68K /OS User Manual 6 9992 .1 GST 35 /1.09
GSI Computer Systems Limited Installing 68K/OS
2.5 Insertion of the 68K/OS Printed Circuit Board
Hold the 68K/OS printed circuit board in your left hand with the EPROM chips on the upper surface and the 64-way female connector pointing towards the peripheral expansion port.
Holding the QL wit h your right. hand, carefully slide the board into the QL using the card guides , ensuring that the board remains parallel to the base ·of the QL, until you feel some resistence and the flat section of the black handle stands proud from the edge of the keyboard by between 3mm and 5mm.
The board may be a tight fit because of the front guide. If the board is very difficult to insert, check that it is correctly l ocated in the board guides and that the metal plate of the front guide all ows the board to slide freely.
When the board is almost fully inserted, you may need to ease the board from side to side or up and down very slightly in order to mate correctly with the. internai connector (you ,;ill feel when the two connectors are aligned) . Apply steady but. firm pressure to the handle and the board should mate with t he connector inside the QL, pushing in a further 3mm to 5mm, with the flat section of the handl e now flush with t.he keyboard edge .
2.6 Testing the 68K/OS Printed Circuit Board
Between the black plastic handle on the board and the. front of the QL is a three-position switch that protrudes from the board: select the switch position closest to the handle. Plug the QL into your monitor or television and the mains power supply and switch on. The QL should power-up into QOOS as usual.
Now select each of the r emaining switch positions in turn (this may be done safely with the power connected) and press the QL reset button a'. the right of the machine. In t.he central switch position the QL should reset. into QDOS, but in thE· position closest to the front of the of the machine the QL should reset into 68K/OS .
If the machine does not. behave as described above (and in particular if t.he QL sound channel is ac tivated), switch off mains power, remove the 68K/OS card and switch mains power on again to ensure that the QL is functioning correctly. I f it is, switch mains power off once more and repeat the installation procedure frou. the beginning.
If, after two attempts, your 68K/OS card does not function as described above and you are certain that you have follow ed these instructions correctly and that the board was correctly inserted, you s hould consult your retailer (or GS1' if you purchased by maiJ. order).
68K/OS User Manual 9992 .1 GST 35 /1 . 09
GST Computer Systems Limited Installing 68K/OS
2.1 Removal of t he 68K/OS Printed Circuit Board
Once 68K/OS is installed there should be no need to remove the board from your QL unless you wish to install extra EPROM chips in the spare sockets provided.
To remove the board, first ensure mains power is switched off. Select the switch position nearest the front of the QL, hold the QL with your right hand, hold the board handle between thumb and forefinger of your left hand and pull firmly. Do not be surprised if the handle bends during this process: this is normal and it will resume its correct shape once the board is removed.
68K/OS User Manual 8 9992 .1 CST 35/1 .09
GSI Computer Systems Limited Gett ing Started
3 GETTING STARTED
3.1 Running QDOS
With the the on-board switch in the QDOS positions, the QL will power up and reset into QDOS. In this mode , the 68K/ OS printed circuit has no effect on QDOS operation, so your QL will oper ate exactly as before.
3.2 Switching Between QDOS and 68K/OS
You may operate the on-board switch a t any time, even when you have programs running. The next time you press reset, the QL will start up according t o the switch position.
Remember to remove your cartridges from the microdrives before pressing reset because the QI, hardware may write on t hem. Note also that QDOS and 68K/OS microdrive formats a.re not compatible.
3.3 68K/OS Startup Screen
After starting 68K / OS , the QL will di splay a red screen Kith a white border with e ight lines of information, indicating the following:
(a) The 68K/OS l ogo
(b) The GST software revis ion number (second l i ne, to the l eft )
(c) Your serial number ( second l ine , to the right)
(d ) Screen mode choices , these are:
Fl - Four colours ] 85 characters across (monitor) F2 - Four col ours, 80 characters across (TV or monitor) F3 - Four colours, 60 characters across (TV) F4 - Eight colours , 42 characters across (monitor) F5 - Eight colours, 40 characters across (TV)
(e ) GST copyright notice
Experiment wi th the screen modes, pressing the reset button on the right hand edge of the QL as necessary, until you find one that s uits the monitor or television that you are using.
Note that the utility and applications programs supplied with 68K / OS will work with a ny screen mode , but are designed to work bes t with a screen width of at l east 80 characters (Fl or F2). In particula r , the 68K/OS command program ADAM will displ ay two directories at t he same time only if there i s a. screen width of at least 80 characters.
Note also that the single-line menu whic h is B.t the bottom of the screer. during 68K/OS operation is always truncated to the screen width .
68K /OS User Manual 9 9992.1 GST 35 /1 .09
GSI Computer Systems Limited Command Program Tutorial
4 COMMAND PROGRAM TUTORIAL
4.1 Command Program Screen
After- sel ecting your screen mode with one of the function keys, 68K/OS will start the main command program which i s called ADAM and is held in ROM. (The description below assumes that you have sel ected screen mode Fl or F2 from the initial red screen. If you have selected some other mode then ADAM will only display a single directory on the screen and you must use F3 to switch directory displays.)
The screen i.s divided into number of different areas. Some of these belong to ADAM , which i s a menu-driven command program, and some of them belong the the operating system and are used to control the system.
The operating system areas are:
(a) At the bottom right-hand corner of the screen there are some red dots displaying a binary count (this may not be visibl e on a TV). When 68K/OS is idle it adds one to the count represented by these dots , which therefore give you some indication of how busy the QL is. If the dots stop moving the QL is either fully loaded or it has crashed.
(b) The bott om line of the s c reen contains B. single line menu (which indica tes the actions currently assigned to the function keys) and is either displ ayed in green a nd white (in which case it relates to the currently selected program: ADAM at the moment) or in red and white, in which case the keyboard is in ' system mode' and is communicating di rectly with the operating system.
The rest of the screen belongs to ADAM and is divided into four windows as follows:
(c) The t.op window is four lines deep and contains a multi-field menu which displays:
a green function field a white command line >lith a red flashing cursor a gr een status field a black blank line a white and red heading line a white and red blank line
(d) The wh i te log window occupies th e lower left of the screen &nd displays status codes and results passed back from programs when they finish .
(e) Two scrollable red directory windows occupy the lower right of the screen . These display the contents of the current default program and data directories (which default to t.he ROM : device when 68K/OS is started up). .
Note that the colours of the heading fields in the menu "'indow line up with the log and directory windows .
68K/OS User Manual ]0 9992. 1 CST 35 /1 .09
GST Computer Systems Limited Command Program Tutorial
4.2 Command Program Operation
The green field in the top left hand corner tells you what ADAM will do with any command line you type. Press F2 a few times to see what the options are, then press Fl to return to the RUN PROGRAM option.
The white field with the red flashing cursor is the command line. Try typing something. (You "'ill find that the fie l d is actually slightly shorter than i t looks .) You can delete indi vidual characters with the either the CURSOR LEFT key or CTRL+CURSOR LEFT. The entire command line can be deleted wi th the combinati on ALT+CTRL+CURSOR LEFT.
The green field in the top right hand corner gives a status code which indicates the resul t of the last thing you tried to do (normally a status code of zero indicates success). Try typing various t.hi ngs and pressing ENTER. Depending on what you typed various hexadecimal status codes are displayed in the status field. This is not very friendly but will improve once ADAM has found the system error message file ERRMSG.PROC on t.he supplied microdri ve cartridge .
The white window headed 'Log ' displays a. list of all t he programs that you have run and their status on completion . To illustrate thi s, try the following:
(a) Ensure the selected option is still RUN PROGRAM, type Fl if not. Then clear the command line if necessary using CURSOR LEFT.
(b) Type ADAM (or adam) followed by ENTER. This will start a second copy of the c;ommand program.
(c) Type the key combinations ALT+Fl followed by SHIFT+F5 · This will abort the second ADAM . Then type ESC to get out of system mode.
(d) Type F4 to update the ' Log' field. You "'ill see that ADAM terminated with status code 26, indicating that it was terminated from the keyboard or by another program. The status codes will be replaced by sensible messages when ADAM has loaded ERRMSG.PROC.
The red windows contain t.wo listings of file directories where programs will l ook for program and data files:
(e) The "indow headed 'Prog' holds the default program directory where programs will usually look for program files .
(f) The window headed 'Data' holds the default data directory where programs will usually look for data files .
At s tartup you have r.o microdrive t.apes ~ounted, and both directory listings are, by default, listings of th~ ROM : device which c ontains t.he single file ADAM.
You will notice & white cursor in the Prog directory . You can move this between the Prog directory and the Data directory by pressing F3. You can also move this cursor up and down either listing with the CURSOR UP and CURSOr' DOWN keys , but this is not useful until you have mounted a directory with more than 0ne file in it .
68K /OS User Manual 11 9992.1 GST 35 / 1 .09
GSI Computer Systems Limited Command Program Tutorial
4.3 Mount ing a Microdrive Cartridge Using SET DEFAULT
68K/OS handles microdrives very efficiently, but one of the costs of this efficiency is the requirement that all microdrive cartridges must be mounted prior to use.
ADAM contains a MOUNT function (you will have seen this when trying out the F2 key earlier) but it is rarely necessary to use this explicitly. Cartridges are normally mounted as an- automatic by-product of setting the program or data default, as follows:
(a) Take the cartridge labelled 68K/OS and place it in either microdrive (the left-hand drive is unit 0 and the right hand drive is unit 1). If you choose drive 0 the copying operations will be much faster.
(b) Press F2 until the option SET DEFAULT is selected.
(c) Press F3 until the white cursor is in the Prog directory listing: you are going to select the tape as the default program directory.
(d) If the command line contains any characters delete them by holding down the CURSOR LEFT key .
(e) Type MD: (or rr.d:) followed by the ENTER key. This specifies that you wish to set the program default directory to a microdrive device . As you have not specified a cartridge name ADAM assumes that you want to mount the tape at the same time, and will ask you which drive the tape is on by creating a UNIT NO? field.
(f) Type 0 or 1 as appropriate in answer to the question, followed by ENTER. The cartridge will now be read for up to 8 seconds, after which the Prog directory display should change to show that the directory name is now MD :OS/ (instead of ROM : ) and the contents of the tape should be listed. If the status code returned from this operation is non-zero and the directory list doe s not change, repeat the operation carefully after re-inser ting the cartridge. If you still have problems contact your retailer (or CST if you purchased by mail order).
(g) The cartridge is now mounted and selected as t.he default program directory and is called MD:OS/ which is made up of the device name MD: for microdrives and the directory name OS / for the individual cartridge. Fron now on (on the rare occasions when you quote the cartridge name) use MD :OS/, not the drive number.
The white cursor can be moved up and down the directory listing wit h the CURSOR UP and CURSOR DOVIN keys, the directory listing scrolling through its window if necessary.
One of the files in t.he list is ERRMSC . PROC which contains system messages. ADAM has already loaded this file into RAM (which explains t.he extra micro drive ac tivity after displaying the directory) and it will stay there until the QL is reset or 68K/OS is rebooted.
68K/OS User Manual 12 9992 . 1 CST 35 / 1 .09
GST Com puter Systems Limited Command Program Tutorial
4.4 Running Programs
The main purpose of ADAM is to start other 68K/OS programs. As an example, run the program DATE.PROG as follows:
(a) Press Fl to return to the RUN PROGRAM function and then delete the current contents of the command line using the CURSOR LEFT key.
(b) Move the white cursor up and down the Prog directory listing using the CURSOR UP and CURSOR DOWN keys until it is adjacent to the filename DATE.PROG and then pres s ESC which copies the filename to the command line . Pressing ENTER will now load the program DATE.PROG from the tape and run it.
The DATE program opens a window at the bottom of the screen a nd will first prompt you for the date and then the time (in 24 hour format). Answer each prompt as specified followed by ENTER. The program now loads the procedure CLOCK.PROC from the cartridge which displays a digital clock in place of the red binary count in the bottom right hand corner of the screen. After a few seconds the DATE program will finish but the clock display will remain. Press F4 to update the Log window.
68K /OS User Manual 9992.1 GST 35 /1 .09
GST Computer Systems Limited Making A Backup Copy
5 MAKING A BACKUP COPY OF THE 68K/OS CARTRIDGE
5.1 Formatting a Blank Cartridge
It is essential to make a backup copy of the 68K/OS microdrive cartridge before using the system in earnest. To do this you will need first to format a blank cartridge. GST do not supply blank cartridges and these must be obtained from your retailer or direct from Sinclair. Alternatively use one of the cartridges originally supplied with your QL if it contains no useful data.
Ensure you are in RUN PROGRAM mode and that the command line is clear. The either type FORMAT.PROG or copy the filename from the directory list using ESC. Place a blank cartridge in the microdrive which is currently not in use and answer all the questions asked by FORMAT, which is designed to be self-explanatory. If you get the unit number wrong don't panic because FORMAT will not let you destroy OS/ or any other cartridge (including those written in QDOS and Spectrum formats) without asking you whether you really mean it.
FORMAT will ask you for a name for your cartridge. You may call it anything you like (except OS/): SYS/ would be a reasonable name.
If the FORMAT fails completely this could be because the cartridge was incorrectly inserted into the microdrive. Take it out, reinsert it and try again. For hardware reasons, Sinclair recommend that each new cartridge is formatted at least twice before being used.
After you have formatted your cartridge, set it to the default data directory by using F3 followed by the SET DEFAULT function. You will notice that the directory display will change to show the the directory name (SYS/ or whatever you called it) followed by an empty file list.
5.2 Copying the 68K/OS Cartridge
To make a backup copy of your OS/ directory cartridge you must run the program COpy from the directory OS/ as follows:
(a) Select RUN PROGRAM by means of the Fl key.
(b) Ensure that the command line is empty.
(c) Type COPY.PROG OS/".* SYS/ followed by the ENTER key.
This should copy all the files, one by one, from OS/ to SYS/ and output a message for each file copied. If you have any write errors, reformat your new cartridge or a different cartridge and try again. If you encounter persistent read errors, contact your retailer (or GST if "you purchased by mail order).
When COPY has finished, use F3 to switch to directory MD:SYS/ (or whatever you called it) and press F4 to update the directory listing.
68K/OS User Manual 14 9992.1 GST 35/1.09
GSI Computer Systems Lim ited Extra Command Program Features
6 EXTRA COMMAND PROGRAM FEATURES
6 . 1 How ADAM Starts Programs
If the RUN PROGRAM function is given a complete program pathname in the commanr. line (such as MD:OS/DATE.PROG) then ADAM will search only the device and directory specified for the program. If only the program name i s given (DATE.PROG) then ADAM will first search the default program directory and, if the program is not found, it will then search the default data directory. If, ultimately, ADAM cannot find the program it will display an appropriate message or status code.
Note that it is possible to MOUNT a cartridge without performing a SET DEFAULT function. In this case t he full program pathname must be given to ADAM in order to find the program.
It is possible to pass parameters from ADAM to programs by typing them in the command line after the program name, each separated by a space, the whole line being terminated by ENTER. For example, you could have run the DATE program by typing DATE.PROG 18/10/84 22:55 (or whatever the date and time realy is) followed by ENTER . If the program you run does not expect parameters passed from ADAM, they will be ignored.
When a program starts it will inherit the current default directories from its parent (which is usually ADAM). It is usual to mount a cartridge containing programs as the default program directory and a second cartridge containing data files as the default data directory. Note, however, that is quite all right to have a single cartridge that is set as both the program and data default directories.
6 . 2 MOUNT and DISMOUNT Functions
ADAM provides facilities to mount micrdrive cartridges without setting either the program or data default. , The MOUNT function operates in exactly the s ame way as SET DEFAULT except that neither of the red directory windows are updated and the directory name is written into the command line by ADAM for confirmation .
Once a directory is mounted you can use the SET DEFAULT function without reading the cartridge again by typing the directory name (such as OS/) instead of MD: followed by the drive number.
When addressing files on e. cartridge that has been mounted with MOUNT but not selected as a default, you must. include the cartridge name in the pathname, otherwise ADAM will assume one of t .he default directories.
The DISMOUNT function requires a directory name to be typed in t.he command line. You will rarely need to use this function because SET DEFAULT and MOUNT automatically dismount directories when you change the cartridge in a microdrive. Note also that forgetting to dismount a cartridge before it is removed from the drive is harmless and will not by itself cause data loss . 11; is possible to lose data by removing a cartridge while a program has files open on it, but attempting to DISMOUNT a cartridge with open files will result in an error message. So if you are in doubt it i s a good idea t.o DISMOUNT a cartridge before removing it.
68KjOS User Manual ]5 9992.1 CST 35/1.09
GSI Computer Systems Limited System Operation
7 SYSTEM OPERATION
7.1 System Mode and Normal Mode
The key combination ALT+Fl switches the keyboard into "system mode" in which all keystrokes are processed directly by the operating system rather than by any particular program. When the system is in this mode a special single-line menu is displayed at the bottom of the screen and every keystroke causes a "bleep" to sound . The ESC key switches the keyboard out of system mode.
7.2 Purpose and Use of System Mode
System mode is used when more than one program is running to control:
(a) the way in which screen space is divided between the running programs
(b) which program receives keyboard input.
Note that onl y one program will have a flashing cursor at any given moment and that normal keyboard input is directed according to the posi tion of the flashing cursor. The partition of the screen containing the flashing cursor is referred to as the "current partition" and of course corresponds to the program which is to receive normal keystrokes.
System mode is also used to suspend, restart or kill individual · programs or to re-boot the entire system.
7.3 General remarks
The next section (on [~ystem functions) is a more or less formal description of the effects of various keystrokes in system mode; it is provided for reference rather than for instruction . The best way to learn about system mode and what it is for is to experiment with it and the best way to do that is to create several copies of ADAM a nd then to experiment with the effects of various keys in system mode.
When experimenting in this way it is B.S well to bear in mind the following few points:
(a) In normal mode a suspended program has its usual one-line menu at the bottom of the screen replaced by the word "SUSPENDED !" .
(b) When you kill a program all its children (and their children etc.) die too.
(c) If you try to kill the original ADAM then nothing will happen.
(d) If you restart the sys tem by means of SHIFT+Fl, you do not have to remove any microdrive cartridges there may be in the machine .
( e ) When you press the SHIFT key, the single-line menu changes: this is rmly possible in "ystem mode - no user program can ever detect the SHIFT key alone.
68K j OS User Manual J6 9992.1 CST 35/1.09
GSI Computer Systems Limited System Operation
7.4 Syst em Functions
In system mode the following keystrokes and key combinations have the following effects :
SHIFT+FI Re-boot 68K/OS regardless of what programs are running and a l so regardless of the position of the 68K/OS card switch position.
F2 Make the next partition on the screen current .
SHIFT+F2 Make the previous partition current.
F3 Make the current partition grow at the expense of the other partitions. (Note that a partition cannot be made larger than the number of lines claimed by the program to which it corresponds; nor can it be made any larger when every other partition has been reduced to one line.)
SHIFT+F3 Make the current partition shrink. (Note that no partition can be made sma ller than one line. Any extra screen space freed by shrinking a partition is evenly shared between the other partitions.)
F4 Suspend the activity of the program which owns the current parti tion. (This may be used to enable other programs to get a better share of the system resources.)
SHIFT+F4 Restart a previously suspended program.
SHIFT+F5 Kill the program which owns t.he current partition. Its screen space is shared amongst the other partitions and the parti tion corresponding to the parent of the killed program b ec ome s active. Note that if the killed program has any descendants then these will be killed too and their resources (such as screen space) recycled in the usual way.
Cursor In system mode the cursor up a nd down keys may be used to perform "meta-scrolling". I.e. the current partition can be used to look at various parts of its owning program's virtual screen which would otherwise be hidden as a result of the way in "hich the screen E;pace is divided between programs . This is the only means by which the current partition's active cursor may cease to be visible: as soon as s.ny normal input takes place at the active cursor position, the partition will meta-scroll again in order to display that cursor.
ESC Switch out of system mode and send subsequent keystrokes (except ALT+Fl) to t.he program owning the current partition.
Anything else will cause a bleep but will otherwise be ignored .
7.5 System Log
F4 (not in f.ystem mode) updates the system log in the left hand side of ADAM's screen . When ADAM has loaded ERRMSG .PROC , messages appear there rather than hexadecimal status codes. See 4. 2 above.
68K /OS User Manual 9992.1 GST 35 /1.09
GSI Computer Systems Limited Path Names
8 PATH NAMES
8 .1 General
All 68K /OS devices and files are referred to by a path name whose general form is:
device:directory/name.extension
An example of such a path name is "MD: SYS /COPY.PROG".
A system of defaults ensures that in most cases only "name .extension" or "device: " needs to be t yped by the user.
8.2 Syntax
Each component of a path name:
device, directory, name , extension
has the same syntax . A component obeys the following rules:
(a ) it i s between 1 and 8 inclusive char acters l ong
(b) allowed characters are letters and digits
(c ) letters may be in upper or lower case and case is not significant
All components of a path name are optional depending on circumstances:
device
directory
name
extension
68K/OS User Manual
i s optional at all times and a user -supplied default (see below ) is used
may be omitted if:
(a ) the devi ce is omitted, in which case a user s uppli ed default (see below ) is used
(b) the devi ce does not support the directory component
may be omitted if the device does not support the name component or if an operation on a directory is being performed; if the name is omitted the n no extension component is permitted
i s optional at all time s (and not allowe d in s om e cases ) ; if the extension is omitted and t hen name is present the separating period (.) may optionally be present.
J8 9992 .1 GST 35 /1 .09
GSI Computer Systems Limited Path Names
8.3 Path Name Defaults
The two dif'ferent sets of default strings are provided so that programs can be loaded from one microdrive and data files can be accessed on another microdrive with no device or directory names needing to be specified by the user.
The "SET DEFAULT" option in ADAM will set either the default program device and directory or the default · data device and directory, depending on which is the current default as indicated by the white cursor. The string supplied by the user is combined with the previous default to make the new default: for example if the previous default is MD:GST/ and the user resets the default to NEWTAPE/ then the previous default device (MD:) will be preserved and the new default will be MD:NEWTAPE/ .
When a new program is started it i nherits the defaults belonging to the parent program. Thus for example any applications program running under ADAM will have the defaults that ADAM had when the program was started, and changing ADAM ' s defaults later will not affect the applications program's defaults.
8.4 Wild Cards
Some applications programs in some circumstances will accept path names that differ from the normal path name syntax in that question mark characters (?) may be included in the name and extension components . During a directory search a question mark matches any character, or a question mark at the end of a component can match no character. For example:
"name??extension " matches "name99.extension " or "name2.extension"
"???????????????? " matches any file name
U????????document" matches any file whose extension is "document "
"f?f " matches "flf'l , "fzf" and "fff"
In addition when question marks are allowed the last character of each of the name and extension components can be an asterisk (*) which has the same meaning as enough question marks to extend the component to eight characters. For example:
IIf* " has the same effect as "f???????"
"* . *" has the same effect as "????????????????"
"bill* . *" has the same effect as "bill???????????? "
68K/OS User Manual 19 9992.1 GST 35/1 . 09
GST Computer Systems Limited Devices
9 DEVICES
9.1 Devices available
This section lists the devices implemented in 68K/OS for the QL.
It gives a rough outline of the properties of each device. In order to write programs to drive these devices a little more information is needed and this can be found in the ·68K/OS Programmer ' s Reference Manual.
In general 68K/OS uses device independent interfaces throughout , so anything that you can do to one device or file car, be done to another. For example the COPY program can copy to and from microdrive fi l es, to and from pipes , to and from RS232 lines, from the keyboard and to the screen. Some programs are more restrictive in that ·they require random (rather than sequential) access to some of their files: the assembler for example can take its source input from a mixture of keyboard, RS232 lines and pipes, and can write its listing output to the screen 0r an PS232 line in addition to files, but must have a microdrive file for its binary output as this is a random access fi le.
Devices differ in their requirements for pa th name components, the full path names for each standard device are defined below:
(a) KEY: the keyboard
(b) SCREEN: sequential screen output
(c) MD: DIRECTORY/FILENAME. EXTENSION microdrive files
(d) PIPE : FILENAME. EXTENSION pipes
(e) TX1: RS232 transmit line one
(f) TX2 : R;,232 trn8.smit J tne two
(g) RX1: Ho;?3? rr. r; r.i vc 1 inc one
(h) RX2: [1;:; 232 r ccc.ive l ine two
(i) ROM : FILENAME. EXTENSION ROM program storage
68K/OS User Manual 20 9992.1 GST 35 /1. 09
GST Computer Systems Limited Devices
9.2 Keyboard driver
Device name
KEY:
Allowed operations
Directory operations: no Reading: yes Writing: no Random access: no
Any number of programs may open any number of channels to the keyboard simultaneously. Keystrokes are directed by the system to the current program as selected by the user with system mode commands (described in 7.2 above) .
Programs can r ead the keyboard in two ways: character by character. Most of the utility most channels which can usefully be connected line by line mode (except when a more powerful as the menu manager, i s being used).
either line by line or programs supplied read to the keyboard in the piece of software, such
Reading the keyboard character by character causes the keystrokes to be read by the user program exactly as they are typed (except of course for system mode commands). The keystrokes are not reflected anywhere on the screen so the user can't see what he is typing . unless the program does something about it itself.
Reading the keyboard line by line causes the keystrokes typed to be reflected on the screen, and some line-imaging commands are available.
The follo wing keystrokes a r e acted on as described, all others being ignored (Le . not copied to t.he user ' s buffer and not displayed on t.he nc r een) :
(a) Di s playable Characters (ASCII Values hex 20 to hex 7F)
All di s playable c haracters are reflected on the screen and are copied to the user 's buffer.
(b) ENTER
Th e ENTER key terminates the line of input, placing the end-ofline character in the user's buffer. The cursor moves down to the beginning of the next line on the screen .
(c) Delete Character Left (CTRL+cursor left)
The delete character left keystroke deletes t.he character to the left of the cursor and moves the cursor left one position on the screen. If all characters entered by the user so far on thi s line have already been deleted then the delete character left keystroke has no effect.
68K/OS User Manual 9992.1 GST 35 /1. 09
GST Computer Systems Limited Devices
(d) Move Cursor Left (cursor left)
The left arrow key on its own will also delete the last character in the same way as CTRL+cursor left: this is just to save the user having to hold down the CTRL key.
(e ) Delete Line (ALT+CTRL+cursor left)
The delete line keystroke deletes all the characters entered so far on this line .
(f) End of File (CTRL+Z)
The end of file keystroke terminates the line being read (without the insertion of an end- of-line character) and returns an end of file condition to the applications program; some programs ignore this, some use it to terminate the input file from the keyboard, and somy programs will stop completely.
9 . 3 Screen driver
Device name
SCREEN:
Allowed operations
Directory operations: no Reading: no Wri ting: yes Random access: no
The SCREEN: device driver provides an interface to the screen for programs which only wish to use the screen as a simple sequential output device and which do not wish to drive "he display file manager explici tly.
Output to this device driver will appear in the co nsole display file window. If the program has not explicitly created such a window then the opening a channel to SCREEN: will create one . Multiple output channels to SCREEN: will by default appear mixed in the same window, in exactly the same way as if a teletype or conventional VDU were the output device, but the program can if it wishe s direct different SCREEN : channel s to different windows.
The SCREEN: device provides a device-independent sequential outRut channel so that a program may write to a sequential output channel without knowing whether the output is to screen, printer or file.
68K / OS User Manual 22 9992 .1 GST 35 /1 .09
GSI Computer Systems Limited Devices
9.4 Microdrive filing system
Device name
MD:
The full path name:
MD: tapename/filename. extension
may be used with the microdrive filing system.
Allowed operations
Directory operations: yes Reading: yes Writing: yes Random access: yes
Before a tape can be used it must be mounted; when it is finished with it may be dismounted before it is removed from the microdrive.
You will normally only run into problems with mounting and dismounting if you try to move a tape from one drive to the other without dismounting it from the first drive, or if you try to mount two tapes with the same name at the same time.
9.5 RS232 Output Driver
Device name
TX1: TX2:
Allowed operations
(socket marked SER1) (socket marked SER2)
Directory operations: no Reading: no Writing: yes Random access: no
There are two RS232 output drivers, one for each line (although they are identical in operation apart from which line they drive).
By default the line speed is 9600 baud. BAUD. FROG - see appendix.
68K/ OS User Manual 23
It may be changed with
9992.1 GST 35/1.09
GSI Computer Systems Limited
9.6 RS232 Input Driver
Device name
RX1: RX2:
Allowed operations
(socket marked SER1) (socket marked SER2)
Directory operations: no Reading : yes Writing: no Random access: no
There is one RS232 input driver for each line.
Devices
There is no safe way to detect "break" signals. However, a break condition on the line will usually give rise to a "hard error" status code, and will usually do so without generating any spurious characters first or losing any characters correctly received before the break.
There is . no way to detect end-of-file signals as all possible received characters are legal byte values. If a file transfer protocol is to be implemented for 8, specific application then a special program must be written to do this.
By default the line speed is 9600 baud. BAUD.PROC - see appendix.
68 K/OS User Manual 24
It may be changed with
9992 .1 CST 35/1.09
GSI Computer Systems Limited Devices
9.7 Pipe Driver
Device name
PIPE:
The file name component mus t be used; the extension component is optional:
PIPE:pipename.extension
Allowed operations
Directory operations: no Reading: yes Wri ting: yes Random access: no
Pipes are the mechanism provided for programs to communicate with each other and synchronise with each other.
Pipes provide an i/o channel from one applications program to another. A pipe is named by giving it a filename, so many pipes may exist in the system a t once.
A pipe is created when it is opened at one end for the first time; this may be the reading end or the writing end. It is deleted when both ends are closed.
The pipe device is fully device-independent in that any sequential input or output channel may be redirected to a pipe simply by quoting a different path name in the normal way.
9.8 ROM Driver
Device name
ROM:
Allowed operations
Directory operations: yes Reading: no Writing: no Random access : no
It is possible to store a number of procedures in ROM and eXecute these either as procedures or as programs. The ROM: device driver exists to allow the available procedures to be queried and loaded.
9.9 Loadable Device Drivers
It is possible to add device drivers t.o the system. This is usually done by running a program which use s special 68K/OS system calls to . install the driver software . If on ntart-up 68K / OS finds any programs in the ROM: directory which have .DRIVER as an extension these are run immediately: by this means drivers may be loaded automatically.
68K/OS User Manual 25 9992.1 GST 35/1 .09
GSI Computer Systems Limited The Menu Handler
10 THE MENU HANDLER
The menu handler is a package within 68K/OS that allows you to communicate with a program in a form-filling manner. The programs supplied that use the menu handler are ADAM, DRAW and IOSSMENU.
A menu consists of one window containing the text of the menu and the fields to be filled in by the user, and optionally one other window from which a line may be copied to fill in a field on the menu.
ADAM in fact contains two such optional secondary windows (the default program directory listing and the default data directory listing), and you can switch between them using the F3 key. This particular feature shows how the basic functions of the menu handler can be easily extended by clever applications programs.
There is one cursor in each window: the one in the main menu window is used for entering data into the user alterable fields, and the one in the second window is used for pointing at items to be selected.
The main menu wi.ndow contains some fixed text, some variable text and some fields which you can modify directly from the keyboard. You can only move the cursor to fields in which you a re allowed to enter data. Fields which you can type over may have default or initial values supplied by the program.
You can enter and correct data in variable fields by means of a subset of the normal editing commands (as used by EDIT).
cursor left and CTRL+cursor left
These two keystrokes are treated identically, in that the character to the left of the cursor position (if any) is deleted, and the cursor moved back into that position. If the cursor is already at the start of the variable field, these keys tokes are ignor~d.
ALT+CTRL+cursor left
Causes t.he current variable field to be cleared. The cursor is placed at the start of the field.
TABULATE
This k.eystroke moves the cursor to the next alterable field. Note that the order of the fields is defined by the program so the "next" field need not be the next one on t.he same line or the first one on t.he next line, although this will usually be the case.
SHIFl'+TABULATE
~'his keystroke moves t.he cursor backwards to the previous alterable field.
68K/OS User Manua l 26 9992 .1 -CST 35/1 . 09
GST Computer Systems Limited The Menu Handler
ENTER
This keystroke causes the menu handler to stop talking to the user and pass the contents of all the variable fields to the applications program which will decide what to do next.
function keys Fl-F5
These are ignored unless the calling program has indicated that they are valid function options for this menu. When valid, they act in the same way as the ENTER key, except that the program will also be told which function key was pressed and can do something different for each function key. The function keys Fl..F5 are also acceptable in combination with SHIFT or CTRL.
cursor up and cursor down
If there is a second window containing a list of options then the cursor in the second window may be moved up or down. Otherwise these keys are ignored.
ESC
If there is a second window containing a list of options then his key causes text from the line contining the cursor in tht window to be copied into the current variable field.
printable cnar,acters
These are appended to the contents of the variable field at the current cursor position, and the cursor is moved one position to the right.
ALT+eursor left and ALT+cursor right
These keystrokes can be useful when you have lost part of your menu off the side of the screen due to horizontal scrolling.
When either of these keystrokes is received, the menu handler will attempt to reposition the menu on the screen such that the start (or end, as appropriate) of the line is displayed in the screen, as well as the current cursor position. Where this is pot possible (e.g. with very long lines) then as much text as possible will be displayed to the left (or right) of the cursor.
68K/OS User Manual 27 9992.1 GST 35/1.09
GSI Computer Systems Limited UTILITY PROGRAMS
APPENDIX UTILITY PROGRAMS
In this appendix are details of the utilities supplied with 68K/ OS.
A.l BAUD
The file BAUD.PROG contains a program to set the line speed for the QL's RS232 lines. The transmit and receive speeds for both ports are set to the same value.
You can either type BAUD.PROG followed by the line speed on ADAM ' s command line or just type BAUD.PROG and wait for the program to prompt you for a line speed .
The permitted line speeds are as follows :
19200 9600 4800 2400 1200
600 300 75
Note that the QL hardware cannot receive at 19200 baud, and that if you want it t o receive at 9600 baud you must. send t he QL at least 1.5 stop bits. At slower ,speeds 1 stop tit is a,dequate.
68K / OS User Manual· 9992.1 GST 35/1 . 09
GST Computer Systems Limited UTILITY PROGRAMS
A.2 COLOUR - print a copy of the screen
The file COLOUR.PROG contains a screen dump program which will print a colour copy of the screen on an Epson JX-80 printer.
Note that the Epson JX-80 still sends you XON and XOFF charcters even when you have set all available switches to use the handshake lines instead, and as this upsets the QL fairly seriously it is necessary to cut jumper J8B on the Epson serial card, or whatever else is necessary if you serial card works differently . If you modify your printer you do so entirely at your own risk and GST Computer Systems Limited do not accept responsibility for any loss, damage or injury.
By default COLOUR will send the screen dump to TX1 : (which then sends it down the wire connected to the socket labelled SER1). You can however send it elsewhere by giving the alternative path name as a parameter on the command line:
COLOUR. PROG TX2 :
COLOUR.PROG FRED
COLOUR.PROG SCREEN:
uses socket SER2 instead
puts it in a microdrive file from where you can copy it to TX1 : or TX2: later
is very silly.
Note that COLOUR is only intended to work properly when the QL is in four-colour mode .
68K/OS User Manua l 9992 .1 GST 35/1.09

GSI Computer Systems Limited UTILITY PROGRAMS
A.3 COpy - copy files
The file COPY.PROG contains a program which copies files around.
You can specify the files to be copied on the co'mmand line. For example:
COPY . PROG myfile.text screen:
will copy the file myfile.text from the default data directory to the COPY program's screen area.
Alternatively you can just say
COPY.PROG
on the command line, in which case the COPY program will ask you for the names of the sources and destinations.
The COPY program will ac cept a source file name containing wild card characters (? and * as described in 8.4 above) and will copy all matching files (in no particular order) . For example:
COPY.PROG * . text md:backup/
will copy all files of type "text" from the current directory to the microdrive cartridge called BACKUP/.
68K/OS User Manua l 30 9992 .1 GST 35/1. 09
GST Computer Systems Limited UTILITY PROGRAMS
A.4 DELETE - delete files
The file DELETE .PROG contains a program that del etes individual files or groups of files.
If you start the DELETE program just by. typing DELETE.PROG in ADAM 's command window then you will be prompted for file names to delete and asked for confirmation just before each one is deleted.
Alternatively you may put one path name in ADAM ' s co mmand line aft er DELETE.PROG. If you also put a Y after that path name the n a.ll files corresponding to that name will b" deleted without further request for confirmation.
E.g. DELETE. FROG *.* Y
deletes all files on the current data default device without further confirmation.
DELETE. FROG GST438/ CAR.PIC
causes DELETE to request confirmation tha t the file CAR.PIC shoul d be deleted from the directory (e.g. microdrive cartridge) called GST4 38/.
68K/OS User Manual 31 9992.1 GST 35/1 .09
GST Computer Systems Limited UTILITY PROGRAMS
A.5 DRAW - draw pict ures
The file DRAW.PROG contains a program which draws pictures on the screen. You may save pictures as you draw them in microdrive files. It is possible to edit pictures using DRAW and the editor, but this is a fairly crude process: DRAW is a toy rather than a computer aided design system .
The program has two main modes: menu ".ode in ,chich you specify what you want to draw and cursor mode in which you specify where you want to draw it.
Don ' t worry about the flashing cursor in the menu field labelled window : you are unlikely to want to use this so don't type anything there yet . Initially DRAW is set to draw black dots on a black background, which is not terribly useful. Pressing F1 selects different shapes to draw, a.nd pressing F2 selects different colours in which to draw them. Apart from the four or eight solid colours DRAy; can deal in stipples formed by mixtures of two of the solid colours. Holding down CTRL or SHIFT when you press F2 selects different stipple colours and patterns; with a little experimentation you will discover how to select a ny particular pattern.
Pressing ENTER will draw the currently selec ted s hape in the currently selected window at the currently selected cursor position( s ) i n the currently selected colour(s). The cefault window setting is t.he entire area. of the black. part. of DRAWs screen; you can set the I-lindo,,' smaller than this .ty changing the x and y start coord i n8.tes and sizes. All these coordinates are in character positions s t;;.r!',in(, at. the top left hand corner c,f the black 8.rea. To move t.he f1n.:;h i nr: cursor from on", menu field to thE next one press th", 'T'AllU f.IIT lI key; to move backl-lar rls press ::;HIFT 8.S I-Iell .
The pos it ion 8t t,/hir~h th in(~:~ :lrr; t o b(: (! rav/n is selected while in cursor mode: r)rA:--';~; F'll tr) F!nt,Ar cur:-.5o yo m()rjc. 'fhe four arrow keys yd .!.! r:Ol-l move the rn8.i.n cur':;c)r (in ;;rl.ite ;;hron th e background is black) around; hol(JintZ AUI' rj(j\o/r! ;),:-; \oJ(:ll will move this c ursor faster. If ttl\' CTRL key i s beld in:;tc").d or",.:; ,'ell a.s the ALT key the secondary cur"or (in red I-Ihen the hack/ZrounrJ i s black : if you can't see it adjus t you r televis ion tuning) I-lill move.
Figures requiring only one position (pixel, paint, fill, text) use th", main cursor position only . The remai ning figures require two pos iti.on" &.nd use the posi ti ons of both cursors .
Vlhil e in curso r mode you can tryout th e figure you wa nt to cI relW _ to see if you tave got the cursors in the right place : pres" ~I. Thi " tri8.1 figure I-lill go away at th E- next keystroke . Vlhen YOll have thE right positions pressing ESC will return you to menu mode ilncl pressing ENTER will draw the figure permanently.
68K/0;; User Manual 32 9992.1 GST 35 / 1.09
GST Computer Systems Limited UTILITY PROGRAMS
The "text" option will draw whatever text you have typed in the appropriate menu field. Remember that you move the cursor between menu fields with the TABULATE key or SHIFT+TABULATE combination (see 4.3 above for more details of the menu r.andler) . (Don't worry if you want a longer string: the menu field is longer than it looks !) Unless you select one of the strange text attributes the background colour used for the text will be the auxiliary col our from the menu which can be selected using F3 and various combinations of control keys as for F2.
"Paint" will fill in the a r ea pointed to by the main cursor up to any boundary. "Fill" will fill up to a border in the auxiliary colour . Note that if the mair. cursor is positioned very near to a col our change for either of these functions then you will get a silly answer as DRAW will think you want it to fill etc. over a stippled background. In general you may obtain rrany st range effects using paint, fill and stippled ink .
Th e file handling facilities are obtained by pressing F5 from menu mode . To illustrate all the file handling facilities:
(a ) Open a log file (Fl ).
(b) Draw a few figures.
(c ) Close the log file (F2 ).
( d) Clear the screen (e.g. draw a large black "block ").
(e ) Read the log file back again (F3 ).
The file s will, as us ual, be looked for or created on the default data directory unless you specify otherwise. We recommend that all picture files end in " .PIC" but no softwa re actually insists on this.
Jf' you cpen L S a log file a file that a lready exists then any more figures you draw will be added to the end of that log file.
rr you rr 'ake a mistake and ,;ant to delete a wrong figure, or change the wording of som~ text, 0 " so meth ine l ik e that, you may EDIT the log file , This is a fni,~y nnsty business a nd we do not give any details he re, but it s houldn ' t take you too long to work out what is going on.
l':xperiment with the file handling until you c.re sure that you und erstand it before expending a large amount of effort in drawing a c:omplicnted picture, and make really sure that you do have a log file open !
The only way to bet rid of the DRAW program is to kill it from system mode .
68K/OS User Manual 33 9992 . 1 GST 35 /1.09
GST Computer Systems Limited UTILITY PROGRAMS
A.6 DUMP - pr int a copy of the screen
The file DUMP .PROG contains a. screen dump program which will print a copy of the screen on an Epson Fx-80 printer or on an Epson JX-80 printer but only i n monochrome .
Note that the Epson Fx-80 still sends you XON and XOFF charcter s even when you have set all available switches to u se the handshake l ines instead, and as this t;psets the QL fairly seriously it is necessary to cut jumper J8B on the Epsor; serial card, or whatever else is necessary i f you serial card works differently . I f you modify your p r inter you do so entirely a t your own risk and GST Compute r Sys t ems Limited do not accept respons ibilit y for any loss, damage or injury.
By default DUMP wilJ send the screen dump to TX1: (which t hen sends it down the wire connected to the socket labelled SER1). You can however send it elsewhere by giving the alternative path name as a parameter on t.he command line :
DUMP.PROG TX2:
DUMP.PROG FRED
DU MP.PROG SCREEN:
68K/OS User Manual
uses socket SER2 instead
puts it in a microdrive file from where you can copy it to TX1: or TX2: later
is very silly .
34 9992.1 GST 35/1.09

GST Computer Systems Limited UTILITY PROGRAMS
A.7 EDIT - the text editor
The file EDIT.PROG contains a text editor.
To edit either an existing or a new file give the command line:
EDIT.PROG file.text
where file .text is the name of the file to be edited . The editor will start up and display a ruler line and the current contents of the file (blank if you are creating a new fi l e).
You Can also edit from an existing file to a. new file: the final result will be that your original file i s unchanged and the newly edited copy is filed with the new name. To do this give the command line:
EDIT.PROG original. text file. text
where "original.text" is the file that you wish to make a copy of and "file. text" is where you want the final result to be stored. (Note that when editing in this way the original fil e can be a device other than a microdri ve file, as the only operation performed on it is sequential reading. It is occasionally useful to edit the output from some other program through a pipe. )
If your command line is just:
EDIT.PROG
then you ;lill be asked for the name of the file to be edited but you will not be able to give a different filename for the destination. If you want to edit from one place to another you must give both filenames on the command line .
All the editor ' s commands are described (directly or indirectly) in the various menus that the menu displays in the one-line menu at the bottom of the screen . You ;lould be ;Iell advised to start with the Fl command which brings up a larger menu g i ving details of the most common functions.
The editor uses up to three files while editing to hold parts of t.he text being edited . If the original file is called "file .text" these temporary files are call ed "file.TOP " , "file.BOTTOM " and "file.TEMP". The only limit to the size of file you can edit is the amount of space available on your tapes.
When you finish editing (with F2 followed by S) the editor will tidy up all the files it has been using. This will leave the newly edited file called "file . text", the previous version of the file (if any) called "file. old" , and will delete any previous version of "file.old". The temporary files ("file.TOP", "file.BOTTOM" a nd "file.TEMP") will also be del eted.
68K / OS User Manual 35 9992.1 GST 35/1.09
GST Computer Systems Limited UTILITY PROGRAMS
The editor tries very hard never to lose data for you. It preserves your original file until the very last moment when it renames it s output file to the correct name, so if it or the whole machine collapses for any reason the original file will be intact.
If the tape becomes full while you are editing the editor will stop and say so . You may use system mode to return to ADAM and delete some files from the tape to make some more space, and then return to the editor a nd continue editing. This will work as long as your file is not too big to edit at all !
Warning. It is not a good idea to attempt to edit any file "hich has any of the follo"ing extensions: . BOTTOM, .OLD, .TEMP or .TOP.
(8K/os User Manual S992.1 GST 35 /1. 09
GST Computer Systems Limited UTILITY PROGRAMS
A.8 FORMAT - prepare a tape
The file FORMAT.PROG contains the program which must be used to format blank microdrive tapes before they can be used with 68K/OS.
The messages produced by the FORMAT program should be adequate to enable you to use the program.
Sinclair recommend for hardware reasons that you format each new tape more than once before using it.
A poor result from an attempt to for mat a tape, such as repeated complete failure, may be due to the tape being incorrectly inserted in the microdrive. Try removing the tape and replacing it a few times before deciding that you have a dead tape or a dead microdrive.
68K/OS User Manual 37 9992.1 GST 35 /1 .09
GST Computer Systems Li mited UTILITY PROGRAMS
A.9 IOSSMENU - l ow level I / O interface
The file IOSSMENU.PROG contains a program which allows the you to access more or less directly the input/output system (lOSS) in 68K/ OS. This program is not useful to a typical personal computer user but is included because:
(a) you may be writing applications programs, in which case IOSSMENU allows you to experiment with the main interface to the operating system
(b) you may be evaluating 68K/OS with a view to using it in a system you are building, in which case you will be interested in the capabilities of the input / output system
(c ) it makes extensi ve use of the menu handling package and is a good example of the use of that package for creating easy and consistent user interfaces.
In order to use· this program you will need to read the 68K / OS Programmer' s Reference Manual, Appendi x A, which defines in detail all the calls to lOSS . What IOSSMENU does is provide a convenient means for you to key in parameters to lOSS calls and view the results.
The various fields in the menu a re usually used for the purposes indicated by the l abels, but some lOSS calls return rat her strange results and these do not all have separate menu fields but are displayed in other fields, usually with an additional label .
Fl controls the value of the program/data indicator that will be passed to those l OSS calls that need one (basically those which requi re a path name). The green asterisk indicates whether program or data defaults will be used.
F2 determines whether read access is required or not and F3 determines whether write access is required or not. Thesf> are used when opening channels (IOOPEN) or modifying directory entries (IOPUTDIR) .
F4 determines whether the access mode required is sequential Or random: this is used when opening channels (IOOPEN).
F5 will switch thf> list of function names on or off. You may want to switch it off if it obscures some of the menu fields . (This will depend on the screen mode you have chosen: note that the menu rearranges itself to some extent to cope with d.ifferent screen widths ,but it can 't always get it completely right.) Shift F5 will terminate the IOSSMENU program.
All numbers required or displayed by IOSSMENU are in ~exadecimal .
Leading zeros may be omitted . If you need to enter a zero value you may leave the entire field blank.
68K/OS User Manual 38 9992 . 1 GST 35/1.09
GST Computer Systems Limited UTILITY PROGRAMS
A brief description follow s of where on the menu the parameters a nd resul ts for each lOSS call are displayed.
IOSETDEF
New default string in path name field. . Fl determines whether program or dat a defaults to be set . Current defaults displayed on screen will be updated.
IOGETDEV, IOGETPRE
Result is displayed in t he path .,ame field. It will be the same as the default displayed a bove .
lOOPEN
Se ttings of Fl, F2, F3, F4 are used. Name of device or file to be opened should be typed in path name field.
Channel number field will be returned .
IOCLOSE
Requires channel number field.
IOLOAD
Requires path name (and Fl sett ing as usual ).
The entrypoin·t and the s ize of RAM needed to run the procedure as a program a r e displayed. The procedure identifier i s displayed.
IOUNLOAD
Requires procedure identifier as returned by an earlier call of IOLOAD or IODEFPRO.
IODELETE
Requ i res path name.
IORENAME
The old name i s supplied in the path name field a nd the new name i s supplied in the buffer field .
68K/OS User Manual 39 9992.1 GST 35/1. 09
GST Computer Systems Limited UTILITY PROGRAMS
IOGRl'DIR
Requires path name a nd magic number. The path name ·may contain wild card characters (? and *). The magic number must be zero or a. magic number returned by a previous call of ynr.ETDIR operating on the same directory.
A particular matched path "arne is returned in the buf'fer field, and the magic number field is updated. The file position field contains the size of the file (in bytes). The time and date of creation and last modification are also displayed.
The read and write access bits for the directory are beneath the last modified date, and the read and write access bits for the file are displayed in the fields that are normally changed by the user with F2 and F3.
IOPUTDIR
Requires path name. Uses current settings of F2 and F3 to update the read and write acces s permissions for the file. Any string typed in the comment field will be added to the directory entry as a user comment and will be displ ayed by subsequent calls of IOGETDIR.
IODIRINF
Requires path name (leaving the menu field blank will tell you about the currently sel~cted (Fl) default directory ) .
C'isplays total space on directory and currently unused space, both in units of lkbyte. Also displays an upper bounG on th", number of files present in the directory; there may actually be fewer files than this at the moment.
IOGETSEQ
Fequires channel number (as returned by a previous call of IOOPEN) and buffer length (the buf'fer length field is labelled length and is below the buffer field).
Returns the buffer contents and the number cf bytes read. The bytes read are displayed as ASCII characters ; any byte whicl is not a reasonable value to display as a character is displayed as the copyright character.
The buf'fer may be longer than you think: move the cursor to the buffer field to see the end of it.
I OGETRAN
As I OGETSEQ except that the file position field is also required.
IOGETLIN
As IOGETSEQ except that it stops reading at a line feed character (and the status codes can be different).
68K/OS User Manual 40 9992.1 GST 35 /1.09
GSI Computer Systems Limited UTILITY PROGRAMS
IOPUTSEQ
Requires channel number. Characters to be sent must be typed in the buff@r (it's longer than you think: just keep typing).
Only printable characters may be sent except that if you type a copyright character IOSSMENU will convert this to a line feed before sending the buffer. The buffer length field is ignored: IOSSMENU takes the buffer contents (with trailing blanks removed) and calculates the length of the actual text typed.
The number of characters actually sent is returned .
IOPUTRAN
As IOPUTSEQ except that a file position is also required.
IOPUTLIN
As IOPUTSEQ except that it stops when it gets to a line feed in the buffer (remember that you get a line feed into the buffer by typing a copyright character).
IOSETPOS
Requires channel number and file position.
IOTRUNC
Requires channel number.
IOGETPOS
Requires channel number and returns file position.
IOEOF
Requires channel number and returns Boolean (possibly hidden under the command list window).
IOSIZE
Requires channel number and returns file position.
IOREADY
Requires channel number and returns Boolean.
IOMOUNT
Requires path name and microdrive unit number.
IODISMOU
F:equires path na me a nd/or microdrive unit number; see the full description of IODISMOU in the Programmer's Reference Manual.
68K/OS User Manual 41 9992 .1 GST 35/1.09
GST Computer Systems Limited UTILITY PROGRAMS
IOSPECIA
Requires path name . The only device driver which has an IOSPECIA routine is the RS232 output driver (see 4.2.4 above); , the Dl parameter for this routine is entered in the file position menu field.
IODEFPRO
Requires path name, entrypoint (specify this in the file position field) and RAM requirement (in K) (specify this in the magic number field) .
68K/OS User Manual 42 9992.1 GST 35/1.09
GST Computer Systems Lim ited UTILITY PROGRAMS
A.IO MEMMAP - display state of memory
The file MEMMAP.PROG contains a program which displays the current usage of the memory .in the QL.
MEMMAP opens a screen window just one line high and paints vertical stripes in it each a bit less than a character wide. There is one such stripe for each of the 96 lKbyte memory blocks in that part of the machine 's RAM space not used for the screen. At the ends of the line are some black and white horizontal stripes whch merely fill the space to the end of the line and carry no information.
The significance of the colours are as follows:
BLACK
GREEN
RED
BLACK & GREEN STIPPLE
WHITE
BLACK & WHITE STIPPLE
available
slaved block in use by filing system containing data which is up to date on the micro drive cartridge.
slaved block in use by filing system containing data which is NOT up to date on the microdrive cartridge.
in use for programs and procedures (code)
in use for programs ' heap/stack, display files etc. (i.e. data)
in use for system tables, system heap etc
Note that this program has been designed to work with the screen in four-colour 85-column mode and may not produce very good results on a television.
68K/OS User Manual 43 9992.1 GST 35/1.09
GSI Computer Systems Limited UTILITY PROGRAMS
A.ll PRINT - filter a fi l e f or an ASCII printer
The file PRINT . PROG contains a program which filters a file for an ASCII printer. It removes aU non-ASCII characters from its input file and converts line-feed characters (he x OA) to carriage-r eturn line-feed (OD OA) pairs.
Type PRINT.PROG on ADAM ' s command line. The PRINT program will prompt you with "Print from? " to which you should give the name of an input f i le. The output will be directed to TXl:
For most print ers and most data you will not. need to use this program and can COpy or otherwise send f iles direct to the printer.
68K/OS User Manual 44 9992.1 CST 35 /1. 09
GST Computer Systems Limited UTILI TY PROGRAMS
A. 12 RENAME - change the name of a file
The file RENAME.PROG contains a program which allows the name of a microdrive fi l e to be changed .
RENAME takes two parameters, either on the command line or i n response to prompts : the first is the current name of the file and t he second i s the new name .
68K/OS User Manua l 9992 .1 GST 35/1 . 09
GST Computer Systems Limited UTILITY PROGRAMS
A.13 SLIDES - produce a slide show
The file SLIDES.PROG is a program which will show a preselected set of pictures on the screen as a slide show.
It takes one parameter which is the name of a file containing a slide show script: this parameter ca~ be given on the command line or in response to a prompt.
SLIDES will load the first picture into memory but will not display it until you press a key (more or less any key will do). It then displays the first slide and immediately starts reading the second picture into memory so that when you have finished talking about the first slide you can again press any key and the second slide will be shown very quickly (while the program goes off and reads in the third, etc.).
The script file should contain the names of the files containing the individual pictures, one per line (with no leading or trailing blanks). Any line that does not contain a single file name ~ill be ignored by SLIDES and you may include comments in your script in this way. For example the script could be:
* * * *
Script for slide show
First the slide saying hello
hello.pic
* * *
then the one saying what a wonderful product we have
product.pic
* *
then the one saying it is time for a free lunch
booze.pic
The individual picture files are created by the QRAW program.
68K/OS User Manual 46 9992.1 GST 35/1.09
GST Computer Systems Limited UTILITY PROGRAMS
A.14 SPACE - report on microdrive file space
The file SPACE.PROG contains a program which reports on the amount of space available on a microdrive cartridge or other file device.
If you j ust type SPACE.PROG on ADAM 's command line SPACE will report on the amount of space on the data default ' directory. Alternatively you can type SPACE.PROG followed by the name of a mounted cartridge to get a report on the amount of space on that cartridge.
E.g . SPACE.PROG MD:PETER/
68K/OS User Manual 47
reports on the amount of free space on the cartridge called "PETER/".
9992 . 1 GST 35/1 . 09
GIT Com puter Systems Limited UTILITY PROGRAMS
A.15 TIME - set date and time and start clock
The file TIME.PROG contains a program which performs various functions concerned with the date and time. It uses the associated file CLOCK.PROC which it will look for on the default program directory.
If you just give the command
TIME.PROG
the program will tell you the date and time and then offer you the opportunity to change them. If you do not wish to change the date and time just hit ENTER in response to the questions (or CTRL+Z meaning end of keyboard input file).
Alternatively you may give the new date and time on the command line, for example:
TIME.PROG 25/7/84 11:46
When the date has been set the TIME program will load the procedure CLOCK . PROC which will continuously display the time in the bottom right-hand corner of the screen instead of the flickering red dots. Note that this clock is only updated when the machine has nothing else to do, so if the machine is very busy the colon will stop flashing and the time will eventually become out of date; the clock will be corrected as soon as the machine has time to do so.
There is no way to get rid of the clock without restarting 68K/OS !
When giving the new time and date on the command line you may enter *; ir, place of either the time and date and no changes will be made. For example
TIME.PROG * *
will tell you the current time and date and will not ask you to give a new time and date .
It is good practice to ensure that your QL always has the correct time and date set, as creation and modi ficattion dates of files are recorded i n rricrodrive directories and some programs (such as the assembler) print the date and time on their output l i stings.
68K/OS User Manual 9992.1 GST 35/1.09