Embed Size (px)
Citation preview
Page 1 Version 0.11
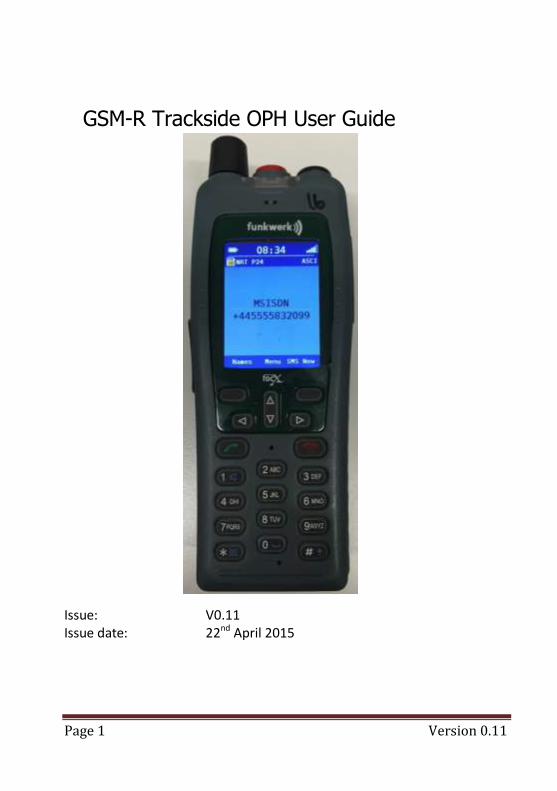
GSM-R Trackside OPH User Guide
Issue: V0.11 Issue date: 22nd April 2015

Trackside Worker GSM-R User Guide
10th March 2015 Page 2
Intentionally Left Blank
Page 3 Version 0.11
1 Warning and Security
Please make a note of the serial number of the handset and SIM issued to you and keep in a safe place. The enclosed GSM-R handset is issued for business use only in connection with the operations of the GB Rail Network and must not be used for any other purpose. The GSM-R handset can ONLY be used by authorised personnel who are briefed to operate the handset. With the issue of this handset to you, you are identified as the responsible person for this handset and are required to know its location at all times. If the handset is lost or stolen you must immediately inform NRT Telecoms Operation Centre on 01782 574 624 and British Transport Police providing the Handset Serial Number and SIM Number, along with your details and as much relevant information as possible.
GSM-R is the operational communications system for the GB Rail Network. Improper use of GSM-R can have serious consequences for the operation of the network and the safety of the people working on the Rail Network
1.1 Operational Use
In operational Use please note; There may be occasions when calls cannot be made – in these instances, trackside telephones should be used as an alternative. Safety must be observed at all times when using trackside phones – observe the GE/RT8000/HB1 – General Duties and Track Safety for Track Workers: Section 4.3 by ensuring you are in a position of safety when using the handset. All calls are recorded to assist with incident investigations.
Trackside Worker GSM-R User Guide
10th March 2015 Page 4
2 Contents
1 Warning and Security ............................................ 3
1.1 Operational Use .................................................... 3
2 Contents .............................................................. 4
3 About the Contents ............................................... 6
4 Safety Information ................................................ 7
4.1 Battery................................................................. 7
4.2 Charger and plug-in power supply units .................. 7
5 Controls and Buttons ............................................. 8
5.1 Operating Elements ............................................... 9
5.2 Switch on / off Handheld ..................................... 10
5.3 Status Displays in Status Field .............................. 11
5.4 Pictograms in the Display Field .............................. 12
5.5 Locking and Unlocking Keyboard .......................... 13 5.5.1 NOTICE ......................................................................... 13 5.5.2 Manual Lock keyboard ..................................................... 13 5.5.3 Unlock Keyboard ............................................................ 13
6 Setting up and Terminating Calls ........................... 14
6.1 Outgoing Calls ..................................................... 14
6.2 Hold .................................................................. 15
6.3 Receiving a Call during Existing Call ....................... 15
6.4 Setting up a Group Call or Broadcast Call ............... 16
6.5 Incoming Group Calls ........................................... 16
6.6 Calling the Operational Terminals .......................... 17 6.6.1 Calling the Signaller ........................................................ 17 6.6.2 Calling the Route Controller ............................................. 17 6.6.3 Calling the ECR ............................................................... 18
6.7 Create Message ................................................... 19
6.8 Incoming messages ............................................. 19
6.9 Text- or Flash Messages Options........................... 20
7 Menu Overview ................................................... 21
Page 5 Version 0.11
7.1 Menu Description ................................................ 21
7.2 Messages Menu ................................................... 22
7.3 Phonebook Menu ................................................ 22
8 Adjust Settings ................................................... 23
8.1 General .............................................................. 23 8.1.1 Set Date / Time .............................................................. 23 8.1.2 Set Brightness ................................................................ 24
8.2 Set Message Settings ........................................... 24
8.3 Phonebook ......................................................... 25 8.3.1 Add contact .................................................................... 25 8.3.2 Edit Contact ................................................................... 25 8.3.3 Delete Contact ................................................................ 25
9 GSM-R Handheld Warranty and Returns ................ 26
9.1 Terms of Warranty .............................................. 26
9.2 Warranty Process ................................................ 26
9.3 Warranty Return Address ..................................... 26
9.4 Breakage and Out of Warranty Repairs ................. 26
9.5 Network Support ................................................. 26
10 Personal Address book ........................................ 27
Trackside Worker GSM-R User Guide
10th March 2015 Page 6
Intentionally Left Blank
3 About the Contents
This document describes the main analogue and digital operation mode for GSM-R on the Funkwerk OPH handheld, including a general overview of the controls and functions. Please note safety instructions in the individual chapters
Page 7 Version 0.11
4 Safety Information
The handhelds are for operational railway communications only.
Note on use
Switch the handheld off if it is damaged or is not in perfect working order. Prevent it from being used and arrange for it to be tested by authorised personnel. Protect the handheld from extreme weather conditions. Do not expose the handheld to strong magnetic fields.
Radio interference
Switch off the handheld in all facilities in which you are asked to do so or there are signs restricting the use of mobile devices.
Switch off the handheld in areas in which the use of hand-held two-way radios is prohibited.
Interference
The handheld can cause interference with other electronic equipment, especially medical devices, for example, pacemakers. We recommend that the handheld always be carried on the side of the body facing away from medical devices.
Risk to your hearing
The handheld is equipped with a loudspeaker on the back for hands-free use. Do not place this loudspeaker in the immediate vicinity of your ears.
Storage
Where possible, store the handheld in the original packaging or in non-conductive packaging, which protects it against moisture and dirt.
Accessories
Only use accessories supplied by Network Rail Telecom.
4.1 Battery Only use the rechargeable batteries supplied by Network Rail Telecom. Use the rechargeable batteries for their intended purpose only. Completely charge the battery before using the handheld for the first time.
4.2 Charger and plug-in power supply units
Do not user chargers with any damage. If damaged whilst in use turn off the power and disconnect from the Handset before unplugging the charger.
Trackside Worker GSM-R User Guide
10th March 2015 Page 8
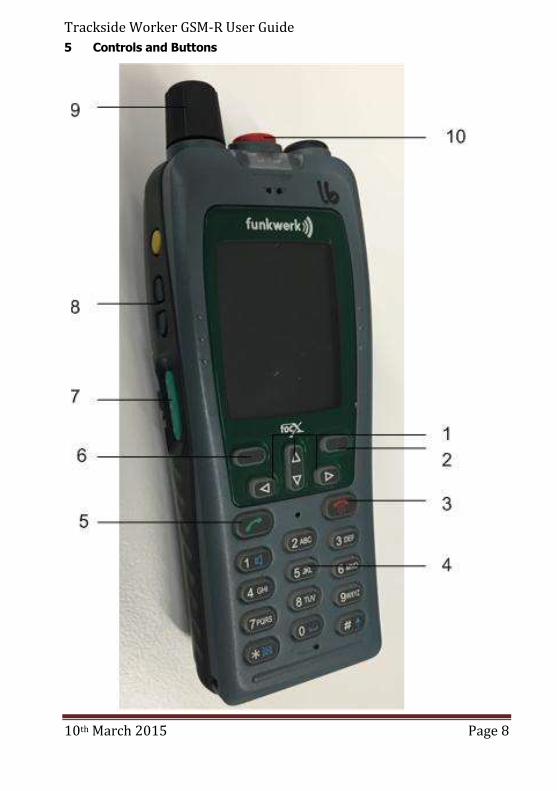
5 Controls and Buttons
Page 9 Version 0.11
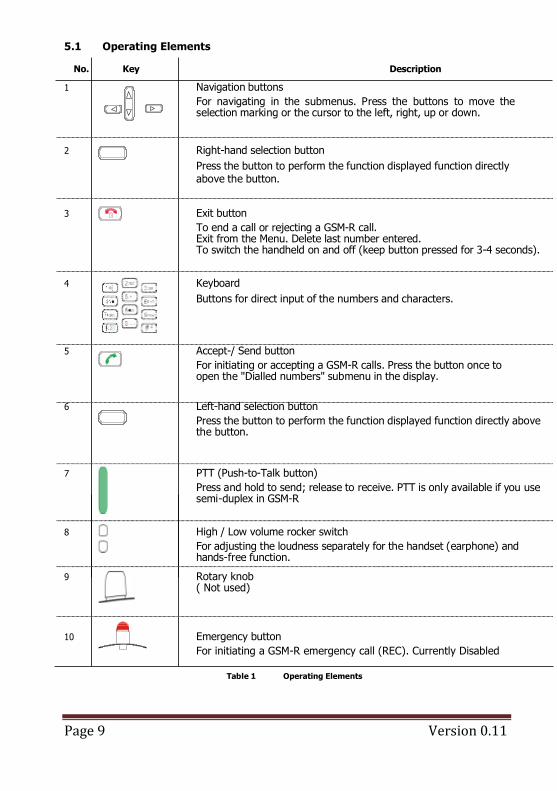
5.1 Operating Elements No. Key Description
1 Navigation buttons
For navigating in the submenus. Press the buttons to move the selection marking or the cursor to the left, right, up or down.
2 Right-hand selection button
Press the button to perform the function displayed function directly above the button.
3 Exit button
To end a call or rejecting a GSM-R call. Exit from the Menu. Delete last number entered. To switch the handheld on and off (keep button pressed for 3-4 seconds).
4 Keyboard
Buttons for direct input of the numbers and characters.
5 Accept-/ Send button
For initiating or accepting a GSM-R calls. Press the button once to open the "Dialled numbers" submenu in the display.
6 Left-hand selection button
Press the button to perform the function displayed function directly above the button.
7 PTT (Push-to-Talk button)
Press and hold to send; release to receive. PTT is only available if you use semi-duplex in GSM-R
8 High / Low volume rocker switch
For adjusting the loudness separately for the handset (earphone) and hands-free function.
9 Rotary knob ( Not used)
10 Emergency button
For initiating a GSM-R emergency call (REC). Currently Disabled
Table 1 Operating Elements
Trackside Worker GSM-R User Guide
10th March 2015 Page 10
5.2 Switch on / off Handheld
Note:
The battery must be fully charged before using the handheld for the first time.
Switch on
Trackside GSM-R Hand held
Press the Exit button .
The display and keypad light-up. The handheld performs a self-
test. This can take several seconds.
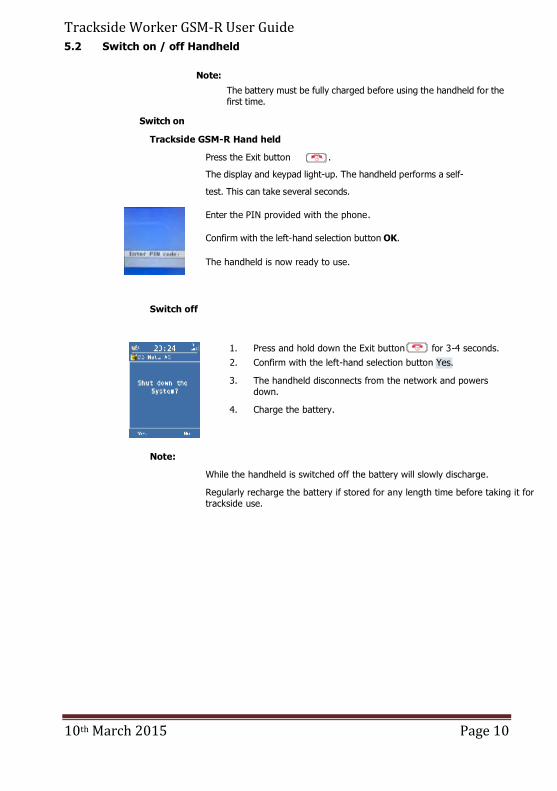
Enter the PIN provided with the phone.
Confirm with the left-hand selection button OK.
The handheld is now ready to use.
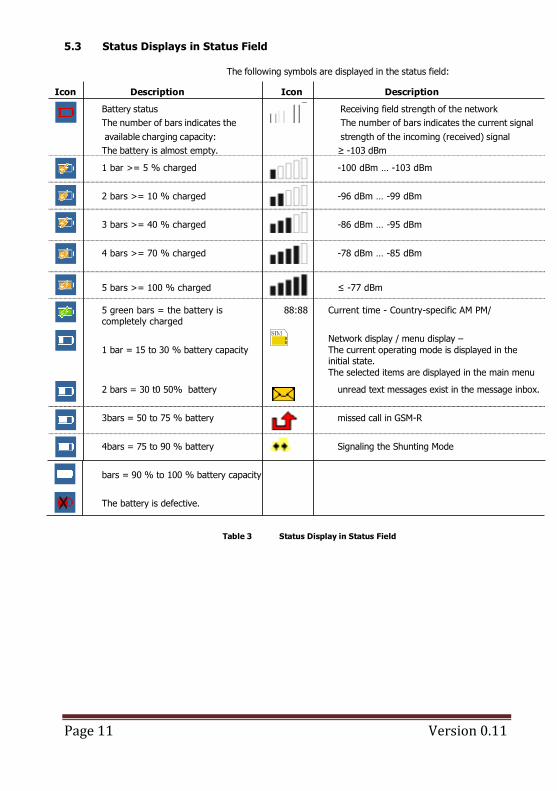
Switch off
1. Press and hold down the Exit button for 3-4 seconds.
2. Confirm with the left-hand selection button Yes.
3. The handheld disconnects from the network and powers down.
4. Charge the battery.
Note:
While the handheld is switched off the battery will slowly discharge.
Regularly recharge the battery if stored for any length time before taking it for trackside use.
Page 11 Version 0.11
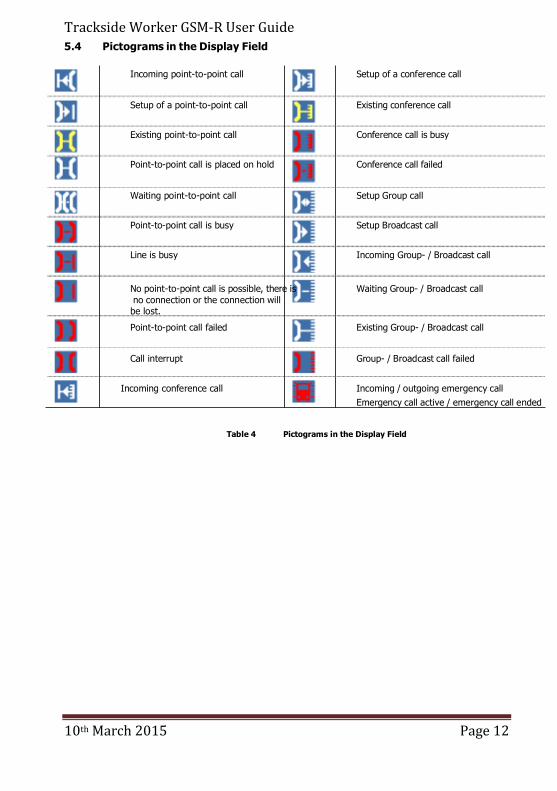
5.3 Status Displays in Status Field
The following symbols are displayed in the status field:
Icon Description Icon Description
Battery status Receiving field strength of the network
The number of bars indicates the The number of bars indicates the current signal
available charging capacity: strength of the incoming (received) signal
The battery is almost empty. ≥ -103 dBm
1 bar >= 5 % charged -100 dBm … -103 dBm
2 bars >= 10 % charged -96 dBm … -99 dBm
3 bars >= 40 % charged -86 dBm … -95 dBm
4 bars >= 70 % charged -78 dBm … -85 dBm
5 bars >= 100 % charged ≤ -77 dBm
5 green bars = the battery is 88:88 Current time - Country-specific AM PM/ completely charged
Network display / menu display –
1 bar = 15 to 30 % battery capacity The current operating mode is displayed in the initial state.
The selected items are displayed in the main menu
2 bars = 30 t0 50% battery unread text messages exist in the message inbox.
3bars = 50 to 75 % battery missed call in GSM-R
4bars = 75 to 90 % battery Signaling the Shunting Mode
bars = 90 % to 100 % battery capacity
The battery is defective.
Table 3 Status Display in Status Field
Trackside Worker GSM-R User Guide
10th March 2015 Page 12
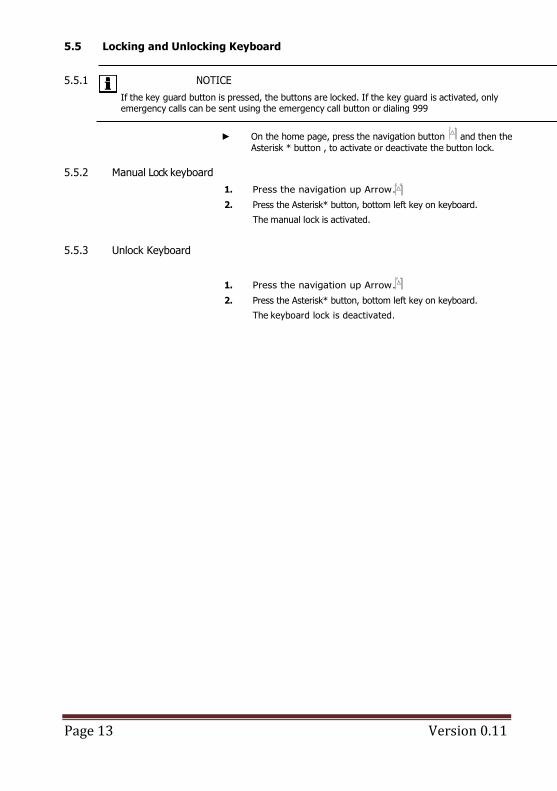
5.4 Pictograms in the Display Field
Incoming point-to-point call Setup of a conference call
Setup of a point-to-point call Existing conference call
Existing point-to-point call Conference call is busy
Point-to-point call is placed on hold Conference call failed
Waiting point-to-point call Setup Group call
Point-to-point call is busy Setup Broadcast call
Line is busy Incoming Group- / Broadcast call
No point-to-point call is possible, there is Waiting Group- / Broadcast call
no connection or the connection will be lost.
Point-to-point call failed Existing Group- / Broadcast call
Call interrupt Group- / Broadcast call failed
Incoming conference call Incoming / outgoing emergency call
Emergency call active / emergency call ended
Table 4 Pictograms in the Display Field
Page 13 Version 0.11
5.5 Locking and Unlocking Keyboard
5.5.1 NOTICE
If the key guard button is pressed, the buttons are locked. If the key guard is activated, only emergency calls can be sent using the emergency call button or dialing 999
► On the home page, press the navigation button and then the
Asterisk * button , to activate or deactivate the button lock.
5.5.2 Manual Lock keyboard
1. Press the navigation up Arrow.
2. Press the Asterisk* button, bottom left key on keyboard.
The manual lock is activated.
5.5.3 Unlock Keyboard
1. Press the navigation up Arrow.
2. Press the Asterisk* button, bottom left key on keyboard.
The keyboard lock is deactivated.
Trackside Worker GSM-R User Guide
10th March 2015 Page 14
6 Setting up and Terminating Calls To make a call on the phone dial the required number and press the send button. The "Establishing call" message and the corresponding pictogram of the call destination appear in the display filed.
The call can be ended at any time by pressing the exit button.
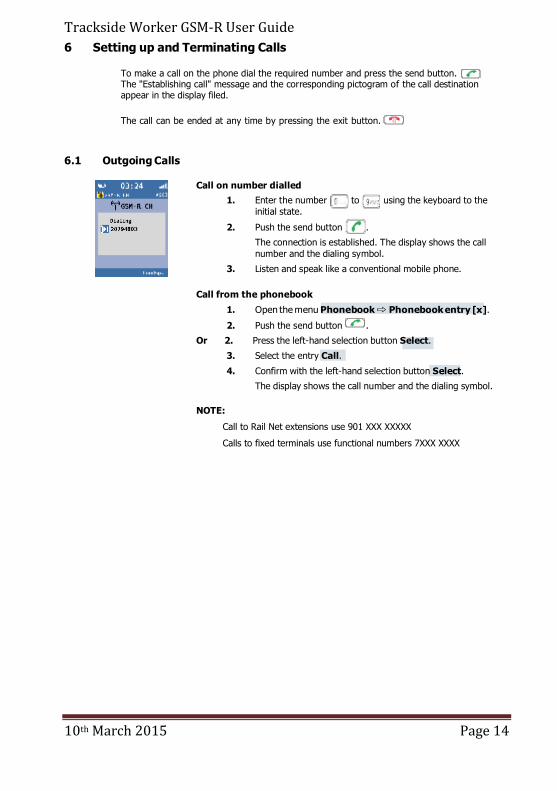
6.1 Outgoing Calls
Call on number dialled
1. Enter the number to using the keyboard to the
initial state.
2. Push the send button .
The connection is established. The display shows the call
number and the dialing symbol.
3. Listen and speak like a conventional mobile phone.
Call from the phonebook
1. Open the menu Phonebook Phonebook entry [x].
2. Push the send button .
Or 2. Press the left-hand selection button Select.
3. Select the entry Call.
4. Confirm with the left-hand selection button Select.
The display shows the call number and the dialing symbol.
NOTE:
Call to Rail Net extensions use 901 XXX XXXXX
Calls to fixed terminals use functional numbers 7XXX XXXX
Page 15 Version 0.11
6.2 Hold
During existing calls it is possible to place the existing call on hold and to setup another call. You can toggle between the two calls.
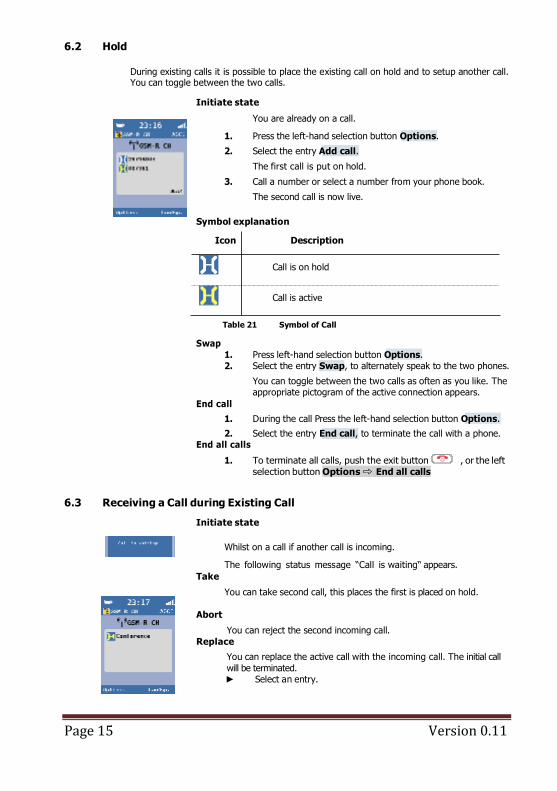
Initiate state
You are already on a call.
1. Press the left-hand selection button Options.
2. Select the entry Add call.
The first call is put on hold.
3. Call a number or select a number from your phone book.
The second call is now live.
Symbol explanation
Icon Description
Call is on hold
Call is active
Table 21 Symbol of Call
Swap
1. Press left-hand selection button Options. 2. Select the entry Swap, to alternately speak to the two phones.
You can toggle between the two calls as often as you like. The appropriate pictogram of the active connection appears.
End call
1. During the call Press the left-hand selection button Options.
2. Select the entry End call, to terminate the call with a phone. End all calls
1. To terminate all calls, push the exit button , or the left
selection button Options End all calls
6.3 Receiving a Call during Existing Call
Initiate state
Whilst on a call if another call is incoming.
The following status message “Call is waiting“ appears.
Take
You can take second call, this places the first is placed on hold.
Abort
You can reject the second incoming call.
Replace
You can replace the active call with the incoming call. The initial call
will be terminated. ► Select an entry.
Trackside Worker GSM-R User Guide
10th March 2015 Page 16
6.4 Setting up a Group Call or Broadcast Call
Requirement:
A Group call or Broadcast call can only be set up using group programmed on the SIM.
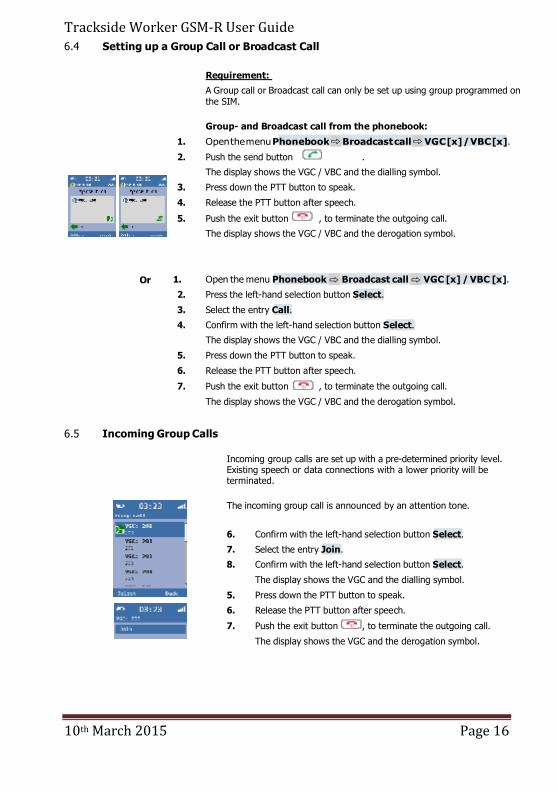
Group- and Broadcast call from the phonebook:
1. Open the menu Phonebook Broadcast call VGC [x] / VBC [x].
2. Push the send button .
The display shows the VGC / VBC and the dialling symbol.
3. Press down the PTT button to speak.
4. Release the PTT button after speech.
5. Push the exit button , to terminate the outgoing call.
The display shows the VGC / VBC and the derogation symbol.
Or 1. Open the menu Phonebook Broadcast call VGC [x] / VBC [x].
2. Press the left-hand selection button Select.
3. Select the entry Call.
4. Confirm with the left-hand selection button Select.
The display shows the VGC / VBC and the dialling symbol.
5. Press down the PTT button to speak.
6. Release the PTT button after speech.
7. Push the exit button , to terminate the outgoing call.
The display shows the VGC / VBC and the derogation symbol.
6.5 Incoming Group Calls
Incoming group calls are set up with a pre-determined priority level. Existing speech or data connections with a lower priority will be terminated.
The incoming group call is announced by an attention tone.
6. Confirm with the left-hand selection button Select.
7. Select the entry Join.
8. Confirm with the left-hand selection button Select.
The display shows the VGC and the dialling symbol.
5. Press down the PTT button to speak.
6. Release the PTT button after speech.
7. Push the exit button , to terminate the outgoing call.
The display shows the VGC and the derogation symbol.
Page 17 Version 0.11
6.6 Calling the Operational Terminals
There are two ways to call the operational terminals
1. Dialling the short code
When using the Short code the GSM-R Network will decide which terminal to route the call to 2. Dial the terminal phone number
6.6.1 Calling the Signaller
Dialling the Short code:
1. Enter the 1200 using the keyboard.
2. Push the send button .
The display shows the called number and the dialling symbol.
3. Listen and speak like a conventional mobile phone.
4. Push the exit button , to terminate the outgoing call.
Dialling the signaller terminal number:
1. Look up the number from the phone book provided by Network
Rail Telecom
2. Enter the phone number using the keyboard.
3. Push the send button .
The display shows the called number and the dialling symbol.
The connection is established.
4. Listen and speak like a conventional mobile phone.
5. Push the exit button , to terminate the outgoing call.
6.6.2 Calling the Route Controller
Dialling the Short code:
1. Enter the 1300 using the keyboard.
2. Push the send button .
The display shows the call number and the dialling symbol.
3. Listen and speak like a conventional mobile phone.
4. Push the exit button , to terminate the outgoing call.
The display shows the call number and the derogation symbol.
Dialling the Route Controllers terminal number:
1. Look up the number from the phone book provided by Network
Rail Telecom
2. Enter the functional number using the keyboard.
3. Push the send button .
The display shows the call number and the dialling symbol.
4. Listen and speak like a conventional mobile phone.
5. Push the exit button , to terminate the outgoing call.
Trackside Worker GSM-R User Guide
10th March 2015 Page 18
6.6.3 Calling the ECR
Dialling the Short code:
1. Enter the 1400 using the keyboard.
2. Push the send button .
The display shows the call number and the dialling symbol.
3. Listen and speak like a conventional mobile phone.
4. Push the exit button , to terminate the outgoing call.
The display shows the call number and the derogation symbol.
Dialling the ECR terminal number:
1. Look up the number from the phone book provided by Network
Rail Telecom
2. Enter the functional number using the keyboard.
3. Push the send button .
The display shows the call number and the dialling symbol.
4. Listen and speak like a conventional mobile phone.
5. Push the exit button , to terminate the outgoing call.
Page 19 Version 0.11
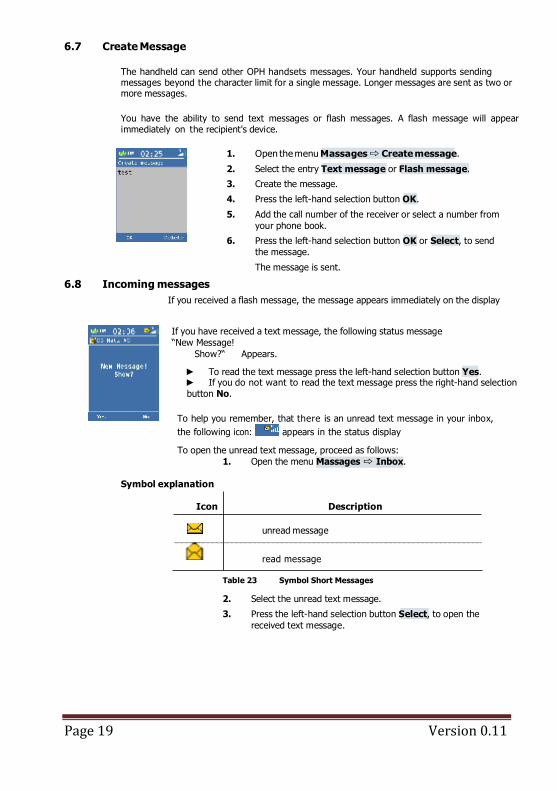
6.7 Create Message
The handheld can send other OPH handsets messages. Your handheld supports sending messages beyond the character limit for a single message. Longer messages are sent as two or more messages.
You have the ability to send text messages or flash messages. A flash message will appear immediately on the recipient's device.
1. Open the menu Massages Create message.
2. Select the entry Text message or Flash message.
3. Create the message.
4. Press the left-hand selection button OK.
5. Add the call number of the receiver or select a number from
your phone book.
6. Press the left-hand selection button OK or Select, to send the message.
The message is sent.
6.8 Incoming messages
If you received a flash message, the message appears immediately on the display
If you have received a text message, the following status message
“New Message!
Show?“ Appears.
► To read the text message press the left-hand selection button Yes. ► If you do not want to read the text message press the right-hand selection button No.
To help you remember, that there is an unread text message in your inbox,
the following icon: appears in the status display
To open the unread text message, proceed as follows:
1. Open the menu Massages Inbox.
Symbol explanation
Icon Description
unread message
read message
Table 23 Symbol Short Messages
2. Select the unread text message.
3. Press the left-hand selection button Select, to open the
received text message.
Trackside Worker GSM-R User Guide
10th March 2015 Page 20
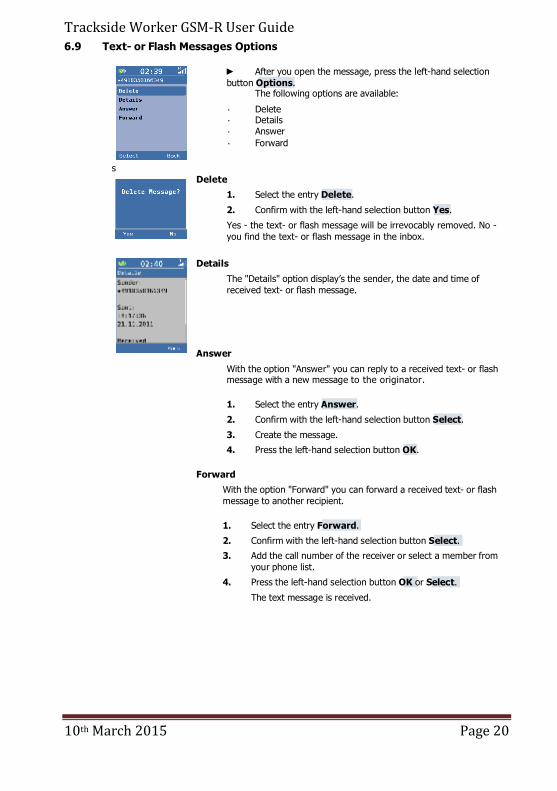
6.9 Text- or Flash Messages Options
► After you open the message, press the left-hand selection
button Options. The following options are available:
· Delete · Details · Answer
· Forward
s
Delete
1. Select the entry Delete.
2. Confirm with the left-hand selection button Yes.
Yes - the text- or flash message will be irrevocably removed. No -
you find the text- or flash message in the inbox.
Details
The "Details" option display’s the sender, the date and time of
received text- or flash message.
Answer
With the option "Answer" you can reply to a received text- or flash message with a new message to the originator.
1. Select the entry Answer.
2. Confirm with the left-hand selection button Select.
3. Create the message.
4. Press the left-hand selection button OK.
Forward
With the option "Forward" you can forward a received text- or flash
message to another recipient.
1. Select the entry Forward.
2. Confirm with the left-hand selection button Select.
3. Add the call number of the receiver or select a member from
your phone list.
4. Press the left-hand selection button OK or Select.
The text message is received.
Page 21 Version 0.11
7 Menu Overview
The handheld provides a number functions for the user. T hese functions a r e accessible via the menus. The handheld's navigation concept is based on the principle of reaching the required functions with the least possible steps.
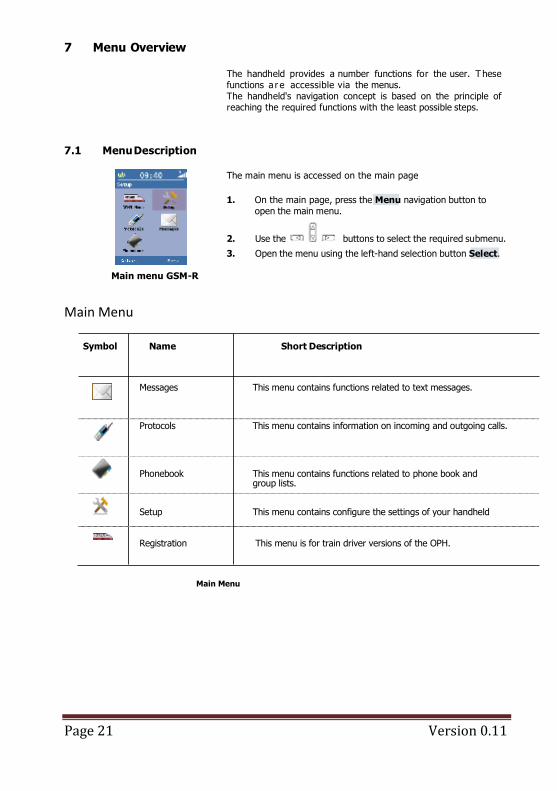
7.1 Menu Description
The main menu is accessed on the main page
1. On the main page, press the Menu navigation button to open the main menu.
2. Use the buttons to select the required submenu.
3. Open the menu using the left-hand selection button Select.
Main menu GSM-R
Main Menu
Symbol Name Short Description
Messages This menu contains functions related to text messages. Protocols This menu contains information on incoming and outgoing calls. Phonebook This menu contains functions related to phone book and group lists. Setup This menu contains configure the settings of your handheld
Registration This menu is for train driver versions of the OPH.
Main Menu
Trackside Worker GSM-R User Guide
10th March 2015 Page 22
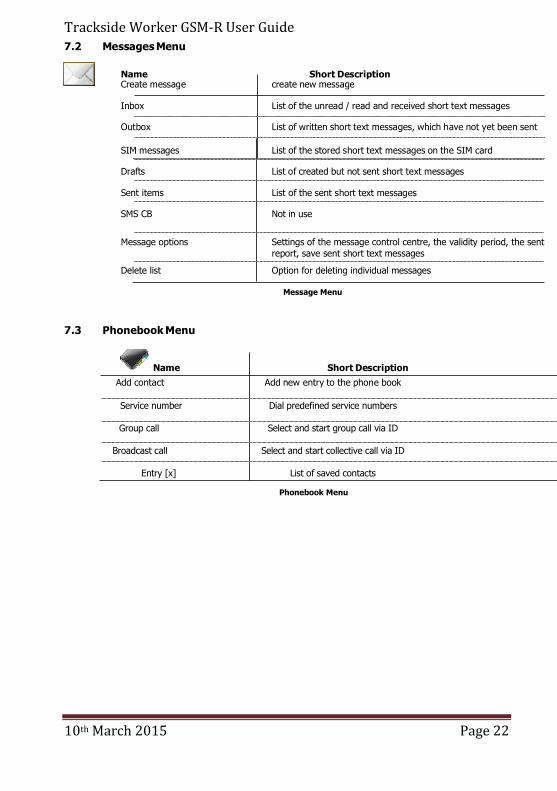
7.2 Messages Menu
Name Short Description Create message create new message Inbox List of the unread / read and received short text messages Outbox List of written short text messages, which have not yet been sent
SIM messages List of the stored short text messages on the SIM card Drafts List of created but not sent short text messages Sent items List of the sent short text messages SMS CB Not in use
Message options Settings of the message control centre, the validity period, the sent
report, save sent short text messages
Delete list Option for deleting individual messages
Message Menu
7.3 Phonebook Menu
Name Short Description
Add contact Add new entry to the phone book
Service number Dial predefined service numbers
Group call Select and start group call via ID
Broadcast call Select and start collective call via ID
Entry [x] List of saved contacts
Phonebook Menu
Page 23 Version 0.11
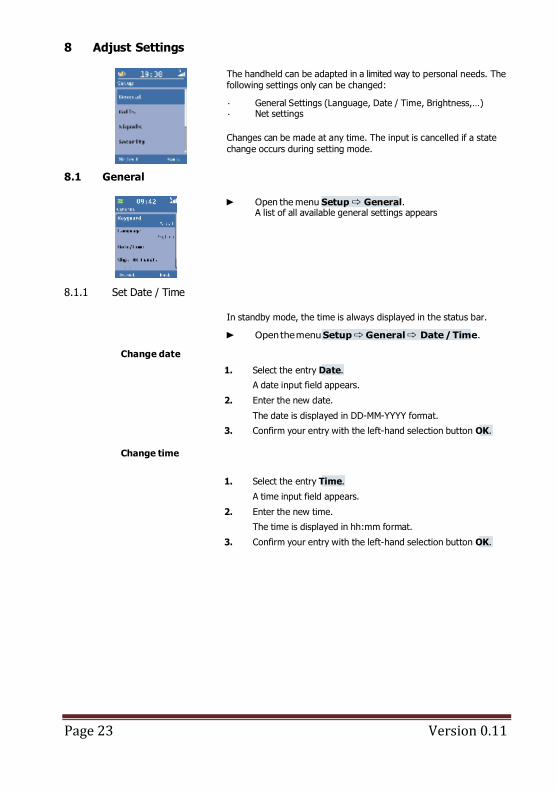
8 Adjust Settings
The handheld can be adapted in a limited way to personal needs. The following settings only can be changed:
· General Settings (Language, Date / Time, Brightness,…) · Net settings
Changes can be made at any time. The input is cancelled if a state
change occurs during setting mode.
8.1 General
► Open the menu Setup General.
A list of all available general settings appears
8.1.1 Set Date / Time
In standby mode, the time is always displayed in the status bar.
► Open the menu Setup General Date / Time.
Change date
1. Select the entry Date.
A date input field appears.
2. Enter the new date.
The date is displayed in DD-MM-YYYY format.
3. Confirm your entry with the left-hand selection button OK.
Change time
1. Select the entry Time.
A time input field appears.
2. Enter the new time.
The time is displayed in hh:mm format.
3. Confirm your entry with the left-hand selection button OK.
Trackside Worker GSM-R User Guide
10th March 2015 Page 24
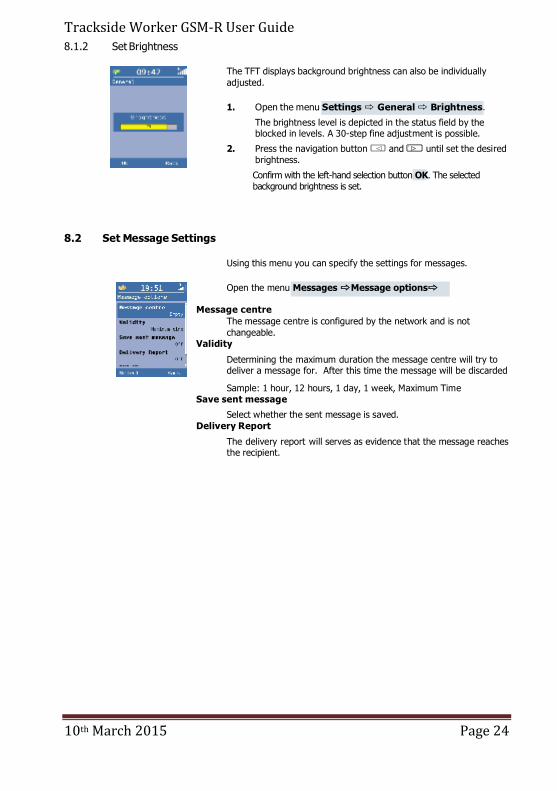
8.1.2 Set Brightness
The TFT displays background brightness can also be individually
adjusted.
1. Open the menu Settings General Brightness.
The brightness level is depicted in the status field by the blocked in levels. A 30-step fine adjustment is possible.
2. Press the navigation button and until set the desired brightness.
Confirm with the left-hand selection button OK. The selected background brightness is set.
8.2 Set Message Settings
Using this menu you can specify the settings for messages.
Open the menu Messages Message options
Message centre
The message centre is configured by the network and is not
changeable. Validity
Determining the maximum duration the message centre will try to deliver a message for. After this time the message will be discarded
Sample: 1 hour, 12 hours, 1 day, 1 week, Maximum Time Save sent message
Select whether the sent message is saved.
Delivery Report
The delivery report will serves as evidence that the message reaches the recipient.
Page 25 Version 0.11
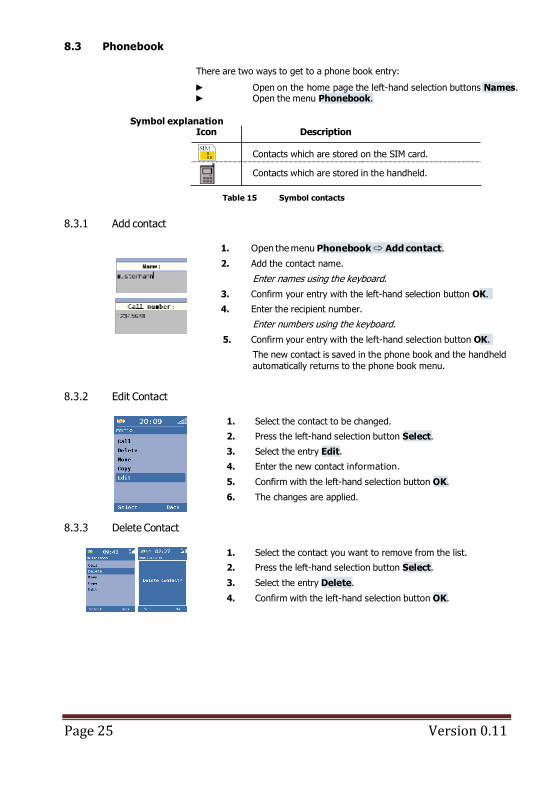
8.3 Phonebook
There are two ways to get to a phone book entry:
► Open on the home page the left-hand selection buttons Names. ► Open the menu Phonebook.
Symbol explanation
Icon Description
Contacts which are stored on the SIM card.
Contacts which are stored in the handheld.
Table 15 Symbol contacts
8.3.1 Add contact
1. Open the menu Phonebook Add contact.
2. Add the contact name.
Enter names using the keyboard.
3. Confirm your entry with the left-hand selection button OK.
4. Enter the recipient number.
Enter numbers using the keyboard.
5. Confirm your entry with the left-hand selection button OK.
The new contact is saved in the phone book and the handheld
automatically returns to the phone book menu.
8.3.2 Edit Contact
1. Select the contact to be changed.
2. Press the left-hand selection button Select.
3. Select the entry Edit.
4. Enter the new contact information.
5. Confirm with the left-hand selection button OK.
6. The changes are applied.
8.3.3 Delete Contact
1. Select the contact you want to remove from the list.
2. Press the left-hand selection button Select.
3. Select the entry Delete.
4. Confirm with the left-hand selection button OK.
Trackside Worker GSM-R User Guide
10th March 2015 Page 26
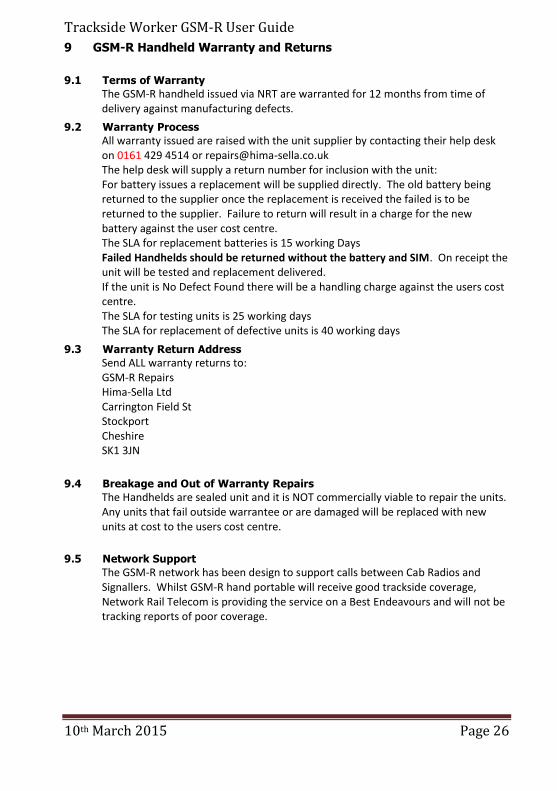
9 GSM-R Handheld Warranty and Returns
9.1 Terms of Warranty
The GSM-R handheld issued via NRT are warranted for 12 months from time of delivery against manufacturing defects.
9.2 Warranty Process
All warranty issued are raised with the unit supplier by contacting their help desk on 0161 429 4514 or [email protected] The help desk will supply a return number for inclusion with the unit: For battery issues a replacement will be supplied directly. The old battery being returned to the supplier once the replacement is received the failed is to be returned to the supplier. Failure to return will result in a charge for the new battery against the user cost centre. The SLA for replacement batteries is 15 working Days Failed Handhelds should be returned without the battery and SIM. On receipt the unit will be tested and replacement delivered. If the unit is No Defect Found there will be a handling charge against the users cost centre. The SLA for testing units is 25 working days The SLA for replacement of defective units is 40 working days
9.3 Warranty Return Address
Send ALL warranty returns to: GSM-R Repairs Hima-Sella Ltd Carrington Field St Stockport Cheshire SK1 3JN
9.4 Breakage and Out of Warranty Repairs
The Handhelds are sealed unit and it is NOT commercially viable to repair the units. Any units that fail outside warrantee or are damaged will be replaced with new units at cost to the users cost centre.
9.5 Network Support
The GSM-R network has been design to support calls between Cab Radios and Signallers. Whilst GSM-R hand portable will receive good trackside coverage, Network Rail Telecom is providing the service on a Best Endeavours and will not be tracking reports of poor coverage.
Page 27 Version 0.11
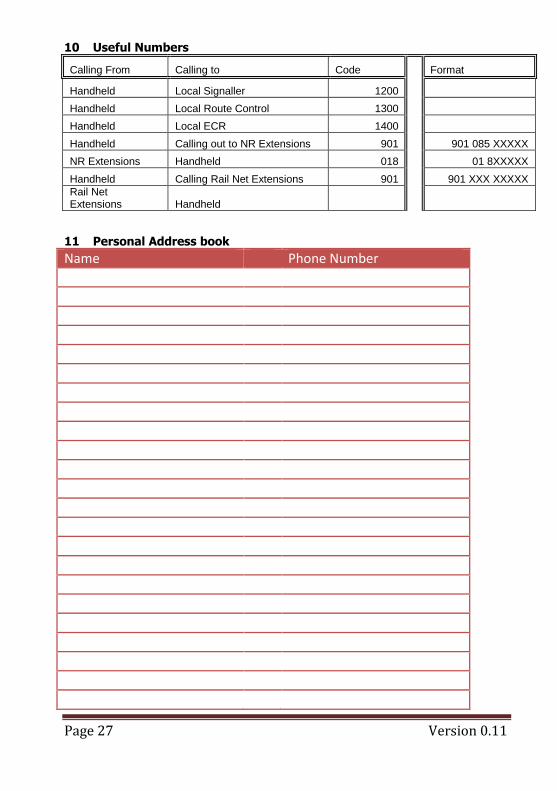
10 Useful Numbers
Calling From Calling to Code Format
Handheld Local Signaller 1200
Handheld Local Route Control 1300
Handheld Local ECR 1400
Handheld Calling out to NR Extensions 901 901 085 XXXXX
NR Extensions Handheld 018 01 8XXXXX
Handheld Calling Rail Net Extensions 901 901 XXX XXXXX
Rail Net Extensions Handheld
11 Personal Address book
Name Phone Number
Trackside Worker GSM-R User Guide
10th March 2015 Page 28
Intentionally Left Blank