Embed Size (px)
Citation preview

Lesson Plan 2
Grow Your Own Potato
Objective:Teach students how to grow their own potatoes. Seed potatoes are needed in order to do the planting in this session. The Wisconsin Potato Growers Auxiliary will provide seed potatoes upon request.
The Students Will Need:Seed potatoesBucketsSoilGrow lightShelving to put potato containers onFertilizerTrowelsPlastic gloves (optional)Watering can
Introduction:Discuss with the students that they will be planting potatoes. Ask the students what equipment they will need to grow a potato. List the equipment on the board or on chart paper. Then ask the students if they can explain the steps they will need to plant the potatoes. This can also be listed.
Procedure:You can do this as a whole group or divide the class up into smaller groups and have the students plant their potatoes. This may be a good time to have students record what they have done in a journal. This will help them later on to see the whole growing process. You may want them to record what their plant is doing at different stages of the growing process.
Conclusion:Discuss with your students how to care for their potato plants. They will need to know how often to water them, when to add fertilizer, and how much light to give them. This process can also be recorded in their journals to keep as a reference.
Extra Activities:Have the students measure the height of their potato plants at regular intervals over the next few
Lesson 2-1

Lesson Plan 2
Grow Your Own Potato
weeks. This can then be recorded on a graph. If the students were in groups when they planted their potatoes, they can then compare plants with other groups.
The students can write a set of instructions for someone else on “How to grow a potato.”
Discuss other root vegetables and compare them to potatoes.
Lesson 2-2

Shelving Unit Instructions
Parts List 2–Shelfracks;72"x15"(5shelfbraces) 1–4'x4'x1/2"plywood 1–2"x2"x8' 1–1"x4"x8'(fordiagonalbraceatback) 2–Screweyes(forhangingthelight) 20–1-5/8"screws 2–Hitchpinclips(tosecureandadjustthechainforhangingthelight) 1–4'shoplight(agoodreflectingdesign,notastriplight) 2–4'growbulbs 1–Extensioncord 1–In-cordtimer
Lesson 2-3
Shelf Rack (2)
Shelf 1
Shelf 2
15"
48"
72"
48"44" 85"
44"
15"
15"
Shelving Unit Instructions
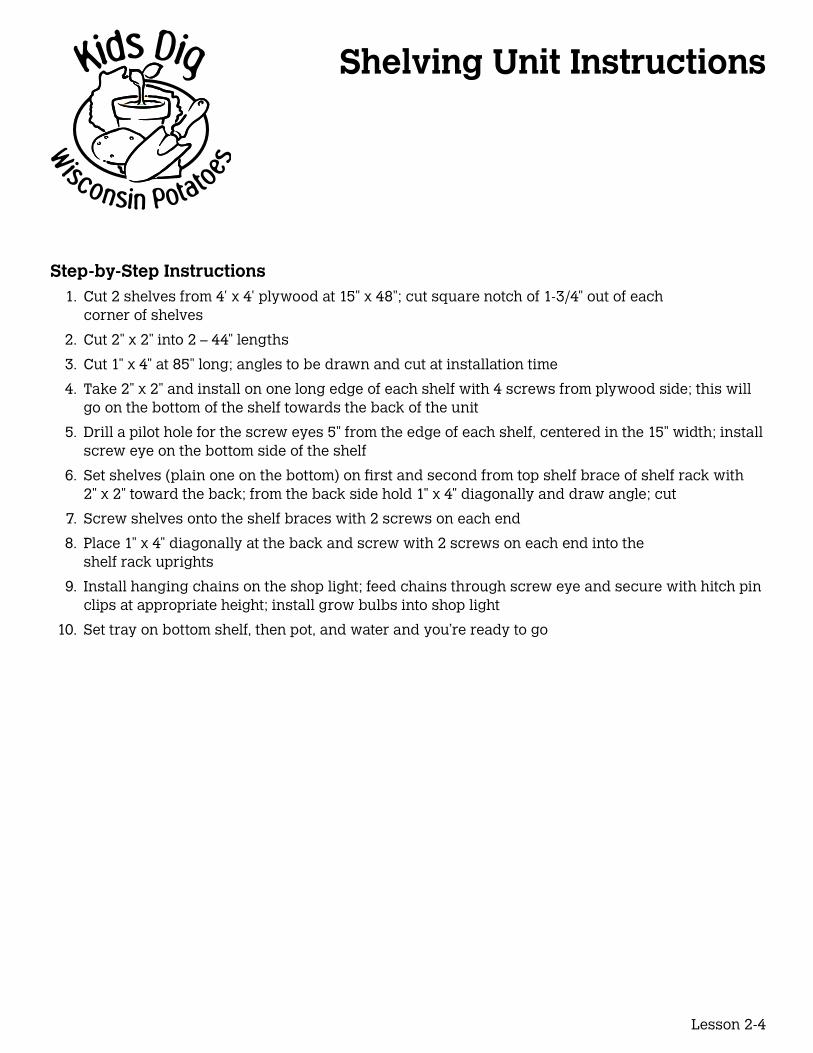
Step-by-Step Instructions 1. Cut 2 shelves from 4' x 4' plywood at 15" x 48"; cut square notch of 1-3/4" out of each corner of shelves
2. Cut 2" x 2" into 2 – 44" lengths
3. Cut 1" x 4" at 85" long; angles to be drawn and cut at installation time
4. Take 2" x 2" and install on one long edge of each shelf with 4 screws from plywood side; this will go on the bottom of the shelf towards the back of the unit
5. Drill a pilot hole for the screw eyes 5" from the edge of each shelf, centered in the 15" width; install screw eye on the bottom side of the shelf
6. Set shelves (plain one on the bottom) on first and second from top shelf brace of shelf rack with 2" x 2" toward the back; from the back side hold 1" x 4" diagonally and draw angle; cut
7. Screw shelves onto the shelf braces with 2 screws on each end
8. Place 1" x 4" diagonally at the back and screw with 2 screws on each end into the shelf rack uprights
9. Install hanging chains on the shop light; feed chains through screw eye and secure with hitch pin clips at appropriate height; install grow bulbs into shop light
10. Set tray on bottom shelf, then pot, and water and you’re ready to go
Lesson 2-4
Lesson 2-5
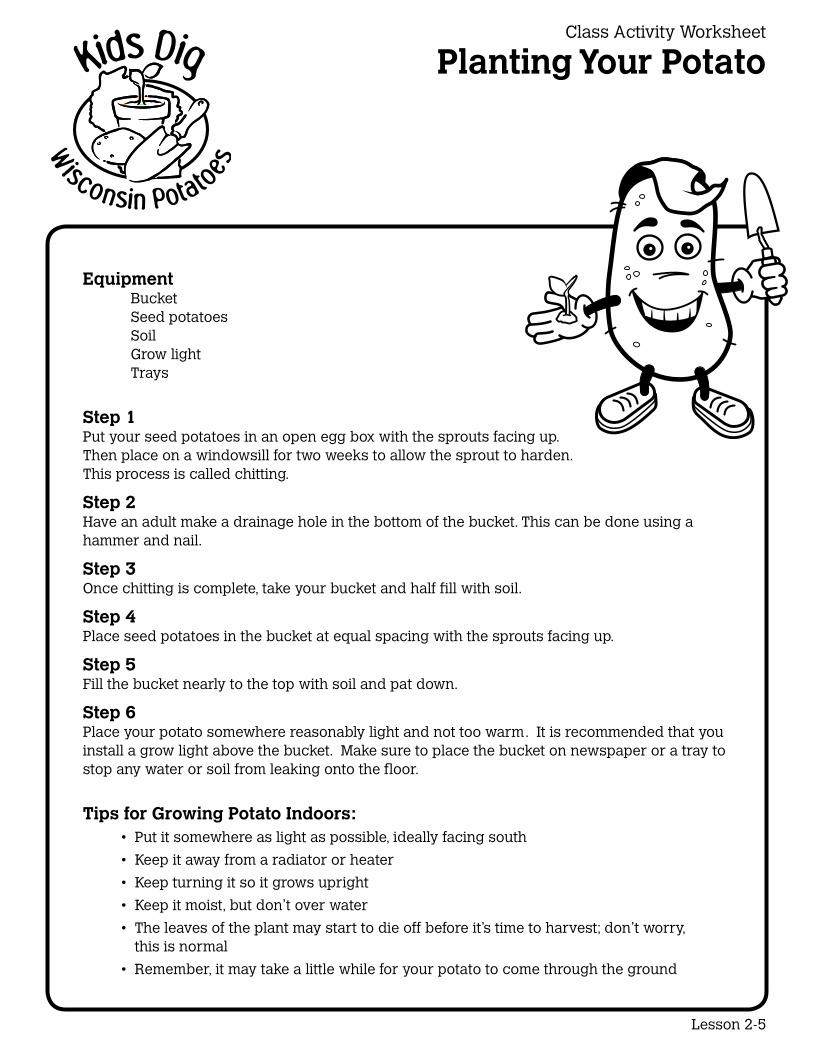
Equipment Bucket Seed potatoes Soil Grow light Trays
Step 1Put your seed potatoes in an open egg box with the sprouts facing up. Then place on a windowsill for two weeks to allow the sprout to harden. This process is called chitting.
Step 2Have an adult make a drainage hole in the bottom of the bucket. This can be done using a hammer and nail.
Step 3Once chitting is complete, take your bucket and half fill with soil.
Step 4 Place seed potatoes in the bucket at equal spacing with the sprouts facing up.
Step 5Fill the bucket nearly to the top with soil and pat down.
Step 6Place your potato somewhere reasonably light and not too warm. It is recommended that you install a grow light above the bucket. Make sure to place the bucket on newspaper or a tray to stop any water or soil from leaking onto the floor.
Tips for Growing Potato Indoors: • Put it somewhere as light as possible, ideally facing south
• Keep it away from a radiator or heater
• Keep turning it so it grows upright
• Keep it moist, but don’t over water
• The leaves of the plant may start to die off before it’s time to harvest; don’t worry, this is normal
• Remember, it may take a little while for your potato to come through the ground
Class Activity Worksheet
Planting Your Potato

Lesson 2-6
Plants need light, water, food, space, air and the correct temperature to grow really well. Here are some tips to help you grow the best potatoes.
SpaceThe more room the plants have to grow, the better. You don’t want a container that is too small.
LightPlants need light to grow, so make sure you put your potato somewhere in the light.
WaterPotatoes need water to grow, but make sure you don’t over water. Water every 3–4 days to ensure that the soil is kept damp.
FoodPotatoes need food to grow—this comes from nutrients in the soil. Some soils come with nutrients in it to help with the growing process. You may want to add some extra plant food— if you do, read the instructions carefully.
TemperatureThe ideal temperature for growing your potato is 50°–59° F.
Class Activity Worksheet
Growing Your Potato
Lesson 2-7Form No. KD103-Mar 2012
Class Activity Worksheet
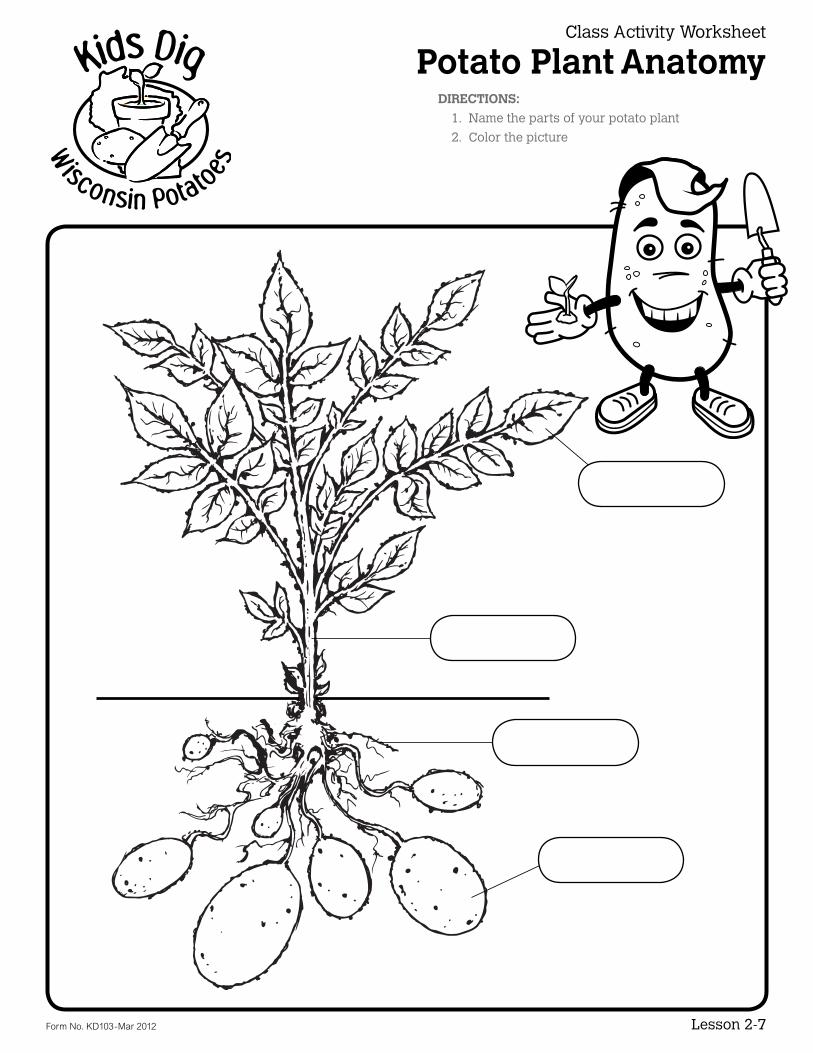
Potato Plant AnatomyDIrECTIONS:
1. Name the parts of your potato plant
2. Color the picture