Embed Size (px)
Citation preview
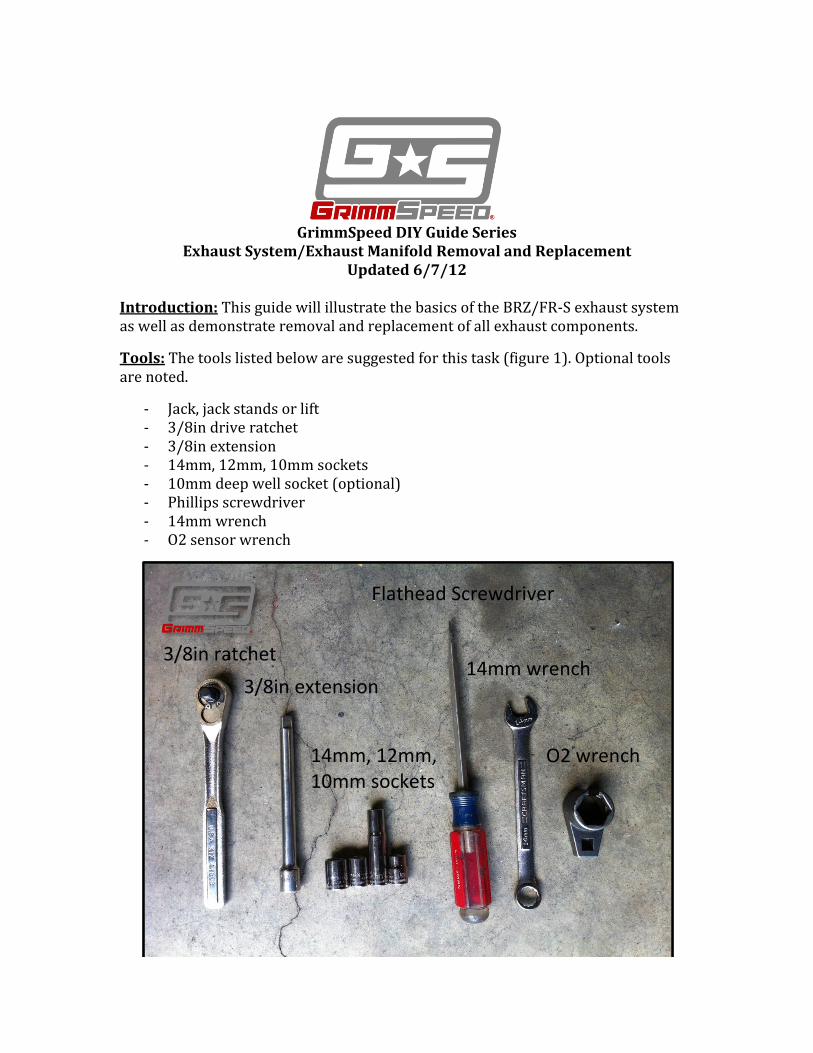
GrimmSpeed DIY Guide Series
Exhaust System/Exhaust Manifold Removal and Replacement Updated 6/7/12
Introduction: This guide will illustrate the basics of the BRZ/FR-S exhaust system as well as demonstrate removal and replacement of all exhaust components.
Tools: The tools listed below are suggested for this task (figure 1). Optional tools are noted.
- Jack, jack stands or lift - 3/8in drive ratchet - 3/8in extension - 14mm, 12mm, 10mm sockets - 10mm deep well socket (optional) - Phillips screwdriver - 14mm wrench - O2 sensor wrench
3/8in ratchet
3/8in extension
14mm, 12mm, 10mm sockets
Flathead Screwdriver
14mm wrench
O2 wrench
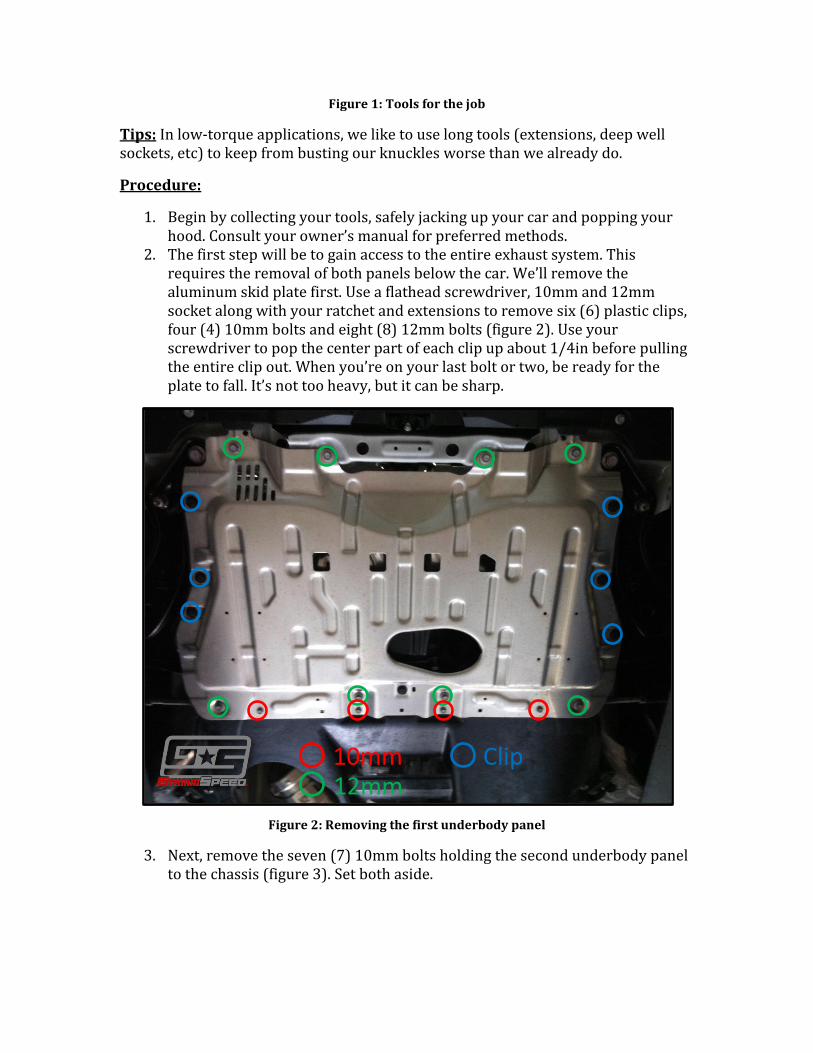
Figure 1: Tools for the job
Tips: In low-torque applications, we like to use long tools (extensions, deep well sockets, etc) to keep from busting our knuckles worse than we already do.
Procedure:
1. Begin by collecting your tools, safely jacking up your car and popping your hood. Consult your owner’s manual for preferred methods.
2. The first step will be to gain access to the entire exhaust system. This requires the removal of both panels below the car. We’ll remove the aluminum skid plate first. Use a flathead screwdriver, 10mm and 12mm socket along with your ratchet and extensions to remove six (6) plastic clips, four (4) 10mm bolts and eight (8) 12mm bolts (figure 2). Use your screwdriver to pop the center part of each clip up about 1/4in before pulling the entire clip out. When you’re on your last bolt or two, be ready for the plate to fall. It’s not too heavy, but it can be sharp.
Figure 2: Removing the first underbody panel
3. Next, remove the seven (7) 10mm bolts holding the second underbody panel to the chassis (figure 3). Set both aside.
10mm 12mm
Clip
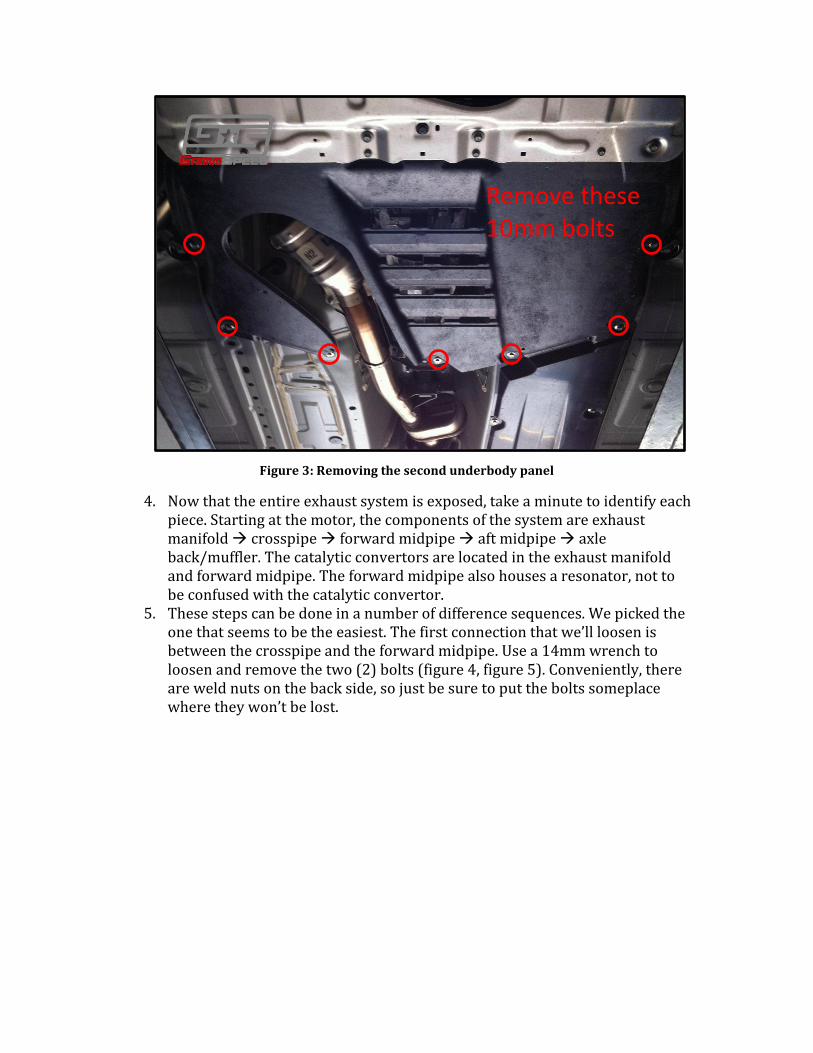
Figure 3: Removing the second underbody panel
4. Now that the entire exhaust system is exposed, take a minute to identify each piece. Starting at the motor, the components of the system are exhaust manifold crosspipe forward midpipe aft midpipe axle back/muffler. The catalytic convertors are located in the exhaust manifold and forward midpipe. The forward midpipe also houses a resonator, not to be confused with the catalytic convertor.
5. These steps can be done in a number of difference sequences. We picked the one that seems to be the easiest. The first connection that we’ll loosen is between the crosspipe and the forward midpipe. Use a 14mm wrench to loosen and remove the two (2) bolts (figure 4, figure 5). Conveniently, there are weld nuts on the back side, so just be sure to put the bolts someplace where they won’t be lost.
Remove these 10mm bolts
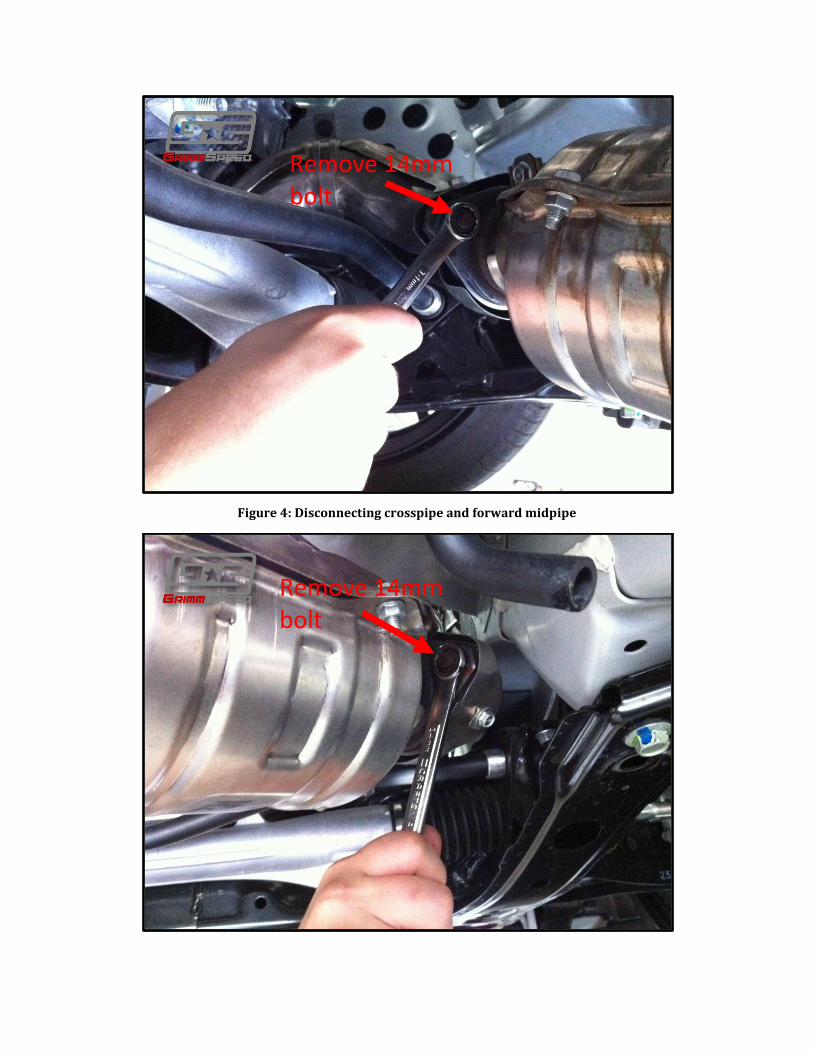
Figure 4: Disconnecting crosspipe and forward midpipe
Remove 14mm bolt
Remove 14mm bolt
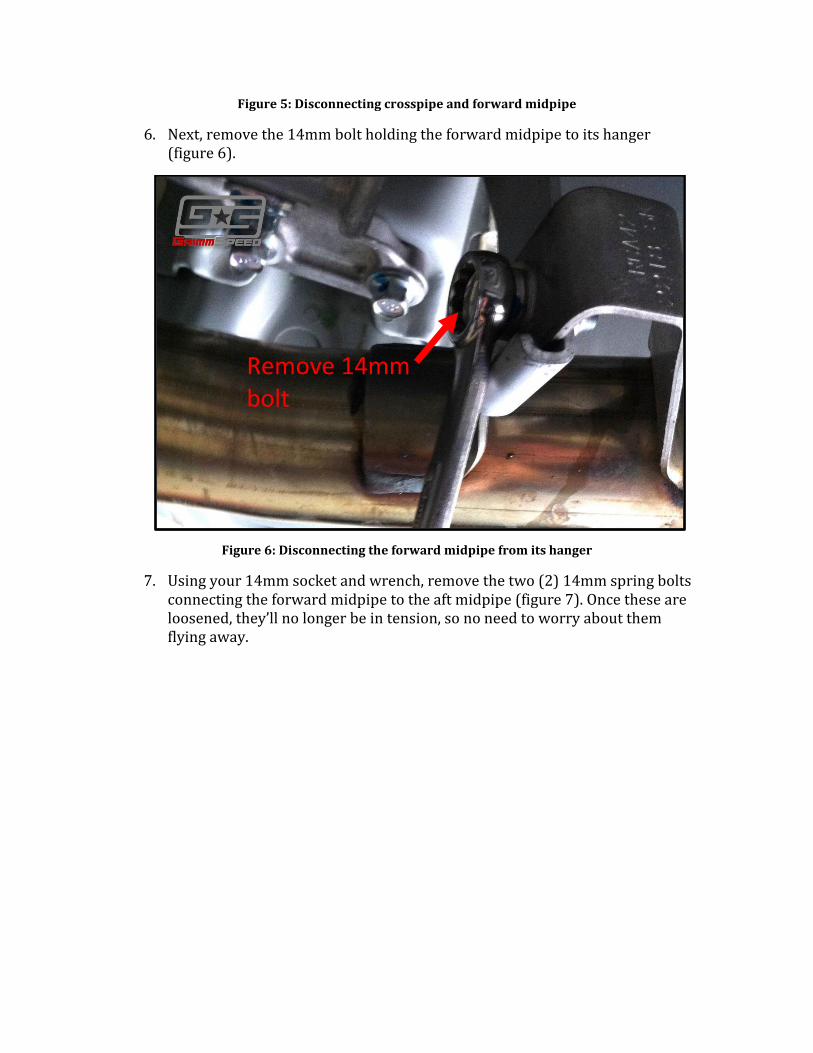
Figure 5: Disconnecting crosspipe and forward midpipe
6. Next, remove the 14mm bolt holding the forward midpipe to its hanger (figure 6).
Figure 6: Disconnecting the forward midpipe from its hanger
7. Using your 14mm socket and wrench, remove the two (2) 14mm spring bolts connecting the forward midpipe to the aft midpipe (figure 7). Once these are loosened, they’ll no longer be in tension, so no need to worry about them flying away.
Remove 14mm bolt
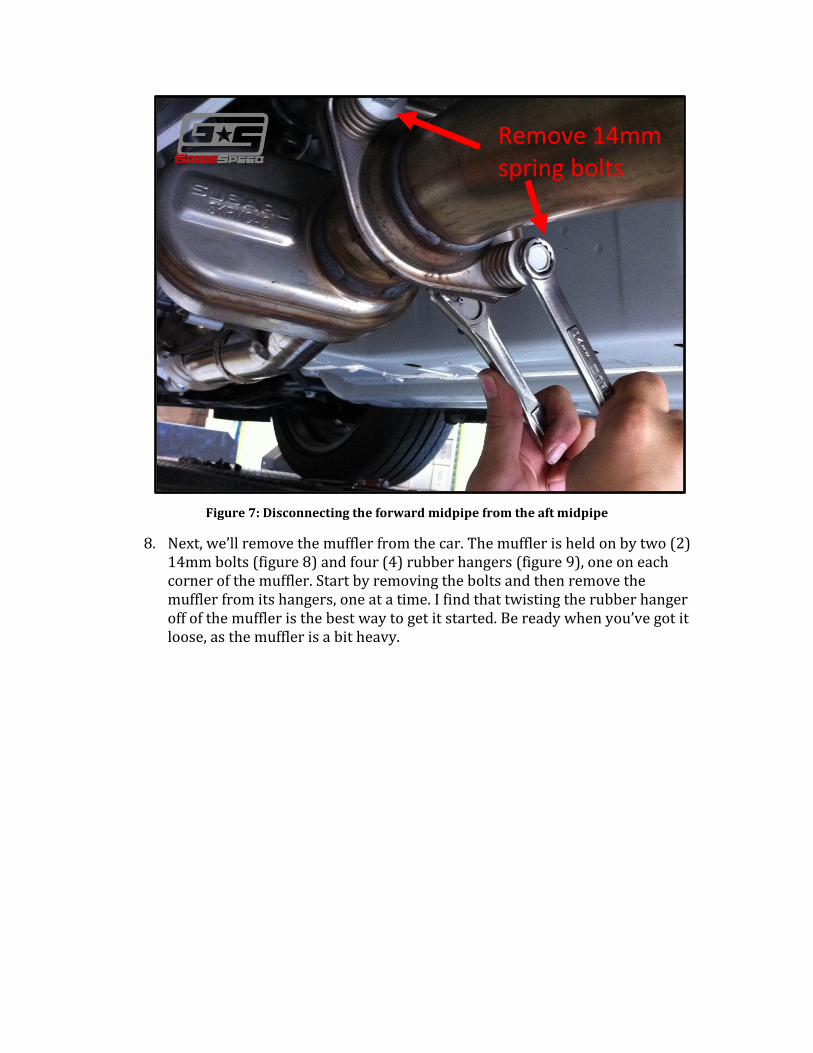
Figure 7: Disconnecting the forward midpipe from the aft midpipe
8. Next, we’ll remove the muffler from the car. The muffler is held on by two (2) 14mm bolts (figure 8) and four (4) rubber hangers (figure 9), one on each corner of the muffler. Start by removing the bolts and then remove the muffler from its hangers, one at a time. I find that twisting the rubber hanger off of the muffler is the best way to get it started. Be ready when you’ve got it loose, as the muffler is a bit heavy.
Remove 14mm spring bolts
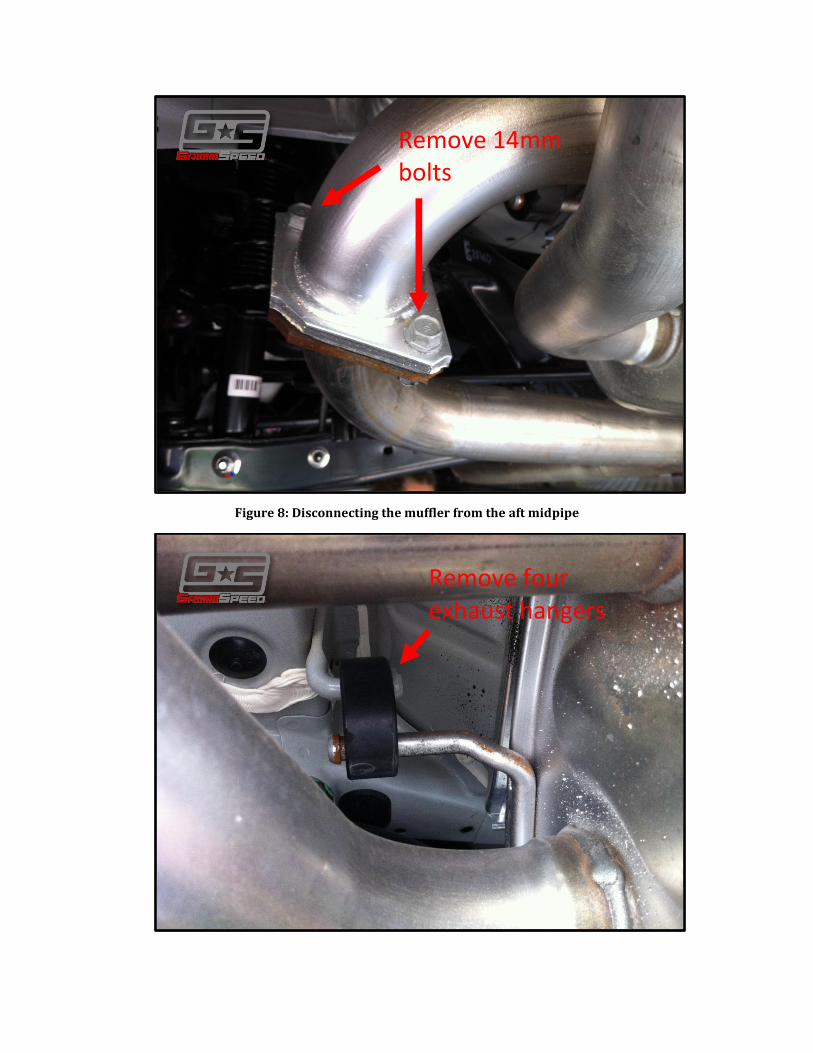
Figure 8: Disconnecting the muffler from the aft midpipe
Remove 14mm bolts
Remove four exhaust hangers

Figure 9: Muffler exhaust hanger
9. Now that you’ve got the muffler and the forward midpipe off the car and set aside, removing the aft midpipe is as easy as pulling it off of its hanger and setting it aside as well.
Figure 10: Aft midpipe
10. The exhaust manifold and crosspipe are the two remaining components in the exhaust system. We’ll tackle the crosspipe first. This smaller pipe runs over the subframe and is a bit tricky to remove. First, remove the two (2) 14mm nuts connecting the crosspipe to the exhaust manifold (figure 11).
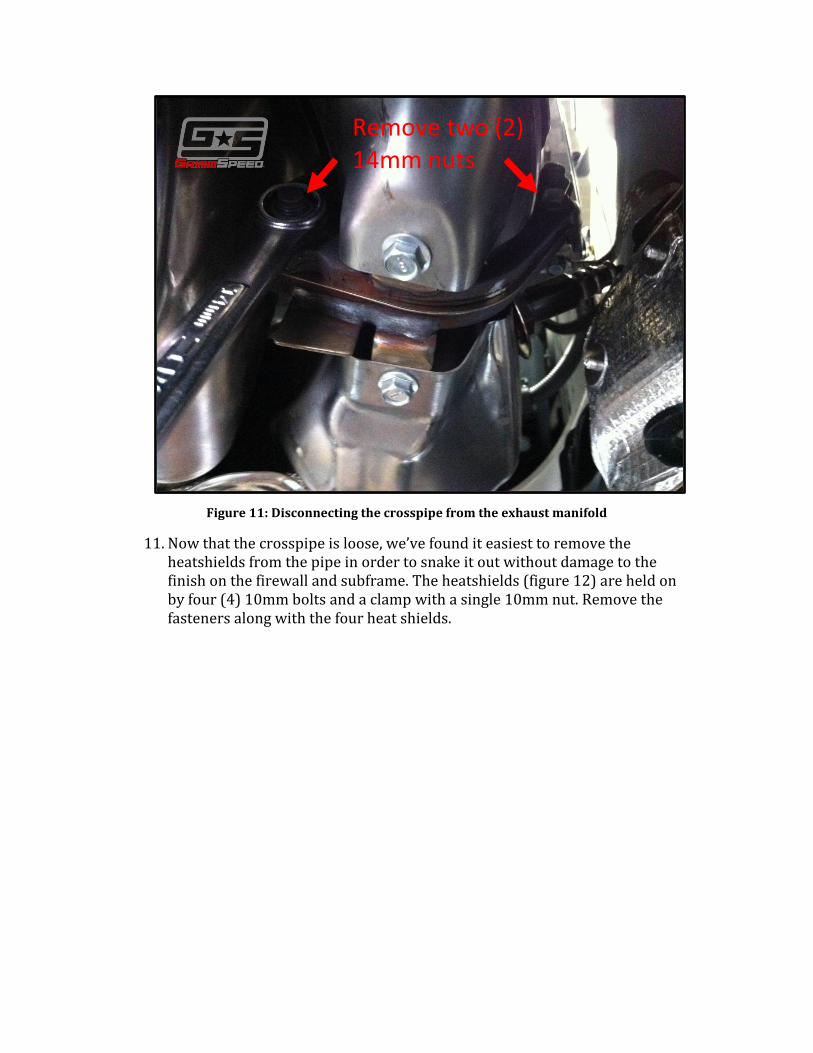
Figure 11: Disconnecting the crosspipe from the exhaust manifold
11. Now that the crosspipe is loose, we’ve found it easiest to remove the heatshields from the pipe in order to snake it out without damage to the finish on the firewall and subframe. The heatshields (figure 12) are held on by four (4) 10mm bolts and a clamp with a single 10mm nut. Remove the fasteners along with the four heat shields.
Remove two (2) 14mm nuts
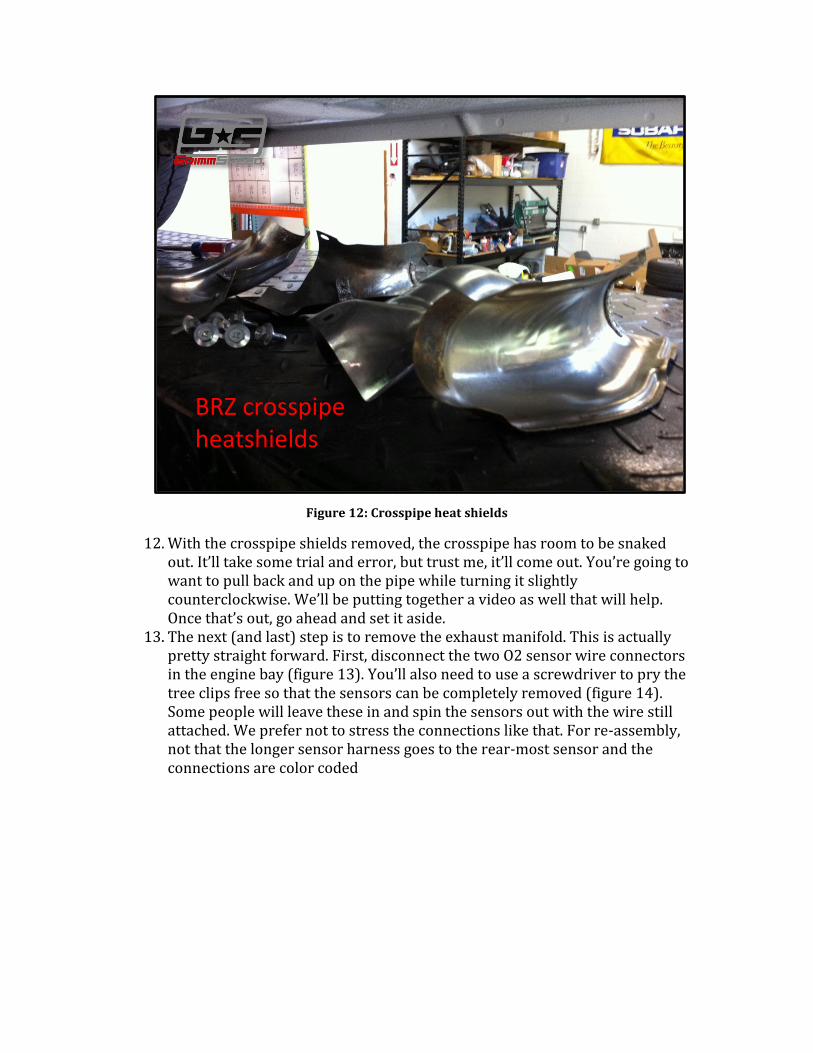
Figure 12: Crosspipe heat shields
12. With the crosspipe shields removed, the crosspipe has room to be snaked out. It’ll take some trial and error, but trust me, it’ll come out. You’re going to want to pull back and up on the pipe while turning it slightly counterclockwise. We’ll be putting together a video as well that will help. Once that’s out, go ahead and set it aside.
13. The next (and last) step is to remove the exhaust manifold. This is actually pretty straight forward. First, disconnect the two O2 sensor wire connectors in the engine bay (figure 13). You’ll also need to use a screwdriver to pry the tree clips free so that the sensors can be completely removed (figure 14). Some people will leave these in and spin the sensors out with the wire still attached. We prefer not to stress the connections like that. For re-assembly, not that the longer sensor harness goes to the rear-most sensor and the connections are color coded
BRZ crosspipe heatshields

Figure 13: O2 harness connectors
Harness Connectors
Tree clip

Figure 14: Disconnect harness tree clips
14. Next, use your O2 sensor wrench or socket to remove both sensors from the exhaust manifold (figure 15, figure 16). If you’ve disconnected the harnesses from the car, this step is optional, as you’re able to remove the exhaust manifold with the sensors still installed.
Figure 15: Forward O2 sensor
Forward O2 Sensor
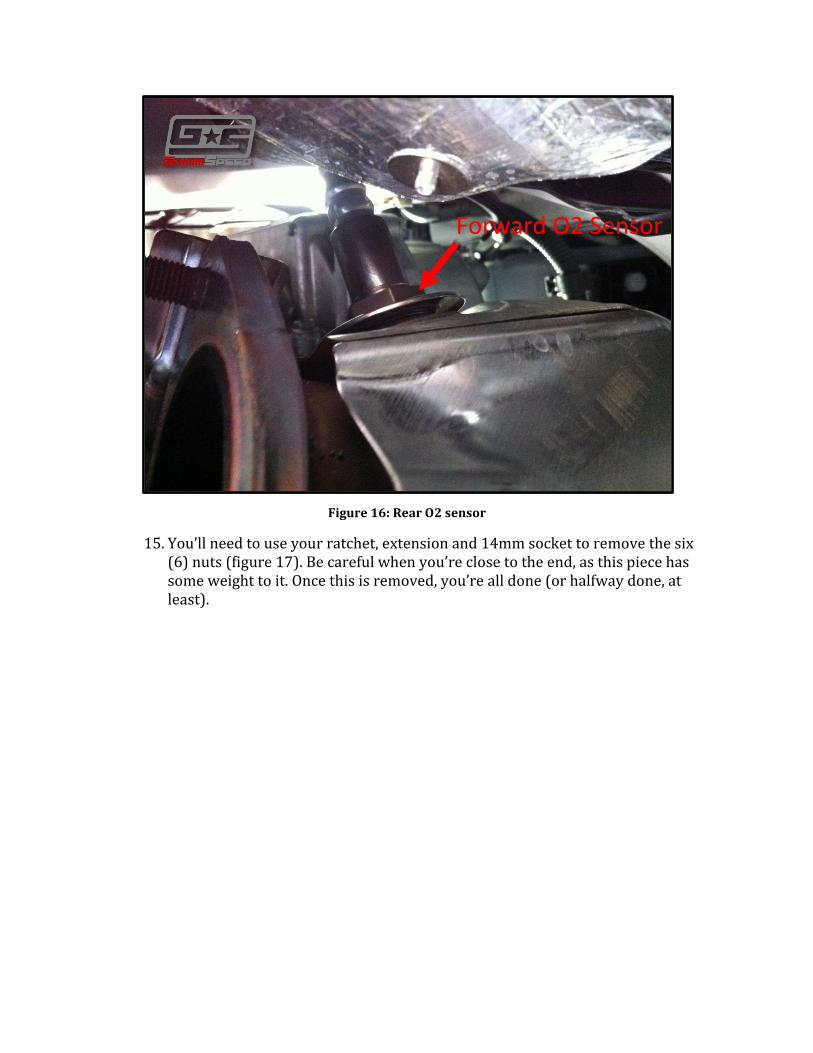
Figure 16: Rear O2 sensor
15. You’ll need to use your ratchet, extension and 14mm socket to remove the six (6) nuts (figure 17). Be careful when you’re close to the end, as this piece has some weight to it. Once this is removed, you’re all done (or halfway done, at least).
Forward O2 Sensor
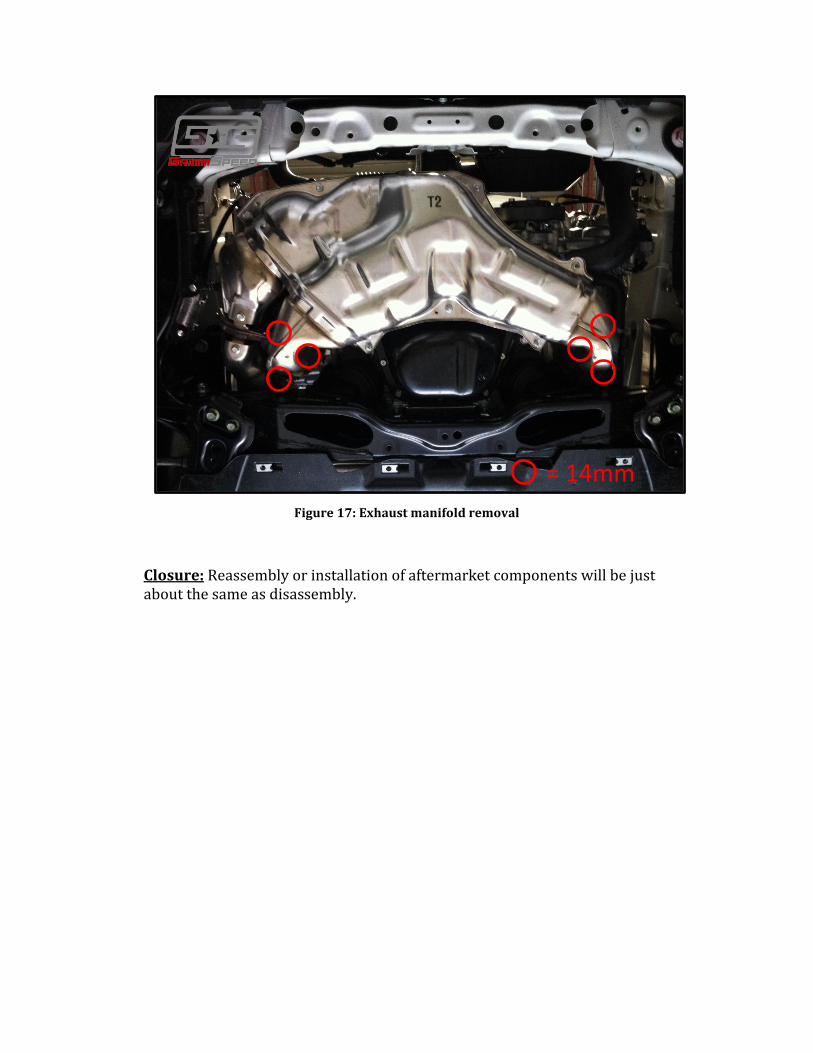
Figure 17: Exhaust manifold removal
Closure: Reassembly or installation of aftermarket components will be just about the same as disassembly.
= 14mm