Embed Size (px)
Citation preview


3
Grazing Guide
Spring
4
Grazing Guide
Spring
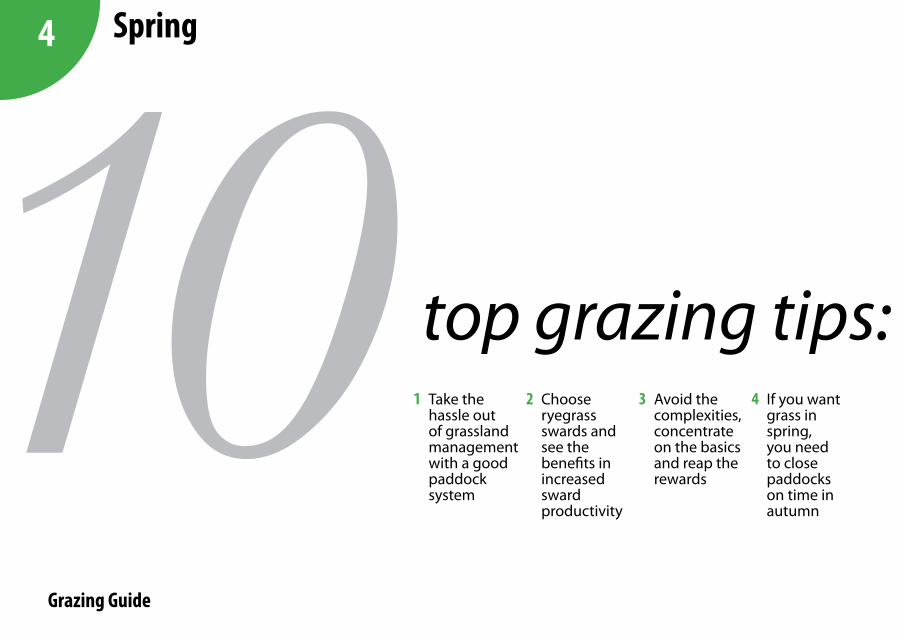
Take the 1 hassle out of grassland management with a good paddock system
Choose 2 ryegrass swards and see the benefits in increased sward productivity
Avoid the 3 complexities, concentrate on the basics and reap the rewards
If you want 4 grass in spring, you need to close paddocks on time in autumn
top grazing tips: how to cash in on grass
5
Grazing Guide
Spring
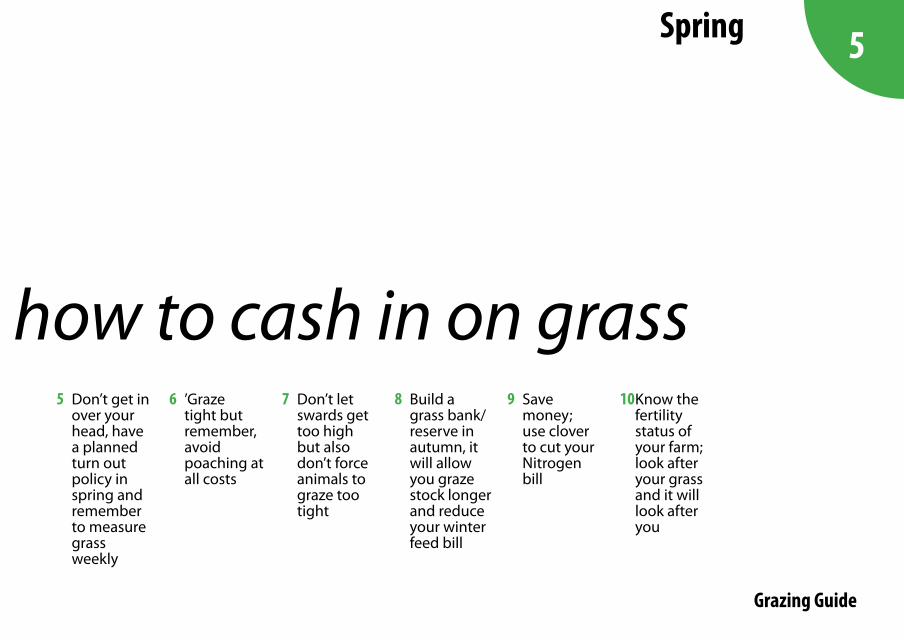
Don’t get in 5 over your head, have a planned turn out policy in spring and remember to measure grass weekly
’Graze 6 tight but remember, avoid poaching at all costs
Don’t let 7 swards get too high but also don’t force animals to graze too tight
Build a 8 grass bank/reserve in autumn, it will allow you graze stock longer and reduce your winter feed bill
Save 9 money; use clover to cut your Nitrogen bill
top grazing tips: how to cash in on grassKnow the 10 fertility status of your farm; look after your grass and it will look after you

6
Grazing Guide
Spring
Contents INTRODUCTIONExploiting our grass-based advantage 7
SPRINGGetting the turnout date right 11Setting up the farm to utilise grass 14Applying slurry in spring 18Spreading nitrogen fertilizer 20Spring rotation planner 22Wet weather management 26
SUMMERManaging grass supply 28Avoid wasting grass offered to grazing herd 30The role of fertilizer in summer 32Main Grazing Season (May to August) 38Understanding your wedge 40Target the autumn to reduce beef costs 50
AUTUMN Nitrogen applications 52Autumn/winter grazing 54Pre-grazing yield 5660:40 rotation planner 58Getting the meal feeding right 62The best use of autumn grass 64Wet weather management 68
GRAZING +Calendars Nitrogen application throughout the year 83Top tips to successfully grazing bulls 84Understanding how rye grass grows 88Getting clover to work on the farm 92
8
Grazing Guide
Spring 9
Grazing Guide
Spring
Grass at a reasonable level of utilisation (75%) costs about 7.5c/kg utilisable dry matter compared with first and second cut grass silage at 18.5c/kg and 18.2c/kg utilisable DM.
Grazed grass is the highest qual-ity feed on the farm in spring, better than silage and equivalent to con-centrates. Based on these figures, it is important to increase the grass proportion in the diet of the beef steer/heifer.
The key period to target is spring for two reasons:
More expensive feeds such as grass silage and concentrate can be displaced by grazed grass.
Early spring grazing increases grass quality in second, third, etc, grazing rotations. Therefore, it should be used as much as pos-sible in the freshly calved suckler cows or grazing steers’ diet. During the early grazing season (Febru-ary or March), a balance must be found between feeding the animal adequately, to sustain high animal performance, and conditioning the sward for the late spring/summer grazing season. In the first rotation,
springJoys of
28
Grazing Guide
Summer 29
Grazing Guide
Summer
Managing grass supply The key to mid-season or sum-mer grazing is to ensure a constant supply of high-quality grass ahead of the animals.
High weight gains can be achieved from a grass-only diet once the correct pre-grazing yield is offered and high levels of utili-sation are continuously achieved. Allowing pre-grazing yield to exceed recommended levels leads to a decline in grass quality and poor bodyweight gain.
Finishing the first rotation on time is critical for mid-season grass supply and quality. It will ensure that grass will be more easily man-aged in the second and subsequent grazing rotations. Finishing the first rotation too early will mean animals are grazing on too short a rotation from April onwards and grass will run out. Finishing the first rotation too late means that grass will be in surplus, post-graz-ing residuals will be hard to achieve
and quality will be affected for the rest of the year.
The biggest problem on farms is that the first rotation starts and ends too late. The level of re-growth recovery from late March to April 10th is the real indicator of the sec-ond rotation’s re-growth and how much grass will be on the farm.
Avoid wasting grass offered to the grazing herd
Too often on livestock farms there is excessive grass offered to the grazing herd. High grass utilisa-tion is possible when pre-grazing yields are at levels that the grazing animals can graze out well.
The key focus during the main grazing season is to offer high-qual-ity/leafy material to the grazing herds as often as possible through the season.
Grazing animals respond positive-ly to high-quality grass and it is far easier for them to graze swards of 1,400 kg DM/ha (7-8cm) than swards of 2,200kg DM/ha (10+cm).
Getting it right during the main grazing season
DOs DON’TsWalk the farm weekly Walk farm fortnightly or less
frequently
Keep monitoring the recovery of re-growths
Delay the reaction to high grass growth
React quickly to increasing grass growth
Let pre-grazing yields increase
Maintain pre-grazing yields at 1400kg DM/ha (8cm)
Increase SR too much on grazing area, by closing paddocks for long-term silage
Graze paddocks out to 4cm Graze paddocks to 5.0-5.5cm
Top only when necessary to 4-5cm
Extend rotation length >23 days
Keep rotation length at 18-21 days
Continually react to changes in growth
Take out paddocks quickly
Grazing to 4cm in the �rst rotation provides a platform for excellent quality grass re-growth.
The ideal pre-grazing yield for maximum animal performance is 1400kg DM/ha (8cm).
Under-grazing leads to a greater proportion of stem. This will lower quality and animal performance.
Avoid turning stock into too heavy covers. React quickly to surplus grass and save as baled silage.
52
Grazing Guide
Autumn 53
Grazing Guide
Autumn
Autumn nitrogen applications
THE
FACTOR
On beef farms, grazing stocking rates are quite varied but generally low, which has a huge ef-fect on feed demand. As the nitrate directive deadline date for nitrogen application is 15 September, farm-ers must decide now what level of nitrogen application they will apply to ensure suffi cient grass growth for the fi nal three rotations.
Farmers with a high grass de-mand in October/November, who have their nitrogen applications up to date by August, should consider applying a blanket application. The amount to apply may vary, and will depend on feed supply. Only blan-ket spread nitrogen if the farm is under target for grass. Spreading excess nitrogen in autumn is wast-ing money as the soil is naturally releasing nitrogen.
Soil temperatures stay quite high in September and grass responses per kg N of between 10kg to 15kg DM/ha have been recorded under good growing conditions. Obvi-ously, swards with more perennial ryegrass will respond better to ni-trogen and these should be targeted
for building autumn grass.Swards on a long rotation with
nitrogen applied have the capacity to achieve grass growth rates of up to 40 to 50kg DM/ha/day through September and October.
Autumn slurryTiming of slurry application has
little effect on P and K utilisation from slurry, provided application does not take place in periods of heavy rainfall that might cause signifi cant run-off losses.
Timing of application only has an effect on N availability due to am-
monia volatilisation in warmer and drier weather.
Approximately 85% of the eco-nomic fertilizer value of slurry is due to its P and K content; 70% is K (about fi ve units of P and 38 units of K per 1,000 gallons). Since applica-tion in autumn has little effect on P and K utilisation, most of the slurry value will still be utilised with au-tumn application.
The key issue with slurry at any time of the year is to spread on fi elds that need P and K. A question that farmers should ask themselves
Nitrogen and slurry applications in autumn
DOs DON’Ts
Apply slurry to paddocks with low soil index
Use urea in dry periods
It may be possible to use urea when spreading N in autumn
Apply nitrogen to clover rich pastures
Apply low levels of nitrogen rather than missing N on paddocks
Miss nitrogen on paddocks if possible
Use light applications of slurry if available
Apply a blanket application of nitrogen if required pre-September 15
70
Grazing Guide
Calendar 71
Grazing Guide
Calendar
JANUARY
Mon 10 Tues 11 Wed 12 Thurs 13 Fri 14 Sat 15
Slurry spread-ingon dry farm
Sun 16
Slurry spread-ing
Mon 17
Slurry spread-ingon dry farm
Tues 18
Slurry spread-ingon dry farm
Wed 19
Slurry spread-ingon dry farm
Thurs 20
Slurry spread-ingon dry farm
Fri 21
Slurry spread-ingon dry farm
Sat 22
Slurry spread-ing
Sun 23
Dividing pad-docks
Mon 24
Dividing pad-docks(heavy&dry farms)
Tues 25
Dividing pad-docks(heavy&dry farms)
Wed 26
Dividing pad-docks(heavy&dry farms)
Thurs 27
Dividing pad-docks(heavy&dry farms)
Fri 28
Dividing pad-docks(heavy&dry farms)
Sat 29 Sun 30
Mon 31
i
Grazing Guide
TOP TIPS FOR THE MONTHSlurry Spread slurry on light covers that were closed up last in the autumn. Apply 2500 gallons per acre – equivalent to spreading 0.5 bags of urea per acre. Remember to check the dates for your spreading zone.
Paddocks When dividing paddocks, avoid long narrow blocks. Try to keep them as square as possible. 2ha paddocks are ideal for a 40-cow herd. Position water troughs so that paddocks can be subdivided during periods of peak growth.
FEBRUARYTues 1
Slurry spread-ing on heavy farm
Wed 2
Slurry spread-ing on heavy farm
Thurs 3
Slurry spread-ing on heavy farm
Fri 4
Slurry spread-ing on heavy farm
Sat 5
Spread Non dry farm
Sun 6
Mon 7
Spread Non dry farm
Tues 8
Spread Non dry farm
Wed 9
Spread Non dry farm
Thurs 10
Spread Non dry farm
Fri 11
Spread Non dry farm
Sat 12
Get stock out to grass on dry farm
Sun 13
Get stock out to grass
Mon 14
Get stock out to grass
Tues 15
Get stock out to grass
Wed 16
Get stock out to grass
Thurs 17
Get stock out to grass
Fri 18
Get stock out to grass
Sat 19
Spread N on heavy farm
Sun 20
Spread N on heavy farm
Mon 21
Spread N on heavy farm
Tues 22
Spread N on heavy farm
Wed 23
Spread N on heavy farm
Thurs 24
Spread N on heavy farm
Fri 25
Spread N on heavy farm
Sat 26
Spread N on heavy farm
Sun 27
Spread N on heavy farm
Mon 28
iMon 28Mon 28TOP TIPS FOR THE MONTHSlurryHeavy farms should spread slurry as soon as ground conditions allow.
Early NitrogenNitrogen should be applied on dry farms in early February with heavier farms getting out in mid-late February. Spread at a rate of 23 units (0.5 bags of urea) per acre. Soil temperature should be consistently above 5-6 degrees C. Do not spread if heavy rain is forecast.
TurnoutDry farms should aim to get out to grass in mid February. Turnout out priority stock fi rst.

7
Grazing Guide
IntroductionExploiting our grass-based advantage
The potential to achieve high levels of lifetime gain from grazed grass gives Irish farmers a major competitive advantage over many of their European counterparts. On average the cost of producing a kilo of liveweight gain from grazed grass is 80-85% less when compared to an intensive concentrate based system.
Ireland and Britain are the only major beef producing regions within Europe that are not heavily
dependent on intensive concen-trate based feedlot systems to both grow and finish animals. In most of the major beef producing regions across continental Europe when a calf is weaned from its mother 100% of the liveweight gain achieved until slaughter is delivered from concentrates. In Ireland on a well managed grass based system there is potential to deliver over 80% of this gain from grazed grass.
Grazing Guide aims to help farm-ers ensure that they are exploiting the full potential of grazed grass on their farm, irrespective of produc-tion system or land type. Land type is often seen as a barrier to adopting good grassland manage-ment practices. However there are still a number of simple steps that farmers operating on heavy land
can take to improve grass growth and utilisation. These are detailed throughout the guide.
Getting cattle out to grass early and ensuring an adequate supply of good quality leafy grass is avail-able throughout the grazing season is key to obtaining high levels of animal performance. The guide breaks down the key management steps that should be taken during the spring, summer and autumn to ensure this is achieved. The role of clover, farm infrastructure, reseed-ing and soil nutrients in improving grass growth and utilisation are also covered in detail.
The authors of Grazing Guide hope you find it beneficial in im-proving grassland management on your farm and ultimately the profit-ability of your business.
8
Grazing Guide
Spring
springJoys of

9
Grazing Guide
Spring
Grass at a reasonable level of utilisation (75%) costs about 7.5c/kg utilisable dry matter (DM) compared with first and second cut grass silage at 16.5c/kg and 18.2c/kg utilisable DM.
Grazed grass is the highest quality feed on the farm in spring, better than silage and equivalent to concentrates. Based on these figures, it is important to increase the grass proportion in the diet of the beef animal.
The key period to target is spring for two reasons:
More expensive feeds such as grass silage and concentrate can be displaced by grazed grass.
Early spring grazing increases grass quality in second, third, etc, grazing rotations. Therefore, it should be used as much as possible in the freshly calved suckler cow or animal’s diet. During the early graz-ing season (February or March), a balance must be found between feeding the animal adequately, to sustain high animal performance, and conditioning the sward for the late spring/summer grazing season.

10
Grazing Guide
Spring
In the first rotation, the key is to graze paddocks out to 3.5 to 4cm and set up paddocks for following rota-tions. By doing this, grass digest-ibility can be increased by 4 units in May and June.
Across the country, the average grazing season length is 220 days.
O b S TA C l E STwo of the main obstacles to achiev-ing more days at grass, especially in early spring, are poor soil condi-tions and periods of high rainfall. If animals stay in the paddock, tread-ing damage caused on heavier soils or during periods of heavy rainfall can result in reduced growth rates
(up to 20% lower) during subse-quent grazing rotations. Allowing animals access to pasture for a few hours per day (on/off grazing) has been shown to maintain high levels of performance when compared with grass silage based diets and may be a strategy that can be imple-mented to extend grazing season length. Traditionally, fattening diets have been focused on high grass silage combined with concentrates. With core prices envisaged to stay strong, beef farmers need to focus on producing more carcase output from pasture.
Animal performance increases, of both finishing and store cattle,
from early turnout are substantial. Research work has shown that ani-mals turned out early to grass have 6% (+23kg) higher carcase weight than animals turned out later in spring. This could equate to close to €60 to €70/head.
O U T P U TThe increase in animal output can be gained with good grazing management and earlier turnout. Not only is grass a lower cost feed but the slurry generated is reduced with a longer grazing season.
Achieving an extra day at grass for the suckler cow is worth on aver-age €1.50/cow/day. It is clear that major efficiency gains can be made with early turnout.
The goal with spring grazing is to ensure that priority stock have first access to grass, i.e. the stock that will make most economic use of the available pasture and reduce their days to finish.
Unlike a dairy farm, a beef farm has the opportunity to turnout stock in smaller numbers. This can be advantageous in targeting high grass utilisation.
Turnout during the main grazing season
DOs DON’Ts
Maximise early spring grazing in the diet of freshly calved suckler cows or priority cattle
Allow stock remain on paddocks during heavy rainfall resulting in poaching
Graze paddocks to 3.5cm to 4cm in the first rotation
Use silage supply as a target for turnout date
Implement on/off grazing or remove stock from grass to prevent damage
Turn out all animals in the herd at once
benefits of spring grazingLower feed costs Higher daily gainFewer days to finish/slaughterLower direct costs (labour/feed/machinery)
11
Grazing Guide
Spring
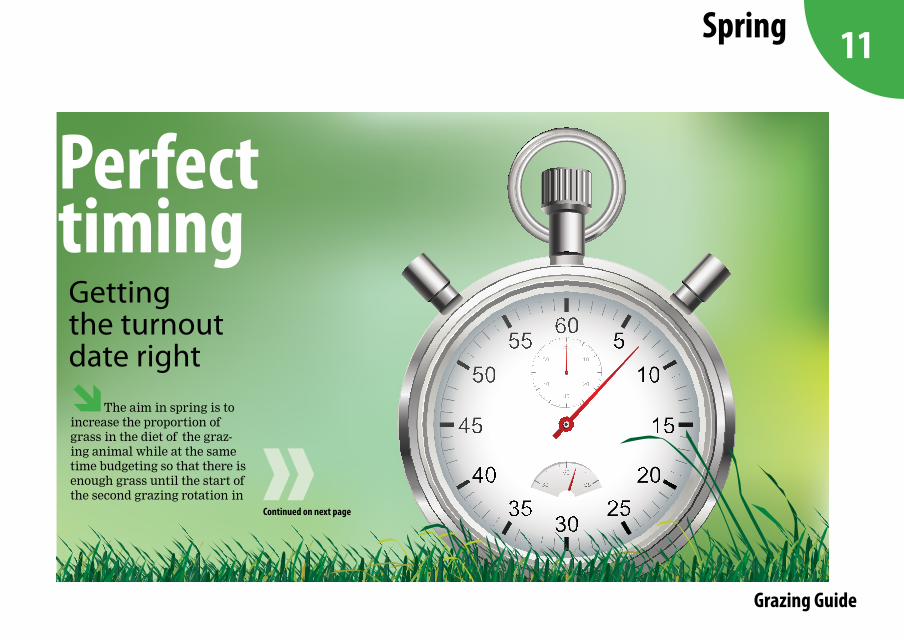
The aim in spring is to increase the proportion of grass in the diet of the graz-ing animal while at the same time budgeting so that there is enough grass until the start of the second grazing rotation in
Getting the turnout date right
Perfect timing
Continued on next page

12
Grazing Guide
Spring
Turnout during the main grazing seasonTURNOUT IS TOO lATE
TURNOUT IS RIGHT
TURNOUT IS TOO EARlY
Too much grass Cheaper feed costs Run out of grass
Poor grass utilisation Long first rotation Very short first rotation
Poor grass growth Utilise all early grass Reduced grass growth
Short first rotation Can close only what's required for silage
No grass before early May
Too much area for first cut silage
Priority stock to grass No rest period for paddocks
High stocking rate on grazing area
Maximise slurry use and reduce chemical fertilizer
Silage cut will be late or unable to make sufficient quantities
Too cautious Continuous measurement No measurement
Slurry may not be spread because of heavy covers
Poor utilisation of slurry
early to mid-April. Spring grazing should start in
February/March and continue until mid-April. This varies from farm to farm but the overriding aspect of grazing management is to make good use of spring grass.
P R I O R I T Y S T O C kAll animals in the herd do not have to be turned out together or at the same time. Groups of animals should be prioritised for early turn-out, i.e. those that will benefit most from high quality spring grass e.g. young bulls, steers or beef heifers.
f I R S T R O TAT I O NThe first grazing rotation should be 40 to 50 days and finish around 10 April. This can be extended to 20 April in later growing or poorer grass growing areas.
A R E A T O G R A Z E f I R S TGraze 30% to 40% of the grazing paddocks first to allow re-growths to accumulate for the start of the second rotation.
13
Grazing Guide
Spring
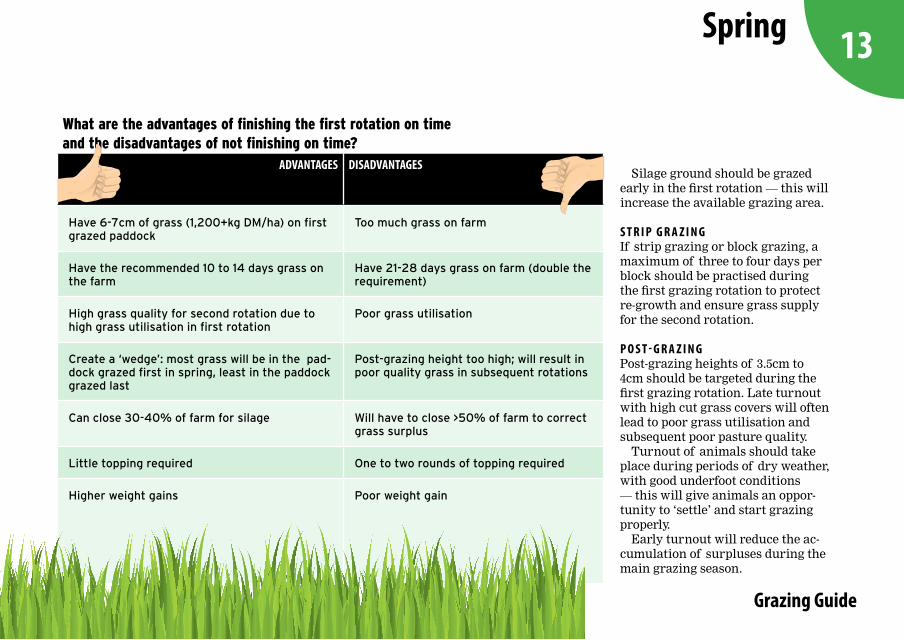
What are the advantages of finishing the first rotation on time and the disadvantages of not finishing on time?
ADVANTAGES DISADVANTAGES
Have 6-7cm of grass (1,200+kg DM/ha) on first grazed paddock
Too much grass on farm
Have the recommended 10 to 14 days grass on the farm
Have 21-28 days grass on farm (double the requirement)
High grass quality for second rotation due to high grass utilisation in first rotation
Poor grass utilisation
Create a ‘wedge’: most grass will be in the pad-dock grazed first in spring, least in the paddock grazed last
Post-grazing height too high; will result in poor quality grass in subsequent rotations
Can close 30-40% of farm for silage Will have to close >50% of farm to correct grass surplus
Little topping required One to two rounds of topping required
Higher weight gains Poor weight gain
Silage ground should be grazed early in the first rotation — this will increase the available grazing area.
S T R I P G R A Z I N GIf strip grazing or block grazing, a maximum of three to four days per block should be practised during the first grazing rotation to protect re-growth and ensure grass supply for the second rotation.
P O S T - G R A Z I N GPost-grazing heights of 3.5cm to 4cm should be targeted during the first grazing rotation. Late turnout with high cut grass covers will often lead to poor grass utilisation and subsequent poor pasture quality.
Turnout of animals should take place during periods of dry weather, with good underfoot conditions — this will give animals an oppor-tunity to ‘settle’ and start grazing properly.
Early turnout will reduce the ac-cumulation of surpluses during the main grazing season.
14
Grazing Guide
Spring
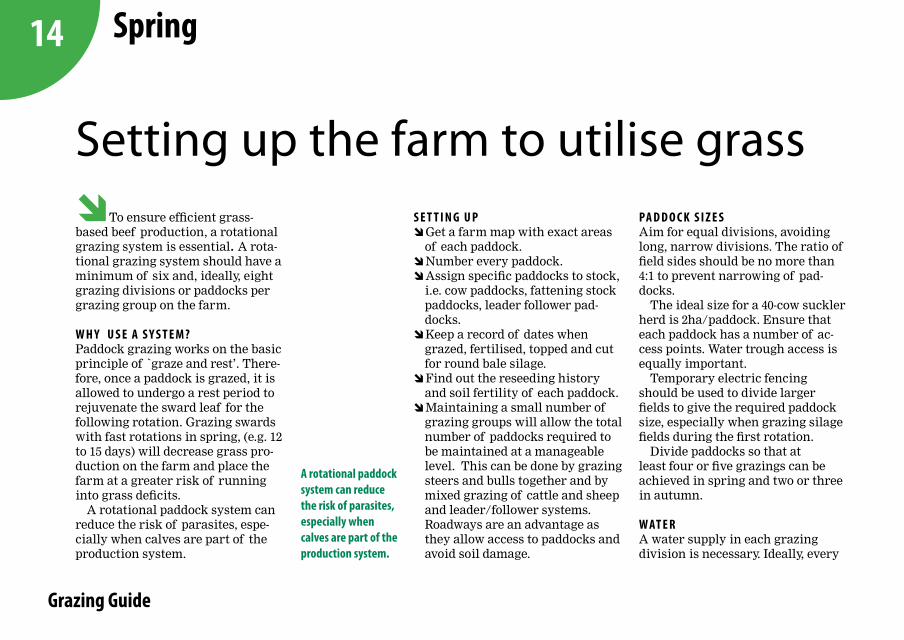
To ensure efficient grass-based beef production, a rotational grazing system is essential. A rota-tional grazing system should have a minimum of six and, ideally, eight grazing divisions or paddocks per grazing group on the farm.
W H Y U S E A S Y S T E M ?Paddock grazing works on the basic principle of `graze and rest’. There-fore, once a paddock is grazed, it is allowed to undergo a rest period to rejuvenate the sward leaf for the following rotation. Grazing swards with fast rotations in spring, (e.g. 12 to 15 days) will decrease grass pro-duction on the farm and place the farm at a greater risk of running into grass deficits.
A rotational paddock system can reduce the risk of parasites, espe-cially when calves are part of the production system.
S E T T I N G U PGet a farm map with exact areas of each paddock.Number every paddock. Assign specific paddocks to stock, i.e. cow paddocks, fattening stock paddocks, leader follower pad-docks.Keep a record of dates when grazed, fertilised, topped and cut for round bale silage.Find out the reseeding history and soil fertility of each paddock.Maintaining a small number of grazing groups will allow the total number of paddocks required to be maintained at a manageable level. This can be done by grazing steers and bulls together and by mixed grazing of cattle and sheep and leader/follower systems. Roadways are an advantage as they allow access to paddocks and avoid soil damage.
PA D D O C k S I Z E SAim for equal divisions, avoiding long, narrow divisions. The ratio of field sides should be no more than 4:1 to prevent narrowing of pad-docks.
The ideal size for a 40-cow suckler herd is 2ha/paddock. Ensure that each paddock has a number of ac-cess points. Water trough access is equally important.
Temporary electric fencing should be used to divide larger fields to give the required paddock size, especially when grazing silage fields during the first rotation.
Divide paddocks so that at least four or five grazings can be achieved in spring and two or three in autumn.
W AT E RA water supply in each grazing division is necessary. Ideally, every
Setting up the farm to utilise grass
A rotational paddock system can reduce the risk of parasites, especially when calves are part of the production system.
15
Grazing Guide
Spring
16
Grazing Guide
Spring
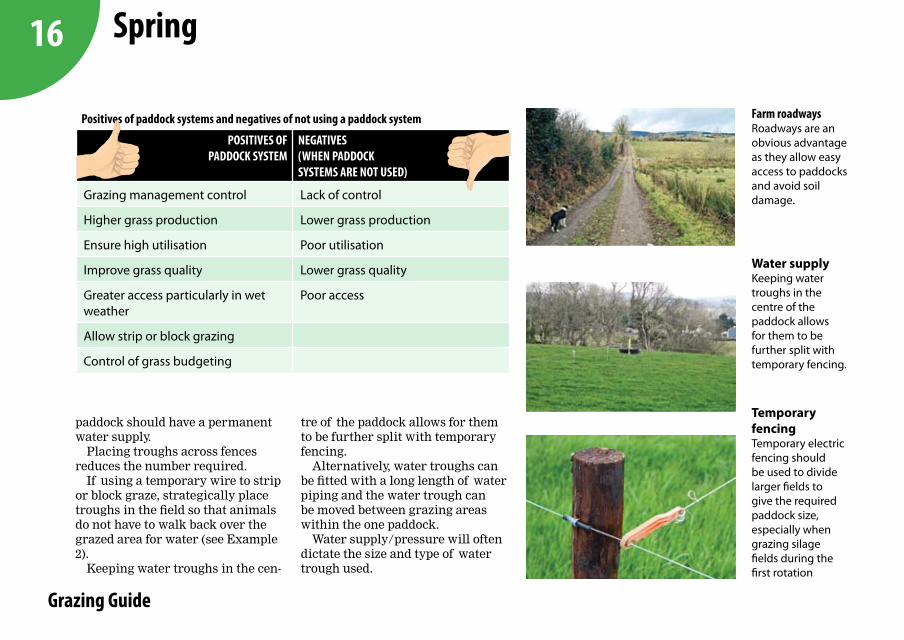
farm roadwaysRoadways are an obvious advantage as they allow easy access to paddocks and avoid soil damage.
Temporary fencingTemporary electric fencing should be used to divide larger fields to give the required paddock size, especially when grazing silage fields during the first rotation
Water supplyKeeping water troughs in the centre of the paddock allows for them to be further split with temporary fencing.
paddock should have a permanent water supply.
Placing troughs across fences reduces the number required.
If using a temporary wire to strip or block graze, strategically place troughs in the field so that animals do not have to walk back over the grazed area for water (see Example 2).
Keeping water troughs in the cen-
tre of the paddock allows for them to be further split with temporary fencing.
Alternatively, water troughs can be fitted with a long length of water piping and the water trough can be moved between grazing areas within the one paddock.
Water supply/pressure will often dictate the size and type of water trough used.
Positives of paddock systems and negatives of not using a paddock system
POSITIVES Of PADDOCk SYSTEM
NEGATIVES (WHEN PADDOCk SYSTEMS ARE NOT USED)
Grazing management control Lack of control
Higher grass production Lower grass production
Ensure high utilisation Poor utilisation
Improve grass quality Lower grass quality
Greater access particularly in wet weather
Poor access
Allow strip or block grazing
Control of grass budgeting
17
Grazing Guide
Spring
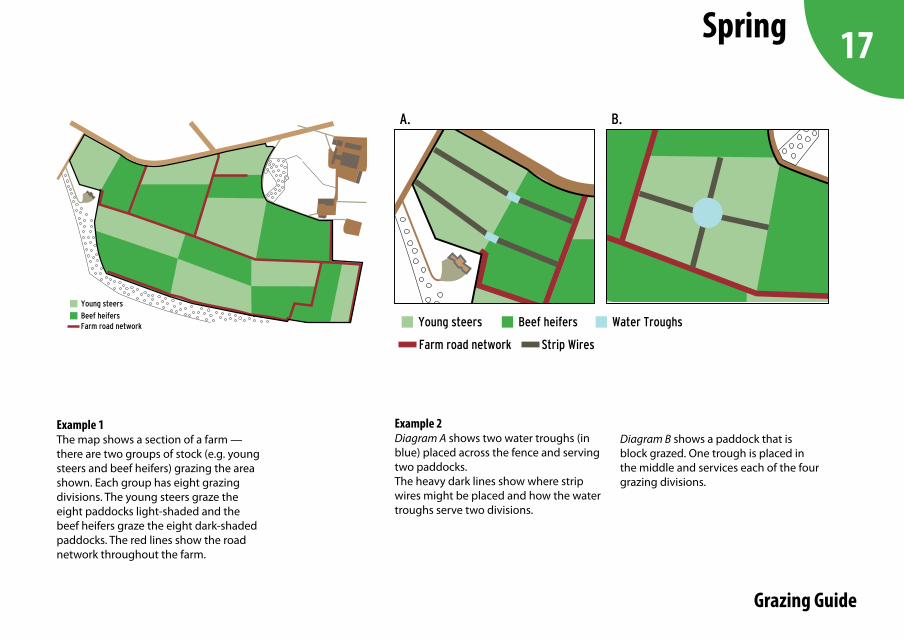
Example 1The map shows a section of a farm — there are two groups of stock (e.g. young steers and beef heifers) grazing the area shown. Each group has eight grazing divisions. The young steers graze the eight paddocks light-shaded and the beef heifers graze the eight dark-shaded paddocks. The red lines show the road network throughout the farm.
Example 2Diagram A shows two water troughs (in blue) placed across the fence and serving two paddocks.The heavy dark lines show where strip wires might be placed and how the water troughs serve two divisions.
Young steers
Beef heifersFarm road network
A. B.
Young steers Beef heifers Water Troughs
Farm road network Strip Wires
Diagram B shows a paddock that is block grazed. One trough is placed in the middle and services each of the four grazing divisions.
18
Grazing Guide
Spring
Applying slurry in springCattle slurry, as a valuable source of N, P and K, should be ap-plied on the fields that need it most and at the time of year that will give you the best response.
All of the P and K in slurry is available to be utilised and fields that are low in both of these nutri-ents need to be targeted to receive slurry. On a lot of farms, this will be the silage fields as this is where the feed that eventually produces the slurry comes from in the first place.
The time of year that slurry is spread does not affect the availabil-ity or utilisation of P and K. This is not the case with N.
N I N C AT T l E S l U R R YHalf of the nitrogen in cattle slurry is in an organic form and the other half is as ammonium, the very same form of nitrogen that is in purchased urea fertilizer.
It is the ammonium half that can
replace bought in bagged N. Similar to urea fertilizer there
are times of the year during which you can expect to get the maximum value of N from slurry and this is very much weather dependent.
Ideal conditions for getting the best nitrogen utilisation from cattle slurry are:
Overcast with very little sunshine Slight drizzle of rain Little or no wind
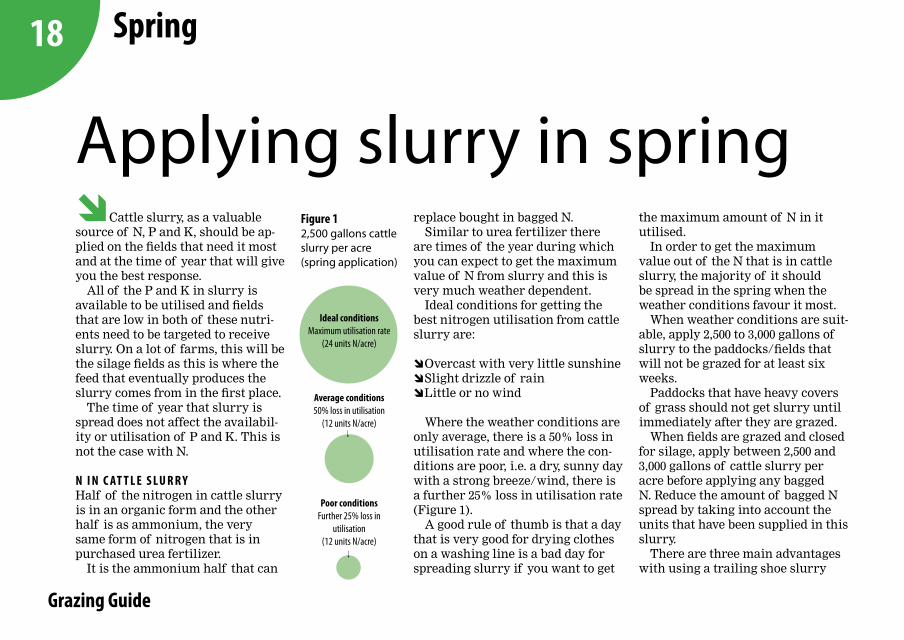
Where the weather conditions are only average, there is a 50% loss in utilisation rate and where the con-ditions are poor, i.e. a dry, sunny day with a strong breeze/wind, there is a further 25% loss in utilisation rate (Figure 1).
A good rule of thumb is that a day that is very good for drying clothes on a washing line is a bad day for spreading slurry if you want to get
the maximum amount of N in it utilised.
In order to get the maximum value out of the N that is in cattle slurry, the majority of it should be spread in the spring when the weather conditions favour it most.
When weather conditions are suit-able, apply 2,500 to 3,000 gallons of slurry to the paddocks/fields that will not be grazed for at least six weeks.
Paddocks that have heavy covers of grass should not get slurry until immediately after they are grazed.
When fields are grazed and closed for silage, apply between 2,500 and 3,000 gallons of cattle slurry per acre before applying any bagged N. Reduce the amount of bagged N spread by taking into account the units that have been supplied in this slurry.
There are three main advantages with using a trailing shoe slurry
figure 12,500 gallons cattle slurry per acre (spring application)
Ideal conditionsMaximum utilisation rate
(24 units N/acre)
Average conditions50% loss in utilisation
(12 units N/acre)
Poor conditionsFurther 25% loss in
utilisation(12 units N/acre)

19
Grazing Guide
Spring
Spreading slurry
DOs DON’Ts
Spread most of the slurry produced on the farm in the spring rather than the summer
Spread slurry when heavy rain or frost is forecast
Apply 2,500-3,000 gls of slurry to ground that is going to be grazed in six weeks
Apply slurry to heavy covers; wait until they are grazed first
Spread slurry on silage ground to replace nutrients and reduce chemical N requirement
Apply slurry on dry sunny days with strong breeze
Spread slurry on dull and slightly wet days
Apply slurry on top of bagged fertiliser
spreader in the spring compared with using a splash-plate spreader:
They widen the window of op-portunity in getting slurry out on farms with heavier soils.
They allow you to spread slurry
on paddocks/fields with heavier covers of grass and still be able to graze them six weeks later, i.e. less contamination of grass.
They increase the utilisation rate
of the N that is available in slurry by up to 40%.
While there are advantages to using a trailing shoe spreader in comparison with more conventional spreaders, at their current cost they are still only justifiable in most cases on a contractor scale. Indi-vidual farmers should negotiate the best rate possible (per 1,000 gallons spread).
A trailing shoe allows slurry to be spread in a wider window, increases N utilisation and allows slurry to be spread on heavier covers.
Ideal conditions for spreading slurryOvercast with very little sunshine Slight drizzle of rain Little or no wind
TOPTIPS

20
Grazing Guide
Spring
Spreading nitrogen fertilizerNitrogen fertilizer can provide a boost to spring grass growth, allowing for more cattle to be turned out earlier. Soil tempera-tures need to be at least 5oC before there is an adequate response to it and the date at which this occurs can differ from year to year.
In good growing conditions, 1kg of N has the ability to grow 10kg to 15kg of grass DM during February while, in other years, there can be little or no grass growth response to the N due to prolonged cold weather into March. The general recommen-dation has been to apply nitrogen fertilizer six weeks before your expected turnout date. With farms that are moving towards turning out smaller groups of cattle at in-tervals and starting with an earlier turnout date, this recommendation no longer applies and a more tar-geted approach is needed.
Paddocks or fields that have heavy
Wait until soil temperatures are at least 5 degrees and rising before spreading N
covers of grass built up on them (10cm+) from the previous autumn and over the winter should be grazed before applying N.
Paddocks with little or no grass covers should receive cattle slurry first and N at a later date. These will be the last to be grazed in the first rotation.
Target your earliest N applications on the paddocks and fields that have the greatest production potential – predominately ryegrass swards – with 5cm to 8cm of grass that have good fertility (P, K & lime)
Apply no more than 23 units N per acre for the first application.
Wait until soil temperatures are at least 5oC and rising.
Urea is cheaper per kg N than CAN and should be used in spring applications wherever possible to reduce costs.
The amount of N that should be spread for first cut silage will de-pend on a number of factors:
Where slurry is applied first, the requirement can be reduced by 9 units N per 1,000 gallons spread per acre, e.g. 24 units N less when 2,500 to 3,000 gallons are spread.
The amount of ryegrass in the sward to respond to N. Old pastures with low levels of perennial ryegrass should receive a maximum of 80 units (from both slurry and N fertilizer).
New reseeds will give a response up to 100 units per acre.
Most fields should be targeted to receive 90 units in total.
Where fields have received N in the weeks coming up to closing for first cut silage, 1/3 of this N is still assumed to be available and this should also be taken off the requirement.
21
Grazing Guide
Spring
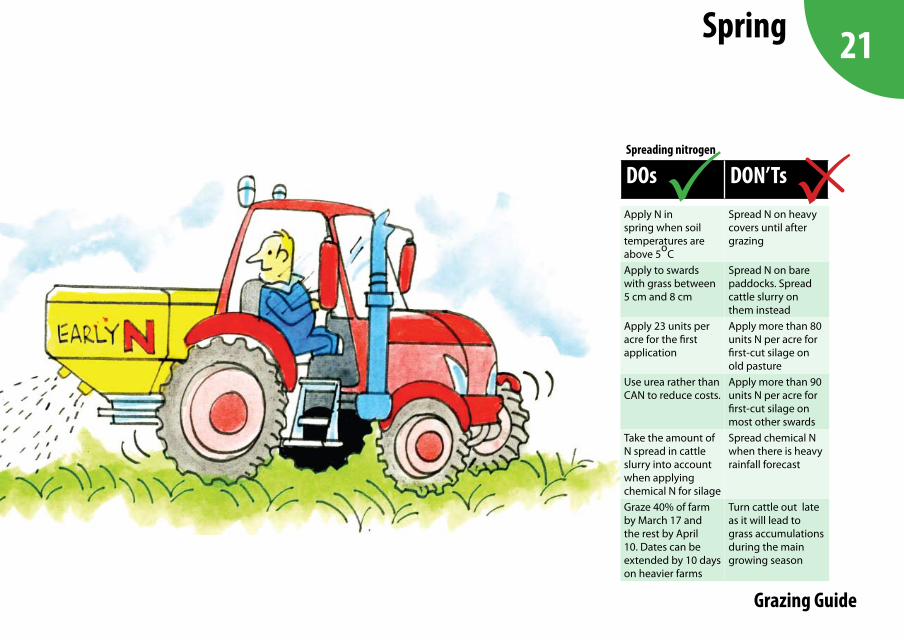
Spreading nitrogen
DOs DON’TsApply N in spring when soil temperatures are above 5oC
Spread N on heavy covers until after grazing
Apply to swards with grass between 5 cm and 8 cm
Spread N on bare paddocks. Spread cattle slurry on them instead
Apply 23 units per acre for the first application
Apply more than 80 units N per acre for first-cut silage on old pasture
Use urea rather than CAN to reduce costs.
Apply more than 90 units N per acre for first-cut silage on most other swards
Take the amount of N spread in cattle slurry into account when applying chemical N for silage
Spread chemical N when there is heavy rainfall forecast
Graze 40% of farm by March 17 and the rest by April 10. Dates can be extended by 10 days on heavier farms
Turn cattle out late as it will lead to grass accumulations during the main growing season