Embed Size (px)
Citation preview

Grade 8Physical Science
Oak Meadow
Coursebook
Oak Meadow, Inc.Post Office Box 1346
Brattleboro, Vermont 05302-1346oakmeadow.com
Item #b085010

iii
Grade
8 Contents
Introduction: ................................................... ix
General Guidelines ............................................................x
A Note About Materials .................................................. xi
Keep Your Work in a Safe Place ...................................... xi
Final Note ......................................................................... xii
Lessons
Lesson 1: A Brief History of Physical Science ............... 1The Flow of DiscoveryStudying Science
Lesson 2: Measuring ...................................................... 13Taking MeasurementsMeasuring SystemsConverting Between U.S. Customary and Metric SystemsMeasuring Linear DistanceMeasuring AreaMeasuring the Volume of SolidsMeasuring the Volume of Liquids
Lesson 3: Scientific Method .......................................... 25Variable and Constant FactorsControlled Versus Uncontrolled EnvironmentThe Scientific MethodUsing the Scientific MethodIntroduction to Mass and MatterMatter, Molecules and Atoms
iv Oak Meadow
Contents Grade 8 Physical Science
Lesson 4: Energy ............................................................. 39Types of EnergyPotential Energy and Kinetic EnergyEnergy Can Change FormUsed Energy and Heat Energy
Lesson 5: Thermodynamics and Conservation of Energy ..................................................................... 49The Laws of ThermodynamicsFirst law of Thermodynamics and Conservation of EnergyPendulums and Conservation of Energy
Lesson 6: Force ............................................................... 59Different Kinds of ForceForce and MotionResultants
Lesson 7: Force of Gravity ............................................. 69Newton’s Law of GravityMass, Weight, and GravityUnits of Weight and MassCenter of Gravity
Lesson 8: The Laws of Motion ...................................... 83FrictionMinimizing FrictionProjectiles
Lesson 9: More Motion ................................................. 93VelocityAccelerationNewton’s Second Law of MotionNewton’s Third Law of Motion
Lesson 10: Work and Power ....................................... 103WorkPowerUnit of Measurement for Power

Oak Meadow v
Grade 8 Physical Science Contents
Lesson 11: Machines .................................................... 113Inclined Planes and Mechanical AdvantageRampsWedgesLeversThe Laws of Thermodynamics and MachinesFriction, Gravity and Machines
Lesson 12: More Machines ......................................... 127Wheels and AxlesGearsPulleys
Lesson 13: Waves as Moving Energy .......................... 137Wave Parts, Period and FrequencyWave VelocityTransverse and Longitudinal WavesWave Interference and ReflectionWaves You Can’t See
Lesson 14: Sound ......................................................... 149How Does Sound Travel?LoudnessPitchThe Speed of Sound
Lesson 15: More Sound ............................................... 161Transmission, Absorption, and Reflection of Sound WavesAcoustics Inside BuildingsNoise Pollution
Lesson 16: Light ............................................................ 173Light WavesIlluminationReflection
Lesson 17: Opaque Materials and Shadows ............. 181Transparent Materials and RefractionLight Technology

vi Oak Meadow
Contents Grade 8 Physical Science
Lesson 18: Color ........................................................... 191Visible SpectrumRefraction and Dispersion of LightBlue Skies and Red SunsetsThe Electromagnetic Spectrum
Lesson 19: Lenses ......................................................... 205Converging and Diverging Light RaysHow Eyes WorkCreating ImagesWearing GlassesPerspectiveCameras
Lesson 20: Electricity.................................................... 217What causes ElectricityLaws of Electrical ChangeStatic ElectricityCurrent ElectricityConductors and InsulatorsCircuits and Switches
Lesson 21: Batteries ..................................................... 231Wet CellsDry cells
Lesson 22: Electric Circuits and Measuring Electricity .................................................................. 237Series CircuitsParallel CircuitsMeasuring Electricity
Lesson 23: Resistance and Ohm’s Law ...................... 247Ohm’s LawResistors and CircuitsResistors and Series CircuitsResistors and Parallel Circuits

Oak Meadow vii
Grade 8 Physical Science Contents
Lesson 24: Home Electricity ........................................ 257OverloadShort CircuitsElectric ShocksElectric meters
Lesson 25: Magnetism ................................................. 267Magnets and PolesMagnetism and AtomsCreating MagnetsMagnetic FieldsThe Earth’s Magnetism
Lesson 26: Magnetism and Electricity ........................ 279Making a Magnet with ElectricityMaking Electricity from MagnetismDirect Current and Alternating Current
Lesson 27: Matter......................................................... 291Element Names and SymbolsAtomic MassElectron Shells
Lesson 28: Mixtures, Compounds and Molecules .... 305MoleculesOxidationPhotosynthesis
Lesson 29: Solutions .................................................... 313Types of SolutionsSolubility and Concentration
Lesson 30: Heat, Temperature and Pressure ............. 323Heat On the MoveThermal Expansion and ContractionTemperaturePressure

viii Oak Meadow
Contents Grade 8 Physical Science
Lesson 31: Aerodynamics and Flight .......................... 341Aerodynamic ForcesBernoulli’s Principle and LiftAirplanesSupersonic Aircraft
Lesson 32: Modern Machines ..................................... 353MicrowavesTelevisionSatellitesCompact Discs and Long-Playing Records
Lesson 33: Cars ............................................................ 367HydraulicsHybrid Cars
Lesson 34: Energy Use in Our World ......................... 375Fossil FuelsHydroelectric PowerElectricity from SteamGeothermal EnergyWind PowerBiomassSolar EnergyNuclear Energy
Lesson 35: Energy Problems ....................................... 395Energy and FoodChemicalsPollutantsAir PollutionThe Greenhouse EffectAcid RainOrganic Compounds and Ozone DepletionThermal Pollution
Lesson 36: Final Review ............................................... 415

25
Scientific Method
Grade 8
3Science describes what we know about our world. We learn about the world by observing what is happening all around us. We observe through all our senses: we watch, we listen, we feel, we smell, we taste, and we use our intuition. Then we reach conclusions about what it all means. This is how we make sense out of the world.
Observing and exploring nature and the workings of our earth is largely a matter of being receptive to what lies all around us. This does not take special training; look at any small child and you’ll see that he/she observes many things that many of us don’t notice. As we said in lesson 1, our species has survived because we pay attention to novel events. Careful observation is the basis of scientific inquiry.
In this lesson, you will learn about the classic “scientific method”. This is an organized way of testing observed phenomena, useful in science courses and in certain research applications. However, it is not the only way that scientific progress is made! Scientists observe the world like children do: exploring every corner, every new thing. It is observation and questioning that is scientific inquiry, and this can come about in many different ways. Sometimes you cannot create experiments around the observed phenomena. If a shower of meteors falls to the earth, how can you devise an experiment to test that they are meteors? You can’t recreate it, but you can observe carefully, and it can open your eyes to new possibilities and new things to observe. This is the way science works. We need to be constantly aware. In fact, most scientific discoveries happen completely by surprise. However, even the surprises aren’t surprising, because scientists expect them!

26 Oak Meadow
Scientific Method
(continued)
Lesson 3 Grade 8 Physical Science
We are all scientists. We ask questions, we guess what the answer will be, we watch to see what happens. Our minds record the results and then we decide what the results mean. We take this knowledge and use it throughout our lives as we decide what to do and how to do it. In the scientific method, observations are made about the world, and then experiments are conducted to explain the observation. How the experiment is designed and then conducted is important, because only then can we get an accurate explanation for the observation. If the experiment is not controlled, then it will not give us a reliable explanation. We will next look at the different things which can make an experiment controlled or uncontrolled, and therefore more or less reliable.
Variable and Constant Factors
When we make observations about the world, it is important to understand what possible variable factors there may be in what we are observing. Factors is a term that describes all the possible parts of an observation or experiment. A variable factor is something that can be varied or changed. Factors that do not change are called con-stant (or determinate) factors.
Let’s say that using the observation above about the ice cream, you decide to figure out why the ice cream is soft sometimes and really hard other times. You have thought about it and come up with four of the variable factors listed above: temperature, placement, type of ice cream, and length of time in freezer. To determine which variable is causing the ice cream to be hard or soft at different times, you decide to conduct a series of experiments to explain your observation.
Oak Meadow 27
Scientific Method
(continued)
Grade 8 Physical Science Lesson 3
Examples of Variable Factors
Let’s suppose that we have made the observation that sometimes the ice cream in the freezer is really hard and sometimes it is a little soft. What are some of the variable factors that could explain this?
• The temperature of the freezer
• The placement of the ice cream in the freezer
• The type of ice cream
• How long the ice cream has been in the freezer
• How many times the door has been opened
• How much ice cream is lef the container
Ice Cream Experiment #1
Let’s say you first decide that you think the most important factor is the placement in the freezer. In order to test this, you put some ice cream in a certain spot in the freezer and then after a while you go and test it for hardness. It seems pretty hard. The next day, when you go to test the ice cream again, you realize that someone ate it all, and there is another kind of ice cream right in the same spot. Since it is in the same place in the freezer, you do another hardness test. It is pretty soft. Uh-oh!
When you think about why the ice cream was soft the second time, you come up with several possible reasons:
a. The ice cream was a different kind, so that might be why it was soft the second time
b. Maybe the ice cream had not been in the freezer for very long.
Maybe it was just put in there after sitting in the car on the way home from the grocery store.
c. Maybe the temperature changed in the freezer.
Your hardness tests of the ice cream didn’t really prove anything because you still don’t really know why the ice cream is soft sometimes and hard

28 Oak Meadow
Scientific Method
(continued)
Lesson 3 Grade 8 Physical Science
at other times. After you did the experiment, you don’t know if it has to do with placement in the freezer any more than you did before. The problem was that there were too many variable factors in your original experiment. This is an example of an uncontrolled experiment - there was not enough control over the variables to find an explanation for the observation. If you really want to find out what causes the ice cream to be harder or softer at different times, you will need to limit the variables.
This brings us to an important rule about experiments: only one variable factor allowed in each experiment! The only way you can figure out why something is happening is to limit the variable factors to one. Each experiment should only have one variable factor.
Limiting Variables
Scientists often simplify the world in order to study just one or two things. This is known as limiting the variables. Think of it like this: if you had an allergic reaction to something that you ate one day, you would probably not be able, at first, to figure out which food it was that gave you the allergic reaction. Each food is a variable. The way to figure it out would be to make a list of all the foods that you ate on that day (a list of all the variables), and then each day eat only one of them at a time. In this way you isolate each food (each variable) until you figure out which one is making you react. This is the process of limiting the variables.
How would this work with the ice cream hardness question? Let’s redesign the experiment to make all the factors constant except one; the variable factor will be the placement of the ice cream in the freezer.
Variables and Constants
• Only one variable factor in each experiment.
• All other factors should be constant.

Oak Meadow 29
Scientific Method
(continued)
Grade 8 Physical Science Lesson 3
Ice Cream Experiment #2
This time you need to make sure that all other factors stay constant (stay the same) throughout the experiment. Now you will have to decide what constants you will need to have in your experiment to make sure only one factor is variable. Let’s say you come up with these constant factors:
a. The temperature of the freezer. You discuss with your family that no one is to touch the freezer control for a couple of days while you conduct the experiment.
b. The type and amount of ice cream. You buy three containers of the same ice cream, all in the same size container , and you ask that no one in your family eat any of it, or move it, for the next several days. (Why three containers? Keep reading!)
c. How long the ice cream has been in the freezer. You place each of the three ice cream containers in the freezer at the same time and you make a note of the time you put them into the freezer.
You decide that the variable factor you will test is the location of the ice cream in the freezer. You are going to vary this factor by placing three identical containers of the same type of ice cream in three different places in your freezer. You then conduct the experiment by checking the hardness in each of the three containers on a set schedule - every six hours, for example — and you write your results down each time. As you do the experiment, you are careful not to change the location of any of the three containers.
Now let’s look at your results. If the results were that the ice cream in one of the containers was soft and the ice cream in the other two containers was hard, then the placement of the ice cream in the freezer affects the hardness of the ice cream! If the results were that the ice cream in all of the containers was equally hard or soft in all locations, then the placement of the ice cream in the freezer is not the variable that affects the hardness and softness of the ice cream. You will have to design another experiment that has a different factor as a variable, and where the placement of the ice cream in the freezer is a constant.
As we have seen, the experiment must be controlled so as not to have too many variable factors.
30 Oak Meadow
Scientific Method
(continued)
Lesson 3 Grade 8 Physical Science
1. Take some time to make an observation around your home. Perhaps you notice that your cat naps in different places at different times of day. Or maybe you see that the temperature on one side of your house generally feels colder than on the other. Then make a list of variable factors that you might consider if you were to design an experiment. After each variable you list, explain how you might control that variable to make it a constant in your experiment.
Controlled Versus Uncontrolled Environments
The environment in which an experiment is conducted has an effect on the outcome of a scientific experiment. It is important to control the environment (the variables), or you will not get an accurate explanation for your observation or question.
A controlled environment is an environment where there is only one, or at most, a few variable factors. Most scientists, when they are working to explain an observation they have made, strive to design and conduct experiments in a controlled environment and to limit the variable factors to as few as possible. An example of a controlled environment is a science laboratory where the scientist can control the temperature, the humidity, and the materials that are used.
An uncontrolled environment is an environment where there are many variable factors. Some kinds of observations cannot be reduced to experiments that can be conducted in a laboratory with controlled variable factors. For example, when dealing with a global environmental issue such as the effect of ozone depletion (which we will discuss more thoroughly in Lesson 35), it is impossible to create a controlled environment to examine this problem. Since ozone depletion occurs on a very large scale - the Earth - it cannot be made to fit into a laboratory. The best that can be done is to study certain pieces of it.
Sometimes it is impossible to isolate variables. Other times the variables work together, and isolating them doesn’t give you an accurate assessment. This has been the case when studying the human body. Scientists have isolated different organs and studied them individually and made conclusions, only to find later that each organ is quite connected to the whole body/mind system. They interact with the system in many complex ways, and controlled systematic study of each separately isn’t quite so simple!

Oak Meadow 31
Scientific Method
(continued)
Grade 8 Physical Science Lesson 3
The Scientific Method
The scientific method is one procedure that all scientists use in trying to understand the earth and all that occurs. You will use this method throughout the rest of this course and many times throughout your life. The scientific method is a series of steps that ask, “Why does something happen?” “Can I figure out why it happened?” “Did I figure out what happened?” and “What did I learn from this?” The steps of the scientific method are as follows:
1. Observation: Identify a problem or a question. This is called the observation.
2. Hypothesis: Make a guess about the answer to the question, based on what you know already. This is called the hypothesis, otherwise known as an “educated guess.”
3. Experiment: Figure out an experiment to test your hypothesis. Try to control the experiment or procedure in order to have as few variable factors as possible. Describe your experiment and the specific steps. Do the experiment. List all the variables that you can figure out.
4. Results: Describe what happened when you did your experiment. What happened is called the results. Sometimes results can be presented in a chart or graph form.
5. Conclusion: Review your original question (Step 1) and your hypothesis (Step 2).
Compare your hypothesis with what actually happened (Step 4).
• Did what you think would happen actually happen?
• Did something unexpected happen?
• Describe the variables and which ones may have impacted your results.
• Consider possible explanations for what happened in your experiment.
• Try to come up with an explanation for your results. This is called the conclusion. The ultimate goal of experimenting is to find scientific truths, or principles, that are true in any situation. This is called a theory, and theories are formed after much experimentation with consistent results.

32 Oak Meadow
Scientific Method
(continued)
Lesson 3 Grade 8 Physical Science
Remember: Control the Variables
It is often difficult to create a completely controlled experiment, but scientists do their best to control as many factors as possible. It is always important to remember that your observations and/or experiment may have variable factors that are affecting your results, so in your role as a scientist you need to control as many factors as you can.
You have now been introduced to the scientific method. Learn the steps well, as you will use the scientific method in almost every lesson in this course, and in all your future science courses.
Before we go on, however, let’s review some related concepts. In lesson 1, you learned that scientific observations must be measurable, repeatable, and that we strive for objective analysis. Remember to apply these principles when using the scientific method. Whenever you use the scientific method for a controlled experiment, it should be written clearly such that somebody else can read your experiment and repeat exactly what you did. You need to document your method precisely! This allows other scientists to verify your results, and it is how scientific theories are proven.
Scientific Experiments Should Be Repeatable By Other Scientists
A repeatable experiment doesn’t mean that the same results will be obtained again! If the experiment is repeatable, it means you’ve documented your method very well, and others can try it. If the results are repeatable, then we have learned a new scientific truth, and a theory can be formed!
Keep in mind that there is a difference between controlled and uncontrolled experiments. If your experiment is not controlled, it will not have the feature of objective analysis, nor will it be repeatable. It is very important to always consider what variables there are in your experiment. Try to limit the number of variables so you can figure out what you are actually measuring.
Memorize the Scientific MethodIt is very important to learn the scientific method, as you will use it in each lesson of this course. Whenever you are asked for observations, conclusions, or a hypothesis, refer to the format presented here when you prepare your answer.

Oak Meadow 33
Scientific Method
(continued)
Grade 8 Physical Science Lesson 3
Using the Scientific Method
Let’s look at an example of the scientific method in action. Pretend that you are washing the dishes in the sink one day, and you notice something about them. This is how the scientific method would be used to make a conclusion about your observation:
Scientific Method Experiment #1:
1. Observation: You have noticed that some objects sink when put in water, and that others float. You decide to test several items to see if you can figure why certain things sink and others don’t.
2. Hypothesis: There are several variables that you need to identify, so that you can test one of them at a time. Some variables that might affect whether an object sinks or floats are shape, size, weight, and density. You decide to test density (which is mass per unit volume). You need to state your hypothesis quite specifically: “Objects that are the same shape and size, but different densities, will act differently in water. Objects that are less dense will float, and the more dense objects will sink. Wood will float and clay will sink.”
3. Experiment: Now you need to clearly document your method, identifying how you will control each variable: “I will take a small block of wood and a lump of clay. I will form the clay to be the exact shape and size as the block of wood. I will put each of them in a sink with water in it and ob- serve whether they sink or float. Both are exposed to the exact same conditions in the room and the water. The only difference is the material they are made of.”
4. Results: Write your results in detail: “The block of wood floated and the clay block sank.”
5. Conclusion: First review your original observation (that some objects sink and others float), and your hypothesis. Your results indicate that what you predicted did actually happen. But what is your conclusion? Basically, all you can conclude from this is that wood floats and clay sinks.
You would like to make the theory that objects that are less dense will float and those that are more dense will sink. As you think about it more, though, you wonder whether this is always true. “Less dense” and “more dense” are vague terms. Less dense than what? What about ships that sail
34 Oak Meadow
Scientific Method
(continued)
Lesson 3 Grade 8 Physical Science
on the ocean? They are metal and quite dense, but they don’t sink. Will clay always sink, no matter what shape it’s in? There are many more questions raised by this experiment than answers obtained! This is the way science works!
Your experiment is an important start. Information was learned, and now further testing can be done. You see that you need to clarify your hypothesis even more, perhaps adding that those objects that are more dense than water will sink, and those less dense than water will float. But that still raises the question about the ships that float. Uh-oh, maybe there is more than one variable that determines whether an object will float! There could be variables that you haven’t thought of yet.
It’s important to remain inquisitive and keep questioning. You need to ask yourself if your conclusion is always true. Consider all the variables you’ve come up with, any experience you might have with any of them, and raise a new question to test. You conclude that further experimentation is needed.
2. Now it’s your turn:
Scientific Method Experiment #2
You are to design an experiment that tests whether the shape of an object has an effect on whether it sinks or floats. We’ll get you started with the observation:
Observation: Light things float and heavy things sink. But some heavy things, such as ships, also float. Why is that?
Now you design the rest of the experiment to test this. You can use clay as your heavy object since it is easy to change the shape of. Write your hypothesis and how you will conduct the experiment. Clearly state the variables involved and how you will keep all but the shape constant. Do the experiment, write your results, and form a conclusion based on your hypothesis and results. Finally, write what other questions might come up, and ideas you have on further testing the variables that affect whether an object floats or sinks. Is there more than one variable involved, and might they work together?
Ask yourself:• Is this always true?• Consider the variables

Oak Meadow 35
Scientific Method
(continued)
Grade 8 Physical Science Lesson 3
Introduction to Mass and MatterWhen you look around you, almost everything you see is matter. What is matter? It is the stuff all around you! Matter is anything with mass that takes up space. For example, when you pick up a pencil, you can feel that it is made up of matter. This matter takes up space. You are matter, your desk is matter, your dog is matter, even the air around you is matter. All of this matter has mass, and the mass is what we measure.
So what is mass? In lesson 2, you were introduced to the concept of mass and how it is similar, but different, from weight. When scientists measure the amount of something, they use the term mass instead of weight. Mass is the actual quantity of matter an object contains, whereas weight is the measure of heaviness. Weight has to do with gravity, while mass doesn’t. You have the same amount of mass whether you are on earth, in outer space, or on the moon. But your weight in each of those places is quite different, because of the difference in gravity. Here on earth, weight and mass will be the same, which is why we can convert kilograms to lbs. That conversion factor (2.2lb/1kg) wouldn’t be the same on the moon! You will learn more about the difference between mass and weight later. Just know that when something feels heavy to you, you are feeling its weight, which is a combination of the amount of mass in the object and the effect of gravity on that mass.
3. Are you matter? Remember, matter has mass and takes up space. Design an experiment to prove that you are matter. The experiment must demonstrate that you have mass and that you take up space. It must also be measurable; your experiment should provide measurements of your mass and space. You do not have to carry out this experiment; just explain it clearly.
Matter, Molecules and Atoms
4. Write down three examples of matter in liquid phase and three ex-amples of matter in solid phase. Write down two examples of matter in the gas phase.
The Scientific Method
1. Observation
2. Hypothesis
3. Experiment
4. Results
5. Conclusion

36 Oak Meadow
Scientific Method
(continued)
Lesson 3 Grade 8 Physical Science
Now that we have reviewed matter, and seen its different phases, let’s look more closely at the different substances that make up matter. Most substances are made up of several other substances. Water is made up of substances called hydrogen and oxygen. Salt is made up of sodium and chlorine. Water can be broken down into hydrogen and oxygen; salt can be broken down into chlorine and sodium. Hydrogen, oxygen, chlorine and sodium are called elements. Elements are the building blocks of all matter, and cannot be broken down further.
Various elements join together in different combinations to make all matter.
But what makes each element different from one another?
As we have seen, elements are the basic buildings blocks of all matter. But each element is made of a different kind of atom. For example, the element “hydrogen” is made of a hydrogen atom, and the element “oxygen” is made of oxygen atoms. Likewise, the elements “sodium” and “chlorine” are made of a sodium atom and a chlorine atom, respectively. Atoms are very small. Millions and millions and millions of atoms could fit on the head of a pin.
ELEMENTS
• Cannot be broken down
• Building blocks of all matter

Oak Meadow 37
Scientific Method
(continued)
Grade 8 Physical Science Lesson 3
Atoms of different types join together to make matter. Hydrogen and oxygen join together to make water. In the case of water, two hydrogen atoms join with one oxygen atom. When they join together, they make a molecule of water. A molecule is made of several atoms of different types joined together to make to make something like water, salt, skin, hair and air. Billions of molecules of water make up a cup of water that you drink.
When scientists draw a picture of how the different atoms join together to form a molecule, they use illustrations like the ones here. As you can see, symbols are used to indicate the different kind of atom, such as the symbol “H” to indicate a hydrogen atom, and the symbol “O” to indicate an oxygen atom. The next image shows how the atoms making up the molecule for salt are symbolized.
As you have seen, all matter is made of molecules, and how the molecules are formed will create different types of matter. Molecules are made up of atoms of different elements. But what are atoms made of? Atoms are made up of atomic particles. There are several kinds of particles which make an atom. These particles are called protons, electrons, and neutrons. The protons and neutrons make up the core, or inner part, of the atom. The core of an atom is called its nucleus. Electrons move around the outside of the atom.
Electrons can move from atom to atom. In Lessons 20-27 you will learn more about atomic particles and how moving electrons create electricity.
5. Define the following terms:
Matter
Solid
Liquid
Gas
Element
Water molecule
Salt molecule

38 Oak Meadow
Lesson 3 Grade 8 Physical Science
Notes

39
Energy
Grade 8
4Go outside and look around you. You can see and hear activity all around you. The wind rustles the leaves on the trees. You feel the heat of the sun. You see cars and bicycles move by. People are moving, talking, working and playing. All of these things require energy for them to happen. We use energy to keep ourselves alive. We use it to work and to make our work easier. Energy runs all living things; energy runs us and our machines. We live in a sea of energy; energy is all around us.
Energy is the capacity for movement and change. It produces changes in matter. You get energy from the sun and from the food you eat that stores the sun’s energy. In fact, most of the energy on earth comes from this one source — the sun. Your body uses energy every time it does anything. Energy is needed to make anything move, even the smallest cell. And whenever anything moves, energy is used.
Most of this course is about energy and the different forms that it takes. This lesson is an overview of the types of energy that we will be studying in more detail throughout the course.
Types of Energy
There are many different types of energy. All of them concern some type of motion. Everything has at least one type of energy and many things have several different types of energy. We will discuss some of the most common ones in turn.
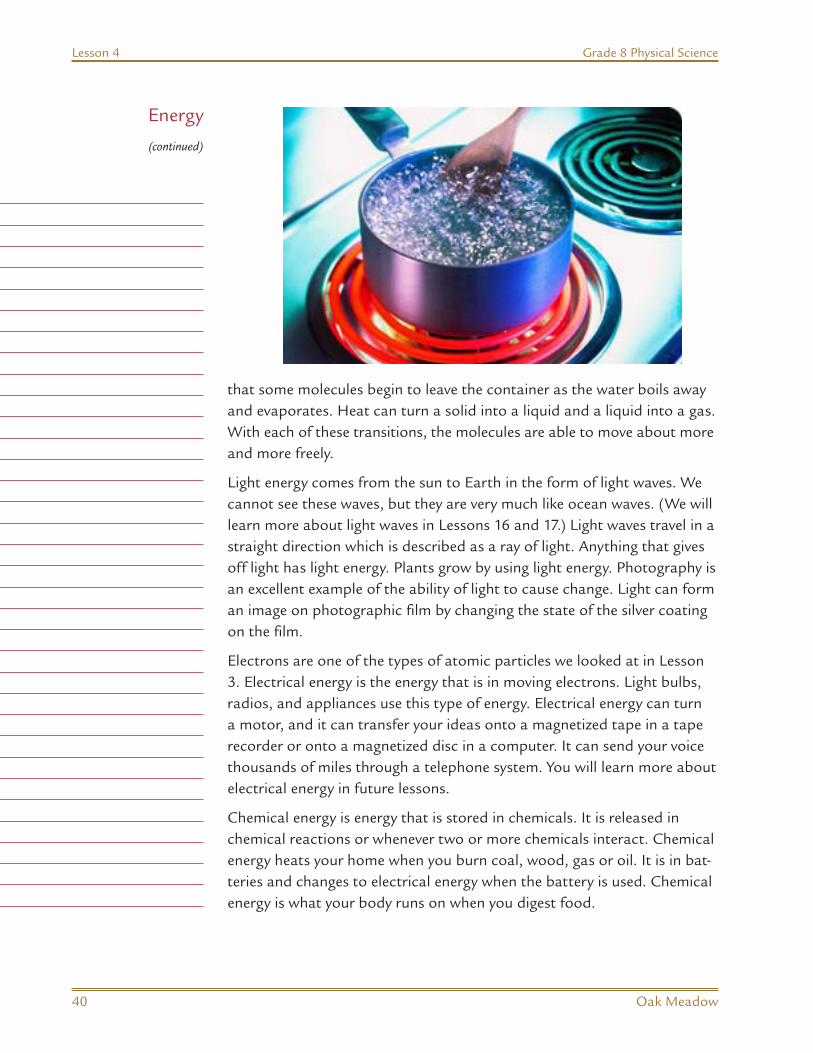
Thermal or heat energy is the energy in moving molecules. All things contain some heat energy. Rub your hand on your arm and it will become warm. Adding heat energy to anything makes its molecules move faster. When you boil water, the water molecules move faster; they move so fast
Energy• Runs all living things• Is everywhere
40 Oak Meadow
Energy
(continued)
Lesson 4 Grade 8 Physical Science
that some molecules begin to leave the container as the water boils away and evaporates. Heat can turn a solid into a liquid and a liquid into a gas. With each of these transitions, the molecules are able to move about more and more freely.
Light energy comes from the sun to Earth in the form of light waves. We cannot see these waves, but they are very much like ocean waves. (We will learn more about light waves in Lessons 16 and 17.) Light waves travel in a straight direction which is described as a ray of light. Anything that gives off light has light energy. Plants grow by using light energy. Photography is an excellent example of the ability of light to cause change. Light can form an image on photographic film by changing the state of the silver coating on the film.
Electrons are one of the types of atomic particles we looked at in Lesson 3. Electrical energy is the energy that is in moving electrons. Light bulbs, radios, and appliances use this type of energy. Electrical energy can turn a motor, and it can transfer your ideas onto a magnetized tape in a tape recorder or onto a magnetized disc in a computer. It can send your voice thousands of miles through a telephone system. You will learn more about electrical energy in future lessons.
Chemical energy is energy that is stored in chemicals. It is released in chemical reactions or whenever two or more chemicals interact. Chemical energy heats your home when you burn coal, wood, gas or oil. It is in bat-teries and changes to electrical energy when the battery is used. Chemical energy is what your body runs on when you digest food.

Oak Meadow 41
Energy
(continued)
Grade 8 Physical Science Lesson 4
Some Types of Energy
Heat or Thermal Mechanical or Motion
Light Gravitational Electrical
Sound Chemical Atomic
Mechanical energy is often defined as “the ability to do work.” It is the energy that is in moving things, or things that have the potential to move if they weren’t being held back by something. Wind, falling rocks, and moving water all have mechanical energy. So do all machines that move, and so do you, when you are running across a field or swimming in a pool. The rock that is about to fall (but isn’t yet) also has mechanical energy, just as you do when you are standing on a diving board. You will learn more about mechanical energy—and the related ideas of work, power, and force—in Lessons 6 through 10
Gravitational energy is a type of mechanical energy. Gravity is the force of attraction between two objects and it exists between any two objects in the universe. The Earth’s huge size makes it easy for you to feel its gravitational energy but there is also a gravitational force between you and everything around you—it’s just too small for you to feel it. You will learn more about gravity and gravitational energy in Lesson 7.
Sound energy is energy caused by vibrating objects. The object vibrating causes the air to vibrate, and the sound wave travels through the air to our ears. Have you ever felt the house shake from a really loud thunder crack? That is sound waves causing the house to vibrate. This is sound energy. So is the music you hear from your CD, and the sound of a kettle of hot water whistling on the stove. We will discuss more about sound energy and sound waves in Lessons 14 and 15.
Atomic or nuclear energy is the energy that is stored in the nucleus (nucleus is another word for center or core) of an atom. The sun produces light and heat from atomic energy. The destructive power of atomic energy
42 Oak Meadow
Energy
(continued)
Lesson 4 Grade 8 Physical Science
is easy to see in pictures of Hiroshima and Nagasaki after the explosion of the atomic bombs in World War II. We will learn more about atomic energy in Lessons 34 and 35.
1. Sit quietly alone in a room for a while. Listen and watch carefully. After a time, you will start to hear and see signs of energy around you — perhaps a family member walks by in the hall, or a bicyclist goes by on the street. Perhaps you can feel air coming through a vent, or see a curtain moving in the breeze. Write down the signs of energy you find, and describe which type of energy it is.
2. For each of the eight types of energy just discussed, write down an example of how or where this energy type occurs. Describe how your example shows that type of energy.
3. For the following story, list the types of energy present. Your answers should include at least one of each of the eight energy types you have learned about:
Pat and her friend Kevin rode to the park on their bicycles ( a ). The sun was shining brightly ( b ) and by the time they got there, they were hot and tired ( c ). They were also hungry, so they pulled out two sandwiches and ate them ( d ); soon they felt much better. They sat on the swings for a while, swinging back and forth ( e ) and talking ( f ). After awhile, they decided to listen to some music on their portable radio ( g ) but soon realized that their batteries were low ( h ), so they rode home and listened to the stereo ( i ) at Pat’s house.
Potential Energy and Kinetic Energy
All types of energy can be divided into two states: kinetic energy and potential energy. The word kinetic means moving. Kinetic energy is energy of motion. When you are bouncing a ball, it has kinetic energy because it is moving. When we refer to kinetic energy, we are usually referring to energies where visible movement occurs. But even sound and electrical energy involve movement (of atoms and molecules, and electrons, respectively), so they could technically fall under this category.
What about when you aren’t bouncing the ball and it just sits on a shelf in your room? Then the ball has potential energy—stored up energy that is waiting to be released. If the ball got a chance, it would roll off the shelf

Oak Meadow 43
Energy
(continued)
Grade 8 Physical Science Lesson 4
and fall to the floor. We can say that the ball has gravitational potential energy (which is actually a type of mechanical energy that you just read about). Potential energy is stored energy. Energy does not have to show itself in order to exist; it exists even when you can’t see it.
Potential energy often exists as a result of the position of an object. Gravitational potential energy is everywhere. Birds have it when they are in the air or in trees. Trees have it; if disturbed they fall down. You have it as you hold yourself up. When you are tired, what do you do? You lie down to lower your potential energy!
Potential energy is energy that is just waiting to happen!
Though gravitational potential energy is quite common, you can see potential energy in other places. There is electrical potential energy; we call it voltage. It is stored electrical energy. When it is released it’s not an object that moves, but an electrical charge (electrons). Electrical potential energy is also found in batteries. This energy is released when you turn on the portable CD player or the flashlight. There is also chemical potential energy stored in molecules. This can be released by a chemical reaction.
When you open a jack-in-the-box, the potential energy of the coiled spring inside is released. If you stretch a rubber band, it has potential energy until it is released and snaps back to its normal position. This is called elastic potential energy, which is a form of mechanical energy.
Another example of potential energy is a pile driver. (A “pile” is another word for a big post, such as the piles which hold up a pier.) A pile driver is a machine with a huge weight on the end of a heavy metal cord. The huge weight is raised up high and then dropped. As it falls, it goes faster and faster and by the time it hits its target, it has enough energy to drive a huge post into the

44 Oak Meadow
Energy
(continued)
Lesson 4 Grade 8 Physical Science
ground. It acquired that energy because as it was raised against gravity, the amount of gravitational potential energy increased. The potential energy was then changed into kinetic energy (energy of motion) when it was released.
Any system wants to get to the lowest potential energy possible. That’s why things fall down! If you leave the lights of your car on, the electrical energy will flow from the battery, eventually getting to the point where the battery has no electrical potential energy! In other words, you have a dead battery. If you wind up a spring loaded toy, it will release and unwind at the first possible chance. When you think about whether something has potential energy, think about whether that thing will move on its own if whatever is holding it in place is removed. A kitchen appliance that plugs into a wall doesn’t have potential energy of its own, as it needs to have energy added to it to run. (OK, it does have some gravitational potential energy because it’s sitting on the shelf!). A ball sitting on the ground doesn’t have potential energy unless it’s at the top of a hill.
4. Think of and write down two different examples of potential energy (energy waiting to happen). The examples should be different from the ones listed in this lesson describing potential energy. Then describe what can happen to create kinetic energy in each of your examples.
5. Take a rubber band, and stretch it between the thumb and index finger of one hand. Hold it there for as long as you can. At what state is the energy in the rubber band? As your hand gets tired, what state of energy is it fighting against? Release the rubber band from your finger. At what state is the energy in the rubber band as it is released?

Oak Meadow 45
Energy
(continued)
Grade 8 Physical Science Lesson 4
6. Choose one of the following:
a. Think of a person standing still at the end of a springboard, getting ready to make a dive into a pool. When the diver is ready, he will make several jumps on the springboard, and then dive into the water. Describe each step of his dive, identifying the points where the amount of potential and kinetic energy change.
b. Think of a rollercoaster standing still as passengers board. Then it starts up, climbing to a high point before beginning its first descent. As it goes along the track it goes up and down, around turns, and perhaps around loops several times. Describe an imaginary roller coaster ride, identifying the points where the amount of potential and kinetic energy change.
Energy Can Change Form
Think about what happens when you strike a match. You are holding a match in one hand and the match box with a striker on it in the other. You, the match, the box and all their components have potential energy. You strike the match on the box, changing your potential energy into mechanical energy as you move. The chemical in the match head sparks (chemical energy) and the match head explodes into flame (heat energy) and makes a “whooshing” sound (sound energy). The chemical energy in the burning match continually changes into heat and light. You blow the match out (mechanical energy again) and the match gives off smoke (chemical energy) as it cools.
This is just one example of how a simple action can produce many energy changes. There are many examples of changing forms of energy all around us all of the time. Our muscles are continually changing the chemical energy that we derive from the food we eat into mechanical energy as we move. A CD player turns electrical energy into mechanical energy (motor that plays the CD) and sound energy (the music that you hear) and heat energy (heat is released from the back of the CD player).
Take some time to consider how energy can change form. For example, think about chemical energy. The chemical energy in food changes form in your body to give you the energy to move (mechanical energy). What energy was changed in order to give energy to the food? The sun’s atomic and light energy was transformed for food to grow. The food stored the sun’s energy and released it into your body in the form of chemical energy.

46 Oak Meadow
Energy
(continued)
Lesson 4 Grade 8 Physical Science
Used Energy and Heat Energy
When energy is used, there is one thing that always happens: heat energy is produced. No matter which type of energy is used, heat is produced. To put it another way, whenever energy changes form, heat is produced. To understand this, let’s look at some examples.
Here is an example of used mechanical energy making heat. Have you ever bent a thin piece of metal back and forth to break it in half? What happens to the metal as you bend it back and forth? The mechanical energy that you are supplying is transferred to the stress point, which becomes warm until it snaps. (The snap is sound energy.) You can feel the heat from the broken metal. The heat is slowly released into the air until the metal cools.
When electrical energy is used, it also releases heat. Electrical energy is used to operate a CD player, stereo, television, or video tape player. If you ever looked at the back of any of these appliances you would see a grill covering a vent through which heat is released. When you buy a new appliance and set it up, the instructions will tell you to place the appliance away from the wall with enough room for the heat in the back to escape. Heat is produced whenever you use electrical energy to operate one of these appliances.
Using chemical energy also releases heat. If you are running, your muscles use a lot of chemical energy through the food you eat to keep you moving. The activity of running warms your body. You actually radiate much of this heat out and away from you, warming the air around you (even though you may not notice that you’re doing this). As your body uses chemical energy, heat is released. Have you ever been in a room with a lot of people dancing or playing an active game? The room warms up with all of the heat being given off from the moving bodies as they use chemical energy.
Whenever energy changes form, some of it is always changed into heat energy and released. Scientists and engineers try very hard to minimize this loss of heat because it is considered “wasted” energy. Imagine that you like to eat ice cream, but you only like it when it is frozen. You can’t stand to eat melted ice cream, but every time you eat a bowl of frozen ice cream some of it melts. Some of the ice cream is wasted because it changes into a form that you won’t eat. Has the wasted ice cream disappeared? No, it has just changed into a form that is not useful to you.
Oak Meadow 47
Energy
(continued)
Grade 8 Physical Science Lesson 4
Even when a machine is supposed to produce heat - like a toaster oven — some of the electrical energy that could be put into making the inside of the toaster oven hot escapes to the air around it. In every use or change of energy, some is “lost” as heat.
When energy is used, heat energy is always produced.
This problem of escaping heat energy is termed by engineers as a problem of efficiency. If all of the electrical energy were used by a CD player in order to produce music, the CD player would be considered 100% efficient. This is not possible however, as some energy is always converted to heat energy and wasted. Some machines are more efficient than others in using the energy put into them. A highly efficient machine is one that uses most of the energy that is put into it and releases very little as heat energy. Efficiency is an important factor to consider when you are deciding which model of an appliance to buy. When an appliance is labeled as “energy efficient,” what it is referring to is how efficient the appliance is at converting the electrical energy or fuel it runs on into the work the appliance is designed to do, while eleasing a minimal amount of heat.
Why can’t we have 100% efficient machines? Why is heat energy always released when energy is used? Does energy disappear? Is energy created? In the next Lesson, we will learn about the Laws of Thermodynamics and get the answers to these questions.
7. Examine some appliances around your house. Find where the heat is released. Write down what appliances you looked at and what you found.
8. Define the following terms:
Energy
Kinetic energy Potential energy Efficiency

48 Oak Meadow
Lesson 4 Grade 8 Physical Science
Notes

247
Resistance and Ohm’s Law
Grade 8
23We have described how electric current moves through a medium, and that conductors, such as metal, are media that let electric current move through them easily. Other materials, called insulators, prevent the movement of electricity. Resistance is the measure of how easy or hard it is for an electric current to flow through a particular medium. Conductors have low resistance while insulators have high resistance.
Wires can be made of different metals. We have already described how aluminum and copper can be good conductors as both have low resistance (although copper is used predominantly in home construction now due to the fire danger associated with aging aluminum wiring). However, sometimes metals with a high resistance are used for special purposes. Nichrome is a metal that is also a conductor, but it has higher resistance than aluminum or copper. When a large electrical current goes through nichrome, it gets very hot. Toasters and electric heaters use wire coils made of nichrome or a metal with similar properties inside them in order to create heat. Tungsten, which is used as the filament in many light bulbs, is another metal that is a conductor but has a high resistance. When current passes through a tungsten wire, it gets so hot that it glows white-hot.

248 Oak Meadow
Resistance and Ohm’s Law
(continued)
Lesson 23 Grade 8 Physical Science
The amount of resistance a wire has depends on four things: the length of the wire, how thick it is, what it is made of, and its temperature. The longer a wire is, the greater its resistance, as the electric current has to pass through more media. The thinner the wire, the greater its resistance as well, as it is harder for the electrical current to move along. As we have seen, the composition of the wire (what it is made of), also determines resistance. And the warmer a wire is, the greater its resistance.
Let’s look at an analogy. Picture a large elevated tank of water. The height of the tank determines the potential energy of the water, similar to the electric potential (voltage) in a circuit. If we want to have water flow out of the tank (current), we need to have a hose or pipe for it to flow through. The amount of water flow we get depends a lot on the size of the hose, as well as on the height of the tank. It is the same with electric current. A higher voltage can allow a higher current. Also, a larger “pipe” has less resistance, and a greater current can result. In this way, as we are about to learn, the current depends on the voltage and the resistance of the material.
Now think about that light bulb again. As you learned in the last lesson, the tungsten filament is surrounded by a special gas that keeps it from burning up too quickly. Nevertheless, little by little the tungsten filament evaporates. As this happens, the wire gets thinner and thinner. This causes the resistance to be even greater. A greater resistance will cause more heating up, and the hotter it gets, the more the resistance increases! Gradually, the filament wears out. Have you noticed that a light bulb usually burns out right when it is turned on? It glows really bright and then — pow! A cool light bulb has less resistance, which allows more current to flow. This is more than the thin filament can take, and when it heats up, the resistance increases until — pow — out it goes. All this happens in a second!
Superconductors
Some materials are called superconductors because they lose all of their resistance at low temperatures. Mercury is a good conductor at ordinary temperatures. It becomes a superconductor at 270 degrees below zero Celsius. If scientists could find a way to make a superconductor at normal temperatures, the cost of moving electricity from a power plant to your house would decrease dramatically!

Oak Meadow 249
Resistance and Ohm’s Law
(continued)
Grade 8 Physical Science Lesson 23
1. Which wire has greater resistance: a light plugged into an extension cord or a light plugged directly into a wall?
2. Compare the thickness and the length of the cords for several appliances in your house, including the cords for small appliances such as table lamps and coffee maker, larger appliances like TV’s and microwaves, and big appliances such as refrigerators, freezers, and air conditioning units. List the cords in order of thickness, from thickest to thinnest, and note the length. Which appliances need the most electricity to operate? How does the length and thickness of the cord compare with the demand for electricity each appliance has?
3. Now compare these household cords to the cord bringing electricity into your house (if you can see it) and the overhead power lines in your neighborhood. If the power lines in your neighborhood are buried, try to find an area to observe where they are above ground. Answer the following questions. Are the power lines thicker than the cords used for the appliances? Why or why not? Are the electrical wires carrying electricity around your neighborhood underground or above-ground? What are the advantages and disadvantages of each of these methods?
4. If you were in charge of designing a wire to carry electricity across your state or province, which of the following properties would be most important for your wire to have? Should it be thick or thin, buried underground or installed out in the sun? What material would you choose and why?
Ohm’s LawOhm:
The unit of measurement for resistance.How is resistance measured? Remember, electric potential is measured in units of volts (physicists use the symbol “V” for this). The amount of electric current is measured in units of amperes (symbol “I”). Resistance is measured in units of ohms (symbol “R”). The definition of an ohm is the resistance at which one volt of electric potential allows one ampere of current to flow.
An example of an ohm value is a flashlight bulb. It has the resistance of 1 ohm, meaning that one ampere of current flows through it at one volt. A 60-watt light bulb has the resistance of about 200 ohms.

250 Oak Meadow
Resistance and Ohm’s Law
(continued)
Lesson 23 Grade 8 Physical Science
George Ohm (1787–1854)German Physicist, Mathematician
George Ohm was a professor of mathematics at Jesuits College in Cologne (Germany) for ten years. In 1827, Ohm wrote a pamphlet outlining his discovery of the law later named after him. Ohm’s
law states that the current flowing through a conductor is directly proportional to the voltage, and inversely proportional to the resistance. This was a major statement with far reaching implications. His work had a great impact on the theory and applications of current electricity. Sadly, it was coldly received and he was so deeply hurt he resigned his teaching position. It wasn’t until 1841 that his work began to be recognized. At that time he was awarded the prestigious Copley Medal of the Royal Society of London.
Ohm’s Law:Electromotive Force = Resistance x Electric current
The voltage, amperage (number of amperes) and resistance are related to each other by a rule known as Ohm’s Law. Ohm’s Law states that the current (I) in a circuit depends on the difference in electric potential across the circuit (V), and the resistance of the material (R). Specifically, Ohm’s Law states that the current in a circuit is equal to the voltage difference divided by the resistance. This is how it looks:
Amperes (I) = Volts (V) ÷ Ohms (R)
We can use Ohm’s Law to calculate the current in a wire when the resis-tance and the voltage are known. By inverting the equation, we can also find the voltage or the resistance if the other two elements are known. Other ways of writing this equation are as follows:
V = I x R or R = V ÷ I

Oak Meadow 251
Resistance and Ohm’s Law
(continued)
Grade 8 Physical Science Lesson 23
For example, if a 4-ohm wire is connected to a 12-volt battery, what would the current be? We know the value for V is 12, and the value for R is 4.
I = V ÷ R
I = 12 volts ÷ 4 ohms
I = 3 amperes
Ohm’s Law:V = R x II = V ÷ RR = V ÷ I
5. Assume your toaster has a resistance of 10 ohms, and it is plugged into your house electricity of 120 volts. What is the current in the wire when your toaster is plugged in and on? Show your calculation.
Resistors and Circuits
In the last lesson you learned about two types of circuits: a series circuit and a parallel circuit. To review, a series circuit is one in which there is only one path for the electricity to follow and a parallel circuit is one in which there are several different paths for the electricity to follow. As you have also learned, you can design a series circuit by connecting a wire from one dry cell terminal to a light socket, and then connect another wire from the light socket to the other dry cell terminal. The electricity would then flow from the dry cell, through the light socket and back to the battery, lighting up the bulb. The light bulb uses the electrical energy carried in the electric current in order to operate.
A resistor is what scientists call any object, such as an appliance or machine, that is connected in a closed circuit. A resistor uses the electrical current running through the circuit to operate. In the series circuit described above, the light bulb is an example of a resistor. Every time you turn on a lamp or appliance in your home, it operates because it is a resistor.
252 Oak Meadow
Resistance and Ohm’s Law
(continued)
Lesson 23 Grade 8 Physical Science
Resistors and Series Circuits
When a number of resistors are connected so that the entire current flows through one resistor after the other, the result is a series circuit. This is true in the previous example of Christmas lights. Each bulb on the string of lights is a resistor. The electrical current flows through each bulb, one after the other.
The total resistance on a series circuit can be determined. When several resistors are linked together in a series circuit, the resistance (in ohms) of each resistor is added together with all of the other resistors. Together they equal the total resistance of the circuit. For example, the ohms of each bulb in a string of fairy lights is added together to find the total resistance of the entire string of lights.
In the last lesson you learned that in a series circuit, the current remains the same everywhere in the circuit. When you add more resistance to the circuit by adding resistors, and the total voltage (determined by the power source) stays the same, then by Ohm’s Law, the current will decrease. So if you want to determine the amperage of a series circuit, you must first add up all the resistances in the circuit.
In a series circuit, the voltage will drop as it goes through each resistor. The more resistors you have, the less voltage difference there will be across each one. All the individual voltage drops added together will add up to the total voltage of the circuit, which is determined by the power source.
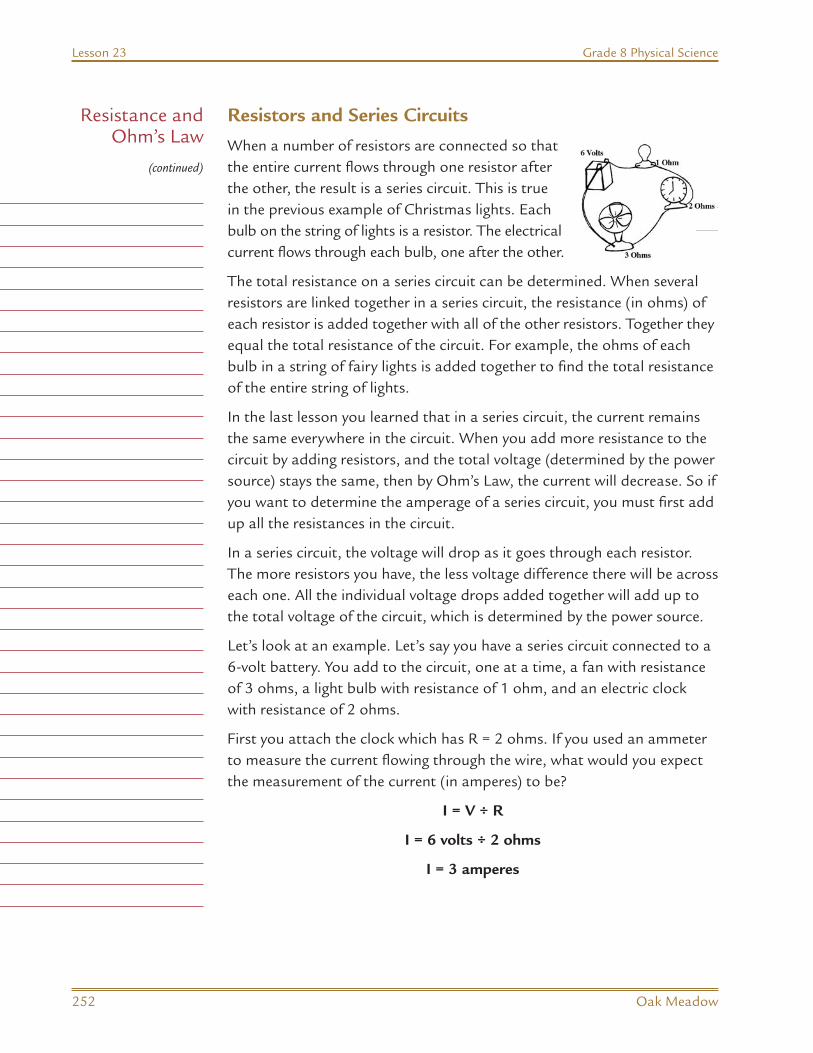
Let’s look at an example. Let’s say you have a series circuit connected to a 6-volt battery. You add to the circuit, one at a time, a fan with resistance of 3 ohms, a light bulb with resistance of 1 ohm, and an electric clock with resistance of 2 ohms.
First you attach the clock which has R = 2 ohms. If you used an ammeter to measure the current flowing through the wire, what would you expect the measurement of the current (in amperes) to be?
I = V ÷ R
I = 6 volts ÷ 2 ohms
I = 3 amperes

Oak Meadow 253
Resistance and Ohm’s Law
(continued)
Grade 8 Physical Science Lesson 23
Next you attach the light bulb which has R = 1 ohm, and the fan which has R =3 ohms. Again you use an ammeter to measure the current flowing through the wire. Remember that no matter where you attach the ammeter, the current will be the same. What would you expect the measurement of the current to be? To calculate, you need to add up each resistor to find the total resistance in the circuit.
I = V ÷ R
I = 6 volts ÷ 2 ohm (clock) + 1 ohm (light bulb) + 3 ohm (fan)
I = 6 volts ÷ 6 ohms
I = 1 ampere
The reason the current is lower when you put all three objects on the circuit than when you only had the clock on the circuit is because of the greater resistance in the circuit. According to the formula, if the voltage stays the same, and the resistance increases, the current has to decrease!
So what about the voltage? As the electric current leaves the negative terminal of the battery, it is at its greatest potential. The potential (voltage) drops after each resistor, but the total voltage change is 6 volts. It is at its lowest potential as it reaches the positive terminal of the battery. The chemical activity in the battery then raises the moving charge back to a high potential as it moves into the circuit again.
What would happen if we were to increase the voltage? Let’s say we had our three resistors, and a total resistance of 6 ohms. We want our current to be higher than 1 ampere, so we have to increase the voltage of the circuit. We switch to a 12 volt battery. In reality, we have to be careful that each of our resistors can handle the increased voltage and current! Now our formula looks like this:
I = 12 volts ÷ 6 ohms
I = 2 amperes
IN A SERIES CIRCUIT:
The voltage drops across each resistor in the circuit. The current remains the same anywhere in the circuit. The individual resistances add up to the total resistance of the circuit.

254 Oak Meadow
Resistance and Ohm’s Law
(continued)
Lesson 23 Grade 8 Physical Science
Resistors and Parallel Circuits
Now let’s look at parallel circuits and the resistors on them. As you have learned, a parallel circuit is one in which there are several different paths for the electricity to follow. Each resistor is wired separately from the others. In a parallel circuit, the current divides and a part of it passes through each resistor. Then the separate currents reunite to complete the circuit. This way if any resistor is open or disconnected, current will still be able to flow through the other resistors and the circuit will rema n closed. The sum of the currents through each path of the circuit is equal to the total current that leaves the source
In a parallel circuit, the total resistance is not equal to the sum of the resistors as in a series circuit. In fact, it is less than any of the individual branches of the circuit! If you think about it, the more pathways the electricity has to travel, the less the total resistance will be The total resistance can be found by using the following equation:
Here is an example of how the equation works. Let’s reconfigure the series circuit (the one that had the fan with 3 ohms, the bulb with 1 ohm, and the clock with 2 ohms) from a series circuit to a parallel circuit.
If we use 6 as a common denominator, this can be rewritten:
Simplify the equation to get:
RESI TORS AND PARALLEL C RCUITS
t m , r l l c r ui i on in h th diff r t h f r t ec rici
to follow Each resistor is wired s p rately rom the othe s. parallel ci cuit t e e p
T s e e o g e i os
th t leaves th s urc
, h n s r es irc it In fa t s le s t an of th i divid b a che f th circui
I y u thi k ab ut i , the mo e pat wa s he elect icit has to t ave
a q o s g s t e h t t it 3 it 1 d the
2 ohms) from a ser es ci c it a paralle ci cu t
1 ( 1 / ( 1 / l
1 R + / o 3 / s
T vo t g d p ro s a esist r i th circ it. h c rrent r ma n r i u i
sist nce f he c r u t
1 1 1 1R = R1 + R2 + R3
o ms h + hR 6 6 6
3 8
RESISTORS AND PARA LEL CIRCU TS
i d par lel c rcuit is one in hich th re re severa d ff rent pa hs for t e elec
to fo l w ach r i r
reunite to c mpl te he i cu t T i way if an es stor is open or dis onnect i t h u e e is c c l n
th t e v s the s u ce
l t r s i i t n f it l t o t e i d
p ta si c
1
Here s a xample of ow t e equ o wo ks. Let s - onfig e t e it e h w ,
i i i ll l t
f we us 6 s a com on den minator t is an be rewrit
N A ER ES C R I :
th a e nywher in t irc it Th i di i ual re istan es ad up to t t t esista of t e ircuit
1 = 1 (fan) + 1 (bulb) + 1 (clock)R R R R
1 = 1 ohms + 1 ohm + 1 ohmsR 3 1 2
R = 1 + R2
P ysic Sci ce
R(11) = 6
R = 6/11 ohms (or 0.545 ohms)
ES STORS AND PARALLEL RCUI S
N l ok l i i t a ara el cu t is ne
a c rr nt d v d s n a p rt f it p sse th g ach r is r T en th s r reunit to complete he ircuit. s w i any resis or is open or isconnected wi l e to g h r si i
r q hat th o rc
h , h mo e p hway th
/
Here is an examp e of how the equatio works Let s re-c
e c i
1 / = / 3 hms + oh
IN A RIES CIRC T:
t e me nywher in t c rc t T n ividu r stan e d to t r istance o he circuit
1
1
1 1 = 1 + 2 +
1 = 2 ohms + 6 ohm + 3 ohmsR 6 6 6
1 = 11 ohmR 6

Oak Meadow 255
Resistance and Ohm’s Law
(continued)
Grade 8 Physical Science Lesson 23
Can you see that this total resistance is less than the resistance of each of the individual resistors? Compare the total resistance in the series circuit to the total resistance in the parallel circuit.
Series circuit: R = 6 ohms
Parallel circuit: R = 0.545 ohms
Since there is a lower resistance in a parallel circuit when more resistors are added, according to Ohm’s Law, the total current will increase.
Okay, so what about the voltage? In a parallel circuit, the voltage is the same anywhere in the circuit. This is quite different from a series circuit!
IN A PARALLEL CIRCUIT:
The voltage is the same anywhere in the circuit. The current differs throughout the circuit, and the total current is equal to the sum of the currents through each path. The total resistance decreases as you add more resistors to the
6. Which kind of circuit has less resistance, a parallel circuit or a series circuit? Would you say this makes it more or less energy efficient?
7. Answer the following questions, showing your calculations if needed:
a. You have a 10 volt parallel circuit, with 2 resistors on it. What is the voltage across the first resistor? Across the second?
b. You have the same two resistors on a 10 volt series circuit. Will the voltage going into the second resistor be more, less, or the same as that going into the first resistor? Exact numbers aren’t needed!
c. You have a series circuit with a current of 6 amps and three resistors on it, with resistances of 10 ohms, 5 ohms, and 6 ohms, respectively. What is the voltage of this circuit? Show your calculation.
8. Define the following terms:
resistance
superconductor
ohm
resistor

256 Oak Meadow
Lesson 23 Grade 8 Physical Science
Notes

257
Home Electricity
Grade 8
24The examples of electric circuits that we have looked at so far mostly involved small amounts of electricity in appliances. There are electrical circuits in your house, too. Your house is part of a larger circuit that is connected to the power supply of a power company. The amount of electricity flowing through your home at any moment depends on the number of appliances that are all working at the same time. The total amount of electricity that flows through your house is determined by the amount of current being used (the sum of thecurrent being used by each appliance) and the voltage of your home circuit. Within each home, there are usually smaller circuits which are wired to the larger circuit running into the home. These smaller circuits control certain areas of the home. For instance, there may be a circuit for the upstairs bedrooms, another for the kitchen, and another for the outdoor lights.
When there are a lot of appliances turned on at the same time in your house, a lot of electric current flows through the wires of your house. When large amounts of current pass through a wire, the wire heats up. If it gets too hot, it can cause materials nearby to heat up and catch fire. It is therefore very important that wires in your house carry only as much electrical current as they can safely carry without getting overheated.
Overload
Suppose that you are using a 150-watt light bulb in a bathroom that has an electrical outlet on the same circuit. It is winter time and you are heating the room with a 3600-watt space heater plugged into the outlet. You plug your 1800-watt hair dryer into the outlet and begin to dry your hair and all of a sudden everything turns off. You are left in the dark with a wet head and cold feet. This is an example of what is called overload.

258 Oak Meadow
Home Electricity
(continued)
Lesson 24 Grade 8 Physical Science
Let’s figure out what happened to better understand overload. (Take a moment to review amperes, volts, and watts from Lesson 22 if you need to.) Remember that there is a relationship between amperes, volts, and watts that can help us. The rule tells us that amperes equals watts divided by volts, or I = W ÷ V.
We know that the circuit in your home is a 120-volt circuit, which is standard in homes in the U.S. We also know the wattage of each appliance. Now let’s determine how much current (amperes) is being drawn by each appliance.
The light draws 150 watts on a 120-volt circuit.
I = 150 watts ÷ 120 volts
I = 1.25 amperes
The light uses 1.25 amperes of electricity.
The heater draws 3600 watts on a 120-volt circuit.
I = 3600 watts ÷ 120 volts
I = 30 amperes
The hair dryer draws 1800 watts on a 12-volt circuit.
I = 1800 watts ÷ 120 volts
I = 15 amperes
When you turned on all three appliances, the total usage was 46.25 amperes at the same time. Since these appliances were all being used in one small room (the bathroom), they were probably all wired to a single, smaller circuit within your home. But why did they all go out?
To prevent wires from overheating, safety devices are installed in homes to limit the amount of electricity that can flow through the wires. These devices are called fuses and circuit breakers. In order to understand the overload problem you experienced in the bathroom, you need to learn about these.
As you now know, electric power is brought into your house in one large power line from the street. Inside your house it is divided up into several different circuits. Most houses have about 5 to 15 circuits. Most house circuits are wired for 120-volts. 240-volt circuits are used for particular circuits that run major appliances like electric clothes dryers, water heaters, well pumps, ceramic kilns, or electric stoves that require large amounts of electricity.

Oak Meadow 259
Home Electricity
(continued)
Grade 8 Physical Science Lesson 24
All houses have either a fuse box or a circuit breaker box, but usually not both. Fuses are inserted into the electric wiring of your house. They are located in the fuse box, which is located at the point where the power entering your house is divided up into the different circuits. A fuse is made of a strip of wire that has high resistance but melts at a relatively low temperature. The fuse is placed somewhere in the cir-cuit and if the current gets too high, the wire in the fuse melts and immediately opens the circuit, stopping the flow of electricity. The circuit is “blown” and electricity can no longer complete the circuit.
A circuit breaker is a similar type of safety device that is part of the electric wiring of your house. Circuit breakers are located in a circuit breaker box that is usually placed somewhere convenient in your house, such as on a wall just inside an attached garage, also at the point where the main line is divided up into different circuits. A circuit breaker works much the same way as a fuse. A circuit breaker is a switch with a gap in it. Because of the gap, no current flows through the switch under normal loads. The heat of a large electrical overload (caused by too many appliances operating at
the same time) causes a bimetallic (two metal) strip within the circuit breaker to bend. When it bends, the metal strip becomes disconnected from the circuit. Electricity will arc, or jump, across the gap and activate the switch which immediately opens the circuit. When the metal strip cools sufficiently to be safely connected, the strip returns to its normal position. While a fuse must be replaced if it is blown, the circuit breaker only has to be

260 Oak Meadow
Home Electricity
(continued)
Lesson 24 Grade 8 Physical Science
reset and moved back into the “on” position after the overloading situation has been located and corrected. You must manually push the circuit breaker back to allow the electricity to flow again.
The difference between circuit breakers and fuses is that while a fuse has to be replaced when it is “blown,” a circuit breaker continues to function over and over again. A circuit breaker can also be manually switched to open a circuit so that you can make electrical repairs without the danger of electricity flowing through the circuit (and you!). Most homes nowadays are set up with circuit breaker boxes instead of fuse boxes. Some individual appliances might have their own fuse for additional protection for that appliance.
1. Locate the fuse box or circuit breaker box in your own home or building. Ask your parents where it is located, and examine it closely.
a. Make a sketch which includes all the fuses or circuit breakers in the box. Usually they will be labeled (such as “Living Room” or “Refrigerator” or “Central Air” or “Bedr oom”). Copy these labels. If the fuses or circuit breakers are numbered instead, there is usu- ally a list nearby to tell you what number goes with what room or section of your home.
b. On each fuse or circuit breaker there will be a number like 10, 15, 20 or 40. Make a note of this number . This is the number of am- peres allowed for that circuit.
c. Add up the total amper es allowed for your house. This is the total of all the circuits for your home.
d. What is the ampere limit for your bedroom circuit? For your bathroom circuit?
e. Make a list of everything that is plugged into the outlets of one room or section of your home (one circuit). Examine each item carefully and determine how many amperes each item uses. Calculate the amper es using the formula if necessary. Compare the total amperes used with the total available amperes on that circuit.
If the wires in a circuit carry too much current, it is possible for the wires in the circuit to build up an excess amount of heat. If the wires become hot enough, the insulation around the wire can burn off and then the exposed wire may ignite whatever is touching it. This is how electrical fires start. Fuses and circuit breakers prevent dangerous overloading of a circuit by

Oak Meadow 261
Home Electricity
(continued)
Grade 8 Physical Science Lesson 24
building in an intentional weak spot in the circuit. The weak spot is the fuse or circuit breaker.
2. Now let’s return to the question of why everything went off when the light, a heater, and a hair dryer were all running in the bathroom at the same time. After all, the light usually stays on just fine whenever you use the bathroom. Why would it go off now? Answer this question assuming the circuit breaker or fuse for the bathroom has a 40-ampere capacity. Use the terms “circuit,” and “overload.” Then think of at least two solutions to prevent this from happening again.
3. Assume that you have plugged into your bedroom outlets a 3600-watt heater, a 300-watt tape recorder, and two 150-watt lamps. You turn them all on and then you plug in a hair dryer (1600 watts) and a vacuum cleaner (200 watts) and you dance around the room vacuuming and drying your hair with your music blasting! Would you blow the fuse or trip the circuit breaker to your bedroom or not? Use the ampere rating for your room that you found in Assignment 1. Calculate the total amperes used, showing your work.
Short Circuits
Sometimes you may find that a fuse or circuit breaker may blow even though the flow of electric current does not exceed the fuse or circuit breaker rating (the number of amperes that the circuit is designed to carry). This is usually caused by a short circuit.
In order to understand short circuits you must remember that all wires going into appliances are actually made up of two wires — one wire to bring the electricity into the appliance (into the resistor) and one to carry it back out. Look closely at a wire on a small appliance or lamp in your home. You will see that it has a ditch down the middle. This ditch is where the insulator separates out the two wires. In an electric circuit, electricity always moves in a circle, from the electric energy source through a wire to a resistor (appliance) and then back through the second wire to the electrical source again.
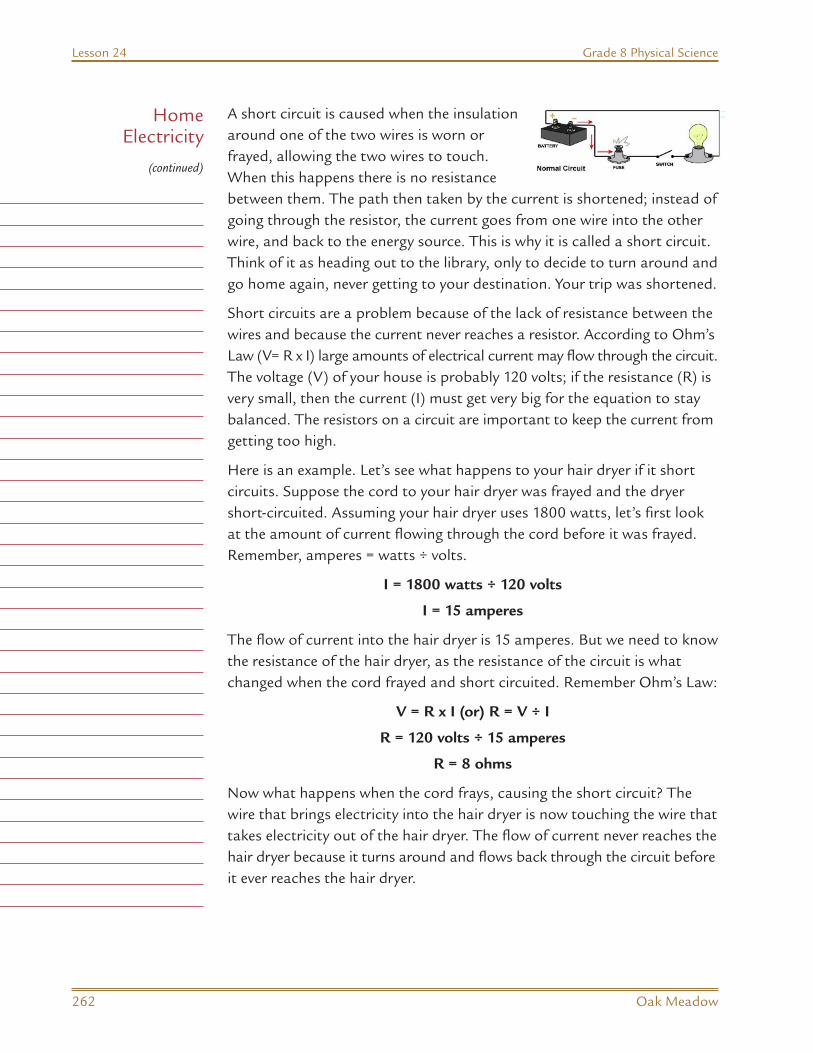
262 Oak Meadow
Home Electricity
(continued)
Lesson 24 Grade 8 Physical Science
A short circuit is caused when the insulation around one of the two wires is worn or frayed, allowing the two wires to touch. When this happens there is no resistance between them. The path then taken by the current is shortened; instead of going through the resistor, the current goes from one wire into the other wire, and back to the energy source. This is why it is called a short circuit. Think of it as heading out to the library, only to decide to turn around and go home again, never getting to your destination. Your trip was shortened.
Short circuits are a problem because of the lack of resistance between the wires and because the current never reaches a resistor. According to Ohm’s Law (V= R x I) large amounts of electrical current may flow through the circuit. The voltage (V) of your house is probably 120 volts; if the resistance (R) is very small, then the current (I) must get very big for the equation to stay balanced. The resistors on a circuit are important to keep the current from getting too high.
Here is an example. Let’s see what happens to your hair dryer if it short circuits. Suppose the cord to your hair dryer was frayed and the dryer short-circuited. Assuming your hair dryer uses 1800 watts, let’s first look at the amount of current flowing through the cord before it was frayed. Remember, amperes = watts ÷ volts.
I = 1800 watts ÷ 120 volts
I = 15 amperes
The flow of current into the hair dryer is 15 amperes. But we need to know the resistance of the hair dryer, as the resistance of the circuit is what changed when the cord frayed and short circuited. Remember Ohm’s Law:
V = R x I (or) R = V ÷ I
R = 120 volts ÷ 15 amperes
R = 8 ohms
Now what happens when the cord frays, causing the short circuit? The wire that brings electricity into the hair dryer is now touching the wire that takes electricity out of the hair dryer. The flow of current never reaches the hair dryer because it turns around and flows back through the circuit before it ever reaches the hair dryer.
Oak Meadow 263
Home Electricity
(continued)
Grade 8 Physical Science Lesson 24
How much current is now flowing through the wire? Ohm’s Law states that I = V ÷ R. Even though the current is not flowing through a resistor, there is still some resistance in the wire. Let’s say the resistance of the circuit is now 1 ohm. The voltage of your house is 120 volts. 120/1 = 120 amperes of current flowing through the wire! Even if there was 2 ohms of resistance still, the current would be 60 amps, enough to trip the circuit breaker, opening the circuit.
Large amounts of electricity flowing through a broken or frayed wire can make it very hot, which may result in a fire. Before the wires get hot, the surge of electricity through the circuit will cause either a fuse to blow or a circuit breaker to switch and open the circuit. Any short circuit should be fixed immediately to reduce the potential threat of heat from the short causing a fire. In addition, broken or worn wires should be replaced.
4. In the United States, household electricity usually has 120 volts of EMF. Homes in Great Britain and much of Europe have 240 volts of EMF, often written 220-230 volts. Choose a small appliance you use regularly, such as a hair dryer or toaster. How do you think it would work in Britain? Use Ohm’s Law to explain your answer. (I = V ÷ R) (Hint: the resistance of your hair dryer would be the same, regardless of where you operate it.)
Electric Shocks
Electrical current can cause shocks. It is current rather than voltage that causes electrical shocks, although the voltage will help determine the amount of shock because higher voltages allow higher current. When electrical current takes a short path through a person, that person is in the middle of a short circuit. Shocks commonly occur when a person touches a frayed cord or other exposed electrical conductor. This is why it is important to keep babies and children away from electrical outlets. The electrical current will prefer to take a path through a person to the ground, rather than around a circuit.
How much of a shock do you get? The flow of current running through a person’s body will depend upon the applied voltage and the resistance of the person’s body. Ohm’s Law (I = V ÷ R) determines the amount of electric shock someone is feeling.

264 Oak Meadow
Home Electricity
(continued)
Lesson 24 Grade 8 Physical Science
If your body is dry, it will have more resistance. Remember that water is a very good conductor, and the human body is comprised mostly of water. However, the outer skin has a lower percentage of water than does inner tissue. When skin is dry, the resistance of the body is relatively high, and the current coming from 10 volts may hardly be felt.
If the skin is wet, the body’s resistance drops about one thousand times! Ten volts can give a strong shock and 120 volts may be fatal.
Many appliances are grounded. That means that a wire is connected from the appliance to a ground. All the wiring in your house should also be grounded with a ground. What a ground does is take excess electric current to prevent it from going where it can cause danger. Many household cords now have three wires running through them, one for the current going to the resistor, another for the current going back to the energy source, and a third to act as a ground should there be a short circuit. More and more household outlets are now installed to take these three-pronged cords.
Every building also has a ground built into it as a safety device. Usually it is either a wire or a pipe that leads from the house down into the ground (the actual earth). The wire to the ground has less electrical resistance than a person’s body does. In the event of a short circuit, or if you touch a “hot” wire, any current flowing through the appliance will take the path of least resistance and flow through the appliance ground to the house ground wire into the ground outside. This prevents a shock from going through you!
5. We’ve all seen small birds sitting on power lines, and squirrels running along them, and none of them get an electric shock.

Oak Meadow 265
Home Electricity
(continued)
Grade 8 Physical Science Lesson 24
It seems the high voltage in the lines should kill them! Many large birds, such as herons and raptors (hawks and eagles) are electrocuted often by power lines. It is a big problem, and has reduced populations of some rare birds. Do some research, and answer why power lines kill large birds but do no harm to small birds that sit on them. Remember, it is current, not voltage, that causes electric shock.
Electric Meters
Electric companies keep track of how much electricity your home uses, and use this information to send your family a bill to pay for the power you used. In order to keep track of your household use, the electric company will install an electric meter on the outside of your home or building in a place where it can easily be reached in order to read it every billing cycle, usually about once a month. Often the electric meter will be close to where your circuit breaker or fuse box is located. It is usually covered with a glass cover.
There are two types of meters. One is like the odometer of a car and you just read the numbers. Some newer digital meters can be read from a distance by the electric company, so the meter reader can read it while driving down the road. Older meters have four or five circular dials lined up in a row, each numbered 0 to 9. They are read in a special way.
The unit of measurement for the use of electricity is kilowatt hours. On an electric meter, the number that shows is kilowatt hours. Electric current is doing work every time you turn something on in your home. That work is being supplied by the electric company. However, the time it takes to do that work depends on the amount of power it takes to use that appliance. Power is measured in watts. A kilowatt hour (kWh) is the number of 1,000-watt units of power that is used in an hour. For example, if you have a 100 watt light bulb burning for 10 hours, you have used 1000 watt-hours, or 1 kWh, of power.

266 Oak Meadow
Home Electricity
(continued)
Lesson 24 Grade 8 Physical Science
6. Locate the electric meter for your house. Write down the number it shows and note the time and date. Come back in a day or two and write the new number in your notebook and note the time. If it is an older meter, it will have four or five circular dials lined up in a row, each numbered 0 to 9. Begin reading at the far left dial. If a number is between two numbers, record the lower number, and move onto the next one to the right. If the dial’s pointer is exactly on a number, check the next dial to the right — if the pointer on the next dial has passed 0, record the number indicated by the first pointer. If the next pointer has not passed 0, record the next lower number on the first dial. Read all the dials in this way, from left to right.
a. How many kilowatt hours did your family use in the amount of time that passed between your readings? Divide that number by the number of hours that passed between readings and write down the average use per hour of your family. How many watts per hour did your family use? (Hint: convert from kilowatts to watts.)
b. Now ask your parents for a copy of last month’ s electric bill. How many kilowatt hours did your family use in the last billing cycle?