Embed Size (px)
Citation preview
Connecting with the Natural World
Junior Division Integrated Curriculum
Grade 4 Habitats and Communities Activities
in partnership with
This resource has been developed by the
Science Teachers’ Association of Ontario/L’Association des professeur de science de l’Ontario with funding and technical support from
Ontario Teacher’s Federation/Fédération des enseignmentes et des enseignants de l’Onrtario
STAO Writing Team Sheila Rhodes, Project Manager, Instructor, Faculty of Education, University of Ontario Institute of Technology Kimberly Arfo, Curriculum and Instruction, Peel District School Board Sarah Feddema, Durham District School Board Jocelyn Paas, Science and Biology Teacher, Peoples Christian Academy Judy Wearing, Senior Editor, The Critical Thinking Consortium
Reviewers Bonnie Anderson, Peel Field Centres, Peel District School Board Corrine Brook-Allred, Pickering (Retired) Victoria Winchester, Russell Public School Care has been taken to trace the ownership of copyright material contained in this document. STAO will be pleased to receive and information that will enable it to rectify any errors or omissions in subsequent editions. Send comments to [email protected] Teachers are permitted to make copies of this document for their classroom use. ©STAO/OTF 2012 The material in this document shall not be copied nor reproduced beyond a classroom without the permission of Science Teachers’ Association of Ontario/L’Association des professeur de science de l’Ontario [STAO/APSO]
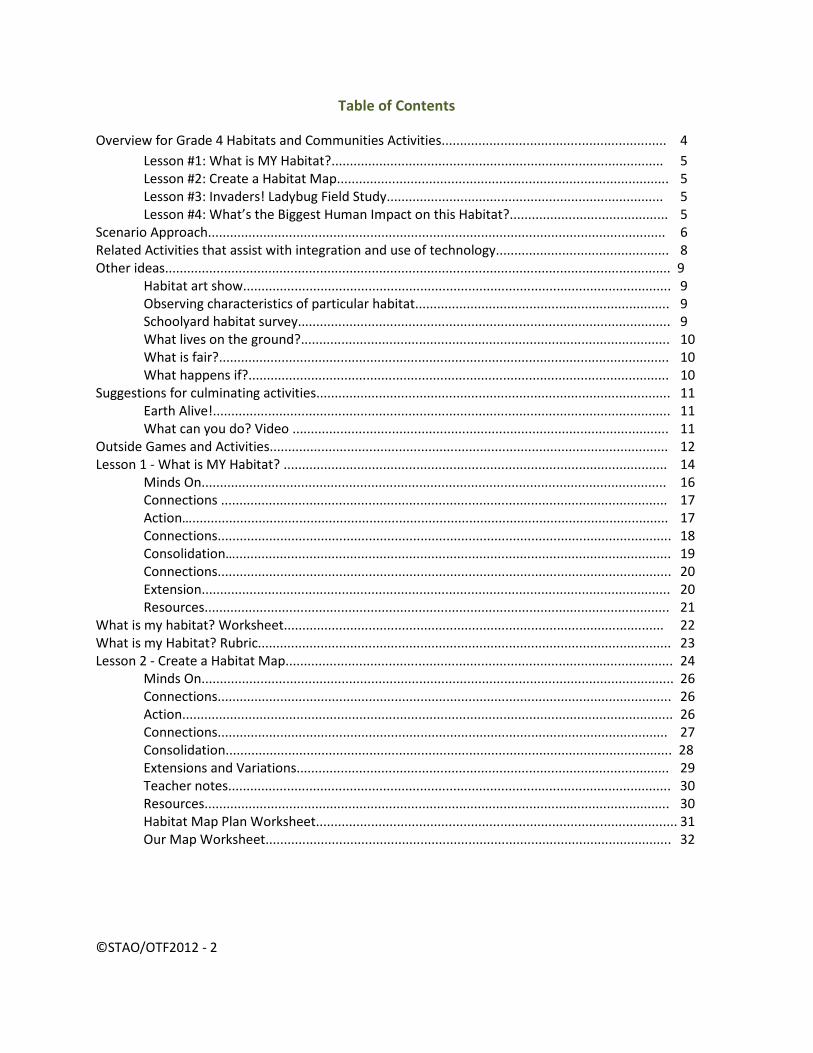
Table of Contents
Overview for Grade 4 Habitats and Communities Activities............................................................. 4 Lesson #1: What is MY Habitat?.......................................................................................... 5 Lesson #2: Create a Habitat Map.......................................................................................... 5 Lesson #3: Invaders! Ladybug Field Study........................................................................... 5 Lesson #4: What’s the Biggest Human Impact on this Habitat?........................................... 5
Scenario Approach............................................................................................................................ 6 Related Activities that assist with integration and use of technology............................................... 8 Other ideas......................................................................................................................................... 9
Habitat art show.................................................................................................................... 9 Observing characteristics of particular habitat..................................................................... 9 Schoolyard habitat survey..................................................................................................... 9 What lives on the ground?.................................................................................................... 10 What is fair?.......................................................................................................................... 10
What happens if?.................................................................................................................. 10 Suggestions for culminating activities................................................................................................ 11
Earth Alive!............................................................................................................................ 11 What can you do? Video ...................................................................................................... 11
Outside Games and Activities............................................................................................................ 12 Lesson 1 - What is MY Habitat? ........................................................................................................ 14
Minds On.............................................................................................................................. 16 Connections ......................................................................................................................... 17 Action…................................................................................................................................. 17 Connections........................................................................................................................... 18 Consolidation…...................................................................................................................... 19 Connections........................................................................................................................... 20 Extension............................................................................................................................... 20 Resources.............................................................................................................................. 21
What is my habitat? Worksheet....................................................................................................... 22 What is my Habitat? Rubric................................................................................................................ 23 Lesson 2 - Create a Habitat Map......................................................................................................... 24
Minds On................................................................................................................................ 26 Connections........................................................................................................................... 26 Action..................................................................................................................................... 26 Connections.......................................................................................................................... 27 Consolidation......................................................................................................................... 28 Extensions and Variations..................................................................................................... 29 Teacher notes........................................................................................................................ 30 Resources.............................................................................................................................. 30 Habitat Map Plan Worksheet.................................................................................................. 31 Our Map Worksheet.............................................................................................................. 32
©STAO/OTF2012 - 2
Lesson 3 - Invaders! Ladybug Field Study......................................................................................... 33 Minds On.….......................................................................................................................... 36 Connections.......................................................................................................................... 37 Action.................................................................................................................................... 37 Connections.......................................................................................................................... 38 Connections.......................................................................................................................... 39 Consolidation........................................................................................................................ 39 Connections.......................................................................................................................... 40 Extension.............................................................................................................................. 40 Teacher notes........................................................................................................................ 41 Resources.............................................................................................................................. 42 Assessing Invaders! Ladybug Field Study.............................................................................. 43
Lesson 4 - What’s the Biggest Human Impact on this Habitat? ........................................................ 44 Minds On............................................................................................................................... 46 Connections........................................................................................................................... 46 Action.................................................................................................................................... 46 Connections........................................................................................................................... 48 Consolidation…...................................................................................................................... 48 Extensions............................................................................................................................. 49
Assessing Biggest Impact Decision Rubric.......................................................................................... 52
©STAO/OTF2012 - 3
Overview for Grade 4 Habitats and Communities Activities
The environmental aspect of this topic is obvious. Teaching this topic is arguably not just best done outside, but essential. There is no other way for students to learn the interrelationships between living things and their environment, that are the core of this strand, without observing them. Photographs cannot capture the essence of living beings and their relationships with one another and the places they live.
This section highlights four inquiry based lessons that are based in the out of doors. If you are a science- shy teacher, or a person without much experience with nature and wildlife, there are suggestions given wherever possible to undertake the activities without venturing too far. Please take a minute to read the Overview section which has extensive assistance to make teaching and learning out of doors a positive experience for you; you won’t regret the time you take to glance at the tips and suggestions we’ve put together.
The lessons are numbered in a sequence that makes sense, but is not necessary to follow. The heading in each lesson, Student Readiness, will indicate what students need to understand prior to beginning the lesson. Extensions have been given where possible. The structure of these lessons allows teachers to work collaboratively (e.g., 2 or more grade 4 science teachers) to plan and implement the suggested activities.
A word on integration with social studies
The new social studies curriculum is organized around thinking concepts, which can be viewed as basic types of questions that can be asked in the discipline. There is some good news for integrating your subjects as these same types of questions that constitute the thinking concepts used in the social studies curriculum can be applied to science topics. For example, the thinking concept interrelationships is featured in the social studies strand for grade 4 which deals with the connections between human societies through time and their relationship with their environment. And what is the basic thinking concept students are addressing when they learn about habitats and communities? The connections between living things and their environment. Throughout these lessons, the connections between the social studies and science learning expectations have been made. The shared thinking concept of interrelationships at the very least will allow you to transition smoothly between the two subjects and use the learnings from one to scaffold the knowledge in the other.
©STAO/OTF2012 - 4
Lesson #1: What is MY Habitat?
What is MY habitat? Based on a class-derived definition of habitat, students consider the features of a habitat by observing green spaces directly, as well as the human place in their environment. Students use their observations to answer the question, what is my habitat? , and present their thoughts to the class. Students then use their answer to examine other civilizations through time. Have human habitats changed through time? If so, how much? Is our human habitat more or less similar than past human habitats? Students discuss this question as a group, backing up their position with evidence.
Lesson #2: Create a Habitat Map
Students create a map of habitats in a chosen locality (schoolyard, city block, conservation area, etc.) that might be used by tourists to the area. Over three sessions, students first analyze tourist maps and develop criteria for a good map of this kind; go outdoors to identify between five and eight habitats in the locality, and observe and record some plants and animals that live there; and, enhance this knowledge with additional research. An appealing map is created on poster paper that shows where the habitats can be observed and the key features of each. Students invite peers, family, or younger students to use the maps to go on a habitat walk.
Lesson #3: Invaders! Ladybug Field Study
Ladybird beetles are common and can be found virtually everywhere in Ontario. However, Ontario ladybirds are in trouble. New species imported from Asia and Europe are taking over, and some species that were once common before students were born are now rare. In this three to four session lesson best suited for late May or June, students look for ladybird beetles in a specified area or areas, photograph and identify the species they find, and note what species they do not find. Students record data, and share it with scientists in Cornell University in New York State who are engaged in a citizen science study of the distribution of native and invasive ladybird species. Students analyze their findings, and brainstorm possible solutions to the issue of invasive species. An extension asks students to link the demise of native ladybugs to human civilizations through time.
Lesson #4: What’s the Biggest Human Impact on this Habitat?
In this two or three session lesson, students use their observations of their environment to create a collaborative list of ways humans have impacted the habitats and community in a chosen locality. Students decide the criteria for the size of human impact on habitat, and discuss the evidence they would observe to back up their choice. Students decide on the biggest human impact they’ve observed in their environment, and then imagine the locality if humans had never been there. They will then communicate their thoughts with a drawing done free-hand or via software.
©STAO/OTF2012 - 5
Scenario Approach
For teachers wishing to use all four lessons, a scenario that is fun and exciting is one way to motivate students and connect the lessons in a narrative. To this end, the following is a suggested scenario that ties all four lessons together, based on a mystery or detective theme.
Present the following scenario as a “Top Secret Mission” and have the school principal bring in the “Special delivery” letter embossed with CSA letterhead. Ask the principal to read the letter to the class and ask students to take a pledge to solve the mystery.
Add to the excitement throughout the unit or “mission” by having email and text messages suddenly appear and delivered to the class. Create an alternate email address for the project so that emails are not coming from your school board address. Engage other teachers in the “secret mission” and have them engage the students in dialogue about the mystery.
Introduction
Good morning, boys and girls. My name is *** and I am the head of a secret detective organization called G.H.D.A. (Global Habitat Detective Agency). We need your help. The last great detective that we had was Sherlock Holmes, but his time has long passed, and we need someone new that is just as quick and sharp as he was. A couple of weeks ago, we received a call from the Canadian Space Agency to say that they have evidence that a creature from another world visited this area. CSA is not sure if the creature is still here, or has left. They think it may have left us a message but they’re not sure. They’ve asked you, who live here, and have open minds because you’re kids, to help us find out if the creature is still here, or if it has gone, and if it has gone, did it leave a message? Thank you, young detectives, for all your help in this sensitive, top secret situation.”
What is my habitat?
CSA got a text message six months ago from a cell phone traced to our schoolyard. The message said, “NOT MY HABITAT YOUR HABITAT. BEWARE” CSA knows it was written by a creature from another world because there was a photo sent, too, which looked like it might have been taken on the planet Mars, but they’re not sure. What did the message mean? Isn’t habitat just for plants and animals? Do intelligent creatures have a habitat too? What does the creature mean by “your habitat”?
©STAO/OTF2012 - 6
Create a habitat map
CSA thanks you. Know they understand that the creature was saying that the schoolyard and the community we live in is human habitat. And it was probably telling us to beware of protecting it. We are certainly glad we have a habitat like this one and not one like the photo of Mars! We still don’t know if the creature comes from Mars or some other planet, or if it is still here. We need to explore all the habitats in this area and come up with a map to help our experts in alien life search for clues. If you see any clues on your search, please let us know.
Invaders! Ladybird beetle study
Our chief detective flew in by helicopter last night and was glad to have your maps of the habitats in the area. She dusted for fingerprints but did not find anything. She did find one alien invader though, and she’s worried they might be taking over entirely. She sent me a note this morning saying, “HELP NEEDED IMMEDIATELY.” She asked me to work with their partner organization. I think it sounds like a code name, “the ladybug project.” Will you help me? We’ll need to go out into the field hunting aliens. The note reassures me they are very small and harmless. We just need to take photos of them and document how many we find.
What’s the biggest human impact?
It is starting to look as though the only aliens in this habitat are aliens that humans brought here. And they’re not from Mars or any other planet; they’re just from different countries. The detective agency has analyzed the data we’ve gathered so far and they have found a coded message! It says, “things have changed; things will change.” How mysterious. The detectives don’t know what this message means. They figure children, who will be here in the future, might have a better chance of figuring out what’s changed and how it is going to change. Plus, children have better eyesight and sharper senses, so they might be better able to observe and detect these changes. Will you help?
Conclusion
Announcement: The chief Inspector of the GHDA has resigned in a scandal. When she was here visiting her grandchildren six months ago, it was she that sent the text to CSA, and when she came here by helicopter and used your maps to explore our habitats, she planted the message. She had good intentions, of course, and has gone back to her old job of elementary school principal, but she can’t be a detective anymore because detectives are not allowed to pretend to be aliens; it is against CSA rules. She asked me to tell you thanks for being such excellent junior detectives and to tell you that you are lifetime members of the Global Habitat Detective Agency, discovering and protecting habitats for children everywhere, with one condition – if you pretend to be an alien, you might lose your license.
©STAO/OTF2012 - 7
Related Activities that assist with integration and use of technology
• Students can create a detective persona, make a detective badge on the iPad or computer and write a resume listing their skills that can be added to their portfolio in order to become detectives in the agency (writing for a purpose, persuasive writing, art)
• Create a “Global Habitat Detective Agency” tracking sheet and students can put a “sticker” beside each task completed
• A simple way to create stickers is to copy a suitable image onto a sheet of mailing labels to make multiple stickers
• Incorporate orienteering activities with clues related to scenario (mapping skills and physical education)
• Mystery Word Jumble – Clue One describes who the culprit might be – add clues during the unit (language) to keep their interest
• Plan a Scavenger Hunt with GPS program or ArcGIS (mapping skills) or as a basic compass activity
• Use Google Earth to create a map of area for habitats and mark what has been located • Record field trips with pictures and data – geotag the pictures with GPS from the digital
cameras or iPads and add to location map on Google Earth or Google Maps • Use Audubon or other nature apps on an iPad to identify and record as many different
species of birds, animals, and trees that live in your area o Audubon Field Guide o Audubon Insects o Audubon Butterflies o iBird Canada o Birds North America o Bugsdb o Flora Folio o Flowers o Tree Watch o LeafSnap o My Nature Tree Guide o My Nature Tracks o Creek Watch
• Create individual or group “life lists” of species that have been identified and add these to the worldwide databases that are incorporated into these apps
• Add information to class project set up on iNaturalist website http://www.inaturalist.org/ • Develop an outside activity that uses programs, such as Skype or iMessage on the iPad, to
send clues that need to be answered and sent back to “headquarters” • Create a class Blog each day to show what students have discovered and the research they
have carried out (writing and research skills)
©STAO/OTF2012 - 8
Additional ideas Below are some additional descriptions of lessons that may be used to teach the habitat and communities topic, all of which are inquiry based and involve the out of doors in simple, feasible ways.
Habitat art show
Students brainstorm ideas of habitats in a designated area, such as their schoolyard, city block, park, or local conservation area. In pairs, students are assigned the task of photographing a habitat – students may be assigned different habitats or sign up for their choice. Students are given support and encouragement about different ways to photograph habitats, perhaps with an internet search for images with their chosen habitat as the search term. Students take turns taking photographs, and decide the best photo for display. They then collaborate on a 100 word description of the photo’s subject, as would befit an art exhibit. Students will be assigned the task of curating the exhibit, proposing ideas in small groups, and deciding as a class the best option; for example, organize by colour, spatially from smallest to largest, from lowest to highest or by the relationships of plants and animals that live there. You may wish to organize a jury to judge and award photos, have students judge each other’s work (and review the habitats featured in the process), and/or have other classes/parents view the show.
Observing characteristics of particular habitat Given poems or famous paintings of a habitat (for example, Joyce Kilmer’s Trees or Tom Thomson’s The Jack Pine or Paul Peel’s The Meadowlark), students are asked to rework it to apply to a local habitat of their choice or to one which you have assigned them. Students are taken outside to observe and reflect on connections firsthand, and to be guided in using their senses to evoke visual, oral or written descriptions. The Voices from the Land project can be incorporated here and students can share their work with a worldwide audience. www.sharingvoices.com.
Schoolyard habitat survey
Students inventory the habitats in a defined region using a data sheet or GPS. They then graph the habitats and the kinds of organisms found. Data on habitats impacted by students or other human activity might also be gathered. Students graph data so that the type of habitat is related to the number of kinds of organisms observed. Questions are then asked about these differences and possible answers are brainstormed.
©STAO/OTF2012 - 9
What lives on the ground?
Students explore the lawn or soil as habitat. With a small yogurt container, they make a soil trap for ground invertebrates and look under objects, such as rocks, for others. Students take photos and gather data on what they observe, and brainstorm questions about the organisms and their habitat. Students take soil samples, sift them looking for organisms that they will look at under microscope. They also rinse soil and look at water under the microscope. Notes are made on what they observe. Students will likely find earthworms as well as microscopic nematodes, pupae of moths, flies or beetles, beetle grubs, and perhaps some single celled protists, such as amoeba or ciliates. The internet might be used to identify some of these organisms or create groupings based on similarity; for example, nematodes and earthworms are both kinds of worms. Grubs are similar to caterpillars – they are both immature insects, etc.
What is fair?
Students consider a scenario based on use of resources of relevance to them; for example, use of the schoolyard for different activities by different groups within the school or how to divide a pizza fairly. Brainstorming will reveal a difference of opinions as well as different stakeholders or perspectives based on needs and desires. These scenarios may be related to the use of habitats and natural resources so that students understand the complexities of these issues, the differences in people’s perspectives, and that there may be a variety of ways to solve these conflicts fairly. This may lead to role play of consensus-building solutions to the use of a habitat, with the goal to minimize negative impacts in the future while meeting needs of all groups. What happens if?
Ask paired students to invent short games for their peers about what happens if something in a habitat is changed, removed or added. Take students outdoors to a habitat and model the game. What happens if this tree is cut down, this field is paved over, this pond is drained, a family of beavers moves into this creek bed, Canada geese are poisoned, etc.? Ask students to work in pairs to compile ideas for their “What Happens If?”. Provide them with time and resources to independently research the answers, as well as peer discussion time and one-on-one time to prepare answers. Work to ensure students draw the connections between living things. Students will need to be in the locality to come up with their ideas.
©STAO/OTF2012 - 10
Suggestions for culminating activities
The following ideas are particularly suitable for culminating activities:
Earth Alive!
Students are given a short paragraph describing how a particular Aboriginal group, such as the ancient Inca, considers the components of their environment to be alive. In the case of Inca, for example, the mountains are gods, and farming on the slopes is to be farming directly on the gods’ bodies. Students are asked to take on the perspective of a habitat they have studied as being alive. They will use their understanding of the relationships of the organic and inorganic aspects of the habitat to develop the characteristics of the habitat as a being. They will consider their role in the habitat, and changes to the habitat brought about by human activity. They then consider how viewing the land as alive might change their perspective about how humans use the habitat, and describe their change in perspective, including how human impacts might differ if everyone else in our society viewed the habitat from this same perspective.
What can you do? Video
Surprisingly, there are not a lot of YouTube videos giving youth quick ideas for how they might make a difference to their environment, in an entertaining way suitable for the audience. However, www.dothegreenthing.com is a collection of real life stories. Ask students to work in small groups to develop such a video and post them to do the green thing as well as YouTube. The video should communicate to their peers around the world or their region or country the reasons that habitats need to be protected.They should give useful, sound advice about what students can do to assist in the protection of habitats and/or tell the story of how they, or their classmates, have followed this advice and made a difference. To do so, students will need to evoke their understanding of what is a habitat, the relationships between the components of a habitat, including our own reliance on our habitat, and the threats to habitats due to human activity. One excellent application for this purpose is iMovie on the iPad; students can incorporate pictures and videos they have taken throughout this study. Photostory is another simple-to-use application, which can be downloaded for free.
©STAO/OTF2012 - 11
Outside Games and Activities
Habitat Lap Sit
Materials: None Objective: Students sit on each other’s lap in a circle. Ecological Context: Habitat is made up of multiple components and each of these intersects in order to support life. Students in the circle represent components of habitat. Instructions:
• Have students form a circle and ask them, “What is habitat?” (Answers: a place where animals and other beings live).
• Ask, “What is habitat made of?” (Answers: food, water, shelter, air/space, etc.). • Assign students a role to play, alternating between food, water, shelter, and air/space.
Stepping outside of the circle, instruct students to stand shoulder to shoulder and then turn to their right so they face the back of the person in front of them.
• Ask everyone to take two baby steps in toward the centre of the circle, in order to close gaps between people. Students should be close enough that they are able to support each other on their knees...but they’ll figure this part out after trying it! Students usually take a few tries to get the mechanics right.
• Add an additional challenge by asking them to take three steps in their squatting position. Have them stand in their circle again and explain that various environmental hazards have impacted the environment.
• Ask those who are food to raise their hands and then choose one or two “food” students to remove from the circle, explaining that pesticides have been sprayed on crops and this part of the habitat no longer supports life in the same way due to bioaccumulation.
• Do the same with each of the remaining three components (ideas include: water contamination due to oil spill, shelter is taken over by urban sprawl, air is polluted due to vehicle emissions). Have fun, be creative!
• Ensure that the gaps you create are small enough that the students will be able to successfully sit again.
• Also, make sure the remaining students don’t close in the gaps left by the students who leave. The idea is that the students have to work with the missing components to do the best they can to sit (“support life”), even though the habitat is compromised.
• After they have successfully sat with the compromised habitat, elicit students’ observations (e.g., “What was it like trying to sit after some of the habitat had been removed?” “How might this be like real life?”)
Source - Project WILD Canadian Wildlife Federation
©STAO/OTF2012 - 12

Food Chains Objective: To illustrate the relationship between predator and prey Materials:
• For the bird of prey or predator: Blindfold • For the prey: Elastic cuff with one or more bells • Classroom or similar space indoors or outside
Instructions: • The children hold hands and form a circle. • One child is chosen to be the predator and wears the blindfold. The child takes up a position
within the circle. Several children are selected to be the prey – the more the merrier, as long as the circle shape can be retained!
• The predator then has to try to catch all the prey, relying on sense of hearing. As the prey are caught, they stand outside of the circle. The children making up the circle can move closer together to make a smaller space as prey are caught.
• More realism can be injected by the use of animal masks (with no eye holes in the case of the predator!).
Herbivore vs. Carnivore Game
• See Resources section • In this activity, participants are involved in a game of tag which imitates an ecosystem of
predator-prey relationships. By assuming the roles of herbivores and carnivores, learners must survive by seeking out food and water, as well as watching out for carnivores, if they are herbivores, and impacts of disease, elements, and humans. This program reinforces the concepts of habitat, the provision of basic needs using food and water, and teaching students to work together to get to a common goal.
©STAO/OTF2012 - 13
Grade 4 Habitats and Communities Lesson 1 - What is MY Habitat?
Lesson Overview
What is MY habitat? Based on a class-derived definition of habitat, students consider the features of a habitat by observing green spaces directly, as well as the human place in their environment. Students use their observations to develop an answer to the question, What is my habitat? and present it to the class. They will then use their answer to examine other civilizations through time. Have human habitats changed through time? If so, how much? Is our human habitat more or less similar to past human habitats? Students discuss this question as a group, backing up their position with evidence.
NOTE: This lesson will likely take 4 or 5 sessions, and with the extension could take 6 sessions. However, it covers several curriculum expectations in both science and social studies as well.
Connections to Environmental Education
● The Earth’s physical and biological systems; ● The dependency of our social and economic systems on these natural systems; ● The positive and negative consequences, both intended and unintended, of the interactions
between human-created and natural systems.
Curriculum Expectations
Science - Grade 4 Understanding Life Systems: Habitats and Communities
• SE1.1 analyse the positive and negative impacts of human interactions with natural habitats and communities, taking different perspectives into account, and evaluate ways of minimizing the negative impacts
• SE2.3 use scientific inquiry/research skills to investigate ways in which plants and animals in a community depend on features of their habitat to meet important needs
• SE 2.5 use appropriate science and technology vocabulary, including habitat, population, community, adaptation, and food chain, in oral and written communication
• SE2.6 use a variety of forms (e.g., oral, written, graphic, multimedia) to communicate with different audiences and for a variety of purposes
• SE3.1 demonstrate an understanding of habitats as areas that provide plants and animals with the necessities of life (e.g., food, water, air, space, and light)
• SE3.3 identify factors (e.g., availability of water or food, amount of light, type of weather) that affect the ability of plants and animals to survive in a specific habitat
• SE3.10 describe ways in which humans are dependent on natural habitats and communities (e.g., for water, medicine, flood control in wetlands, leisure activities)
©STAO/OTF2012 - 14
Social Studies - Grade 4 Heritage and Identity: Early Societies, 3000 BCE–1500 CE
• OE A1 Application: compare key aspects of life in a few early societies (3000 BCE–1500 CE), each from a different region and era and representing a different culture, and describe some key similarities and differences between these early societies and present-day Canadian society (FOCUS ON: Continuity and Change; Perspective)
• OE A2 Inquiry: use the social studies inquiry process to investigate ways of life and relationships with the environment in two or more early societies (3000 BCE–1500 CE), with an emphasis on aspects of the interrelationship between the environment and life in those societies (FOCUS ON: Interrelationships)
• OE A3. Understanding Context: demonstrate an understanding of key aspects of a few early societies (3000 BCE–1500 CE), each from a different region and era and representing a different culture, with reference to their political and social organization, daily life, and relationships with the environment and with each other (FOCUS ON: Significance)
• SE A2.1 formulate questions to guide investigations into ways of life and relationships with the environment in two or more early societies, with an emphasis on aspects of the interrelationship between the environment and life in those societies
Learning Goals
• At the end of this lesson, students will understand the concept of habitat. • At the end of this lesson, students will recognize their dependence on the environment, their
role in the environment. • At the end of this lesson, students will question whether humans have changed the
environment, and whether these changes have a positive or negative impact on our society. • At the end of this lesson, students will understand that over time, some things stay the same
and some things change. • At the end of this lesson, students will understand that societies, as well as wild plants and
animals, have complex interrelationships with the environment.
Instructional Components and Context
Readiness
• Students have studied the requirements of life (space, oxygen, food, water) • Students have studied some human civilizations other than their own, including their
interaction with their environment (e.g., agriculture, hunting and fishing, use of natural resources)
Materials
• Access to internet for research purposes • Digital cameras (optional) • iPads (optional)
©STAO/OTF2012 - 15
Terminology
• habitat • human impact • civilization
Minds On
Small group and class discussion: what is a habitat?
Ask students about the requirements of life and list their responses to draw out the list: space, food, water, air, light. Then ask students in a think, pair, share format to consider the meaning of the word habitat, sharing their ideas in small groups. Allow students time to consider the problem, but if groups have tremendous difficulty, after a few minutes provide them with a hint, such as "place" or “environment.”
Class exploration of habitats
Once students have had some time to struggle with the question, but before they lose interest, take them outside to look for habitats. Assist students to make connections between living things and the environment, but do not provide definitions. Encourage students to gather ideas about what they think a habitat might be, based on their observations.
Create definition of habitat in small groups
Back in the classroom, ask small groups of students to write, in twenty words or less, a definition of habitat. Gather and post the definitions. Look for the common elements in the definitions and circle, underline, and otherwise mark them. Use these elements to build a class definition. Note to students that there is some ambiguity in this definition – it is a concept and different people might define it in slightly different ways, and that is okay. For example, one definition of a habitat is: the place where plants and animals live, and their needs for life (space, air, water, food, light) are met. However, this is used to describe the place where a population of plants or animals, rather than an individual or a species, lives. That said, it is possible to describe the habitat of a single turtle. Some definitions refer to the community of plants and animals that rely on a place, so a wetland is a habitat, supporting a variety of living things. Also, habitat can refer to the place where plants and animals live, but it can also refer to the environment that has an impact on living things or that is influenced by living things.
©STAO/OTF2012 - 16
Connections
Assessment for learning Observe students’ understanding of concepts of requirements for life and habitat as they respond to discussion questions and contribute to discussion with their peers. Ask questions to determine their level of understanding. Differentiated Instruction Provide lists of terms to assist students brainstorming their definitions and/or to remove focus from writing definitions to deciding on the concept of a habitat. Encourage students to use graphic organizers or doodling to work out their thoughts. Provide sample BLM for this purpose to give students ideas of concept maps (e.g., thought bubbles connected with arrows or lines; concentric circles, etc.). Use a program such as Smart Ideas (Ministry licenced) for concept mapping. Apps on the iPad include Popplet and Idea Sketch that encourage collaboration.
Give students requiring additional challenge the task of gathering all student definitions, finding common elements, and formulating and editing the final definition. Alternatively, suggest the challenge of creating a definition of habitat with few words – 18, 15 or 12. In addition, you may ask students who work quickly or have well-developed computer skills to research existing habitat definitions on the internet and report back to the class, once the class has developed its definitions.
Action
Individuals observe their habitat
Once the class has agreed on a definition, post it in view in the classroom and turn students’ attention to the problem: what is your habitat? Take students on a walk and ask them to think about their requirements for life (space, food, water, air, light), and take photos or make notes to answer this question. You may wish to give students the activity sheet, What is my Habitat?, prior to the walk to prompt their thinking. Give students time, perhaps overnight or over a couple of days, to consider the environment that supplies their food, water, air, light, and space. Students may have questions regarding the ambiguity of the definition. (If students find difficulty with a definition, they could use the Frayer Model. Although this is typically used for vocabulary development, there is a section designated for a non-example.)
©STAO/OTF2012 - 17
Encourage such contemplation and encourage students to decide independently what they think their habitat is – does it include just the place where they live or the place where the whole population, the whole community of people they interact with lives? Does it include just the place where food, water, air, and living space exists, or does it also include the fields where the food was grown, the lake that the water came from, etc.? Does it include the environment that supplies their needs, or does it also include the environment they influence?; the lake where their waste water is emptied?; the landfill where their garbage is buried? You may wish to raise these questions to the whole class if/as students raise them, or encourage peers to ask them of each other.
Individuals present their solutions to the question: what is my habitat?
Invite students to present their decision of what is their habitat to the rest of the class, in one or two sentences. Encourage their peers to ask questions about their decision, if it is different than their own. Inform them that they will be able to refine their own answers based on what they hear from the rest of the class. One way to do this is to post questions, such as: what observations did you make that led you to this decision?; why do you say that…?; etc. You may wish to coach students in how to respond to questions they might be asked in their presentations. Either model such responses or give students the opportunity to present their responses in writing or orally to you for feedback. Encourage students, and model for students, acceptance of differences in ideas. Teachers can access resources on introducing cooperative groups to help establish the appropriate risk-free atmosphere in the classroom. Focus on the quality of thought –the reasonableness of the conclusion and the quality of evidence given for the conclusion.
Students refine their ideas
Encourage students to refine their solutions to the question, what is my habitat?, based on their peer`s presentations. Emphasize that humans, like all other living things, depend on the environment.
Connections
Assessment of learning
The rubric, What is my Habitat? Rubric, can be used to assess student understanding of the concept of habitat and their connection to their environment, as well as their communication of their ideas on this subject. If time permits, students could participate in creating the rubric in student-friendly language.
Pay attention to any written notes, the planning sheets, and graphic organizers students may have used through the activities; these will provide additional information about student understanding, in addition to students’ written definition of their habitat, as well as their oral presentation.
©STAO/OTF2012 - 18
Differentiated Instruction Providing students the opportunity to defend their ideas orally is important, no matter what their strengths. For students for whom this is particularly challenging, provide as much scaffolding as possible by modeling how to make a presentation and answer questions, by offering coaching and practice sessions for anyone who requires it. Also coach and model positive responses and critique among students; for example, make it a rule to always say positive comments and always say them first.
Provide students alternative opportunities to demonstrate their learning via written communication and visual communication.
Consolidation
Students apply their knowledge to past civilizations
In small groups arranged by common ideas of “what is our habitat?”, ask students to consider the habitats of past civilizations they have studied and compare them to what they consider to be their habitat today. How is the habitat of past human civilizations the same as students’ present human civilizations: what has remained constant? Possible responses include: rely on lakes and rivers for water, rely on fields for agriculture for much of our food, the sun is a constant source of light and warmth, live in communities that require space and resources to build shelters. How is the habitat of past human civilizations different? What has changed over time? Food comes from much farther away than it used to; food supplies once relied more heavily on hunting and gathering; some civilizations were nomadic and required territory with food and water supply, and space for temporary settlements; and many civilizations needed to live closer to water than we do today because they did not have a way to transport it over distances. A Venn diagram may be a useful way for students to organize their thoughts.
Ask students to answer the question: was the habitat(s) of past civilizations more similar or more different to our habitat? Back up their answer with evidence from their comparison.
In discussion, emphasize the interrelationship between humans and the environment throughout the ages.
©STAO/OTF2012 - 19
Connections
Assessment for/of learning
Gather data about student contributions to group discussion, insight into comparison between past and present human habitats, and their ability to translate their findings into a conclusion.
Differentiated Instruction
You may wish to assign a past civilization for some groups of students to compare to ours. For students requiring extra challenge, you may wish to have them compare all the past civilizations they have studied with ours.
For students who struggle with reading and writing, you may wish to prepare a Venn diagram comparing two civilizations. Pepper it with comparisons that are accurate and some that are not accurate, then ask students to rework the Venn diagram.
Extension
Taking care of our habitat
Ask students to discuss what happens when people don’t take care of their environment. Use an exploration of the collapse of past civilizations to decide if not taking care of the environment has had a negative impact on humans in the past. One way to do this is to have students use a web site to research the collapse of human civilizations, or supply them with short readings to contemplate (see Resources for suggestions). Ask students to consider what could happen if people in their community don’t take care of their habitat. Be sure to follow up this discussion with practical suggestions for taking care of their habitat (see Resources for suggestions). One idea is for students to create a video to tell or show other students just like them ways that they, too, can protect habitats, including their own! Alternatively, students may research a local issue that is threatening their habitat.
©STAO/OTF2012 - 20
Resources
General
The Canadian Wildlife Federation has developed education resources about the importance of habitats, invasive species, and protecting habitats:
http://www.cwf-fcf.org/en/educate/ed-resources/lesson-plans/kit/
What is habitat?
A brief explanation of habitats in student-friendly language from Idaho Public Television: http://idahoptv.org/dialogue4kids/season10/habitat/facts.cfm
A broad definition of habitats from BBC nature, with lots of photographs:
http://www.bbc.co.uk/nature/habitats
Wikipedia also has a discussion of the concept of ‘habitat’.
Collapse of civilizations
A table of factors impacting the collapse of several major ancient civilizations: http://www.learner.org/interactives/collapse/
Taking care of our habitat Simple, feasible ideas for kids:
www.wikihow.com/Take-Action-to-Help-the-Environment-(Kids)
Fun, organized, doable act for the planet suggestions:
www.ecokids.ca/pub/take_action/campaigns/act_for_the_planet/index.cfm
©STAO/OTF2012 - 21
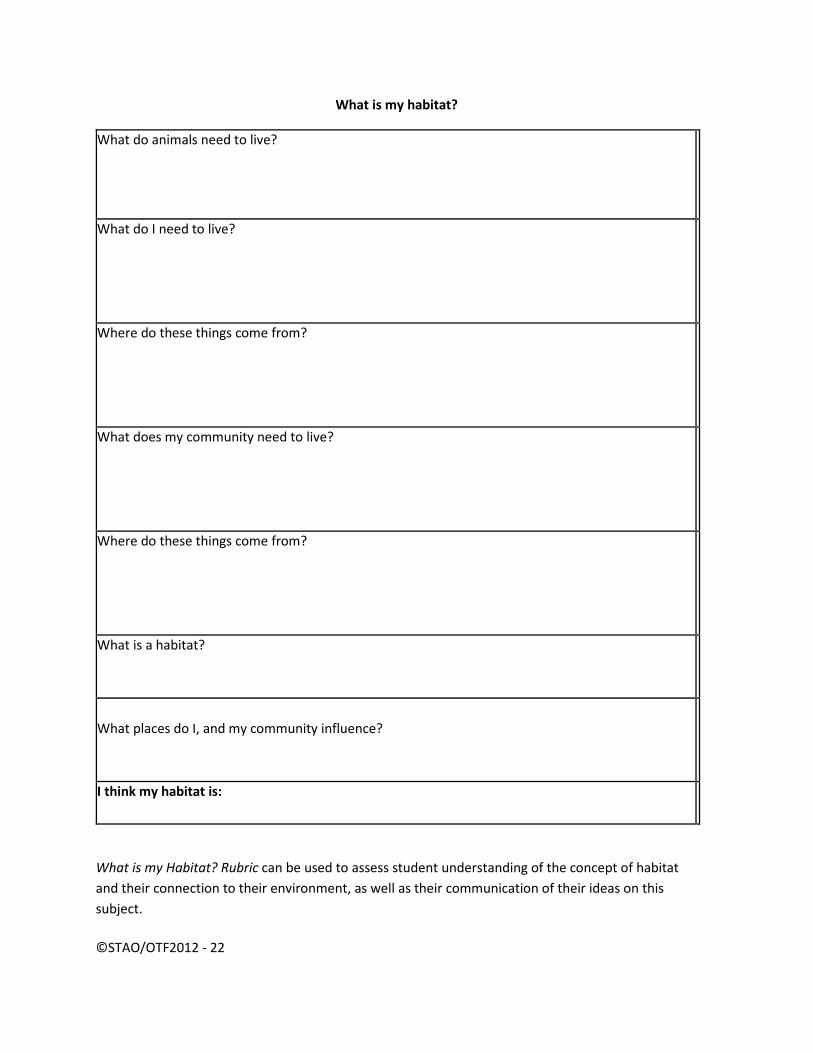
What is my habitat?
What do animals need to live?
What do I need to live?
Where do these things come from?
What does my community need to live?
Where do these things come from?
What is a habitat?
What places do I, and my community influence?
I think my habitat is:
What is my Habitat? Rubric can be used to assess student understanding of the concept of habitat and their connection to their environment, as well as their communication of their ideas on this subject.
©STAO/OTF2012 - 22
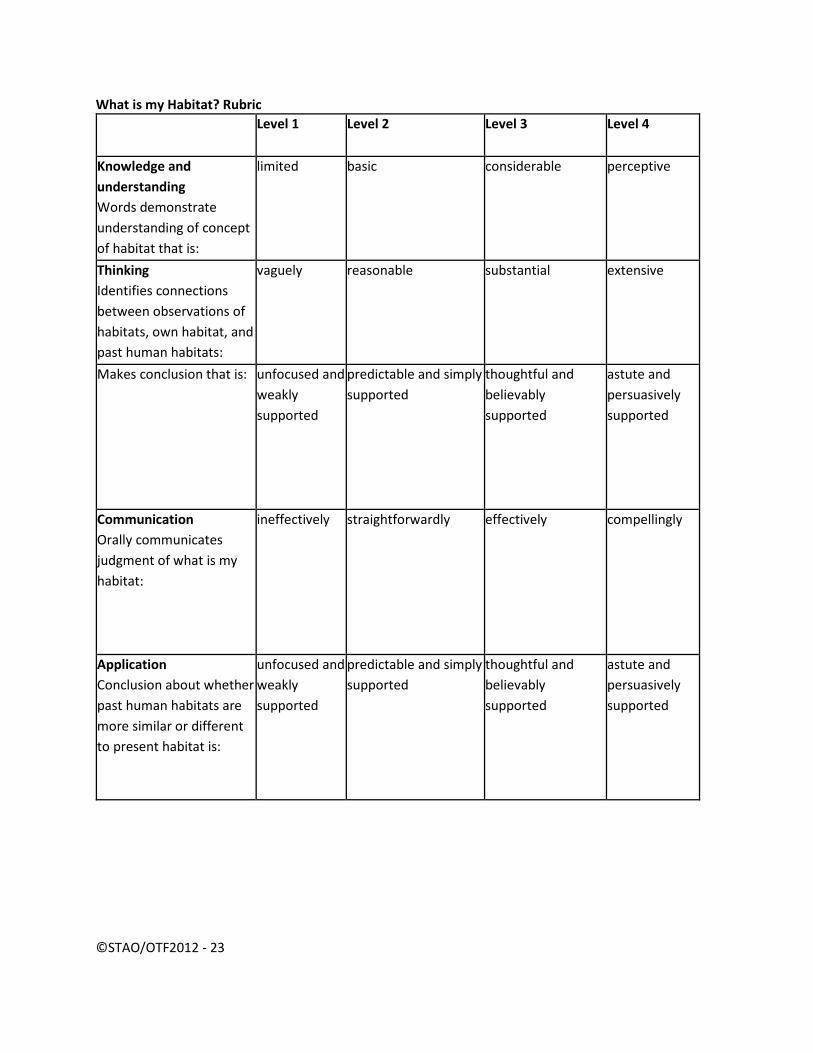
What is my Habitat? Rubric Level 1
Level 2
Level 3
Level 4
Knowledge and understanding Words demonstrate understanding of concept of habitat that is:
limited basic considerable perceptive
Thinking Identifies connections between observations of habitats, own habitat, and past human habitats:
vaguely reasonable substantial extensive
Makes conclusion that is: unfocused and weakly supported
predictable and simply supported
thoughtful and believably supported
astute and persuasively supported
Communication Orally communicates judgment of what is my habitat:
ineffectively straightforwardly effectively compellingly
Application Conclusion about whether past human habitats are more similar or different to present habitat is:
unfocused and weakly supported
predictable and simply supported
thoughtful and believably supported
astute and persuasively supported
©STAO/OTF2012 - 23
Grade 4 Habitats and Communities Lesson 2 - Create a Habitat Map
Lesson Overview
Students create a tourist map of habitats in a chosen locality (schoolyard, city block, conservation area, etc.). Over three sessions, students first analyze tourist maps and develop criteria for a good map of this kind; go outdoors to identify between five and eight habitats in the locality, and observe and record some plants and animals that live there; and, enhance this knowledge with additional research. An appealing map is created on poster paper that shows where the habitats can be observed and the key features of each. Students invite peers, family or younger students to use the maps to go on a habitat walk.
Connections to Environmental Education
● The Earth’s physical and biological systems
Curriculum Expectations
Science - Grade 4 Understanding Life Systems: Habitats and Communities
• OE2. investigate the interdependence of plants and animals within specific habitats and communities
• SE2.5 use appropriate science and technology vocabulary, including habitat, population, community, adaptation, and food chain, in oral and written communication
• SE2.6 use a variety of forms (e.g., oral, written, graphic, multimedia) to communicate with different audiences and for a variety of purposes (e.g., use presentation software to show the steps one might follow to set up and maintain a terrarium)
• OE3 demonstrate an understanding of habitats and communities and the relationships among the plants and animals that live in them SE3.1 demonstrate an understanding of habitats as areas that provide plants and animals with the necessities of life (e.g., food, water, air, space, and light)
• SE3.4 demonstrate an understanding of a community as a group of interacting species sharing a common habitat (e.g., the life in a meadow or in a patch of forest)
Social Studies - Grade 4 People and Environments: Political and Physical Regions in Canada
• OE B3. Understanding Context: identify Canada’s political and physical regions, and describe their main characteristics and some of the significant activities that take place in them (FOCUS ON: Significance, Patterns and Trends) (Extension activity)
• SE B2.2 gather and organize information and data from various sources to investigate issues and challenges associated with balancing human needs/wants and activities with environmental stewardship in one or more of the political and/or physical regions of Canada
©STAO/OTF2012 - 24
• SE B2.3 analyse and construct print and/or digital maps, including thematic maps, as part of their investigations into balancing human needs/ wants and activities with environmental stewardship in Canada
• SE B2.4 interpret and analyse information and data related to their investigations, using a variety of tools
Learning Goals
• At the end of this lesson, students will be able to recognize and describe habitats and some of the plants and animals that live in them.
• At the end of this lesson, students will make connections between the plants and animals that co-exist and also the environmental conditions that provide the necessities of life.
• At the end of this lesson, students will apply mapping skills. • At the end of this lesson, students will recognize there are patterns in the natural world and
the physical world.
Instructional Components and Context
Readiness
Students need to:
● Be able to create a 2D map of a space with labels ● Understand the concept of a habitat
Materials
● Field guides to local plants and animals (see Resources) ● Poster paper and markers ● A few examples of tourist maps with several locations featured (e.g., Toronto Metro Zoo
map, etc.) ● Digital cameras (optional) ● iPads (optional) ● Access to research resources about local habitats and plants and animals
Terminology
• Habitats • communities • species
©STAO/OTF2012 - 25
Minds On
Small groups explore tourist maps
Pass around examples of tourist maps and ask students to examine them, listing their characteristics as well as what they like and do not like about them. Ask students to share their thoughts with the whole class. Collect student responses on the board and use them to make two lists: the features of a tourist map (these will be the requirements for their assignment) and the criteria for a good tourist map (these will inform the criteria for peer assessment as learning and your assessment of learning).
Think, pair, share: what is a habitat?
Remind students of the definition of a habitat by asking them to state and discuss what a habitat is in their own words in a think, pair, share format. Post the definition somewhere in the class for students to refer to.
Connections
Assessment for learning
Check students for understanding of concept of a tourist map and habitats.
Action
Small groups explore local habitats
In small groups, take students to a defined area – schoolyard, city block, park or area in a conservation area - and ask them to find more than five to eight habitats to use to create a tourist map. They will need to:
● Create a map of the area; ● Pinpoint at least five to eight habitats, or good locations from which to view them; and, ● Observe plants, animals, and environmental features of their chosen habitats.
You may wish to have students photograph or sketch their habitats to make it easier to assemble their completed maps. You may also wish to have students use GPS technology to map their selected habitat locations. Make field guides available for students to use and/or encourage them to take photographs of dominant plants or animals to research later.
If using iPads, there are several excellent apps that can be used in the field to help identify plants and animals of the area. Utilize the camera on the iPad to record the habitat area. Refer to Lesson 1 for
©STAO/OTF2012 - 26
suggested nature apps. Use the Voice recorder or a program such as Dragon Dictation to document what is found in the area. Take notes while in the field with the Notes app.
Examples of habitats, and the plants and animals students might find include:
● Oak tree: robin, squirrel, ants ● Under rock: earthworm, pill bug, earwig ● Hay field: alfalfa, timothy grass, grasshopper, bobolink ● Wetland: bulrushes, water lilies, frogs, turtles, dragonflies, mosquitoes
Small groups do additional research and plan their final maps
Back in the classroom, provide students with the resources (i.e., field guides, access to the Internet, access to knowledgeable guests) to choose five to eight habitats, and write or list several features of each. Give students time to plan how they will present their final map; refer back to the examples they examined at the beginning of the lesson pointing out font and phrase length, titles, photos and bright colours, clearly marked roads or paths, etc. You may wish to ensure that students within a group all have a role to play. One way to do this is to interview each group briefly; ask who is doing what and provide additional suggestions as necessary. See student planning sheet, Habitat Map Plan.
Share plans with peers
Ask students to share their completed map plans with another group to obtain peer feedback.
Connections
Assessment as learning
Ask students to peer review each other’s plans based on the criteria developed at the beginning of the lesson, based on a simple scale, or one thing they liked and one suggestion for improvement.
©STAO/OTF2012 - 27

Differentiated instruction
Consider giving students the option of using GPS coordinates and podcasts to create a virtual map. Vary the complexity of requirements for the tourist map or the size of the area included in the map. Encourage students looking for extra challenge to do additional research on the habitats, and plants and animals they find for their tourist maps.
Consolidation
Groups create and share tourist maps
Once students have incorporated peer feedback into their plans, give them time to create their maps and provide opportunity for them to share their products. Audiences might include peers, younger grades or family members.
Discuss with students that the activity of creating a tourist map involves determining and describing a pattern to the living creatures in their environment. Patterns of how living creatures are distributed is related to the patterns of the physical environment: where there are trees, where there is water, etc. These patterns exist on a small scale in a locality, but also in much larger scales, such as all of Canada or all of the world (for example, regions of ocean, desert, mountains, and forests). Just as these patterns influence what plants and animals live where, they also influence where humans live, and what people do. You may wish to use this as a segue into the study of Canada’s physical regions. See the extension below for another suggestion.
Connections
Assessment of learning
Use the criteria developed for the tourist map at the beginning of the activity as the criteria for assessment of the product. Some possible criteria are:
● Clear: maps are easy to read and follow ● Concise: habitat descriptions are short and to the point ● Catchy: map is visually appealing with use of words and graphics ● Informative: map includes key information about chosen habitats
©STAO/OTF2012 - 28

Extensions and Variations
Instead of a tourist map, ask students to create a maze or a treasure hunt, with clues leading to the next chosen habitat viewing point on their path. The final habitat point could be the students’ favourite habitat, the best place to get a glimpse of their favourite plant or animal, or the most important habitat to look after.
This activity can incorporate GPS programs and mapping apps on the iPad, such as Motion X and ArcGIS. Motion X allows students to create waypoints that can then be sent to another group via email. Students can take pictures when they find the habitat spot. This activity can be done with Skype and students can share their findings.
Bigger picture habitats
Ask students to make connections between the habitats they studied and their physical region, using a map of their region. Have students make a brief list of their region’s dominant habitats. Then, ask them to research or discuss in small groups, the dominant habitats in other physical regions. Make connections based on learning of local habitats and their features, and plants and animals to the differences in features, and plants and animals in other physical regions. Ask students to discuss and consider questions and current knowledge regarding how these differences influence the people living in these physical regions as a starting point for a study of the connections between society and the environment within and between Canadian regions.
Mini-trails
Students might use their maps to design mini-trails, with markers in the locations and a pamphlet describing each station. (See Grade 6 Biodiversity Lesson 2 "Miniature Nature Trails” for more details of how this might be accomplished.)
Teacher notes
Consider inviting a naturalist from a local conservation authority or from the volunteer/parent pool to accompany you and your students as you explore habitats. The expert can help students identify habitats, and the plants and animals they find living there.
Ask your IT support person or colleagues for additional ideas of technologies available to you that might be used to enhance student learning with this lesson, or for advice about how to use GPS technology for mapping.
©STAO/OTF2012 - 29
Resources
Tourist map examples: search Google images using search terms: trail guide, trail map, conservation area map, tourist map + community or region of your choice (e.g., Ontario, Toronto, etc.)
Field guides: The Royal Ontario Museum has a “create your own field guide” that allows students to specify their region: http://www.rom.on.ca/ontario/fieldguides.php
The University of Michigan web site, BioKids, has some field guides that are largely applicable to Ontario habitats available for download at no charge: http://www.biokids.umich.edu/guides/
Canadian Geographic has animal facts searchable by species: http://www.canadiangeographic.ca/kids/animal-facts/animals.asp?region=ont
If you wish to purchase field guides, Golden Guides are child friendly.
For assistance using GPS, use the search term “GPS tutorial.”
iPad apps
• Voice Recorder • Dragon Dictation • Notes • Motion X • ArcGIS • PathAway
©STAO/OTF2012 - 30
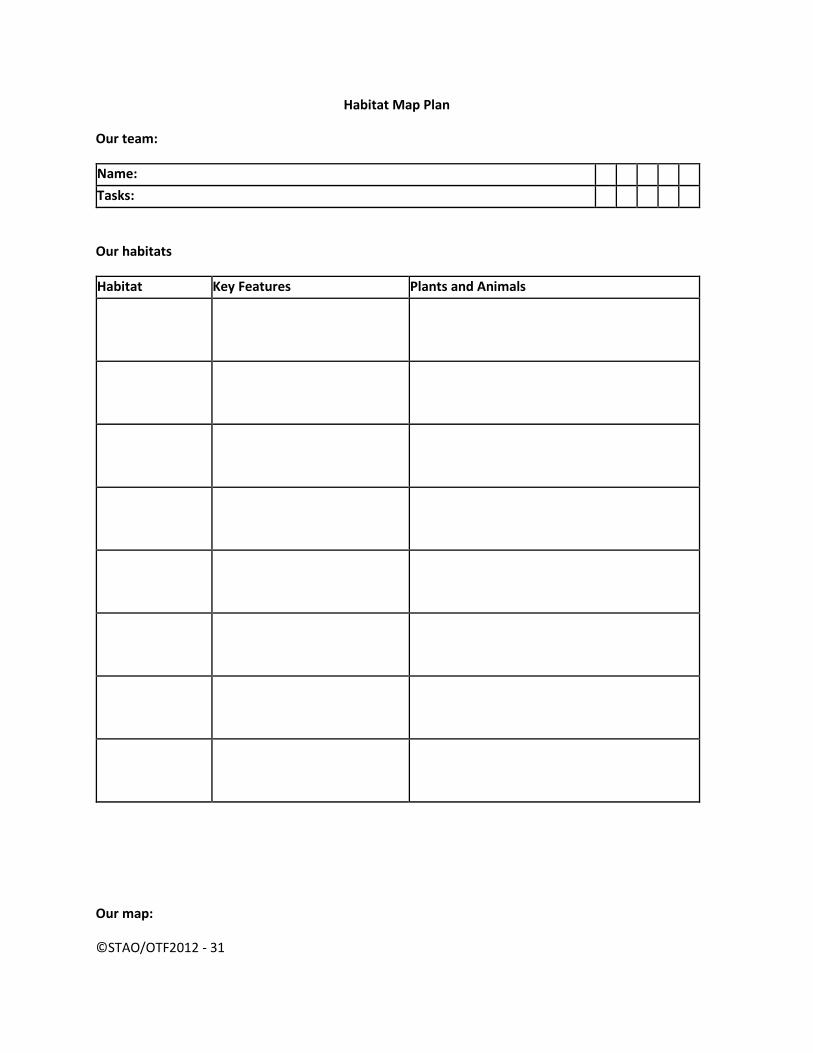
Habitat Map Plan
Our team:
Name: Tasks:
Our habitats
Habitat Key Features Plants and Animals
Our map:
©STAO/OTF2012 - 31
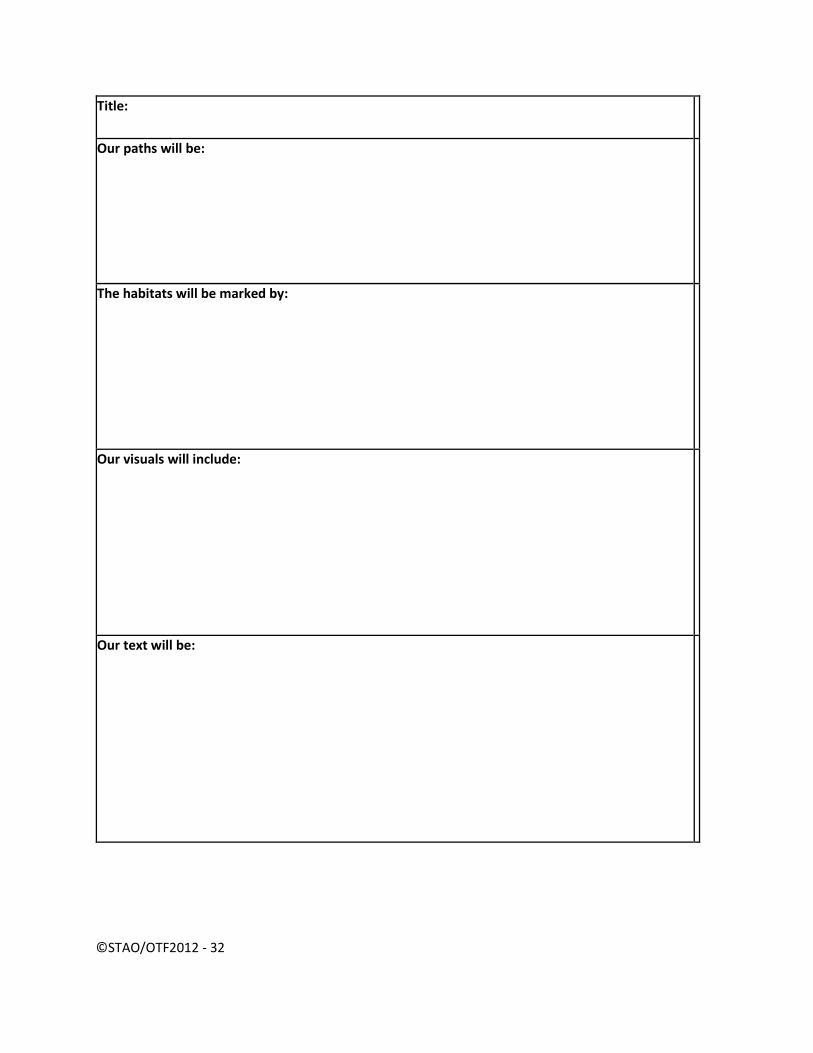
Title:
Our paths will be:
The habitats will be marked by:
Our visuals will include:
Our text will be:
©STAO/OTF2012 - 32
Grade 4 Habitats and Communities Lesson 3 - Invaders! Ladybug Field Study
Lesson Overview Ladybird beetles are common and can be found virtually everywhere in Ontario. However, Ontario ladybirds are in trouble. New species imported from Asia and Europe are taking over, and some species that were once common before your students were born are now rare. In this three to four session lesson, students look for ladybird beetles in a specified area or areas, photograph and identify the species they find, and note what species they do not find. Students record dataand share it with scientists in Cornell University in New York State who are engaged in a citizen science study of the distribution of native and invasive ladybird species. Students analyze their findings and brainstorm possible solutions to the issue of invasive species. An extension asks students to link the demise of native ladybugs to human civilizations through time.
Connections to Environmental Education
• The Earth’s physical and biological systems; • The scientific and human dimensions of environmental issues; • The positive and negative consequences, both intended and unintended, of the interactions
between human-created and natural systems.
Curriculum Expectations
Science - Grade 4 Understanding Life Systems: Habitats and Communities
• OE1 analyse the effects of human activities on habitats and communities • SE1.2 identify reasons for the depletion or extinction of a plant or animal species (e.g.,
hunting, disease, invasive species, changes in or destruction of its habitat), evaluate the impacts on the rest of the natural community, and propose possible actions for preventing such depletions or extinctions from happening
• SE2.1 follow established safety procedures for working with soils and natural materials (e.g., wear gloves when handling soils to set up a working terrarium)
• SE2.3 use scientific inquiry/research skills (see page 15) to investigate ways in which plants and animals in a community depend on features of their habitat to meet important needs
• SE2.6 use a variety of forms (e.g., oral, written, graphic, multimedia) to communicate with different audiences and for a variety of purposes
• OE3 demonstrate an understanding of habitats and communities and the relationships among the plants and animals that live in them
©STAO/OTF2012 - 33
• SE3.1 demonstrate an understanding of habitats as areas that provide plants and animals with the necessities of life (e.g., food, water, air, space, and light)
• SE3.3 identify factors (e.g., availability of water or food, amount of light, type of weather) that affect the ability of plants and animals to survive in a specific habitat
• SE3.4 demonstrate an understanding of a community as a group of interacting species sharing a common habitat (e.g., the life in a meadow or in a patch of forest)
Social Studies - Grade 4 Heritage and Identity: Early Societies, 3000 BCE–1500 CE
• OE A2 Inquiry: use the social studies inquiry process to investigate ways of life and relationships with the environment in two or more early societies (3000 BCE–1500 CE), with an emphasis on aspects of the interrelationship between the environment and life in those societies (FOCUS ON: Interrelationships)
Learning Goals
• At the end of this lesson, students will be able to collect, photograph, and identify insects, and record data on their collection including habitat and weather.
• At the end of this lesson, students will be able to analyze data of distribution of species. • At the end of this lesson, students will be able to relate distribution of species to
interrelationships between animals. • At the end of this lesson, students will be able to understand how invasive species negatively
impact native species. • At the end of this lesson, students will be able to consider solutions to the environmental
issue of invasive species. • At the end of this lesson, students will be able to make a positive contribution to a bonafide
and meaningful environmental research study. • At the end of this lesson, students will be able to understand that there are
interrelationships between living things and that they impact each other (and between cultures, if doing the extension).
©STAO/OTF2012 - 34
Instructional Components and Context
Readiness
Students need to know and be able to:
● Identify major habitats and plant types in the chosen area(s); for example: wheat field, meadow, lawn, rose bush, etc.
● Understand the concept of species Materials
● Drawing, diagram, video or actual sample of native ladybugs, Japanese ladybugs, and aphids (www.lostladybug.org has good images of native and Japanese ladybugs, or use Google to find good images of these and aphids – see Resources)
● Digital cameras (preferably with close-up setting) ● Background to do photos on, preferably grey ● Field notebooks and writing implements ● Rulers and medium gray paper (as a background for photography) ● Access to internet to upload photos ● Copies of ladybug species identification key, (www.lostladybug.org/identification-tools-
1083.php), is a student-friendly PDF available for download. This PDF is included with this lesson.
● Insect nets (see lostladybugproject.org for instructions on how to make or where to purchase)
● Access to freezer or cooler (optional) ● Plastic containers and Ziploc bags for collecting ● Plant identification field guide (optional) ● iPads with plant identification apps
○ Flora Folio ○ Flowers ○ Tree Watch ○ LeafSnap ○ My Nature Tree Guide ○ Audubon Field Guide ○ What’s Invasive
Terminology
● Invasive species ● native species
©STAO/OTF2012 - 35
Minds On Whole class discussion: what is a ladybug? Ask students, “what is a ladybug?” Using a drawing or real sample, draw out that ladybugs are insects, which have six legs and three body parts. Draw out that ladybugs are beetles with wings covered by hard shells, and incomplete metamorphosis; unlike fly larvae and caterpillars, juvenile ladybugs have legs, are active, and resemble the adults, except for the conspicuous absence of wings. Note that ladybugs are also called ladybird beetles or lady beetles. Discuss what ladybugs eat (small insects, especially aphids) and show students an image of an aphid. Ask students to share their experiences with ladybugs and their thoughts about them.
Whole class or small group: Invasive species demonstration Tell students that the ladybugs that have lived in Ontario for thousands of years are disappearing. Ask students to guess why and record any suggestions. Explain that ladybugs eat aphids and aphids eat many plants we grow for food – like broccoli and wheat and food grown in greenhouses, like cucumbers and tomatoes. Ladybugs are important in the environment because they eat aphids, keeping their numbers down so that wheat and vegetables can still grow. Introduce students to the Asian lady beetle, also called the Japanese ladybug, with a visual image and explain that this is a ladybug, too, but a different species. People in the United States brought these ladybugs over here from Asia (they are native to Russia, Japan, China, and other countries)and put them into farmer’s fields because they eat a lot of aphids: more aphids than the native species that live here. They thought they were doing a good thing. Ask students what they think would happen if two ladybug species lived in the same habitat and one species ate more aphids than the other. Demonstrate this with multiple cut-out copies of images of the two ladybird bugs and aphids (or alternately, cut-outs of red, orange, and green construction paper to represent the two species and aphids). Either as a demonstration with volunteers or in groups of two or three, ask students to act out what will happen when two species coexist and eat the same food, but one eats more. Give students 44 aphids and 4 of each ladybug species. One student is the Ontario ladybird, one student is the Asian lady beetle. If you have a third student, they can look after the aphids. Tell students that:
● their ladybugs will eat every time you say ‘eat;’ ● with every six aphids that a ladybug eats, they are able to reproduce and multiply, and they
will add another ladybug, which will also eat ; and, ● the Asian lady beetle eats three aphids every time, while the ladybug only eats two.
Post these three ‘rules’ so they are visible to students. When the aphids are all eaten, students will notice that the Asian lady beetle will have multiplied so that there are four ladybugs, but only two Ontario ladybugs. Ask students to explain what will ©STAO/OTF2012 - 36
happen over time. You may wish to have groups combine and do the demonstration over a longer period of “time.” Explain that when a species from a different country is able to grow and reproduce faster than a species that lives in the habitat already, it will take over in time, and the home, or native, species will die out. When this happens, the introduced species is called an invasive species. Discuss with students the meaning of the word invasive – make links to ‘invade’ and ‘invasion,’ terms students may have heard related with human conflict (e.g., in video games). Invasive denotes aggression. Note that not all species from a new country are invasive. Explain that the Asian ladybug has spread very quickly throughout North America and Europe and wherever it lives; native ladybirds have become more and more rare. It not only feeds voraciously on aphids, but it also feeds on ladybirds! So it directly kills off the ladybirds in the area.
Connections Assessment for learning Observe students’ understanding of introductory concepts of ladybirds and invasive species as they respond to discussion questions. Ask questions to determine their level of understanding. Differentiated instruction
Give verbal learners or students who excel at mathematics the opportunity to work out what would happen to the two ladybird species over time with words or with numbers, in addition to or instead of using the models.
Action Whole class: introduce problem Explain to students that to protect the North American species of ladybugs, scientists need to know where they are and how many of them there are. Scientists at Cornell University in the United States have invited students to help them by going out where they live and finding ladybugs of all kinds and sending them photos of what they find. Explain that it is important for this work that scientists know as much information as possible about where and when the ladybugs were found: in what habitat the ladybugs were found, the date, the time of day, the plants they were on, how they were collected, how many people collected and for
©STAO/OTF2012 - 37
how long, and the weather. Also explain that a finding of zero ladybug beetles is also valuable information for scientists to have. It tells them that there are no ladybugs in that area. Pairs: practice using camera Ensure students know how to use a digital camera. Explain how taking a photo on a grey background helps the colours of the ladybug and its spots be seen more clearly. If digital cameras are in short supply, have teams get practice by rotating in the classroom prior to the field trip. Also explain that taking the photo of a ladybug next to a ruler gives scientists information about the beetle’s size. Show students how to use the close-up setting on the camera(s). Practice taking photos of sample ladybugs or other models (e.g., plastic bugs, houseflies, etc.). You may suggest students work in pairs or trios, one student setting up the ladybug on the paper, another taking the photo, a third recording the data.
Connections
Assessment for learning Check student photos and data recording for understanding and provide further instruction as necessary.
Whole class: prepare for field work Take students out into a meadow or farmer’s field where they are likely to find ladybugs. Discuss with class on the way the types of plants they’ll find and the habitat they’ll be encountering. Explain that they will be collecting insects and looking specifically for ladybugs. All the ladybugs they find will be recorded and photographed to be emailed to Cornell University. Remind students that bees and wasps sting and that they should not be handled.
Demonstrate how to use the insect net – use a consistent sweeping motion to brush over the grasses and field plants, capturing the insects inside. Walk steadily while you sweep to cover an area of about five to ten metres or more. End the sweep with the top of the net folded over the frame so the insects cannot escape. Open the net carefully, allowing any dragonflies, bees, and wasps to fly away. Examine the insects left at the bottom of the net and carefully remove ladybugs. You may use a Ziploc bag or a plastic container to contain ladybugs. Set up a photo station to take photos of the ladybugs: you may wish to put them into a cooler for a few minutes to slow the ladybugs down to take the photos. You may wish to elect a trained parent or expert volunteer to operate the camera or assist students in taking their photos.
©STAO/OTF2012 - 38
Groups: collect and photograph ladybugs in the field ● Provide supervised groups of students ample time to collect and photograph any ladybugs
they find. Encourage students to identify their findings using the field guide supplied by the lost ladybug project (included with this resource).
Groups: analyze data
● Back at the classroom, upload the photos following the instructions on the lost ladybug project site.
● Have students work in groups to finish any identification and to collate the numbers of the species they found. Have them record their findings on the board and ask the class to graph the results.
Connections Assessment for learning Gather observational data about student thinking (e.g., strategies they used) for collecting and identifying ladybugs.
Differentiated Instruction Consider dividing roles among students according to their strengths: some do the collecting (gross motor skills), others are responsible for taking the ladybugs out of the net (fine motor skills), others photograph and record data (organizational skills; technical skills). All students should have the opportunity to try all roles they wish to, and all should have the opportunity to contribute their knowledge of habitat, weather, etc., to the data recorded, as well as try to identify the ladybugs.
Consolidation Group discussion: Response to findings Give students an opportunity to express their thoughts on these findings, which unfortunately are likely to show that the Asian ladybird is dominating.
©STAO/OTF2012 - 39
Group discussion: Suggest a solution
Ask students to brainstorm in groups possible solutions to this invasive species, or how to prevent other invasive species from altering the environment. Ask each group (or student) to share one idea with the rest of the class. Make links between student ideas and those being considered and used by scientists right now, including: chemicals, traps, and release of natural predators and germs that kill the Asian beetle in their native habitat. Prevention of more invasive species is something that many places are generally aware of and try to do through public education and border control laws and practices.
Connections
Assessment Use rubric, Assessing Invaders! Ladybug Field Study Extension The reasons for the demise of native ladybugs have been a factor in the demise of many human civilizations in the past, as other cultures moved in and either were aggressive with local occupants or outcompeted them for resources; for example, when Cro-Magnon man immigrated into Europe and Asia, the demise of Neanderthals was hastened and they were extinct within 10,000 years. Ask students to find an example of a past culture that suffered or dissolved as the result of invaders who outcompeted or out rightly killed them. Alternatively, provide students with an example from your program of study (such as the Spanish conquest of the Aztecs) and ask students to use a Venn diagram to make connections between the analogous situations.
Differentiated instruction If feasible, give students time to consider the options in their group overnight before coming together to make a final decision. Encourage students to use paper, if they wish, during the brainstorm, and provide students with the opportunity to communicate verbally or in writing.
©STAO/OTF2012 - 40
Teacher notes Familiarize yourself with the instructions on the web site www.lostladybugproject.org regarding collecting and photographing ladybugs, identifying them, and sending data. This lesson is best done in May and/or June, when ladybugs are most active. This lesson has been written for a field trip to a meadow or farmer’s field. Ensure that you have permission of the landowner and that the field has not been sprayed recently. You can search for local organic farms on the Canadian Organic Growers web site: www.cog.ca/directory, or the Organic Council of Ontario web site: http://www.organiccouncil.ca/directory. Be sure you are aware of any stinging allergies and are prepared for an emergency related to stings in the field. Ensure that students wear appropriate footwear and sun protection. See the Overview section for more detailed safety information. If a field trip and insect net sweep is not feasible, there are alternatives:
• After an initial, less formal search for ladybugs in the schoolyard, students may be asked to be on alert for ladybugs in the schoolyard and elsewhere for a period of weeks. They will need to either take a photo of any ladybugs they observe or bring them into class to be photographed in order for them to be admissible as data.
• A blacklight may be used to attract ladybugs, and other insects, to you. For instructions on how to set this up, see the lost ladybug project web site.
Resources The Lost Ladybug Project: www.lostladybugproject.org Ladybird beetle information:
● Everything ladybug: student-friendly site with interesting information and videos. Has advertisements: http://everything-ladybug.com/ladybug-facts.html
● Biokids: student-friendly site, but rife with technical terms, from the University of Michigan: http://www.biokids.umich.edu/critters/Coccinellidae/
Monarch watch: another citizen science project related to habitats and communities: http://www.monarchwatch.org/ Nature watch offers several citizen science projects: http://www.naturewatch.ca/english/
©STAO/OTF2012 - 41
Organizations of interest: ● Ontario conservation authorities: http://www.conservation-ontario.on.ca/about/cas.html ● Let’s talk science: graduate student volunteers
http://www.letstalkscience.ca/educators/science-outreach.html iPad apps
● Flora Folio ● Flowers ● Tree Watch ● LeafSnap ● My Nature Tree Guide ● Audubon Field Guide ● What’s Invasive
See Grade 6 Biodiversity - Lesson 6 -Invasive Species Investigation for additional websites and resources.
©STAO/OTF2012 - 42
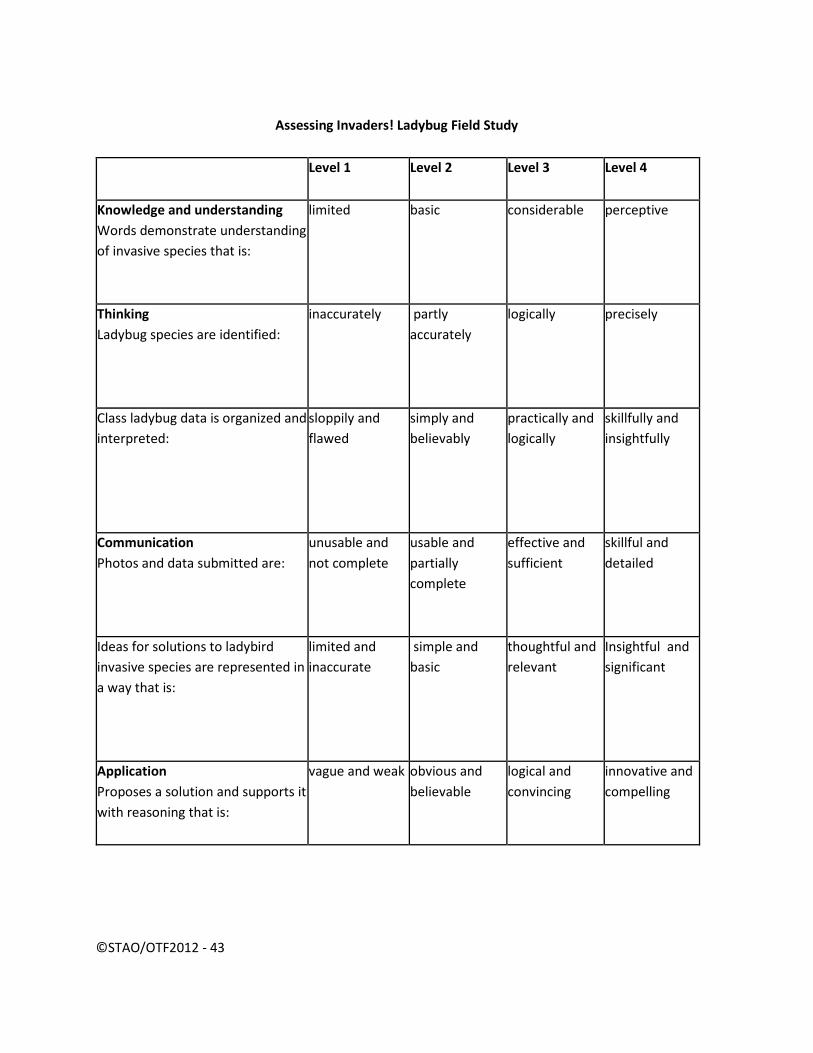
Assessing Invaders! Ladybug Field Study
Level 1
Level 2
Level 3
Level 4
Knowledge and understanding Words demonstrate understanding of invasive species that is:
limited basic considerable perceptive
Thinking Ladybug species are identified:
inaccurately partly accurately
logically precisely
Class ladybug data is organized and interpreted:
sloppily and flawed
simply and believably
practically and logically
skillfully and insightfully
Communication Photos and data submitted are:
unusable and not complete
usable and partially complete
effective and sufficient
skillful and detailed
Ideas for solutions to ladybird invasive species are represented in a way that is:
limited and inaccurate
simple and basic
thoughtful and relevant
Insightful and significant
Application Proposes a solution and supports it with reasoning that is:
vague and weak obvious and believable
logical and convincing
innovative and compelling
©STAO/OTF2012 - 43

Grade 4 Habitats and Communities Lesson 4 - What’s the Biggest Human Impact on this Habitat?
Lesson Overview
In this two or three session lesson, students use their observations of their environment to create a collaborative list of ways humans have impacted the habitats and community in a chosen locality. Students decide the criteria for the size of human impact on habitat, and discuss the evidence they would observe to back up their choice. Students decide on the biggest human impact they’ve observed in their environment, and then imagine the locality if humans had never been there, and communicate their thoughts with a drawing done free-hand or via software.
Connections to Environmental Education
● The Earth’s physical and biological systems; ● The dependency of our social and economic systems on these natural systems; ● The positive and negative consequences, both intended and unintended, of the interactions
between human-created and natural systems.
Curriculum Expectations
Science - Grade 4 Understanding Life Systems: Habitats and Communities
• OE1 analyse the effects of human activities on habitats and communities • SE1.1 analyse the positive and negative impacts of human interactions with natural habitats
and communities (e.g., human dependence on natural materials), taking different perspectives into account (e.g., the perspectives of a housing developer, a family in need of housing, an ecologist), and evaluate ways of minimizing the negative impacts
Social Studies - Grade 4 Heritage and Identity: Early Societies, 3000 BCE–1500 CE
• OE A2 Inquiry: use the social studies inquiry process to investigate ways of life and relationships with the environment in two or more early societies (3000 BCE–1500 CE), with an emphasis on aspects of the interrelationship between the environment and life in those societies (FOCUS ON: Interrelationships) (Extension)
• SE A2.1 formulate questions to guide investigations into ways of life and relationships with the environment in two or more early societies, with an emphasis on aspects of the interrelationship between the environment and life in those societies
• SE A3.5 describe the importance of the environment for two or more early societies, including how the local environment affected the ways in which people met their physical needs
©STAO/OTF2012 - 44
Social Studies - Grade 4 People and Environments: Political and Physical Regions in Canada
• OE B2 Inquiry: use the social studies inquiry process to investigate some issues and challenges associated with balancing human needs/wants and activities with environmental stewardship in one or more of the political and/or physical regions of Canada (FOCUS ON: Perspective)
• SE B2.4 interpret and analyse information and data related to their investigations, using a variety of tools
Learning Goals
• After completing this lesson, students will be able to identify a range of human impacts on the environment and consider the degree of impact.
• After completing this lesson, students will be able to recognize the complexities involved in reducing human impacts.
• After completing this lesson, students will be able to understand that perspectives on issues related to science and the environment differ from person to person and by culture (the influence of culture on perspective is gleaned from the extension activity that looks at other cultures being studied).
Instructional Components and Context
Readiness
Students should:
● understand that habitats are where plants and animals live, where their basic needs for life are fulfilled
● be able to use a digital camera or software, if these technologies are chosen to be used in the lesson
● have studied several other cultures and have some familiarity with their interactions with their environment (extension)
Materials
• Drawing paper • Digital cameras (optional) • iPads or access to other computer-drawing software
Terminology
• Human impact • Habitat ,environment
©STAO/OTF2012 - 45
Minds On Whole class: introduce human impact observations
Begin, if feasible, by looking out the window as a class and asking students to observe human impacts on the natural environment, the habitat of plants and animals. Ask students who make these observations how they did so, and model observations for students, such as suggesting they examine the whole view systematically, look for signs of the non-natural – or alterations of the natural, including rocks, soil, landscape, plants, animals, structures, etc. Guide students in recognizing that there are direct effects they will observe, such as paving over land or creating an open grassy field where trees would have once grown. Also point out indirect effect that may not be so readily apparent; for example, the pavement used consists of mined rocks and minerals and fossil fuels, and the grassy field took gasoline to create, releasing carbon dioxide into the atmosphere and contributing to climate change. Brainstorm with students some of the factors that might influence how a person or group of people perceive impact. Using a readily seen example (e.g., pavement), discuss how an ecologist, a city planner, a mining company owner or a safety advisor might view the size of impact. If possible, point out positive impacts on the environment as well (e.g., nest boxes for osprey, trees planted in schoolyard, conservation of lands, etc.).
Connections
Assessment for learning
Observe students’ understanding of introductory concepts of human impact as they make initial observations. Ask questions to determine their level of understanding of the concept and strategies to make observations in the field.
Differentiated instruction
If appropriate, provide written tips for observing impacts to students in advance.
Action
Groups identify human impacts
Bring students outside to schoolyard, city block or local park and ask them in small groups to compile a list of human impacts they observe. Remind students that impacts can be both negative and positive. Give students the opportunity to take digital photographs for future reference, or take these photos yourself and make them available to students in the classroom.
©STAO/OTF2012 - 46
Back in the classroom or in a suitable location outside (e.g., under a shady tree), ask student groups to examine their lists and make shortlists of the five biggest impacts they observed. Invite students to share their ideas with their classmates. Encourage student groups to alter their shortlists, if they wish, based on what they hear from their peers. Provide students with assistance as needed on strategies to reach a consensus; for example, each student in the group chooses one impact, or a designated leader in the group makes the decision when there is disagreement. Whole class discussion of criteria for big impact
In the classroom, ask students to consider what is a ‘big’ impact. How did they decide which impacts were the largest? Use student responses, such as:
• the number of plants and animals that are affected • the amount of habitat space that is altered • whether plants and animals can still live there or if they are gone entirely
From this, develop a list of criteria for deciding if a human impact is big or small. Note that the criteria allow for positive impacts as well as negative impacts to be judged to be large or small.
Give students the opportunity, after considering the impacts, to alter their shortlist.
Individuals analyze the human impacts and judge which one is biggest Ask students to list in a notebook or a computer document their shortlist of impacts in a column on the left hand side, and make a column for each criterion to the right. See the example below – you may wish to display an example on the board or interactive white board. Give students the opportunity to do internet research to enhance their analysis. Ask students to judge the size of each impact on habitats by using a scale of 0-3 (none, little, some, lots) for each criterion, and use their analysis to decide the biggest impact. Ask students to come up with two pieces of evidence from their observations to support this judgment.
©STAO/OTF2012 - 47
Connections
Assessment for learning
Gather observational data about student thinking (e.g., strategies they used) for brainstorming impacts and deciding on a shortlist of the biggest impact. For example, did they look widely around them? Did they make notes? Did they look for small scale impacts or broad scale impacts, and positive and negative impacts? Differentiated instruction
Provide students alternative means where appropriate to compiling a list, such as the use of an audiorecording device. The iPad has a voice recording tool and apps, such as Dragon Dictation, can be used Vary group sizes to ensure optimal peer interaction. Alter the number of impacts to be included on the shortlist to make the task more or less involved. Invite students seeking an extra challenge to include additional criteria (which you will preapprove) to their decision-making. Consider asking specific groups to focus on positive impacts only, which will be more challenging.
Consolidation Individuals present their decisions
Give each student the opportunity to tell the rest of their class their decision and their reason for it. Invite peers to discuss the choices their classmates have made. Point out that differences in judgments are indicative of the complexities of the issues and differing perspectives, rather than there being right or wrong answers. Assessment for learning
Provide feedback orally to students, focusing on the quality of the reasoning used to back up their choices.
Assessment of learning
Gather student charts and assess their judgement and reasoning using the assessment rubric, Assessing Biggest Impact Decisions.
©STAO/OTF2012 - 48

Extensions
Individuals imagine what if
What if humans had never been here? What if they had never impacted this location? Based on students’ observations of the impact humans have had on this habitat, ask them to draw a scene of how they imagine the habitat in its natural condition, without human alteration. Photographs of the habitat could help students with this task. Software, such as that offered with iPads, allows students to sketch on top of digital photographs.
Groups compare to other periods in human history
Ask groups of students to take what they have learned about human impacts on the local environment and consider how humans in mediaeval Europe or Aztecs or ancient Egyptians impacted their environment. Using a Venn diagram, or similar graphic organizer, ask students to decide if the impacts of people long ago are more similar to the impacts of today or more different. You may wish to have each group do the comparison for a different culture you’ve studied.
Groups consider how to improve habitat
Ask groups to consider the list of negative human impacts that they observed. Can one of these impacts be lessened or reversed? For example, is there garbage lying around that could be picked up? Or could a small area of unused pavement be converted into a natural garden? Could a native species of tree be planted in a grassy, open lawn? Encourage students to find ways to actualize their ideas; for example, approach parent council for funds to plant a tree or get students involved in fundraising for this purpose.
©STAO/OTF2012 - 49
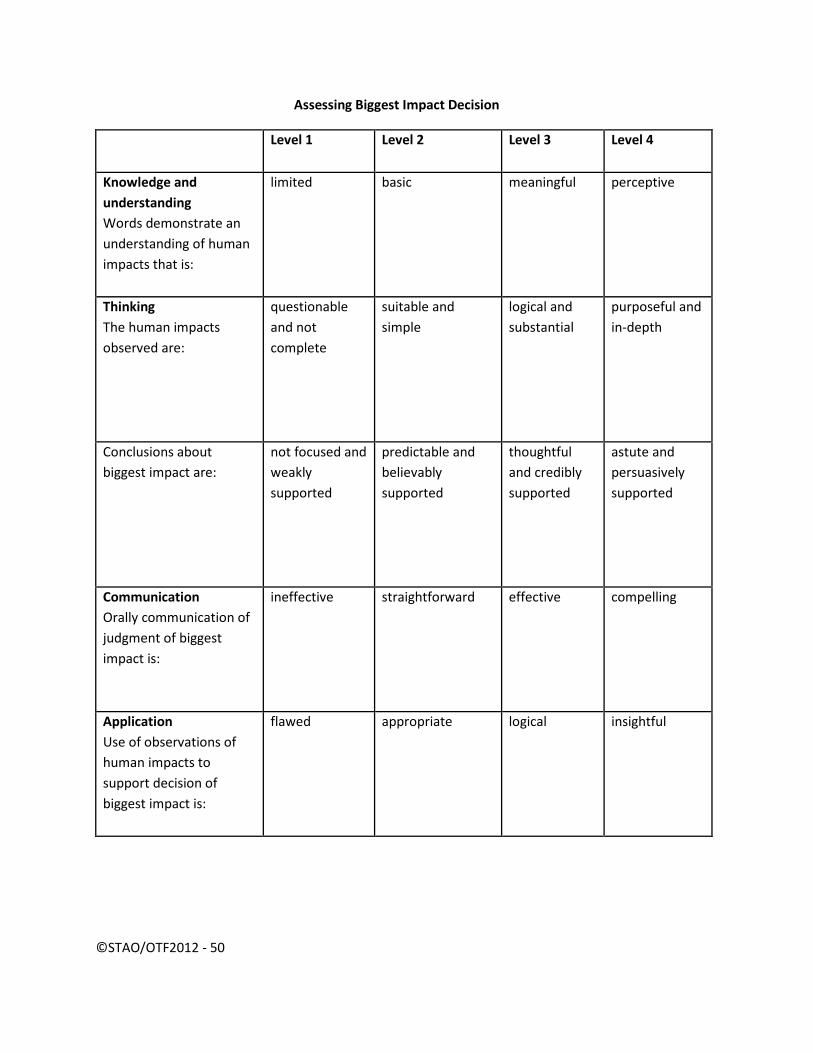
Assessing Biggest Impact Decision
Level 1
Level 2
Level 3
Level 4
Knowledge and understanding Words demonstrate an understanding of human impacts that is:
limited
basic meaningful perceptive
Thinking The human impacts observed are:
questionable and not complete
suitable and simple
logical and substantial
purposeful and in-depth
Conclusions about biggest impact are:
not focused and weakly supported
predictable and believably supported
thoughtful and credibly supported
astute and persuasively supported
Communication Orally communication of judgment of biggest impact is:
ineffective
straightforward effective compelling
Application Use of observations of human impacts to support decision of biggest impact is:
flawed
appropriate logical insightful
©STAO/OTF2012 - 50