Embed Size (px)
Citation preview
1
Grade 1: Needs of Plants in the Boreal Forest
Table of Contents:
Learning Objectives & Curriculum Connections ............................................................................................ 2
Lesson Plan Script .............................................................................................................................................. 3
Extra Activities .................................................................................................................................................... 7
Appendix A: Living & Non-living Cards ........................................................................................................... 10
Appendix B: Food, Water, Shelter Game ....................................................................................................... 20
Appendix C: Spruce vs Pine Cones ................................................................................................................. 28
Grade 1: Needs of Plants in the Boreal Forest
2
When you arrive at the field trip site, you can begin the lesson plan! Have fun!
INTRODUCTION Students will learn about living things and what they need to live and grow in the Boreal Forest. The following games and activities will develop skills for describing and classifying living things, the needs of those things, and how those needs are met in order to survive. Students also learn about their own responsibility in caring for living things that live in the forest. LEARNING OBJECTIVES: By the end of this lesson, students will:
• Be able to differentiate between living and non-living things in the Boreal Forest
• Understand that plants and animals need each other in the Boreal Forest
• Recognize the ways in which living and non- living things, plants and animals might interact
• Recognize different plants in the Boreal Forest based on shape, leaf type, margins, etc.
LOCATION: A rural, forested setting is ideal, but in more urban places go to a natural area within city limits or a provincial park. SET UP: Cut out pictures/cards for games and laminate them. Make extras if needed so there is enough for each student to have one for the living/non-living sorting relay. Get all materials together. Scout hike route beforehand (know how far to go, where to stop and talk, and interesting things to point out). Place pictures and cones in an open grassy area with a tarp if grass is wet. SAFETY PLAN: Leader must carry a first aid kit and be aware of their surroundings on the hike (i.e. bear safety). Ensure any students with bee, wasp, or other severe allergies carries their Epi-pen.
MATERIALS
Attached Worksheets
• Living vs. Non-living pictures
• Have/need/give pictures
• Food Water Shelter Game
• Pine/Spruce Cone Identification
Additional
• Tarp for sitting on if grass is wet
• Two buckets or large containers that can
hold the ‘Living vs. Non-living pictures’
• Samples of:
o Broadleaf
o Needle leaf
o Oval leaf
o Heart-shaped leaf
o Leaf with a smooth margin
o Leaf with a toothed margin
o Leaf with a wavy margin
Extra Activity
• True/False Questions
Per student
• 1 spruce cone sample
• 1 pine cone sample
GRADE: 1
TEACHER PREPARATION TIME: 15-40 Minutes
LESSON DURATION: 60 Minutes
Extra Activities Duration: 30-40 Minutes
PRE-REQUISITE: None
WORKSHEETS: Attached
CONNECTIONS TO SCIENCE CURRICULUM TOPIC E:
E-1 Describe and compare similar living things
E-2 Living vs. Non-Living Things
E-4 Categorize living things based on traits
E-6 Requirements to live
E-9 Adaptations to extremes
E-10 Plants and animals need each other
3
PROCEDURE: 1. Introduction: (Approx. 5 minutes)
Introduce topic for the day and rules (Boundaries, respecting wildlife, stay with the group, any
other rules that apply to your class, etc.)
• ‘What is the name of the biggest forest in Alberta?’ Answer: Boreal Forest! (if you don’t
live in Northern Alberta, ask a question about the forest you live in)
• ‘The Boreal Forest is one of the biggest on Earth; it goes around the whole globe and is really important so I want to make sure you all learn the name. Let’s yell it as loud as we
can!’ Answer: Boreal Forest! o ‘What do we find in a forest?’ Answer: Plants and animals (students will give
lots of animal examples), living things and non-living things (make sure they also list non-living)
2. Living vs. Non-Living: (Approx. 10 minutes)
Sitting in a circle on the tarp
• ‘Forests are made up of living things, like plants and animals, and also non-living things like rocks, soil, air, water, etc.’
• ‘What’s the difference between living and non-living things?’ Activity: ‘Let’s play a quick game to make sure we can tell them apart.’ Standing in a circle
o I’m going to hold up a picture and if it is something living, we’re all going to …* (make up an action), if it is non-living, we’re going to …** (make up a different action). (See Appendix A for living vs. non-living pictures).
o Play a few rounds of the game
o Some Examples of Actions:
- living* = the action could include movement: crouching to pretend to be a seed and then growing by standing up or standing in one spot waving your arms around or lifting arms over your head and do the wave
- non-living** = action could show stillness: freezing in place or crouching down and pretending to be a rock or taking a deep breath and place hands over mouth to pretend to be air
Curriculum Link: Topic E- 2 Living vs. Non-Living Things
• ‘Now that we know the different living and non-living things in the forest, we are going to play a game to practice sorting them.’ Activity: ‘We are going to have a living and non-living sorting relay race.’ Standing in line facing the playing field o Place two buckets labeled ‘living’ and ‘non-living’ or have two different coloured
buckets o Split the class into two teams and give each student a picture o One at a time (relay style) the students will run and put their picture in the bucket that
best represents it (living or non-living). o Then they will run back to their team and tag the next person in line. o The next person will repeat the action until a team classifies all of their cards
Curriculum Link: Topic E- 2 Living vs. Non-Living Things
4
When you arrive at the field trip site, you can begin the lesson plan! Have fun!
3. Requirements to Live (Approx. 15 minutes)
• Have students stand up. ‘I want you all to hold your breath for as long as possible’ (ham it
up with the kids!) ‘What is the one thing every living thing needs to survive?’ Answer: Air ‘What else do we need to survive?’ Answer: Food, water, shelter (There are others but
those are the basic three)
• Ask ‘what do animals need to live?’ Answer: Food, water, shelter, air, space. (It is more
tangible for them to think of animals first)
• Do you think plants and animals need each other? Answer: Yes! ‘What do plants give to
animals?’ Answer: Some animals use the forest as shelter. Other animals eat plants for food. ‘What do animals give to plants?’ Answer: Air
• So animals need food, water, and shelter. What about plants? What do plants need to
live? Answer: Sun, water, space, soil, air. - Plants use the sun and water and air to make their own food!
• Food, Water, Shelter game (See Appendix B for game instructions and pictures)
Cut out and laminate in advance
Curriculum Links: Topic E-6 Requirements to live Topic E-10 Plants and animals need each other
4. Hike Out: Traits & Functions: (Approx. 15 minutes)
• “Plants are living things in the forest, so we’re going to go on a hike to learn more about plants!”
Activity: Take the students on a short hike, stopping along the way to discuss the following topics: categorizing living things based on traits, and describing and comparing similar living things. o Stop at a tree and a flower and ask “how do we know it is a tree/flower?”
Answers: We can tell it’s a tree because it is: - Tall - Has a big trunk - Has Bark - Can see the leaves or needles
We can tell it is a flower because it is: - Small - Has a stem - Has leaves - Has petals
Curriculum Link: Topic E- 4 Categorize living things based on traits
o Stop in an area with a lot of different plants and show the class samples of the many
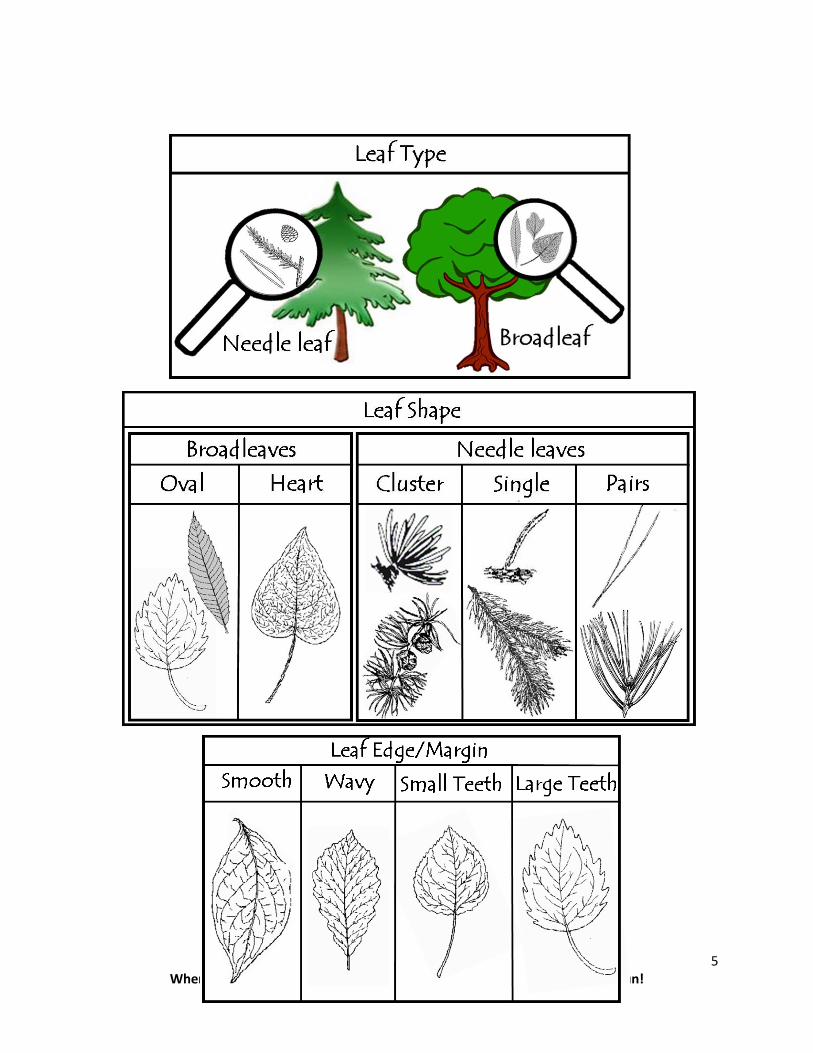
different kinds of leaves they might see. “Let’s look at the different kinds of plants – broad leaf and needle leaf.” Show examples:
- Leaf type – “Is it a broad leaf or needle leaf? - Leaf shape – “Look at the shape” – heart shaped, oval, lobed - Leaf edge – “Look at the edge of the leaf. It is called the margin. Is it smooth
or does it have teeth/points?”
5
When you arrive at the field trip site, you can begin the lesson plan! Have fun!
6
When you arrive at the field trip site, you can begin the lesson plan! Have fun!
o Establish some boundaries and a call back signal, then send students on a scavenger hunt. Ask the kids to find and bring you one at a time:
- A needle leaf - A broad leaf - A leaf with a smooth edge - A leaf with a toothed edge - Different shapes and sizes of broad leaves - Two different kinds of needle trees - Moss - A plant with a flower on it
o Ask the students ‘do you think all plants are the same? What makes them different?’ Curriculum Links: Topic E-1 Describe and compare similar living things
E-4 Categorize living things based on traits Conclusions: (Approx. 15 minutes) 5. Have, Need, Give
Sitting in a circle
• ‘We just learned lots of interesting things about plants and why they are important. Let’s look at these pictures and make sure we know all the things that plants have, need and give.’ o Use pictures from living vs. non-living activity and sort them into things plants:
1) Have
2) Need
3) Give
o Pass out a card to each student and go around the circle and ask each student “Is this something a plant has, needs, or gives?”
Plants have: seeds, roots, leaves, stems
Plants need: sun, soil, water, air
Plants give: shelter, food, oxygen, seeds, and space for us to learn and play!
• ‘We learned today that there are lots of living and non-living things in the forest. Put up your hand and tell me something we learned about today.’
• ‘We also learned that plants and animals need each other. What are some things that animals need from plants?’
• ‘What are some of the different leaf shapes and types we learned about today?’
• ‘Thank you for being such a great class. We sure learned a lot today!’
Curriculum Link: Topic E-6 Requirements to live Topic E-10 Plants and animals need each other
7
When you arrive at the field trip site, you can begin the lesson plan! Have fun!
EXTRA ACTIVITIES:
1. Boreal Forest Mix-up
Open grassy area with lots of space.
• ‘Now that we know some of the different living and non-living things in the forest, can anyone think of how a living thing and a non-living thing might work together or use each other in the forest?’
- This is particularly challenging for this age group, try giving them a few examples first. o The trees (living) use sunlight (non-living) to make food o Trees (living) give off oxygen (non-living) for us (living) to breathe o Plants (living) grow in soil (non-living) o Insects and other small animals (living) live in the soil (non-living) o Animals (living) need air (non-living) to breathe o All living things need water (non-living) to survive You may want to use the living and non-living cards from the game to show the two things for the visual learners.
Activity: The students will attempt to match up a set of living and non-living cards that work together to survive. This is a fairly advanced concept for this age group so use this activity when your class has a good grasp on classifying living and non-living things.
o Set boundaries for the playing area (approximately 5 metres by 5 metres of space)
o Explain that each student will get a card and will be running around in the playing area. They will keep their card hidden until you yell ‘BOREAL FOREST MIX-UP!’
o Then they will reveal their card and look at each other’s cards to match up a living and non-living that goes together with their card
o Example a seed (living) could match up with soil (non-living)
o Students can hook arms when they find their match
o Play a few rounds and then switch everyone’s cards
Curriculum Link: Topic E-2 Living vs. Non-living things E-6 Requirements to live
E-10 Plants and animals need each other
8
When you arrive at the field trip site, you can begin the lesson plan! Have fun!
2. Pine Cones (See Appendix C for information on the differences between spruce and pine cones) Sitting in a circle
• Hand out pine cones.
• ‘Cones hold the seeds for new trees to grow. What does it feel like?’ Answer: Waxy & hard
• ‘What are some words we could use to describe the cone?’ Answers: Hard, spikey, rough, pointy
• Ask the students to try to break the cone apart and if anyone was successful in getting any seeds out. They will likely not be able to get anything out. ‘Pine cones are covered in a special coating, kind of like candle wax.’
• ‘Can you think of something that would melt wax?’ Answers: Fire or heat. ‘The pine trees
need a wildfire to come along for the cone to release the seeds so more little trees can start growing.’
• Show the students a pine cone that has begun to open. ‘This is what a cone looks like after it has been exposed to heat. You can see where the seeds came out.
• ‘We might think forest fires can be scary, but they are actually really important for the Boreal Forest (ex. Pine cones need it to open so baby pine trees can grow)
• People that work in the forest work very hard so that if a fire does happen it can be managed so that it doesn’t threaten our homes and communities.’
Spruce Cone
• Hand out spruce cones.
• ‘Some types of trees have seeds that fall out easily, like a spruce cone. We just found out that it is pretty hard to get the seeds out of pine cones because of their hard waxy coating. Let’s see if it’s the same for spruce cones.’
• ‘What are some words we could use to describe this cone?’ Answers: Softer, papery, flexible
• Ask the students to try to break the cone apart and if anyone was successful in getting any seeds out. A couple of students will likely be able to get a few seeds out. ‘Spruce seeds are easy to get out of the cones. That’s why they are a favourite food for animals like squirrels.’
• If you can see the seeds, notice that they have wings. Ask the students, ‘why would a seed
have wings?’ Answers: To float in the wind
• ‘If this cone has parts on it that feel kind of like paper, what do you think would happen
to this cone in a wildfire?’ Answer: The fire would burn the cone and the seed
• ‘Spruce trees are not adapted to extreme heat. They like to grow in the shade of other trees. The seeds are easy to get out of the cone and spread around the forest.’
Curriculum Link: Topic E-9 Adaptations to extremes
9
When you arrive at the field trip site, you can begin the lesson plan! Have fun!
3. True False Game Open grassy area with lots of space.
Have kids line up in the middle of the playing area. Mark the centre with some kind of object like
pylons or a rope. Have the teacher stand about 10 metres to one side and ask another adult
supervisor to stand about 10 metres to the other side (You could also use some natural features or
2 backpacks as a boundary if there no extra adults to help you).
Tell your students you are going to say something about plants. ‘If it is true you will run in this
direction (point in that direction and indicate the boundary where they can stop). If it is false you
will run in this direction (point in that direction and indicate the boundary where they can stop).’
When the students come back to the middle - ask them the questions again to make sure they
understand why the answer is true or false.
This is the simplest way to play this game but if your kids need more of a challenge then have the
students split into two groups and one side is the false side and the other side is the true side. If
you say something true the true side runs to their boundary and the false side chases them. If they
get caught they go to the false team for the next round
Sample questions:
1. All trees have broad leaves - False 2. Some plants have flowers – True 3. All plants need Pepsi to live – False 4. Air is a living thing – False 5. Plants need sunlight and air to live – True 6. Living and non-living things work together – True 7. Soil is good to breathe – False
Curriculum Link: Topic E-2 Living vs. Non-living things
E-4 Categorize living things based on traits
10
When you arrive at the field trip site, you can begin the lesson plan! Have fun!
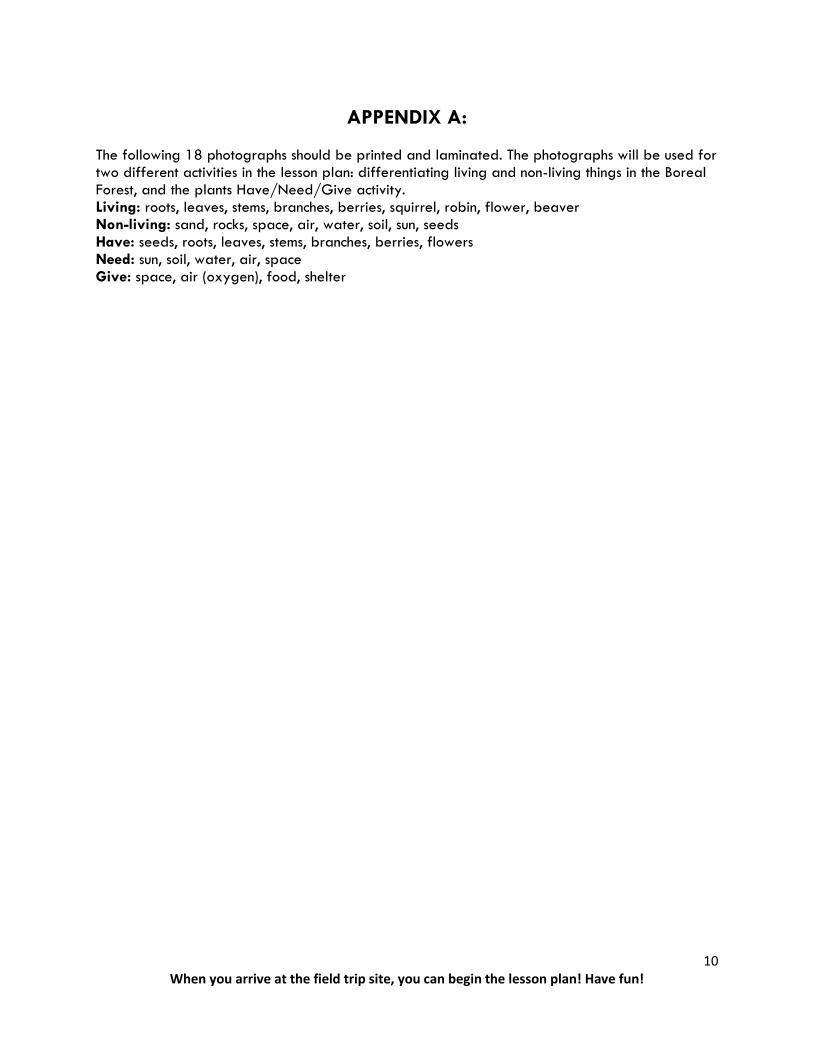
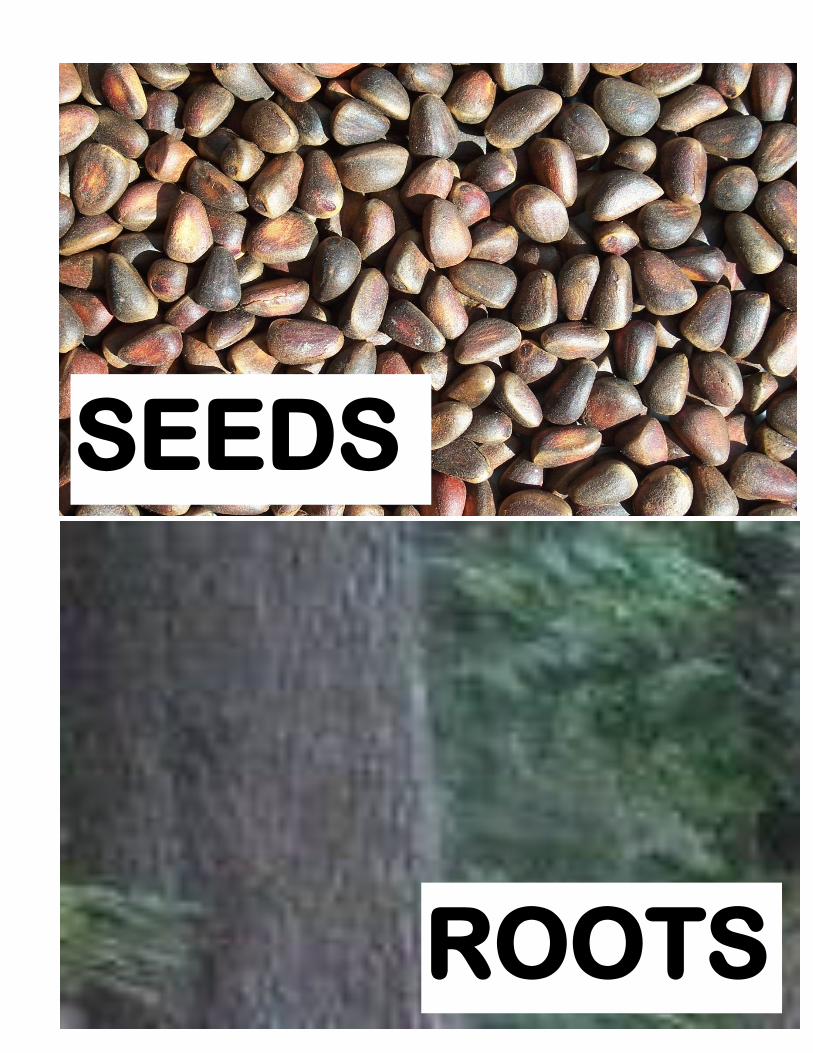
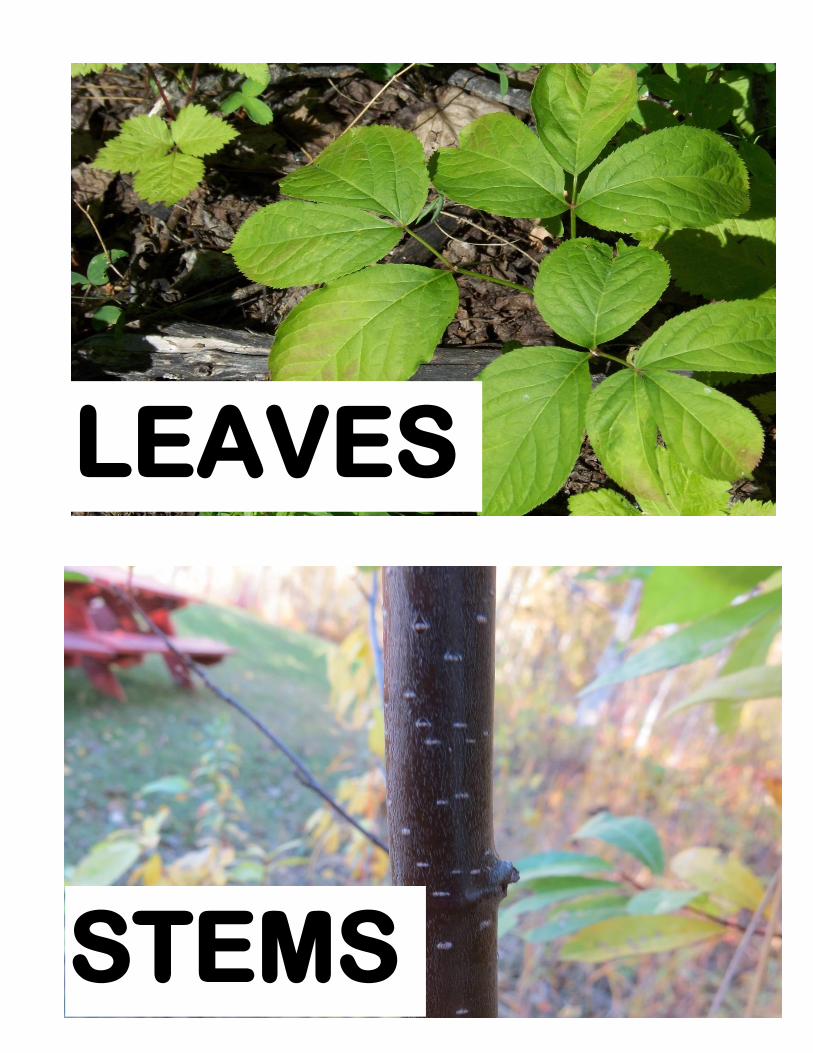
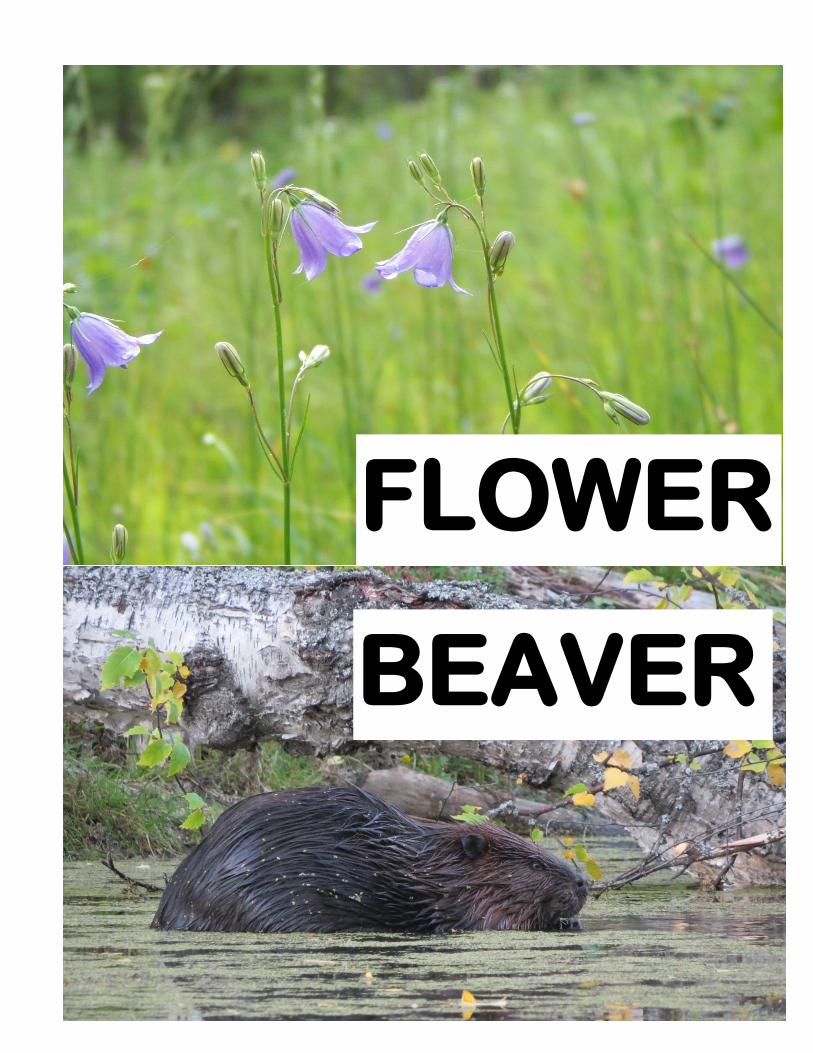
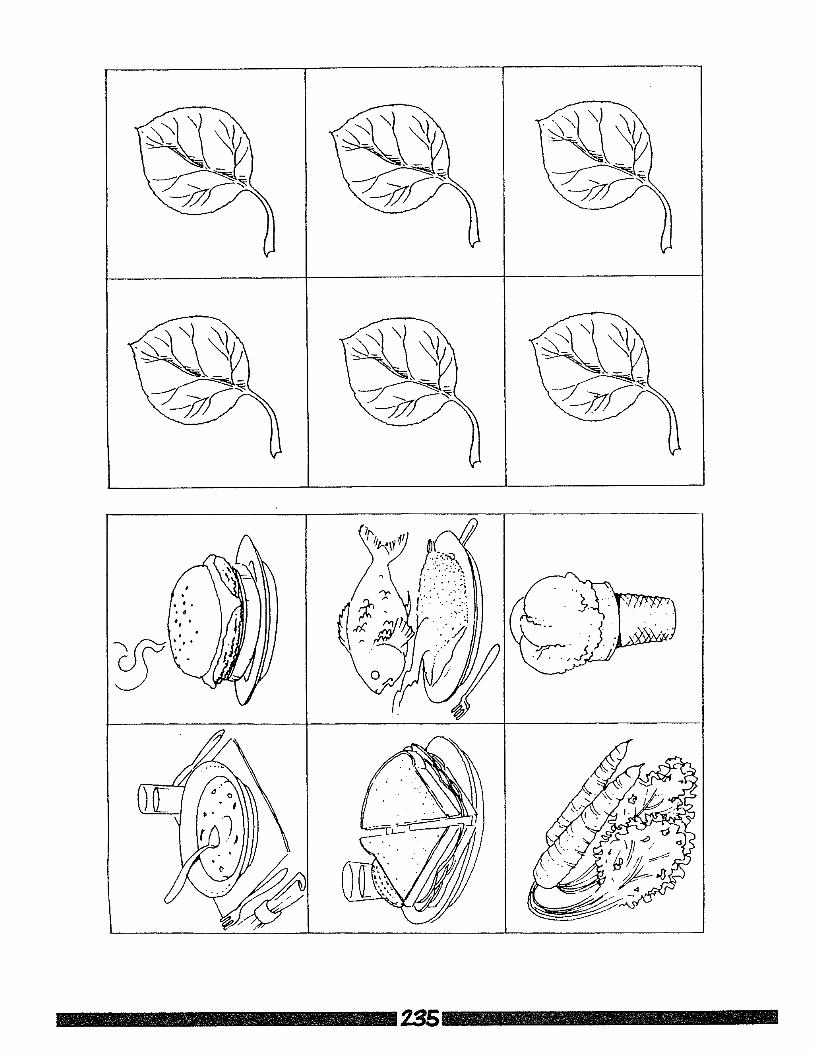
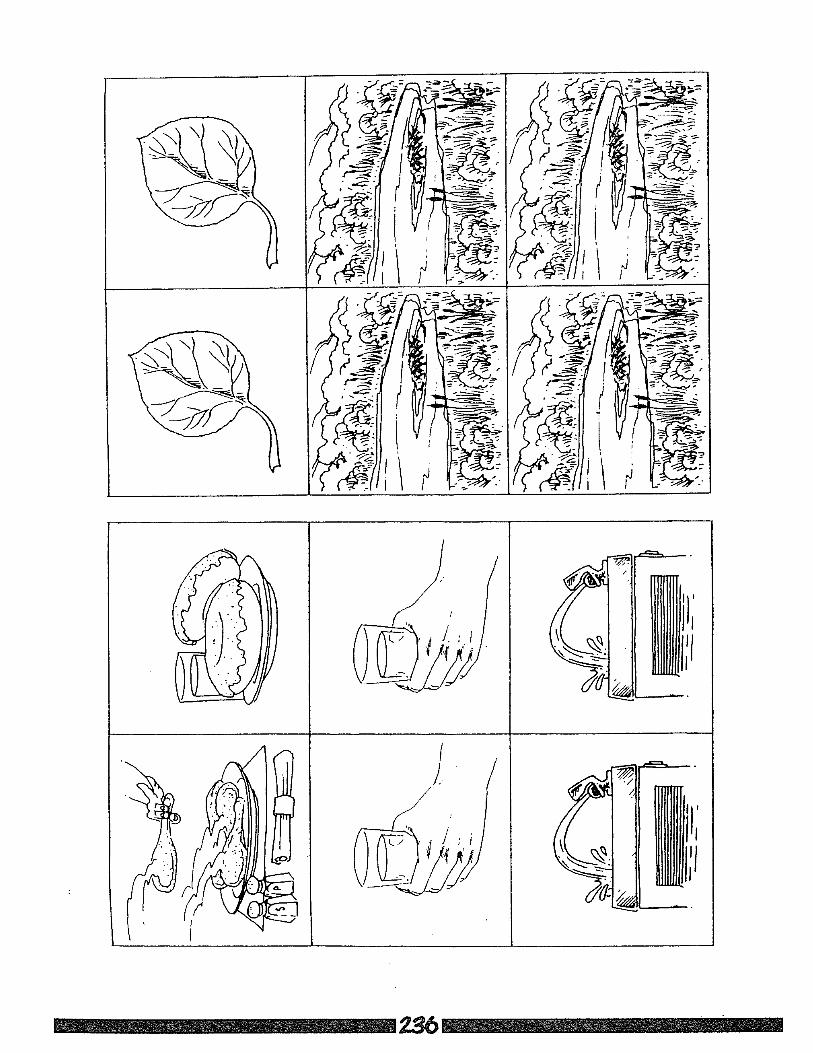
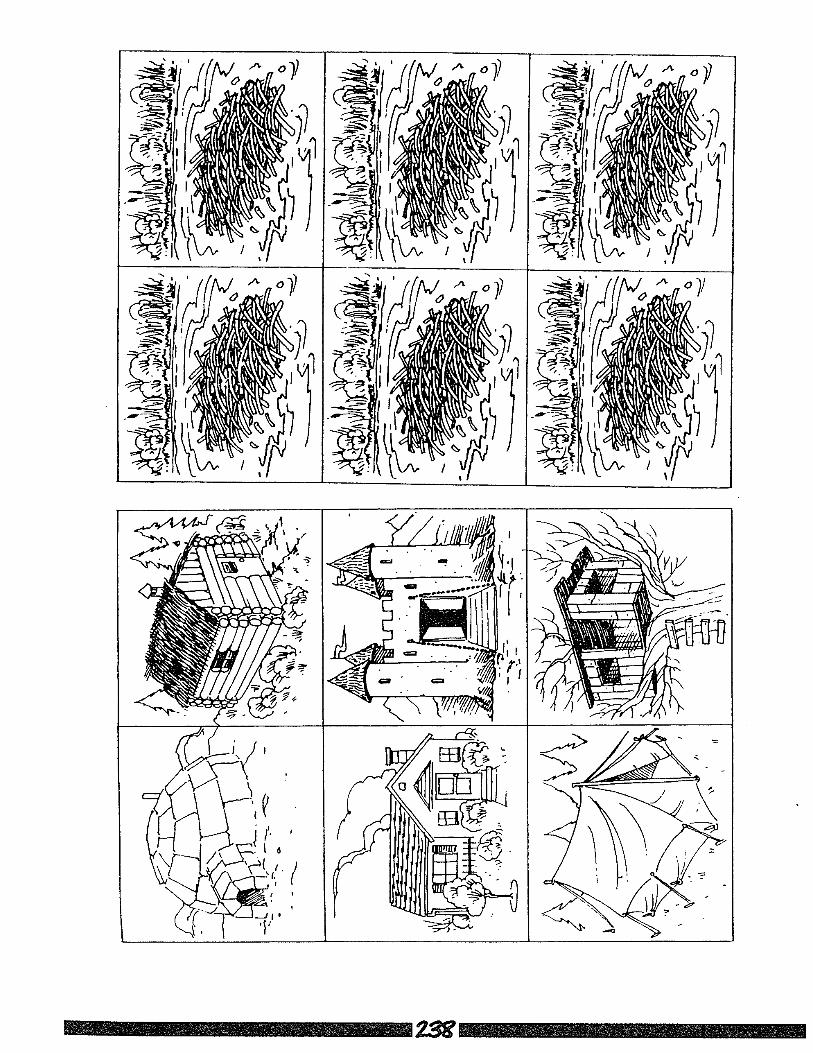
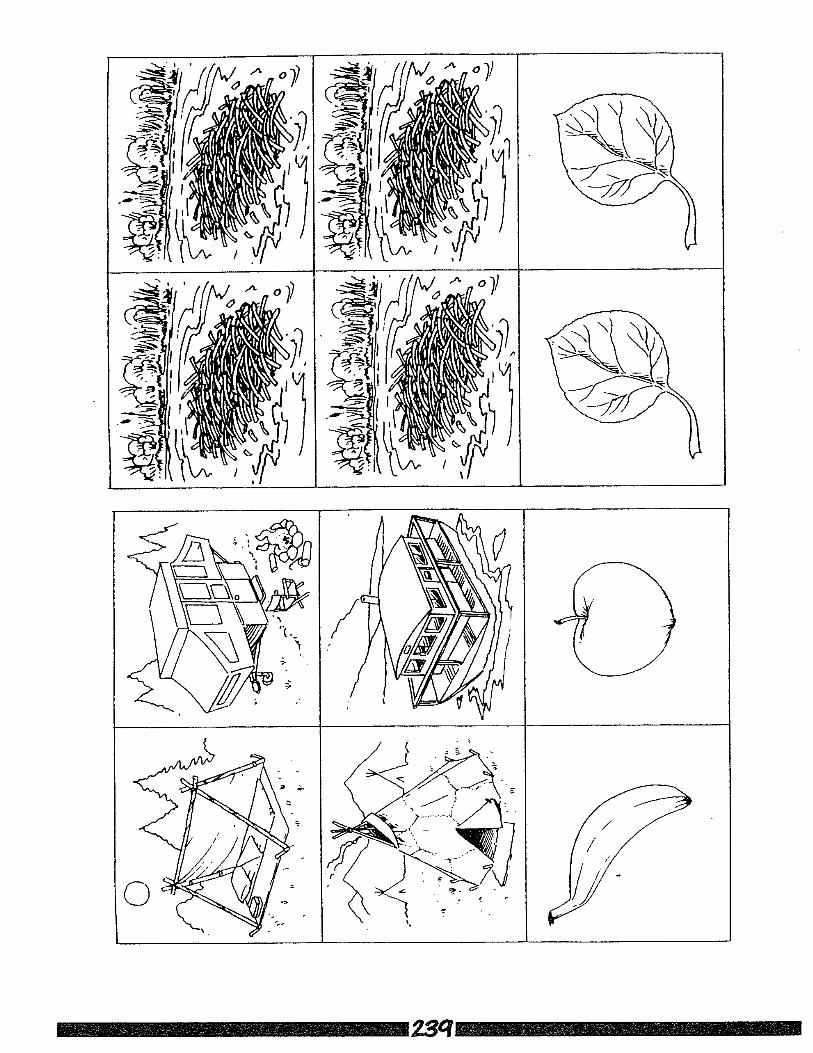
APPENDIX A: The following 18 photographs should be printed and laminated. The photographs will be used for two different activities in the lesson plan: differentiating living and non-living things in the Boreal Forest, and the plants Have/Need/Give activity. Living: roots, leaves, stems, branches, berries, squirrel, robin, flower, beaver Non-living: sand, rocks, space, air, water, soil, sun, seeds Have: seeds, roots, leaves, stems, branches, berries, flowers Need: sun, soil, water, air, space Give: space, air (oxygen), food, shelter
11
When you arrive at the field trip site, you can begin the lesson plan! Have fun!
SEEDS
ROOTS
12
When you arrive at the field trip site, you can begin the lesson plan! Have fun!
LEAVES
STEMS
13
When you arrive at the field trip site, you can begin the lesson plan! Have fun!
SUN
SOIL
14
When you arrive at the field trip site, you can begin the lesson plan! Have fun!
WATER
AIR

15
When you arrive at the field trip site, you can begin the lesson plan! Have fun!
BRANCHES
for SHELTER
BERRIES
for FOOD
16
When you arrive at the field trip site, you can begin the lesson plan! Have fun!
AIR
SPACE
17
When you arrive at the field trip site, you can begin the lesson plan! Have fun!
SQUIRREL
BIRD
18
When you arrive at the field trip site, you can begin the lesson plan! Have fun!
ROCKS
SAND
19
When you arrive at the field trip site, you can begin the lesson plan! Have fun!
FLOWER
BEAVER
20
When you arrive at the field trip site, you can begin the lesson plan! Have fun!
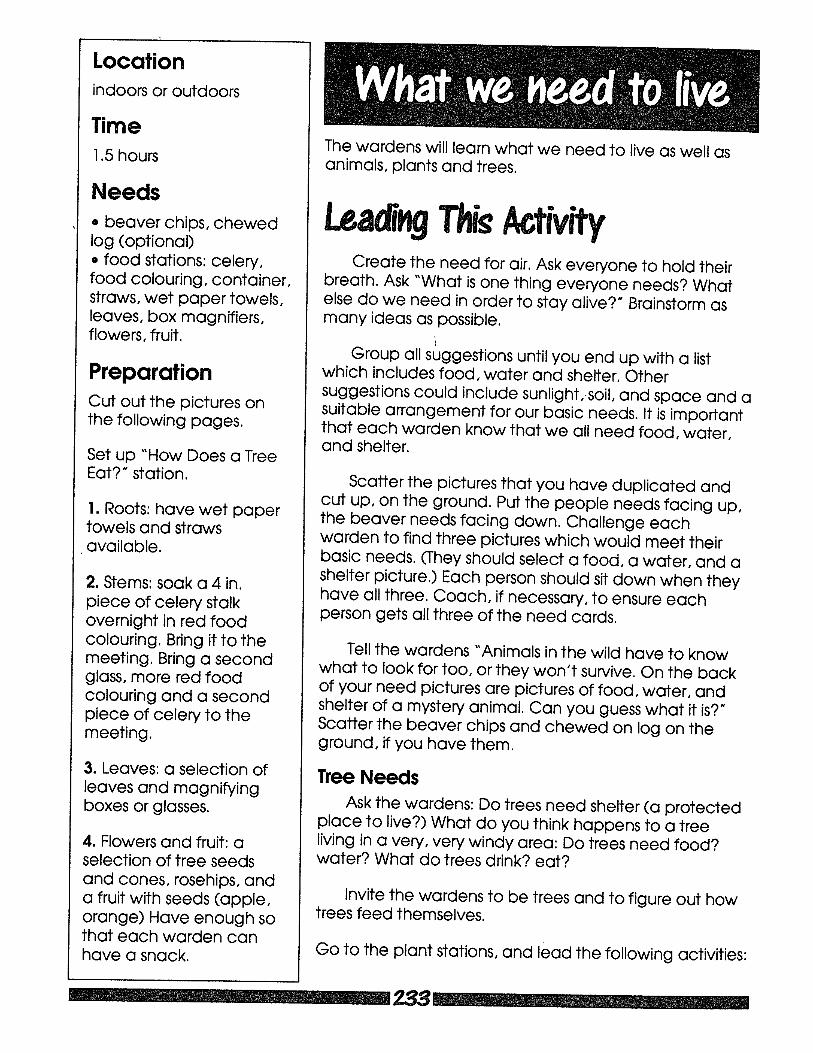
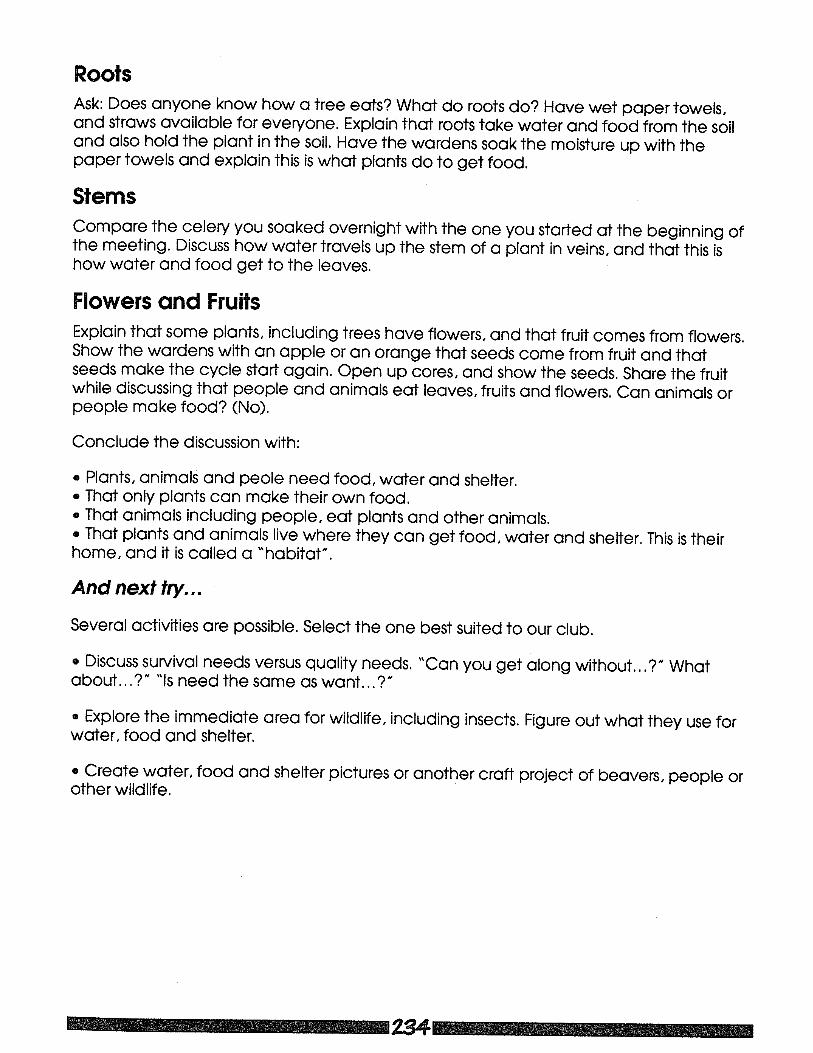
APPENDIX B:
Food, Water, Shelter game from the Junior Forest Warden’s ‘Blue Tree Leader Manual’
See www.jfwa.ca for more details.
21
When you arrive at the field trip site, you can begin the lesson plan! Have fun!
22
When you arrive at the field trip site, you can begin the lesson plan! Have fun!
23
When you arrive at the field trip site, you can begin the lesson plan! Have fun!
24
When you arrive at the field trip site, you can begin the lesson plan! Have fun!

25
When you arrive at the field trip site, you can begin the lesson plan! Have fun!
26
When you arrive at the field trip site, you can begin the lesson plan! Have fun!
27
When you arrive at the field trip site, you can begin the lesson plan! Have fun!
28
When you arrive at the field trip site, you can begin the lesson plan! Have fun!
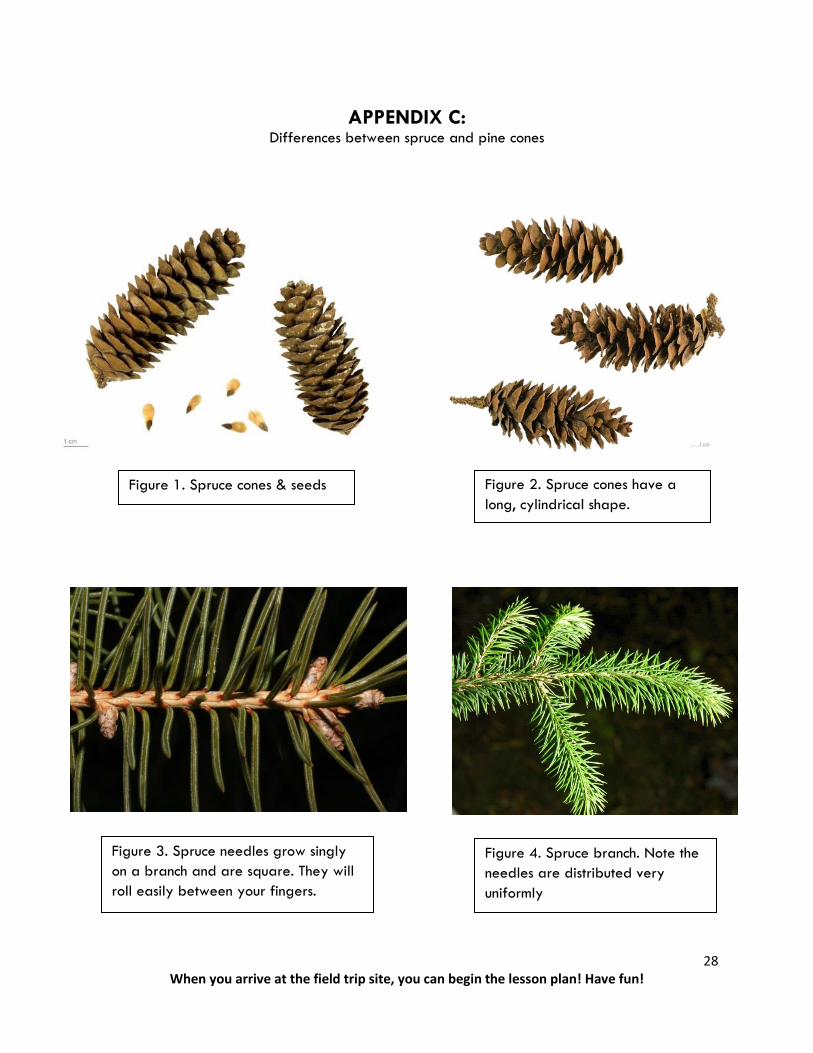
APPENDIX C: Differences between spruce and pine cones
Figure 1. Spruce cones & seeds Figure 2. Spruce cones have a
long, cylindrical shape.
Figure 3. Spruce needles grow singly
on a branch and are square. They will
roll easily between your fingers.
Figure 4. Spruce branch. Note the
needles are distributed very
uniformly
29
When you arrive at the field trip site, you can begin the lesson plan! Have fun!
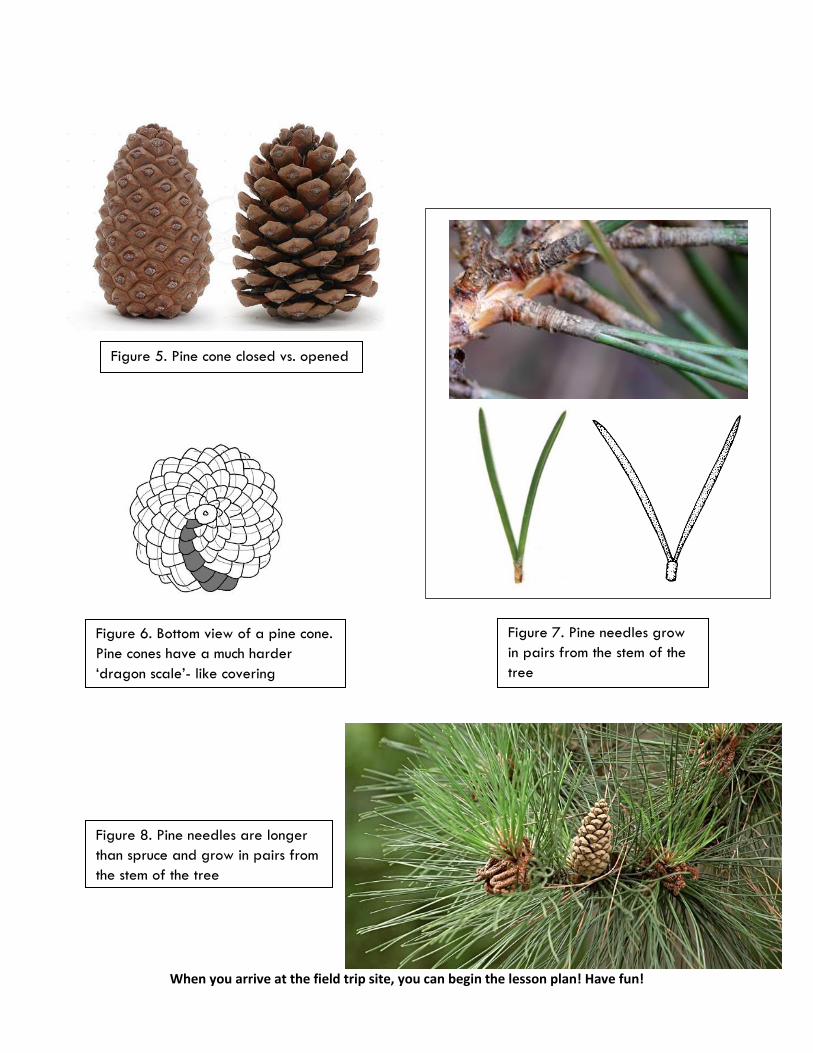
Figure 5. Pine cone closed vs. opened
Figure 6. Bottom view of a pine cone.
Pine cones have a much harder
‘dragon scale’- like covering
Figure 8. Pine needles are longer
than spruce and grow in pairs from
the stem of the tree
Figure 7. Pine needles grow
in pairs from the stem of the
tree