Embed Size (px)
Citation preview
1
2
Board of Directors
Chairman Terry Cusick
PO Box 551373 Fort Lauderdale, FL 33355
(954) 423-0663 inf [email protected]
Secretary
Joe Lightcap PO Box 22, Nathalie, VA 24577
(434) 349-3700
Treasurer Carlos Perez 57 Still Road
Poughquag, NY 12570 (845) 724-5108
Scott Tay lor
5372 S. Richfield Court Aurora, CO 80015
(303) 693-8120 stgoldf [email protected]
Dav id Mandley 8871 Camelot
Chesterland, OH 44026
Russell Tay lor Vienna, Va 22182
WebMaster@goldf ishsociety.org
Gay e Langley Comtois Lawrencev ille, GA 30044
John Barcellona Southern California [email protected]
Joan Berryman San Antonio, TX
Larry Christensen
The Goldfish Society of America Committee Chairpersons
Membership Terry Cusick
PO Box 551373 Fort Lauderdale, FL 33355
(954) 423-0663 [email protected]
Publicity & Adv ertising Gaye Langley Comtois
Back Issues Basil Smith
3155 Hwy 11 North Laurel, MS 39440 (601) 425-1571
Editor
Matt Lyon PO Box 551373
Fort Lauderdale, FL 33355 [email protected]
Publishers Terry Cusick
And Andrea Pecher PO Box 551373
Fort Lauderdale, FL 33355 (954) 423-0663
Chairman Emeritus Al Thomma
16804 Ernadale Avenue Cleveland, OH 44111
(216) 941-6165
The Goldfish Report is published and distributed six times a year by the Goldfish Society of America. Material for publication if elec-tronic should be sent to: [email protected]; everything else should be sent to
Editor, Goldfish Society of America, PO Box 551373, Fort Lauderdale, FL 33355.
Special events, press releases, and other notices will be included in the next issue if space is available. Article contributions will be re-viewed for content only to the point of correcting found gram-matical errors or removing infor-mation deemed as advertising. The GFSA reserves the right to with-draw any information, without loss of revenue, that does not meet with good selling practices. The GFSA also reserves the right to print at any time, founded information, after proper investigation that is found improper or questionable. The GFSA is in no way held liable nor is responsible for any loss in-curred by a transaction between buyer and seller from the informa-tion contained in these pages. The GFSA is considered free press, and releases submitted information, that may or may not have been reviewed at the time of printing. It is the responsibility of the reader to further investigate before taking any actions or making any pur-chases. The opinions and information in the published material are those of the individual author or represented company and do not necessarily reflect those of the officers and members of the GFSA. We encour-age all hobbyists to research what is best for their individual situation.
Reprinting or use of the information on these pages, web site pages, or any other media from the GFSA without written permission is unlawful and punishable by law © Copyright 2002 GFSA PO Box 551373, Fort Lauderdale, FL 33355-1373

3
The GFSA is a great organization and it has its niche, that is dis-seminating information nation-ally or should I say globally about all things goldfish and set-ting universal standards for judg-ing. However, it is a much more satis-fying experience to have face time with people who share your joy about goldfish and to be able to inter-act with them. And, if you are a novice to goldfish keeping, it is a lot easier to learn, particularly from people who share similar local prob-lems in keeping goldfish. For the experienced goldfish aquarist, there is the satisfaction of men-toring a fellow goldfish keeper. The problem with joining a local goldfish club is finding one. Back in the 1950's and for many years before, goldfish keeping was one of the major hobbies and though I think it could be again, goldfish keeping has fallen on hard times. I believe that this is due to gold-fish getting an undeserved bad rap. Most people today believe that goldfish do not live long and that they are not that attractive if they did. They have no idea what fancy goldfish are, or that they can be quite beauti ful and color-ful. When you say goldfish, most people think of the feeder gold-fish sold in pet stores, but I di-gress. My point is that you may have to be a little creative about finding a local goldfish club, like starting your own or joining a
In This Issue
From the Fish House 4 by Joe Lightcap Buying a Microscope 6 by Matt Lyon Spring Viremia of Carp 8 by Andy Goodwin DIY Cont. Siphon Overflow 10 by Matt Lyon Something to Judge Ranchu 13 Vic Medore Useful Products 14 Russ Taylor Continuous Drip System 15 Taylor Moffitt
related club and then get goldfish converts. My own story kind of followed that line - my brother, that had been into koi for many years,
asked me to go with him to the meetings of t hi s newly formed koi club about 10 years ago. It was a real eye opener. Though I had been keeping goldfish for 20 years, I learned 10 times more about fish keeping in the next two years than I had learned on my own in those 20 years. I also con-vinced the club to call itself a koi,
goldfish, and water garden club, converted some of the koi bigots into goldfish fanci ers, and re-cruited some goldfish keepers to join the club. We now have an annual goldfish show and it grows in size every year. So if you're interest ed in forming a goldfish club I would be glad to help find like minded members. Speaking of that I have already had two requests: one from a member in the Eire PA area and the other from Orange County CA. You can contact me at:
PO Box 551373 Fort Lauderdale, FL 33355
Or Email: info@goldfishsoci ety.org
For those interested in joining a koi/goldfish club, check out the Associated Koi Clubs of America web site: www.akca.org for the club closest to you or write or email me at the above addresses.
Local Goldfish Clubs By Terry Cusick
Please check your mailing label and if it is time to renew, send us your name, mailing address, and a check for $25 for US members made out the GFSA to:
Goldfish Society of America PO Box 551373 Fort Lauderdale, FL 33355
You can also get a membership form and additional information about membership in the GFSA from our web site: www.goldfishsociety.org Or you can write to us at the above address. Thank you!
Membership Renewal
Local Clubs Florida GF Association Terry Cusick (954) 423-0663 Northwest Koi & GF Club Larry Christensen Texas Koi & Fancy GF Society Joan Berryman Miami Valley Water Garden Steve Grainer Potomac Area GF Enthusiasts Pat & Jon Huff Great er Louisville Koi & GF Jack O’Daniel
4
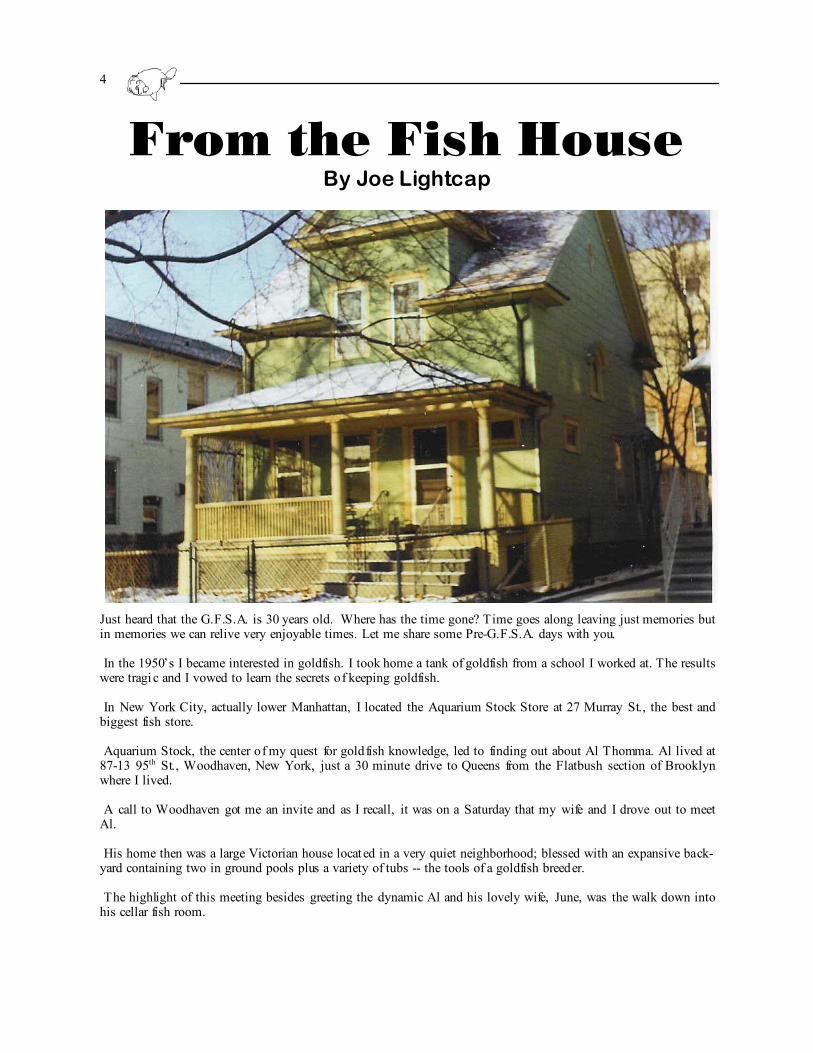
Just heard that the G.F.S.A. is 30 years old. Where has the time gone? Time goes along leaving just memories but in memories we can relive very enjoyable times. Let me share some Pre-G.F.S.A. days with you. In the 1950’s I became interested in goldfish. I took home a tank of goldfish from a school I worked at. The results were tragi c and I vowed to learn the secrets of keeping goldfish. In New York City, actually lower Manhattan, I located the Aquarium Stock Store at 27 Murray St., the best and biggest fish store. Aquarium Stock, the center of my quest for goldfish knowledge, led to finding out about Al Thomma. Al lived at 87-13 95th St., Woodhaven, New York, just a 30 minute drive to Queens from the Flatbush section of Brooklyn where I lived. A call to Woodhaven got me an invite and as I recall, it was on a Saturday that my wife and I drove out to meet Al. His home then was a large Victorian house locat ed in a very quiet neighborhood; blessed with an expansive back-yard containing two in ground pools plus a variety of tubs -- the tools of a goldfish breeder. The highlight of this meeting besides greeting the dynamic Al and his lovely wife, June, was the walk down into his cellar fish room.
From the Fish House By Joe Lightcap
5
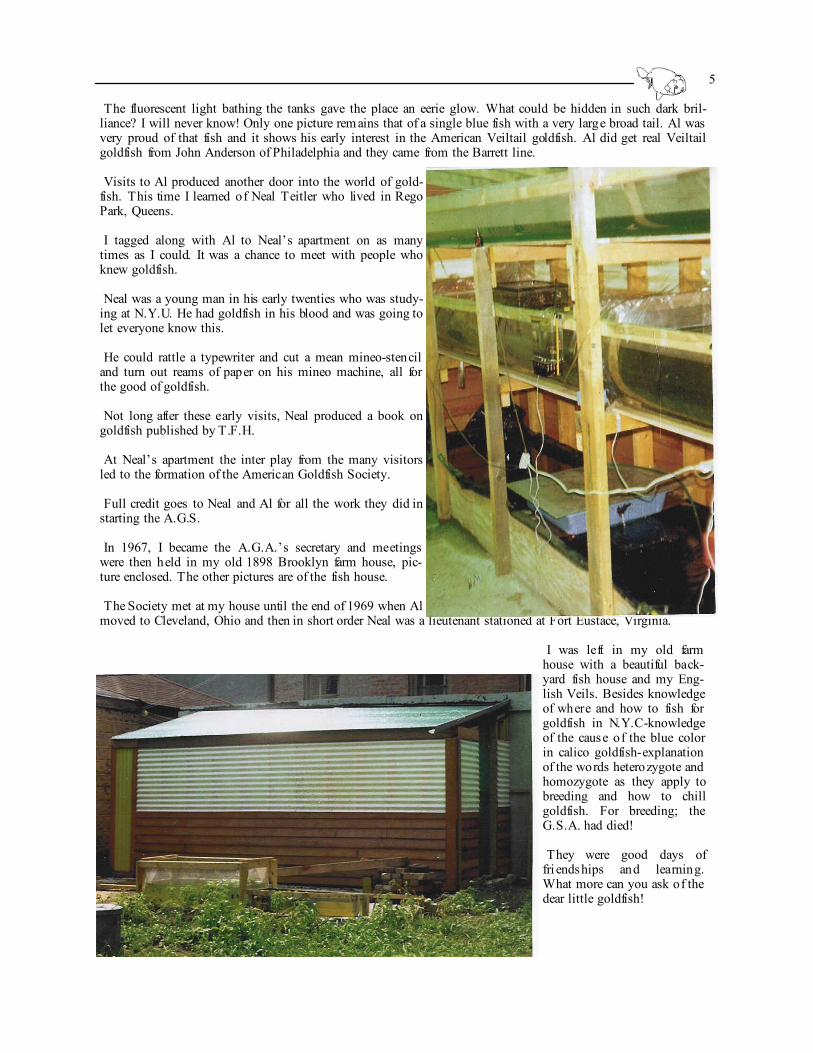
The fluorescent light bathing the tanks gave the place an eerie glow. What could be hidden in such dark bril-liance? I will never know! Only one picture remains that of a single blue fish with a very large broad tail. Al was very proud of that fish and it shows his early interest in the American Veiltail goldfish. Al did get real Veiltail goldfish from John Anderson of Philadelphia and they came from the Barrett line. Visits to Al produced another door into the world of gold-fish. This time I learned of Neal Teitler who lived in Rego Park, Queens. I tagged along with Al to Neal’s apartment on as many times as I could. It was a chance to meet with people who knew goldfish. Neal was a young man in his early twenties who was study-ing at N.Y.U. He had goldfish in his blood and was going to let everyone know this. He could rattle a typewriter and cut a mean mineo-stencil and turn out reams of paper on his mineo machine, all for the good of goldfish. Not long after these early visits, Neal produced a book on goldfish published by T.F.H. At Neal’s apartment the inter play from the many visitors led to the formation of the American Goldfish Society. Full credit goes to Neal and Al for all the work they did in starting the A.G.S. In 1967, I became the A.G.A.’s secretary and meetings were then held in my old 1898 Brooklyn farm house, pic-ture enclosed. The other pictures are of the fish house. The Society met at my house until the end of 1969 when Al moved to Cleveland, Ohio and then in short order Neal was a lieutenant stationed at Fort Eustace, Virginia.
I was left in my old farm house with a beautiful back-yard fish house and my Eng-lish Veils. Besides knowledge of where and how to fish for goldfish in N.Y.C-knowledge of the cause of the blue color in calico goldfish-explanation of the words heterozygote and homozygote as they apply to breeding and how to chill goldfish. For breeding; the G.S.A. had died! They were good days of fri endships and learning. What more can you ask of the dear little goldfish!
6
Buying a Microscope By Matt Lyon
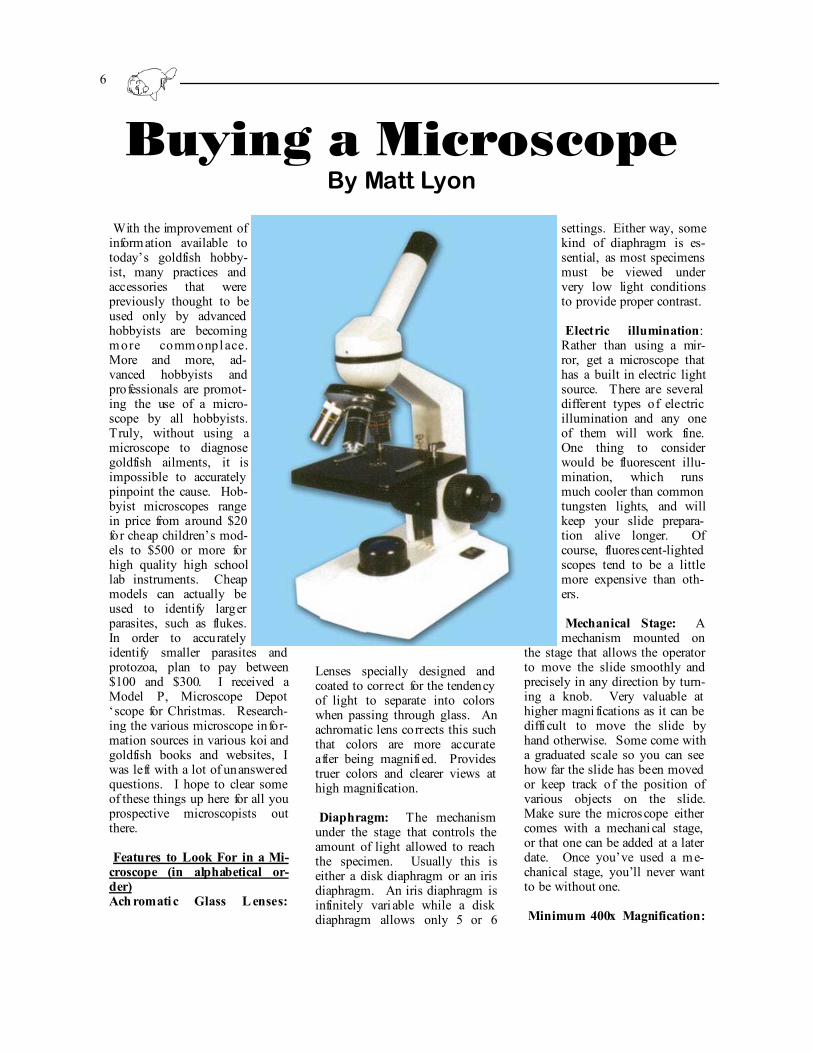
With the improvement of information available to today’s goldfish hobby-ist, many practices and accessories that were previously thought to be used only by advanced hobbyists are becoming more commonplace. More and more, ad-vanced hobbyists and professionals are promot-ing the use of a micro-scope by all hobbyists. Truly, without using a microscope to diagnose goldfish ailments, it is impossible to accurately pinpoint the cause. Hob-byist microscopes range in price from around $20 for cheap children’s mod-els to $500 or more for high quality high school lab instruments. Cheap models can actually be used to identify larger parasites, such as flukes. In order to accurately identify smaller parasites and protozoa, plan to pay between $100 and $300. I received a Model P, Microscope Depot ‘scope for Christmas. Research-ing the various microscope infor-mation sources in various koi and goldfish books and websites, I was left with a lot of unanswered questions. I hope to clear some of these things up here for all you prospective microscopists out there. Features to Look For in a Mi-croscope (in alphabetical or-der) Ach romati c Glass L enses:
Lenses specially designed and coated to correct for the tendency of light to separate into colors when passing through glass. An achromatic lens corrects this such that colors are more accurate after being magnifi ed. Provides truer colors and clearer views at high magnification. Diaphragm: The mechanism under the stage that controls the amount of light allowed to reach the specimen. Usually this is either a disk diaphragm or an iris diaphragm. An iris diaphragm is infinitely vari able while a disk diaphragm allows only 5 or 6
settings. Either way, some kind of diaphragm is es-sential, as most specimens must be viewed under very low light conditions to provide proper contrast. Electric illumination: Rather than using a mir-ror, get a microscope that has a built in electric light source. There are several different types of electric illumination and any one of them will work fine. One thing to consider would be fluorescent illu-mination, which runs much cooler than common tungsten lights, and will keep your slide prepara-tion alive longer. Of course, fluorescent-lighted scopes tend to be a little more expensive than oth-ers. Mechanical Stage: A mechanism mounted on
the stage that allows the operator to move the slide smoothly and precisely in any direction by turn-ing a knob. Very valuable at higher magni fications as it can be diffi cult to move the slide by hand otherwise. Some come with a graduated scale so you can see how far the slide has been moved or keep track of the position of various objects on the slide. Make sure the microscope either comes with a mechanical stage, or that one can be added at a later date. Once you’ve used a me-chanical stage, you’ll never want to be without one. Minimum 400x Magnification:
7
The consensus among hobbyists and professionals seems to be that you need a microscope with a minimum of 400x magnifica-tion. This will allow you to iden-tify pretty much all goldfish para-sites, including protozoa such as Chilodonella and Costia. There are a few scopes out there in the $200-$300 range that will mag-nify up to 1000x. Using the 1000x objective usually requires that you place a drop of immer-sion oil between the lens and the cover slip of your prepared speci-men. Retractable Lenses: Micro-scopes sometimes have retract-able lenses on the 40x and 100x objectives (the ones that give you 400x and 1000x magnification). Retractabl e objectives have a spring-loaded mechanism that allows the end of the objective to retract upon touching the slide. I assume that this prevents damage to the lens itself and/or the objec-tive. Separate Coarse and Fine Fo-cus Adjustment: It doesn’t mat-ter how high your microscope can magnify if it doesn’t allow you to focus precisely. You will miss seeing a lot of parasites i f you only have one focusing ad-justment. Recommended Accessori es (in order of importance) • Glass Slides (standard, $5 or
so for 72 pkg)* • Plastic and/or Glass Cover
Slips ($2.50 and up for 1oz. pkg.)*
• Rubbing Alcohol (for clean-ing slides and slips)*
• Cotton Swabs (q-tips, for cleaning slides and collect-ing samples)*
• Dust Cover for Microscope (usually included with the
microscope)* • Mechanical Stage ($40 and
up) • Eye Droppers (I’d have 2 or
3) • Forceps • Spare Bulb for El ectric Light
Source ($2.50 to $6.50) • Immersion Oil For 1000x
Viewing ($5 or so, essential if you have a 1000x ‘scope)
• Concavity well slides (very handy for viewing larger parasites, brine shrimp, etc. $1 each)
• Carrying Case ($39-$49 or so)
*Accessories marked with an asterisk should be considered essential Mail Order and Internet Mi-croscope Sources Microscope World 1-800-942-0528 www.microscopeworld.com Microscope Models Available: • Explorer Series ranges from
$121-$138 • Investigator Series ranges
from $195-$291 (accepts mech. stage for $38)
• Researcher Seri es ranges from $354-$854
Microscope Depot 1-800-721-8835 www.microscope-depot.com Microscope Models Available: • Model M microscope $89.95
(no fine focus, no mech. stage option)
• Model O microscope $129 ($179 w/mech. stage)
• Model P microscope $259 (W/mech. stage and 1000x mag., highly recommended!)
EBAY There are always many
microscopes listed here for auc-tion www.ebay.com Sources of Microscope Use In-formation There are now several sources of detailed information on micro-scope terminology, use, etc. It is beyond the scope of this article to define all of the terms discussed. Please refer to the excellent re-sources listed below to learn more about microscopes and how to use them for goldfish pathogen identification.
www.koivet.com Includes basic info on micro-scope use, and several videos and photos of common koi/goldfish pathogens. You can also order Dr. Johnson’s Koi Health & Dis-ease textbook and video, which include comprehensive coverage on microscope use and pathogen identification. Dr. Johnson’s section in the fairly new book Fancy Goldfish: A Guide to Keeping and Collecting also con-tains good instructions on basic microscopy.
www.fishdoc.co.uk Includes comprehensive info on microscope use and many para-
Member Exchange
Bristol Shubunkins
For Sale Imported from England 2002 1—Metallic Male 1—Calico Female 1—Pseudo Matt Female Have breed 11/02 16 offspring for sale also.
Dave Mandley (440) 729-0070 Evenings 7-9:30
8
Spring Viremia of Carp Virus (SVCV) Edited by Matt Lyon
Information Provided by Andy Goodwin, University of Arkansas at Pine Bluff Fish Disease Diagnostic Laboratory
History and Intro Spring Viremia of Carp Virus (SVCV) is one of five fish vi-ruses that are listed by the OIE, an international organization that issues guidelines used by mem-ber countries to prevent the spread of animal diseases. It is a deadly disease that is at this time, essentially untreatable [except by elevated temps]. This is a very scary disease as we are still miss-ing some important details like how dangerous it is to other cy-prinid fish, if fish act as carriers, and i f other animals can act as carriers. It usually occurs in early spring, when the water tem-perature rises into the 50's and higher. Infected fish show symp-toms of bulging eyes, swollen bellies, red rashes, red hemor-rhaging adjacent to scales, and mucus trailing from their vents (sometimes bloody mucus). When it occurs, it may wipe out a large percentage of the fish in a pond. Survival time is vari-able........it may take anywhere from two weeks to two months before fish stop dying from the disease. The first known North American occurrence of this disease was confirmed in the U.S. during the summer of 2002. A large koi farm in North Carolina noticed a new disease problem on their farm so they submitted samples to the UAPB Fish Disease Labo-ratory in Arkansas. The fish were found to carry SVCV and when the outbreak was reported
to government officials on July 3rd, 2002 the facility was quaran-tined that same afternoon. It is possible that infect ed fish were distributed to many other koi dealers throughout the country before the disease was diagnosed. Almost simultaneously, Cedar Lake in Wisconsin experienced the death of 10,000-20,000 pounds of wild carp. A virus was isolated and sent to UAPB for identi fication. It once again proved to be SVCV. The mys-tery is that thus far, officials and
researchers have been unable to determine how the lake was in-fected. The event cannot be linked to the North Carolina koi infection. The Mississippi River had also experienced a large carp die off the previous fall (2001). It was found later that samples taken from these fish showed antibod-ies against SVCV, evidence that this kill may also have been caused by SVCV.
What We Know About SVCV SVCV is a viral disease caused by Rhabdovirus carpio. SVCV is extremely contagious. It can be transmitted from fish to fish, by parasites, and possibly by birds and other animals that travel among different watery locales. SVCV affects a broad range of fish species, including all cypri-nids (koi, goldfish, carp, min-nows, etc.). It affects fish of all ages and usually kills them in 14-60 days when water temperatures are right. SVCV symptoms can be very similar to those of Aeromonas, the symptoms are bulging eyes, red rashes, swollen bellies, mu-cus trailing from the vent, light pressure causes bloody mucus to ooze from their vents. It is a disease that relishes fairly cold water. The symptoms are brought on by water temperatures between 50 and 70 degrees F, usually in early spring. Raising the temperature above 70 degrees F brings the symp-toms to a halt, and any fish that survive will be immune to future infections. It is not yet known whether survivors of an infection can transmit the disease to other fish.
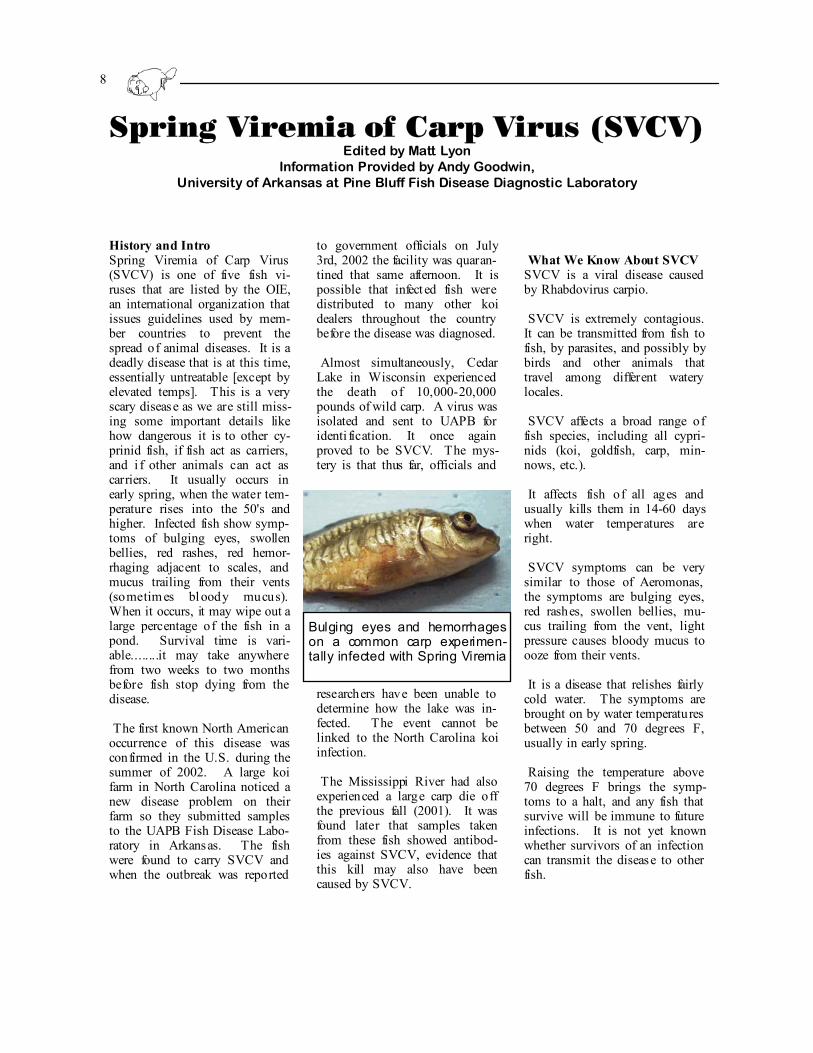
Bulging eyes and hemorrhages on a common carp experimen-tally infected with Spring Viremia

9
Where Spring Viremia Came From European fish farmers have been dealing with the disease since the middle ages. One of the reasons it has been so prevalent there may be due to the popularity of carp as a food fish in those coun-tries. Offi cially, Asian countries claim that all their farms are free from SVCV. Interestingly, the interna-tional SVCV Reference Labora-tory in Weymouth England has on several occasions found that imported Asian fish were carry-ing the virus before they were even removed from the box they were shipped in. The SVCV that has appeared in North America seems to be most closely related to that found in imported Asian fish, suggesting that the disease was most likely introduced through ornamental fish rather than by other means. Where SVCV is Going in North America So far, the disease has only been confirmed in North Carolina and Wisconsin. Remember that the symptoms are normally brought on as water temperatures warm in the spring, and that SVC is just about to experience its first spring season following the in-fection in North Carolina. There is currently a lot of controversy over what the introduction of SVC might mean to the North American koi and goldfish world. Government offi cials, food fish farmers, ornamental fish breeders and importers, koi and goldfish retailers, and hobbyists across the country wait in anticipation of
what spring 2003 might mean to this vast network. Currently, the only fish imported into North America that are re-quired to be inspected are trout and salmon. There has been little or no inspection of any other food or ornamental fish at all. Within the next few months, we may see some serious regulations put into place on all imported fish, and possibly even interstate transport of carps, goldfish, and other related species. The impli-cations of this for the ornamental koi and goldfish trade could be staggering, but may well provide many benefits for hobbyists. APHIS and the USDA are cur-rently working with aquaculture researchers to develop a SVCV control program. It will be only the second of its kind for North American fish. This will help decide how future occurrences of SVCV are to be dealt with, as well as determine the speci fi cs of regulations regarding the inspec-tion of imported fish and inter-state transport of fish. It has been speculated that farms harboring SVCV will be quarantined, de-populated, and disinfect ed, and that they will be compensated monetarily for their loss. It has also been speculated that the fish collections of any retailer or hob-byist found with infected fish will also be quarantined, depopulated, and disinfected. This prospect has caused many individuals to feel hesitant about reporting pos-sible occurrences of SVCV, in the event that their business or hobby might be shut down. Ac-cording to Goodwin, it is unlikely that the repercussions for individ-ual hobbyists will be that ex-
treme, and that at the present time, all of this is nothing more than speculation anyway. At the time of this writing, the final pol-icy will come following a meet-ing in Washington during mid March, and many of the out-comes may be well under way by the time you read this. In any event, it isn't hard to imagine how widespread the disease could become in a single season if potentially infected farms and retailers continue to distribute fish to the public without being tested for SVC. What We Can Do As Hobbyists Don't panic. There are several other goldfish disorders that can result in very similar symptoms. Be sure to rule out the other pos-sibilities before fingering SVC as the culprit. Bacterial infections can mostly be ruled out if the symptoms started at lower water temperatures (50-60 F), as they are unlikely to occur in water this cold. SVCV symptoms may be similar to protozoan infections, but protozoa will not cause the telltale bloody mucus from the vent of the fish. It can be differ-entiated from KHV by the tem-peratures at which the symptoms begin; KHV affects fish above 70 degrees F. If you experience the SVCV symptoms listed above, consult a veterinari an or local fish disease diagnostic center for advice. If SVCV seems likely, you will need to send fish to a laboratory equipped to diagnose SVC. One laboratory that can help is the one at UAPB. You can call or email Andy Goodwin at UAPB Diagnostic Lab to find out how to submit fish for testing. Phone: 870-543-8137 Email: [email protected]

10
This is Part II of a two part article on building your own continuous siphon overflow. P lease refer to the Jan/Feb 2003 Goldfish Report for Part I, which explains the form and function of traditional overflows. In this con-tinuation, I illustrate how to modify the traditional design to make it more useful for the goldfish hobbyist. Also included are photos and instruc-tions to help you build your own modified continuous siphon over-flow. It's not very pretty, but it works great and hides behind your aquarium with about 6" clearance.
Modif ied Design (Please refer to figure 1) A. Note that we have eliminated the inside skimmer box. Here, water from the lower portion of the aquar-ium (instead of fro m the surface) is drawn into the siphon tube. B. Unfiltered water flows via siphon tube over the side of the aquarium and down into the overflow chamber.
C. Water enters the overflow cham-ber (Note that the end of the siphon tube is below the outlet level. In case of power outage, pump failure etc., water will only siphon out of the tank until the water level drops below the overflow outlet. This means that the siphon stays intact when water flow is interrupted and starts automatically when water flow resumes. Because the overflow chamber and aquarium are connected by siphon, the water level in the aquarium will be equal to that in the overflow chamber. This means that when water flow is inter-rupted, the aquarium will never drain more than an inch or so! D. Water overflows into exit pipe, and flows via gravity to the filter below the aquarium. Note that the overflow box is not fitted with a prefilter of any kind. A large capac-ity, easy-to-clean prefilter should be fitted before the main filter, to re-move all solid waste. Tools Needed • Table Saw (optional)
• Band Saw
• Jig Saw
• Variable Speed Drill
• 1 5/8" Hole Saw
• 5/16" Drill Bit
• Drill Press (optional but recom-mended)
• Hand Saw and Miter Box
• Sandpaper 200 Grit
• Rattail File Parts Needed (refer to figure 2 for a view of parts A through E and their measurements) Hanging Bracket • Qty 2 Part A 3/1 6 " PVC
Cutout • Qty 2 Part B 3/1 6 " PVC
Cutout Exterior Chamber Assembly • Qty 1 Part C 3/1 6 " PVC
Cutout • Qty 1 Part D 3/1 6 " PVC
Cutout • Qty 2 Part E 3/1 6 " PVC
Cutout • Qty 2 1.5" Section of 1.25"
Diameter PVC Pipe • Qty 1 6" Section of 3" Di-
ameter ABS Pipe (used in this design) or 3" PVC Pipe
Siphon Tube • Qty 1 2.5" Section of 1.25"
Diameter PVC Pipe (connection between the 90 deg fittings)
• Qty 1 5" Section of 1.25" Diameter PVC Pipe (outlet to the overflow chamber)
• Qty 1 12" Section of 1.25" Diameter PVC Pipe (intake from the aquarium)
• Qty 2 90 Degree Elbows for 1.25" Diameter PVC Pipe
• Qty 1 End Cap for 1.25" Di-ameter PVC (drill with 5/16" holes to make an intake screen)
Fasteners, Adhesives, and Miscel-laneous • Qty 1 Can of Purple P ipe
Primer • Qty 1 Can of All Purpose
DIY Continuous Siphon Overflow: Part II
By Matt Lyon
Figure 1
Figure 2
11
P ipe Cement (I'm using Oatey brand all purpose cement for PVC, ABS, and CPVC. Just make sure your cement specifies that it can be used on pipes for potable water, to ensure safety for your fish. It wouldn't hurt to ask someone at the store if it's safe for fish.)
• Qty 2 Nylon Bolts 1/4" or 5/16" X 1"
• Qty 2 Nylon Wing nuts 1/4" or 5/16"
Procuring Materials I purchased everything except the flat PVC sheets at Home Depot and Lowe's. The flat PVC is sold in sheets of different thicknesses by plastics suppliers. You will find this stuff at the same places that sell acrylic, lexan, and other plastics. I would recommend using either 3/16" or 1/4" PVC. By searching through the scrap bins at a plastics supplier, I found enough flat gray PVC to build three overflows, for less than $10. Construction All flat PVC parts were cut out using a band saw. A standard fine-toothed band for woodworking worked great. The slots on both Part A's were first laid out with a ruler and pen, then drilled on both ends with a 5/16" wood bit, and last cut out using a scroll saw. All pipe sections were cut using a hand miter saw. When cutting the flat PVC, for really pre-cise cuts and tighter joints, I would recommend using a table saw for the straight cuts, a band saw for round and corner cuts, and a router for cut-ting the slots in both part A's. Lightly sand the cut edges on all flat PVC pieces and pipe sections with 200 grit sandpaper. Measure, mark, and drill the holes in both Part E's. For folks who don't have a shop full of tools, a Dremel tool with bits for cutting, drilling, and sanding could actually be used for the entire pro-ject. If you go this route, I would recommend using Dremel's router attachment for making most of the cuts. Prepare surfaces to be joined by lightly sanding and applying purple primer. Apply light coat of pipe
cement to both surfaces within 1 minute of applying purple primer. Join cemented surfaces while still wet. Work on a flat table and use clamps, bricks, blocks of wood, etc. to hold parts together while they dry. Allow to dry for 1/2 hour before handling. Next, apply light coat of cement around all sides of all joints, to ensure joints will be strong, with no gaps between joined surfaces. It should be possible to glue all flat PVC parts together in one sitting for either the hanging bracket or exterior chamber assembly. I would recom-mend allowing the cement to cure for 1-2 weeks before using your over-
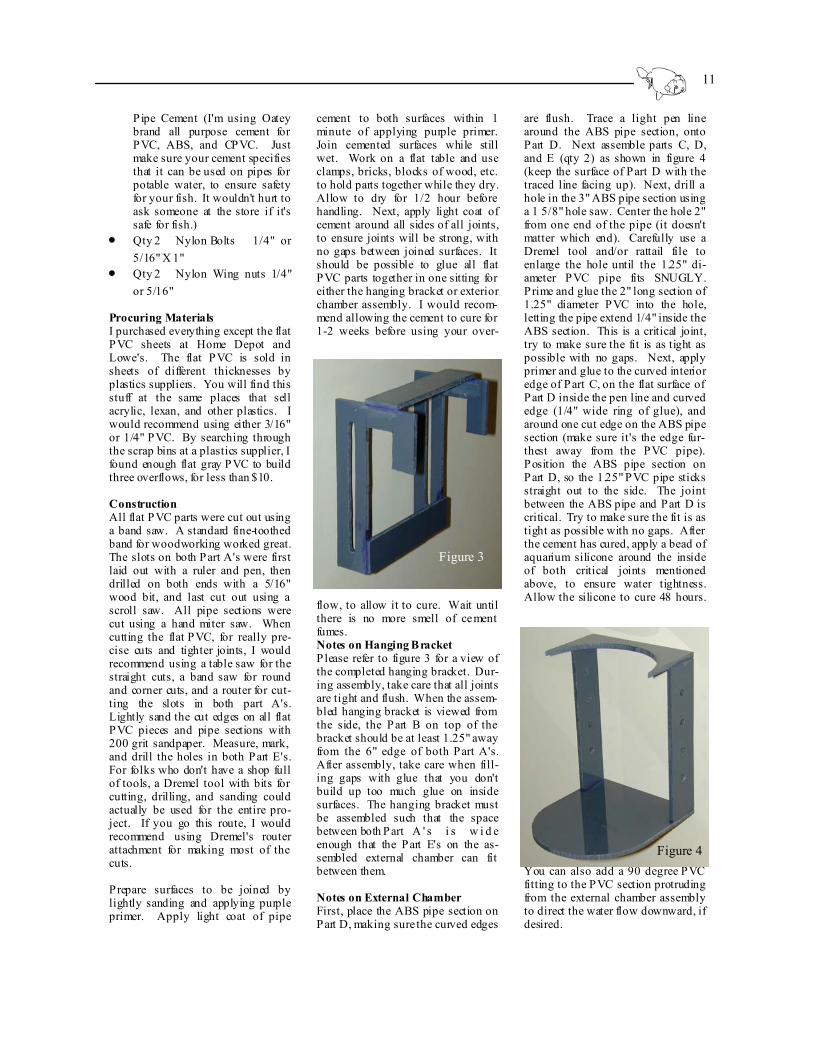
flow, to allow it to cure. Wait until there is no more smell of cement fumes. Notes on Hanging Bracket Please refer to figure 3 for a view of the completed hanging bracket. Dur-ing assembly, take care that all joints are tight and flush. When the assem-bled hanging bracket is viewed from the side, the Part B on top of the bracket should be at least 1.25" away from the 6" edge of both Part A's. After assembly, take care when fill-ing gaps with glue that you don't build up too much glue on inside surfaces. The hanging bracket must be assembled such that the space between both Part A ' s i s w i d e enough that the Part E's on the as-sembled external chamber can fit between them. Notes on External Chamber First, place the ABS pipe section on Part D, making sure the curved edges
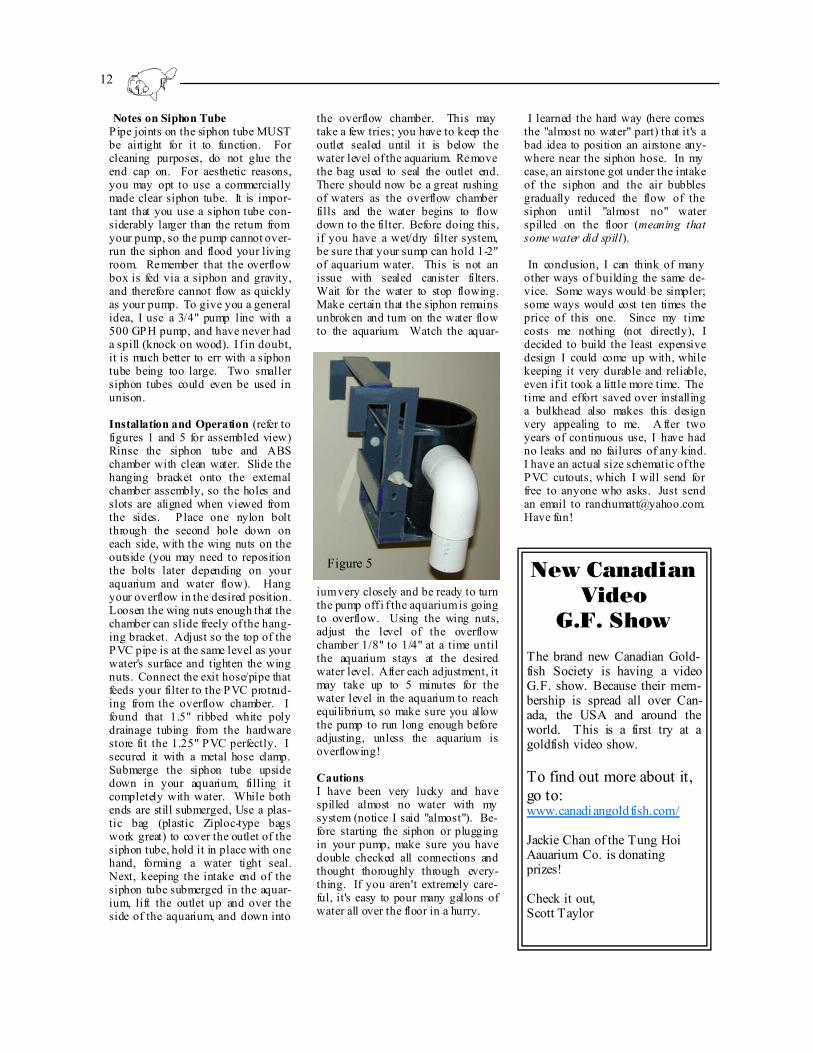
are flush. Trace a light pen line around the ABS pipe section, onto Part D. Next assemble parts C, D, and E (qty 2) as shown in figure 4 (keep the surface of Part D with the traced line facing up). Next, drill a hole in the 3" ABS pipe section using a 1 5/8" hole saw. Center the hole 2" from one end of the pipe (it doesn't matter which end). Carefully use a Dremel tool and/or rattail file to enlarge the hole until the 1.25" di-ameter PVC pipe fits SNUGLY. Prime and glue the 2" long section of 1.25" diameter PVC into the hole, letting the pipe extend 1/4" inside the ABS section. This is a critical joint, try to make sure the fit is as tight as possible with no gaps. Next, apply primer and glue to the curved interior edge of Part C, on the flat surface of Part D inside the pen line and curved edge (1/4" wide ring of glue), and around one cut edge on the ABS pipe section (make sure it's the edge fur-thest away from the PVC pipe). Position the ABS pipe section on Part D, so the 1.25" PVC pipe sticks straight out to the side. The joint between the ABS pipe and Part D is critical. Try to make sure the fit is as tight as possible with no gaps. After the cement has cured, apply a bead of aquarium silicone around the inside of both critical joints mentioned above, to ensure water tightness. Allow the silicone to cure 48 hours.
You can also add a 90 degree PVC fitting to the PVC section protruding from the external chamber assembly to direct the water flow downward, if desired.
Figure 3
Figure 4
12
Notes on Siphon Tube P ipe joints on the siphon tube MUST be airtight for it to function. For cleaning purposes, do not glue the end cap on. For aesthetic reasons, you may opt to use a commercially made clear siphon tube. It is impor-tant that you use a siphon tube con-siderably larger than the return from your pump, so the pump cannot over-run the siphon and flood your living room. Remember that the overflow box is fed via a siphon and gravity, and therefore cannot flow as quickly as your pump. To give you a general idea, I use a 3/4" pump line with a 500 GPH pump, and have never had a spill (knock on wood). I f in doubt, it is much better to err with a siphon tube being too large. Two smaller siphon tubes could even be used in unison. Installation and Operation (refer to figures 1 and 5 for assembled view) Rinse the siphon tube and ABS chamber with clean water. Slide the hanging bracket onto the external chamber assembly, so the holes and slots are aligned when viewed from the sides. P lace one nylon bolt through the second hole down on each side, with the wing nuts on the outside (you may need to reposition the bolts later depending on your aquarium and water flow). Hang your overflow in the desired position. Loosen the wing nuts enough that the chamber can slide freely of the hang-ing bracket. Adjust so the top of the PVC pipe is at the same level as your water's surface and tighten the wing nuts. Connect the exit hose/pipe that feeds your filter to the PVC protrud-ing from the overflow chamber. I found that 1.5" ribbed white poly drainage tubing from the hardware store fit the 1.25" PVC perfectly. I secured it with a metal hose clamp. Submerge the siphon tube upside down in your aquarium, filling it completely with water. While both ends are still submerged, Use a plas-tic bag (plastic Ziploc-type bags work great) to cover the outlet of the siphon tube, hold it in place with one hand, forming a water tight seal. Next, keeping the intake end of the siphon tube submerged in the aquar-ium, lift the outlet up and over the side of the aquarium, and down into
the overflow chamber. This may take a few tries; you have to keep the outlet sealed until it is below the water level of the aquarium. Remove the bag used to seal the outlet end. There should now be a great rushing of waters as the overflow chamber fills and the water begins to flow down to the filter. Before doing this, if you have a wet/dry filter system, be sure that your sump can hold 1-2" of aquarium water. This is not an issue with sealed canister filters. Wait for the water to stop flowing. Make certain that the siphon remains unbroken and turn on the water flow to the aquarium. Watch the aquar-
ium very closely and be ready to turn the pump off i f the aquarium is going to overflow. Using the wing nuts, adjust the level of the overflow chamber 1/8" to 1/4" at a time until the aquarium stays at the desired water level. After each adjustment, it may take up to 5 minutes for the water level in the aquarium to reach equilibrium, so make sure you allow the pump to run long enough before adjusting, unless the aquarium is overflowing! Cautions I have been very lucky and have spilled almost no water with my system (notice I said "almost"). Be-fore starting the siphon or plugging in your pump, make sure you have double checked all connections and thought thoroughly through every-thing. If you aren't extremely care-ful, it's easy to pour many gallons of water all over the floor in a hurry.
I learned the hard way (here comes the "almost no water" part) that it's a bad idea to position an airstone any-where near the siphon hose. In my case, an airstone got under the intake of the siphon and the air bubbles gradually reduced the flow of the siphon until "almost no" water spilled on the floor (meaning that some water did spill). In conclusion, I can think of many other ways of building the same de-vice. Some ways would be simpler; some ways would cost ten times the price of this one. Since my time costs me nothing (not directly), I decided to build the least expensive design I could come up with, while keeping it very durable and reliable, even if it took a little more time. The time and effort saved over installing a bulkhead also makes this design very appealing to me. A fter two years of continuous use, I have had no leaks and no failures of any kind. I have an actual size schematic of the PVC cutouts, which I will send for free to anyone who asks. Just send an email to [email protected]. Have fun!
Figure 5 New Canadian Video
G.F. Show The brand new Canadian Gold-fish Society is having a video G.F. show. Because their mem-bership is spread all over Can-ada, the USA and around the world. This is a first try at a goldfish video show. To find out more about it, go to: www.canadiangoldfish.com/ Jackie Chan of the Tung Hoi Aauarium Co. is donating prizes! Check it out, Scott Taylor
13
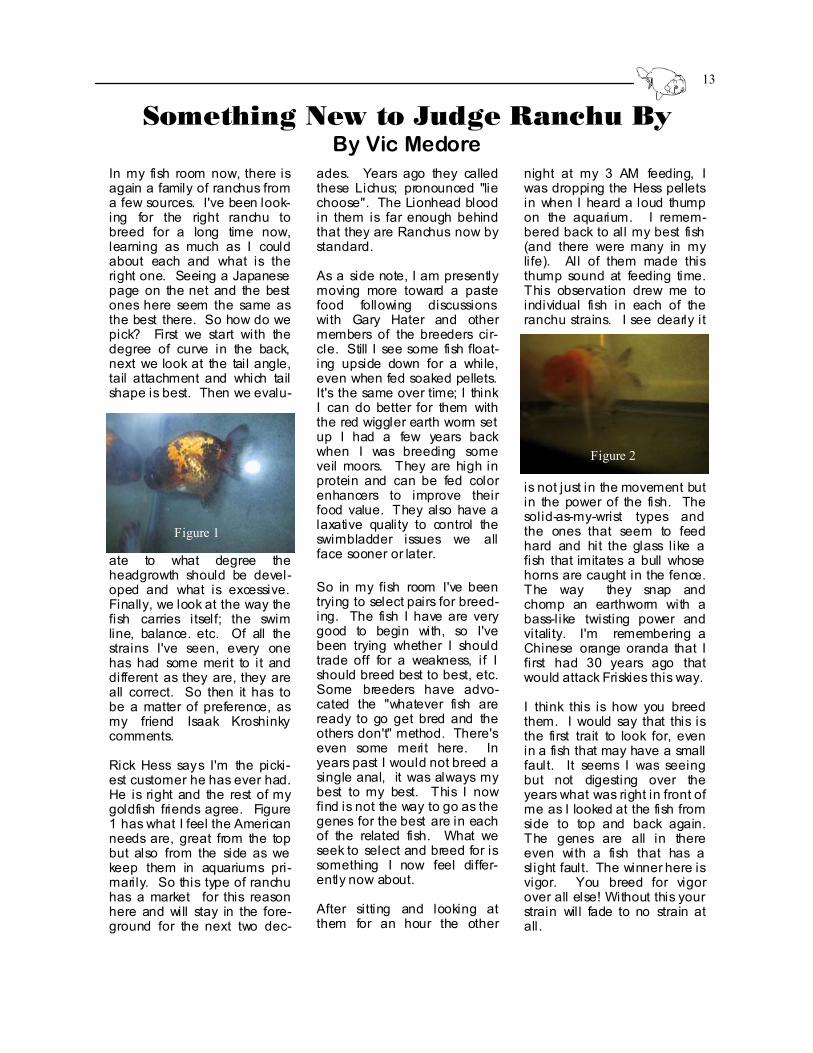
In my fish room now, there is again a family of ranchus from a few sources. I've been look-ing for the right ranchu to breed for a long time now, learning as much as I could about each and what is the right one. Seeing a Japanese page on the net and the best ones here seem the same as the best there. So how do we pick? First we start with the degree of curve in the back, next we look at the tail angle, tail attachment and which tail shape is best. Then we evalu-
ate to what degree the headgrowth should be devel-oped and what is excessive. Finally, we look at the way the fish carries itself; the swim line, balance. etc. Of all the strains I've seen, every one has had some merit to it and different as they are, they are all correct. So then it has to be a matter of preference, as my friend Isaak Kroshinky comments. Rick Hess says I'm the picki-est customer he has ever had. He is right and the rest of my goldfish friends agree. Figure 1 has what I feel the American needs are, great from the top but also from the side as we keep them in aquariums pri-marily. So this type of ranchu has a market for this reason here and will stay in the fore-ground for the next two dec-
Something New to Judge Ranchu By By Vic Medore
ades. Years ago they called these Lichus; pronounced "lie choose". The Lionhead blood in them is far enough behind that they are Ranchus now by standard. As a side note, I am presently moving more toward a paste food following discussions with Gary Hater and other members of the breeders cir-cle. Still I see some fish float-ing upside down for a while, even when fed soaked pellets. It's the same over time; I think I can do better for them with the red wiggler earth worm set up I had a few years back when I was breeding some veil moors. They are high in protein and can be fed color enhancers to improve their food value. They also have a laxative quality to control the swimbladder issues we all face sooner or later. So in my fish room I've been trying to select pairs for breed-ing. The fish I have are very good to begin with, so I've been trying whether I should trade off for a weakness, if I should breed best to best, etc. Some breeders have advo-cated the "whatever fish are ready to go get bred and the others don't" method. There's even some merit here. In years past I would not breed a single anal, it was always my best to my best. This I now find is not the way to go as the genes for the best are in each of the related fish. What we seek to select and breed for is something I now feel differ-ently now about. After sitting and looking at them for an hour the other
night at my 3 AM feeding, I was dropping the Hess pellets in when I heard a loud thump on the aquarium. I remem-bered back to all my best fish (and there were many in my life). All of them made this thump sound at feeding time. This observation drew me to individual fish in each of the ranchu strains. I see clearly it
is not just in the movement but in the power of the fish. The solid-as-my-wrist types and the ones that seem to feed hard and hit the glass like a fish that imitates a bull whose horns are caught in the fence. The way they snap and chomp an earthworm with a bass-like twisting power and vitality. I'm remembering a Chinese orange oranda that I first had 30 years ago that would attack Friskies this way. I think this is how you breed them. I would say that this is the first trait to look for, even in a fish that may have a small fault. It seems I was seeing but not digesting over the years what was right in front of me as I looked at the fish from side to top and back again. The genes are all in there even with a fish that has a slight fault. The winner here is vigor. You breed for vigor over all else! Without this your strain will fade to no strain at all.
Figure 1
Figure 2
14
The most prosaic contriv-ances, intended to simplify our lives, are as often the bane of our existence, as they are a boon. With tech-nology, this is true in spades. We buy gadgets to l i b e r a t e o u r s e l v e s (remember computers and the mythical "paperless" offi ce?), only to find we are disappointed slaves to some unexpect ed tyranny of ac-commodation and compli-ance. It is against this back-drop of wary, jaded experi-ence that I find mysel f writ-ing this column to sing the praises of a thermometer. Of course, this is not an ordinary thermometer. But let me start at the beginning. I have an above ground fish pond of about 400 gallons here in northern Vir-ginia. In it was a standard pool thermometer, which did an admi-rable job of measuring the tem-perature. Sadly, though, to do this feat, it had to be in the pond and therein lies the rub. In the winter, I cover the pond with plastic and fasten it down rather thoroughly. To check the temperature, I would have to go out and undo the securing strap, lift the plastic and pull out the thermometer. Add to that put on my boots and wade out through the snow at midnight when it was 10 degrees Fahrenheit, to see how the pond was doing, and perhaps you fol-low my interest in improving this activity. My technological liberation in
this case occurred at my local Radio Shack. I had wanted one of those indoor-outdoor thermome-ters with a big digital readout. For Christmas I had received one with a miniscule display and a feature that was threatening my sanity: an alarm that sounded, every 30-seconds, when the tem-perature was below 36F, and which could not be turned off. So I took it back to Radio Shack to exchange. For whatever reason, this particular Radio Shack had all of the digital thermometers behind the counter. So the clerk was forced to try to explain the differences to me, at length, for the ten different models they car-ried, in an effort to effect the ex-change and leave me a little less disgruntled. They had exactly what I wanted, a wireless unit with nice big dis-
Useful Products, Clever Ideas
By Russell W. Taylor
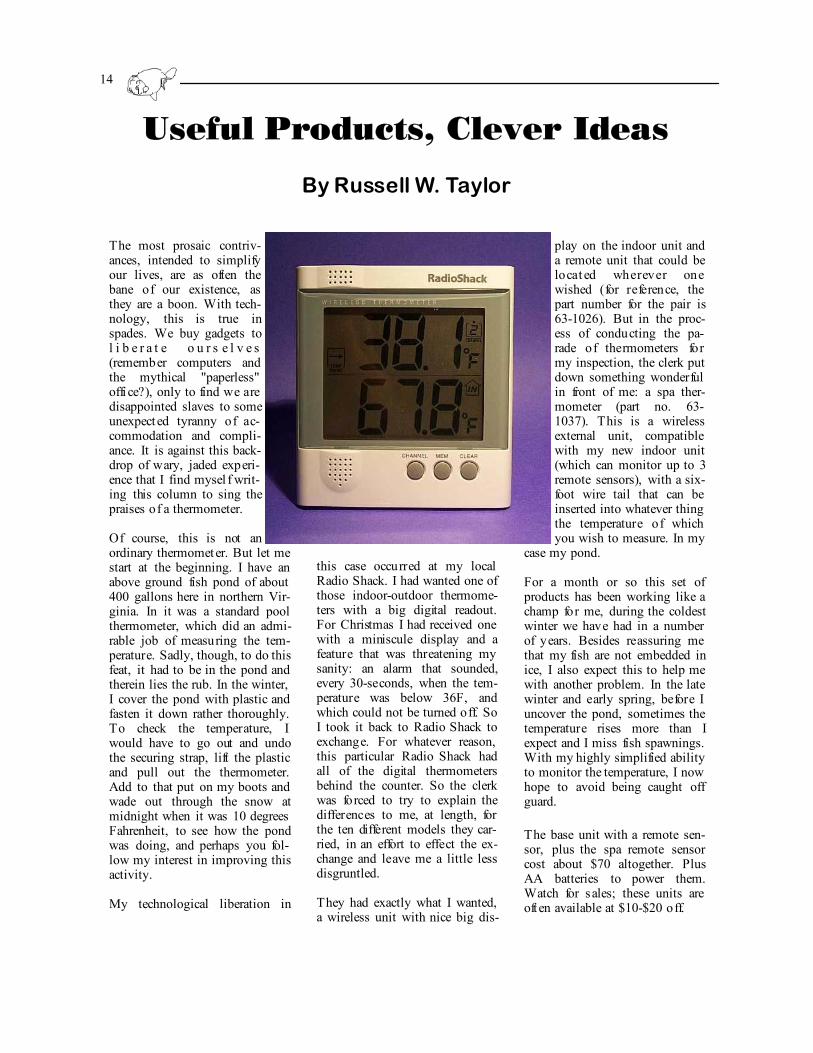
play on the indoor unit and a remote unit that could be locat ed wherever one wished (for reference, the part number for the pair is 63-1026). But in the proc-ess of conducting the pa-rade of thermometers for my inspection, the clerk put down something wonderful in front of me: a spa ther-mometer (part no. 63-1037). This is a wireless external unit, compatible with my new indoor unit (which can monitor up to 3 remote sensors), with a six-foot wire tail that can be inserted into whatever thing the temperature of which you wish to measure. In my
case my pond. For a month or so this set of products has been working like a champ for me, during the coldest winter we have had in a number of years. Besides reassuring me that my fish are not embedded in ice, I also expect this to help me with another problem. In the late winter and early spring, before I uncover the pond, sometimes the temperature rises more than I expect and I miss fish spawnings. With my highly simplified ability to monitor the temperature, I now hope to avoid being caught off guard. The base unit with a remote sen-sor, plus the spa remote sensor cost about $70 altogether. Plus AA batteries to power them. Watch for sales; these units are oft en available at $10-$20 off.
15
Continuous-Drip System Alleged to be: “The most extreme way to control water quality”
By Taylor Moffitt
Water quality is everything. If you are intearested in better water quality, you are really going to like this series. Time is money. If you are lazy, like me, or just plain having trouble getting the water changes done, I’m here to tell you that you are just going to flip when you try this. We are going to learn about the continuous-drip system’s benefits and caveats in the first part. Next, we’ll see a rather expensive example system, and a cheap one too, in the second part. Finally, we’ll see how anyone can build their own system (two di fferent types!) in the third part. If you’re going to have nice fish, you’re going to have water qual-ity of a satisfactory level, or you’re going to have nice dead fish. The purpose of this series is not to belabor that point. I’ve heard stories about people who had sick fish, and they were tossed into a continuous-drip tank, and, as if they were in a magical healing water, they got better. (Notice the pattern here, water quality = good.) Since I converted my tanks, I’ve had drastically healthier fish, and I don’t have to have garbage cans of aging water sitting around either. Now, I know what your weekly routine is like. You probably have too many tanks (according to my wife, that would be one or more) and you have to treat &
age water, scrub (thank goodness for floating algae-scraper mag-nets!), siphon, fill, then put away the hose, et cetera. Well, last week when you were doing all of that, the folks with continuous drip systems were just sitting by their favorite tank, leisurely watching their fish swim. I learned this system from a man named Heip (Pronounced “ hip.” Later, you’ll see his system), who is from Vietnam. He claims that he learned this method by way of a fellow from China, whose fam-ily raises fish for a living. The story goes that this method was passed down from father to son, as the family secret. Heip told me, “But I don’t care!”, so here I am, happily blabbing it all over the place. Here’s how it works. There’s a little drippy thing that lets water into your tank, at a rate which you control (for example, two tank changes per week). The fresh water comes so slowly that the fish are never in shock, and the slow dripping gives chlorine time to dissipate into the air, and the fish are never exposed to enough to hurt them. A low-cost
array of pre-filters removes sediment & chemicals from incoming water before it hits your tank. There is an overflow drain, which is a bulkhead fitted to a hole in the side of the tank. You don’t need a bunch of fil-ters, just something to house bacteri a and oxygen-ate the water, like an under-gravel filter, or a wet-dry tower.
This all sounded very odd to me when I first heard it. I thought, “What, no salt?!” This took me a while to get over. You also have to have incoming water lines, and drain lines, which can be hard, or fl exible. The salt becomes un-necessary when your water qual-ity is near perfect. I took a week to slowly acclimate my fish to salt-free living, and they never complained once. Oddities aside, the only reason I could think of for not wanting to do this is if your water is too acidic or has some other unusual quality. To be continued… Until then, enjoy changing your water. ;-) In the next part of this three part series, you will see an expensive example and a home-brew cheapie example, all with photos. “But wait, there’s more!” In the final part, you’ll learn how to do both, all by yourself. If you enjoyed this article, pho-tocopy it, photocopy the GFSA membership application, and give them to your friends!
Part I of a
Three Part Series