Embed Size (px)
Citation preview
GM’s Guide to Creating Challenging Encounters
NOTE: EFFECTIVE 02/03/2014 THIS GUIDE WILL NO LONGER BE UPDATED. IT WILL NOT BE REMOVED.
STARTING 2/10/14, THIS GUIDE’S CONTENT WILL BE EXPANED UPON IN BLOG-FORMAT AT THE NEW
EVERYMAN GAMING BLOG. EVERYMAN GAMING IS UPDATED WEEKLY ON MONDAYS, WEDNESDAYS, AND FRIDAYS. NO INFORMATION IN THIS GUIDE WILL BE
COPY/PASTED ONTO THE BLOG; IT WILL BE WRITTEN ENTIRELY FROM SCRATCH AND WILL CONTAIN AT
LEAST 69% BETTER GRAMMAR AND PUNCTUATION.
The Paizo thread will continue to function if you wish to discuss these changes. The Everyman Gaming blog also contains a Facebook page (there is a link at the bottom of each page on the blog. If you would like to submit ideas for future articles, please PM the author
at the Everyman Gaming Facebook Page.
You may now return your regular scheduled GuideViewing. ~ Alexander Augunas
Table of Contents 1. Glossary 2. Debunking Myths 3. The Action Economy 4. The Math Behind CR 5. Recapping the Process 6. Calculating a Player’s CR 7. Deploying the Linear Guild 8. Revenge of the Recap 9. Mythic Mathematics — Designing Encounters for Mythic Adventures 10. Designing Effective Boss Monsters 11. Practice What We Preach — The Haunting of Harrowstone 12. Taking Advantage of Terrain and Weather 13. The Real Goal 14. Miscellaneous Tips and Tricks 15. Summary
Glossary This guide assumes that you know what the following terms mean. If you don’t, this is where you should good to reference those terms.
• GM Game Master; the person who runs the game you’re playing. • PC Player Character; the people playing in the game that is being run. • APL Average Party Level; this is the average level of your party. • CR Challenge Rating; this is how difficult the monster is. • XP Experience Points; a numerical system that determines when PCs level up; is also used to determine a monster’s CR. • Depletable Resources Anything that a player can lose as a result of participating in an encounter. Typical Depletable Resources include hit points, ability scores, spells per day, magic item charges, daily use abilities, and so on.
Debunking Myths Before we get started on this guide, there some important myths that need dispelling.
1. Designing my encounters in advance is the same as railroading my players, and only poor GMs railroad their players. Railroading can be loosely defined as forcing your players down a specific plot or storyline without giving them any choice or the illusion of choice. Designing encounters in advance can sometimes be railroading, but it is not a sure sign of this poor GMing practice. The best GMs plan their encounters in advance and sprinkle in spontaneity later. 2. Having Five Players in my party does not affect how difficult I should make my encounter. This is perhaps the biggest myth I have encountered, and the problem is that it stems directly from the Core Rulebook, which states that you do not need to adjust a party’s APL if you have five players. This is simply not true because of how the CR system is balanced and how the game’s action economy works. 3. A CR 4 encounter is a reasonably hard challenge for an APL 4 party. No, it is not. If you read the Core Rulebook, a CR 4 encounter should only drain roughly 25% of the an APL 4 party’s depletable resources; that is not a difficult encounter. When CR equals APL, it is an average encounter. 4. Why don’t you talk about how to design creative encounters here? I’m answering this question here because I was asked it on the Paizo Boards. There is a reason why this guide does not talk about the creative aspect of designing encounters, and believe it or not but it isn’t because I’m lazy. Ultimately, you can be taught Mathematics and techniques for how to design challenging encounters. But the ability to design creative encounters comes only from experience. So get out there, GM some games, play in some games, and earn experience down and dirty. GM for new players and help new players learn to GM themselves; no matter how new someone is, a good encounter designer (and a good GM) knows that there are lessons to learn from every experience he acquires. 5. The Gunslinger / Magus / Zen Archer is broken! I’m willing to bet that 90% of the GMs who cry ‘broken’ don’t know what the phrase actually means. “Broken” is an option that ruins your game by grinding it to a halt. In other words, any player option is only as broken as you allow it to be. For different reasons, the three classes I’ve listed are the common subjects of complaints when it comes to, “Is this class broken?” Honestly, it makes me laugh because [Broken Nova] class threads almost always exist alongside [Martials suck compared to spellcasters] threads, and yet two of three most commonly complained about classes have no spellcasting whatsoever. Twist! In order to be a successful GM, you need to be familiar enough with the rules that you can
easily and effectively modify encounters to suit your party. There’s a very powerful misconception by RPG Gamers nowadays that the FirstParty Publisher (Hint: Paizo) is allpowerful and allknowing and is the golden standard by which all lesser products should be judged. That’s malarkey, and here’s why. Paizo needs to sell Adventure Paths, and often that means shooting for a standard deviation of players. Many of their encounters are tuned for the iconic party of four, which we discuss later in this Guide.The farther you deviate from that norm, the harder or easier the adventure becomes. This is why it is absolutely crucial that you learn how to adjust encounters for your party. Yes, the Gunslinger, Magus, and Zen Archer have an extremely high damage output. But they also have their weaknesses. We’ll talk about some of those weaknesses elsewhere in this guide, but you need to A) use a variety of encounters and B) note which type of encounters your players are challenged by. Tldr: Adventure Paths (and even the XP tables, to a certain degree) are balanced assuming that your players are a party of four consisting of a Core Wizard, a Core Cleric, a Core Rogue, and a Core Fighter. The father you deviate away from this “standard’ party, the more you will have to adjust your encounters. This guide will give you excellent tips to make encounters harder, and most of them are backwards compatible towards making encounters
easier too. Just take all of my suggestions and apply them in reverse!
The Action Economy, or the Real Reason Your Encounters Are Trivial
I am not going to go indepth on the Action Economy here in this guide; it is quite literally a topic that deserves its own guide, such as the fabulous guide written by the Geek Industrial Complex here. Most Guides on Action Economy are PlayerOriented. I am about to give you a GMoriented guide to the Action Economy.
1. What is the Action Economy? Put simply, the action economy is the number of actions per side in a combat; the sides being GM vs. PCs. With some exceptions, every character in a combat has access to three actions; a Standard Action, a Move Action, and a Swift Action. You can also combine the Standard and Move actions together into a Full Round Action, with the most common of those actions being the Full Attack Action and the Full Movement Action. 2. Why does this affect me as the GM? Your players are going to constantly look for ways to swing the action economy in their favor. Are they buffing before a fight? Those spells spent buffing are standard actions that do not need to be cast during the combat, which nets the PCs a bonus on their Action Economy. When you allow your players to gain advantages in the Action Economy, you are making the encounter easier for them. This isn’t to imply that you should never allow the PCs to buff before an encounter, but you need to be aware that the players using out of combat time to cast buffs means that they are going to be able to dedicate more of their combat actions to ripping apart your monsters. 3. How does this affect my encounter design? The very real concept of the Action Economy is basically what makes the iconic boss monster so incredibly easy to defeat unless said boss monster significantly overpowers the PCs in terms of its CR to their APL. Instead of a roleplaying game, look at a game of Pathfinder as if it were a game of chess. If you place an APL 4 party of four adventurers against a CR 4 monster, both “sides” of the board would the same number of chess pieces. However, because there are four PCs to one CR 4 monster, the PC’s side is effectively taking four turns; they are making four moves to every one move that the CR 4 opponent gets to make. More turns per round for the PCs means that it is not likely that the GM’s side is going to win this game of chess. The game is designed with this in mind, so if you want to design a difficult encounter, you need to even out the chessboard somewhat, which will always mean an encounter of a higher CR.
The Math Behind CR The Pathfinder Roleplaying Game is built upon decades of spreadsheets and mathematical calculations. In order to design a challenging encounter, you need to be familiar with the math behind the system, both the math that allows CR to function the way it does and how the system is intended to work. First, we’ll look at the important relationships in encounter designing before we dive headfirst into Numberland.
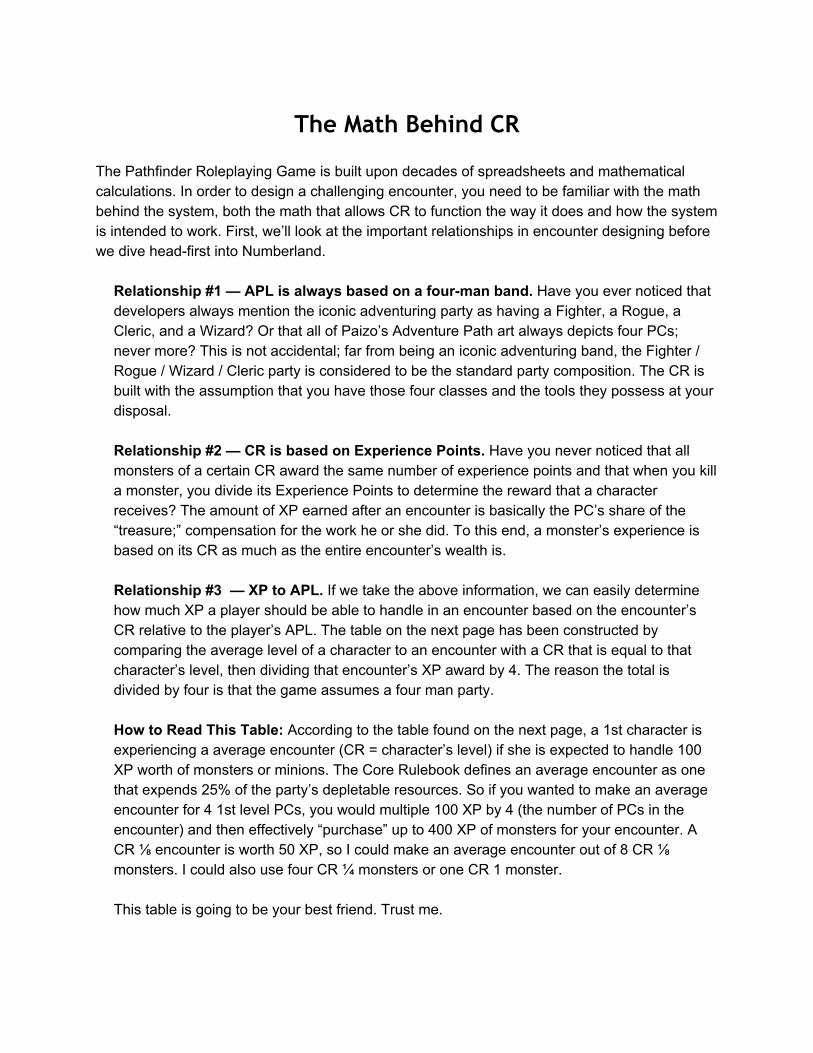
Relationship #1 — APL is always based on a fourman band. Have you ever noticed that developers always mention the iconic adventuring party as having a Fighter, a Rogue, a Cleric, and a Wizard? Or that all of Paizo’s Adventure Path art always depicts four PCs; never more? This is not accidental; far from being an iconic adventuring band, the Fighter / Rogue / Wizard / Cleric party is considered to be the standard party composition. The CR is built with the assumption that you have those four classes and the tools they possess at your disposal. Relationship #2 — CR is based on Experience Points. Have you never noticed that all monsters of a certain CR award the same number of experience points and that when you kill a monster, you divide its Experience Points to determine the reward that a character receives? The amount of XP earned after an encounter is basically the PC’s share of the “treasure;” compensation for the work he or she did. To this end, a monster’s experience is based on its CR as much as the entire encounter’s wealth is. Relationship #3 — XP to APL. If we take the above information, we can easily determine how much XP a player should be able to handle in an encounter based on the encounter’s CR relative to the player’s APL. The table on the next page has been constructed by comparing the average level of a character to an encounter with a CR that is equal to that character’s level, then dividing that encounter’s XP award by 4. The reason the total is divided by four is that the game assumes a four man party. How to Read This Table: According to the table found on the next page, a 1st character is experiencing a average encounter (CR = character’s level) if she is expected to handle 100 XP worth of monsters or minions. The Core Rulebook defines an average encounter as one that expends 25% of the party’s depletable resources. So if you wanted to make an average encounter for 4 1st level PCs, you would multiple 100 XP by 4 (the number of PCs in the encounter) and then effectively “purchase” up to 400 XP of monsters for your encounter. A CR ⅛ encounter is worth 50 XP, so I could make an average encounter out of 8 CR ⅛ monsters. I could also use four CR ¼ monsters or one CR 1 monster. This table is going to be your best friend. Trust me.

Character LvL CR –1 CR +0 CR +1 CR +2 CR +3 CR +4 CR +5
01 50 100 150 200 300 400 600
02 100 150 200 300 400 600 800
03 150 200 300 400 600 800 1,200
04 200 300 400 600 800 1,200 1,600
05 300 400 600 800 1,200 1,600 2,400
06 400 600 800 1,200 1,600 2,400 3,200
07 600 800 1,200 1,600 2,400 3,200 4,800
08 800 1,200 1,600 2,400 3,200 4,800 6,400
09 1,200 1,600 2,400 3,200 4,800 6,400 9,600
10 1,600 2,400 3,200 4,800 6,400 9,600 12,800
11 2,400 3,200 4,800 6,400 9,600 12,800 19,200
12 3,200 4,800 6,400 9,600 12,800 19,200 25,600
13 4,800 6,400 9,600 12,800 19,200 25,600 38,400
14 6,400 9,600 12,800 19,200 25,600 38,400 51,200
15 9,600 12,800 19,200 25,600 38,400 51,200 76,800
16 12,800 19,200 25,600 38,400 51,200 76,800 102,400
17 19,200 25,600 38,400 51,200 76,800 102,400 153,600
18 25,600 38,400 51,200 76,800 102,400 153,600 205,800
19 38,400 51,200 76,800 102,400 153,600 204,800 307,200
20 51,200 76,800 102,400 153,600 204,800 307,200 409,600
Recapping the Process Let’s quickly review everything that we’ve gone over up until this point.
1. The reason most encounters sour is due to the Action Economy, which can be simplified as the number of actions that all characters participating in the combat can take. When the PCs have more actions than their opponents, encounters end quickly. 2. The Challenge Rating (CR) system is budgeted through XP and assumes that your party composes of four characters that can take actions. Because of this, the system is designed knowing that when a party faces off against a monster of appropriate APL, the players receive four times as many actions. This is why an encounter with a CR equal to a party’s APL is considered average difficulty; they often lack the sheer number of actions in order to match the party move for move and end up losing the combat because of it.. 3. Players split XP evenly when an encounter ends. Because of this, we can assume that players are mathematically expected to act and expend resources at a somewhat equal rate during an encounter; XP earned is literally compensation for actions taken and resources used during the day. 4. For all of the reasons listed above, we can divide the XP Award for a given CR by 4 to find the amount of XP that one player is expected to contribute to an encounter. These values are listed on the Chart provided above, based on the character’s level compared to the encounter’s CR.
Calculating a Player’s CR If you’re reading this guide, you probably want to learn how to challenge your players. In order to do that, you need to know how to determine the CR of your PCs. Seems like an abstract concept, right? Placing a CR onto your players when they’re not monsters that do your bidding? Well, you’ll be happy to know that is quite possible to do if you know the rules for determining the CR of humanoid opponents.
Class Levels: When determining a humanoid’s CR, use its total PC class level –1 as its CR. For example, a 5th level Fighter is a CR 4 encounter. For NPC classes, use its total NPC class level –2. For example, a 2nd level Commoner is a CR ½ encounter. Multiclassing NPC classes and PC classes is messy CRwise; avoid it if possible. Equipment: Your character’s equipment factors into its CR as well. If the character has NPC wealth appropriate for its level, its CR remains the same. If the character has no wealth, reduce its CR by 1. If the character has PC wealth, increase its CR by 1.
This means that if a character has all PC class levels and is equipped appropriately for a PC of its level, its CR equals its class level. This is why the wealth guidelines are so important; if you do not keep your PCs up to date with treasure, you actually reduce the quality of the challenges that your party can face because like the total number of players in your party, the game makes assumptions about how well equipped your players are.
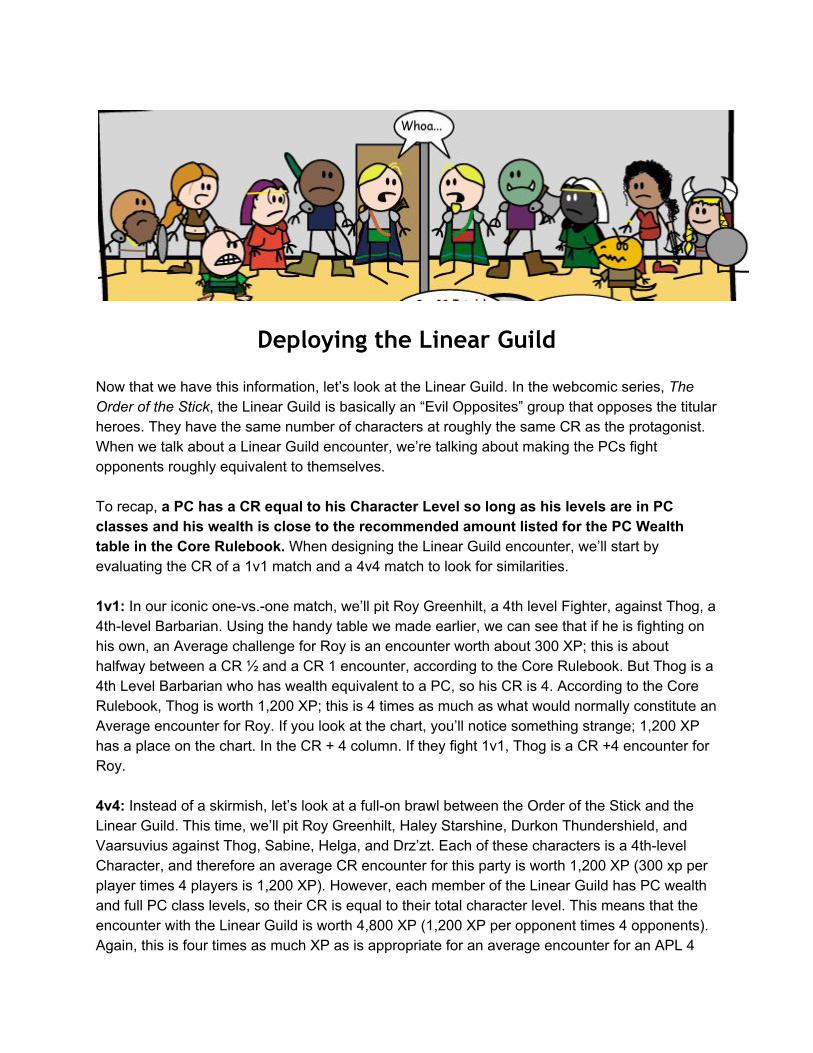
Deploying the Linear Guild Now that we have this information, let’s look at the Linear Guild. In the webcomic series, The Order of the Stick, the Linear Guild is basically an “Evil Opposites” group that opposes the titular heroes. They have the same number of characters at roughly the same CR as the protagonist. When we talk about a Linear Guild encounter, we’re talking about making the PCs fight opponents roughly equivalent to themselves. To recap, a PC has a CR equal to his Character Level so long as his levels are in PC classes and his wealth is close to the recommended amount listed for the PC Wealth table in the Core Rulebook. When designing the Linear Guild encounter, we’ll start by evaluating the CR of a 1v1 match and a 4v4 match to look for similarities. 1v1: In our iconic onevs.one match, we’ll pit Roy Greenhilt, a 4th level Fighter, against Thog, a 4thlevel Barbarian. Using the handy table we made earlier, we can see that if he is fighting on his own, an Average challenge for Roy is an encounter worth about 300 XP; this is about halfway between a CR ½ and a CR 1 encounter, according to the Core Rulebook. But Thog is a 4th Level Barbarian who has wealth equivalent to a PC, so his CR is 4. According to the Core Rulebook, Thog is worth 1,200 XP; this is 4 times as much as what would normally constitute an Average encounter for Roy. If you look at the chart, you’ll notice something strange; 1,200 XP has a place on the chart. In the CR + 4 column. If they fight 1v1, Thog is a CR +4 encounter for Roy. 4v4: Instead of a skirmish, let’s look at a fullon brawl between the Order of the Stick and the Linear Guild. This time, we’ll pit Roy Greenhilt, Haley Starshine, Durkon Thundershield, and Vaarsuvius against Thog, Sabine, Helga, and Drz’zt. Each of these characters is a 4thlevel Character, and therefore an average CR encounter for this party is worth 1,200 XP (300 xp per player times 4 players is 1,200 XP). However, each member of the Linear Guild has PC wealth and full PC class levels, so their CR is equal to their total character level. This means that the encounter with the Linear Guild is worth 4,800 XP (1,200 XP per opponent times 4 opponents). Again, this is four times as much XP as is appropriate for an average encounter for an APL 4

group. And interestingly enough, a CR 8 encounter is worth 4,800 XP according to the Core Rulebook. Even more interestingly, this example perfectly follows the High CR Equivalencies table in the Core Rulebook, which states that adding four monsters of the same CR increase the encounter’s CR by 4. In this case, four CR 4 characters makes a CR 8 encounter overall. Aside from being a useful tool for calculating how much a party can handle, this validates that the CR system is designed for a 4Person party. If we take all of the information from the Linear Guild exercise, then it tells us that if you want to design an encounter where the PCs are evenly matched to their opponent, the encounter needs to have a CR equal to APL +4. At this point, the opponents should be able to match the PCs one for one in terms of resources, and only when you get to APL +5 encounters do the odds truly start to stack against the PCs mathematically speaking. This gives us a platform with which to base our challenging encounters.
Revenge of the Recap Let’s review some key information that we’ve discussed so far in this guide.
1. The reason Boss Monsters do not work is that they cannot keep up with the PCs in terms of action economy. In order for them to have a staying chance, they need to have powerful abilities and raw numbers that the PCs cannot keep up with, which leads to short, decisive encounters instead of epic, challenging encounters. 2. APL +4 represents a CR where the players and their opponents are evenly matched. As you increase the encounter’s CR beyond this point, the odds slide more and more towards the opponent’s favor. 3. The CR system was originally designed assuming that you have a fourperson party.
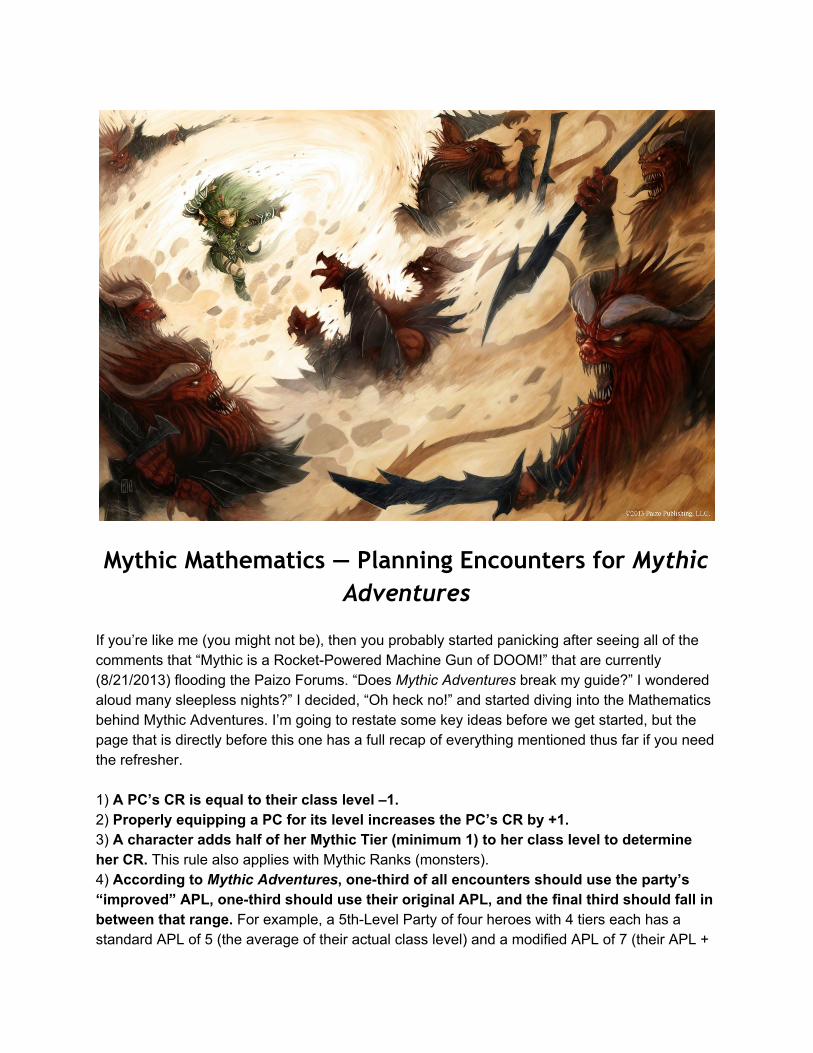
Mythic Mathematics — Planning Encounters for Mythic Adventures
If you’re like me (you might not be), then you probably started panicking after seeing all of the comments that “Mythic is a RocketPowered Machine Gun of DOOM!” that are currently (8/21/2013) flooding the Paizo Forums. “Does Mythic Adventures break my guide?” I wondered aloud many sleepless nights?” I decided, “Oh heck no!” and started diving into the Mathematics behind Mythic Adventures. I’m going to restate some key ideas before we get started, but the page that is directly before this one has a full recap of everything mentioned thus far if you need the refresher. 1) A PC’s CR is equal to their class level –1. 2) Properly equipping a PC for its level increases the PC’s CR by +1. 3) A character adds half of her Mythic Tier (minimum 1) to her class level to determine her CR. This rule also applies with Mythic Ranks (monsters). 4) According to Mythic Adventures, onethird of all encounters should use the party’s “improved” APL, onethird should use their original APL, and the final third should fall in between that range. For example, a 5thLevel Party of four heroes with 4 tiers each has a standard APL of 5 (the average of their actual class level) and a modified APL of 7 (their APL +
½ of their Mythic Tiers). According to the book, onethird of the encounters should assume that the player’s APL is 5, onethird should assume an APL 7 party, and onethird should assume an APL 6 party (somewhere between those two). 5) In accordance with #4, you should be varying encounters up in order to properly challenge your foes. For example, you can use a Challenging encounter (+1 CR) appropriate for the PC’s actual level (CR 6 in the above example), they’re Mythic level (CR 8), or somewhere in between (CR 7). In order to pull this off, we need some sort of baseline to work from when designing Mythic Adventures. Although it never was reprinted in the Pathfinder Core Rulebook, an old 3.5 Edition book (I believe it was the DMG) mentioned that on average, it takes 13 ⅓ encounters in order to reach a new level assuming that 50% of your encounters are of an appropriate APL, and the rest are whatever you feel like. Its not the best jumping point, but its good enough for what we’re going to discuss. So, if we take the 13 ⅓ encounters number as factual (its entirely opinionbased) then we can dissect that number down into two smaller parts: APL appropriate encounters and APL varied encounters. In this case, we have 6 encounters that should have a CR equal to your APL, 6 encounters that should be varied, and 1 or 2 leftover encounters that should go wherever you feel like. This first chart takes this information and places it in a dapper table. And yes, I am aware that I am neither British nor qualified to use the word “dapper” in a sentence. For this exercise, we’re assuming that your party is a 5th Level party of four players.
APLAppropriate (NonMythic, 50%) Six CR 5 encounters
APLVaried (NonMythic, 50%) Six encounters, ranging from CR 4 to CR 8.
Leftover 1 to 2 encounters (any)
Nothing new on the above table. But let’s take those values and apply them to Mythic Adventures using the four facts from the Core Rulebook and Mythic Adventures that I stated above. Like the NonMythic exercise above, we’re assuming that your players are comprised of four 5th Level adventures, but we’ll also use 2 Mythic Tiers each when calculating CR..
APLAppropriate (Mythic, 50%) Two CR 5, Two CR 6, Two CR 5 to 6.
APLVaried (Mythic, 50%) Two Encounters ranging from CR 4 to CR 8
Two Encounters ranging from CR 5 to CR 9 Two Encounters ranging from CR 4 to CR 9
Leftover 1 to 2 encounters CR 4 to CR 9
So, how does this all affect you as the GM? It doesn’t. Not much, anyway. The real draw to Mythic Adventures is that it allows you, as the GM, to throw bigger challenges sooner at your players, and eventually it will allow them to combat unspeakable horrors and realityshaking evils. Mythic is designed to let you play a whole new calibur of hero, and if you implement Mythic expecting to keep the status quo, you’ll be disappointed. I’m going to end this section by dispelling some Mythic Myths. 1) Mythic PCs will destroy everything in their wake. They certainly will if you don’t challenge them. Remember anywhere from ⅓ to ⅔ of your encounters should now be a CR higher ALL THE TIME. You know that CR 12 dragonandboggard encounter we wanted to throw at our PCs earlier on the guide? If your PCs are Mythic, that encounter could be a maximum of a CR 13. Now all of you people who complained about me wanting to throw 20 frog people at my players can rejoice because all of those frog people now got ONE EXTRA CLASS LEVEL! They’re living large and in charge! Or better yet, they all got PC WEALTH! Your players want treasure? MAKE THEM DIE FOR IT! In addition, Mythic Tiers do not improve your Base Attack Bonus, so you might actually miss some of those really high AC monsters considering that even though you’re Mythic, your APL is still 4 levels lower than your opponent’s CR. 2) Mythic PCs are unkillable. This is a common misconception. Mythic PCs receive no bonuses to saving throws outside of daysperuse powers and a couple of really handy, really expensive magic cloaks. This means that most Mythic PCs are going up against ungodly horrors with some cool abilities, but they’re still easily affected by the nasty powers of those High CR creatures. This does cause Mythic encounters to be firefights, but let’s face it, aren’t the highpowered battles the coolest part of movies like Sparta and Clash of the Titans? Before you complain about Mythic, remember what Mythic is trying to help you emulate: the Mythic Greek and Roman heroes of old. In addition, Mythic Tiers do not improve your AC outside of a handful of cool Guardian Path abilities, so those high CR monsters that you’re now fighting will probably get to attack you on
their turn.

Designing Effective Boss Encounters Boss encounters are iconic to Roleplaying Games; everyone has fond memories of twentyminute encounters against RPG behemoths like Sepiroth or Lady Yunalesca and it is only natural to want to plan encounters such as these for your roleplaying game. The truth of the matter, however, is that doing so is exceptionally difficult because of the Action Economy. Your precious Boss Monsters either need to overpower the PCs drastically with defenses that are difficult or impossible to penetrate (see: Tarrasque) or one of the following happens: the boss monster goes down with a whimper or the PCs are utterly annihilated in a matter of turns. So no, I am not telling you to build APL +4 dragons for your boss monsters. That’s punishing and cruel, and your PCs aren’t likely to overcome that encounter, especially after a long dungeon. Instead, flesh out your encounters and add minions. Let’s look at a classic encounter against a dragon. For simplicity’s sake, we’ll say that the Dragon we want to use has a CR of 11 and the party has a CR of 10; the dragon is a little bit tougher than the PCs, but not by much. Now, we don’t want this encounter to be easy for the PCs, so we decide to bump up the encounter’s CR to 14; this is the party’s AP +4, which we have discussed is the “magic number” for a balanced combat between both sides. On his own, the CR 11 dragon is worth 12,800 XP. Our target goal, CR 14, has an XP budget of 38,400 XP.
After subtracting the dragon from our budget, we have 25,600 XP to work with. Let’s say we’re working with a Green Dragon. Green dragons live in swamps, so we decide to look for some relatively weak monsters to try and even out the action economy. I am a fan of boggards, so maybe the Green Dragon is being worshiped as a living god by a local boggard tribe. You’ll notice that I picked a humanoid race; this is simply because humanoids are easy to customize and their CR is easy to calculate. For example, if I build a bunch of 4th level boggard fighters and equip them as appropriate for 4th level PCs, each boggard has a CR of 4. A CR 4 boggard is worth 1,200 XP, so some quick division reveals that I can purchase 21 CR 4 boggards and only have 400 XP left over; I can either discount that, add some random swamp animals to the combat (after all, the green dragon might have empathy with the swamp’s serpents or the boggards might have giant frogs as mounts), or spend it on a trap or natural hazard. You might be asking yourself, “You could have afforded two dragons. Why didn’t you buy a second dragon instead of an army of easytokill frog people?” The answer, my friends, is Action Economy. As much work as it might be for you to track, you have the action economy if you are fighting with 22 opponents (one dragon, plus 21 boggards). A typical party has four adventurers. Each adventure will typically have nine spaces adjacent to it, meaning a total of 36 creatures can attack the party at once in melee. Your players will be surrounded and swarmed. Their movement will be restricted, least they provoke an attack of opportunity. Not every party member will have the AC of a god; some will be wizards and rogues and even the CR 4 boggard would have a chance to hit them. And every creature has a 5% chance of automatically hitting with a natural 20; simple math states that by restricting how the PCs move and by pulling resources away from the dragon, the boggards are more of a hassle and make the encounter challenging without making it impossible in the way that two dragons might. This is just one example of how you can make an encounter more difficult by working the Action Economy in your favor.
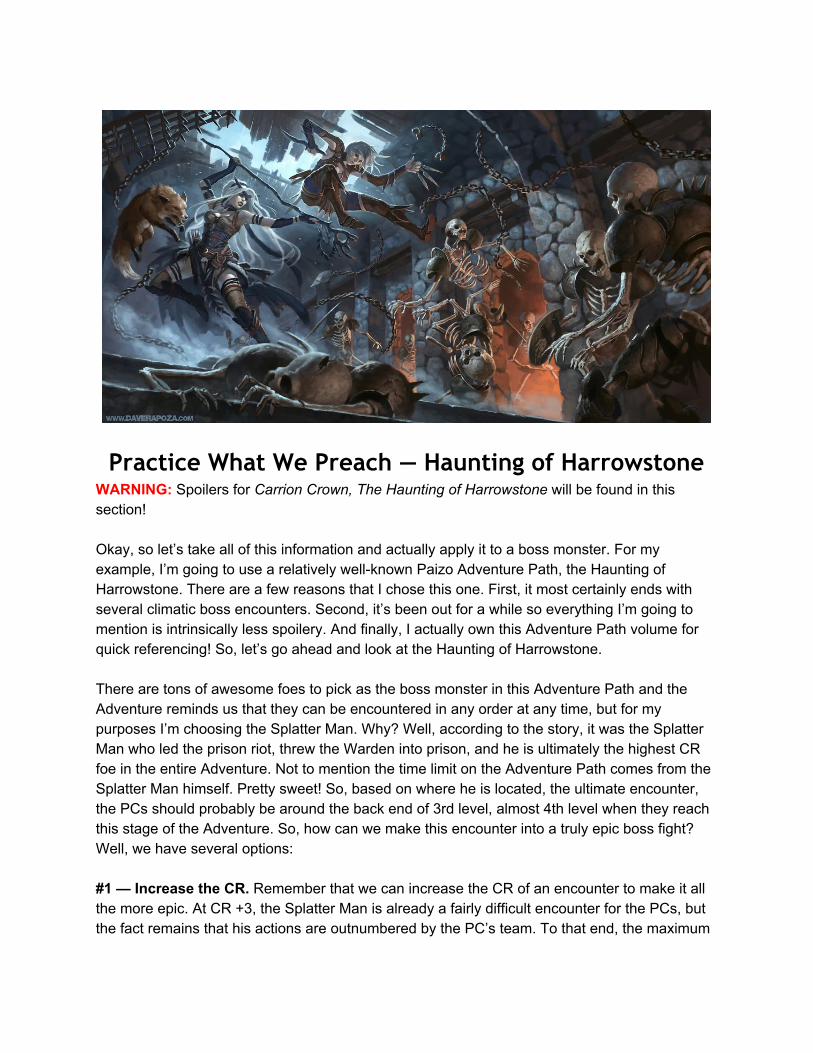
Practice What We Preach — Haunting of Harrowstone WARNING: Spoilers for Carrion Crown, The Haunting of Harrowstone will be found in this section! Okay, so let’s take all of this information and actually apply it to a boss monster. For my example, I’m going to use a relatively wellknown Paizo Adventure Path, the Haunting of Harrowstone. There are a few reasons that I chose this one. First, it most certainly ends with several climatic boss encounters. Second, it’s been out for a while so everything I’m going to mention is intrinsically less spoilery. And finally, I actually own this Adventure Path volume for quick referencing! So, let’s go ahead and look at the Haunting of Harrowstone. There are tons of awesome foes to pick as the boss monster in this Adventure Path and the Adventure reminds us that they can be encountered in any order at any time, but for my purposes I’m choosing the Splatter Man. Why? Well, according to the story, it was the Splatter Man who led the prison riot, threw the Warden into prison, and he is ultimately the highest CR foe in the entire Adventure. Not to mention the time limit on the Adventure Path comes from the Splatter Man himself. Pretty sweet! So, based on where he is located, the ultimate encounter, the PCs should probably be around the back end of 3rd level, almost 4th level when they reach this stage of the Adventure. So, how can we make this encounter into a truly epic boss fight? Well, we have several options: #1 — Increase the CR. Remember that we can increase the CR of an encounter to make it all the more epic. At CR +3, the Splatter Man is already a fairly difficult encounter for the PCs, but the fact remains that his actions are outnumbered by the PC’s team. To that end, the maximum
you are going to want to raise the encounter of this CR to is probably CR 7, an increase of +1 CR. The reason for this is that any higher and you’re really pushing yourplayers’ ability to be prepared for the encounter. As a CR + 4 encounter, our table shows us that we have 800 XP per player to work with, for a total of 3,200 XP. The Splatter Man himself is worth 2,400 XP, for a total of 800 extra XP to make the encounter more challenging for the players. #2 — Reduce the Splatter Man’s CR. Never forget that you can make the encounter “harder” by nerfing your boss monster. In this case, we could apply the young creature template to the Splatter Man but not actually change his physical appearance. Give him all of the adjustments of this template without actually changing his physical description. For example, you don’t need to describe the Splatter Man as being the size of a halfling in order to apply the penalties for being small to him. Maybe his attacks are feeble having breached this far into Harrowstone. Maybe you just don’t show your players what kind of dice you’re rolling. Regardless, the Splatter Man’s CR is now CR 5, meaning he is worth 1,600 XP. This means you freed up 800 XP to worth with, just like in the first example. So regardless of which of my two suggestions you took, we now have 800 XP to work with. (Isn’t mathematics AWESOME?!) So, you might be asking yourself, “What sort of monsters can I use to make this encounter more challenging?” I thought you’d never ask. So the question is, how miserable do you want to make your players using those 800 XP? Here are some pointers: Pointer #1 — NO UNDEAD. How many of you were like, “NO WHY?!” Here’s the reason: using undead will NOT affect your player’s action economy if they have a character capable of channeling positive energy. And I’m willing to bet that 90% of parties going through this Adventure Path will have channel energy. “The undead horror Adventure? Um, yeah. Need a cleric.” This means that said channel energy character can hurt your boss monster AND the undead in the same manner, and because you only have 800 xp, they’re likely to kill your extra monsters on Turn 1 with no difficulty with channel energy. Mathematically speaking they have a 50% chance to do so, so don’t pick things that share the Splatter Man’s weakness. Pointer #2 Pick cheap monsters with defenses against the players that aren’t impossible to kill. I cannot stress this enough. You need to pick monsters that can defend against most of the player’s attacks and take a hit or two, but can ultimately be killed. Why is that? Because if your monsters cannot be killed somewhat easily, your players are less likely to waste time trying to kill them. But if they have no defenses, your players will destroy lowlevel foes. You want to shoot for monsters that will survive for two to three rounds on average. Taking two to three rounds away from your players is plenty when making a challenging encounter. Don’t be greedy. So, who are our candidates for good monsters? Well, here’s my personal pick: Blood of the Splatter Man: So for the first choice, I looked in the Carrion Crown Bestiary. One of the monsters you can find there is the Sanguine Ooze Swarm. As a Tiny swarm, it provides

delicious benefits like the distraction ability (make your casters cry!), automatic damage if you are in its space, a chance to become staggered just for being in its space, and on top of all this, it takes half damage from all weapon attacks and can’t be directly affected by spells that declare a target. At this stage of the Adventure (Hint: the end), your spellcasters aren’t likely going to have many area attacks left, meaning that your fighters are going to need to effectively deal 14 damage to the ooze in order to break it up. That’s actually challenging at 3rd level. To make matters worse for your players, the ooze literally steals away their actions during a round. Adding more than one ooze swarm might be overkill, but it is a surefire way to damage your player’s action economy during the Splatter Man encounter.
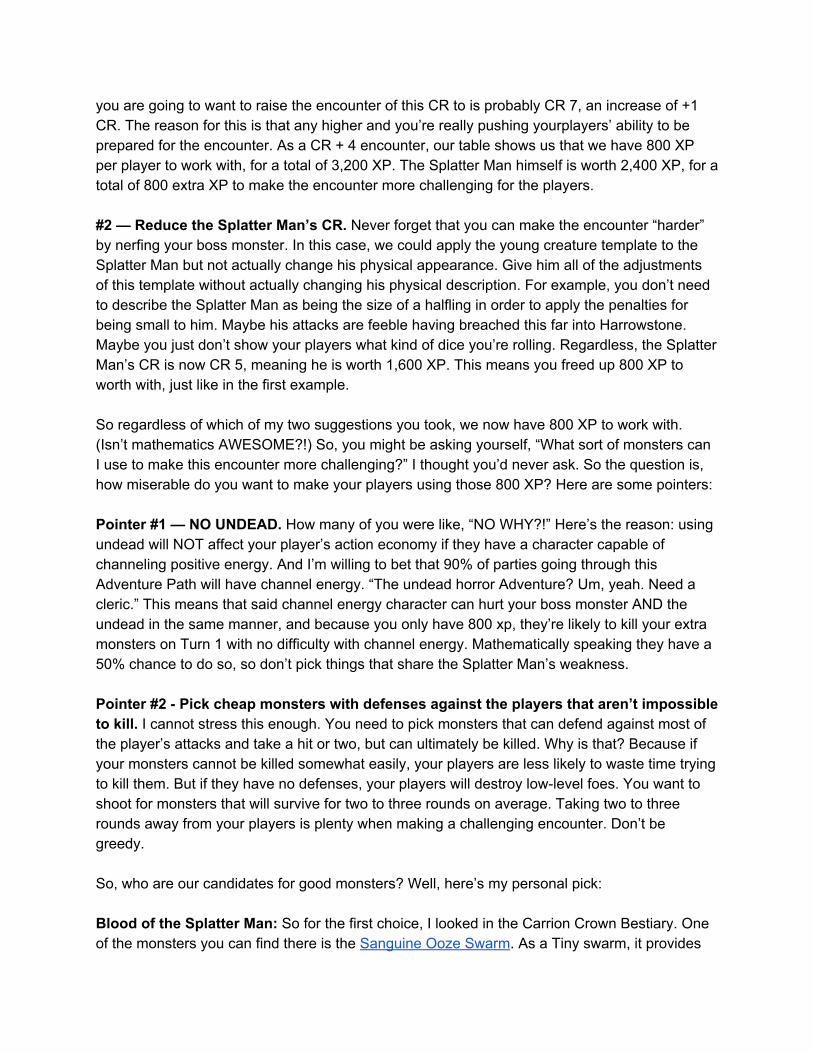
Gruesome Entry: Since Carrion Crown is all about horror, I wouldn’t start the encounter with all of the oozes being attackable. Instead, add the ooze at the bottom of initiative during a round a player A) deals damage to the Splatter Man or B) is dealt damage by the Splatter Man. Use creepy imagery such as, “The moment your blood touches the air, it quivers. The Splatter Man grins as your red ichor enters his area of influence and your blood animals into hundreds of small, amorphous blobs that swarm the room, attempting to siphon even more of your blood from your withering veins.”
How Many: At 135 XP per swarm, it might be tempting to throw all of your XP into oodles of ooze swarms. I wouldn’t recommend this. While you’ll get an impressive four to five swarms don’t so, having that many ooze swarms is bound to agitate and frustate your players. Because of all of the negative effects the oozes have, it’ll quickly grow from a challenging encounter to a punishing encounter. I don’t recommend more than two ooze swarms unless you have a party that is very well equipped to dealing with oozes and/or swarms. Monster 2 — Ectoplasmic Elemental: Also from Carrion Crown’s own bestiary is the Ectoplasmic Creature template. The reason I choose elemental is for flavor purposes; it makes a lot of sense for an ectoplasmic, amorphous creature to appear from nowhere. At CR 2, its a relatively strong choice weighing in at a hefty 600 XP. Slashing weapons are popular, so the DR / slashing will not be extremely powerful. The elemental’s Hit Dice drop from d10s to d8s, but it gains 1 extra hit point per Hit Die, which offsets this somewhat. More importantly, if you pick Fire Elemental, you get to keep the burn attack, which is pretty sweet. I would explain this creature as a giant manifestation of boiling, ectoplasmic blood to match the oozes’ theme and basically use it to try and debuff as many PCs as possible with the shaken condition using its horrifying ooze attack while putting on the hurt with burn. Having the elemental go after lowarmored, lowWill save foes is key, because its attack bonus is going to be pretty terrible and you want to make them shaken if possible.
How Many: You can afford no more than one.
In short, I would use the Splatter Man’s theme of blood to expand upon the encounter. Although it goes over my XP limit by 70 points, I would throw two sanguine ooze swarms and an ectoplasmic fire elemental at my foes in addition to the Splatter Man. These monsters are immune to most of the weaknesses of the Splatter Man and can challenge the opponents who are most likely to hurt him, enemy spellcasters. The encounter gives martials who might not be able to hurt incorporeal creatures something to do while forcing spellcasters to rely on martial
characters to save their bacon; getting caught in the area of an ooze will have a high chance to shut down a spellcaster (or even a martial) and getting struck by the elemental causes a fair amount of damage (potentially up to 2d4+1) with the chance of inflicting the shaken condition onto the target. These changes do not make the encounter impossibly hard, and your players will still have a fair chance at defeating them. What they do accomplish, however, is making the encounter longer, more challenging, and require more teamwork while making the overall experience more memorable.
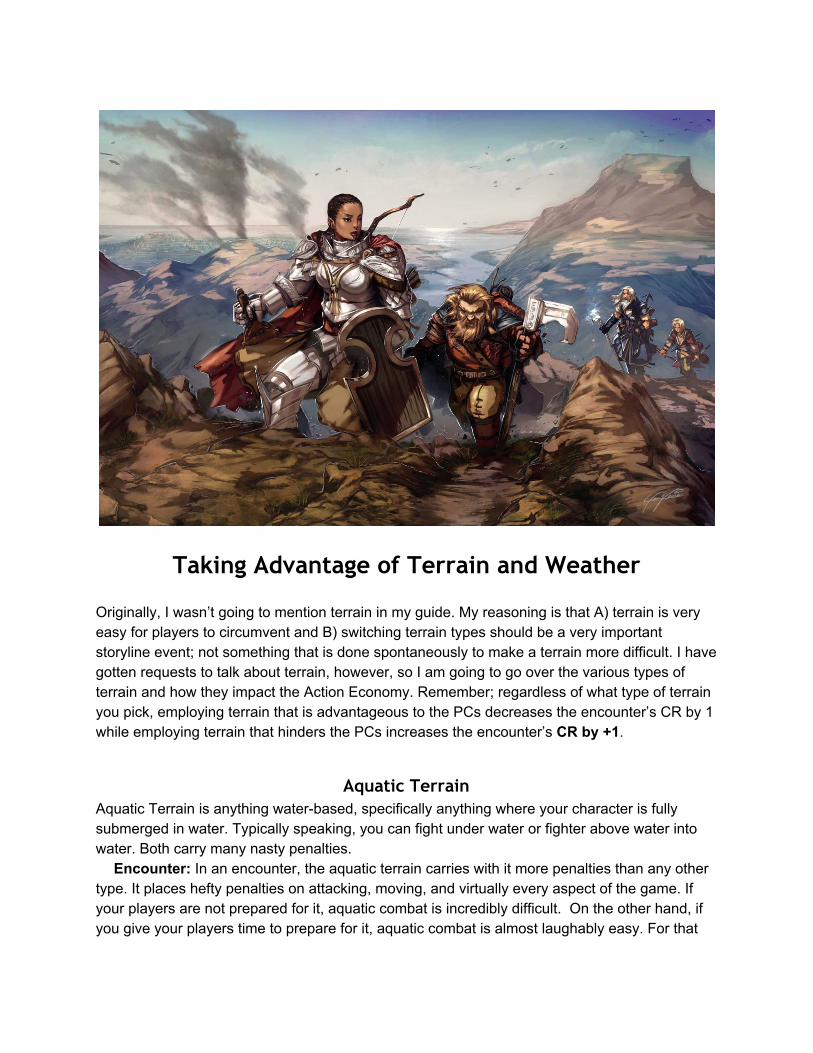
Taking Advantage of Terrain and Weather Originally, I wasn’t going to mention terrain in my guide. My reasoning is that A) terrain is very easy for players to circumvent and B) switching terrain types should be a very important storyline event; not something that is done spontaneously to make a terrain more difficult. I have gotten requests to talk about terrain, however, so I am going to go over the various types of terrain and how they impact the Action Economy. Remember; regardless of what type of terrain you pick, employing terrain that is advantageous to the PCs decreases the encounter’s CR by 1 while employing terrain that hinders the PCs increases the encounter’s CR by +1.
Aquatic Terrain Aquatic Terrain is anything waterbased, specifically anything where your character is fully submerged in water. Typically speaking, you can fight under water or fighter above water into water. Both carry many nasty penalties.
Encounter: In an encounter, the aquatic terrain carries with it more penalties than any other type. It places hefty penalties on attacking, moving, and virtually every aspect of the game. If your players are not prepared for it, aquatic combat is incredibly difficult. On the other hand, if you give your players time to prepare for it, aquatic combat is almost laughably easy. For that
reason, I recommend treating Aquatic terrain as other types of terrain too. Add an underwater forest of kelp and run it like a forest or underwater caves for the benefit of poor lightning. Many players will forget that they are all fighting in a three dimensional battlefield underwater, so use swimming above or below your PCs to your advantage. Perhaps the most dangerous (and smartest) tactic that a GM can rely on is the ability to remove a player’s precious underwater survival tools while underwater. Dispel magic changes from an inconvenience to literally fatal spell, especially if your players didn’t think to prepare multiple uses of water breathing. For extra destruction, dispel the characters capable of casting water breathing first. Trying to cast a spell while underwater and unable to breath requires a monstrously high concentration check, after all. If you don’t kill your spellcasters outright, you force them to waste an entire turn casting water breathing again in order to prevent their own deaths while rewarding the characters smart enough to prepare a 4th level silent water breathing spell. This will be a trick that works once on them, but never, ever again and feels awfully cheap when your player dies in this manner. Still, you wanted challenging, right?
Bog/Marsh/Swamp Terrain This type of terrain is any sort of watery environment that is landbound and no more than several feet deep. Unlike aquatic terrain, bogs can be incredibly nasty because most players won’t think to prepare specific spells to deal with this type of terrain. Going underwater? Of course you brings bunches of water breathing with you. Going into a swamp? Pssst, no, why would I need THAT spell! In short, use aquatic terrain for story and bog terrain to actually challenge players with water.
Encounter: Bogs are a waking nightmare. Its true. They reduce your movement speed by half if you’re Medium or larger and they force you to swim through part of it if you are Small or smaller. In addition, ambushing in a swamp is childs play, and entire species of animals evolved to utilize this tactic. Prime example: crocodiles. When using bogs to their fullest, capitalize on their ambushing power alongside their difficult grounds. Remember that most bogdwelling animals can hold their breath longer than your players can and will literally attempt to grapple and drown enemy players as their combat tactic. Everything from crocodiles to lizardfolk should be using this strategy; grab them and use the fact that they can hold their breath longer than you to drown you. For crocodiles, they’ll go after whatever is noisiest / closest / shiniest but creatures like lizardfolk are intelligent and will hide out in the muck, waiting to ambush unsuspecting PCs. Like always, when ambushing go for the lightly armored / physically weaker guys first and snuff’em out so you can swarm the tougherlooking opponents. This is a very common tactic and isn’t metagaming against your wizards, although they certainly won’t feel like gods when they’re pinned under several feet of mud, choking to cast a spell while a lizardfolk is smashing their skull into the ground.
Terrain: Never forget two things about a bog—trees and quicksand. The ground is not your friend, and while it is mean, having your lizardfolk / boggards identify quicksand and position themselves so there are pits of it between them at the opponents they are attacking is an excellent combat strategy. At this point, you are controlling your player’s ability to act by either forcing the twohanded greatswordtotting fighter who notices the quicksand to feebly waste his
rounds doing pitiful damage to you and your cover bonus in the trees or you control your player’s ability to act by tricking them to charge into quicksand. Bonus points if you are able to shoot them with Strengthsapping poison so they can’t escape.
Desert Terrain A desert is any place with an extremely low amount of rainfall. This means you can have cold deserts, but not snowy ones. This terrain is painful for characters who rely on armor, because both hot and cold deserts require a lot of endurance out of you as well as Acrobatics checks. As a result, you might be able to catch the party fighter pants down and armor off, so to speak.
Encounter: Reflex saves and Acrobatics checks are your weapons of choice here. From slippery ice to shifting sand, everything require Acrobatics checks to avoid falling prone. And guess what? Chances are that only your swashbuckling rogue PC took ranks in them, as most of the heavyarmored guys ignore Acrobatics because “that attack’ll never hit me” and most ranged characters and spellcasters chime in, “I’ll never be in melee range!” This is where you laugh as they fall on their faces. That said, deserts don’t alter an encounter as much as other types of terrain. Deserts shine when players visit them longterm.
Terrain: I’ll get this out of the way, don’t count on dehydrating your players in a desert. At least, not initially. If they’re prepared for it, they’re going to stock up on all of the water they can before heading out, and some of the savvy ones might even invest in a decanter of endless water. So instead, simply remind them to track the amount of water they have. People often forget that the recommended amount of water for daily consumption is 8 cups, or half a gallon of water. Half a gallon of water weighs a lot, so your players probably won’t carry too much of it or they’ll rely on the party cleric to cast create water. So no, don’t count on dehydration. However, you can still use water to catch your players with their pants down. Start making your players make Will saves (DC 10 + the number of days in the desert) and describe in excrutiating detail how painful the lack of water is to the player regardless of the result. If they cave and drink water, “reward’ them with a description of how cool and refreshing it was to splurge like that. You’ll be surprised how quickly you’ll get into your player’s heads, and we haven’t even started talking about dunes yet!
Hot vs. Cold: Climate affects a desert more than anything else because of conditions like heat exhaustion and frostbite. Remember to roll Fortitude saves at the appropriate intervals, as you can easy slap the fatigued and sickened conditions on multiple party members at once, either forcing them to stop and rest (and thereby setting them up for an ambush) or force them to eat major penalties for the rest of the day that only get worse. The DCs tend to be low, but boy do you feel them when you fail. Again, don’t count on this because of relatively easy DCs. In hot deserts, your PCs are going to be assaulted from below by burrowing creatures and at night. Capitalize on their need to rest and initiate surprise attacks when they are most vulnerable. In contrast, enemies are going to often adapt themselves to usually frigid environment by using camouflage and staying in the sun during the day and retreating to warmer dens and burrows at night. Players could easily camp in a creature’s den and enter a Goldilocks scenario, except the Three Beats are cornering them in the dank cave.
Forest Terrain Forest terrain is any place with lots of trees. Doesn’t matter if its thin or thick, hot or cold, or any tree filled place in between. Forests have a lot of unique potential when designing encounters if they are used correctly, namely, they allow both players and enemies that are able climbers to fight in three dimensions somewhat easily while making it more difficult to fly in using a fly spell, assuming that your forest is dense.
Encounter: Like marshes and bogs, forests are excellent places to set up ambushes. Forest creatures often get just as many bonuses for hiding in the woods as marsh creatures do, and depending on a number of factors forests can be deadly places. Namely, forests with a high tree density will make your players cringe. This is somewhat cumbersome to do well, as you have to be comfortable with drawing a large number of trees on your map. But when you do, trees provide many unmentioned benefits. Their thick branches will often easily provide cover or concealment to any enemies hiding within them while providing little to no benefit to the PCs being pelted with arrows, bullets, or bolts. In addition, a high tree density can make flying in trees nearly impossible and it isn’t a far stretch to give fliers the blinded condition while trying to fly in a forest’s canopy. For this reason, most flies are restricted to below the branch line or above it, making them easy prey. Climb speeds and Climb bonuses are pivotal in the forest, and luckly for you as a GM, Climb is up there with Swim as one of those skills players never take. Unlike Swim, there are far less ways to acquire a Climb speed. And many players often choose to ignore extremely useful spells like spider climb once fly is acquired.
Terrain: Forest terrain can often be incredibly dark in regions where trees grow densely together, even during the middle of the day. This in part depends on where your forest is located and what sort of trees grow there, however. For example, don’t expect to play the lowlight card if you are playing in a forest of pine trees, those branches don’t spread wide enough or thick enough to blot out the sun. That is, unless they were impossibly tall pine trees. Remember that it is difficult to charge in a forest, especially when the ground is covered in roots, and anyone who has ever been hiking will agree that it is very practical to require Acrobatics checks to move across the ground while running or charging. Finally, don’t forget that when we’re talking about attacking from the trees, the attacker is always going to receive a higher ground bonus, which is also a very nice perk.
Hot vs. Cold: Both temperatures can be very effective when combined with forests. Hot forests are usually jungles, and they have tons of unique roles for running them. Cold forests are a little bit less punishing, but a double whammy of a snowstorm plus a forest can quickly lead to lost, unsuspecting PCs. In short, jungles are going to affect your encounters much more than cold climates will, but both of them have nasty ways to soften up your PCs if they plan on staying for a long time.
Hills Terrain (In Progress) You can get the High Ground bonus pretty easily in Hill terrain, but this is really the terrain to use if you want to pelt a meleefocused party with ranged attacks. Steep hills are difficult to climb and will cause unbalanced martial types (hint: all of the ones who don’t wear plate) to tumble down. Smart archers will be ducking down over the ledge to get total cover (or
concealment) against pesky spellcasters who are trying to pelt them with rays. Remember that you have the terrain on your side when you are a ranged character fighting on the hills. Also remember that having one archer who is able to identify spellcasters and interrupt them by using a readied action to shoot a spellcaster who starts making somatic gestures is an effective counter to even the most studious of wizards. So yes, Hills terrain can be very, very nasty if your players are the ones being attacked downhill.
Mountain Terrain (In Progress) Mountain Terrain doesn’t affect the Action Economy much, but it can be incredibly challenging to fight in nevertheless. Mountain Terrain is at its most difficult when you deal with one of two types of monsters; monsters with fly speeds and monsters with burrow speeds. The reason these monsters are so effective against PCs in Mountain Terrain is due to the simple fact that Mountains focus on the vertical axis rather than the horizontal axis; that is, they stretch up rather than spread across. Landbased PCs are going to struggle when fighting flying enemies especially, as the enemies will have full maneuverability while PCs are severely limited in where they can move, the sheer distance will often prevent full attacks as the PCs rely on readied actions to take down their foes. Naturally, this is not a concern for a rangedfocused character or a party with access to fly, which is why a truly challenging encounter is going to have ways to nullify magical or supernatural flight. A mountain’s natural hazards include avalanches and slipping off ledges to your death; while the consequences of these hazards are especially fatal, at the same time there isn’t much a player can do about them. Players will often complain that encounters that use Mountain Terrain to create a challenge are exceptionally cheap; especially when the villain grabs their PCs and tosses them off a mountain.
Plains Terrain (In Progress) Plains terrain is the absolute worst place for you to challenge your players. Its small, flat, and there isn’t much you can challenge them with. Sink holes are common in the plains, as are tall grasses for hiding, but ultimately your players will bore of this quickly and both of these conditions can be fixed without penalty to a spellcaster by 3rd level spells (fly and fireball respectively). The plains offers no counters to the “gamechanging spells,” namely fly, and most creatures can’t hide well in the plains. The best way to use the plains is to use the PCs’ confidence against them. This is the place to ambush them with bandits who are clearly out of the player’s league, dragon attacks, and so on. Basically, use plains if your party is already over their heads and you don’t want to punish them even further with terrain.
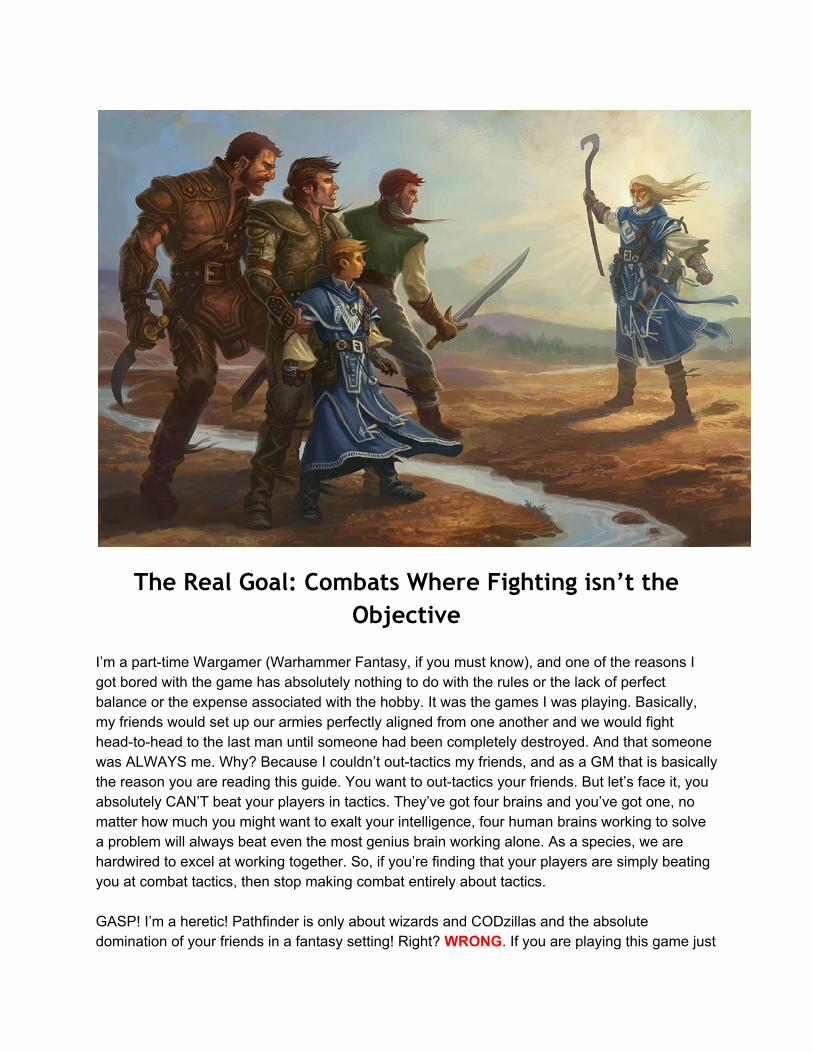
The Real Goal: Combats Where Fighting isn’t the Objective
I’m a parttime Wargamer (Warhammer Fantasy, if you must know), and one of the reasons I got bored with the game has absolutely nothing to do with the rules or the lack of perfect balance or the expense associated with the hobby. It was the games I was playing. Basically, my friends would set up our armies perfectly aligned from one another and we would fight headtohead to the last man until someone had been completely destroyed. And that someone was ALWAYS me. Why? Because I couldn’t outtactics my friends, and as a GM that is basically the reason you are reading this guide. You want to outtactics your friends. But let’s face it, you absolutely CAN’T beat your players in tactics. They’ve got four brains and you’ve got one, no matter how much you might want to exalt your intelligence, four human brains working to solve a problem will always beat even the most genius brain working alone. As a species, we are hardwired to excel at working together. So, if you’re finding that your players are simply beating you at combat tactics, then stop making combat entirely about tactics. GASP! I’m a heretic! Pathfinder is only about wizards and CODzillas and the absolute domination of your friends in a fantasy setting! Right? WRONG. If you are playing this game just
to absolutely destroy your players, you’re not playing the game correctly. I wish I could say that I was biased, but I’m not. Nowhere in this entire guide is this idea demonstrated better than here, in the “Combat isn’t the Objective” section, because welldesigned, intelligent, and equipped PCs will beat your planning when it comes to combat. But what if there was a wrench in the works? One of the best examples that I’ve ever read about this subject comes from Wizard’s of the Coast’s Book of Vile Darkness. In it, one of the sample villains generated for the PCs was an antipaladin who honestly wasn’t that tough. No healing, Level 10ish. Not a dangerous encounter. That is, until you read his tactics. You see, this antipaladin wore a belt of manacles. Don’t go looking in Ultimate Equipment either, that’s not a magic item. It was literally a nice adamantine belt with a bunch of manacles attached to it. And attached to every manacle, occupying all of his flanking spaces, were eight neardead children that he beat and tortured for his own amusement. And that right there is one of the hardest encounters in the game for a specific type of PC group. How do you hit him? The children provide him with a cover bonus to his AC against ranged attacks, worsened if your PCs don’t have precise shot. The children can’t be moved because of the belt (which might have been reinforced with arcane lock, if I remember right). Attacking him with anything less than a reach weapon would simply be useless, and he used a reach weapon himself. Upgrade him to Pathfinder, give him Selective Channeling, and he can nuke the party while making attacks of opportunity against the PCs who use their rounds trying to free the children. In the end, the best solution I’ve seen is to try and destroy those chains, but at that point you’re no longer fighting a “tactic” combat. You’re fighting a moral combat, and that is exactly how you can make your encounters challenging AND remove the focus from fighting. By making combats that mess with your PCs’ (and their players’) sense of morality. This isn’t something I can teach you, though. I gave you an awesome example, but now its up to you to figure out what buttons your PCs have to exploit. Even the coldest person has a button to press, and if they don’t or you don’t want to go there, maybe this isn’t the encounter type for you. But it is guaranteed to make a memorable, challenging encounter because instead of testing your players’ brains, you’re testing their hearts. Just don’t over do this one, or your players will flatout hate you. Unless you’re running a horrorthemed game, in which case stuff like this is part of the baggage.
Miscellaneous Tips and Tricks This section is not part of the guide itself, but here are some tips and tricks to solve your needs. 1. Be on the lookout for spells and abilities that increase the Action Economy in one of the teams’ favor. The biggest examples of these tricks are haste, slow, and time stop. Haste effectively gives a free movement action or an extra standard action when used to attack during a full attack action. Slow removes one action from its victims (either move or standard), and time stop gives a heap of extra actions to one specific player. These spells work for both the players and the GM and the game assumes that your players have access to these powerful spells at the appropriate levels. If you are using an enemy wizard, giving your monsters haste or debuffing your players with slow can turn a relatively easy encounter into a challenging one. 2. Take advantage of conditions that impact the Action Economy. Creatures that can paralyze, stun, stagger, or entangle opponents are wicked nasty because they hamper your player’s ability to contribute actions in the Action Economy. Here is a quick summary of underappreciated conditions and actions:
Entangled: Utterly destroys your enemy’s ability to use Move actions. Exhausted: Destroy your enemy’s battlefield mobility. Grappled: Limits an opponent’s ability to use Move actions and destroys a spellcaster’s ability to use Standard actions to cast spells. Even melee attackers have a hard time landing blows while grappled, and a nongrappled focus character is going to very stressed against a grapplefocused one. Nauseated: Take away your opponent’s ability to contribute anything to the Action Economy at all. Pinned: As grappled, but a million times worse for the pinned creature. Prone: Waste a Move action standing up; you take huge penalties to hit while prone and enemies have an easier time hitting you with melee attacks while you’re down. Most of the big monsters are meleebased rather than rangedbased. Staggered: Remove ⅓ of your target’s actions.
3. Make sure your PCs aren’t always buffed. This one seems like a nobrainer, but many new GMs forget to make sure that their PCs are tracking buff durations. Casting buffs before an encounter has its downsides; they can easily end prematurely in an epic encounter. As a general rule, round/level buffs will typically last one encounter, minute/level and 10 minutes/level
buffs will generally last two, maybe three encounters depending upon how quickly the PCs search the area or move onto their next challenge, and hour/level spells end up lasting for most of the day, especially when the PCs start getting to higher levels. If your players rely on buffs, take advantage of that with antimagic zone and good old dispel magic. 4. Dealing with Munchkins: Quick bit of info, I define a “Munchkin” as a player who utilizes system mastery to build a character who overpowers his character for a specific aspect of the game; usually, Munchkins are combatoriented. To me, there is a difference between someone who builds a strong character and someone who builds a Munchkin character; the Munchkin character typically has a very narrow focus and does not collaborate with the teamplay spirit of the game. Munchkins are typically concerned only with the performance of their own character and rather than excelling in their given situation, the Munchkin dominates it to the point where no one is having fun. The best way to tell if you’re dealing with a Munchkin who will negatively impact your gaming experience is to ramp up the difficulty of your encounters to compensate for his presence; nine times of out ten, a player with system mastery will rise to the challenge, but the Munchkin will cry foul that you are adapting to his character choices. Do not listen to these complaints; adaptation is literally the name of the GM’s game. Such complaints usually mean, “I designed my character to plow through anything you could do and you are taking that away from me.” Because remember, the Munchkin built his character to dominate your game. He doesn’t like being outdesigned. So, you’ve identified a Munchkin. What do you do? If this isn’t a player you wish to continue to game with, asking him to leave is an option. Sometimes this doesn’t work for political reasons. Since you’re reading this guide, I can assume you don’t mind adapting your game to problems such as this. As mentioned, using the Action Economy against the Munchkin is the most effective method to dealing with him. Take advantage of the Munchkin’s weaknesses in order to challenge him, and its okay if the Munchkin succeeds despite your attempts; you want to instill the idea that system mastery in terms of tactics is more enjoyable than building ridiculously powerful characters. Your highpowered game might only encourage the Munchkin, however, and honestly that’s not really a downside. HighPowered games are often the stuff of legend that gamers talk about for years to come, after all!
Tips for Countering Classes This section provides specific information that will help you counter specific PC class options. This section will only be expanded upon request, so if there is a specific class or option you want some advice countering, post in my thread and I’ll post an answer here!
Gunslinger Of all the new Pathfinder classes, I’ve personally found that the gunslinger is the hardest to counter. A gunslinger operates under three cardinal rules, which I will delve into here: 1> The Gunslinger uses a full base attack bonus. 2> The Gunslinger needs to hit their target’s touch AC, which is usually a low value. 3> Because the Gunslinger uses a high bonus to strike a low AC, the Gunslinger’s gameplay is based around taking penalties on attack rolls in order to increase its damage output through feats like Deadly Aim and Rapid Shot. Because of these three rules as well as how the gunslinger class operates, most gunslingers hit their maximum damage around 7th or 8th level. A competent gunslinger player is going to spend the first few levels grabbing Deadly Aim, Rapid Reload, and Rapid Shot, usually in that order because Rapid Reload is not important until 6th level or so when the gunslinger needs this feat in order to successfully make iterative attacks. Its at that point, when the gunslinger can make iterative attacks, that GMs usually start complaining about the gunslinger’s high damage potential. And if you think about it, this trend makes perfect sense. As your players get stronger, monsters generally get bigger, and big monsters typically have high natural armor and low Dexterity scores, leading to many monsters that you could hit as easily as the broad side of a barn. Add in the fact that taking penalties for multiple attacks doesn’t hurt the gunslinger as much as it hurts, say, the fighter, and it is easy to see why the gunslinger makes such quick work out of Single Monster encounters. Aside from the advice presented in this guide (Hint: minimize single monster encounters and never use them for climatic battles), the best way to deal with the gunslinger is to hit them in the numbers. Similar to the fighter, gunslingers are all about the extra numbers and attacks, so using creatures with damage reducing abilities will hurt your gunslinger player. Remember that the gunslinger is a Yojimbo; she basically shoots money at enemies with how expensive it is to buy or craft ammunition. Make sure your player is properly calculating how much those lead bullets cost to make and weigh. Players will quickly encumber themselves trying to stock up on too many bullets, and even if they have a bag of holding its still a move action to retrieve a stored item (this is especially noticeable for alchemical cartridges). Finally, incorporeal monsters are amazing choices against gunslingers as they typically have strong touch ACs thanks to the incorporeal trait that allows them to add their Charisma to their touch AC as well as their incorporeal defense that significantly reduces damage dealt to them. The Colour Out of Space
was the most challenging monster my gunslinger player ever dealt with!
Magus Many GMs struggle running a magus PC in their game because of the “Nova” effect. Ironically enough, are some of the absolute worst nova characters in the game. By definition, “Nova” means that you are spending a bunch of resources at once in order to produce a massive effect. A cleric using Channel Smite and a spellstored inflict serious wounds is novaing. A magus spellstriking with an intensified shocking grasp is not novaing. That’s just one spell. Countering a magus, however, is fairly easy if you remember the cardinal rule of the spellstrike class feature: the melee attack is an alteration of a specific type of spell. This means that casting the spell still provokes an attack of opportunity and if the attack of opportunity lands, there is a fairly good chance that the magus is going to lose the spell he or she is trying to cast. There are three ways around this that your magus play might (and should) employ: casting defensively, holding the charge, and what I am going to start calling, “spring casting.” Casting Defensively: When a spellcaster casts defensively, the spell doesn’t provoke an attack of opportunity, but the caster needs to make a concentration check to avoid losing the spell. The caster is more concerned with keeping their guard up against the dragon’s bite than getting the spell off successfully, in effect. If you’re allowing the Magus to cast those shocking grasps in combat without making him cast defensively, you’re essentially missing out on a chance to hurt the PCs’ action economy and drain resources from a player (a prepared spell and potentially the arcane points to recall it via spell recall). Holding the Charge: When you hold the charge, this essentially means that the player is casting the spell when its safe to do so and keeping the spell’s energy stored for later. The magus might cast the spell far away from enemies and then rush in to deliver the spell via spellstrike later. This is a fairly smart tactic and the only penalty a magi takes when using this tactic is the inability to use spell combat, gaining multiple attacks plus a free spellcasting. Even so, this does mean that your player is sacrificing some damage potential to make sure they don’t get clobbered or lose their previous spell, so in the end the tactics have stemmed the magus’s damage somewhat. ‘Spring Casting:’ Spell shoutout to Rey Garza for pointing this one out to me, Page 185 of the Core Rulebook notes that a spellcaster can deliver a touch spell as a free action at any point during the round that it is cast. This means that the player can cast a spell as a standard action, move up to his speed within range of an opponent, and then deliver the touch as a free action. Its a very neat trick (and one your magus player should certainly employ) but this comes with the same basic drawback as holding the charge; your magus is preventing any chance from taking damage or losing his precious spell in exchange for putting a cap on the amount of damage the character can do during the turn.
In a nutshell, the magus is powerful, but if used at full power the class is prone to taking attacks of opportunity in the face or losing its prepared spells. If the character wants to avoid these determinants, doing so is laughably easy at the cost of the character’s damage potential. Spending that move action to make sure the magus can deliver a touch spell safely instead of risking a full powered spell combat could potentially save your NPCs a bucketload of damage, and this is a perfect case of how that room full of boggards could save a black dragon’s life.
Zen Archer Monk If you haven’t heard of this character class before, Zen Archer is a monk archetype that heralds from the Advanced Player’s Guide, the oldest of archetype sources. The Zen Archer monk does exactly what its name suggests; it adapts the monk’s tool kit to function at range with a bow. Before I get started, I want to acknowledge that this is an incredibly powerful archer build. Archers in general are a strong character option because they generally receive more damageincreasing feats than martials do and thanks to a recent ruling that full round attack actions are also full attacks, the Zen Archer monk can benefit from all of them.
Summary Let’s summarize what you have learned here. 1. Boss Monsters are not effective encounters because the PCs have them beat in the number of actions that they can perform. This is known as the Action Economy. 2. XP and CR are related and the CR system makes several assumptions about the parties that face it, namely that four characters are present and each player shares the amount of resources depleted evenly. 3. Because the game assumes that players are sharing resources evenly and that there are four party members present, we can divide the total XP Award for a given CR by 4 to determine how much XP a character whose level equals the given CR is expected to contribute to a party. 4.The game is built with the assumption that the PCs will win an encounter, and it isn’t until CR +4 that the encounter is a fair fight between the PCs and their opponents. We can prove this because placing a party against a Linear Guild party is always a CR +4 encounter. 5. The most effective way to design challenging encounters is to overwhelm the action economy in the antagonist’s favor. When the enemies have more actions than the PCs or the PCs’ actions are restricted, encounters are challenging.


![Credits [multi]/1st Edition/3rd Party/Legendary Games...31 lippoth mythic cythnigot 31 41 mythic holer 25 93 lippoth mythic shoggti 33 135 lippoth mythic nyogoth 32 135 mythic bebilith](https://img.pdfslide.us/doc/110x75/60ab19574474a6253677524e/credits-multi1st-edition3rd-partylegendary-games-31-lippoth-mythic-cythnigot.jpg)


![Mythic PocketMod[Fixed]](https://img.pdfslide.us/doc/110x75/55cf85e4550346484b926db6/mythic-pocketmodfixed.jpg)