Embed Size (px)
Citation preview
Getting Started With JavaScript Blocks: Truth or Dare
Micro:bit Educational Foundation 2016 1
Truth or Dare
Overview The fifth project introduces the students programming multiple coding blocks for the micro:bit to use. A randomly generated statement of truth or dare is displayed on the screen following a input. LEDs are used to select the player.
.hex File Final version of the .hex file called “05 Truth or Dare.hex”
POS Reference Designs simple algorithms using loops, and selection i.e. if statements. (AL) Declares and assigns variables. (AB) Uses a variable and relational operators within a loop to govern termination. (AL) (GE) Uses logical reasoning to predict outcomes. (AL) Detects and corrects errors i.e. debugging, in algorithms. (AL) Creates programs that implement algorithms to achieve given goals. (AL) Understands that programming bridges the gap between algorithmic solutions and computers.(AB) Uses nested selection statements. (AL)
I can statements The students can:
• Display own patterns on the LEDs
• Create a randomly generated variable
• Use an IF…THEN…ELSE
• Run two programming blocks at once
• Display own patterns on the LEDs
Challenges A number of challenges could be based upon this basic task.
Add the number of player in the game and display who is playing.
Add different directions of the arrow.
Add an animation of the arrow spinning.
Add a score based system whether completed the truth or dare.
Next Steps Lesson 6 uses builds upon this project but builds the “magic 8” ball question game.

Getting Started With JavaScript Blocks: Truth or Dare
Micro:bit Educational Foundation 2016 2
Step by Step This program shows an arrow to select the player following a spin of the micro:bit. The user then presses the A button to see a randomly generated statement choosing from either Truth or Dare. The first stage is to create the arrow. From the basic option in the block menu, select the “show leds” block.
Drag the “Show leds” block onto the workspace and draw the pattern by clicking on the boxes that you want to light up. A red led indicates on.
Getting Started With JavaScript Blocks: Truth or Dare
Micro:bit Educational Foundation 2016 3
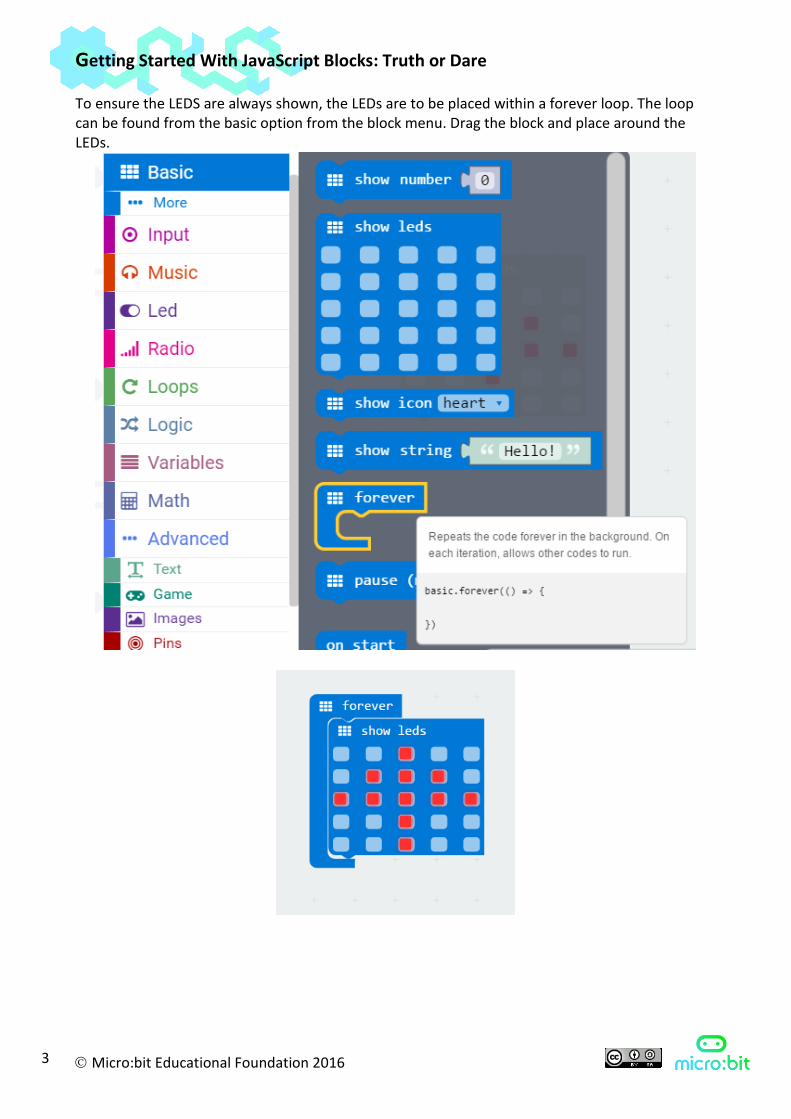
To ensure the LEDS are always shown, the LEDs are to be placed within a forever loop. The loop can be found from the basic option from the block menu. Drag the block and place around the LEDs.
Getting Started With JavaScript Blocks: Truth or Dare
Micro:bit Educational Foundation 2016 4
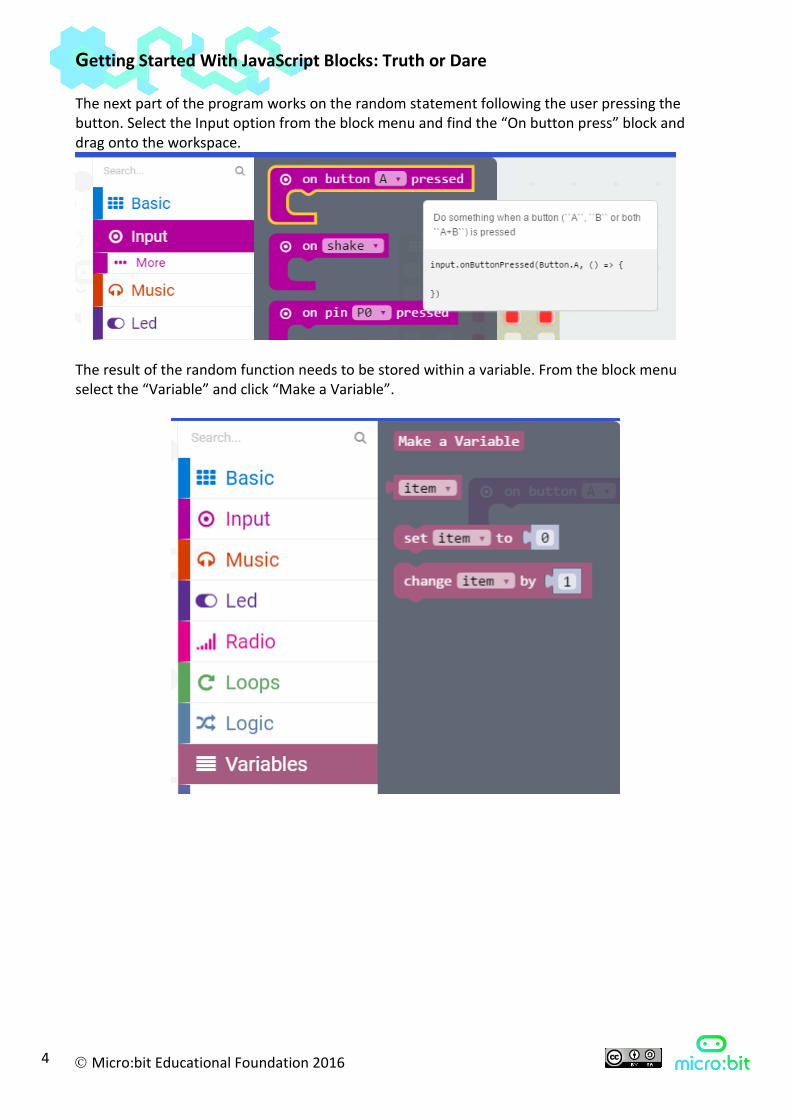
The next part of the program works on the random statement following the user pressing the button. Select the Input option from the block menu and find the “On button press” block and drag onto the workspace.
The result of the random function needs to be stored within a variable. From the block menu select the “Variable” and click “Make a Variable”.
Getting Started With JavaScript Blocks: Truth or Dare
Micro:bit Educational Foundation 2016 5
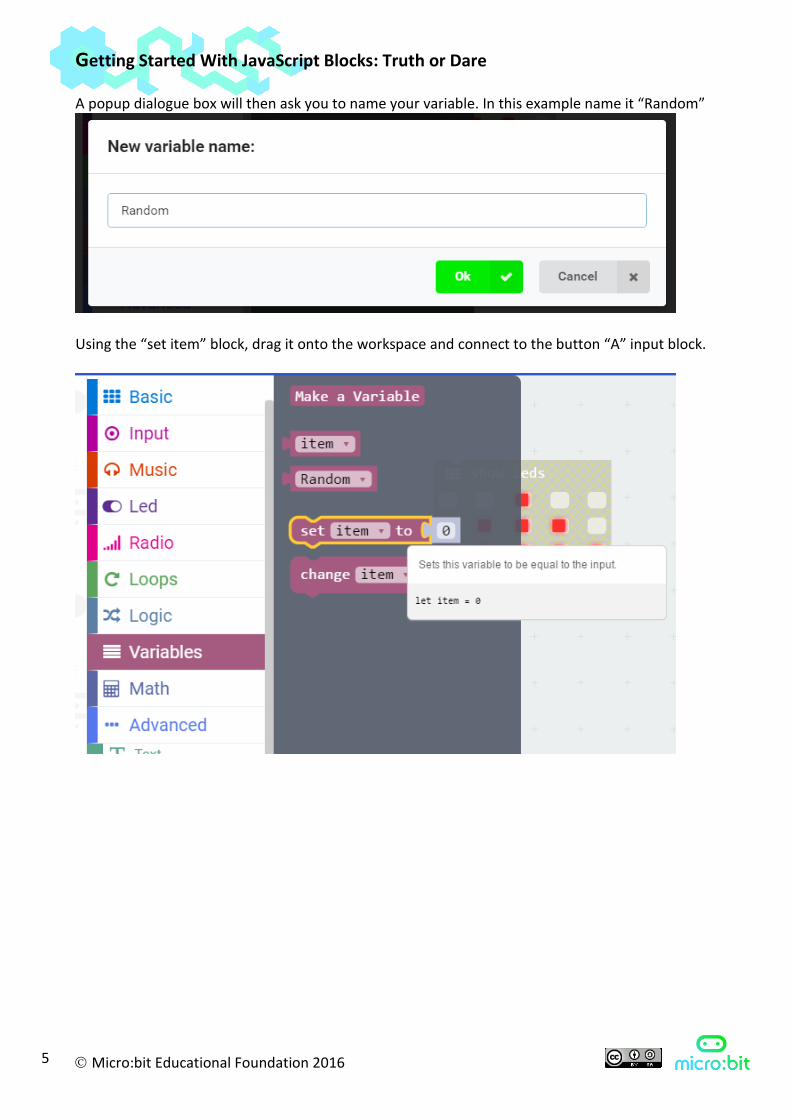
A popup dialogue box will then ask you to name your variable. In this example name it “Random”
Using the “set item” block, drag it onto the workspace and connect to the button “A” input block.
Getting Started With JavaScript Blocks: Truth or Dare
Micro:bit Educational Foundation 2016 6
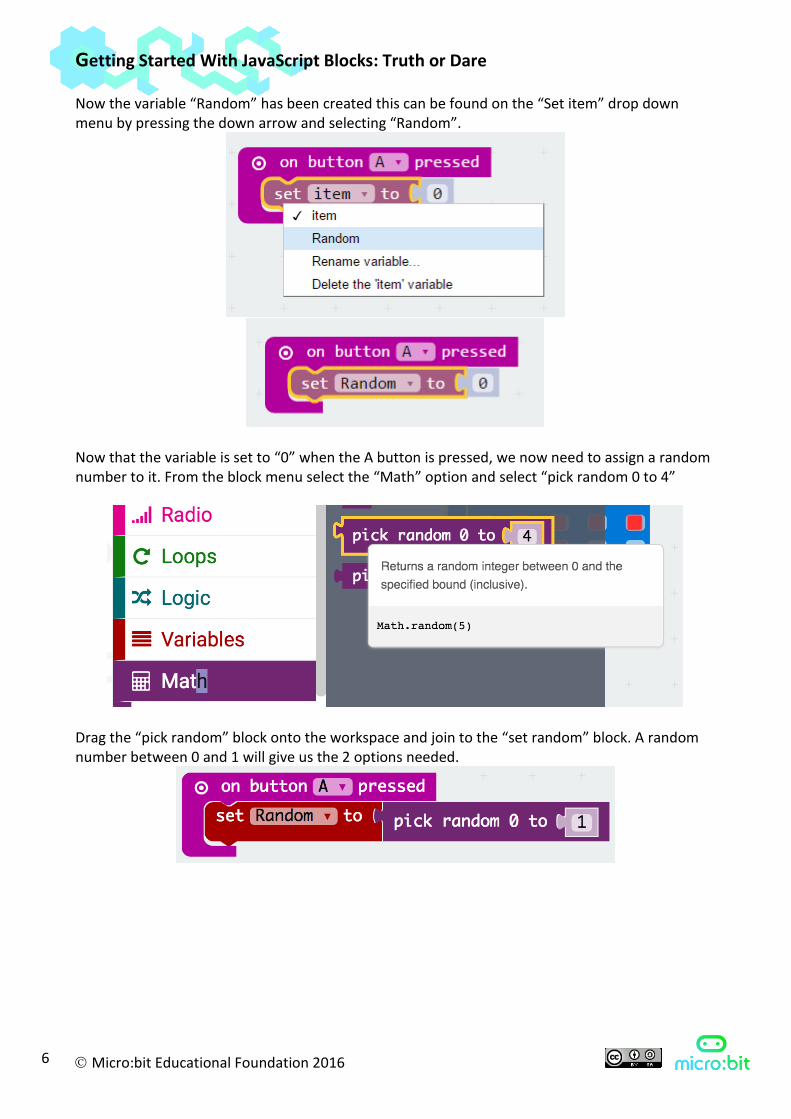
Now the variable “Random” has been created this can be found on the “Set item” drop down menu by pressing the down arrow and selecting “Random”.
Now that the variable is set to “0” when the A button is pressed, we now need to assign a random number to it. From the block menu select the “Math” option and select “pick random 0 to 4”
Drag the “pick random” block onto the workspace and join to the “set random” block. A random number between 0 and 1 will give us the 2 options needed.
Getting Started With JavaScript Blocks: Truth or Dare
Micro:bit Educational Foundation 2016 7
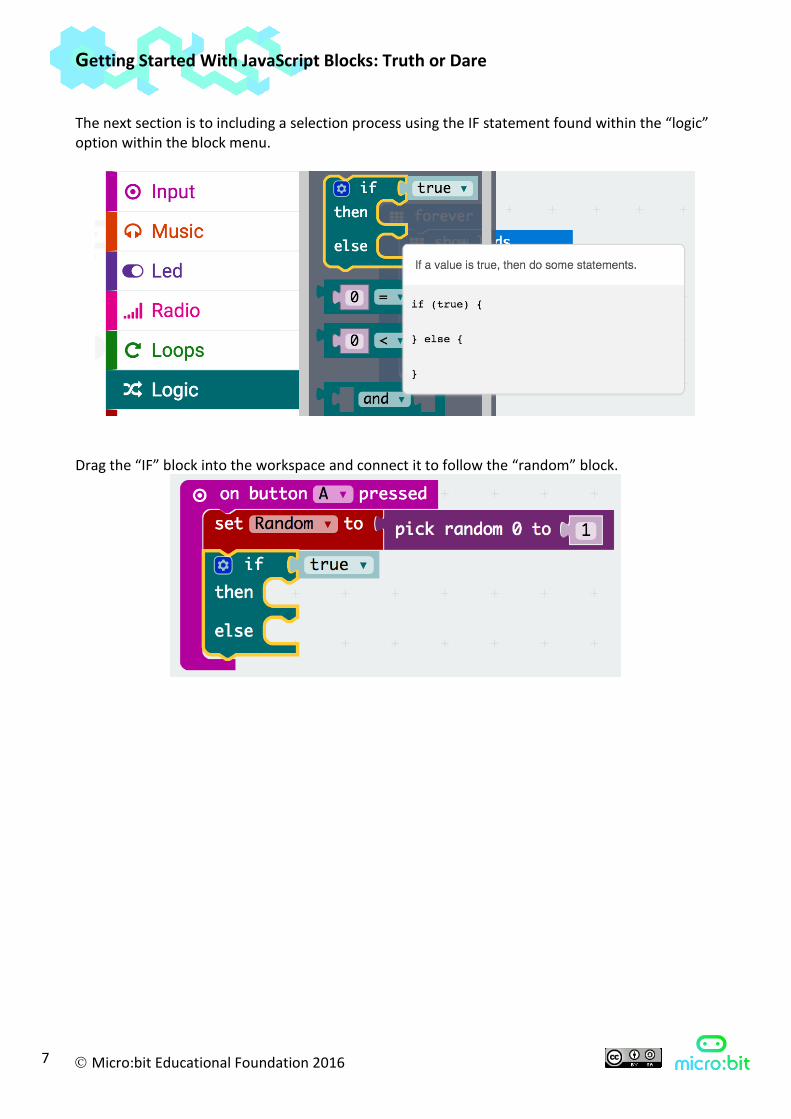
The next section is to including a selection process using the IF statement found within the “logic” option within the block menu.
Drag the “IF” block into the workspace and connect it to follow the “random” block.
Getting Started With JavaScript Blocks: Truth or Dare
Micro:bit Educational Foundation 2016 8
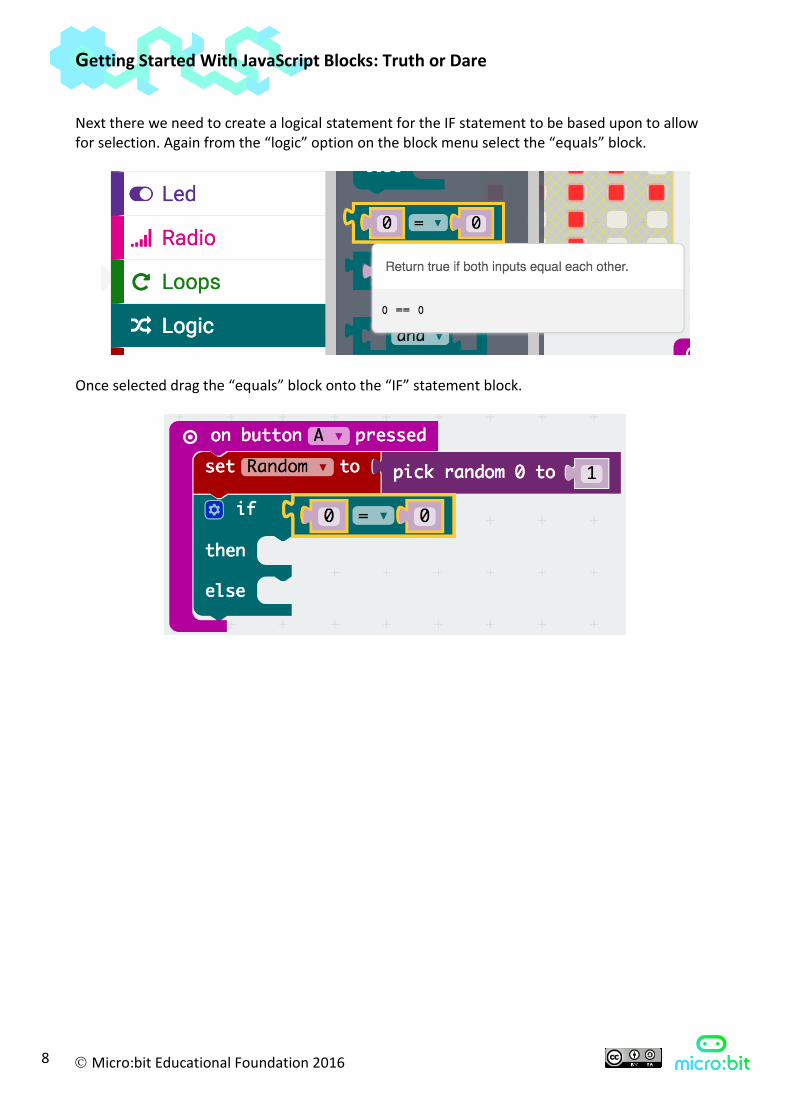
Next there we need to create a logical statement for the IF statement to be based upon to allow for selection. Again from the “logic” option on the block menu select the “equals” block.
Once selected drag the “equals” block onto the “IF” statement block.
Getting Started With JavaScript Blocks: Truth or Dare
Micro:bit Educational Foundation 2016 9
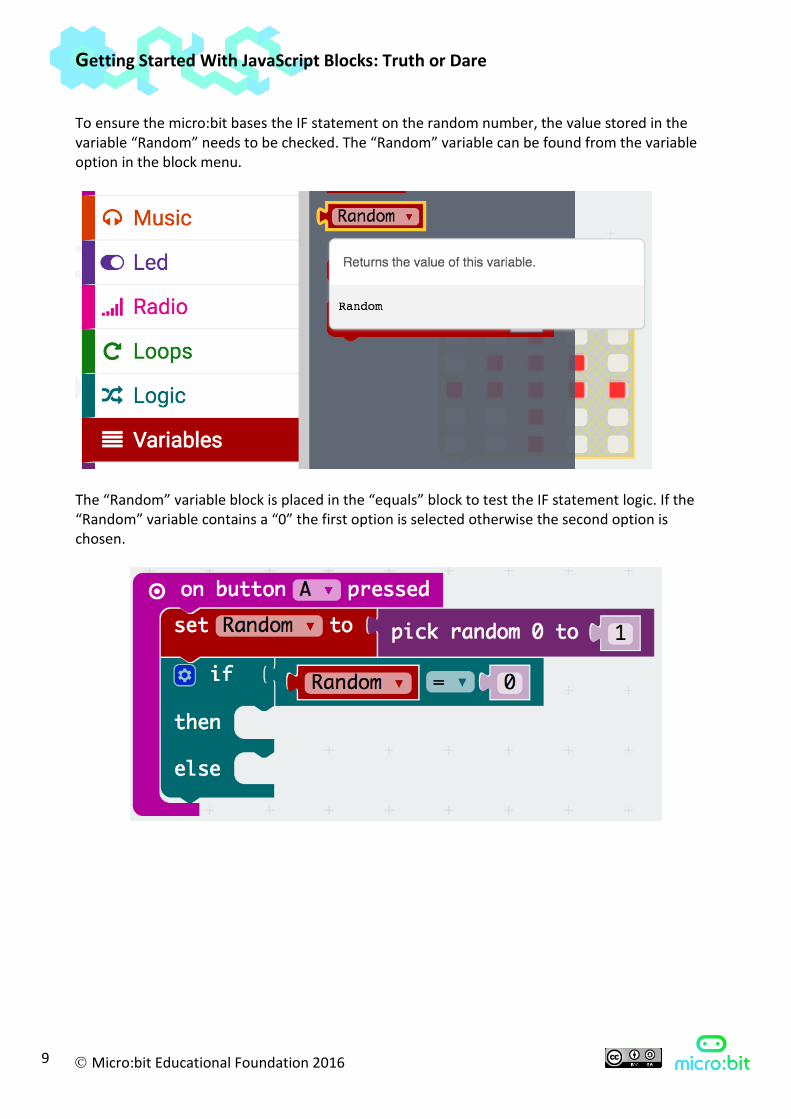
To ensure the micro:bit bases the IF statement on the random number, the value stored in the variable “Random” needs to be checked. The “Random” variable can be found from the variable option in the block menu.
The “Random” variable block is placed in the “equals” block to test the IF statement logic. If the “Random” variable contains a “0” the first option is selected otherwise the second option is chosen.
Getting Started With JavaScript Blocks: Truth or Dare
Micro:bit Educational Foundation 2016 10
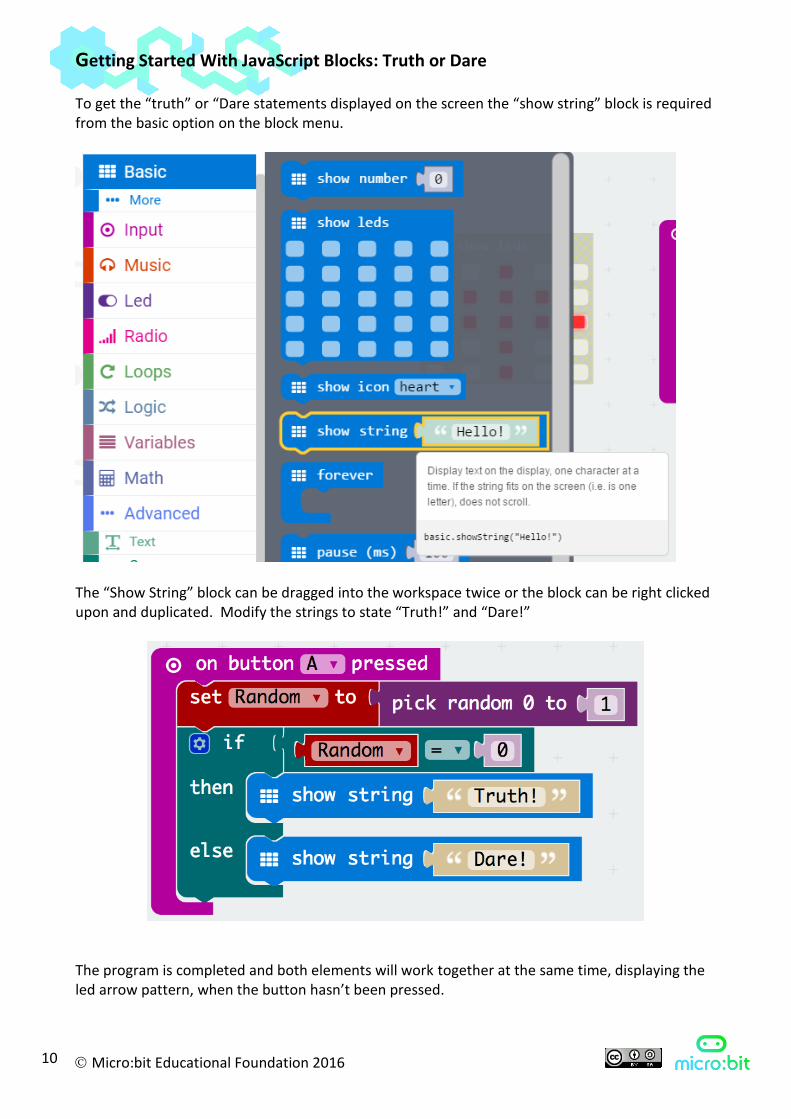
To get the “truth” or “Dare statements displayed on the screen the “show string” block is required from the basic option on the block menu.
The “Show String” block can be dragged into the workspace twice or the block can be right clicked upon and duplicated. Modify the strings to state “Truth!” and “Dare!”
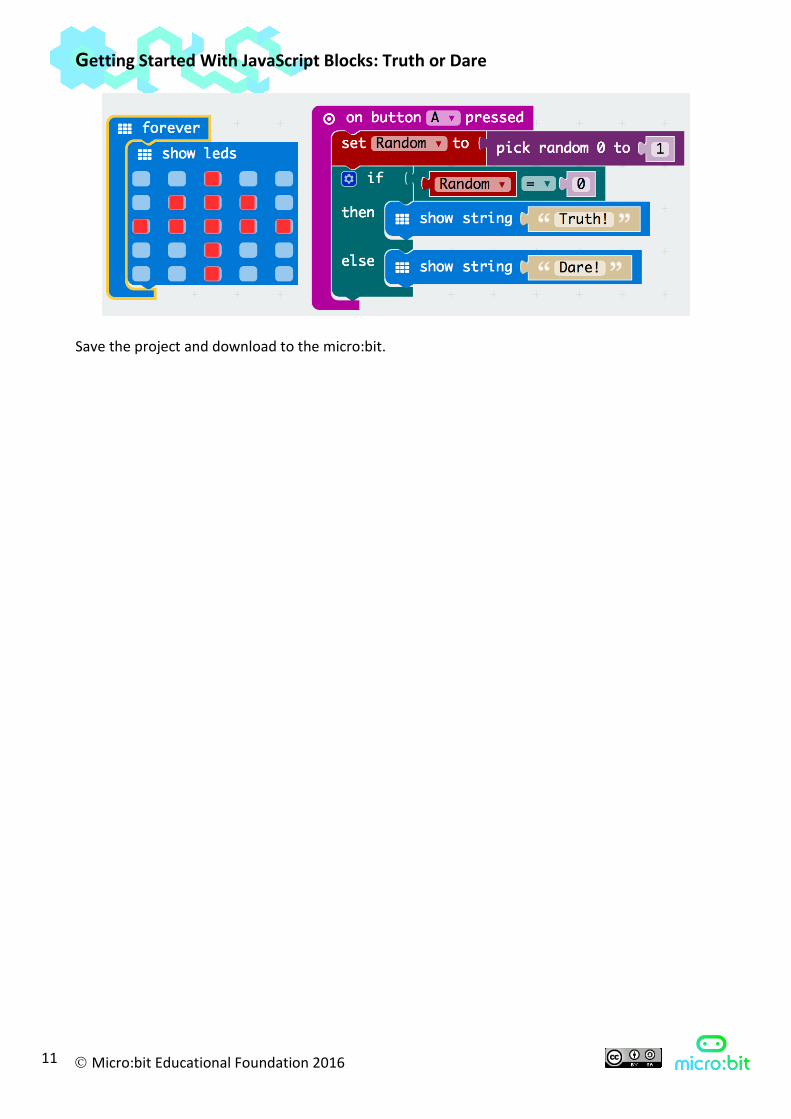
The program is completed and both elements will work together at the same time, displaying the led arrow pattern, when the button hasn’t been pressed.
Getting Started With JavaScript Blocks: Truth or Dare
Micro:bit Educational Foundation 2016 11
Save the project and download to the micro:bit.