Embed Size (px)
Citation preview
Getting Started with ClassroomA teacher’s guide to the Classroom app for iPad
Getting Started with Classroom | A teacher’s guide to the Classroom app for iPad | March 2016 2
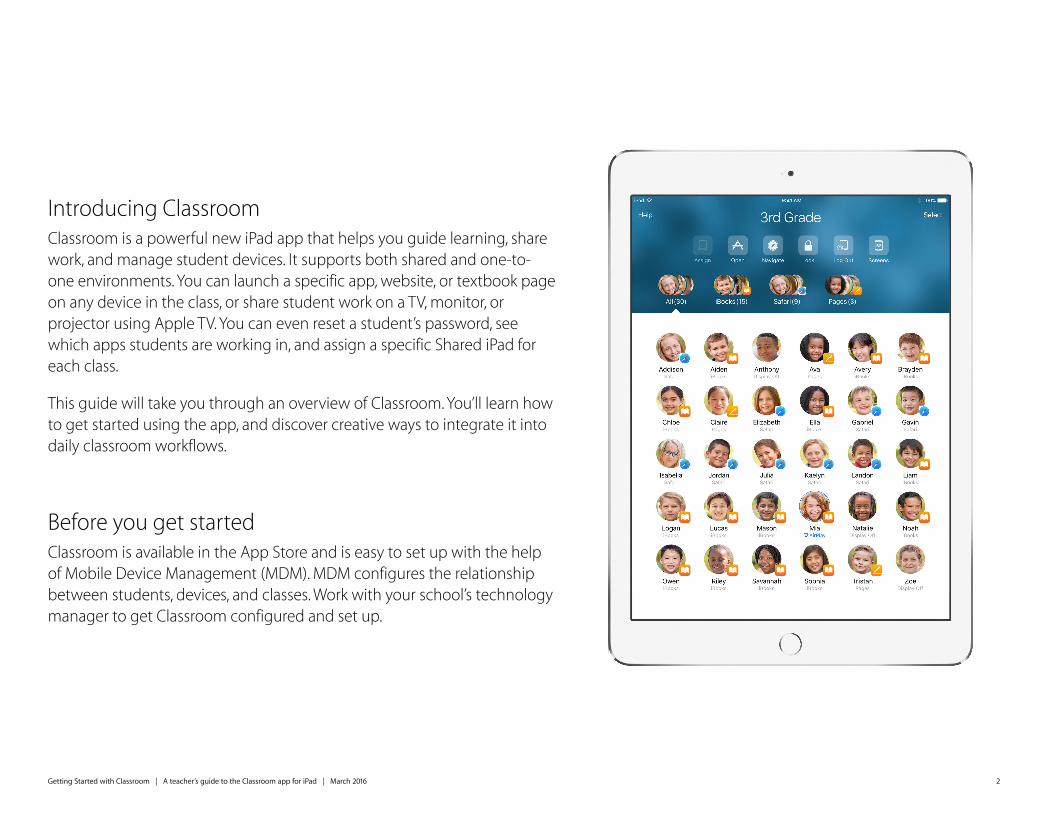
Introducing ClassroomClassroom is a powerful new iPad app that helps you guide learning, share work, and manage student devices. It supports both shared and one-to-one environments. You can launch a specific app, website, or textbook page on any device in the class, or share student work on a TV, monitor, or projector using Apple TV. You can even reset a student’s password, see which apps students are working in, and assign a specific Shared iPad for each class.
This guide will take you through an overview of Classroom. You’ll learn how to get started using the app, and discover creative ways to integrate it into daily classroom workflows.
Before you get started Classroom is available in the App Store and is easy to set up with the help of Mobile Device Management (MDM). MDM configures the relationship between students, devices, and classes. Work with your school’s technology manager to get Classroom configured and set up.
Getting Started with Classroom | A teacher’s guide to the Classroom app for iPad | March 2016 3
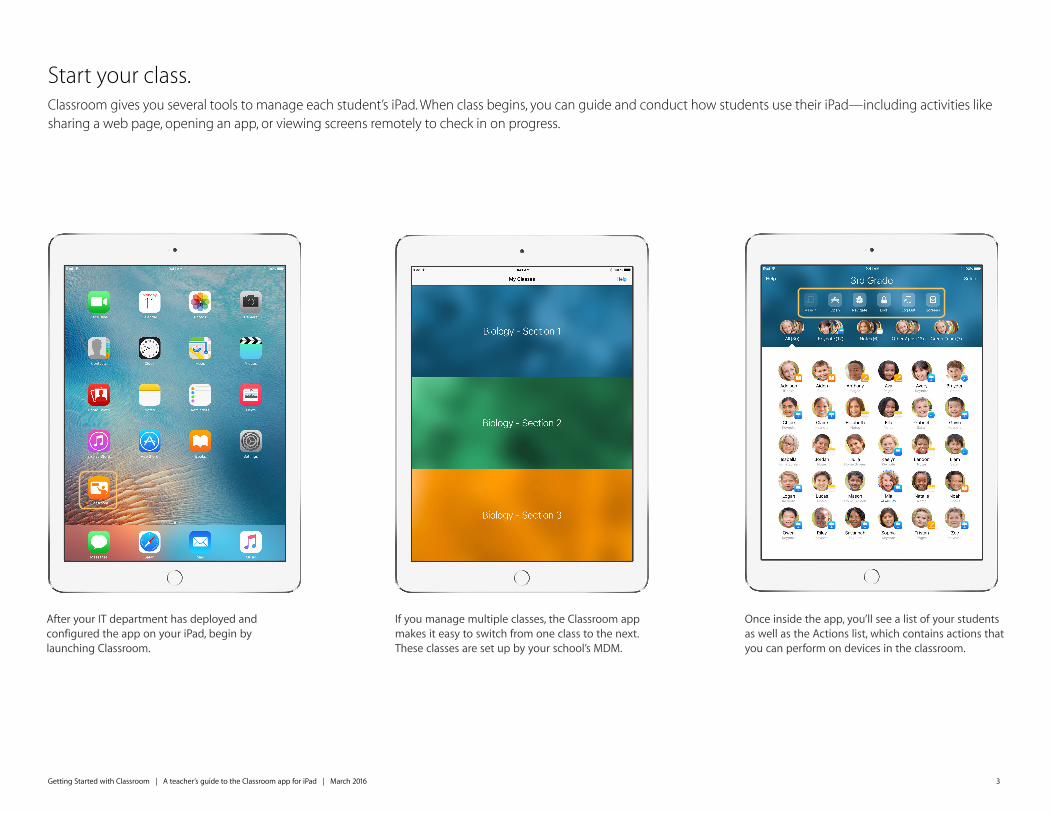
If you manage multiple classes, the Classroom app makes it easy to switch from one class to the next. These classes are set up by your school’s MDM.
Once inside the app, you’ll see a list of your students as well as the Actions list, which contains actions that you can perform on devices in the classroom.
Start your class.Classroom gives you several tools to manage each student’s iPad. When class begins, you can guide and conduct how students use their iPad—including activities like sharing a web page, opening an app, or viewing screens remotely to check in on progress.
After your IT department has deployed and configured the app on your iPad, begin by launching Classroom.
Getting Started with Classroom | A teacher’s guide to the Classroom app for iPad | March 2016 4
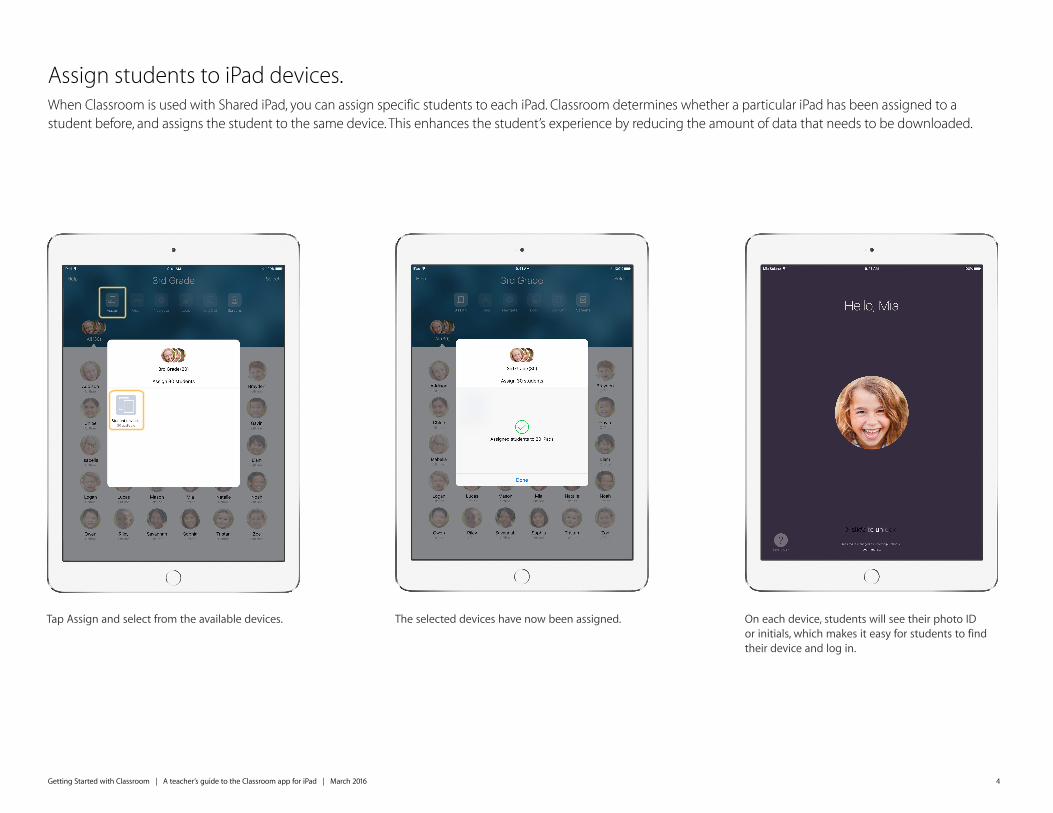
Tap Assign and select from the available devices. The selected devices have now been assigned. On each device, students will see their photo ID or initials, which makes it easy for students to find their device and log in.
Assign students to iPad devices.When Classroom is used with Shared iPad, you can assign specific students to each iPad. Classroom determines whether a particular iPad has been assigned to a student before, and assigns the student to the same device. This enhances the student’s experience by reducing the amount of data that needs to be downloaded.
Getting Started with Classroom | A teacher’s guide to the Classroom app for iPad | March 2016 5
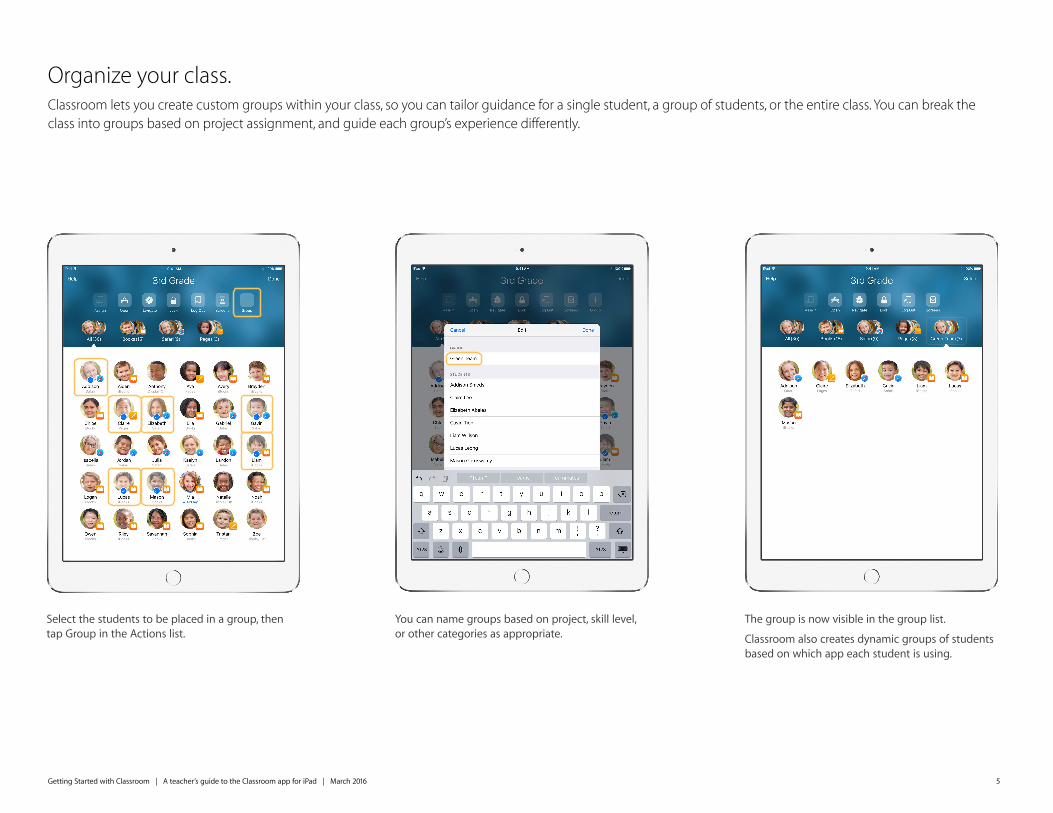
Organize your class.Classroom lets you create custom groups within your class, so you can tailor guidance for a single student, a group of students, or the entire class. You can break the class into groups based on project assignment, and guide each group’s experience differently.
Select the students to be placed in a group, then tap Group in the Actions list.
You can name groups based on project, skill level, or other categories as appropriate.
The group is now visible in the group list. Classroom also creates dynamic groups of students based on which app each student is using.

Getting Started with Classroom | A teacher’s guide to the Classroom app for iPad | March 2016 6
Launch and lock apps.Launch a specific app on each student’s iPad at the same time. You can also lock iPad into a single app, so students stay focused on the subject or test at hand.
Tap Open to view the list of available apps, then select the app that you would like to open. Note that you and your students must both have the app installed for this to work.
If you would like to lock your students into the app, select “Lock in app after opening” in the lower right.
The app now opens on every student’s iPad.
Getting Started with Classroom | A teacher’s guide to the Classroom app for iPad | March 2016 7
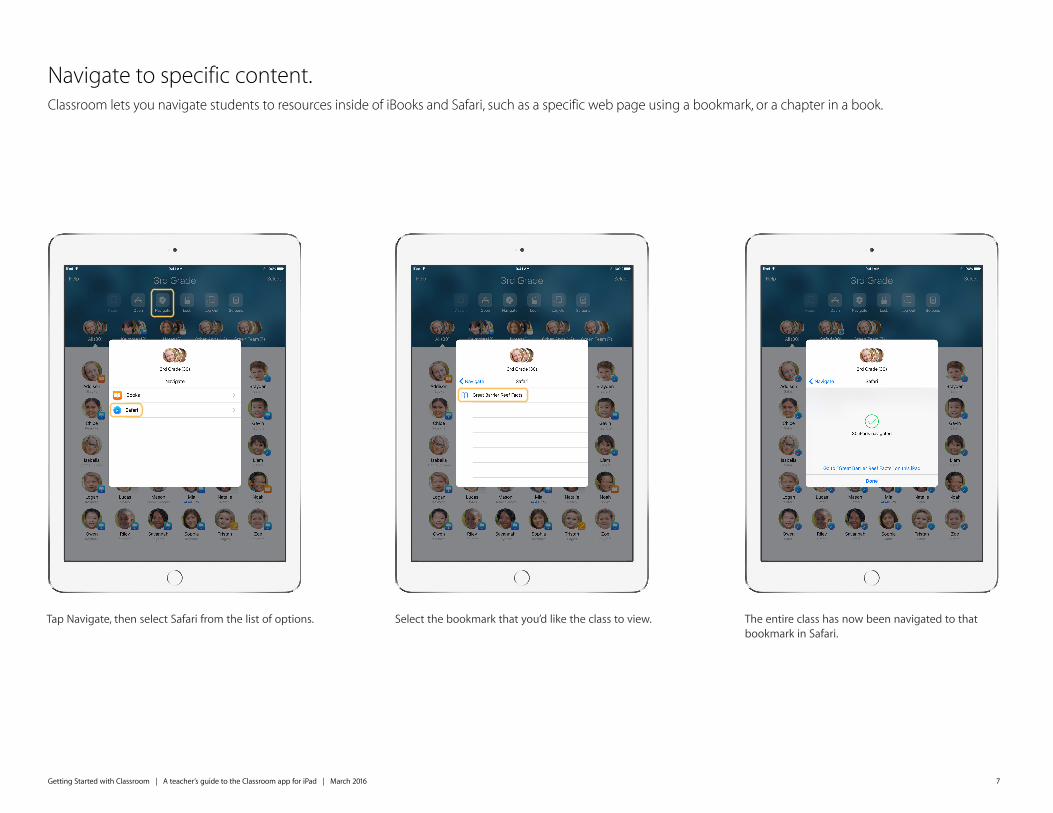
Navigate to specific content.Classroom lets you navigate students to resources inside of iBooks and Safari, such as a specific web page using a bookmark, or a chapter in a book.
Tap Navigate, then select Safari from the list of options. Select the bookmark that you’d like the class to view. The entire class has now been navigated to that bookmark in Safari.
Getting Started with Classroom | A teacher’s guide to the Classroom app for iPad | March 2016 8
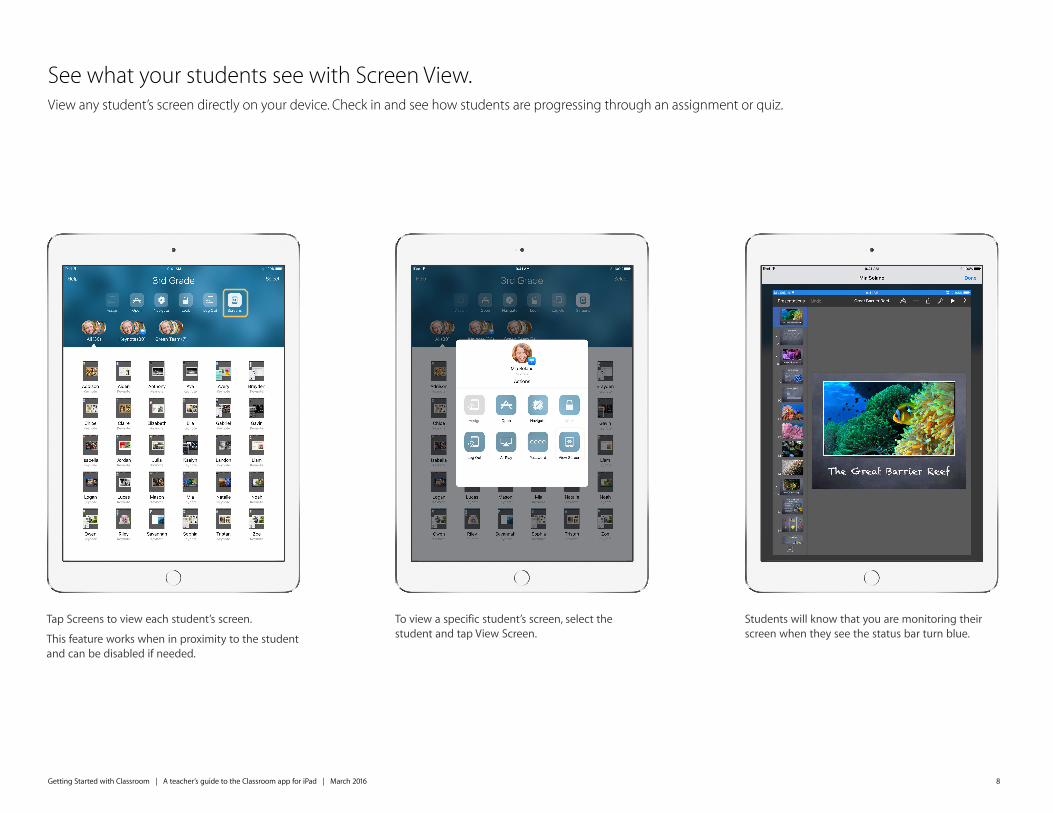
Tap Screens to view each student’s screen. This feature works when in proximity to the student and can be disabled if needed.
See what your students see with Screen View.View any student’s screen directly on your device. Check in and see how students are progressing through an assignment or quiz.
To view a specific student’s screen, select the student and tap View Screen.
Students will know that you are monitoring their screen when they see the status bar turn blue.
Getting Started with Classroom | A teacher’s guide to the Classroom app for iPad | March 2016 9
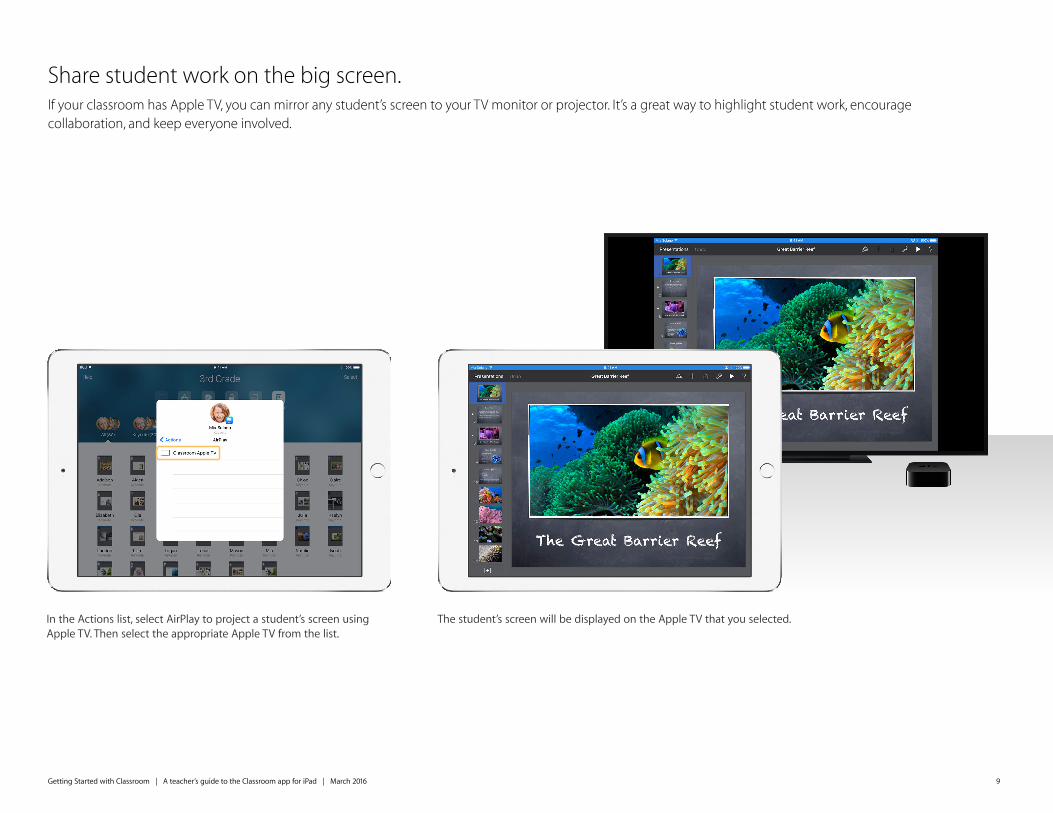
Share student work on the big screen.If your classroom has Apple TV, you can mirror any student’s screen to your TV monitor or projector. It’s a great way to highlight student work, encourage collaboration, and keep everyone involved.
In the Actions list, select AirPlay to project a student’s screen using Apple TV. Then select the appropriate Apple TV from the list.
The student’s screen will be displayed on the Apple TV that you selected.
Getting Started with Classroom | A teacher’s guide to the Classroom app for iPad | March 2016 10
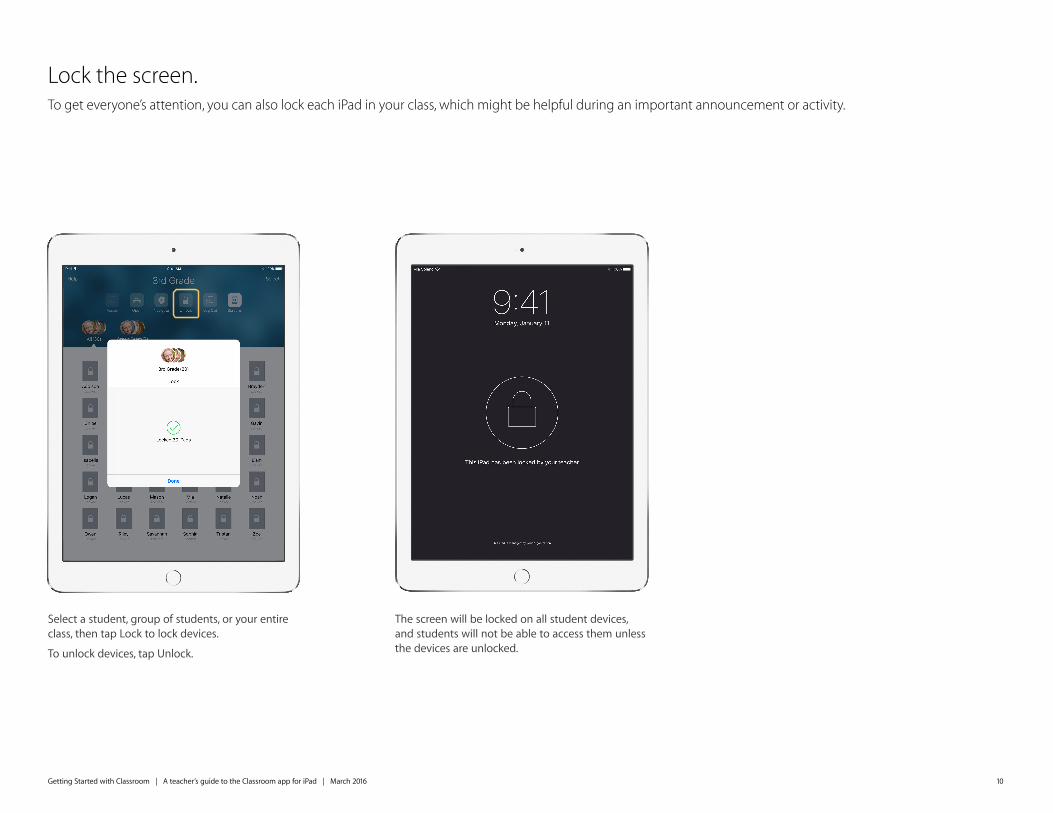
Lock the screen.To get everyone’s attention, you can also lock each iPad in your class, which might be helpful during an important announcement or activity.
Select a student, group of students, or your entire class, then tap Lock to lock devices. To unlock devices, tap Unlock.
The screen will be locked on all student devices, and students will not be able to access them unless the devices are unlocked.
Getting Started with Classroom | A teacher’s guide to the Classroom app for iPad | March 2016 11
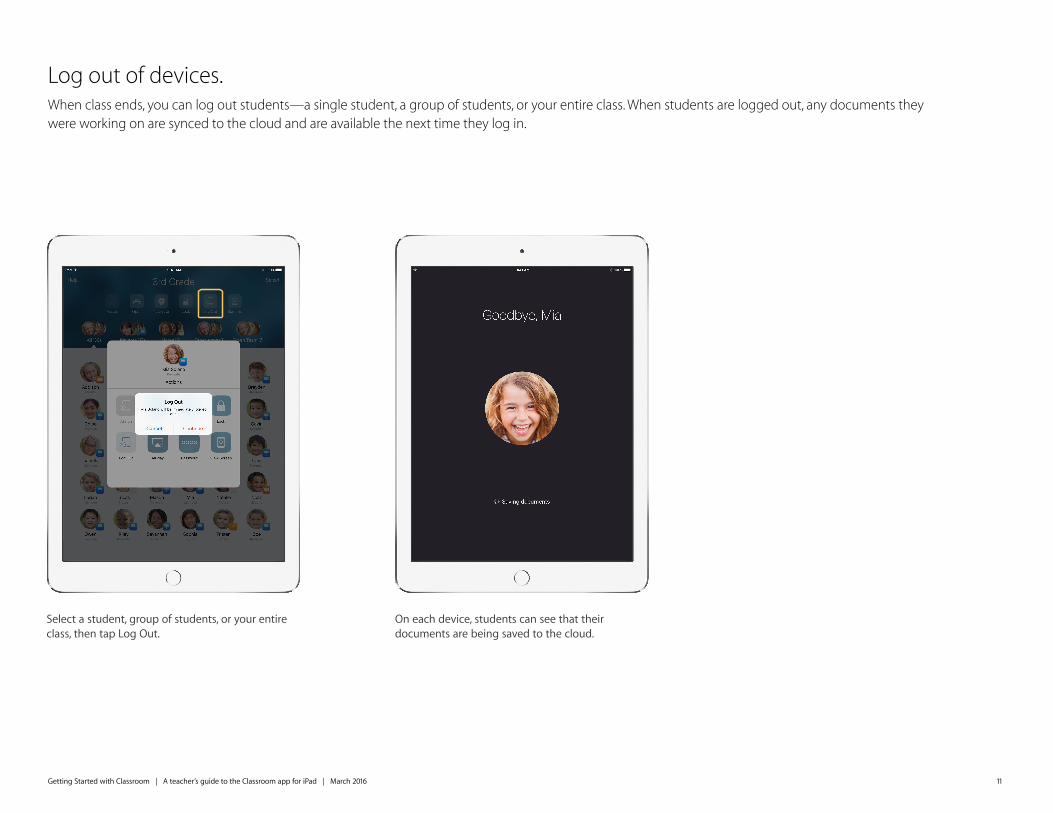
Log out of devices.When class ends, you can log out students—a single student, a group of students, or your entire class. When students are logged out, any documents they were working on are synced to the cloud and are available the next time they log in.
On each device, students can see that their documents are being saved to the cloud.
Select a student, group of students, or your entire class, then tap Log Out.

© 2016 Apple Inc. All rights reserved.
Apple, the Apple logo, AirPlay, Apple TV, iBooks, iPad, Keynote, and Safari are trademarks of Apple Inc., registered in the U.S. and other countries. Other product and company names mentioned herein may be the trademarks of their respective companies.


![Skaffold - storage.googleapis.com · [getting-started getting-started] Hello world! [getting-started getting-started] Hello world! [getting-started getting-started] Hello world! 5](https://img.pdfslide.us/doc/110x75/5ec939f2a76a033f091c5ac7/skaffold-getting-started-getting-started-hello-world-getting-started-getting-started.jpg)