Embed Size (px)
Citation preview

C H A P T E R 3
General VPN SetupA virtual private network is a network of virtual circuits that carry private traffic over a public network such as the Internet. VPNs can connect two or more LANS, or remote users to a LAN. VPNs provide privacy and security by requiring all users to authenticate and by encrypting all data traffic.
• AnyConnect Customization/Localization, page 3-1
• IPsec VPN Client Software, page 3-4
• Group Policies, page 3-6
• Access Control List Manager, page 3-36
• Configuring AnyConnect VPN Client Connections, page 3-48
• Configuring AnyConnect VPN Connections, page 3-57
• Configuring AnyConnect Secure Mobility, page 3-69
• IPsec Remote Access Connection Profiles, page 3-78
• Add or Edit an IPsec Remote Access Connection Profile, page 3-79
• Mapping Certificates to IPsec or SSL VPN Connection Profiles, page 3-80
• System Options, page 3-107
• Zone Labs Integrity Server, page 3-108
• Easy VPN Remote, page 3-109
• Advanced Easy VPN Properties, page 3-111
• AnyConnect Essentials, page 3-113
• Configuring AnyConnect Host Scan, page 3-115
• Configuring Maximum VPN Sessions, page 3-122
• Configuring the Pool of Cryptographic Cores, page 3-122
• Configuring ISE Policy Enforcement, page 3-123
AnyConnect Customization/LocalizationYou can customize the AnyConnect VPN client to display your own corporate image to remote users, including clients running on Windows, Linux, and Mac OS X computers. The following ASDM screens under AnyConnect Customization/Localization allow you to import the following types of customized files:
3-1Cisco ASA Series VPN ASDM Configuration Guide

Chapter 3 General VPN Setup AnyConnect Customization/Localization
• Resources—Modified GUI icons for the AnyConnect client.
• Binary—Executable files to replace the AnyConnect installer. This includes GUI files, plus the VPN client profile, scripts and other client files.
• Script—Scripts that will run before or after AnyConnect makes a VPN connection.
• GUI Text and Messages—Titles and messages used by the AnyConnect client.
• Customized Installer—Transforms that modify the client installation.
• Localized Installer—Transforms Transforms that change the language used by the client.
Each dialog provides the following actions:
• Import launches the Import AnyConnect Customization Objects dialog, where you can specify a file to import as an object.
• Export launches the Export AnyConnect Customization Objects dialog, where you can specify a file to export as an object.
• Delete removes the selected object.
Restrictions
• Customization is not supported for the AnyConnect client running on a Windows Mobile device.
AnyConnect Customization/Localization > ResourcesThe filenames of the custom components that you import must match the filenames used by the AnyConnect GUI, which are different for each operating system and are case sensitive for Mac and Linux. For example, if you want to replace the corporate logo for Windows clients, you must import your corporate logo as company_logo.png. If you import it as a different filename, the AnyConnect installer does not change the component. However, if you deploy your own executable to customize the GUI, the executable can call resource files using any filename.
If you import an image as a resource file (such as company_logo.bmp), the image you import customizes AnyConnect until you reimport another image using the same filename. For example, if you replace company_logo.bmp with a custom image, and then delete the image, the client continues to display your image until you import a new image (or the original Cisco logo image) using the same filename.
AnyConnect Customization/Localization > Binary and ScriptThe same link is used in ASDM for both Binary and Script, so share this link for now, and submit a defect against ASDM to have them add another link.
AnyConnect Customization/Localization > Binary
For Windows, Linux, or Mac (PowerPC or Intel-based) computers, you can deploy your own client that uses the AnyConnect client API. You replace the AnyConnect GUI and the AnyConnect CLI by replacing the client binary files.
Fields for the Import dialog:
• Name Enter the name of the AnyConnect file that you are replacing.
• Platform Select the OS platform that your file runs on.
• Select a file The filename name does not need to be the same as the name of the imported file.
3-2Cisco ASA Series VPN ASDM Configuration Guide
Chapter 3 General VPN Setup AnyConnect Customization/Localization
AnyConnect Customization/Localization > Script
For complete information about deploying scripts, and their limitations and restrictions, see the AnyConnect VPN Client Administrators Guide.
Fields for the Import dialog:
• Name—Enter a name for the script. Be sure to specify the correct extension with the name. For example, myscript.bat.
• Script Type—Choose when to run the script.
AnyConnect adds the prefix scripts_ and the prefix OnConnect or OnDisconnect to your filename to identify the file as a script on the ASA. When the client connects, the ASA downloads the script to the proper target directory on the remote computer, removing the scripts_ prefix and leaving the remaining OnConnect or OnDisconnect prefix. For example, if you import the script myscript.bat, the script appears on the ASA as scripts_OnConnect_myscript.bat. On the remote computer, the script appears as OnConnect_myscript.bat.
To ensure the scripts run reliably, configure all ASAs to deploy the same scripts. If you want to modify or replace a script, use the same name as the previous version and assign the replacement script to all of the ASAs that the users might connect to. When the user connects, the new script overwrites the one with the same name.
• Platform—Select the OS platform that your file runs on.
• Select a file—The filename name does not need to be the same as the name you provided for the script.
ASDM imports the file from any source file, creating the new name you specify for Name in Step 3.
AnyConnect Customization/Localization > GUI Text and MessagesYou can edit the default translation table, or create new ones, to change the text and messages displayed on the AnyConnect client GUI . This pane also shares functionality with the Language Localization pane. For more extensive language translation, go to Configuration > Remote Access VPN > Language Localization.
In addition to the usual buttons on the top toolbar, this pane also has an Add button, and a Template area with extra buttons.
Add—The Add button opens a copy of the default translation table, which you can edit directly, or save. You can select the language of the saved file, and edit the language of the text inside the file later.
When you customize messages in the translation table, do not change msgid, change the text in msgstr.
Specify a language for the template. The template becomes a translation table in cache memory with the name you specify. Use an abbreviation that is compatible with the language options for your browser. For example, if you are creating a table for the Chinese language, and you are using IE, use the abbreviation zh, that is recognized by IE.
Template Section
• Click Template to expand the template area, which provides access to the default English translation table.
• Click View to view, and optionally save, the default English translation table
• Click Export to save a copy of the default English translation table without looking at it.
3-3Cisco ASA Series VPN ASDM Configuration Guide
Chapter 3 General VPN Setup IPsec VPN Client Software
AnyConnect Customization/Localization > Customized Installer TransformsYou can perform more extensive customizing of the AnyConnect client GUI (Windows only) by creating your own transform that deploys with the client installer program. You import the transform to the ASA, which deploys it with the installer program.
Windows is the only valid choice for applying a transform. For more information about transforms, see the AnyConnect Administration Guide.
AnyConnect Customization/Localization > Localized Installer TransformsYou can translate messages displayed by the client installer program with a transform. The transform alters the installation, but leaves the original security-signed MSI intact. These transforms only translate the installer screens and do not translate the client GUI screens.
IPsec VPN Client SoftwareConfiguration > Remote Access VPN > Network (Client) Access > Advanced > IPsec > Upload Software > Client Software
The Client Software pane configures the following options for the IPsec VPN client:
• Enables client update; specify the types and revision numbers of clients to which the update applies.
• Provides a URL or IP address from which to get the update.
• In the case of Windows clients, optionally notifies users that they should update their VPN client version.
Note The Client Update function in Configuration > Remote Access VPN > Network (Client) Access > Advanced > IPsec > Upload Software > Client Software applies only to the IPsec VPN client, (For Windows, MAC OS X, and Linux), and the VPN 3002 hardware client. It does not apply to the Cisco AnyConnect VPN clients, which is updated by the ASA automatically when it connects.
For the IPsec VPN client, you can provide a mechanism for users to accomplish that update. For VPN 3002 hardware client users, the update occurs automatically, with no notification. You can apply client updates only to the IPsec remote-access tunnel-group type.
Note If you try to do a client update to an IPsec Site-to-Site IPsec connection or a Clientless VPN IPsec connection, you do not receive an error message, but no update notification or client update goes to those types of IPsec connections.
To enable client update globally for all clients of a particular client type, use this dialog box. You can also notify all Windows, MAC OS X, and Linux clients that an upgrade is needed and initiate an upgrade on all VPN 3002 hardware clients from this dialog box. To configure the client revisions to which the update applies and the URL or IP address from which to download the update, click Edit.
To configure client update revisions and software update sources for a specific tunnel group, choose Configuration > Remote Access VPN > Network (Client) Access > IPsec > Add/Edit > Advanced > IPsec > Client Software Update.
3-4Cisco ASA Series VPN ASDM Configuration Guide
Chapter 3 General VPN Setup IPsec VPN Client Software
Fields
• Enable Client Update—Enables or disables client update, both globally and for specific tunnel groups. You must enable client update before you can send a client update notification to Windows, MAC OS X, and Linux VPN clients, or initiate an automatic update to hardware clients.
• Client Type—Lists the clients to upgrade: software or hardware, and for Windows software clients, all Windows or a subset. If you click All Windows Based, do not specify Windows 95, 98 or ME and Windows NT, 2000 or XP individually. The hardware client gets updated with a release of the ASA 5505 software or of the VPN 3002 hardware client.
• VPN Client Revisions—Contains a comma-separated list of software image revisions appropriate for this client. If the user client revision number matches one of the specified revision numbers, there is no need to update the client, and, for Windows-based clients, the user does not receive an update notification. The following caveats apply:
– The revision list must include the software version for this update.
– Your entries must match exactly those on the URL for the VPN client, or the TFTP server for the hardware client.
– The TFTP server for distributing the hardware client image must be a robust TFTP server.
– A VPN client user must download an appropriate software version from the listed URL.
– The VPN 3002 hardware client software is automatically updated via TFTP, with no notification to the user.
• Image URL—Contains the URL or IP address from which to download the software image. This URL must point to a file appropriate for this client. For Windows, MAC OS X, and Linux-based clients, the URL must be in the form: http:// or https://. For hardware clients, the URL must be in the form tftp://.
– For Windows, MAC OS X, and Linux-based VPN clients: To activate the Launch button on the VPN Client Notification, the URL must include the protocol HTTP or HTTPS and the server address of the site that contains the update. The format of the URL is: http(s)://server_address:port/directory/filename. The server address can be either an IP address or a hostname if you have configured a DNS server. For example:
http://10.10.99.70/vpnclient-win-4.6.Rel-k9.exe
The directory is optional. You need the port number only if you use ports other than 80 for HTTP or 443 for HTTPS.
– For the hardware client: The format of the URL is tftp://server_address/directory/filename. The server address can be either an IP address or a hostname if you have configured a DNS server. For example:
tftp://10.1.1.1/vpn3002-4.1.Rel-k9.bin
• Edit—Opens the Edit Client Update Entry dialog box, which lets you configure or change client update parameters. See Edit Client Software Location.
• Live Client Update—Sends an upgrade notification message to all currently connected VPN clients or selected tunnel group(s).
– Tunnel Group—Selects all or specific tunnel group(s) for updating.
– Update Now—Immediately sends an upgrade notification containing a URL specifying where to retrieve the updated software to the currently connected VPN clients in the selected tunnel group or all connected tunnel groups. The message includes the location from which to download the new version of software. The administrator for that VPN client can then retrieve the new software version and update the VPN client software.
3-5Cisco ASA Series VPN ASDM Configuration Guide
Chapter 3 General VPN Setup Group Policies
For VPN 3002 hardware clients, the upgrade proceeds automatically, with no notification.
You must check Enable Client Update for the upgrade to work. Clients that are not connected receive the upgrade notification or automatically upgrade the next time they log on.
Edit Client Software LocationConfiguration > Remote Access VPN > Network (Client) Access > Advanced > IPsec > Upload Software > Client Software, Edit
The Edit Client Update dialog box lets you change information about VPN client revisions and URLs for the indicated client types. The clients must be running one of the revisions specified for the indicated client type. If not, the clients are notified that an upgrade is required.
Fields
• Client Type—(Display-only) Displays the client type selected for editing.
• VPN Client Revisions—Lets you type a comma-separated list of software or firmware images appropriate for this client. If the user client revision number matches one of the specified revision numbers, there is no need to update the client. If the client is not running a software version on the list, an update is in order. The user of a Windows, MAC OS X, or Linux-based VPN client must download an appropriate software version from the listed URL. The VPN 3002 hardware client software is automatically updated via TFTP.
• Image URL—Lets you type the URL for the software/firmware image. This URL must point to a file appropriate for this client.
– For a Windows, MAC OS X, or Linux-based VPN client, the URL must include the protocol HTTP or HTTPS and the server address of the site that contains the update. The format of the URL is: http(s)://server_address:port/directory/filename. The server address can be either an IP address or a hostname if you have configured a DNS server. For example:
http://10.10.99.70/vpnclient-win-4.6.Rel-k9.exe
The directory is optional. You need the port number only if you use ports other than 80 for HTTP or 443 for HTTPS.
– For the hardware client: The format of the URL is tftp://server_address/directory/filename. The server address can be either an IP address or a hostname if you have configured a DNS server. For example:
tftp://10.1.1.1/vpn3002-4.1.Rel-k9.bin
The directory is optional.
Group PoliciesThe Group Policies pane lets you manage VPN (AnyConnect or Clientless) group policies. A VPN group policy is a collection of user-oriented attribute/value pairs stored either internally on the device or externally on a RADIUS or LDAP server. Configuring the VPN group policy lets users inherit attributes that you have not configured at the individual group or username level. By default, VPN users have no group policy association. The group policy information is used by VPN tunnel groups and user accounts.
3-6Cisco ASA Series VPN ASDM Configuration Guide
Chapter 3 General VPN Setup Group Policies
The “child” panes and dialog boxes let you configure the group parameters, including those for the default group, DfltGrpPolicy. The default group parameters are those that are most likely to be common across all groups and users, and they streamline the configuration task. Groups can “inherit” parameters from this default group, and users can “inherit” parameters from their group or the default group. You can override these parameters as you configure groups and users.
You can configure either an internal or an external group policy. An internal group policy is stored locally, and an external group policy is stored externally on a RADIUS or LDAP server. Clicking Edit opens a similar dialog box on which you can create a new group policy or modify an existing one.
In these dialog boxes, you configure the following kinds of parameters:
• General attributes: Name, banner, address pools, protocols, filtering, and connection settings.
• Servers: DNS and WINS servers, DHCP scope, and default domain name.
• Advanced attributes: Split tunneling, IE browser proxy, AnyConnect client, and IPsec client.
Before configuring these parameters, you should configure:• Access hours.
• Filters.
• Network lists for filtering and split tunneling
• User authentication servers and the internal authentication server.
You can configure these types of group policies:
• Configuring External Group Policies—An external group policy points the ASA to the RADIUS or LDAP server to retrieve much of the policy information that would otherwise be configured in an internal group policy. External group policies are configured the same way for Network (Client) Access VPN connections, Clientless SSL VPN connections, and Site-to-Site VPN connections.
• Configuring Network (Client) Access Internal Group Policies—These connections are initiated by a VPN client installed on the endpoint. The AnyConnect Secure Mobility Client and Cisco VPN IPsec client are examples of VPN clients. After the VPN client is authenticated, remote users can access corporate networks or applications as if they were on-site. The data traffic between remote users and the corporate network is secured by being encrypted when going through the Internet.
• Configuring Clientless SSL VPN Internal Group Policies—This is also known as browser-based VPN access. On successful login to the ASA’s portal page, remote users can access corporate networks and applications from the links shown in the web pages. The data traffic between remote users and the corporate network is secured by traveling through SSL tunnel.
• Configuring Site-to-Site Internal Group Policies
Group Policy Pane Fields
Lists the currently configured group policies and Add, Edit, and Delete buttons to help you manage VPN group policies.
• Add—Offers a drop-down list on which you can select whether to add an internal or an external group policy. If you simply click Add, then by default, you create an internal group policy. Clicking Add opens the Add Internal Group Policy dialog box or the Add External Group Policy dialog box, which let you add a new group policy to the list. This dialog box includes three menu sections. Click each menu item to display its parameters. As you move from item to item, ASDM retains your settings. When you have finished setting parameters on all menu sections, click Apply or Cancel. Offers a drop-down list from which you can select whether to add an internal or an external group policy. If you simply click Add, then by default, you create an internal group policy.
• Edit—Displays the Edit Group Policy dialog box, which lets you modify an existing group policy.
3-7Cisco ASA Series VPN ASDM Configuration Guide
Chapter 3 General VPN Setup Group Policies
• Delete—Lets you remove a AAA group policy from the list. There is no confirmation or undo.
• Assign—Lets you assign a group policy to one ore more connection profiles.
• Name—Lists the name of the currently configured group policies.
• Type—Lists the type of each currently configured group policy.
• Tunneling Protocol—Lists the tunneling protocol that each currently configured group policy uses.
• Connection Profiles/Users Assigned to—Lists the connection profiles and users configured directly on the ASA that are associated with this group policy.
Configuring External Group PoliciesAn external group policy points the ASA to the RADIUS or LDAP server to retrieve much of the policy information that would otherwise be configured in an internal group policy. External group policies are configured the same way for Network (Client) Access VPN connections, Clientless SSL VPN connections, and Site-to-Site VPN connections.
External group policies take their attribute values from the external server that you specify. For an external group policy, you must identify the RADIUS or LDAP server group that the ASA can query for attributes and specify the password to use when retrieving attributes from that external server group. If you are using an external authentication server, and if your external group-policy attributes exist in the same RADIUS server as the users that you plan to authenticate, you have to make sure that there is no name duplication between them.
Note External group names on the ASA refer to user names on the RADIUS server. In other words, if you configure external group X on the ASA, the RADIUS server sees the query as an authentication request for user X. So external groups are really just user accounts on the RADIUS server that have special meaning to the ASA. If your external group attributes exist in the same RADIUS server as the users that you plan to authenticate, there must be no name duplication between them.
The ASA supports user authorization on an external LDAP or RADIUS server. Before you configure the ASA to use an external server, you must configure the server with the correct ASA authorization attributes and, from a subset of these attributes, assign specific permissions to individual users. Follow the instructions in Appendix 9, “External Server for Authorization and Authentication” to configure your external server.
Fields
• Name—Identifies the group policy to be added or changed. For Edit External Group Policy, this field is display-only.
• Server Group—Lists the available server groups to which to apply this policy.
• New—Opens a dialog box that lets you select whether to create a new RADIUS server group or a new LDAP server group. Either of these options opens the Add AAA Server Group dialog box.
• Password—Specifies the password for this server group policy.
3-8Cisco ASA Series VPN ASDM Configuration Guide
Chapter 3 General VPN Setup Group Policies
Adding an LDAP or RADIUS Server to a Network (Client) Access External Group Policy
Configuration > Remote Access VPN > Network (Client) Access > Group Policies > Add/Edit > Add or Edit External Group Policy > New > RADIUS Server Group/New LDAP Server Group > Add AAA Server Group
The Add AAA Server Group dialog box lets you configure a new AAA server group. The Accounting Mode attribute applies only to RADIUS and TACACS+ protocols.
Fields
• Server Group—Specifies the name of the server group.
• Protocol—(Display only) Indicates whether this is a RADIUS or an LDAP server group.
• Accounting Mode—Indicates whether to use simultaneous or single accounting mode. In single mode, the ASA sends accounting data to only one server. In simultaneous mode, the ASA sends accounting data to all servers in the group. The Accounting Mode attribute applies only to RADIUS and TACACS+ protocols.
• Reactivation Mode—Specifies the method by which failed servers are reactivated: Depletion or Timed reactivation mode. In Depletion mode, failed servers are reactivated only after all of the servers in the group become inactive. In Timed mode, failed servers are reactivated after 30 seconds of down time.
• Dead Time—Specifies, for depletion mode, the number of minutes (0 through 1440) that must elapse between the disabling of the last server in the group and the subsequent re-enabling of all servers. The default value is 10 minutes. This field is not available for timed mode.
• Max Failed Attempts— Specifies the number (an integer in the range 1 through 5) of failed connection attempts allowed before declaring a nonresponsive server inactive. The default value is 3 attempts.
Configuring Network (Client) Access Internal Group PoliciesConfigure Network (Client) Access internal group policies for VPN connections made from AnyConnect Secure Mobility Clients or legacy Cisco IPsec VPN clients installed on an endpoint.
Configuring General Attributes for an Internal Group Policy
The Add or Edit Group Policy dialog box lets you specify tunneling protocols, filters, connection settings, and servers for the group policy being added or modified. For each of the fields in this dialog box, checking the Inherit check box lets the corresponding setting take its value from the default group policy. Inherit is the default value for all of the attributes in this dialog box.
You can configure the general attributes of an internal group policy by starting ASDM and selecting Configuration > Remote Access VPN > Network (Client) Access > Group Policies > Add or Edit Internal Group Policy > General.
Fields
The following attributes appear in the Add Internal Group Policy > General dialog box. They apply to SSL VPN and IPsec sessions. Thus, some attributes are present for one type of session, but not the other.
• Name—Specifies the name of this group policy up to 64 characters; spaces are allowed. For the Edit function, this field is read-only.
3-9Cisco ASA Series VPN ASDM Configuration Guide

Chapter 3 General VPN Setup Group Policies
• Banner—Specifies the banner text to present to users at login. The length can be up to 491 characters. There is no default value.
The IPsec VPN client supports full HTML for the banner. However, the clientless portal and the AnyConnect client support partial HTML. To ensure the banner displays properly to remote users, follow these guidelines:
– For IPsec client users, use the /n tag.
– For AnyConnect client users, use the <BR> tag.
• SCEP forwarding URL—Address of the CA, required when SCEP Proxy is configured in the client profile.
• Address Pools—Specifies the name of one or more IPv4 address pools to use for this group policy. If the Inherit check box is checked, the group policy will use the IPv4 address pool specified in the Default Group Policy. See Configuring Local IP Address Pools, page 4-3 for information on adding or editing an IPv4 address pool.
Select—Uncheck the Inherit checkbox to activate the Select command button. Click Select to open the Address Pools dialog box, which shows the pool name, starting and ending addresses, and subnet mask of address pools available for client address assignment and lets you select, add, edit, delete, and assign entries from that list.
• IPv6 Address Pools—Specifies the name of one or more IPv6 address pools to use for this group policy.
Select—Uncheck the Inherit checkbox to activate the Select command button. Click Select to open the Select Address Pools dialog box, as previously described. See Configuring Local IP Address Pools, page 4-3 for information on adding or editing an IPv6 address pool.
Note You can specify both an IPv4 and an IPv6 address pool for an internal group policy.
• More Options—Click the down arrows at the right of the field to display additional configurable options for this group policy.
• Tunneling Protocols—Specifies the tunneling protocols that this group can use. Users can use only the selected protocols. The choices are as follows:
– Clientless SSL VPN—Specifies the use of VPN via SSL/TLS, which uses a web browser to establish a secure remote-access tunnel to an ASA; requires neither a software nor hardware client. Clientless SSL VPN can provide easy access to a broad range of enterprise resources, including corporate websites, web-enabled applications, NT/AD file share (web-enabled), e-mail, and other TCP-based applications from almost any computer that can reach HTTPS Internet sites.
– SSL VPN Client—Specifies the use of the Cisco AnyConnect VPN client or the legacy SSL VPN client. If you are using the AnyConnect client, you must choose this protocol for Mobile User Security (MUS) to be supported.
– IPsec IKEv1—IP Security Protocol. Regarded as the most secure protocol, IPsec provides the most complete architecture for VPN tunnels. Both Site-to-Site (peer-to-peer) connections and Cisco VPN client-to-LAN connections can use IPsec IKEv1.
– IPsec IKEv2—Supported by the AnyConnect Secure Mobility Client. AnyConnect connections using IPsec with IKEv2 provide advanced features such as software updates, client profiles, GUI localization (translation) and customization, Cisco Secure Desktop, and SCEP proxy.
3-10Cisco ASA Series VPN ASDM Configuration Guide
Chapter 3 General VPN Setup Group Policies
– L2TP over IPsec—Allows remote users with VPN clients provided with several common PC and mobile PC operating systems to establish secure connections over the public IP networkto the security appliance and private corporate networks. L2TP uses PPP over UDP (port 1701)to tunnel the data. The security appliance must be configured for IPsec transport mode.
• Filter—Specifies which unified access control list to use for an IPv4 or an IPv6 connection, or whether to inherit the value from the group policy. Filters consist of rules that determine whether to allow or reject tunneled data packets coming through the ASA, based on criteria such as source address, destination address, and protocol. To configure filters and rules, see the ACL Manager dialog box.
Manage—Displays the ACL Manager dialog box, with which you can add, edit, and delete Access Control Lists (ACLs) and Extended Access Control Lists (ACEs). For more information about the ACL Manager, see the online Help for that dialog box.
• NAC Policy—Selects the name of a Network Admission Control policy to apply to this group policy. You can assign an optional NAC policy to each group policy. The default value is --None--.
• Manage—Opens the Configure NAC Policy dialog box. After configuring one or more NAC policies, the NAC policy names appear as options in the drop-down list next to the NAC Policy attribute.
• Access Hours—Selects the name of an existing access hours policy, if any, applied to this user or create a new access hours policy. The default value is Inherit, or, if the Inherit check box is not checked, the default value is --Unrestricted--.
Manage—Opens the Browse Time Range dialog box, in which you can add, edit, or delete a time range. See Defining Time Ranges, page 3-34 for more information.
• Simultaneous Logins—Specifies the maximum number of simultaneous logins allowed for this user. The default value is 3. The minimum value is 0, which disables login and prevents user access.
Note While there is no maximum limit, allowing several simultaneous connections might compromise security and affect performance.
• Restrict Access to VLAN—(Optional) Also called “VLAN mapping,” this parameter specifies the egress VLAN interface for sessions to which this group policy applies. The ASA forwards all traffic from this group to the selected VLAN. Use this attribute to assign a VLAN to the group policy to simplify access control. Assigning a value to this attribute is an alternative to using ACLs to filter traffic on a session. In addition to the default value (Unrestricted), the drop-down list shows only the VLANs that are configured in this ASA.
Note This feature works for HTTP connections, but not for FTP and CIFS.
• Connection Profile (Tunnel Group) Lock—This parameter permits remote VPN access only with the selected connection profile (tunnel group), and prevents access with a different connection profile. The default inherited value is None.
• Maximum Connect Time—If the Inherit check box is not checked, this parameter specifies the maximum user connection time in minutes. At the end of this time, the system terminates the connection. The minimum is 1 minute, and the maximum is 35791394 minutes (over 4000 years, should we be so lucky). To allow unlimited connection time, check Unlimited (the default).
3-11Cisco ASA Series VPN ASDM Configuration Guide

Chapter 3 General VPN Setup Group Policies
• Idle Timeout—If the Inherit check box is not checked, this parameter specifies this user’s idle timeout period in minutes. If there is no communication activity on the user connection in this period, the system terminates the connection. The minimum time is 1 minute, and the maximum time is 10080 minutes. The default is 30 minutes. To allow unlimited connection time, check Unlimited. This value does not apply to Clientless SSL VPN users.
• On smart card removal—With the default option, Disconnect, the client tears down the connection if the smart card used for authentication is removed. Click Keep the connection if you do not want to require users to keep their smart cards in the computer for the duration of the connection.
Smart card removal configuration only works on Microsoft Windows using RSA smart cards.
Configuring Server Attributes for an Internal Group Policy
Configure DNS servers, WINS servers and DHCP Scope in the Group Policy > Servers window. DNS and WINS servers are applied to full-tunnel clients (IPsec, AnyConnect, SVC, L2TP/IPsec) only and are used for name resolution. DHCP scope is used when DHCP-address assignment is in place.
Configuring a DNS Server for an Internal Group Policy
Use this procedure to configure a specific DNS server for a group policy.
Note This setting overrides the DNS setting configured on the ASDM in the Configuration > Remote Access VPN > DNS window.
Step 1 Select Configuration > Remote Access VPN > Network (Client) Access > Group Policies > Add/Edit > Servers.
Step 2 Unless you are editing the DefaultGroupPolicy, uncheck the DNS Servers Inherit checkbox.
Step 3 In the DNS Servers field, add the IPv4 or IPv6 addresses of the DNS servers you want this group to use.
If you specify more than one DNS server, the remote access client will attempt to use the DNS servers in the order you specify them in this field.
AnyConnect 3.0.4 and later supports up to 25 DNS server entries in the DNS Servers field, earlier releases only support up to 10 DNS server entries.
Step 4 Expand the More Options area by clicking the double down arrow in the More Options bar.
Step 5 If there is no default domain specified in the Configuration > Remote Access VPN > DNS window, you must specify the default domain in the Default Domain field. Use the domain name and top level domain for example, example.com.
Step 6 Click OK.
Step 7 Click Apply.
Configuring WINS Servers for an Internal Group Policy
Use this procedure to configure primary and secondary WINS servers. WINS servers are applied to full-tunnel clients (IPsec, AnyConnect, SVC, L2TP/IPsec) only and are used for name resolution. The default value in each case is none.
3-12Cisco ASA Series VPN ASDM Configuration Guide
Chapter 3 General VPN Setup Group Policies
Step 1 Select Configuration > Remote Access VPN > Network (Client) Access > Group Policies > Add/Edit > Servers.
Step 2 Uncheck the WINS Servers Inherit checkbox.
Step 3 In the WINS Servers field, enter the IP addresses of the primary and secondary WINS servers. The first IP address you specify is that of the primary WINS server. The second (optional) IP address you specify is that of the secondary WINS server.
Step 4 Click OK.
Configuring Split Tunneling for AnyConnect Traffic
Split tunneling directs some of the AnyConnect network traffic through the VPN tunnel (encrypted) and other network traffic outside the VPN tunnel (unencrypted or “in the clear”).
Split tunneling is configured by creating a split tunneling policy, configuring an access control list for that policy, and adding the split tunnel policy to a group policy. When the group policy is sent to the client, that client will use the ACLs in the split tunneling policy to decide where to direct network traffic.
For Windows clients, firewall rules from the ASA are evaluated first, then the ones on the client. For Mac OS X, the firewall and filter rules on the client are not used. For Linux systems, starting with AnyConnect version 3.1.05149, you can configure AnyConnect to evaluate the client's firewall and filter rules, by adding a custom attribute named circumvent-host-filtering to a group profile, and setting it to true.
When you create access lists:
• You can specify both IPv4 and IPv6 addresses in an access control list.
• If you use a standard ACL, only one address or network is used.
• If you use extended ACLs, the source network is the split-tunneling network. The destination network is ignored.
• Access lists configured with any or with a split include or exclude of 0.0.0.0/0.0.0.0 or ::/0 will not be sent to the client. To send all traffic over the tunnel, select Tunnel All Networks for the split-tunnel Policy.
• Address 0.0.0.0/255.255.255.255 or ::/128 will be sent to the client only when the split-tunnel policy is Exclude Network List Below. This configuration tells the client not to tunnel traffic destined for any local subnets.
• AnyConnect passes traffic to all sites specified in the split tunneling policy, and to all sites that fall within the same subnet as the IP address assigned by the ASA. For example, if the IP address assigned by the ASA is 10.1.1.1 with a mask of 255.0.0.0, the endpoint device passes all traffic destined to 10.0.0.0/8, regardless of the split tunneling policy. Therefore, use a netmask for the assigned IP address that properly references the expected local subnet.
Prerequisites
• You must create an access list with ACLs and (optionally) ACEs.
• If you created a split tunnel policy for IPv4 networks and another for IPv6 networks, then the network list you specify is used for both protocols. So, the network list should contain access control entries (ACEs) for both IPv4 and IPv6 traffic.
3-13Cisco ASA Series VPN ASDM Configuration Guide
Chapter 3 General VPN Setup Group Policies
Note Split tunneling is a traffic management feature, not a security feature. For optimum security, we recommend that you do not enable split tunneling.
In the following procedure, in all cases where there is an Inherit checkbox next to a field, leaving the Inherit check box checked means that the group policy you are configuring will use the same values for that field as the default group policy. Unchecking Inherit lets you specify new values specific to your group policy.
Step 1 Connect to the ASA using ASDM and select Configuration > Remote Access VPN > Network (Client) Access > Group Policies.
Step 2 Click Add to add a new group policy or select an existing group policy and click Edit.
Step 3 Select Advanced > Split Tunneling.
Step 4 In the DNS Names field, enter the domain names that are to be resolved by AnyConnect via the tunnel. These names correspond to hosts in the private network. If split-include tunneling is configured, the network list must include the specified DNS servers. You can enter a full qualified domain name, IPv4 or IPv6 address in the field.
Step 5 To disable split tunneling, select Yes for Send All DNS Lookups Through Tunnel. This option ensures that DNS traffic is not leaked to the physical adapter; it disallows traffic in the clear. If DNS resolution fails, the address remains unresolved and the AnyConnect client does not try to resolve the address outside the VPN.
To enable split tunneling, choose No (the default). This setting tells the client send DNS queries over the tunnel according to the split tunnel policy.
Step 6 To configure split-tunneling by unchecking the Inherit check box and choosing a split-tunneling policy. If you do not uncheck Inherit, your group policy uses the split tunneling settings defined in the default group policy, DfltGrpPolicy. The default split tunneling policy setting in the default group policy is to Tunnel All Networks.
To define the split tunneling policy, chose from the drop-downs Policy and IPv6 Policy. The Policy field defines the split tunneling policy for IPv4 network traffic. The IPv6 Policy field selects the split tunneling policy for IPv6 network traffic. Other than that difference, these fields have the same purpose.
Unchecking Inherit allows you to choose one of these policy options:
• Exclude Network List Below—Defines a list of networks to which traffic is sent in the clear. This feature is useful for remote users who want to access devices on their local network, such as printers, while they are connected to the corporate network through a tunnel.
• Tunnel Network List Below—Tunnels all traffic from or to the networks specified in the Network List. Traffic to addresses in the include network list are tunneled. Data to all other addresses travels in the clear and is routed by the remote user’s Internet service provider.
For versions of ASA 9.1.4 and higher, when you specify an include list, you can also specify an exclude list that is a subnet inside the include range. Those excluded subnets will not be tunneled, and the rest of the include list networks will be. Networks in the exclusion list that are not a subset of the include list will be ignored by the client. For Linux, you must add a custom attribute to the group policy to support excluded subnets.
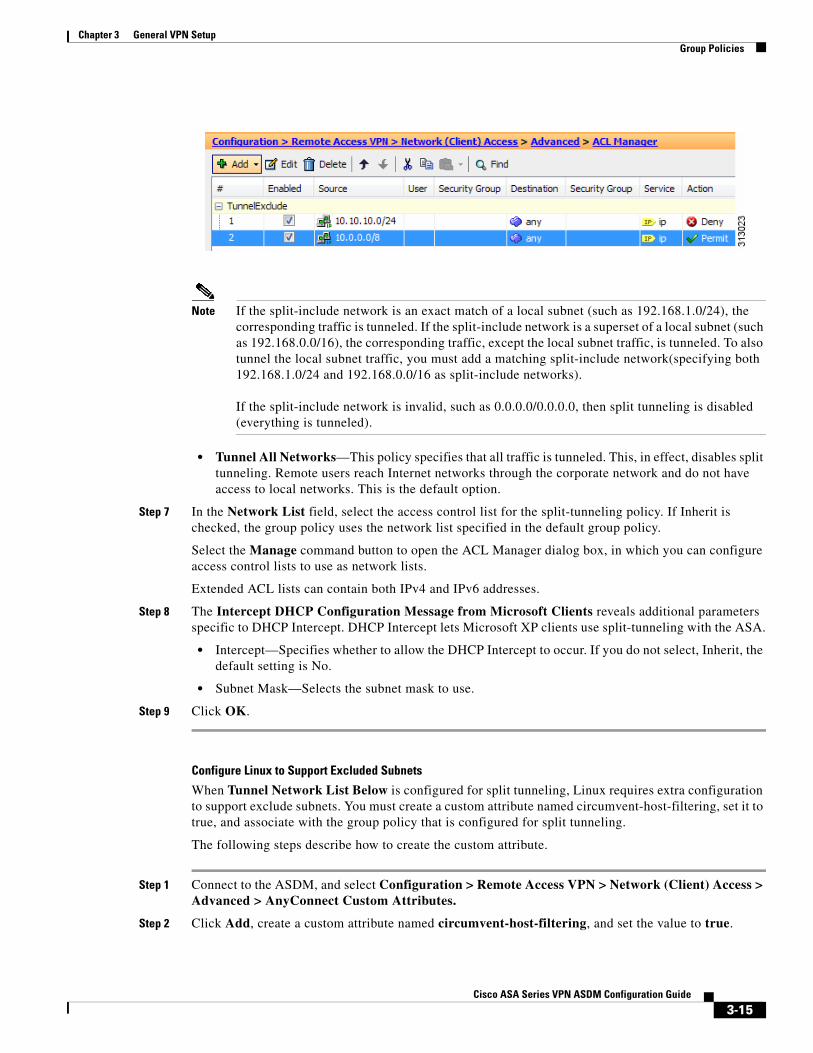
For example:
3-14Cisco ASA Series VPN ASDM Configuration Guide
Chapter 3 General VPN Setup Group Policies
Note If the split-include network is an exact match of a local subnet (such as 192.168.1.0/24), the corresponding traffic is tunneled. If the split-include network is a superset of a local subnet (such as 192.168.0.0/16), the corresponding traffic, except the local subnet traffic, is tunneled. To also tunnel the local subnet traffic, you must add a matching split-include network(specifying both 192.168.1.0/24 and 192.168.0.0/16 as split-include networks).
If the split-include network is invalid, such as 0.0.0.0/0.0.0.0, then split tunneling is disabled (everything is tunneled).
• Tunnel All Networks—This policy specifies that all traffic is tunneled. This, in effect, disables split tunneling. Remote users reach Internet networks through the corporate network and do not have access to local networks. This is the default option.
Step 7 In the Network List field, select the access control list for the split-tunneling policy. If Inherit is checked, the group policy uses the network list specified in the default group policy.
Select the Manage command button to open the ACL Manager dialog box, in which you can configure access control lists to use as network lists.
Extended ACL lists can contain both IPv4 and IPv6 addresses.
Step 8 The Intercept DHCP Configuration Message from Microsoft Clients reveals additional parameters specific to DHCP Intercept. DHCP Intercept lets Microsoft XP clients use split-tunneling with the ASA.
• Intercept—Specifies whether to allow the DHCP Intercept to occur. If you do not select, Inherit, the default setting is No.
• Subnet Mask—Selects the subnet mask to use.
Step 9 Click OK.
Configure Linux to Support Excluded Subnets
When Tunnel Network List Below is configured for split tunneling, Linux requires extra configuration to support exclude subnets. You must create a custom attribute named circumvent-host-filtering, set it to true, and associate with the group policy that is configured for split tunneling.
The following steps describe how to create the custom attribute.
Step 1 Connect to the ASDM, and select Configuration > Remote Access VPN > Network (Client) Access > Advanced > AnyConnect Custom Attributes.
Step 2 Click Add, create a custom attribute named circumvent-host-filtering, and set the value to true.
3-15Cisco ASA Series VPN ASDM Configuration Guide
Chapter 3 General VPN Setup Group Policies
Step 3 Edit the group policy you plan to use for client firewall, and select Advanced > AnyConnect Client > Custom Attributes.
Step 4 Add the custom attribute that you created, circumvent-host-filtering, to the group policy you will use for split tunneling.
Configuring VPN Policy Attributes for a Local UserTo configure VPN policy attributes for a user, perform the following steps:
Detailed Steps
Step 1 Start ASDM and choose Configuration > Remote Access VPN > AAA/Local Users > Local Users.
Step 2 Select the user you want to configure and click Edit.
The Edit User Account dialog box appears.
Step 3 In the left-hand pane, click VPN Policy.
Step 4 Specify a group policy for the user. The user policy will inherit the attributes of this group policy. If there are other fields that are set to inherit the configuration from the Default Group Policy, the attributes specified in this group policy will take precedence over those set in the Default Group Policy.
Step 5 Specify which tunneling protocols are available for the user, or whether the value is inherited from the group policy. Check the desired Tunneling Protocols check boxes to choose the VPN tunneling protocols that you want to make available for use. The choices are as follows:
• Clientless SSL VPN (VPN via SSL/TLS) uses a web browser to establish a secure remote-access tunnel to a VPN concentrator; this option requires neither a software nor hardware client. Clientless SSL VPN can provide easy access to a broad range of enterprise resources, including corporate websites, web-enabled applications, web-enabled NT/AD file shares, e-mail, and other TCP-based applications from almost any computer that can reach secure Internet sites through HTTPS.
• The SSL VPN Client lets you connect after downloading the Cisco AnyConnect Client application. You use a clientless SSL VPN connection to download this application the first time. Client updates then occur automatically as needed whenever you connect.
• IPsec IKEv1—IP Security Protocol. Regarded as the most secure protocol, IPsec provides the most complete architecture for VPN tunnels. Both site-to-site (peer-to-peer) connections and Cisco VPN client-to-LAN connections can use IPsec IKEv1.
• IPsec IKEv2—Supported by the AnyConnect Secure Mobility Client. AnyConnect connections using IPsec with IKEv2 provide advanced features such as software updates, client profiles, GUI localization (translation) and customization, Cisco Secure Desktop, and SCEP proxy.
• L2TP over IPsec allows remote users with VPN clients provided with several common PC and mobile PC operating systems to establish secure connections over the public IP network to the ASA and private corporate networks.
Note If no protocol is selected, an error message appears.
3-16Cisco ASA Series VPN ASDM Configuration Guide
Chapter 3 General VPN Setup Group Policies
Step 6 Specify which filter (IPv4 or IPv6) to use, or whether to inherit the value from the group policy. Filters consist of rules that determine whether to allow or reject tunneled data packets coming through the ASA, based on criteria such as source address, destination address, and protocol. To configure filters and rules, choose Configuration > Remote Access VPN > Network (Client) Access > Group Policies > Add/Edit > General > More Options > Filter.
Click Manage to display the ACL Manager pane, on which you can add, edit, and delete ACLs and ACEs.
Step 7 Specify whether to inherit the Connection Profile (tunnel group) lock or to use the selected tunnel group lock, if any. Selecting a specific lock restricts users to remote access through this group only. Tunnel group lock restricts users by checking to see if the group configured in the VPN client is the same as the users assigned group. If it is not, the ASA prevents the user from connecting. If the Inherit check box is not checked, the default value is None.
Step 8 Specify whether to inherit the Store Password on Client System setting from the group. Uncheck the Inherit check box to activate the Yes and No radio buttons. Click Yes to store the login password on the client system (potentially a less-secure option). Click No (the default) to require the user to enter the password with each connection. For maximum security, we recommend that you not allow password storage.
Step 9 Specify an Access Hours policy to apply to this user, create a new access hours policy for the user, or leave the Inherit box checked. The default value is Inherit, or, if the Inherit check box is not checked, the default value is Unrestricted.
Click Manage to open the Add Time Range dialog box, in which you can specify a new set of access hours.
Step 10 Specify the number of simultaneous logins by the user. The simultaneous logins setting specifies the maximum number of simultaneous logins allowed for this user. The default value is 3. The minimum value is 0, which disables login and prevents user access.
Note While there is no maximum limit, allowing several simultaneous connections could compromise security and affect performance.
Step 11 Specify the maximum connection time for the user connection time in minutes. At the end of this time, the system terminates the connection. The minimum is 1 minute, and the maximum is 2147483647 minutes (over 4000 years). To allow unlimited connection time, check the Unlimited check box (the default).
Step 12 Specify the idle timeout for the user in minutes. If there is no communication activity on the connection by this user in this period, the system terminates the connection. The minimum time is 1 minute, and the maximum time is 10080 minutes. This value does not apply to users of clientless SSL VPN connections.
Step 13 Configure the session alert interval. If you uncheck the Inherit check box, the Default check box is checked automatically and the session alert interval is set to 30 minutes. If you want to specify a new value, uncheck the Default check box and specify a session alert interval from 1 to 30 minutes in the minutes box.
Step 14 Configure the idle alert interval. If you uncheck the Inherit check box, the Default check box is checked automatically. This sets the idle alert interval to 30 minutes. If you want to specify a new value, uncheck the Default check box and specify a session alert interval from 1 to 30 minutes in the minutes box.
Step 15 To set a dedicated IPv4 address for this user, enter an IPv4 address and subnet mask in the Dedicated IPv4 Address (Optional) area.
Step 16 To set a dedicated IPv6 address for this user, enter an IPv6 address with an IPv6 prefix in the Dedicated IPv6 Address (Optional) field. The IPv6 prefix indicates the subnet on which the IPv6 address resides.
3-17Cisco ASA Series VPN ASDM Configuration Guide

Chapter 3 General VPN Setup Group Policies
Step 17 Click OK.
The changes are saved to the running configuration.
Configuring a Browser Proxy for an Internal Group Policy
Configuration > Remote Access VPN > Network (Client) Access > Group Policies > Add/Edit > Advanced > Browser Proxy
This dialog box configures attributes for Microsoft Internet Explorer.
Fields
• Proxy Server Policy—Configures the Microsoft Internet Explorer browser proxy actions (“methods”) for a client PC.
– Do not modify client proxy settings—Leaves the HTTP browser proxy server setting in Internet Explorer unchanged for this client PC.
– Do not use proxy—Disables the HTTP proxy setting in Internet Explorer for the client PC.
– Select proxy server settings from the following—Enables the following check boxes for your selections: Auto detect proxy, Use proxy server settings given below, and Use proxy auto configuration (PAC) given below.
– Auto detect proxy—Enables the use of automatic proxy server detection in Internet Explorer for the client PC.
– Use proxy server settings specified below—Sets the HTTP proxy server setting in Internet Explorer to use the value configured in the Proxy Server Name or IP Address field.
– Use proxy auto configuration (PAC) given below—Specifies the use of the file specified in the Proxy Auto Configuration (PAC) field as the source for auto configuration attributes.
• Proxy Server Settings—Configures the proxy server parameters for Microsoft clients using Microsoft Internet Explorer.
– Server Address and Port—Specifies the IP address or name and the port of an Microsoft Internet Explorer server that is applied for this client PC.
– Bypass Proxy Server for Local Addresses—Configures Microsoft Internet Explorer browser proxy local-bypass settings for a client PC. Click Yes to enable local bypass or No to disable local bypass.
– Exception List—Lists the server names and IP addresses that you want to exclude from proxy server access. Enter the list of addresses that you do not want to have accessed through a proxy server. This list corresponds to the Exceptions list in the Proxy Settings dialog box in Internet Explorer.
• Proxy Auto Configuration Settings—The PAC URL specifies the URL of the auto-configuration file. This file tells the browser where to look for proxy information. To use the proxy auto-configuration (PAC) feature, the remote user must use the Cisco AnyConnect VPN client.
Many network environments define HTTP proxies that connect a web browser to a particular network resource. The HTTP traffic can reach the network resource only if the proxy is specified in the browser and the client routes the HTTP traffic to the proxy. SSLVPN tunnels complicate the definition of HTTP proxies because the proxy required when tunneled to an enterprise network can differ from that required when connected to the Internet via a broadband connection or when on a third-party network.
3-18Cisco ASA Series VPN ASDM Configuration Guide
Chapter 3 General VPN Setup Group Policies
In addition, companies with large networks might need to configure more than one proxy server and let users choose between them, based on transient conditions. By using .pac files, an administrator can author a single script file that determines which of numerous proxies to use for all client computers throughout the enterprise.
The following are some examples of how you might use a PAC file:
– Choosing a proxy at random from a list for load balancing.
– Rotating proxies by time of day or day of the week to accommodate a server maintenance schedule.
– Specifying a backup proxy server to use in case the primary proxy fails.
– Specifying the nearest proxy for roaming users, based on the local subnet.
You can use a text editor to create a proxy auto-configuration (.pac) file for your browser. A .pac file is a JavaScript file that contains logic that specifies one or more proxy servers to be used, depending on the contents of the URL. Use the PAC URL field to specify the URL from which to retrieve the .pac file. Then the browser uses the .pac file to determine the proxy settings.
Configuring General AnyConnect Client Attributes for an Internal Group Policy
Clicking the AnyConnect Client icon in the group policy directory tree shows the list of configurable attributes that follow. Configuring the ASA to distribute and manage AnyConnect client sessions is a larger procedure than just setting these attribute fields in a group policy. See Configuring AnyConnect VPN Client Connections, page 3-48, Configuring AnyConnect VPN Connections, page 3-57, and Configuring AnyConnect Secure Mobility, page 3-69.
Fields
• Keep Installer on Client System—Enable permanent client installation on the remote computer. Enabling disables the automatic uninstalling feature of the client. The client remains installed on the remote computer for subsequent connections, reducing the connection time for the remote user.
Note Keep Installer on Client System is not supported after version 2.5 of the AnyConnect client.
• Datagram Transport Layer Security (DTLS)—Avoids latency and bandwidth problems associated with some SSL connections and improves the performance of real-time applications that are sensitive to packet delays.
• Ignore Don’t Defrag (DF) Bit—This feature allows the force fragmentation of packets that have the DF bit set, allowing them to pass through the tunnel. An example use case is for servers in your network that do not respond correctly to TCP MSS negotiations.
• Client Bypass Protocol—The Client Protocol Bypass feature allows you to configure how the ASA manages IPv4 traffic when it is expecting only IPv6 traffic or how it manages IPv6 traffic when it is expecting only IPv4 traffic.
When the AnyConnect client makes a VPN connection to the ASA, the ASA could assign it an IPv4, IPv6, or both an IPv4 and IPv6 address. If the ASA assigns the AnyConnect connection only an IPv4 address or only an IPv6 address, you can now configure the Client Bypass Protocol to drop network traffic for which the ASA did not assign an IP address, or allow that traffic to bypass the ASA and be sent from the client unencrypted or “in the clear”.
3-19Cisco ASA Series VPN ASDM Configuration Guide
Chapter 3 General VPN Setup Group Policies
For example, assume that the ASA assigns only an IPv4 address to an AnyConnect connection and the endpoint is dual stacked. When the endpoint attempts to reach an IPv6 address, if Client Bypass Protocol is disabled, the IPv6 traffic is dropped; however, if Client Bypass Protocol is enabled, the IPv6 traffic is sent from the client in the clear.
• FQDN of This Device—This information is used by the client after network roaming in order to resolve the ASA IP address used for re-establishing the VPN session. This setting is critical to support roaming between networks of different IP protocols (such as IPv4 to IPv6).
Note You cannot use the ASA FQDN present in the AnyConnect profile to derive the ASA IP address after roaming. The addresses may not match the correct device (the one the tunnel was established to) in the load balancing scenario.
If the device FQDN is not pushed to the client, the client will try to reconnect to whatever IP address the tunnel had previously established. In order to support roaming between networks of different IP protocols (from IPv4 to IPv6), AnyConnect must perform name resolution of the device FQDN after roaming, so that it can determine which ASA address to use for re-establishing the tunnel. The client uses the ASA FQDN present in its profile during the initial connection. During subsequent session reconnects, it always uses the device FQDN pushed by ASA (and configured by the administrator in the group policy), when available. If the FQDN is not configured, the ASA derives the device FQDN (and sends it to the client) from whatever is set under Device Setup > Device Name/Password and Domain Name.
If the device FQDN is not pushed by the ASA, the client cannot re-establish the VPN session after roaming between networks of different IP protocols.
• MTU—Adjusts the MTU size for SSL connections. Enter a value in bytes, from 256 to 1410 bytes. By default, the MTU size is adjusted automatically based on the MTU of the interface that the connection uses, minus the IP/UDP/DTLS overhead.
• Keepalive Messages—Enter a number, from 15 to 600 seconds, in the Interval field to enable and adjust the interval of keepalive messages to ensure that an connection through a proxy, firewall, or NAT device remains open, even if the device limits the time that the connection can be idle. Adjusting the interval also ensures that the client does not disconnect and reconnect when the remote user is not actively running a socket-based application, such as Microsoft Outlook or Microsoft Internet Explorer.
• Optional Client Modules to Download—To minimize download time, the AnyConnect client requests downloads (from the ASA) only of modules that it needs for each feature that it supports. You must specify the names of modules that enable other features. The AnyConnect client, version 3.0, includes the following modules (previous versions have fewer modules):
– AnyConnect DART—The Diagnostic AnyConnect Reporting Tool (DART) captures a snapshot of system logs and other diagnostic information and creates a .zip file on your desktop so you can conveniently send troubleshooting information to Cisco TAC.
– AnyConnect Network Access Manager—Formerly called the Cisco Secure Services Client, this module provides 802.1X (Layer 2) and device authentication for access to both wired and wireless network is integrated into AnyConnect 3.0.
– AnyConnect SBL—Start Before Logon (SBL) forces the user to connect to the enterprise infrastructure over a VPN connection before logging on to Windows by starting AnyConnect before the Windows login dialog box appears.
– AnyConnect Web Security Module—Formerly called ScanSafe Hostscan, this module is integrated into the AnyConnect 3.0.
3-20Cisco ASA Series VPN ASDM Configuration Guide
Chapter 3 General VPN Setup Group Policies
– AnyConnect Telemetry Module—Sends information about the origin of malicious content to the web filtering infrastructure of the Cisco IronPort Web Security Appliance (WSA), which uses this data to provide better URL filtering rules.
– AnyConnect Posture Module—Formerly called the Cisco Secure Desktop HostScan feature, the posture module is integrated into AnyConnect 3.0 and provides AnyConnect the ability to gather credentials for posture assessment prior to creating a remote access connection to the ASA.
• Always-On VPN—Determine if the always-on VPN flag setting in the AnyConnect service profile is disabled or if the AnyConnect service profile setting should be used. The always-on VPN feature lets AnyConnnect automatically establish a VPN session after the user logs onto a computer. The VPN session remains up until the user logs off the computer. If the physical connection is lost, the session remains up, and AnyConnect continually attempts to reestablish the physical connection with the adaptive security appliance to resume the VPN session.
Always-on VPN permits the enforcement of corporate policies to protect the device from security threats. You can use it to help ensure AnyConnect establishes a VPN session whenever the endpoint is not in a trusted network. If enabled, a policy is configured to determine how network connectivity is managed in the absence of a connection.
Note Always-On VPN requires an AnyConnect release that supports AnyConnect Secure Mobility features. Refer to the Cisco AnyConnect VPN Client Administrator Guide for additional information.
• Client Profiles to Download—A profile is a group of configuration parameters that the AnyConnect client uses to configure VPN, Network Access Manager, web security, and telemetry settings. Click Add to launch the Select Anyconnect Client Profiles window where you can specify previously-created profiles for this group policy.
Configuring AnyConnect Login Settings for an Internal Group Policy
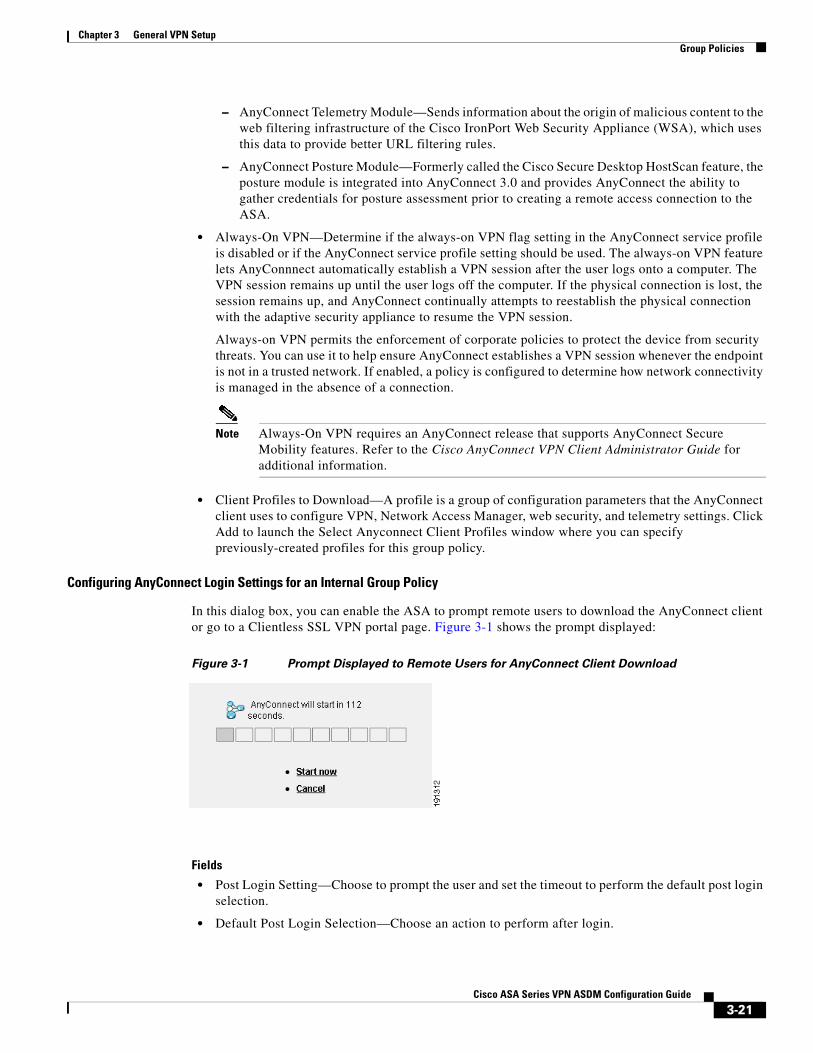
In this dialog box, you can enable the ASA to prompt remote users to download the AnyConnect client or go to a Clientless SSL VPN portal page. Figure 3-1 shows the prompt displayed:
Figure 3-1 Prompt Displayed to Remote Users for AnyConnect Client Download
Fields
• Post Login Setting—Choose to prompt the user and set the timeout to perform the default post login selection.
• Default Post Login Selection—Choose an action to perform after login.
3-21Cisco ASA Series VPN ASDM Configuration Guide
Chapter 3 General VPN Setup Group Policies
Configuring AnyConnect Client Client Firewall Attributes for an Internal Group Policy
In ASA 9.0 and later releases, access control lists for client firewalls support both access control entries for both IPv4 and IPv6 addresses.
See Client Firewall with Local Printer and Tethered Device Support, page 3-43 to configure the group policy for these situations.
Configuring AnyConnect Client Key Regeneration for an Internal Group Policy
Rekey Negotiation occurs when the security appliance and the client perform a rekey and they renegotiate the crypto keys and initialization vectors, increasing the security of the connection.
Fields
• Renegotiation Interval—Uncheck the Unlimited check box to specify the number of minutes from the start of the session until the rekey takes place, from 1 to 10080 (1 week).
• Renegotiation Method—Uncheck the Inherit check box to specify a renegotiation method different from the default group policy. Select the None radio button to disable rekey, select either the SSL or New Tunnel radio button to establish a new tunnel during rekey.
Note Configuring the Renegotiation Method as SSL or New Tunnel specifies that the client establishes a new tunnel during rekey instead of the SSL renegotiation taking place during the rekey. See the command reference for a history of the anyconnect ssl rekey command.
Configuring AnyConnect Client Dead Peer Detection for an Internal Group Policy
Dead Peer Detection (DPD) ensures that the security appliance (gateway) or the client can quickly detect a condition where the peer is not responding, and the connection has failed.
If DPD is enabled on the ASA, you can use the Optimal MTU (OMTU) function to find the largest endpoint MTU at which the client can successfully pass DTLS packets. Implement OMTU by sending a padded DPD packet to the maximum MTU. If a correct echo of the payload is received from the head end, the MTU size is accepted. Otherwise, the MTU is reduced, and the probe is sent again until the minimum MTU allowed for the protocol is reached.
Note Using OMTU does not interfere with the existing tunnel DPD function.
Limitations
This feature does not work with IPsec, since DPD is based on the standards implementation that does not allow padding.
Fields
• Gateway Side Detection—Uncheck the Disable check box to specify that DPD is performed by the security appliance (gateway). Enter the interval, from 30 to 3600 seconds, with which the security appliance performs DPD.
• Client Side Detection—Uncheck the Disable check box to specify that DPD is performed by the client. Enter the interval, from 30 to 3600 seconds, with which the client performs DPD.
3-22Cisco ASA Series VPN ASDM Configuration Guide
Chapter 3 General VPN Setup Group Policies
Customizing a VPN Access Portal for an Internal Group Policy
To configure customization for a group policy, select a preconfigured portal customization object, or accept the customization provided in the default group policy. You can also configure a URL to display
Fields
• Portal Customization—Selects the customization to apply to the AnyConnect Client/SSL VPN portal page. The default is DfltCustomization.
– Inherit—To inherit a portal customization from the default group policy, check Inherit. To specify a previously configured customization object, uncheck Inherit and choose the customization object from the drop-down list.
– Manage—Opens the Configure GUI Customization objects dialog box, in which you can specify that you want to add, edit, delete, import, or export a customization object.
• Homepage URL (optional)—To specify a homepage URL for users associated with the group policy, enter it in this field. The string must begin with either http:// or https://. To inherit a home page from the default group policy, click Inherit. Clientless users are immediately brought to this page after successful authentication. AnyConnect launches the default web browser to this URL upon successful establishment of the VPN connection.
Note AnyConnect does not currently support this field on the Linux platform, Android mobile devices, and Apple iOS mobile devices. If set, it will be ignored by these AnyConnect clients.
• Access Deny Message—To create a message to users for whom access is denied, enter it in this field. To accept the message in the default group policy, click Inherit.
The default message, if you deselect Inherit, is: “Login was successful, but because certain criteria have not been met or due to some specific group policy, you do not have permission to use any of the VPN features. Contact your IT administrator for more information.”
Configuring AnyConnect Client Custom Attributes for an Internal Group Policy
This dialog box lists the custom attributes that are assigned to this group policy. Custom attributes can be created in this dialog, or on Configuration > Remote Access VPN > Network (Client) Access > Advanced > AnyConnect Custom Attributes. In this dialog, you can add custom attributes to this group policy, and define values for those attributes.
For AnyConnect 3.1, custom attributes are available to support AnyConnect Deferred Upgrade and Phone Home.
See the Cisco AnyConnect Secure Mobility Client Administrator Guide, Release 3.1, Chapter 2, “User Control Over Upgrade” for more information about the deferred upgrade custom attributes.
IPsec (IKEv1) Client
Configuring IPsec (IKEv1) Client General Attributes for an Internal Group Policy
Configuration > Remote Access > Network (Client) Access > Group Policies > Advanced > IPsec (IKEv1) Client
The Add or Edit Group Policy > IPsec dialog box lets you specify tunneling protocols, filters, connection settings, and servers for the group policy being added or modified.
3-23Cisco ASA Series VPN ASDM Configuration Guide
Chapter 3 General VPN Setup Group Policies
Fields
• Re-Authentication on IKE Re-key—Enables or disables reauthentication when IKE re-key occurs, unless the Inherit check box is checked. The user has 30 seconds to enter credentials, and up to three attempts before the SA expires at approximately two minutes and the tunnel terminates.
• Allow entry of authentication credentials until SA expires—Allows users the time to reenter authentication credentials until the maximum lifetime of the configured SA.
• IP Compression—Enables or disables IP Compression, unless the Inherit check box is checked.
• Perfect Forward Secrecy—Enables or disables perfect forward secrecy (PFS), unless the Inherit check box is selected. PFS ensures that the key for a given IPsec SA was not derived from any other secret (like some other keys). In other words, if someone were to break a key, PFS ensures that the attacker would not be able to derive any other key. If PFS were not enabled, someone could hypothetically break the IKE SA secret key, copy all the IPsec protected data, and then use knowledge of the IKE SA secret to compromise the IPsec SAs set up by this IKE SA. With PFS, breaking IKE would not give an attacker immediate access to IPsec. The attacker would have to break each IPsec SA individually.
• Store Password on Client System—Enables or disables storing the password on the client system.
Note Storing the password on a client system can constitute a potential security risk.
• IPsec over UDP—Enables or disables using IPsec over UDP.
• IPsec over UDP Port—Specifies the UDP port to use for IPsec over UDP.
• Tunnel Group Lock—Enables locking the tunnel group you select from the list, unless the Inherit check box or the value None is selected.
• IPsec Backup Servers—Activates the Server Configuration and Server IP Addresses fields, so you can specify the UDP backup servers to use if these values are not inherited.
– Server Configuration—Lists the server configuration options to use as an IPsec backup server. The available options are: Keep Client Configuration (the default), Use the Backup Servers Below, and Clear Client Configuration.
– Server Addresses (space delimited)—Specifies the IP addresses of the IPsec backup servers. This field is available only when the value of the Server Configuration selection is Use the Backup Servers Below.
Configuring IPsec (IKEv1) Client Client Access Rules for an Internal Group Policy
The Client Access Rules table in thisdialog box lets you view up to 25 client access rules. If you uncheck the Inherit check box, the Add, Edit, and Delete buttons become active and the following column headings appear in the table:
• Priority—Shows the priority for this rule.
• Action—Specifies whether this rule permits or denies access.
• VPN Client Type—Specifies the type of VPN client to which this rule applies, software or hardware, and for software clients, all Windows clients or a subset.
• VPN Client Version—Specifies the version or versions of the VPN client to which this rule applies. This column contains a comma-separated list of software or firmware images appropriate for this client.
3-24Cisco ASA Series VPN ASDM Configuration Guide
Chapter 3 General VPN Setup Group Policies
Configuring IPsec (IKEv1) Client Client Firewall Attributes for an Internal Group Policy
Configuration > Remote Access > Network (Client) Access > Group Policies > Advanced > IPsec (IKEv1) Client > Client Firewall Tab
The Add or Edit Group Policy Client Firewall dialog box lets you configure firewall settings for VPN clients for the group policy being added or modified.
Note Only VPN clients running Microsoft Windows can use these firewall features. They are currently not available to hardware clients or other (non-Windows) software clients.
A firewall isolates and protects a computer from the Internet by inspecting each inbound and outbound individual packet of data to determine whether to allow or drop it. Firewalls provide extra security if remote users in a group have split tunneling configured. In this case, the firewall protects the user’s PC, and thereby the corporate network, from intrusions by way of the Internet or the user’s local LAN. Remote users connecting to the ASA with the VPN client can choose the appropriate firewall option.
In the first scenario, a remote user has a personal firewall installed on the PC. The VPN client enforces firewall policy defined on the local firewall, and it monitors that firewall to make sure it is running. If the firewall stops running, the VPN client drops the connection to the ASA. (This firewall enforcement mechanism is called Are You There (AYT), because the VPN client monitors the firewall by sending it periodic “are you there?” messages; if no reply comes, the VPN client knows the firewall is down and terminates its connection to the ASA.) The network administrator might configure these PC firewalls originally, but with this approach, each user can customize his or her own configuration.
In the second scenario, you might prefer to enforce a centralized firewall policy for personal firewalls on VPN client PCs. A common example would be to block Internet traffic to remote PCs in a group using split tunneling. This approach protects the PCs, and therefore the central site, from intrusions from the Internet while tunnels are established. This firewall scenario is called push policy or Central Protection Policy (CPP). On the ASA, you create a set of traffic management rules to enforce on the VPN client, associate those rules with a filter, and designate that filter as the firewall policy. The ASA pushes this policy down to the VPN client. The VPN client then in turn passes the policy to the local firewall, which enforces it.
Fields
• Inherit—Determines whether the group policy obtains its client firewall setting from the default group policy. This option is the default setting. When set, it overrides the remaining attributes in this dialog boxing dims their names.
• Client Firewall Attributes—Specifies the client firewall attributes, including what type of firewall (if any) is implemented and the firewall policy for that firewall.
• Firewall Setting—Lists whether a firewall exists, and if so, whether it is required or optional. If you select No Firewall (the default), none of the remaining fields in thisdialog box are active. If you want users in this group to be firewall-protected, select either the Firewall Required or Firewall Optional setting.
If you choose Firewall Required, all users in this group must use the designated firewall. The ASA drops any session that attempts to connect without the designated, supported firewall installed and running. In this case, the ASA notifies the VPN client that its firewall configuration does not match.
Note If you require a firewall for a group, make sure the group does not include any clients other than Windows VPN clients. Any other clients in the group (including ASA 5505 in client mode and VPN 3002 hardware clients) are unable to connect.
3-25Cisco ASA Series VPN ASDM Configuration Guide
Chapter 3 General VPN Setup Group Policies
If you have remote users in this group who do not yet have firewall capacity, choose Firewall Optional. The Firewall Optional setting allows all the users in the group to connect. Those who have a firewall can use it; users that connect without a firewall receive a warning message. This setting is useful if you are creating a group in which some users have firewall support and others do not—for example, you may have a group that is in gradual transition, in which some members have set up firewall capacity and others have not yet done so.
• Firewall Type—Lists firewalls from several vendors, including Cisco. If you select Custom Firewall, the fields under Custom Firewall become active. The firewall you designate must correlate with the firewall policies available. The specific firewall you configure determines which firewall policy options are supported.
• Custom Firewall—Specifies the vendor ID, Product ID and description for the custom firewall.
– Vendor ID—Specifies the vendor of the custom firewall for this group policy.
– Product ID—Specifies the product or model name of the custom firewall being configured for this group policy.
– Description—(Optional) Describes the custom firewall.
• Firewall Policy—Specifies the type and source for the custom firewall policy.
– Policy defined by remote firewall (AYT)—Specifies that the firewall policy is defined by the remote firewall (Are You There). Policy defined by remote firewall (AYT) means that remote users in this group have firewalls located on their PCs. The local firewall enforces the firewall policy on the VPN client. The ASA allows VPN clients in this group to connect only if they have the designated firewall installed and running. If the designated firewall is not running, the connection fails. Once the connection is established, the VPN client polls the firewall every 30 seconds to make sure that it is still running. If the firewall stops running, the VPN client ends the session.
– Policy pushed (CPP)—Specifies that the policy is pushed from the peer. If you choose this option, the Inbound Traffic Policy and Outbound Traffic Policy lists and the Manage button become active. The ASA enforces on the VPN clients in this group the traffic management rules defined by the filter you choose from the Policy Pushed (CPP) drop-down list. The choices available on the menu are filters defined in thisASA, including the default filters. Keep in mind that the ASA pushes these rules down to the VPN client, so you should create and define these rules relative to the VPN client, not the ASA. For example, “in” and “out” refer to traffic coming into the VPN client or going outbound from the VPN client. If the VPN client also has a local firewall, the policy pushed from the ASA works with the policy of the local firewall. Any packet that is blocked by the rules of either firewall is dropped.
– Inbound Traffic Policy—Lists the available push policies for inbound traffic.
– Outbound Traffic Policy—Lists the available push policies for outbound traffic.
– Manage—Displays the ACL Manager dialog box, in which you can configure Access Control Lists (ACLs).
Configuring IPsec (IKEv1) Client Hardware Client Attributes for an Internal Group Policy
Configuration > Remote Access > Network (Client) Access > Group Policies > Advanced > IPsec (IKEv1) Client > Hardware Client
The Add or Edit Group Policy > Hardware Client dialog box lets you configure settings for the VPN 3002 hardware client for the group policy being added or modified. The Hardware Client dialog box parameters do not pertain to the ASA 5505 in client mode.
3-26Cisco ASA Series VPN ASDM Configuration Guide
Chapter 3 General VPN Setup Group Policies
Fields
• Inherit—(Multiple instances) Indicates that the corresponding setting takes its value from the default group policy, rather than from the explicit specifications that follow. This is the default setting for all attributes in this dialog box.
• Require Interactive Client Authentication—Enables or disables the requirement for interactive client authentication. This parameter is disabled by default. Interactive hardware client authentication provides additional security by requiring the VPN 3002 to authenticate with a username and password that you enter manually each time the VPN 3002 initiates a tunnel. With this feature enabled, the VPN 3002 does not have a saved username and password. When you enter the username and password, the VPN 3002 sends these credentials to the ASA to which it connects. The ASA facilitates authentication, on either the internal or an external authentication server. If the username and password are valid, the tunnel is established.
When you enable interactive hardware client authentication for a group, the ASA pushes that policy to the VPN 3002s in the group. If you have previously set a username and password on the VPN 3002, the software deletes them from the configuration file. When you try to connect, the software prompts you for a username and password.
If, on the ASA, you subsequently disable interactive hardware authentication for the group, it is enabled locally on the VPN 3002s, and the software continues to prompt for a username and password. This lets the VPN 3002 connect, even though it lacks a saved username and password, and the ASA has disabled interactive hardware client authentication. If you subsequently configure a username and password, the feature is disabled, and the prompt no longer appears. The VPN 3002 connects to the ASA using the saved username and password.
• Require Individual User Authentication—Enables or disables the requirement for individual user authentication for users behind ASA 5505 in client mode or the VPN 3002 hardware client in the group. To display a banner to hardware clients in a group, individual user authentication must be enabled. This parameter is disabled by default.
Individual user authentication protects the central site from access by unauthorized persons on the private network of the hardware client. When you enable individual user authentication, each user that connects through a hardware client must open a web browser and manually enter a valid username and password to access the network behind the ASA, even though the tunnel already exists.
Note You cannot use the command-line interface to log in if user authentication is enabled. You must use a browser.
If you have a default home page on the remote network behind the ASA, or if you direct the browser to a website on the remote network behind the ASA, the hardware client directs the browser to the proper pages for user login. When you successfully log in, the browser displays the page you originally entered.
If you try to access resources on the network behind the ASA that are not web-based, for example, e-mail, the connection fails until you authenticate using a browser.
To authenticate, you must enter the IP address for the private interface of the hardware client in the browser Location or Address field. The browser then displays the login dialog box for the hardware client. To authenticate, click Connect/Login Status.
One user can log in for a maximum of four sessions simultaneously. Individual users authenticate according to the order of authentication servers configured for a group.
3-27Cisco ASA Series VPN ASDM Configuration Guide
Chapter 3 General VPN Setup Group Policies
• User Authentication Idle Timeout—Configures a user timeout period. The security appliance terminates the connection if it does not receive user traffic during this period. You can specify that the timeout period is a specific number of minutes or unlimited.
– Unlimited—Specifies that the connection never times out. This option prevents inheriting a value from a default or specified group policy.
– Minutes—Specifies the timeout period in minutes. Use an integer between 1 and 35791394. The default value is Unlimited.
Note that the idle timeout indicated in response to the show uauth command is always the idle timeout value of the user who authenticated the tunnel on the Cisco Easy VPN remote device.
• Cisco IP Phone Bypass—Lets Cisco IP Phones bypass the interactive individual user authentication processes. If enabled, interactive hardware client authentication remains in effect. Cisco IP Phone Bypass is disabled by default.
Note You must configure the ASA 5505 in client mode or the VPN 3002 hardware client to use network extension mode for IP phone connections.
• LEAP Bypass—Lets LEAP packets from Cisco wireless devices bypass the individual user authentication processes (if enabled). LEAP Bypass lets LEAP packets from devices behind a hardware client travel across a VPN tunnel prior to individual user authentication. This lets workstations using Cisco wireless access point devices establish LEAP authentication. Then they authenticate again per individual user authentication (if enabled). LEAP Bypass is disabled by default.
Note This feature does not work as intended if you enable interactive hardware client authentication.
IEEE 802.1X is a standard for authentication on wired and wireless networks. It provides wireless LANs with strong mutual authentication between clients and authentication servers, which can provide dynamic per-user, per-session wireless encryption privacy (WEP) keys, removing administrative burdens and security issues that are present with static WEP keys.
Cisco Systems has developed an 802.1X wireless authentication type called Cisco LEAP. LEAP implements mutual authentication between a wireless client on one side of a connection and a RADIUS server on the other side. The credentials used for authentication, including a password, are always encrypted before they are transmitted over the wireless medium.
Note Cisco LEAP authenticates wireless clients to RADIUS servers. It does not include RADIUS accounting services.
LEAP users behind a hardware client have a circular dilemma: they cannot negotiate LEAP authentication because they cannot send their credentials to the RADIUS server behind the central site device over the tunnel. The reason they cannot send their credentials over the tunnel is that they have not authenticated on the wireless network. To solve this problem, LEAP Bypass lets LEAP packets, and only LEAP packets, traverse the tunnel to authenticate the wireless connection to a RADIUS server before individual users authenticate. Then the users proceed with individual user authentication.
LEAP Bypass works as intended under the following conditions:
3-28Cisco ASA Series VPN ASDM Configuration Guide
Chapter 3 General VPN Setup Group Policies
– The interactive unit authentication feature (intended for wired devices) must be disabled. If interactive unit authentication is enabled, a non-LEAP (wired) device must authenticate the hardware client before LEAP devices can connect using that tunnel.
– Individual user authentication is enabled (if it is not, you do not need LEAP Bypass).
– Access points in the wireless environment must be Cisco Aironet Access Points. The wireless NIC cards for PCs can be other brands.
– The Cisco Aironet Access Point must be running Cisco Discovery Protocol (CDP).
– The ASA 5505 or VPN 3002 can operate in either client mode or network extension mode.
– LEAP packets travel over the tunnel to a RADIUS server via ports 1645 or 1812.
Note Allowing any unauthenticated traffic to traverse the tunnel might pose a security risk.
• Allow C—Restricts the use of Network Extension Mode on the hardware client. Choose the option to let hardware clients use Network Extension Mode. Network Extension Mode is required for the hardware client to support IP phone connections, because the Call Manager can communicate only with actual IP addresses.
Note If you disable network extension mode, the default setting, the hardware client can connect to this ASA in PAT mode only. If you disallow network extension mode here, be careful to configure all hardware clients in a group for PAT mode. If a hardware client is configured to use Network Extension Mode and the ASA to which it connects disables Network Extension Mode, the hardware client attempts to connect every 4 seconds, and every attempt is rejected. In this situation, the hardware client puts an unnecessary processing load on the ASA to which it connects; large numbers of hardware clients that are misconfigured in this way reduces the ability of the security appliance to provide service.
Configuring Clientless SSL VPN Internal Group Policies
Configuring Clientless SSL VPN General Attributes for an Internal Group Policy
Configuration > Remote Access VPN > Clientless SSL VPN Access > Group Policies > Add/Edit > Add or Edit Internal Group Policy > General
The Add or Edit Group Policy dialog box lets you specify tunneling protocols, filters, connection settings, and servers for the group policy being added or modified. For each of the fields in thisdialog box, checking the Inherit check box lets the corresponding setting take its value from the default group policy. Inherit is the default value for all of the attributes in this dialog box.
Fields
The following attributes appear in the Add Internal Group Policy > General dialog box. They apply to SSL VPN and IPsec sessions, or clientless SSL VPN sessions. Thus, several are present for one type of session, but not the other.
• Name—Specifies the name of this group policy up to 64 characters; spaces are allowed. For the Edit function, this field is read-only.
• Banner—Specifies the banner text to present to users at login. The length can be up to 491 characters. There is no default value.
3-29Cisco ASA Series VPN ASDM Configuration Guide
Chapter 3 General VPN Setup Group Policies
The IPsec VPN client supports full HTML for the banner. However, the clientless portal and the AnyConnect client support partial HTML. To ensure the banner displays properly to remote users, follow these guidelines:
– For clientless users, use the <BR> tag.
• Tunneling Protocols—Specifies the tunneling protocols that this group can use. Users can use only the selected protocols. The choices are as follows:
– Clientless SSL VPN—Specifies the use of VPN via SSL/TLS, which uses a web browser to establish a secure remote-access tunnel to an ASA; requires neither a software nor hardware client. Clientless SSL VPN can provide easy access to a broad range of enterprise resources, including corporate websites, web-enabled applications, NT/AD file share (web-enabled), e-mail, and other TCP-based applications from almost any computer that can reach HTTPS Internet sites.
– SSL VPN Client—Specifies the use of the Cisco AnyConnect VPN client or the legacy SSL VPN client. If you are using the AnyConnect client, you must choose this protocol for MUS to be supported.
– IPsec IKEv1—IP Security Protocol. Regarded as the most secure protocol, IPsec provides the most complete architecture for VPN tunnels. Both Site-to-Site (peer-to-peer) connections and Cisco VPN client-to-LAN connections can use IPsec IKEv1.
– IPsec IKEv2—Supported by the AnyConnect Secure Mobility Client. AnyConnect connections using IPsec with IKEv2 provide advanced features such as software updates, client profiles, GUI localization (translation) and customization, Cisco Secure Desktop, and SCEP proxy.
– L2TP over IPsec—Allows remote users with VPN clients provided with several common PC and mobile PC operating systems to establish secure connections over the public IP networkto the security appliance and private corporate networks. L2TP uses PPP over UDP (port 1701)to tunnel the data. The security appliance must be configured for IPsec transport mode.
Note If you do not select a protocol, an error message appears.
• Web ACL—(Clientless SSL VPN only) Choose an access control list (ACL) from the drop-down list if you want to filter traffic. Click Manage next to the list if you want to view, modify, add, or remove ACLs before making a selection.
– Manage—Displays the ACL Manager dialog box, with which you can add, edit, and delete Access Control Lists (ACLs) and Extended Access Control Lists (ACEs). For more information about the ACL Manager, see the online Help for that dialog box.
• Access Hours—Selects the name of an existing access hours policy, if any, applied to this user or create a new access hours policy. The default value is Inherit, or, if the Inherit check box is not checked, the default value is --Unrestricted--.
– Manage—Opens the Browse Time Range dialog box, in which you can add, edit, or delete a time range. See Defining Time Ranges, page 3-34 for more information.
• Simultaneous Logins—Specifies the maximum number of simultaneous logins allowed for this user. The default value is 3. The minimum value is 0, which disables login and prevents user access.
Note While there is no maximum limit, allowing several simultaneous connections might compromise security and affect performance.
3-30Cisco ASA Series VPN ASDM Configuration Guide
Chapter 3 General VPN Setup Group Policies
• Restrict Access to VLAN—(Optional) Also called “VLAN mapping,” this parameter specifies the egress VLAN interface for sessions to which this group policy applies. The ASA forwards all traffic in this group to the selected VLAN. Use this attribute to assign a VLAN to the group policy to simplify access control. Assigning a value to this attribute is an alternative to using ACLs to filter traffic on a session. In addition to the default value (Unrestricted), the drop-down list shows only the VLANs that are configured on this ASA.
Note This feature works for HTTP connections, but not for FTP and CIFS.
• Connection Profile (Tunnel Group) Lock—This parameter permits remote VPN access only with the selected connection profile (tunnel group), and prevents access with a different connection profile. The default inherited value is None.
• Maximum Connect Time—If the Inherit check box is not checked, this parameter specifies the maximum user connection time in minutes. At the end of this time, the system terminates the connection. The minimum is 1 minute, and the maximum is 35791394 minutes (over 4000 years). To allow unlimited connection time, check Unlimited (the default).
• Idle Timeout—If the Inherit check box is not checked, this parameter specifies this user’s idle timeout period in minutes. If there is no communication activity on the user connection in this period, the system terminates the connection. The minimum time is 1 minute, and the maximum time is 10080 minutes. The default is 30 minutes. To allow unlimited connection time, check Unlimited. This value does not apply to Clientless SSL VPN users.
• Session Alert Interval— If you uncheck the Inherit check box, the Default checkbox is checked automatically. This sets the session alert interval to 30 minutes. If you want to specify a new value, uncheck the Default check box and specify a session alert interval from 1 to 30 minutes in the minutes box.
• Idle Alert Interval—If you uncheck the Inherit check box, the Default checkbox is checked automatically. This sets the idle alert interval to 30 minutes. If you want to specify a new value, uncheck the Default check box and specify a session alert interval from 1 to 30 minutes in the minutes box.
Configuring the Clientless SSL VPN Access Portal for an Internal Group Policy
The Portal attributes determine what appears on the portal page for members of this group policy establishing Clientless SSL VPN connections. In this pane, you can enable Bookmark lists and URL Entry, file server access, Port Forwarding and Smart Tunnels, ActiveX Relay, and HTTP settings.
Fields
• Bookmark List—Choose a previously-configured Bookmark list or click Manage to create a new one. Bookmarks appear as links, from which users can navigate from the portal page.
• URL Entry—Enable to allow remote users to enter URLs directly into the portal URL field.
• File Access Control—Controls the visibility of “hidden shares” for Common Internet File System (CIFS) files. A hidden share is identified by a dollar sign ($) at the end of the share name. For example, drive C is shared as C$. With hidden shares, a shared folder is not displayed, and users are restricted from browsing or accessing these hidden resources.
– File Server Entry—Enable to allow remote users to enter the name of a file server.
– File Server Browsing—Enable to allow remote users to browse for available file servers.
– Hidden Share Access—Enable to hide shared folders.
3-31Cisco ASA Series VPN ASDM Configuration Guide
Chapter 3 General VPN Setup Group Policies
• Port Forwarding Control—Provides users access to TCP-based applications over a Clientless SSL VPN connection through a Java Applet.
– Port Forwarding List—Choose a previously-configured list TCP applications to associate with this group policy. Click Manage to create a new list or to edit an existing list.
– Auto Applet Download—Enables automatic installation and starting of the Applet the first time the user logs in.
– Applet Name—Changes the name of the title bar that of the Applet dialog box to the name you designate. By default, the name is Application Access.
• Smart Tunnel—Specify your smart tunnel options using a clientless (browser-based) SSL VPN session with the ASA as the pathway and the security appliance as a proxy server:
– Smart Tunnel Policy—Choose from the network list and specify one of the tunnels options: use smart tunnel for the specified network, do not use smart tunnel for the specified network, or use tunnel for all network traffic. Assigning a smart tunnel network to a group policy or username enables smart tunnel access for all users whose sessions are associated with the group policy or username but restricts smart tunnel access to the applications specified in the list. To view, add, modify, or delete a smart tunnel list, click Manage.
– Smart Tunnel Application—Choose from the drop-down list to connect a Winsock 2, TCP-based application installed on the end station to a server on the intranet. To view, add, modify, or delete a smart tunnel application, click Manage.
– Smart Tunnel all Applications—Check this check box to tunnel all applications. All applications are tunneled without choosing from the network list or knowing which executables an end user may invoke for external applications.
– Auto Start—Check this check box to start smart tunnel access automatically upon user login. This option to start smart tunnel access upon user login applies only to Windows. Uncheck the check box to enable smart tunnel access upon user login but require the user to start it manually, using the Application Access > Start Smart Tunnels button on the Clientless SSL VPN Portal Page.
– Auto Sign-on Server List—Choose the list name from the drop-down list if you want to reissue the user credentials when the user establishes a smart tunnel connection to a server. Each smart tunnel auto sign-on list entry identifies a server with which to automate the submission of user credentials. To view, add, modify, or delete a smart tunnel auto sign-on list, click Manage.
– Windows Domain Name (Optional)—Specify the Windows domain to add it to the username during auto sign-on, if the universal naming convention (domain\username) is required for authentication. For example, enter CISCO to specify CISCO\qa_team when authenticating for the username qu_team. You must also check the “Use Windows domain name with user name” option when configuring associated entries in the auto sign-on server list.
• ActiveX Relay—Lets Clientless users launch Microsoft Office applications from the browser. The applications use the session to download and upload Microsoft Office documents. The ActiveX relay remains in force until the Clientless SSL VPN session closes.
More Options:
• HTTP Proxy—Enables or disables the forwarding of an HTTP applet proxy to the client. The proxy is useful for technologies that interfere with proper content transformation, such as Java, ActiveX, and Flash. It bypasses mangling while ensuring the continued use of the security appliance. The forwarded proxy automatically modifies the old browser proxy configuration and redirects all HTTP and HTTPS requests to the new proxy configuration. It supports virtually all client side technologies, including HTML, CSS, JavaScript, VBScript, ActiveX, and Java. The only browser it supports is Microsoft Internet Explorer.
3-32Cisco ASA Series VPN ASDM Configuration Guide
Chapter 3 General VPN Setup Group Policies
• Auto Start (HTTP Proxy)—Check to enable HTTP Proxy automatically upon user login. Uncheck to enable smart tunnel access upon user login, but require the user to start it manually.
• HTTP Compression—Enables compression of HTTP data over the Clientless SSL VPN session.
Configuring Portal Customization for a Clientless SSL VPN Internal Group Policy
To configure customization for a group policy, select a preconfigured portal customization object, or accept the customization provided in the default group policy. You can also configure a URL to display.
The procedure for customizing an access portal for a Clientless SSL VPN Access connection is the same as it is for a Network Client Access connection. See Customizing a VPN Access Portal for an Internal Group Policy, page 3-23.
Configuring Login Settings for a Clientless SSL VPN Internal Group Policy
In this dialog box, you can enable the ASA to prompt remote users to download the AnyConnect client or go to a Clientless SSL VPN portal page. See Configuring AnyConnect Login Settings for an Internal Group Policy, page 3-21.
Configuring Single Signon and Auto Signon Servers for a Clientless SSL VPN Access Internal Group Policy
To configure single sign-on servers and Auto sign-on servers, see Chapter 15, “Clientless SSL VPN Users.”.
Configuring Session Settings for Clientless SSL VPN Access
The clientless SSL VPN Add/Edit Internal Group Policy > More Options > Session Settings window lets you specify personalized user information between clientless SSL VPN sessions. By default, each group policy inherits the settings from the default group policy. Use this window to specify personalized clientless SSL VPN user information for the default group policy and any group policies for which you want to differentiate these values. See “Configuring Session Settings” Chapter 71, “Clientless SSL VPN” in Cisco ASA 5500 Series Configuration Guide using ASDM, 6.4 and 6.6 or in Chapter 73 of Cisco ASA 5500 Series Configuration Guide using the CLI, 8.4 and 8.6.
Configuring Site-to-Site Internal Group PoliciesConfiguration > Remote Access VPN > Network (Client) Access > Group Policies > Add/Edit > Add or Edit Internal Group Policy > General
The Add or Edit Group Policy dialog box lets you specify tunneling protocols, filters, connection settings, and servers for the group policy being added or modified. For each of the fields in this dialog box, checking the Inherit check box lets the corresponding setting take its value from the default group policy. Inherit is the default value for all of the attributes in this dialog box.
Fields
The following attributes appear in the Add Internal Group Policy > General dialog box. They apply to SSL VPN and IPsec sessions, or clientless SSL VPN sessions. Thus, several are present for one type of session, but not the other.
3-33Cisco ASA Series VPN ASDM Configuration Guide
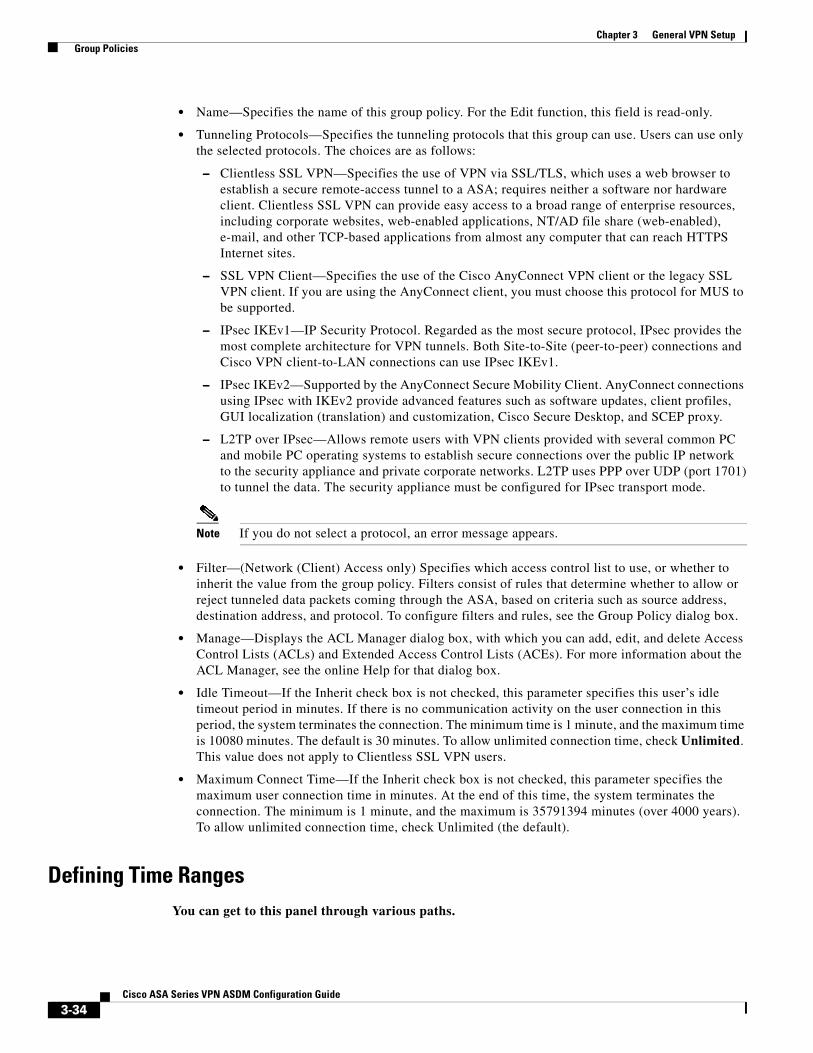
Chapter 3 General VPN Setup Group Policies
• Name—Specifies the name of this group policy. For the Edit function, this field is read-only.
• Tunneling Protocols—Specifies the tunneling protocols that this group can use. Users can use only the selected protocols. The choices are as follows:
– Clientless SSL VPN—Specifies the use of VPN via SSL/TLS, which uses a web browser to establish a secure remote-access tunnel to a ASA; requires neither a software nor hardware client. Clientless SSL VPN can provide easy access to a broad range of enterprise resources, including corporate websites, web-enabled applications, NT/AD file share (web-enabled), e-mail, and other TCP-based applications from almost any computer that can reach HTTPS Internet sites.
– SSL VPN Client—Specifies the use of the Cisco AnyConnect VPN client or the legacy SSL VPN client. If you are using the AnyConnect client, you must choose this protocol for MUS to be supported.
– IPsec IKEv1—IP Security Protocol. Regarded as the most secure protocol, IPsec provides the most complete architecture for VPN tunnels. Both Site-to-Site (peer-to-peer) connections and Cisco VPN client-to-LAN connections can use IPsec IKEv1.
– IPsec IKEv2—Supported by the AnyConnect Secure Mobility Client. AnyConnect connections using IPsec with IKEv2 provide advanced features such as software updates, client profiles, GUI localization (translation) and customization, Cisco Secure Desktop, and SCEP proxy.
– L2TP over IPsec—Allows remote users with VPN clients provided with several common PC and mobile PC operating systems to establish secure connections over the public IP networkto the security appliance and private corporate networks. L2TP uses PPP over UDP (port 1701)to tunnel the data. The security appliance must be configured for IPsec transport mode.
Note If you do not select a protocol, an error message appears.
• Filter—(Network (Client) Access only) Specifies which access control list to use, or whether to inherit the value from the group policy. Filters consist of rules that determine whether to allow or reject tunneled data packets coming through the ASA, based on criteria such as source address, destination address, and protocol. To configure filters and rules, see the Group Policy dialog box.
• Manage—Displays the ACL Manager dialog box, with which you can add, edit, and delete Access Control Lists (ACLs) and Extended Access Control Lists (ACEs). For more information about the ACL Manager, see the online Help for that dialog box.
• Idle Timeout—If the Inherit check box is not checked, this parameter specifies this user’s idle timeout period in minutes. If there is no communication activity on the user connection in this period, the system terminates the connection. The minimum time is 1 minute, and the maximum time is 10080 minutes. The default is 30 minutes. To allow unlimited connection time, check Unlimited. This value does not apply to Clientless SSL VPN users.
• Maximum Connect Time—If the Inherit check box is not checked, this parameter specifies the maximum user connection time in minutes. At the end of this time, the system terminates the connection. The minimum is 1 minute, and the maximum is 35791394 minutes (over 4000 years). To allow unlimited connection time, check Unlimited (the default).
Defining Time RangesYou can get to this panel through various paths.
3-34Cisco ASA Series VPN ASDM Configuration Guide

Chapter 3 General VPN Setup Group Policies
Use the Browse Time Range dialog box to add, edit, or delete a time range. A time range is a reusable component that defines starting and ending times that can be applied to a group policy. After defining a time range, you can select the time range and apply it to different options that require scheduling. For example, you can attach an ACL to a time range to restrict access to the ASA. A time range consists of a start time, an end time, and optional recurring (that is, periodic) entries. For more information about time ranges, see the online Help for the Add or Edit Time Range dialog box.
Fields
• Add—Opens the Add Time Range dialog box, in which you can create a new time range.
Note Creating a time range does not restrict access to the device.
• Edit—Opens the Edit Time Range dialog box, in which you can modify an existing time range. This button is active only when you have selected an existing time range from the Browse Time Range table.
• Delete—Removes a selected time range from the Browse Time Range table. There is no confirmation or undo of this action.
• Name—Specifies the name of the time range.
• Start Time—Specifies when the time range begins.
• End Time—Specifies when the time range ends.
• Recurring Entries—Specifies further constraints of active time of the range within the start and stop time specified.
Add/Edit Time Range
You can get to this panel through various paths.
The Add or Edit Time Range dialog box lets you configure a new time range.
Fields
• Time Range Name—Specifies the name that you want to assign to this time range.
• Start Time—Defines the time when you want the time range to start.
– Start now—Specifies that the time range starts immediately.
– Start at—Selects the month, day, year, hour, and minute at which you want the time range to start.
• End Time—Defines the time when you want the time range to end.
– Never end—Specifies that the time range has no defined end point.
– End at (inclusive)—Selects the month, day, year, hour, and minute at which you want the time range to end.
• Recurring Time Ranges—Constrains the active time of this time range within the start and end times when the time range is active. For example, if the start time is start now and the end time is never end, and you want the time range to be effective every weekday, Monday through Friday, from 8:00 AM to 5:00 PM, you could configure a recurring time range, specifying that it is to be active weekdays from 08:00 through 17:00, inclusive.
• Add—Opens the Add Recurring Time Range dialog box, in which you can configure a recurring time range.
3-35Cisco ASA Series VPN ASDM Configuration Guide
Chapter 3 General VPN Setup Access Control List Manager
• Edit—Opens the Edit Recurring Time Range dialog box, in which you can modify a selected recurring time range.
• Delete—Removes a selected recurring time range.
Add/Edit Recurring Time Range
You can get to this panel through various paths.
The Add or Edit Recurring Time Range dialog box lets you configure or modify a recurring time range.
Fields
• Specify days of the week and times on which this recurring range will be active—Makes available the options in the Days of the week area. For example, use this option when you want the time range to be active only every Monday through Thursday, from 08:00 through 16:59.
– Days of the week—Specifies the days that you want to include in this recurring time range. Possible options are: Every day, Weekdays, Weekends, and On these days of the week. For the last of these, you can check a check box for each day that you want included in the range.
– Daily Start Time—Specifies the hour and minute, in 24-hour format, when you want the recurring time range to be active on each selected day.
– Daily End Time (inclusive)—Specifies the hour and minute, in 24-hour format, when you want the recurring time range to end on each selected day.
• Specify a weekly interval when this recurring range will be active—Makes available the options in the Weekly Interval area. The range extends inclusively through the end time. All times in this area are in 24-hour format. For example, use this option when you want the time range to be active continuously from Monday at 8:00 AM through Friday at 4:30 PM.
– From—Selects the day, hour, and minute when you want the weekly time range to start.
– Through—Selects the day, hour, and minute when you want the weekly time range to end.
Access Control List ManagerYou can get to this panel through various paths.
The ACL Manager dialog box lets you define access control lists (ACLs) to control the access of a specific host or network to another host/network, including the protocol or port that can be used.
You can configure ACLs (access control lists) to apply to user sessions. These are filters that permit or deny user access to specific networks, subnets, hosts, and web servers.
• If you do not define any filters, all connections are permitted.
• The ASA supports only an inbound ACL on an interface.
• At the end of each ACL, there is an implicit, unwritten rule that denies all traffic that is not permitted. If traffic is not explicitly permitted by an access control entry (ACE), the ASA denies it. ACEs are referred to as rules in this section.
Standard Access Control ListThis pane provides summary information about standard ACLs, and lets you add or edit ACLs and ACEs.
3-36Cisco ASA Series VPN ASDM Configuration Guide
Chapter 3 General VPN Setup Access Control List Manager
Fields
• Add—Lets you add a new ACL. When you highlight an existing ACL, it lets you add a new ACE for that ACL.
• Edit—Opens the Edit ACE dialog box, in which you can change an existing access control list rule.
• Delete—Removes an ACL or ACE. There is no confirmation or undo.
• Move Up/Move Down—Changes the position of a rule in the ACL Manager table.
• Cut—Removes the selection from the ACL Manager table and places it on the clipboard.
• Copy—Places a copy of the selection on the clipboard.
• Paste—Opens the Paste ACE dialog box, in which you can create a new ACL rule from an existing rule.
• No—Indicates the order of evaluation for the rule. Implicit rules are not numbered, but are represented by a hyphen.
• Address—Displays the IP address or URL of the application or service to which the ACE applies.
• Action—Specifies whether this filter permits or denies traffic flow.
• Description—Shows the description you typed when you added the rule. An implicit rule includes the following description: “Implicit outbound rule.”
Extended Access Control ListThis pane provides summary information about extended ACLs, and lets you add or edit ACLs and ACEs.
Fields
• Add—Lets you add a new ACL. When you highlight an existing ACL, it lets you add a new ACE for that ACL.
• Edit—Opens the Edit ACE dialog box, in which you can change an existing access control list rule.
• Delete—Removes an ACL or ACE. There is no confirmation or undo.
• Move Up/Move Down—Changes the position of a rule in the ACL Manager table.
• Cut—Removes the selection from the ACL Manager table and places it on the clipboard.
• Copy—Places a copy of the selection on the clipboard.
• Paste—Opens the Paste ACE dialog box, in which you can create a new ACL rule from an existing rule.
• No—Indicates the order of evaluation for the rule. Implicit rules are not numbered, but are represented by a hyphen.
• Enabled—Enables or disables a rule. Implicit rules cannot be disabled.
• Source—Specifies the IP addresses (Host/Network) that are permitted or denied to send traffic to the IP addresses listed in the Destination column. In detail mode (see the Show Detail radio button), an address column might contain an interface name with the word any, such as inside: any. This means that any host on the inside interface is affected by the rule.
• Destination—Specifies the IP addresses (Host/Network) that are permitted or denied to send traffic to the IP addresses listed in the Source column. An address column might contain an interface name with the word any, such as outside: any. This means that any host on the outside interface is affected by the rule. An address column might also contain IP addresses; for example
3-37Cisco ASA Series VPN ASDM Configuration Guide

Chapter 3 General VPN Setup Access Control List Manager
209.165.201.1-209.165.201.30. These addresses are translated addresses. When an inside host makes a connection to an outside host, the firewall maps the address of the inside host to an address from the pool. After a host creates an outbound connection, the firewall maintains this address mapping. The address mapping structure is called an xlate, and remains in memory for a period of time. During this time, outside hosts can initiate connections to the inside host using the translated address from the pool, if allowed by the ACL. Normally, outside-to-inside connections require a static translation so that the inside host always uses the same IP address.
• Service—Names the service and protocol specified by the rule.
• Action—Specifies whether this filter permits or denies traffic flow.
• Logging—Shows the logging level and the interval in seconds between log messages (if you enable logging for the ACL). To set logging options, including enabling and disabling logging, right-click this column, and click Edit Log Option. The Log Options dialog box appears.
• Time—Specifies the name of the time range to be applied in this rule.
• Description—Shows the description you typed when you added the rule. An implicit rule includes the following description: “Implicit outbound rule.”
Add/Edit/Paste ACE
ACL Manager > Add/Edit/Paste Extended ACE
The Add/Edit/Paste ACE dialog box lets you create a new extended ACE, or modify an existing rule. The Paste option becomes available only when you cut or copy a rule.
Fields
• Action—Determines the action type of the new rule. Select either permit or deny.
– Permit—Permits all matching traffic.
– Deny—Denies all matching traffic.
• Source/Destination—Specifies the source or destination type and, depending on that type, the other relevant parameters describing the source or destination host/network IP Address. Possible values are: any, IP address, Network Object Group, and Interface IP. The availability of subsequent fields depends upon the value of the Type field:
– any—Specifies that the source or destination host/network can be any type. For this value of the Type field, there are no additional fields in the Source or Destination area.
– IP Address—Specifies the source or destination host or network IP address. Both IPv4 and IPv6 addresses are supported. With this selection, the IP Address, ellipsis button, and Netmask fields become available. Choose an IP address or host name from the drop-down list in the IP Address field or click the ellipsis (...) button to browse for an IP address or name. Select a network mask from the drop-down list.
– Network Object Group—Specifies the name of the network object group. Choose a name from the drop-down list or click the ellipsis (...) button to browse for a network object group name.
– Interface IP—Specifies the interface on which the host or network resides. Select an interface from the drop-down list. The default values are inside and outside. There is no browse function.
• Protocol and Service—Specifies the protocol and service to which this ACE filter applies. Service groups let you identify multiple non-contiguous port numbers that you want the ACL to match. For example, if you want to filter HTTP, FTP, and port numbers 5, 8, and 9, define a service group that includes all these ports. Without service groups, you would have to create a separate rule for each port.
3-38Cisco ASA Series VPN ASDM Configuration Guide
Chapter 3 General VPN Setup Access Control List Manager
You can create service groups for TCP, UDP, TCP-UDP, ICMP, and other protocols. A service group with the TCP-UDP protocol contains services, ports, and ranges that might use either the TCP or UDP protocol.
– Protocol—Selects the protocol to which this rule applies. Possible values are ip, tcp, udp, icmp, and other. The remaining available fields in the Protocol and Service area depend upon the protocol you select. The next few bullets describe the consequences of each of these selections:
– Protocol: TCP and UDP—Selects the TCP/UDP protocol for the rule. The Source Port and Destination Port areas allow you to specify the ports that the ACL uses to match packets.
– Source Port/Destination Port—(Available only for TCP and UDP protocols) Specifies an operator and a port number, a range of ports, or a well-known service name from a list of services, such as HTTP or FTP. The operator list specifies how the ACL matches the port. Choose one of the following operators: = (equals the port number), not = (does not equal the port number), > (greater than the port number), < (less than the port number), range (equal to one of the port numbers in the range).
– Group—(Available only for TCP and UDP protocols) Selects a source port service group. The Browse (...) button opens the Browse Source Port or Browse Destination Port dialog box.
– Protocol: ICMP—Lets you choose an ICMP type or ICMP group from a preconfigured list or browse (...) for an ICMP group. The Browse button opens the Browse ICMP dialog box.
– Protocol: IP—Specifies the IP protocol for the rule in the IP protocol box. No other fields are available when you make this selection.
– Protocol: Other—Lets you choose a protocol from a drop-down list, choose a protocol group from a drop-down list, or browse for a protocol group. The Browse (...) button opens the Browse Other dialog box.
• Rule Flow Diagram—(Display only) Provides a graphical representation of the configured rule flow. This same diagram appears on the ACL Manager dialog box unless you explicitly close that display.
• Options—Sets optional features for this rule, including logging parameters, time ranges, and description.
– Logging—Enables or disables logging or specifies the use of the default logging settings. If logging is enabled, the Syslog Level and Log Interval fields become available.
– Syslog Level—Selects the level of logging activity. The default is Informational.
– Log Interval—Specifies the interval for permit and deny logging. The default is 300 seconds. The range is 1 through 6000 seconds.
– Time Range—Selects the name of the time range to use with this rule. The default is (any). Click the Browse (...) button to open the Browse Time Range dialog box to select or add a time range.
– Description—(Optional) Provides a brief description of this rule. A description line can be up to 100 characters long, but you can break a description into multiple lines.
Browse Source/Destination Address
ACL Manager > Add/Edit Extended Access List Rule > Source or Destination > Browse button
The Browse Source or Destination Address dialog box lets you select an object to use as a source or destination for this rule.
3-39Cisco ASA Series VPN ASDM Configuration Guide
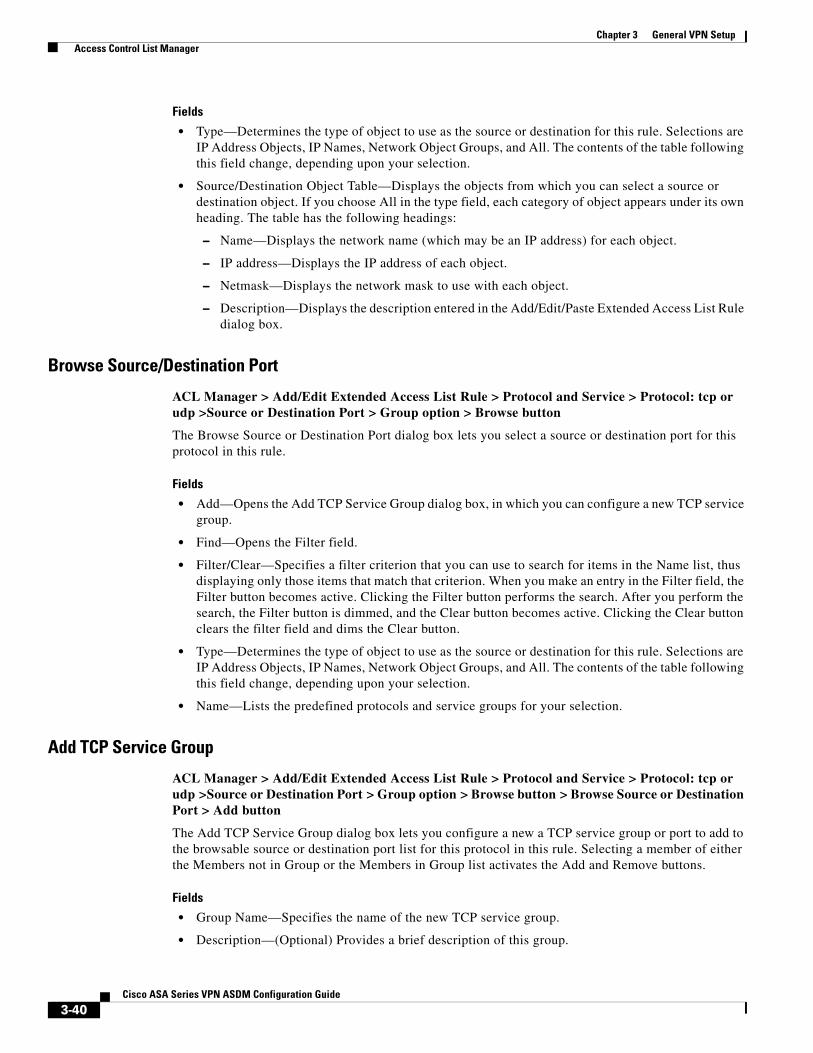
Chapter 3 General VPN Setup Access Control List Manager
Fields
• Type—Determines the type of object to use as the source or destination for this rule. Selections are IP Address Objects, IP Names, Network Object Groups, and All. The contents of the table following this field change, depending upon your selection.
• Source/Destination Object Table—Displays the objects from which you can select a source or destination object. If you choose All in the type field, each category of object appears under its own heading. The table has the following headings:
– Name—Displays the network name (which may be an IP address) for each object.
– IP address—Displays the IP address of each object.
– Netmask—Displays the network mask to use with each object.
– Description—Displays the description entered in the Add/Edit/Paste Extended Access List Rule dialog box.
Browse Source/Destination Port
ACL Manager > Add/Edit Extended Access List Rule > Protocol and Service > Protocol: tcp or udp >Source or Destination Port > Group option > Browse button
The Browse Source or Destination Port dialog box lets you select a source or destination port for this protocol in this rule.
Fields
• Add—Opens the Add TCP Service Group dialog box, in which you can configure a new TCP service group.
• Find—Opens the Filter field.
• Filter/Clear—Specifies a filter criterion that you can use to search for items in the Name list, thus displaying only those items that match that criterion. When you make an entry in the Filter field, the Filter button becomes active. Clicking the Filter button performs the search. After you perform the search, the Filter button is dimmed, and the Clear button becomes active. Clicking the Clear button clears the filter field and dims the Clear button.
• Type—Determines the type of object to use as the source or destination for this rule. Selections are IP Address Objects, IP Names, Network Object Groups, and All. The contents of the table following this field change, depending upon your selection.
• Name—Lists the predefined protocols and service groups for your selection.
Add TCP Service Group
ACL Manager > Add/Edit Extended Access List Rule > Protocol and Service > Protocol: tcp or udp >Source or Destination Port > Group option > Browse button > Browse Source or Destination Port > Add button
The Add TCP Service Group dialog box lets you configure a new a TCP service group or port to add to the browsable source or destination port list for this protocol in this rule. Selecting a member of either the Members not in Group or the Members in Group list activates the Add and Remove buttons.
Fields
• Group Name—Specifies the name of the new TCP service group.
• Description—(Optional) Provides a brief description of this group.
3-40Cisco ASA Series VPN ASDM Configuration Guide
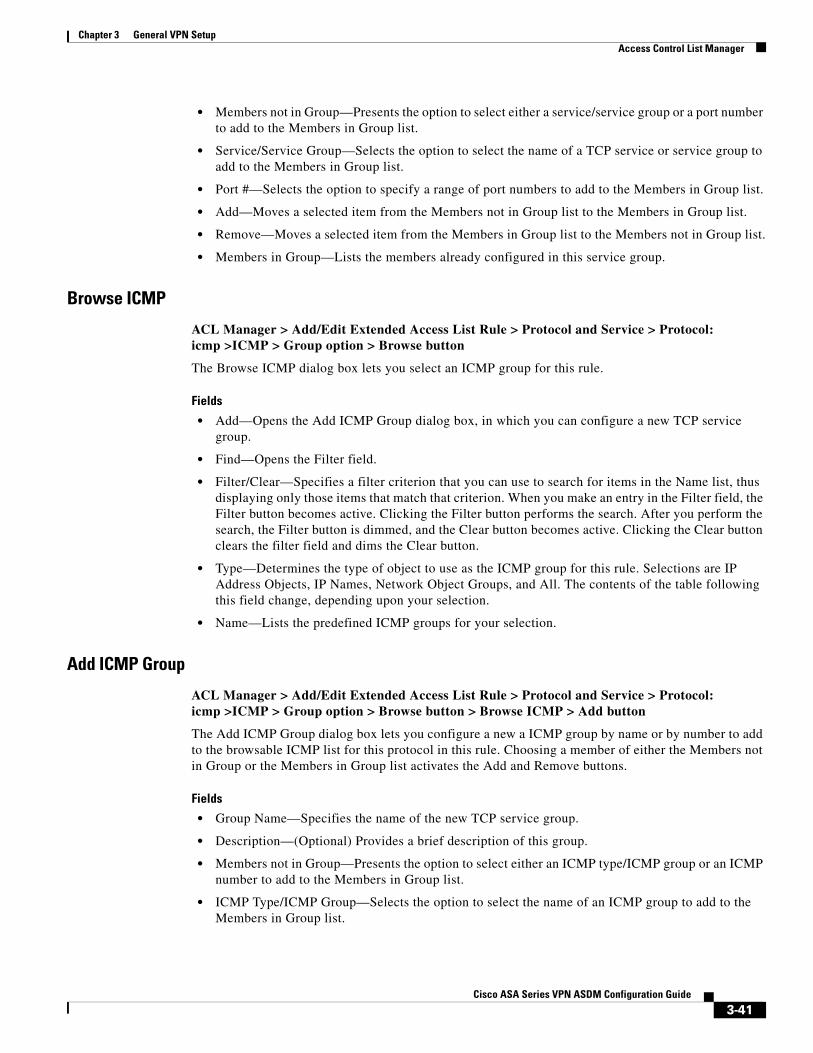
Chapter 3 General VPN Setup Access Control List Manager
• Members not in Group—Presents the option to select either a service/service group or a port number to add to the Members in Group list.
• Service/Service Group—Selects the option to select the name of a TCP service or service group to add to the Members in Group list.
• Port #—Selects the option to specify a range of port numbers to add to the Members in Group list.
• Add—Moves a selected item from the Members not in Group list to the Members in Group list.
• Remove—Moves a selected item from the Members in Group list to the Members not in Group list.
• Members in Group—Lists the members already configured in this service group.
Browse ICMP
ACL Manager > Add/Edit Extended Access List Rule > Protocol and Service > Protocol: icmp >ICMP > Group option > Browse button
The Browse ICMP dialog box lets you select an ICMP group for this rule.
Fields
• Add—Opens the Add ICMP Group dialog box, in which you can configure a new TCP service group.
• Find—Opens the Filter field.
• Filter/Clear—Specifies a filter criterion that you can use to search for items in the Name list, thus displaying only those items that match that criterion. When you make an entry in the Filter field, the Filter button becomes active. Clicking the Filter button performs the search. After you perform the search, the Filter button is dimmed, and the Clear button becomes active. Clicking the Clear button clears the filter field and dims the Clear button.
• Type—Determines the type of object to use as the ICMP group for this rule. Selections are IP Address Objects, IP Names, Network Object Groups, and All. The contents of the table following this field change, depending upon your selection.
• Name—Lists the predefined ICMP groups for your selection.
Add ICMP Group
ACL Manager > Add/Edit Extended Access List Rule > Protocol and Service > Protocol: icmp >ICMP > Group option > Browse button > Browse ICMP > Add button
The Add ICMP Group dialog box lets you configure a new a ICMP group by name or by number to add to the browsable ICMP list for this protocol in this rule. Choosing a member of either the Members not in Group or the Members in Group list activates the Add and Remove buttons.
Fields
• Group Name—Specifies the name of the new TCP service group.
• Description—(Optional) Provides a brief description of this group.
• Members not in Group—Presents the option to select either an ICMP type/ICMP group or an ICMP number to add to the Members in Group list.
• ICMP Type/ICMP Group—Selects the option to select the name of an ICMP group to add to the Members in Group list.
3-41Cisco ASA Series VPN ASDM Configuration Guide

Chapter 3 General VPN Setup Access Control List Manager
• ICMP #—Selects the option to specify an ICMP member by number to add to the Members in Group list.
• Add—Moves a selected item from the Members not in Group list to the Members in Group list.
• Remove—Moves a selected item from the Members in Group list to the Members not in Group list.
• Members in Group—Lists the members already configured in this service group.
Browse Other
ACL Manager > Add/Edit Extended Access List Rule > Protocol and Service > Protocol: other >Other > Group option > Browse button
The Browse Other dialog box lets you select a protocol group for this rule.
Fields
• Add—Opens the Add Protocol Group dialog box, in which you can configure a new service group.
• Find—Opens the Filter field.
• Filter/Clear—Specifies a filter criterion that you can use to search for items in the Name list, thus displaying only those items that match that criterion. When you make an entry in the Filter field, the Filter button becomes active. Clicking the Filter button performs the search. After you perform the search, the Filter button is dimmed, and the Clear button becomes active. Clicking the Clear button clears the filter field and dims the Clear button.
• Type—Determines the type of object to use as the protocol group for this rule. Selections are IP Address Objects, IP Names, Network Object Groups, and All. The contents of the table following this field change, depending upon your selection.
• Name—Lists the predefined protocol groups for your selection.
Add Protocol Group
ACL Manager > Add/Edit Extended Access List Rule > Protocol and Service > Protocol: other > Group option > Browse button > Browse Other > Add button
The Add Protocol Group dialog box lets you configure a new a protocol group by name or by number to add to the browsable protocol list for this rule. Selecting a member of either the Members not in Group or the Members in Group list activates the Add and Remove buttons.
Fields
• Group Name—Specifies the name of the new TCP service group.
• Description—(Optional) Provides a brief description of this group.
• Members not in Group—Presents the option to select either a protocol/protocol group or a protocol number to add to the Members in Group list.
• Protocol/Protocol Group—Selects the option to select the name of a protocol or protocol group to add to the Members in Group list.
• Protocol #—Selects the option to specify a protocol by number to add to the Members in Group list.
• Add—Moves a selected item from the Members not in Group list to the Members in Group list.
• Remove—Moves a selected item from the Members in Group list to the Members not in Group list.
• Members in Group—Lists the members already configured in this service group.
3-42Cisco ASA Series VPN ASDM Configuration Guide
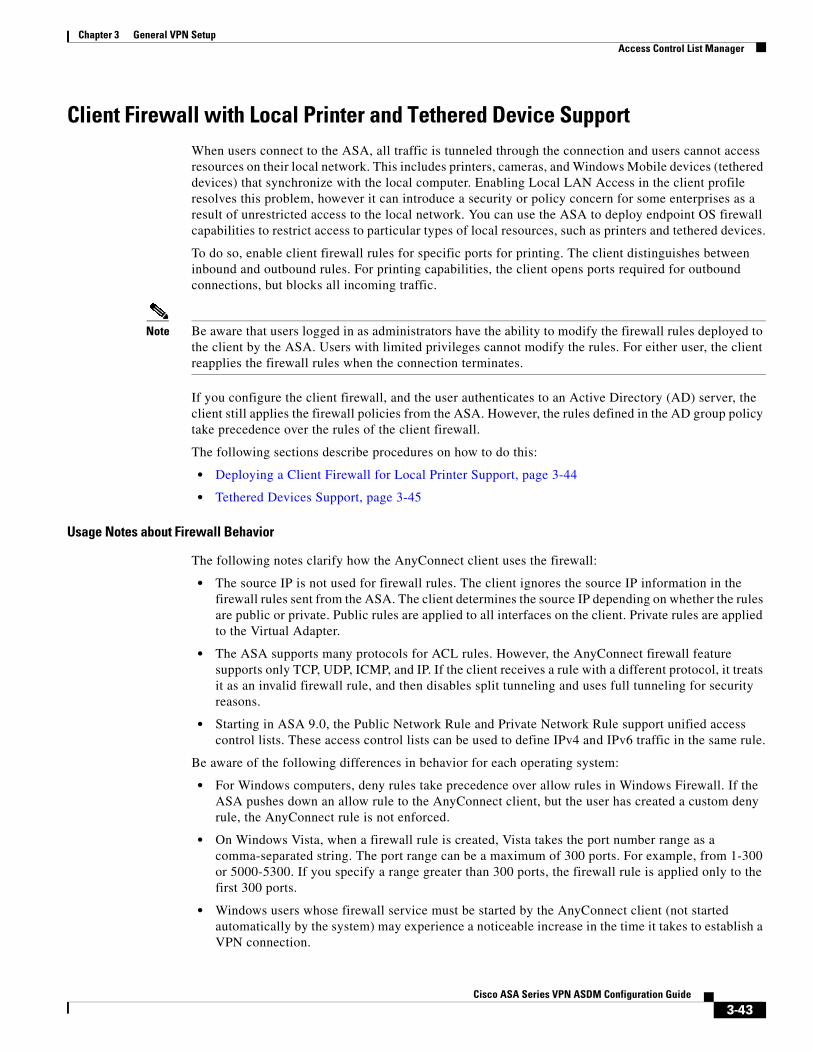
Chapter 3 General VPN Setup Access Control List Manager
Client Firewall with Local Printer and Tethered Device SupportWhen users connect to the ASA, all traffic is tunneled through the connection and users cannot access resources on their local network. This includes printers, cameras, and Windows Mobile devices (tethered devices) that synchronize with the local computer. Enabling Local LAN Access in the client profile resolves this problem, however it can introduce a security or policy concern for some enterprises as a result of unrestricted access to the local network. You can use the ASA to deploy endpoint OS firewall capabilities to restrict access to particular types of local resources, such as printers and tethered devices.
To do so, enable client firewall rules for specific ports for printing. The client distinguishes between inbound and outbound rules. For printing capabilities, the client opens ports required for outbound connections, but blocks all incoming traffic.
Note Be aware that users logged in as administrators have the ability to modify the firewall rules deployed to the client by the ASA. Users with limited privileges cannot modify the rules. For either user, the client reapplies the firewall rules when the connection terminates.
If you configure the client firewall, and the user authenticates to an Active Directory (AD) server, the client still applies the firewall policies from the ASA. However, the rules defined in the AD group policy take precedence over the rules of the client firewall.
The following sections describe procedures on how to do this:
• Deploying a Client Firewall for Local Printer Support, page 3-44
• Tethered Devices Support, page 3-45
Usage Notes about Firewall Behavior
The following notes clarify how the AnyConnect client uses the firewall:
• The source IP is not used for firewall rules. The client ignores the source IP information in the firewall rules sent from the ASA. The client determines the source IP depending on whether the rules are public or private. Public rules are applied to all interfaces on the client. Private rules are applied to the Virtual Adapter.
• The ASA supports many protocols for ACL rules. However, the AnyConnect firewall feature supports only TCP, UDP, ICMP, and IP. If the client receives a rule with a different protocol, it treats it as an invalid firewall rule, and then disables split tunneling and uses full tunneling for security reasons.
• Starting in ASA 9.0, the Public Network Rule and Private Network Rule support unified access control lists. These access control lists can be used to define IPv4 and IPv6 traffic in the same rule.
Be aware of the following differences in behavior for each operating system:
• For Windows computers, deny rules take precedence over allow rules in Windows Firewall. If the ASA pushes down an allow rule to the AnyConnect client, but the user has created a custom deny rule, the AnyConnect rule is not enforced.
• On Windows Vista, when a firewall rule is created, Vista takes the port number range as a comma-separated string. The port range can be a maximum of 300 ports. For example, from 1-300 or 5000-5300. If you specify a range greater than 300 ports, the firewall rule is applied only to the first 300 ports.
• Windows users whose firewall service must be started by the AnyConnect client (not started automatically by the system) may experience a noticeable increase in the time it takes to establish a VPN connection.
3-43Cisco ASA Series VPN ASDM Configuration Guide
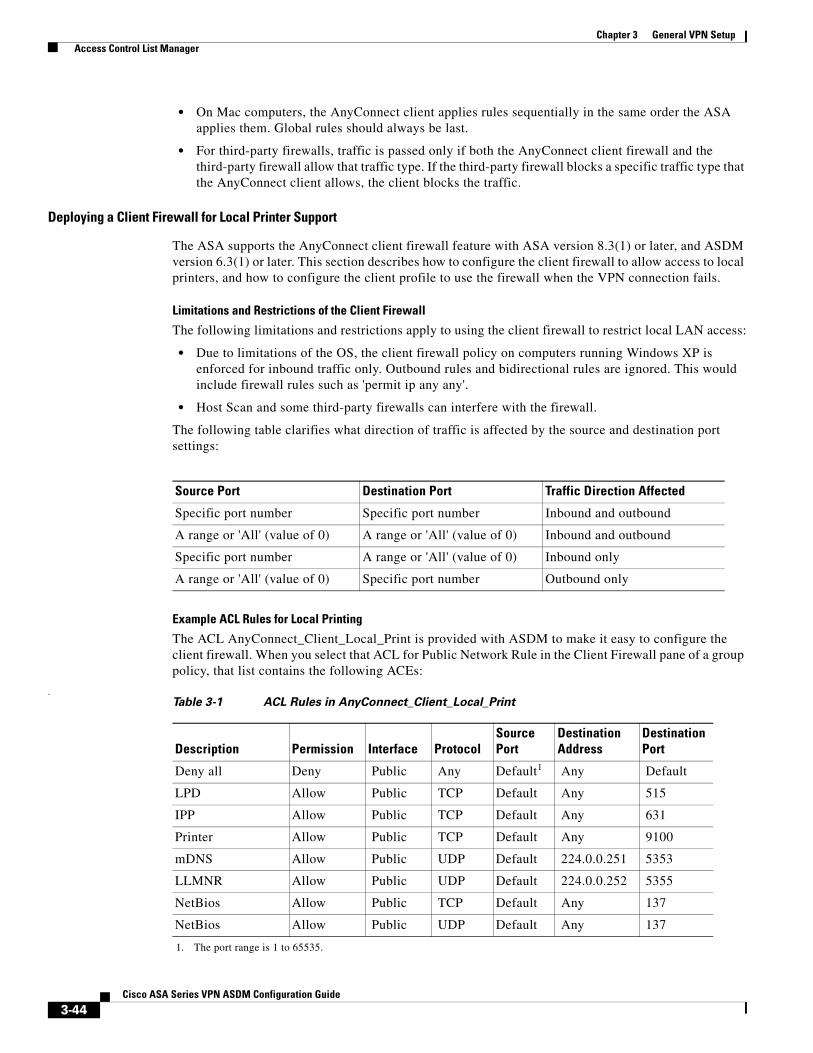
Chapter 3 General VPN Setup Access Control List Manager
• On Mac computers, the AnyConnect client applies rules sequentially in the same order the ASA applies them. Global rules should always be last.
• For third-party firewalls, traffic is passed only if both the AnyConnect client firewall and the third-party firewall allow that traffic type. If the third-party firewall blocks a specific traffic type that the AnyConnect client allows, the client blocks the traffic.
Deploying a Client Firewall for Local Printer Support
The ASA supports the AnyConnect client firewall feature with ASA version 8.3(1) or later, and ASDM version 6.3(1) or later. This section describes how to configure the client firewall to allow access to local printers, and how to configure the client profile to use the firewall when the VPN connection fails.
Limitations and Restrictions of the Client Firewall
The following limitations and restrictions apply to using the client firewall to restrict local LAN access:
• Due to limitations of the OS, the client firewall policy on computers running Windows XP is enforced for inbound traffic only. Outbound rules and bidirectional rules are ignored. This would include firewall rules such as 'permit ip any any'.
• Host Scan and some third-party firewalls can interfere with the firewall.
The following table clarifies what direction of traffic is affected by the source and destination port settings:
Example ACL Rules for Local Printing
The ACL AnyConnect_Client_Local_Print is provided with ASDM to make it easy to configure the client firewall. When you select that ACL for Public Network Rule in the Client Firewall pane of a group policy, that list contains the following ACEs:
.
Source Port Destination Port Traffic Direction Affected
Specific port number Specific port number Inbound and outbound
A range or 'All' (value of 0) A range or 'All' (value of 0) Inbound and outbound
Specific port number A range or 'All' (value of 0) Inbound only
A range or 'All' (value of 0) Specific port number Outbound only
Table 3-1 ACL Rules in AnyConnect_Client_Local_Print
Description Permission Interface ProtocolSource Port
Destination Address
Destination Port
Deny all Deny Public Any Default1
1. The port range is 1 to 65535.
Any Default
LPD Allow Public TCP Default Any 515
IPP Allow Public TCP Default Any 631
Printer Allow Public TCP Default Any 9100
mDNS Allow Public UDP Default 224.0.0.251 5353
LLMNR Allow Public UDP Default 224.0.0.252 5355
NetBios Allow Public TCP Default Any 137
NetBios Allow Public UDP Default Any 137
3-44Cisco ASA Series VPN ASDM Configuration Guide
Chapter 3 General VPN Setup Access Control List Manager
Note To enable local printing, you must enable the Local LAN Access feature in the client profile with a defined ACL rule allow Any Any.
Configuring Local Print Support
Step 1 Enable the AnyConnect client firewall in a group policy. Go to Configuration > Remote Access VPN > Network (Client) Access > Group Policies.
Step 2 Select a group policy and click Edit. The Edit Internal Group Policy window displays.
Step 3 Select Advanced > AnyConnect Client > Client Firewall. Click Manage for the Private Network Rule.
Step 4 Create an ACL and specify an ACE using the rules in Table 3-1. Add this ACL as a PrivateNetwork Rule.
Step 5 If you enabled the Automatic VPN Policy always-on and specified a closed policy, in the event of a VPN failure, users have no access to local resources. You can apply the firewall rules in this scenario by going to Preferences (Cont) in the profile editor and checking Apply last local VPN resource rules.
Tethered Devices Support
To support tethered devices and protect the corporate network, create a standard ACL in the group policy, specifying destination addresses in the range that the tethered devices use. Then specify the ACL for split tunneling as a network list to exclude from tunneled VPN traffic. You must also configure the client profile to use the last VPN local resource rules in case of VPN failure.
Note For Windows Mobile devices that need to sync with the computer running AnyConnect, specify the IPv4 destination address as 169.254.0.0, or the IPv6 destination address fe80::/64 in the ACL.
Follow these steps:
Step 1 In ASDM, go to Group Policy > Advanced > Split Tunneling.
Step 2 Uncheck Inherit next to the Network List field and click Manage. The ACL Manager displays.
Step 3 Click the Extended ACL tab.
Step 4 Click Add and then Add ACL. Specify a name for the new ACL.
Step 5 Choose the new ACL in the table and click Add and then Add ACE. The Edit ACE window displays.
Step 6 For Action, choose the Permit radio button.
Step 7 In the destination criteria area, specify the IPv4 destination address as 169.254.0.0 or the IPv6 destination address fe80::/64.
Step 8 For Service, choose IP.
Step 9 Click OK.
Step 10 Click OK to save the ACL.
Step 11 In the Split Tunneling pane for the internal group policy, uncheck Inherit for the Policy or IPv6 Policy, depending on the IP address you specified in step 7, and choose Exclude Network List Below. For Network List, choose the ACL you created.
3-45Cisco ASA Series VPN ASDM Configuration Guide
Chapter 3 General VPN Setup Access Control List Manager
Step 12 Click OK.
Step 13 Click Apply.
Fields
• Public Network Rule—Use the drop-down list to choose from the existing defined ACLs.
Manage—Displays the ACL Manager dialog box, with which you can add, edit, and delete Access Control Lists (ACLs) and Extended Access Control Lists (ACEs).
• Private Network Rule—Use the drop-down list to choose from the existing defined ACLs.
Manage—Displays the ACL Manager dialog box, with which you can add, edit, and delete Access Control Lists (ACLs) and Extended Access Control Lists (ACEs).
Configure a Web ACLs
Configuration > Remote Access > Clientless SSL VPN Access > Advanced > Web ACLs
Configuration > Remote Access > Clientless SSL VPN Access > Group Policies > General > More Options > Web ACL
This dialog box lets you configure ACLs for Clientless SSL VPN connections.
Fields
• View (Unlabeled)—Indicates whether the selected entry is expanded (minus sign) or contracted (plus sign).
• # column—Specifies the ACE ID number.
• Enable—Indicates whether this ACL is enabled or disabled. You can enable or disable the ACL using this check box.
• Action—Specifies whether this ACL permits or denies access.
• Type—Specifies whether this ACL applies to a URL or a TCP address/port.
• Filter—Specifies the type of filter being applied.
• Syslog Level (Interval)—Specifies the syslog parameters for this ACL.
• Time Range—Specifies the name of the time range, if any, for this ACL. The time range can be a single interval or a series of periodic ranges.
• Description—Specifies the description, if any, of the ACL.
• Add ACL—Displays the Add Web Type ACL dialog box, in which you can specify an ACL ID.
• Add ACE—Displays the Add Web Type ACE dialog box, in which you specify parameters for the named ACL. This button is active only if there are one or more entries in the Web Type ACL table.
• Edit ACE/Delete—Click to edit or delete the highlighted ACL or ACE. When you delete an ACL, you also delete all of its ACEs. No warning or undelete.
• Move Up/Move Down—Highlight an ACL or ACE and click these buttons to change the order of ACLs and ACEs. The ASA checks ACLs and their ACEs in priority order according to their position in the ACLs list box until it finds a match.
3-46Cisco ASA Series VPN ASDM Configuration Guide
Chapter 3 General VPN Setup Access Control List Manager
Add/Edit Standard Access List Rule
ACL Manager > Add or Edit Standard Access List Rule
The Add/Edit Standard Access List Rule dialog box lets you create a new rule, or modify an existing rule.
Fields
• Action—Determines the action type of the new rule. Choose either Permit or Deny.
– Permit—Permits all matching traffic.
– Deny—Denies all matching traffic.
• Host/Network IP Address—Identifies the networks by IP address.
– IP address—The IP address of the host or network.
– Mask—The subnet mask of the host or network
• Description—(Optional) Enter a description of the access rule.
Add/Edit Server and URL List
Configuration > VPN > General > Group Policy > Add/Edit > Internal Group Policy > Web VPN Tab > Other Tab > Add or Edit Server and URL List
The Add or Edit Server and URL List dialog box lets you add, edit, delete, and order the items in the designated URL list.
Fields
• List Name—Specifies the name of the list to be added or selects the name of the list to be modified or deleted.
• URL Display Name—Specifies the URL name displayed to the user.
• URL—Specifies the actual URL associated with the display name.
• Add—Opens the Add Server or URL dialog box, in which you can configure a new server or URL and display name.
• Edit—Opens the Edit Server or URL dialog box, in which you can configure a new server or URL and display name.
• Delete—Removes the selected item from the server and URL list. There is no confirmation or undo.
• Move Up/Move Down—Changes the position of the selected item in the server and URL list.
Add/Edit Server or URL
Configuration > VPN > General > Group Policy > Add/Edit > Internal Group Policy > Web VPN Tab > Other Tab > Add or Edit Server and URL
The Add or Edit Server or URL dialog box lets you add or edit, delete, and order the items in the designated URL list.
Fields
• URL Display Name—Specifies the URL name displayed to the user.
• URL—Specifies the actual URL associated with the display name.
3-47Cisco ASA Series VPN ASDM Configuration Guide
Chapter 3 General VPN Setup Configuring AnyConnect VPN Client Connections
Configuring AnyConnect VPN Client ConnectionsThe Cisco AnyConnect VPN client provides secure SSL or IPsec (IKEv2) connections to the ASA for remote users. The client gives remote users the benefits of a VPN client without the need for network administrators to install and configure clients on remote computers.
Without a previously-installed client, remote users enter the IP address in their browser of an interface configured to accept SSL VPN connections. Unless the ASA is configured to redirect http:// requests to https://, users must enter the URL in the form https://<address>.
After entering the URL, the browser connects to that interface and displays the login screen. If the user satisfies the login and authentication, and the ASA identifies the user as requiring the client, it downloads the client that matches the operating system of the remote computer. After downloading, the client installs and configures itself, establishes a VPN connection and either remains or uninstalls itself (depending on the ASA configuration) when the connection terminates.
In the case of a previously installed client, when the user authenticates, the ASA examines the revision of the client, and upgrades the client as necessary.
The AnyConnect client can be downloaded from the ASA, or it can be installed manually on the remote PC by the system administrator. For more information about installing the client manually, see the AnyConnect Administrators Guide.
The ASA downloads the client based on the group policy or username attributes of the user establishing the connection. You can configure the ASA to automatically download the client, or you can configure it to prompt the remote user about whether to download the client. In the latter case, if the user does not respond, you can configure the ASA to either download the client after a timeout period or present the login page.
Fields
• Keep Installer on Client System—Enable to allow permanent client installation on the remote computer. Enabling disables the automatic uninstalling feature of the client. The client remains installed on the remote computer for subsequent connections, reducing the connection time for the remote user.
Note Keep Installer on Client System is not supported after version 2.5 of the AnyConnect client.
• Compression—Compression increases the communications performance between the security appliance and the client by reducing the size of the packets being transferred.
• Datagram TLS—Datagram Transport Layer Security avoids latency and bandwidth problems associated with some SSL connections and improves the performance of real-time applications that are sensitive to packet delays.
• Ignore Don’t Defrag (DF) Bit—This feature allows the force fragmentation of packets that have the DF bit set, allowing them to pass through the tunnel. An example use case is for servers in your network that do not respond correctly to TCP MSS negotiations.
• Client Bypass Protocol—The Client Protocol Bypass feature allows you to configure how the ASA manages IPv4 traffic when it is expecting only IPv6 traffic or how it manages IPv6 traffic when it is expecting only IPv4 traffic.
3-48Cisco ASA Series VPN ASDM Configuration Guide
Chapter 3 General VPN Setup Configuring AnyConnect VPN Client Connections
When the AnyConnect client makes a VPN connection to the ASA, the ASA could assign it an IPv4, IPv6, or both an IPv4 and IPv6 address. If the ASA assigns the AnyConnect connection only an IPv4 address or only an IPv6 address, you can now configure the Client Bypass Protocol to drop network traffic for which the ASA did not assign an IP address, or allow that traffic to bypass the ASA and be sent from the client unencrypted or “in the clear”.
For example, assume that the ASA assigns only an IPv4 address to an AnyConnect connection and the endpoint is dual stacked. When the endpoint attempts to reach an IPv6 address, if Client Bypass Protocol is disabled, the IPv6 traffic is dropped; however, if Client Bypass Protocol is enabled, the IPv6 traffic is sent from the client in the clear.
• FQDN of This Device—This information is used by the client after network roaming in order to resolve the ASA IP address used for re-establishing the VPN session. This setting is critical to support roaming between networks of different IP protocols (such as IPv4 to IPv6).
Note You cannot use the ASA FQDN present in the AnyConnect profile to derive the ASA IP address after roaming. The addresses may not match the correct device (the one the tunnel was established to) in the load balancing scenario.
If the device FQDN is not pushed to the client, the client will try to reconnect to whatever IP address the tunnel had previously established. In order to support roaming between networks of different IP protocols (from IPv4 to IPv6), AnyConnect must perform name resolution of the device FQDN after roaming, so that it can determine which ASA address to use for re-establishing the tunnel. The client uses the ASA FQDN present in its profile during the initial connection. During subsequent session reconnects, it always uses the device FQDN pushed by ASA (and configured by the administrator in the group policy), when available. If the FQDN is not configured, the ASA derives the device FQDN (and sends it to the client) from whatever is set under Device Setup > Device Name/Password and Domain Name.
If the device FQDN is not pushed by the ASA, the client cannot re-establish the VPN session after roaming between networks of different IP protocols.
• MTU—Adjusts the MTU size for SSL connections. Enter a value in bytes, from 256 to 1410 bytes. By default, the MTU size is adjusted automatically based on the MTU of the interface that the connection uses, minus the IP/UDP/DTLS overhead.
• Keepalive Messages—Enter a number, from 15 to 600 seconds, in the Interval field to enable and adjust the interval of keepalive messages to ensure that an connection through a proxy, firewall, or NAT device remains open, even if the device limits the time that the connection can be idle. Adjusting the interval also ensures that the client does not disconnect and reconnect when the remote user is not actively running a socket-based application, such as Microsoft Outlook or Microsoft Internet Explorer.
• Optional Client Modules to Download—To minimize download time, the AnyConnect client requests downloads (from the ASA) only of modules that it needs for each feature that it supports. You must specify the names of modules that enable other features. The AnyConnect client, version 3.0, includes the following modules (previous versions have fewer modules):
– AnyConnect DART—The Diagnostic AnyConnect Reporting Tool (DART) captures a snapshot of system logs and other diagnostic information and creates a .zip file on your desktop so you can conveniently send troubleshooting information to Cisco TAC.
– AnyConnect Network Access Manager—Formerly called the Cisco Secure Services Client, this module provides 802.1X (Layer 2) and device authentication for access to both wired and wireless network is integrated into AnyConnect 3.0.
3-49Cisco ASA Series VPN ASDM Configuration Guide
Chapter 3 General VPN Setup Configuring AnyConnect VPN Client Connections
– AnyConnect SBL—Start Before Logon (SBL) forces the user to connect to the enterprise infrastructure over a VPN connection before logging on to Windows by starting AnyConnect before the Windows login dialog box appears.
– AnyConnect Web Security Module—Formerly called ScanSafe Hostscan, this module is integrated into the AnyConnect 3.0.
– AnyConnect Telemetry Module—Sends information about the origin of malicious content to the web filtering infrastructure of the Cisco IronPort Web Security Appliance (WSA), which uses this data to provide better URL filtering rules.
– AnyConnect Posture Module—Formerly called the Cisco Secure Desktop HostScan feature, the posture module is integrated into AnyConnect 3.0 and provides AnyConnect the ability to gather credentials for posture assessment prior to creating a remote access connection to the ASA.
• Always-On VPN—Determine if the always-on VPN flag setting in the AnyConnect service profile is disabled or if the AnyConnect service profile setting should be used. The always-on VPN feature lets AnyConnnect automatically establish a VPN session after the user logs onto a computer. The VPN session remains up until the user logs off the computer. If the physical connection is lost, the session remains up, and AnyConnect continually attempts to reestablish the physical connection with the adaptive security appliance to resume the VPN session.
Always-on VPN permits the enforcement of corporate policies to protect the device from security threats. You can use it to help ensure AnyConnect establishes a VPN session whenever the endpoint is not in a trusted network. If enabled, a policy is configured to determine how network connectivity is managed in the absence of a connection.
Note Always-On VPN requires an AnyConnect release that supports AnyConnect Secure Mobility features. Refer to the Cisco AnyConnect VPN Client Administrator Guide for additional information.
• Client Profiles to Download—A profile is a group of configuration parameters that the AnyConnect client uses to configure VPN, Network Access Manager, web security, and telemetry settings. Click Add to launch the Select Anyconnect Client Profiles window where you can specify previously-created profiles for this group policy.
Using AnyConnect Client ProfilesYou enable Cisco AnyConnect Secure Mobility client features in the AnyConnect profiles—XML files that contain configuration settings for the core client with its VPN functionality and for the optional client modules Network Access Manager, telemetry, and web security. The ASA deploys the profiles during AnyConnect installation and updates. Users cannot manage or modify profiles.
You can configure a profile using the AnyConnect profile editor, a convenient GUI-based configuration tool launched from ASDM. The AnyConnect software package, version 2.5 and later (for all OSs), includes the editor, which activates when you load the AnyConnect package on the ASA as an AnyConnect client image. Alternatively, you can manually edit the XML file and import the file to the ASA as a profile.
You can configure the ASA to deploy profiles globally for all AnyConnect users or to users based on their group policy. Usually, a user has a single profile file for each AnyConnect module installed. In some cases, you might want to provide more than one profile for a user. Someone who works from
3-50Cisco ASA Series VPN ASDM Configuration Guide
Chapter 3 General VPN Setup Configuring AnyConnect VPN Client Connections
multiple locations might need more than one profile. Be aware that some of the profile settings (such as SBL) control the connection experience at a global level. Other settings are unique to a particular host and depend on the host selected.
Some profile settings are stored locally on the user computer in a user preferences file or a global preferences file. The user file has information the client needs to display user-controllable settings in the Preferences tab of the client GUI and information about the last connection, such as the user, the group, and the host. The global file has information about user-controllable settings to be able to apply those settings before login (since there is no user). For example, the client needs to know if Start Before Logon and/or AutoConnect On Start are enabled before login. For more information about creating and deploying AnyConnect client profiles and controlling client features, see the AnyConnect VPN Client Administrator Guide.
Fields
Add—Displays the Add AnyConnect Client Profiles dialog box, where you can specify a file in flash memory as a profile, or where you can browse flash memory for a file to specify as a profile. You can also upload a file from a local computer to the flash memory.
Edit—Displays the Edit SSL VPN Client Profile window, where you can change the settings contained in the profile for AnyConnect client features.
Delete—Deletes a profile from the table. This does not delete the XML file from flash.
AnyConnect Client Profiles Table—Displays the XML files specified as AnyConnect client profiles:
• Profile Name—The name of the profile specified when the profile was added.
• Profile Usage/Type—Displays the use for this profile, such as VPN, Network Access Manager, or telemetry.
Specifying an AnyConnect Client Profile
Specify an AnyConnect client profile for this group policy.
For more information about creating and deploying AnyConnect client profiles and controlling client features, see the AnyConnect VPN Client Administrator Guide.
Fields
Profile Name—Specify an AnyConnect client profile for this group policy.
Profile Usage—Displays the usage assigned to the profile when originally created: VPN, Network Access Manager, web security, or telemetry. If ASDM does not recognize the usage specified in the XML file, the drop-down list becomes selectable and you can choose a usage type manually.
Profile Location—Specify a path to the profile file in the ASA flash memory. If the file does not exist, the ASA creates one based on the profile template.
Importing an AnyConnect Client Profile
Import a new AnyConnect client profile in this window. You can import a profile from a local device or a remote server.
For more information about creating and deploying AnyConnect client profiles and controlling client features, see the AnyConnect VPN Client Administrator Guide.
Fields
Profile Name—Specify a name for the profile you add.
3-51Cisco ASA Series VPN ASDM Configuration Guide
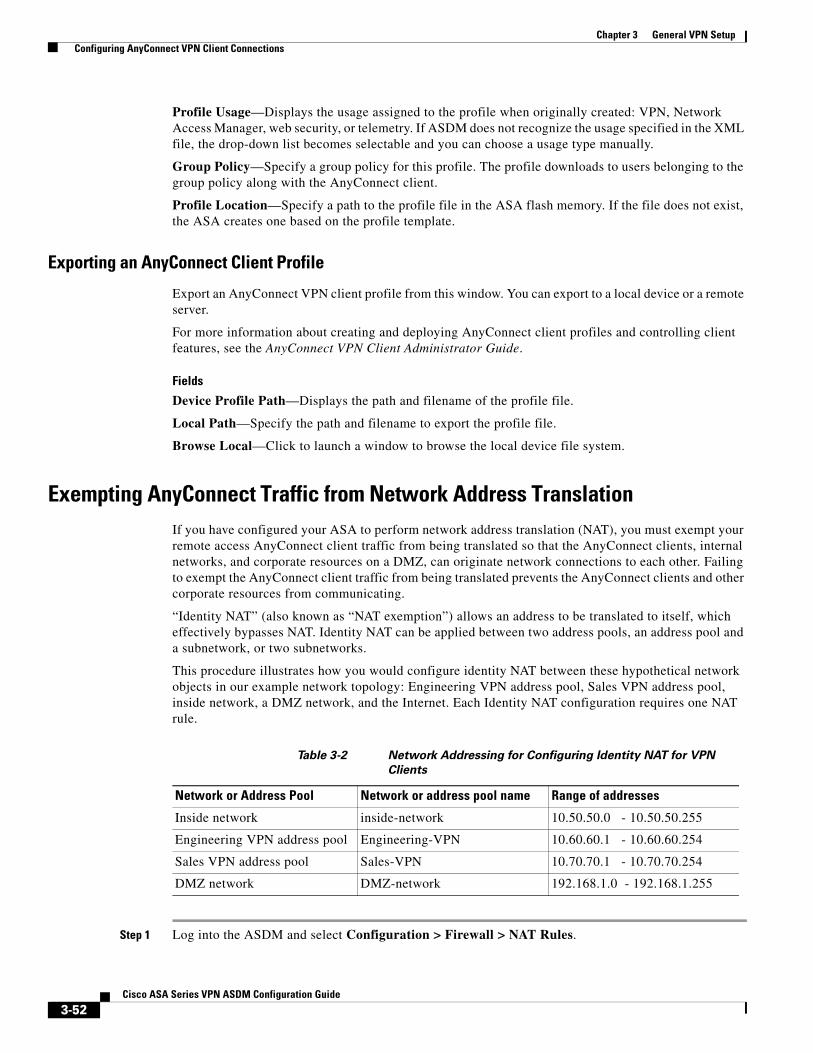
Chapter 3 General VPN Setup Configuring AnyConnect VPN Client Connections
Profile Usage—Displays the usage assigned to the profile when originally created: VPN, Network Access Manager, web security, or telemetry. If ASDM does not recognize the usage specified in the XML file, the drop-down list becomes selectable and you can choose a usage type manually.
Group Policy—Specify a group policy for this profile. The profile downloads to users belonging to the group policy along with the AnyConnect client.
Profile Location—Specify a path to the profile file in the ASA flash memory. If the file does not exist, the ASA creates one based on the profile template.
Exporting an AnyConnect Client Profile
Export an AnyConnect VPN client profile from this window. You can export to a local device or a remote server.
For more information about creating and deploying AnyConnect client profiles and controlling client features, see the AnyConnect VPN Client Administrator Guide.
Fields
Device Profile Path—Displays the path and filename of the profile file.
Local Path—Specify the path and filename to export the profile file.
Browse Local—Click to launch a window to browse the local device file system.
Exempting AnyConnect Traffic from Network Address TranslationIf you have configured your ASA to perform network address translation (NAT), you must exempt your remote access AnyConnect client traffic from being translated so that the AnyConnect clients, internal networks, and corporate resources on a DMZ, can originate network connections to each other. Failing to exempt the AnyConnect client traffic from being translated prevents the AnyConnect clients and other corporate resources from communicating.
“Identity NAT” (also known as “NAT exemption”) allows an address to be translated to itself, which effectively bypasses NAT. Identity NAT can be applied between two address pools, an address pool and a subnetwork, or two subnetworks.
This procedure illustrates how you would configure identity NAT between these hypothetical network objects in our example network topology: Engineering VPN address pool, Sales VPN address pool, inside network, a DMZ network, and the Internet. Each Identity NAT configuration requires one NAT rule.
Table 3-2 Network Addressing for Configuring Identity NAT for VPN
Clients
Step 1 Log into the ASDM and select Configuration > Firewall > NAT Rules.
Network or Address Pool Network or address pool name Range of addresses
Inside network inside-network 10.50.50.0 - 10.50.50.255
Engineering VPN address pool Engineering-VPN 10.60.60.1 - 10.60.60.254
Sales VPN address pool Sales-VPN 10.70.70.1 - 10.70.70.254
DMZ network DMZ-network 192.168.1.0 - 192.168.1.255
3-52Cisco ASA Series VPN ASDM Configuration Guide
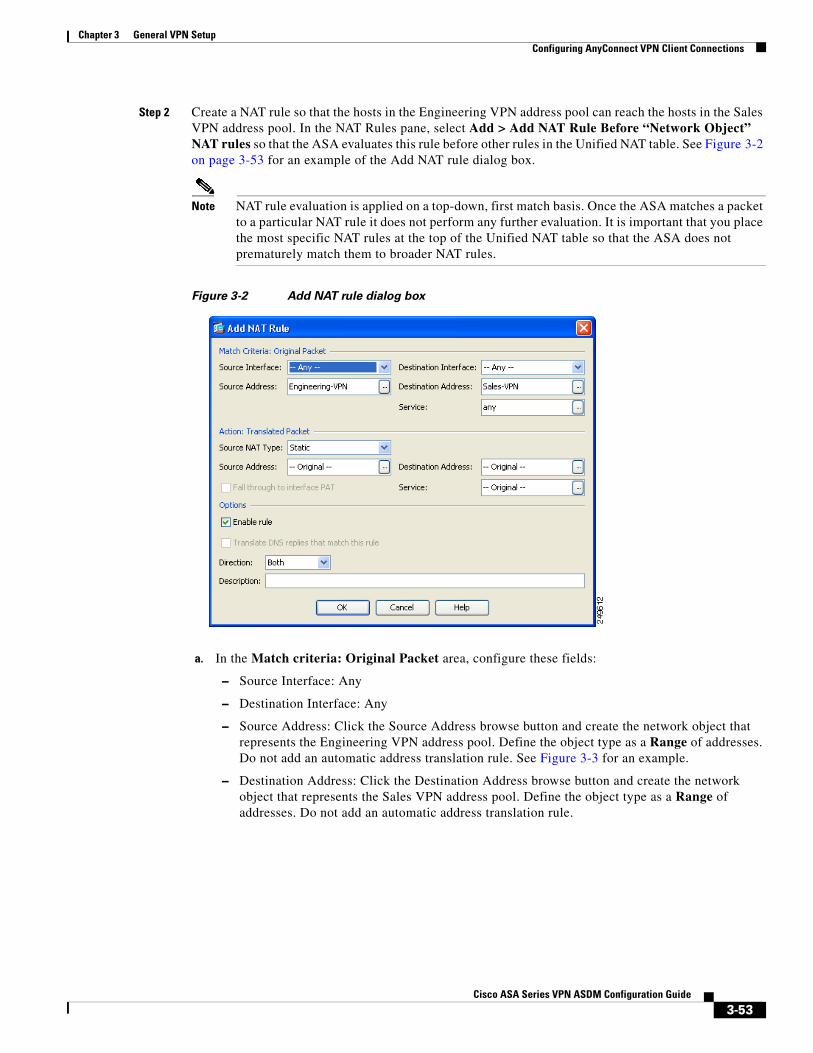
Chapter 3 General VPN Setup Configuring AnyConnect VPN Client Connections
Step 2 Create a NAT rule so that the hosts in the Engineering VPN address pool can reach the hosts in the Sales VPN address pool. In the NAT Rules pane, select Add > Add NAT Rule Before “Network Object” NAT rules so that the ASA evaluates this rule before other rules in the Unified NAT table. See Figure 3-2 on page 3-53 for an example of the Add NAT rule dialog box.
Note NAT rule evaluation is applied on a top-down, first match basis. Once the ASA matches a packet to a particular NAT rule it does not perform any further evaluation. It is important that you place the most specific NAT rules at the top of the Unified NAT table so that the ASA does not prematurely match them to broader NAT rules.
Figure 3-2 Add NAT rule dialog box
a. In the Match criteria: Original Packet area, configure these fields:
– Source Interface: Any
– Destination Interface: Any
– Source Address: Click the Source Address browse button and create the network object that represents the Engineering VPN address pool. Define the object type as a Range of addresses. Do not add an automatic address translation rule. See Figure 3-3 for an example.
– Destination Address: Click the Destination Address browse button and create the network object that represents the Sales VPN address pool. Define the object type as a Range of addresses. Do not add an automatic address translation rule.
3-53Cisco ASA Series VPN ASDM Configuration Guide
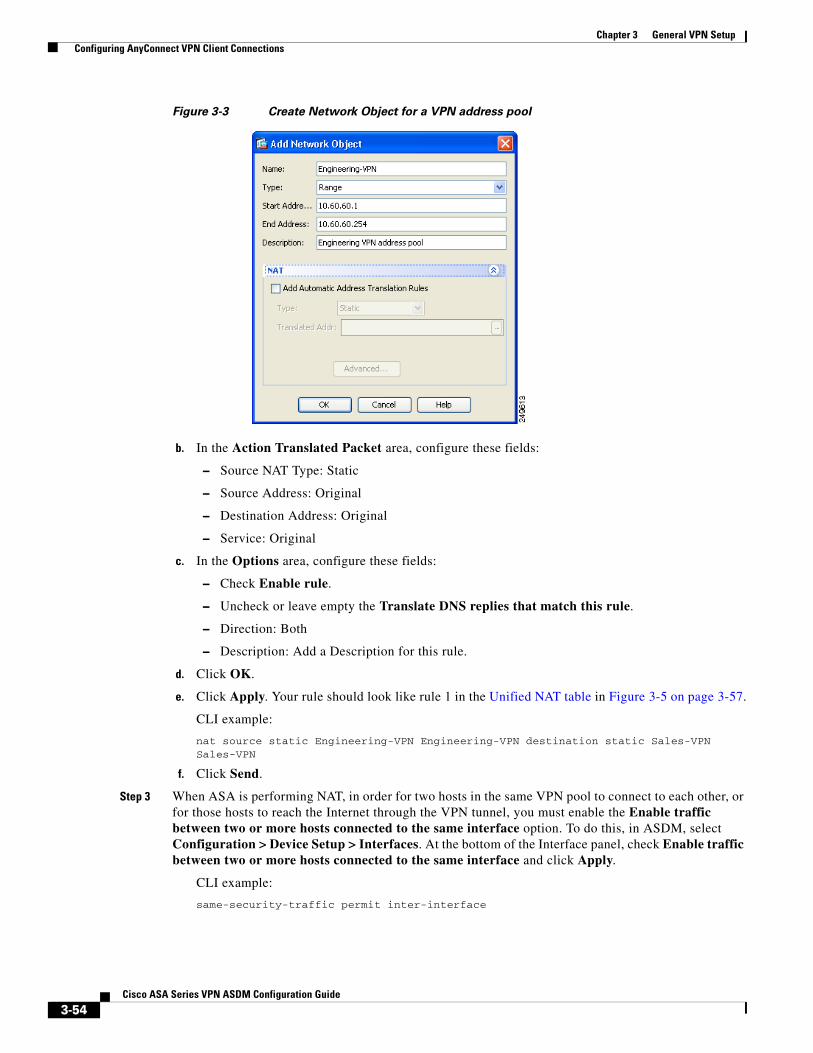
Chapter 3 General VPN Setup Configuring AnyConnect VPN Client Connections
Figure 3-3 Create Network Object for a VPN address pool
b. In the Action Translated Packet area, configure these fields:
– Source NAT Type: Static
– Source Address: Original
– Destination Address: Original
– Service: Original
c. In the Options area, configure these fields:
– Check Enable rule.
– Uncheck or leave empty the Translate DNS replies that match this rule.
– Direction: Both
– Description: Add a Description for this rule.
d. Click OK.
e. Click Apply. Your rule should look like rule 1 in the Unified NAT table in Figure 3-5 on page 3-57.
CLI example:
nat source static Engineering-VPN Engineering-VPN destination static Sales-VPN Sales-VPN
f. Click Send.
Step 3 When ASA is performing NAT, in order for two hosts in the same VPN pool to connect to each other, or for those hosts to reach the Internet through the VPN tunnel, you must enable the Enable traffic between two or more hosts connected to the same interface option. To do this, in ASDM, select Configuration > Device Setup > Interfaces. At the bottom of the Interface panel, check Enable traffic between two or more hosts connected to the same interface and click Apply.
CLI example:
same-security-traffic permit inter-interface
3-54Cisco ASA Series VPN ASDM Configuration Guide
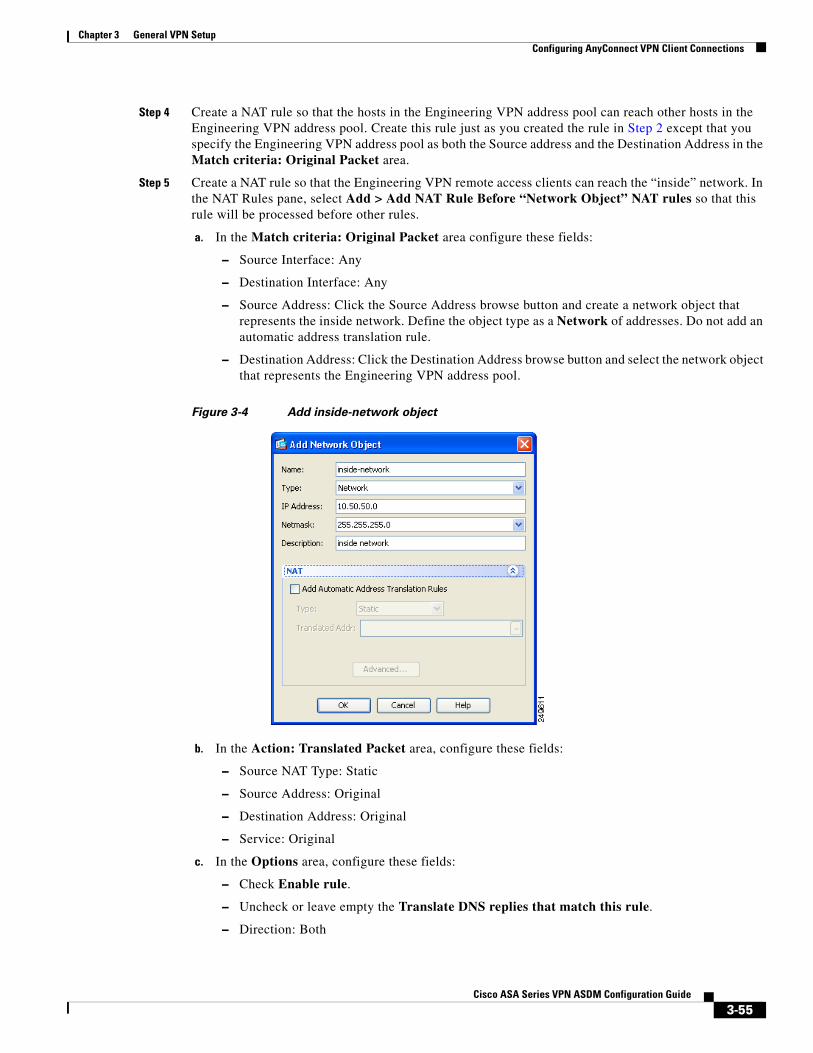
Chapter 3 General VPN Setup Configuring AnyConnect VPN Client Connections
Step 4 Create a NAT rule so that the hosts in the Engineering VPN address pool can reach other hosts in the Engineering VPN address pool. Create this rule just as you created the rule in Step 2 except that you specify the Engineering VPN address pool as both the Source address and the Destination Address in the Match criteria: Original Packet area.
Step 5 Create a NAT rule so that the Engineering VPN remote access clients can reach the “inside” network. In the NAT Rules pane, select Add > Add NAT Rule Before “Network Object” NAT rules so that this rule will be processed before other rules.
a. In the Match criteria: Original Packet area configure these fields:
– Source Interface: Any
– Destination Interface: Any
– Source Address: Click the Source Address browse button and create a network object that represents the inside network. Define the object type as a Network of addresses. Do not add an automatic address translation rule.
– Destination Address: Click the Destination Address browse button and select the network object that represents the Engineering VPN address pool.
Figure 3-4 Add inside-network object
b. In the Action: Translated Packet area, configure these fields:
– Source NAT Type: Static
– Source Address: Original
– Destination Address: Original
– Service: Original
c. In the Options area, configure these fields:
– Check Enable rule.
– Uncheck or leave empty the Translate DNS replies that match this rule.
– Direction: Both
3-55Cisco ASA Series VPN ASDM Configuration Guide
Chapter 3 General VPN Setup Configuring AnyConnect VPN Client Connections
– Description: Add a Description for this rule.
d. Click OK.
e. Click Apply. Your rule should look like rule two in the Unified NAT table in Figure 3-5 on page 3-57.
CLI example
nat source static inside-network inside-network destination static Engineering-VPN Engineering-VPN
Step 6 Create a new rule, following the method in Step 5, to configure identity NAT for the connection between the Engineering VPN address pool and the DMZ network. Use the DMZ network as the Source Address and use the Engineering VPN address pool as the Destination address.
Step 7 Create a new NAT rule to allow the Engineering VPN address pool to access the Internet through the tunnel. In this case, you do not want to use identity NAT because you want to change the source address from a private address to an Internet routable address. To create this rule, follow this procedure:
a. In the NAT Rules pane, select Add > Add NAT Rule Before “Network Object” NAT rules so that this rule will be processed before other rules.
b. In the Match criteria: Original Packet area configure these fields:
– Source Interface: Any
– Destination Interface: Any. This field will be automatically populated with “outside” after you select outside as the Source Address in the Action: Translated Packet area.
– Source Address: Click the Source Address browse button and select the network object that represents the Engineering VPN address pool.
– Destination Address: Any.
c. In the Action: Translated Packet area, configure these fields:
– Source NAT Type: Dynamic PAT (Hide)
– Source Address: Click the Source Address browse button and select the outside interface.
– Destination Address: Original
– Service: Original
d. In the Options area, configure these fields:
– Check Enable rule.
– Uncheck or leave empty the Translate DNS replies that match this rule.
– Direction: Both
– Description: Add a Description for this rule.
e. Click OK.
f. Click Apply. Your rule should look like rule five in the Unified NAT table in Figure 3-5 on page 3-57.
CLI example:
nat (any,outside) source dynamic Engineering-VPN interface
3-56Cisco ASA Series VPN ASDM Configuration Guide
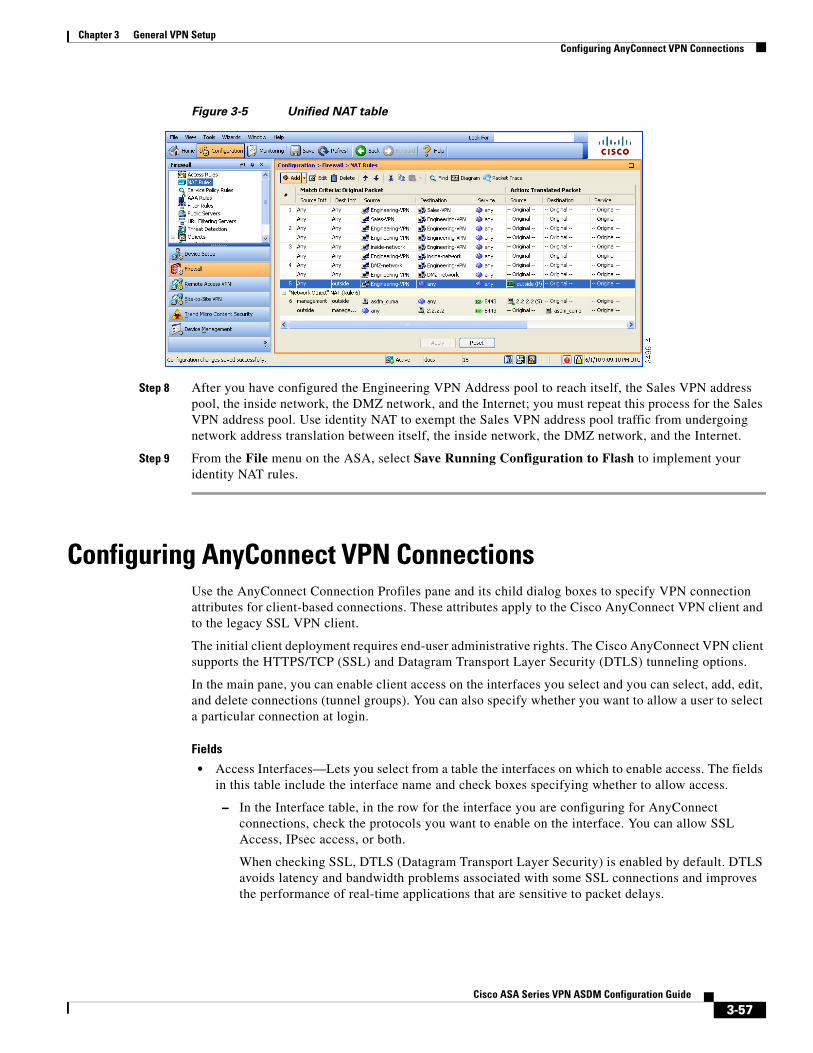
Chapter 3 General VPN Setup Configuring AnyConnect VPN Connections
Figure 3-5 Unified NAT table
Step 8 After you have configured the Engineering VPN Address pool to reach itself, the Sales VPN address pool, the inside network, the DMZ network, and the Internet; you must repeat this process for the Sales VPN address pool. Use identity NAT to exempt the Sales VPN address pool traffic from undergoing network address translation between itself, the inside network, the DMZ network, and the Internet.
Step 9 From the File menu on the ASA, select Save Running Configuration to Flash to implement your identity NAT rules.
Configuring AnyConnect VPN ConnectionsUse the AnyConnect Connection Profiles pane and its child dialog boxes to specify VPN connection attributes for client-based connections. These attributes apply to the Cisco AnyConnect VPN client and to the legacy SSL VPN client.
The initial client deployment requires end-user administrative rights. The Cisco AnyConnect VPN client supports the HTTPS/TCP (SSL) and Datagram Transport Layer Security (DTLS) tunneling options.
In the main pane, you can enable client access on the interfaces you select and you can select, add, edit, and delete connections (tunnel groups). You can also specify whether you want to allow a user to select a particular connection at login.
Fields
• Access Interfaces—Lets you select from a table the interfaces on which to enable access. The fields in this table include the interface name and check boxes specifying whether to allow access.
– In the Interface table, in the row for the interface you are configuring for AnyConnect connections, check the protocols you want to enable on the interface. You can allow SSL Access, IPsec access, or both.
When checking SSL, DTLS (Datagram Transport Layer Security) is enabled by default. DTLS avoids latency and bandwidth problems associated with some SSL connections and improves the performance of real-time applications that are sensitive to packet delays.
3-57Cisco ASA Series VPN ASDM Configuration Guide
Chapter 3 General VPN Setup Configuring AnyConnect VPN Connections
When checking IPsec (IKEv2) access, client services are enabled by default. Client services include enhanced Anyconnect features including software updates, client profiles, GUI localization (translation) and customization, Cisco Secure Desktop, and SCEP proxy. If you disable client services, the AnyConnect client still establishes basic IPsec connections with IKEv2.
– Device Certificate—Lets you specify a certificate for authentication for either an RSA key or an ECDSA key. See Specifying a Device Certificate, page 3-58.
– Port Setting—Configure port numbers for clientless SSL and IPsec (IKEv2) connections. See Configuring Port Settings, page 3-59.
– Enable inbound VPN sessions to bypass interface ACLs is checked by default.— The security appliance allows all VPN traffic to pass through the interface ACLs. For example, even if the outside interface ACL does not permit the decrypted traffic to pass through, the security appliance trusts the remote private network and permits the decrypted packets to pass through. You can change this default behavior. If you want the interface ACL to inspect the VPN protected traffic, uncheck this box.
• Login Page Setting
– Allow the user to select a connection profile, identified by its alias, on the login page. If you do not check this check box, the default connection profile is DefaultWebVPNGroup.
– Shutdown portal login page.—Shows the web page when the login is disabled.
• Connection Profiles—Configure protocol-specific attributes for connections (tunnel groups).
– Add/Edit—Click to Add or Edit a Connection Profile (tunnel group).
– Name—The name of the Connection Profile.
– Aliases—Other names by which the Connection Profile is known.
– SSL VPN Client Protocol—Specifies whether SSL VPN client have access.
– Group Policy—Shows the default group policy for this Connection Profile.
– Allow user to select connection, identified by alias in the table above, at login page—Check to enable the display of Connection Profile (tunnel group) aliases on the Login page.
• Let group URL take precedence if group URL and certificate map match different connection profiles. Otherwise, the connection profile matches the certificate map will be used.—This option specifies the relative preference of the group URL and certificate values during the connection profile selection process. If the ASA fails to match the preferred value, it chooses the connection profile that matches the other value. Check this option only if you want to rely on the preference used by many older ASA software releases to match the group URL specified by the VPN endpoint to the connection profile that specifies the same group URL. This option is unchecked by default. If it is unchecked, the ASA prefers to match the certificate field value specified in the connection profile to the field value of the certificate used by the endpoint to assign the connection profile.
Specifying a Device CertificateThe Specify Device Certificate screen allows you to specify a certificate that will identify the ASA to the client when it attempts to create a connection. This screen is for AnyConnect Connection Profiles and Clientless Connection Profiles.
For VPN connections (not clientless):
• Certain AnyConnect features, such as Always-on IPsec/IKEv2, require that a valid and trusted device certificate be available on the ASA.
3-58Cisco ASA Series VPN ASDM Configuration Guide
Chapter 3 General VPN Setup Configuring AnyConnect VPN Connections
• If your AnyConnect clients are configured to use only SSL, then you only need to specify an RSA certificate as AnyConnect does not support ECDSA certificates for SSL VPN. If your AnyConnect clients are configured to use IPsec or SSL, or both IPsec and SSL, you can configure both kinds of certificates.
• ECDSA certificates are only supported on IPsec connections.
Detailed Steps
Step 1 (For VPN connections only) In the Certificate with RSA Key area, perform one of these tasks:
• Keep the Use the same device certificate for SSL and IPsec IKEv2 box checked if you want to choose one certificate to authenticate clients using either protocol. You can select the certificate from those available in the list box or click Manage to create an identity certificate to use.
• Uncheck the Use the same device certificate for SSL and IPsec IKEv2 check box to specify separate certificates for SSL connections or IPsec connections.
Step 2 Select a certificate from the Device Certficate list box.
If you do not see the certificate you want, click the Manage button to manage the identity certficiates on the ASA.
Step 3 (For VPN connections only) In the Certificate with ECDSA key field, select the ECDSA certificate from the list box or click Manage to create an ECDSA identity certificate.
Step 4 Click OK.
Configuring Port SettingsConfigure port numbers for SSL and IPsec (IKEv2) connections in this window:
Fields
• SSL Ports:
– HTTPS Port—The port to enable HTTPS for clientless (browser-based) SSL connections. The range is 1-65535. The default is port 443.
– DTLS Port—The port to enable DTLS for SSL connections. The range is 1-65535. The default is port 443.
• IPsec Client Services Port—The port to enable client services for IKEv2 connections. The range is 1-65535. The default is port 443.
Setting the Basic Attributes for an AnyConnect VPN ConnectionTo set the basic attributes for an AnyConnect VPN connection, choose Add or Edit in the Anyconnect Connection Profiles section. The Add (or Edit) Anyconnect Connection Profile > Basic dialog box opens.
Fields
Set the attributes in the Add AnyConnect Connection Profile > Basic dialog box as follows:
3-59Cisco ASA Series VPN ASDM Configuration Guide
Chapter 3 General VPN Setup Configuring AnyConnect VPN Connections
• Name—For Add, specify the name of the connection profile you are adding. For Edit, this field is not editable.
• Aliases—(Optional) Enter one or more alternative names for the connection. You can spaces or punctuation to separate the names.
• Authentication—Choose one of the following methods to use to authenticate the connection and specify a AAA server group to use in authentication.
– AAA, Certificate, or Both—Select the type of authentication to use: AAA, Certificate, or Both. If you choose either Certificate or Both, the user must provide a certificate in order to connect.
– AAA Server Group—Choose a AAA server group from the drop-down list. The default setting is LOCAL, which specifies that the ASA handles the authentication. Before making a selection, you can click Manage to open a dialog box over this dialog box to view or make changes to the ASA configuration of AAA server groups.
– Choosing something other than LOCAL makes available the Use LOCAL if Server Group Fails check box.
– Use LOCAL if Server Group fails—Check to enable the use of the LOCAL database if the group specified by the Authentication Server Group attribute fails.
• Client Address Assignment—Select the DHCP servers, client address pools, and client IPv6 address pools to use.
– DHCP Servers—Enter the name or IP address of a DHCP server to use.
– Client Address Pools—Enter pool name of an available, configured pool of IPv4 addresses to use for client address assignment. Before making a selection, you can click Select to open a dialog box over this dialog box to view or make changes to the address pools. See Configuring Local IP Address Pools, page 4-3 for more information on adding or editing an IPv4 address pool.
– Client IPv6 Address Pools—Enter the pool name of an available, configured pool of IPv6 addresses to use for client address assignment. Before making a selection, you can click Select to open a dialog box over this dialog box to view or make changes to the address pools. See Configuring Local IP Address Pools, page 4-3 for more information on adding or editing an IPv6 address pool.
• Default Group Policy—Select the group policy to use.
– Group Policy—Select the VPN group policy that you want to assign as the default group policy for this connection. A VPN group policy is a collection of user-oriented attribute-value pairs that can be stored internally on the device or externally on a RADIUS server. The default value is DfltGrpPolicy. You can click Manage to open a dialog box over this one to make changes to the group policy configuration.
– Enable SSL VPN client protocol—Check to enable SSL for this VPN connection.
– Enable IPsec (IKEv2) client protocol—Check to enable IPsec using IKEv2 for this connection.
– DNS Servers—Enter the IP address(s) of DNS servers for this policy.
– WINS Servers—Enter the IP address(s) of WINS servers for this policy.
– Domain Name—Enter a default domain name.
• Find—Enter a GUI label or a CLI command to use as a search string, then click Next or Previous to begin the search.
3-60Cisco ASA Series VPN ASDM Configuration Guide
Chapter 3 General VPN Setup Configuring AnyConnect VPN Connections
Setting Advanced Attributes for a Connection ProfileThe Advanced menu items and their dialog boxes let you configure the following characteristics for this connection:
• General attributes
• Client Addressing attributes
• Authentication attributes
• Authorization attributes
• Accounting attributes
• Name server attributes
• Clientless SSL VPN attributes
Note SSL VPN and secondary authentication attributes apply only to SSL VPN connection profiles.
Setting General Attributes for an AnyConnect SSL VPN ConnectionConfigure the General attributes to specify the password management parameters.
Fields
Set the Advanced General attributes as follows:
• Enable Simple Certificate Enrollment (SCEP) for this Connection Profile
• Strip the realm from username before passing it on to the AAA server
• Strip the group from username before passing it on to the AAA server
• Group Delimiter—Changing the group delimiter value makes the change globally on all other remote connection profiles.
• Enable Password Management—Lets you configure parameters relevant to overriding an account-disabled indication from a AAA server and to notifying users about password expiration.
The ASA supports password management for the RADIUS and LDAP protocols. It supports the “password-expire-in-days” option only for LDAP. This parameter is valid for AAA servers that support such notification. The ASA ignores this command if RADIUS or LDAP authentication has not been configured.
You can configure password management for IPsec remote access and SSL VPN tunnel-groups.
Note Some RADIUS servers that support MS-CHAP currently do not support MS-CHAPv2. This feature requires MS-CHAPv2, so please check with your vendor.
The ASA, releases 7.1 and later, generally supports password management for the following connection types when authenticating with LDAP or with any RADIUS configuration that supports MS-CHAPv2:
– AnyConnect VPN client
– IPsec VPN client
– Clientless SSL VPN
3-61Cisco ASA Series VPN ASDM Configuration Guide
Chapter 3 General VPN Setup Configuring AnyConnect VPN Connections
Password management is not supported for any of these connection types for Kerberos/Active Directory (Windows password) or NT 4.0 Domain. The RADIUS server (for example, Cisco ACS) could proxy the authentication request to another authentication server. However, from the ASA perspective, it is talking only to a RADIUS server.
Note For LDAP, the method to change a password is proprietary for the different LDAP servers on the market. Currently, the ASA implements the proprietary password management logic only for Microsoft Active Directory and Sun LDAP servers.
Native LDAP requires an SSL connection. You must enable LDAP over SSL before attempting to do password management for LDAP. By default, LDAP uses port 636.
Note Allowing override account-disabled is a potential security risk.
– Notify user __ days prior to password expiration—Specifies that ASDM must notify the user at login a specific number of days before the password expires. The default is to notify the user 14 days prior to password expiration and every day thereafter until the user changes the password. The range is 1 through 180 days.
– Notify user on the day password expires—Notifies the user only on the day that the password expires.
In either case, and, if the password expires without being changed, the ASA offers the user the opportunity to change the password. If the current password has not expired, the user can still log in using that password.
Note This does not change the number of days before the password expires, but rather, it enables the notification. If you select this option, you must also specify the number of days.
– Override account-disabled indication from AAA server—Overrides an account-disabled indication from a AAA server.
• Translate Assigned IP Address to Public IP Address—In rare situations, you might want to use a VPN peer’s real IP address on the inside network instead of an assigned local IP address. Normally with VPN, the peer is given an assigned local IP address to access the inside network. However, you might want to translate the local IP address back to the peer’s real public IP address if, for example, your inside servers and network security is based on the peer’s real IP address. You can enable this feature on one interface per tunnel group.
– Enable the address translation on interface—Enables the address translation and allows you to choose which interface the address appears on. Outside is the interface to which the AnyConnect client connects, and inside is the interface specific to the new tunnel group.
Note Because of routing issues and other limitations, we do not recommend using this feature unless you know you need it.
• Find—Enter a GUI label or a CLI command to use as a search string, then click Next or Previous to begin the search.
3-62Cisco ASA Series VPN ASDM Configuration Guide
Chapter 3 General VPN Setup Configuring AnyConnect VPN Connections
Setting Client Addressing Attributes for an AnyConnect SSL VPN ConnectionThe Client Addressing attributes let you configure interface-specific address pools that your connection can use. Click Add to add a new address pool or Edit to modify an existing pool. The Select Address Pools dialog box opens, showing a table listing the pool name, starting and ending address (or number of addresses), and subnet mask/prefix length of any existing pools. For a complete description of Client Addressing see Configuring Client Addressing, page 3-92.
Configuring Authentication Attributes for a Connection Profile• Interface-specific Authentication Server Groups—Manages the assignment of authentication server
groups to specific interfaces.
– Add or Edit—Opens the Assign Authentication Server Group to Interface dialog box, in which you can specify the interface and server group, and specify whether to allow fallback to the LOCAL database if the selected server group fails. The Manage button in this dialog box opens the Configure AAA Server Groups dialog box. Your selections appear in the Interface/Server Group table.
– Delete—Removes the selected server group from the table. There is no confirmation or undo.
• Username Mapping from Certificate—Lets you specify the methods and fields in a digital certificate from which to extract the username.
– Pre-fill Username from Certificate—Extracts the username from the specified certificate field and uses it for username/password authentication and authorization, according to the options that follow in this panel.
– Hide username from end user—Specifies to not display the extracted username to the end user.
– Use script to select username—Specify the name of a script to use to select a username from a digital certificate. The default is --None--.
– Add or Edit—Opens the Add or Edit Script Content dialog box, in which you can define a script to use in mapping the username from the certificate.
– Delete—Deletes the selected script. There is no confirmation or undo.
– Use the entire DN as the username—Specifies that you want to use the entire Distinguished Name field of the certificate as the username.
– Specify the certificate fields to be used as the username—Specifies one or more fields to combine into the username.
Possible values for primary and secondary attributes include the following:
Attribute Definition
C Country: the two-letter country abbreviation. These codes conform to ISO 3166 country abbreviations.
CN Common Name: the name of a person, system, or other entity. Not available a s a secondary attribute.
DNQ Domain Name Qualifier.
EA E-mail address.
GENQ Generational Qualifier.
GN Given Name.
3-63Cisco ASA Series VPN ASDM Configuration Guide
Chapter 3 General VPN Setup Configuring AnyConnect VPN Connections
– Primary Field—Selects the first field to use from the certificate for the username. If this value is found, the secondary field is ignored.
– Secondary Field—Selects the field to us if the primary field is not found.
• Find—Enter a GUI label or a CLI command to use as a search string, then click Next or Previous to begin the search.
Configuring Secondary Authentication Attributes for an SSL VPN Connection Profile
The Secondary Authentication dialog box lets you configure secondary or “double” authentication for this connection profile. With double authentication enabled, the end user must present two sets of valid authentication credentials in order to log on. You can use secondary authentication in conjunction with pre-filling the username from a certificate. The fields in this dialog box are similar to those you configure for primary authentication, but these fields relate only to secondary authentication.
When double authentication is enabled, these attributes select one or more fields in a certificate to use as the username. Configuring the secondary username from certificate attribute forces the security appliance to use the specified certificate field as the second username for the second username/password authentication.
Note If you also specify the secondary authentication server group, along with the secondary username from certificate, only the primary username is used for authentication.
Fields
• Secondary Authorization Server Group—Specifies an authorization server group from which to extract secondary credentials.
– Server Group—Select an authorization server group to use as the secondary server AAA group. The default is none. The secondary server group cannot be an SDI server group.
– Manage—Opens the Configure AAA Server Groups dialog box.
I Initials.
L Locality: the city or town where the organization is located.
N Name.
O Organization: the name of the company, institution, agency, association or other entity.
OU Organizational Unit: the subgroup within the organization (O).
SER Serial Number.
SN Surname.
SP State/Province: the state or province where the organization is located
T Title.
UID User Identifier.
UPN User Principal Name.
Attribute Definition
3-64Cisco ASA Series VPN ASDM Configuration Guide
Chapter 3 General VPN Setup Configuring AnyConnect VPN Connections
– Use LOCAL if Server Group fails—Specifies to fall back to the LOCAL database if the specified server group fails.
– Use primary username—Specifies that the login dialog must request only one username.
– Attributes Server—Select whether this is the primary or secondary attributes server.
Note If you also specify an authorization server for this connection profile, the authorization server settings take precedence—the ASA ignores this secondary authentication server.
– Session Username Server—Select whether this is the primary or secondary session username server.
• Interface-Specific Authorization Server Groups—Manages the assignment of authorization server groups to specific interfaces.
– Add or Edit—Opens the Assign Authentication Server Group to Interface dialog box, in which you can specify the interface and server group, and specify whether to allow fallback to the LOCAL database if the selected server group fails. The Manage button in this dialog box opens the Configure AAA Server Groups dialog box. Your selections appear in the Interface/Server Group table.
– Delete—Removes the selected server group from the table. There is no confirmation or undo.
• Username Mapping from Certificate—Specify the fields in a digital certificate from which to extract the username.
• Pre-fill Username from Certificate—Check to extract the names to be used for secondary authentication from the primary and secondary fields specified in this panel. You must configure the authentication method for both AAA and certificates before checking this attribute. To do so, return to the Basic panel in the same window and check Both next to Method.
• Hide username from end user—Check to hide the username to be used for secondary authentication from the VPN user.
• Fallback when a certificate is unavailable —This attribute is configurable only if “Hide username from end user” is checked. Uses Cisco Secure Desktop Host Scan data to pre-fill the username for secondary authentication if a certificate is unavailable.
• Password—Choose one of the following methods to retrieve the password to be used for secondary authentication:
– Prompt—Prompt the user for the password.
– Use Primary—Reuse the primary authentication password for all secondary authentications.
– Use—Enter a common secondary password for all secondary authentications.
• Specify the certificate fields to be used as the username—Specifies one or more fields to match as the username. To use this username in the pre-fill username from certificate feature for the secondary username/password authentication or authorization, you must also configure the pre-fill-username and secondary-pre-fill-username.
– Primary Field—Selects the first field to use from the certificate for the username. If this value is found, the secondary field is ignored.
– Secondary Field—Selects the field to us if the primary field is not found.
The options for primary and secondary field attributes include the following:
3-65Cisco ASA Series VPN ASDM Configuration Guide
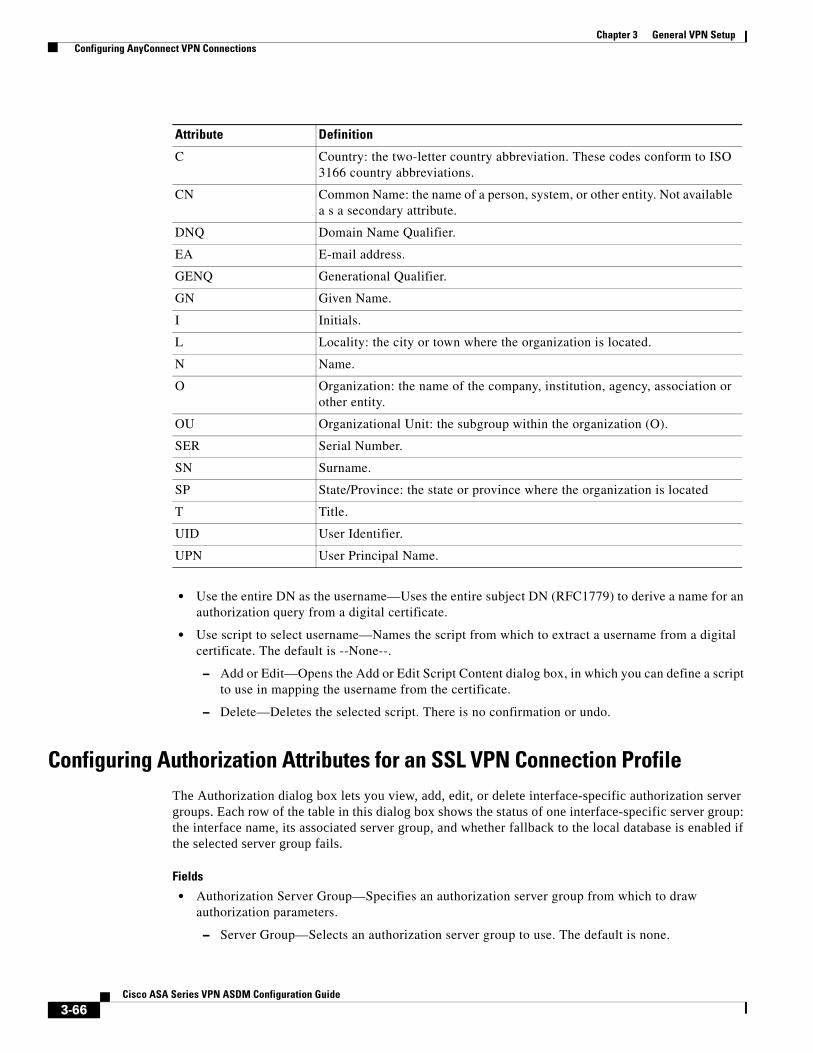
Chapter 3 General VPN Setup Configuring AnyConnect VPN Connections
• Use the entire DN as the username—Uses the entire subject DN (RFC1779) to derive a name for an authorization query from a digital certificate.
• Use script to select username—Names the script from which to extract a username from a digital certificate. The default is --None--.
– Add or Edit—Opens the Add or Edit Script Content dialog box, in which you can define a script to use in mapping the username from the certificate.
– Delete—Deletes the selected script. There is no confirmation or undo.
Configuring Authorization Attributes for an SSL VPN Connection ProfileThe Authorization dialog box lets you view, add, edit, or delete interface-specific authorization server groups. Each row of the table in this dialog box shows the status of one interface-specific server group: the interface name, its associated server group, and whether fallback to the local database is enabled if the selected server group fails.
Fields
• Authorization Server Group—Specifies an authorization server group from which to draw authorization parameters.
– Server Group—Selects an authorization server group to use. The default is none.
Attribute Definition
C Country: the two-letter country abbreviation. These codes conform to ISO 3166 country abbreviations.
CN Common Name: the name of a person, system, or other entity. Not available a s a secondary attribute.
DNQ Domain Name Qualifier.
EA E-mail address.
GENQ Generational Qualifier.
GN Given Name.
I Initials.
L Locality: the city or town where the organization is located.
N Name.
O Organization: the name of the company, institution, agency, association or other entity.
OU Organizational Unit: the subgroup within the organization (O).
SER Serial Number.
SN Surname.
SP State/Province: the state or province where the organization is located
T Title.
UID User Identifier.
UPN User Principal Name.
3-66Cisco ASA Series VPN ASDM Configuration Guide
Chapter 3 General VPN Setup Configuring AnyConnect VPN Connections
– Manage—Opens the Configure AAA Server Groups dialog box.
– Users must exist in the authorization database to connect—Select this check box to require that users meet this criterion.
• Interface-specific Authorization Server Groups—Manages the assignment of authorization server groups to specific interfaces.
– Add or Edit—Opens the Assign Authentication Server Group to Interface dialog box, in which you can specify the interface and server group, and specify whether to allow fallback to the LOCAL database if the selected server group fails. The Manage button in this dialog box opens the Configure AAA Server Groups dialog box. Your selections appear in the Interface/Server Group table.
– Delete—Removes the selected server group from the table. There is no confirmation or undo.
• Username Mapping from Certificate—Specify the fields in a digital certificate from which to extract the username.
– Use script to select username—Specifies the name of a script to use to select a username from a digital certificate. The default is --None--.
– Add or Edit—Opens the Add or Edit Script Content dialog box, in which you can define a script to use in mapping the username from the certificate.
– Delete—Deletes the selected script. There is no confirmation or undo.
– Use the entire DN as the username—Specifies that you want to use the entire Distinguished Name field of the certificate as the username.
– Specify the certificate fields to be used as the username—Specifies one or more fields to combine into the username.
– Primary Field—Selects the first field to use in the certificate for the username. If this value is found, the secondary field is ignored.
– Secondary Field—Selects the field to use if the primary field is not found.
• Find—Enter a GUI label or a CLI command to use as a search string, then click Next or Previous to begin the search.
Adding or Editing Content to a Script for Certificate Pre-Fill-UsernameThe Add or Edit Script Content dialog box lets you create an authentication or authorization script.
Note Both AnyConnect client and clientless WebVPN display “Unknown” in the username field when pre-fill-username from certificate using a script cannot find the username in the client certificate.
Fields
• Script Name—Specify the name of the script. The script name must be the same in both authorization and authentication.You define the script here, and CLI uses the same script to perform this function.
• Select script parameters—Specify the attributes and content of the script.
• Value for Username—Select an attribute from the drop-down list of standard DN attributes to use as the username (Subject DN).
• No Filtering—Specify that you want to use the entire specified DN name.
3-67Cisco ASA Series VPN ASDM Configuration Guide
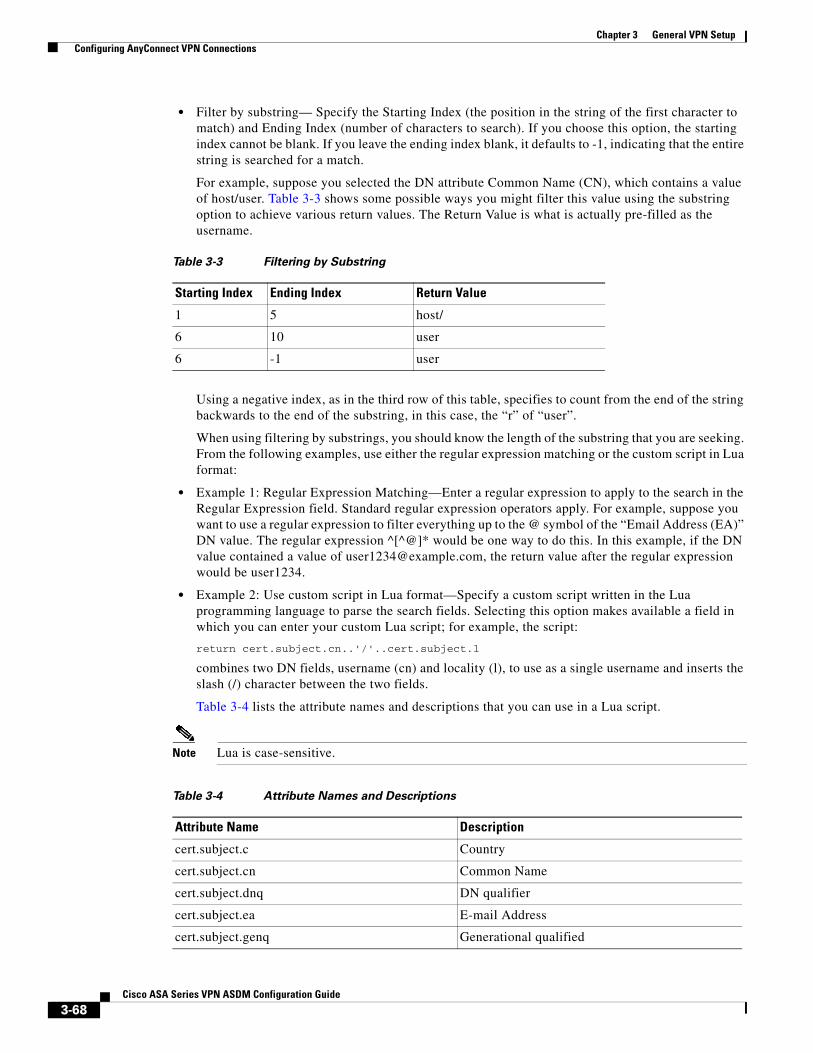
Chapter 3 General VPN Setup Configuring AnyConnect VPN Connections
• Filter by substring— Specify the Starting Index (the position in the string of the first character to match) and Ending Index (number of characters to search). If you choose this option, the starting index cannot be blank. If you leave the ending index blank, it defaults to -1, indicating that the entire string is searched for a match.
For example, suppose you selected the DN attribute Common Name (CN), which contains a value of host/user. Table 3-3 shows some possible ways you might filter this value using the substring option to achieve various return values. The Return Value is what is actually pre-filled as the username.
Using a negative index, as in the third row of this table, specifies to count from the end of the string backwards to the end of the substring, in this case, the “r” of “user”.
When using filtering by substrings, you should know the length of the substring that you are seeking. From the following examples, use either the regular expression matching or the custom script in Lua format:
• Example 1: Regular Expression Matching—Enter a regular expression to apply to the search in the Regular Expression field. Standard regular expression operators apply. For example, suppose you want to use a regular expression to filter everything up to the @ symbol of the “Email Address (EA)” DN value. The regular expression ^[^@]* would be one way to do this. In this example, if the DN value contained a value of [email protected], the return value after the regular expression would be user1234.
• Example 2: Use custom script in Lua format—Specify a custom script written in the Lua programming language to parse the search fields. Selecting this option makes available a field in which you can enter your custom Lua script; for example, the script:
return cert.subject.cn..'/'..cert.subject.l
combines two DN fields, username (cn) and locality (l), to use as a single username and inserts the slash (/) character between the two fields.
Table 3-4 lists the attribute names and descriptions that you can use in a Lua script.
Note Lua is case-sensitive.
Table 3-3 Filtering by Substring
Starting Index Ending Index Return Value
1 5 host/
6 10 user
6 -1 user
Table 3-4 Attribute Names and Descriptions
Attribute Name Description
cert.subject.c Country
cert.subject.cn Common Name
cert.subject.dnq DN qualifier
cert.subject.ea E-mail Address
cert.subject.genq Generational qualified
3-68Cisco ASA Series VPN ASDM Configuration Guide
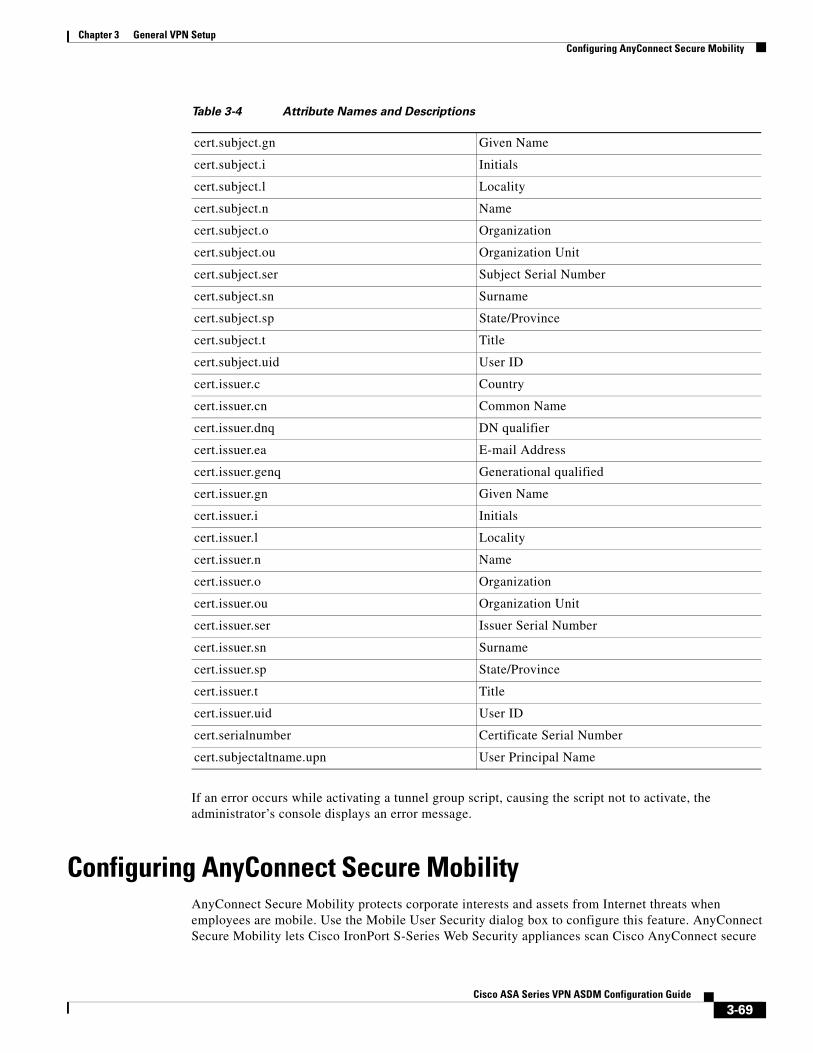
Chapter 3 General VPN Setup Configuring AnyConnect Secure Mobility
If an error occurs while activating a tunnel group script, causing the script not to activate, the administrator’s console displays an error message.
Configuring AnyConnect Secure MobilityAnyConnect Secure Mobility protects corporate interests and assets from Internet threats when employees are mobile. Use the Mobile User Security dialog box to configure this feature. AnyConnect Secure Mobility lets Cisco IronPort S-Series Web Security appliances scan Cisco AnyConnect secure
cert.subject.gn Given Name
cert.subject.i Initials
cert.subject.l Locality
cert.subject.n Name
cert.subject.o Organization
cert.subject.ou Organization Unit
cert.subject.ser Subject Serial Number
cert.subject.sn Surname
cert.subject.sp State/Province
cert.subject.t Title
cert.subject.uid User ID
cert.issuer.c Country
cert.issuer.cn Common Name
cert.issuer.dnq DN qualifier
cert.issuer.ea E-mail Address
cert.issuer.genq Generational qualified
cert.issuer.gn Given Name
cert.issuer.i Initials
cert.issuer.l Locality
cert.issuer.n Name
cert.issuer.o Organization
cert.issuer.ou Organization Unit
cert.issuer.ser Issuer Serial Number
cert.issuer.sn Surname
cert.issuer.sp State/Province
cert.issuer.t Title
cert.issuer.uid User ID
cert.serialnumber Certificate Serial Number
cert.subjectaltname.upn User Principal Name
Table 3-4 Attribute Names and Descriptions
3-69Cisco ASA Series VPN ASDM Configuration Guide
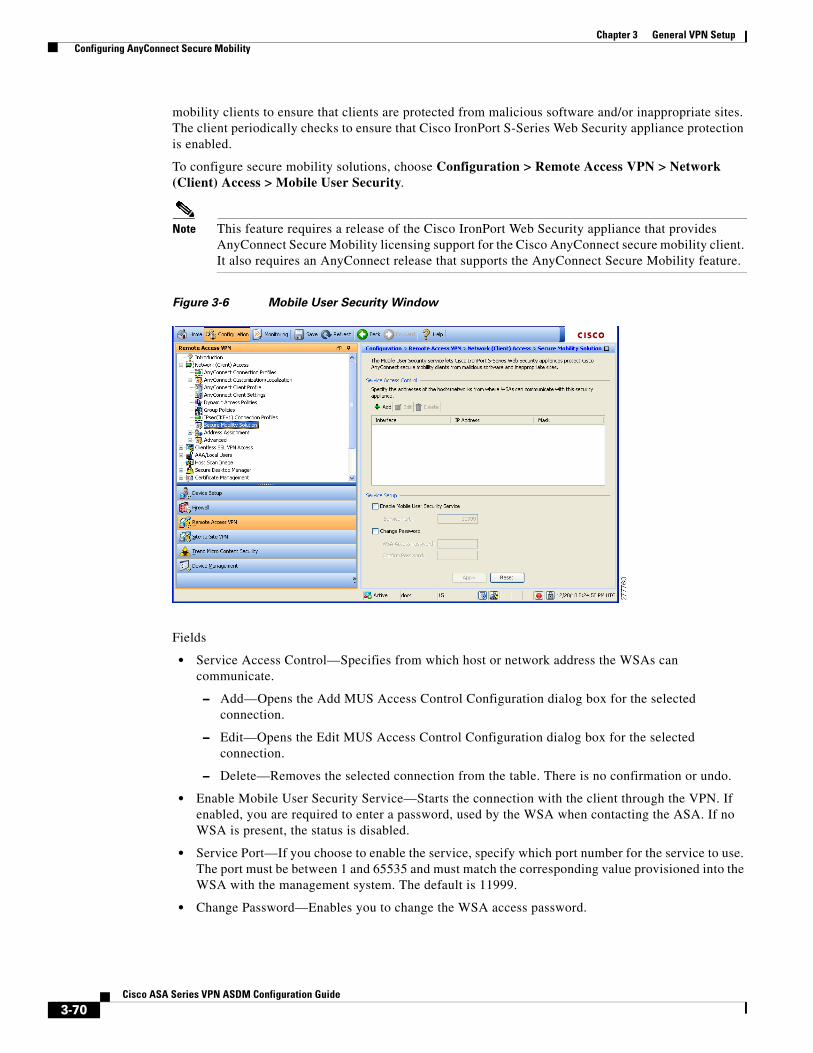
Chapter 3 General VPN Setup Configuring AnyConnect Secure Mobility
mobility clients to ensure that clients are protected from malicious software and/or inappropriate sites. The client periodically checks to ensure that Cisco IronPort S-Series Web Security appliance protection is enabled.
To configure secure mobility solutions, choose Configuration > Remote Access VPN > Network (Client) Access > Mobile User Security.
Note This feature requires a release of the Cisco IronPort Web Security appliance that provides AnyConnect Secure Mobility licensing support for the Cisco AnyConnect secure mobility client. It also requires an AnyConnect release that supports the AnyConnect Secure Mobility feature.
Figure 3-6 Mobile User Security Window
Fields
• Service Access Control—Specifies from which host or network address the WSAs can communicate.
– Add—Opens the Add MUS Access Control Configuration dialog box for the selected connection.
– Edit—Opens the Edit MUS Access Control Configuration dialog box for the selected connection.
– Delete—Removes the selected connection from the table. There is no confirmation or undo.
• Enable Mobile User Security Service—Starts the connection with the client through the VPN. If enabled, you are required to enter a password, used by the WSA when contacting the ASA. If no WSA is present, the status is disabled.
• Service Port—If you choose to enable the service, specify which port number for the service to use. The port must be between 1 and 65535 and must match the corresponding value provisioned into the WSA with the management system. The default is 11999.
• Change Password—Enables you to change the WSA access password.
3-70Cisco ASA Series VPN ASDM Configuration Guide
Chapter 3 General VPN Setup Configuring Clientless SSL VPN Connections
• WSA Access Password—Specify the shared secret password required for authentication between the ASA and WSA. This password must match the corresponding password provisioned into the WSA with the management system.
• Confirm Password—Re-enter the specified password.
• Show WSA Sessions—Allows you to view session information of WSAs connected to the ASA.The host IP address of the WSA that is connected (or has been connected) and the duration of the connection is returned in a dialog box.
Add or Edit MUS Access ControlThe Add or Edit MUS Access Control dialog box lets you configure MUS access.
Fields
• Interface Name—Use the drop-down list to choose which interface name you are adding or editing.
• IP Address—Enter either an IPv4 or IPv6 address.
• Mask—Use the drop-down list to choose the appropriate mask.
Configuring Clientless SSL VPN ConnectionsUse the Clientless SSL VPN Access Connections dialog box to configure clientless SSL VPN access parameters. This dialog box also records the configuration choices you make in its child dialog boxes.
Fields
• Access Interfaces—Lets you select from a table the interfaces on which to enable access. The fields in this table include the interface name and check boxes specifying whether to allow access.
– Device Certificate—Lets you specify a certificate for authentication for either an RSA key or an ECDSA key or trustpoint. You have the option to configure two trustpoints. The client indicates ECDSA support with a vendor ID payload. The ASA scans the configured trustpoint list and chooses the first one that the client supports. If ECDSA is preferred, you should configure that trustpoint before the RSA trustpoint.
– Manage—Opens the Manage Identity Certificates dialog box, on which you can add, edit, delete, export, and show details for a selected certificate.
– Port Setting—Configure port numbers for clientless SSL and IPsec (IKEv2) connections. The range is 1-65535. The default is port 443.
• Login Page Setting
– Allow user to select connection profile, identified by its alias, on the login page. Otherwise, DefaultWebVPN Group will be the connection profile.—Specifies that the user login page presents the user with a drop-down list from which the user can select a particular tunnel group with which to connect.
– Allow user to enter internal password on the login page.—Adds an option to input a different password when accessing internal servers.
– Shutdown portal login page.—Shows the web page when the login is disabled.
3-71Cisco ASA Series VPN ASDM Configuration Guide

Chapter 3 General VPN Setup Configuring Clientless SSL VPN Connections
• Connection Profiles—Provides a connection table that shows the records that determine the connection policy for this connection (tunnel group). Each record identifies a default group policy for the connection and contains protocol-specific connection parameters.
– Add—Opens the Add Clientless SSL VPN dialog box for the selected connection.
– Edit—Opens the Edit Clientless SSL VPN dialog box for the selected connection.
– Delete—Removes the selected connection from the table. There is no confirmation or undo.
– Name—The name of the Connection Profile.
– Enabled—Checkmark when enabled.
– Aliases—Other names by which the Connection Profile is known.
– Authentication Method—Specifies which authentication method is used.
– Group Policy—Shows the default group policy for this Connection Profile.
• Let group URL take precedence if group URL and certificate map match different connection profiles. Otherwise, the connection profile matches the certificate map will be used.—This option specifies the relative preference of the group URL and certificate values during the connection profile selection process. If the ASA fails to match the preferred value specified by the endpoint to that specified by a connection profile, it chooses the connection profile that matches the other value. Check this option only if you want to rely on the preference used by many older ASA software releases to match the group URL specified by the VPN endpoint to the connection profile that specifies the same group URL. This option is unchecked by default. If it is unchecked, the ASA prefers to match the certificate field value specified in the connection profile to the field value of the certificate used by the endpoint to assign the connection profile.
Add or Edit Clientless SSL VPN Connections The Add or Edit SSL VPN dialog box consists of Basic and Advanced sections, accessible through the expandable menu on the left of the box.
Add or Edit Clientless SSL VPN Connections > BasicThe Basic dialog box lets you configure essential characteristics for this connection.
Fields
• Name—Specifies the name of the connection. For the edit function, this field is read-only.
• Aliases—(Optional) Specifies one or more alternate names for this connection. The aliases appear on the login page if you configure that option on the Clientless SSL VPN Access Connections dialog box.
• Authentication—Specifies the authentication parameters.
– Method—Specifies whether to use AAA authentication, certificate authentication, or both methods for this connection. The default is AAA authentication.
– AAA server Group—Selects the AAA server group to use for authenticating this connection. The default is LOCAL.
– Manage—Opens the Configure AAA Server Groups dialog box.
• DNS Server Group—Selects the server to use as the DNS server group for this connection. The default is DefaultDNS.
3-72Cisco ASA Series VPN ASDM Configuration Guide
Chapter 3 General VPN Setup Configuring Clientless SSL VPN Connections
• Default Group Policy—Specifies the default group policy parameters to use for this connection.
– Group Policy—Selects the default group policy to use for this connection. The default is DfltGrpPolicy.
– Clientless SSL VPN Protocol—Enables or disables the Clientless SSL VPN protocol for this connection.
Add or Edit Clientless SSL VPN Connections > AdvancedThe Advanced menu items and their dialog boxes let you configure the following characteristics for this connection:
• General attributes.
• Authentication attributes.
• Authorization attributes.
• Accounting attributes.
• Name server attributes.
• Clientless SSL VPN attributes.
Add or Edit Clientless SSL VPN Connections > Advanced > GeneralUse this dialog box to specify whether to strip the realm and group from the username before passing them to the AAA server, and to specify password management options.
Fields
• Password Management—Lets you configure parameters relevant to overriding an account-disabled indication from a AAA server and to notifying users about password expiration.
– Enable notification password management—Checking this check box makes the following two parameters available. You can select either to notify the user at login a specific number of days before the password expires or to notify the user only on the day that the password expires. The default is to notify the user 14 days prior to password expiration and every day thereafter until the user changes the password. The range is 1 through 180 days.
Note This does not change the number of days before the password expires, but rather, it enables the notification. If you select this option, you must also specify the number of days.
In either case, and, if the password expires without being changed, the ASA offers the user the opportunity to change the password. If the current password has not yet expired, the user can still log in using that password.
This parameter is valid for AAA servers that support such notification; that is, RADIUS, RADIUS with an NT server, and LDAP servers. The ASA ignores this command if RADIUS or LDAP authentication has not been configured.
– Override account-disabled indication from AAA server—Overrides an account-disabled indication from a AAA server.
3-73Cisco ASA Series VPN ASDM Configuration Guide
Chapter 3 General VPN Setup Configuring Clientless SSL VPN Connections
Note Allowing override account-disabled is a potential security risk.
Add or Edit Clientless or SSL VPN Client Connection Profile or IPsec Connection Profiles> Advanced > Authentication
The Authentication dialog box lets you view, add, edit, or delete interface-specific authentication server groups. Each row of the table in thisdialog box shows the status of one interface-specific server group: the interface name, its associated server group, and whether fallback to the local database is enabled if the selected server group fails.
Fields
• Interface-specific Authorization Server Groups—Manages the assignment of authorization server groups to specific interfaces.
– Add or Edit—Opens the Assign Authentication Server Group to Interface dialog box, in which you can specify the interface and server group, and specify whether to allow fallback to the LOCAL database if the selected server group fails. The Manage button in thisdialog box opens the Configure AAA Server Groups dialog box. Your selections appear in the Interface/Server Group table.
– Delete—Removes the selected server group from the table. There is no confirmation or undo.
Assign Authentication Server Group to InterfaceThis dialog box lets you associate an interface with a AAA server group. The results appear in the table on the Authentication dialog box.
Fields
• Interface—Selects an interface, DMZ, Outside, or Inside. The default is DMZ.
• Server Group—Selects a server group to assign to the selected interface. The default is LOCAL.
• Manage—Opens the Configure AAA Server Groups dialog box.
• Fallback—Enables or disables fallback to LOCAL if the selected server group fails.
Add or Edit SSL VPN Connections > Advanced > AuthorizationThis dialog box lets you configure the default authorization server group, interface-specific authorization server groups, and user name mapping attributes. The attributes are the same for SSL VPN and Clientless SSL VPN connections.
Fields
• Default Authorization Server Group—Configures default authorization server group attributes.
– Server Group—Selects the authorization server group to use for this connection. The default is --None--.
– Manage—Opens the Configure AAA Server Groups dialog box.
– Users must exist in the authorization database to connect—Enables or disables this requirement.
3-74Cisco ASA Series VPN ASDM Configuration Guide
Chapter 3 General VPN Setup Configuring Clientless SSL VPN Connections
• Interface-specific Authorization Server Groups
– Table—Lists each configured interface and the server group with which it is associated.
– Add or Edit—Opens the Assign Authorization Server Group to Interface dialog box.
– Delete—Removes the selected row from the table.
• User Name Mapping—Specifies user name mapping attributes.
• Username Mapping from Certificate—Lets you specify the fields in a digital certificate from which to extract the username.
– Pre-fill Username from Certificate —Enables the use of a username extracted from the specified certificate field as the username for username/password authentication and authorization, using the options that follow in this dialog box.
– Hide username from end user—Specifies not to display the extracted username to the end user.
– Use script to select username—Specify the name of a script to use to select a username from a digital certificate. There is no default.
– Add or Edit—Opens the Add or Edit Script Content dialog box, in which you can define a script to use in mapping the username from the certificate.
– Delete—Deletes the selected script. There is no confirmation or undo.
– Use the entire DN as the username—Enables or disables the requirement to use the entire DN as the username.
– Specify individual DN fields as the username. You can select both the primary DN field, for which the default is CN (Common Name) and the secondary DN field, for which the default is OU (Organization Unit).
– Primary Field—Selects the first field to use in the username.
– Secondary Field—Selects the second field to use in the username.
Assign Authorization Server Group to InterfaceThis dialog box lets you associate an interface with a AAA server group. The results appear in the table on the Authorization dialog box.
Fields
• Interface—Selects an interface, DMZ, Outside, or Inside. The default is DMZ.
• Server Group—Selects a server group to assign to the selected interface. The default is LOCAL.
• Manage—Opens the Configure AAA Server Groups dialog box.
Add or Edit SSL VPN Connections > Advanced > SSL VPNThis dialog box lets you configure attributes that affect what the remote user sees upon login.
Fields
• Portal Page Customization—Configures the look and feel of the user login page by specifying which preconfigured customization attributes to apply. The default is DfltCustomization.
• Enable the display of Radius Reject-Message on the login screen—Select this check box to display the RADIUS-reject message on the login dialog box when authentication is rejected.
3-75Cisco ASA Series VPN ASDM Configuration Guide
Chapter 3 General VPN Setup Configuring Clientless SSL VPN Connections
• Enable the display of SecurId message on the login screen—Select this check box to display SecurID messages on the login dialog box.
• Manage—Opens the Configure GUI Customization Objects dialog box.
• Connection Aliases—Lists in a table the existing connection aliases and their status and lets you add or delete items in that table. A connection alias appears on the user login page if the connection is configured to allow users to select a particular connection (tunnel group) at login. The rows in this table are editable in place, so there is no Edit button. Clicking the “i” icon above the table opens a tooltip for the edit function.
– Add—Opens the Add Connection Alias dialog box, on which you can add and enable a connection alias.
– Delete—Removes the selected row from the connection alias table. There is no confirmation or undo.
– To edit an alias listed in the table, double-click the line.
• Group URLs—Lists in a table the existing group URLs and their status and lets you add or delete items in that table. A group URL appears on the user login page if the connection is configured to allow users to select a particular group at login. The rows in this table are editable in place, so there is no Edit button. Clicking the “i” icon above the table opens a tooltip for the edit function.
– Add—Opens the Add Group URL dialog box, on which you can add and enable a group URL.
– Delete—Removes the selected row from the connection alias table. There is no confirmation or undo.
– To edit a URL listed in the table, double-click the line.
• Do not run Cisco Secure Desktop (CSD) on client machine when using group URLs defined above to access the ASA. (If a client connects using a connection alias, this setting is ignored.)—Check if you want to exempt users from running CSD who use a URL that matches an entry in the Group URLs table. Be aware that doing so stops the security appliance from receiving endpoint criteria from these users, so you might have to change the DAP configuration to provide them with VPN access.
Add or Edit Clientless SSL VPN Connections > Advanced > Clientless SSL VPNThis dialog box lets you configure attributes that affect what the remote user sees upon login.
Fields
• Portal Page Customization—Configures the look and feel of the user login page by specifying which preconfigured customization attributes to apply. The default is DfltCustomization.
• Enable the display of Radius Reject-Message on the login screen—Select this check box to display the RADIUS-reject message on the login dialog box when authentication is rejected.
• Enable the display of SecurId message on the login screen—Select this check box to display SecurID messages on the login dialog box.
• Manage—Opens the Configure GUI Customization Objects dialog box.
• Connection Aliases—Lists in a table the existing connection aliases and their status and lets you add or delete items in that table. A connection alias appears on the user login page if the connection is configured to allow users to select a particular connection (tunnel group) at login.
– Add—Opens the Add Connection Alias dialog box, on which you can add and enable a connection alias.
3-76Cisco ASA Series VPN ASDM Configuration Guide

Chapter 3 General VPN Setup Configuring Clientless SSL VPN Connections
– Delete—Removes the selected row from the connection alias table. There is no confirmation or undo.
• Group URLs—Lists in a table the existing group URLs and their status and lets you add or delete items in that table. A group URL appears on the user login page if the connection is configured to allow users to select a particular group at login.
– Add—Opens the Add Group URL dialog box, on which you can add and enable a group URL.
– Delete—Removes the selected row from the connection alias table. There is no confirmation or undo.
• Do not run Cisco Secure Desktop (CSD) on client machine when using group URLs defined above to access the ASA. (If a client connects using a connection alias, this setting is ignored.)—Check if you want to exempt users from running CSD who use a URL that matches an entry in the Group URLs table. Be aware that doing so stops the security appliance from receiving endpoint criteria from these users, so you might have to change the DAP configuration to provide them with VPN access.
Add or Edit Clientless SSL VPN Connections > Advanced > NetBIOS ServersThe table in thisdialog box shows the attributes of the already-configured NetBIOS servers. The Add or Edit Tunnel Group dialog box for Clientless SSL VPN access, NetBIOS dialog box, lets you configure the NetBIOS attributes for the tunnel group. Clientless SSL VPN uses NetBIOS and the Common Internet File System protocol to access or share files on remote systems. When you attempt a file-sharing connection to a Windows computer by using its computer name, the file server you specify corresponds to a specific NetBIOS name that identifies a resource on the network.
The ASA queries NetBIOS name servers to map NetBIOS names to IP addresses. Clientless SSL VPN requires NetBIOS to access or share files on remote systems.
To make the NBNS function operational, you must configure at least one NetBIOS server (host). You can configure up to 3 NBNS servers for redundancy. The ASA uses the first server on the list for NetBIOS/CIFS name resolution. If the query fails, it uses the next server.
Fields
• IP Address—Displays the IP addresses of configured NetBIOS servers.
• Master Browser—Shows whether a server is a WINS server or one that can also be a CIFS server (that is, a master browser).
• Timeout (seconds)—Displays the initial time in seconds that the server waits for a response to an NBNS query before sending the query to the next server.
• Retries—Shows the number of times to retry sending an NBNS query to the configured servers, in order. In other words, this is the number of times to cycle through the list of servers before returning an error. The minimum number of retries is 0. The default number of retries is 2. The maximum number of retries is 10.
• Add/Edit—Click to add a NetBIOS server. This opens the Add or Edit NetBIOS Server dialog box.
• Delete—Removes the highlighted NetBIOS row from the list.
• Move Up/Move Down—The ASA sends NBNS queries to the NetBIOS servers in the order in which they appear in this box. Use this box to change the priority order of the servers by moving them up or down in the list.
3-77Cisco ASA Series VPN ASDM Configuration Guide

Chapter 3 General VPN Setup IPsec Remote Access Connection Profiles
Configure DNS Server GroupsThis dialog box displays the configured DNS servers in a table, including the server group name, servers, timeout in seconds, number of retries allowed, and domain name. You can add, edit, or delete DNS server groups in thisdialog box.
Fields
• Add or Edit—Opens the Add or Edit DNS Server Group dialog box.
• Delete—Removes the selected row from the table. There is no confirmation or undo.
• DNS Server Group—Selects the server to use as the DNS server group for this connection. The default is DefaultDNS.
• Manage—Opens the Configure DNS Server Groups dialog box.
Add or Edit Clientless SSL VPN Connections > Advanced > Clientless SSL VPNThis dialog box lets you specify portal-related attributes for Clientless SSL VPN connections.
Fields
• Portal Page Customization—Selects the customization to apply to the user interface.
• Manage—Opens the Configure GUI Customization Objects dialog box.
IPsec Remote Access Connection Profiles Configuration > VPN > General > Tunnel Group
The parameters in the IPsec Connection Profiles dialog box let you configure IPsec remote access connections. Most of the parameters in this section were formerly configured under tunnel groups. An IPsec connection represents a connection-specific record for IPsec and Clientless SSL VPN connections.
The IPsec group uses the IPsec connection parameters to create a tunnel. An IPsec connection can be either remote-access or Site-to-Site. The IPsec group is configured on the internal server or on an external RADIUS server. For ASA 5505 in client mode or VPN 3002 hardware client parameters, which enable or disable interactive hardware client authentication and individual user authentication, the IPsec connection parameters take precedence over parameters set for users and groups.
The Clientless SSL VPN tunnel-group parameters are the parameters of the Clientless SSL VPN group that you want to apply to this IPsec connection. You configure Clientless SSL VPN access on the Configuration > Clientless SSL VPN dialog box.
Fields
• Access Interfaces—Selects the interfaces to enable for IPsec access. The default is that no access is selected.
• Connections—Shows in tabular format the configured parameters for existing IPsec connections. The Connections table contains records that determine connection policies. A record identifies a default group policy for the connection and contains protocol-specific connection parameters. The table contains the following columns:
– Name—Specifies the name or IP address of the IPsec connection.
– ID Certificate—Specifies the name of the ID certificate, if available.
3-78Cisco ASA Series VPN ASDM Configuration Guide
Chapter 3 General VPN Setup Add or Edit an IPsec Remote Access Connection Profile
– IPsec Protocol—Indicates whether the IPsec protocol is enabled. You enable this protocol on the Add or Edit IPsec Remote Access Connection, Basic dialog box.
– L2TP/IPsec Protocol—Indicates whether the L2TP/IPsec protocol is enabled. You enable this protocol on the Add or Edit IPsec Remote Access Connection, Basic dialog box.
– Group Policy—Indicates the name of the group policy for this IPsec connection.
• Add or Edit—Opens the Add or Edit IPsec Remote Access Connection Profile dialog box.
• Delete—Removes the selected server group from the table. There is no confirmation or undo.
Add or Edit an IPsec Remote Access Connection ProfileThe Add or Edit IPsec Remote Access Connection Profile dialog box has a navigation pane that lets you select basic or advanced elements to configure.
Add or Edit IPsec Remote Access Connection Profile BasicThe Add or Edit IPsec Remote Access Connection Profile Basic dialog box lets you configure common attributes for IPsec connections.
Fields
• Name—Identifies the name of the connection.
• IKE Peer Authentication—Configures IKE peers.
– Pre-shared key—Specifies the value of the pre-shared key for the connection. The maximum length of a pre-shared key is 128 characters.
– Identity Certificate—Selects the name of an identity certificate, if any identity certificates are configured and enrolled.
– Manage—Opens the Manage Identity Certificates dialog box, on which you can add, edit, delete, export, and show details for a selected certificate.
• User Authentication—Specifies information about the servers used for user authentication. You can configure more authentication information in the Advanced section.
– Server Group—Selects the server group to use for user authentication. the default is LOCAL. If you select something other than LOCAL, the Fallback check box becomes available.
– Manage—Opens the Configure AAA Server Groups dialog box.
– Fallback—Specifies whether to use LOCAL for user authentication if the specified server group fails.
• Client Address Assignment—Specifies attributes relevant to assigning client attributes.
– DHCP Servers—Specifies the IP address of a DHCP server to use. You can add up to 10 servers, separated by spaces.
– Client Address Pools—Specifies up to 6 predefined address pools. To define an address pool, go to Configuration > Remote Access VPN > Network Client Access > Address Assignment > Address Pools.
– Select—Opens the Select Address Pools dialog box.
• Default Group Policy—Specifies attributes relevant to the default group policy.
3-79Cisco ASA Series VPN ASDM Configuration Guide
Chapter 3 General VPN Setup Mapping Certificates to IPsec or SSL VPN Connection Profiles
– Group Policy—Selects the default group policy to use for this connection. The default is DfltGrpPolicy.
– Manage—Opens the Configure Group Policies dialog box, from which you can add, edit, or delete group policies.
– Client Protocols—Selects the protocol or protocols to use for this connection. By default, both IPsec and L2TP over IPsec are selected.
Mapping Certificates to IPsec or SSL VPN Connection ProfilesWhen the ASA receives an IPsec connection request with client certificate authentication, it assigns a connection profile to the connection according to policies you configure. That policy can be to use rules you configure, use the certificate OU field, use the IKE identity (i.e. hostname, IP address, key ID), the peer IP address, or a default connection profile. For SSL connections, the ASA only uses the rules you configure.
For IPsec or SSL connections using rules, the ASA evaluates the attributes of the certificate against the rules until it finds a match. When it finds a match, it assigns the connection profile associated with the matched rule to the connection. If it fails to find a match, it assigns the default connection profile (DefaultRAGroup for IPsec and DefaultWEBVPNGroup for SSL VPN) to the connection and lets the user choose the connection profile from a drop-down list displayed on the portal page (if it is enabled). The outcome of the connection attempt once in this connection profile depends on whether or not the certificate is valid and the authentication settings of the connection profile.
A certificate group matching policy defines the method to use for identifying the permission groups of certificate users. You can use any or all of these methods.
First configure the policy for matching a certificate to a connection profile at Configuration > Remote Access VPN > Network (Client) Access > Advanced > IPsec > Certificate to Connection Profile Maps. If you choose to use rules you configure, go to Rules to specify the rules. The following procedures shows how you create the certificate-based criteria for each IPsec and SSL VPN connection profile:
Step 1 Use the table at the top (Certificate to Connection Profile Maps) to do one of the following:
• Create a list name, called a “map,” specify the priority of the list, and assign the list to a connection profile.
ASDM highlights the list after you add it to the table.
• Confirm that a list is assigned to the connection profile for which you want to add certificate-based rules.
ASDM highlights the list after you add it to the table and displays any associated list entries in the table at the bottom of the pane.
Step 2 Use the table at the bottom (Mapping Criteria) to view, add, change or delete entries to the selected list.
Each entry in the list consists of one certificate-based rule. All of the rules in the mapping criteria list need to match the contents of the certificate for the ASA to choose the associated map index. To assign a connection if one criterion or another matches, create one list for each matching criterion.
To understand the fields, see the following sections:
• Setting a Certificate Matching Policy
• Add/Edit Certificate Matching Rule
3-80Cisco ASA Series VPN ASDM Configuration Guide

Chapter 3 General VPN Setup Mapping Certificates to IPsec or SSL VPN Connection Profiles
• Add/Edit Certificate Matching Rule Criterion
Setting a Certificate Matching Policy
For IPsec connections, a certificate group matching policy defines the method to use for identifying the permission groups of certificate users. You can use any or all of these methods:
Fields
• Use the configured rules to match a certificate to a group—Lets you use the rules you have defined under Rules.
• Use the certificate OU field to determine the group—Lets you use the organizational unit field to determine the group to which to match the certificate. This is selected by default.
• Use the IKE identity to determine the group—Lets you use the identity you previously defined under Configuration > Remote Access VPN > Network (Client) Access > Advanced > IPsec > IKE Parameters. The IKE identity can be hostname, IP address, key ID, or automatic.
• Use the peer IP address to determine the group—Lets you use the peer's IP address. This is selected by default.
• Default to group—Lets you select a default group for certificate users that is used when none of the preceding methods resulted in a match. This is selected by default. Click the default group in the Default to group list. The group must already exist in the configuration. If the group does not appear in the list, you must define it by using Configuration > Remote Access VPN > Network (Client) Access > Group Policies.
Add/Edit Certificate Matching Rule
Configuration > VPN > IKE > Certificate Group Matching > Rules > Add/Edit Certificate Matching Rule
Use the Add/Edit Certificate Matching Rule dialog box to assign the name of a list (map) to a connection profile.
Fields
• Map—Choose one of the following:
– Existing—Select the name of the map to include the rule.
– New—Enter a new map name for a rule.
• Rule Priority—Type a decimal to specify the sequence with which the ASA evaluates the map when it receives a connection request. For the first rule defined, the default priority is 10. The ASA evaluates each connection against the map with the lowest priority number first.
• Mapped to Connection Profile—Select the connection profile, formerly called a “tunnel group,” to map to this rule.
3-81Cisco ASA Series VPN ASDM Configuration Guide

Chapter 3 General VPN Setup Mapping Certificates to IPsec or SSL VPN Connection Profiles
If you do not assign a rule criterion to the map, as described in the next section, the ASA ignores the map entry.
Add/Edit Certificate Matching Rule Criterion
Configuration > VPN > IKE > Certificate Group Matching > Rules > Add/Edit Certificate Matching Rule Criterion
Use the Add/Edit Certificate Matching Rule Criterion dialog box to configure a certificate matching rule criterion for the selected connection profile.
Fields
• Rule Priority—(Display only). Sequence with which the ASA evaluates the map when it receives a connection request. The ASA evaluates each connection against the map with the lowest priority number first.
• Mapped to Group—(Display only). Connection profile to which the rule is assigned.
• Field—Select the part of the certificate to be evaluated from the drop-down list.
– Subject—The person or system that uses the certificate. For a CA root certificate, the Subject and Issuer are the same.
– Alternative Subject—The subject alternative names extension allows additional identities to be bound to the subject of the certificate.
– Issuer—The CA or other entity (jurisdiction) that issued the certificate.
– Extended Key Usage—An extension of the client certificate that provides further criteria that you can choose to match.
3-82Cisco ASA Series VPN ASDM Configuration Guide

Chapter 3 General VPN Setup Mapping Certificates to IPsec or SSL VPN Connection Profiles
• Component—(Applies only if Subject of Issuer is selected.) Select the distinguished name component used in the rule:
• Operator—Select the operator used in the rule:
– Equals—The distinguished name field must exactly match the value.
– Contains—The distinguished name field must include the value within it.
– Does Not Equal—The distinguished name field must not match the value
– Does Not Contain—The distinguished name field must not include the value within it.
• Value—Enter up to 255 characters to specify the object of the operator. For Extended Key Usage, select one of the pre-defined values in the drop-down list, or you can enter OIDs for other extensions. The pre-defined values include the following:
DN Field Definition
Whole Field The entire DN.
Country (C) The two-letter country abbreviation. These codes conform to ISO 3166 country abbreviations.
Common Name (CN) The name of a person, system, or other entity. This is the lowest (most specific) level in the identification hierarchy.
DN Qualifier (DNQ) A specific DN attribute.
E-mail Address (EA) The e-mail address of the person, system or entity that owns the certificate.
Generational Qualifier (GENQ)
A generational qualifier such as Jr., Sr., or III.
Given Name (GN) The first name of the certificate owner.
Initials (I) The first letters of each part of the certificate owner’s name.
Locality (L) The city or town where the organization is located.
Name (N) The name of the certificate owner.
Organization (O) The name of the company, institution, agency, association, or other entity.
Organizational Unit (OU)
The subgroup within the organization.
Serial Number (SER) The serial number of the certificate.
Surname (SN) The family name or last name of the certificate owner.
State/Province (S/P) The state or province where the organization is located.
Title (T) The title of the certificate owner, such as Dr.
User ID (UID) The identification number of the certificate owner.
Unstructured Name (UNAME)
The unstructuredName attribute type specifies the name or names of a subject as an unstructured ASCII string.
IP Address (IP) IP address field.
3-83Cisco ASA Series VPN ASDM Configuration Guide
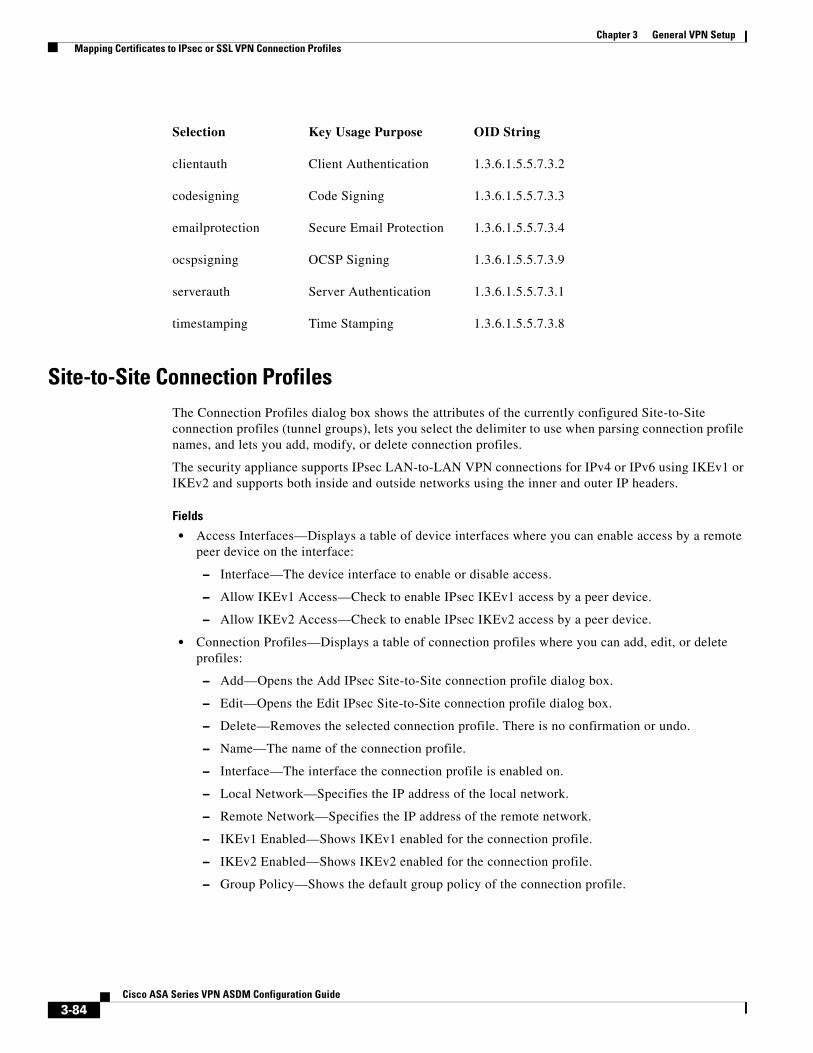
Chapter 3 General VPN Setup Mapping Certificates to IPsec or SSL VPN Connection Profiles
Site-to-Site Connection ProfilesThe Connection Profiles dialog box shows the attributes of the currently configured Site-to-Site connection profiles (tunnel groups), lets you select the delimiter to use when parsing connection profile names, and lets you add, modify, or delete connection profiles.
The security appliance supports IPsec LAN-to-LAN VPN connections for IPv4 or IPv6 using IKEv1 or IKEv2 and supports both inside and outside networks using the inner and outer IP headers.
Fields
• Access Interfaces—Displays a table of device interfaces where you can enable access by a remote peer device on the interface:
– Interface—The device interface to enable or disable access.
– Allow IKEv1 Access—Check to enable IPsec IKEv1 access by a peer device.
– Allow IKEv2 Access—Check to enable IPsec IKEv2 access by a peer device.
• Connection Profiles—Displays a table of connection profiles where you can add, edit, or delete profiles:
– Add—Opens the Add IPsec Site-to-Site connection profile dialog box.
– Edit—Opens the Edit IPsec Site-to-Site connection profile dialog box.
– Delete—Removes the selected connection profile. There is no confirmation or undo.
– Name—The name of the connection profile.
– Interface—The interface the connection profile is enabled on.
– Local Network—Specifies the IP address of the local network.
– Remote Network—Specifies the IP address of the remote network.
– IKEv1 Enabled—Shows IKEv1 enabled for the connection profile.
– IKEv2 Enabled—Shows IKEv2 enabled for the connection profile.
– Group Policy—Shows the default group policy of the connection profile.
Selection Key Usage Purpose OID String
clientauth Client Authentication 1.3.6.1.5.5.7.3.2
codesigning Code Signing 1.3.6.1.5.5.7.3.3
emailprotection Secure Email Protection 1.3.6.1.5.5.7.3.4
ocspsigning OCSP Signing 1.3.6.1.5.5.7.3.9
serverauth Server Authentication 1.3.6.1.5.5.7.3.1
timestamping Time Stamping 1.3.6.1.5.5.7.3.8
3-84Cisco ASA Series VPN ASDM Configuration Guide
Chapter 3 General VPN Setup Mapping Certificates to IPsec or SSL VPN Connection Profiles
Add/Edit Site-to-Site Connection You can get to this panel through various paths.
The Add or Edit IPsec Site-to-Site Connection dialog box lets you create or modify an IPsec Site-to-Site connection. These dialog boxes let you specify the peer IP address (IPv4 or IPv6), specify a connection name, select an interface, specify IKEv1 and IKEv2 peer and user authentication parameters, specify protected networks, and specify encryption algorithms.
The ASA supports LAN-to-LAN VPN connections to Cisco or third-party peers when the two peers have IPv4 inside and outside networks (IPv4 addresses on the inside and outside interfaces).
For LAN-to-LAN connections using mixed IPv4 and IPv6 addressing, or all IPv6 addressing, the security appliance supports VPN tunnels if both peers are Cisco ASA 5500 series security appliances, and if both inside networks have matching addressing schemes (both IPv4 or both IPv6).
Specifically, the following topologies are supported when both peers are Cisco ASA 5500 series ASAs:
• The ASAs have IPv4 inside networks and the outside network is IPv6 (IPv4 addresses on the inside interfaces and IPv6 addresses on the outside interfaces).
• The ASAs have IPv6 inside networks and the outside network is IPv4 (IPv6 addresses on the inside interface and IPv4 addresses on the outside interfaces).
• The ASAs have IPv6 inside networks and the outside network is IPv6 (IPv6 addresses on the inside and outside interfaces).
Fields
• Peer IP Address—Lets you specify an IP address (IPv4 or IPv6) and whether that address is static.
• Connection Name—Specifies the name assigned to this connection profile. For the Edit function, this field is display-only. You can specify that the connection name is the same as the IP address specified in the Peer IP Address field.
• Interface—Selects the interface to use for this connection.
• Protected Networks—Selects or specifies the local and remote network protected for this connection.
– IP Address Type—Specifies the address is an IPv4 or IPv6 address.
– Local Network—Specifies the IP address of the local network.
– ...—Opens the Browse Local Network dialog box, in which you can select a local network.
– Remote Network—Specifies the IP address of the remote network.
• IPsec Enabling—Specifies the group policy for this connection profile and the key exchange protocol specified in that policy:
– Group Policy Name—Specifies the group policy associated with this connection profile.
– Manage—Opens the Browse Remote Network dialog box, in which you can select a remote network.
– Enable IKEv1—Enables the key exchange protocol IKEv1 in the specified group policy.
– Enable IKEv2—Enables the key exchange protocol IKEv2 in the specified group policy.
• IKEv1 Settings tab—Specifies authentication and encryption settings for IKEv1:
– Pre-shared Key—Specify the value of the pre-shared key for the tunnel group. The maximum length of the pre-shared key is 128 characters.
3-85Cisco ASA Series VPN ASDM Configuration Guide
Chapter 3 General VPN Setup Mapping Certificates to IPsec or SSL VPN Connection Profiles
– Device Certificate—Specifies the name of the identity certificate, if available, to use for authentication.
– Manage—Opens the Manage Identity Certificates dialog box, on which you can see the certificates that are already configured, add new certificates, show details for a certificate, and edit or delete a certificate.
– IKE Policy—Specifies one or more encryption algorithms to use for the IKE proposal.
– Manage—Opens the Configure IKEv1 Proposals dialog box.
– IPsec Proposal—Specifies one or more encryption algorithms to use for the IPsec IKEv1 proposal.
• IKEv2 Settings tab—Specifies authentication and encryption settings for IKEv2:
– Local Pre-shared Key—Specify the value of the pre-shared key for the tunnel group. The maximum length of the pre-shared key is 128 characters.
– Local Device Certificate—Specifies the name of the identity certificate, if available, to use for authentication.
– Manage—Opens the Manage Identity Certificates dialog box, on which you can see the certificates that are already configured, add new certificates, show details for a certificate, and edit or delete a certificate.
– Remote Peer Pre-shared Key—Specify the value of the remote peer pre-shared key for the tunnel group. The maximum length of the pre-shared key is 128 characters.
– Remote Peer Certificate Authentication—Check Allowed to allow certificate authentication for IKEv2 connections for this connection profile.
– Manage—Opens the Manage CA Certificates dialog where you can view certificates and add new ones.
– IKE Policy—Specifies one or more encryption algorithms to use for the IKE proposal.
– Manage—Opens the Configure IKEv1 Proposals dialog box.
– IPsec Proposal—Specifies one or more encryption algorithms to use for the IPsec IKEv1 proposal.
– Select—Opens the Select IPsec Proposals (Transform Sets) dialog box, where you can assign a proposal to the connection profile for IKEv2 connections.
Adding or Editing a Site-to-Site Tunnel GroupYou can get to this panel through various paths.
The Add or Edit IPsec Site-to-Site Tunnel Group dialog box lets you specify attributes for the IPsec site-to-site connection that you are adding. In addition, you can select IKE peer and user authentication parameters, configure IKE keepalive monitoring, and select the default group policy.
Fields
• Name—Specifies the name assigned to this tunnel group. For the Edit function, this field is display-only.
• IKE Authentication—Specifies the pre-shared key and Identity certificate parameters to use when authenticating an IKE peer.
– Pre-shared Key—Specify the value of the pre-shared key for the tunnel group. The maximum length of the pre-shared key is 128 characters.
3-86Cisco ASA Series VPN ASDM Configuration Guide
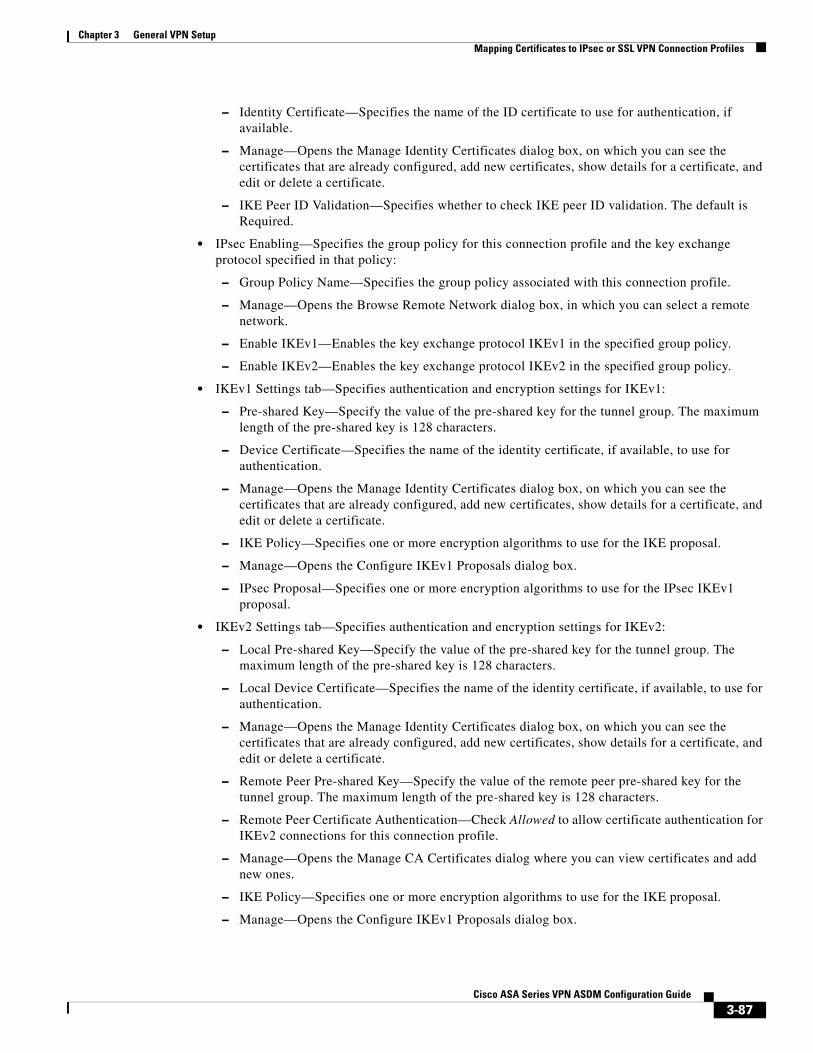
Chapter 3 General VPN Setup Mapping Certificates to IPsec or SSL VPN Connection Profiles
– Identity Certificate—Specifies the name of the ID certificate to use for authentication, if available.
– Manage—Opens the Manage Identity Certificates dialog box, on which you can see the certificates that are already configured, add new certificates, show details for a certificate, and edit or delete a certificate.
– IKE Peer ID Validation—Specifies whether to check IKE peer ID validation. The default is Required.
• IPsec Enabling—Specifies the group policy for this connection profile and the key exchange protocol specified in that policy:
– Group Policy Name—Specifies the group policy associated with this connection profile.
– Manage—Opens the Browse Remote Network dialog box, in which you can select a remote network.
– Enable IKEv1—Enables the key exchange protocol IKEv1 in the specified group policy.
– Enable IKEv2—Enables the key exchange protocol IKEv2 in the specified group policy.
• IKEv1 Settings tab—Specifies authentication and encryption settings for IKEv1:
– Pre-shared Key—Specify the value of the pre-shared key for the tunnel group. The maximum length of the pre-shared key is 128 characters.
– Device Certificate—Specifies the name of the identity certificate, if available, to use for authentication.
– Manage—Opens the Manage Identity Certificates dialog box, on which you can see the certificates that are already configured, add new certificates, show details for a certificate, and edit or delete a certificate.
– IKE Policy—Specifies one or more encryption algorithms to use for the IKE proposal.
– Manage—Opens the Configure IKEv1 Proposals dialog box.
– IPsec Proposal—Specifies one or more encryption algorithms to use for the IPsec IKEv1 proposal.
• IKEv2 Settings tab—Specifies authentication and encryption settings for IKEv2:
– Local Pre-shared Key—Specify the value of the pre-shared key for the tunnel group. The maximum length of the pre-shared key is 128 characters.
– Local Device Certificate—Specifies the name of the identity certificate, if available, to use for authentication.
– Manage—Opens the Manage Identity Certificates dialog box, on which you can see the certificates that are already configured, add new certificates, show details for a certificate, and edit or delete a certificate.
– Remote Peer Pre-shared Key—Specify the value of the remote peer pre-shared key for the tunnel group. The maximum length of the pre-shared key is 128 characters.
– Remote Peer Certificate Authentication—Check Allowed to allow certificate authentication for IKEv2 connections for this connection profile.
– Manage—Opens the Manage CA Certificates dialog where you can view certificates and add new ones.
– IKE Policy—Specifies one or more encryption algorithms to use for the IKE proposal.
– Manage—Opens the Configure IKEv1 Proposals dialog box.
3-87Cisco ASA Series VPN ASDM Configuration Guide
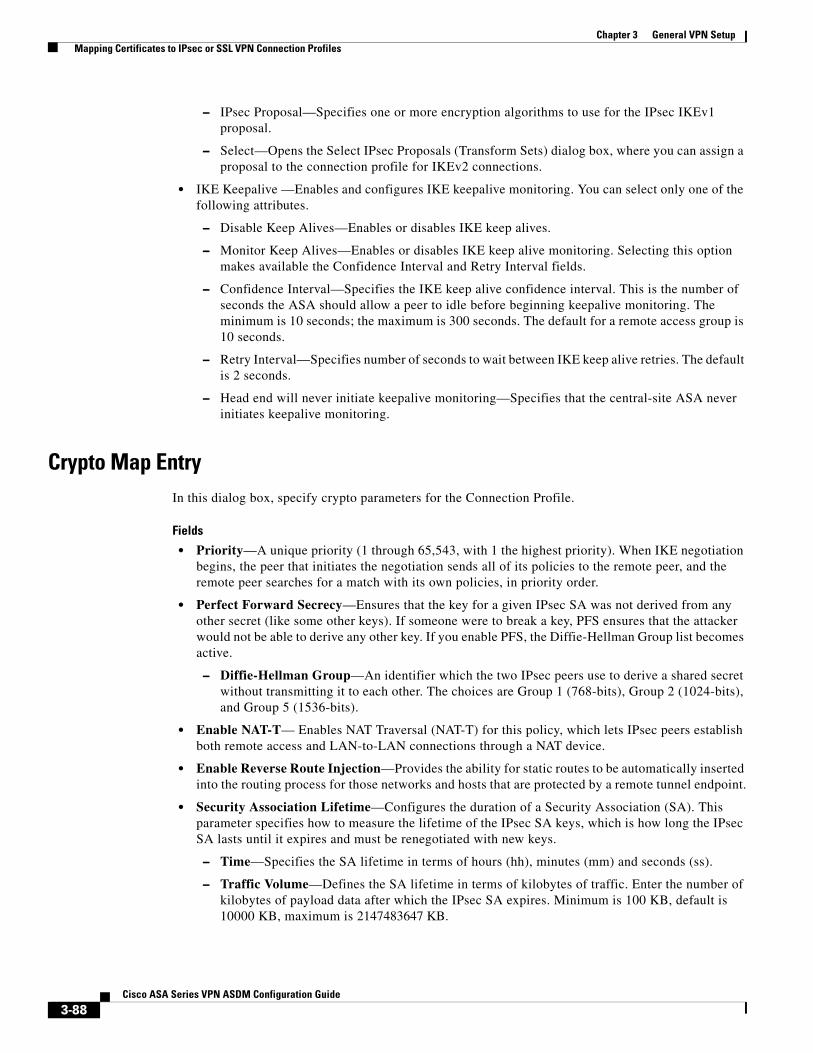
Chapter 3 General VPN Setup Mapping Certificates to IPsec or SSL VPN Connection Profiles
– IPsec Proposal—Specifies one or more encryption algorithms to use for the IPsec IKEv1 proposal.
– Select—Opens the Select IPsec Proposals (Transform Sets) dialog box, where you can assign a proposal to the connection profile for IKEv2 connections.
• IKE Keepalive —Enables and configures IKE keepalive monitoring. You can select only one of the following attributes.
– Disable Keep Alives—Enables or disables IKE keep alives.
– Monitor Keep Alives—Enables or disables IKE keep alive monitoring. Selecting this option makes available the Confidence Interval and Retry Interval fields.
– Confidence Interval—Specifies the IKE keep alive confidence interval. This is the number of seconds the ASA should allow a peer to idle before beginning keepalive monitoring. The minimum is 10 seconds; the maximum is 300 seconds. The default for a remote access group is 10 seconds.
– Retry Interval—Specifies number of seconds to wait between IKE keep alive retries. The default is 2 seconds.
– Head end will never initiate keepalive monitoring—Specifies that the central-site ASA never initiates keepalive monitoring.
Crypto Map EntryIn this dialog box, specify crypto parameters for the Connection Profile.
Fields
• Priority—A unique priority (1 through 65,543, with 1 the highest priority). When IKE negotiation begins, the peer that initiates the negotiation sends all of its policies to the remote peer, and the remote peer searches for a match with its own policies, in priority order.
• Perfect Forward Secrecy—Ensures that the key for a given IPsec SA was not derived from any other secret (like some other keys). If someone were to break a key, PFS ensures that the attacker would not be able to derive any other key. If you enable PFS, the Diffie-Hellman Group list becomes active.
– Diffie-Hellman Group—An identifier which the two IPsec peers use to derive a shared secret without transmitting it to each other. The choices are Group 1 (768-bits), Group 2 (1024-bits), and Group 5 (1536-bits).
• Enable NAT-T— Enables NAT Traversal (NAT-T) for this policy, which lets IPsec peers establish both remote access and LAN-to-LAN connections through a NAT device.
• Enable Reverse Route Injection—Provides the ability for static routes to be automatically inserted into the routing process for those networks and hosts that are protected by a remote tunnel endpoint.
• Security Association Lifetime—Configures the duration of a Security Association (SA). This parameter specifies how to measure the lifetime of the IPsec SA keys, which is how long the IPsec SA lasts until it expires and must be renegotiated with new keys.
– Time—Specifies the SA lifetime in terms of hours (hh), minutes (mm) and seconds (ss).
– Traffic Volume—Defines the SA lifetime in terms of kilobytes of traffic. Enter the number of kilobytes of payload data after which the IPsec SA expires. Minimum is 100 KB, default is 10000 KB, maximum is 2147483647 KB.
3-88Cisco ASA Series VPN ASDM Configuration Guide
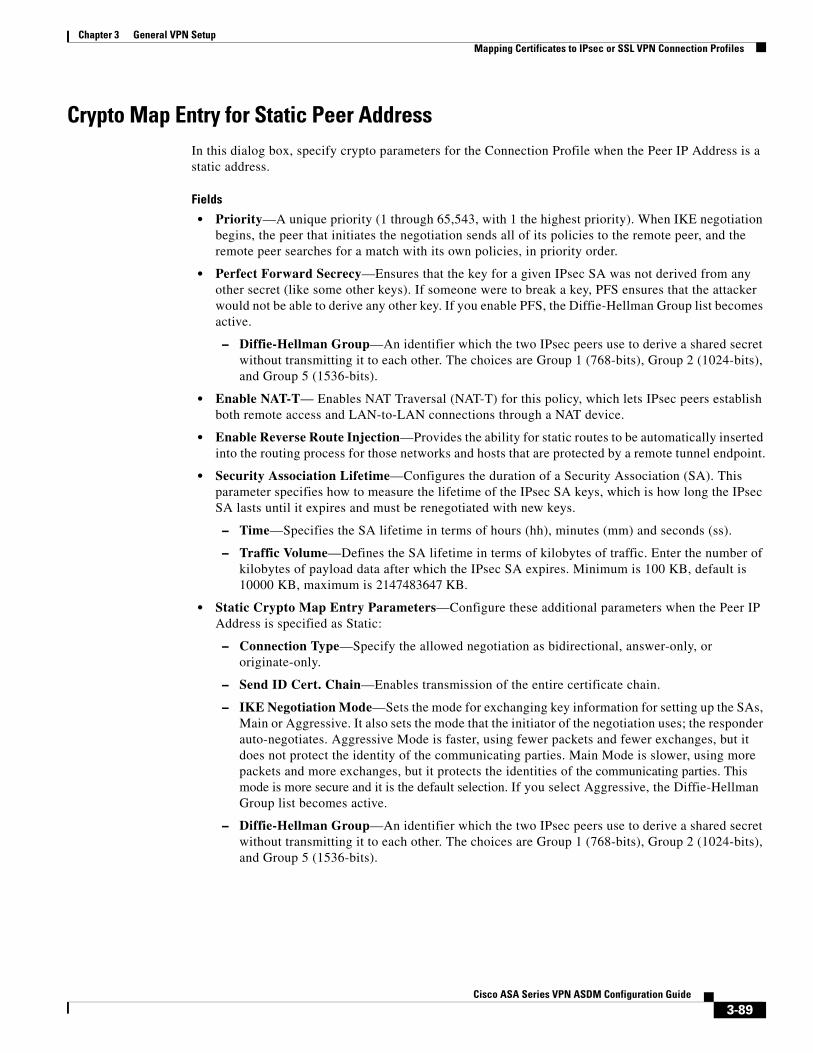
Chapter 3 General VPN Setup Mapping Certificates to IPsec or SSL VPN Connection Profiles
Crypto Map Entry for Static Peer AddressIn this dialog box, specify crypto parameters for the Connection Profile when the Peer IP Address is a static address.
Fields
• Priority—A unique priority (1 through 65,543, with 1 the highest priority). When IKE negotiation begins, the peer that initiates the negotiation sends all of its policies to the remote peer, and the remote peer searches for a match with its own policies, in priority order.
• Perfect Forward Secrecy—Ensures that the key for a given IPsec SA was not derived from any other secret (like some other keys). If someone were to break a key, PFS ensures that the attacker would not be able to derive any other key. If you enable PFS, the Diffie-Hellman Group list becomes active.
– Diffie-Hellman Group—An identifier which the two IPsec peers use to derive a shared secret without transmitting it to each other. The choices are Group 1 (768-bits), Group 2 (1024-bits), and Group 5 (1536-bits).
• Enable NAT-T— Enables NAT Traversal (NAT-T) for this policy, which lets IPsec peers establish both remote access and LAN-to-LAN connections through a NAT device.
• Enable Reverse Route Injection—Provides the ability for static routes to be automatically inserted into the routing process for those networks and hosts that are protected by a remote tunnel endpoint.
• Security Association Lifetime—Configures the duration of a Security Association (SA). This parameter specifies how to measure the lifetime of the IPsec SA keys, which is how long the IPsec SA lasts until it expires and must be renegotiated with new keys.
– Time—Specifies the SA lifetime in terms of hours (hh), minutes (mm) and seconds (ss).
– Traffic Volume—Defines the SA lifetime in terms of kilobytes of traffic. Enter the number of kilobytes of payload data after which the IPsec SA expires. Minimum is 100 KB, default is 10000 KB, maximum is 2147483647 KB.
• Static Crypto Map Entry Parameters—Configure these additional parameters when the Peer IP Address is specified as Static:
– Connection Type—Specify the allowed negotiation as bidirectional, answer-only, or originate-only.
– Send ID Cert. Chain—Enables transmission of the entire certificate chain.
– IKE Negotiation Mode—Sets the mode for exchanging key information for setting up the SAs, Main or Aggressive. It also sets the mode that the initiator of the negotiation uses; the responder auto-negotiates. Aggressive Mode is faster, using fewer packets and fewer exchanges, but it does not protect the identity of the communicating parties. Main Mode is slower, using more packets and more exchanges, but it protects the identities of the communicating parties. This mode is more secure and it is the default selection. If you select Aggressive, the Diffie-Hellman Group list becomes active.
– Diffie-Hellman Group—An identifier which the two IPsec peers use to derive a shared secret without transmitting it to each other. The choices are Group 1 (768-bits), Group 2 (1024-bits), and Group 5 (1536-bits).
3-89Cisco ASA Series VPN ASDM Configuration Guide
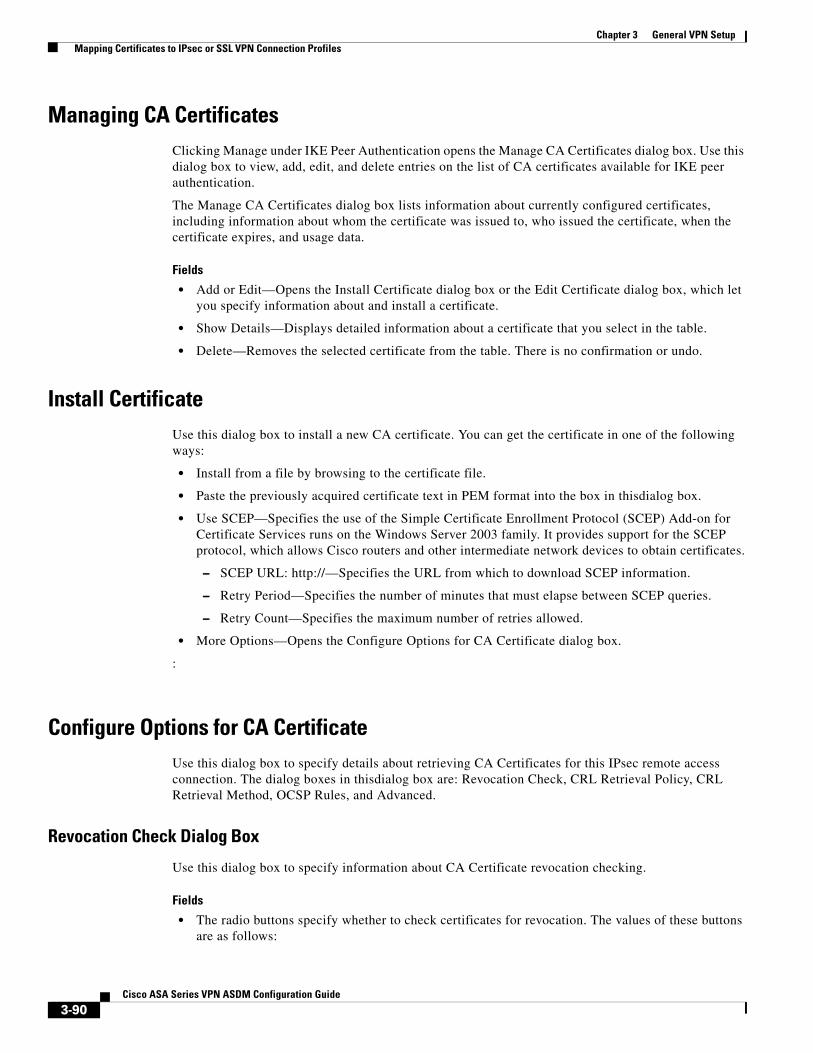
Chapter 3 General VPN Setup Mapping Certificates to IPsec or SSL VPN Connection Profiles
Managing CA CertificatesClicking Manage under IKE Peer Authentication opens the Manage CA Certificates dialog box. Use this dialog box to view, add, edit, and delete entries on the list of CA certificates available for IKE peer authentication.
The Manage CA Certificates dialog box lists information about currently configured certificates, including information about whom the certificate was issued to, who issued the certificate, when the certificate expires, and usage data.
Fields
• Add or Edit—Opens the Install Certificate dialog box or the Edit Certificate dialog box, which let you specify information about and install a certificate.
• Show Details—Displays detailed information about a certificate that you select in the table.
• Delete—Removes the selected certificate from the table. There is no confirmation or undo.
Install CertificateUse this dialog box to install a new CA certificate. You can get the certificate in one of the following ways:
• Install from a file by browsing to the certificate file.
• Paste the previously acquired certificate text in PEM format into the box in thisdialog box.
• Use SCEP—Specifies the use of the Simple Certificate Enrollment Protocol (SCEP) Add-on for Certificate Services runs on the Windows Server 2003 family. It provides support for the SCEP protocol, which allows Cisco routers and other intermediate network devices to obtain certificates.
– SCEP URL: http://—Specifies the URL from which to download SCEP information.
– Retry Period—Specifies the number of minutes that must elapse between SCEP queries.
– Retry Count—Specifies the maximum number of retries allowed.
• More Options—Opens the Configure Options for CA Certificate dialog box.
:
Configure Options for CA CertificateUse this dialog box to specify details about retrieving CA Certificates for this IPsec remote access connection. The dialog boxes in thisdialog box are: Revocation Check, CRL Retrieval Policy, CRL Retrieval Method, OCSP Rules, and Advanced.
Revocation Check Dialog Box
Use this dialog box to specify information about CA Certificate revocation checking.
Fields
• The radio buttons specify whether to check certificates for revocation. The values of these buttons are as follows:
3-90Cisco ASA Series VPN ASDM Configuration Guide
Chapter 3 General VPN Setup Mapping Certificates to IPsec or SSL VPN Connection Profiles
– Do not check certificates for revocation
– Check Certificates for revocation
• Revocation Methods area—Lets you specify the method–CRL or OCSP–to use for revocation checking, a nd the order in which to use these methods. You can choose either or both methods.
Add/Edit Remote Access Connections > Advanced > GeneralUse this dialog box to specify whether to strip the realm and group from the username before passing them to the AAA server, and to specify password management parameters.
Fields
• Strip the realm from username before passing it on to the AAA server—Enables or disables stripping the realm (administrative domain) from the username before passing the username on to the AAA server. Check the Strip Realm check box to remove the realm qualifier of the username during authentication. You can append the realm name to the username for AAA: authorization, authentication and accounting. The only valid delimiter for a realm is the @ character. The format is username@realm, for example, [email protected]. If you check this Strip Realm check box, authentication is based on the username alone. Otherwise, authentication is based on the full username@realm string. You must check this box if your server is unable to parse delimiters.
Note You can append both the realm and the group to a username, in which case the ASA uses parameters configured for the group and for the realm for AAA functions. The format for this option is username[@realm]]<#or!>group], for example, [email protected]#VPNGroup. If you choose this option, you must use either the # or ! character for the group delimiter because the ASA cannot interpret the @ as a group delimiter if it is also present as the realm delimiter.
A Kerberos realm is a special case. The convention in naming a Kerberos realm is to capitalize the DNS domain name associated with the hosts in the Kerberos realm. For example, if users are in the example.com domain, you might call your Kerberos realm EXAMPLE.COM.
The ASA does not include support for the user@grouppolicy, as the VPN 3000 Concentrator did. Only the L2TP/IPsec client supports the tunnel switching via user@tunnelgroup.
• Strip the group from the username before passing it on to the AAA server—Enables or disables stripping the group name from the username before passing the username on to the AAA server. Check Strip Group to remove the group name from the username during authentication. This option is meaningful only when you have also checked the Enable Group Lookup box. When you append a group name to a username using a delimiter, and enable Group Lookup, the ASA interprets all characters to the left of the delimiter as the username, and those to the right as the group name. Valid group delimiters are the @, #, and ! characters, with the @ character as the default for Group Lookup. You append the group to the username in the format username<delimiter>group, the possibilities being, for example, JaneDoe@VPNGroup, JaneDoe#VPNGroup, and JaneDoe!VPNGroup.
• Password Management—Lets you configure parameters relevant to overriding an account-disabled indication from a AAA server and to notifying users about password expiration.
– Override account-disabled indication from AAA server—Overrides an account-disabled indication from a AAA server.
3-91Cisco ASA Series VPN ASDM Configuration Guide
Chapter 3 General VPN Setup Configuring Client Addressing
Note Allowing override account-disabled is a potential security risk.
– Enable notification upon password expiration to allow user to change password—Checking this check box makes the following two parameters available. You can select either to notify the user at login a specific number of days before the password expires or to notify the user only on the day that the password expires. The default is to notify the user 14 days prior to password expiration and every day thereafter until the user changes the password. The range is 1 through 180 days.
Note This does not change the number of days before the password expires, but rather, it enables the notification. If you select this option, you must also specify the number of days.
In either case, and, if the password expires without being changed, the ASA offers the user the opportunity to change the password. If the current password has not yet expired, the user can still log in using that password.
This parameter is valid for AAA servers that support such notification; that is, RADIUS, RADIUS with an NT server, and LDAP servers. The ASA ignores this command if RADIUS or LDAP authentication has not been configured.
This feature requires the use of MS-CHAPv2.
Configuring Client Addressing To specify the client IP address assignment policy and assign address pools to all IPsec and SSL VPN connections, open ASDM and select Configuration > Remote Access VPN > Network (Client) Access > IPsec or SSL VPN Connections > Add or Edit > Advanced > Client Addressing. The Add IPsec Remote Access Connection or Add SSL VPN Access Connection opens. Use this dialog box to add address pools and assign them to interfaces, and view, edit, or delete them. The table at the bottom of the dialog box lists the configured interface-specific address pools.
To understand the fields in this dialog box or its descendent dialog boxes, see the sections that follow this one. You can view or change the configuration of address pools and their assignment to interfaces, as follows:
• To view or change the configuration of address pools, click Add or Edit in the Add IPsec Remote Access Connection or Add SSL VPN Access Connection dialog box. The Assign Address Pools to Interface dialog box opens. This dialog box lets you assign IP address pools to the interfaces configured on the ASA. Click Select. The Select Address Pools dialog box opens. Use this dialog box to view the configuration of address pools. You can change their address pool configuration as follows:
– To add an address pool to the ASA, choose Add. The Add IP Pool dialog box opens.
– To change the configuration of an address pool on the ASA, choose Edit. The Edit IP Pool dialog box opens if the addresses in the pool are not in use.
Note You cannot modify an address pool if it is already in use. If you click Edit and the address pool is in use, ASDM displays an error message and lists the connection names and usernames that are using the addresses in the pool.
3-92Cisco ASA Series VPN ASDM Configuration Guide
Chapter 3 General VPN Setup Configuring Client Addressing
– To remove address pool on the ASA, select the entry in the table and click Delete.
Note You cannot remove an address pool if it is already in use. If you click Delete and the address pool is in use, ASDM displays an error message and lists the connection names that are using the addresses in the pool.
• To assign address pools to an interface, click Add in the Add IPsec Remote Access Connection or Add SSL VPN Access Connection dialog box. The Assign Address Pools to Interface dialog box opens. Select the interface to be assigned an address pool. Click Select next to the Address Pools field. The Select Address Pools dialog box opens. Double-click each unassigned pool you want to assign to the interface or choose each unassigned pool and click Assign. The adjacent field displays the list of pool assignments. Click OK to populate the Address Pools field with the names of these address pools, then OK again to complete the configuration of the assignment.
• To change the address pools assigned to an interface, double-click the interface, or choose the interface in the Add IPsec Remote Access Connection or Add SSL VPN Access Connection dialog box and click Edit. The Assign Address Pools to Interface dialog box opens. To remove address pools, double-click each pool name and press the Delete button on the keyboard. Click Select next to the Address Pools field if you want to assign additional fields to the interface. The Select Address Pools dialog box opens. Note that the Assign field displays the address pool names that remained assigned to the interface. Double-click each unassigned pool you want to add to the interface. The Assign field updates the list of pool assignments. Click OK to revise the Address Pools field with the names of these address pools, then OK again to complete the configuration of the assignment.
• To remove an entry from the Add IPsec Remote Access Connection or Add SSL VPN Access Connection dialog box, choose the entry and click Delete.
The Add IPsec Remote Access Connection and Add SSL VPN Access Connection dialog boxes and their descendent dialog boxes are identical. Use the following sections to understand or assign values to the fields in these dialog boxes:
• Add IPsec Remote Access Connection and Add SSL VPN Access Connection
• Assign Address Pools to Interface
• Select Address Pools
• Add or Edit IP Pool
Add IPsec Remote Access Connection and Add SSL VPN Access Connection
To access the Add IPsec Remote Access Connection and Add SSL VPN Access Connection dialog boxes, choose Config > Remote Access VPN > Network (Client) Access > IPsec or SSL VPN Connections > Add or Edit > Advanced > Client Addressing.
Fields
Use the following descriptions to assign values to the fields in this dialog box:
• Global Client Address Assignment Policy—Configures a policy that affects all IPsec and SSL VPN Client connections (including AnyConnect client connections). The ASA uses the selected sources in order, until it finds an address:
– Use authentication server—Specifies that the ASA should attempt to use the authentication server as the source for a client address.
– Use DHCP—Specifies that the ASA should attempt to use DHCP as the source for a client address.
3-93Cisco ASA Series VPN ASDM Configuration Guide
Chapter 3 General VPN Setup Configuring Client Addressing
– Use address pool—Specifies that the ASA should attempt to use address pools as the source for a client address.
• Interface-Specific Address Pools—Lists the configured interface-specific address pools.
Assign Address Pools to Interface
Use the Assign Address Pools to Interface dialog box to select an interface and assign one or more address pools to that interface. To access this dialog box, choose Config > Remote Access VPN > Network (Client) Access > IPsec or SSL VPN Connections > Add or Edit > Advanced > Client Addressing > Add or Edit.
Fields
Use the following descriptions to assign values to the fields in this dialog box:
• Interface—Select the interface to which you want to assign an address pool. The default is DMZ.
• Address Pools—Specify an address pool to assign to the specified interface.
• Select—Opens the Select Address Pools dialog box, in which you can select one or more address pools to assign to this interface. Your selection appears in the Address Pools field of the Assign Address Pools to Interface dialog box.
Select Address Pools
The Select Address Pools dialog box shows the pool name, starting and ending addresses, and subnet mask of address pools available for client address assignment and lets you add, edit, or delete entries from that list. To access this dialog box, choose Config > Remote Access VPN > Network (Client) Access > IPsec or SSL VPN Connections > Add or Edit > Advanced > Client Addressing > Add or Edit > Select.
Fields
Use the following descriptions to assign values to the fields in this dialog box:
• Add—Opens the Add IP Pool dialog box, on which you can configure a new IP address pool.
• Edit—Opens the Edit IP Pool dialog box, on which you can modify a selected IP address pool.
• Delete—Removes the selected address pool. There is no confirmation or undo.
• Assign—Displays the address pool names that remained assigned to the interface. Double-click each unassigned pool you want to add to the interface. The Assign field updates the list of pool assignments.
Add or Edit IP Pool
The Add or Edit IP Pool dialog box lets you specify or modify a range of IP addresses for client address assignment. To access this dialog box, choose Config > Remote Access VPN > Network (Client) Access > IPsec or SSL VPN Connections > Add or Edit > Advanced > Client Addressing > Add or Edit > Select > Add or Edit.
Fields
Use the following descriptions to assign values to the fields in this dialog box:
• Name—Specifies the name assigned to the IP address pool.
• Starting IP Address—Specifies the first IP address in the pool.
• Ending IP Address—Specifies the last IP address in the pool.
3-94Cisco ASA Series VPN ASDM Configuration Guide
Chapter 3 General VPN Setup Configuring Client Addressing
• Subnet Mask—Selects the subnet mask to apply to the addresses in the pool.
Add/Edit Connection Profile > General > Authentication
You can get to this panel through various paths.
This dialog box is available for IPsec on Remote Access and Site-to-Site tunnel groups. The settings in thisdialog box apply to the tunnel group globally across the ASA. To set authentication server group settings per interface, click Advanced. This dialog box lets you configure the following attributes:
• Authentication Server Group—Lists the available authentication server groups, including the LOCAL group (the default). You can also select None. Selecting something other than None or Local makes available the Use LOCAL if Server Group Fails check box. To set the authentication server group per interface, click Advanced.
• Use LOCAL if Server Group fails—Enables or disables fallback to the LOCAL database if the group specified by the Authentication Server Group attribute fails.
Add/Edit SSL VPN Connection > General > Authorization
You can get to this panel through various paths.
The settings in this dialog box apply to the connection (tunnel group) globally across the ASA. This dialog box lets you configure the following attributes:
• Authorization Server Group—Lists the available authorization server groups, including the LOCAL group. You can also select None (the default). Selecting something other than None makes available the check box for Users must exist in authorization database to connect.
• Users must exist in the authorization database to connect—Tells the ASA to allow only users in the authorization database to connect. By default this feature is disabled. You must have a configured authorization server to use this feature.
• Interface-Specific Authorization Server Groups—(Optional) Lets you configure authorization server groups on a per-interface basis. Interface-specific authorization server groups take precedence over the global server group. If you do not explicitly configure interface-specific authorization, authorization takes place only at the group level.
– Interface—Select the interface on which to perform authorization. The standard interfaces are outside (the default), inside, and DMZ. If you have configured other interfaces, they also appear in the list.
– Server Group—Select an available, previously configured authorization server group or group of servers, including the LOCAL group. You can associate a server group with more than one interface.
– Add—Click Add to add the interface/server group setting to the table and remove the interface from the available list.
– Remove—Click Remove to remove the interface/server group from the table and restore the interface to the available list.
• Authorization Settings—Lets you set values for usernames that the ASA recognizes for authorization. This applies to users that authenticate with digital certificates and require LDAP or RADIUS authorization.
– Use the entire DN as the username—Allows the use of the entire Distinguished Name (DN) as the username.
3-95Cisco ASA Series VPN ASDM Configuration Guide
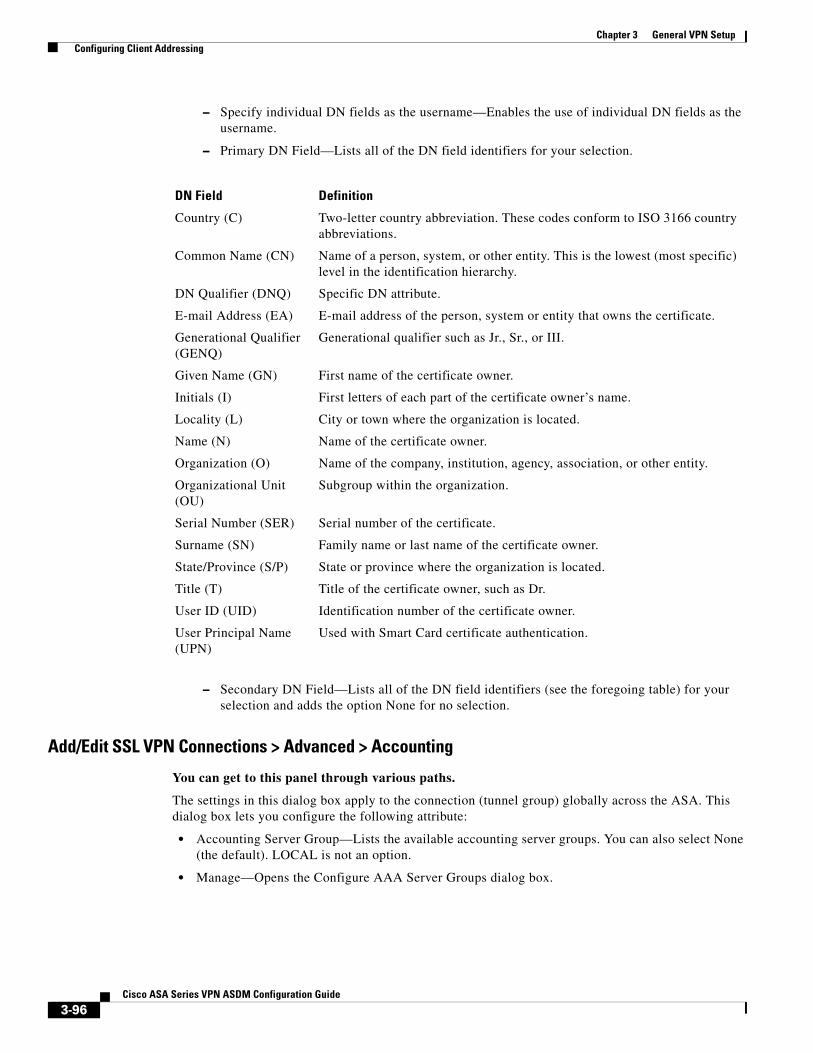
Chapter 3 General VPN Setup Configuring Client Addressing
– Specify individual DN fields as the username—Enables the use of individual DN fields as the username.
– Primary DN Field—Lists all of the DN field identifiers for your selection.
– Secondary DN Field—Lists all of the DN field identifiers (see the foregoing table) for your selection and adds the option None for no selection.
Add/Edit SSL VPN Connections > Advanced > Accounting
You can get to this panel through various paths.
The settings in this dialog box apply to the connection (tunnel group) globally across the ASA. This dialog box lets you configure the following attribute:
• Accounting Server Group—Lists the available accounting server groups. You can also select None (the default). LOCAL is not an option.
• Manage—Opens the Configure AAA Server Groups dialog box.
DN Field Definition
Country (C) Two-letter country abbreviation. These codes conform to ISO 3166 country abbreviations.
Common Name (CN) Name of a person, system, or other entity. This is the lowest (most specific) level in the identification hierarchy.
DN Qualifier (DNQ) Specific DN attribute.
E-mail Address (EA) E-mail address of the person, system or entity that owns the certificate.
Generational Qualifier (GENQ)
Generational qualifier such as Jr., Sr., or III.
Given Name (GN) First name of the certificate owner.
Initials (I) First letters of each part of the certificate owner’s name.
Locality (L) City or town where the organization is located.
Name (N) Name of the certificate owner.
Organization (O) Name of the company, institution, agency, association, or other entity.
Organizational Unit (OU)
Subgroup within the organization.
Serial Number (SER) Serial number of the certificate.
Surname (SN) Family name or last name of the certificate owner.
State/Province (S/P) State or province where the organization is located.
Title (T) Title of the certificate owner, such as Dr.
User ID (UID) Identification number of the certificate owner.
User Principal Name (UPN)
Used with Smart Card certificate authentication.
3-96Cisco ASA Series VPN ASDM Configuration Guide
Chapter 3 General VPN Setup Configuring Client Addressing
Add/Edit Tunnel Group > General > Client Address Assignment
You can get to this panel through various paths.
To specify whether to use DHCP or address pools for address assignment, go to Configuration > VPN > I P Address Management > Assignment. The Add or Edit Tunnel Group dialog box > General > Client Address Assignment dialog box, lets you configure the following Client Address Assignment attributes:
• DHCP Servers—Specifies a DHCP server to use. You can add up to 10 servers, one at a time.
– IP Address—Specifies the IP address of a DHCP server.
– Add—Adds the specified DHCP server to the list for client address assignment.
– Delete—Deletes the specified DHCP server from the list for client address assignment. There is no confirmation or undo.
• Address Pools—Lets you specify up to 6 address pools, using the following parameters:
– Available Pools—Lists the available, configured address pools you can choose.
– Add—Adds the selected address pool to the list for client address assignment.
– Remove—Moves the selected address pool from the Assigned Pools list to the Available Pools list.
– Assigned Pools—Lists the address pools selected for address assignment.
Note To configure interface-specific address pools, click Advanced.
Add/Edit Tunnel Group > General > Advanced
You can get to this panel through various paths.
The Add or Edit Tunnel Group dialog box, General, Advanced dialog box, lets you configure the following interface-specific attributes:
• Interface-Specific Authentication Server Groups—Lets you configure an interface and server group for authentication.
– Interface—Lists available interfaces for selection.
– Server Group—Lists authentication server groups available for this interface.
– Use LOCAL if server group fails—Enables or disables fallback to the LOCAL database if the server group fails.
– Add—Adds the association between the selected available interface and the authentication server group to the assigned list.
– Remove—Moves the selected interface and authentication server group association from the assigned list to the available list.
– Interface/Server Group/Use Fallback—Show the selections you have added to the assigned list.
• Interface-Specific Client IP Address Pools—-Lets you specify an interface and Client IP address pool. You can have up to 6 pools.
– Interface—Lists the available interfaces to add.
– Address Pool—Lists address pools available to associate with this interface.
– Add—Adds the association between the selected available interface and the client IP address pool to the assigned list.
3-97Cisco ASA Series VPN ASDM Configuration Guide
Chapter 3 General VPN Setup Configuring Client Addressing
– Remove—Moves the selected interface/address pool association from the assigned list to the available list.
– Interface/Address Pool—Shows the selections you have added to the assigned list.
Add/Edit Tunnel Group > IPsec for Remote Access > IPsec
Configuration > VPN > General > Tunnel Group > Add/Edit Tunnel Group > IPSec for Remote Access > IPSec Tab
On the Add or Edit Tunnel Group dialog box for IPsec for Remote Access, the IPsec dialog box lets you configure or edit IPsec-specific tunnel group parameters.
Fields
• Pre-shared Key—Lets you specify the value of the pre-shared key for the tunnel group. The maximum length of the pre-shared key is 128 characters.
• Trustpoint Name—Selects a trustpoint name, if any trustpoints are configured. A trustpoint is a representation of a certificate authority. A trustpoint contains the identity of the CA, CA-specific configuration parameters, and an association with one enrolled identity certificate.
• Authentication Mode—Specifies the authentication mode: none, xauth, or hybrid.
– none—Specifies no authentication mode.
– xauth—Specifies the use of IKE Extended Authentication mode, which provides the capability of authenticating a user within IKE using TACACS+ or RADIUS.
– hybrid—Specifies the use of Hybrid mode, which lets you use digital certificates for security appliance authentication and a different, legacy method—such as RADIUS, TACACS+ or SecurID—for remote VPN user authentication. This mode breaks phase 1 of the Internet Key Exchange (IKE) into the following steps, together called hybrid authentication:
1. The security appliance authenticates to the remote VPN user with standard public key techniques. This establishes an IKE security association that is unidirectionally authenticated.
2. An extended authentication (xauth) exchange then authenticates the remote VPN user. This extended authentication can use one of the supported legacy authentication methods.
Note Before setting the authentication type to hybrid, you must configure the authentication server and create a pre-shared key.
• IKE Peer ID Validation—Selects whether IKE peer ID validation is ignored, required, or checked only if supported by a certificate.
• Enable sending certificate chain—Enables or disables sending the entire certificate chain. This action includes the root certificate and any subordinate CA certificates in the transmission.
• ISAKMP Keep Alive—Enables and configures ISAKMP keep alive monitoring.
– Disable Keep Alives—Enables or disables ISAKMP keep alives.
– Monitor Keep Alives—Enables or disables ISAKMP keep alive monitoring. Selecting this option makes available the Confidence Interval and Retry Interval fields.
– Confidence Interval—Specifies the ISAKMP keep alive confidence interval. This is the number of seconds the ASA should allow a peer to idle before beginning keepalive monitoring. The minimum is 10 seconds; the maximum is 300 seconds. The default for a remote access group is 300 seconds.
3-98Cisco ASA Series VPN ASDM Configuration Guide
Chapter 3 General VPN Setup Configuring Client Addressing
– Retry Interval—Specifies number of seconds to wait between ISAKMP keep alive retries. The default is 2 seconds.
– Head end will never initiate keepalive monitoring—Specifies that the central-site ASA never initiates keepalive monitoring.
• Interface-Specific Authentication Mode—Specifies the authentication mode on a per-interface basis.
– Interface—Lets you select the interface name. The default interfaces are inside and outside, but if you have configured a different interface name, that name also appears in the list.
– Authentication Mode—Lets you select the authentication mode, none, xauth, or hybrid, as above.
– Interface/Authentication Mode table—Shows the interface names and their associated authentication modes that are selected.
– Add—Adds an interface/authentication mode pair selection to the Interface/Authentication Modes table.
– Remove—Removes an interface/authentication mode pair selection from the Interface/Authentication Modes table.
• Client VPN Software Update Table—Lists the client type, VPN Client revisions, and image URL for each client VPN software package installed. For each client type, you can specify the acceptable client software revisions and the URL or IP address from which to download software upgrades, if necessary. The client update mechanism (described in detail under the Client Update dialog box) uses this information to determine whether the software each VPN client is running is at an appropriate revision level and, if appropriate, to provide a notification message and an update mechanism to clients that are running outdated software.
– Client Type—Identifies the VPN client type.
– VPN Client Revisions—Specifies the acceptable revision level of the VPN client.
– Image URL—Specifies the URL or IP address from which the correct VPN client software image can be downloaded. For dialog boxes-based VPN clients, the URL must be of the form http:// or https://. For ASA 5505 in client mode or VPN 3002 hardware clients, the URL must be of the form tftp://.
Add/Edit Tunnel Group for Site-to-Site VPN
Configuration > VPN > General > Tunnel Group > Add/Edit Tunnel Group > IPSec for Remote Access > IPSec Tab
The Add or Edit Tunnel Group dialog box lets you configure or edit tunnel group parameters for this Site-to-Site connection profile.
Fields
• Certificate Settings—Sets the following certificate chain and IKE peer validation attributes:
– Send certificate chain—Enables or disables sending the entire certificate chain. This action includes the root certificate and any subordinate CA certificates in the transmission.
– IKE Peer ID Validation—Selects whether IKE peer ID validation is ignored, required, or checked only if supported by a certificate.
• IKE Keep Alive—Enables and configures IKE (ISAKMP) keepalive monitoring.
– Disable Keepalives—Enables or disables IKE keep alives.
3-99Cisco ASA Series VPN ASDM Configuration Guide
Chapter 3 General VPN Setup Configuring Client Addressing
– Monitor Keepalives—Enables or disables IKE keep alive monitoring. Selecting this option makes available the Confidence Interval and Retry Interval fields.
– Confidence Interval—Specifies the IKE keepalive confidence interval. This is the number of seconds the ASA should allow a peer to idle before beginning keepalive monitoring. The minimum is 10 seconds; the maximum is 300 seconds. The default for a remote access group is 300 seconds.
– Retry Interval—Specifies number of seconds to wait between IKE keepalive retries. The default is 2 seconds.
– Head end will never initiate keepalive monitoring—Specifies that the central-site ASA never initiates keepalive monitoring.
• Default Group Policy—Specifies the following group-policy attributes:
– Group Policy—Selects a group policy to use as the default group policy. The default value is DfltGrpPolicy.
– Manage—Opens the Configure Group Policies dialog box.
– IPsec Protocol—Enables or disables the use of the IPsec protocol for this connection profile.
Add/Edit Tunnel Group > PPP
Configuration > VPN > General > Tunnel Group > Add/Edit Tunnel Group > PPP Tab
On the Add or Edit Tunnel Group dialog box for a IPsec remote access tunnel group, the PPP dialog box lets you configure or edit the authentication protocols permitted of a PPP connection. This dialog box applies only to IPsec remote access tunnel groups.
Fields
• CHAP—Enables the use of the CHAP protocol for a PPP connection.
• MS-CHAP-V1—Enables the use of the MS-CHAP-V1 protocol for a PPP connection.
• MS-CHAP-V2—Enables the use of the MS-CHAP-V2 protocol for a PPP connection.
• PAP—Enables the use of the PAP protocol for a PPP connection.
• EAP-PROXY—Enables the use of the EAP-PROXY protocol for a PPP connection. EAP refers to the Extensible Authentication protocol.
Add/Edit Tunnel Group > IPsec for LAN to LAN Access > General > Basic
Configuration > VPN > General > Tunnel Group > Add/Edit Tunnel Group > IPSec for LAN to LAN Access > General Tab > Basic Tab
On the Add or Edit Tunnel Group dialog box for Site-to-Site Remote Access, the General, Basic dialog box you can specify a name for the tunnel group that you are adding (Add function only) and select the group policy.
On the Edit Tunnel Group dialog box, the General dialog box displays the name and type of the tunnel group you are modifying.
Fields
• Name—Specifies the name assigned to this tunnel group. For the Edit function, this field is display-only.
3-100Cisco ASA Series VPN ASDM Configuration Guide
Chapter 3 General VPN Setup Configuring Client Addressing
• Type—(Display-only) Displays the type of tunnel group you are adding or editing. The contents of this field depend on your selection on the previous dialog box.
• Group Policy—Lists the currently configured group policies. The default value is the default group policy, DfltGrpPolicy.
• Strip the realm (administrative domain) from the username before passing it on to the AAA server—Enables or disables stripping the realm from the username before passing the username on to the AAA server. Check the Strip Realm check box to remove the realm qualifier of the username during authentication. You can append the realm name to the username for AAA: authorization, authentication and accounting. The only valid delimiter for a realm is the @ character. The format is username@realm, for example, [email protected]. If you check this Strip Realm check box, authentication is based on the username alone. Otherwise, authentication is based on the full username@realm string. You must check this box if your server is unable to parse delimiters.
Note You can append both the realm and the group to a username, in which case the ASA uses parameters configured for the group and for the realm for AAA functions. The format for this option is username[@realm]]<#or!>group], for example, [email protected]#VPNGroup. If you choose this option, you must use either the # or ! character for the group delimiter because the ASA cannot interpret the @ as a group delimiter if it is also present as the realm delimiter.
A Kerberos realm is a special case. The convention in naming a Kerberos realm is to capitalize the DNS domain name associated with the hosts in the Kerberos realm. For example, if users are in the example.com domain, you might call your Kerberos realm EXAMPLE.COM.
The ASA does not include support for the user@grouppolicy, as the VPN 3000 Concentrator did. Only the L2TP/IPsec client supports the tunnel switching via user@tunnelgroup.
• Strip the group from the username before passing it on to the AAA server—Enables or disables stripping the group name from the username before passing the username on to the AAA server. Check Strip Group to remove the group name from the username during authentication. This option is meaningful only when you have also checked the Enable Group Lookup box. When you append a group name to a username using a delimiter, and enable Group Lookup, the ASA interprets all characters to the left of the delimiter as the username, and those to the right as the group name. Valid group delimiters are the @, #, and ! characters, with the @ character as the default for Group Lookup. You append the group to the username in the format username<delimiter>group, the possibilities being, for example, JaneDoe@VPNGroup, JaneDoe#VPNGroup, and JaneDoe!VPNGroup.
• Password Management—Lets you configure parameters relevant to overriding an account-disabled indication from a AAA server and to notifying users about password expiration.
– Override account-disabled indication from AAA server—Overrides an account-disabled indication from a AAA server.
Note Allowing override account-disabled is a potential security risk.
– Enable notification upon password expiration to allow user to change password—Checking this check box makes the following two parameters available. If you do not also check the Enable notification prior to expiration check box, the user receives notification only after the password has expired.
3-101Cisco ASA Series VPN ASDM Configuration Guide
Chapter 3 General VPN Setup Configuring Client Addressing
– Enable notification prior to expiration—When you check this option, the ASA notifies the remote user at login that the current password is about to expire or has expired, then offers the user the opportunity to change the password. If the current password has not yet expired, the user can still log in using that password. This parameter is valid for AAA servers that support such notification; that is, RADIUS, RADIUS with an NT server, and LDAP servers. The ASA ignores this command if RADIUS or LDAP authentication has not been configured.
Note that this does not change the number of days before the password expires, but rather, it enables the notification. If you check this check box, you must also specify the number of days.
– Notify...days prior to expiration—Specifies the number of days before the current password expires to notify the user of the pending expiration. The range is 1 through 180 days.
Add/Edit Tunnel Group > IPsec for LAN to LAN Access > IPsec
Configuration > VPN > General > Tunnel Group > Add/Edit Tunnel Group > IPSec for LAN to LAN Access > IPSec Tab
The Add or Edit Tunnel Group dialog box for IPsec for Site-to-Site access, IPsec dialog box, lets you configure or edit IPsec Site-to-Site-specific tunnel group parameters.
Fields
• Name—Specifies the name assigned to this tunnel group. For the Edit function, this field is display-only.
• Type—(Display-only) Displays the type of tunnel group you are adding or editing. The contents of this field depend on your selection on the previous dialog box.
• Pre-shared Key—Lets you specify the value of the pre-shared key for the tunnel group. The maximum length of the pre-shared key is 128 characters.
• Trustpoint Name—Selects a trustpoint name, if any trustpoints are configured. A trustpoint is a representation of a certificate authority. A trustpoint contains the identity of the CA, CA-specific configuration parameters, and an association with one enrolled identity certificate.
• Authentication Mode—Specifies the authentication mode: none, xauth, or hybrid.
– none—Specifies no authentication mode.
– xauth—Specifies the use of IKE Extended Authentication mode, which provides the capability of authenticating a user within IKE using TACACS+ or RADIUS.
– hybrid—Specifies the use of Hybrid mode, which lets you use digital certificates for security appliance authentication and a different, legacy method—such as RADIUS, TACACS+ or SecurID—for remote VPN user authentication. This mode breaks phase 1 of the Internet Key Exchange (IKE) into the following steps, together called hybrid authentication:
1. The security appliance authenticates to the remote VPN user with standard public key techniques. This establishes an IKE security association that is unidirectionally authenticated.
2. An extended authentication (xauth) exchange then authenticates the remote VPN user. This extended authentication can use one of the supported legacy authentication methods.
Note Before setting the authentication type to hybrid, you must configure the authentication server and create a pre-shared key.
• IKE Peer ID Validation—Selects whether IKE peer ID validation is ignored, required, or checked only if supported by a certificate.
3-102Cisco ASA Series VPN ASDM Configuration Guide
Chapter 3 General VPN Setup Configuring Client Addressing
• Enable sending certificate chain—Enables or disables sending the entire certificate chain. This action includes the root certificate and any subordinate CA certificates in the transmission.
• ISAKMP Keep Alive—Enables and configures ISAKMP keep alive monitoring.
– Disable Keep Alives—Enables or disables ISAKMP keep alives.
– Monitor Keep Alives—Enables or disables ISAKMP keep alive monitoring. Selecting this option makes available the Confidence Interval and Retry Interval fields.
– Confidence Interval—Specifies the ISAKMP keep alive confidence interval. This is the number of seconds the ASA should allow a peer to idle before beginning keepalive monitoring. The minimum is 10 seconds; the maximum is 300 seconds. The default for a remote access group is 300 seconds.
– Retry Interval—Specifies number of seconds to wait between ISAKMP keep alive retries. The default is 2 seconds.
– Head end will never initiate keepalive monitoring—Specifies that the central-site ASA never initiates keepalive monitoring.
• Interface-Specific Authentication Mode—Specifies the authentication mode on a per-interface basis.
– Interface—Lets you select the interface name. The default interfaces are inside and outside, but if you have configured a different interface name, that name also appears in the list.
– Authentication Mode—Lets you select the authentication mode, none, xauth, or hybrid, as above.
– Interface/Authentication Mode table—Shows the interface names and their associated authentication modes that are selected.
– Add—Adds an interface/authentication mode pair selection to the Interface/Authentication Modes table.
– Remove—Removes an interface/authentication mode pair selection from the Interface/Authentication Modes table.
• Client VPN Software Update Table—Lists the client type, VPN Client revisions, and image URL for each client VPN software package installed. For each client type, you can specify the acceptable client software revisions and the URL or IP address from which to download software upgrades, if necessary. The client update mechanism (described in detail under the Client Update dialog box) uses this information to determine whether the software each VPN client is running is at an appropriate revision level and, if appropriate, to provide a notification message and an update mechanism to clients that are running outdated software.
– Client Type—Identifies the VPN client type.
– VPN Client Revisions—Specifies the acceptable revision level of the VPN client.
– Image URL—Specifies the URL or IP address from which the correct VPN client software image can be downloaded. For Windows-based VPN clients, the URL must be of the form http:// or https://. For ASA 5505 in client mode or VPN 3002 hardware clients, the URL must be of the form tftp://.
Clientless SSL VPN Access > Connection Profiles > Add/Edit > General > Basic
Configuration > VPN > General > Tunnel Group > Add/Edit> WebVPN Access > General Tab > Basic Tab
3-103Cisco ASA Series VPN ASDM Configuration Guide
Chapter 3 General VPN Setup Configuring Client Addressing
The Add or Edit pane, General, Basic dialog box lets you specify a name for the tunnel group that you are adding, lets you select the group policy, and lets you configure password management.
On the Edit Tunnel Group dialog box, the General dialog box displays the name and type of the selected tunnel group. All other functions are the same as for the Add Tunnel Group dialog box.
Fields
• Name—Specifies the name assigned to this tunnel group. For the Edit function, this field is display-only.
• Type—Displays the type of tunnel group you are adding or editing. For Edit, this is a display-only field whose contents depend on your selection in the Add dialog box.
• Group Policy—Lists the currently configured group policies. The default value is the default group policy, DfltGrpPolicy.
• Strip the realm —Not available for Clientless SSL VPN.
• Strip the group —Not available or Clientless SSL VPN.
• Password Management—Lets you configure parameters relevant to overriding an account-disabled indication from a AAA server and to notifying users about password expiration.
– Override account-disabled indication from AAA server—Overrides an account-disabled indication from a AAA server.
Note Allowing override account-disabled is a potential security risk.
– Enable notification upon password expiration to allow user to change password—Checking this check box makes the following two parameters available. If you do not also check the Enable notification prior to expiration check box, the user receives notification only after the password has expired.
– Enable notification prior to expiration—When you check this option, the ASA notifies the remote user at login that the current password is about to expire or has expired, then offers the user the opportunity to change the password. If the current password has not yet expired, the user can still log in using that password. This parameter is valid for AAA servers that support such notification; that is, RADIUS, RADIUS with an NT server, and LDAP servers. The ASA ignores this command if RADIUS or LDAP authentication has not been configured.
Note that this does not change the number of days before the password expires, but rather, it enables the notification. If you check this check box, you must also specify the number of days.
– Notify...days prior to expiration—Specifies the number of days before the current password expires to notify the user of the pending expiration. The range is 1 through 180 days.
Configuring Internal Group Policy IPsec Client AttributesUse this dialog box to specify whether to strip the realm and group from the username before passing them to the AAA server, and to specify password management options.
Fields
• Strip the realm from username before passing it on to the AAA server—Enables or disables stripping the realm (administrative domain) from the username before passing the username on to the AAA server. Check the Strip Realm check box to remove the realm qualifier of the username during authentication. You can append the realm name to the username for AAA: authorization,
3-104Cisco ASA Series VPN ASDM Configuration Guide
Chapter 3 General VPN Setup Configuring Client Addressing
authentication and accounting. The only valid delimiter for a realm is the @ character. The format is username@realm, for example, [email protected]. If you check this Strip Realm check box, authentication is based on the username alone. Otherwise, authentication is based on the full username@realm string. You must check this box if your server is unable to parse delimiters.
Note You can append both the realm and the group to a username, in which case the ASA uses parameters configured for the group and for the realm for AAA functions. The format for this option is username[@realm]]<#or!>group], for example, [email protected]#VPNGroup. If you choose this option, you must use either the # or ! character for the group delimiter because the ASA cannot interpret the @ as a group delimiter if it is also present as the realm delimiter.
A Kerberos realm is a special case. The convention in naming a Kerberos realm is to capitalize the DNS domain name associated with the hosts in the Kerberos realm. For example, if users are in the example.com domain, you might call your Kerberos realm EXAMPLE.COM.
The ASA does not include support for the user@grouppolicy, as the VPN 3000 Concentrator did. Only the L2TP/IPsec client supports the tunnel switching via user@tunnelgroup.
• Strip the group from the username before passing it on to the AAA server—Enables or disables stripping the group name from the username before passing the username on to the AAA server. Check Strip Group to remove the group name from the username during authentication. This option is meaningful only when you have also checked the Enable Group Lookup box. When you append a group name to a username using a delimiter, and enable Group Lookup, the ASA interprets all characters to the left of the delimiter as the username, and those to the right as the group name. Valid group delimiters are the @, #, and ! characters, with the @ character as the default for Group Lookup. You append the group to the username in the format username<delimiter>group, the possibilities being, for example, JaneDoe@VPNGroup, JaneDoe#VPNGroup, and JaneDoe!VPNGroup.
• Password Management—Lets you configure parameters relevant to overriding an account-disabled indication from a AAA server and to notifying users about password expiration.
– Override account-disabled indication from AAA server—Overrides an account-disabled indication from a AAA server.
Note Allowing override account-disabled is a potential security risk.
– Enable notification upon password expiration to allow user to change password—Checking this check box makes the following two parameters available. You can select either to notify the user at login a specific number of days before the password expires or to notify the user only on the day that the password expires. The default is to notify the user 14 days prior to password expiration and every day thereafter until the user changes the password. The range is 1 through 180 days.
Note This does not change the number of days before the password expires, but rather, it enables the notification. If you select this option, you must also specify the number of days.
In either case, and, if the password expires without being changed, the ASA offers the user the opportunity to change the password. If the current password has not yet expired, the user can still log in using that password.
3-105Cisco ASA Series VPN ASDM Configuration Guide
Chapter 3 General VPN Setup Configuring Client Addressing
This parameter is valid for AAA servers that support such notification; that is, RADIUS, RADIUS with an NT server, and LDAP servers. The ASA ignores this command if RADIUS or LDAP authentication has not been configured.
Configuring Client Addressing for SSL VPN ConnectionsUse this dialog box to specify the global client address assignment policy and to configure interface-specific address pools. You can also add, edit, or delete interface-specific address pools using this dialog box. The table at the bottom of the dialog box lists the configured interface-specific address pools.
Fields
• Interface-Specific IPv4 Address Pools—Lists the configured interface-specific address pools.
• Interface-Specific IPv6 Address Pools—Lists the configured interface-specific address pools.
• Add—Opens the Assign Address Pools to Interface dialog box, on which you can select an interface and select an address pool to assign.
• Edit—Opens the Assign Address Pools to Interface dialog box with the interface and address pool fields filled in.
• Delete—Deletes the selected interface-specific address pool. There is no confirmation or undo.
Assign Address Pools to InterfaceUse this dialog box to select an interface and assign one or more address pools to that interface.
Fields
• Interface—Select the interface to which you want to assign an address pool. The default is DMZ.
• Address Pools—Specify an address pool to assign to the specified interface.
• Select—Opens the Select Address Pools dialog box, in which you can select one or more address pools to assign to this interface. Your selection appears in the Address Pools field of the Assign Address Pools to Interface dialog box.
Select Address PoolsThe Select Address Pools dialog box shows the pool name, starting and ending addresses, and subnet mask of address pools available for client address assignment and lets you add, edit, or delete entries from that list.
Fields
• Add—Opens the Add IP Pool dialog box, on which you can configure a new IP address pool.
• Edit—Opens the Edit IP Pool dialog box, on which you can modify a selected IP address pool.
• Delete—Removes the selected address pool. There is no confirmation or undo.
• Assign—Displays the address pool names that remained assigned to the interface. Double-click each unassigned pool you want to add to the interface. The Assign field updates the list of pool assignments.
3-106Cisco ASA Series VPN ASDM Configuration Guide
Chapter 3 General VPN Setup System Options
Add or Edit an IP Address PoolConfigures or modifies an IP address pool.
Fields
• Name—Specifies the name assigned to the IP address pool.
• Starting IP Address—Specifies the first IP address in the pool.
• Ending IP Address—Specifies the last IP address in the pool.
• Subnet Mask—Selects the subnet mask to apply to the addresses in the pool.
Authenticating SSL VPN ConnectionsThe SSL VPN Connections > Advanced > Authentication dialog box lets you configure authentication attributes for SSL VPN connections.
System OptionsThis panel can be reached by navigating these paths:
• Configuration > Site-to-Site VPN > Advanced > System Options
• Configuration > Remote Access VPN > Network (Client) Access > Advanced > IPsec > System Options
The System Options pane lets you configure features specific to VPN sessions on the ASA.
Fields
• Limit the maximum number of active IPsec VPN sessions—Enables or disables limiting the maximum number of active IPsec VPN sessions. The range depends on the hardware platform and the software license.
– Maximum IPsec Sessions—Specifies the maximum number of active IPsec VPN sessions allowed. This field is active only when you select the preceding check box to limit the maximum number of active IPsec VPN sessions.
• L2TP Tunnel Keep-alive Timeout—Specifies the frequency, in seconds, of keepalive messages. The range is 10 through 300 seconds. The default is 60 seconds. This is an advanced system option for Network (Client) Access only.
• Reclassify existing flows when VPN tunnels establish
• Preserve stateful VPN flows when the tunnel drops—Enables or disables preserving IPsec tunneled flows in Network-Extension Mode (NEM). With the persistent IPsec tunneled flows feature enabled, as long as the tunnel is recreated within the timeout dialog box, data continues flowing successfully because the security appliance still has access to the state information. This option is disabled by default.
Note Tunneled TCP flows are not dropped, so they rely on the TCP timeout for cleanup. However, if the timeout is disabled for a particular tunneled flow, that flow remains in the system until being cleared manually or by other means (for example, by a TCP RST from the peer).
3-107Cisco ASA Series VPN ASDM Configuration Guide
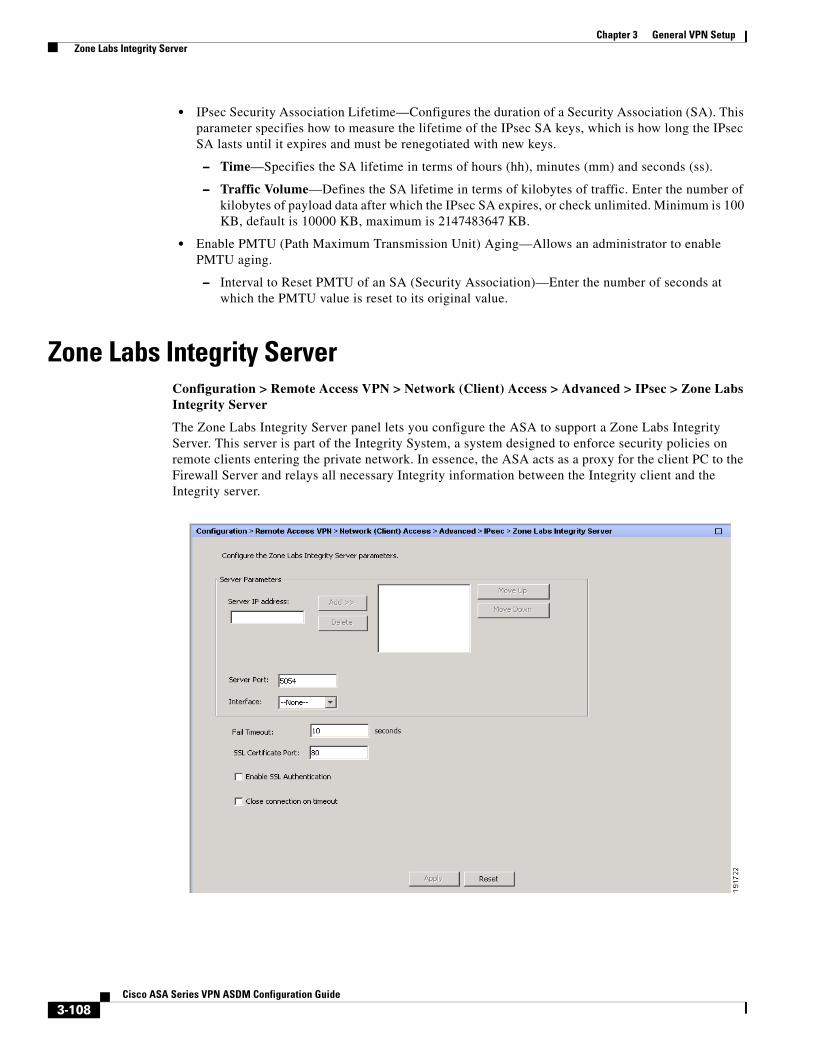
Chapter 3 General VPN Setup Zone Labs Integrity Server
• IPsec Security Association Lifetime—Configures the duration of a Security Association (SA). This parameter specifies how to measure the lifetime of the IPsec SA keys, which is how long the IPsec SA lasts until it expires and must be renegotiated with new keys.
– Time—Specifies the SA lifetime in terms of hours (hh), minutes (mm) and seconds (ss).
– Traffic Volume—Defines the SA lifetime in terms of kilobytes of traffic. Enter the number of kilobytes of payload data after which the IPsec SA expires, or check unlimited. Minimum is 100 KB, default is 10000 KB, maximum is 2147483647 KB.
• Enable PMTU (Path Maximum Transmission Unit) Aging—Allows an administrator to enable PMTU aging.
– Interval to Reset PMTU of an SA (Security Association)—Enter the number of seconds at which the PMTU value is reset to its original value.
Zone Labs Integrity ServerConfiguration > Remote Access VPN > Network (Client) Access > Advanced > IPsec > Zone Labs Integrity Server
The Zone Labs Integrity Server panel lets you configure the ASA to support a Zone Labs Integrity Server. This server is part of the Integrity System, a system designed to enforce security policies on remote clients entering the private network. In essence, the ASA acts as a proxy for the client PC to the Firewall Server and relays all necessary Integrity information between the Integrity client and the Integrity server.
3-108Cisco ASA Series VPN ASDM Configuration Guide
Chapter 3 General VPN Setup Easy VPN Remote
Note The current release of the security appliance supports one Integrity Server at a time even though the user interfaces support the configuration of up to five Integrity Servers. If the active Server fails, configure another Integrity Server on the ASA and then reestablish the client VPN session.
Fields
• Server IP address—Type the IP address of the Integrity Server. Use dotted decimal notation.
• Add—Adds a new server IP address to the list of Integrity Servers. This button is active when an address is entered in the Server IP address field.
• Delete—Deletes the selected server from the list of Integrity Servers.
• Move Up—Moves the selected server up in the list of Integrity Servers. This button is available only when there is more than one server in the list.
• Move Down—Moves the selected server down in the list of Integrity Servers. This button is available only when there is more than one server in the list.
• Server Port—Type the ASA port number on which it listens to the active Integrity server. This field is available only if there is at least one server in the list of Integrity Servers. The default port number is 5054, and it can range from 10 to 10000. This field is only available when there is a server in the Integrity Server list.
• Interface—Choose the interface ASA interface on which it communicates with the active Integrity Server. This interface name menu is only available when there is a server in the Integrity Server list.
• Fail Timeout—Type the number of seconds that the ASA should wait before it declares the active Integrity Server to be unreachable. The default is 10 and the range is from 5 to 20.
• SSL Certificate Port: Specify the ASA port to be used for SSL Authorization. The default is port 80.
• Enable SSL Authentication—Check to enable authentication of the remote client SSL certificate by the ASA. By default, client SSL authentication is disabled.
• Close connection on timeout—Check to close the connection between the ASA and the Integrity Server on a timeout. By default, the connection remains open.
• Apply—Click to apply the Integrity Server setting to the ASA running configuration.
• Reset—Click to remove Integrity Server configuration changes that have not yet been applied.
Easy VPN RemoteConfiguration > VPN > Easy VPN Remote
Easy VPN Remote lets the ASA 5505 act as an Easy VPN client device. The ASA 5505 can then initiate a VPN tunnel to an Easy VPN server, which can be an ASA, a Cisco VPN 3000 Concentrator, a Cisco IOS-based router, or a firewall acting as an Easy VPN server.
The Easy VPN client supports one of two modes of operation: Client Mode or Network Extension Mode (NEM). The mode of operation determines whether the Easy VPN Client inside hosts are accessible from the Enterprise network over the tunnel. Specifying a mode of operation is mandatory before making a connection because Easy VPN Client does not have a default mode.
Client mode, also called Port Address Translation (PAT) mode, isolates all devices on the Easy VPN Client private network from those on the enterprise network. The Easy VPN Client performs Port Address Translation (PAT) for all VPN traffic for its inside hosts. IP address management is neither required for the Easy VPN Client inside interface or the inside hosts.
3-109Cisco ASA Series VPN ASDM Configuration Guide
Chapter 3 General VPN Setup Easy VPN Remote
NEM makes the inside interface and all inside hosts routable across the enterprise network over the tunnel. Hosts on the inside network obtain their IP addresses from an accessible subnet (statically or via DHCP) pre-configured with static IP addresses. PAT does not apply to VPN traffic in NEM. This mode does not require a VPN configuration for each client. The Cisco ASA 5505 configured for NEM mode supports automatic tunnel initiation. The configuration must store the group name, user name, and password. Automatic tunnel initiation is disabled if secure unit authentication is enabled.
The network and addresses on the private side of the Easy VPN Client are hidden, and cannot be accessed directly.
Fields
• Enable Easy VPN Remote—Enables the Easy VPN Remote feature and makes available the rest of the fields in this dialog box for configuration.
• Mode—Selects either Client mode or Network extension mode.
– Client mode—Uses Port Address Translation (PAT) mode to isolate the addresses of the inside hosts, relative to the client, from the enterprise network.
– Network extension mode—Makes those addresses accessible from the enterprise network.
Note If the Easy VPN Remote is using NEM and has connections to secondary servers, establish an ASDM connection to each headend and check Enable Reverse Route Injection on the crypto map you created on Configuration > Remote Access VPN > Network (Client) Access > Advanced > IPsec > Crypto Maps to configure dynamic announcements of the remote network using RRI.
– Auto connect—The Easy VPN Remote establishes automatic IPsec data tunnels unless both of the following are true: Network extension mode is configured locally, and split-tunneling is configured on the group policy pushed to the Easy VPN Remote. If both are true, checking this attribute automates the establishment of IPsec data tunnels. Otherwise, this attribute has no effect.
• Group Settings—Specifies whether to use a pre-shared key or an X.509 certificate for user authentication.
– Pre-shared key—Enables the use of a pre-shared key for authentication and makes available the subsequent Group Name, Group Password, and Confirm Password fields for specifying the group policy name and password containing that key.
– Group Name—Specifies the name of the group policy to use for authentication.
– Group Password—Specifies the password to use with the specified group policy.
– Confirm Password—Requires you to confirm the group password just entered.
– X.509 Certificate—Specifies the use of an X.509 digital certificate, supplied by a Certificate Authority, for authentication.
– Select Trustpoint—Lets you select a trustpoint, which can be an IP address or a hostname, from the drop-down list. To define a trustpoint, click the link to Trustpoint(s) configuration at the bottom of this area.
– Send certificate chain—Enables sending a certificate chain, not just the certificate itself. This action includes the root certificate and any subordinate CA certificates in the transmission.
• User Settings—Configures user login information.
3-110Cisco ASA Series VPN ASDM Configuration Guide
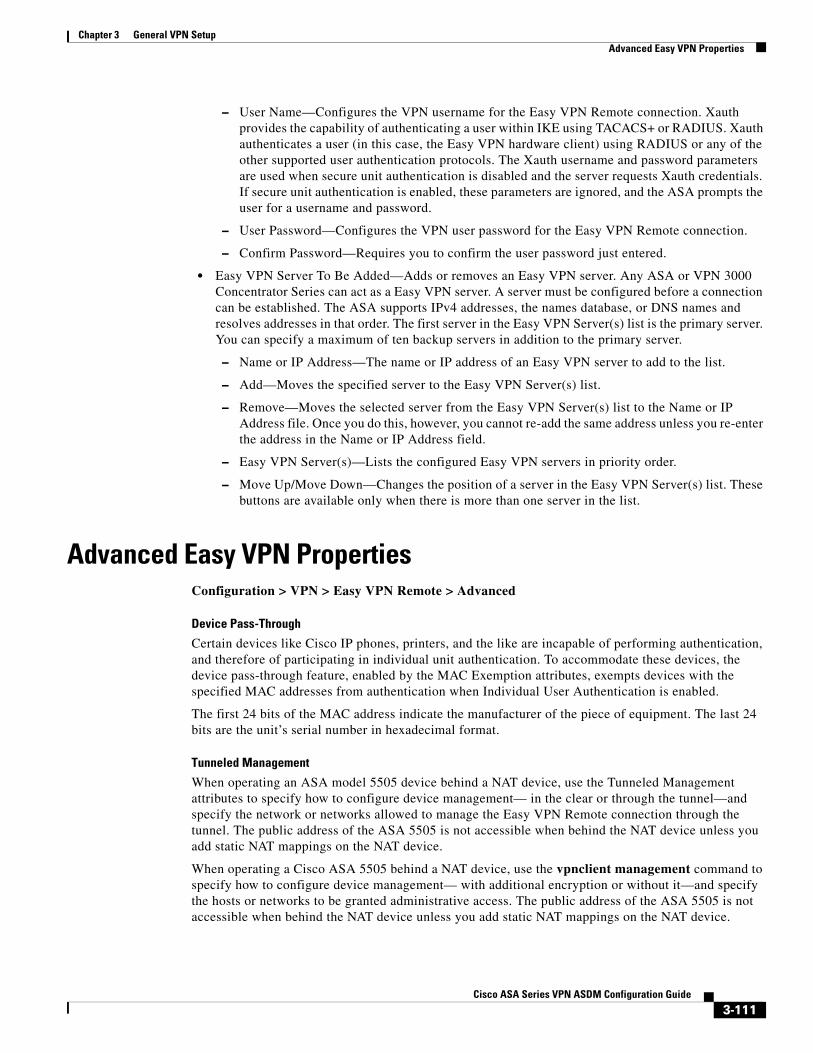
Chapter 3 General VPN Setup Advanced Easy VPN Properties
– User Name—Configures the VPN username for the Easy VPN Remote connection. Xauth provides the capability of authenticating a user within IKE using TACACS+ or RADIUS. Xauth authenticates a user (in this case, the Easy VPN hardware client) using RADIUS or any of the other supported user authentication protocols. The Xauth username and password parameters are used when secure unit authentication is disabled and the server requests Xauth credentials. If secure unit authentication is enabled, these parameters are ignored, and the ASA prompts the user for a username and password.
– User Password—Configures the VPN user password for the Easy VPN Remote connection.
– Confirm Password—Requires you to confirm the user password just entered.
• Easy VPN Server To Be Added—Adds or removes an Easy VPN server. Any ASA or VPN 3000 Concentrator Series can act as a Easy VPN server. A server must be configured before a connection can be established. The ASA supports IPv4 addresses, the names database, or DNS names and resolves addresses in that order. The first server in the Easy VPN Server(s) list is the primary server. You can specify a maximum of ten backup servers in addition to the primary server.
– Name or IP Address—The name or IP address of an Easy VPN server to add to the list.
– Add—Moves the specified server to the Easy VPN Server(s) list.
– Remove—Moves the selected server from the Easy VPN Server(s) list to the Name or IP Address file. Once you do this, however, you cannot re-add the same address unless you re-enter the address in the Name or IP Address field.
– Easy VPN Server(s)—Lists the configured Easy VPN servers in priority order.
– Move Up/Move Down—Changes the position of a server in the Easy VPN Server(s) list. These buttons are available only when there is more than one server in the list.
Advanced Easy VPN PropertiesConfiguration > VPN > Easy VPN Remote > Advanced
Device Pass-Through
Certain devices like Cisco IP phones, printers, and the like are incapable of performing authentication, and therefore of participating in individual unit authentication. To accommodate these devices, the device pass-through feature, enabled by the MAC Exemption attributes, exempts devices with the specified MAC addresses from authentication when Individual User Authentication is enabled.
The first 24 bits of the MAC address indicate the manufacturer of the piece of equipment. The last 24 bits are the unit’s serial number in hexadecimal format.
Tunneled Management
When operating an ASA model 5505 device behind a NAT device, use the Tunneled Management attributes to specify how to configure device management— in the clear or through the tunnel—and specify the network or networks allowed to manage the Easy VPN Remote connection through the tunnel. The public address of the ASA 5505 is not accessible when behind the NAT device unless you add static NAT mappings on the NAT device.
When operating a Cisco ASA 5505 behind a NAT device, use the vpnclient management command to specify how to configure device management— with additional encryption or without it—and specify the hosts or networks to be granted administrative access. The public address of the ASA 5505 is not accessible when behind the NAT device unless you add static NAT mappings on the NAT device.
3-111Cisco ASA Series VPN ASDM Configuration Guide
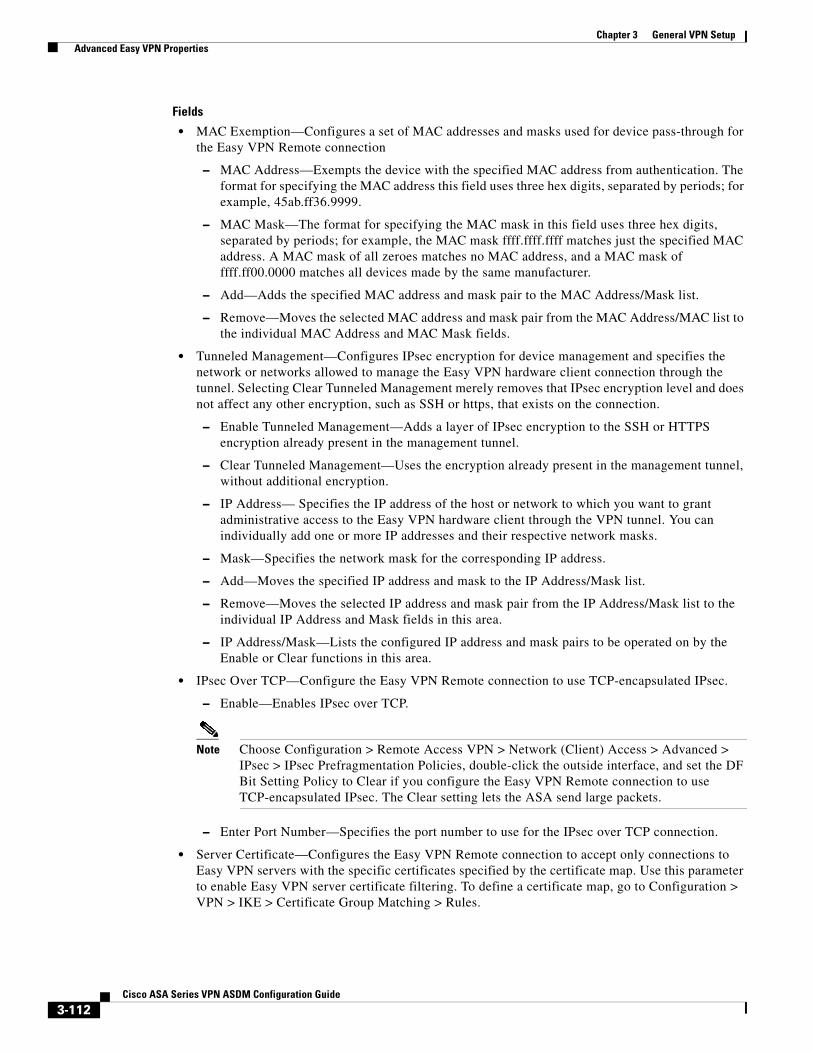
Chapter 3 General VPN Setup Advanced Easy VPN Properties
Fields
• MAC Exemption—Configures a set of MAC addresses and masks used for device pass-through for the Easy VPN Remote connection
– MAC Address—Exempts the device with the specified MAC address from authentication. The format for specifying the MAC address this field uses three hex digits, separated by periods; for example, 45ab.ff36.9999.
– MAC Mask—The format for specifying the MAC mask in this field uses three hex digits, separated by periods; for example, the MAC mask ffff.ffff.ffff matches just the specified MAC address. A MAC mask of all zeroes matches no MAC address, and a MAC mask of ffff.ff00.0000 matches all devices made by the same manufacturer.
– Add—Adds the specified MAC address and mask pair to the MAC Address/Mask list.
– Remove—Moves the selected MAC address and mask pair from the MAC Address/MAC list to the individual MAC Address and MAC Mask fields.
• Tunneled Management—Configures IPsec encryption for device management and specifies the network or networks allowed to manage the Easy VPN hardware client connection through the tunnel. Selecting Clear Tunneled Management merely removes that IPsec encryption level and does not affect any other encryption, such as SSH or https, that exists on the connection.
– Enable Tunneled Management—Adds a layer of IPsec encryption to the SSH or HTTPS encryption already present in the management tunnel.
– Clear Tunneled Management—Uses the encryption already present in the management tunnel, without additional encryption.
– IP Address— Specifies the IP address of the host or network to which you want to grant administrative access to the Easy VPN hardware client through the VPN tunnel. You can individually add one or more IP addresses and their respective network masks.
– Mask—Specifies the network mask for the corresponding IP address.
– Add—Moves the specified IP address and mask to the IP Address/Mask list.
– Remove—Moves the selected IP address and mask pair from the IP Address/Mask list to the individual IP Address and Mask fields in this area.
– IP Address/Mask—Lists the configured IP address and mask pairs to be operated on by the Enable or Clear functions in this area.
• IPsec Over TCP—Configure the Easy VPN Remote connection to use TCP-encapsulated IPsec.
– Enable—Enables IPsec over TCP.
Note Choose Configuration > Remote Access VPN > Network (Client) Access > Advanced > IPsec > IPsec Prefragmentation Policies, double-click the outside interface, and set the DF Bit Setting Policy to Clear if you configure the Easy VPN Remote connection to use TCP-encapsulated IPsec. The Clear setting lets the ASA send large packets.
– Enter Port Number—Specifies the port number to use for the IPsec over TCP connection.
• Server Certificate—Configures the Easy VPN Remote connection to accept only connections to Easy VPN servers with the specific certificates specified by the certificate map. Use this parameter to enable Easy VPN server certificate filtering. To define a certificate map, go to Configuration > VPN > IKE > Certificate Group Matching > Rules.
3-112Cisco ASA Series VPN ASDM Configuration Guide
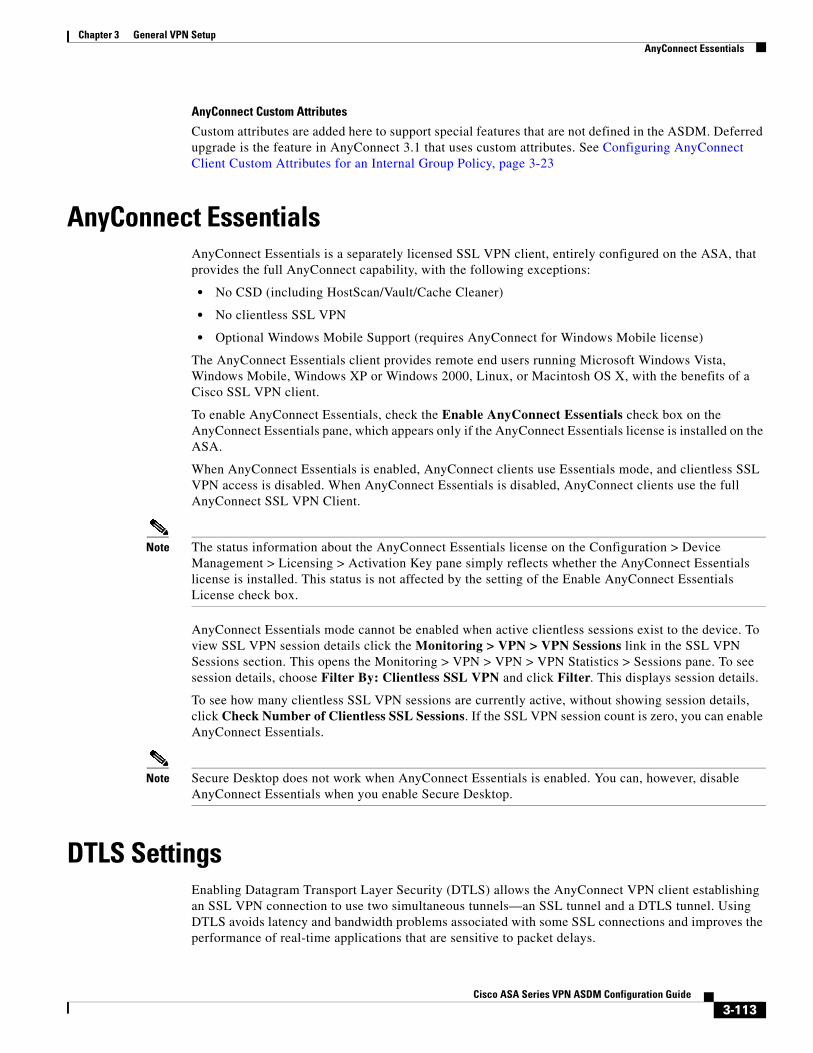
Chapter 3 General VPN Setup AnyConnect Essentials
AnyConnect Custom Attributes
Custom attributes are added here to support special features that are not defined in the ASDM. Deferred upgrade is the feature in AnyConnect 3.1 that uses custom attributes. See Configuring AnyConnect Client Custom Attributes for an Internal Group Policy, page 3-23
AnyConnect EssentialsAnyConnect Essentials is a separately licensed SSL VPN client, entirely configured on the ASA, that provides the full AnyConnect capability, with the following exceptions:
• No CSD (including HostScan/Vault/Cache Cleaner)
• No clientless SSL VPN
• Optional Windows Mobile Support (requires AnyConnect for Windows Mobile license)
The AnyConnect Essentials client provides remote end users running Microsoft Windows Vista, Windows Mobile, Windows XP or Windows 2000, Linux, or Macintosh OS X, with the benefits of a Cisco SSL VPN client.
To enable AnyConnect Essentials, check the Enable AnyConnect Essentials check box on the AnyConnect Essentials pane, which appears only if the AnyConnect Essentials license is installed on the ASA.
When AnyConnect Essentials is enabled, AnyConnect clients use Essentials mode, and clientless SSL VPN access is disabled. When AnyConnect Essentials is disabled, AnyConnect clients use the full AnyConnect SSL VPN Client.
Note The status information about the AnyConnect Essentials license on the Configuration > Device Management > Licensing > Activation Key pane simply reflects whether the AnyConnect Essentials license is installed. This status is not affected by the setting of the Enable AnyConnect Essentials License check box.
AnyConnect Essentials mode cannot be enabled when active clientless sessions exist to the device. To view SSL VPN session details click the Monitoring > VPN > VPN Sessions link in the SSL VPN Sessions section. This opens the Monitoring > VPN > VPN > VPN Statistics > Sessions pane. To see session details, choose Filter By: Clientless SSL VPN and click Filter. This displays session details.
To see how many clientless SSL VPN sessions are currently active, without showing session details, click Check Number of Clientless SSL Sessions. If the SSL VPN session count is zero, you can enable AnyConnect Essentials.
Note Secure Desktop does not work when AnyConnect Essentials is enabled. You can, however, disable AnyConnect Essentials when you enable Secure Desktop.
DTLS SettingsEnabling Datagram Transport Layer Security (DTLS) allows the AnyConnect VPN client establishing an SSL VPN connection to use two simultaneous tunnels—an SSL tunnel and a DTLS tunnel. Using DTLS avoids latency and bandwidth problems associated with some SSL connections and improves the performance of real-time applications that are sensitive to packet delays.
3-113Cisco ASA Series VPN ASDM Configuration Guide
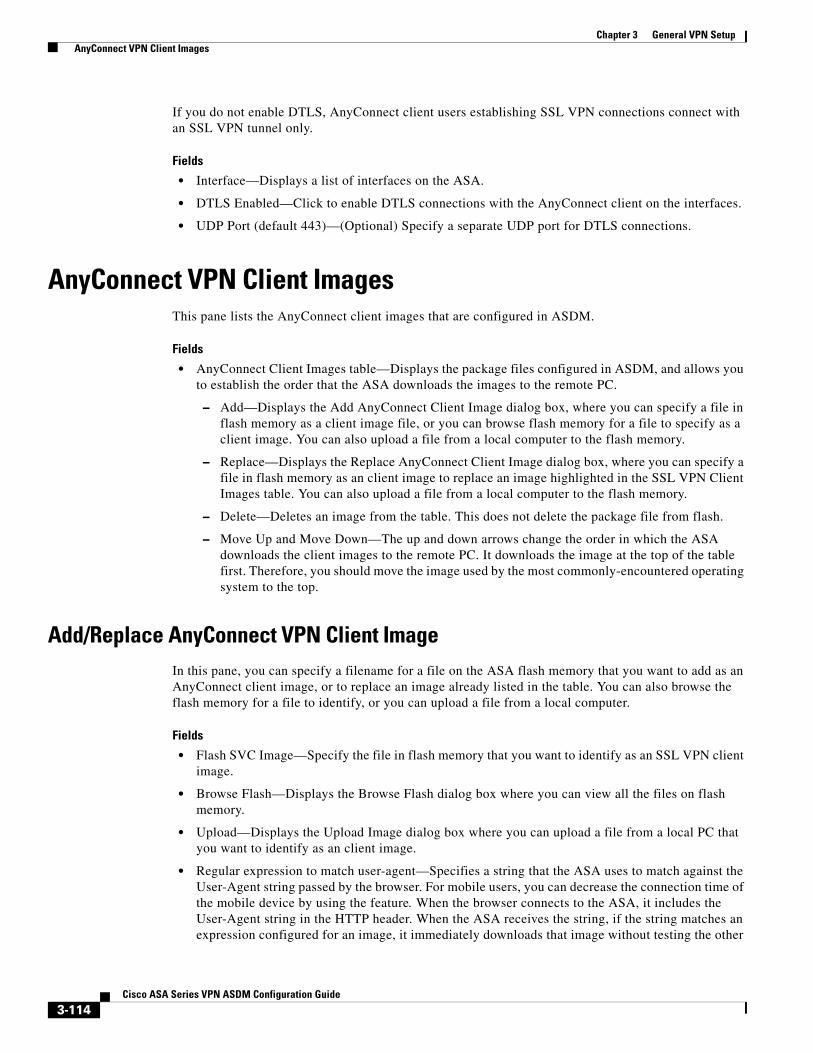
Chapter 3 General VPN Setup AnyConnect VPN Client Images
If you do not enable DTLS, AnyConnect client users establishing SSL VPN connections connect with an SSL VPN tunnel only.
Fields
• Interface—Displays a list of interfaces on the ASA.
• DTLS Enabled—Click to enable DTLS connections with the AnyConnect client on the interfaces.
• UDP Port (default 443)—(Optional) Specify a separate UDP port for DTLS connections.
AnyConnect VPN Client ImagesThis pane lists the AnyConnect client images that are configured in ASDM.
Fields
• AnyConnect Client Images table—Displays the package files configured in ASDM, and allows you to establish the order that the ASA downloads the images to the remote PC.
– Add—Displays the Add AnyConnect Client Image dialog box, where you can specify a file in flash memory as a client image file, or you can browse flash memory for a file to specify as a client image. You can also upload a file from a local computer to the flash memory.
– Replace—Displays the Replace AnyConnect Client Image dialog box, where you can specify a file in flash memory as an client image to replace an image highlighted in the SSL VPN Client Images table. You can also upload a file from a local computer to the flash memory.
– Delete—Deletes an image from the table. This does not delete the package file from flash.
– Move Up and Move Down—The up and down arrows change the order in which the ASA downloads the client images to the remote PC. It downloads the image at the top of the table first. Therefore, you should move the image used by the most commonly-encountered operating system to the top.
Add/Replace AnyConnect VPN Client ImageIn this pane, you can specify a filename for a file on the ASA flash memory that you want to add as an AnyConnect client image, or to replace an image already listed in the table. You can also browse the flash memory for a file to identify, or you can upload a file from a local computer.
Fields
• Flash SVC Image—Specify the file in flash memory that you want to identify as an SSL VPN client image.
• Browse Flash—Displays the Browse Flash dialog box where you can view all the files on flash memory.
• Upload—Displays the Upload Image dialog box where you can upload a file from a local PC that you want to identify as an client image.
• Regular expression to match user-agent—Specifies a string that the ASA uses to match against the User-Agent string passed by the browser. For mobile users, you can decrease the connection time of the mobile device by using the feature. When the browser connects to the ASA, it includes the User-Agent string in the HTTP header. When the ASA receives the string, if the string matches an expression configured for an image, it immediately downloads that image without testing the other
3-114Cisco ASA Series VPN ASDM Configuration Guide
Chapter 3 General VPN Setup Bypass Interface ACL
client images.
Upload ImageIn this pane, you can specify the path of a file on the local computer or in flash memory of the security appliance that you want to identify as an AnyConnect client image. You can also browse the local computer or the flash memory of the security appliance for a file to identify.
Fields
• Local File Path—Identifies the filename of the file in on the local computer that you want to identify as an SSL VPN client image.
• Browse Local Files—Displays the Select File Path dialog box where you can view all the files on local computer and where you can select a file to identify as a client image.
• Flash File System Path—Identifies the filename of the file in the flash memory of the security appliance that you want to identify as an SSL VPN client image.
• Browse Flash—Displays the Browse Flash Dialog dialog box where you can view all the files on flash memory of the security appliance and where you can choose a file to identify as a client image.
• Upload File—Initiates the file upload.
Bypass Interface ACLYou can require an access rule to apply to the local IP addresses by unchecking this check box. The access rule applies to the local IP address, and not to the original client IP address used before the VPN packet was decrypted.
• Enable inbound IPsec sessions to bypass interface access-lists. Group policy and per-user authorization ACLs still apply to the traffic—By default, the ASA allows VPN traffic to terminate on an ASA interface; you do not need to allow IKE or ESP (or other types of VPN packets) in an access rule. When this check box is checked, you also do not need an access rule for local IP addresses of decrypted VPN packets. Because the VPN tunnel was terminated successfully using VPN security mechanisms, this feature simplifies configuration and maximizes the ASA performance without any security risks. (Group policy and per-user authorization ACLs still apply to the traffic.)
Configuring AnyConnect Host ScanConfiguration > Remote Access VPN > Host Scan Image
The AnyConnect Posture Module provides the AnyConnect Secure Mobility Client the ability to identify the operating system, anti-virus, anti-spyware, and firewall software installed on the host. The Host Scan application gathers this information.
Using the secure desktop manager tool in the Adaptive Security Device Manager (ASDM), you can create a prelogin policy which evaluates the operating system, anti-virus, anti-spyware, and firewall software Host Scan identifies. Based on the result of the prelogin policy’s evaluation, you can control which hosts are allowed to create a remote access connection to the security appliance.
3-115Cisco ASA Series VPN ASDM Configuration Guide
Chapter 3 General VPN Setup Configuring AnyConnect Host Scan
The Host Scan support chart contains the product name and version information for the anti-virus, anti-spyware, and firewall applications you use in your prelogin policies. We deliver Host Scan and the Host Scan support chart, as well as other components, in the Host Scan package.
Starting with AnyConnect Secure Mobility Client, release 3.0, Host Scan is available separately from CSD. This means you can deploy Host Scan functionality without having to install CSD and you will be able to update your Host Scan support charts by upgrading the latest Host Scan package.
Posture assessment and the AnyConnect telemetry module require Host Scan to be installed on the host.
This chapter contains the following sections:
• Host Scan Dependencies and System Requirements, page 3-116
• Host Scan Packaging, page 3-117
• Installing and Enabling Host Scan on the ASA, page 3-117
• Other Important Documentation Addressing Host Scan, page 3-121
Host Scan Dependencies and System Requirements
Dependencies
The AnyConnect Secure Mobility Client with the posture module requires these minimum ASA components:
• ASA 8.4
• ASDM 6.4
These AnyConnect features require that you install the posture module.
• SCEP authentication
• AnyConnect Telemetry Module
System Requirements
The posture module can be installed on any of these platforms:
• Windows XP (x86 and x86 running on x64)
• Windows Vista (x86 and x86 running on x64)
• Windows 7 (x86 and x86 running on x64)
• Mac OS X 10.5,10.6 (32-bit and 32-bit running on 64-bit)
• Linux (32-bit and 32-bit running on 64-bit)
• Windows Mobile
Licensing
These are the AnyConnect licensing requirements for the posture module:
• AnyConnect Premium for basic Host Scan.
• Advanced Endpoint Assessment license is required for
– Remediation
3-116Cisco ASA Series VPN ASDM Configuration Guide
Chapter 3 General VPN Setup Configuring AnyConnect Host Scan
– Mobile Device Management
Entering an Activation Key to Support Advanced Endpoint Assessment
Advanced Endpoint Assessment includes all of the Endpoint Assessment features and lets you configure an attempt to update noncompliant computers to meet version requirements. You can use ASDM to activate a key to support Advanced Endpoint Assessment after acquiring it from Cisco, as follows:
Step 1 Choose Configuration > Device Management > Licensing > Activation Key.
Step 2 Enter the key in the New Activation Key field.
Step 3 Click Update Activation Key.
Step 4 Choose File > Save Running Configuration to Flash.
An Advanced Endpoint Assessment entry appears and the Configure button becomes active in the Host Scan Extensions area of the Configuration > Remote Access VPN > Secure Desktop Manager > Host Scan pane, which is accessible only if CSD is enabled.
Host Scan PackagingYou can load the Host Scan package on to the ASA in one of these ways:
• You can upload it as a standalone package: hostscan-version.pkg
• You can upload it by uploading an AnyConnect Secure Mobility package: anyconnect-NGC-win-version-k9.pkg
• You can upload it by uploading a Cisco Secure Desktop package: csd_version-k9.pkg
Installing and Enabling Host Scan on the ASAThese tasks describe installing and enabling Host Scan on the ASA:
• Installing or Upgrading Host Scan
• Enabling or Disabling Host Scan
File Description
hostscan-version.pkg This file contains the Host Scan software as well as the Host Scan library and support charts.
anyconnect-NGC-win-version-k9.pkg This package contains all the Cisco AnyConnect Secure Mobility Client features including the hostscan-version.pkg file.
csd_version-k9.pkg This file contains all Cisco Secure Desktop features including Host Scan software as well as the Host Scan library and support charts.
This method requires a separate license for Cisco Secure Desktop.
3-117Cisco ASA Series VPN ASDM Configuration Guide
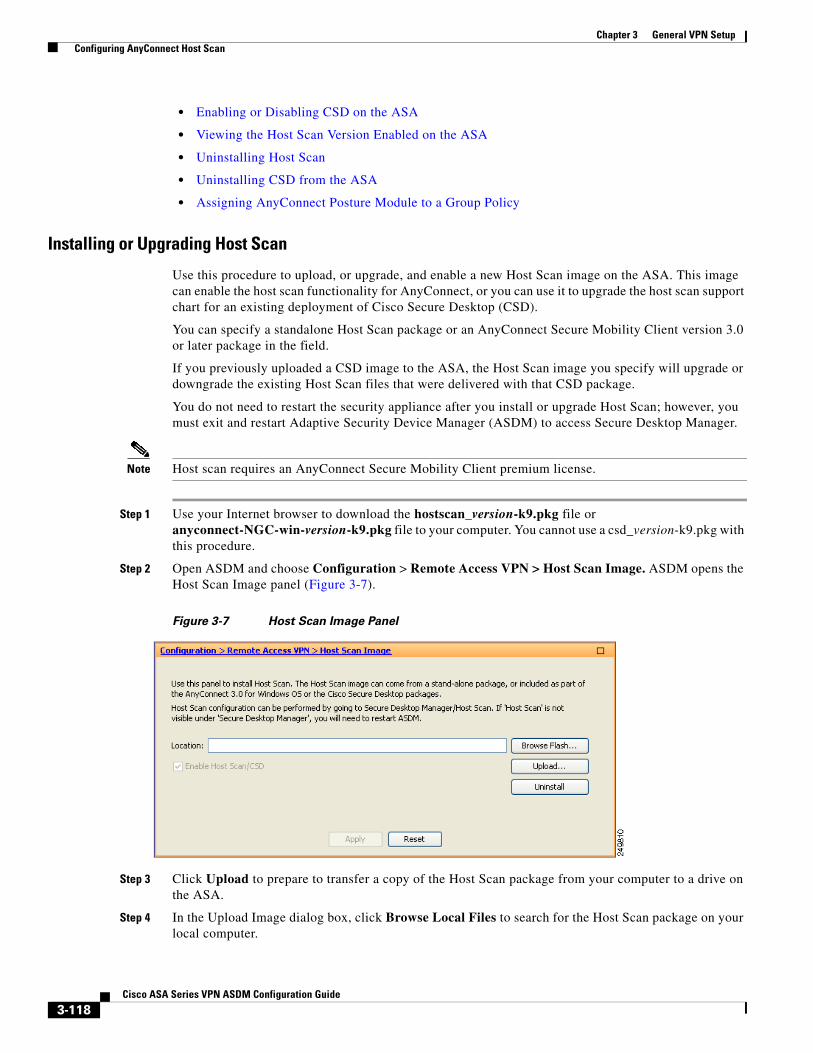
Chapter 3 General VPN Setup Configuring AnyConnect Host Scan
• Enabling or Disabling CSD on the ASA
• Viewing the Host Scan Version Enabled on the ASA
• Uninstalling Host Scan
• Uninstalling CSD from the ASA
• Assigning AnyConnect Posture Module to a Group Policy
Installing or Upgrading Host Scan
Use this procedure to upload, or upgrade, and enable a new Host Scan image on the ASA. This image can enable the host scan functionality for AnyConnect, or you can use it to upgrade the host scan support chart for an existing deployment of Cisco Secure Desktop (CSD).
You can specify a standalone Host Scan package or an AnyConnect Secure Mobility Client version 3.0 or later package in the field.
If you previously uploaded a CSD image to the ASA, the Host Scan image you specify will upgrade or downgrade the existing Host Scan files that were delivered with that CSD package.
You do not need to restart the security appliance after you install or upgrade Host Scan; however, you must exit and restart Adaptive Security Device Manager (ASDM) to access Secure Desktop Manager.
Note Host scan requires an AnyConnect Secure Mobility Client premium license.
Step 1 Use your Internet browser to download the hostscan_version-k9.pkg file or anyconnect-NGC-win-version-k9.pkg file to your computer. You cannot use a csd_version-k9.pkg with this procedure.
Step 2 Open ASDM and choose Configuration > Remote Access VPN > Host Scan Image. ASDM opens the Host Scan Image panel (Figure 3-7).
Figure 3-7 Host Scan Image Panel
Step 3 Click Upload to prepare to transfer a copy of the Host Scan package from your computer to a drive on the ASA.
Step 4 In the Upload Image dialog box, click Browse Local Files to search for the Host Scan package on your local computer.
3-118Cisco ASA Series VPN ASDM Configuration Guide
Chapter 3 General VPN Setup Configuring AnyConnect Host Scan
Step 5 Select the hostscan_version.pkg file or anyconnect-NGC-win-version-k9.pkg file you downloaded in Step 1 and click Select. The path to the file you selected is in the Local File Path field and the Flash File System Path field reflects the destination path of the Host Scan package. If your ASA has more than one flash drive, you can edit the Flash File System Path to indicate another flash drive.
Step 6 Click Upload File. ASDM transfers a copy of the file to the flash card. An Information dialog box displays the following message:
File has been uploaded to flash successfully.
Step 7 Click OK.
Step 8 In the Use Uploaded Image dialog, click OK to use the Host Scan package file you just uploaded as the current image.
Step 9 Check Enable Host Scan/CSD if it is not already checked.
Step 10 Click Apply.
Note If AnyConnect Essentials is enabled on the ASA, you receive a message that CSD will not work with it. You have the choice to Disable or Keep AnyConnect Essentials.
Step 11 From the File menu, select Save Running Configuration To Flash.
Enabling or Disabling Host Scan
When you first install or upgrade a Host Scan image using ASDM, you enable the image as part of that procedure. See Installing and Enabling Host Scan on the ASA, page 3-117.
Otherwise, to enable or disable a Host Scan image using ASDM, follow this procedure:
Step 1 Open ASDM and choose Configuration > Remote Access VPN > Host Scan Image. ASDM opens the Host Scan Image panel (Figure 3-7).
Step 2 Check Enable Host Scan/CSD to enable Host Scan or uncheck Enable Host Scan/CSD to disable Host Scan.
Step 3 Click Apply.
Enabling or Disabling CSD on the ASA
Enabling CSD loads the CSD configuration file, data.xml, from the flash device to the running configuration.
Disabling CSD does not alter the CSD configuration.
Use ASDM to enable or disable CSD as follows:
Step 1 Choose Configuration > Clientless SSL VPN > Secure Desktop > Setup.
ASDM opens the Setup pane (Figure 3-7).
3-119Cisco ASA Series VPN ASDM Configuration Guide
Chapter 3 General VPN Setup Configuring AnyConnect Host Scan
Note The Secure Desktop Image field displays the image (and version) that is currently installed. The Enable Secure Desktop check box indicates whether CSD is enabled.
Step 2 Check or uncheck Enable Secure Desktop and click Apply.
ASDM enables or disables CSD.
Step 3 Click the X in the upper right corner of the ASDM window to exit.
A window displays the following message:
The configuration has been modified. Do you want to save the running configuration to flash memory?
Step 4 Click Save. ASDM saves the configuration and closes.
Viewing the Host Scan Version Enabled on the ASA
Open ASDM and select Configuration > Remote Access VPN > Host Scan Image.
If there is a Host Scan image designated in the Host Scan Image location field, and the Enable HostScan/CSD box is checked, the version of that image is the Host Scan version being used by the ASA.
If the Host Scan Image filed is empty, and the Enable HostScan/CSD box is checked, select Configuration > Remote Access VPN > Secure Desktop Manager. The version of CSD in the Secure Desktop Image Location field is the Host Scan version being used by the ASA.
Uninstalling Host Scan
Uninstalling Host Scan package removes it from view on the ASDM interface and prevents the ASA from deploying it even if Host Scan or CSD is enabled. Uninstalling Host Scan does not delete the Host Scan package from the flash drive.
Uninstall Host Scan on the security appliance as follows:
Step 1 Open ASDM and select Configuration > Remote Access VPN > Host Scan Image.
Step 2 In the Host Scan Image pane, click Uninstall. ASDM removes the text from the Location text box.
Step 3 From the File menu select Save Running Configuration to Flash.
Uninstalling CSD from the ASA
Uninstalling CSD removes the CSD configuration file, data.xml, from the desktop directory on the flash card. If you want to retain the file, copy it using an alternative name or download it to your workstation before you uninstall CSD.
Uninstall CSD on the security appliance as follows:
Step 1 Open ASDM and choose Configuration > Remote Access VPN > Secure Desktop Manager > Setup.
ASDM opens the Setup pane (Figure 3-7).
3-120Cisco ASA Series VPN ASDM Configuration Guide
Chapter 3 General VPN Setup Configuring AnyConnect Host Scan
Step 2 Click Uninstall.
A confirmation window displays the following message:
Do you want to delete disk0:/csd_<n>.<n>.*.pkg and all CSD data files?
Step 3 Click Yes.
ASDM removes the text from the Location text box and removes the Secure Desktop Manager menu options below Setup.
Step 4 Click the X in the upper right corner of the ASDM window to exit.
A window displays the following message:
The configuration has been modified. Do you want to save the running configuration to flash memory?
Step 5 Click Save. ASDM saves the configuration and closes.
Assigning AnyConnect Posture Module to a Group Policy
Step 1 Open ASDM and choose Configuration > Remote Access VPN > Network (Client) Access > Group Policies.
Step 2 In the Group Policies panel, click Add to create a new group policy or select the group policy to which you want to assign the Host Scan package and click Edit.
Step 3 In the Edit Internal Group Policy panel, expand the Advanced navigation tree on the left side of the panel and select AnyConnect Client.
Step 4 Uncheck the Optional Client Modules to Download Inherit checkbox.
Step 5 In the Optional Client Modules to Download drop down menu, check the AnyConnect Posture Module and click OK.
Step 6 Click OK.
Other Important Documentation Addressing Host ScanOnce Host Scan gathers the posture credentials from the endpoint computer, you will need to understand subjects like, configuring prelogin policies, configuring dynamic access policies, and using Lua expressions to make use of the information.
These topics are covered in detail in these documents:
• Cisco Secure Desktop Configuration Guides
• Cisco Adaptive Security Device Manager Configuration Guides
See also the Cisco AnyConnect Secure Mobility Client Administrator Guide, Release 3.0 for more information about how Host Scan works with AnyConnect clients.
3-121Cisco ASA Series VPN ASDM Configuration Guide
Chapter 3 General VPN Setup Configuring Maximum VPN Sessions
Configuring Maximum VPN SessionsTo specify the maximum allowed number of VPN sessions or AnyConnect client VPN sessions, perform the following steps:
Step 1 Choose Configuration > Remote Access VPN > Advanced > Maximum VPN Sessions.
Step 2 In the Maximum AnyConnect Sessions field, enter the maximum number of sessions allowed.
Valid values range from 1 to the maximum number of sessions that are allowed by your license.
Step 3 In the Maximum Other VPN Sessions field, enter the maximum number of VPN sessions allowed, which includes Cisco VPN client (IPsec IKEv1) LAN-to-LAN VPN, and clientless SSL VPN sessions.
Valid values range from 1 to the maximum number of sessions that are allowed by your license.
Step 4 Click Apply.
Configuring the Pool of Cryptographic CoresYou can change the allocation of cryptographic cores on Symmetric Multi-Processing (SMP) platforms to give you better throughput performance for AnyConnect TLS/DTLS traffic. These changes can accelerate the SSL VPN datapath and provide customer-visible performance gains in AnyConnect, smart tunnels, and port forwarding. To configure the pool of cryptographic cores, perform the following steps.
Limitations
• Cryptographic core rebalancing is available on the following platforms:
– 5585-X
– 5545-X
– 5555-X
– ASASM
Detailed Steps
Step 1 Choose Configuration > Remote Access VPN > Advanced > Crypto Engine.
Step 2 From the Accelerator Bias drop-down list, choose one of the following:
Note This field only shows up if the feature is available in ASA.
• balanced—Equally distributes cryptography hardware resources (Admin/SSL and IPsec cores).
• ipsec—Allocates cryptography hardware resources to favor IPsec (includes SRTP encrypted voice traffic).
• ssl—Allocates cryptography hardware resources to favor Admin/SSL.
Step 3 Click Apply.
3-122Cisco ASA Series VPN ASDM Configuration Guide
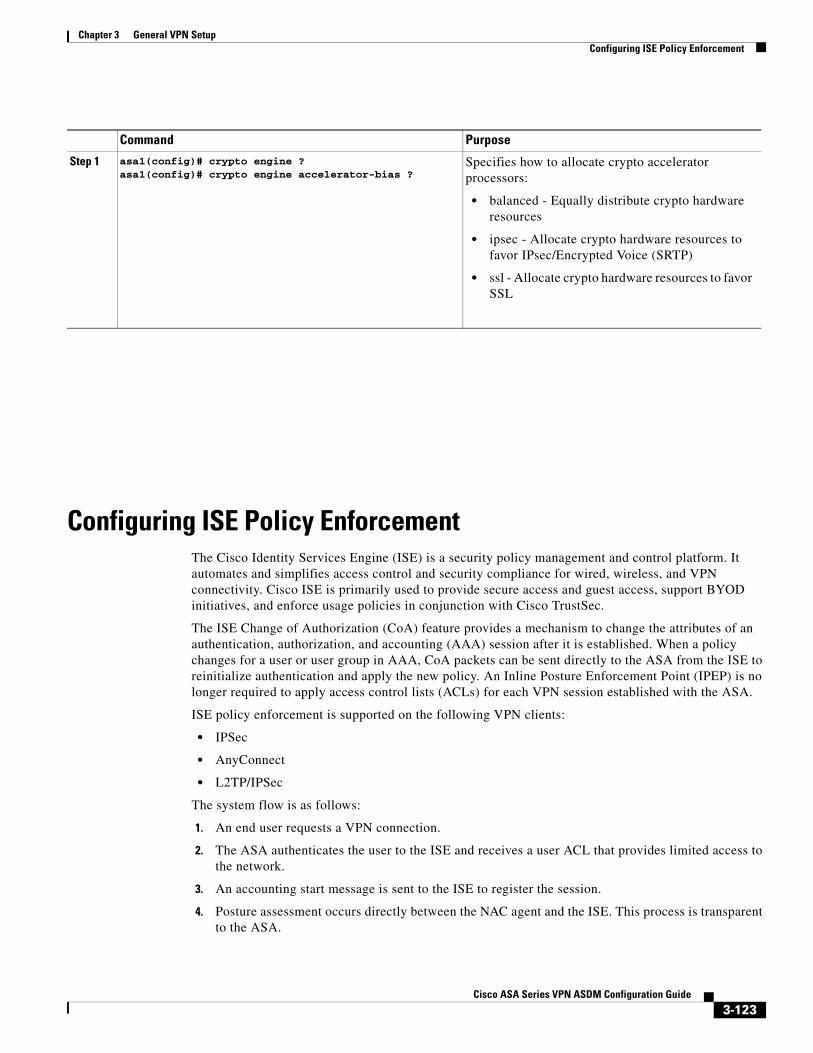
Chapter 3 General VPN Setup Configuring ISE Policy Enforcement
Configuring ISE Policy EnforcementThe Cisco Identity Services Engine (ISE) is a security policy management and control platform. It automates and simplifies access control and security compliance for wired, wireless, and VPN connectivity. Cisco ISE is primarily used to provide secure access and guest access, support BYOD initiatives, and enforce usage policies in conjunction with Cisco TrustSec.
The ISE Change of Authorization (CoA) feature provides a mechanism to change the attributes of an authentication, authorization, and accounting (AAA) session after it is established. When a policy changes for a user or user group in AAA, CoA packets can be sent directly to the ASA from the ISE to reinitialize authentication and apply the new policy. An Inline Posture Enforcement Point (IPEP) is no longer required to apply access control lists (ACLs) for each VPN session established with the ASA.
ISE policy enforcement is supported on the following VPN clients:
• IPSec
• AnyConnect
• L2TP/IPSec
The system flow is as follows:
1. An end user requests a VPN connection.
2. The ASA authenticates the user to the ISE and receives a user ACL that provides limited access to the network.
3. An accounting start message is sent to the ISE to register the session.
4. Posture assessment occurs directly between the NAC agent and the ISE. This process is transparent to the ASA.
Command Purpose
Step 1 asa1(config)# crypto engine ?asa1(config)# crypto engine accelerator-bias ?
Specifies how to allocate crypto accelerator processors:
• balanced - Equally distribute crypto hardware resources
• ipsec - Allocate crypto hardware resources to favor IPsec/Encrypted Voice (SRTP)
• ssl - Allocate crypto hardware resources to favor SSL
3-123Cisco ASA Series VPN ASDM Configuration Guide
Chapter 3 General VPN Setup Configuring ISE Policy Enforcement
5. The ISE sends a policy update to the ASA via a CoA “policy push.” This identifies a new user ACL that provides increased network access privileges.
Note Additional policy evaluations may occur during the lifetime of the connection, transparent to the ASA, via subsequent CoA updates.
Configuring an AAA Server Group for Change of AuthorizationThis following steps show an example Change of Authorization configuration.
Step 1 In the ASDM, naviagte to Configuration > Remote Access VPN > AAA/Local Users > AAA Server Groups
Step 2 Create or edit an existing AAA Server Group with the RADIUS protocol.
Step 3 Select the Accounting Mode type Single.
Step 4 Select the Reactivation Mode type Depletion.
Step 5 In the Dead Time field enter 10.
Step 6 In the Max Failed Attempts field, enter 3.
Step 7 Check the Enable Interim Accounting Update check box.
Step 8 In the Update Interval field, enter 1.
Step 9 Ensure the Enable Active Directory Agent Mode check box is not checked.
Step 10 Check the Enable Dynamic Authorization check box.
Step 11 In the Dynamic Authorizaiton Port field, enter 1700.
Step 12 Check the Use Authorization Only Mode check box.
Step 13 Click OK to apply your changes. Alternatively, click Cancel to abandon your changes.
For further information, see the “Configuring RADIUS Servers for AAA” chapter in the general operations configuration guide.
If you are using AnyConnect you must also specify the tunnel-group URL in the AnyConnect Connection Profile screen for that tunnel-group:
Step 1 Navigate to the AnyConnect Connection Profile screen for the required tunnel-group.
Step 2 In the Group URLs section, click Add and enter the URL, for example http://10.10.10.4/ISE-Tunnel-Group.
Step 3 Ensure the Enabled check box is selected.
Step 4 Click OK to apply your changes.
Note For informaion on troubleshooting this feature see the “Configuring ISE Policy Enforcement” section in the VPN configuration guide.
3-124Cisco ASA Series VPN ASDM Configuration Guide