Embed Size (px)
Citation preview

GDD X Plug-in Installation Guide
Microchip Technology Inc. Page 1
GDD X Plug‐in Installation Guide

GDD X Plug-in Installation Guide
Microchip Technology Inc. Page 2
Table of Contents 1. Installing GDD X plug-in under MPLAB X ............................................................................... 3
Pre-requisites .......................................................................................................................... 3
Plug-in Installation Steps ........................................................................................................ 3
2. Creating a project using MPLAB X ....................................................................................... 10
Pre-requisites ........................................................................................................................ 10
MPLAB X Steps: ................................................................................................................... 10
Project Settings ( Right click on Project name in Project window and Select Properties )....11
3. Launching GDD X from MPLAB X.………….....................……………………..………………13
4. Warnings while operating GDD X ......................................................................................... 13
5. Code generation from GDD X ............................................................................................... 14
MPLAB X Directory Structure on successful code generation.……………………....………..15
6. Uninstalling Plugin from MPLABX ......................................................................................... 16
GDD X Plug-in Installation Guide
Microchip Technology Inc. Page 3
1. Installing GDD X plug-in under MPLAB X
Pre-requisites 1. MPLABX IDE (v1.20 and above).
2. Java Runtime Environment (v1.6.0 and above).
Plug-in Installation Steps 1. Launch MPLAB X IDE, Navigate to Tools ->Plug-ins.
The below Plug-in dialog should appear.

GDD X Plug-in Installation Guide
Microchip Technology Inc. Page 4
2. Select “Downloaded” tab and click on “Add Plug-ins” button.

GDD X Plug-in Installation Guide
Microchip Technology Inc. Page 5
3. Locate GDD X NBM file in the local disk from the user saved path. The released version of GDD X NBM file is named as “com-microchip-mplab-modules-gdd.nbm”.
4. Select the NBM (com-microchip-mplab-modules-gdd.nbm) file and Click on
“Open” button.

GDD X Plug-in Installation Guide
Microchip Technology Inc. Page 6
5. In the “Downloaded” tab you can see “Graphics Display Designer X” with description and plug-in version.

GDD X Plug-in Installation Guide
Microchip Technology Inc. Page 7
6. Click on “Install” button to start plug-in installation. Press “Next” to continue installation.

GDD X Plug-in Installation Guide
Microchip Technology Inc. Page 8
7. Click and check the option “I accept the terms in all of the license agreements” to enable “Install” button. The installation process will begin.
Note: Ignore warning dialogs related to signing.

GDD X Plug-in Installation Guide
Microchip Technology Inc. Page 9
8. Click on “Finish” to complete the Plug-in installation.

GDD X Plug-in Installation Guide
Microchip Technology Inc. Page 10
2. Creating a project using MPLAB X
Pre-requisites 1. The latest Microchip Application Libraries (MLA) must be installed on your
system. This can be downloaded from the Microchip website. 2. GDD X project folder must be inside “Microchip Solutions vXXXX-XX-XX”
folder only. 3. Latest C30/C32 compiler version for MPLAB X.
MPLAB X Steps 1. Click on File->New Project when MPLAB X starts. 2. Select Microchip Embedded->Standalone Project and press “Next”. 3. Select the device(PIC Device) and press Next. 4. Select Header dialog, press Next. 5. Select the programmer tool(ICD3, PICKit etc) and press Next. 6. Choose a compiler ( C30 ) and press Next. 7. This will open the last dialog which is the Project creation dialog. Please
follow the below steps exactly as mentioned a. Name of the project must be entered in the “Project Name” field. b. Project location must be inside the MLA directory (e.g.: E:\Microchip
Solutions v2012-05-12 ) .

GDD X Plug-in Installation Guide
Microchip Technology Inc. Page 11
8. On Pressing Finish, the project creation is successful.
Project Settings: (Right click on Project name in Project window and Select Properties)
1. Heap memory : Select pic30-ld->Option Categories(General)-> Heap Size.

GDD X Plug-in Installation Guide
Microchip Technology Inc. Page 12
2. Large code memory: Select pic30-gcc->Option Categories(Memory Model).

GDD X Plug-in Installation Guide
Microchip Technology Inc. Page 13
3. Launching GDD X from MPLAB X Select Tools->Embedded->Graphics Display Designer X.
4. Warnings while operating GDD X
1. When there is no project selected in MPLAB X IDE.
2. When the MPLAB X project selected is not present in the Microchip Solutions folder.

GDD X Plug-in Installation Guide
Microchip Technology Inc. Page 14
3. When user tries to open GDD X multiple times.
5. Code generation from GDD X
Create your design using the GDD X and save it.
Click on Project->Generate Code to generate code from GDD X and add files to MPLAB X project
Note: If GDD X doesn’t start from Tools->Embedded, then please restart the MPLABX IDE and try again.

GDD X Plug-in Installation Guide
Microchip Technology Inc. Page 15
MPLAB X Directory Structure on successful code generation
The project window on the MPLAB X on successful generation of code would look similar to attached screen shot below.
The driver files would be under Drivers.

GDD X Plug-in Installation Guide
Microchip Technology Inc. Page 16
6. Uninstalling Plug-in from MPLABX
1. Navigate to Tools -> Plug-ins.

GDD X Plug-in Installation Guide
Microchip Technology Inc. Page 17
2. Select “Installed” tab and check for “Graphics Display Designer X”.
GDD X Plug-in Installation Guide
Microchip Technology Inc. Page 18
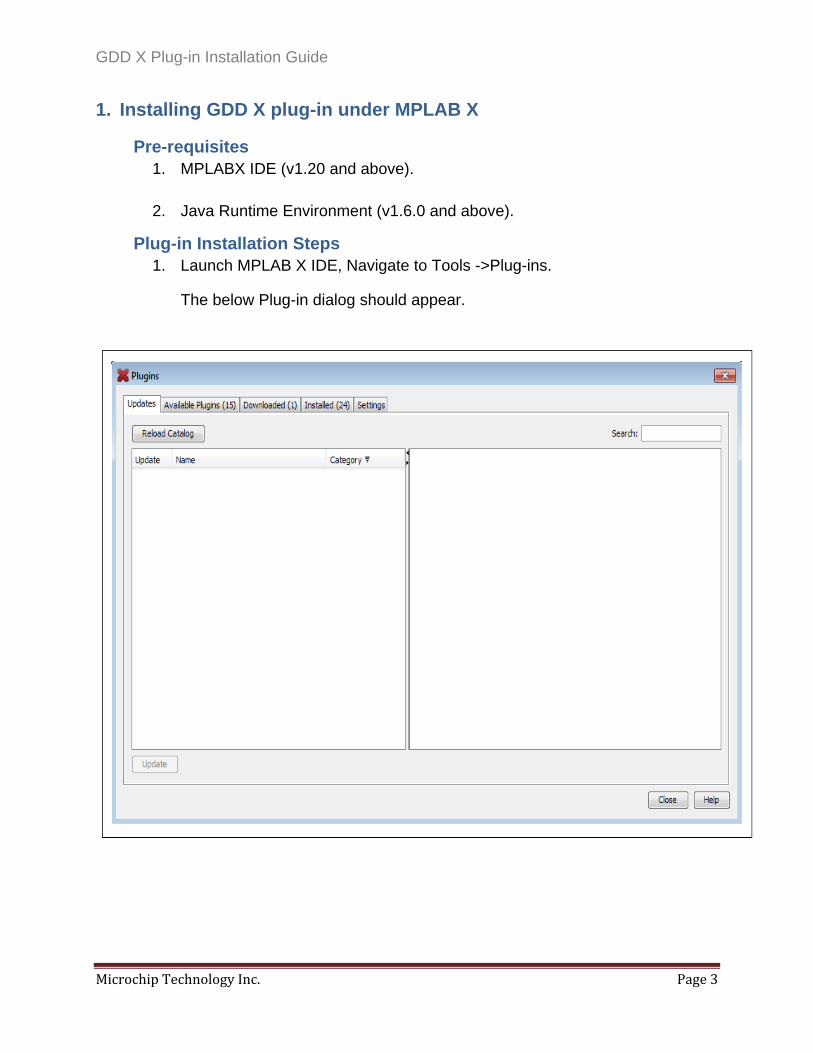
3. Click “Uninstall” button and restart the MPLAB X IDE by selecting “Restart Now” option.
This will uninstall and remove the plug-in from MPLAB X IDE.