Embed Size (px)
Citation preview

SPECIAL EDITION
Got Wood. Now What? Learn how to cut and store wood.By Joseph M. Herrmann
Publication of the American Association of WoodturnersSpecial Edition | woodturner.org
WOODTURNING
FUNdamentals
Woodturning Fundamentals TABLE OF CONTENTS
AAW | woodturner.org
2014 Special Edition: Got Wood. Now What?
Welcome message from AAW Executive Director, Phil McDonald, and note of thanks from Kurt Hertzog, Woodturning FUNdamentals chair
About the author, Joseph Herrmann, and a note from the AAW Safety Chair, Rob Wallace
Got Wood, Now What? By Joseph M. Herrmann
• Part 1: Green or Un-Dried Wood
• Part 2: Cutting Logs into Blanks
• Part 3: Cutting Bowl Blanks
• Part 4: Preparing Blanks
• Part 5: Choosing Band Saw Blades
Video ~ Safety Tips: Be Safe, Be Smart with Steve Marlow
1
2
3 X
7 X
10 X
14 X
17 X 19
Woodturning Fundamentals a bimonthly publication by the American Association of Woodturners 222 Landmark Ctr. 75 5th St W St. Paul, MN 55102 phone 651-484-9094 website woodturner.org Exec. Director: Phil McDonald [email protected] Program Director: Linda Ferber [email protected]
Board of Directors (2014) Dale Larson, President Kurt Hertzog, VP Cassandra Speier, Sec. Philip Hauser, Treas. Binh Pho Rob Wallace Lou Williams Denis Delehanty Art Liestman
Woodturning Fundamentals Committee Denis Delehanty, Chair Linda Ferber, Editor Beth Ireland Rob Wallace John Lucas Alan Zenreich
A Note About Safety: An accident at the lathe can happen with blinding suddenness. Respiratory and other problems can build over years. Take precautions when you turn. Safety guidelines are published online at http://www.woodturner.org/?page=Safety Following them will help you continue to enjoy woodturning.
AAW EDUCATION
Cover Photo: Joseph Herrmann
INTRODUCTION
AAW | woodturner.org
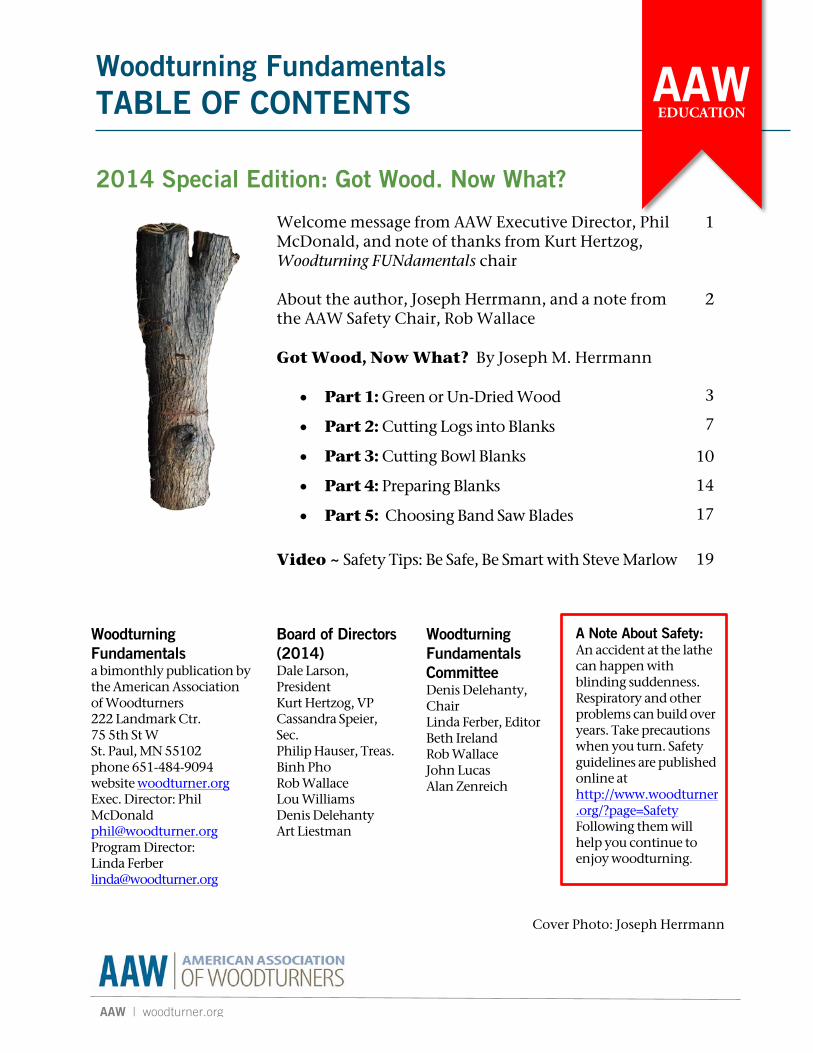
Note from Phil McDonald, Executive Director AAW staff and board are pleased to present you with this complimentary special edition of Woodturning FUNdamentals. We’ve recently given Woodturning FUNdamentals a facelift and have expanded the educational content in each issue. This is an integral part of our ongoing plan to complement our bi-monthly American Woodturner journal and serve AAW members with a greater variety of woodturning information. We are introducing more video, with more basic woodturning information. And coming soon, watch for the latest installment in our premium content, Elements of Woodturning project workbook series. The newest title will cover all aspects of sharpening turning tools and will be available for purchase on the AAW website in both a digital download and a print on demand paperback. I would like to express my gratitude to our volunteer member authors, the FUNdamentals Committee and AAW staff for progressively elevating the quantity and quality of our publications.
Thank you, Joe Herrmann! On behalf of the AAW, I would like to thank Joe Herrmann for his contributions to the field of woodturning and the AAW. Joe’s humor and common sense approaches are invaluable. We appreciate him sharing his skills and contributing materials for our Woodturning FUNdamentals digital publication.
~ Kurt Hertzog Woodturning FUNdamentals chair
1

ABOUT THE AUTHOR
AAW | woodturner.org
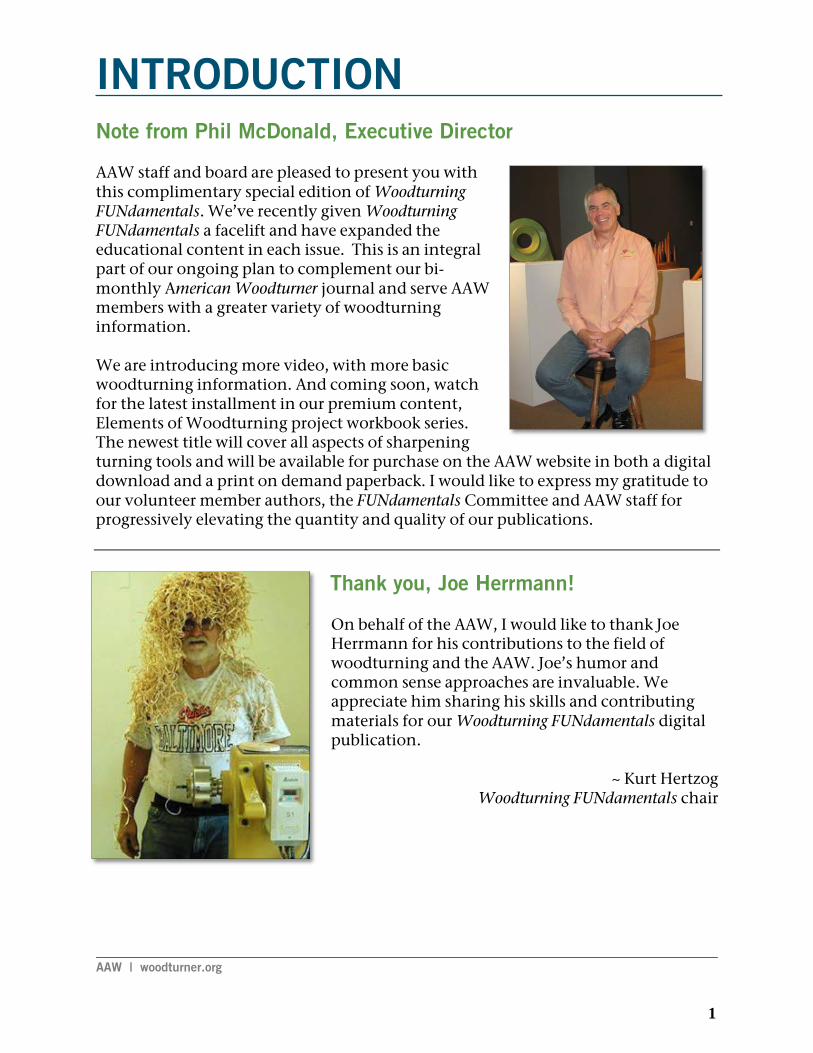
Joseph M. Herrmann Joe Herrmann is an award-winning, retired Industrial Arts teacher, who taught high school woodworking in a small rural school in Northeast Ohio for thirty years. In addition to exhibiting at major craft shows on the East coast, Ohio, and Michigan, Joe is a published author, having written articles for Fine Woodworking and The Woodworker's Journal. He was also a contributing editor for Creative Woodworks and Crafts and was the editor for Woodturning Design magazine. Joe also provided a sizable portion on school shop safety to the "Productions Systems Technology" student workbook. Joe teaches at nationally known craft schools and demonstrates at regional woodworking stores and shows. He is presently working to complete a large workshop where he will teach beginning woodworking courses to adults.
Message from Rob Wallace, AAW Safety Committee Chair Thanks for taking time to read “Got Wood. Now What?” by Joseph M. Herrmann. Every woodturner goes through a learning curve to acquire the knowledge and skills needed to accomplish different turning methods. It is my hope that sharing this series of articles will help you effectively cut and store wood for woodturning. A great companion to this series is AAW’s Safety for Woodturners book which offers a basic understanding of important safety practices and the need to turn safely. Safety will become second nature to every woodturner who reads it. Safety-aware turners are better able to experience the enjoyment and thrill of woodturning, as well as an increased confidence in their abilities. You’ll take comfort in knowing you are doing everything possible to maximize safety of yourself and those around you.
Turn SAFELY! Rob Wallace
2
GOT WOOD. NOW WHAT?
AAW | woodturner.org
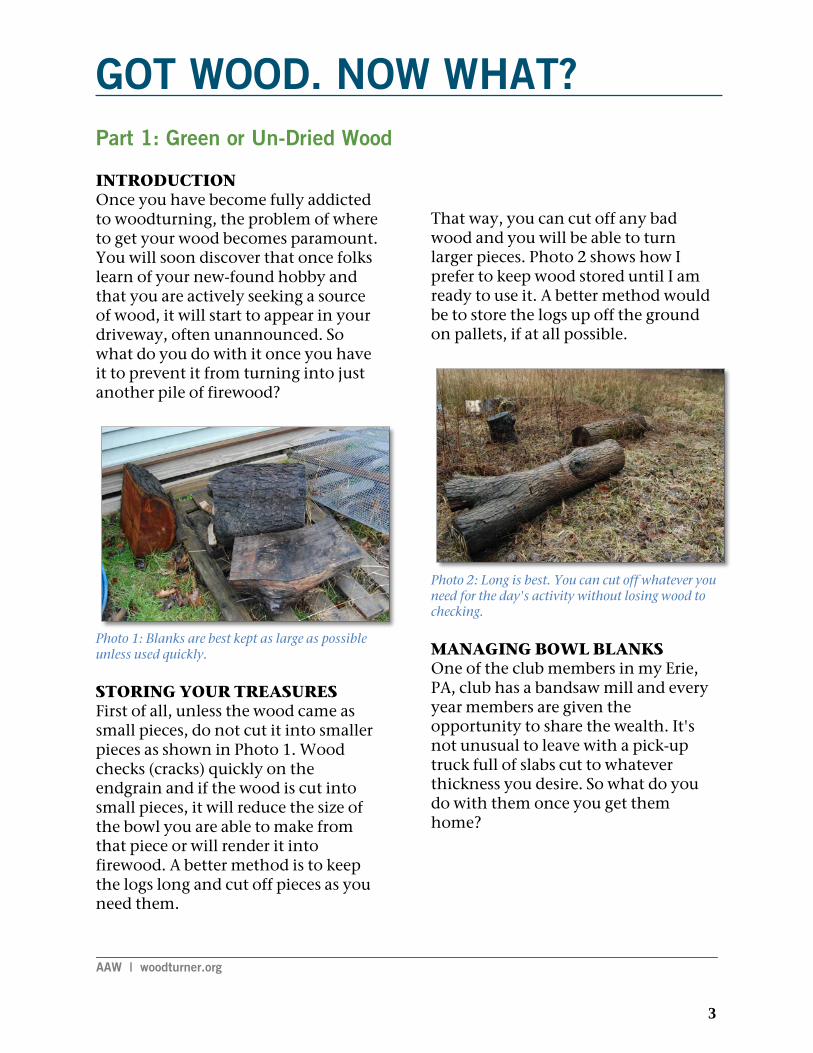
Part 1: Green or Un-Dried Wood INTRODUCTION Once you have become fully addicted to woodturning, the problem of where to get your wood becomes paramount. You will soon discover that once folks learn of your new-found hobby and that you are actively seeking a source of wood, it will start to appear in your driveway, often unannounced. So what do you do with it once you have it to prevent it from turning into just another pile of firewood?
Photo 1: Blanks are best kept as large as possible unless used quickly. STORING YOUR TREASURES First of all, unless the wood came as small pieces, do not cut it into smaller pieces as shown in Photo 1. Wood checks (cracks) quickly on the endgrain and if the wood is cut into small pieces, it will reduce the size of the bowl you are able to make from that piece or will render it into firewood. A better method is to keep the logs long and cut off pieces as you need them.
That way, you can cut off any bad wood and you will be able to turn larger pieces. Photo 2 shows how I prefer to keep wood stored until I am ready to use it. A better method would be to store the logs up off the ground on pallets, if at all possible.
Photo 2: Long is best. You can cut off whatever you need for the day's activity without losing wood to checking. MANAGING BOWL BLANKS One of the club members in my Erie, PA, club has a bandsaw mill and every year members are given the opportunity to share the wealth. It's not unusual to leave with a pick-up truck full of slabs cut to whatever thickness you desire. So what do you do with them once you get them home?
3
AAW | woodturner.org
AMERICAN ASSOCIATION OF WOODTURNERS
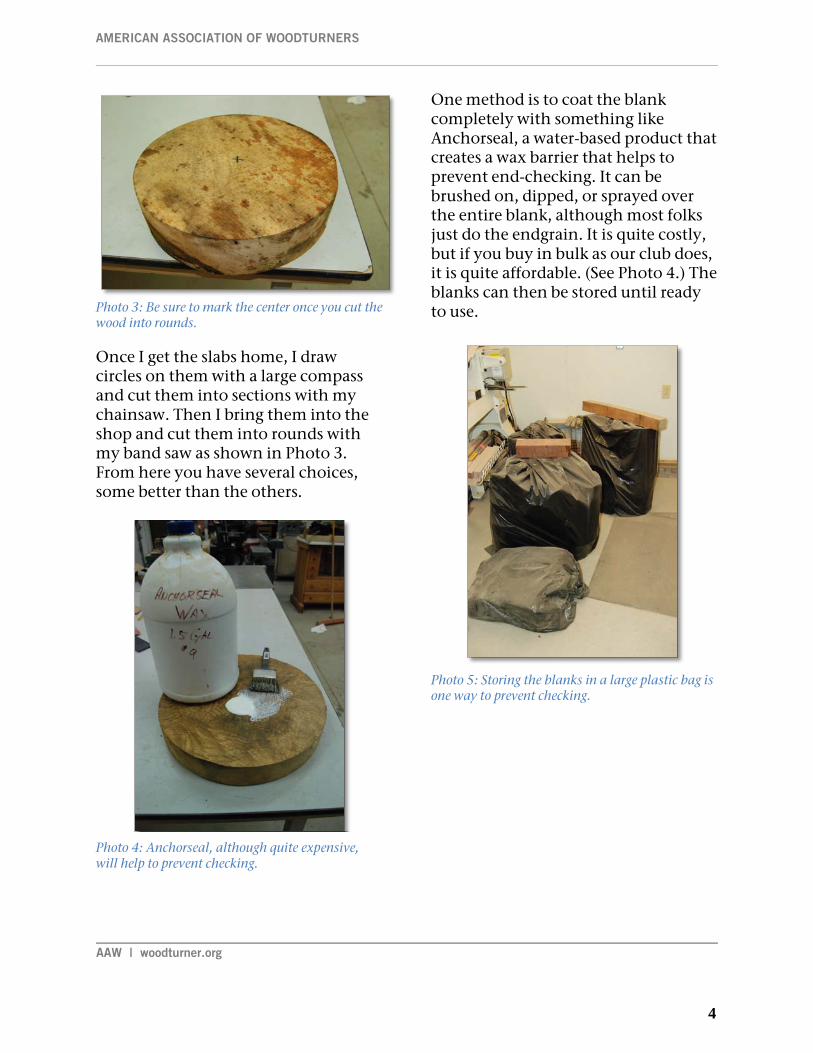
Photo 3: Be sure to mark the center once you cut the wood into rounds. Once I get the slabs home, I draw circles on them with a large compass and cut them into sections with my chainsaw. Then I bring them into the shop and cut them into rounds with my band saw as shown in Photo 3. From here you have several choices, some better than the others.
Photo 4: Anchorseal, although quite expensive, will help to prevent checking.
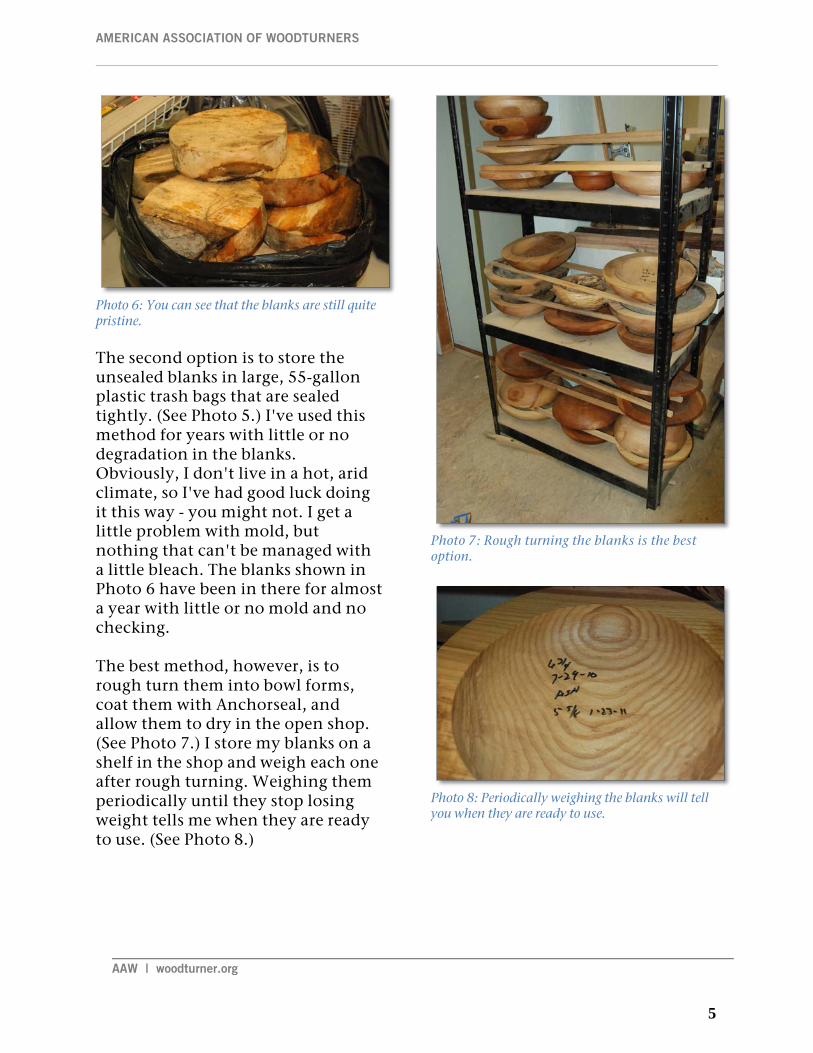
One method is to coat the blank completely with something like Anchorseal, a water-based product that creates a wax barrier that helps to prevent end-checking. It can be brushed on, dipped, or sprayed over the entire blank, although most folks just do the endgrain. It is quite costly, but if you buy in bulk as our club does, it is quite affordable. (See Photo 4.) The blanks can then be stored until ready to use.
Photo 5: Storing the blanks in a large plastic bag is one way to prevent checking.
4
AAW | woodturner.org
AMERICAN ASSOCIATION OF WOODTURNERS
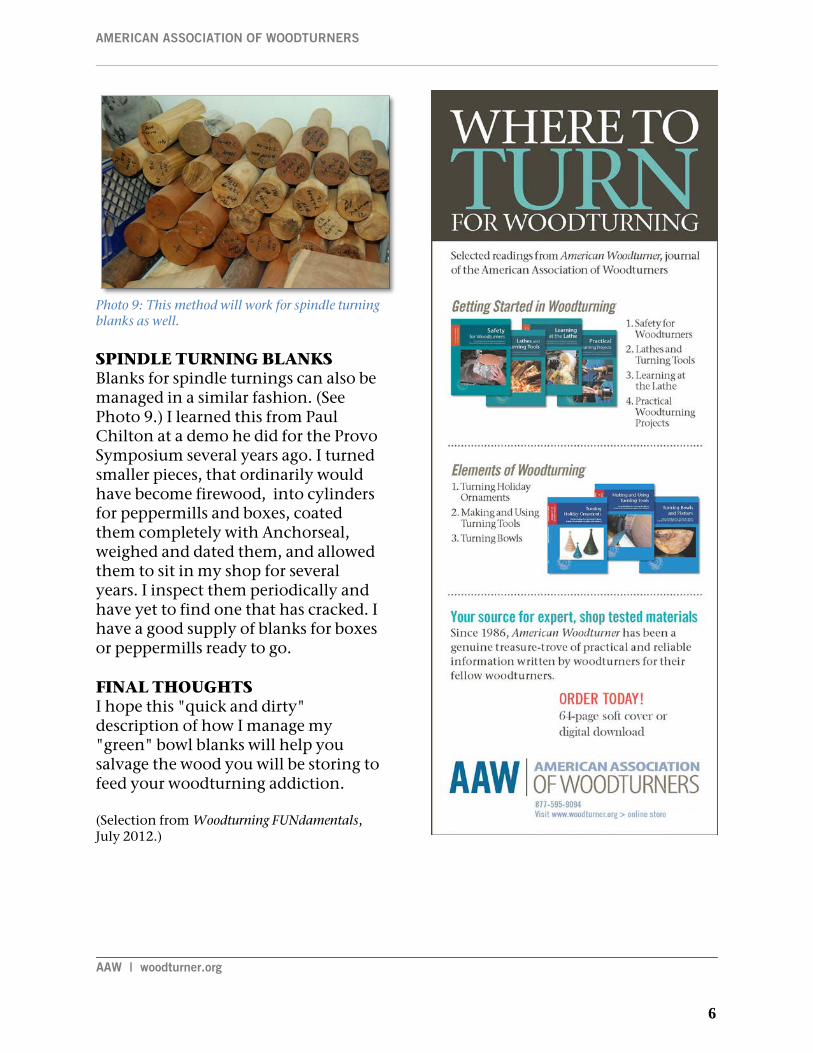
Photo 6: You can see that the blanks are still quite pristine. The second option is to store the unsealed blanks in large, 55-gallon plastic trash bags that are sealed tightly. (See Photo 5.) I've used this method for years with little or no degradation in the blanks. Obviously, I don't live in a hot, arid climate, so I've had good luck doing it this way - you might not. I get a little problem with mold, but nothing that can't be managed with a little bleach. The blanks shown in Photo 6 have been in there for almost a year with little or no mold and no checking. The best method, however, is to rough turn them into bowl forms, coat them with Anchorseal, and allow them to dry in the open shop. (See Photo 7.) I store my blanks on a shelf in the shop and weigh each one after rough turning. Weighing them periodically until they stop losing weight tells me when they are ready to use. (See Photo 8.)
Photo 7: Rough turning the blanks is the best option.
Photo 8: Periodically weighing the blanks will tell you when they are ready to use.
5
AAW | woodturner.org
AMERICAN ASSOCIATION OF WOODTURNERS
Photo 9: This method will work for spindle turning blanks as well. SPINDLE TURNING BLANKS Blanks for spindle turnings can also be managed in a similar fashion. (See Photo 9.) I learned this from Paul Chilton at a demo he did for the Provo Symposium several years ago. I turned smaller pieces, that ordinarily would have become firewood, into cylinders for peppermills and boxes, coated them completely with Anchorseal, weighed and dated them, and allowed them to sit in my shop for several years. I inspect them periodically and have yet to find one that has cracked. I have a good supply of blanks for boxes or peppermills ready to go. FINAL THOUGHTS I hope this "quick and dirty" description of how I manage my "green" bowl blanks will help you salvage the wood you will be storing to feed your woodturning addiction. (Selection from Woodturning FUNdamentals, July 2012.)
6
GOT WOOD. NOW WHAT?
AAW | woodturner.org
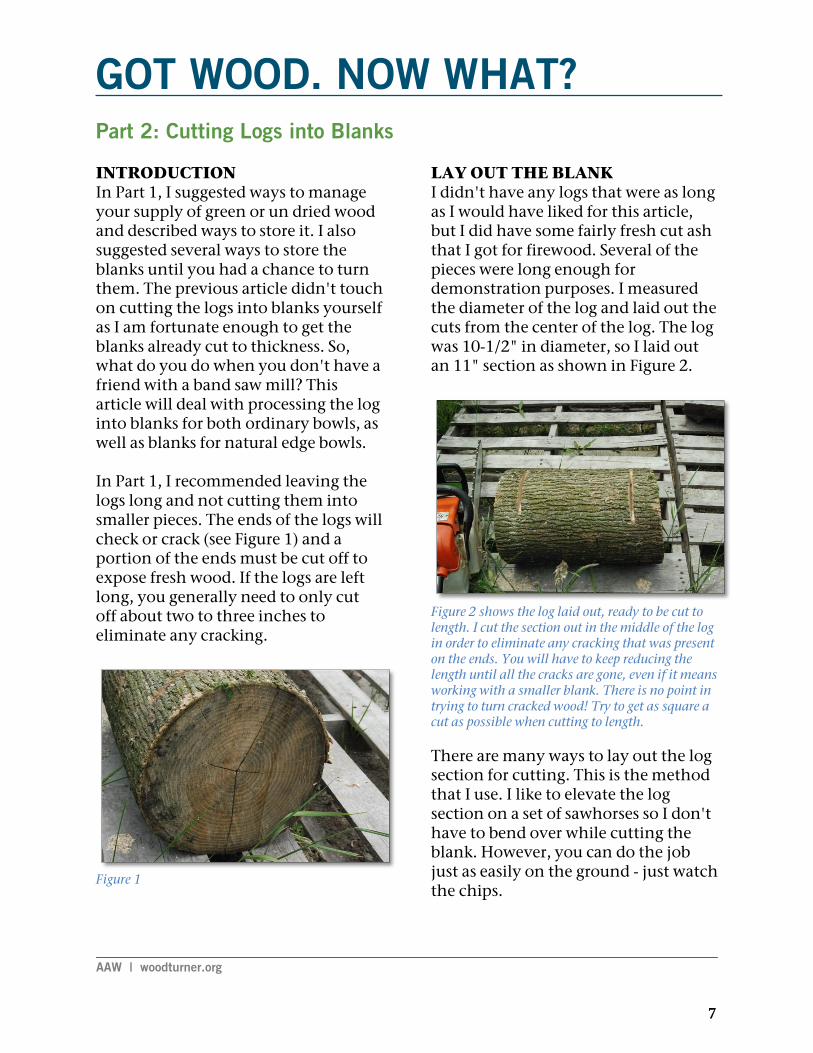
Part 2: Cutting Logs into Blanks INTRODUCTION In Part 1, I suggested ways to manage your supply of green or un dried wood and described ways to store it. I also suggested several ways to store the blanks until you had a chance to turn them. The previous article didn't touch on cutting the logs into blanks yourself as I am fortunate enough to get the blanks already cut to thickness. So, what do you do when you don't have a friend with a band saw mill? This article will deal with processing the log into blanks for both ordinary bowls, as well as blanks for natural edge bowls. In Part 1, I recommended leaving the logs long and not cutting them into smaller pieces. The ends of the logs will check or crack (see Figure 1) and a portion of the ends must be cut off to expose fresh wood. If the logs are left long, you generally need to only cut off about two to three inches to eliminate any cracking.
Figure 1
LAY OUT THE BLANK I didn't have any logs that were as long as I would have liked for this article, but I did have some fairly fresh cut ash that I got for firewood. Several of the pieces were long enough for demonstration purposes. I measured the diameter of the log and laid out the cuts from the center of the log. The log was 10-1/2" in diameter, so I laid out an 11" section as shown in Figure 2.
Figure 2 shows the log laid out, ready to be cut to length. I cut the section out in the middle of the log in order to eliminate any cracking that was present on the ends. You will have to keep reducing the length until all the cracks are gone, even if it means working with a smaller blank. There is no point in trying to turn cracked wood! Try to get as square a cut as possible when cutting to length. There are many ways to lay out the log section for cutting. This is the method that I use. I like to elevate the log section on a set of sawhorses so I don't have to bend over while cutting the blank. However, you can do the job just as easily on the ground - just watch the chips.
7

AAW | woodturner.org
AMERICAN ASSOCIATION OF WOODTURNERS
I span the sawhorses with a piece of scrap plywood or some other material. The log section is held in place by shims to prevent it from rolling around during the cut. Position the log so that the pith is somewhat centered to produce the greatest yield from the log. I use a level to draw a plumb line through the pith. Do the same on the opposite end. (See Figure 3.)
Figure 3: The initial plumb line drawn in will establish a reference line on both sides of the log section and will allow you to lay out two parallel blanks on either side of the pith.
Figure 4 shows the rest of the lines that I drew on the ends of the log to lay out the two blanks. The wood was not perfectly symmetrical and one blank was a bit larger than the other.
The next task is to connect the lines on both ends of the log so you have a straight line to cut. I used to use a magic marker to draw the lines, but now I use a hand saw (see Figure 5). I don't recall where I learned this technique, but it really does make a difference.
I projected the lines from either end up to the top with a marker and then connected them with the handsaw.
Figure 4: You do not want the pith to be present in either blank so the first lines drawn are to eliminate it. You will note that I drew two lines adjacent to the initial line, 1-1/2" apart I then laid out the two blanks with the level, making sure that the lines were plumb. The other end is the mirror image of this end.
Figure 5: The lines on the top of the log will show you where to cut with the chainsaw. They are much easier to see when cutting than if I had drawn them with a marker. They don't have to be cut very deep, just deep enough to score the bark.
8
AAW | woodturner.org
AMERICAN ASSOCIATION OF WOODTURNERS
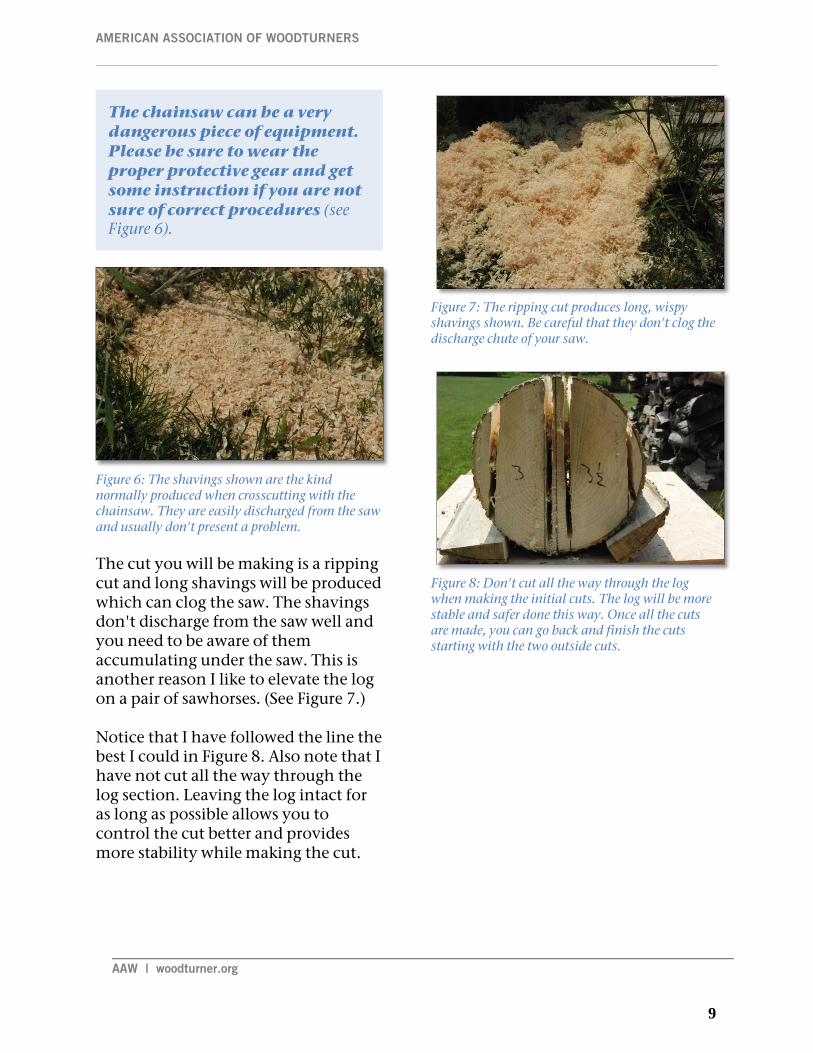
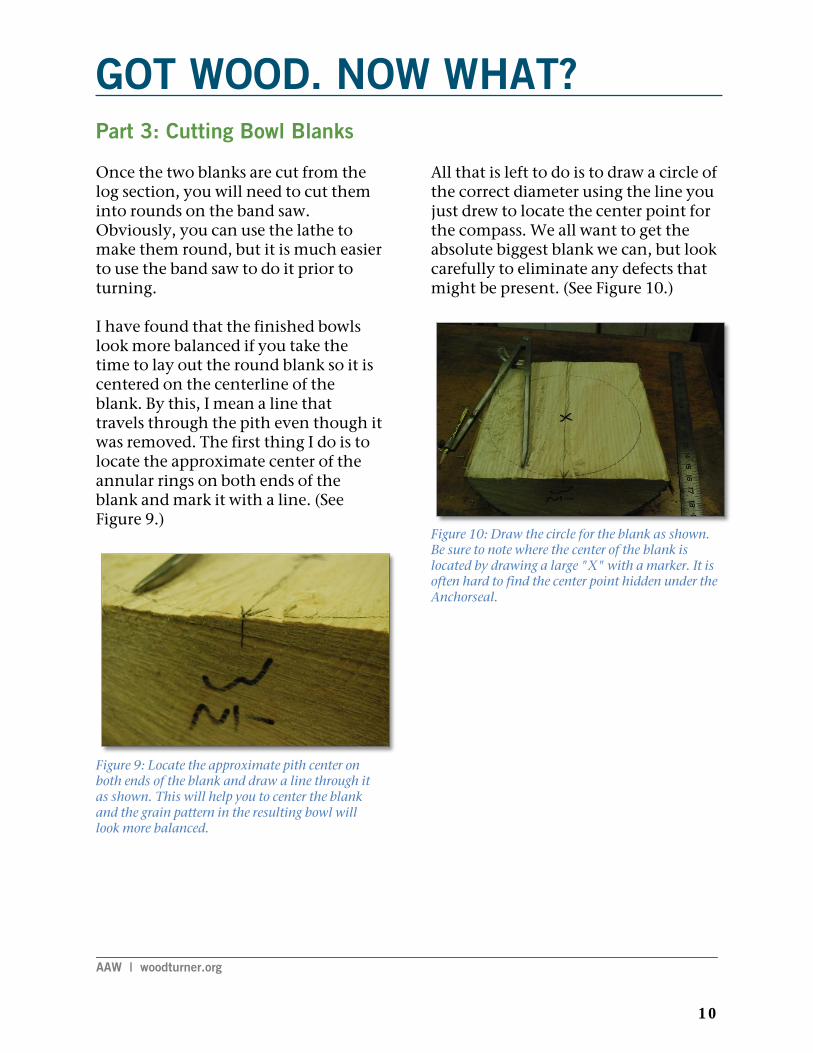
Figure 6: The shavings shown are the kind normally produced when crosscutting with the chainsaw. They are easily discharged from the saw and usually don't present a problem. The cut you will be making is a ripping cut and long shavings will be produced which can clog the saw. The shavings don't discharge from the saw well and you need to be aware of them accumulating under the saw. This is another reason I like to elevate the log on a pair of sawhorses. (See Figure 7.) Notice that I have followed the line the best I could in Figure 8. Also note that I have not cut all the way through the log section. Leaving the log intact for as long as possible allows you to control the cut better and provides more stability while making the cut.
Figure 7: The ripping cut produces long, wispy shavings shown. Be careful that they don't clog the discharge chute of your saw.
Figure 8: Don't cut all the way through the log when making the initial cuts. The log will be more stable and safer done this way. Once all the cuts are made, you can go back and finish the cuts starting with the two outside cuts.
The chainsaw can be a very dangerous piece of equipment. Please be sure to wear the proper protective gear and get some instruction if you are not sure of correct procedures (see Figure 6).
9
GOT WOOD. NOW WHAT?
AAW | woodturner.org
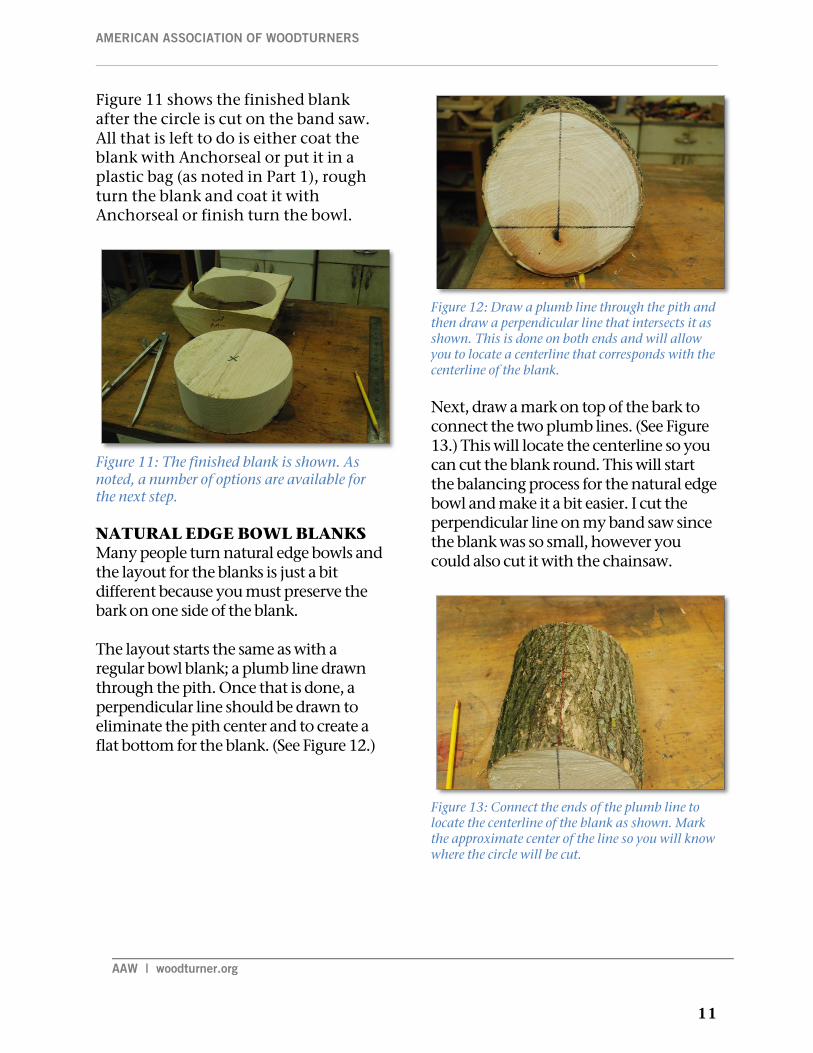
Part 3: Cutting Bowl Blanks Once the two blanks are cut from the log section, you will need to cut them into rounds on the band saw. Obviously, you can use the lathe to make them round, but it is much easier to use the band saw to do it prior to turning. I have found that the finished bowls look more balanced if you take the time to lay out the round blank so it is centered on the centerline of the blank. By this, I mean a line that travels through the pith even though it was removed. The first thing I do is to locate the approximate center of the annular rings on both ends of the blank and mark it with a line. (See Figure 9.)
Figure 9: Locate the approximate pith center on both ends of the blank and draw a line through it as shown. This will help you to center the blank and the grain pattern in the resulting bowl will look more balanced.
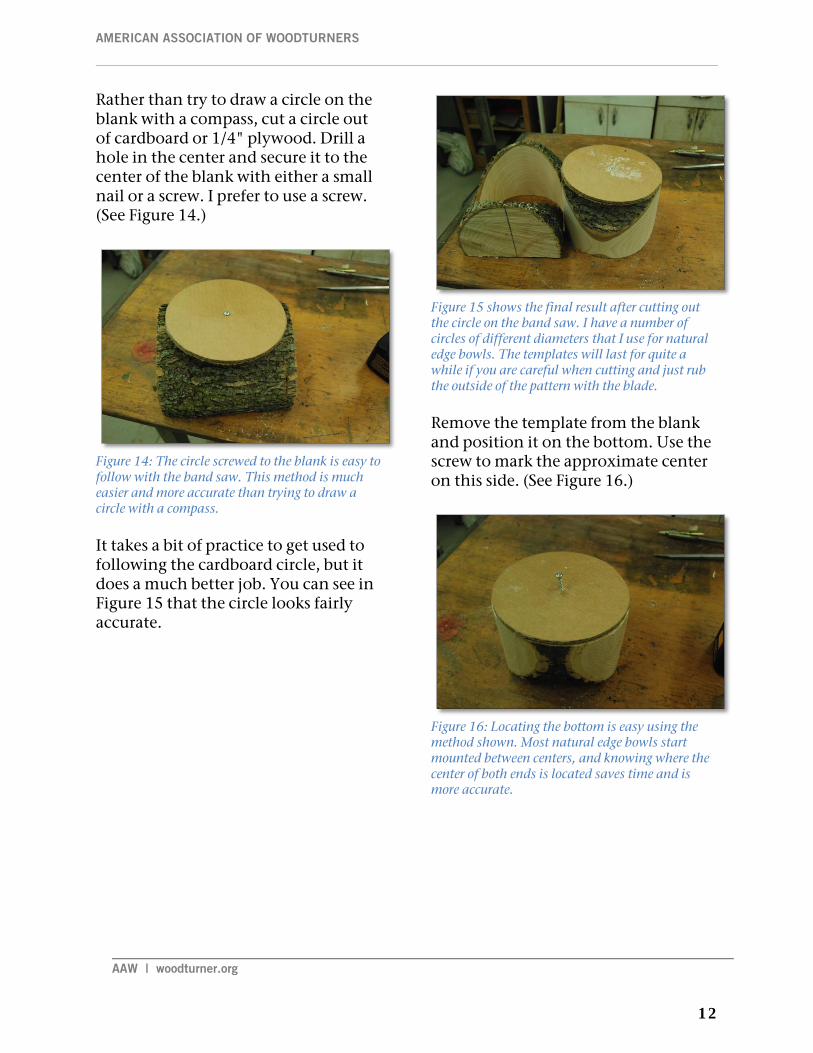
All that is left to do is to draw a circle of the correct diameter using the line you just drew to locate the center point for the compass. We all want to get the absolute biggest blank we can, but look carefully to eliminate any defects that might be present. (See Figure 10.)
Figure 10: Draw the circle for the blank as shown. Be sure to note where the center of the blank is located by drawing a large "X" with a marker. It is often hard to find the center point hidden under the Anchorseal.
10
AAW | woodturner.org
AMERICAN ASSOCIATION OF WOODTURNERS
Figure 11 shows the finished blank after the circle is cut on the band saw. All that is left to do is either coat the blank with Anchorseal or put it in a plastic bag (as noted in Part 1), rough turn the blank and coat it with Anchorseal or finish turn the bowl.
Figure 11: The finished blank is shown. As noted, a number of options are available for the next step. NATURAL EDGE BOWL BLANKS Many people turn natural edge bowls and the layout for the blanks is just a bit different because you must preserve the bark on one side of the blank. The layout starts the same as with a regular bowl blank; a plumb line drawn through the pith. Once that is done, a perpendicular line should be drawn to eliminate the pith center and to create a flat bottom for the blank. (See Figure 12.)
Figure 12: Draw a plumb line through the pith and then draw a perpendicular line that intersects it as shown. This is done on both ends and will allow you to locate a centerline that corresponds with the centerline of the blank. Next, draw a mark on top of the bark to connect the two plumb lines. (See Figure 13.) This will locate the centerline so you can cut the blank round. This will start the balancing process for the natural edge bowl and make it a bit easier. I cut the perpendicular line on my band saw since the blank was so small, however you could also cut it with the chainsaw.
Figure 13: Connect the ends of the plumb line to locate the centerline of the blank as shown. Mark the approximate center of the line so you will know where the circle will be cut.
11
AAW | woodturner.org
AMERICAN ASSOCIATION OF WOODTURNERS
Rather than try to draw a circle on the blank with a compass, cut a circle out of cardboard or 1/4" plywood. Drill a hole in the center and secure it to the center of the blank with either a small nail or a screw. I prefer to use a screw. (See Figure 14.)
Figure 14: The circle screwed to the blank is easy to follow with the band saw. This method is much easier and more accurate than trying to draw a circle with a compass. It takes a bit of practice to get used to following the cardboard circle, but it does a much better job. You can see in Figure 15 that the circle looks fairly accurate.
Figure 15 shows the final result after cutting out the circle on the band saw. I have a number of circles of different diameters that I use for natural edge bowls. The templates will last for quite a while if you are careful when cutting and just rub the outside of the pattern with the blade. Remove the template from the blank and position it on the bottom. Use the screw to mark the approximate center on this side. (See Figure 16.)
Figure 16: Locating the bottom is easy using the method shown. Most natural edge bowls start mounted between centers, and knowing where the center of both ends is located saves time and is more accurate.
12
AAW | woodturner.org
AMERICAN ASSOCIATION OF WOODTURNERS
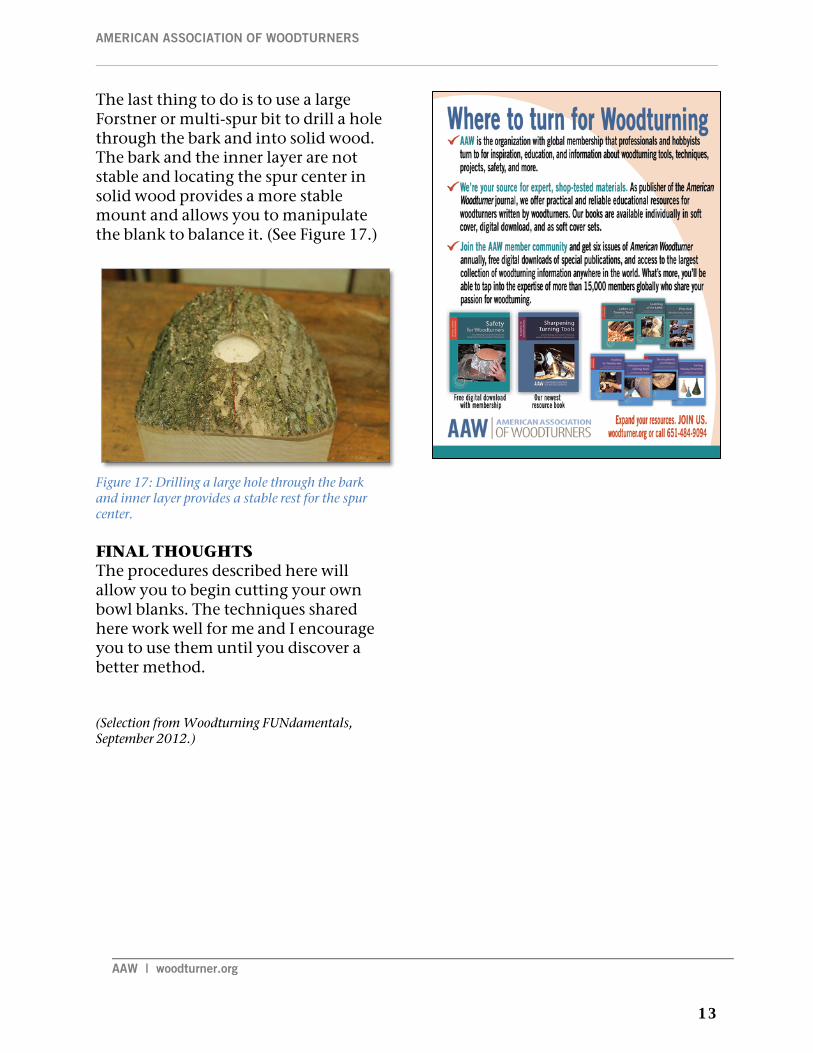
The last thing to do is to use a large Forstner or multi-spur bit to drill a hole through the bark and into solid wood. The bark and the inner layer are not stable and locating the spur center in solid wood provides a more stable mount and allows you to manipulate the blank to balance it. (See Figure 17.)
Figure 17: Drilling a large hole through the bark and inner layer provides a stable rest for the spur center. FINAL THOUGHTS The procedures described here will allow you to begin cutting your own bowl blanks. The techniques shared here work well for me and I encourage you to use them until you discover a better method. (Selection from Woodturning FUNdamentals, September 2012.)
13

GOT WOOD. NOW WHAT?
AAW | woodturner.org
Part 4: Preparing Blanks I received an email from a reader who was having trouble cutting blanks on his band saw. It seems that he was having trouble with the saw stalling and he was not able to cut the blanks round. There could be a number of factors that could cause this problem, and this list is not all inclusive. First, the saw could be under-powered. Ideally, a 1-1/2 hp (or larger) motor would be best. However, my saw has a ¾-hp motor and it cuts the blanks okay - usually. Second, the saw blade could be dull. Whenever I am cutting blanks, I always try to saw with a new blade and use one that has the correct tooth style and wide enough to do the job. And last, the blank itself might not be flat enough. More often than not, this will cause the saw to bind and prevent the cut from being made easily. IMPERFECT BLANKS Cutting a blank flat and smooth with a chainsaw is no easy task. It is difficult to produce a blank that is flat with parallel sides. Usually, the tip of the saw produces a large divot and creates a lopsided blank. The blank shown in Photo 1 is often the norm. Obviously, a blank this rough will not sit flat on the table of the band saw and will cause problems when you try to cut the circle for the bowl blank. This blank is too far gone and too punky to use, so I will use another blank for this article.
Photo 1 shows a more-often-than-not cut with the chainsaw.
photo2 is an ash blank that is rough, but not so badly cut that it would be unusable. You will note that there are some lines and ridges that might cause problems and the task here is to eliminate them to produce a flat surface. Photo 2 has a rougher than desired surface that could cause problems when cutting the blank.
14
AAW | woodturner.org
AMERICAN ASSOCIATION OF WOODTURNERS
PREPARING THE BLANK The first task is to secure the blank on a bench or saw horse. Whenever possible, I try to use the workbench in the shop because it is large enough and sturdy enough to support the work. You wouldn't want the blank to collapse the table while you were working on it. The workbench also has a vise that I can use to lock the blank into position, so I don't have to chase it around when I am working to smooth out the surface. I like to use a vise dog along with another sturdy board that I clamp to the table behind the blank. Photo 3 shows how I normally fix the blank.
Photo 3 shows how I clamp the blank securely to the workbench.
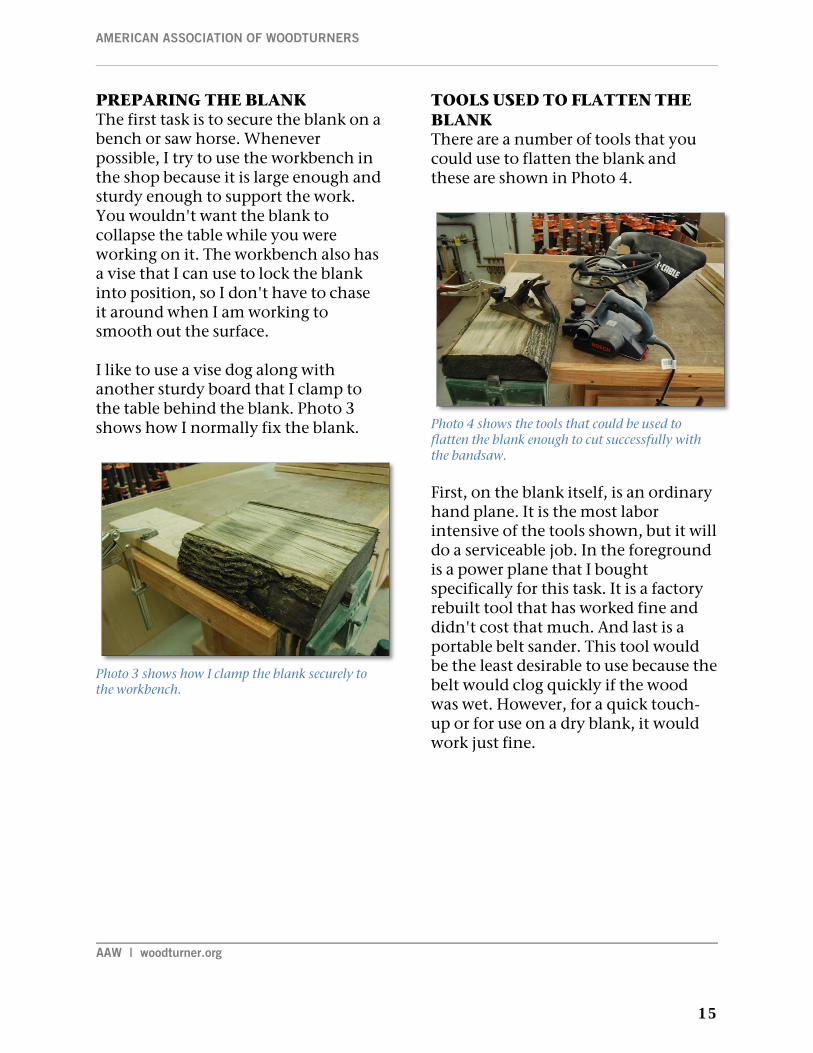
TOOLS USED TO FLATTEN THE BLANK There are a number of tools that you could use to flatten the blank and these are shown in Photo 4.
Photo 4 shows the tools that could be used to flatten the blank enough to cut successfully with the bandsaw. First, on the blank itself, is an ordinary hand plane. It is the most labor intensive of the tools shown, but it will do a serviceable job. In the foreground is a power plane that I bought specifically for this task. It is a factory rebuilt tool that has worked fine and didn't cost that much. And last is a portable belt sander. This tool would be the least desirable to use because the belt would clog quickly if the wood was wet. However, for a quick touch-up or for use on a dry blank, it would work just fine.
15
AAW | woodturner.org
AMERICAN ASSOCIATION OF WOODTURNERS
Photo 5 shows what just a few strokes with the hand plane will do to the surface of the blank. The plane will cut the wet wood fairly quickly and will make short work of smoothing out a blank that wasn't too rough. The power plane is the ideal tool to use for surfacing the wet blank. It is quick and removes the wood easily. I think I paid around $40 for the tool and it is worth every penny! FINAL THOUGHTS If you are having trouble cutting your blanks, I suggest that you look at how rough they are. It is very difficult to cut a lopsided blank that is rocking up and down on the band saw. (Selection from Woodturning FUNdamentals, November 2012.)
16
GOT WOOD. NOW WHAT?
AAW | woodturner.org
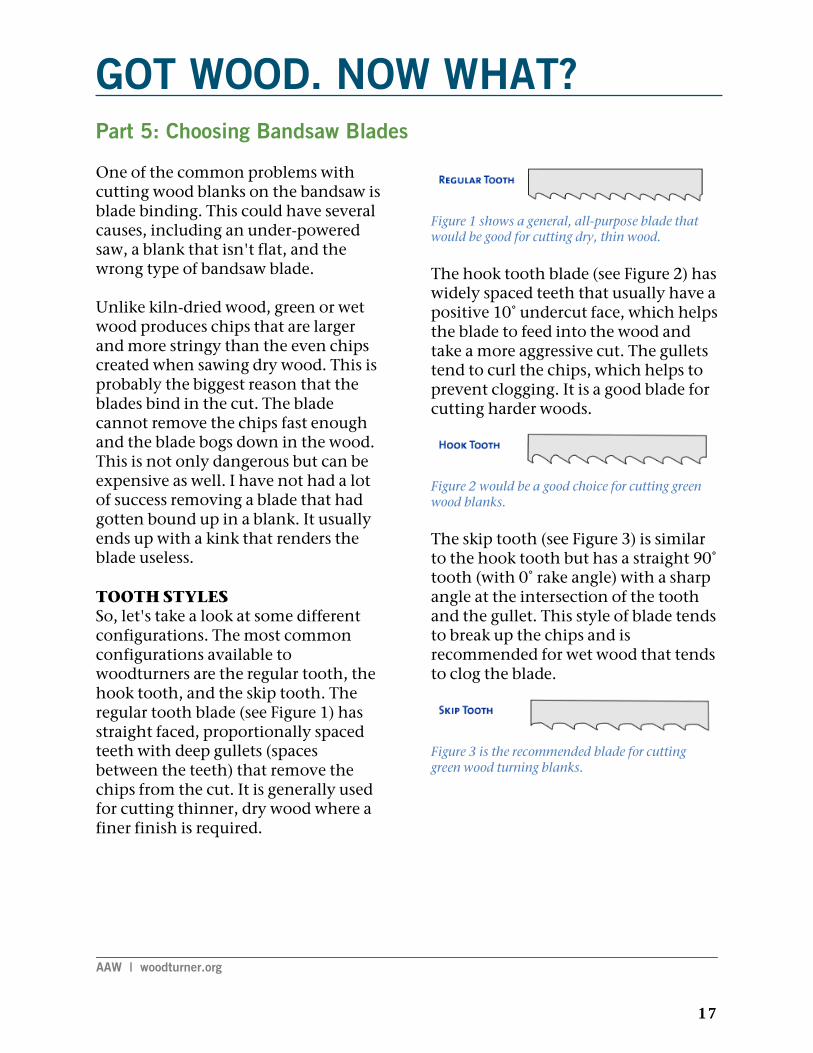
Part 5: Choosing Bandsaw Blades One of the common problems with cutting wood blanks on the bandsaw is blade binding. This could have several causes, including an under-powered saw, a blank that isn't flat, and the wrong type of bandsaw blade. Unlike kiln-dried wood, green or wet wood produces chips that are larger and more stringy than the even chips created when sawing dry wood. This is probably the biggest reason that the blades bind in the cut. The blade cannot remove the chips fast enough and the blade bogs down in the wood. This is not only dangerous but can be expensive as well. I have not had a lot of success removing a blade that had gotten bound up in a blank. It usually ends up with a kink that renders the blade useless. TOOTH STYLES So, let's take a look at some different configurations. The most common configurations available to woodturners are the regular tooth, the hook tooth, and the skip tooth. The regular tooth blade (see Figure 1) has straight faced, proportionally spaced teeth with deep gullets (spaces between the teeth) that remove the chips from the cut. It is generally used for cutting thinner, dry wood where a finer finish is required.
Figure 1 shows a general, all-purpose blade that would be good for cutting dry, thin wood. The hook tooth blade (see Figure 2) has widely spaced teeth that usually have a positive 10˚ undercut face, which helps the blade to feed into the wood and take a more aggressive cut. The gullets tend to curl the chips, which helps to prevent clogging. It is a good blade for cutting harder woods.
Figure 2 would be a good choice for cutting green wood blanks. The skip tooth (see Figure 3) is similar to the hook tooth but has a straight 90˚ tooth (with 0˚ rake angle) with a sharp angle at the intersection of the tooth and the gullet. This style of blade tends to break up the chips and is recommended for wet wood that tends to clog the blade.
Figure 3 is the recommended blade for cutting green wood turning blanks.
17
AAW | woodturner.org
AMERICAN ASSOCIATION OF WOODTURNERS
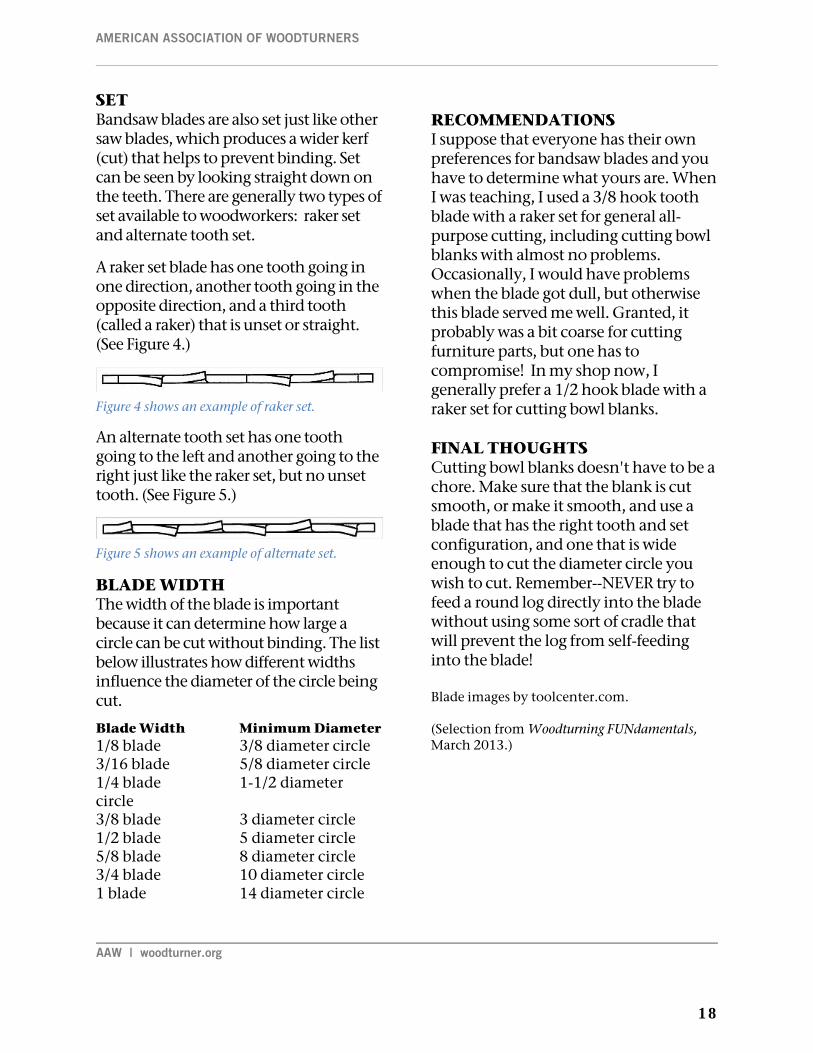
SET Bandsaw blades are also set just like other saw blades, which produces a wider kerf (cut) that helps to prevent binding. Set can be seen by looking straight down on the teeth. There are generally two types of set available to woodworkers: raker set and alternate tooth set.
A raker set blade has one tooth going in one direction, another tooth going in the opposite direction, and a third tooth (called a raker) that is unset or straight. (See Figure 4.)
Figure 4 shows an example of raker set.
An alternate tooth set has one tooth going to the left and another going to the right just like the raker set, but no unset tooth. (See Figure 5.)
Figure 5 shows an example of alternate set.
BLADE WIDTH The width of the blade is important because it can determine how large a circle can be cut without binding. The list below illustrates how different widths influence the diameter of the circle being cut.
Blade Width Minimum Diameter 1/8 blade 3/8 diameter circle 3/16 blade 5/8 diameter circle 1/4 blade 1-1/2 diameter circle 3/8 blade 3 diameter circle 1/2 blade 5 diameter circle 5/8 blade 8 diameter circle 3/4 blade 10 diameter circle 1 blade 14 diameter circle
RECOMMENDATIONS I suppose that everyone has their own preferences for bandsaw blades and you have to determine what yours are. When I was teaching, I used a 3/8 hook tooth blade with a raker set for general all-purpose cutting, including cutting bowl blanks with almost no problems. Occasionally, I would have problems when the blade got dull, but otherwise this blade served me well. Granted, it probably was a bit coarse for cutting furniture parts, but one has to compromise! In my shop now, I generally prefer a 1/2 hook blade with a raker set for cutting bowl blanks. FINAL THOUGHTS Cutting bowl blanks doesn't have to be a chore. Make sure that the blank is cut smooth, or make it smooth, and use a blade that has the right tooth and set configuration, and one that is wide enough to cut the diameter circle you wish to cut. Remember--NEVER try to feed a round log directly into the blade without using some sort of cradle that will prevent the log from self-feeding into the blade! Blade images by toolcenter.com. (Selection from Woodturning FUNdamentals, March 2013.)
18

SAFETY MESSAGE
AAW | woodturner.org
Video
Safety Tips: Be Safe, Be Smart, a video from the AAW 2013 Symposium in Tampa. In this video clip, Steven Marlow shares his experience with safety glasses and face shields. (TRT 1:23) Video link: http://vimeo.com/100206599 (Tip: If you have trouble accessing the video directly from this document, you may copy the video link and paste it directly into your browser.) A Note About Safety An accident at the lathe can happen with blinding suddenness. Respiratory and other problems can build over years. Take the appropriate precautions when you turn. Among the most important of these is the use of face shields, safety glasses, and dust masks. It is important to observe all manufacturers' safety guidelines. Following manufacturer's safety guidelines and information will help you continue to enjoy woodturning years into the future.
19