Embed Size (px)
Citation preview

7Ways NAVIGATION APP
USER GUIDE
ENGLISH VERSION version 1.0

1
Contents
Copyright notices ............................................................................................................................ 3
IMPORTANT SAFETY NOTICES AND WARNINGS .............................................................................. 4
Brief Details..................................................................................................................................... 5
Installation of App........................................................................................................................... 5
Android 2.2+ Operating System ............................................................................................................. 5
iOS Operating System ............................................................................................................................. 5
WinCE \ Windows Mobile operating system ........................................................................................ 5
Windows XP \ Vista \ 7 \ 8 Operating System....................................................................................... 5
Getting Started................................................................................................................................ 6
Main Control Elements and Buttons ............................................................................................... 7
Main menu: ............................................................................................................................................. 7
Search menu:........................................................................................................................................... 7
Settings menu: ........................................................................................................................................ 7
Map control: ............................................................................................................................................ 7
Page control: ........................................................................................................................................... 8
Load and control buttons: ...................................................................................................................... 8
Route control: ......................................................................................................................................... 8
Quick Menu: ............................................................................................................................................ 9
Route Quick Menu: ............................................................................................................................... 10
Main Menu ................................................................................................................................... 11
Search Menu ................................................................................................................................. 13
Address Search .............................................................................................................................. 13
Country .................................................................................................................................................. 15
Settlement ............................................................................................................................................. 17
Street ..................................................................................................................................................... 20
House ..................................................................................................................................................... 23
POI ................................................................................................................................................ 25
Coordinates ................................................................................................................................... 29
My POI Search ............................................................................................................................... 31

2
Find POI nearby ............................................................................................................................. 35
History .......................................................................................................................................... 38
Trip Computer ............................................................................................................................... 40
Settings ......................................................................................................................................... 42
Navigation Settings ............................................................................................................................... 44
Map Settings.......................................................................................................................................... 46
Interface Settings .................................................................................................................................. 49
GPS Settings........................................................................................................................................... 51
Map Settings ................................................................................................................................. 54
Map ........................................................................................................................................................ 55
Browse Map .......................................................................................................................................... 56
Map Control .......................................................................................................................................... 57
Map Mode .................................................................................................................................... 61
Day Colours / Night Colours ................................................................................................................. 62
Bottom information bar card ............................................................................................................... 63
Indicators on the Map ................................................................................................................... 65
Route Indicators .................................................................................................................................... 65
Permanent Indicators ........................................................................................................................... 66
Quick Menu ................................................................................................................................... 67
Route ............................................................................................................................................ 70
Find the Route ....................................................................................................................................... 71
Route Menu .................................................................................................................................. 77
Overspeed Alert ............................................................................................................................ 80
Application of the speedcam files ................................................................................................. 81

3
Copyright notices The 7Ways App is a trademark beneficially owned by Registration Centre LLC, Krasnoyarsk. All rights reserved. Great care was taken in preparing this Guide. Constant product development may mean that some information is not entirely up to date. The information in this document is subject to change without notice. ____________________________________________________________________________

4
Thank you for having chosen 7Ways Navigation App. We recommend exploring this Guide before starting to operate user-friendly and intuitive 7Ways Navigation App for even better understanding of the user interface and functions. ____________________________________________________________________________
IMPORTANT SAFETY NOTICES AND WARNINGS WARNING!
Even when using 7Ways App for navigation, you must drive with due care and attention. Start moving when you have customized the settings and found the route.
Plan the route before starting to move and stop moving if any changes to the route or settings are required.
Avoid looking at display when you are driving if you are not sure that it is safe.
Do not install a navigation device within the airbag deployment area and other improper areas to prevent impairment of driver's visibility and causing injuries in case of accident. Your route is untraceable because 7Ways Navigation App transmits no data on your location.

5
Brief Details The 7Ways Navigation App is a GPS-based multitasking system helping to find ways to the destination chosen. It provides your location, finds objects and addresses required, plans the best route and directs moving via display image and voice guidance. 7Ways Navigation App is designed for safe driving when you follow voice guidance paying no attention to navigator display. ____________________________________________________________________________
Installation of App
Android 2.2+ Operating System To download the app, go to play.google.com You can also install the app, if you download the 7ways.apk setup file from the official web-site www.navikey.ru Copy the 7ways.apk file to your device. Run the file. Installation of the 7Ways App will start. Icon of the 7Ways App will appear in the list of the icons after installation
7ways
iOS Operating System Download the app from AppleAppStore. Icon of the 7Ways App will appear on desktop of your device
7ways
WinCE \ Windows Mobile operating system Copy the program folder to the data store of your device. Run the 7ways.exe file from the 7ways folder.
Windows XP \ Vista \ 7 \ 8 Operating System

6
Copy the program folder to the data store of your device. Run the 7ways32.exe file from the 7ways folder. Create shortcut for the 7ways32.exe file to run the app in window with the definition required. Change the shortcut properties (right mouse button, properties) The required definition is set after the file name via blank space. Example: \7ways32\7ways32.exe 800 480
Getting Started
Tap respective button on your device to start the App. You will see Main Menu after splash screen and program load.
When you start the App for the first time, it may need to customize settings of GPS/Glonass receiver (see Chapter "GPS Settings") Please, explore main control elements and buttons before starting to use the App.

Main Control Elements and Buttons
Main menu:
About
Map
Exit
Search
Settings
Trip Computer
Route Options
Search menu:
Address
POI
Coordinates
History
Settings menu:
Navigation settings
Map settings
Interface settings
Equipment settings
Map control:
Find Location
Zoom out
Zoom in
Tilt the Map up

8
Tilt the Map down
Browse Map
Page control:
Go to Menu
Speedometer/Quick Menu
Current Manoeuvre Indicator/Route Quick Menu
Complete Editing/Accept
Cancel/Exit Menu/Close
Go to previous page
Satellite Signal Indicator / Equipment Settings
Load and control buttons:
Keyboard
Delete a Symbol
Clear the input field
Hide the keyboard
Function on
Function off
Inactive buttons
Automatic data insert
Route control:
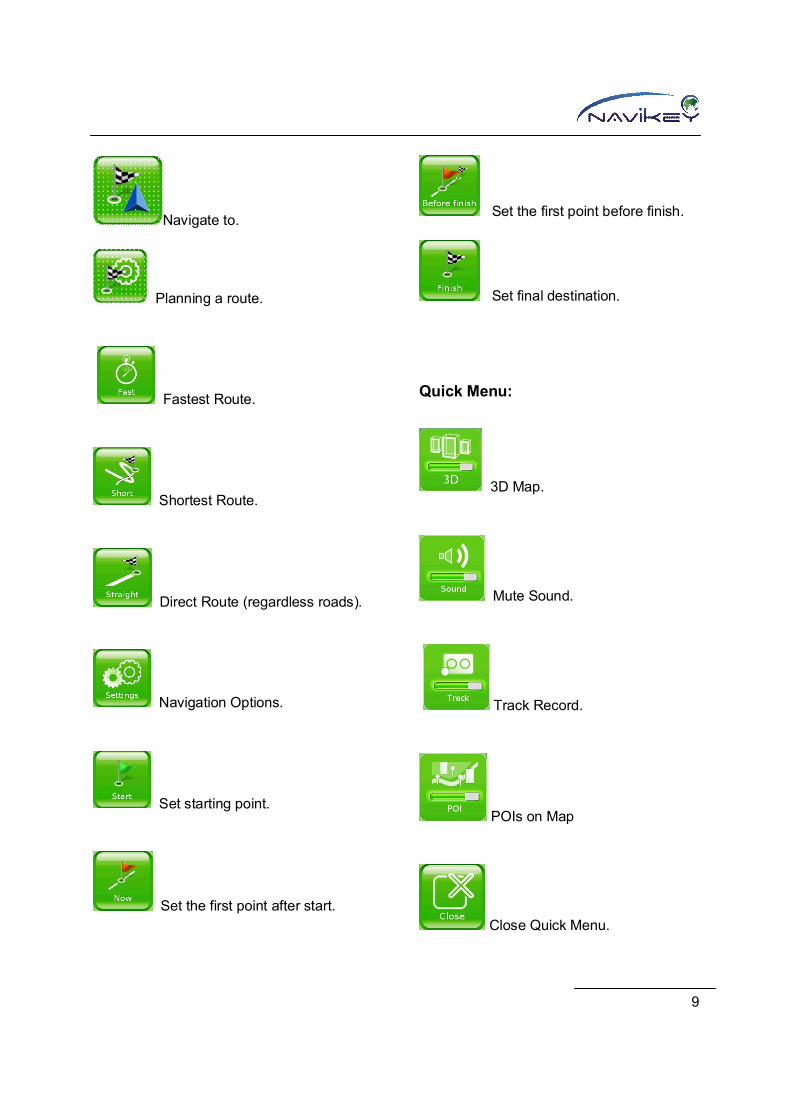
9
Navigate to.
Planning a route.
Fastest Route.
Shortest Route.
Direct Route (regardless roads).
Navigation Options.
Set starting point.
Set the first point after start.
Set the first point before finish.
Set final destination.
Quick Menu:
3D Map.
Mute Sound.
Track Record.
POIs on Map
Close Quick Menu.
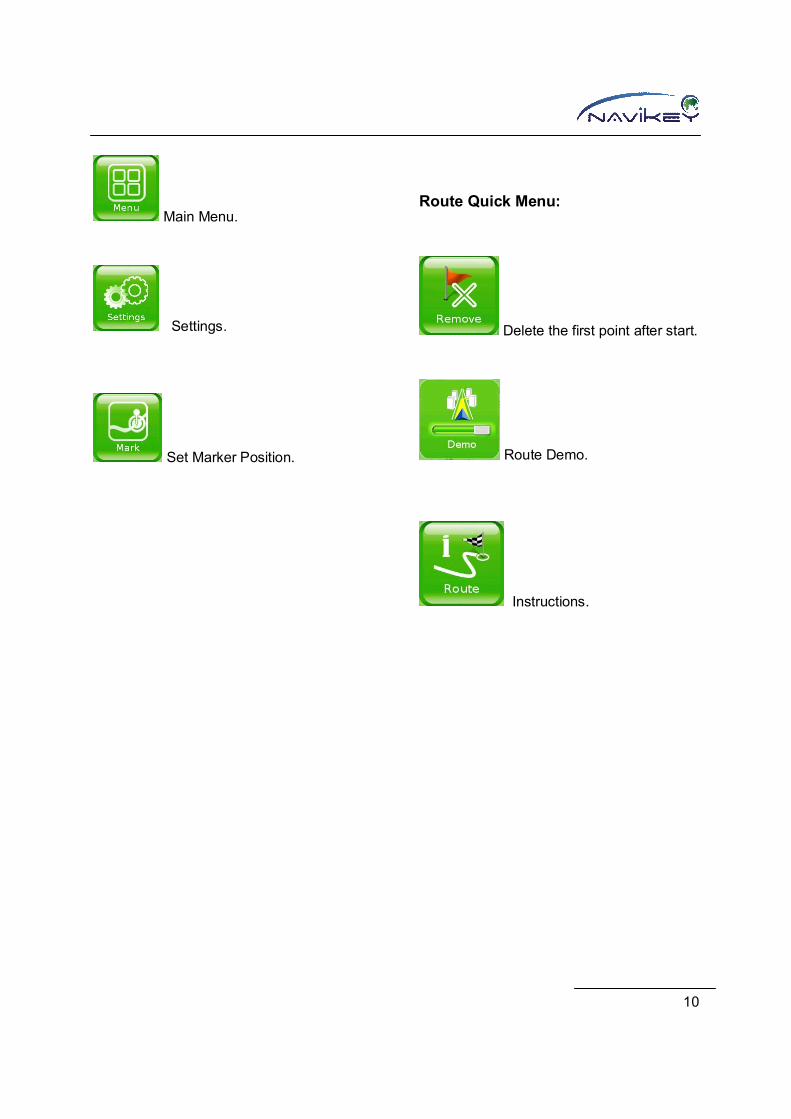
10
Main Menu.
Settings.
Set Marker Position.
Route Quick Menu:
Delete the first point after start.
Route Demo.
Instructions.

11
Main Menu
The following menus are available in Main Menu:
SEARCH
TRIP COMPUTER
SETTINGS
ROUTE OPTIONS Select a menu item to go to respective page.

12
To exit the App, press
(EXIT) in the bottom-left corner of the screen. To go to the map, tap
(MAP) in the upper right corner of the screen.
(About) Tap About to see information about the application.

13
Search Menu
Search Menu is one of the most important items of the App. You can find a destination by its address details, name, group and coordinates. Option Find POI nearby is also available. All points selected are saved and stored in history. To make use of these points, tap History. ____________________________________________________________________________
Address Search To start address search, tap SEARCH in the Main Menu of the App. Then tap Address. Page for selecting the address is open. You are asked to select address details starting with country. After country, please, select settlement, street and house number.

14
Tip! The first time you use the App, all the fields with address details are blank. Then the fields with data are saved for future use and adjustable, when required. _______________________________________________________________________
Automatic Data Insert For automatic data insert, tap
(AUTOMATIC DATA Insert). The App needs good GPS reception for correct operation of this function. When connection is set, tap this button to enter positioning information into respective fields. Otherwise, the App enters information on the point in the centre of the map.

15
Country
To start typing the name of country, tap COUNTRY button in Address Search Menu.
Sequentially type each letter of the name of country.
Tip! As you type, the names of the countries that match what you have typed are shown. Searching with the first symbol only may take some time.

16
If map includes the name of required country, it will appear in the top line. Tap
(HIDE THE KEYBOARD), to observe the list of all country names including the letters typed. Tap the screen to open keyboard. If the country name is incorrect, delete the symbols and enter the name correctly. To delete a symbol, tap
(DELETE A SYMBOL). To delete all symbols, tap
(DELETE ALL SYMBOLS).
You can drag the list up and down. Tap respective line or select the required country and tap
(COMPLETE EDITING/ACCEPT).

17
Settlement
To start typing the name of settlement, tap SETTLEMENT in the Address Search Menu.
Sequentially type each letter of the name of required settlement.
Tip! As you type, the names of the settlements that match what you have typed are shown. Searching with the first symbol only may take some time. If map includes the name of required settlement, it will appear in the top line.
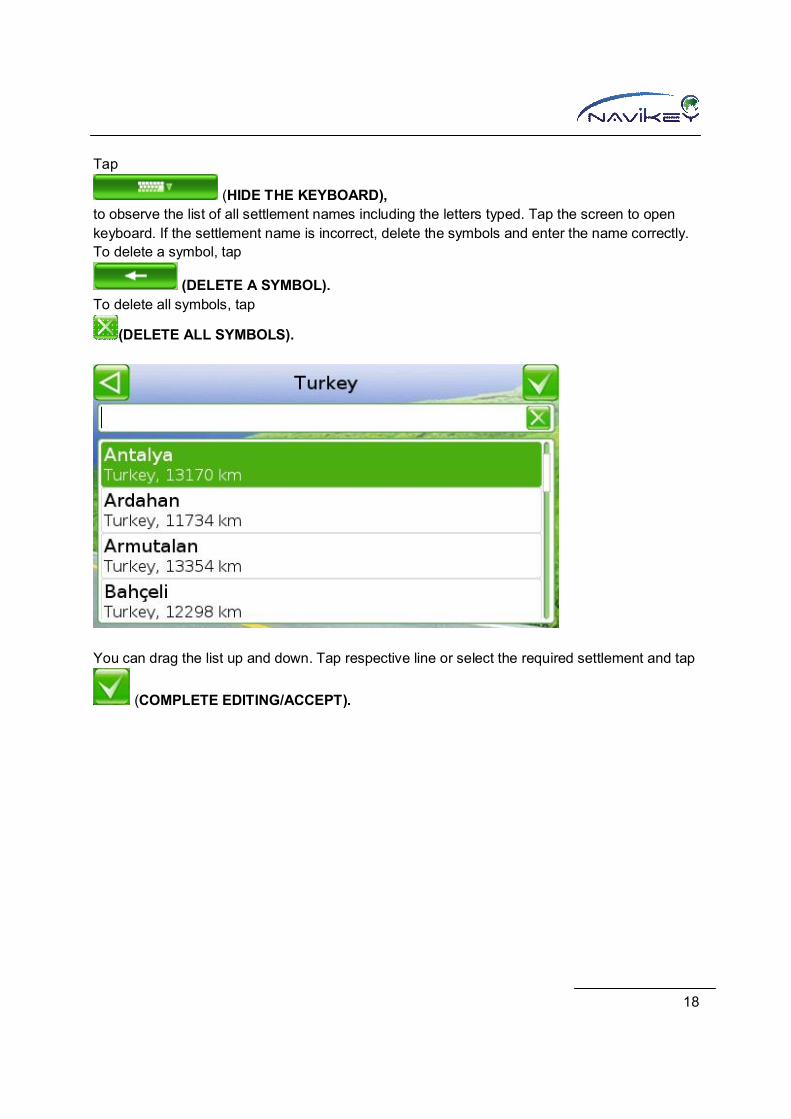
18
Tap
(HIDE THE KEYBOARD), to observe the list of all settlement names including the letters typed. Tap the screen to open keyboard. If the settlement name is incorrect, delete the symbols and enter the name correctly. To delete a symbol, tap
(DELETE A SYMBOL). To delete all symbols, tap
(DELETE ALL SYMBOLS).
You can drag the list up and down. Tap respective line or select the required settlement and tap
(COMPLETE EDITING/ACCEPT).

19
If you need to enter no further address details (name of street and house number) after the name of settlement, you may tap
(COMPLETE EDITING/ACCEPT) and the App will go to the settlement selected.
____________________________________________________________________________

20
Street
To start typing the name of street, tap STREET in the Address Search Menu.
Sequentially type each letter of the name of the required street.
Tip! As you type, the names of the streets that match what you have typed are shown. Searching with the first symbol only may take some time.

21
If map includes the name of required street, it will appear in the top line. Tap
(HIDE THE KEYBOARD), to observe the list of all street names including the letters typed. Tap the screen to open keyboard. If the street name is incorrect, delete the symbols and enter the name correctly To delete a symbol, tap
(DELETE A SYMBOL). To delete all symbols, tap
(DELETE ALL SYMBOLS).
You can drag the list up and down. Tap respective line or select the required street name and tap
(COMPLETE EDITING/ACCEPT).

22
If you do not need to enter further address details (house number) after the name of street, you may tap
(COMPLETE EDITING/ACCEPT) and the App goes to the map with the street marked.
____________________________________________________________________________

23
House
To start typing the house number, tap HOUSE in the Address Search Menu.
Sequentially type each number and letter of the house required. If map includes the required house number, it will appear in the top line. Tap
(HIDE THE KEYBOARD), to observe the list of all house numbers including the symbols typed.

24
Tap the screen to open keyboard. If the house number is incorrect, delete the symbols and enter the number correctly To delete a symbol, tap
(DELETE A SYMBOL). To delete all symbols, tap
(DELETE ALL SYMBOLS).
You can drag the list up and down. Tap respective line or select the required house number and tap
(COMPLETE EDITING/ACCEPT).

25
When the address details are complete, the App automatically goes to the map where selected house is highlighted with red.
POI
Selecting POI includes searching for objects, places and points of prime importance and significance for drivers and pedestrians, including FUEL STATIONS, GAS FILLING STATIONS, CAFES, CHEMISTRIES, CINEMAS, SHOPS, TRADE CENTERS, RESTAURANTS, LAKES, CAMPINGS, SIGHTSEEINGS and many more. If these objects are indicated on the map, you may find them by navigating to a POI . To enter the POI, tap SEARCH in the Main Menu. Tap POI . Some points of interest are grouped by their main features. These groups are indicated by respective icons in the menu. POI can be found by typing the first letters of its name. Tap the screen to open keyboard. Sequentially type each letter of name of the required POI.
Tip! As you type, the names of POIs that match what you have typed are shown. Searching with the first symbol only may take some time. If map includes the required POI, it will appear in the top line.

26
If the App has shown your current position on the map, the nearest POI appears in the top line, the next nearest POI is one line down in the list. And so forth.
So, to find the nearest FUEL STATION you need to type FUEL STATION in the input field, and the nearest station will appear in the top line of the list. The distance to POI is indicated near its name.

27
Tip! If box of the search settings is checked
and the route has been already selected, the App finds POIs nearby the selected route only. So, the number of POIs found is considerably decreased, but their priority is much higher. You find them on your route and spend no extra time.
Tap
(HIDE THE KEYBOARD), to observe the whole list of POIs which names include the letters typed. Tap the screen to open keyboard. If the name is incorrect, delete the symbols and enter the name correctly. To delete a symbol, tap
(DELETE A SYMBOL). To delete all symbols, tap
(DELETE ALL SYMBOLS).

28
You can drag the list up and down. Tap respective line or select the required POI and tap
(COMPLETE EDITING/ACCEPT).
The App automatically goes to the map with the special sign indicating the POI required in the centre of display. ____________________________________________________________________________

29
Coordinates
This function is designed for searching points by precise setting of their location within one of coordinate systems. To start searching with coordinates tap SEARCH in the Main Menu. Tap COORDINATES . Sequentially type all symbols and numbers in the respective fields. If you have made a mistake in the sequence of fields, tap
(INTERCHANGE THE INPUT FIELDS). Upon completion tap
(COMPLETE EDITING/ACCEPT). Tap the screen to open keyboard. If the name is incorrect, delete the symbols and enter the name correctly. To delete a symbol, tap

30
(DELETE A SYMBOL). To delete all symbols, tap
(DELETE ALL SYMBOLS). Tap
(COMPLETE EDITING/ACCEPT)
and the App automatically goes to the map with the POI indicated in the centre of display by a special sign. ____________________________________________________________________________

31
My POI Search
The POIs set by User can be found in this menu. Here you may move to the menu for editing attributes of the selected POI. Hold the highlighted line selected or move your finger to the right or to the left over the line selected, to open buttons for editing and deleting the POI.

32
Tap
(DELETE) to delete the point selected. Tap
(CHANGE) to start editing the point.
Sequentially fill in the fields.

33
Select an icon:
Completing of the fields:

34
The fields completed:
Tap
(COMPLETE EDITING/ACCEPT) when all fields are filled in correctly. If you need to delete this point, tap
(DELETE)
Drag the list of points up and down. Tap the line required and the App automatically goes to the map with the POI indicated by a special sign in the centre of display.

35
____________________________________________________________________________
Find POI nearby
This menu offers a list of POIs near to your current location. The nearest POIs appear in the top lines. Hold the highlighted line selected or move your finger to the right right or to the left over the line selected, to open buttons for editing and deleting the POI.

36
Tap the information button, to see information about the point.
The found POIs can be filtered by checking the box "Along Route". When the box is checked, you will see the POIs along your planned route only.
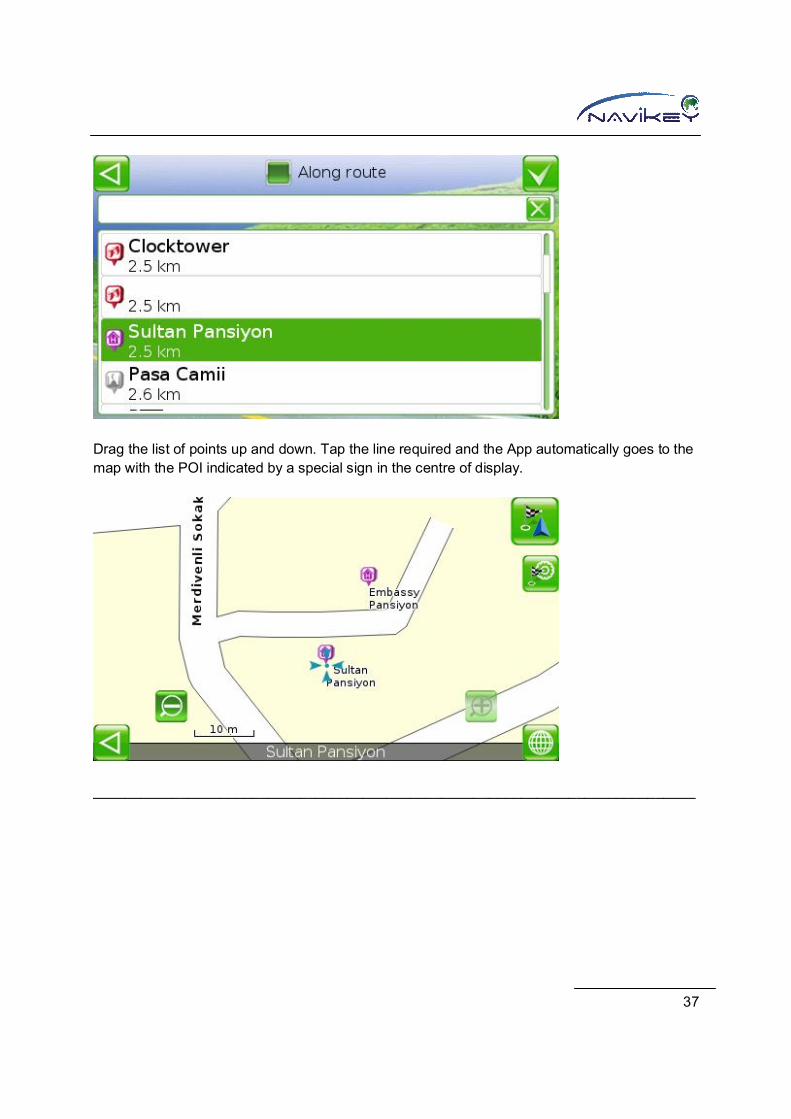
37
Drag the list of points up and down. Tap the line required and the App automatically goes to the map with the POI indicated by a special sign in the centre of display.
____________________________________________________________________________
38
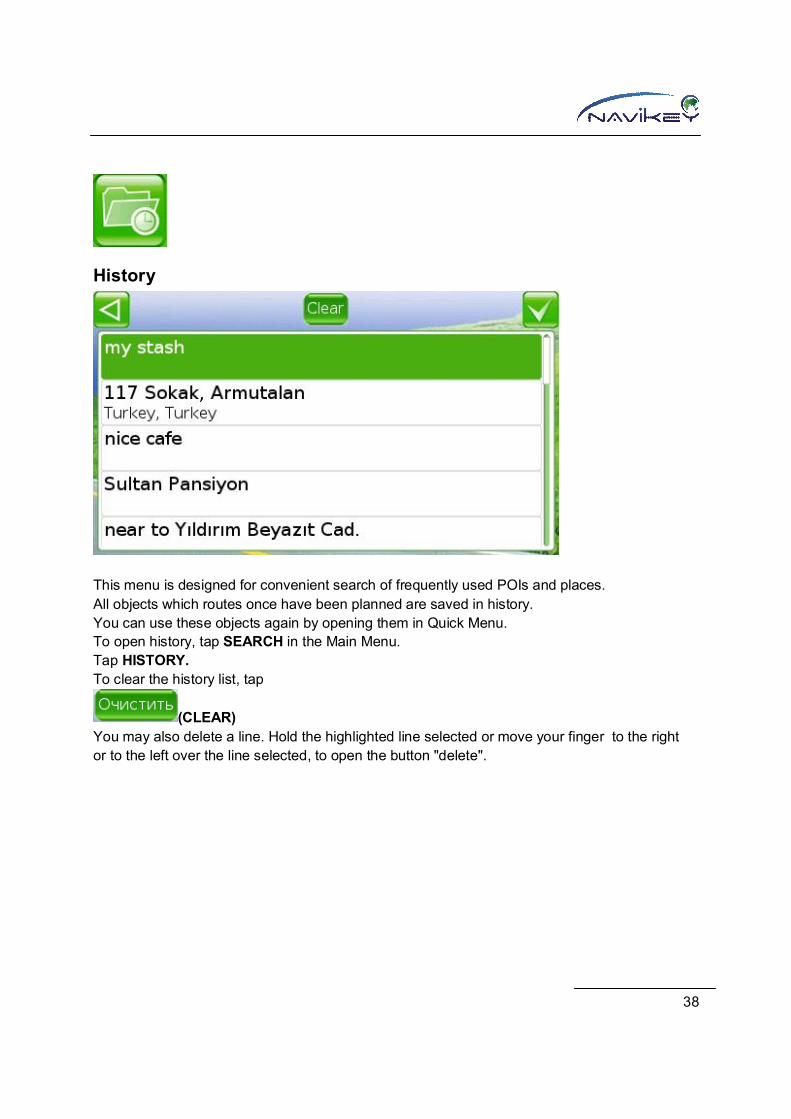
History
This menu is designed for convenient search of frequently used POIs and places. All objects which routes once have been planned are saved in history. You can use these objects again by opening them in Quick Menu. To open history, tap SEARCH in the Main Menu. Tap HISTORY. To clear the history list, tap
(CLEAR) You may also delete a line. Hold the highlighted line selected or move your finger to the right or to the left over the line selected, to open the button "delete".

39
You can drag the list up and down. Tap the object, to select it, and tap
(COMPLETE EDITING/ACCEPT).
The App automatically goes to the map with the place indicated by a special sign in the centre of display.

40
Trip Computer
The Trip Computer provides information from indicators, and allows to customize the list of indicators. To open the trip computer, tap TRIP COMPUTER in the Main Menu. List and description of trip computer indicators, from left to right: 1. General ODOMETER summarises distance passed from start of the App use. The readings are non-zeroing. 2. Odometer (traffic jam) summarises distance passed with the speed from 5 to 10 km/h (in traffic jams) from the moment of setting indicator to zero. The readings can be set to zero. 3. Resettable ODOMETER summarises distance passed from the moment of setting the indicator to zero. The readings can be set to zero. 4. Travelling time summarises total time of trip. The readings can be set to zero. 5. Out-of-Travel Time summarises time with no movement performed. The readings can be set to zero. 6. Traffic jam time summarises time with travelling speed from 5 to 10 km/h (traffic jams). The readings can be set to zero.

41
7. Maximum speed shows maximum speed from the moment of setting the indicator to zero. The readings can be set to zero. 8. Average travelling speed shows average travelling speed calculated for the period from setting the indicator to zero till current moment. The readings can be set to zero.
To customize the indicator, tap it. To set the readings to zero, select ZERO THE INDICATOR Any indicator can be replaced with the required one. To select an indicator, tap SELECT AN INDICATOR Selection of indicators

42
List of indicators includes three main categories. 1. Indicators of trip computer A are marked with letter A 2. Indicators of trip computer B are marked with letter B 3. Main odometer is a non-zeroing indicator. To select an indicator, tap it and tap
(COMPLETE EDITING/ACCEPT). And the indicator selected from the list will replace the indicator in trip computer.
Indicators of category В are marked with another colour. To exit this menu, tap
(CANCEL/EXIT MENU ITEM/CLOSE) ____________________________________________________________________________
Settings

43
To open the settings menu, tap SETTINGS in the Main Menu. The settings are subdivided into four main groups:
NAVIGATION SETTING
MAP SETTINGS
INTERFACE SETTINGS
EQUIPMENT SETTINGS

44
Navigation Settings
To open the navigation settings, tap PROGRAM SETTINGS in the Main Menu. Tap NAVIGATION SETTINGS. FASTEST ROUTE - when the setting is on, planning of the route considers speed limit, if known. Herewith, the route is set at the fastest roads. When the setting is off, the route is set at the shortest way. AVOID EARTHROADS - the setting is designed for planning the routes at the roads marked as "hard surfaced" only. If the setting is on, the route never includes earthroads when other roads are available. If map provides no opportunities for planning a route with the earthroads avoided, the route may include them. AVOID U-TURNS - when the setting is on, the route includes no U-turns. This function is especially helpful in the busy city streets. In case of any deviation from the route, the App re-plans the route considering bypass roads and no U-turns. TRACK RECORD - the setting for recording tracks into device data store.

45
* Track is a group of points showing the way passed in the form of line on the map. Track is recorded in the data store as a file. You can use the track for detailed studying of the way passed if you load it into the programs working with tracks. OVERSPEED INDICATOR - special indicator on the map display that shows speeding of the rate specified in the map file for respective road section. SHOW THE ROUTE – the setting allows to see the whole route after its planning. To save your settings, tap
(COMPLETE EDITING/ACCEPT). To exit the interface settings without saving, tap
(CANCEL/EXIT MENU/CLOSE) ___________________________________________________________________________

46
Map Settings
To open the map settings, tap PROGRAM SETTINGS in the Main Menu. Tap MAP SETTINGS. ATLAS – selection of map or atlas. To go to the selection of atlas, tap the field with atlas name.

47
To select atlas with map, tap respective line. TURN ROUTEWISE - the setting for 2D Map. When the setting is off, the map is always in the "North-Up" mode. When the setting is on, the map moves so that your current direction is always at the top of the screen. AUTO-ZOOM - the setting automatically adjusts the area of the map due to speed or distance to manoeuvre or place. SHOW THE TRACK - when setting is on, the track recorded is shown on the display. * Track is a group of points showing the way passed in the form of line on the map. Track is recorded in the data store as a file. You can use the track for detailed studying of the way passed if you load it into the programs working with tracks. For more efficient work of the App, only the last 10,000 points are shown. The App records about one point per second, so, about 2.5 hours of trip will be shown. SMOOTH LINE - the function is designed for improved perception of the map and its objects. Though, this processor consuming setting is inappropriate for slow devices and highly detailed maps. If processor of your device is slow and you see a delay in image, disable this setting. SMOOTH MOVING - when the setting is on, cursor moves smoother on display. Map will move softly on display.

48
If processor of your device is slow and you see a delay in image, disable this setting. SMOOTH ROTATION - the setting improves image when the map is rotated on display at the moments of turning movement and manoeuvres. If processor of your device is slow and you see a delay in image, disable this setting. PULL TO ROAD - the setting negates errors for location of position on the map. When you are within 100 meters from the road, you will be positioned in the road. But the track will be recorded due to coordinates determined (actual position). When the setting SHOW THE TRACK is on, sometimes you can see that your location and the track are different. POI – the setting enables/disables screen imaging of points of interest (fuel stations, chemistries, banks, traffic lights, etc.) SHOW SPEEDCAMS – when the setting is on, you see alerts about speed bumps, overspeeding, indicated road irregularities, etc. For correct operation of the function Speedcam folder shall include a file with the list of alerts (speedcam.txt) To save your settings, tap
(COMPLETE EDITING/ACCEPT). To exit the map settings, tap
(CANCEL/EXIT MENU/CLOSE) ___________________________________________________________________________

49
Interface Settings
To open the interface settings, tap PROGRAM SETTINGS in the Main Menu. Tap INTERFACE SETTINGS. FIRST LETTER SEARCH - the setting disables search of the typed word in any part of the line. When the setting is off, search can be slower but provides more results. EDIT "MY PLACE" - when the setting is on, you can edit the point marked as "My Place No." after setting this point. VOLUME - move the slider on the bar to control sound. Left-most position correspond to the minimum volume, right-most - to the maximum one. To mute the sound, check the box

50
(MUTE SOUND). To improve perception of the sound guides and program sounds, you can apply any scheme you like selected from the drop-down list of the sound schemes. KEEP ENLIGHTED - the setting prohibits to switch off the lighting of display. Check the box to keep display enlighted. SKIN - the file allows to change the App appearance. Colour, form of control elements, buttons, separate objects, etc. To change the App appearance, choose the skin you like. MODE - select the required mode for display lighting. Available modes: Day - the App is always shown in day mode (maximum brightness of the menu items and map). Night - the App is always shown in night mode (brightness of menu items and map is adjusted to use the App at night). Auto - automatic change of lighting mode. The App switches modes automatically due to the change of day time, from day to night and vice versa. LANGUAGE - choose language of the App. LAYOUT - the setting allows to choose layout of the keyboard. SYSTEM KEYBOARD (for Android and iOS operating systems) - check the box to use the system keyboard of your operating system. To save your settings, tap
(COMPLETE EDITING/ACCEPT). To exit the interface settings without saving, tap
(CANCEL/EXIT MENU/CLOSE) ___________________________________________________________________________

51
GPS Settings IMPORTANT!
Layout of the window can vary for different operating systems. iOS and Android operating systems require no setting of satellites.
To open the GPS settings, tap PROGRAM SETTINGS in the Main Menu. Tap GPS SETTINGS.

52
Satellite Signal Indicator.
This setting allows to adjust consumption of rechargeable battery for your device when you use the 7Ways App.
The following modes are available: LOCATE - when the App is in the background mode (folded), the position is located and track is recorded. WHEN RECHARGED - if the App is in the background mode (folded) and charger is operating, the position is located and track is recorded. When charger is not operating, the App disables finding the position in the background mode. NOT LOCATE - when the App is in the background mode, position is not located and track is not recorded. To use the App with no position located, uncheck the box.
Tap the button to set the port number and speed automatically in WinCE, Windows Mobile, XP, Vista, 7 and 8 operating systems.
The App connects your receiver and shows settings in the fields PORT and SPEED, respectively. The text box "Disconnected" will be replaced by "Connected". You can type the port number and speed by hand when automatic connection is unavailable. Uncheck the box "Use API". The fields PORT and SPEED will be available for editing. So, you will be able to enter the COM number of the port of your equipment and speed in respective fields. Tap the screen to open keyboard.

53
Sequentially fill in all symbols of the port number in the field PORT and its speed - in the field SPEED. Tap
(HIDE THE KEYBOARD), to hide the keyboard on display. Tap the screen to open keyboard. If the number incorrect, delete the symbols and enter the number correctly. To delete a symbol, tap
(DELETE THE SYMBOL) To delete all symbols, tap
(DELETE ALL SYMBOLS). To make use of automatically controlled port of the API - system, check the box.
When you do not use API uncheck the box. To enable auto adjustment of the system time in your device to the time obtained from satellites, check the box
(ADJUST THE SYSTEM TIME)
Tip! Sometimes, the time determined by the satellites does not comply with the time set in you device due to the difference in time zone settings.

54
If you take note of such difference, turn off adjustment of time. To save your settings, tap
(COMPLETE EDITING/ACCEPT). To exit the GPS settings, tap
(CANCEL/EXIT MENU/CLOSE) ____________________________________________________________________________
Map Settings
The map is designed for displaying image of surroundings with all objects significant for this place. You can see buildings, roads, rail roads, water reservoirs, bridges, names of street, house numbers, points of interest (POI), etc. on the map of settlement.
Map Modes

55
The map is available in two main modes:
Map
Browse Map ___________________________________________________________________________
Map
To move to the map mode, tap
(MAP) This mode is designed for improved perception of the moving on the map. The map in this mode enhances real feelings of moving forward and turning left and right. Zoom, tilt and rotation buttons are available in this mode. Tap the screen and the selected point

56
will be marked by blinking cursor. Though, this mode plans no routes for the points selected. To plan the route for the point selected, make use of:
Browse Map
To move to the browse map mode, tap
(BROWSE MAP) The map operates in two modes: TOP VIEW, NORTH-UP. Tilt and rotation of the map are unavailable in this mode. This mode is designed for visual search of the required objects or points, quick moving on the map and zooming. If you tap the screen, the point selected is indicated with a blinking cursor and buttons for planning a route become available.

57
Map Control You can control the map on display. Some control elements in the form of buttons are available with this aim. Set up zooming and tilt of map as you like with help of following buttons:
(ZOOM OUT)
Zooming of the map can be increased. Then the map moves away. Area of the displayed surface increases. Small objects disappear.

58
( ZOOM IN)
Zooming of the map can be decreased. Then the map moves closer. Area of the displayed surface decreases. Small objects appear on the map.

59
In the Map Mode:
(TILT THE MAP UP)
When you tap this button, the map tilts up.

60
(TILT THE MAP DOWN)
When you tap this button, the map tilts down. ___________________________________________________________________________ Moving of the Map on Display You can move the map on display with your finger. You can rotate the map right and left by moving it with your finger in the top part of display (1/3 from the top edge). ___________________________________________________________________________

61
Map Mode
The App determines your location and indicates it on the map when receives data from the satellites. If you do not move, your position is indicated as a point in the centre of display. When you start moving, your position is marked with an arrow. The arrow points the direction of your trip When the setting TURN ROUTEWISE is on, the map is rotated in accordance with your movement.

62
Day Colours / Night Colours Day colours of the map.
63
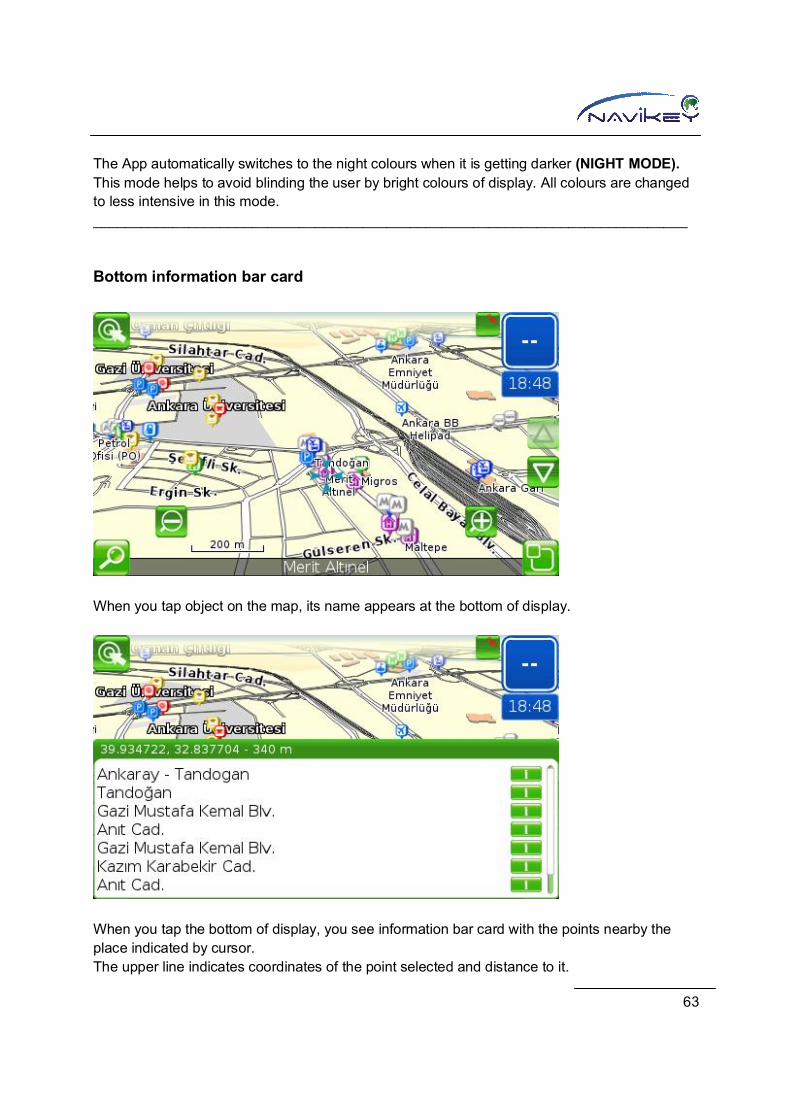
The App automatically switches to the night colours when it is getting darker (NIGHT MODE). This mode helps to avoid blinding the user by bright colours of display. All colours are changed to less intensive in this mode. ___________________________________________________________________________
Bottom information bar card
When you tap object on the map, its name appears at the bottom of display.
When you tap the bottom of display, you see information bar card with the points nearby the place indicated by cursor. The upper line indicates coordinates of the point selected and distance to it.
64
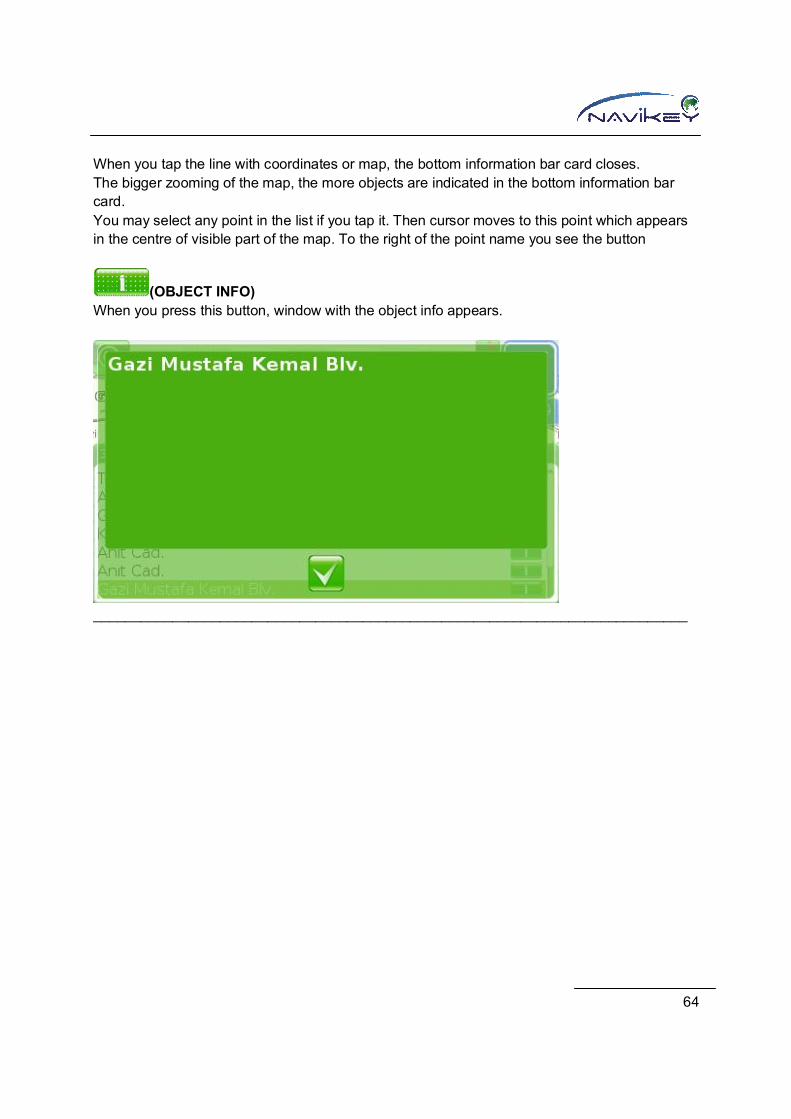
When you tap the line with coordinates or map, the bottom information bar card closes. The bigger zooming of the map, the more objects are indicated in the bottom information bar card. You may select any point in the list if you tap it. Then cursor moves to this point which appears in the centre of visible part of the map. To the right of the point name you see the button
(OBJECT INFO) When you press this button, window with the object info appears.
___________________________________________________________________________

65
Indicators on the Map
Some indicators are located on the map display. __________________________________________________________________________
Route Indicators
CROSSROAD SCHEME Indicator shows the nearest manoeuvre on your route. Indicator is on the screen only when the route has been selected.
DISTANCE TO MANOEUVRE Indicator shows the distance to the nearest manoeuvre on your route. Indicator is on the screen only when the route has been selected.

66
DISTANCE TO FINISH Indicator shows the distance to the final point of the route selected. Indicator is on the screen only when the route has been selected.
TIME OF ARRIVAL AT FINISH Indicator shows time of arrival at final point of the route selected. Indicator is on the screen only when the route has been selected. ____________________________________________________________________________
Permanent Indicators
CURRENT SPEED Indicator shows current speed. Indicator is permanently on display.
TIME Indicator shows current time in 24-hours format. Indicator is permanently on display. ____________________________________________________________________________

67
Quick Menu
To move to Quick Menu, tap the button
(QUICK MENU / SPEEDOMETER) in the upper right corner of display. Quick Menu makes available the most important or permanently used settings and control elements:
Imaging of map in 2D\3Dmode. When the mode is on, the button is of green colour. When off - grey.
The Sound on/off settings. When the sound is on, the button is of green colour. When off - grey.

68
The Track Record on/off settings. When the track record is on, the button is of green colour. When off - grey.
The map Spec on/off. When the map specification is high, the button is of green colour. When low - grey.
Quick Menu Close button.
Move to Main Menu .
Move to Settings Menu .
Button of the Point quick saving. When you tap this button, the App saves your location on the map as a special point named “MY PLACE No.” If the setting my place direct editing is on, menu for editing the point opens when you tap the button "cancel".

69
Each tap adds new point with a new number.

70
Route
The main function of the App is Find the Route. The route allows you to follow the way selected by yourself or offered by the App as the best one. The route can be selected on the shortest or fastest basis. 1. Fastest Route - the route takes note of many factors. Such as, type and category of the roads, speed-limits and distance. This type of finding the route is recommended for automobile navigation, because the App precisely calculates the way and offers the best route. 2. Shortest Route - the route does not consider type, category of roads and speed limit. The shortest road route will be found with regard to the shortest distance only. This type of finding the route is recommended for off-road navigation. You can select type of planning a route in navigation settings.

71
Find the Route
To find the route, you have to select a point on the screen. Please, make use of search or select an object via Browse Map.
When you selected an object or point, the App offers you to find the route. In the upper left corner of display you will see buttons of planning a route.

72
(START MOVEMENT TO FINISH) Button of finding the route and starting movement on the route.
Example: Tap this button, if you need to arrive to the place selected with no stops at other places. Application will find the route and immediately start to follow the route. In the upper left corner of display you will see the route indicators.

73
(ADVANCED PLANNING)
If your route has several places to be included, move to advanced menu for finding the route.
Button for planning the route with regard to roads with maximum speed limit. The route will be set on the fastest way.
Shortest Route. Speed limit is of no importance herewith.
Direct Route. The route considers no roads. Direct line to finish will be set from point of your location or starting point.

74
Set Starting Point. When you set the starting point, your location is ignored and the route shall start from the point selected.

75
Set the first point after start.
Set the first point before finish.
76
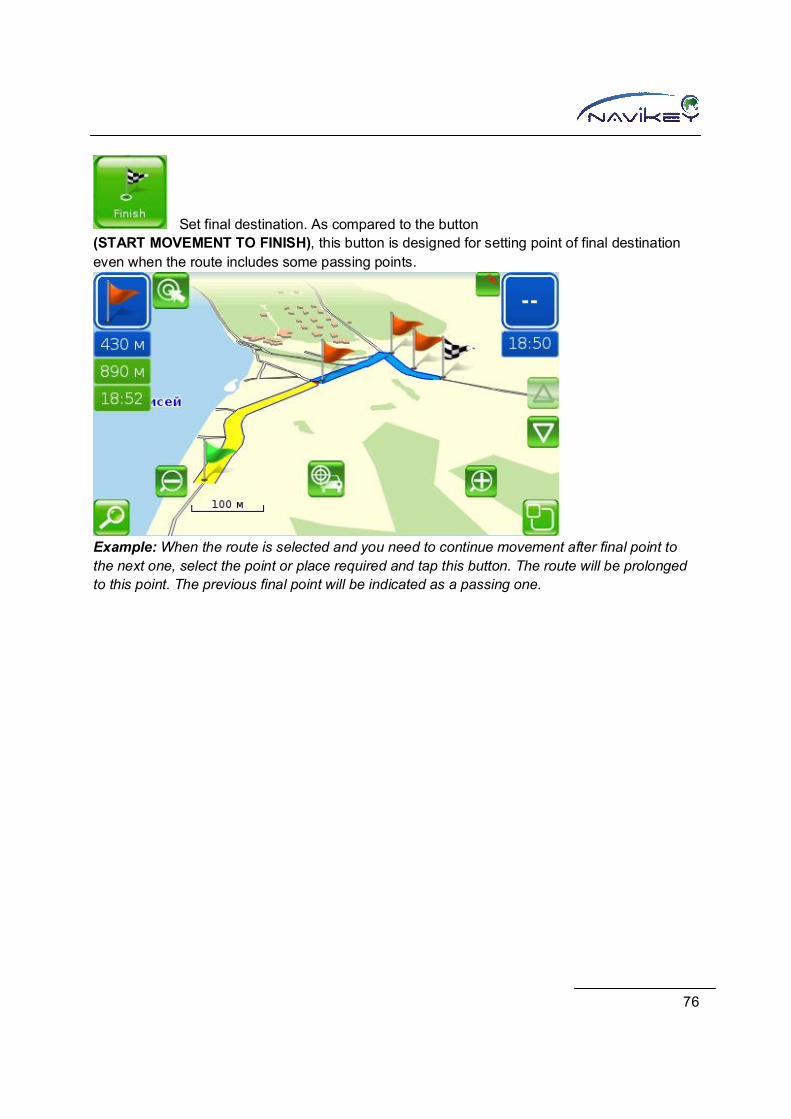
Set final destination. As compared to the button (START MOVEMENT TO FINISH), this button is designed for setting point of final destination even when the route includes some passing points.
Example: When the route is selected and you need to continue movement after final point to the next one, select the point or place required and tap this button. The route will be prolonged to this point. The previous final point will be indicated as a passing one.

77
Route Menu
The Route Settings Menu allows you to see the route selected and explore each manoeuvre. To open the route settings menu, tap the button SETTINGS in the Main Menu. Tap the button ROUTE OPTIONS. You can also open the route settings menu, if you tap the indicator

78
(CROSSROAD SCHEME) in the upper left corner of display.
Remove present target Button for removing point which is the first on the route.
Route Demo Tap this button to watch the demo of the trip or to stop the demo.
Route Details Button for moving to details about whole route and its specific manoeuvres.

79
Tap the button
(ON THE MAP) to see the whole route in separate window.
To delete the route, tap the button
(DELETE THE ROUTE) Tap the line with a manoeuvre, to go to the window for watching this manoeuvre on the map.

80
Overspeed Alert Enable this setting in MENU/OPTIONS/NAVIGATION/overspeed indicator, to make use of this function. If you current speed is 10 km/h higher than the speed indicated on the map, the sign with number will be shown on display. This number corresponds to the speed specified on the map.

81
Application of the speedcam files
To operate this function correctly, copy file with the speedcam data in \7ways\speedcam folder. Enable speedcam markers imaging via MENU/OPTIONS/MAP/show speedcams . This function requires no planning of the route. When moving, the App will show on display and provide audio guidance, if any alerts are on your route. Image of respective speedcam point and distance to it are shown in the upper right corner of the map display. The sign installed on the road appears on the map.
82
We wish you the open ways and great pleasure of making use of our App. look beyond the horizon…
with application 7Ways!
____________________________________________________________________________ This Guide describes operation of the 7Ways App RUSSIAN VERSION 1.0 The Application and information provided in this Guide are subject to change without notice. ____________________________________________________________________________ If you take note of inaccuracy in application description or any discrepancies of application and guide, please, be so kind to inform the Navikey support service. Support Service: [email protected] The Application web-site: www.navikey.ru User support forum: http://forum.navikey.ru/
November 2012