Embed Size (px)
Citation preview
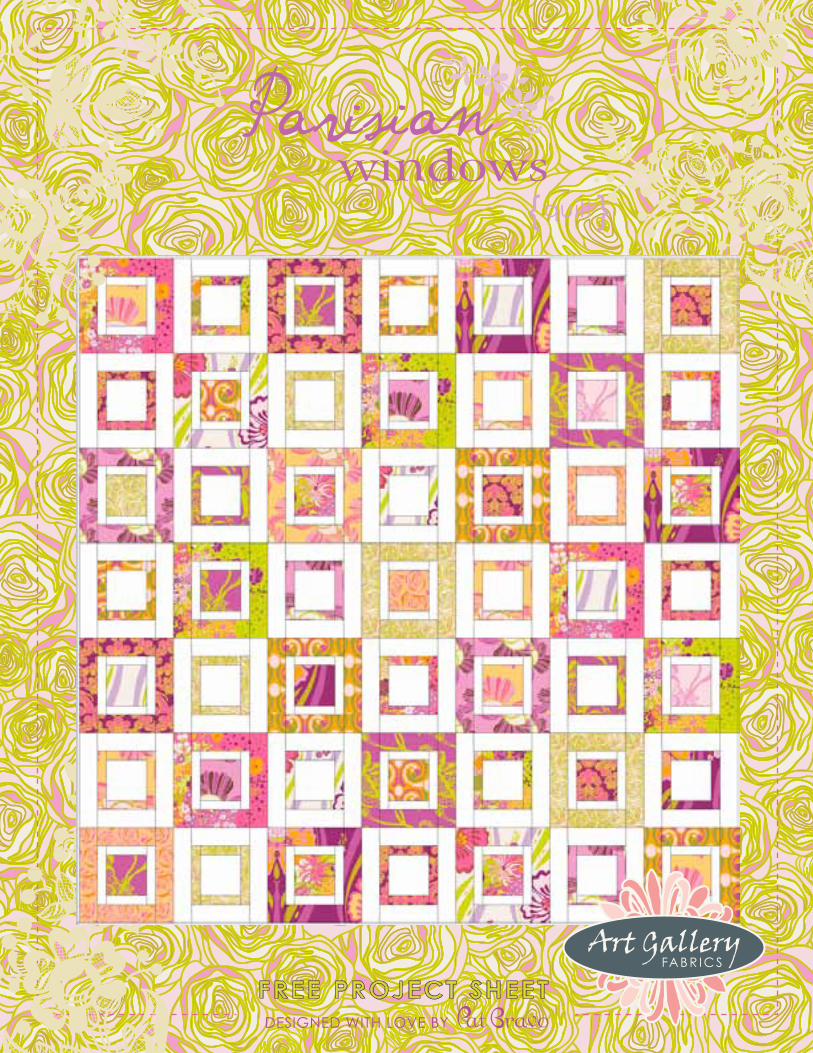
{quilt }
F R E E P R O J E C T S H E E TF R E E P R O J E C T S H E E TDESIGNED WITH LOVE BY
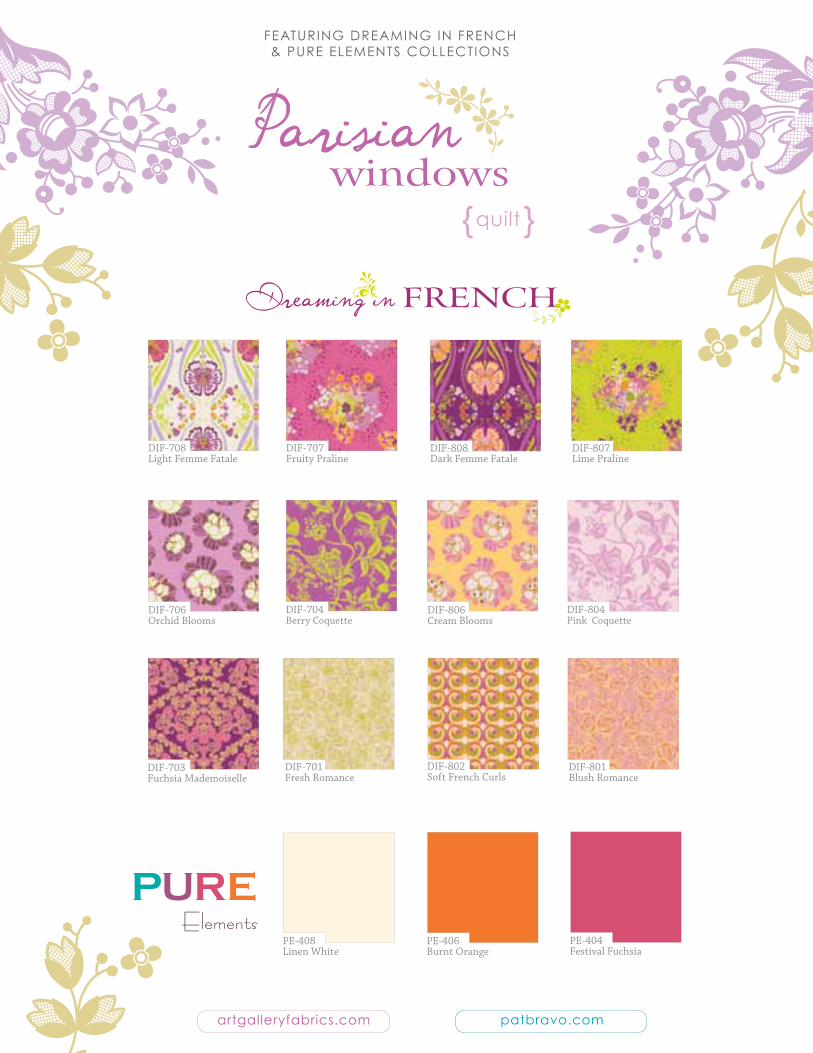
DIF-808Dark Femme Fatale
DIF-807Lime Praline
DIF-806Cream Blooms
DIF-706Orchid Blooms
DIF-804Pink Coquette
DIF-704Berry Coquette
DIF-703Fuchsia Mademoiselle
PE-408Linen White
PE-406Burnt Orange
PE-404Festival Fuchsia
DIF-802Soft French Curls
DIF-801Blush Romance
DIF-701Fresh Romance
DIF-708Light Femme Fatale
DIF-707Fruity Praline
patbravo.comartgalleryfabrics.com
{quilt }
FEATURING DREAMING IN FRENCH& PURE ELEMENTS COLLECTIONS
C U T T I N G D I R E C T I O N S
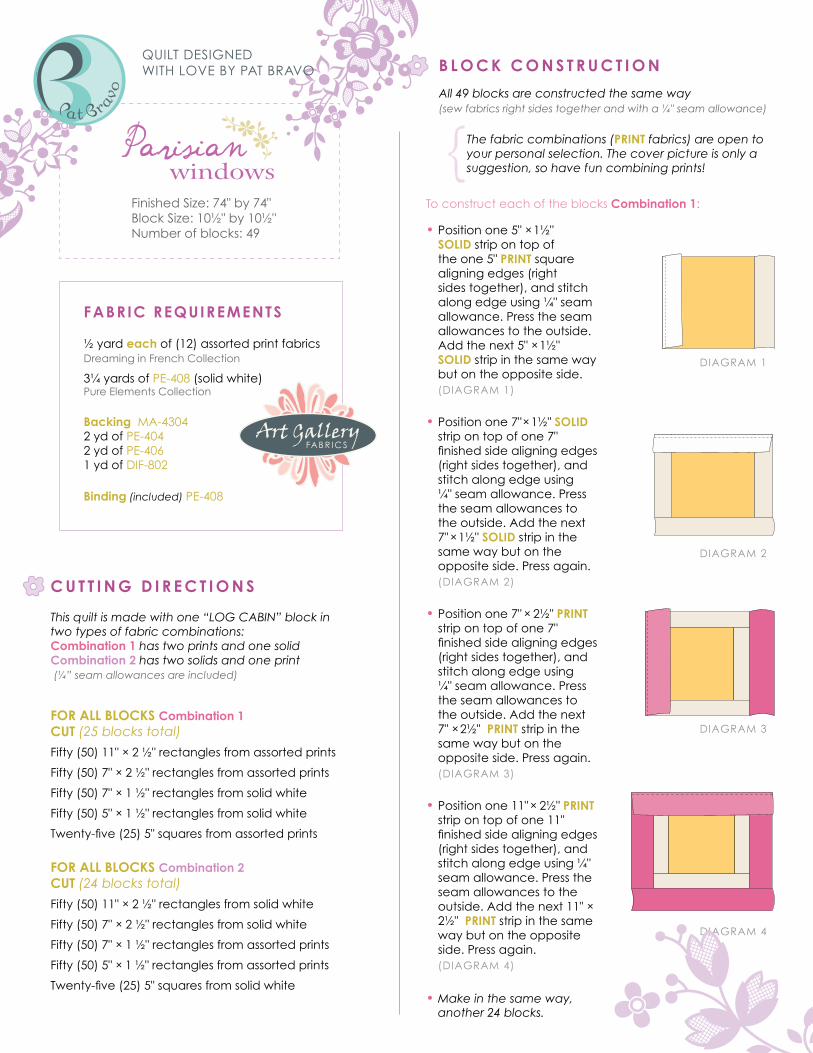
B L O C K C O N S T R U C T I O N
•Position one 5" × 1½" SOLID strip on top of the one 5" PRINT square aligning edges (right sides together), and stitch along edge using ¼" seam allowance. Press the seam allowances to the outside. Add the next 5" × 1½" SOLID strip in the same way but on the opposite side.(DIAGRAM 1)
•Position one 7" × 1½" SOLID strip on top of one 7" finishedsidealigningedges(right sides together), and stitch along edge using ¼" seam allowance. Press the seam allowances to the outside. Add the next 7" × 1½" SOLID strip in the same way but on the opposite side. Press again. (DIAGRAM 2)
•Position one 7" × 2½" PRINT strip on top of one 7" finishedsidealigningedges(right sides together), and stitch along edge using ¼" seam allowance. Press the seam allowances to the outside. Add the next 7" × 2½" PRINT strip in the same way but on the opposite side. Press again. (DIAGRAM 3)
•Position one 11" × 2½" PRINT strip on top of one 11" finishedsidealigningedges(right sides together), and stitch along edge using ¼" seam allowance. Press the seam allowances to the outside. Add the next 11" × 2½" PRINT strip in the same way but on the opposite side. Press again. (DIAGRAM 4)
•Make in the same way, another 24 blocks.
DIAGRAM 1
DIAGRAM 2
DIAGRAM 3
DIAGRAM 4
FABRIC REQUIREMENTS
½ yard each of (12) assorted print fabrics Dreaming in French Collection
3¼ yards of PE-408 (solid white) Pure Elements Collection
Backing MA-4304 2 yd of PE-4042 yd of PE-406 1 yd of DIF-802
Binding (included) PE-408
This quilt is made with one “LOG CABIN” block in two types of fabric combinations: Combination 1 has two prints and one solidCombination 2 has two solids and one print (¼” seam allowances are included)
FOR ALL BLOCKS Combination 1CUT (25 blocks total)
Fifty (50) 11" × 2 ½" rectangles from assorted prints
Fifty (50) 7" × 2 ½" rectangles from assorted prints
Fifty (50) 7" × 1 ½" rectangles from solid white
Fifty (50) 5" × 1 ½" rectangles from solid white
Twenty-five(25)5"squaresfromassortedprints
FOR ALL BLOCKS Combination 2CUT (24 blocks total)
Fifty (50) 11" × 2 ½" rectangles from solid white
Fifty (50) 7" × 2 ½" rectangles from solid white
Fifty (50) 7" × 1 ½" rectangles from assorted prints
Fifty (50) 5" × 1 ½" rectangles from assorted prints
Twenty-five(25)5" squares from solid white
To construct each of the blocks Combination 1:
(sew fabrics right sides together and with a ¼" seam allowance) All 49 blocks are constructed the same way
The fabric combinations (PRINT fabrics) are open to your personal selection. The cover picture is only a suggestion, so have fun combining prints!
Finished Size: 74" by 74"Block Size: 10½" by 10½"Number of blocks: 49
QUILT DESIGNEDWITH LOVE BY PAT BRAVO
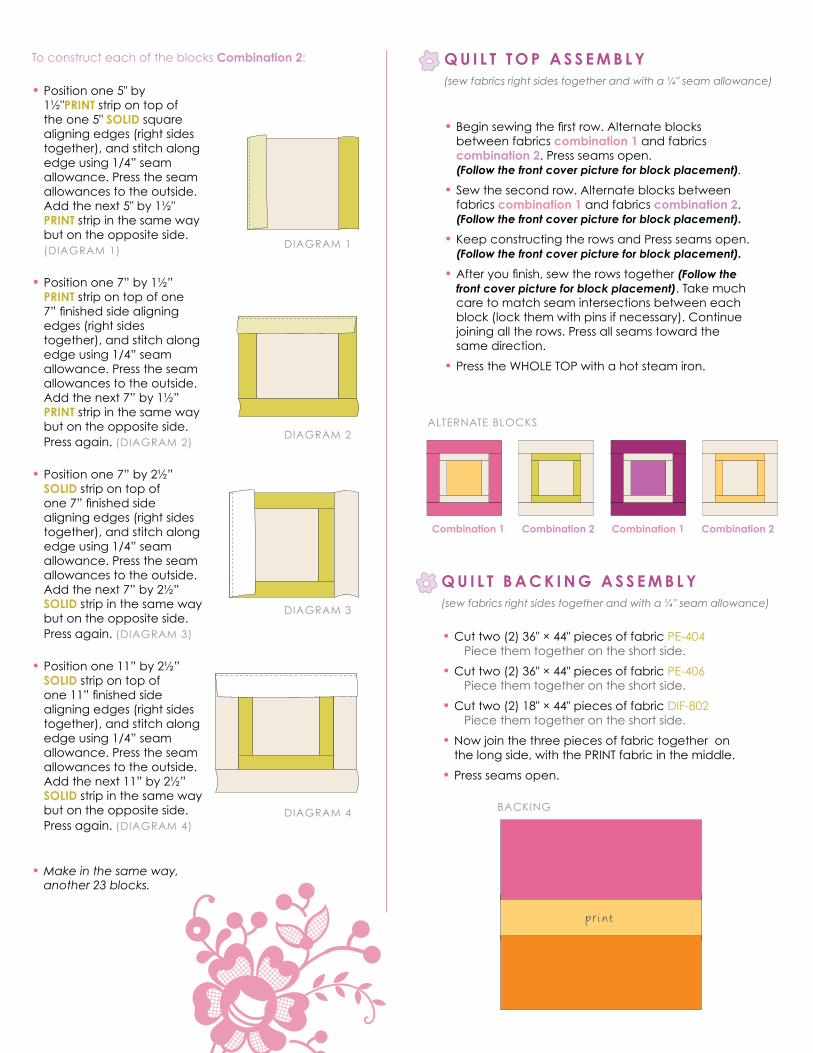
•Position one 5" by 1½"PRINT strip on top of the one 5" SOLID square aligning edges (right sides together), and stitch along edge using 1/4” seam allowance. Press the seam allowances to the outside. Add the next 5" by 1½" PRINT strip in the same way but on the opposite side. (DIAGRAM 1)
•Position one 7” by 1½” PRINT strip on top of one 7”finishedsidealigningedges (right sides together), and stitch along edge using 1/4” seam allowance. Press the seam allowances to the outside. Add the next 7” by 1½” PRINT strip in the same way but on the opposite side. Press again. (DIAGRAM 2)
•Position one 7” by 2½” SOLID strip on top of one7”finishedsidealigning edges (right sides together), and stitch along edge using 1/4” seam allowance. Press the seam allowances to the outside. Add the next 7” by 2½” SOLID strip in the same way but on the opposite side. Press again. (DIAGRAM 3)
•Position one 11” by 2½” SOLID strip on top of one11”finishedsidealigning edges (right sides together), and stitch along edge using 1/4” seam allowance. Press the seam allowances to the outside. Add the next 11” by 2½” SOLID strip in the same way but on the opposite side. Press again. (DIAGRAM 4)
•Make in the same way, another 23 blocks.
•Beginsewingthefirstrow.Alternateblocksbetween fabrics combination 1 and fabrics combination 2. Press seams open. (Follow the front cover picture for block placement).
•Sew the second row. Alternate blocks between fabrics combination 1 and fabrics combination 2. (Follow the front cover picture for block placement).
•Keep constructing the rows and Press seams open. (Follow the front cover picture for block placement).
•Afteryoufinish,sewtherowstogether(Follow the front cover picture for block placement). Take much care to match seam intersections between each block (lock them with pins if necessary). Continue joining all the rows. Press all seams toward the same direction.
•Press the WHOLE TOP with a hot steam iron.
To construct each of the blocks Combination 2:
(sew fabrics right sides together and with a ¼" seam allowance)
Q U I L T T O P A S S E M B L Y
DIAGRAM 1
ALTERNATE BLOCKS
BACKING
DIAGRAM 2
DIAGRAM 3
DIAGRAM 4
Combination 2Combination 1 Combination 2Combination 1
•Cut two (2) 36" × 44" pieces of fabric PE-404 Piece them together on the short side.
•Cut two (2) 36" × 44" pieces of fabric PE-406 Piece them together on the short side.
•Cut two (2) 18" × 44" pieces of fabric DIF-802 Piece them together on the short side.
•Now join the three pieces of fabric together on the long side, with the PRINT fabric in the middle.
•Press seams open.
(sew fabrics right sides together and with a ¼" seam allowance)
Q U I L T B A C K I N G A S S E M B L Y
p ri nt
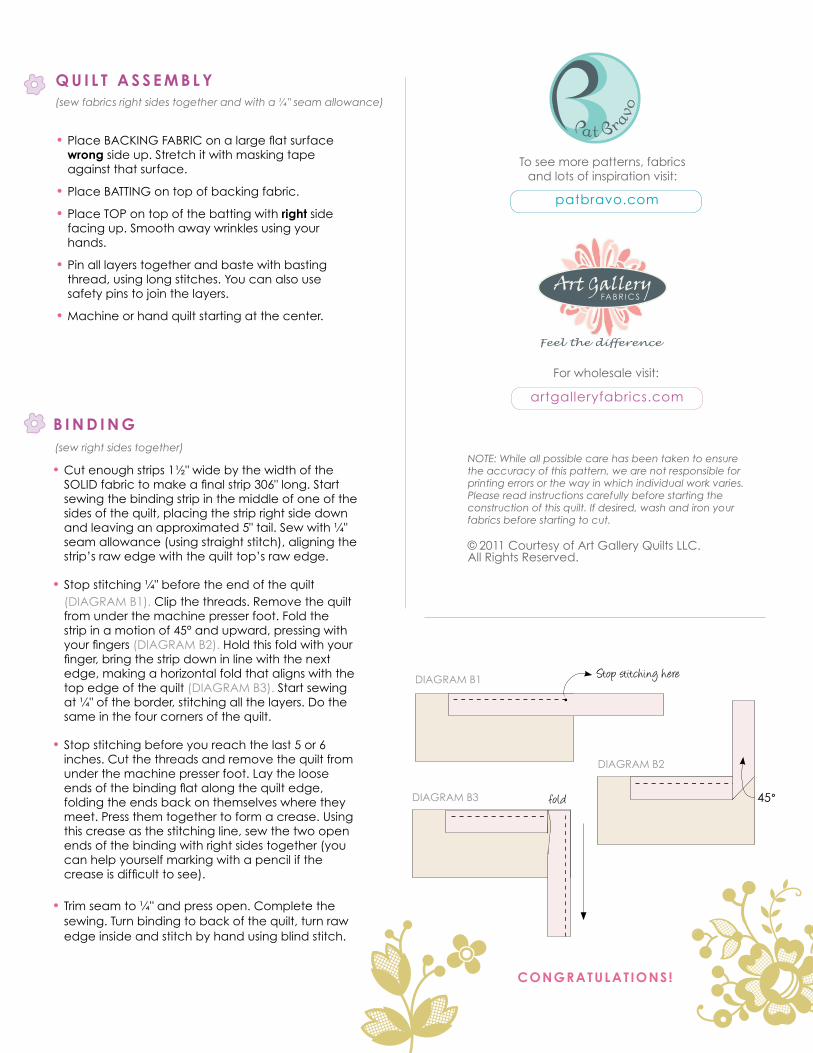
•Cut enough strips 1½" wide by the width of the SOLIDfabrictomakeafinalstrip306"long.Startsewing the binding strip in the middle of one of the sides of the quilt, placing the strip right side down and leaving an approximated 5" tail. Sew with ¼" seam allowance (using straight stitch), aligning the strip’s raw edge with the quilt top’s raw edge.
•Stop stitching ¼" before the end of the quilt (DIAGRAM B1). Clip the threads. Remove the quilt from under the machine presser foot. Fold the strip in a motion of 45° and upward, pressing with yourfingers (DIAGRAM B2). Hold this fold with your finger,bringthestripdowninlinewiththenextedge, making a horizontal fold that aligns with the top edge of the quilt (DIAGRAM B3). Start sewing at ¼" of the border, stitching all the layers. Do the same in the four corners of the quilt.
•Stop stitching before you reach the last 5 or 6 inches. Cut the threads and remove the quilt from under the machine presser foot. Lay the loose endsofthebindingflatalongthequiltedge,folding the ends back on themselves where they meet. Press them together to form a crease. Using this crease as the stitching line, sew the two open ends of the binding with right sides together (you can help yourself marking with a pencil if the creaseisdifficulttosee).
•Trim seam to ¼" and press open. Complete the sewing. Turn binding to back of the quilt, turn raw edge inside and stitch by hand using blind stitch.
(sew right sides together)
B I N D I N G
•PlaceBACKINGFABRIConalargeflatsurfacewrong side up. Stretch it with masking tape against that surface.
•Place BATTING on top of backing fabric.
•Place TOP on top of the batting with right side facing up. Smooth away wrinkles using your hands.
•Pin all layers together and baste with basting thread, using long stitches. You can also use safety pins to join the layers.
•Machine or hand quilt starting at the center.
(sew fabrics right sides together and with a ¼" seam allowance)
Q U I L T A S S E M B L Y
CONGRATULATIONS!
NOTE: While all possible care has been taken to ensure the accuracy of this pattern, we are not responsible for printing errors or the way in which individual work varies.Please read instructions carefully before starting the construction of this quilt. If desired, wash and iron your fabrics before starting to cut.
© 2011 Courtesy of Art Gallery Quilts LLC.All Rights Reserved.
To see more patterns, fabricsand lots of inspiration visit:
For wholesale visit:
artgalleryfabrics.com
patbravo.com
45˚
DIAGRAM B2
DIAGRAM B1Stop stitching here
DIAGRAM B3 fold


![CPT TM CYBER-LAB DIF*±]E3ßåÞZI** ... · CPT TM CYBER-LAB DIF*±]E3ßåÞZI**](https://img.pdfslide.us/doc/110x75/5e07447e09a007101859965b/cpt-tm-cyber-lab-dife3zi-cpt-tm-cyber-lab-dife3zi-.jpg)