Embed Size (px)
Citation preview
FortiAnalyzer™
Version 4.0Install Guide
FortiAnalyzer Install GuideVersion 4.008 May 200905-400-0411-20090508© Copyright 2009 Fortinet, Inc. All rights reserved. No part of this publication including text, examples, diagrams or illustrations may be reproduced, transmitted, or translated in any form or by any means, electronic, mechanical, manual, optical or otherwise, for any purpose, without prior written permission of Fortinet, Inc.
TrademarksDynamic Threat Prevention System (DTPS), APSecure, FortiASIC, FortiBIOS, FortiBridge, FortiClient, FortiGate®, FortiGate Unified Threat Management System, FortiGuard®, FortiGuard-Antispam, FortiGuard-Antivirus, FortiGuard-Intrusion, FortiGuard-Web, FortiLog, FortiAnalyzer, FortiManager, Fortinet®, FortiOS, FortiPartner, FortiProtect, FortiReporter, FortiResponse, FortiShield, FortiVoIP, and FortiWiFi are trademarks of Fortinet, Inc. in the United States and/or other countries. The names of actual companies and products mentioned herein may be the trademarks of their respective owners.
Regulatory complianceFCC Class A/Class B Part 15 CSA/CUS
CAUTION: Risk of Explosion if Battery is replaced by an Incorrect Type. Dispose of Used Batteries According to the Instructions
Contents
F0h
ContentsIntroduction .............................................................................................. 5Registering your Fortinet product................................................................................. 5
Customer service and technical support...................................................................... 5
Fortinet documentation ................................................................................................. 5Fortinet Tools and Documentation CD ....................................................................... 5Fortinet Knowledge Center ........................................................................................ 5Comments on Fortinet technical documentation ....................................................... 6
Conventions .................................................................................................................... 6IP addresses............................................................................................................... 6CLI constraints............................................................................................................ 6Notes, Tips and Cautions ........................................................................................... 6Typographical conventions ......................................................................................... 6
Installing ................................................................................................... 9Environmental specifications ........................................................................................ 9
Cautions and warnings................................................................................................. 10Grounding................................................................................................................. 10Rack mount instructions ........................................................................................... 10
Mounting the FortiAnalyzer-400B and FortiAnalyzer-800B....................................... 10
Mounting the FortiAnalyzer-1000B.............................................................................. 11
Mounting the FortiAnalyzer-2000A and FortiAnalyzer-4000A................................... 11Disassembling the slide rail ...................................................................................... 11Attaching the slide rail to the FortiAnalyzer unit........................................................ 13Mounting the FortiAnalyzer unit ................................................................................ 13
Powering on the FortiAnalyzer unit............................................................................. 13Connecting to the network ........................................................................................ 14
Powering off the FortiAnalyzer unit ............................................................................ 14
Using the FortiAnalyzer-1000B recovery CD.............................................................. 14
Configuring............................................................................................. 15Connecting to the FortiAnalyzer unit .......................................................................... 15
Web-based manager ................................................................................................ 15Command line interface............................................................................................ 15
Using the web-based manager .................................................................................... 15
Using the command line interface............................................................................... 16
Collecting logs .............................................................................................................. 17Adding a FortiGate unit............................................................................................. 18Log configuration ...................................................................................................... 18Register the FortiGate unit with FortiAnalyzer .......................................................... 18
Further reading.............................................................................................................. 20
ortiAnalyzer Version 4.0 Install Guide5-400-0411-20090508 3ttp://docs.fortinet.com/ • Feedback
Contents
Firmware ................................................................................................. 21Backing up the FortiAnalyzer unit............................................................................... 21
Backing up the configuration .................................................................................... 21Backing up the FortiAnalyzer hard disk .................................................................... 21Restoring the logs..................................................................................................... 22
Using the web-based manager .................................................................................... 22Upgrading the firmware ............................................................................................ 22Downgrading the firmware........................................................................................ 22
Using the CLI ................................................................................................................. 23Upgrading the firmware ............................................................................................ 23Downgrading using the CLI ...................................................................................... 24
Installing firmware images from a system reboot using the CLI.............................. 25
Index........................................................................................................ 27
FortiAnalyzer Version 4.0 Install Guide4 05-400-0411-20090508
http://docs.fortinet.com/ • Feedback
Introduction Registering your Fortinet product
F0h
IntroductionThe FortiAnalyzer is a network appliance that provides reporting, data analysis and integrated log collection tools. Detailed log reports provide historical as well as current analysis of network traffic, such as email, FTP and web browsing activity, to help identify security issues and reduce network misuse and abuse.The FortiAnalyzer unit provides a selection of reporting tools from detailed reports that can be scheduled or generated on demand, to basic traffic sniffing and real-time network monitoring.
Registering your Fortinet productBefore you begin, take a moment to register your Fortinet product at the Fortinet Technical Support web site, https://support.fortinet.com.Many Fortinet customer services, such as firmware updates, technical support, and FortiGuard Antivirus and other FortiGuard services, require product registration.For more information, see the Fortinet Knowledge Center article Registration Frequently Asked Questions.
Customer service and technical supportFortinet Technical Support provides services designed to make sure that your Fortinet products install quickly, configure easily, and operate reliably in your network. To learn about the technical support services that Fortinet provides, visit the Fortinet Technical Support web site at https://support.fortinet.com.
Fortinet documentation The Fortinet Technical Documentation web site, http://docs.fortinet.com, provides the most up-to-date versions of Fortinet publications, as well as additional technical documentation such as technical notes.In addition to the Fortinet Technical Documentation web site, you can find Fortinet technical documentation on the Fortinet Tools and Documentation CD, and on the Fortinet Knowledge Center.
Fortinet Tools and Documentation CDMany Fortinet publications are available on the Fortinet Tools and Documentation CD shipped with your Fortinet product. The documents on this CD are current at shipping time. For current versions of Fortinet documentation, visit the Fortinet Technical Documentation web site, http://docs.fortinet.com.
Fortinet Knowledge Center The Fortinet Knowledge Center provides additional Fortinet technical documentation, such as troubleshooting and how-to-articles, examples, FAQs, technical notes, a glossary, and more. Visit the Fortinet Knowledge Center at http://kc.fortinet.com.
ortiAnalyzer Version 4.0 Install Guide5-400-0411-20090508 5ttp://docs.fortinet.com/ • Feedback
Conventions Introduction
Comments on Fortinet technical documentation Please send information about any errors or omissions in this or any Fortinet technical document to [email protected].
ConventionsFortinet technical documentation uses the conventions described below.
IP addressesTo avoid publication of public IP addresses that belong to Fortinet or any other organization, the IP addresses used in Fortinet technical documentation are fictional and follow the documentation guidelines specific to Fortinet. The addresses used are from the private IP address ranges defined in RFC 1918: Address Allocation for Private Internets, available at http://ietf.org/rfc/rfc1918.txt?number-1918.
CLI constraintsCLI constraints, such as <address_ipv4>, indicate which data types or string patterns are acceptable input for a given parameter or variable value. CLI constraint conventions are described in the CLI Reference document for each product.
Notes, Tips and CautionsFortinet technical documentation uses the following guidance and styles for notes, tips and cautions.
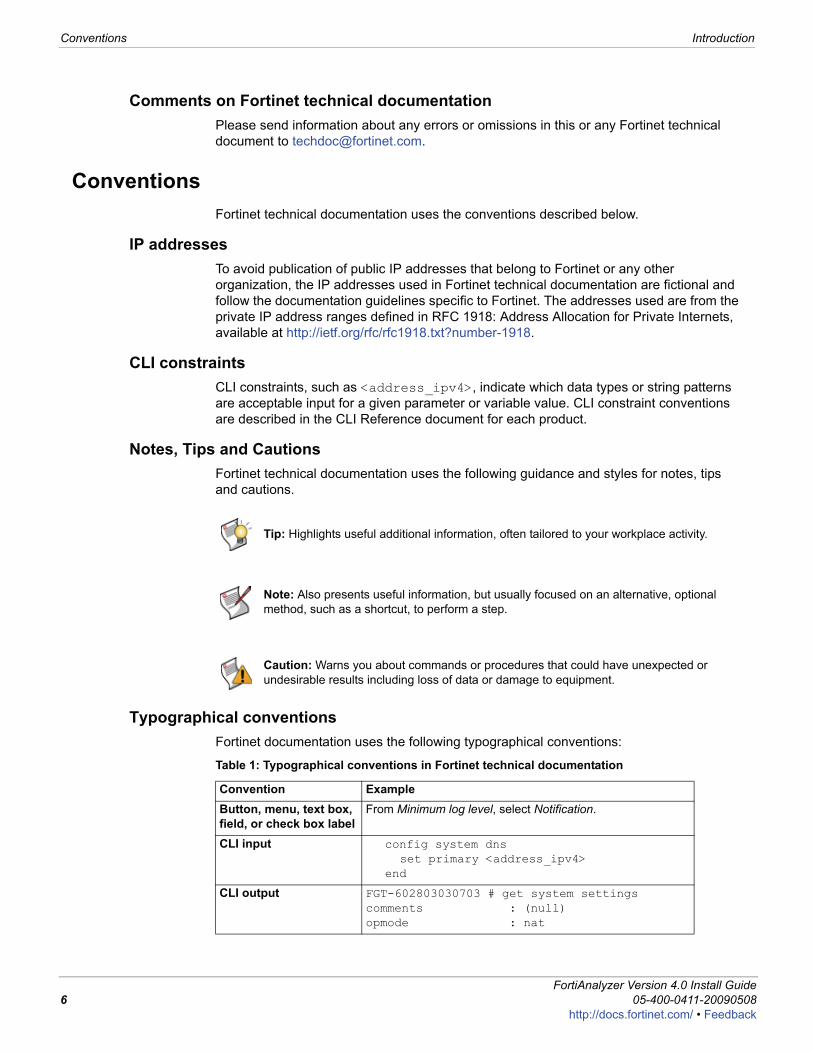
Typographical conventionsFortinet documentation uses the following typographical conventions:
Tip: Highlights useful additional information, often tailored to your workplace activity.
Note: Also presents useful information, but usually focused on an alternative, optional method, such as a shortcut, to perform a step.
Caution: Warns you about commands or procedures that could have unexpected or undesirable results including loss of data or damage to equipment.
Table 1: Typographical conventions in Fortinet technical documentation
Convention ExampleButton, menu, text box, field, or check box label
From Minimum log level, select Notification.
CLI input config system dnsset primary <address_ipv4>
end
CLI output FGT-602803030703 # get system settingscomments : (null)opmode : nat
FortiAnalyzer Version 4.0 Install Guide6 05-400-0411-20090508
http://docs.fortinet.com/ • Feedback

Introduction Conventions
F0h
Emphasis HTTP connections are not secure and can be intercepted by a third party.
File content <HTML><HEAD><TITLE>Firewall Authentication</TITLE></HEAD><BODY><H4>You must authenticate to use this service.</H4>
Hyperlink Visit the Fortinet Technical Support web site, https://support.fortinet.com.
Keyboard entry Type a name for the remote VPN peer or client, such as Central_Office_1.
Navigation Go to VPN > IPSEC > Auto Key (IKE).
Publication For details, see the FortiGate Administration Guide.
Table 1: Typographical conventions in Fortinet technical documentation
ortiAnalyzer Version 4.0 Install Guide5-400-0411-20090508 7ttp://docs.fortinet.com/ • Feedback
Conventions Introduction
FortiAnalyzer Version 4.0 Install Guide8 05-400-0411-20090508
http://docs.fortinet.com/ • Feedback
Installing Environmental specifications
F0h
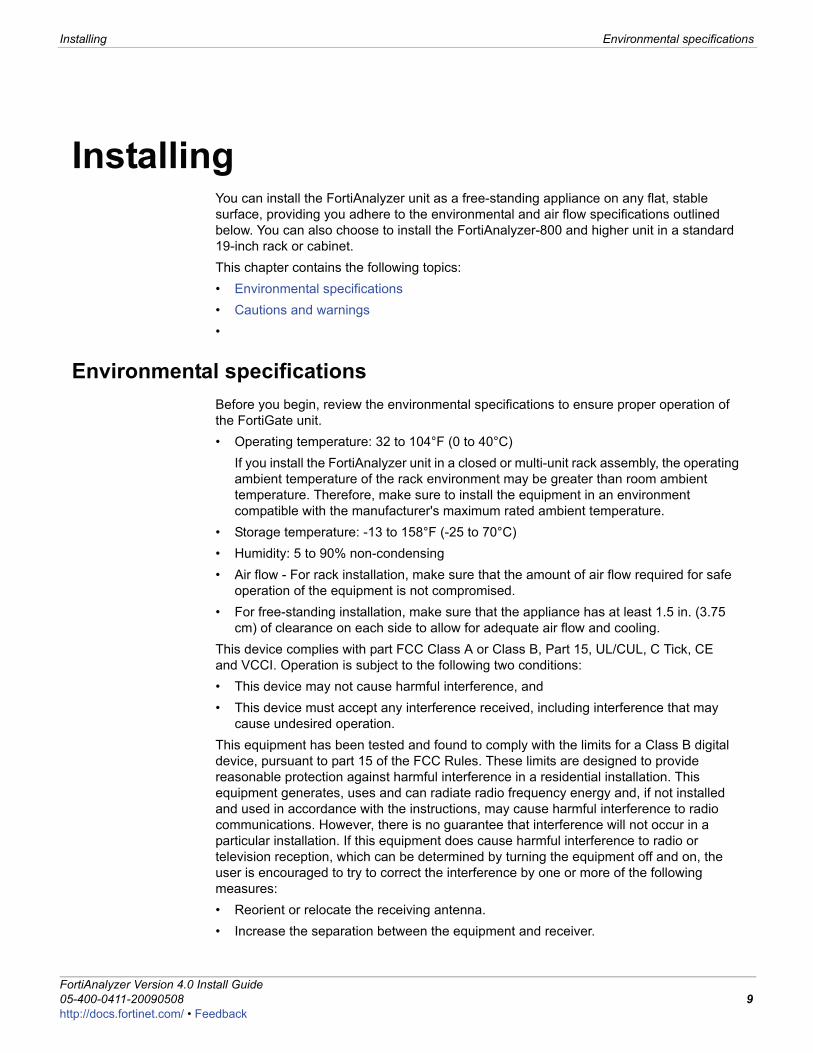
InstallingYou can install the FortiAnalyzer unit as a free-standing appliance on any flat, stable surface, providing you adhere to the environmental and air flow specifications outlined below. You can also choose to install the FortiAnalyzer-800 and higher unit in a standard 19-inch rack or cabinet.This chapter contains the following topics:• Environmental specifications• Cautions and warnings•
Environmental specificationsBefore you begin, review the environmental specifications to ensure proper operation of the FortiGate unit.• Operating temperature: 32 to 104°F (0 to 40°C)
If you install the FortiAnalyzer unit in a closed or multi-unit rack assembly, the operating ambient temperature of the rack environment may be greater than room ambient temperature. Therefore, make sure to install the equipment in an environment compatible with the manufacturer's maximum rated ambient temperature.
• Storage temperature: -13 to 158°F (-25 to 70°C)• Humidity: 5 to 90% non-condensing• Air flow - For rack installation, make sure that the amount of air flow required for safe
operation of the equipment is not compromised.• For free-standing installation, make sure that the appliance has at least 1.5 in. (3.75
cm) of clearance on each side to allow for adequate air flow and cooling.This device complies with part FCC Class A or Class B, Part 15, UL/CUL, C Tick, CEand VCCI. Operation is subject to the following two conditions:• This device may not cause harmful interference, and• This device must accept any interference received, including interference that may
cause undesired operation.This equipment has been tested and found to comply with the limits for a Class B digital device, pursuant to part 15 of the FCC Rules. These limits are designed to provide reasonable protection against harmful interference in a residential installation. This equipment generates, uses and can radiate radio frequency energy and, if not installed and used in accordance with the instructions, may cause harmful interference to radio communications. However, there is no guarantee that interference will not occur in a particular installation. If this equipment does cause harmful interference to radio or television reception, which can be determined by turning the equipment off and on, the user is encouraged to try to correct the interference by one or more of the following measures:• Reorient or relocate the receiving antenna.• Increase the separation between the equipment and receiver.
ortiAnalyzer Version 4.0 Install Guide5-400-0411-20090508 9ttp://docs.fortinet.com/ • Feedback
Cautions and warnings Installing
• Connect the equipment into an outlet on a circuit different from that to which the receiver is connected.
• Consult the dealer or an experienced radio/TV technician for help.The equipment compliance with FCC radiation exposure limit set forth for uncontrolled Environment.
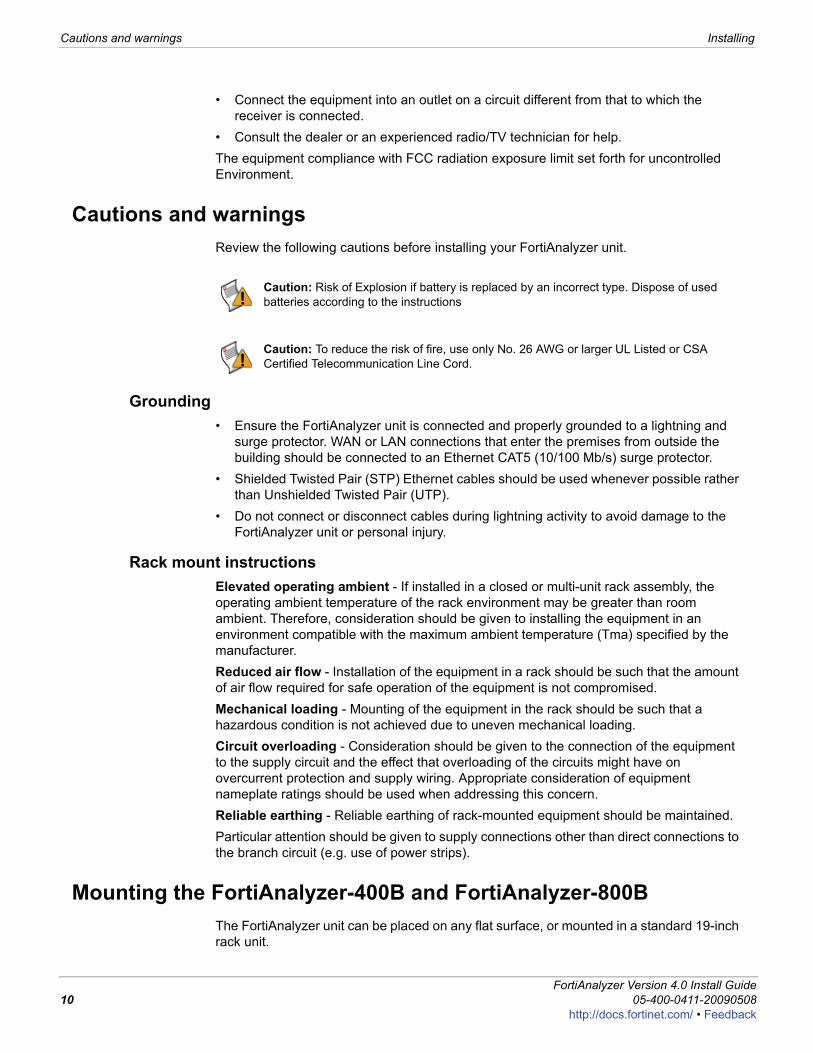
Cautions and warningsReview the following cautions before installing your FortiAnalyzer unit.
Grounding• Ensure the FortiAnalyzer unit is connected and properly grounded to a lightning and
surge protector. WAN or LAN connections that enter the premises from outside the building should be connected to an Ethernet CAT5 (10/100 Mb/s) surge protector.
• Shielded Twisted Pair (STP) Ethernet cables should be used whenever possible rather than Unshielded Twisted Pair (UTP).
• Do not connect or disconnect cables during lightning activity to avoid damage to the FortiAnalyzer unit or personal injury.
Rack mount instructionsElevated operating ambient - If installed in a closed or multi-unit rack assembly, the operating ambient temperature of the rack environment may be greater than room ambient. Therefore, consideration should be given to installing the equipment in an environment compatible with the maximum ambient temperature (Tma) specified by the manufacturer.Reduced air flow - Installation of the equipment in a rack should be such that the amount of air flow required for safe operation of the equipment is not compromised.Mechanical loading - Mounting of the equipment in the rack should be such that a hazardous condition is not achieved due to uneven mechanical loading.Circuit overloading - Consideration should be given to the connection of the equipment to the supply circuit and the effect that overloading of the circuits might have on overcurrent protection and supply wiring. Appropriate consideration of equipment nameplate ratings should be used when addressing this concern.Reliable earthing - Reliable earthing of rack-mounted equipment should be maintained. Particular attention should be given to supply connections other than direct connections to the branch circuit (e.g. use of power strips).
Mounting the FortiAnalyzer-400B and FortiAnalyzer-800BThe FortiAnalyzer unit can be placed on any flat surface, or mounted in a standard 19-inch rack unit.
Caution: Risk of Explosion if battery is replaced by an incorrect type. Dispose of used batteries according to the instructions
Caution: To reduce the risk of fire, use only No. 26 AWG or larger UL Listed or CSA Certified Telecommunication Line Cord.
FortiAnalyzer Version 4.0 Install Guide10 05-400-0411-20090508
http://docs.fortinet.com/ • Feedback
Installing Mounting the FortiAnalyzer-1000B
F0h
When placing the FortiAnalyzer unit on any flat, stable surface, ensure the unit has adequate clearance on each side to ensure adequate airflow for cooling.For rack mounting, use the mounting brackets and screws included with the FortiAnalyzer unit.
To install the FortiAnalyzer unit into a rack1 Attach the mounting brackets to the side to the unit so that the brackets are on the front
portion of the FortiAnalyzer unit if they are not already attached when shipped. Ensure that the screws are tight and not loose.
2 Position the FortiAnalyzer unit in the rack to allow for sufficient air flow.3 Line up the mounting bracket holes to the holes on the rack, ensuring the FortiAnalyzer
unit is level.4 Finger tighten the screws to attach the FortiAnalyzer unit to the rack.5 Once you verify the spacing of the FortiAnalyzer unit and that it is level, tighten the
screws with a screwdriver. Ensure that the screws are tight and not loose.
Mounting the FortiAnalyzer-1000BFor instructions on mounting the FortiAnalyzer-1000B in a rack mount unit, see the FortiAnalyzer 1000B Rack Install Guide.
Mounting the FortiAnalyzer-2000A and FortiAnalyzer-4000ATo mount the FortiAnalyzer unit on a 19 in rack or cabinet, use the slide rails included with the product. The rails enable you to safely pull the FortiAnalyzer units out from the rack to access the back or top of the unit.
Mounting requires three steps:• disassembling the slide rail from the rail housing• attaching the slide rail to the sides of the FortiAnalyzer unit• mounting the FortiAnalyzer unit to the rack or cabinet.
Disassembling the slide railThe slide rail assembly has two moving rails within the rail housing. You need to remove the innermost rail. This rail will attach to the sides of the FortiAnalyzer unit.
Note: Fortinet recommends purchasing side rail mounts or similar rack mount aids separately to ensure the FortiAnalyzer unit is attached safely to the rack.
Caution: To avoid personal injury, you may require two or more people to install the FortiAnalyzer unit in the rack.
Caution: To avoid personal injury or damage to the FortiAnalyzer unit, it is highly recommended a minimum of two people perform this procedure.
ortiAnalyzer Version 4.0 Install Guide5-400-0411-20090508 11ttp://docs.fortinet.com/ • Feedback
Mounting the FortiAnalyzer-2000A and FortiAnalyzer-4000A Installing
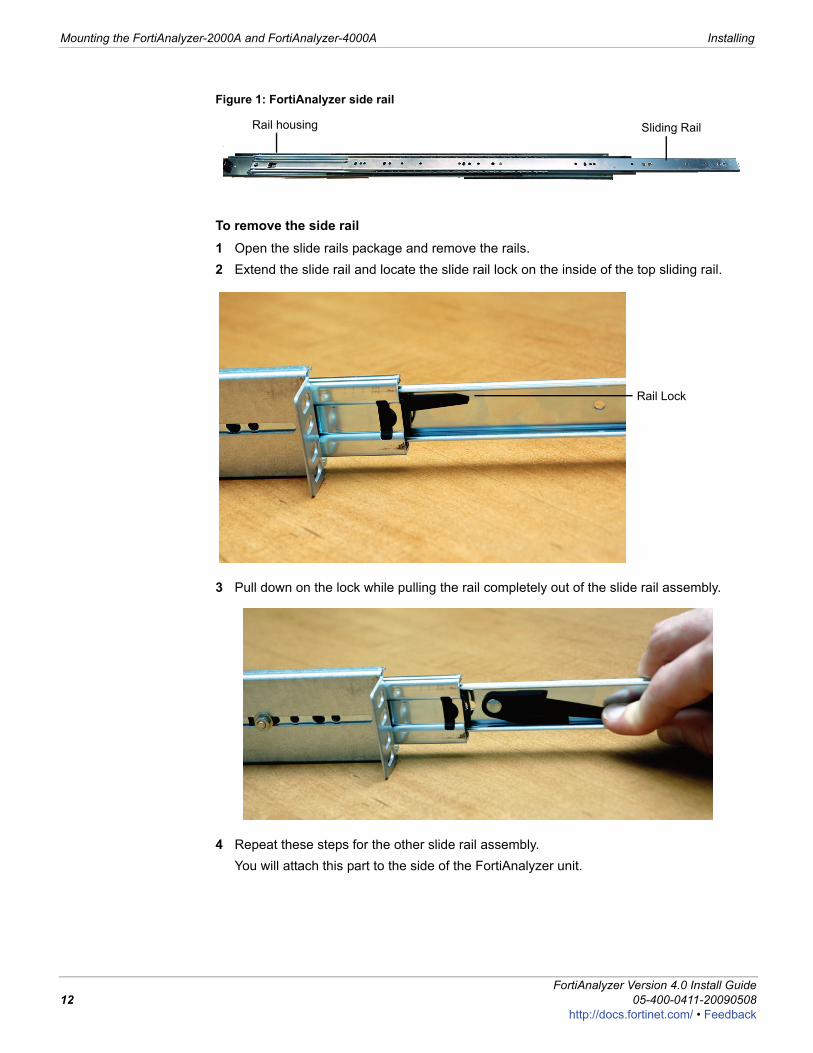
Figure 1: FortiAnalyzer side rail
To remove the side rail1 Open the slide rails package and remove the rails.2 Extend the slide rail and locate the slide rail lock on the inside of the top sliding rail.
3 Pull down on the lock while pulling the rail completely out of the slide rail assembly.
4 Repeat these steps for the other slide rail assembly.You will attach this part to the side of the FortiAnalyzer unit.
Rail housing Sliding Rail
Rail Lock
FortiAnalyzer Version 4.0 Install Guide12 05-400-0411-20090508
http://docs.fortinet.com/ • Feedback
Installing Powering on the FortiAnalyzer unit
F0h
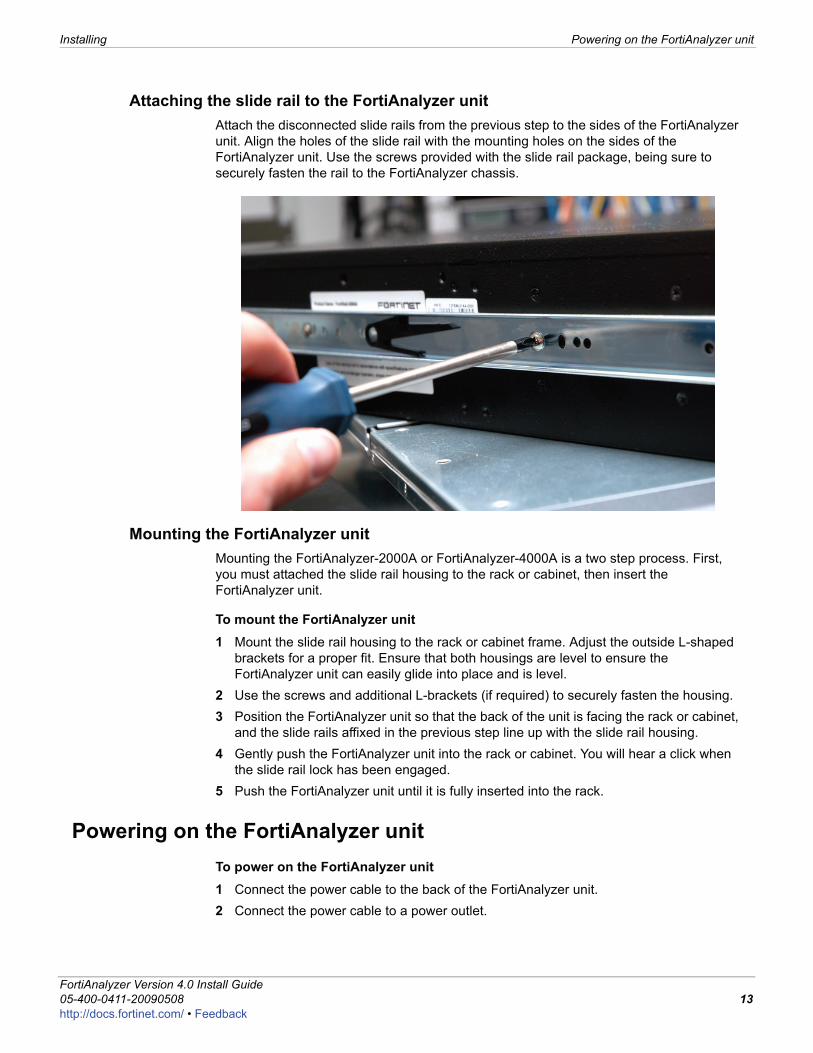
Attaching the slide rail to the FortiAnalyzer unitAttach the disconnected slide rails from the previous step to the sides of the FortiAnalyzer unit. Align the holes of the slide rail with the mounting holes on the sides of the FortiAnalyzer unit. Use the screws provided with the slide rail package, being sure to securely fasten the rail to the FortiAnalyzer chassis.
Mounting the FortiAnalyzer unitMounting the FortiAnalyzer-2000A or FortiAnalyzer-4000A is a two step process. First, you must attached the slide rail housing to the rack or cabinet, then insert the FortiAnalyzer unit.
To mount the FortiAnalyzer unit1 Mount the slide rail housing to the rack or cabinet frame. Adjust the outside L-shaped
brackets for a proper fit. Ensure that both housings are level to ensure the FortiAnalyzer unit can easily glide into place and is level.
2 Use the screws and additional L-brackets (if required) to securely fasten the housing.3 Position the FortiAnalyzer unit so that the back of the unit is facing the rack or cabinet,
and the slide rails affixed in the previous step line up with the slide rail housing.4 Gently push the FortiAnalyzer unit into the rack or cabinet. You will hear a click when
the slide rail lock has been engaged.5 Push the FortiAnalyzer unit until it is fully inserted into the rack.
Powering on the FortiAnalyzer unitTo power on the FortiAnalyzer unit1 Connect the power cable to the back of the FortiAnalyzer unit.2 Connect the power cable to a power outlet.
ortiAnalyzer Version 4.0 Install Guide5-400-0411-20090508 13ttp://docs.fortinet.com/ • Feedback
Powering off the FortiAnalyzer unit Installing
Connecting to the networkUsing the supplied Ethernet cable, connect one end of the cable to your router or switch. Connect the other end to port 1 on the FortiAnalyzer unit.
Powering off the FortiAnalyzer unitWhen powering off the FortiAnalyzer unit, always shut down the unit using the following procedures before disconnecting the power supply. By not following this procedure, you risk damaging the FortiAnalyzer hard disk.
To power off the FortiAnalyzer unit1 From the web-based manager, go to System > Dashboard.2 In the Unit Operation widget, select Shut Down and select OK.ORfrom the CLI, enter:execute shutdown
3 Disconnect the power supply when the FortiAnalyzer unit indicates it is safe to disconnect the power.
Using the FortiAnalyzer-1000B recovery CDThe CD included with the FortiAnalyzer-1000B is a recovery CD as well as including documentation. Should the FortiAnalyzer become unresponsive, you can use the recovery CD to reset the FortiAnalyzer unit.
To use the recovery CD1 Connect console cable and power cable to FortiAnalyzer unit.2 Open a terminal window and set the baud rate to 9600.3 Power on the FortiAnalyzer unit.4 Insert the recovery CD into CD-ROM drive of the FortiAnalyzer unit.
The message “Do you want to recover the FortiBootLoader? (Y/N)” appears.5 Enter Y and press enter.
After a few minutes, the message “Please remove the recover CD, press any key to reboot the system” appears.
6 Remove recovery CD from CD-ROM and press any key.The FortiAnalyzer unit reboots with the recovered system.
Note: The FortiAnalyzer unit may take a few minutes to load the CD. There may be a short delay for the following messages to appear on the screen.
FortiAnalyzer Version 4.0 Install Guide14 05-400-0411-20090508
http://docs.fortinet.com/ • Feedback
Configuring Connecting to the FortiAnalyzer unit
F0h
ConfiguringThe FortiAnalyzer unit ships with a factory default configuration. The default configuration enables you to connect to and use the FortiAnalyzer web-based manager to configure the FortiAnalyzer unit onto the network. To configure the FortiAnalyzer unit onto the network, you add an administrator password, change network interface IP addresses, add DNS server IP addresses, and, if required, configure basic routing.Once you complete the network configuration, you can perform additional configuration tasks such as setting system time, adding Fortinet devices or user accounts.
Connecting to the FortiAnalyzer unitThere are two methods of connecting and configuring the basic FortiAnalyzer settings:• the web-based manager• the command line interface (CLI)
Web-based managerYou can configure and manage the FortiAnalyzer unit using HTTP or a secure HTTPS connection from any computer running Microsoft Internet Explorer 6.0 or recent browser.You can use the web-based manager to configure most FortiAnalyzer settings, and monitor the status of the FortiAnalyzer unit.
Command line interfaceYou can access the FortiAnalyzer command line interface (CLI) by connecting a management computer serial port to the FortiAnalyzer serial console connector. You can also use Telnet or an SSH connection to connect to the CLI from any network that is connected to the FortiAnalyzer unit, including the Internet.
Using the web-based managerThe web-based manager provides a GUI interface to configure and administer the FortiAnalyzer unit.Use the web-based manager to:• configure most FortiAnalyzer settings• monitor the status of the FortiAnalyzer unit• configure and view reports• view real-time and historical log messages• administer users, groups and set access rights.You can configure and manage the FortiAnalyzer unit using a secure HTTPS connection from any computer running Internet Explorer 6.0 or other current browser.Configuration changes made using the web-based manager are effective immediately without restarting the FortiAnalyzer unit or interrupting service. For all FortiAnalyzer models, use the following procedure to connect to the web-based manager for the first time.To connect to the web-based manager, you need:
ortiAnalyzer Version 4.0 Install Guide5-400-0411-20090508 15ttp://docs.fortinet.com/ • Feedback
Using the command line interface Configuring
• an Ethernet connection between the FortiAnalyzer unit and management computer• Internet Explorer version 6.0 or higher or other current popular web browser on the
management computer
To connect to the web-based manager1 Connect the Port1 interface of the FortiAnalyzer unit to the Ethernet port of the
management computer. Use straight-through Ethernet cables to connect the devices through a hub or switch.
2 Configure the management computer to be on the same subnet as the FortiAnalyzer LAN interface.
3 To do this, change the IP address of the management computer to 192.168.1.2 and the netmask to 255.255.255.0.
4 To access the FortiAnalyzer web-based manager, start your browser and browse to https://192.168.1.99/ (remember to include the “s” in https://).
5 Type admin in the Name field and select Login.After connecting to the Web-based manager, you can configure the FortiAnalyzer unit IP address, DNS server IP address, and default gateway to connect the FortiAnalyzer unit to the network.
To configure the FortiAnalyzer unit using the web-based manager1 In the web-based manager, go to System > Network > Interface.2 Select Edit for Port1.3 Enter the IP address and netmask and select OK.If the FortiAnalyzer unit will be connected to the internet:4 Go to System > Network > DNS.5 Enter the IP address for the Primary DNS server and Secondary DNS server
(optional).6 Select Apply.7 Got to System > Network > Routing.8 Select Create New and add the Destination IP/Mask and Gateway IP address and any
other routes as required.9 Select OK.For more configuring options, see the FortiAnalyzer Administration Guide.
Using the command line interfaceYou can also use terminal emulation software to connect to the command line interface (CLI) from any network that is connected to the FortiAnalyzer unit, including the Internet. This applies to all FortiAnalyzer models.The CLI supports the same configuration as the web-based manager. You cannot use the CLI to view log data or reports.
FortiAnalyzer Version 4.0 Install Guide16 05-400-0411-20090508
http://docs.fortinet.com/ • Feedback
Configuring Collecting logs
F0h
To connect to the FortiAnalyzer unit through the console1 Use a null-modem cable to connect the serial port. 2 Start a terminal emulation program (such as HyperTerminal) on the management
computer. Use these settings:• Baud Rate (bps) 9600• Data bits 8• Parity None• Stop bits 1• Flow Control None.
3 At the login: prompt, type admin and press Enter. After connecting to the CLI, you can configure the unit IP address, DNS server IP address, and default gateway to connect the FortiAnalyzer unit to the network.
To configure the FortiAnalyzer unit using the CLI1 Set the IP address and netmask of the LAN interface:
config system interfaceedit port1set ip <interface_ipv4mask>end
2 Confirm that the address is correct:get system interface
3 Set the primary and optionally the secondary DNS server IP address:
config system dnsset primary <dns_ipv4>set secondary <dns_ipv4>end
4 Set the default gateway:
config system routeedit 1set device port1set dst <address_ipv4mask>set gateway <gateway_address_ipv4>end
For more configuring options, see the FortiAnalyzer CLI Reference.
Collecting logsThe power of theFortiAnalyzer unit centers on reporting and network analysis capability collated from log data. The FortiAnalyzer unit can collect log messages from multiple FortiGate, FortiManager, FortiClient and FortiMail devices and Syslog servers, to enable you to generate many different report types from that log data.This section describes how to configure the FortiAnalyzer unit and a FortiGate unit for log collection. For information on collecting log data from other Fortinet products, see the FortiAnalyzer Administration Guide.
ortiAnalyzer Version 4.0 Install Guide5-400-0411-20090508 17ttp://docs.fortinet.com/ • Feedback
Collecting logs Configuring
Adding a FortiGate unitA FortiGate unit must be configured to send log messages to a FortiAnalyzer unit. This configuration can occur before or after the FortiAnalyzer unit’s configuration to receive those logs.The steps to add a device vary according to the log settings you want, and to a FortiAnalyzer unit’s configured response to an initial log connection attempt. For details, see “Unregistered Device Options” in the FortiAnalyzer Administration Guide.The following procedure uses the default options and configures a FortiGate unit running FortiOS 4.0.
To send FortiGate unit logs to a FortiAnalyzer unit1 On the FortiGate unit, go to Log&Report > Log Config > Log Setting.2 Select the Expand Arrow for Remote Logging to expand the options.3 Select a security level to log.4 Select Static IP Address and enter the IP Address of the FortiAnalyzer unit.5 Select Apply.For more information on the logging options, see the “Log&Report” chapter in the FortiGate Administration Guide.
Log configurationYou must also configure the FortiGate unit for the type of data you want the FortiGate to log and send to the FortiAnalyzer unit. There are two main locations for configuring the log types:• configure the event logs by going to Log&Report > Log Config > Event Log.• enable feature logs by going to Firewall > Protection Profile, and editing a profile.
Register the FortiGate unit with FortiAnalyzerOnce the FortiGate unit begins sending log data to the FortiAnalyzer unit, the FortiGate unit will appear in the devices list. To complete the connection, configure the device privileges and port assignments for the log data.
To register a FortiGate unit with a FortiAnalyzer unit1 On the FortiAnalyzer unit, go to Device > All.2 Select Edit.3 Expand the Devices Privileges settings.4 Set the privileges the FortiGate unit has when sending and viewing log files, archived
content and quarantined files.
5 Expand the Group Membership settings.
Note: Due to the nature of connectivity for certain HA modes, full content archiving and quarantining may not be available for FortiGate units in an HA cluster. For details, see the FortiGate HA Overview.
Note: Accessing logs, content logs and quarantined files is available on FortiGate units running firmware version 3.0 or later.
FortiAnalyzer Version 4.0 Install Guide18 05-400-0411-20090508
http://docs.fortinet.com/ • Feedback
Configuring Collecting logs
F0h
6 Select the group where you want to include the FortiGate unit, and select the right arrow button to add the FortiGate unit to the group. A FortiGate unit can belong to multiple groups.You can also add the FortiGate unit to a group later or change the group you assigned.
7 Expand the FortiGate Interface Specification settings.8 Define the port interface options using the arrow buttons. For details on port interface
settings see “Defining FortiGate interfaces” on page 19.If you want to add a VLAN or other interface, type the name of the interface and select Add.
9 Select OK.For more information, see the FortiAnalyzer Administration Guide.
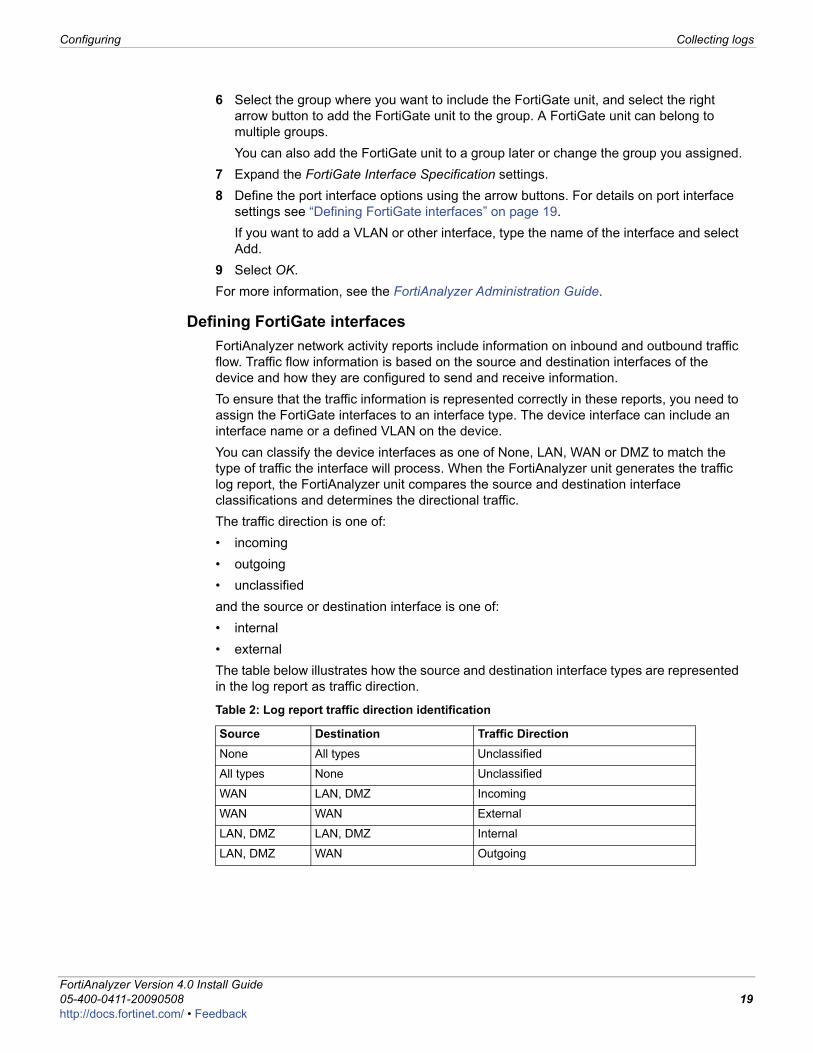
Defining FortiGate interfacesFortiAnalyzer network activity reports include information on inbound and outbound traffic flow. Traffic flow information is based on the source and destination interfaces of the device and how they are configured to send and receive information.To ensure that the traffic information is represented correctly in these reports, you need to assign the FortiGate interfaces to an interface type. The device interface can include an interface name or a defined VLAN on the device.You can classify the device interfaces as one of None, LAN, WAN or DMZ to match the type of traffic the interface will process. When the FortiAnalyzer unit generates the traffic log report, the FortiAnalyzer unit compares the source and destination interface classifications and determines the directional traffic.The traffic direction is one of:• incoming• outgoing• unclassifiedand the source or destination interface is one of:• internal• externalThe table below illustrates how the source and destination interface types are represented in the log report as traffic direction.
Table 2: Log report traffic direction identification
Source Destination Traffic DirectionNone All types Unclassified
All types None Unclassified
WAN LAN, DMZ Incoming
WAN WAN External
LAN, DMZ LAN, DMZ Internal
LAN, DMZ WAN Outgoing
ortiAnalyzer Version 4.0 Install Guide5-400-0411-20090508 19ttp://docs.fortinet.com/ • Feedback
Further reading Configuring
Further readingThe FortiGate unit and FortiAnalyzer unit are now configured to send and receive log information. Using this log collection, you can view traffic, vulnerability statistics and run reports from a selection of over 200 reports in 15 categories.To help you in further configuration and data analysis, see these other Fortinet documents, available from the Technical Documentation web site (http://docs.forticare.com).• FortiAnalyzer Administration Guide includes further configuration and technical
information on your FortiAnalyzer unit.• FortiGate Administration Guide includes steps for enabling the various logging options
and details on the logging levels.• FortiGate Log Message Reference, describes what each log messages means and its
components.
FortiAnalyzer Version 4.0 Install Guide20 05-400-0411-20090508
http://docs.fortinet.com/ • Feedback
Firmware Backing up the FortiAnalyzer unit
F0h
FirmwareFortinet periodically updates the FortiAnalyzer firmware to include enhancements and address issues. After you have registered your FortiAnalyzer unit, FortiAnalyzer firmware is available for download at http:// support.fortinet.com.Only the FortiAnalyzer administrators, whose access profiles contain system configuration read and write privileges, and the FortiAnalyzer admin user can change the FortiAnalyzer firmware.
Backing up the FortiAnalyzer unitBefore upgrading the FortiAnalyzer firmware, it is good practice to backup your configuration information and logs stored on the hard disk in the event something goes wrong during the upgrade.
Backing up the configurationBackup the FortiAnalyzer configuration to a local PC using the web-based manager or to a FTP server using the CLI.
To back up the configuration using the web-based manager1 Go to System > Maintenance > Backup & Restore.2 Select Encrypt if you want a secure configuration file or to save the passwords included
in the configuration.3 Select Backup and select a location to store the configuration file.To back up the configuration using the CLI, enter the following command:
execute backup config {[ftp | sftp | scp | tftp] <ip_address> <arg_1> <arg_2> <arg_3> <arg_4>}
where• arg_1 – For FTP, SFTP or SCP enter a user name. For TFTP enter a directory or
filename. • arg_2 – For FTP, SFTP or SCP enter a password or enter ‘-’. For TFTP enter the
filename or press Enter. • arg_3 – For FTP, SFTP or SCP enter a directory or filename. For TFTP, press Enter. • arg_4 – Enter a filename or press Enter.
Backing up the FortiAnalyzer hard diskBefore upgrading the FortiAnalyzer firmware, it is extremely important that you back up the log data first. Using the CLI, you can perform a global backup of all log information to an FTP server.To backup the log information on the FortiAnalyzer hard disk, use the CLI to enter the following command:execute backup logs {[all | <devices_str>] [ftp | scp | sftp | tftp] <server_ipv4> <username_str> <password_str> <directory_str>}
ortiAnalyzer Version 4.0 Install Guide5-400-0411-20090508 21ttp://docs.fortinet.com/ • Feedback
Using the web-based manager Firmware
Restoring the logsOnce you complete the firmware upgrade, you can restore the log information to the FortiAnalyzer hard disk.
execute restore logs {[all | All_FortiClients | <device_name(s)] [ftp | sftp | scp] <ip_address> <user_name> <password> <directory_str>
Using the web-based managerThe web-based manager provides an easy to use method of upgrading or downgrading the firmware on the FortiAnalyzer unit.
Upgrading the firmware
To upgrade the firmware1 Download the firmware image file to your management computer.2 Log into the web-based manager as the admin administrative user.3 Go to System > Dashboard.4 Under System Information > Firmware Version, select Update.5 Select Choose File and locate the file.6 Select OK.
The FortiAnalyzer unit uploads the firmware image file, upgrades to the new firmware version, restarts, and displays the FortiAnalyzer login. This process takes a few minutes.
Downgrading the firmwareThe following procedures install an older version of the firmware and reverts the FortiAnalyzer unit to its factory default configuration.Before beginning this procedure, it is recommended that you:• back up the FortiAnalyzer unit configuration • back up the logs on the hard disk.
To revert to a previous firmware version1 Download the firmware image file to the management computer.2 Log into the FortiAnalyzer web-based manager.3 Go to System > Dashboard.
Note: Before using the restore CLI command, ensure you add the FortiGate units for the logs first. The command will not function without the devices to associate with the logs. For details on adding a FortiGate unit, see the chapter “Adding a FortiGate unit” on page 18.
Note: To use this procedure, you must log in using the admin administrator account, or an administrator account that has system configuration read and write privileges.
Note: To use this procedure, you must log in using the admin administrator account, or an administrator account that has system configuration read and write privileges.
FortiAnalyzer Version 4.0 Install Guide22 05-400-0411-20090508
http://docs.fortinet.com/ • Feedback
Firmware Using the CLI
F0h
4 Under System Information > Firmware Version, select Update.5 Select Choose File and locate the file.6 Select OK.
The FortiAnalyzer unit uploads the firmware image file, reverts to the old firmware version, resets the configuration, restarts, and displays the FortiAnalyzer login. This process takes a few minutes.
7 Log into the web-based manager and restore your configuration and log data.
Using the CLIThe CLI provides an easy to use method of upgrading or downgrading the firmware on the FortiAnalyzer unit.
Upgrading the firmwareTo use the following procedure, you must have a TFTP server the FortiAnalyzer unit can connect to.
To upgrade the firmware using the CLI1 Make sure the TFTP server is running.2 Copy the new firmware image file to the root directory of the TFTP server.3 Log into the CLI.4 Make sure the FortiAnalyzer unit can connect to the TFTP server.
You can use the following command to ping the computer running the TFTP server. For example, if the IP address of the TFTP server is 192.168.1.168:execute ping 192.168.1.168
5 Enter the following command to copy the firmware image from the TFTP server to the FortiAnalyzer unit:execute restore image {[ftp | sftp | scp | tftp] <ip_address> <arg_1> <arg_2> <arg_3> <arg_4>}
Where • arg_1 – For FTP, SFTP or SCP enter a user name. For TFTP enter a directory or
filename. • arg_2 – For FTP, SFTP or SCP enter a password or enter ‘-’. For TFTP enter the
filename or press Enter. • arg_3 – For FTP, SFTP or SCP enter a directory or filename. For TFTP, press Enter. • arg_4 – Enter a filename or press Enter.
The FortiAnalyzer unit responds with the message:This operation will replace the current firmware version!Do you want to continue? (y/n)
6 Type y.The FortiAnalyzer unit uploads the firmware image file, upgrades to the new firmware version, and restarts. This process takes a few minutes.
Note: To use this procedure, you must log in using the admin administrator account, or an administrator account that has system configuration read and write privileges.
ortiAnalyzer Version 4.0 Install Guide5-400-0411-20090508 23ttp://docs.fortinet.com/ • Feedback
Using the CLI Firmware
7 Reconnect to the CLI.8 To confirm the new firmware image is successfully installed, enter:
get system status
Downgrading using the CLIThis procedure reverts the FortiAnalyzer unit to its factory default configuration and deletes IPS custom signatures, web content lists, email filtering lists, and changes to replacement messages.Before beginning this procedure you should:• back up the FortiAnalyzer unit system configuration• back up the logs on the hard disk
To use the following procedure, you must have a TFTP server the FortiAnalyzer unit can connect to.
To revert to a previous firmware version using the CLI1 Make sure the TFTP server is running.2 Copy the firmware image file to the root directory of the TFTP server.3 Log into the FortiAnalyzer CLI.4 Make sure the FortiAnalyzer unit can connect to the TFTP server.
You can use the following command to ping the computer running the TFTP server. For example, if the TFTP server's IP address is 192.168.1.168:execute ping 192.168.1.168
5 Enter the following command to copy the firmware image from the TFTP server to the FortiAnalyzer unit:execute restore image {[ftp | sftp | scp | tftp] <ip_address> <arg_1> <arg_2> <arg_3> <arg_4>}
Where • arg_1 – For FTP, SFTP or SCP enter a user name. For TFTP enter a directory or
filename. • arg_2 – For FTP, SFTP or SCP enter a password or enter ‘-’. For TFTP enter the
filename or press Enter. • arg_3 – For FTP, SFTP or SCP enter a directory or filename. For TFTP, press Enter. • arg_4 – Enter a filename or press Enter.The FortiAnalyzer unit responds with the message:
This operation will replace the current firmware version!Do you want to continue? (y/n)
Note: To use this procedure, you must log in using the admin administrator account, or an administrator account that has system configuration read and write privileges.
FortiAnalyzer Version 4.0 Install Guide24 05-400-0411-20090508
http://docs.fortinet.com/ • Feedback
Firmware Installing firmware images from a system reboot using the CLI
F0h
6 Type y.The FortiAnalyzer unit uploads the firmware image file. After the file uploads, a message similar to the following is displayed:Get image from tftp server OK.Check image OK.This operation will downgrade the current firmware version!Do you want to continue? (y/n)
7 Type y.The FortiAnalyzer unit reverts to the old firmware version, resets the configuration to factory defaults, and restarts. This process takes a few minutes.
8 Reconnect to the CLI.9 To confirm the new firmware image has been loaded, enter:
get system status
Installing firmware images from a system reboot using the CLIThis procedure installs a specified firmware image and resets the FortiAnalyzer unit to default settings. You can use this procedure to upgrade to a new firmware version, revert to an older firmware version, or re-install the current firmware version.To use this procedure, you must connect to the CLI using the FortiAnalyzer console port and a RJ-45 to DB-9 or null-modem cable. This procedure reverts the FortiAnalyzer unit to its factory default configuration.
For this procedure you:• Access the CLI by connecting to the FortiAnalyzer console port using a null-modem
cable.• Install a TFTP server that you can connect to from the FortiAnalyzer interface. The
TFTP server should be on the same subnet as the internal interface.Before beginning this procedure you can:• back up the FortiAnalyzer unit configuration • back up the log data on the hard disk
To install firmware from a system reboot1 Connect to the CLI using the null-modem or RJ-45 to DB9 cable and FortiAnalyzer
console port.2 Make sure the TFTP server is running.3 Copy the new firmware image file to the root directory of the TFTP server.4 Make sure the internal interface is connected to the same network as the TFTP server.5 Enter the following command to restart the Fortinet unit:
execute reboot
The FortiAnalyzer unit responds with the following message:This operation will reboot the system !Do you want to continue? (y/n)
ortiAnalyzer Version 4.0 Install Guide5-400-0411-20090508 25ttp://docs.fortinet.com/ • Feedback
Installing firmware images from a system reboot using the CLI Firmware
6 Type y.As the FortiAnalyzer units starts, a series of system startup messages is displayed.When one of the following messages appears:
Press any key to display configuration menu.......
Immediately press any key to interrupt the system startup.
If you successfully interrupt the startup process, one of the following messages appears:
[G]: Get firmware image from TFTP server.[F]: Format boot device.[B]: Boot with backup firmware and set as default[C]: Configuration and information[Q]: Quit menu and continue to boot with default firmware.[H]: Display this list of options.
Enter G,F,B,C,Q,or H:
7 Type G to get the new firmware image from the TFTP server.The following message appears:Enter TFTP server address [192.168.1.168]:
8 Type the address of the TFTP server and press Enter.The following message appears:Enter Local Address [192.168.1.188]:
9 Type an IP address that can be used by the FortiAnalyzer unit to connect to the FTP server.The IP address can be any IP address that is valid for the network the interface is connected to. Make sure you do not enter the IP address of another device on this network.The following message appears:Enter File Name [image.out]:
10 Enter the firmware image file name and press Enter.The TFTP server uploads the firmware image file to the FortiAnalyzer unit and messages similar to the following are displayed:
Save as Default firmware/Run image without saving:[D/R]
11 Type D.The FortiAnalyzer unit installs the new firmware image and restarts. The installation might take a few minutes to complete.
Note: You have only 3 seconds to press any key. If you do not press a key soon enough, the Fortinet unit reboots and you must log in and repeat the execute reboot command.
FortiAnalyzer Version 4.0 Install Guide26 05-400-0411-20090508
http://docs.fortinet.com/ • Feedback
Index
F0h
IndexAackup, 21Adding a FortiGate unit, 18air flow, 9ambient temperature, 9
Bbackup, 21
CCLI, 15
connecting, 16command line interface, 15, 16comments, documentation, 6configuration backup, 21connecting
to the CLI, 16to the web-based manager, 16
customer service, 5
Ddefine device port interfaces, 19documentation
commenting on, 6Fortinet, 5
downgrade firmware, 22
Eearthing, 10environmental specifications, 9
Ffirmware
downgrade, 22installing, 25re-installing current version, 25reverting to an older version, 25upgrade, 22
firmware updates, 21FortiAnalyzer
specs, 9FortiGate
port interfaces, 19registering, 18
FortiGate documentationcommenting on, 6
FortiGate unitgroups, 19registering, 18
Fortinet customer service, 5Fortinet documentation, 5Fortinet Knowledge Center, 5further reading, 20
Ggrounding, 10groups
FortiGate unit, 19
Hhumidity, 9
Iinstalling slide rails, 11introduction
Fortinet documentation, 5
Llogs
backup, 21configuring, 18restore, 21
Mmounting, 11
Nnull modem, 17
Ooperating temperature, 9
Pport
interfaces, 19powering
off, 14on, 13
Rrecovery CD, 14Register a FortiGate unit, 18restore, 21reverting, to an older firmware version, 25
Sshielded twisted pair, 10shut down, 14slide rails, 11specifications
environmental, 9FortiAnalyzer, 9
Ttechnical support, 5
ortiAnalyzer Version 4.0 Install Guide5-400-0411-20090508 27ttp://docs.fortinet.com/ • Feedback
Index
terminal settings, 17traffic
flow on a FortiGate unit, 19turning
off, 14on, 13
Uupdating firmware, 21upgrade
firmware, 22
Wweb-based manager, 15
connecting, 16
FortiAnalyzer Version 4.0 Install Guide28 05-400-0411-20090508
http://docs.fortinet.com/ • Feedback

www.fortinet.com

www.fortinet.com