Embed Size (px)
Citation preview

Instructions for posting purchase card transactions in JP Morgan.
1. Go to www.paymentnet.jpmorgan.com
2. Log in:
a. Organization ID is Yavapai
b. User ID will be provided by JP Morgan
c. Password will be provided by JP Morgan
3. For Log in help select Log in Help from the Resources menu
4. Use the attached Quick Reference Guide when logging in for the first time.

5. The main home page will display.

6. To view transactions, select Transactions from the menu bar and then select Manage

7. Cardholders will be able to view all current transactions. Note: each month the Business Office
will export all transactions into Banner after all FOAPS have been entered. Once that occurs the
transaction will no longer display in the transaction list.
8. Cardholders can sort transactions by selecting any of the fields in the menu bar. Cardholders that
have more transactions than will fit on one page can use the navigation arrows that appear on the
bottom of the page.
9. The Accounting Code Value field now contains the following data:
a. COA‐US64368‐ Yavapai College Chart of Accounts
b. Cardholder Department
c. FOAP
Note: The Cardholder Department and FOAP are now merged together whereas before the FOAP was
listed in a separate column. The transactions will now have dashes after the Cardholder Department
when the FOAP has not been entered.
FOAP not
entered

10. To enter FOAP, double click on the transaction.
11. Enter the correct FOAP in the Account Code Section.
12. Enter a description of the purchase in Transaction Notes.
13. Select the Save button to save data entry.
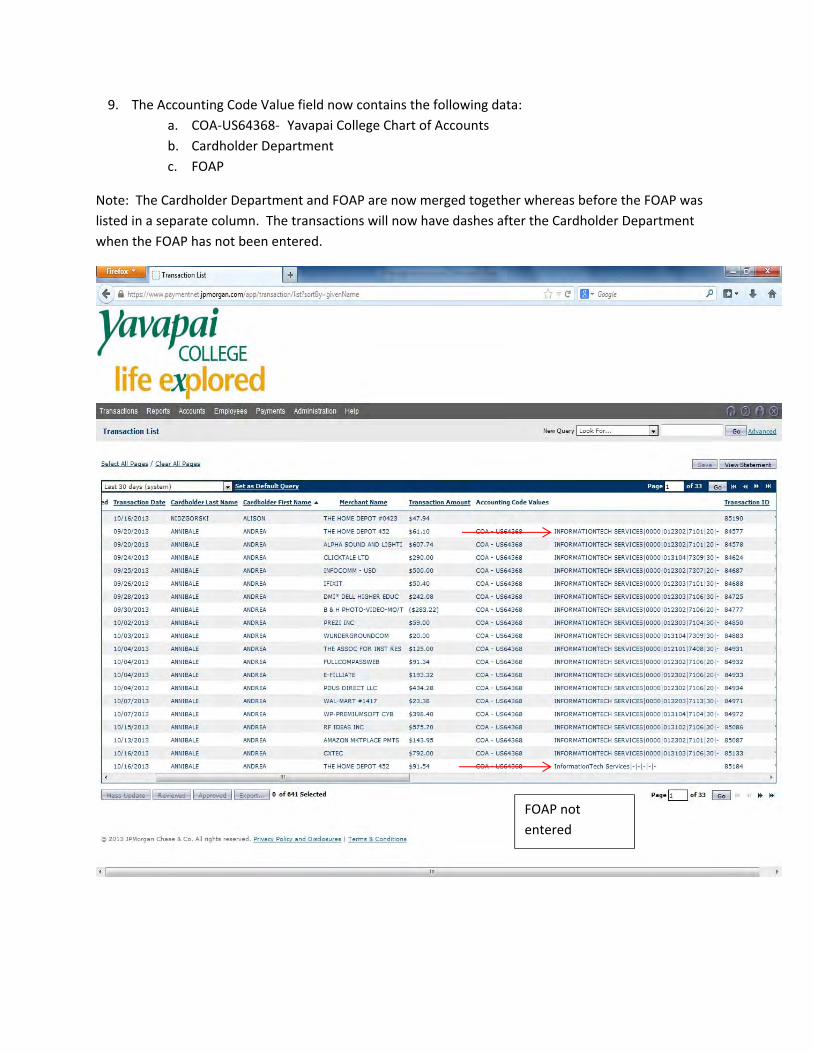
14. A message will display in green indicating the transaction has been saved.

15. To split a transaction between multiple FOAPS select Add Lines.

16. Enter the Number of Lines that will be needed.

17. Click on the arrow button to enter FOAPS.

18. Enter the FOAP for the first line. If the transaction is to be split equally, the system will split the
transaction equally depending on the number of lines selected.

19. If the transaction needs to be split another way, enter the amount to be allocated in the Unit Price
box for the first transaction. If there are only two lines, the system will automatically calculate the
difference and allocate it to the second line. If not, continue entering amounts in the Unit Price
column until the transaction is complete.
20. Make sure to save the data entry before returning to the main transaction list

21. Split transactions will show up under the Accounting Code Values as show above. Single line
transactions will show the FOAP.

23. To log off, select the log off Icon
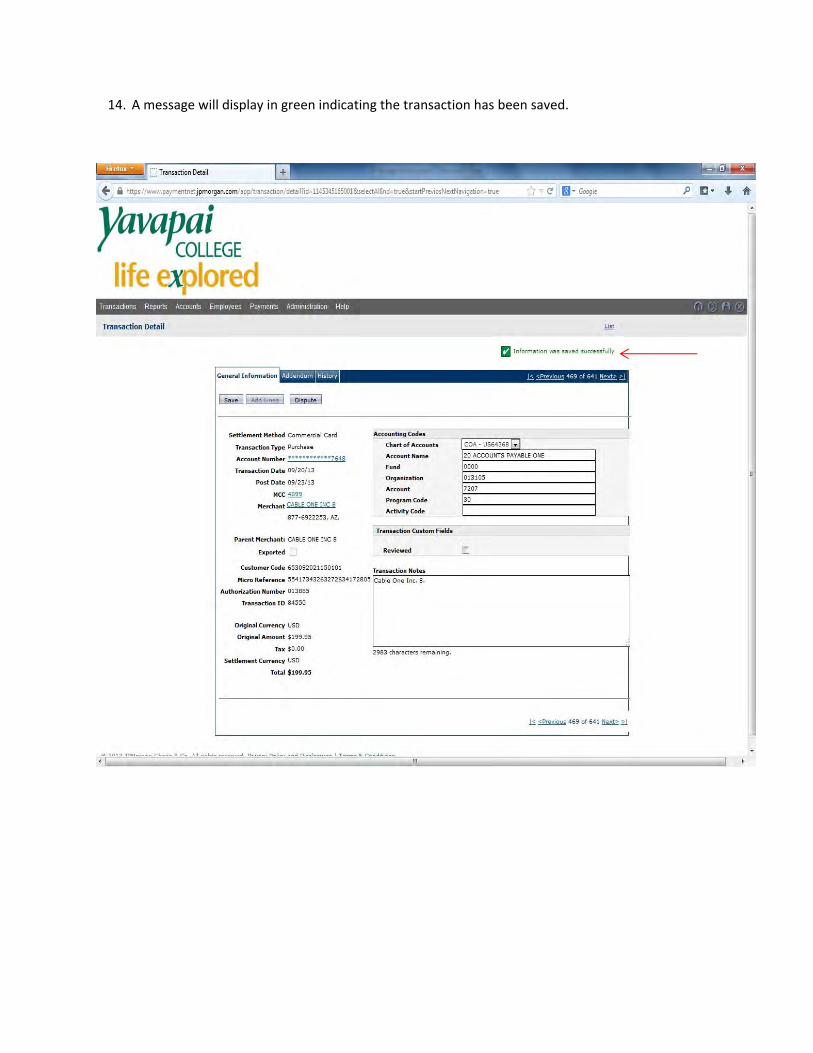
To change the screen view when reviewing transactions select my profile Icon.

Select the Screen Views tab and then Transaction List. From there Columns can be added/deleted moved up or down.