Embed Size (px)
Citation preview
www.beaconmedia.com.au
1
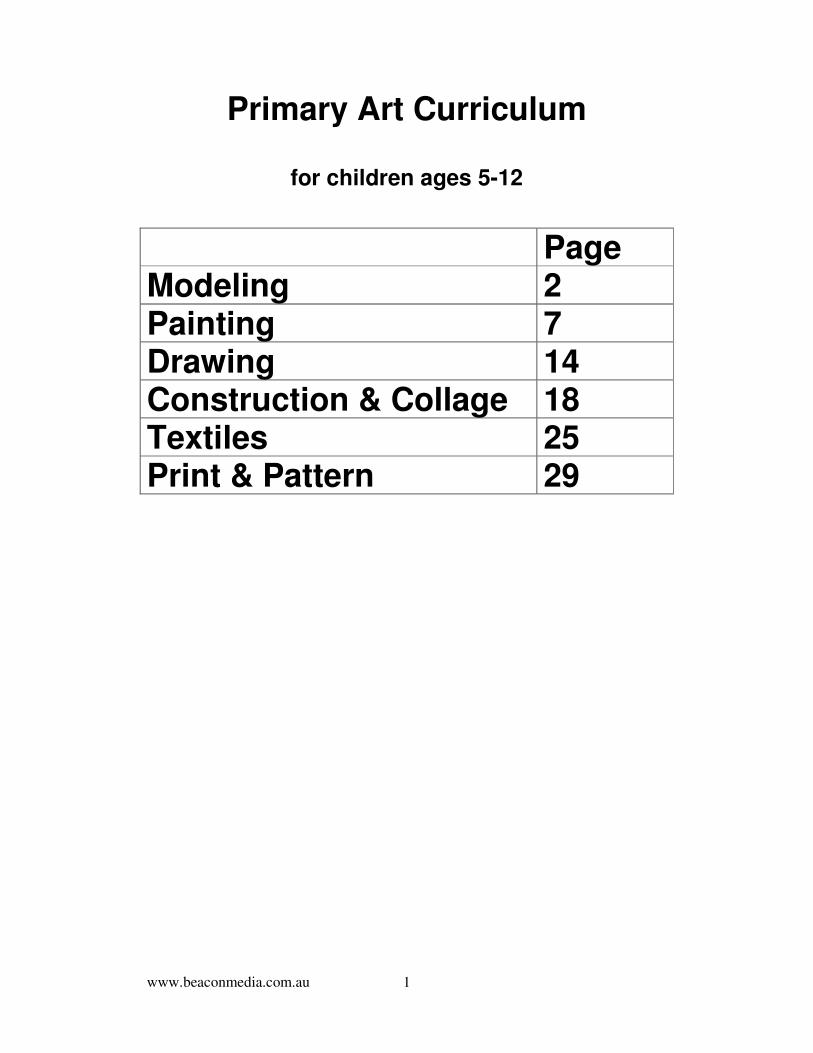
Primary Art Curriculum
for children ages 5-12
Page Modeling 2 Painting 7 Drawing 14 Construction & Collage 18 Textiles 25 Print & Pattern 29

www.beaconmedia.com.au
2
Modeling
Christian growth: • Jeremiah at the potter’s house (Jeremiah 18) – God shapes us and
moulds us. We need to allow Him to change us.
• The Wedding of Cana (John 2:1-11) – Jesus changed water into wine. He can change people, but people have to be willing to change.
• A servant of all (Mark 10:32-45) – A servant is flexible. They put aside their own plans to help others. Think about the flexibility of the modeling material.
Age group: 5-6 years Number of lessons: 4
Sequence: To explore the modeling media using manipulation (2 lessons) Activities for Lesson 1:
• Close the fist on modeling material and feel the texture.
• Use the finger and thumb to pinch the modeling material.
• Nip the modeling material between adjacent fingers.
• Press into a mass using knuckles.
• Roll into a ball, a) between palms b) on a table top Activities for Lesson 2
• Explore rolling, pounding, throwing down onto a table, pulling apart, joining together, stretching, flattening
• Make a form by squeezing out only.
• Make a form by adding pieces to a basic form.
• Hollow out the lump.
Sequence: To explore shape and form. (2 lessons) Activities for Lesson 1:
• Create the following shapes: tall, thin, round, fat, flat, curled, wide, twisted, short.
• Make a snake.
• Make 2D shapes from coils Activities for Lesson 2:
• Cut out 2D shapes from a flat piece of clay / dough. e.g. make ‘biscuits’.
• Make a tired shape; a happy shape
• Make pancakes.

www.beaconmedia.com.au
3
Age group: 6-7 years Number of lessons: 4
Sequence: To explore shape and form using clay Activities for Lesson 1:
• Divide your piece of clay into 2 equal pieces. Put a hole in one lump of clay. Work the hole into a shape. Now change the shape of the other lump to match the hole.
• Make a flat shape, e.g. a triangle. Now make a solid 3D shape that looks like the flat one, (a pyramid). Do the same for a flat circle and a 3D ball; a flat square and a 2D cube.
Activities for Lesson 2:
• Look at pebbles and stones. Make some with clay.
• Make some beads. Activities for Lesson 3:
• Make your pet or a zoo animal.
• Now make your animal move.
• Make an animal you could ride.
• Now make a rider for the animal. Activities Lesson 4:
• Make a 2D person.
• make a 3D person
Age group: 7-8 years Number of lessons: 4
Sequence: To use clay to develop features of a head Activities for Lesson 1:
• Make a 2D relief sculpture of the face of the person opposite you, a) using incision (carved out), b) raised features.
• Make a drawing in clay of a face using long thin sausages. Activities for Lesson 2
• Make 3D standing models of various people e.g. family members, TV personalities.

www.beaconmedia.com.au
4
Sequence: To model a human figure using clay
Activities for Lesson 1:
• Ask children to take turns in demonstrating the following actions, while class observes the human form in action: running, jumping, skipping, hopping, walking, washing, balancing, kicking a football.
• Now model a human figure involved in one of these actions. Activities for Lesson 2:
• Ask children to mime people at work: gardener digging, farmer picking fruit etc.
• Now model a human figure involved in one of these activities.
Age group: 8-9 years Number of lessons: 4
Sequence: To develop and understanding of texture using clay Activities for Lesson 1:
• Make pieces of clay into flat pancakes. Make imprints of things with texture, e.g. a pine cone, a toothbrush, a kitchen grater, a fork, sea shells, fly-wire
• Flatten more clay and try making textures with just the point of a pencil.
• Make a series of textured ‘tiles’. Activities for Lesson 2:
• Make a textured picture using a large piece of flattened clay.
• Make a porcupine; a feathered bird; a scaly lizard of dinosaur
Sequence: To create a group scene using clay Activities for Lesson 1:
• animals in a zoo
• landing on the moon
• boats in a storm
• climbing over rocks Activities for Lesson 2:
• a city
• a countryside
• a playground
• a village

www.beaconmedia.com.au
5
Age group: 9-10 years Number of lessons: 4
Sequence: To develop representation of dress, facial expression and gesture using clay Activities for Lesson 1:
• Make a person dressed up for a cold day.
• Make a child wearing Mum’s shoes.
• Make a clown.
• Make a person dressed in national costume.
Activities for Lesson 2:
• Make a rich person.
• Make an old person.
• Make a happy person.
• Make a sad person.
Sequence: To experiment with structures for strength using clay Activities for Lesson 1:
• How tall can you make the clay?
• How thin can you make the clay?
• Make a man lifting a log
• Make a fat elephant. (You will need short, thick legs for a heavy body.)
Activities for Lesson 2:
• Make a tall person kneeling.
• Make the Eiffel Tower.
• Make the Sydney harbour bridge.
• Make a person riding a fast horse.
Age group: 10-11 years Number of lessons: 4
Sequence: To show expression of emotions and feelings using clay Activities for Lesson 1:
• Make faces: happy, sad, afraid, angry.
• Make a person who feels cold; Make a person who feels hot.
• Make a person who feels tired.

www.beaconmedia.com.au
6
Sequence: To show texture and decoration in clay Activities for Lesson 1:
• Experiment with raising the clay surface. Pull up the clay with your thumb and first finger. Now pull up the clay with all your fingers.
• Make a long sausage and make it into a flat coil.
• Make another sausage and make it into waves.
• Make a flat plaque and decorate it with flat coils and waves.
Activities for Lesson 2:
• Make a flat plaque. See how many different marks you can make with your hands and fingers.
• Make another plaque and decorate it with stamped imprints. Use things like cotton reels, bottle lids, coins, or any objects that will make an interesting textured pattern.
Activities for Lesson 3:
• Make a coil pot.
• Smooth out the surface of your pot.
• Now decorate the surface of your pot with textured or coiled patterns.
Age group: 11-12 years Number of lessons: 4
Sequence: To make some simple pottery Activities for Lesson 1:
• Make a thumb pot. Start with a ball of clay and work out the centre with your two thumbs.
• Use coils to extend your thumb pot, (making it higher). Use slip. Smooth out the coils.
Activities for Lesson 2:
• Make a slab pot. Roll out some clay to form a flat slab. Use a knife to cut 5 squares of the same size. Use one as the bottom and the other four as sides. Use a sausage of clay to join where the sides meet. (The sausages go on the inside. Use slip and smooth out.)
Activities for Lesson 3:
• Make a mat by making flat spirals and joining them together.
• Make a coil pot.
Activities for Lesson 4:
• Make a useful vessel with a handle.

www.beaconmedia.com.au
7
Painting Spiritual growth: Painting is an avenue for our expression of worship to God. We can celebrate the joy He gives us when we use bright happy colours, and vibrant movement of the brush. We can express His peace by using calm, cool colours and by representing the tranquil beauty of His creation. We are reminded of His loving kindness as we depict human activity. We can say that God is an awesome God as we stop to experience His wonderful creation and express our praise through paint.
Age group: 5-6 years Number of lessons: 8
Sequence: To develop an understanding of the qualities of paint Children will explore qualities of paint: different thicknesses and methods of applying it. Activities for Lesson 1:
• Finger paint using one colour. Teacher prepares mixture of paint and laundry starch.
• Finger paint using other items as well, such as bottle tops, forks, combs, piece of cardboard with zigzag cut edge.
Activities for Lesson 2:
• Paint with thickened paint on paper, using both large and medium sized brushes. (Primary colours)
Activities for Lesson 3:
• Thin paint or food dye on non-absorbent paper.
• This paint or food dye on absonant paper.
Activities for lesson 4:
• Paint on fabric.
Sequence: To develop awareness of the human figure Activities for Lesson 1:
• Paint yourself. (Children can draw themselves on a large sheet of paper where everyone contributes and teacher writes names on each figure. Then display as wall mural)
Activities for Lesson 2:
• Paint yourself running / jumping / hopping / swimming.

www.beaconmedia.com.au
8
Activities for Lesson 3:
• Paint yourself: at the dentist; cooking with Mum; digging in the garden with Dad.
Activities for Lesson 4:
• Paint a picture of your family.
Age group: 6-7 years Number of lessons: 8
Sequence: To develop an understanding of the qualities of paint Activities for Lesson 1:
• Paint with varied tools such as rollers, sponges, cotton wool in a cloth bundle; toothbrushes; cardboard; finders
Activities for Lesson 2:
• Paint with dry powder paint on wet paper. (Children wet the paper with a sponge.)
Activities for Lesson 3:
• Paint with thin paint on wet paper. Activities for Lesson 4:
• Paint with thick paint and two thicknesses of brushes.
Sequence: To develop and understanding of colour Activities for Lesson 1:
• Finger painting using two primary colours. Activities for Lesson 2:
• Marbelling. Drop some thin paint of two colours on to a sheet of paper. Fold in half.
Activities for Lesson 3:
• Paint using three primary colours. Activities for Lesson 4:
• Two colours of powder paint are together in a container: blue and yellow; red and blue; or red and yellow. Paint with dry powder paints on wet paper.

www.beaconmedia.com.au
9
Age group: 7-8 years Number of lessons: 8
Sequence: To develop the skills of observation and awareness Activities for lesson 1:
• Look at food pictures and smell some different types of food.
• Mime some food activities, e.g. eating hot curry; eating an ice block; eating something sour; eating something delicious.
• Paint some favourite foods, or food experiences.
Activities for Lesson 2:
• What colour makes you feel…angry? sad? happy? excited?
• Paint a happy picture.
Activities for Lesson 3:
• Paint a picture of yourself when you are feeling happy.
Activities for Lesson 4:
• Look through a small hole in a piece of cardboard. Take your cardboard outside and look at plants, trees, flowers, grass, stones. Look at these things carefully.
• Paint some of the things you saw outside.
Sequence: To develop and understanding of shape Activities for Lesson 1:
• Look at shapes around you, or in photographs. E.g. the moon, a circle or crescent; a roof might be a triangle.
• Paint a picture, and try to think about shapes.
• Explain your painting to the class and ask the class to find the shapes you have used.
Activities for Lesson 2:
• Tear or cut shapes from newspaper. Paste these on your page and now complete the painting.
Activities for Lesson 3:
• Draw a large shape on a page and make it into a painting.
Activities for Lesson 4: Think of some shapes in the environment. Cut out these shapes from coloured paper, stick them on the page and complete the picture in paint. E.g. a brown rectangle could be the trunk of a tree; a blue oval could be a pond.

www.beaconmedia.com.au
10
Age group: 8-9 years Number of lessons: 8
Sequence: To develop and understanding of size relationships Activities for Lesson 1:
• Paint the members of your family using black paint only. Activities for Lesson 2:
• Paint a picture of your family’s house. Paint yourself and your pets outside the house. Paint the garden and trees if there are any.
Activities for Lesson 3:
• Paint a picture of Noah’s ark, and the animals going in two by two. Include some very big animals and some very small animals.
Activities for Lesson 4:
• Paint a city scene. Think about tall buildings, roads, cars, bikes, and people.
Sequence: To develop an understanding of texture (tactile) Activities for Lesson 1:
• Add sawdust to paint to create texture.
Activities for Lesson 2:
• Paint with paint thickened with glue. Sprinkle sand on top.
Activities for Lesson 3:
• Paint with paint thickened with glue, using paint knives and / or cardboard strips, or…
• Make a collage with pieces of corrugated cardboard, match sticks, leaves, fabrics etc. Paint over it.
Activities for Lesson 4:
• Drip candle wax over paper. Paint over it when dry, or…
• Build up a textured surface using tissue paper soaked in glue. Paint over it when dry.

www.beaconmedia.com.au
11
Age group: 9-10 years Number of lessons: 8
Sequence: To develop an understanding of visual texture Activities for lesson 1:
• Finger paint on paper that has been screwed up and smoothed out again. Alternatively use a wash.
Activities for lesson 2:
• Find examples of visual texture around us. Look for wood grains, patterns, photographs.
• Paint a scene that has visual texture, e.g. the trunk of a tree; the surface of the moon.
Activities for lesson 3
• Look at famous examples of pointillism, (dot painting).
• Paint with tools that give the appearance of visual texture, e.g. toothbrushes; cotton buds for dot painting; sponges, and pieces of textured fabric.
Activities for lesson 4:
• Paint with finger tips to create a scene. Press fingertips on to paper in repeated patterns. E.g. make a line of finger tip prints.
Activities for lesson 5:
• Paint on cardboard with thick paint mixed with glue. Create texture using palette knives and forks.
Activities for lesson 6:
• Paint a piece of paper completely with thick paint. Now etch a design by gently scratching the paint off while wet.
Activities for lesson 7:
• Paint a scene featuring dry brush strokes.
Activities for Lesson 8:
• Paint a scene from nature that shows visual texture
www.beaconmedia.com.au
12
Age group: 10-11 years Number of lessons: 8
Sequence: To develop and understanding of colour Activities for Lesson 1:
• Experiment with primary colour, mixing to make other colours.
Activities for Lesson 2:
• Paint a watercolour scene using wet paper and a sponge. Watch how the colours merge together.
Activities for Lesson 3:
• Paint a colourful scene, e.g. snorkelling on a coral reef; a flower garden
Activities for Lesson 4:
• Paint a colourful scene, e.g. fireworks; an explosion in the paint factory
Sequence: To develop representation of rhythm and movement Activities for Lesson 1:
• Paint a scene that shows movement, e.g. a stormy sea.
Activities for Lesson 2:
• Paint an abstract pattern using free movement with the brush, swirls and dynamic colour.
Activities for Lesson 3:
• Paint to music, transferring the rhythm of the music to your painting.
Activities for Lesson 4:
• Paint a scene showing movement, e.g. fireworks; wind in the trees; a tornado.
Age group: 11-12 years Number of lessons: 8 Sequence: To develop an understanding of tone and hue Activities for Lesson 1:
• Create a ‘wash-off’ painting. First paint the page with thick white paint. Allow to dry. Now paint with thin black paint. Wash off.
Activities for Lesson 2:
• Make a charcoal drawing and paint over it with a thin wash.
Activities for Lesson 3:

www.beaconmedia.com.au
13
• On a practice piece of paper, practice blending black and white in various tones.
• Now paint a scene of your choice using only black and white paint. E.g. skiing
Activities for Lesson 4:
• On a practice piece of paper develop various hues of one colour. E.g. if you choose green, start with white, then add a tiny bit of green for light green. Then add more little by little until you have dark green. Show the colours on your page from lightest to darkest.
• Paint a scene of your choice using white and one other colour. Try to include as many hues as possible.
Sequence: To develop understanding of colour Activities for Lesson 1:
• Create a colour wheel using the colours of the rainbow.
Activities for Lesson 2:
• Paint a composition using warm colours.
Activities for Lesson 3:
• Paint a composition using cool colours.
Activities for Lesson 4:
• Paint a composition using earthy colours, e.g. Australian Aboriginal art.

www.beaconmedia.com.au
14
Drawing
Christian growth: Drawing is a skill of precision. We use drawing to design objects and buildings, to draw maps and portray meaning. God has given us the ability to communicate through drawing. God showed King Solomon how to design a beautiful temple. God showed Noah how to design an ark of precise proportions. When we give our lives to God we ask Him to draw the plan for our lives. As we learn to hear His voice He will guide us with precision in the direction we are to go, in order to serve Him and have the maximum fulfillment in life. As well as using drawing as an art activity, students use drawing to develop communication skills, e.g. Making mind maps to summarize concepts or ideas; using a drawing to explain an idea to someone; playing ‘Pictionary’.
What is drawing? Drawing is making a line. Lines do not have to be made with pencils and crayons. They can be made with many other types of media.
Age group: 5-6 years Number of lessons: 4
Sequence: To develop observation and awareness For each of the following choose a different drawing medium, e.g. crayons, felt pens, dry pastel, oil pastel, coloured pencils, wet chalk. Activities for Lesson 1:
• Draw yourself. How many fingers? What colour is your hair? What colour are your eyes? What clothes do you like wearing? How many fingers do you have? Will you be smiling in your picture?
Activities for Lesson 2:
• Draw your family. Activities for Lesson 3:
• Draw your house. Draw your pets. Activities for Lesson 4:
• Draw some living things that you find on a nature walk..

www.beaconmedia.com.au
15
Age group: 6 - 7 years Number of lessons: 4
Sequence: To develop imagination For each of the four lessons in this sequence, the teacher can read a story for the children to illustrate. Choose a variety of different drawing materials, e.g. crayon, oil pastel with a wash over top; dry pastel on wet paper; felt pens
Age group: 7 - 8 years Number of lessons: 4
Sequence: To explore the possibilities of varied drawing media Activities for Lesson 1:
• Draw with match sticks, toothpicks or pipe cleaners.
Activities for Lesson 2:
• Draw with paper strips. Activities for Lesson 3:
• Draw with a brush and glue / paste. Then sprinkle coloured sand over the lines to make them show up.
Activities for Lesson 4:
• Draw with plant materials you collect on a nature walk, e.g. twigs, grasses, leaves, stems.
Age group: 8 - 9 years Number of lessons: 4
Sequence: To develop an understanding of texture in drawing Activities for Lesson 1:
• Draw on rough surfaces, such as fabric or corrugated cardboard. Activities for Lesson 2:
• Make some crayon rubbings. Then cut rectangles from the rubbings and make a line collage.

www.beaconmedia.com.au
16
Activities for Lesson 3:
• Crayon batik. Draw a design with crayon, very heavily on a piece of coloured paper. Now screw up your paper. Flatten it out again and use a wash (thin food dye) over the whole sheet). When dry, the paper can be ironed between two sheets of newspaper.
Activities for Lesson 4:
• Collect plant materials, e.g. grasses, twigs and use them to make a line collage.
Age group: 9 - 10 years Number of lessons: 4
Sequence: To experiment with lines Activities for Lesson 1:
• Take a line for a walk.
• Use different types of pecils to take a line for a walk on the one sheet of paper, e.g. different grades of grey lead pencils; coloured pencils.
Activities for Lesson 2:
• Make a drawing from wool. Cover the page with glue and stick the wool on to the page as a single line drawing.
Activities for Lesson 3:
• Cover the page with an oil pastel pattern. The whole page must be coloured in. Now paint over the pattern with black paint. Now etch in a design.
Activities for Lesson 4:
• Draw with a fine brush and black paint. Choose a subject that involves lines, e.g. tall buildings in a city.
Age group: 10 - 11 years Number of lessons: 4
Sequence: To develop an understanding of shape Activities for Lesson 1:
• Cut our tissue paper shapes and make a collage. Outline the shapes in black felt pen. Add line drawing to the shapes to make a picture.
Activities for Lesson 2:
• Draw shapes in both positive and negative designs. e.g. a solid square and an outlined square.

www.beaconmedia.com.au
17
• Make a design using positive and negative shapes.
Activities for Lesson 3:
• Draw the face of your partner using charcoal or pastel. Focus on shape.
Activities for Lesson 4:
• Make close-up detailed drawings of natural objects such as leaves, flowers, plants, fruit, vegetables.
.
Age group: 11 - 12 years Number of lessons: 4
Sequence: To develop an understanding of rhythm and movement Activities for Lesson 1:
• Use pencil or charcoal to create a scene which shows movement, e.g. the waves of the sea.
Activities for Lesson 2:
• Draw a free moving design with black crayon on newspaper. Paint over the design with a coloured or white wash.
Activities for Lesson 3:
• Look at photos of African animals on the move. Draw some animals in motion.
Activities for Lesson 4:
• Sketch a landscape.
www.beaconmedia.com.au
18
Construction and Collage
Christian growth: Buildings remind us that God is a protector. He keeps us safe. He is our shelter. We can build structures to protect ourselves from the weather. We can also build and make things to serve God and others. The Tower of Babel, (Gen 11:1-9), is an example of construction used to serve self, as the builders aimed at making a structure to get to God. Whatever we build should be founded upon the rock, (Matthew 7:24) Noah’s ark is an example of a structure used for God’s purposed. Noah built the ark in obedience to God. King Solomon also built the temple in obedience to God. When we give our creative talent to God, He can use it for His purposes. Buildings can be designed to serve God. Using our hands to create things is a way of using construction to serve.
Age group: 5-6 years Duration: 8 weeks
Sequence: To develop skills paper manipulation skills: cutting, tearing and fringing Activities for Lesson 1:
• Look at and name shapes around you.
• Tear an animal from newspaper.
• Tear shapes from tissue paper of different colours and paste them on to paper.
Activities for Lesson 2:
• Look at shapes in a picture story book.
• Cut shapes from coloured paper and paste them on to a sheet of paper.
• Cut out some spots for a leopard or a caterpillar. Now make a large drawing of the animal and paste on the spots.
Activities for Lesson 3:
• Experiment with fringing one edge of a piece of paper or newspaper.
• Make a garden mural with fringed crepe paper for grass and fringed flowers. Paint the stems and the background.
Activities for Lesson 4:

www.beaconmedia.com.au
19
• Make a clowns face using a paper plate as the base. Develop features using tearing, cutting and fringing.
• Or make a paper bag puppet.
Sequence: To make some simple 3D models. Activities for Lesson 1:
• Make some animals from vegetables and toothpicks.
Activities for Lesson 2:
• Make an egg carton caterpillar. Add cut-out shapes and pipe cleaner feelers.
Activities for Lesson 3:
• Make a box puppet. Use recycled boxes from home, e.g. biscuit boxes. The boxes should not be too large and should fit on a hand.
Activities for Lesson 4:
• Use recycled boxes from home to make a 3D construction of choice. Boxes can be held together with glued strips of paper. Decorate with coloured paper and other materials such as bottle tops, buttons, pop sticks.
• Give your construction a name.
Age group: 6-7 years Number of lessons: 8
Sequence: To develop paper manipulation skills: folding, scoring, weaving Activities for Lesson 1:
• Make a paper fan. Use the fan as a tail for a bird or a fish.
• Make an insect with folded legs.
Activities for Lesson 2:
• Cut out shapes from a single sheet of paper, but don’t cut them out completely. Leave a section or a side and fold each shape back on itself, so that a 3D textured look is created.
Activities for Lesson 3:
• Take a piece of newspaper and cut or tear around and around in a spiral to make one long strip. See who can get the longest strip without breaking the paper.
• Using scoring, cut a curly tail for a pig in the same way. Now cut out the pig and paste on to paper with its tail. (2D)
• Make a girl with curly hair. (2D)
Activities for Lesson 4:

www.beaconmedia.com.au
20
• Make a coloured woven mat. First take a sheet of coloured paper and cut horizontal strips inside an outer border. (Keep the paper in tact.) Now cut coloured strips from other pieces of paper. Weave these paper strips in and out of the strips on the first piece of paper.
Sequence: To construct 2D models form recycled materials Activities for Lesson 1:
• Make a large group traffic mat. Cut out and glue on roads, bridges and traffic signs. Make cars and buildings from small boxes.
Activities for Lesson 2:
• Use a box to make an animal. Think about how to join legs and head. Paper strips coated in glue can be used.
Activities for Lesson 3:
• Use a box as a base to make a dinosaur.
Activities for Lesson 4:
• Make a building of some kind: e.g. a house, a castle
Age group: 7-8 years Number of lessons: 8
Sequence: To develop paper construction skills: splitting and curling Activities for Lesson 1:
• Take two sheets of paper, of contrasting colours, or black and white. One piece should be bigger than the other. Draw repeated vertical lines on the smaller sheet. The lines can be straight or wavy. Now carefully separate the strips, pulling them apart. Glue the vertical strips on to the larger piece of paper, so that it appears as stripes. (This is paper splitting).
Activities for Lesson 2:
• Cut out a shape and split it. Glue it on to contrasting paper. Activities for Lesson 3:
• Make a paper strip relief. First cut out paper strips of different colours. Now arrange them on a piece of paper. In come places the strips can be risen up like a bridge.
Activities for Lesson 4:
• Make a box mask with curly hair. Make curls by rolling up thin paper strips.
www.beaconmedia.com.au
21
Sequence: To work with paper cylinders Activities for Lesson 1:
• Make a cylinder from strong paper. Make a city using cylinders like this one that you will make. Also use some recycled small boxes to make your city. To stick the cylinders on to a base, fringe all around the bottom of the cylinder and fold back. Glue on.
Activities for Lesson 2:
• Make a large cylinder and make it into a rocket.
• Or make small cylinders and string them together to make the arms and legs of a marionette puppet. (Use a small box as the body and a ball of screwed up tissue paper for the head.)
Activities for Lesson 4:
• Make a 3D park or garden scene on a cardboard base. This can be a group project. Make tree trunks out of cylinders. Fringe the bottom, fold back and stick to base. Add a playground if you like. Use any scrap materials but include your own constructed cylinders.
Activities for Lesson 4:
• Make a marvellous machine using egg cartons, boxes, pipe cleaners, straws etc. and your own constructed cylinders.
Age group: 8-9 years Number of lessons: 8
Sequence: To explore collage Activities for Lesson 1:
• Make a paper patchwork picture. Use torn magazine pieces, wrapping paper, tissue paper. Combine with paint to make a picture.
Activities for Lesson 2:
• Make a collage using any kind of environmental materials: dried plant materials, sand, wood, bark.
Activities for Lesson 3:
• Make an egg shell mosaic. Draw the outlines of shapes. Paste glue inside. Press broken egg shells into the shapes. Paint.
Activities for Lesson 4:
• Make a collage from flat pieces of wood, cork, matchsticks/toothpicks and pop sticks.

www.beaconmedia.com.au
22
Sequence: To work with corrugated cardboard Activities for Lesson 1:
• Explore the possibilities of using corrugated cardboard. Cut up small pieces and try the following: flatten it, curl it, twist it, open it out. Make a large group mural showing all the experimental samples.
Activities for Lesson 2:
• Make a collage using corrugated cardboard. Cut shapes. Contrast the vertical / horizontal lines. Paint.
Activities for Lesson 3:
• Use corrugated card with recycled materials to make a 3D scene on a base.
Activities for Lesson 4:
• Make a mobile form shapes cut from corrugated card. Glue identical shapes back-to-back for strength. Choose a theme, e.g. planets, flying insects
Age group: 9-10 years Number of lessons: 8
Sequence: to build with environmental materials Materials: mud, sand, plant materials, wood, bark, shells Activities for lesson 1:
• Make a large shelter using environmental materials, (group project).
Activities for lesson 2:
• Make a small model shelter using environmental materials, (individual).
Activities for lesson 3:
• Make a collage using environmental materials.
Activities for lesson 4:
• Make a sand plaster cast bay relief. Start with a box of wet sand. Press environmental materials into the wet sand to make an imprint, e.g. shells, gumnuts, pine cones. Now pour Plaster of Paris over the imprints and allow to dry. Remove and brush excess sand away.
Sequence: To create moveable joints in construction Activities for Lesson 1:
• Make a cylinder robot / person with moveable arms and legs.
Activities for Lesson 2:

www.beaconmedia.com.au
23
• Make a 2D cardboard puppet with moveable arms and legs. (Use split pins).
Activities for Lesson 3:
• Make a box figure with moveable arms and legs.
Activities for Lesson 4:
• Using cardboard and split pins, make a 2D animal with moveable legs.
Age group: 10-11 years Number of lessons: 8
Sequence: To use wire for construction Activities for Lesson 1:
• Make 2D shapes with wire or pipe cleaners. Cover with foils and make a mobile.
Activities for Lesson 2:
• Make 3 D shapes with wire or pipe cleaners, e.g. cube, pyramid, cone. Cover with tissue paper brushed with glue, (paper mache).
Activities for Lesson 3:
• Make a 3D construction from wire / pipe cleaners plus recycled materials such as boxes.
Activities for Lesson 4:
• Make a 2D collage with pipe cleaners plus wool or string. You may add other materials or paper shapes.
Sequence: To use construction materials freely in problem solving activities For each lesson, present a variety of constructions materials for the students to work with. Activities for Lesson 1- 4:
Children can make something of their own choice. Some suggestions can be given:
• a lighthouse
• a boat
• Noah’s ark
• a shelter
• a toy
• a vehicle
• an animal
www.beaconmedia.com.au
24
Age group: 11-12 years
Sequence: To create models and scenes using paper mache Activities for Lessons 1 & 2: Make a paper mache puppet head . Begin by gluing a ball of scrunched up newspaper to a cardboard cylinder. Gradually add paper mache strips. Continue until you have a smooth ball. Then add facial features in paper mache. Activities for Lessons 3 & 4: Make a paper mache scene on a large flat sheet of cardboard. Use paper mache to build up the terrain. This can be a group project. Examples:
• an Antarctic ice scene with penguins
• a country landscape
• a volcano
• a tropical island
Sequence: To make something out of wood Activities for Lessons 1 & 2 Collect small off-cuts of wood from builders. These can be used in free construction activities. Additional materials can be provided: popsticks, matchsticks, cane, cork, straws and wood shavings if possible. Students can use woodworking glue, hammer and nails or string for joining. Some suggestions for constructions:
• a toy
• a mousetrap
• a scarecrow
• a plant box
• a boat
• a vehicle
• a city
• a marionette puppet
• a model of a children’s playground
Sequence: To make models or collage using environmental materials Suggested materials: pine cones; rocks and stones; feathers; gum nuts; shells, dried grasses Activities for Lessons 1 & 2 Students can use materials freely to make models and collage, e.g:
• an animal from a pine cone and pieces of felt
• a bird from a gum nut and feathers
• a shell collage
• a decorated rock paper weight
• a basket from reeds

www.beaconmedia.com.au
25
Textiles
Christian growth: Textiles in the Bible had significance: Purple fabric was worn by royalty Sack cloth was worn by people who were sad or sorry Jesus was wrapped in humble swaddling cloth The creation of fabrics speaks of diligence. Dorcas was diligent in sewing. (Acts 9:36-43). Creating fabric takes patience and perseverance. Dorcas was also generous in that she gave the clothes away to the poor.
Age group: 5-6 years Number of lessons: 4
Sequence: To develop and awareness of pattern and design Activities for Lesson 1:
• Classify pieces of fabric according to colour and design
• Make a collage with pre-cut shapes of coloured fabric / felt. Activities for Lesson 2:
• Make a collage from coloured paper, cellophane and fabric shapes. Activities for Lesson 3:
• Cover a box with fabric pieces.
Activities for Lesson 4:
• Look for patterns in clothing. Discuss the terms ‘spots’, ‘stripes’ and ‘checks’.
• Draw yourself in your new patterned clothes.
Age group: 6 – 7 years Number of lessons: 4
Sequence: To create and awareness of texture in threads and textiles Activities for Lesson 1:
• Explore texture using touch. Discuss rough, smooth. What does it feel like? e.g. “It feels like a … slippery fish; cuddly bear.”
• Make a fabric collage using fabrics of differing textures.
www.beaconmedia.com.au
26
Activities for Lesson 2:
• Draw threads in a piece of Hessian to make “space” patterns. Activities for Lesson 3:
• Discuss the texture of threads, e.g. silky, rough, bumpy. Feel textures of wool, string, cotton etc.
• Weave threads into prepared mesh. Change texture of threads by knotting.
Activities for Lesson 4:
• Cut, fray and fringe pieces of fabric to develop texture. Use these in a collage.
Age group: 7-8 years Number of lessons: 4
Sequence: To explore shape through textile manipulation Activities for Lesson 1:
• Cut shapes from cloth and arrange them on paper. Make a collage. Activities for Lesson 2:
• Make a pattern out of holes by cutting shapes out of a single piece of cloth. Now glue the cut-out shapes to a piece of paper. (Positive and negative)
Activities for Lesson 3:
• Take a plastic bottle and dress it up using fabric.
Activities for Lesson 4:
• Attach shapes to cloth using glue. (Felt works well).
Age group: 8-9 years Number of lessons: 4
Sequence: To explore threads Activities for Lesson 1:
• Classify threads according to colour, texture and thickness.
• Make a thread collage. Activities for Lesson 2:
• Pull threads out of a piece of Hessian to make a pattern, and replace the drawn threads with other threads such as wool, string, grasses
www.beaconmedia.com.au
27
Activities for Lesson 3:
• Find ways of altering threads by plaiting, knotting and “finger knitting”. Activities for Lesson 4:
• Use different threads to make patterns with stitches on a piece of cloth.
Age group: 9-10 years Number of lessons: 4
Sequence: To develop the skill of stitching Activities for Lesson 1:
• Create stitches – straight, zig-zag, cross stitch.
• Make a picture on Hessian using stitches. Activities for Lesson 2:
• Make a picture on Hessian using stitches, adding buttons, beads and pieces of plastic straw.
Activities for Lesson 3:
• Make a picture with stitches adding fabric shapes (appliqué).
Activities for Lesson 4:
• Make a glove puppet out of felt, stitching around the perimeter.
Age group: 10 - 11 years Number of lessons: 4
Sequence: To experiment with fabric dying and batik Activities for Lesson 1:
• Explore natural dyes: beetroot, tea, coffee. Also explore commercial “food dyes”. Paint a design using these on to a piece of white cloth and/or paper.
Activities for Lesson 2:
• Tie dye a piece of fabric. Create circles and bands etc. by tying string. Activities for Lesson 3:
• Using stitching, make a bag out of your tie died fabric from lesson 2. Activities for Lesson 4:
• Create a wax resist picture by heavily drawing with wax crayon on a piece of fabric. Now paint over the fabric using food dyes.

www.beaconmedia.com.au
28
Age group: 11 - 12 years Number of lessons: 4
Sequence: Textile making Activities for Lesson 1:
• Make a weaving frame from a rectangular piece of cardboard, by notching the two smaller opposite ends. Wind threads up and down to create the “warp”. Using a darning needle, weave threads in and out going across to create the “weft”.
Activities for Lesson 2:
• Make a “spider’s web” by wrapping wool around a forked branch.
Sequence: To make a puppet or a toy using stitching Activities for Lessons 1 & 2: Make a sock puppet, stitching on button eyes, mouth and hair. Or make a stuffed toy, e.g. a frog or a lizard. Cut two identical shapes for the body, stitch around the perimeter and fill with wadding. Cut out legs from felt and stitch them on. Add eyes and tongue.

www.beaconmedia.com.au
29
Print and Pattern
Christian growth: A print is like a stamp. In Deuteronomy 11:18 we read how important to have God’s commandments stamped upon our lives. We can use prints to make patterns. If we look closely at the creation we can find many patterns. Look at the wings of a butterfly, the scales of a fish or the segments of an orange when it is cut in half, or our own fingerprints. God is a designer. We can see His designs in the patterns of nature. These patterns show His orderly nature. God shows us how special we are by giving each one of us a special pattern on the tips of our fingers. No one else in the whole world has your finger print. Even identical twins have different finger prints. Yet God knows each one of us. He knows our fingerprint. He knows how many hairs on our head. He knew us even before we were born (Psalm 139).
Age group: 5 – 6 years Number of lessons: 4
Sequence: To make some simple stamped prints A “stamp pad” is made from a thin damp kitchen sponge placed in an open container such as an ice-cream container. Paint is spread over the sponge. Activities for Lesson 1:
• How many marks can you make with your hand? Use finger tips, whole hand print, side of hand, side of finger.
Activities for Lesson 2:
• Make a picture from finger prints. “Draw” with finger prints, making lines from repeated prints.
Activities for Lesson 3:
• Draw animal shapes and fill the inside of the shape with finger prints. Use crayon or oil pastel to draw around the prints
Activities for Lesson 4:
• Find objects for some simple junk printing, e.g. bottle tops, buttons, corks, forks, cookie cutters.

www.beaconmedia.com.au
30
Age group: 6 - 7 years Number of lessons: 4
Sequence: To make some simple stamped prints A “stamp pad” is made from a thin damp kitchen sponge placed in an open container such as an ice-cream container. Paint is spread over the sponge. Activities for Lesson 1:
• Cut vegetables for stamped prints, e.g. cucumber, celery, carrots, potato
Activities for Lesson 2:
• Make prints from screwed up paper, (newspaper, tissue paper) and screwed up pieces of fabric.
Activities for Lesson 3:
• Make prints from small sponges and chunks of polystyrene. Activities for Lesson 4:
• Use junk prints, (bottle tops, lids, kitchen utensils etc.), to make a picture.
Age group: 7 - 8 years Number of lessons: 4
Sequence: To make some simple stamped prints A “stamp pad” is made from a thin damp kitchen sponge placed in an open container such as an ice-cream container. Paint is spread over the sponge. Activities for Lesson 1:
• Make ‘stamps’ out of clay or dough for stamped printing. Activities for Lesson 2:
• Make some junk prints with corrugated card. Cut out the corrugated card into the shapes you want to print. Add other junk prints – coins, fly wire, cotton reels
Activities for Lesson 3:
• Make a picture using corrugated card prints. Try white paint on thick black paper. e.g. cut out stars, moon for a night sky; houses, trees
Activities for Lesson 4:

www.beaconmedia.com.au
31
• Make some junk print patterns on a piece of paper covered with a “finger paint” mix. Spread the finger paint all over the page then stamp objects into the paint.
Age group: 8 - 9 years Number of lessons: 4
Sequence: To make some stamped prints A “stamp pad” is made from a thin damp kitchen sponge placed in an open container such as an ice-cream container. Paint is spread over the sponge. Activities for Lesson 1:
• Make some stamped wood prints using wood off-cuts, pop sticks, ends of pieces of dowel.
Activities for Lesson 2:
• Use ends of pieces of dowel to make dot prints. Use dot prints to make some Aboriginal art.
Activities for Lesson 3:
• Combine stamped wood prints with painting. Create a picture using paint, and then use stamped wood prints to add to the painting, e.g. straight lines or dots.
Activities for Lesson 4:
• Make you own stamps by cutting shapes from thick cardboard, (both pain and corrugated), and gluing these to wooden blocks. Then make a stamped picture or design.
Age group: 9-10 years Number of lessons: 4
Sequence: To make mono-prints You will need sponge rollers and hard rollers. To make mono-prints, lay the shapes you want to print, (such as leaves), on to newspaper. Now cover the ‘leaves’ with paint, (using a sponge roller or a brush). Lift them off the newspaper and lay them paint-side down on a piece of art paper. Now lay a piece of clean newspaper on top of the “leaves”. Take a hard roller, (or a glass jar or a rolling pin), and roll over the newspaper. Carefully lift the paper and remove the “leaves”. Activities for Lesson 1:
www.beaconmedia.com.au
32
• Print with leaves, grasses and flowers. Note that the back of the leaves make better prints than the front.
Activities for Lesson 2:
• Print with string.
Activities for Lesson 3:
• Print with pieces of textured fabric such as hessian. Activities for Lesson 4:
• Print with your own shapes cut from cardboard or thick paper.
Age group: 10-11 years Number of lessons: 4
Sequence: To create stencil prints You will need rollers. Activities for Lesson 1:
• Cut out shapes from thick paper and arrange them on a piece of art paper. Secure shapes with tiny pieces of double-sided masking tape. Now run a painted roller over the whole sheet. You may use rollers of several colours. The paint should be thick, not runny. Carefully remove stencils while the paint is still wet.
Activities for Lesson 2:
• Cut out stencils and lay them on art paper. Apply dry pastel on its side all around the perimeter of the stencil.
Activities for Lesson 3:
• Create a mountain scene by tearing newspaper in the form of mountain tops. Lay the newspaper on your art paper as a stencil and roll a painted roller over the “mountain tops”. Tear another mountain shape and repeat down the page.
Activities for Lesson 4:
• Make a stamp out of a string. Take a block of wood or a small square of thick cardboard. Using strong glue, make a string design on the board / cardboard. Allow to dry. Now cover with paint and use as a stamp.
Age group: 11-12 years Number of lessons: 4

www.beaconmedia.com.au
33
Sequence: To create prints and patterns, inspired by art of different cultures Number of lessons: 4 Activities for Lessons 1 – 4: Use a variety of art materials to create art inspired by different cultures. Examples: Australian Aboriginal; Egyptian; Pacific Islands; African.