Embed Size (px)
DESCRIPTION
How to grow by yourself Spirulina magic food for the future
Citation preview
http://www.instructables.com/id/Food-of-the-Future-Window-DIY-Spirulina-Superfood/
Food Living Outside Play Technology Workshop
Food of the Future: Window DIY Spirulina Superfoodby Algaescientist on July 23, 2013
Table of Contents
Food of the Future: Window DIY Spirulina Superfood . . . . . . . . . . . . . . . . . . . . . . . . . . . . . . . . . . . . . . . . . . . . . . . . . . . . . . . . . . . . . . . . . . . . . . . . . . . . . . . . . . . 1
Intro: Food of the Future: Window DIY Spirulina Superfood . . . . . . . . . . . . . . . . . . . . . . . . . . . . . . . . . . . . . . . . . . . . . . . . . . . . . . . . . . . . . . . . . . . . . . . . . . . 2
Step 1: Hardware . . . . . . . . . . . . . . . . . . . . . . . . . . . . . . . . . . . . . . . . . . . . . . . . . . . . . . . . . . . . . . . . . . . . . . . . . . . . . . . . . . . . . . . . . . . . . . . . . . . . . . . . . . 2
Step 2: Tank Setup . . . . . . . . . . . . . . . . . . . . . . . . . . . . . . . . . . . . . . . . . . . . . . . . . . . . . . . . . . . . . . . . . . . . . . . . . . . . . . . . . . . . . . . . . . . . . . . . . . . . . . . . . 4
Step 3: Hardware Setup . . . . . . . . . . . . . . . . . . . . . . . . . . . . . . . . . . . . . . . . . . . . . . . . . . . . . . . . . . . . . . . . . . . . . . . . . . . . . . . . . . . . . . . . . . . . . . . . . . . . . 5
Step 4: Medium . . . . . . . . . . . . . . . . . . . . . . . . . . . . . . . . . . . . . . . . . . . . . . . . . . . . . . . . . . . . . . . . . . . . . . . . . . . . . . . . . . . . . . . . . . . . . . . . . . . . . . . . . . . . 5
Step 5: Adding your culture . . . . . . . . . . . . . . . . . . . . . . . . . . . . . . . . . . . . . . . . . . . . . . . . . . . . . . . . . . . . . . . . . . . . . . . . . . . . . . . . . . . . . . . . . . . . . . . . . . . 6
Step 6: Mark you water level . . . . . . . . . . . . . . . . . . . . . . . . . . . . . . . . . . . . . . . . . . . . . . . . . . . . . . . . . . . . . . . . . . . . . . . . . . . . . . . . . . . . . . . . . . . . . . . . . . 6
Step 7: Cover tank . . . . . . . . . . . . . . . . . . . . . . . . . . . . . . . . . . . . . . . . . . . . . . . . . . . . . . . . . . . . . . . . . . . . . . . . . . . . . . . . . . . . . . . . . . . . . . . . . . . . . . . . . 7
Step 8: Adding Iron . . . . . . . . . . . . . . . . . . . . . . . . . . . . . . . . . . . . . . . . . . . . . . . . . . . . . . . . . . . . . . . . . . . . . . . . . . . . . . . . . . . . . . . . . . . . . . . . . . . . . . . . . 7
Step 9: Growing Period . . . . . . . . . . . . . . . . . . . . . . . . . . . . . . . . . . . . . . . . . . . . . . . . . . . . . . . . . . . . . . . . . . . . . . . . . . . . . . . . . . . . . . . . . . . . . . . . . . . . . . 7
Step 10: Repeat . . . . . . . . . . . . . . . . . . . . . . . . . . . . . . . . . . . . . . . . . . . . . . . . . . . . . . . . . . . . . . . . . . . . . . . . . . . . . . . . . . . . . . . . . . . . . . . . . . . . . . . . . . . 8
Step 11: Harvesting Safety . . . . . . . . . . . . . . . . . . . . . . . . . . . . . . . . . . . . . . . . . . . . . . . . . . . . . . . . . . . . . . . . . . . . . . . . . . . . . . . . . . . . . . . . . . . . . . . . . . . 8
Step 12: Harvesting . . . . . . . . . . . . . . . . . . . . . . . . . . . . . . . . . . . . . . . . . . . . . . . . . . . . . . . . . . . . . . . . . . . . . . . . . . . . . . . . . . . . . . . . . . . . . . . . . . . . . . . . . 9
Step 13: Enjoy . . . . . . . . . . . . . . . . . . . . . . . . . . . . . . . . . . . . . . . . . . . . . . . . . . . . . . . . . . . . . . . . . . . . . . . . . . . . . . . . . . . . . . . . . . . . . . . . . . . . . . . . . . . . 10
Step 14: Feeding . . . . . . . . . . . . . . . . . . . . . . . . . . . . . . . . . . . . . . . . . . . . . . . . . . . . . . . . . . . . . . . . . . . . . . . . . . . . . . . . . . . . . . . . . . . . . . . . . . . . . . . . . . . 10
Step 15: Quality Control . . . . . . . . . . . . . . . . . . . . . . . . . . . . . . . . . . . . . . . . . . . . . . . . . . . . . . . . . . . . . . . . . . . . . . . . . . . . . . . . . . . . . . . . . . . . . . . . . . . . . 11
Advertisements . . . . . . . . . . . . . . . . . . . . . . . . . . . . . . . . . . . . . . . . . . . . . . . . . . . . . . . . . . . . . . . . . . . . . . . . . . . . . . . . . . . . . . . . . . . . . . . . . . . . . . . . . . . . . . . 11
http://www.instructables.com/id/Food-of-the-Future-Window-DIY-Spirulina-Superfood/
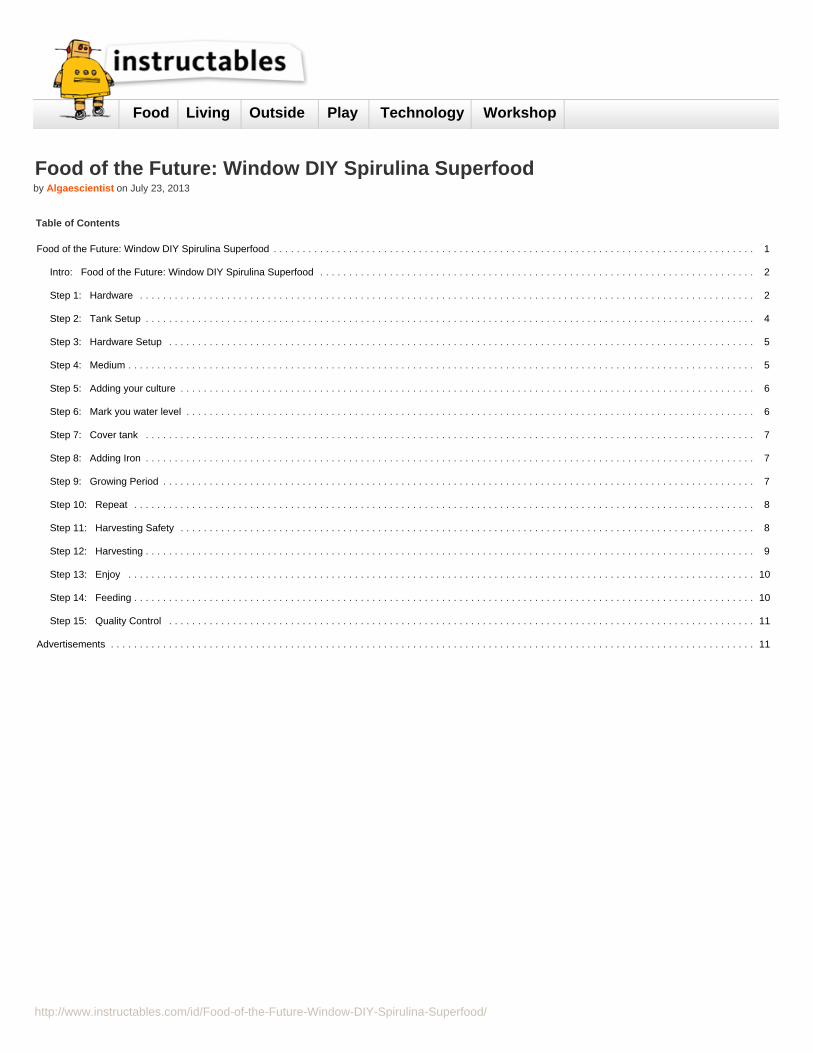
Intro: Food of the Future: Window DIY Spirulina SuperfoodHaving your own spirulina window farm is one of the easiest most satisfying things you could ever take on. It is an environmentally friendly way to produce and consumea complete protein and nutritional source! Algae Spirulina is 25 times more efficient per squared foot than any other plant, which makes it optimal for indoor growth.Integrating algae into our homes can be one of the most significant things that can impact our nutrition. It is truly the food of the future as it contains all of the amino acidsand is a complete protein!
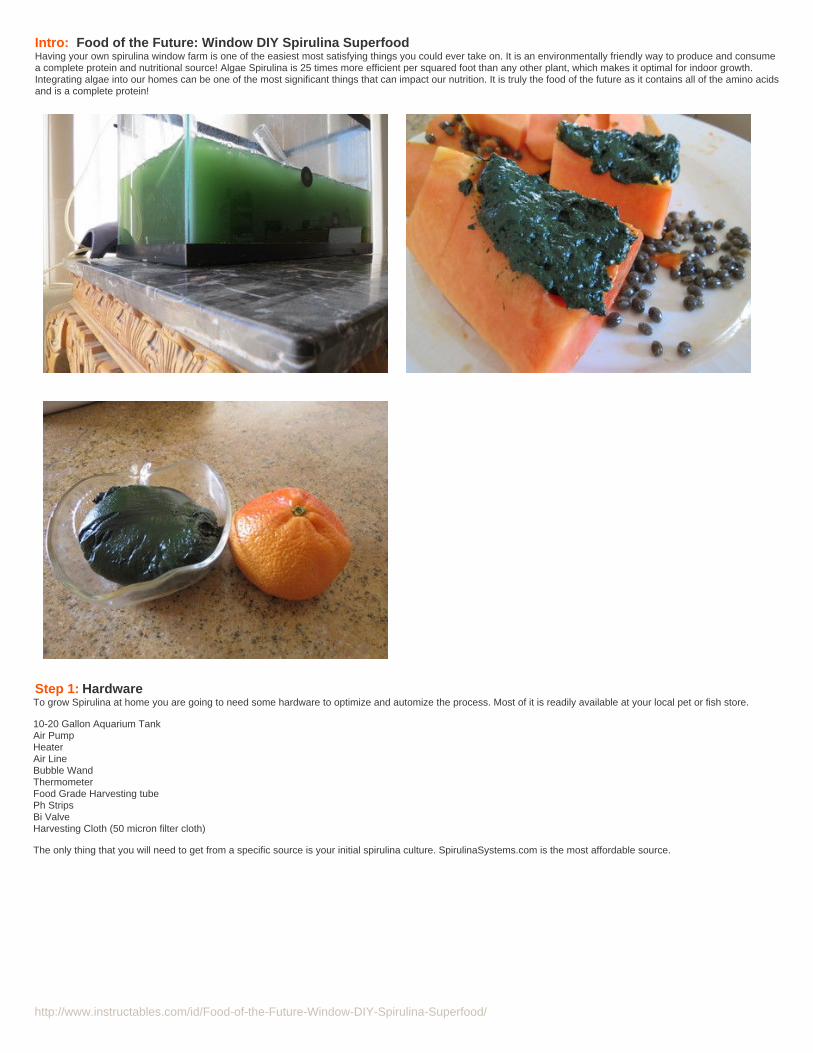
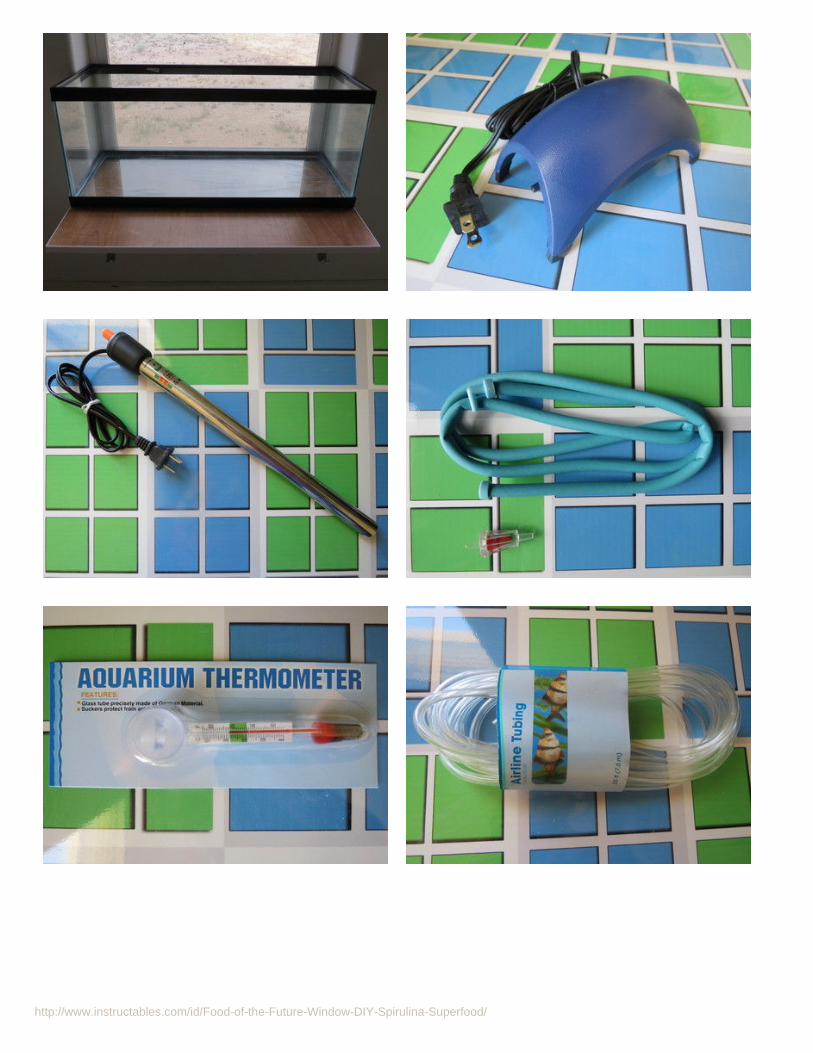
Step 1: HardwareTo grow Spirulina at home you are going to need some hardware to optimize and automize the process. Most of it is readily available at your local pet or fish store.
10-20 Gallon Aquarium TankAir PumpHeaterAir LineBubble WandThermometerFood Grade Harvesting tubePh StripsBi ValveHarvesting Cloth (50 micron filter cloth)
The only thing that you will need to get from a specific source is your initial spirulina culture. SpirulinaSystems.com is the most affordable source.
http://www.instructables.com/id/Food-of-the-Future-Window-DIY-Spirulina-Superfood/
http://www.instructables.com/id/Food-of-the-Future-Window-DIY-Spirulina-Superfood/
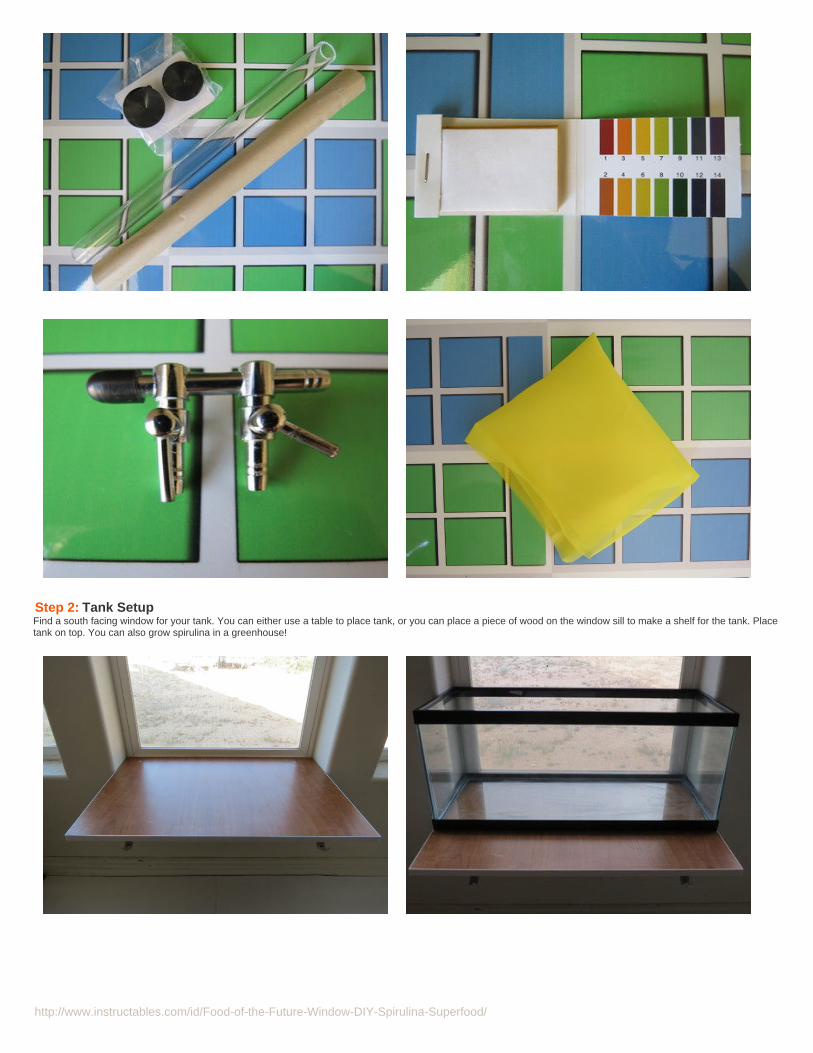
Step 2: Tank SetupFind a south facing window for your tank. You can either use a table to place tank, or you can place a piece of wood on the window sill to make a shelf for the tank. Placetank on top. You can also grow spirulina in a greenhouse!
http://www.instructables.com/id/Food-of-the-Future-Window-DIY-Spirulina-Superfood/
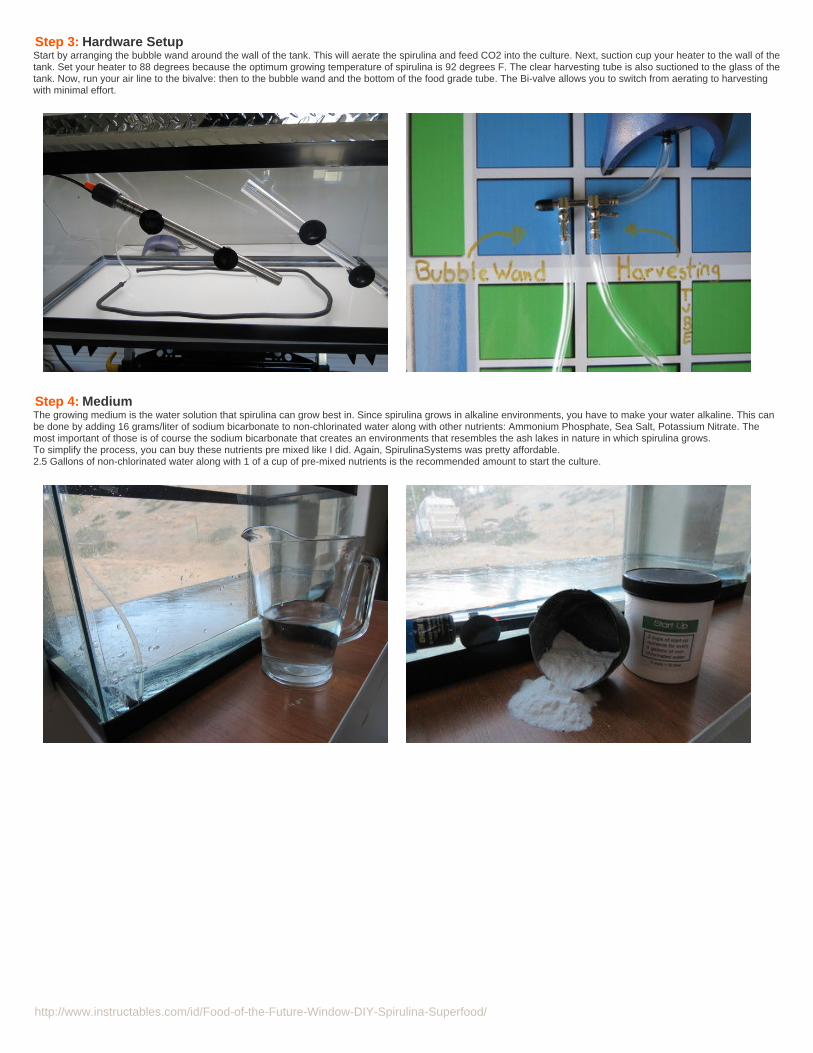
Step 3: Hardware SetupStart by arranging the bubble wand around the wall of the tank. This will aerate the spirulina and feed CO2 into the culture. Next, suction cup your heater to the wall of thetank. Set your heater to 88 degrees because the optimum growing temperature of spirulina is 92 degrees F. The clear harvesting tube is also suctioned to the glass of thetank. Now, run your air line to the bivalve: then to the bubble wand and the bottom of the food grade tube. The Bi-valve allows you to switch from aerating to harvestingwith minimal effort.
Step 4: MediumThe growing medium is the water solution that spirulina can grow best in. Since spirulina grows in alkaline environments, you have to make your water alkaline. This canbe done by adding 16 grams/liter of sodium bicarbonate to non-chlorinated water along with other nutrients: Ammonium Phosphate, Sea Salt, Potassium Nitrate. Themost important of those is of course the sodium bicarbonate that creates an environments that resembles the ash lakes in nature in which spirulina grows.To simplify the process, you can buy these nutrients pre mixed like I did. Again, SpirulinaSystems was pretty affordable.2.5 Gallons of non-chlorinated water along with 1 of a cup of pre-mixed nutrients is the recommended amount to start the culture.
http://www.instructables.com/id/Food-of-the-Future-Window-DIY-Spirulina-Superfood/
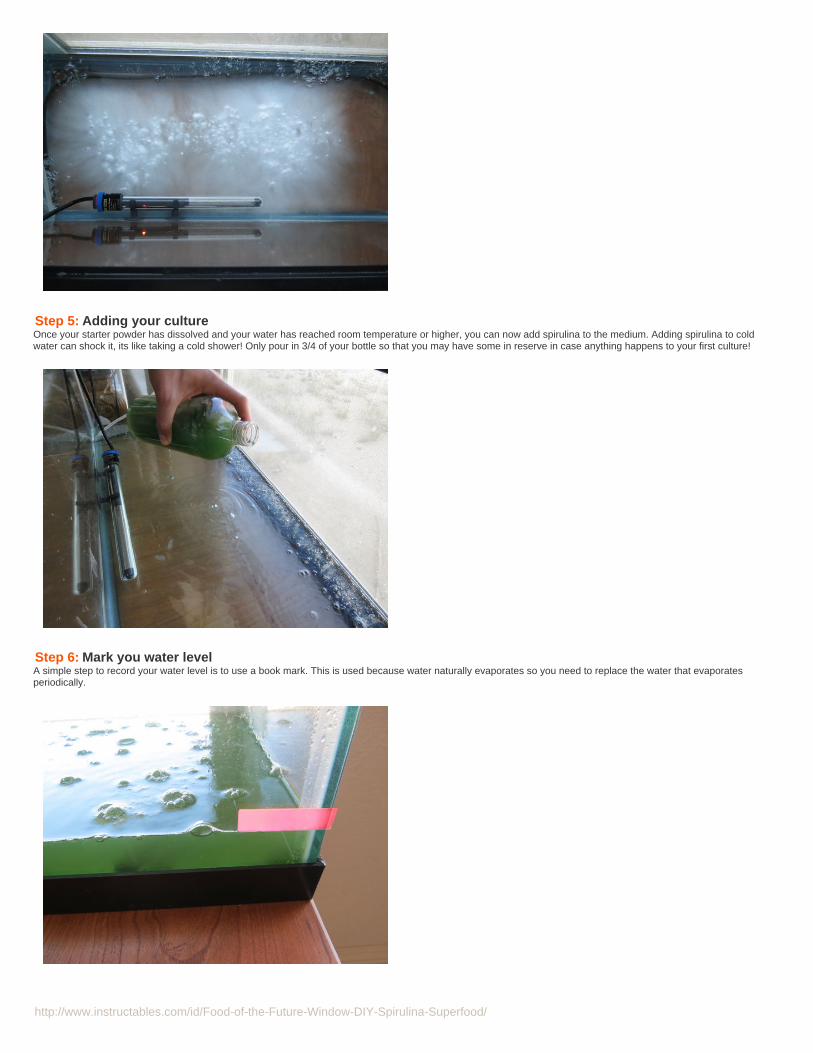
Step 5: Adding your cultureOnce your starter powder has dissolved and your water has reached room temperature or higher, you can now add spirulina to the medium. Adding spirulina to coldwater can shock it, its like taking a cold shower! Only pour in 3/4 of your bottle so that you may have some in reserve in case anything happens to your first culture!
Step 6: Mark you water levelA simple step to record your water level is to use a book mark. This is used because water naturally evaporates so you need to replace the water that evaporatesperiodically.
http://www.instructables.com/id/Food-of-the-Future-Window-DIY-Spirulina-Superfood/
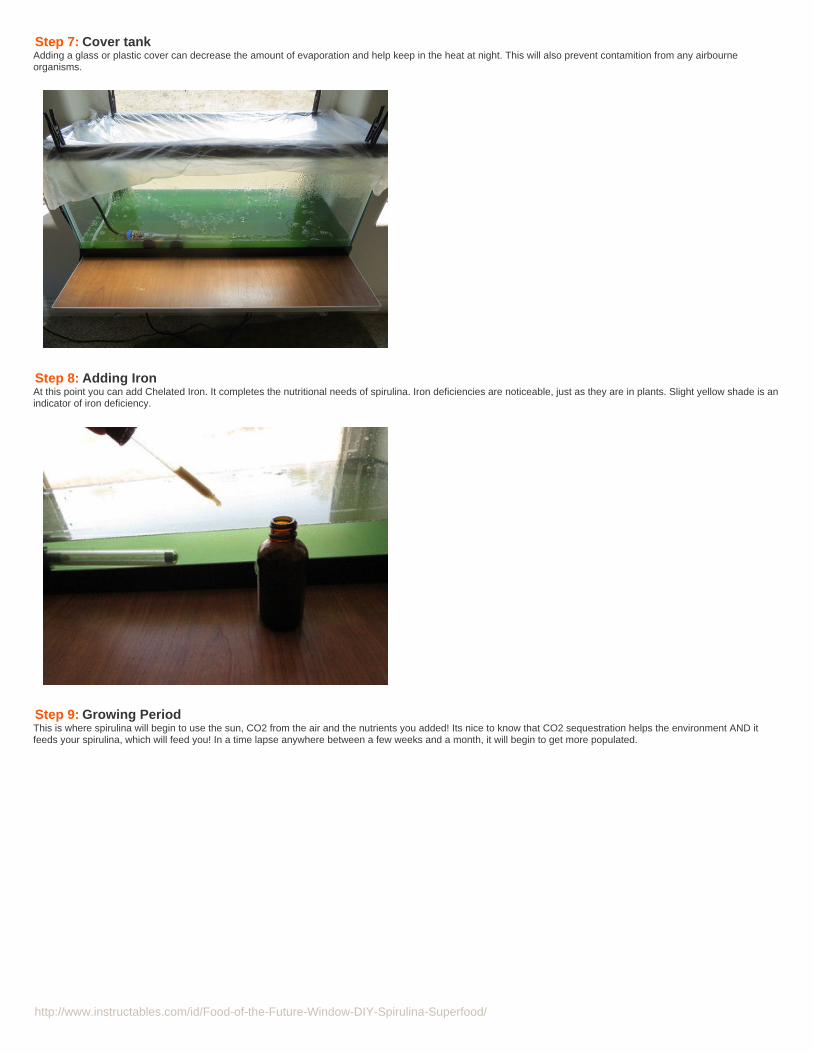
Step 7: Cover tankAdding a glass or plastic cover can decrease the amount of evaporation and help keep in the heat at night. This will also prevent contamition from any airbourneorganisms.
Step 8: Adding IronAt this point you can add Chelated Iron. It completes the nutritional needs of spirulina. Iron deficiencies are noticeable, just as they are in plants. Slight yellow shade is anindicator of iron deficiency.
Step 9: Growing PeriodThis is where spirulina will begin to use the sun, CO2 from the air and the nutrients you added! Its nice to know that CO2 sequestration helps the environment AND itfeeds your spirulina, which will feed you! In a time lapse anywhere between a few weeks and a month, it will begin to get more populated.
http://www.instructables.com/id/Food-of-the-Future-Window-DIY-Spirulina-Superfood/
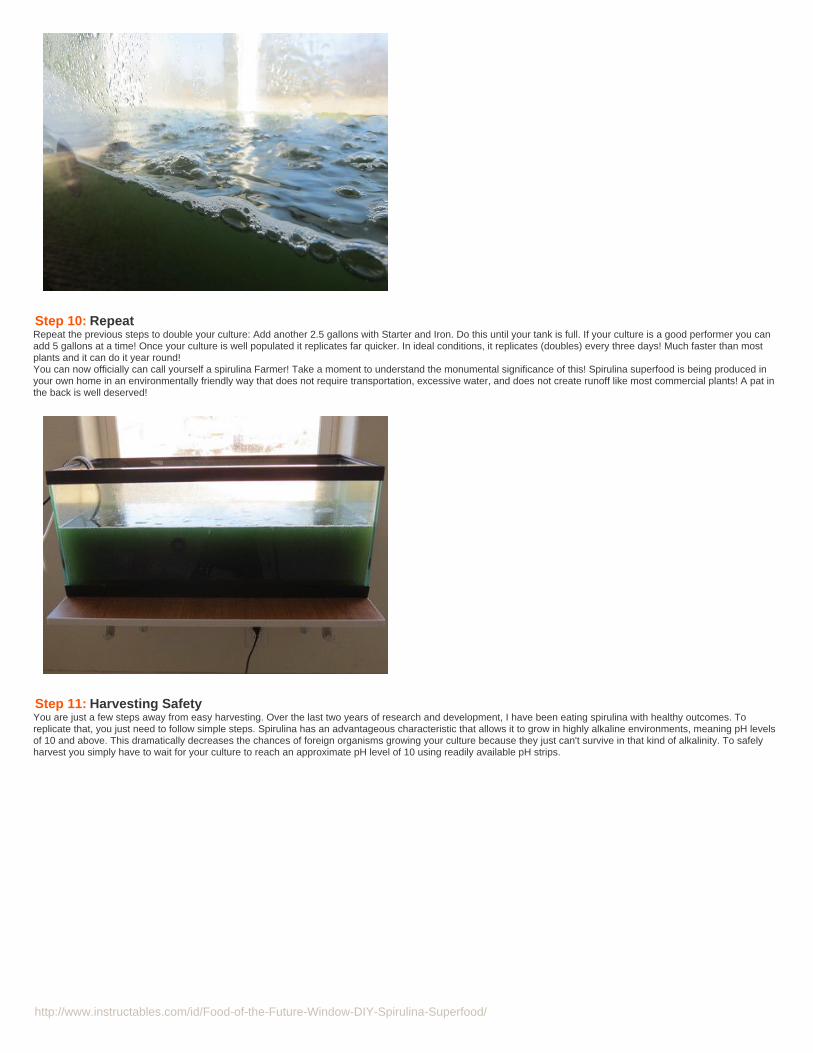
Step 10: RepeatRepeat the previous steps to double your culture: Add another 2.5 gallons with Starter and Iron. Do this until your tank is full. If your culture is a good performer you canadd 5 gallons at a time! Once your culture is well populated it replicates far quicker. In ideal conditions, it replicates (doubles) every three days! Much faster than mostplants and it can do it year round!You can now officially can call yourself a spirulina Farmer! Take a moment to understand the monumental significance of this! Spirulina superfood is being produced inyour own home in an environmentally friendly way that does not require transportation, excessive water, and does not create runoff like most commercial plants! A pat inthe back is well deserved!
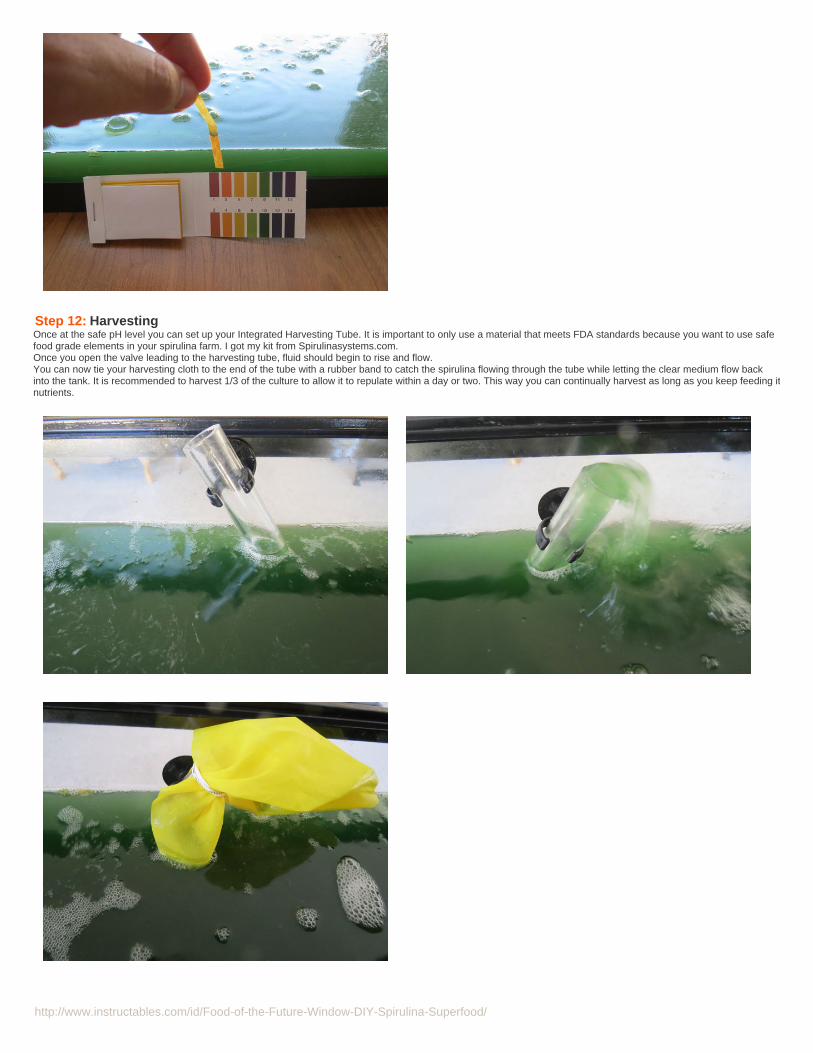
Step 11: Harvesting SafetyYou are just a few steps away from easy harvesting. Over the last two years of research and development, I have been eating spirulina with healthy outcomes. Toreplicate that, you just need to follow simple steps. Spirulina has an advantageous characteristic that allows it to grow in highly alkaline environments, meaning pH levelsof 10 and above. This dramatically decreases the chances of foreign organisms growing your culture because they just can't survive in that kind of alkalinity. To safelyharvest you simply have to wait for your culture to reach an approximate pH level of 10 using readily available pH strips.
http://www.instructables.com/id/Food-of-the-Future-Window-DIY-Spirulina-Superfood/
Step 12: HarvestingOnce at the safe pH level you can set up your Integrated Harvesting Tube. It is important to only use a material that meets FDA standards because you want to use safefood grade elements in your spirulina farm. I got my kit from Spirulinasystems.com.Once you open the valve leading to the harvesting tube, fluid should begin to rise and flow.You can now tie your harvesting cloth to the end of the tube with a rubber band to catch the spirulina flowing through the tube while letting the clear medium flow backinto the tank. It is recommended to harvest 1/3 of the culture to allow it to repulate within a day or two. This way you can continually harvest as long as you keep feeding itnutrients.
http://www.instructables.com/id/Food-of-the-Future-Window-DIY-Spirulina-Superfood/
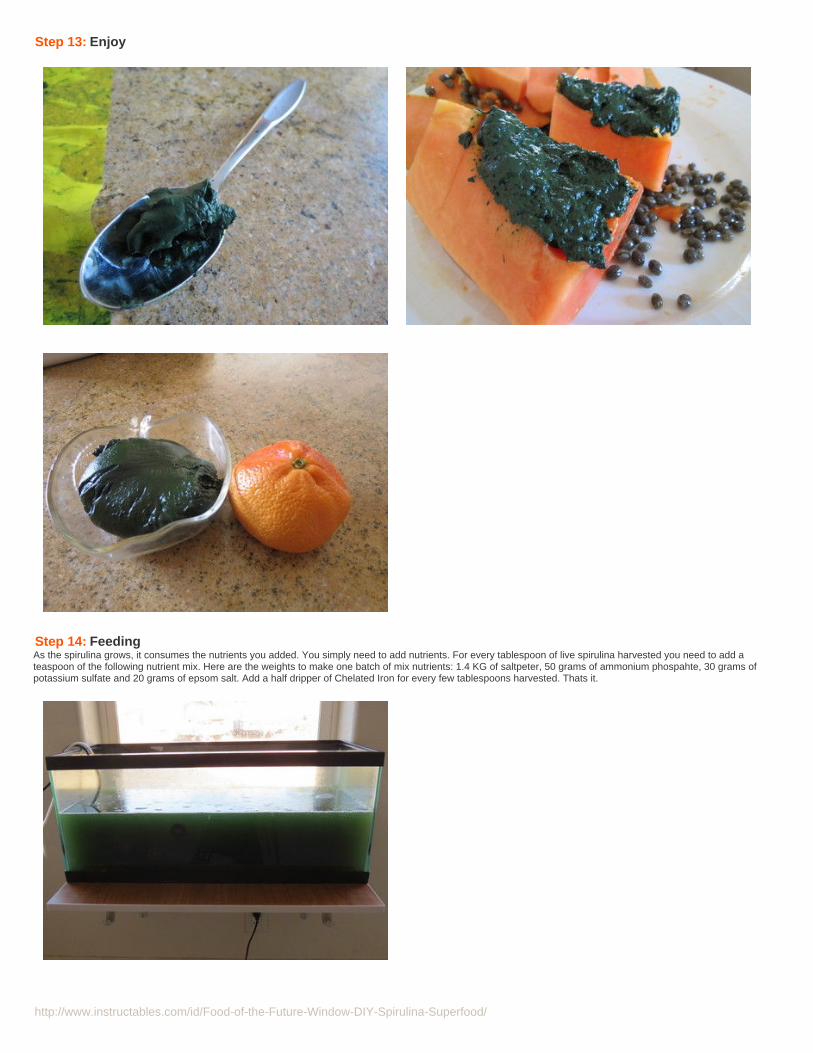
Step 13: Enjoy
Step 14: FeedingAs the spirulina grows, it consumes the nutrients you added. You simply need to add nutrients. For every tablespoon of live spirulina harvested you need to add ateaspoon of the following nutrient mix. Here are the weights to make one batch of mix nutrients: 1.4 KG of saltpeter, 50 grams of ammonium phospahte, 30 grams ofpotassium sulfate and 20 grams of epsom salt. Add a half dripper of Chelated Iron for every few tablespoons harvested. Thats it.

http://www.instructables.com/id/Food-of-the-Future-Window-DIY-Spirulina-Superfood/
Step 15: Quality ControlSpirulina is safe to grow by the fact that its medium is highly alkaline so few other organisms grow in that environment. At the same time it is really fun and ensuring to dosome quality control by getting hold of an affordable microscope and viewing your culture. Amazon is a great place to get a cheap microscope that will be more thanenough for this task. This will really make you appreciate the little algae that you are consuming. Below you can see that only spirulina is growing in the culture. You couldalso buy a usb microscope camera to make your own video and documentation.
Advertisements