Embed Size (px)
Citation preview
A CCEA Publication © 2012
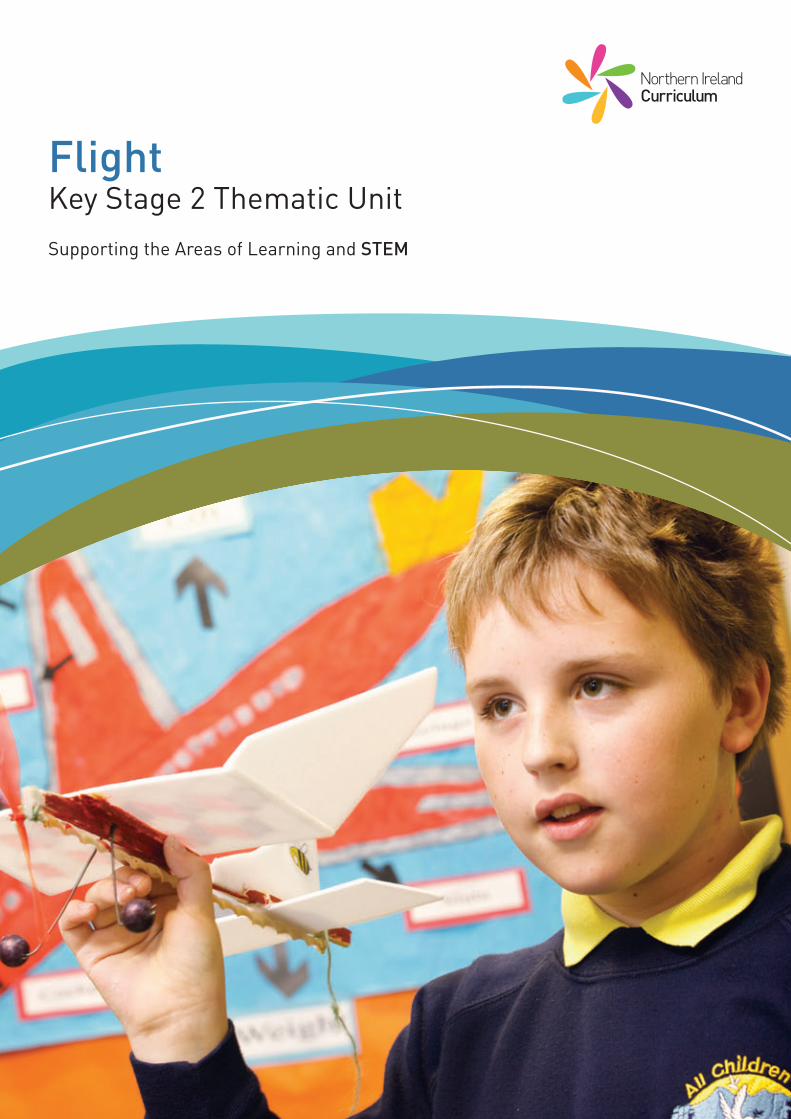
FlightKey Stage 2 Thematic UnitSupporting the Areas of Learning and STEM
Flight_COVER.indd 1 21/03/2012 13:28
ContentsActivity 1 Planning Together 3Activity 2 What Makes a Bird a Bird? 4Activity 3 Bird Migration 7Activity 4 Flight in the Plant Kingdom 9
Activity 5 What is a Force? 13Activity 6 Air Pressure 14Activity 7 The First Force of Flight - Lift 17Activity 8 The Second Force of Flight - Thrust 20Activity 9 The Third Force of Flight - Drag 22 Activity 10 The Fourth Force of Flight - Weight 24
Activity 11 Flight in History 29Activity 12 Early Flight and Famous People 31Activity 13 The History of the Kite 33
Section 3 How Time Flies
Section 2 The Science of Flight
Section 1 Flight in Nature
Resources 37Online Resources 49Suggested Additional Resources 50
This Thematic Unit is for teachers of Key Stage 2 children. Schools can decide which year group will use this unit and it should be presented in a manner relevant to the age, ability and interests of the children.
This Thematic Unit sets out a range of teaching and learning activities to support teachers in delivering the objectives of the Northern Ireland Curriculum. It also supports the STEM initiative.
Health and Safety WarningCCEA has assessed the health and safety risks associated with these activities.However, we strongly recommend that all staff leading these activities carry out their own health and safety assessment, taking into account the ability of the students, the school’s resources and its quality of equipment, etc.
Flight.indd 1 16/01/2012 15:41
AcknowledgementCCEA would like to thank the teachers and children of St. Colmcille’s Primary School, Ballymena, St. Bride’s Primary School, Belfast and All Children’s Integrated Primary School, Newcastle for their contribution towards the enclosed images and activities in this book.
Flight.indd 2 16/01/2012 15:41
1
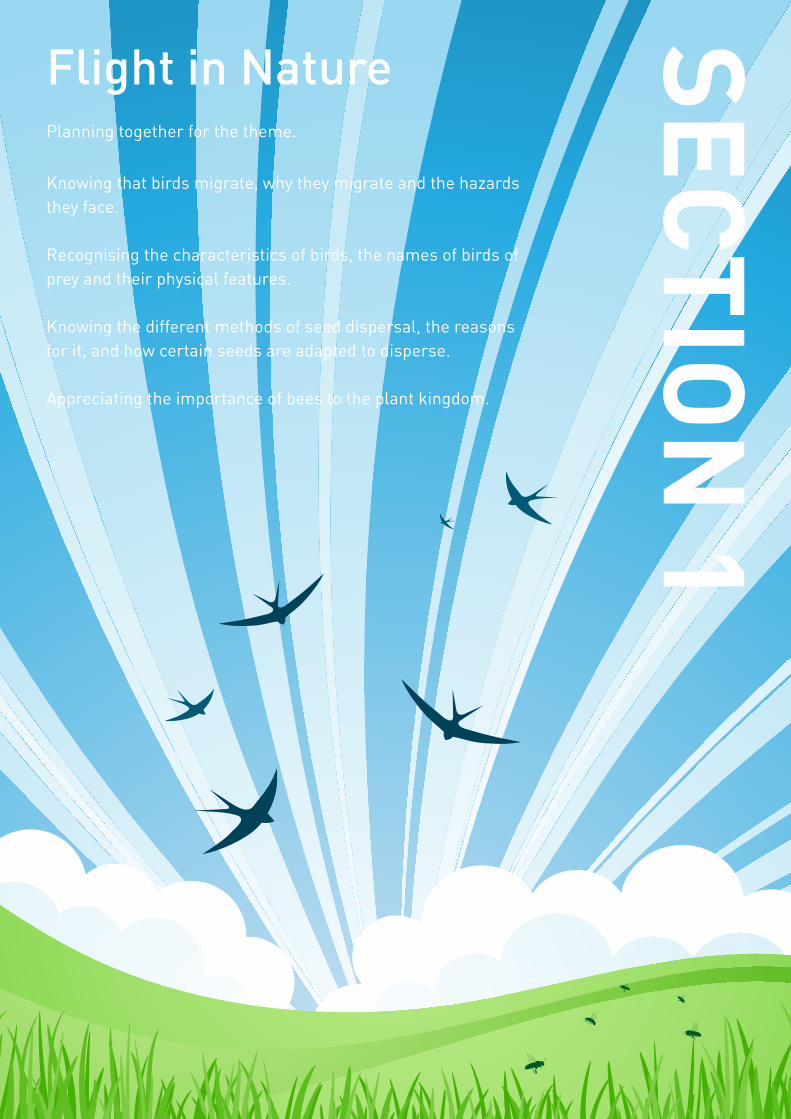
Flight in NaturePlanning together for the theme.
Knowing that birds migrate, why they migrate and the hazards they face.
Recognising the characteristics of birds, the names of birds of prey and their physical features.
Knowing the different methods of seed dispersal, the reasons for it, and how certain seeds are adapted to disperse.
Appreciating the importance of bees to the plant kingdom.
SECTION
1
Flight.indd 1 16/01/2012 15:41

2
Flight.indd 2 16/01/2012 15:41
Flight in Nature Section 1
3
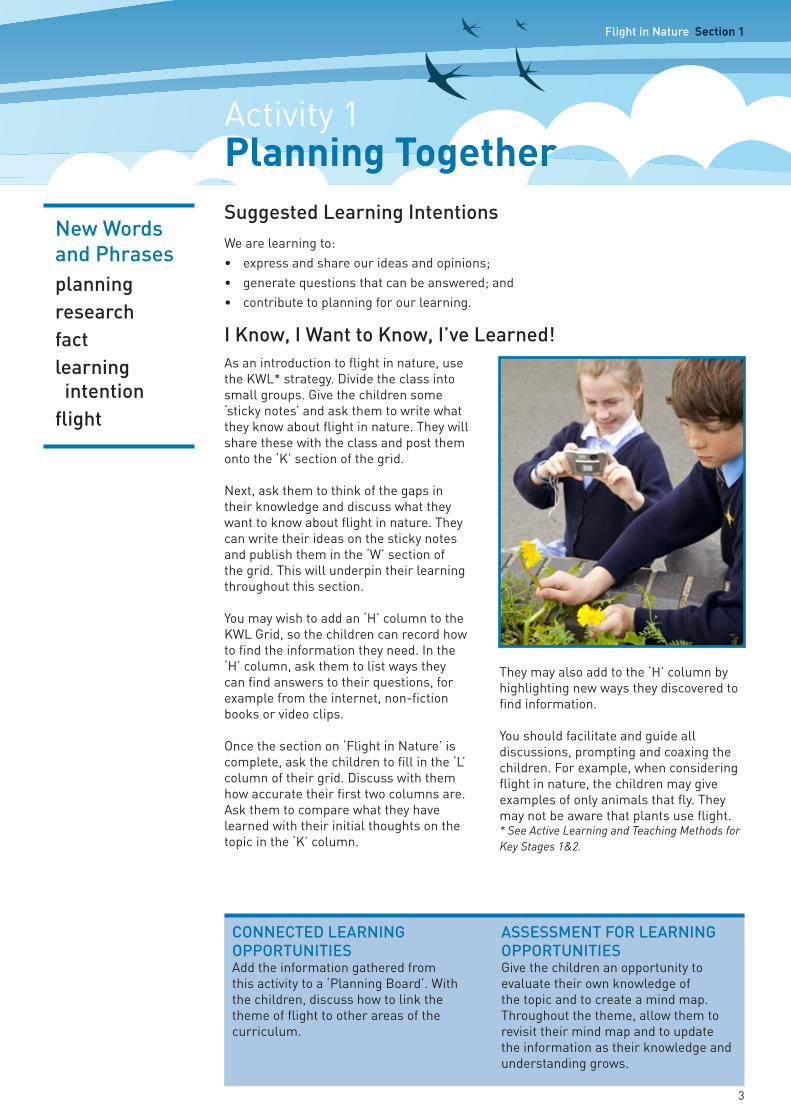
Activity 1 Planning TogetherSuggested Learning IntentionsWe are learning to:• express and share our ideas and opinions; • generate questions that can be answered; and • contribute to planning for our learning.
As an introduction to flight in nature, use the KWL* strategy. Divide the class into small groups. Give the children some ‘sticky notes’ and ask them to write what they know about flight in nature. They will share these with the class and post them onto the ‘K’ section of the grid.
Next, ask them to think of the gaps in their knowledge and discuss what they want to know about flight in nature. They can write their ideas on the sticky notes and publish them in the ‘W’ section of the grid. This will underpin their learning throughout this section.
You may wish to add an ‘H’ column to the KWL Grid, so the children can record how to find the information they need. In the ‘H’ column, ask them to list ways they can find answers to their questions, for example from the internet, non-fiction books or video clips.
Once the section on ‘Flight in Nature’ is complete, ask the children to fill in the ‘L’ column of their grid. Discuss with them how accurate their first two columns are. Ask them to compare what they have learned with their initial thoughts on the topic in the ‘K’ column.
They may also add to the ‘H’ column by highlighting new ways they discovered to find information.
You should facilitate and guide all discussions, prompting and coaxing the children. For example, when considering flight in nature, the children may give examples of only animals that fly. They may not be aware that plants use flight. * See Active Learning and Teaching Methods for Key Stages 1&2.
I Know, I Want to Know, I’ve Learned!
CONNECTED LEARNINGOPPORTUNITIESAdd the information gathered from this activity to a ‘Planning Board’. With the children, discuss how to link the theme of flight to other areas of the curriculum.
ASSESSMENT FOR LEARNING OPPORTUNITIESGive the children an opportunity to evaluate their own knowledge of the topic and to create a mind map. Throughout the theme, allow them to revisit their mind map and to update the information as their knowledge and understanding grows.
planningresearchfactlearning intentionflight
New Words and Phrases
Flight.indd 3 16/01/2012 15:42
Section 1 Flight in Nature
4
Activity 2 What Makes a Bird a Bird?Suggested Learning IntentionsWe are learning to:• recognise the characteristics of different types of birds; and• compare and contrast.
Ask the children to consider flight in nature by using the following questions and information as prompts:
1. What makes a bird a bird? The children may give answers that include:• two legs; • a beak; • wings; • feathers; • young born from an egg; and • parents do not feed their young milk.
Explain that the ability to fly does not distinguish a bird from other creatures.
2. How do birds fly? Answers may include the fact that birds have:• light bones with air pockets;• very strong muscles for rapid wing
beating; and • feathers to help with lift.
Features of Birds
CONNECTED LEARNINGOPPORTUNITIESThe Arts Create 3D models of birds of prey.
Language and Literacy Create a class poem about birds of prey.
The World Around Us Investigate the food chains of different flying creatures and identify producers, consumers and predators.
ASSESSMENT FOR LEARNING OPPORTUNITIESEncourage and motivate the children during their grouping and classifying activity, for example: ‘I think this is a really clever way to group these birds. I bet you could find another way to classify them, if you look at the other features.’
characteristicswingspanbeakfeathersflightlessgroupclassifycategorycomparecontrastbirds of preyfood chainproducerconsumerpredatorhunting
New Words and Phrases
Fact FileBirds are warm-blooded (endothermic) animals that:• have a beak, feathers, and scales
on their legs; and• lay eggs, which they usually keep
warm in nests until they hatch.
Fact File• Birds have light, strong bones and
powerful wings. • Their bones are mostly hollow. • In some of their bones, the hollow
spaces contain extensions of the air sacs from the lungs. This helps birds to quickly and easily get the oxygen they need to fly.
• Their bones have struts in them that make them stronger.
• A bird’s wings are curved at the top, which helps to create lift (similar to an aeroplane).
• When a bird flaps its wings, they generate lift and move the bird forward.
Flight.indd 4 16/01/2012 15:42
Flight in Nature Section 1
5
3. Why do birds fly?Answers may include:• to hunt; • to migrate; • to find places to live; or • to find a mate.
4. Can you list some flightless birds?Answers may include:• penguin; • emu;• ostrich; • cassowary; or• kiwi.
Look at images of birds with the children, using books and the internet. Ask them to print a selection. Encourage them to look for information on:• shape of beak;• wing span;• height and length;• diet; and• how they fly.
Ask them to consider how these features make the birds so well adapted to flight. Get them to consider why each bird needs to fly, for example to migrate or to hunt.
Group, Classify, CategoriseDisplay the images of birds that the children collected in a prominent place or give them to each group in the class. Ask the class to group the birds by deciding why different birds should ‘go together’. When they have finished, ask each group to discuss how they would classify each set. For example, ‘this set of birds has curved beaks,’ or ‘these all have a wingspan over one metre’ and so on. You may need to explain the word ‘classify’ before this activity. Discuss these classifications with the children. When the groups have explained their classifications ask them to start again, this time grouping and classifying the birds in a different way. When they have sorted and classified the birds in several ways, help them to summarise the different categories they have used.
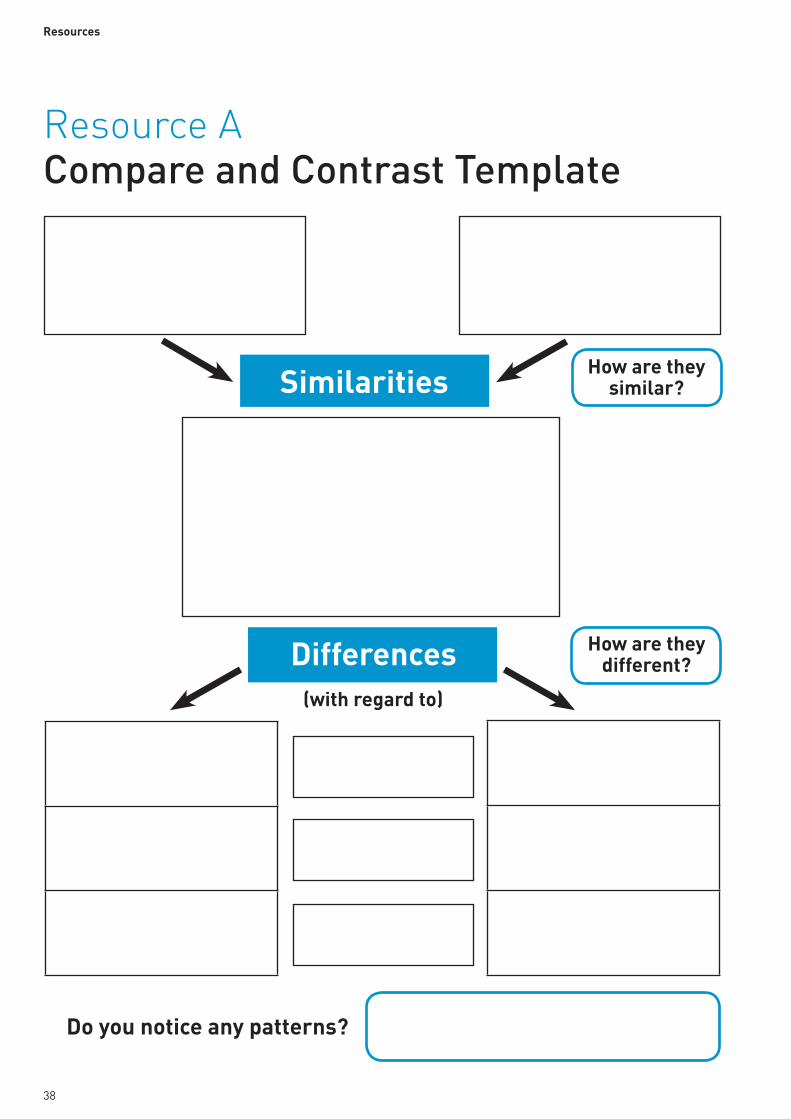
Compare and ContrastIn pairs or groups, give the children images of two birds to compare and contrast. Using videos and information from the internet, encourage them to observe the different features of each bird. You could use the images of birds of prey in Online Resource 1. They can complete a Compare and Contrast* activity (Resource A and Online Resource 2) to record the similarities and differences between the two birds. * See Active Learning & Teaching Methods for Key Stages 1&2.
Fact FileFlight has allowed birds to colonise every habitat in the world.
Fact FileSome birds do not need to fly, so they have lost this ability. For instance:• The ostrich can outrun a predator,
so it does not need flight to escape. • The kiwi has no natural predators,
so it has adapted to life on the ground.
• The penguin lives at sea and swims to catch fish, instead of flying.
Flight.indd 5 16/01/2012 15:42
Section 1 Flight in Nature
6
Birds of PreyAs an extension activity, you may wish to invite a bird of prey agency into school. You can find details of these in the Useful Resources section of this book. The children will be able to observe the birds in flight. They can discuss with the bird handler the names of the different birds of prey, such as:• peregrine falcon; • barn owl;• burrowing owl;• kestrel; • sparrow hawk; or • vulture.
Ask the children to find out about the food chain of birds of prey. You should introduce terms such as producer, consumer and predator.
Flight.indd 6 16/01/2012 15:42
Flight in Nature Section 1
7
Activity 3 Bird MigrationSuggested Learning IntentionsWe are learning to:• know that birds migrate, why they migrate and the hazards they face; • research using a variety of sources of information; and• display appropriate information on a world map.
As a research activity, ask the children to find out which birds migrate south in the early autumn (for example swallows, swifts, martins and flycatchers). They can also discover which birds visit Northern Ireland in the winter (for example whooper swan, Brent goose, Greenland white-fronted goose and snowy owl).
With the children discuss when these birds migrate, where they migrate from and where they commonly migrate to. Ask the children to consider what the primary reason for migration is and what sort of hazards the birds face on their journey. Use a suitable search engine to find a clip of bird migration. You can find an example of whooper swan migration at www.bbc.co.uk/nature/life/Whooper_Swan
Ask the children to design a table to present their information. They should plan the columns they need to include, such as:• name of bird; • country of origin;• date it arrives in Northern Ireland;• where it stays in Northern Ireland;
and• when it leaves.
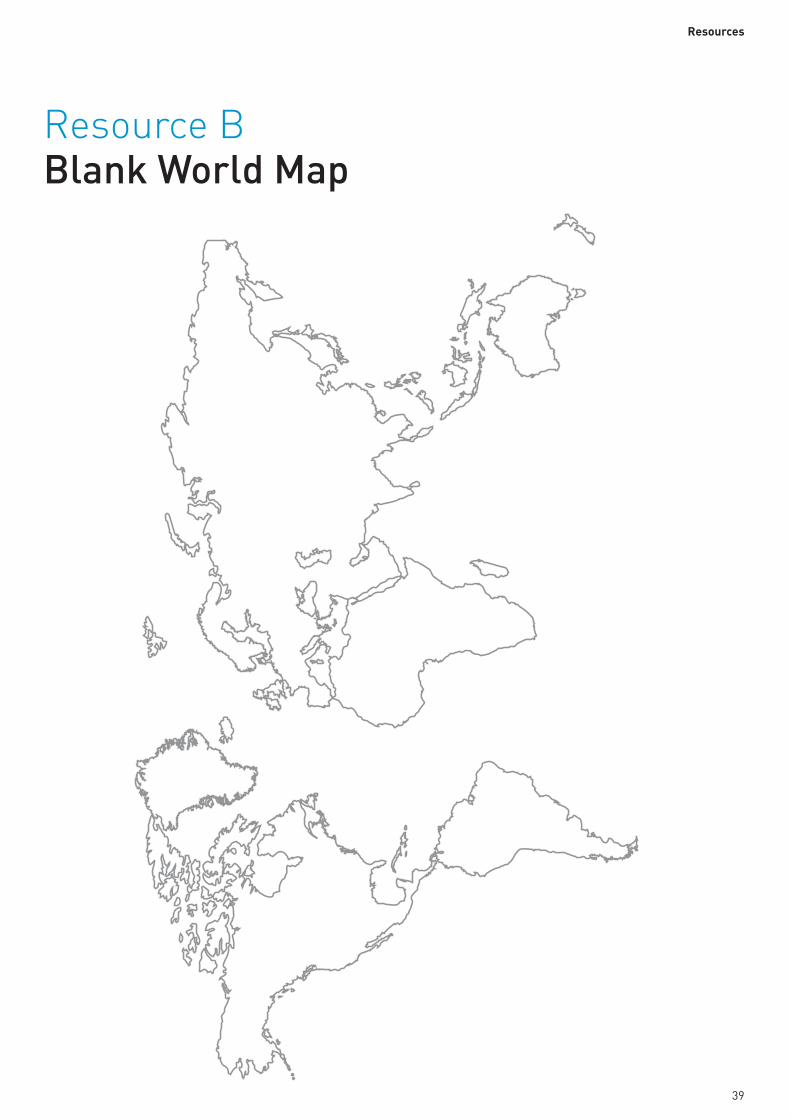
Alternatively, ask them to present the information on a blank world map (Resource B).
It might be useful to demonstrate first, using the blank world map (Online Resource 3) on an interactive whiteboard. Alternatively, you could use the interactive ‘Migration Route Map’ from the ‘Play’ section of the RSPB website www.rspb.org.uk/youth
The children can use the map to record: • the migratory routes to Northern
Ireland (in one colour);• the migratory routes from Northern
Ireland (in another colour);• the countries involved; and • a key.
Recap what the children have learned about bird migration. You could also discuss other living things that migrate, such as butterflies, moths, whales and salmon. For example:• The hummingbird hawk moth and the
painted lady butterfly come to the UK from North Africa and the southern Mediterranean each year.
• Whales travel to cold waters for feeding and to warmer waters to give birth.
• Salmon lay eggs in gravel stream beds. When young fish hatch they move downstream towards the colder sub-arctic waters. After four years at sea they travel all the way back to the stream they hatched in to lay their eggs.
Migration Research
CONNECTED LEARNINGOPPORTUNITIESThe World Around UsFind out about where birds migrate from or to and plot the locations on a world map.
ASSESSMENT FOR LEARNING OPPORTUNITIESCreate and share success criteria for this activity with the children. Use a strategy, such as ‘Thumbs Up’, to help the children decide if they have achieved the success criteria.
habitat migrationroutemapkey
New Words and Phrases
Flight.indd 7 21/03/2012 14:59
Section 1 Flight in Nature
8
Ask the children to explore the dangers of migration for birds. Allow them to consider what they might be and make a list. Prompt them to think of risks, such as: • thunderstorms;• strong winds;• frost or snow;• being eaten by predators;• being lost at sea;• tiredness;• having to travel across hot deserts;
and• lack of food supply.
Next, ask them to list what would make migration easier for birds, such as: • having a plentiful food source of
insects or seeds;• good winds;• no predators;• no injuries; or• good weather.
You could play the interactive RSPB game Dangers of Migration with the children on an interactive whiteboard. This is available from www.rspb.org.uk/youth
Next, tell the children that they are going to design and make a board game based on the dangers of migration for birds. The goal of the game is to get their birds safely from one country to another, for example from Africa to Northern Ireland, surviving all the dangers. The first bird to reach the other country is the winner.
In groups, they should discuss what makes a good board game. They should consider:• the format of their game, for example
it could be like snakes and ladders;• the rules of their game; and• how to have dangers and advantages
of migration in the game, for example if a bird lands on a square with a picture of: - a thunderstorm, it must go back
five squares; or - lots of insects for it to eat, it will
have more energy, so it can move forward three squares.
Dangers of Migration
Flight.indd 8 21/03/2012 14:59
Flight in Nature Section 1
9
Activity 4 Flight in the Plant KingdomSuggested Learning IntentionsWe are learning to:• know the different methods of seed dispersal;• understand why seeds are dispersed away from the parent
plant;• understand that shape in nature is often related to function;• recognise the importance of bees to the plant kingdom; and• use more precise scientific language.
Ask the children if they think plants fly. Encourage discussion around this question. Lead them to realise that some seeds become airborne to reach a site where they can germinate.
You may need to take them through the entire life cycle of a plant, starting perhaps with the germinating seed. The subsequent detail will depend on the age and prior knowledge of the children.
With them, you could discuss: • the conditions the seed needs for
growth, such as space and moisture;• the root’s development, followed by
the shoot and the subsequent growth of the plant and the flower;
• the role of bees in pollination, ensuring the movement of the pollen from the anther to the stigma;
• the structure of a flowering plant, by examining its cross section (if appropriate to the age and ability of the children);
• how fertilisation occurs when the male sex cells (pollen) fuse with the female sex cell and seeds develop, observing the shape of a seed with the children;
• why seeds need to be dispersed so they can grow without competing with each other;
• the different methods of seed dispersal, such as wind, animal and bird;
• how seeds are dispersed from the parent plant to colonise new areas and to ensure there is no competition with the parent plant; and
• how, after dispersal, the cycle begins again.
Once the children understand the life cycle of a flowering plant, ask them to research the life cycle of the dandelion.
The children should select information from a variety of sources such as pictures, posters, books and the internet.
Dandelions
CONNECTED LEARNINGOPPORTUNITIESLanguage and LiteracyWrite a detailed explanation of the life cycle of the dandelion. Focus on the features of explanation writing.
The ArtsCreate a dramatisation about the journey of a seed.Look at flowering plants in art, like the work of artist Georgia O’Keeffe. Recreate it using a variety of media.
ASSESSMENT FOR LEARNING OPPORTUNITIESSelf-EvaluationReflecting on how they have learned, as well as what they learned, is an important skill for children to develop. Help this evaluation process by prompting them to consider:• ‘What I learned that is new is…’• ‘What surprised me was…’• ‘What helped me when something
got tricky was…’
reproductionseed dispersalpollinationantherstigmapollengerminationconditions necessary for growthsurvival of the fittest colonise
New Words and Phrases
Flight.indd 9 16/01/2012 15:42
Section 1 Flight in Nature
10
Show them the video of dandelion seed dispersal (clip number 2257) at www.bbc.co.uk/learningzone/clips
Show the children some real dandelion seeds or images from the internet. Discuss how the dandelion seed is
parachute shaped, so that the wind can easily disperse it. Compare it to a sycamore seed, which is a natural autogyro. It is light and wing-shaped, so it spins in the wind.
Flight.indd 10 16/01/2012 15:42
11
The Science of FlightGaining an understanding of the four forces of flight: Lift, Thrust, Drag and Weight.
Demonstrating the forces of flight through practical activity.
Planning, designing and making a model to carry out a problem-solving task.
Carrying out a fair test.
SECTION
2
Flight.indd 11 16/01/2012 15:42

Section 2 The Science of Flight
12
Flight.indd 12 16/01/2012 15:42
The Science of Flight Section 2
13
Activity 5 What is a Force?Suggested Learning IntentionsWe are learning to:• know that nothing can start moving, stop moving,
change shape or direction, unless a force is acting on it;• observe a variety of scenarios and discuss whether
there are forces acting; and• classify forces into categories.
The children will be aware that objects move, but they may not be aware that an invisible force is acting on the object. You can categorise these forces into three groups:• push; • pull; and • collision.
Each of these forces can, in turn, cause six possible changes to the movement of an object: • starting a movement;• stopping a movement;• making an object move faster;• slowing an object down;• changing the direction of movement;
or• changing the shape of an object. Introduce the word ‘force’ to the children, by giving them large sheets of paper with the word ‘force’ in the centre. Ask them, in groups, to write down their ideas of what a force is. There are no right or wrong answers. This will allow you to assess their knowledge of the concept.
Using slides 1–12 of Online Resource 4, show the children:• what push, pull and collision forces
are; and • an example of the six effects of a
force.
Classifying ForcesPlace A3 pages, each labelled with one of the types of force (push, pull, collision), in three different areas of the classroom. Now, using the pictures on slides 13–20 of Online Resource 4, ask the children to decide whether each picture shows a push, pull or collision force. They can show their decision by moving to the area of the classroom labelled with their chosen force.
CONNECTED LEARNINGOPPORTUNITIESPersonal Development and Mutual UnderstandingFind out about the forces that muscles in the body use.
Physical EducationDuring a PE lesson, ask the children to demonstrate push and pull forces and how they can change movement.
ASSESSMENT FOR LEARNING OPPORTUNITIESGenerating Pupil Questions Allow the children to form their own questions about how forces act in their own scenarios.
forcepushpullcollisionclassifyacceleratedirection
New Words and Phrases
Flight.indd 13 16/01/2012 15:42
Section 2 The Science of Flight
14
Activity 6 Air PressureSuggested Learning IntentionsWe are learning to:• know that air pressure is acting all around us; and• carry out experiments that demonstrate air pressure.
If the children are able to understand how lift works, they must first understand that the air around us creates pressure. Demonstrate air pressure by conducting the experiments below. Ask them to write a short explanation for each result.Please note: The result and explanation of each experiment is stated here for your reference.
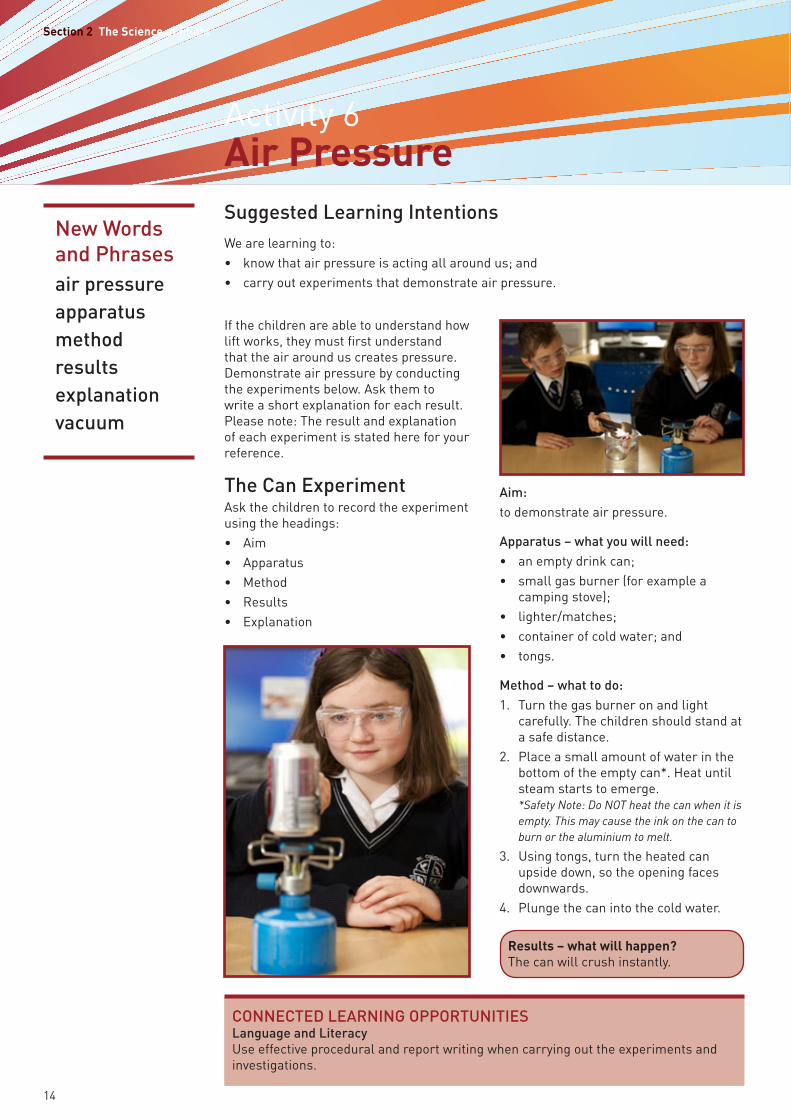
The Can ExperimentAsk the children to record the experiment using the headings:• Aim• Apparatus• Method• Results • Explanation
Aim:to demonstrate air pressure.
Apparatus – what you will need: • an empty drink can;• small gas burner (for example a
camping stove);• lighter/matches;• container of cold water; and• tongs.
Method – what to do:1. Turn the gas burner on and light
carefully. The children should stand at a safe distance.
2. Place a small amount of water in the bottom of the empty can*. Heat until steam starts to emerge. *Safety Note: Do NOT heat the can when it is empty. This may cause the ink on the can to burn or the aluminium to melt.
3. Using tongs, turn the heated can upside down, so the opening faces downwards.
4. Plunge the can into the cold water.
CONNECTED LEARNING OPPORTUNITIESLanguage and LiteracyUse effective procedural and report writing when carrying out the experiments and investigations.
air pressureapparatusmethodresultsexplanationvacuum
New Words and Phrases
Results – what will happen?The can will crush instantly.
Flight.indd 14 16/01/2012 15:42
The Science of Flight Section 2
15
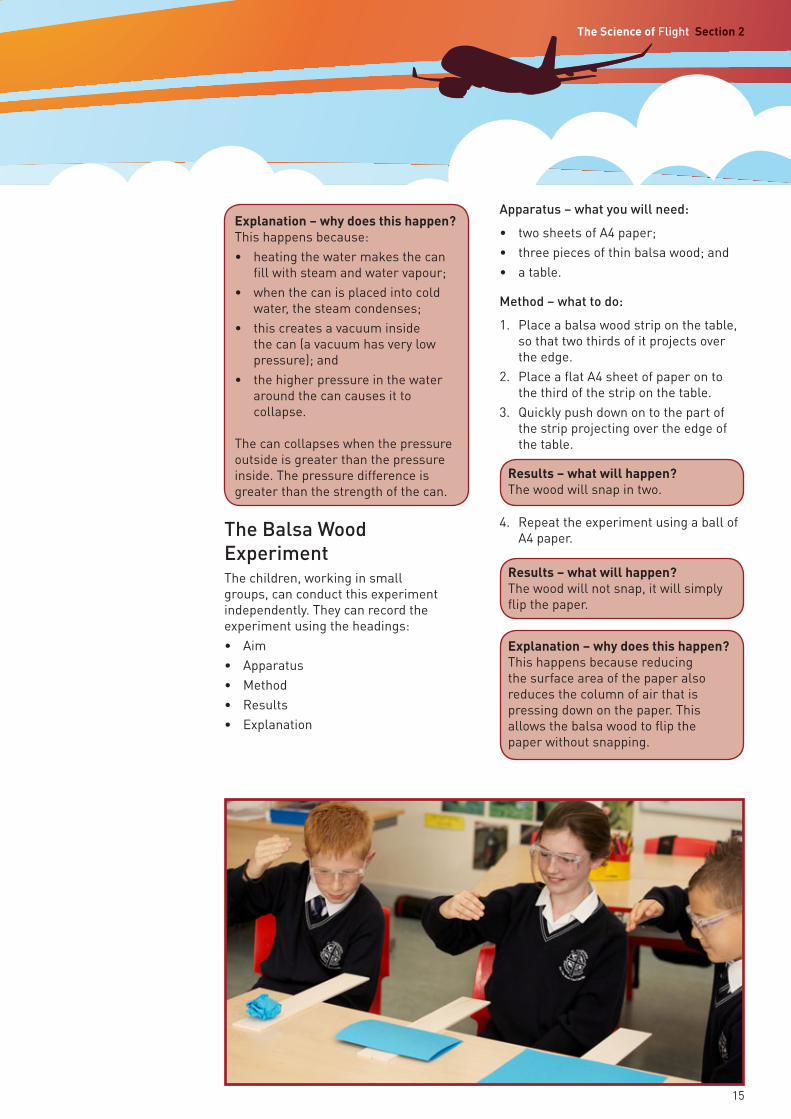
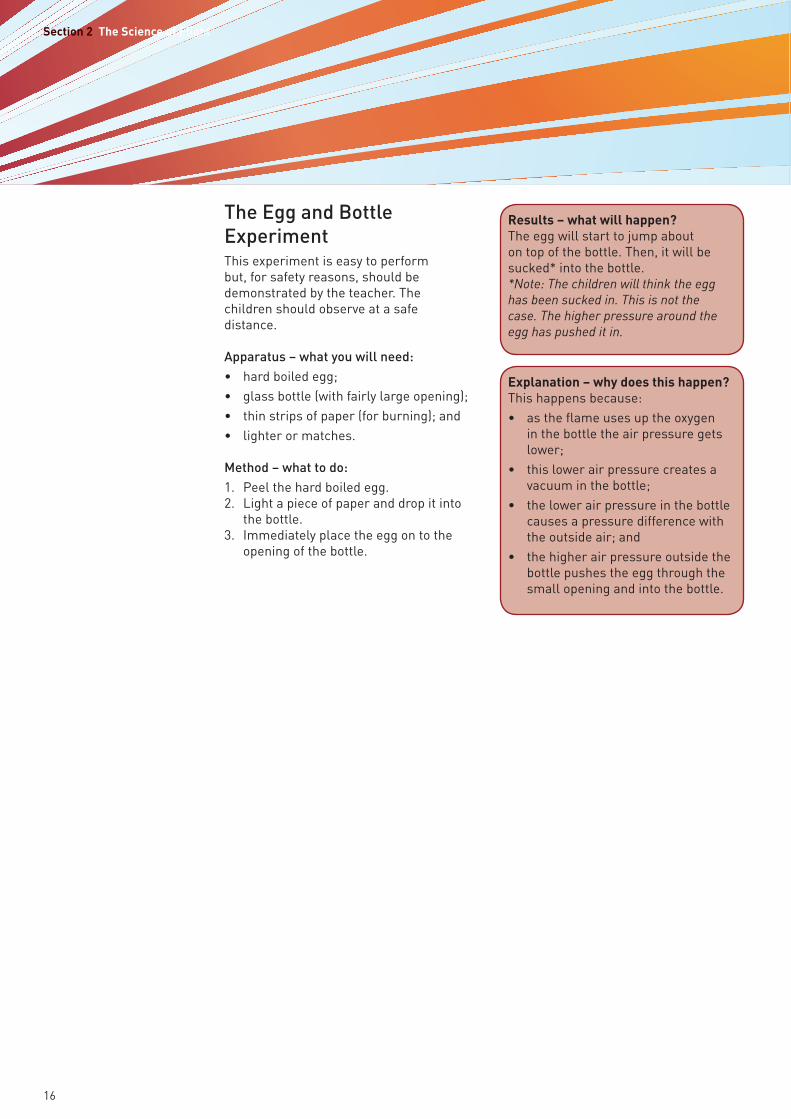
The Balsa Wood ExperimentThe children, working in small groups, can conduct this experiment independently. They can record the experiment using the headings:• Aim• Apparatus• Method• Results • Explanation
Apparatus – what you will need:
• two sheets of A4 paper;• three pieces of thin balsa wood; and• a table.
Method – what to do:
1. Place a balsa wood strip on the table, so that two thirds of it projects over the edge.
2. Place a flat A4 sheet of paper on to the third of the strip on the table.
3. Quickly push down on to the part of the strip projecting over the edge of the table.
Explanation – why does this happen? This happens because:• heating the water makes the can
fill with steam and water vapour;• when the can is placed into cold
water, the steam condenses;• this creates a vacuum inside
the can (a vacuum has very low pressure); and
• the higher pressure in the water around the can causes it to collapse.
The can collapses when the pressure outside is greater than the pressure inside. The pressure difference is greater than the strength of the can.
Results – what will happen?The wood will snap in two.
Results – what will happen?The wood will not snap, it will simply flip the paper.
Explanation – why does this happen? This happens because reducing the surface area of the paper also reduces the column of air that is pressing down on the paper. This allows the balsa wood to flip the paper without snapping.
4. Repeat the experiment using a ball of A4 paper.
Flight.indd 15 16/01/2012 15:42
Section 2 The Science of Flight
16
The Egg and Bottle ExperimentThis experiment is easy to perform but, for safety reasons, should be demonstrated by the teacher. The children should observe at a safe distance.
Apparatus – what you will need:• hard boiled egg;• glass bottle (with fairly large opening);• thin strips of paper (for burning); and• lighter or matches. Method – what to do:1. Peel the hard boiled egg.2. Light a piece of paper and drop it into
the bottle.3. Immediately place the egg on to the
opening of the bottle.
Results – what will happen?The egg will start to jump about on top of the bottle. Then, it will be sucked* into the bottle.*Note: The children will think the egg has been sucked in. This is not the case. The higher pressure around the egg has pushed it in.
Explanation – why does this happen? This happens because:• as the flame uses up the oxygen
in the bottle the air pressure gets lower;
• this lower air pressure creates a vacuum in the bottle;
• the lower air pressure in the bottle causes a pressure difference with the outside air; and
• the higher air pressure outside the bottle pushes the egg through the small opening and into the bottle.
Flight.indd 16 16/01/2012 15:42
The Science of Flight Section 2
17
Activity 7 The First Force of Flight - LiftSuggested Learning IntentionsWe are learning to:• know the names of the four forces of flight;• understand the force of lift and the role it plays in flight;• explain how two forces prevent flight and two forces act
to create flight; and• explain why an aeroplane wing has one curved side.
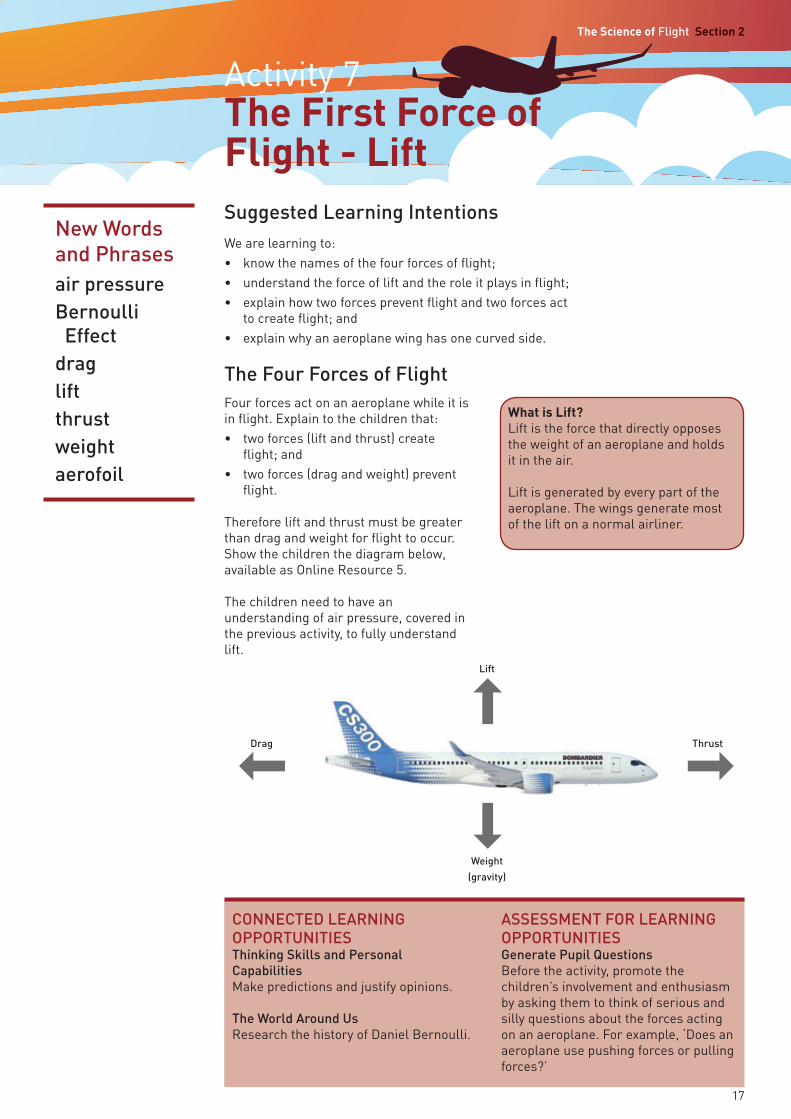
Four forces act on an aeroplane while it is in flight. Explain to the children that:• two forces (lift and thrust) create
flight; and • two forces (drag and weight) prevent
flight.
Therefore lift and thrust must be greater than drag and weight for flight to occur. Show the children the diagram below, available as Online Resource 5.
The children need to have an understanding of air pressure, covered in the previous activity, to fully understand lift.
CONNECTED LEARNINGOPPORTUNITIESThinking Skills and Personal CapabilitiesMake predictions and justify opinions.
The World Around UsResearch the history of Daniel Bernoulli.
ASSESSMENT FOR LEARNING OPPORTUNITIESGenerate Pupil QuestionsBefore the activity, promote the children’s involvement and enthusiasm by asking them to think of serious and silly questions about the forces acting on an aeroplane. For example, ‘Does an aeroplane use pushing forces or pulling forces?’
air pressureBernoulli Effectdragliftthrustweightaerofoil
New Words and Phrases
The Four Forces of Flight
What is Lift?Lift is the force that directly opposes the weight of an aeroplane and holds it in the air. Lift is generated by every part of the aeroplane. The wings generate most of the lift on a normal airliner.
Lift
Weight(gravity)
ThrustDrag
Flight.indd 17 09/03/2012 10:00
Section 2 The Science of Flight
18
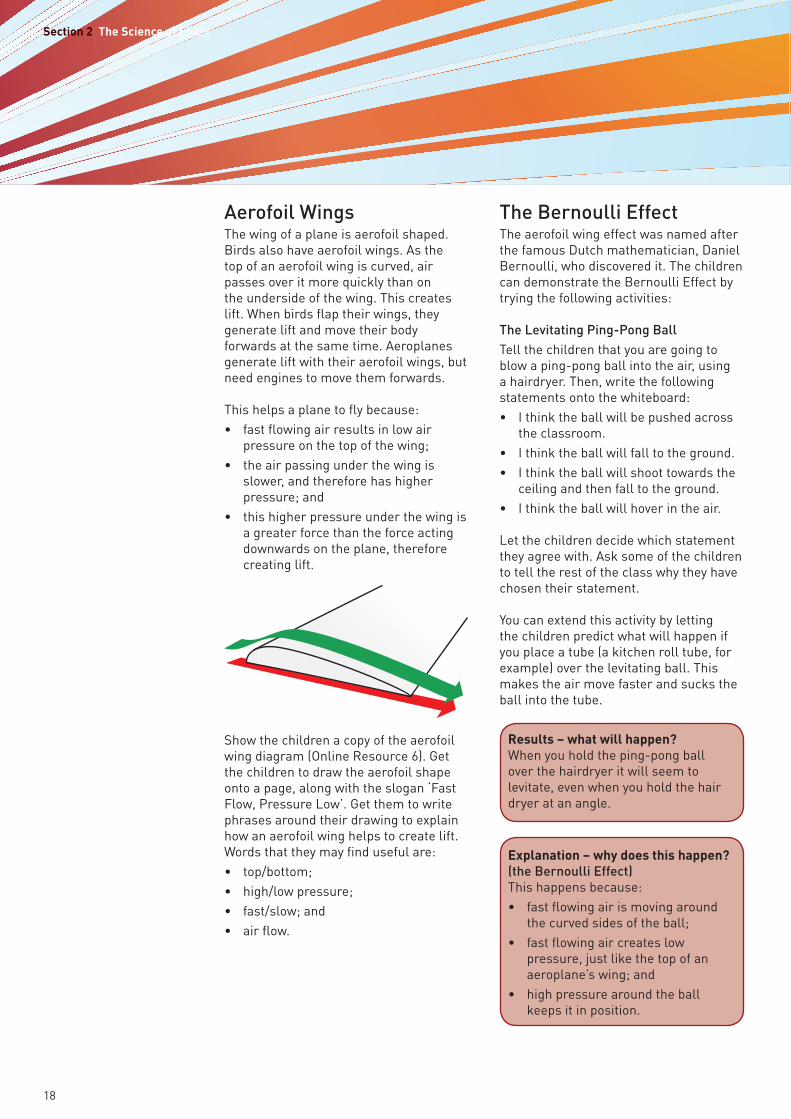
Aerofoil WingsThe wing of a plane is aerofoil shaped. Birds also have aerofoil wings. As the top of an aerofoil wing is curved, air passes over it more quickly than on the underside of the wing. This creates lift. When birds flap their wings, they generate lift and move their body forwards at the same time. Aeroplanes generate lift with their aerofoil wings, but need engines to move them forwards.
This helps a plane to fly because: • fast flowing air results in low air
pressure on the top of the wing; • the air passing under the wing is
slower, and therefore has higher pressure; and
• this higher pressure under the wing is a greater force than the force acting downwards on the plane, therefore creating lift.
Show the children a copy of the aerofoil wing diagram (Online Resource 6). Get the children to draw the aerofoil shape onto a page, along with the slogan ‘Fast Flow, Pressure Low’. Get them to write phrases around their drawing to explain how an aerofoil wing helps to create lift. Words that they may find useful are:• top/bottom;• high/low pressure;• fast/slow; and• air flow.
The Bernoulli EffectThe aerofoil wing effect was named after the famous Dutch mathematician, Daniel Bernoulli, who discovered it. The children can demonstrate the Bernoulli Effect by trying the following activities:
The Levitating Ping-Pong Ball Tell the children that you are going to blow a ping-pong ball into the air, using a hairdryer. Then, write the following statements onto the whiteboard:• I think the ball will be pushed across
the classroom.• I think the ball will fall to the ground.• I think the ball will shoot towards the
ceiling and then fall to the ground.• I think the ball will hover in the air.
Let the children decide which statement they agree with. Ask some of the children to tell the rest of the class why they have chosen their statement.
You can extend this activity by letting the children predict what will happen if you place a tube (a kitchen roll tube, for example) over the levitating ball. This makes the air move faster and sucks the ball into the tube.
Explanation – why does this happen? (the Bernoulli Effect)This happens because:• fast flowing air is moving around
the curved sides of the ball;• fast flowing air creates low
pressure, just like the top of an aeroplane’s wing; and
• high pressure around the ball keeps it in position.
Results – what will happen?When you hold the ping-pong ball over the hairdryer it will seem to levitate, even when you hold the hair dryer at an angle.
Flight.indd 18 16/01/2012 15:42
The Science of Flight Section 2
19
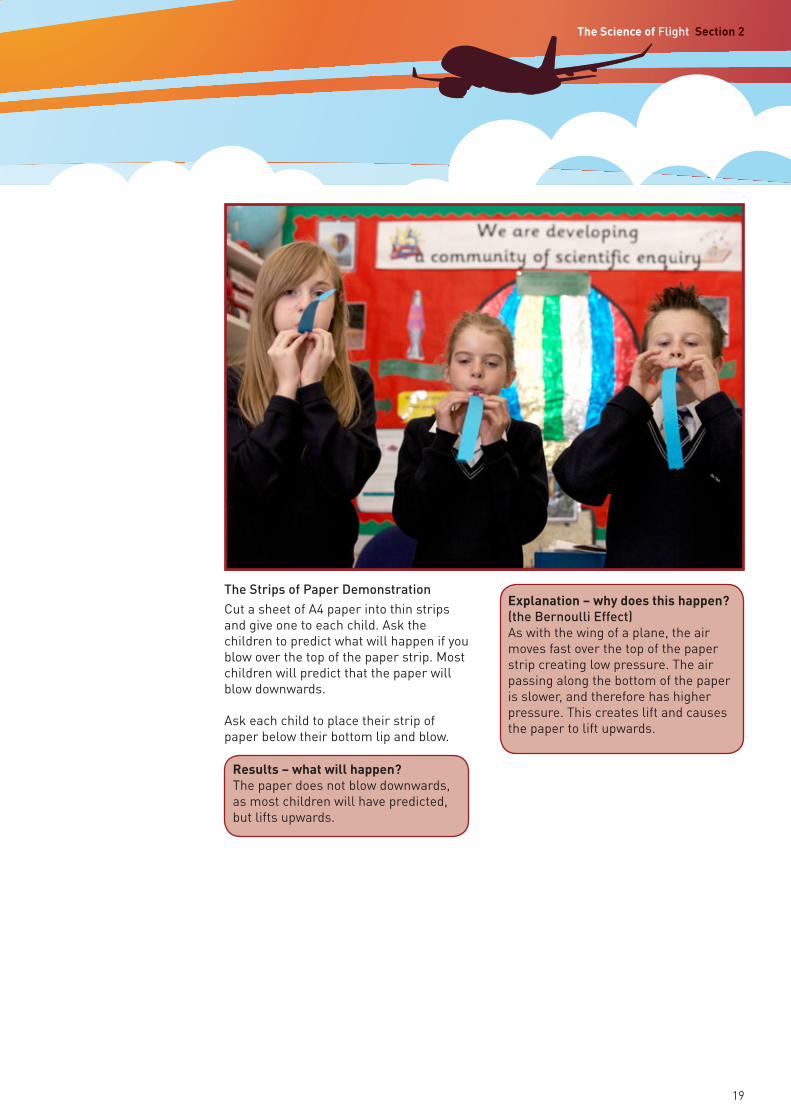
The Strips of Paper DemonstrationCut a sheet of A4 paper into thin strips and give one to each child. Ask the children to predict what will happen if you blow over the top of the paper strip. Most children will predict that the paper will blow downwards.
Ask each child to place their strip of paper below their bottom lip and blow.
Explanation – why does this happen? (the Bernoulli Effect)As with the wing of a plane, the air moves fast over the top of the paper strip creating low pressure. The air passing along the bottom of the paper is slower, and therefore has higher pressure. This creates lift and causes the paper to lift upwards.
Results – what will happen?The paper does not blow downwards, as most children will have predicted, but lifts upwards.
Flight.indd 19 16/01/2012 15:42
Section 2 The Science of Flight
20
Activity 8 The Second Force of Flight - ThrustSuggested Learning IntentionsWe are learning to:• understand how the force of thrust works and the role
it plays in flight;• know that thrust is a push force that pushes an aircraft
into the air;• know that air pressure is acting all around us; and• carry out a fair test.
Recap the four forces of flight (and how they work on an aeroplane) by showing the children the diagram in Online Resource 5.
Rockets - Thrust InvestigationRockets are a good way to explain thrust to the children. To demonstrate the immense force needed to push an aircraft into the air, find a video clip on the internet of a space shuttle take-off to show the children. Tell the children that you are going to demonstrate thrust.
Apparatus – what you will need:• empty 35 mm film containers (most
film processing centres will provide these free of charge);
• effervescent tablets (for example Vitamin C tablets);
• water; and• safety glasses.
Method – what to do:1. Fill three or four containers with a
small amount of water.2. Add an effervescent tablet to each
container.3. Quickly replace the lids on the
containers and place them on the floor, with the lid facing down.
4. Stand back and wait for a few seconds.
CONNECTED LEARNINGOPPORTUNITIESLanguage and LiteracyWrite a scientific procedure.
Thinking Skills and Personal CapabilitiesMake predictions and justify opinions. Mathematics and NumeracyRead, interpret, organise and present information in mathematical formats.
The World Around UsResearch the forces of flight through space travel.
ASSESSMENT FOR LEARNING OPPORTUNITIESShare learning intentions and success criteria with the children.Ask better questions according to the children’s responses, for example ‘Why do you think that?’
thrustfair test variable conclusionpredictionprocedure
New Words and Phrases
What is thrust?Thrust is the force that moves an aircraft through the air. It overcomes the drag and weight of an aeroplane. Aircraft engines generate thrust through the propulsion system (propeller or jet engine).
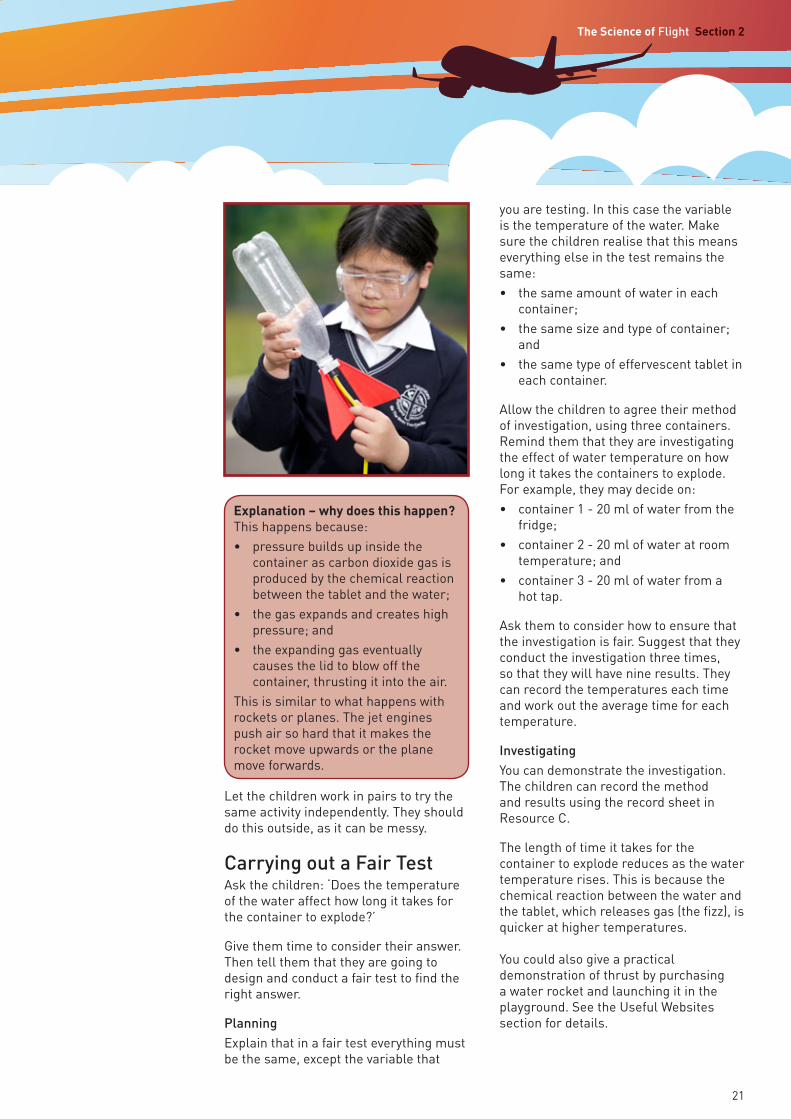
Results – what will happen?The pressure will build inside each container. Eventually it will thrust the container into the air (the children will be very excited by this).
Flight.indd 20 16/01/2012 15:42
The Science of Flight Section 2
21
Let the children work in pairs to try the same activity independently. They should do this outside, as it can be messy.
Carrying out a Fair TestAsk the children: ‘Does the temperature of the water affect how long it takes for the container to explode?’
Give them time to consider their answer. Then tell them that they are going to design and conduct a fair test to find the right answer.
PlanningExplain that in a fair test everything must be the same, except the variable that
you are testing. In this case the variable is the temperature of the water. Make sure the children realise that this means everything else in the test remains the same:• the same amount of water in each
container;• the same size and type of container;
and• the same type of effervescent tablet in
each container.
Allow the children to agree their method of investigation, using three containers.Remind them that they are investigating the effect of water temperature on how long it takes the containers to explode. For example, they may decide on:• container 1 - 20 ml of water from the
fridge; • container 2 - 20 ml of water at room
temperature; and• container 3 - 20 ml of water from a
hot tap.
Ask them to consider how to ensure that the investigation is fair. Suggest that they conduct the investigation three times, so that they will have nine results. They can record the temperatures each time and work out the average time for each temperature.
InvestigatingYou can demonstrate the investigation. The children can record the method and results using the record sheet in Resource C.
The length of time it takes for the container to explode reduces as the water temperature rises. This is because the chemical reaction between the water and the tablet, which releases gas (the fizz), is quicker at higher temperatures.
You could also give a practical demonstration of thrust by purchasing a water rocket and launching it in the playground. See the Useful Websites section for details.
Explanation – why does this happen? This happens because:• pressure builds up inside the
container as carbon dioxide gas is produced by the chemical reaction between the tablet and the water;
• the gas expands and creates high pressure; and
• the expanding gas eventually causes the lid to blow off the container, thrusting it into the air.
This is similar to what happens with rockets or planes. The jet engines push air so hard that it makes the rocket move upwards or the plane move forwards.
Flight.indd 21 16/01/2012 15:42
Section 2 The Science of Flight
22
Activity 9 The Third Force of Flight - DragSuggested Learning IntentionsWe are learning to:• know that drag is a force that opposes an aircraft’s motion;• understand the role of aerodynamics in decreasing drag;• investigate some of the factors that affect drag; and• design, make and test a model.
Demonstrating DragUsing the explanation above as guidance, discuss with the children what drag is. Tell them that they are going to conduct an investigation to demonstrate drag at work.
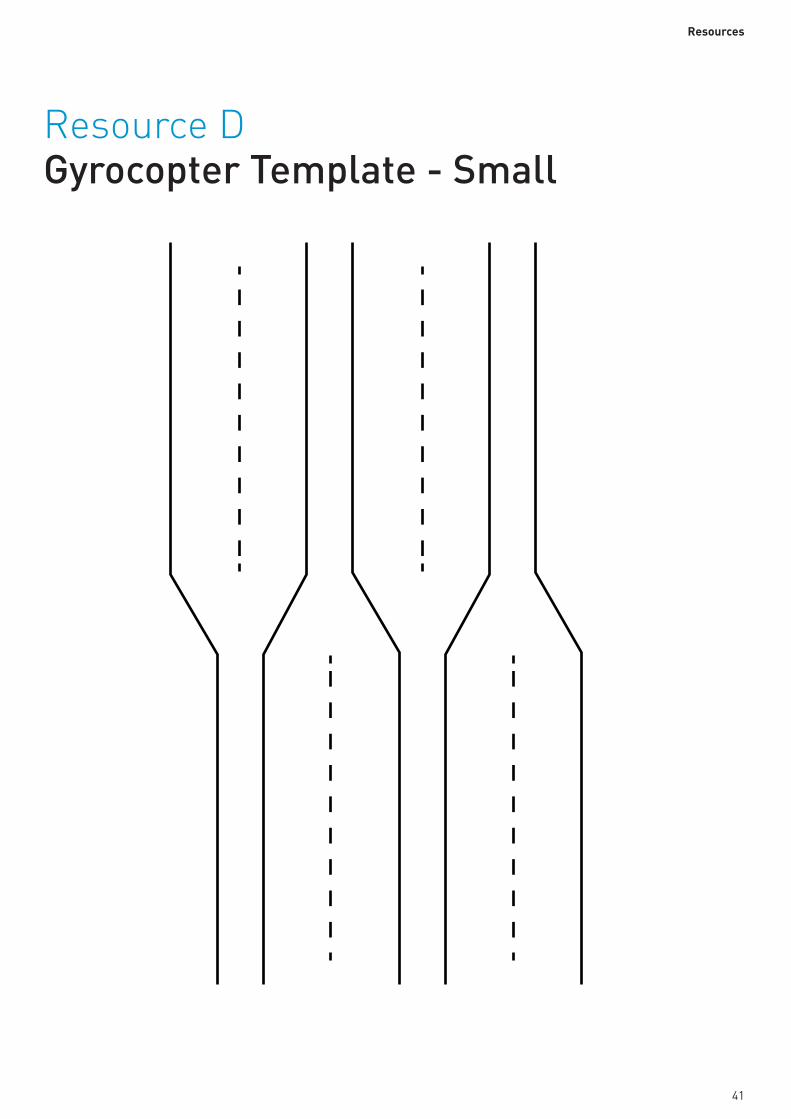
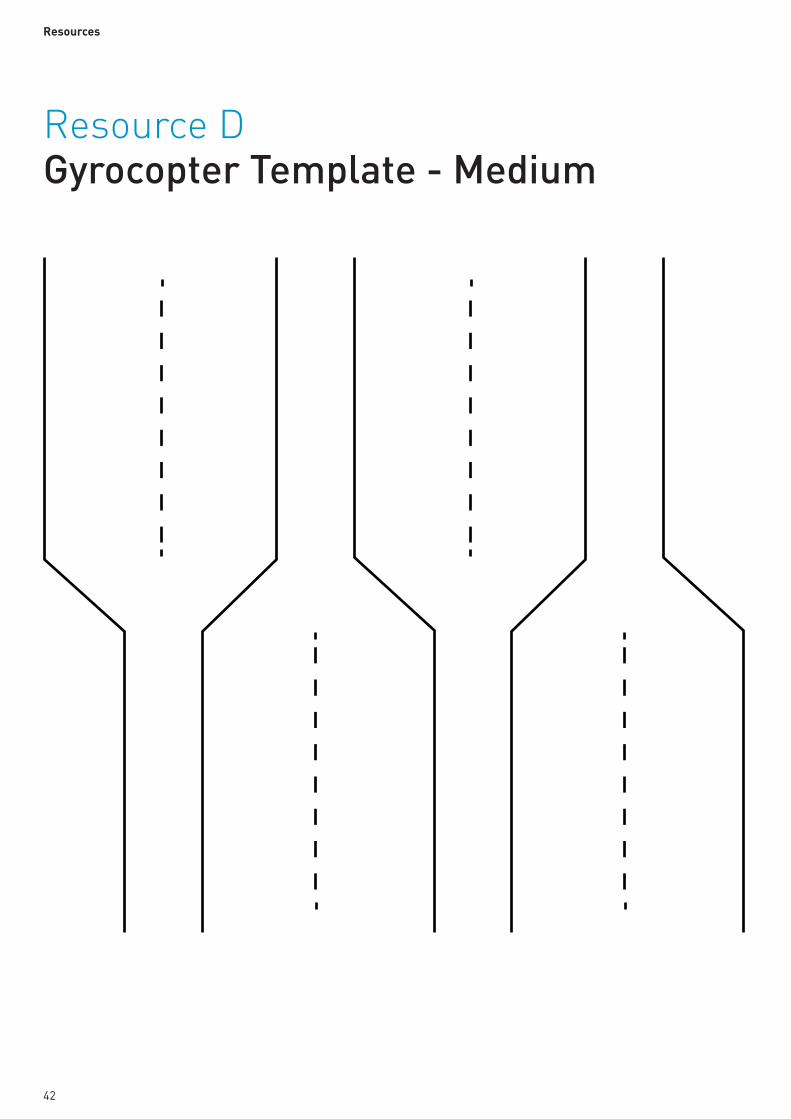
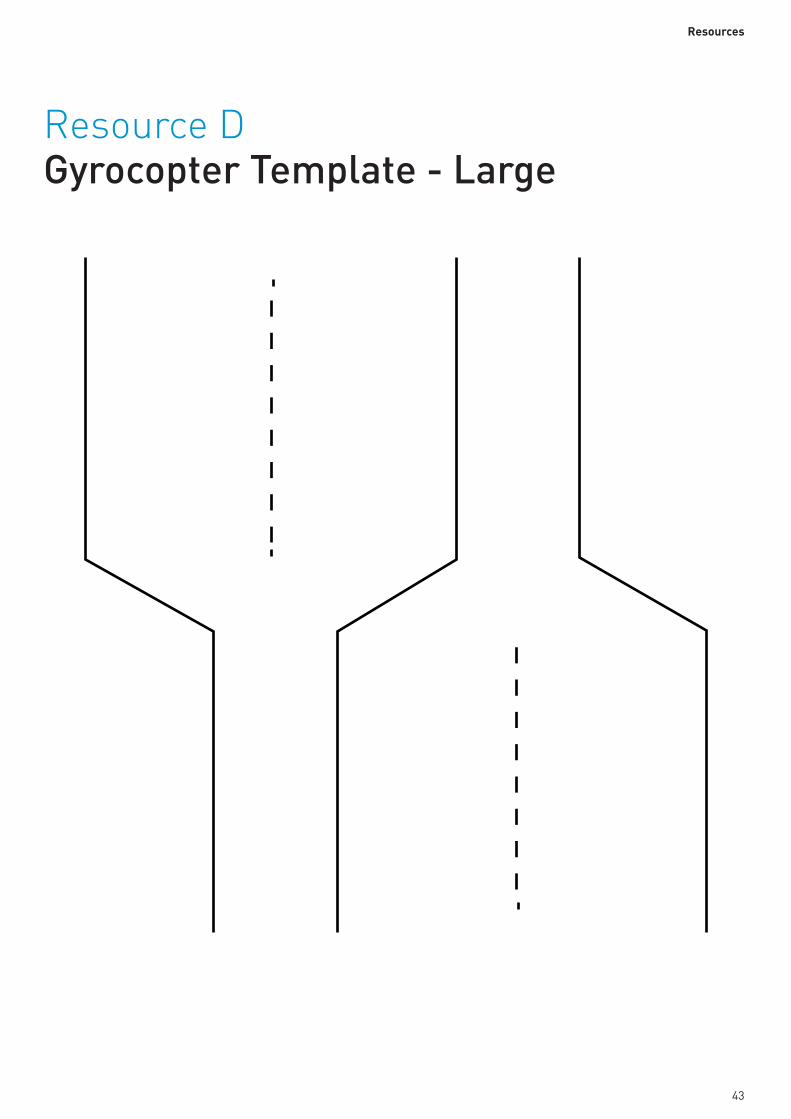
Search the internet to find an image of a gyrocopter. Show this to the children, pointing out the wings. Ask them whether they think the size of a gyrocopter wing affects the speed it falls at. Ask them to consider the role of air resistance, or drag, which will slow the gyrocopter down. How will the size of the wings affect drag?
Photocopy the three (different sized) gyrocopter templates in Resource D. Let the children cut out the templates, so that they each have all three sizes. They should add a paper clip to the bottom of
each gyrocopter to provide extra weight if needed. Allow them time to discuss and, if necessary, change their predicted outcome of the investigation.
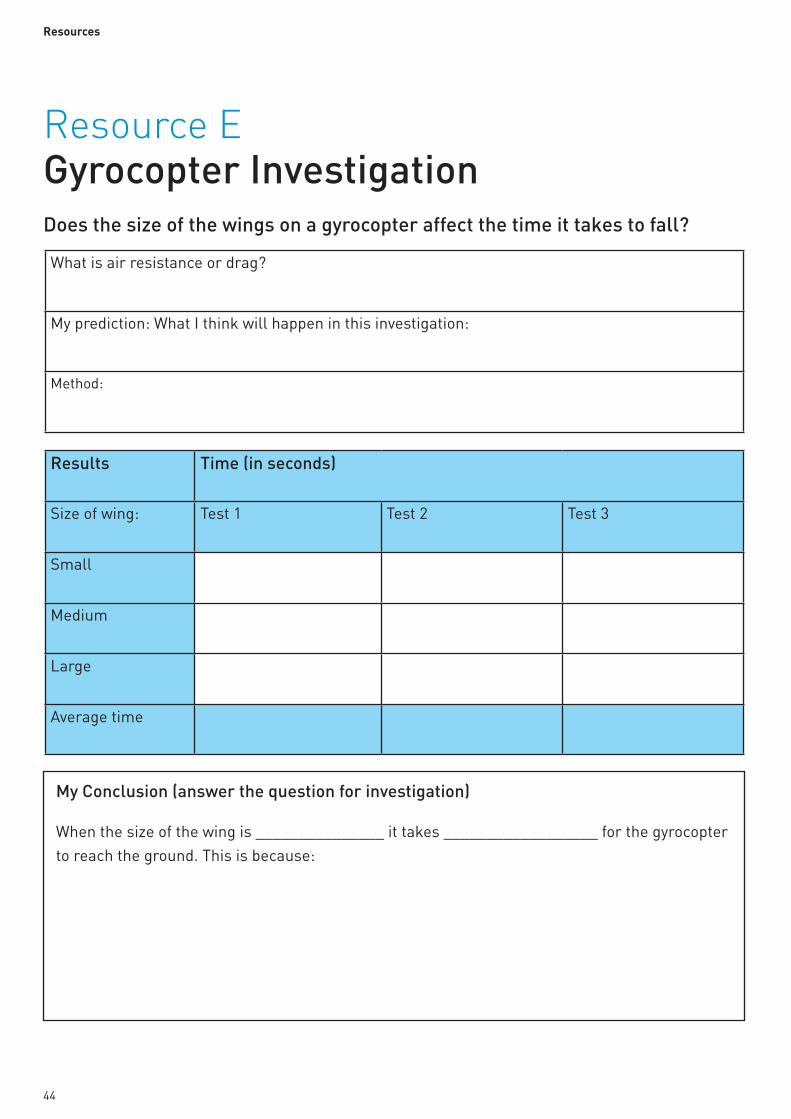
Give each child a copy of Resource E, Gyrocopter Investigation. Ask them to complete the first section and record their prediction for the outcome of the investigation.
InvestigationExplain to the children that, as in the previous investigation of thrust, they are going to test each of the three sizes of gyrocopter three times. They will drop the gyrocopters from the highest accessible point in the school (for example the top of a stairway or climbing frames in the PE hall) using a stopwatch to time how long each gyrocopter takes to reach the ground.
They will record their method, results and conclusion using Resource E. Take photographs during the investigation and let the children include one in their report.
As an extension, they could repeat the investigation by adapting or changing the material or weight of the gyrocopters, as an alternative to size of wing.
CONNECTED LEARNINGOPPORTUNITIESLanguage and LiteracyWrite a scientific procedure.
Mathematics and Numeracy Read, interpret, organise and present information in mathematical formats.
The World Around UsResearch the forces of flight through space travel.
ASSESSMENT FOR LEARNING OPPORTUNITIESPupil ReflectionDevelop the children’s ability to look at their work critically and constructively. Let them create and use a WILF (What I’m Looking For) sheet to mark themselves on meeting set criteria for the Air Resistance Challenge.
dragaerodynamic streamlineair resistanceoppositedesign testconclusion
New Words and Phrases
What is drag?Drag is a form of friction known as air resistance. Drag is the force that opposes an aircraft’s motion through the air. Every part of the aeroplane generates drag, even the engines. Drag acts in the opposite direction to the motion of the aircraft.
Flight.indd 22 21/03/2012 13:21
The Science of Flight Section 2
23
AerodynamicsIntroduce the children to the term aerodynamic (or streamlined). Show them the images in Online Resource 7. Ask them to consider which element of each picture demonstrates a streamlined or aerodynamic shape. Ask them why they think it is important for aeroplanes to be streamlined. Answers might include:• to reduce the cost of fuel to push the
plane through the air;• to make the flight smoother – less
turbulence; or• to cause less drag making the aircraft
fly faster, without having to create more thrust.
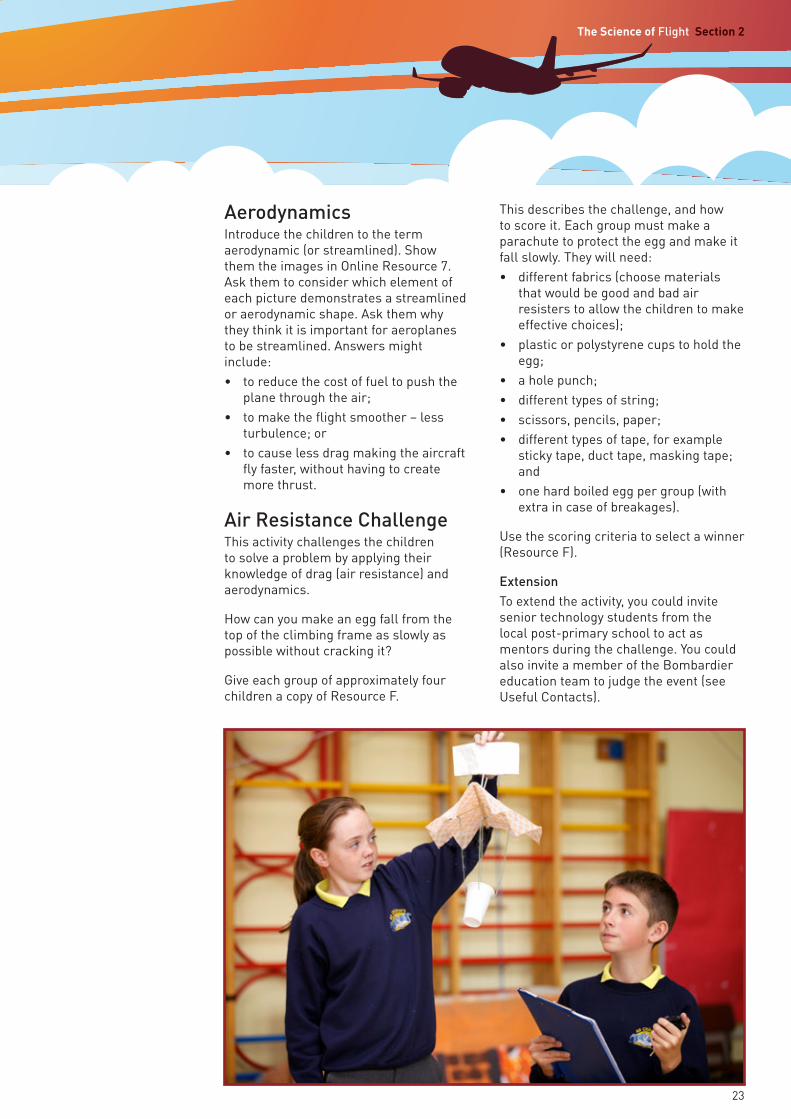
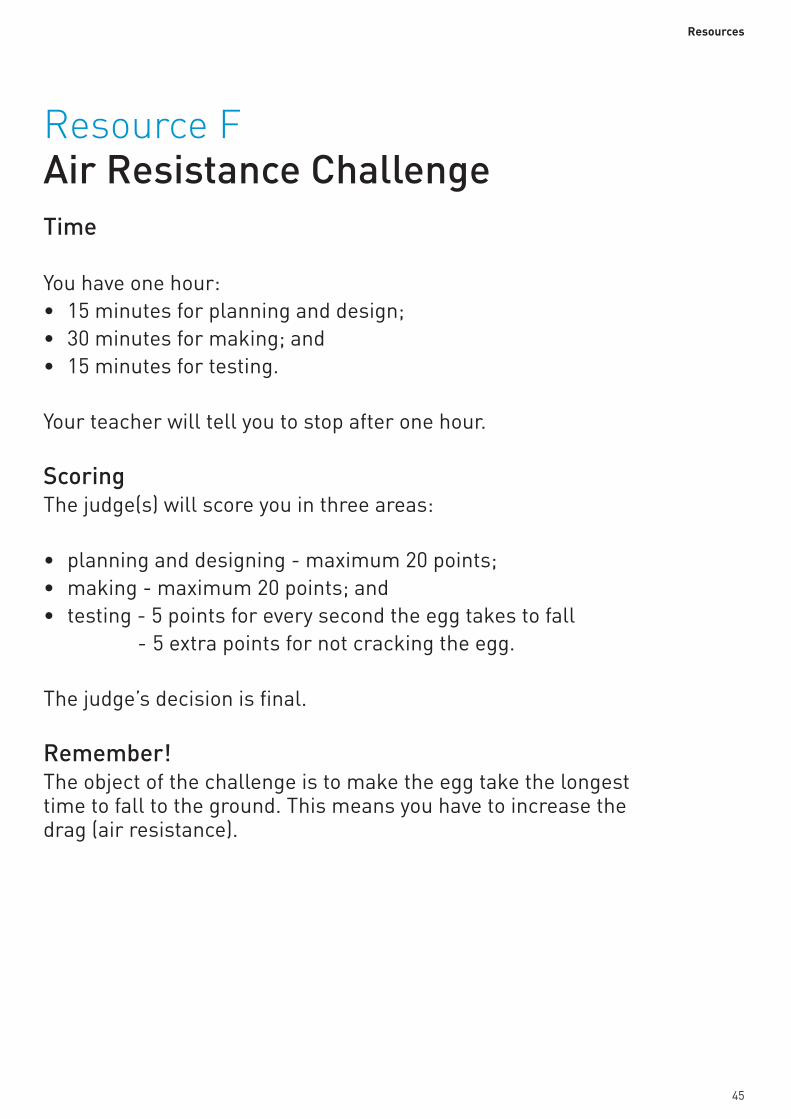
Air Resistance ChallengeThis activity challenges the children to solve a problem by applying their knowledge of drag (air resistance) and aerodynamics.
How can you make an egg fall from the top of the climbing frame as slowly as possible without cracking it?
Give each group of approximately four children a copy of Resource F.
This describes the challenge, and how to score it. Each group must make a parachute to protect the egg and make it fall slowly. They will need:• different fabrics (choose materials
that would be good and bad air resisters to allow the children to make effective choices);
• plastic or polystyrene cups to hold the egg;
• a hole punch;• different types of string;• scissors, pencils, paper; • different types of tape, for example
sticky tape, duct tape, masking tape; and
• one hard boiled egg per group (with extra in case of breakages).
Use the scoring criteria to select a winner (Resource F).
ExtensionTo extend the activity, you could invite senior technology students from the local post-primary school to act as mentors during the challenge. You could also invite a member of the Bombardier education team to judge the event (see Useful Contacts).
Flight.indd 23 16/01/2012 15:42
Section 2 The Science of Flight
24
Activity 10 The Fourth Force of Flight - Weight Suggested Learning IntentionsWe are learning to:• know that drag is a force that opposes an aircraft’s motion;• understand the role of aerodynamics in decreasing drag;• investigate some of the factors that affect drag; and• design, make and test a model.
Mass, Gravity and WeightWe have to make a link between mass, gravity and weight to fully understand the forces an aeroplane (or any object) must overcome to be able to fly.
These points may help you to explain this, in simple terms, to the children:• The mass (measured in grams) of a
person or an object is the amount of space that they take up. The weight of an object depends on where it is, whereas mass is constant and never changes.
• We can see this when you consider that the force of gravity on the Moon is less than gravity on the Earth. This is because the Earth itself has a greater mass than the Moon, so its gravitational field is greater.
• Gravity acts as a force that interacts with mass to pull it towards the centre of the Earth and so gives us a weight.
CONNECTED LEARNINGOPPORTUNITIESThinking Skills and Personal CapabilitiesSelect the most appropriate method for a task.
The World Around UsExtend this activity by looking at other forces, such as gravity. Show how you can increase the gravitational force acting on an object, by acceleration and spinning, by turning a bicycle wheel into a gyroscope or spinning a bucket of water.
Mathematics and NumeracySolve problems and puzzles related to Greenwich Mean Time (GMT) and world time zones.
ASSESSMENT FOR LEARNING OPPORTUNITIESPeer AssessmentEncourage peer assessment by allowing the children time to give each other positive feedback about their ideas.
massgravityweightfuselage cockpitjet enginewingpitchyawspoilerflapsslatselevatorrudderaileronvertical stabiliserhorizontal stabiliseraluminium
New Words and Phrases
What is weight?Weight is the force generated by the gravitational attraction of the earth on an aeroplane.
The first three forces of flight – lift, thrust and drag – are all controlled in some way by the design of the aeroplane:• lift by the shape of the wings and
fuselage;• thrust by the engines or force of
propulsion; and• drag by the aerodynamic shape
of the aeroplane (it is shaped to reduce resistance to the air).
As well as the lightweight materials used to make the aeroplane, these three things (lift, thrust and drag) help the aeroplane to overcome the fourth force (weight) when it flies.
Flight.indd 24 16/01/2012 15:42
The Science of Flight Section 2
25
• Therefore, while our mass would stay the same on the Moon, our weight would change because the gravitational field is less.
• The mass (measured in grams) of an object does not change, but its weight can vary depending on gravity.
• For convenience, we usually think of gravity as causing objects to fall towards the centre of the Earth. We can see its effect when we drop an object. An object falls to the ground because it is enclosed within the gravitational field of the Earth, which has the effect of pulling an object downwards.
• A plane has a large mass (and therefore a large weight). To keep it in the air we must decrease its weight as much as possible. With less weight the aeroplane requires less thrust to fly. This means it uses less fuel.
Parts of an AeroplaneShow the children Online Resource 8. This shows the parts of an aeroplane that help it to overcome the two major problems of flight:• the forces that would otherwise
prevent it from taking off and flying (weight and drag); and
• controlling the object in flight.
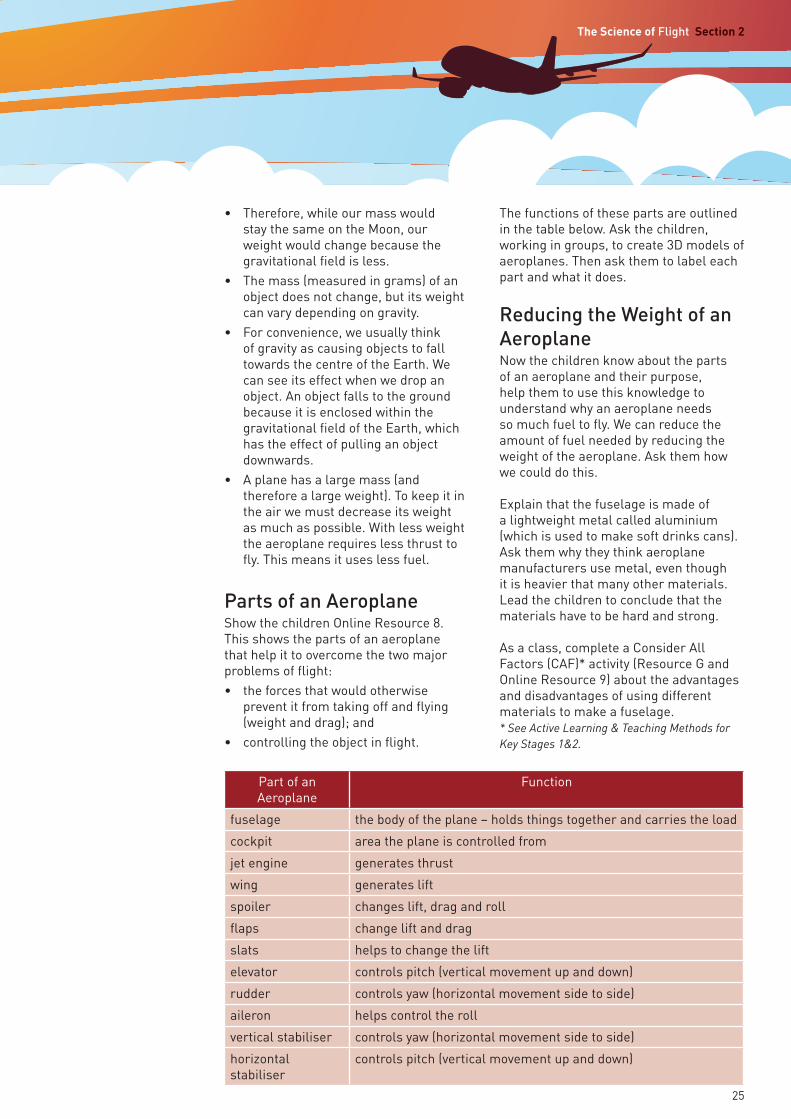
The functions of these parts are outlined in the table below. Ask the children, working in groups, to create 3D models of aeroplanes. Then ask them to label each part and what it does.
Reducing the Weight of an AeroplaneNow the children know about the parts of an aeroplane and their purpose, help them to use this knowledge to understand why an aeroplane needs so much fuel to fly. We can reduce the amount of fuel needed by reducing the weight of the aeroplane. Ask them how we could do this.
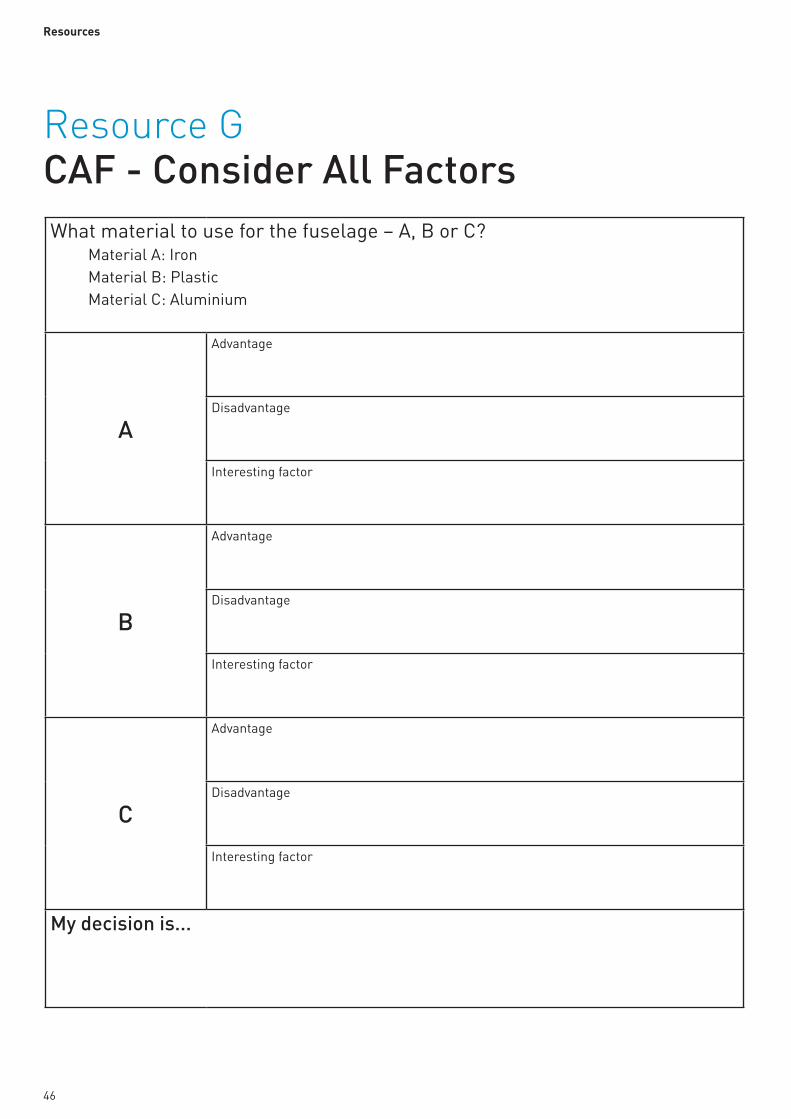
Explain that the fuselage is made of a lightweight metal called aluminium (which is used to make soft drinks cans). Ask them why they think aeroplane manufacturers use metal, even though it is heavier that many other materials. Lead the children to conclude that the materials have to be hard and strong.
As a class, complete a Consider All Factors (CAF)* activity (Resource G and Online Resource 9) about the advantages and disadvantages of using different materials to make a fuselage.* See Active Learning & Teaching Methods for Key Stages 1&2.
Part of an Aeroplane
Function
fuselage the body of the plane – holds things together and carries the load
cockpit area the plane is controlled from
jet engine generates thrust
wing generates lift
spoiler changes lift, drag and roll
flaps change lift and drag
slats helps to change the lift
elevator controls pitch (vertical movement up and down)
rudder controls yaw (horizontal movement side to side)
aileron helps control the roll
vertical stabiliser controls yaw (horizontal movement side to side)
horizontal stabiliser
controls pitch (vertical movement up and down)
Flight.indd 25 16/01/2012 15:42
Section 2 The Science of Flight
26
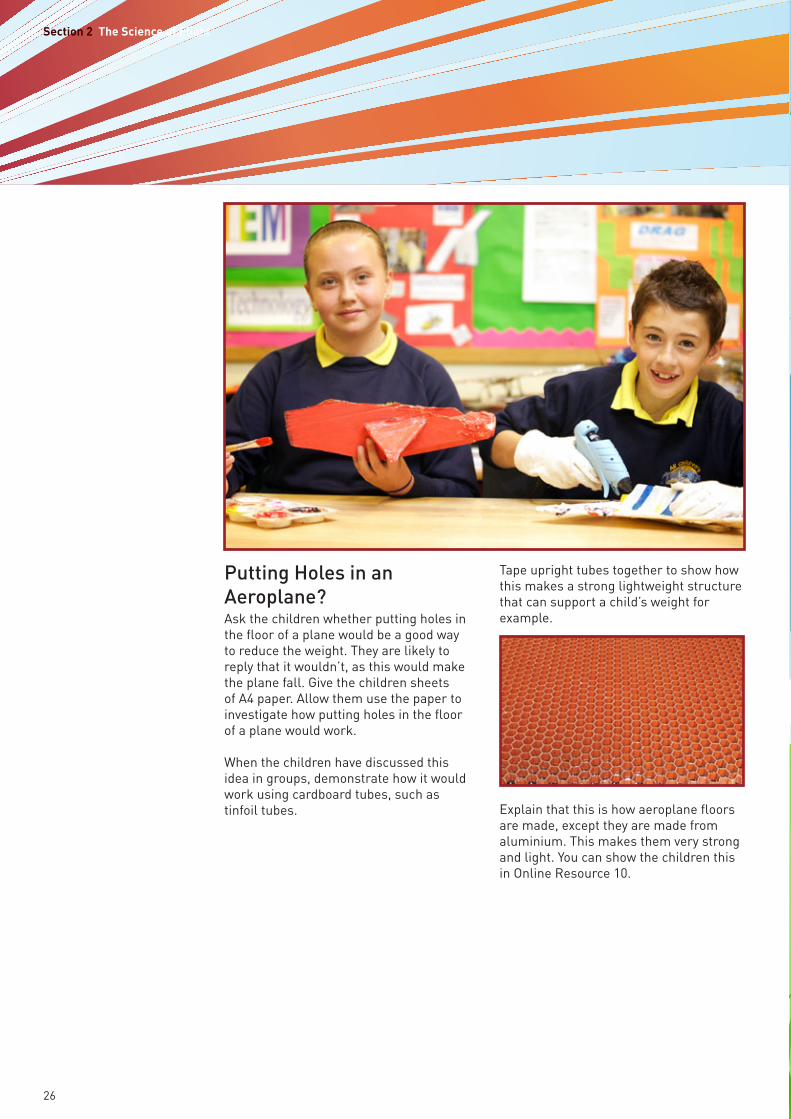
Putting Holes in an Aeroplane?Ask the children whether putting holes in the floor of a plane would be a good way to reduce the weight. They are likely to reply that it wouldn’t, as this would make the plane fall. Give the children sheets of A4 paper. Allow them use the paper to investigate how putting holes in the floor of a plane would work.
When the children have discussed this idea in groups, demonstrate how it would work using cardboard tubes, such as tinfoil tubes.
Tape upright tubes together to show how this makes a strong lightweight structure that can support a child’s weight for example.
Explain that this is how aeroplane floors are made, except they are made from aluminium. This makes them very strong and light. You can show the children this in Online Resource 10.
Flight.indd 26 16/01/2012 15:42
27
How Time FliesRecognising the contribution that some people have made to the development of flight through history.
Understanding chronological order.
Transferring knowledge about forces on an aeroplane to other things such as kites.
Recognising symmetry.
SECTION
3
Flight.indd 27 16/01/2012 15:42

Section 3 How Time Flies
28
Flight.indd 28 16/01/2012 15:42
How Time Flies Section 3
29
Activity 11 Flight in HistorySuggested Learning IntentionsWe are learning to:• create a timeline;• understand the terms bc and ad; • find out about the dates of important events associated with
flight; and• research the contribution that some people in history have
made to flight.
Explain a timeline to the children. Draw a horizontal line across the centre of a large strip of paper (for example the back of a roll of wallpaper or by sticking several A3 pages together, landscape). You can put the timeline into context by marking events, such as the year 2000 or the birth of Christ. Note: you do not need to mark the years to scale. Explain to the children what the terms bc and ad mean (or Before Common Era (bce) and Common Era (ce), if these are more appropriate). As the children find out about events in history linked to flight, mark them on the timeline.
CONNECTED LEARNINGOPPORTUNITIESThe ArtsAsk the children to dramatise the story of Icarus. Create wax resist paintings by drawing on paper with a white candle and painting a wash on top. The wax will repel the watery paint.
Language and LiteracyFind out about various myths and legends and discuss their similarities and differences.
The World Around UsInvestigate the properties of wax and other materials.
Personal Development & Mutual UnderstandingLet the children create their own timeline of events they have experienced. They could ask a grandparent, or another older person, to do the same. Then they can compare events and experiences.
ASSESSMENT FOR LEARNING OPPORTUNITIESIndependent Learning SkillsEncourage the children to develop independent learning skills. Help them to plan and carry out their work with purpose and structure.
timelinebc and adchronologicalmythIcarus and Daedalus Pegasus
New Words and Phrases
TimelinesFact FileWe use bc and ad to count years. We use Christ’s birth as a starting point.
• bc stands for Before Christ.• ad stands for Anno Domini, which
is Latin for ‘In the year of our Lord’.
We use bc for the years before Christ’s birth and ad for the years after his birth.
For example, the year 326 bc refers to a time 326 years before Christ’s birth.
Flight.indd 29 16/01/2012 15:42
Section 3 How Time Flies
30
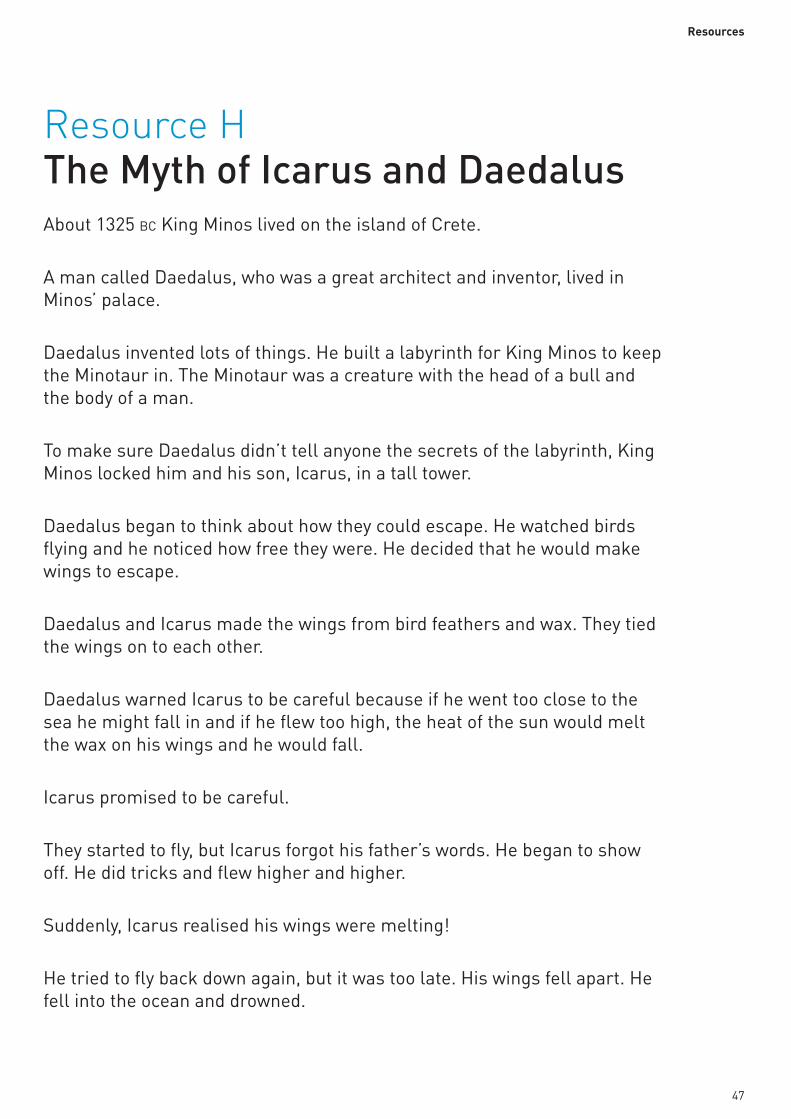
Icarus and Daedalus Discuss with the children what a myth is. Then tell them the story of Icarus and Daedalus (Resource H). Discuss with them where they might place the story on the timeline.
Ask them to try one of these ICT activities.
Desktop PublishingThe children will:• use software, such as Comic Life, to
create a comic strip of the story of Icarus and Daedalus;
• use the main points of the story to help them plan their comic strip;
• draw the images, then scan them onto the computer to use in their comic; or
• use painting software, such as Paint or Fresco, to draw the illustrations.
PodcastingThe children will:• use software, such as Audacity, to
create a ‘radio story’ of Icarus and Daedalus;
• in groups, think about the sound effects they need to make the story interesting and let the listener know what is happening;
• write a script for the story and dialogue for each character;
• use Resource H to help them to plan their story;
• use a USB microphone to record their story, when they have gathered their sound effect props and decided who will play each character;
• use Audacity to edit their story and add music; and
• export the file when they are finished. As an extension activity, the children could find out about the following myths and legends that have links to the theme of flight:
The Greek legend of PegasusBellerophon the Valiant, son of the King of Corinth, captured Pegasus, a winged horse. Pegasus took him to a battle with the triple headed monster, Chimera.
King KajKaoos of PersiaKing KajKaoos attached eagles to his throne and flew around his kingdom.
Alexander the GreatAlexander the Great harnessed his griffins, four mystical winged animals, to a basket and flew around his empire.
Flight.indd 30 16/01/2012 15:42
How Time Flies Section 3
31
Activity 12 Early Flight and Famous People Suggested Learning IntentionsWe are learning to:• find out about the lives of people involved in flight in history;• evaluate the reliability of sources of information;• decide on important events leading to the development of today’s air travel; and• appreciate the role that engineers have played in the development of flight.
The Wright Brothers and Harry Ferguson Ask the children to find out what the Wright brothers and Harry Ferguson have in common. Let them use the internet to discover that both the Wright brothers and Harry Ferguson contributed to designing and making aeroplanes.
Split the class into groups. Ask each group to decide who made the greater contribution to flight, Harry Ferguson or the Wright brothers. Discuss what makes a good, clear argument and how to write a speech supporting their decision.
Let each group deliver their speech to another class. Then ask the other classes to vote for the argument that convinced them.
Bombardier Aerospace, BelfastAs homework (over a week) ask the children to research the history of Bombardier Aerospace, Belfast. Give them the opportunity to discover how the Short brothers founded the company in 1908. Ask them to write a biography of
the three brothers who secured the first orders from the Wright brothers to build six Wright Flyers in 1909.
Using dictionaries, encyclopedias or suitable search engines, let the children work in small groups to find out about the Short brothers and what prompted them to move to Belfast in 1936. They should consider whether the information they find is from reliable and accurate sources. If possible, arrange a trip to the Ulster Folk and Transport Museum at Cultra to see the SC1 vertical take-off and landing research aircraft.
Ask the children to include the following in their biographies:• four sentences about the Short
brothers and their contribution to flight;
• a picture and description of an aircraft manufactured by Short Brothers plc (Shorts);
• a list of aircraft manufactured by Shorts and Bombardier Aerospace;
• an explanation of how Shorts became Bombardier Aerospace, Belfast; and
• three facts about Bombardier Aerospace.
CONNECTED LEARNINGOPPORTUNITIESLanguage and LiteracyAsk the children to write:• a chronological report about Amelia
Earhart’s life; and• a speech debating the question ‘Are
there too many aeroplanes in the sky?’
The ArtsResearch the ‘Wright Flyer’ and ask the children to create models based on it.
ASSESSMENT FOR LEARNING OPPORTUNITIESAssessment for Learning OpportunitiesGet the children to imagine a number line, from 1–10, running across the room. Ask them to position themselves on the line according to how much they feel they know about flight (with one meaning not very much and ten meaning a lot). Repeat this self-assessment task at intervals throughout the theme.
Amelia EarhartaviationThe Wright brothersThe Wright FlyerHarry Ferguson
New Words and Phrases
Flight.indd 31 16/01/2012 15:42
Section 3 How Time Flies
32
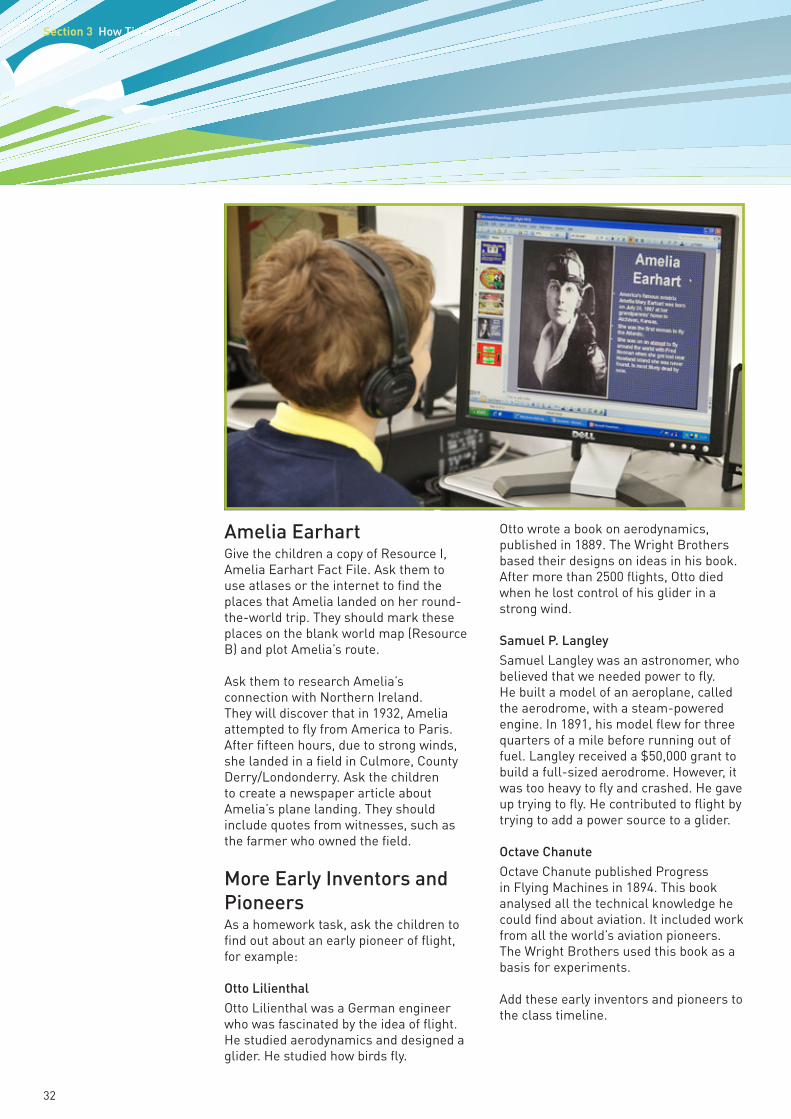
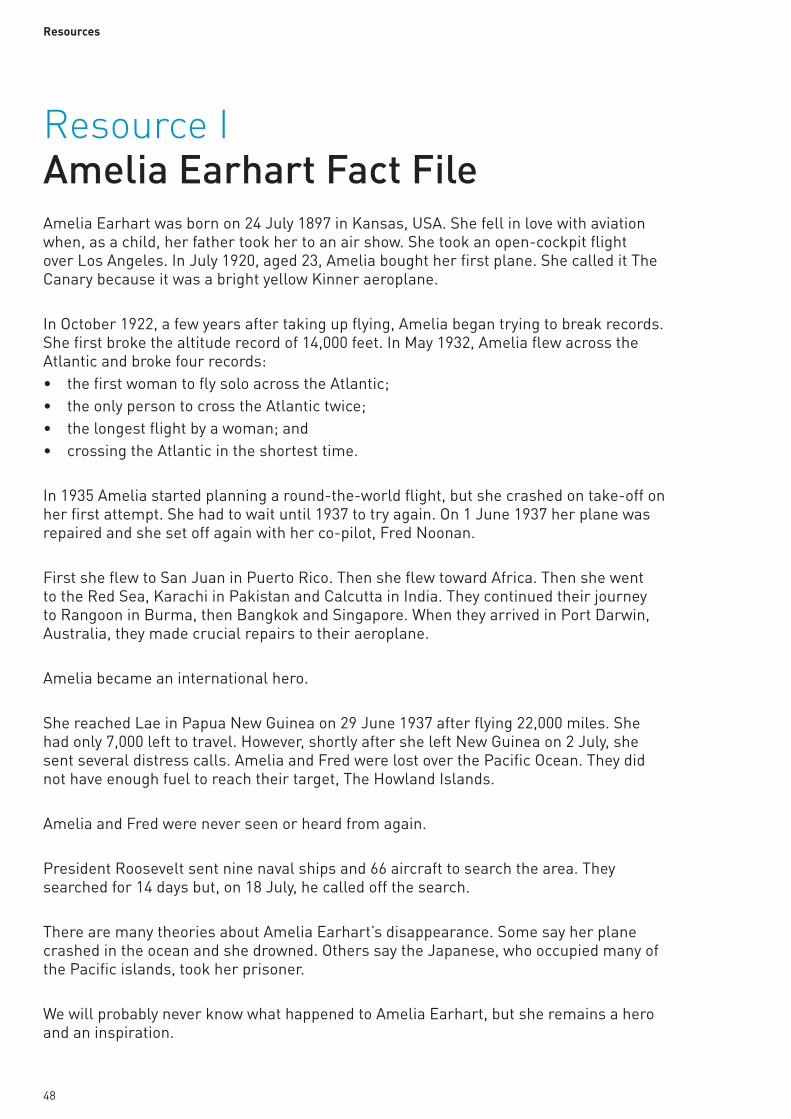
Amelia EarhartGive the children a copy of Resource I, Amelia Earhart Fact File. Ask them to use atlases or the internet to find the places that Amelia landed on her round-the-world trip. They should mark these places on the blank world map (Resource B) and plot Amelia’s route.
Ask them to research Amelia’s connection with Northern Ireland. They will discover that in 1932, Amelia attempted to fly from America to Paris. After fifteen hours, due to strong winds, she landed in a field in Culmore, County Derry/Londonderry. Ask the children to create a newspaper article about Amelia’s plane landing. They should include quotes from witnesses, such as the farmer who owned the field.
More Early Inventors and PioneersAs a homework task, ask the children to find out about an early pioneer of flight, for example:
Otto Lilienthal Otto Lilienthal was a German engineer who was fascinated by the idea of flight. He studied aerodynamics and designed a glider. He studied how birds fly.
Otto wrote a book on aerodynamics, published in 1889. The Wright Brothers based their designs on ideas in his book. After more than 2500 flights, Otto died when he lost control of his glider in a strong wind.
Samuel P. Langley Samuel Langley was an astronomer, who believed that we needed power to fly. He built a model of an aeroplane, called the aerodrome, with a steam-powered engine. In 1891, his model flew for three quarters of a mile before running out of fuel. Langley received a $50,000 grant to build a full-sized aerodrome. However, it was too heavy to fly and crashed. He gave up trying to fly. He contributed to flight by trying to add a power source to a glider.
Octave Chanute Octave Chanute published Progress in Flying Machines in 1894. This book analysed all the technical knowledge he could find about aviation. It included work from all the world’s aviation pioneers. The Wright Brothers used this book as a basis for experiments.
Add these early inventors and pioneers to the class timeline.
Flight.indd 32 16/01/2012 15:42
How Time Flies Section 3
33
Activity 13 The History of the KiteSuggested Learning IntentionsWe are learning to:• research the history of the kite;• observe the forces involved in the flight of a kite;• investigate symmetry; • observe how wind powers a kite;• research, design and make a model kite; and• list how we use kites today.
Introduce the topic of kites to the children. Ask them what they think kites are used for. Once they have answered, ask them to consider other uses that kites could have had in history.
Split the class into four groups and give each group a topic to research:• the invention of the kite in China;• the use of kites in World War II;• the use of kites in Afghanistan; or• the use of kites for recreation today.
When they have completed their research, they can make a poster or presentation for the rest of the class.
Forces on a KiteWith the children, recap the different types of forces that they know about, including push, pull, collision, lift, drag, thrust and weight.
Ask the children to consider the structure of a kite and an aeroplane and the
forces acting on them. Then ask them to consider what a kite and an aeroplane have in common, and what they need to make them fly.
Some points to note:• With the exception of thrust, the
forces acting on a kite are the same forces that act on an aeroplane.
• Like an aircraft, kites are heavier than air and use aerodynamic forces to fly.
• Kites have a solid frame, normally made of plastic or wood. The frame is covered in plastic, paper or cloth to generate the lift necessary to overcome the kite’s weight.
• Like an aeroplane, a kite must be as light as possible for good performance, yet strong enough to withstand high winds.
• A kite is slightly curved at the top, where the material is stretched over the frame. Like the wings on a plane, this creates an aerofoil (see Activity 7).
CONNECTED LEARNINGOPPORTUNITIESMathematics and NumeracyInvestigate lines of symmetry in regular and irregular shapes.
Language and LiteracyWrite about the adventures of a flying kite.
The Arts Explore music and dance related to kites.
Using ICTProduce a presentation on the topic of kites and upload to LearningNI.
ASSESSMENT FOR LEARNING OPPORTUNITIESMake a table to record the children’s predictions as they carry out the investigation. Compare and contrast their predictions with the outcomes.
accurate measurementsymmetry sequencebillowflexibility
New Words and Phrases
The History of the Kite
Flight.indd 33 16/01/2012 15:42
Section 3 How Time Flies
34
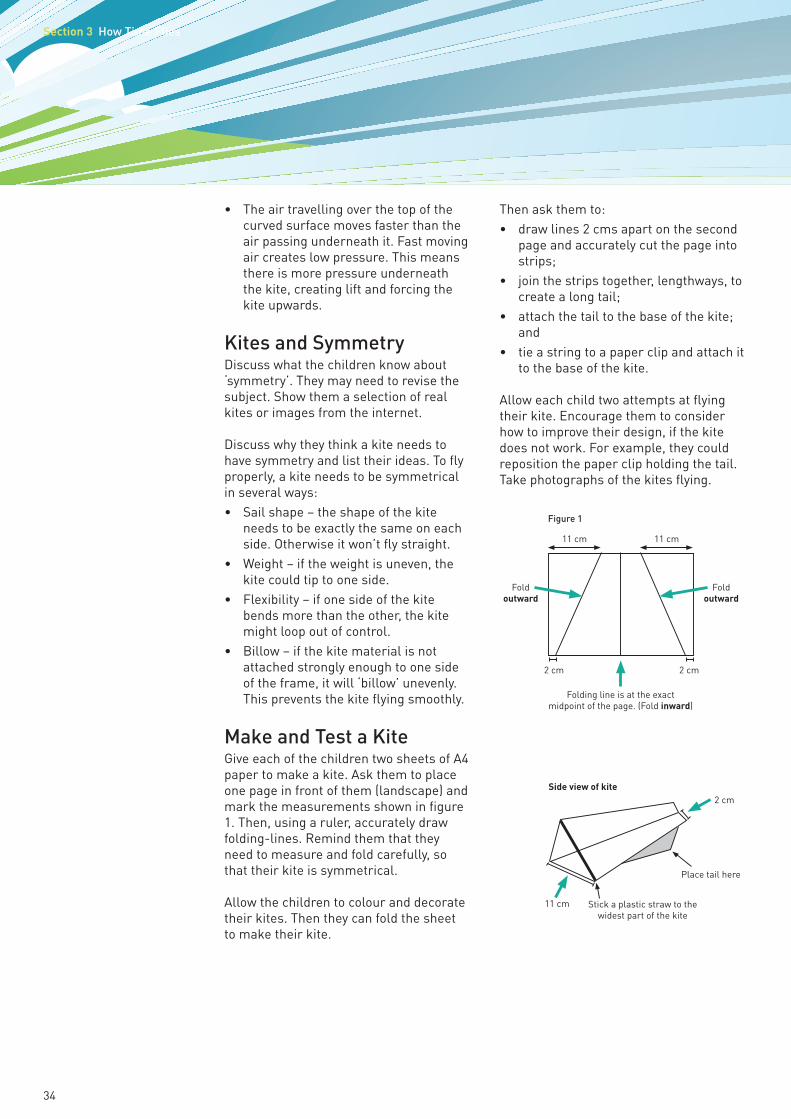
• The air travelling over the top of the curved surface moves faster than the air passing underneath it. Fast moving air creates low pressure. This means there is more pressure underneath the kite, creating lift and forcing the kite upwards.
Kites and SymmetryDiscuss what the children know about ‘symmetry’. They may need to revise the subject. Show them a selection of real kites or images from the internet.
Discuss why they think a kite needs to have symmetry and list their ideas. To fly properly, a kite needs to be symmetrical in several ways: • Sail shape – the shape of the kite
needs to be exactly the same on each side. Otherwise it won’t fly straight.
• Weight – if the weight is uneven, the kite could tip to one side.
• Flexibility – if one side of the kite bends more than the other, the kite might loop out of control.
• Billow – if the kite material is not attached strongly enough to one side of the frame, it will ‘billow’ unevenly. This prevents the kite flying smoothly.
Make and Test a Kite Give each of the children two sheets of A4 paper to make a kite. Ask them to place one page in front of them (landscape) and mark the measurements shown in figure 1. Then, using a ruler, accurately draw folding-lines. Remind them that they need to measure and fold carefully, so that their kite is symmetrical.
Allow the children to colour and decorate their kites. Then they can fold the sheet to make their kite.
Then ask them to:• draw lines 2 cms apart on the second
page and accurately cut the page into strips;
• join the strips together, lengthways, to create a long tail;
• attach the tail to the base of the kite; and
• tie a string to a paper clip and attach it to the base of the kite.
Allow each child two attempts at flying their kite. Encourage them to consider how to improve their design, if the kite does not work. For example, they could reposition the paper clip holding the tail. Take photographs of the kites flying.
Stick a plastic straw to the widest part of the kite
11 cm 11 cm
2 cm2 cm
Folding line is at the exact midpoint of the page. (Fold inward)
Fold outward
Fold outward
Side view of kite
Figure 1
2 cm
11 cm
Place tail here
Flight.indd 34 16/01/2012 15:42

How Time Flies Section 3
35
Investigation TimeLet the children design and make a kite. Working in small groups, they can use their research to decide which style of kite, such as diamond or rectangular shape, to make. Photograph the children exploring kites throughout the activities.1. Using the same measurements as
before, let the children create new kites using different materials. For example, they could use plastic or different weights of paper. Let them test each kite to see how long it flies for and how well. They may need a stopwatch to accurately record how long the kite stays in the air. They should record their findings in a table (Table 1).
2. Ask the children to make a kite using the same materials as before, but changing the size. They must keep the dimensions the same ratio. For example, if they double the size of the page from A4 to A3, they must double their measurements. Let them test their kites and record their findings in a table (Table 2).
When they have completed the tasks, encourage the groups to discuss their findings and draw conclusions about what affects the flight of a kite. As a class, summarise their conclusions and compile a list of agreed statements.
ExtensionUpload photographs of the activities into a folder on your computer that the children can access. Ask them to choose which photos they would like to use and copy them into a Word document. They could then use the photographs to create a report called ‘How we made our kites’.
Type of material Comments on the material
Comments on the flight of the kite
Time in air (seconds)
plastic a strong material It flew high and stayed in the air for 10 seconds.
light paper
Type of material Comments on the material
Comments on the flight of the kite
Comment on the size of kite
Time in air (seconds)
plastic a strong material It flew high and stayed in the air for 10 seconds.
20 cm
light paper
Table 1
Table 2
Flight.indd 35 21/03/2012 13:21

Flight.indd 36 16/01/2012 15:42

Resources
37
Resources
Flight.indd 37 16/01/2012 15:42
Resources
38
Resource ACompare and Contrast Template
Similarities
Differences
How are they similar?
How are they different?
(with regard to)
Do you notice any patterns?
Flight.indd 38 16/01/2012 15:42
Resources
39
Resource BBlank World Map
Flight.indd 39 16/01/2012 15:42

Resources
40
Resource CThrust Investigation - A Fair Test
Our question for our investigation is:
Things we need: My prediction (what I think will happen):
This is how we made our test fair:
Method (what we did):
Our results: Time taken to explode:
Test number Water from fridge Water at room temperature
Water from hot tap
1
2
3
Average time:
Our conclusion (answer the question for investigation and explain why):
Flight.indd 40 16/01/2012 15:42
Resources
41
Resource DGyrocopter Template - Small
Flight.indd 41 16/01/2012 15:42
Resources
42
Resource DGyrocopter Template - Medium
Flight.indd 42 16/01/2012 15:42
Resources
43
Resource DGyrocopter Template - Large
Flight.indd 43 16/01/2012 15:42
Resources
44
Does the size of the wings on a gyrocopter affect the time it takes to fall?
Resource EGyrocopter Investigation
What is air resistance or drag?
My prediction: What I think will happen in this investigation:
Method:
Results Time (in seconds)
Size of wing: Test 1 Test 2 Test 3
Small
Medium
Large
Average time
My Conclusion (answer the question for investigation)
When the size of the wing is _______________ it takes __________________ for the gyrocopter to reach the ground. This is because:
Flight.indd 44 16/01/2012 15:42
Resources
45
Time
You have one hour:• 15 minutes for planning and design;• 30 minutes for making; and• 15 minutes for testing.
Your teacher will tell you to stop after one hour.
ScoringThe judge(s) will score you in three areas:
• planning and designing - maximum 20 points; • making - maximum 20 points; and• testing - 5 points for every second the egg takes to fall
- 5 extra points for not cracking the egg.
The judge’s decision is final.
Remember!The object of the challenge is to make the egg take the longest time to fall to the ground. This means you have to increase the drag (air resistance).
Resource FAir Resistance Challenge
Flight.indd 45 16/01/2012 15:42
Resources
46
Resource GCAF - Consider All FactorsWhat material to use for the fuselage – A, B or C?
Material A: Iron Material B: Plastic Material C: Aluminium
A
Advantage
Disadvantage
Interesting factor
B
Advantage
Disadvantage
Interesting factor
C
Advantage
Disadvantage
Interesting factor
My decision is...
Flight.indd 46 16/01/2012 15:42
Resources
47
About 1325 bc King Minos lived on the island of Crete.
A man called Daedalus, who was a great architect and inventor, lived in Minos’ palace.
Daedalus invented lots of things. He built a labyrinth for King Minos to keep the Minotaur in. The Minotaur was a creature with the head of a bull and the body of a man.
To make sure Daedalus didn’t tell anyone the secrets of the labyrinth, King Minos locked him and his son, Icarus, in a tall tower.
Daedalus began to think about how they could escape. He watched birds flying and he noticed how free they were. He decided that he would make wings to escape.
Daedalus and Icarus made the wings from bird feathers and wax. They tied the wings on to each other.
Daedalus warned Icarus to be careful because if he went too close to the sea he might fall in and if he flew too high, the heat of the sun would melt the wax on his wings and he would fall.
Icarus promised to be careful.
They started to fly, but Icarus forgot his father’s words. He began to show off. He did tricks and flew higher and higher.
Suddenly, Icarus realised his wings were melting!
He tried to fly back down again, but it was too late. His wings fell apart. He fell into the ocean and drowned.
Resource HThe Myth of Icarus and Daedalus
Flight.indd 47 16/01/2012 15:42
Resources
48
Amelia Earhart was born on 24 July 1897 in Kansas, USA. She fell in love with aviation when, as a child, her father took her to an air show. She took an open-cockpit flight over Los Angeles. In July 1920, aged 23, Amelia bought her first plane. She called it The Canary because it was a bright yellow Kinner aeroplane.
In October 1922, a few years after taking up flying, Amelia began trying to break records. She first broke the altitude record of 14,000 feet. In May 1932, Amelia flew across the Atlantic and broke four records:• the first woman to fly solo across the Atlantic;• the only person to cross the Atlantic twice;• the longest flight by a woman; and• crossing the Atlantic in the shortest time.
In 1935 Amelia started planning a round-the-world flight, but she crashed on take-off on her first attempt. She had to wait until 1937 to try again. On 1 June 1937 her plane was repaired and she set off again with her co-pilot, Fred Noonan.
First she flew to San Juan in Puerto Rico. Then she flew toward Africa. Then she went to the Red Sea, Karachi in Pakistan and Calcutta in India. They continued their journey to Rangoon in Burma, then Bangkok and Singapore. When they arrived in Port Darwin, Australia, they made crucial repairs to their aeroplane.
Amelia became an international hero.
She reached Lae in Papua New Guinea on 29 June 1937 after flying 22,000 miles. She had only 7,000 left to travel. However, shortly after she left New Guinea on 2 July, she sent several distress calls. Amelia and Fred were lost over the Pacific Ocean. They did not have enough fuel to reach their target, The Howland Islands.
Amelia and Fred were never seen or heard from again.
President Roosevelt sent nine naval ships and 66 aircraft to search the area. They searched for 14 days but, on 18 July, he called off the search. There are many theories about Amelia Earhart’s disappearance. Some say her plane crashed in the ocean and she drowned. Others say the Japanese, who occupied many of the Pacific islands, took her prisoner. We will probably never know what happened to Amelia Earhart, but she remains a hero and an inspiration.
Resource IAmelia Earhart Fact File
Flight.indd 48 16/01/2012 15:42

Resources
49
You can find online resources to accompany this Thematic Unit at www.nicurriculum.org.uk
Follow the links to ‘Key Stages 1 & 2’, ‘Thematic Units’ and ‘STEM’.
1. Birds of Prey (Images)2. Compare and Contrast Template3. Blank World Map4. Forces and the Effects of Force (Images) 5. The Four Forces of Flight6. Aerofoil Wing Diagram7. Streamlined & Aerodynamic (Images) 8. Parts of an Aeroplane9. CAF - Consider All Factors Template10. Honeycomb Structure in a Plane
Online Resources
Flight.indd 49 16/01/2012 15:42
Resources
50
BooksAmy Johnson by Sydney Wood (links with the History of Flight)The Kites Are Flying by Michael Morpurgo
Useful WebsitesBBC Naturewww.bbc.co.uk/nature
Wildfowl & Wetlands Trust www.wwt.org.uk/learn
BBC Learning ZoneBroadBand Class Clips: www.bbc.co.uk/learningzone/clips/
www.rokit.com (You can buy water rockets here and watch a video clip of the water rocket in action.)
Useful Contacts
Suggested Additional Resources
Ulster Folk & Transport MuseumCultraHolywoodBT18 0EU(028) 9042 8428www.nmni.com/uftm
Bombardier AerospaceBombardier runs an educational outreach programme to schools across Northern Ireland called ‘The Flight Experience’.
The key objectives of this programme are to encourage interest in the STEM (Science, Technology, Engineering and Mathematics) subjects as exciting and creative processes of discovery and invention, and to inspire and inform pupils about possible career choices in these subject choices.
For further information please contact Tony Monaghan (Education Liaison Officer) on tel: (028) 9046 2339 or email:[email protected]
RSPB Northern IrelandBelvoir Park ForestBelvoir DriveBelfastBT8 7QZ(028) 9049 1547 www.rspb.org.uk/youth
RSPB Bird Reserves•Belfast Harbour Reserve•Lower Lough Erne Reserve•Portmore Lough Reserve (Aghalee)
Northern Ireland School of Falconry66 Tildarg RoadKellsBallymenaBT42 3NY(028) 2589 8555
The World of Owls CentreRandalstown ForestBT41 3LE(028) 9447 2307
Ulster Wildlife Trust3 New LineCrossgarDownpatrickBT30 9EP(028) 4483 0282
Flight.indd 50 16/01/2012 15:42

CCEA accepts no responsibility or liability for any material supplied by or contained in anyof the linked websites and does not necessarily endorse the views expressed within them.We cannot guarantee that these links will work all of the time and we have no control overaccountability of the linked pages. All web addresses are correct at time of going to print.
Photo CreditsPage 1 - iStockphoto (www.thinkstockphotos.com)Page 1 - Hemera (www.thinkstockphotos.com)Page 11 - Bombardier AerospacePage 17 - Bombardier AerospacePage 27 - Hemera (www.thinkstockphotos.com)Page 39 - Hemera (www.thinkstockphotos.com)
Flight.indd 51 21/03/2012 13:21

A CCEA Publication © 2012
FlightKey Stage 2 Thematic UnitSupporting the Areas of Learning and STEM
Flight_COVER.indd 1 21/03/2012 13:28