Embed Size (px)
Citation preview

FLAT DIE PELLET MILL13” Red and 16” Red
INSTRUCTION MANUAL
Model No. Power(KW)
Output (kg/h)
Packing (cm)
NW/GW (kg)
13” Red3-rollers, die fixed 22KW/220V/3 phase 600~900 134*60*115 580/600
16” Red3-rollers, die fixed 30KW/220V/3 phase 700~1100 152*60*115 650/680
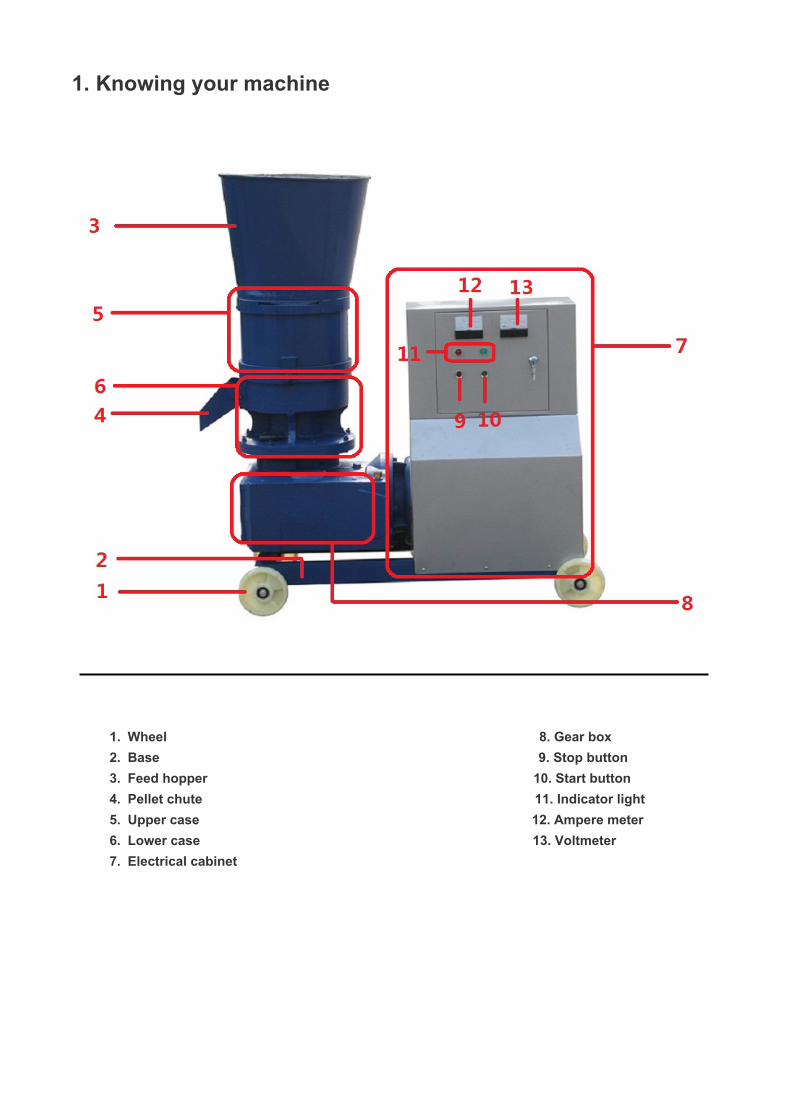
1. Knowing your machine
1. Wheel 8. Gear box2. Base 9. Stop button3. Feed hopper 10. Start button 4. Pellet chute 11. Indicator light5. Upper case 12. Ampere meter 6. Lower case 13. Voltmeter7. Electrical cabinet
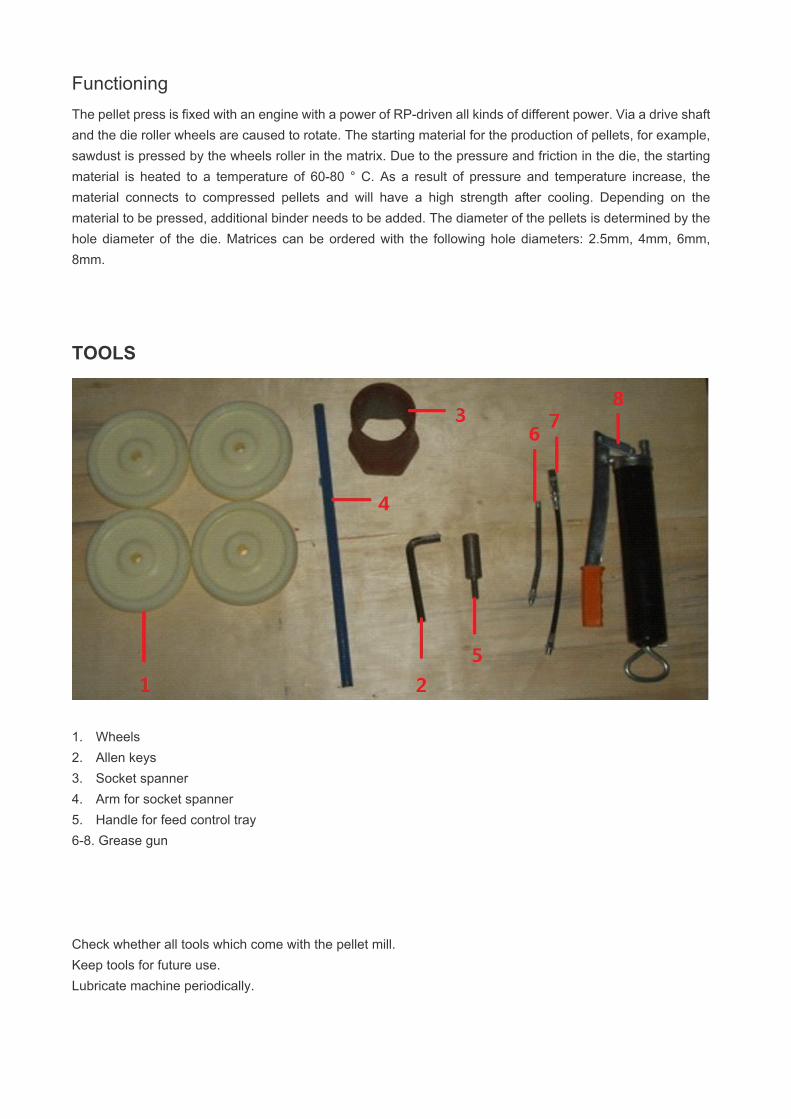
FunctioningThe pellet press is fixed with an engine with a power of RP-driven all kinds of different power. Via a drive shaft and the die roller wheels are caused to rotate. The starting material for the production of pellets, for example, sawdust is pressed by the wheels roller in the matrix. Due to the pressure and friction in the die, the starting material is heated to a temperature of 60-80 ° C. As a result of pressure and temperature increase, the material connects to compressed pellets and will have a high strength after cooling. Depending on the material to be pressed, additional binder needs to be added. The diameter of the pellets is determined by the hole diameter of the die. Matrices can be ordered with the following hole diameters: 2.5mm, 4mm, 6mm, 8mm.
TOOLS
1. Wheels2. Allen keys3. Socket spanner4. Arm for socket spanner5. Handle for feed control tray6-8. Grease gun
Check whether all tools which come with the pellet mill.Keep tools for future use.Lubricate machine periodically.
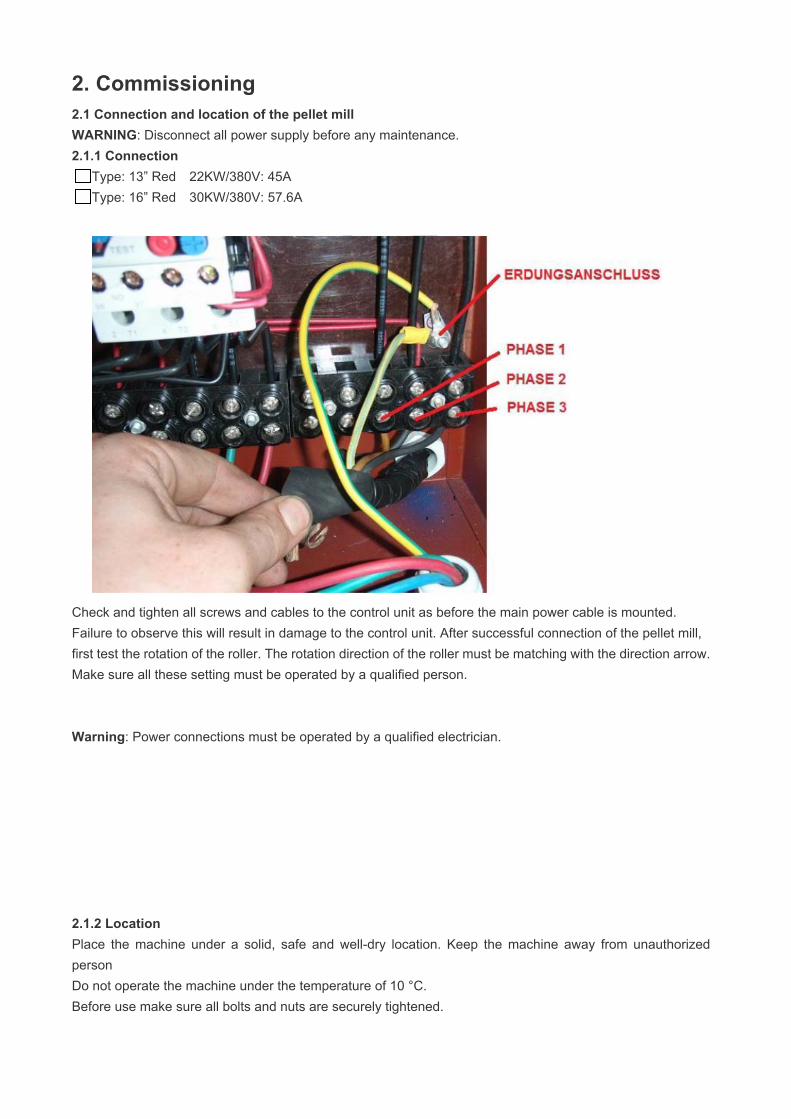
2. Commissioning 2.1 Connection and location of the pellet millWARNING: Disconnect all power supply before any maintenance.2.1.1 Connection
Type: 13” Red 22KW/380V: 45AType: 16” Red 30KW/380V: 57.6A
Check and tighten all screws and cables to the control unit as before the main power cable is mounted. Failure to observe this will result in damage to the control unit. After successful connection of the pellet mill, first test the rotation of the roller. The rotation direction of the roller must be matching with the direction arrow. Make sure all these setting must be operated by a qualified person.
Warning: Power connections must be operated by a qualified electrician.
2.1.2 Location Place the machine under a solid, safe and well-dry location. Keep the machine away from unauthorized personDo not operate the machine under the temperature of 10 °C.Before use make sure all bolts and nuts are securely tightened.
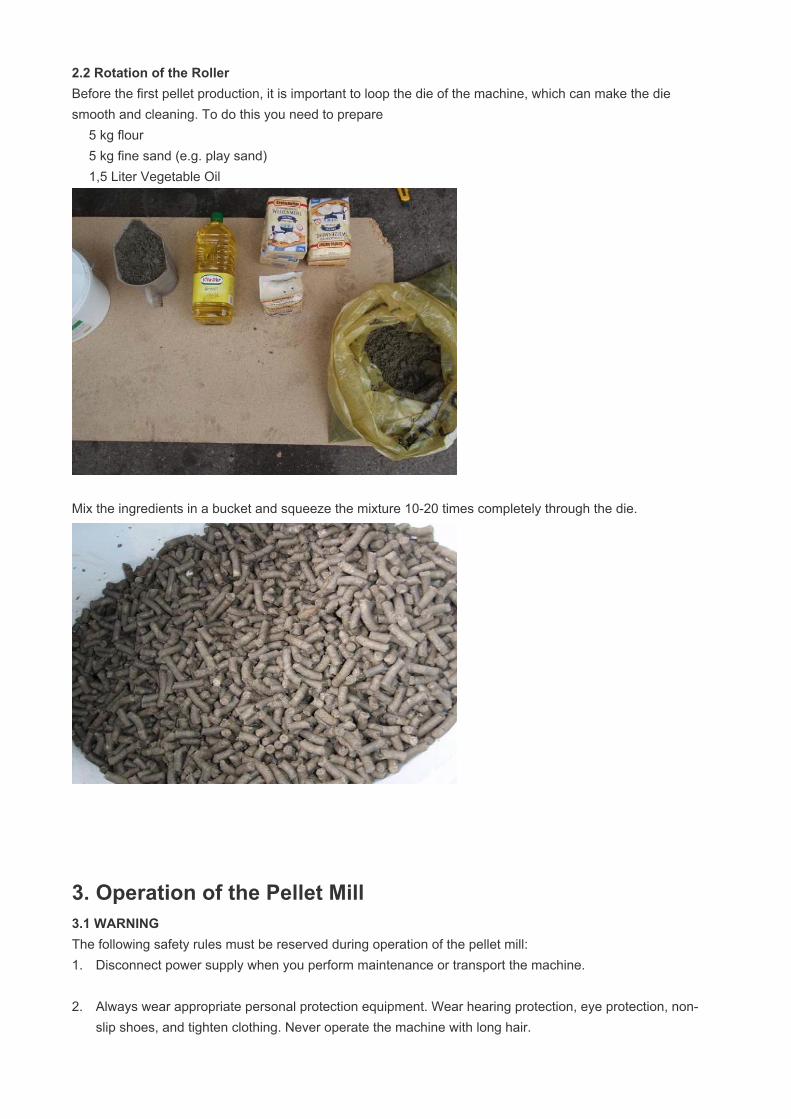
2.2 Rotation of the Roller Before the first pellet production, it is important to loop the die of the machine, which can make the die smooth and cleaning. To do this you need to prepare 5 kg flour 5 kg fine sand (e.g. play sand) 1,5 Liter Vegetable Oil
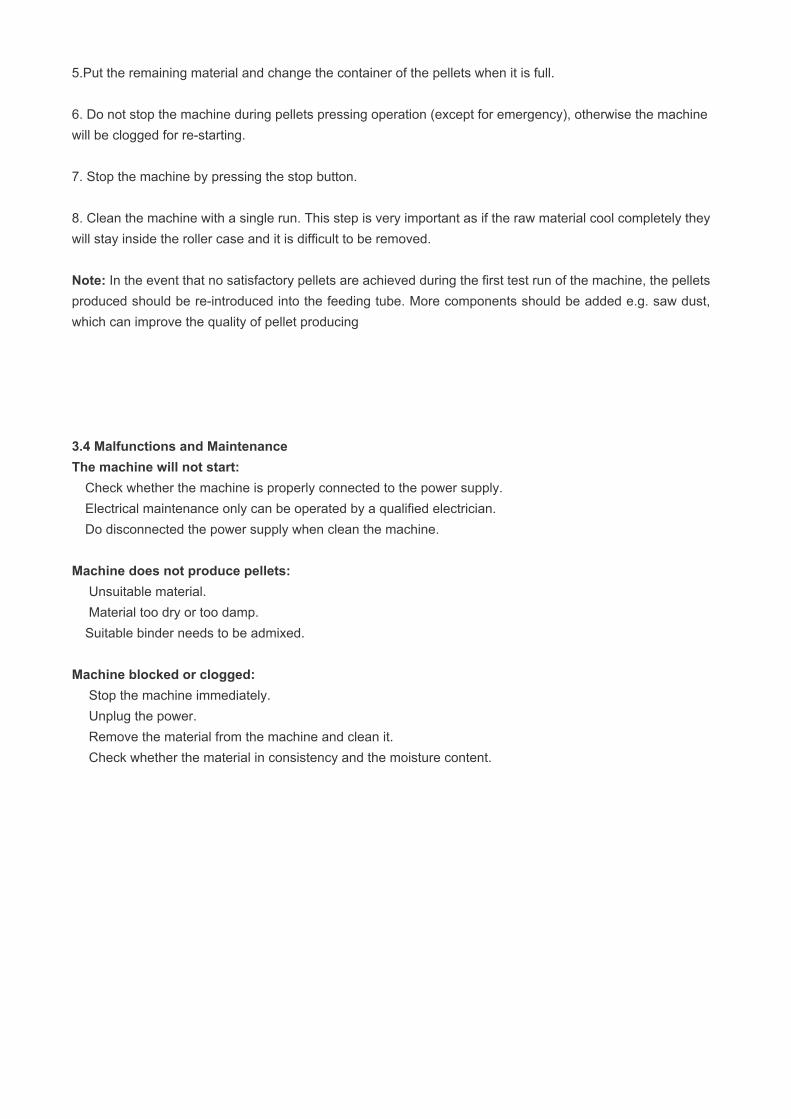
Mix the ingredients in a bucket and squeeze the mixture 10-20 times completely through the die.
3. Operation of the Pellet Mill3.1 WARNINGThe following safety rules must be reserved during operation of the pellet mill:1. Disconnect power supply when you perform maintenance or transport the machine.
2. Always wear appropriate personal protection equipment. Wear hearing protection, eye protection, non-slip shoes, and tighten clothing. Never operate the machine with long hair.
3. Do not insert long objects into the hopper.
4. Be sure not to get the machine or the connections in contact with water.
5. Be away from open fire during operation.
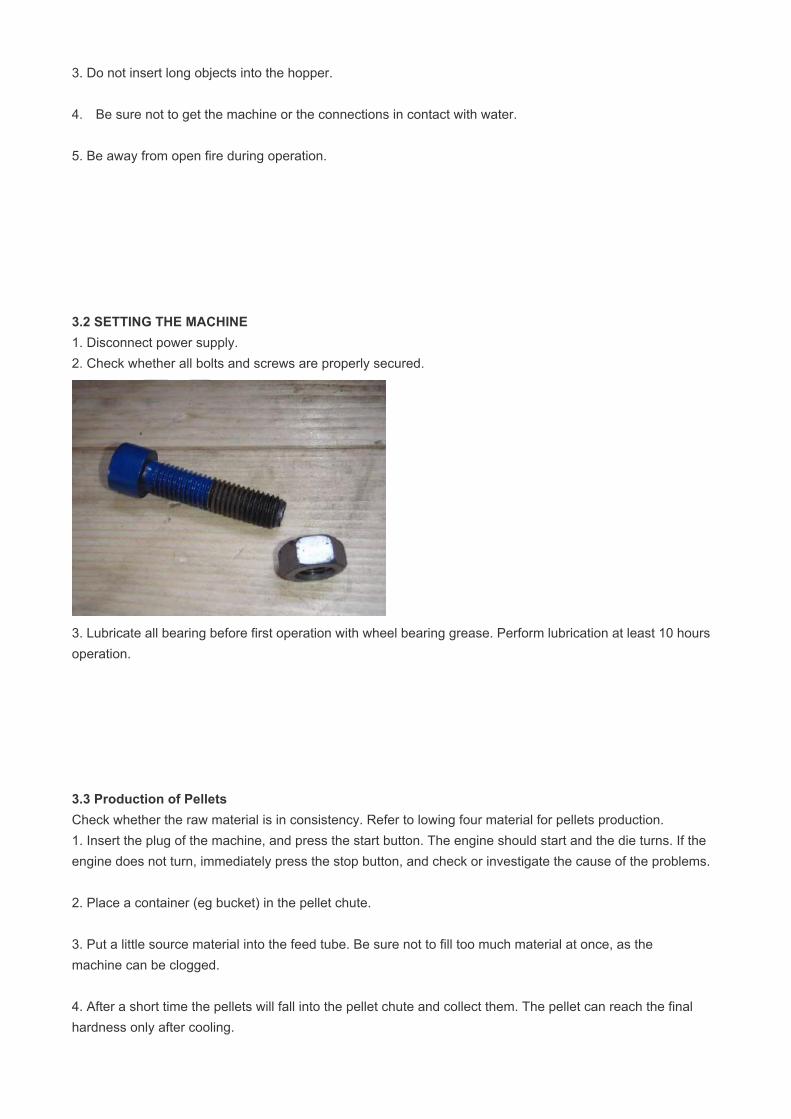
3.2 SETTING THE MACHINE 1. Disconnect power supply.2. Check whether all bolts and screws are properly secured.
3. Lubricate all bearing before first operation with wheel bearing grease. Perform lubrication at least 10 hours operation.
3.3 Production of Pellets Check whether the raw material is in consistency. Refer to lowing four material for pellets production.1. Insert the plug of the machine, and press the start button. The engine should start and the die turns. If the engine does not turn, immediately press the stop button, and check or investigate the cause of the problems.
2. Place a container (eg bucket) in the pellet chute.
3. Put a little source material into the feed tube. Be sure not to fill too much material at once, as themachine can be clogged.
4. After a short time the pellets will fall into the pellet chute and collect them. The pellet can reach the final hardness only after cooling.
5.Put the remaining material and change the container of the pellets when it is full.
6. Do not stop the machine during pellets pressing operation (except for emergency), otherwise the machine will be clogged for re-starting.
7. Stop the machine by pressing the stop button.
8. Clean the machine with a single run. This step is very important as if the raw material cool completely they will stay inside the roller case and it is difficult to be removed.
Note: In the event that no satisfactory pellets are achieved during the first test run of the machine, the pellets produced should be re-introduced into the feeding tube. More components should be added e.g. saw dust, which can improve the quality of pellet producing
3.4 Malfunctions and Maintenance The machine will not start: Check whether the machine is properly connected to the power supply. Electrical maintenance only can be operated by a qualified electrician.
Do disconnected the power supply when clean the machine.
Machine does not produce pellets: Unsuitable material. Material too dry or too damp. Suitable binder needs to be admixed.
Machine blocked or clogged: Stop the machine immediately. Unplug the power. Remove the material from the machine and clean it. Check whether the material in consistency and the moisture content.
5. Use and Types of Pellets 4.1 Use of Pellets The pellets can be used in different areas, such as animal feeding, heating of the buildings, and the production of the manure. The major advantage of the pellets compared with other material, it can be easily handled, transported and stored for longer life.
4.2 Fundamental to the starting pellet Pellets can be produced from various organic materials. Thus, the starting material bonds to be fixed into durable pellets, and the moisture contents need to be controlled within 12% und 15%. If the starting material is too dry, it often occurs as powder or need to be re-emerged from the pellet chute. If the starting material is too damp, the pellets will be of inferior quality. The residual moisture of the starting material can be measured or determined by a commercial moisture meter. The length of raw material should be controlled within 5mm, otherwise the pellet mill machine will be clogged or the performance will be slowing down. The raw material with longer length (e.g. wood shaving) need to be grinded into small size by a hammer mill.
4.3 Pellet-Types Here are the main types of pellets and the composition of starting material which can be used for pellet. Saw Dust Pellets Starting material: Saw dust Use: Pellet Heating Mixturea. Pine or spruce percentage at least 50%: It can be directly pressed into pellets.b. Portion of pine or spruce less than 50%: For stable pellet it needs to add 0.2-2% corn or potatostarch. (Total moisture content 12-15%)
Straw-Pellets, Hay-Pellets, Miscanthus-Pellets Starting material: Straw, Hay, Miscanthus (chopped) Use: Pellet-Heating, Animal Bedding, Feed Mixture: directly (Moisture 12-15%)
Feed-Pellets Starting material: Straw, Hay, other feed (chopping) Use: Animal Bedding, Feed Mixture: directly (Total Moisture Content 12-15%)
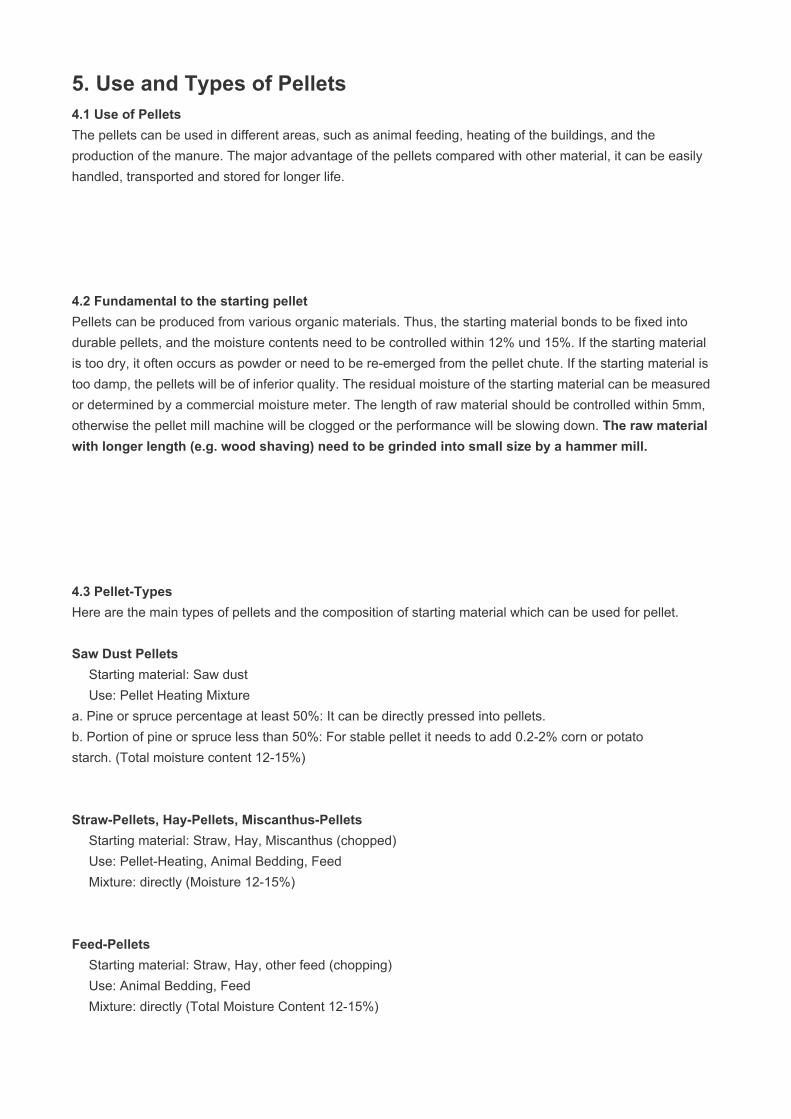
Fertilizer-Pellets Starting material: Manure, Straw/Hay (chopped) Use: Fertilization Mixture: approximately equal proportion (Total Moisture Content 12-15%)
SAW DUST
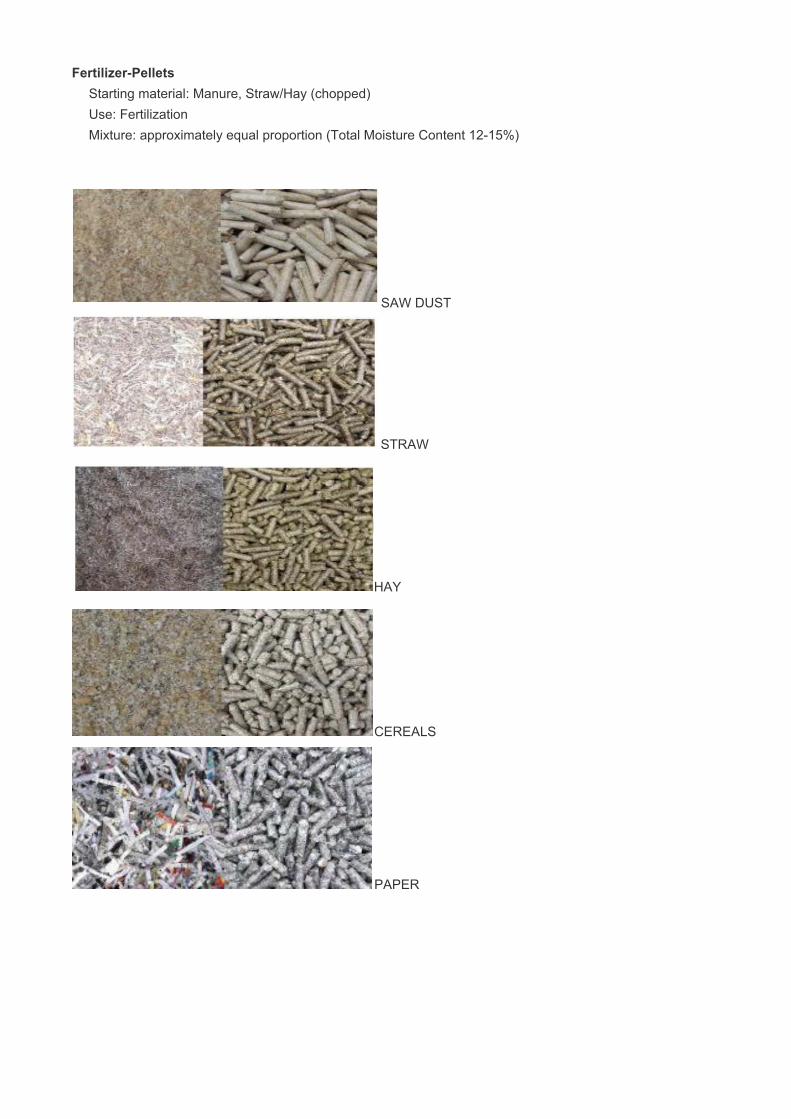
STRAW
HAY
CEREALS
PAPER
6. Maintenance and important information Carefully and strictly follow the instructions which will make your pellet mill long time service.Failure to follow the instructions will cause parts defect or serious injury.
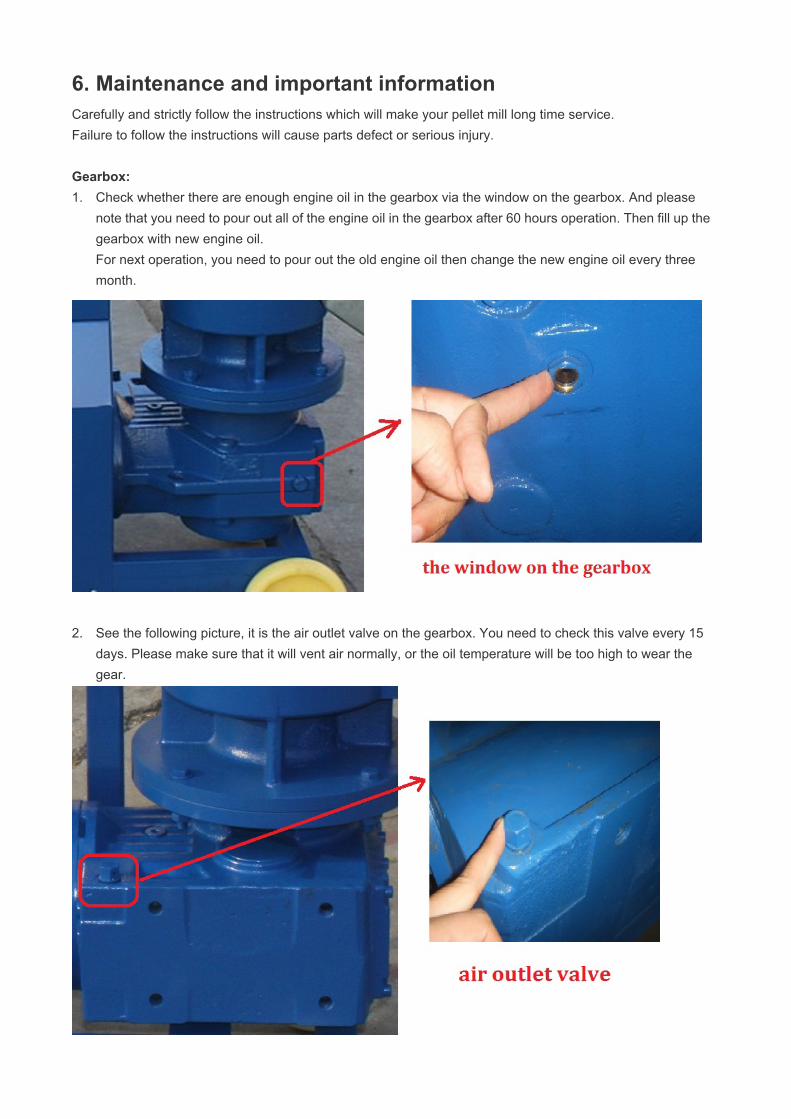
Gearbox:1. Check whether there are enough engine oil in the gearbox via the window on the gearbox. And please
note that you need to pour out all of the engine oil in the gearbox after 60 hours operation. Then fill up the gearbox with new engine oil.For next operation, you need to pour out the old engine oil then change the new engine oil every three month.
2. See the following picture, it is the air outlet valve on the gearbox. You need to check this valve every 15 days. Please make sure that it will vent air normally, or the oil temperature will be too high to wear the gear.
ATTENTION!Be away from moving parts. Failure to do this will result in serious injury. Disconnect the power supply before maintenance or repair. Regularly check and re-tighten the screws and nuts due to vibration.
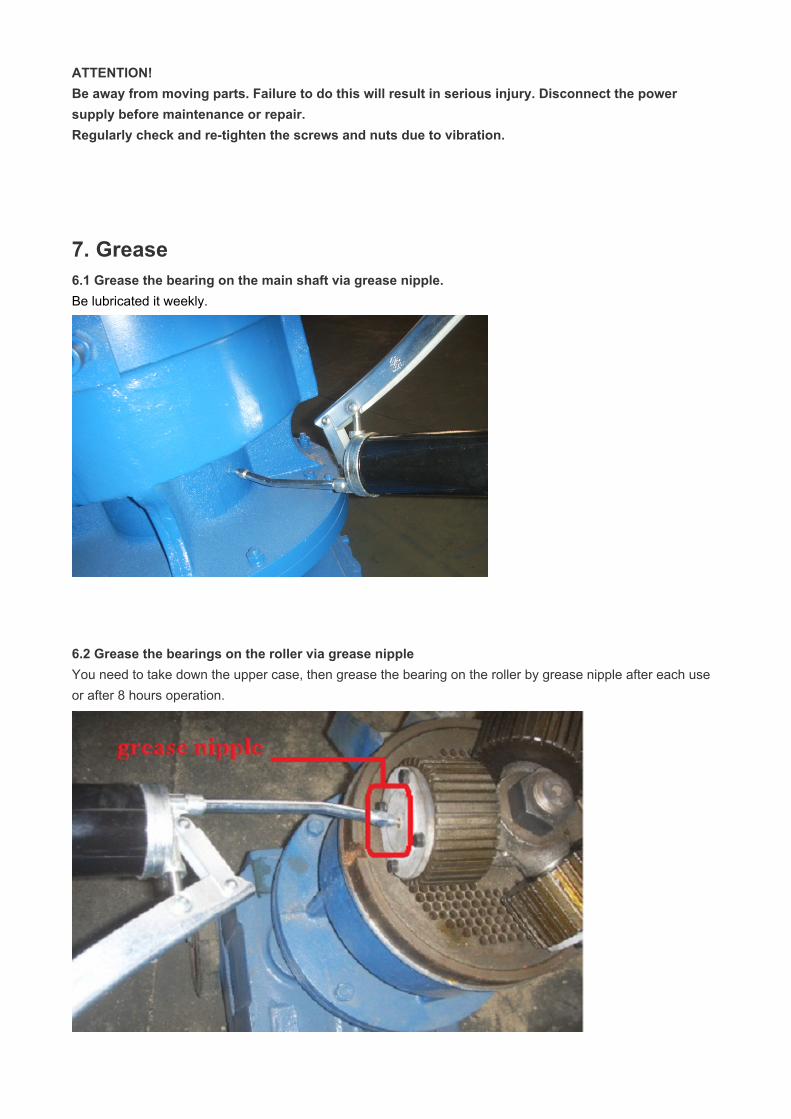
7. Grease6.1 Grease the bearing on the main shaft via grease nipple.Be lubricated it weekly.
6.2 Grease the bearings on the roller via grease nippleYou need to take down the upper case, then grease the bearing on the roller by grease nipple after each use or after 8 hours operation.
8. EXCHANGING ROLLER AND DIE
01 – Disconnect the power connector
02 – Remove the feed hopper
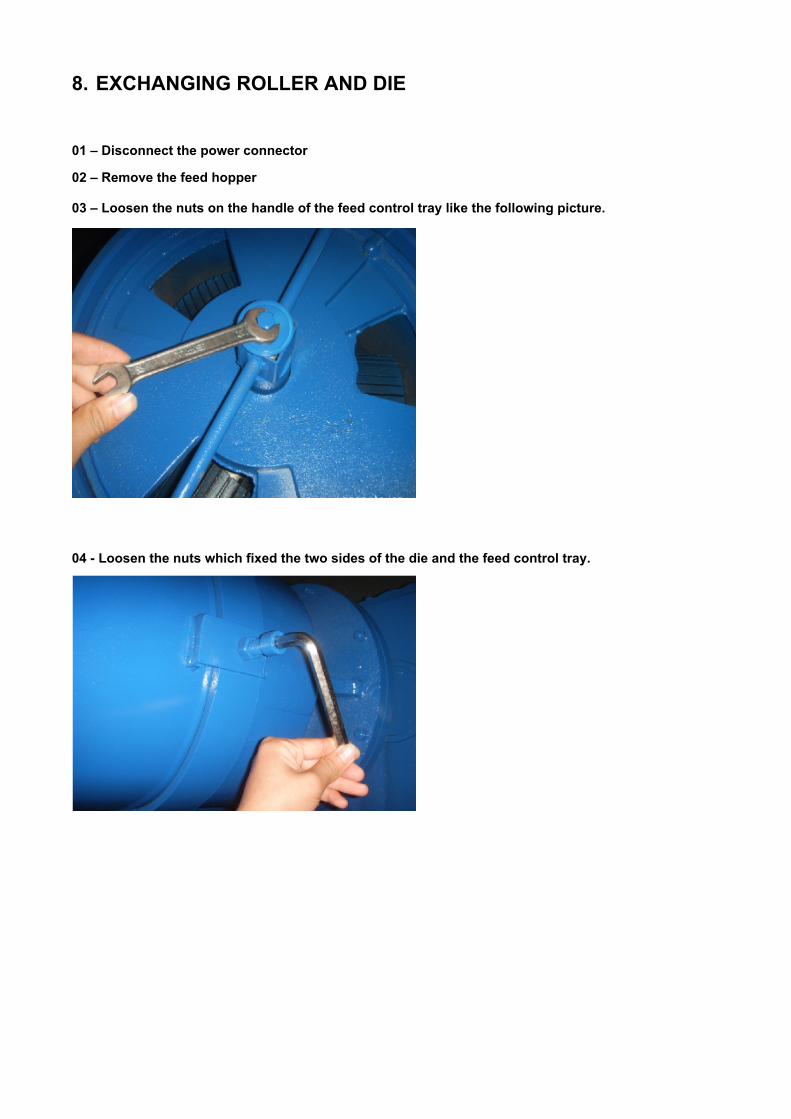
03 – Loosen the nuts on the handle of the feed control tray like the following picture.
04 - Loosen the nuts which fixed the two sides of the die and the feed control tray.
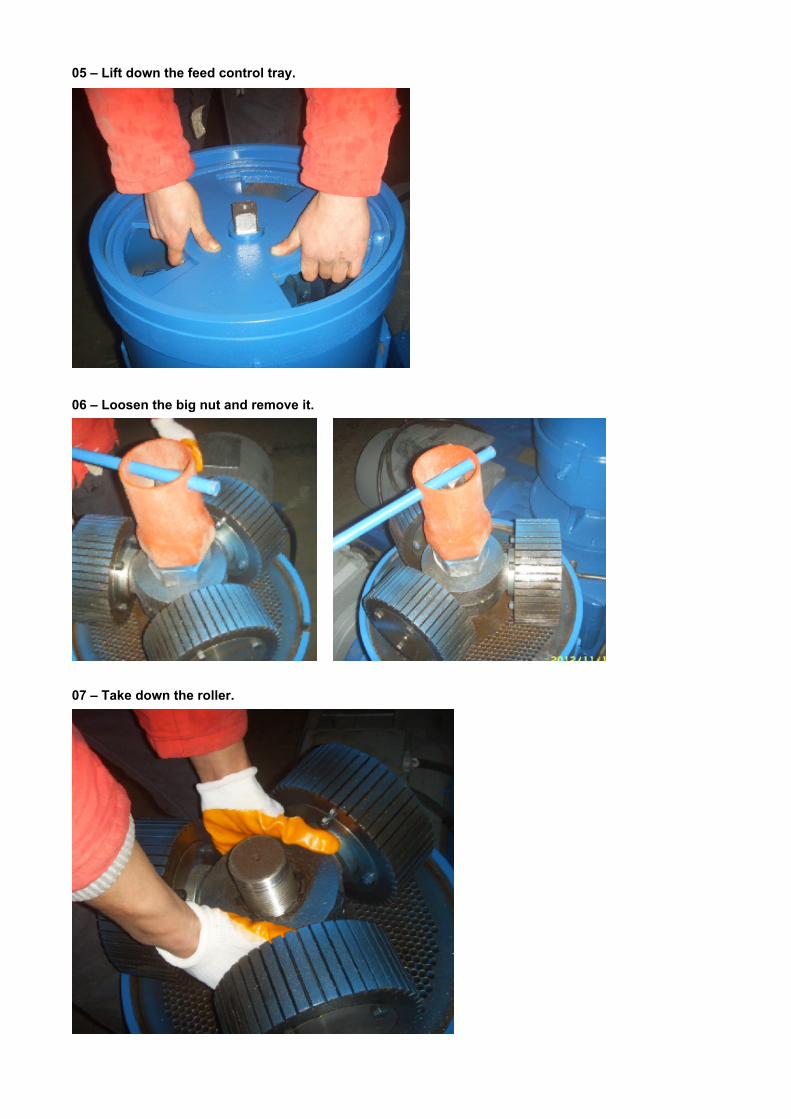
05 – Lift down the feed control tray.
06 – Loosen the big nut and remove it.
07 – Take down the roller.
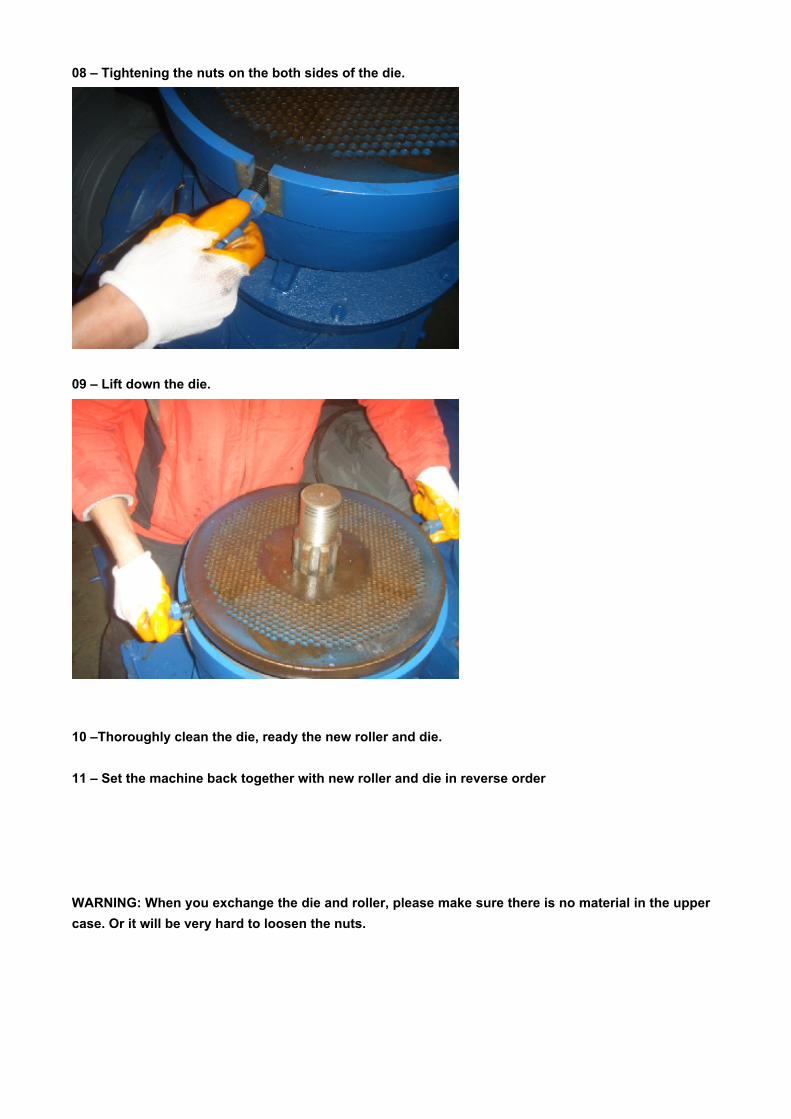
08 – Tightening the nuts on the both sides of the die.
09 – Lift down the die.
10 –Thoroughly clean the die, ready the new roller and die.
11 – Set the machine back together with new roller and die in reverse order
WARNING: When you exchange the die and roller, please make sure there is no material in the upper case. Or it will be very hard to loosen the nuts.