Embed Size (px)
Citation preview
209fix it
fix it
RATIONALE FOR ADVENTUREThis adventure will help Scouts develop their motor skills and increase their knowledge of tools and safe-ty procedures. Each boy will gain the confidence he needs to react properly and help out if certain home or auto repairs are needed.
TAKEAWAYS FOR CUB SCOUTS• Home repair knowledge and skills
• A Scout is helpful.COMPASS
CHARACTER
COMPASS
CHARACTER
COMPASS
CHARACTER
COMPASS
CHARACTER
ADVENTURE REQUIREMENTSDo all of these:
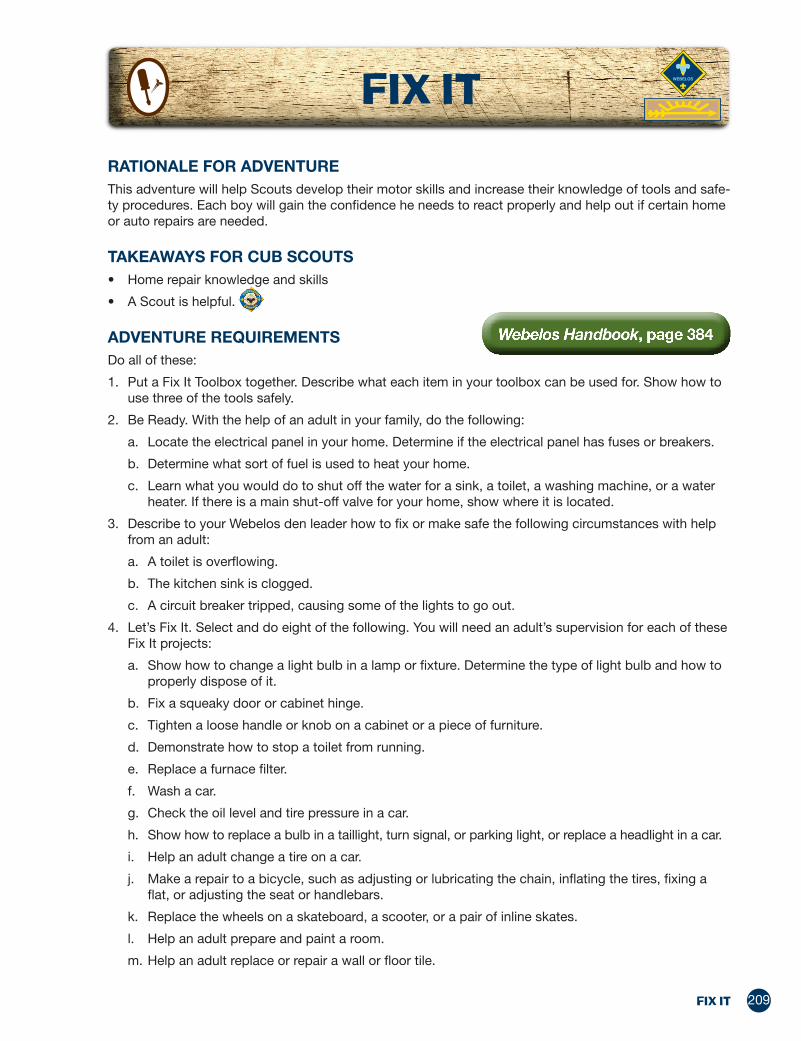
1. Put a Fix It Toolbox together. Describe what each item in your toolbox can be used for. Show how to use three of the tools safely.
2. Be Ready. With the help of an adult in your family, do the following:
a. Locate the electrical panel in your home. Determine if the electrical panel has fuses or breakers.
b. Determine what sort of fuel is used to heat your home.
c. Learn what you would do to shut off the water for a sink, a toilet, a washing machine, or a water heater. If there is a main shut-off valve for your home, show where it is located.
3. Describe to your Webelos den leader how to fix or make safe the following circumstances with help from an adult:
a. A toilet is overflowing.
b. The kitchen sink is clogged.
c. A circuit breaker tripped, causing some of the lights to go out.
4. Let’s Fix It. Select and do eight of the following. You will need an adult’s supervision for each of these Fix It projects:
a. Show how to change a light bulb in a lamp or fixture. Determine the type of light bulb and how to properly dispose of it.
b. Fix a squeaky door or cabinet hinge.
c. Tighten a loose handle or knob on a cabinet or a piece of furniture.
d. Demonstrate how to stop a toilet from running.
e. Replace a furnace filter.
f. Wash a car.
g. Check the oil level and tire pressure in a car.
h. Show how to replace a bulb in a taillight, turn signal, or parking light, or replace a headlight in a car.
i. Help an adult change a tire on a car.
j. Make a repair to a bicycle, such as adjusting or lubricating the chain, inflating the tires, fixing a flat, or adjusting the seat or handlebars.
k. Replace the wheels on a skateboard, a scooter, or a pair of inline skates.
l. Help an adult prepare and paint a room.
m. Help an adult replace or repair a wall or floor tile.
Webelos Handbook, page 384
210 WEBELOS/ARROW OF LIGHT
n. Help an adult install or repair a window or door lock.
o. Help an adult fix a slow or clogged sink drain.
p. Help an adult install or repair a mailbox.
q. Change the battery in a smoke detector or a carbon monoxide detector, and test its operation.
r. Help an adult fix a leaky faucet.
s. Find wall studs, and help an adult hang a curtain rod or a picture.
t. Take an old item, such as a small piece of furniture, a broken toy, or a picture frame, and rebuild and/or refinish it. Show your work to an adult or your Webelos leader.
u. Do a Fix It project agreed upon with your parent or guardian.
NOTES TO DEN LEADER
This elective adventure may be covered in one meeting—with requirement 2 and at least parts of requirements 1 and 3 completed at home with the Scout’s family. Or you can arrange for as many meetings as you want, inviting parents and other volunteers to help the Scouts do some Fix It projects at the meeting site.
Before starting the adventure, print out copies of the two Talk Time worksheets in Meeting 1 Resources. Give a copy to each Scout and tell him to write what he learns for requirements 2 and 3 so he can share at the meeting. He should also keep the worksheets for reference the next time one of those situations occurs at home.
A den outing might provide more opportunities for the Scouts. Examples include a trip to a lumberyard or to a home improvement store that offers repair demonstrations. At an auto repair shop, the boys could learn how to check oil levels and tire pressure, and how to change a tire.
Make sure an adult is present to supervise all the Fix It projects in requirement 4. The safety of the Scouts is of utmost importance.
See the Appendix for optional den meeting activities, including openings, gatherings, and closings.
MeetinG 1 PlAnPREPARATION AND MATERIALS NEEDED• U.S. and den flags
• Items for Gathering game: screwdrivers, safety glasses, picture hanging equipment, etc.
• Select a few Fix It projects from the requirement 4 list. The needed materials should be portable and easy to collect for the meeting. Make sure each job can be completed at the meeting location in the time allowed.
• The meeting could also be done as an outing at a lumberyard, an auto repair shop, or a hardware or home improvement store. A store might provide meeting space and other resources like project plans and classes for children.
• Identify parents or others in the pack who are handy with tools and could assist at the meeting. They could include woodworkers, carpenters, plumbers, mechanics, handymen, or anyone with practical homeowner Fix It skills.
• For requirement 1, if desired, you may request the Scouts prepare their toolboxes before the meeting and bring them for review.
— Many families have various hand tools in their home, yet when a problem arises the right tool can’t always be found. The purpose of the box is to store all the tools in one container so they will be there when needed.
— A Scout may be able to put together his box simply by organizing what the family already has at home. If they need to purchase tools, inexpensive options are available at home improvement stores, discount stores, etc.
211fix it
GATHERING• Arrange a scavenger hunt of common household items, tools, etc. As each Scout arrives, team him
with a buddy to find as many hidden things as they can before the meeting starts.
• You may ask the den chief to come early and hide the items. Be sure to tell the teams if you want them to quietly leave what they find for others to discover.
OPENING• Conduct a flag ceremony of your choosing that includes the Pledge of Allegiance and, as appropriate,
the Scout Oath and Scout Law.
• Lead the den in singing the “Toolbox Song” (see Meeting 1 Resources).
TALK TIME (REQUIREMENTS 1, 2, AND 3)• Carry out business items for the den.
• Allow time for sharing among Webelos Scouts.
• If Scouts prepared their toolboxes (requirement 1) and brought them to the meeting, take time to review them along with the safety rules for each tool. Reflect on any differences between the tools from box to box; sometimes tools can serve multiple purposes.
• If Scouts completed requirement 2 at home, have each boy share what he learned. Does the electrical panel at his family’s house have fuses or breakers? What type of heat does the home have? How can you shut off the water to a sink, toilet, water heater, or washing machine?
• Did anyone practice the requirement 3 fixes at home? If some of the boys did, ask them what they learned about fixing an overflowing toilet or clogged sink and resetting a tripped circuit breaker. Are there any differences in the answers due to different types of housing (e.g., single-family home versus multi-unit apartment building)?
ACTIVITIES
◆Activity 1: Safety First (Requirement 1)• If Scouts brought their toolboxes, have each boy demonstrate the safe use of three different tools
from his box. Be sure to cover a variety of tools in this activity.
• If this meeting is at a location unfamiliar to the den or in someplace other than the usual meeting site, point out any potential safety hazards they must consider.
• Emphasize the need for listening and paying attention at all times.
◆Activity 2: Fix It Projects (Requirement 4)• Have Scouts carry out the Fix It projects you selected for the meeting. As noted above, choose only
projects that you know can be completed at the meeting site within the time you have available.
• If your den is large, you may want to arrange multiple Fix It stations and have a group of boys working at each one. Recruiting additional parents or other helpers will be critical in this situation.
• Some Fix It activities that could work as stations at a group meeting site include the following:
— Requirement 4a: Bring a small light fixture and several types of light bulbs.
— Requirement 4c: Bring a drawer from a cabinet and extra knobs, and have screwdrivers on hand so Scouts can practice changing the knobs.
— Requirement 4f: Ask an adult to volunteer to have his or her car washed, and bring enough car soap, sponges, buckets, and rags for Scouts to help. Position the station near a hose.
— Requirement 4g: Have a tire pressure gauge and several rags on hand for testing the oil level and air pressure of a car.
— Requirement 4k: Bring extra wheels, new bearings, a set of wrenches, and a sample skateboard or scooter.
— Requirement 4q: Bring a smoke detector and/or a carbon monoxide detector to the meeting along with extra batteries.
212 WEBELOS/ARROW OF LIGHT
CLOSING• Hold a Den Leader Minute that focuses on the Helpful point of the Scout Law: Just as our tools are
always ready to help other people, so should Webelos Scouts. You can be a big help to your families and neighborhoods by doing a Good Turn each day.
• From the Boy Scout Handbook: “A Scout is helpful. A Scout cares about other people. He helps others without expecting payment or reward. He fulfills his duties to his family by helping at home.”
AFTER THE MEETING• Serve refreshments, if desired.
• Work together to clean up the meeting place, including the areas used for the Fix It projects. Have Scouts clean the tools they used and put them away.
• Record completion of requirements 1, 2, 3, and 4.
MeetinG 1 ResouRCesOPENINGToolbox Song
(tune: “I’m a Little Teapot”)
I’m a pair of pliers just because.Here is my handle, here are my jaws.
Keep me in your toolbox bright and new.Take me out, and I’ll work for you.
I’m a big strong hammer, a mighty tool.Hit the nails only, that’s the rule.
Keep me in your toolbox bright and newTake me out, and I’ll work for you.
I’m a happy C-clamp, tell you what I do:I eat board sandwiches filled with glue.
Keep me in your toolbox bright and newTake me out, and I’ll work for you.
I’m a handy wood plane, give me a try.I can help you out if your door’s too high.Keep me in your toolbox bright and new
Take me out, and I’ll work for you.
213fix it
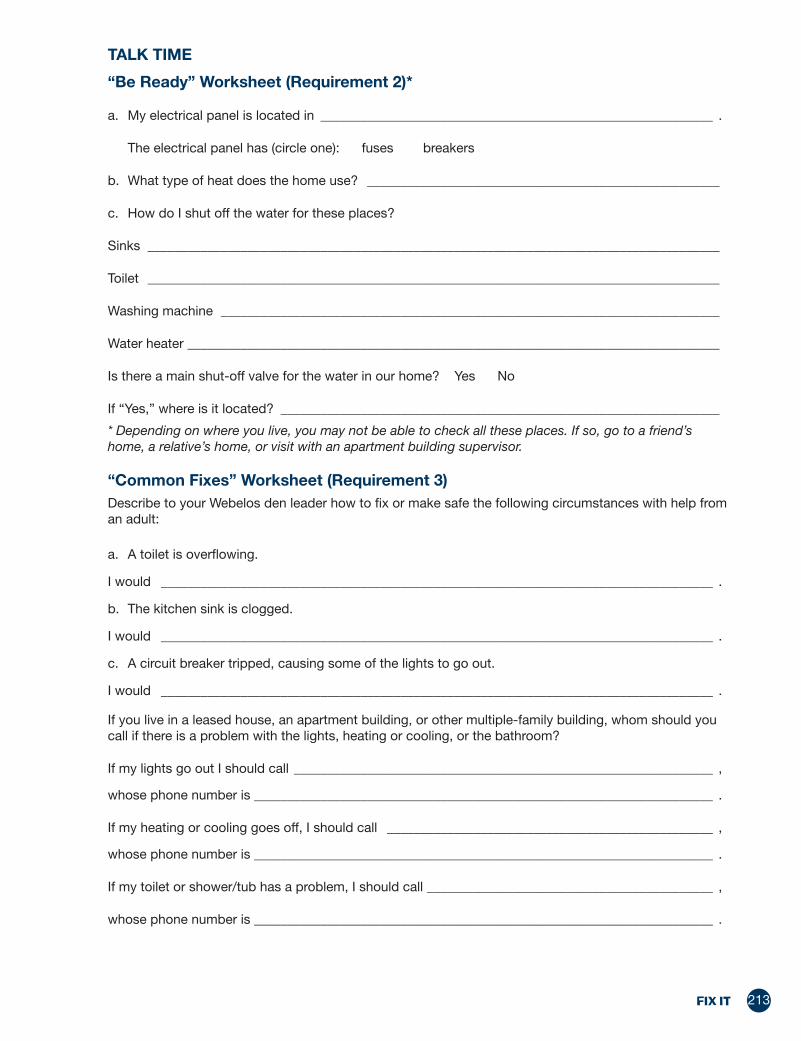
TALK TIME
“Be Ready” Worksheet (Requirement 2)*
a. My electrical panel is located in ___________________________________________________________ .
The electrical panel has (circle one): fuses breakers
b. What type of heat does the home use? _____________________________________________________
c. How do I shut off the water for these places?
Sinks ______________________________________________________________________________________
Toilet ______________________________________________________________________________________
Washing machine ___________________________________________________________________________
Water heater ________________________________________________________________________________
Is there a main shut-off valve for the water in our home? Yes No
If “Yes,” where is it located? __________________________________________________________________
* Depending on where you live, you may not be able to check all these places. If so, go to a friend’s home, a relative’s home, or visit with an apartment building supervisor.
“Common Fixes” Worksheet (Requirement 3)Describe to your Webelos den leader how to fix or make safe the following circumstances with help from an adult:
a. A toilet is overflowing.
I would ___________________________________________________________________________________ .
b. The kitchen sink is clogged.
I would ___________________________________________________________________________________ .
c. A circuit breaker tripped, causing some of the lights to go out.
I would ___________________________________________________________________________________ .
If you live in a leased house, an apartment building, or other multiple-family building, whom should you call if there is a problem with the lights, heating or cooling, or the bathroom?
If my lights go out I should call _______________________________________________________________ ,
whose phone number is _____________________________________________________________________ .
If my heating or cooling goes off, I should call _________________________________________________ ,
whose phone number is _____________________________________________________________________ .
If my toilet or shower/tub has a problem, I should call ___________________________________________ ,
whose phone number is _____________________________________________________________________ .
214 WEBELOS/ARROW OF LIGHT
ACTIVITIES
Activity 1: Fix It Projects (Requirement 4)Here are expanded instructions for a few of the Fix It options in requirement 4.
Requirement 4m. Help an adult replace or repair a wall or floor tile.
Cracked or broken tiles in the floor or on a wall will need to be replaced. Be sure to wear safety glasses to protect your eyes from chips and dust. You will also want to wear old work clothes. If you don’t own the necessary tools to complete this Fix It project, you may borrow them from a family friend or a neighbor.
Apply painter’s tape around the edges of the adjacent tiles to protect them.
Rake out the grout around the broken tile using a carbide-tipped scoring tool. Apply just enough pressure to remove the grout but not so much that a slip will gouge the neighboring tiles. This portion of the project may need to be performed by an adult.
Working from the center out toward the edges, gently tap out the broken pieces with a hammer and a narrow (3⁄8- or ¼-inch) chisel. If you don’t have a tile chisel, a cold chisel or even a flat-blade screwdriver will also do the job. Start with the chisel at 90 degrees to the tile, and switch to a 45-degree angle after you penetrate the glaze.
Once the broken tile is removed, use a wider chisel to clean all the old thinset off the floor or wall (thinset is the adhesive that is used to glue the tile into place).
Comb a small amount of thinset mortar over the place for the new tile in straight furrows using a ¼-inch notched trowel. For best adhesion, also trowel adhesive on the back of the new tile.
Set the tile in place and press down firmly to level it with the surrounding tile. Adjust it so the spacing is even on all sides. Wait at least two hours for the thinset to dry completely, then mix up a batch of grout.
Swipe the grout into the joints with a rubber grout float held at a 45-degree angle, then wait 15 minutes for it to harden. When the grout no longer feels tacky to the touch, clean off the excess with a damp sponge or rag.
If this feels like a really big Fix It project, check with your nearest home improvement store to see if it offers a class on tile repair. This project takes multiple steps, but a Webelos Scout can do it!
Requirement 4p. Help an adult install or repair a mailbox.
In this project you will definitely need to have an adult assisting you. If you are installing a new mailbox, it is important that you check first with your local U.S. Postal Service office to discover what rules may need to be followed. Sometimes there are rules determining the exact location or height of a mailbox. If you live in a rural area, you will need to know if a post must be installed, or if one is already waiting. The mailbox will be secured to the top of the post using a board and nails or screws driven through holes on the side lip of the mailbox. Sometimes people purchase ornamental mailboxes, which may have their own set of instructions.
If you are repairing a mailbox, you will need to determine which parts you need to replace. If the door isn’t working properly, you will need to repair the fasteners at the lower hinge. If the flag is not working properly, you will need to repair the fastener that makes sure the flag stays up when mail is to be picked up.
To complete this Fix It project, you will need to determine what needs to be repaired or installed, discuss and plan with an adult, gather supplies and tools, then do your project.
215fix it
Requirement 4q. Change the battery in a smoke detector or a carbon monoxide detector, and test its operation.
Most detectors require a 9-volt battery, which should be replaced at least once or twice a year. Fire officials and utility companies recommend replacement of smoke detector batteries when we adjust clocks for daylight savings time. Check the manufacturer information that came with the device for
\more information.
Most homes have multiple detectors, so be certain you check each of them.
You will probably need a ladder or step stool to reach the detector. Be sure to have the help of a parent for this portion.
Push the test button located on the front of the detector. You should hear a high-pitched tone, meaning your battery is still functioning. If you do not, remove the front cover of the detector. Most are of the snap-on type. You will then remove the dead battery and replace it with a new one, then replace the cover. Retest with the new battery to make sure the detector is functioning normally.
Be certain you have everything you need before you begin, and return everything to its proper place when finished.
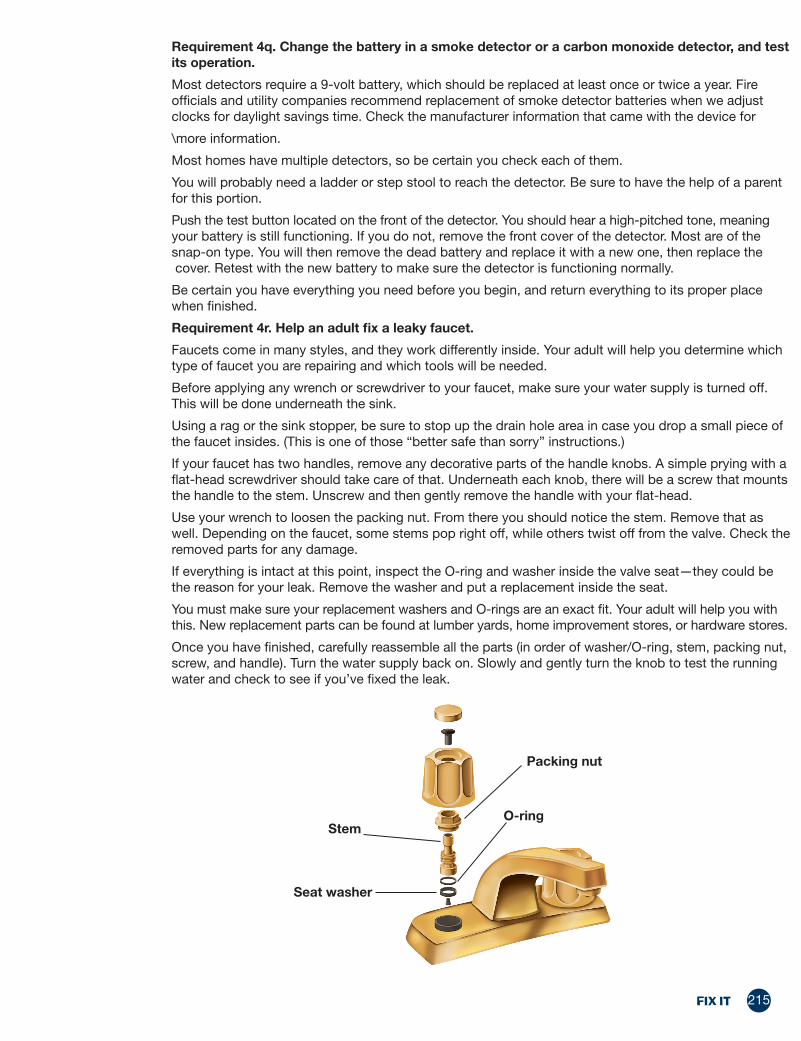
Requirement 4r. Help an adult fix a leaky faucet.
Faucets come in many styles, and they work differently inside. Your adult will help you determine which type of faucet you are repairing and which tools will be needed.
Before applying any wrench or screwdriver to your faucet, make sure your water supply is turned off. This will be done underneath the sink.
Using a rag or the sink stopper, be sure to stop up the drain hole area in case you drop a small piece of the faucet insides. (This is one of those “better safe than sorry” instructions.)
If your faucet has two handles, remove any decorative parts of the handle knobs. A simple prying with a flat-head screwdriver should take care of that. Underneath each knob, there will be a screw that mounts the handle to the stem. Unscrew and then gently remove the handle with your flat-head.
Use your wrench to loosen the packing nut. From there you should notice the stem. Remove that as well. Depending on the faucet, some stems pop right off, while others twist off from the valve. Check the removed parts for any damage.
If everything is intact at this point, inspect the O-ring and washer inside the valve seat—they could be the reason for your leak. Remove the washer and put a replacement inside the seat.
You must make sure your replacement washers and O-rings are an exact fit. Your adult will help you with this. New replacement parts can be found at lumber yards, home improvement stores, or hardware stores.
Once you have finished, carefully reassemble all the parts (in order of washer/O-ring, stem, packing nut, screw, and handle). Turn the water supply back on. Slowly and gently turn the knob to test the running water and check to see if you’ve fixed the leak.
Packing nut
O-ringStem
Seat washer
216 WEBELOS/ARROW OF LIGHT
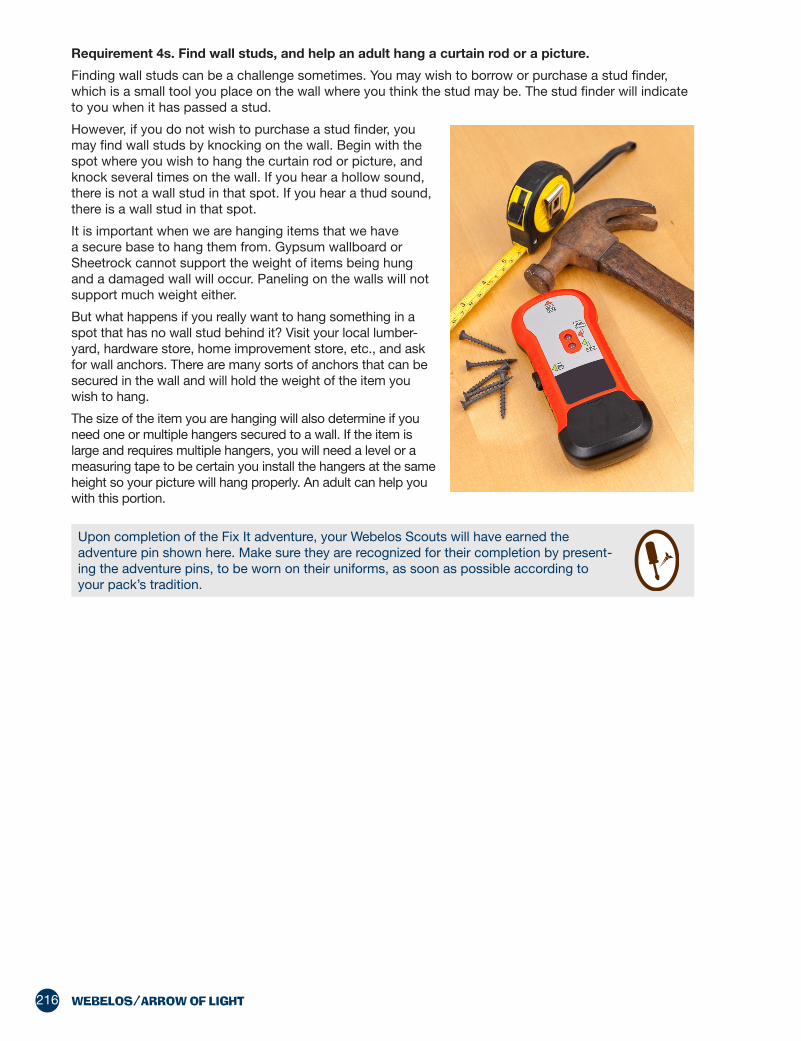
Requirement 4s. Find wall studs, and help an adult hang a curtain rod or a picture.
Finding wall studs can be a challenge sometimes. You may wish to borrow or purchase a stud finder, which is a small tool you place on the wall where you think the stud may be. The stud finder will indicate to you when it has passed a stud.
However, if you do not wish to purchase a stud finder, you may find wall studs by knocking on the wall. Begin with the spot where you wish to hang the curtain rod or picture, and knock several times on the wall. If you hear a hollow sound, there is not a wall stud in that spot. If you hear a thud sound, there is a wall stud in that spot.
It is important when we are hanging items that we have a secure base to hang them from. Gypsum wallboard or Sheetrock cannot support the weight of items being hung and a damaged wall will occur. Paneling on the walls will not support much weight either.
But what happens if you really want to hang something in a spot that has no wall stud behind it? Visit your local lumber-yard, hardware store, home improvement store, etc., and ask for wall anchors. There are many sorts of anchors that can be secured in the wall and will hold the weight of the item you wish to hang.
The size of the item you are hanging will also determine if you need one or multiple hangers secured to a wall. If the item is large and requires multiple hangers, you will need a level or a measuring tape to be certain you install the hangers at the same height so your picture will hang properly. An adult can help you with this portion.
Upon completion of the Fix It adventure, your Webelos Scouts will have earned the adventure pin shown here. Make sure they are recognized for their completion by present-ing the adventure pins, to be worn on their uniforms, as soon as possible according to your pack’s tradition.