Embed Size (px)
Citation preview
The fitting process of the SomnoGuard®AP Tips to complement the actual Instructions for Use
© Tomed Dr. Toussaint GmbH, 1st Line Medical, Inc. (USA), 2013
Video Presentation on the fitting process available online at:
www.1stLineMedical.com or scan
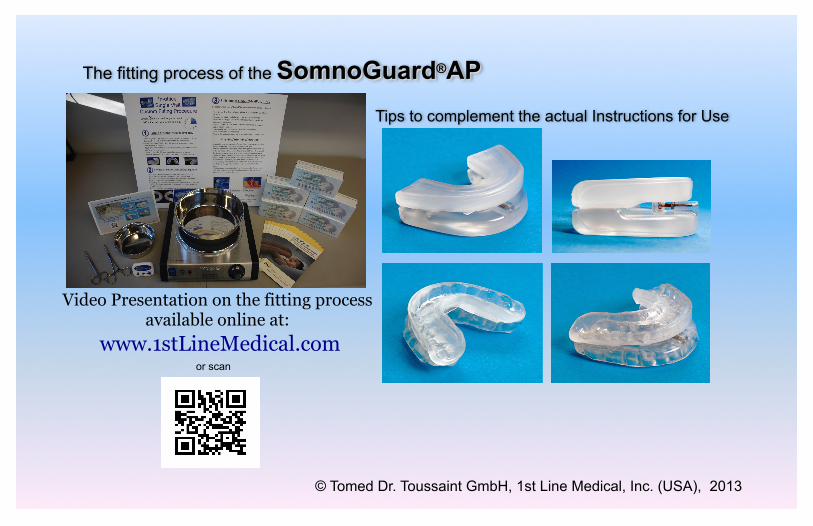
Needed accessories – Fitting Kit Spray disinfectant for all working tools
Electric Hotplate
Cold water bath
Water boiler (Optional)
Scissors
Grasping Forceps
Disposable gloves
Knife or scalpel
Boiling water bath
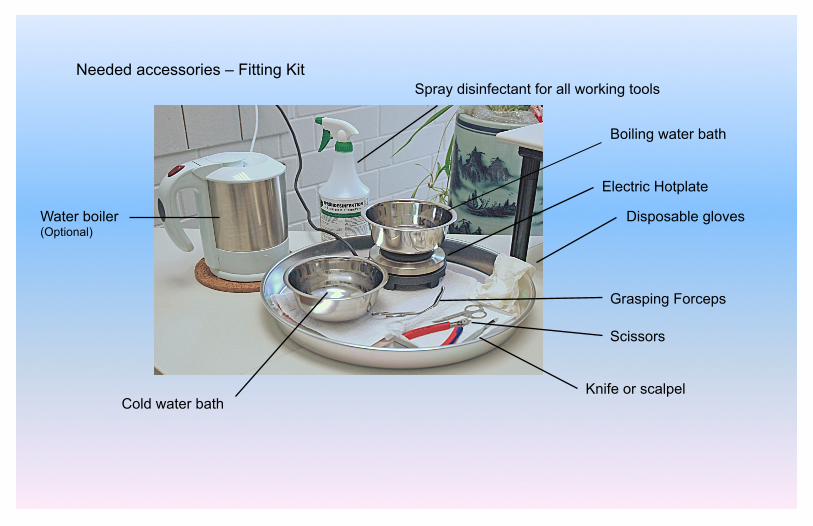
Dental examination prior to treatment
Purpose: Exclusion of any contraindications such as - Central sleep apnoea - Mandibular joint disorder - (Strong) gag reflex, larger gaps between the teeth, unstable dental crowns, decay, parodontosis - Limited mandibular advancement. Patients with sleep apnoea should be able to extend their lower jaw forward at least 7mm. - Restricted breathing through the nasal passages If the patient’s dental condition appears uncertain and in case of occlusal abnormalities (e.g. crossbite, overbite, underbite) a check up visit with a dentist is necessary and strongly recommended prior to the start of treatment.
Fitting preparation (1/2)
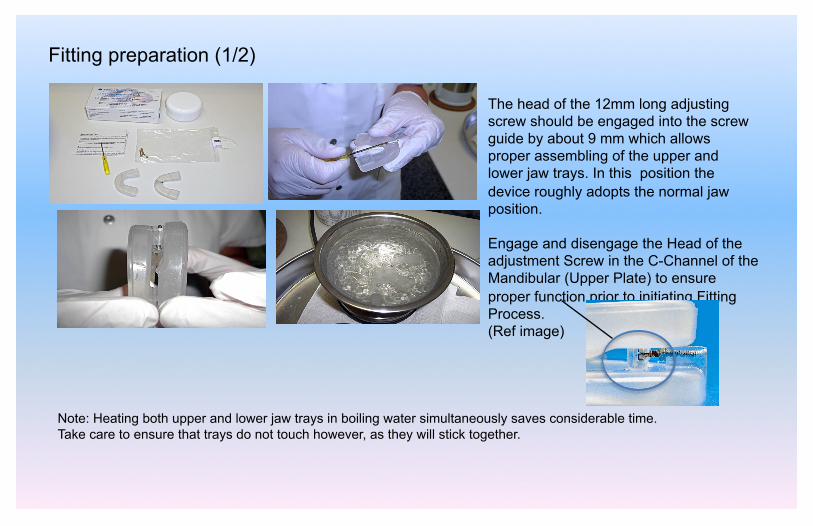
The head of the 12mm long adjusting screw should be engaged into the screw guide by about 9 mm which allows proper assembling of the upper and lower jaw trays. In this position the device roughly adopts the normal jaw position. Engage and disengage the Head of the adjustment Screw in the C-Channel of the Mandibular (Upper Plate) to ensure proper function prior to initiating Fitting Process. (Ref image)
Note: Heating both upper and lower jaw trays in boiling water simultaneously saves considerable time. Take care to ensure that trays do not touch however, as they will stick together.
Fitting preparation (2/2)
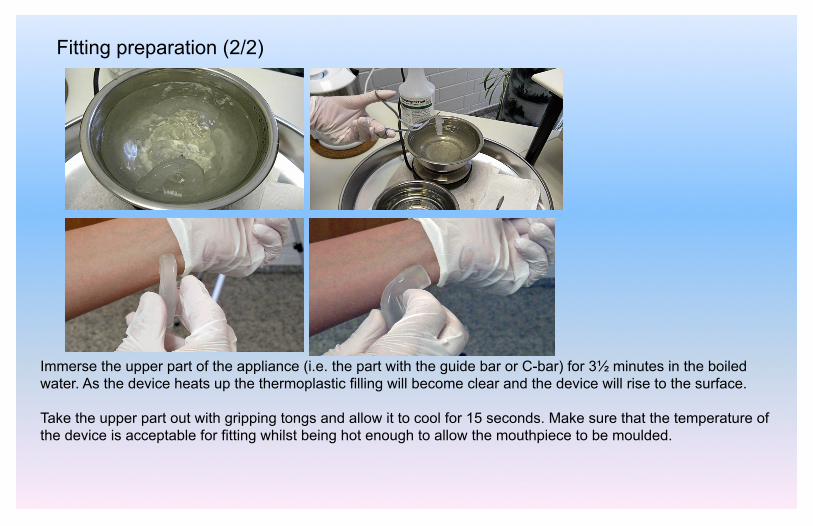
Immerse the upper part of the appliance (i.e. the part with the guide bar or C-bar) for 3½ minutes in the boiled water. As the device heats up the thermoplastic filling will become clear and the device will rise to the surface. Take the upper part out with gripping tongs and allow it to cool for 15 seconds. Make sure that the temperature of the device is acceptable for fitting whilst being hot enough to allow the mouthpiece to be moulded.
Fitting of the upper tray (1/2)
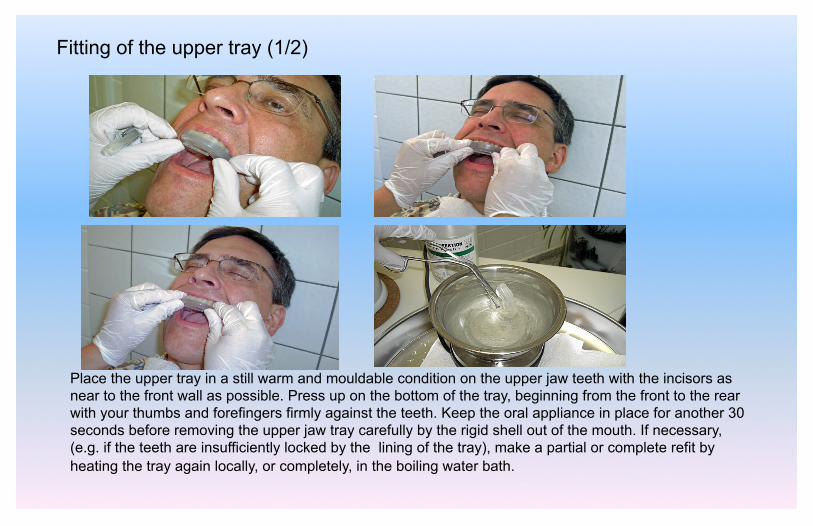
Place the upper tray in a still warm and mouldable condition on the upper jaw teeth with the incisors as near to the front wall as possible. Press up on the bottom of the tray, beginning from the front to the rear with your thumbs and forefingers firmly against the teeth. Keep the oral appliance in place for another 30 seconds before removing the upper jaw tray carefully by the rigid shell out of the mouth. If necessary, (e.g. if the teeth are insufficiently locked by the lining of the tray), make a partial or complete refit by heating the tray again locally, or completely, in the boiling water bath.
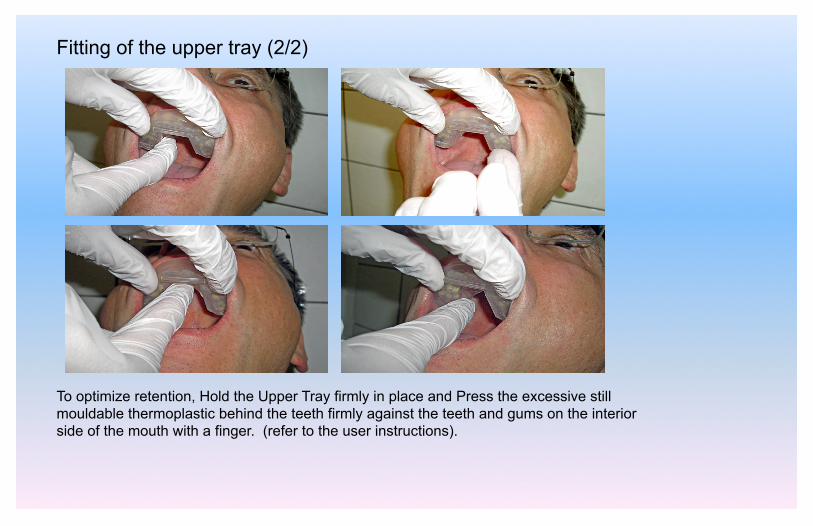
To optimize retention, Hold the Upper Tray firmly in place and Press the excessive still mouldable thermoplastic behind the teeth firmly against the teeth and gums on the interior side of the mouth with a finger. (refer to the user instructions).
Fitting of the upper tray (2/2)
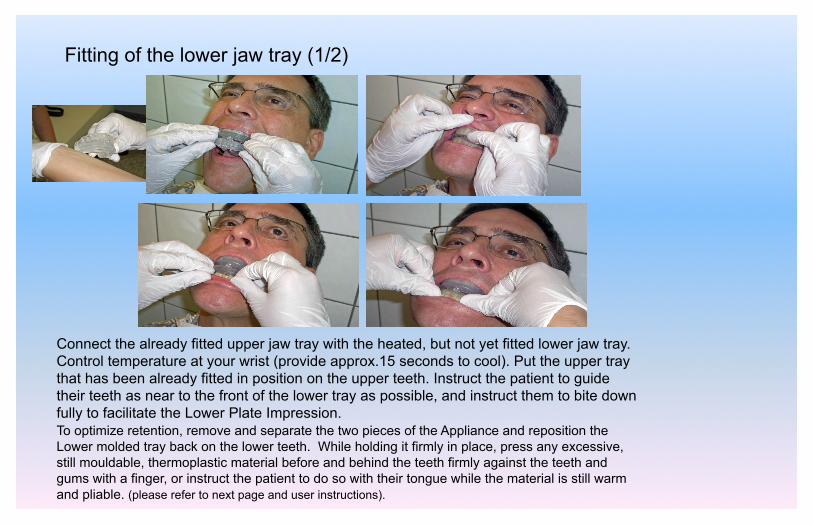
Fitting of the lower jaw tray (1/2)
Connect the already fitted upper jaw tray with the heated, but not yet fitted lower jaw tray. Control temperature at your wrist (provide approx.15 seconds to cool). Put the upper tray that has been already fitted in position on the upper teeth. Instruct the patient to guide their teeth as near to the front of the lower tray as possible, and instruct them to bite down fully to facilitate the Lower Plate Impression. To optimize retention, remove and separate the two pieces of the Appliance and reposition the Lower molded tray back on the lower teeth. While holding it firmly in place, press any excessive, still mouldable, thermoplastic material before and behind the teeth firmly against the teeth and gums with a finger, or instruct the patient to do so with their tongue while the material is still warm and pliable. (please refer to next page and user instructions).
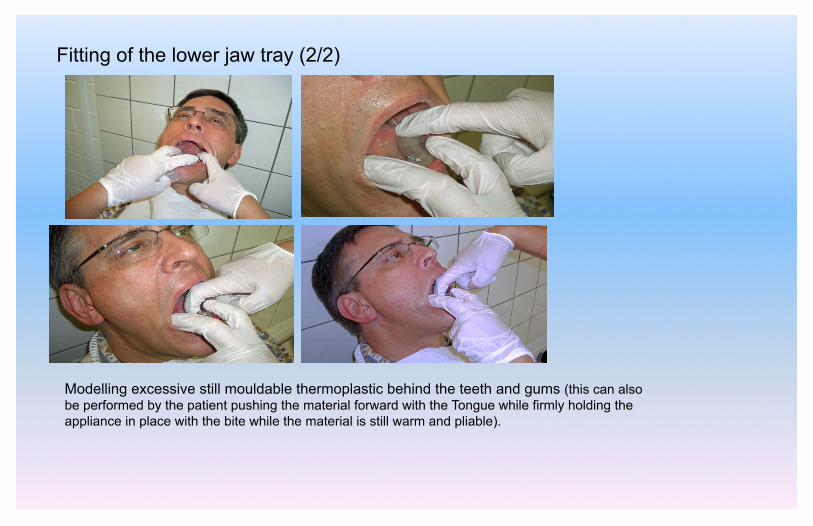
Modelling excessive still mouldable thermoplastic behind the teeth and gums (this can also be performed by the patient pushing the material forward with the Tongue while firmly holding the appliance in place with the bite while the material is still warm and pliable).
Fitting of the lower jaw tray (2/2)
Finishing the fitting process & Titration
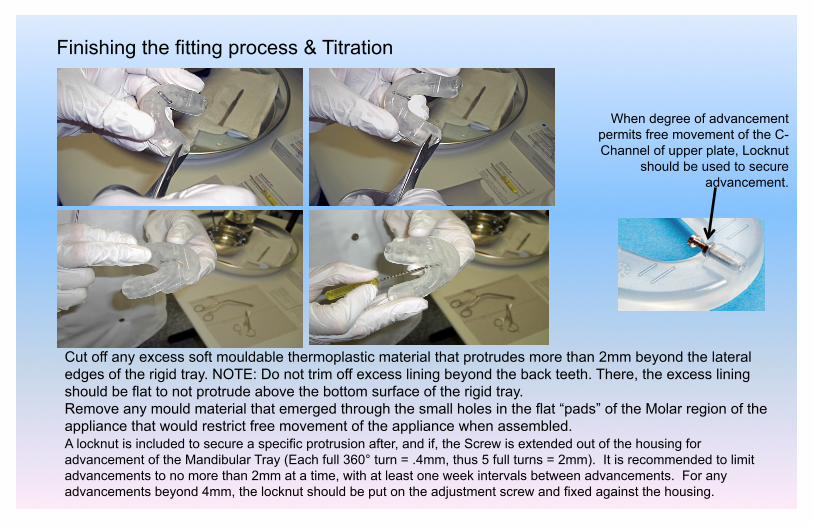
Cut off any excess soft mouldable thermoplastic material that protrudes more than 2mm beyond the lateral edges of the rigid tray. NOTE: Do not trim off excess lining beyond the back teeth. There, the excess lining should be flat to not protrude above the bottom surface of the rigid tray. Remove any mould material that emerged through the small holes in the flat “pads” of the Molar region of the appliance that would restrict free movement of the appliance when assembled. A locknut is included to secure a specific protrusion after, and if, the Screw is extended out of the housing for advancement of the Mandibular Tray (Each full 360° turn = .4mm, thus 5 full turns = 2mm). It is recommended to limit advancements to no more than 2mm at a time, with at least one week intervals between advancements. For any advancements beyond 4mm, the locknut should be put on the adjustment screw and fixed against the housing.
When degree of advancement permits free movement of the C-Channel of upper plate, Locknut
should be used to secure advancement.
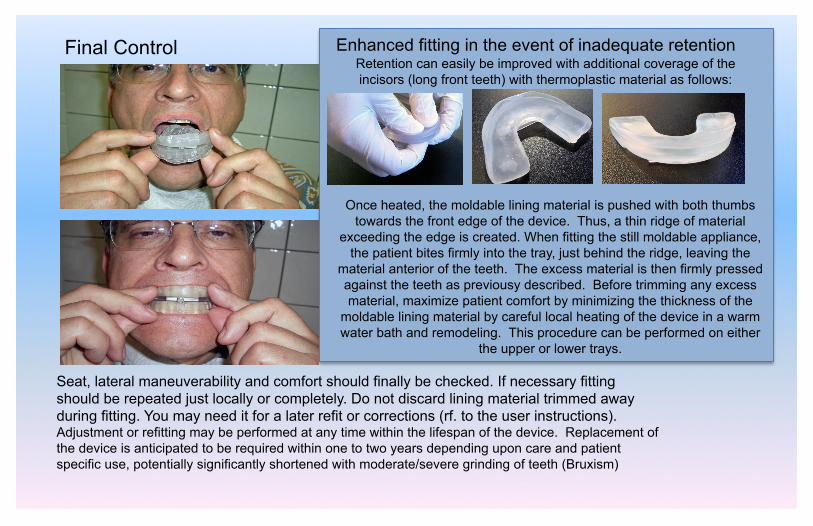
Final Control
Seat, lateral maneuverability and comfort should finally be checked. If necessary fitting should be repeated just locally or completely. Do not discard lining material trimmed away during fitting. You may need it for a later refit or corrections (rf. to the user instructions). Adjustment or refitting may be performed at any time within the lifespan of the device. Replacement of the device is anticipated to be required within one to two years depending upon care and patient specific use, potentially significantly shortened with moderate/severe grinding of teeth (Bruxism)
Enhanced fitting in the event of inadequate retention Retention can easily be improved with additional coverage of the incisors (long front teeth) with thermoplastic material as follows:
Once heated, the moldable lining material is pushed with both thumbs towards the front edge of the device. Thus, a thin ridge of material
exceeding the edge is created. When fitting the still moldable appliance, the patient bites firmly into the tray, just behind the ridge, leaving the
material anterior of the teeth. The excess material is then firmly pressed against the teeth as previousy described. Before trimming any excess material, maximize patient comfort by minimizing the thickness of the
moldable lining material by careful local heating of the device in a warm water bath and remodeling. This procedure can be performed on either
the upper or lower trays.

Made available in the USA by: A Proud Member of the:
Customer Service: 866-720-8080 Customer Service Fax: 800-918-7860
Direct Dial (International): 603-968-3172
854 US Route 3, Holderness, NH 03245 USA
www.1stLineMedical.com