Embed Size (px)
Citation preview
First Battle of Bishenpur AAR A Burma AAR from a game played in May 2010 by Martin Small and Mark Davies. Introduction: Following their distraction operation (Opration Ha-Go) in the Arakan coastal strip of Burma in the opening weeks of 1944, the Japanese opened their main offensive (Operation U-Go) against India in early March 1944. Their plan was to surround and destroy the Indian IV Corps at the city of Imphal while the rest of the British/Indian 14th Army was still bogged down in the Arakan. When the attack came, the 17th (‘Black Cat’) and 23rd (‘Fighting Cock’) Indian Infantry Divisions, along with the 50th Indian Parachute Brigade were still widely scattered along the border hills and were taken completely by surprise. Fighting desperate rearguard actions, the two divisions fought their way back toward Imphal. The Indian Paras meanwhile, fought to the last man at Sangshak, giving 23rd Division time to form a defence line at Imphal. In the south, the 17th Division once again found itself fighting its old adversaries – the elite Japanese 33rd Infantry Division. Fighting grimly all the way, the 17th Division withdrew from the Chin Hills, through Tiddim, Singgel and back across the Indian border until they finally reached the high Imphal Plain. Here, in the flat, open paddy surrounding the marshy Logtak Lake, the British and Indian troops could bring their full combat power to bear on the Japanese. Each village on the plain was like a forested island, surrounded by a sea of flat, featureless dry paddy fields. If the villages were strongly held, the near-featureless plain between could be turned into a killing ground. Unfortunately, this worked both ways… In mid-April, Brigadier MacKenzie’s 32 Indian Brigade was holding the plain – the villages of Potsangbam and Bishenpur were strongly held and the flanks were covered by mountains on the right and the marshy basin of Logtak Lake on the left. However, the Japanese were making some headway in pushing back the outposts in villages on the plain and on the surrounding mountain tops. On 18th April, the Japanese launched their first assault against the Bishenpur position: a Japanese battlegroup was formed under one Colonel Taguchi, comprising Taguchi’s own 4th Independent Engineer Regiment, Major Isagoda’s 2nd Battalion/213th Infantry Regiment (less two companies), the 213th Anti-Tank Company (47mm guns), the 213th Gun Company (75mm guns), an additional Anti-Tank Company and most esoterically, a company of 320mm heavy spigot mortars, carried by elephants! However, Taguchi failed to take Potsangbam and Bishenpur with his first assault, but managed to drive the Indians out of Ningthoukong, which lay a short way to the south. With the arrival of reinforcements on the 19th, MacKenzie decided to attempt to seize the initiative; on the 22nd the 9th Battalion, 14th Punjab Regiment was ordered to mount a reconnaissance in force against Ningthoukong. The operation would be preceded by an air-strike comprising twelve Vengeance dive-bombers and would be supported by half of ‘C’ Squadron 150th RAC (with Lee medium tanks), 311 Battery, 129 Field Regiment Royal Artillery and a battery of Indian mountain artillery.
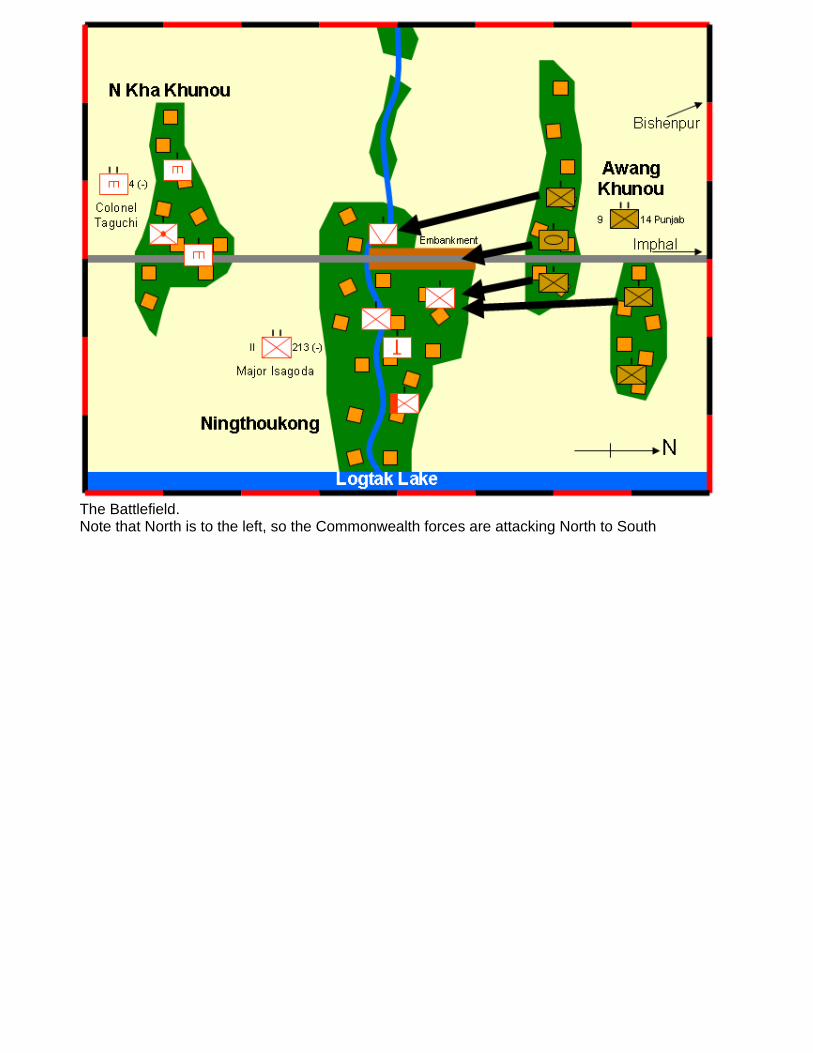
The Battlefield. Note that North is to the left, so the Commonwealth forces are attacking North to South
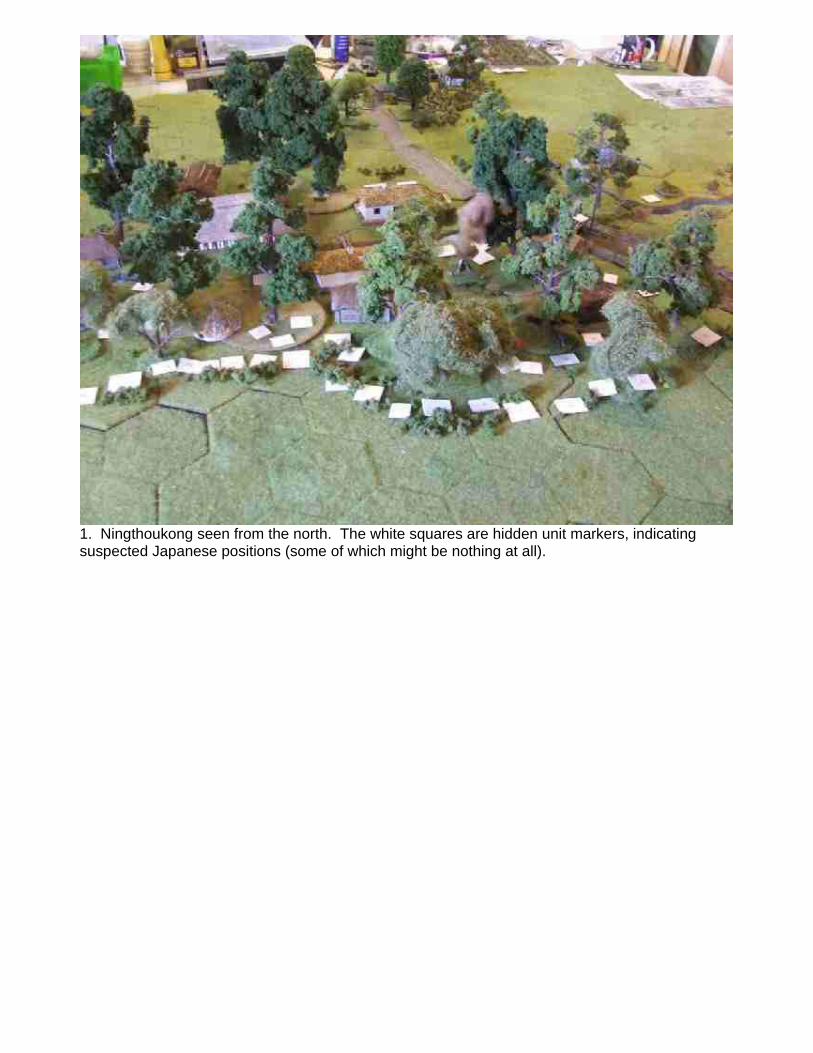
1. Ningthoukong seen from the north. The white squares are hidden unit markers, indicating suspected Japanese positions (some of which might be nothing at all).
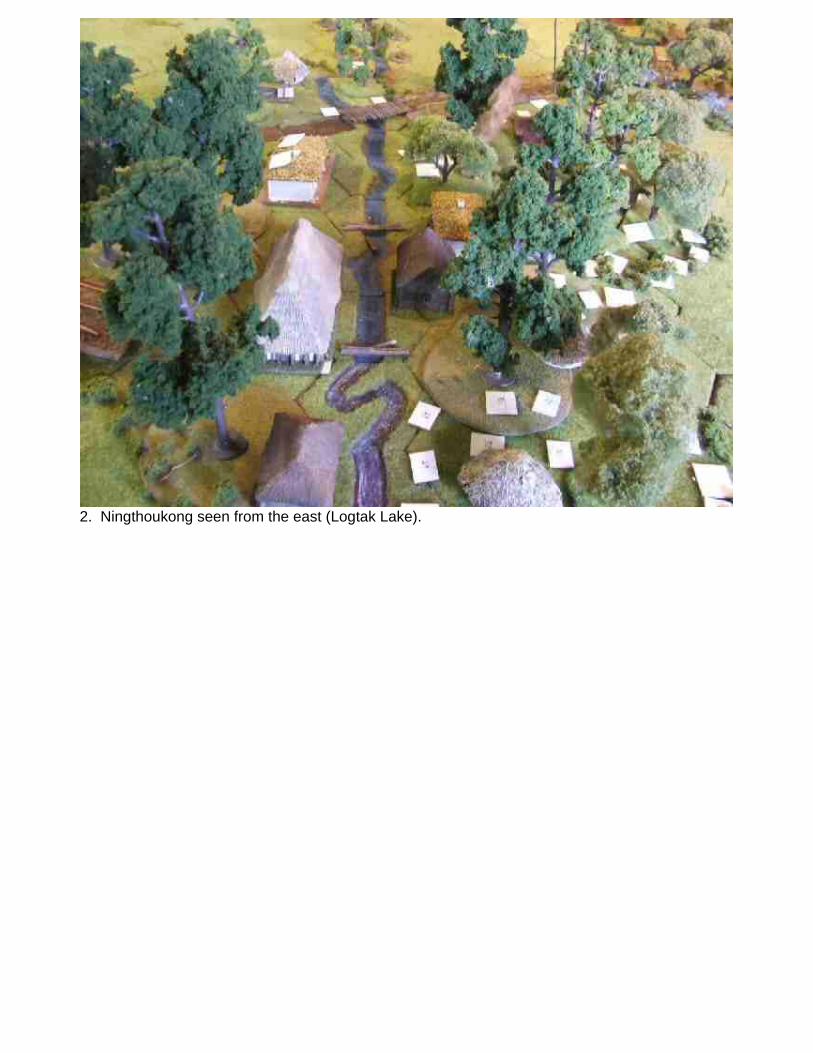
2. Ningthoukong seen from the east (Logtak Lake).
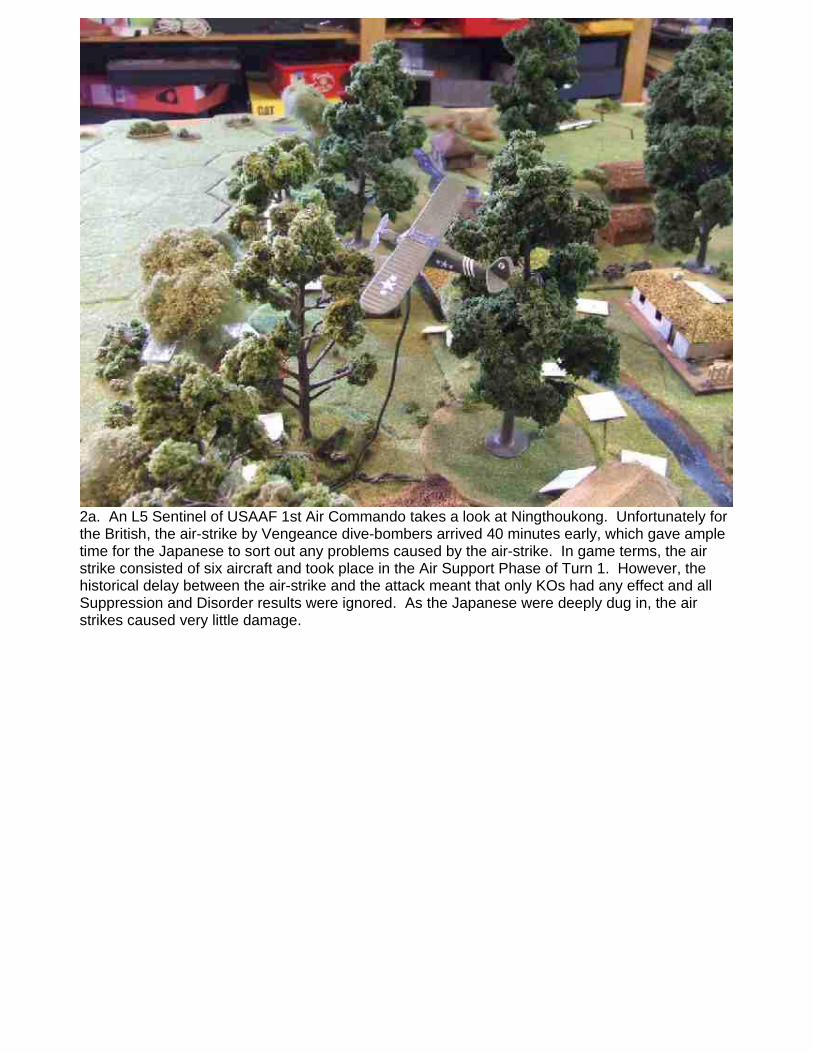
2a. An L5 Sentinel of USAAF 1st Air Commando takes a look at Ningthoukong. Unfortunately for the British, the air-strike by Vengeance dive-bombers arrived 40 minutes early, which gave ample time for the Japanese to sort out any problems caused by the air-strike. In game terms, the air strike consisted of six aircraft and took place in the Air Support Phase of Turn 1. However, the historical delay between the air-strike and the attack meant that only KOs had any effect and all Suppression and Disorder results were ignored. As the Japanese were deeply dug in, the air strikes caused very little damage.
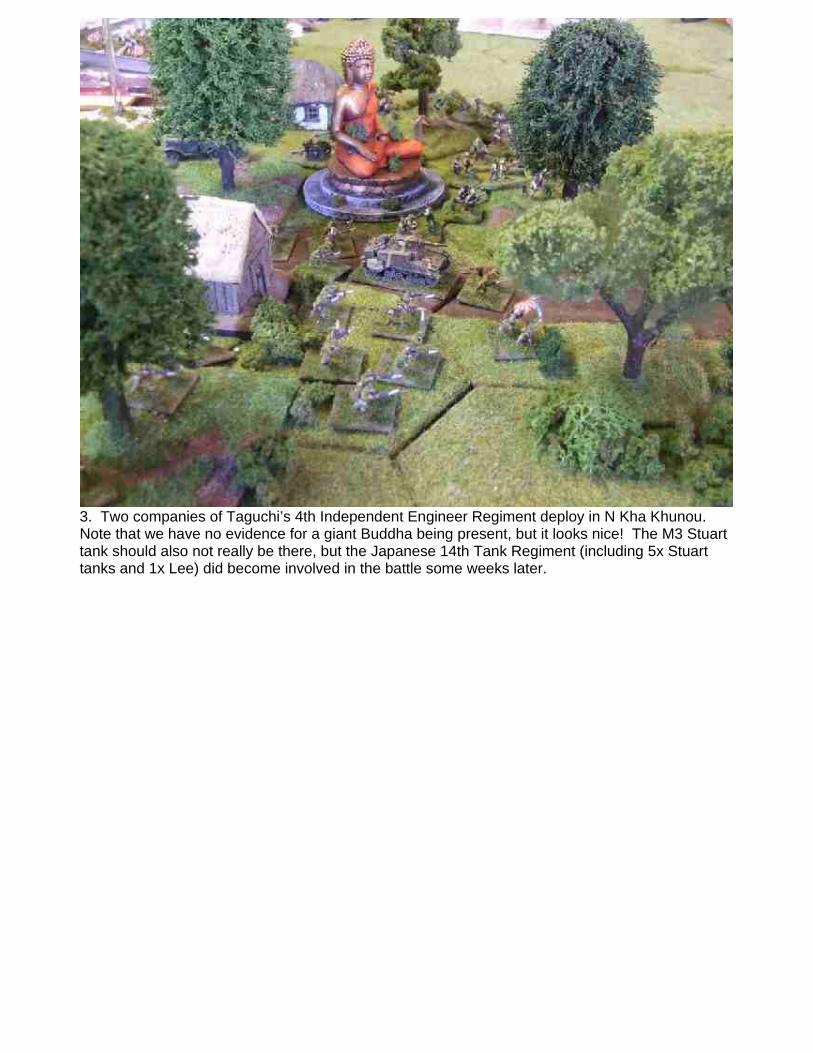
3. Two companies of Taguchi’s 4th Independent Engineer Regiment deploy in N Kha Khunou. Note that we have no evidence for a giant Buddha being present, but it looks nice! The M3 Stuart tank should also not really be there, but the Japanese 14th Tank Regiment (including 5x Stuart tanks and 1x Lee) did become involved in the battle some weeks later.
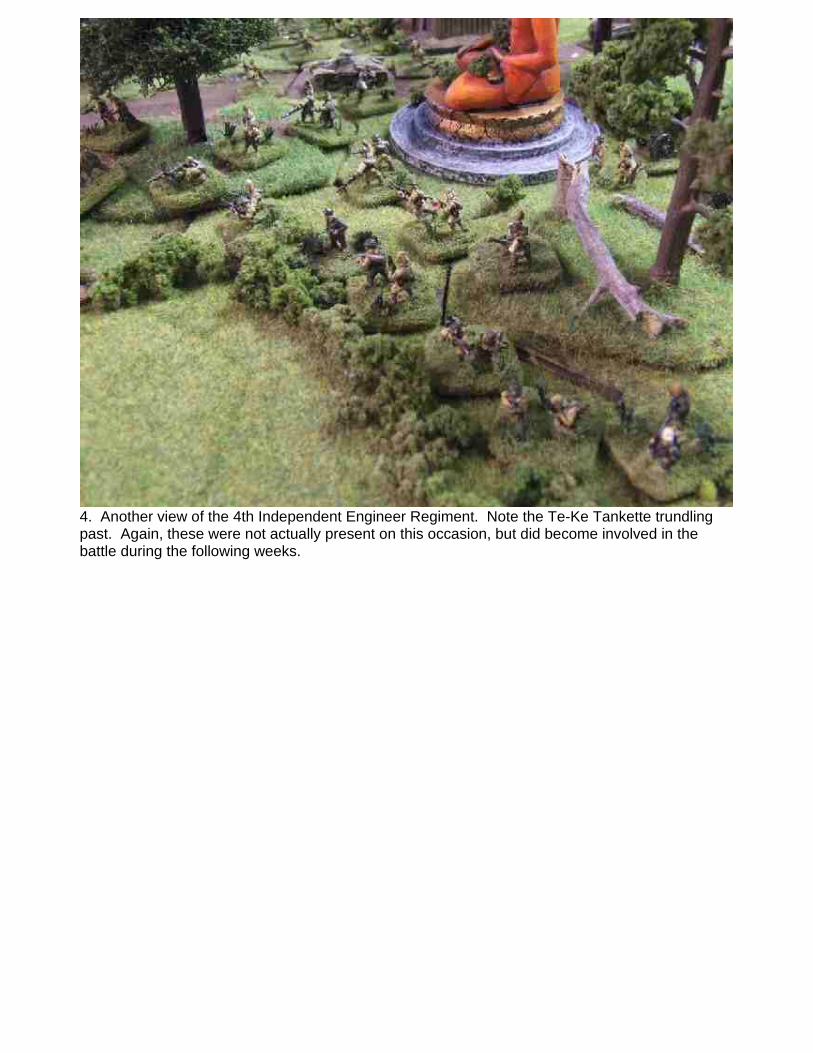
4. Another view of the 4th Independent Engineer Regiment. Note the Te-Ke Tankette trundling past. Again, these were not actually present on this occasion, but did become involved in the battle during the following weeks.
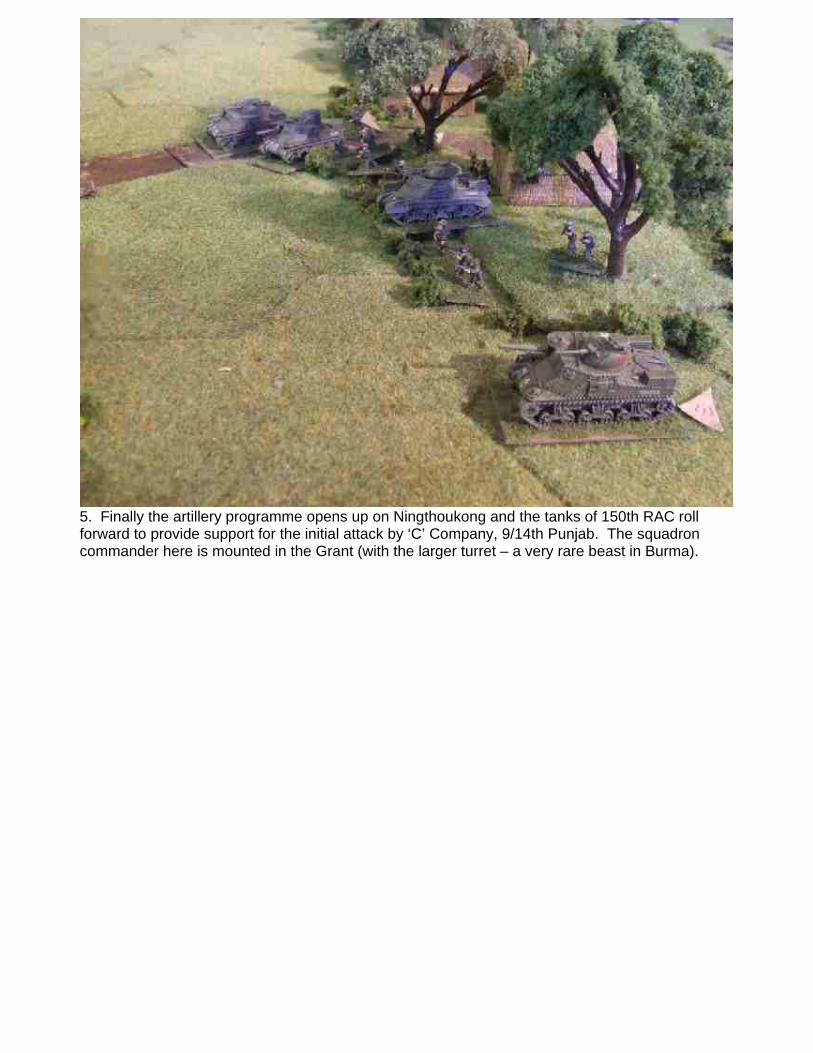
5. Finally the artillery programme opens up on Ningthoukong and the tanks of 150th RAC roll forward to provide support for the initial attack by ‘C’ Company, 9/14th Punjab. The squadron commander here is mounted in the Grant (with the larger turret – a very rare beast in Burma).
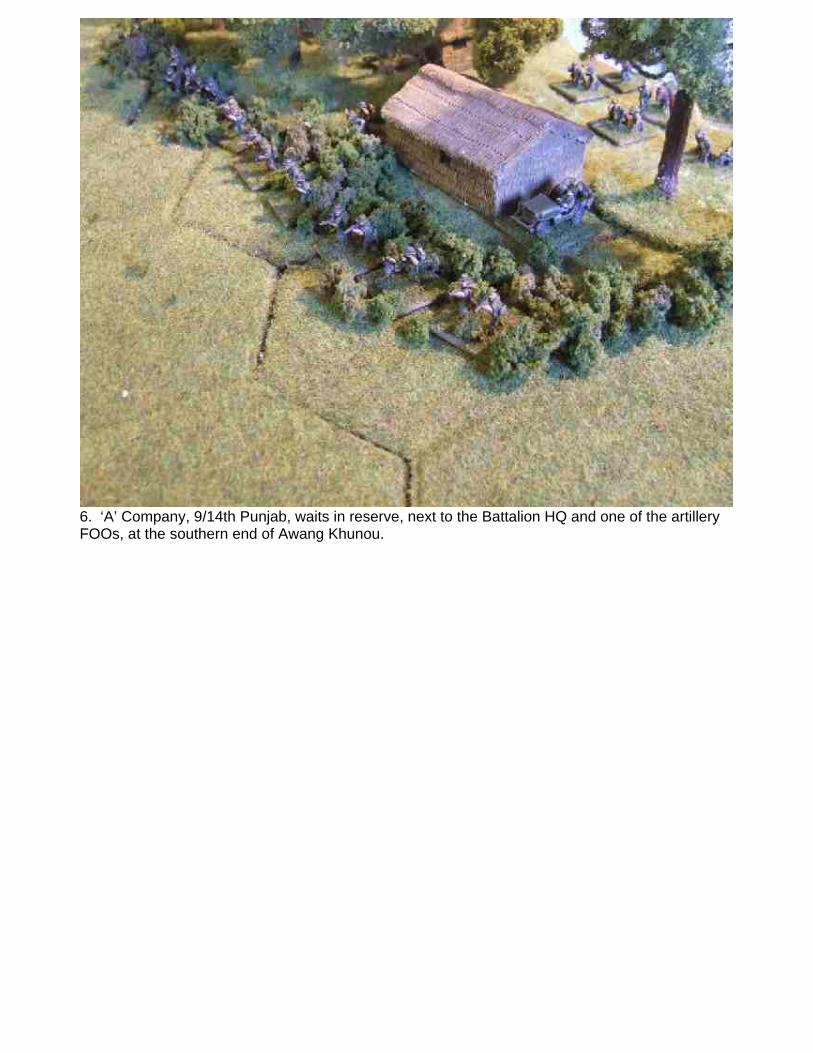
6. ‘A’ Company, 9/14th Punjab, waits in reserve, next to the Battalion HQ and one of the artillery FOOs, at the southern end of Awang Khunou.
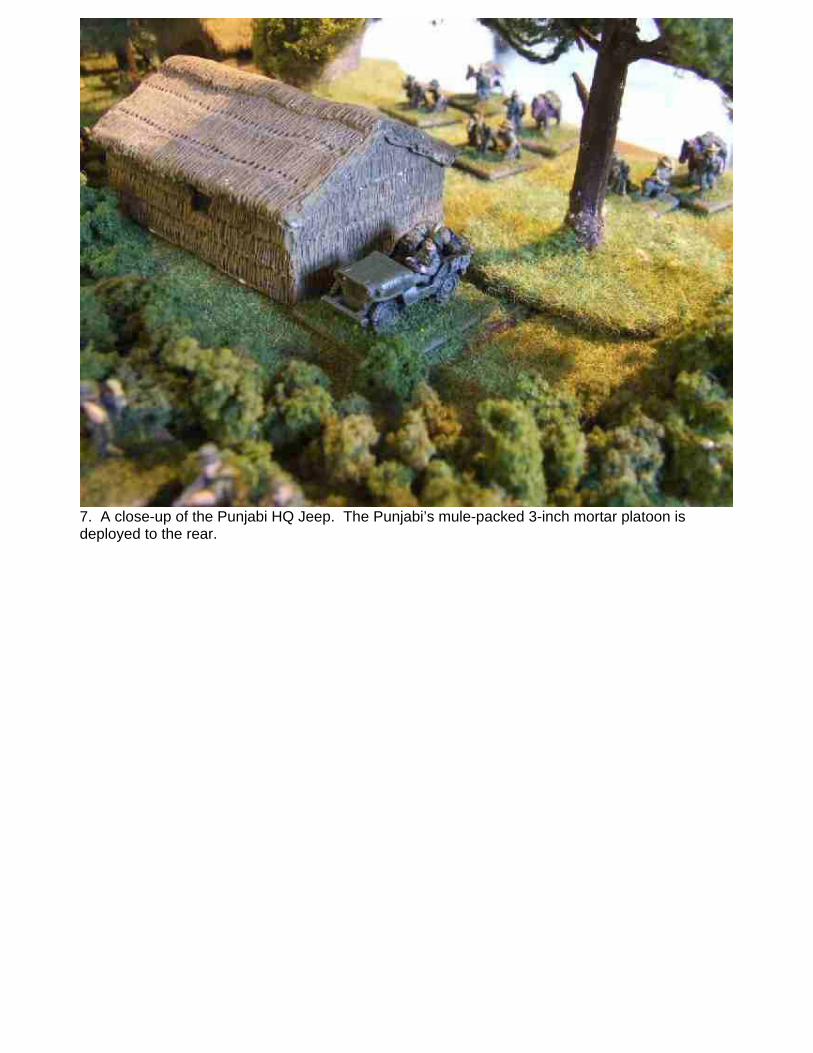
7. A close-up of the Punjabi HQ Jeep. The Punjabi’s mule-packed 3-inch mortar platoon is deployed to the rear.
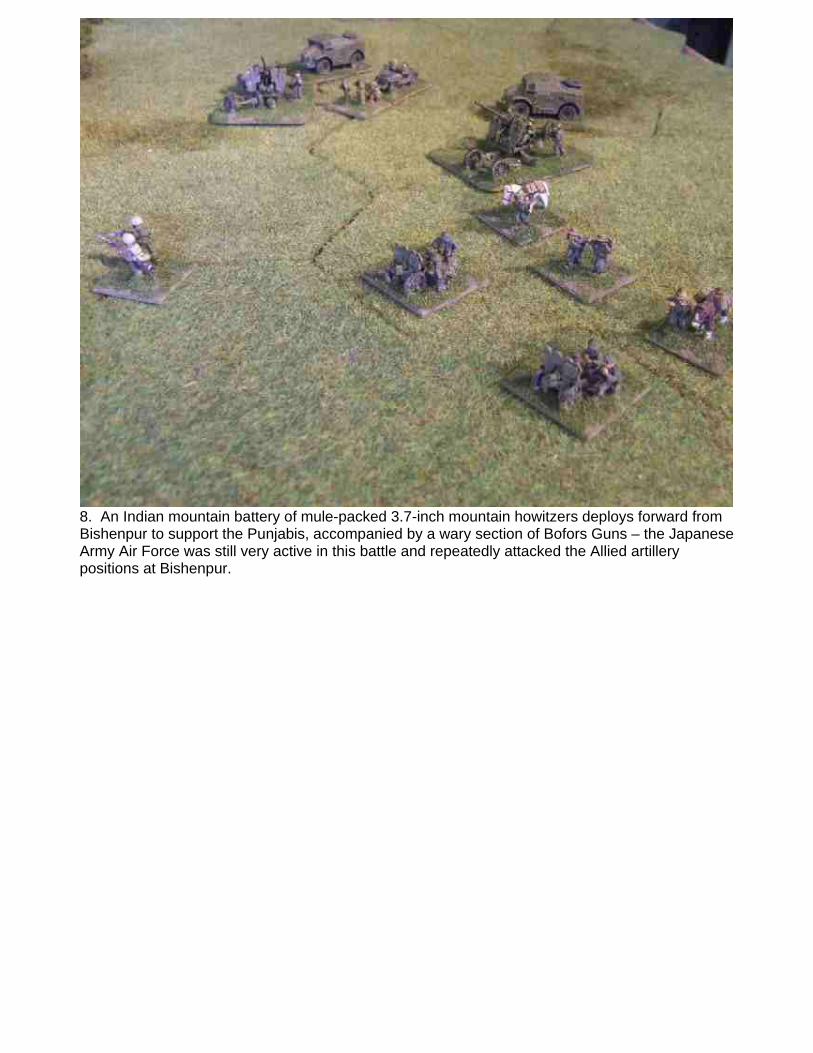
8. An Indian mountain battery of mule-packed 3.7-inch mountain howitzers deploys forward from Bishenpur to support the Punjabis, accompanied by a wary section of Bofors Guns – the Japanese Army Air Force was still very active in this battle and repeatedly attacked the Allied artillery positions at Bishenpur.
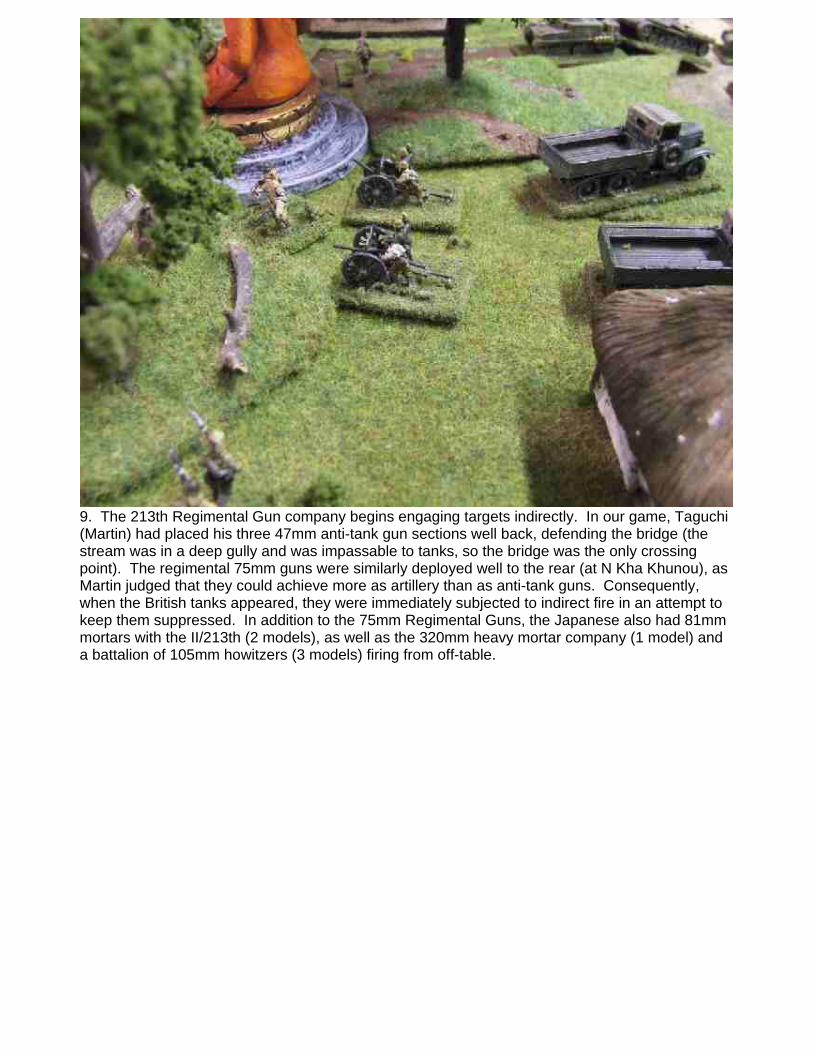
9. The 213th Regimental Gun company begins engaging targets indirectly. In our game, Taguchi (Martin) had placed his three 47mm anti-tank gun sections well back, defending the bridge (the stream was in a deep gully and was impassable to tanks, so the bridge was the only crossing point). The regimental 75mm guns were similarly deployed well to the rear (at N Kha Khunou), as Martin judged that they could achieve more as artillery than as anti-tank guns. Consequently, when the British tanks appeared, they were immediately subjected to indirect fire in an attempt to keep them suppressed. In addition to the 75mm Regimental Guns, the Japanese also had 81mm mortars with the II/213th (2 models), as well as the 320mm heavy mortar company (1 model) and a battalion of 105mm howitzers (3 models) firing from off-table.
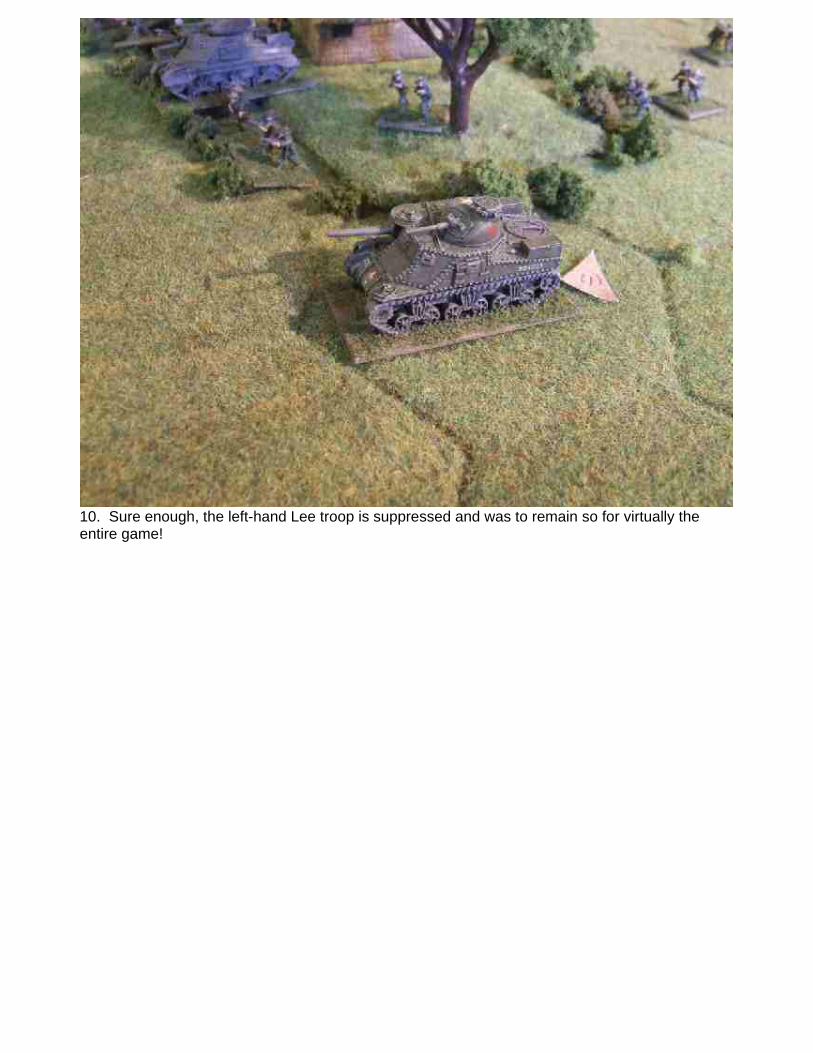
10. Sure enough, the left-hand Lee troop is suppressed and was to remain so for virtually the entire game!
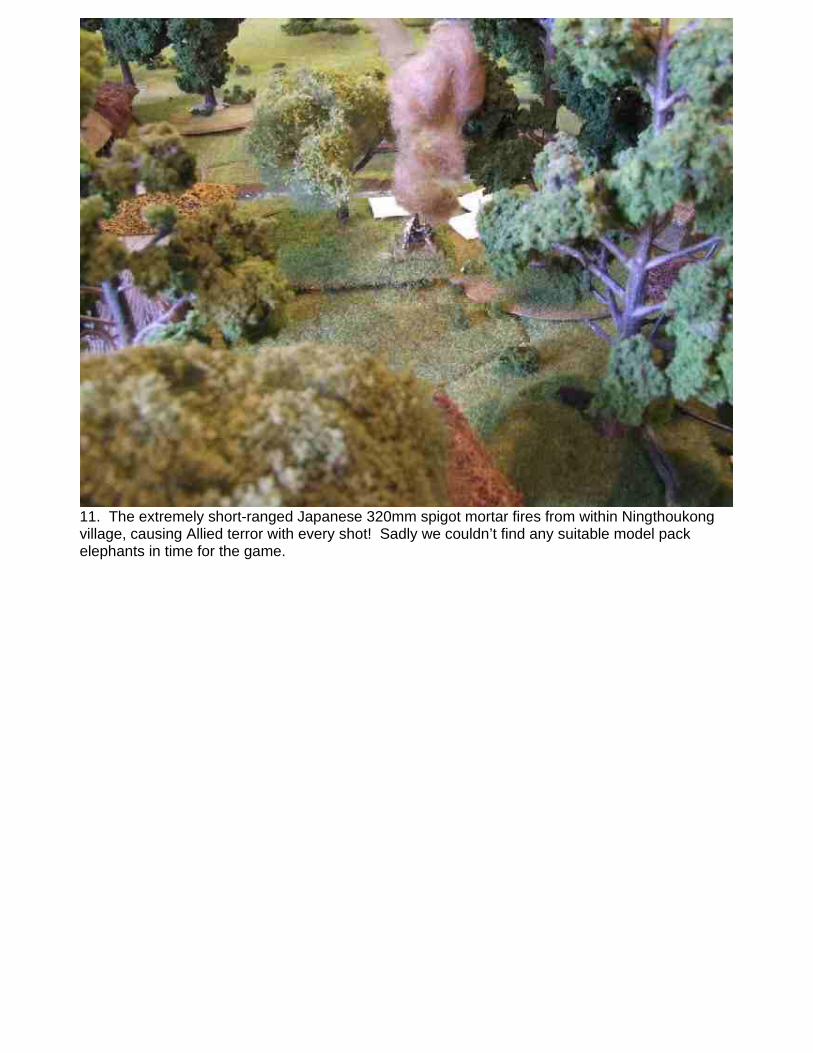
11. The extremely short-ranged Japanese 320mm spigot mortar fires from within Ningthoukong village, causing Allied terror with every shot! Sadly we couldn’t find any suitable model pack elephants in time for the game.

11a. A close-up of Martin’s superb scratch-built 320mm spigot mortar.
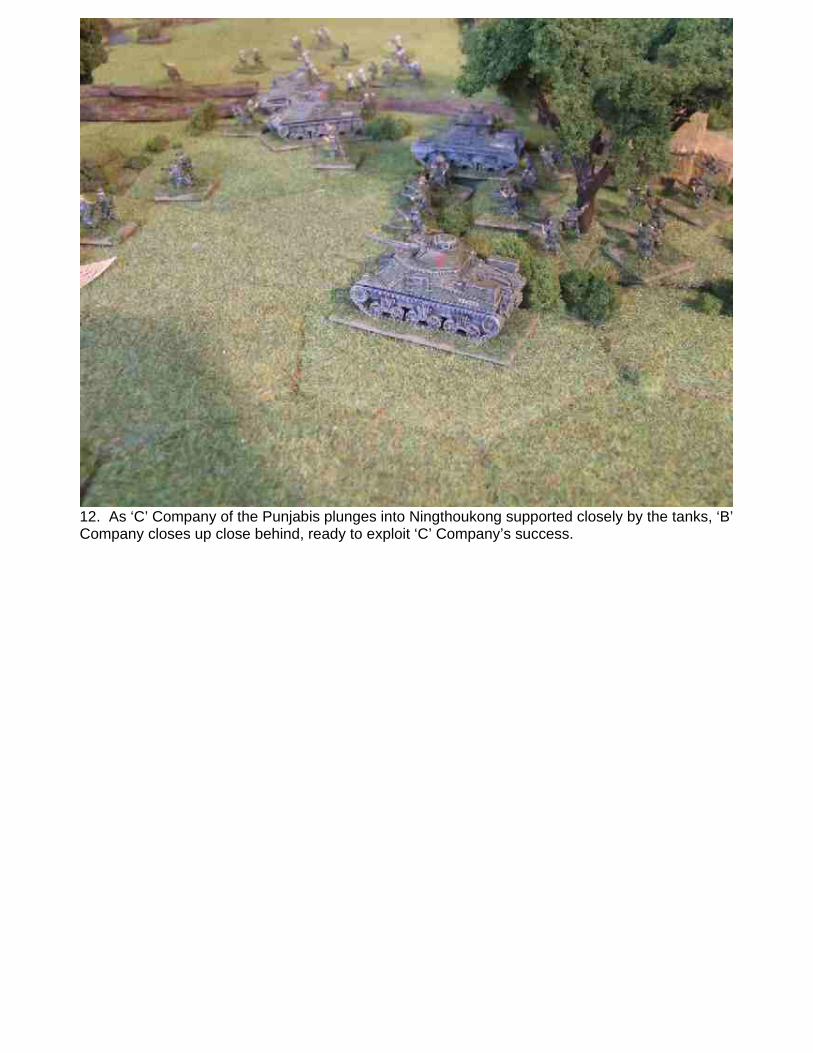
12. As ‘C’ Company of the Punjabis plunges into Ningthoukong supported closely by the tanks, ‘B’ Company closes up close behind, ready to exploit ‘C’ Company’s success.
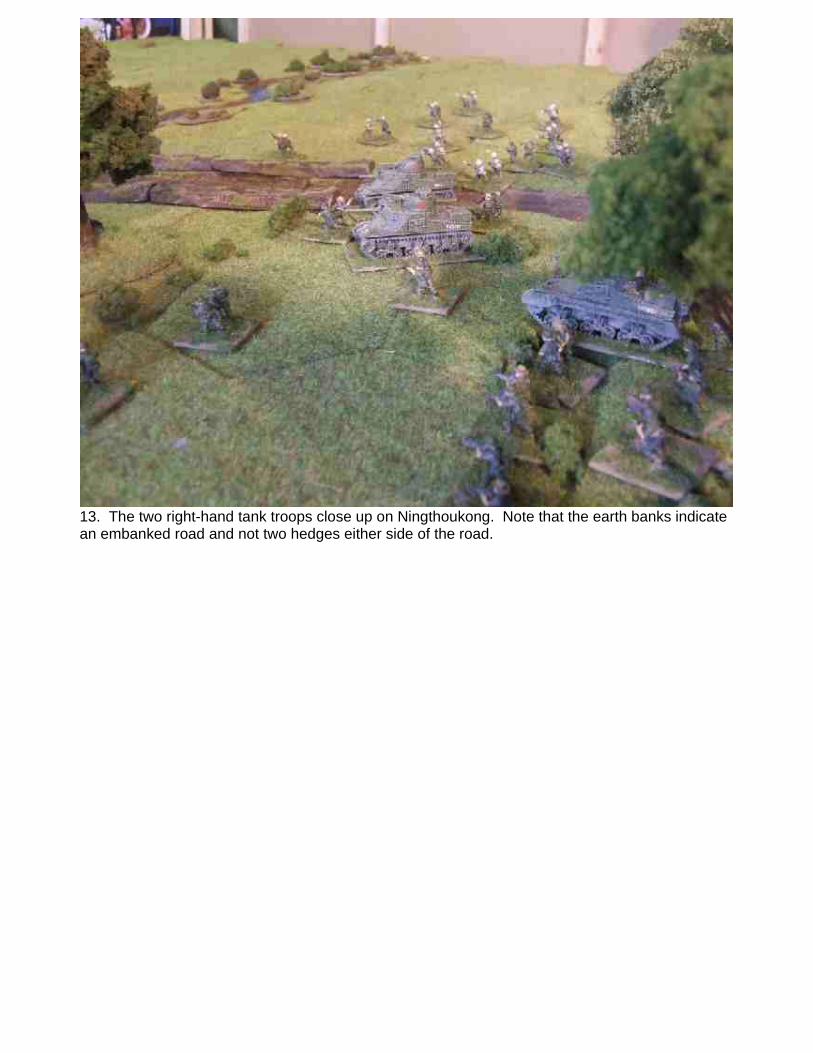
13. The two right-hand tank troops close up on Ningthoukong. Note that the earth banks indicate an embanked road and not two hedges either side of the road.
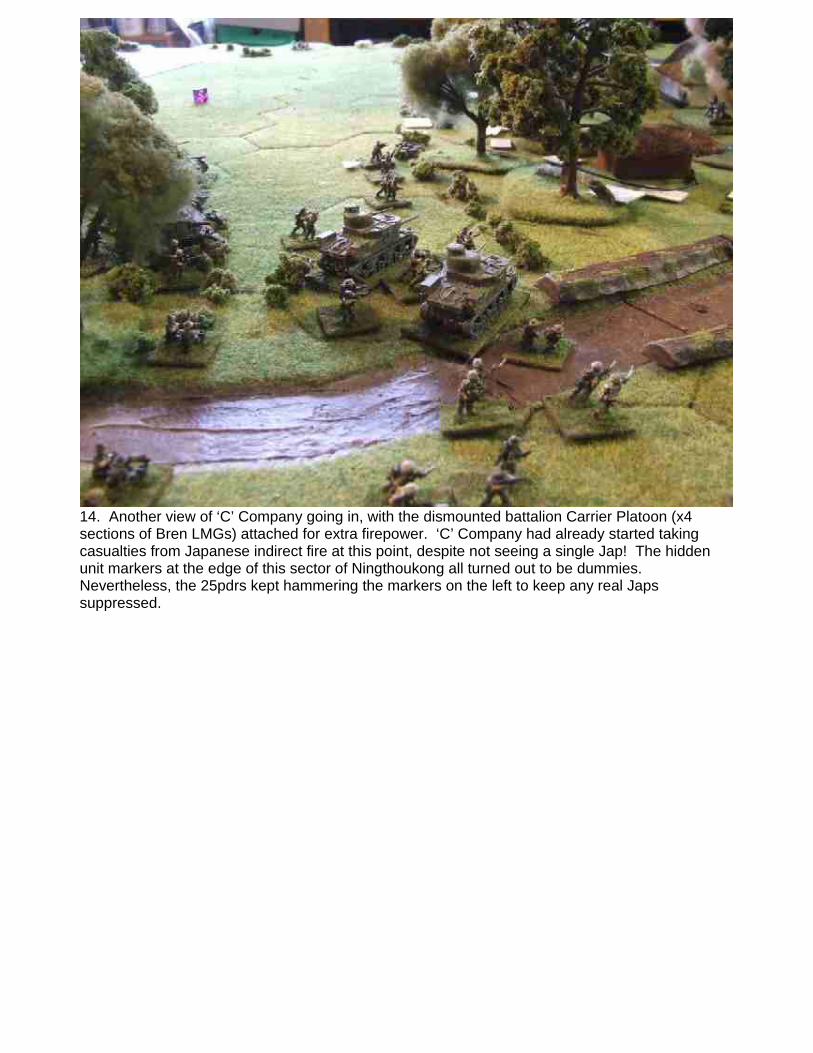
14. Another view of ‘C’ Company going in, with the dismounted battalion Carrier Platoon (x4 sections of Bren LMGs) attached for extra firepower. ‘C’ Company had already started taking casualties from Japanese indirect fire at this point, despite not seeing a single Jap! The hidden unit markers at the edge of this sector of Ningthoukong all turned out to be dummies. Nevertheless, the 25pdrs kept hammering the markers on the left to keep any real Japs suppressed.
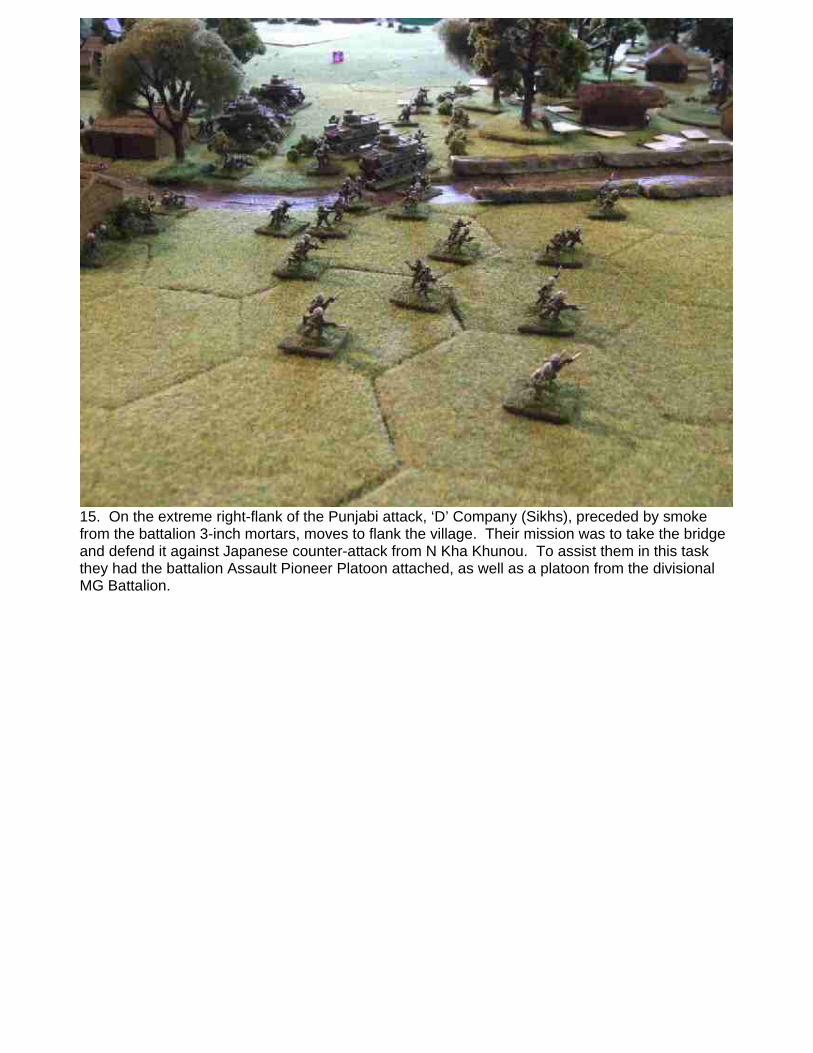
15. On the extreme right-flank of the Punjabi attack, ‘D’ Company (Sikhs), preceded by smoke from the battalion 3-inch mortars, moves to flank the village. Their mission was to take the bridge and defend it against Japanese counter-attack from N Kha Khunou. To assist them in this task they had the battalion Assault Pioneer Platoon attached, as well as a platoon from the divisional MG Battalion.
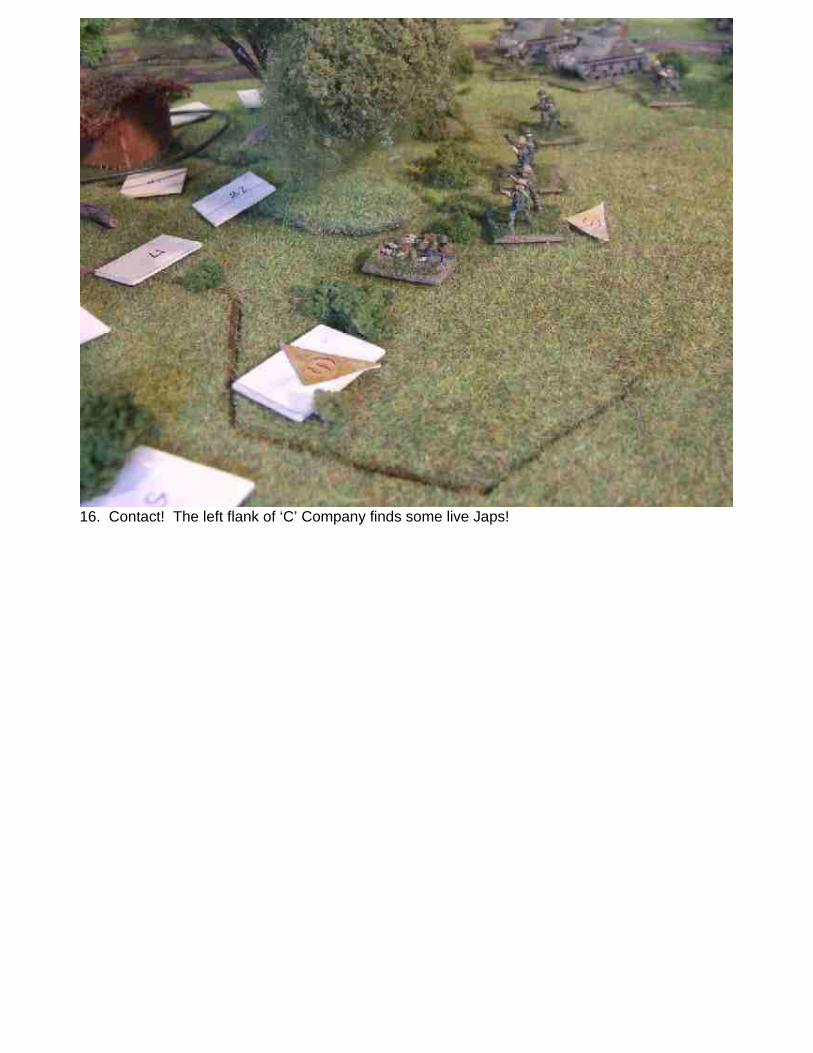
16. Contact! The left flank of ‘C’ Company finds some live Japs!
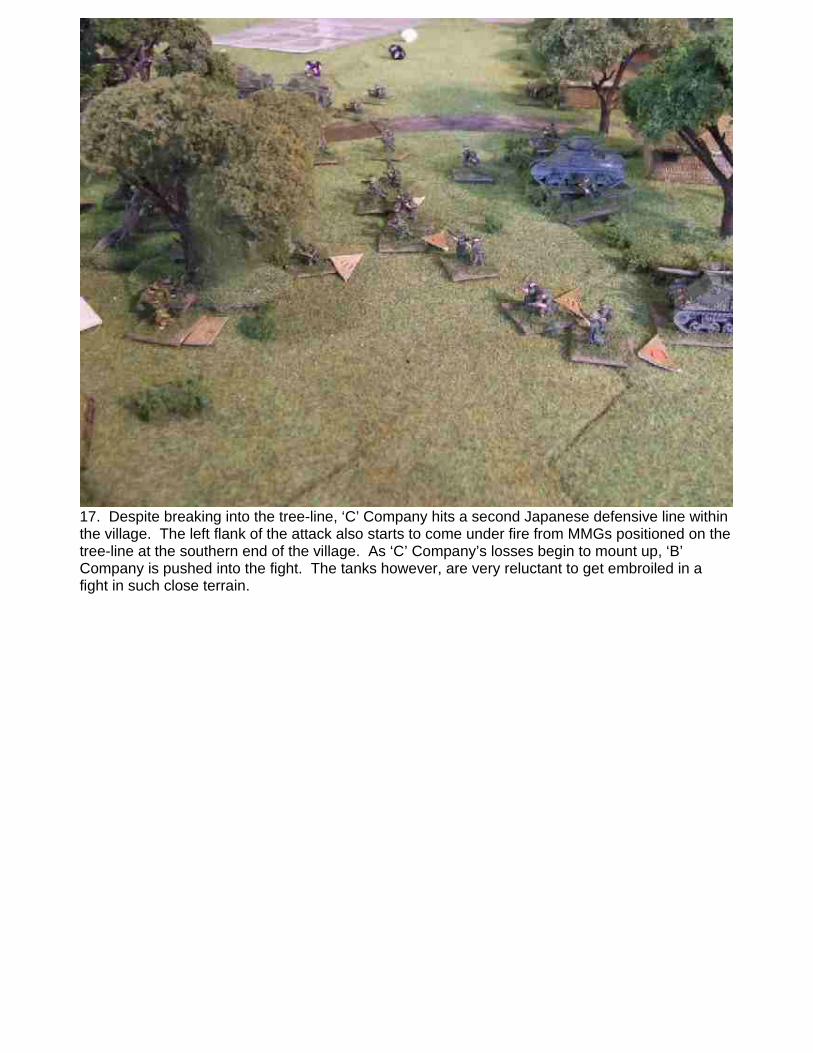
17. Despite breaking into the tree-line, ‘C’ Company hits a second Japanese defensive line within the village. The left flank of the attack also starts to come under fire from MMGs positioned on the tree-line at the southern end of the village. As ‘C’ Company’s losses begin to mount up, ‘B’ Company is pushed into the fight. The tanks however, are very reluctant to get embroiled in a fight in such close terrain.
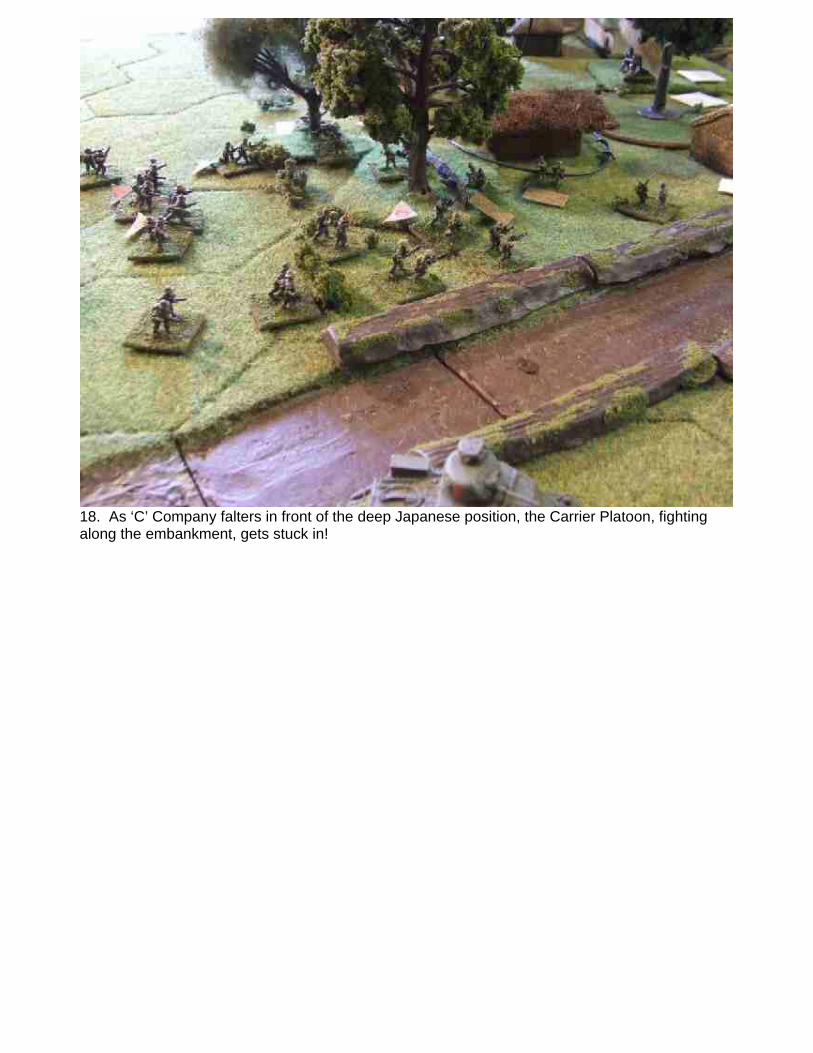
18. As ‘C’ Company falters in front of the deep Japanese position, the Carrier Platoon, fighting along the embankment, gets stuck in!
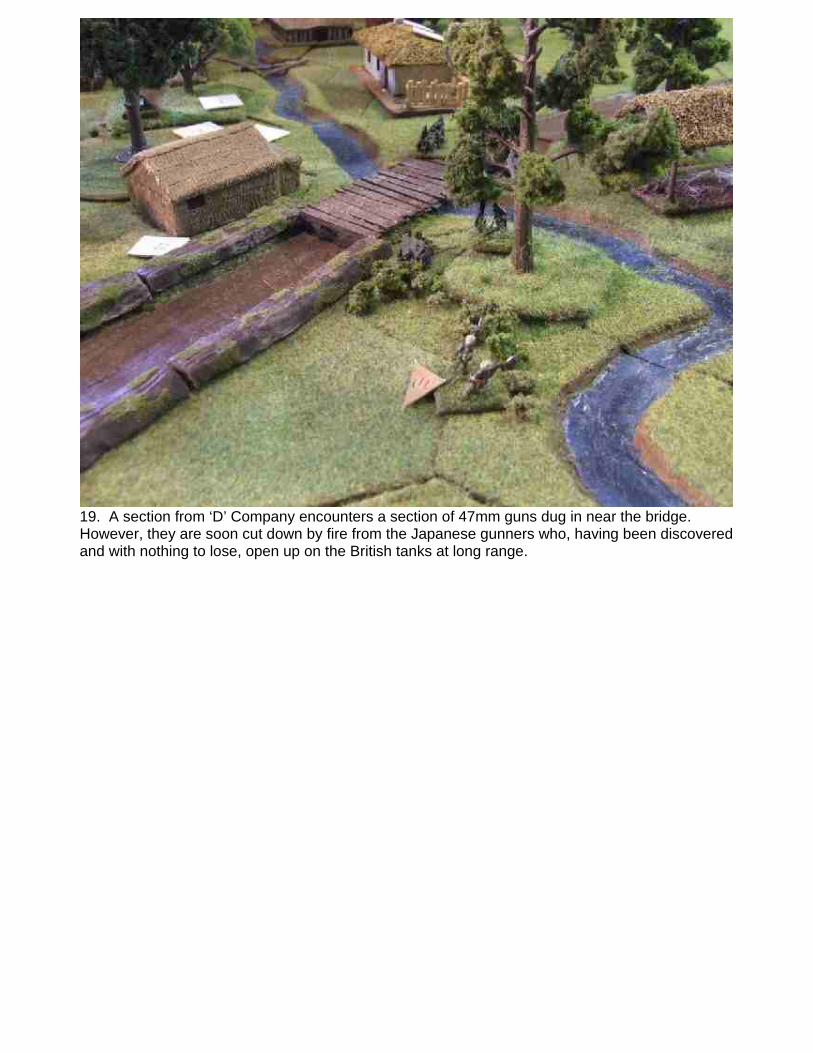
19. A section from ‘D’ Company encounters a section of 47mm guns dug in near the bridge. However, they are soon cut down by fire from the Japanese gunners who, having been discovered and with nothing to lose, open up on the British tanks at long range.
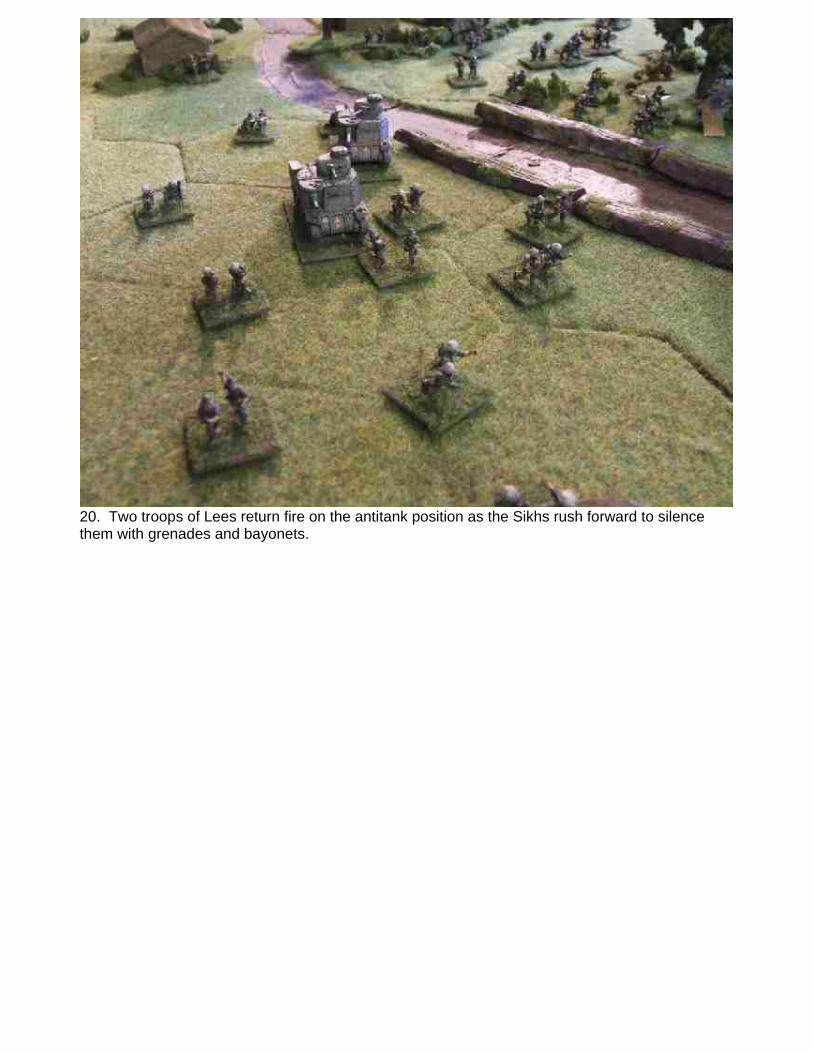
20. Two troops of Lees return fire on the antitank position as the Sikhs rush forward to silence them with grenades and bayonets.
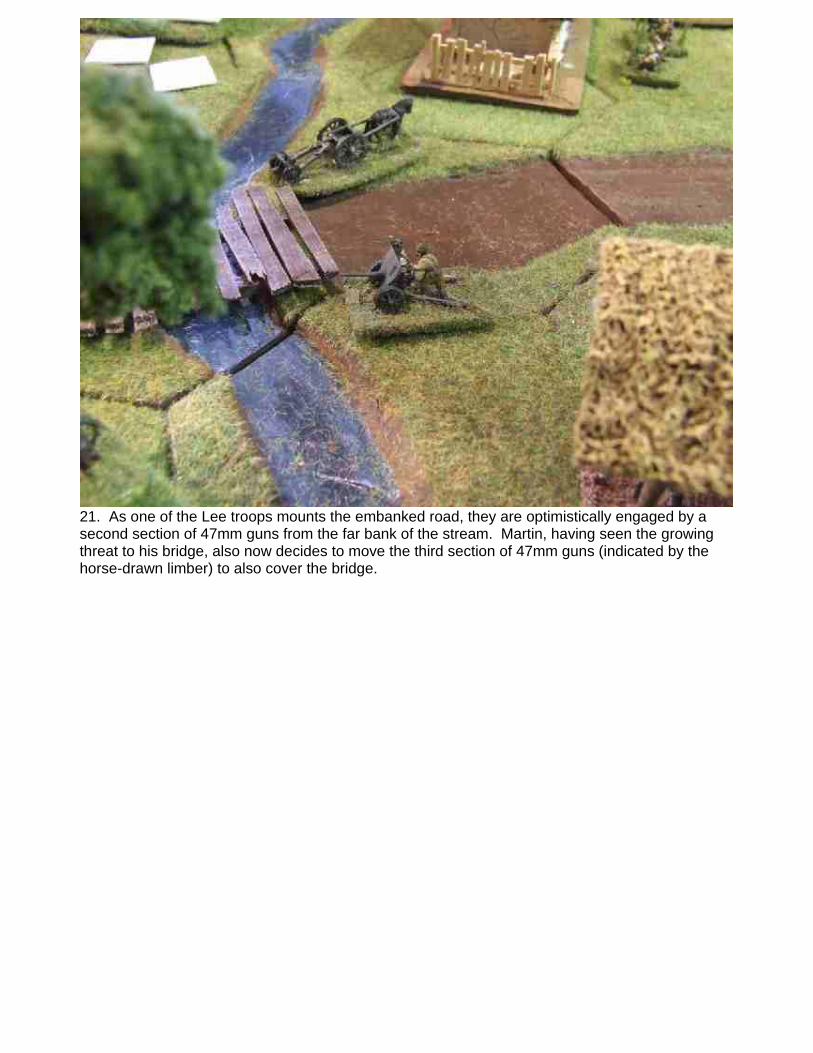
21. As one of the Lee troops mounts the embanked road, they are optimistically engaged by a second section of 47mm guns from the far bank of the stream. Martin, having seen the growing threat to his bridge, also now decides to move the third section of 47mm guns (indicated by the horse-drawn limber) to also cover the bridge.
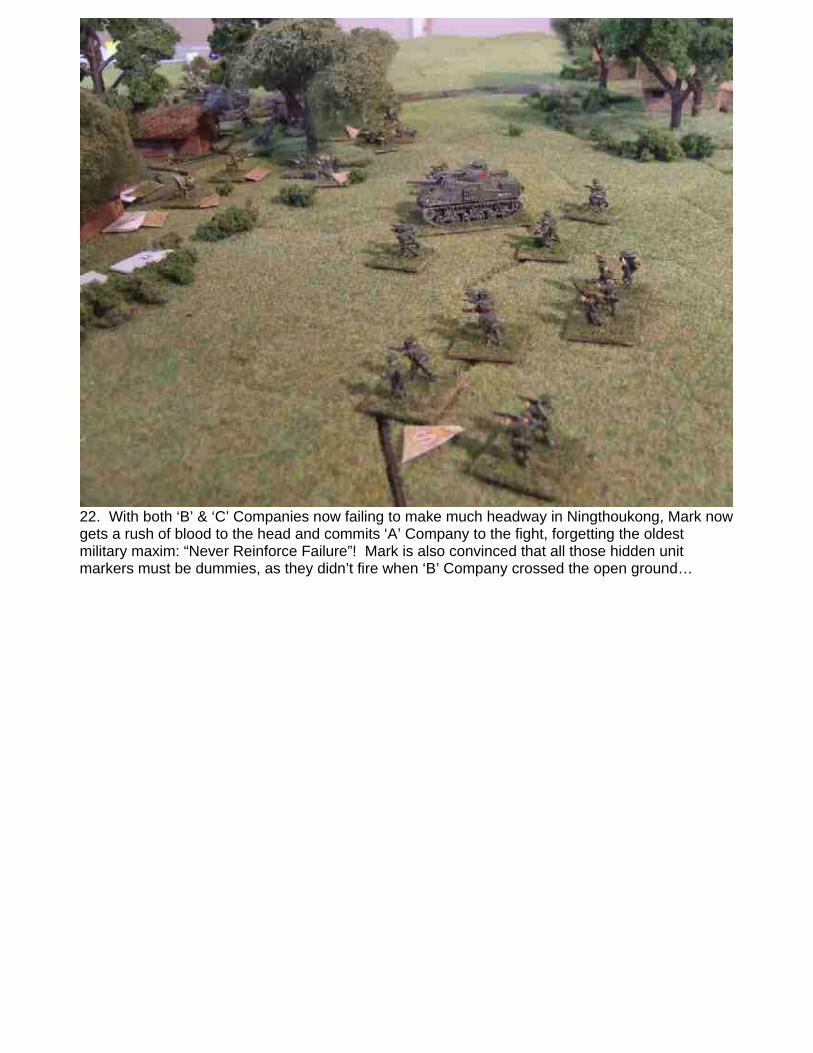
22. With both ‘B’ & ‘C’ Companies now failing to make much headway in Ningthoukong, Mark now gets a rush of blood to the head and commits ‘A’ Company to the fight, forgetting the oldest military maxim: “Never Reinforce Failure”! Mark is also convinced that all those hidden unit markers must be dummies, as they didn’t fire when ‘B’ Company crossed the open ground…
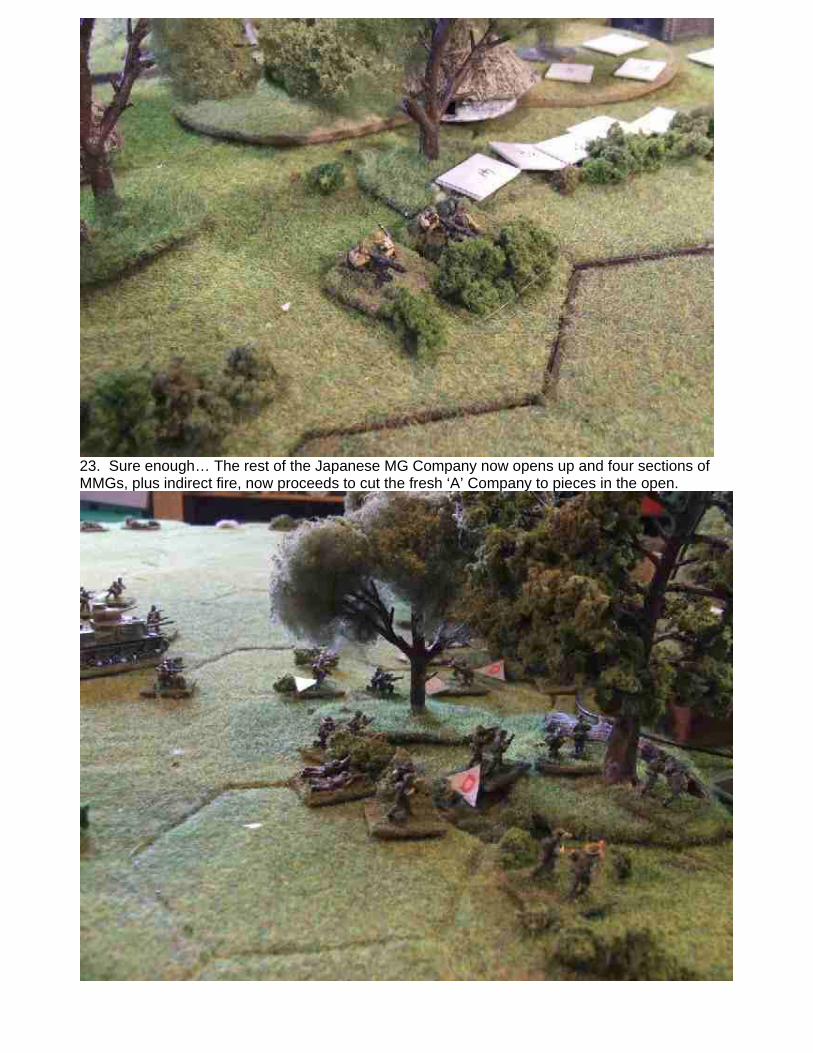
23. Sure enough… The rest of the Japanese MG Company now opens up and four sections of MMGs, plus indirect fire, now proceeds to cut the fresh ‘A’ Company to pieces in the open.
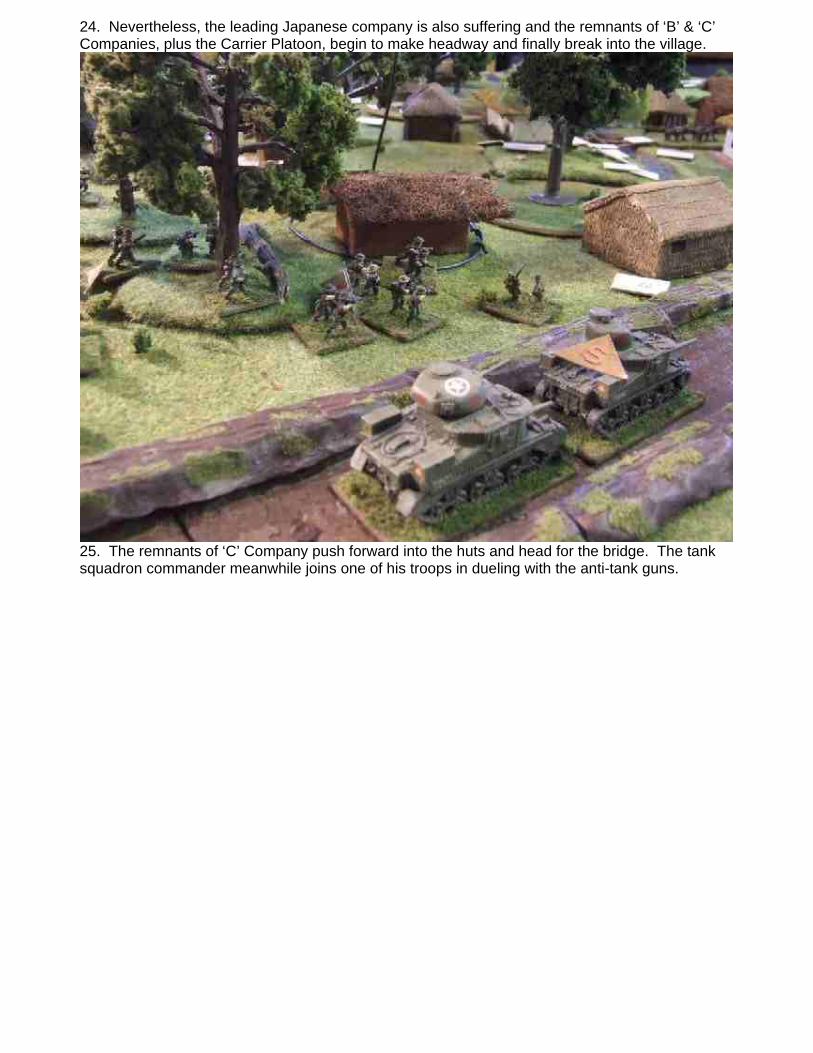
24. Nevertheless, the leading Japanese company is also suffering and the remnants of ‘B’ & ‘C’ Companies, plus the Carrier Platoon, begin to make headway and finally break into the village.
25. The remnants of ‘C’ Company push forward into the huts and head for the bridge. The tank squadron commander meanwhile joins one of his troops in dueling with the anti-tank guns.
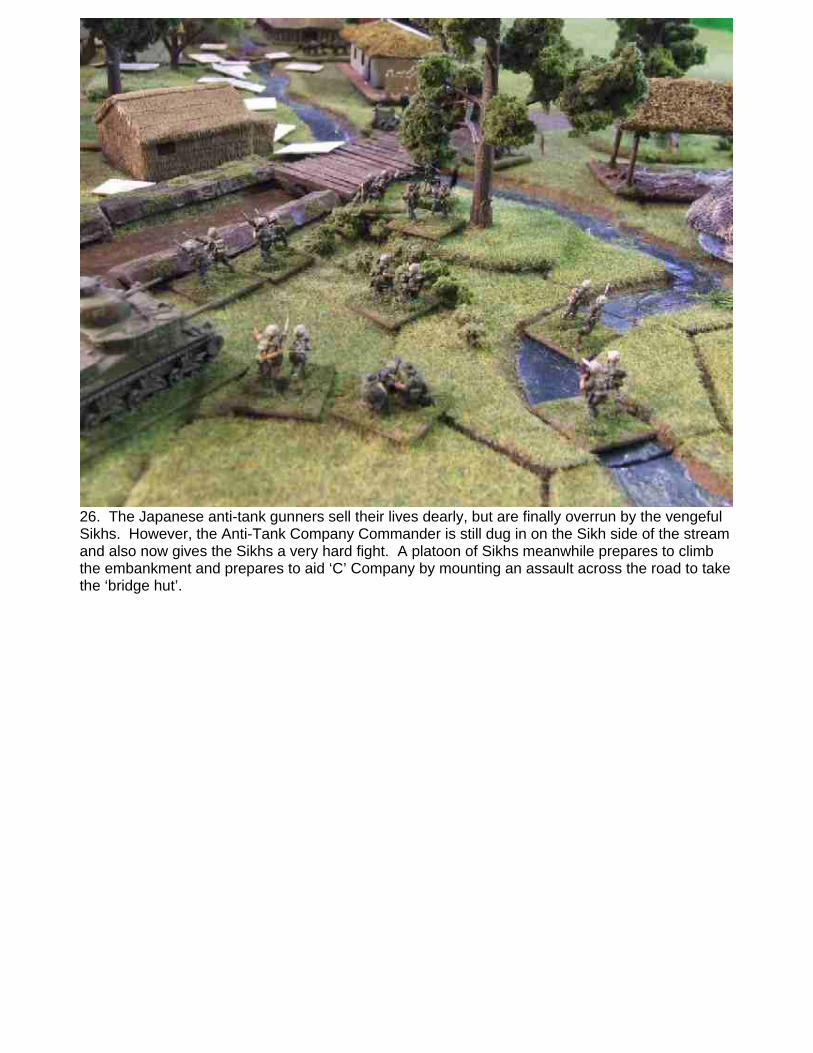
26. The Japanese anti-tank gunners sell their lives dearly, but are finally overrun by the vengeful Sikhs. However, the Anti-Tank Company Commander is still dug in on the Sikh side of the stream and also now gives the Sikhs a very hard fight. A platoon of Sikhs meanwhile prepares to climb the embankment and prepares to aid ‘C’ Company by mounting an assault across the road to take the ‘bridge hut’.
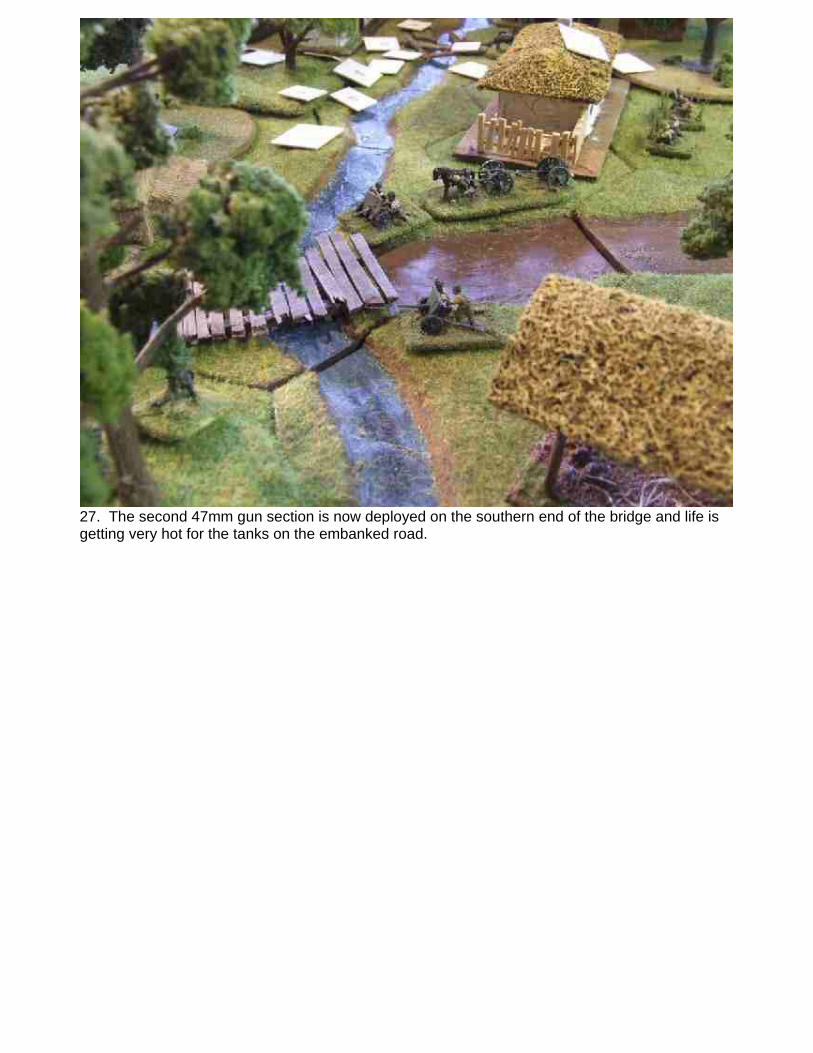
27. The second 47mm gun section is now deployed on the southern end of the bridge and life is getting very hot for the tanks on the embanked road.
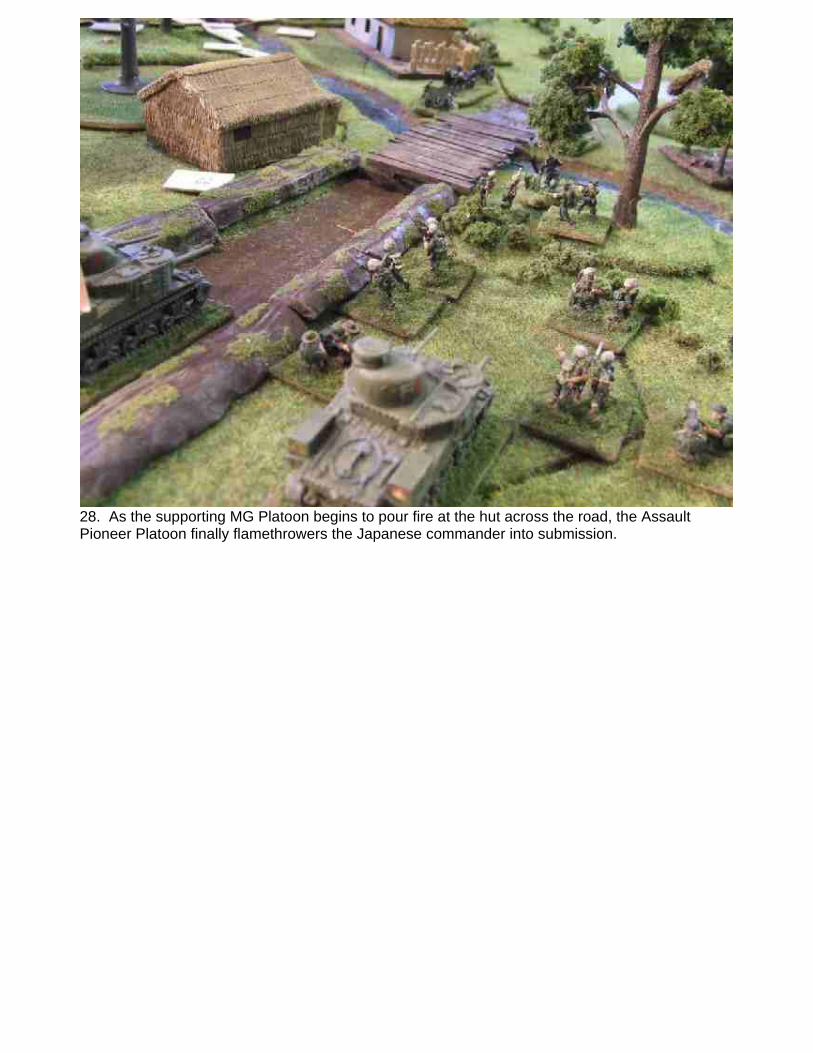
28. As the supporting MG Platoon begins to pour fire at the hut across the road, the Assault Pioneer Platoon finally flamethrowers the Japanese commander into submission.
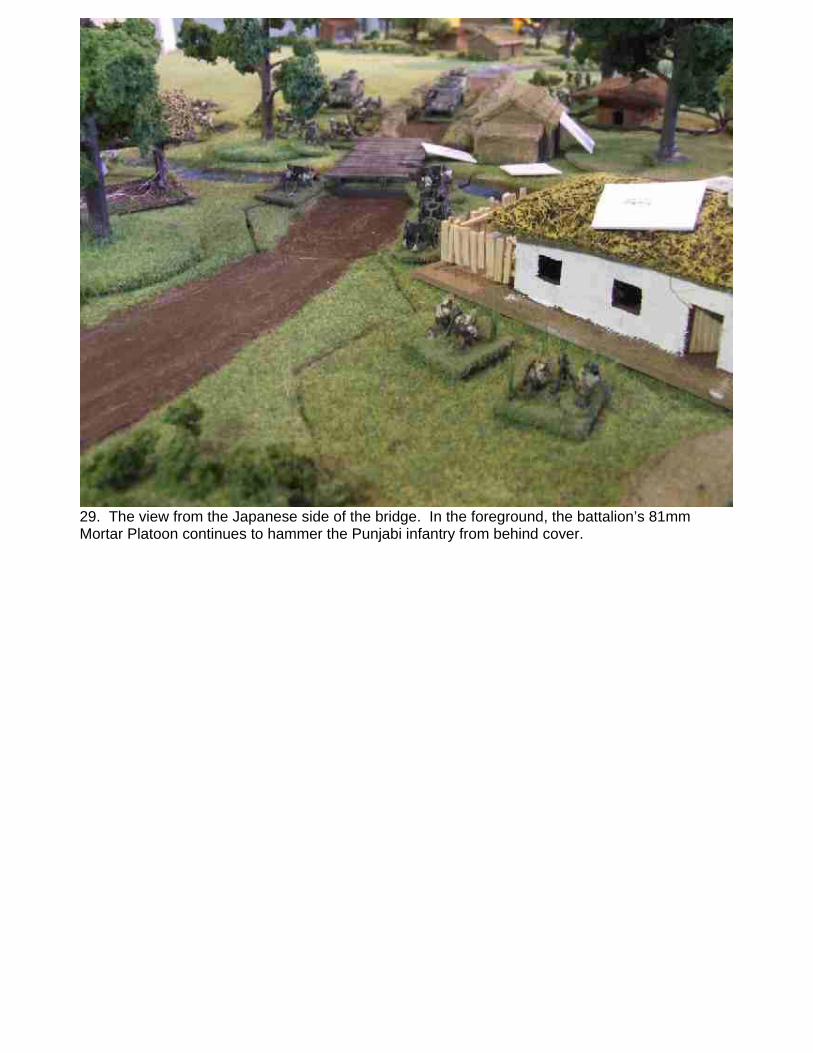
29. The view from the Japanese side of the bridge. In the foreground, the battalion’s 81mm Mortar Platoon continues to hammer the Punjabi infantry from behind cover.
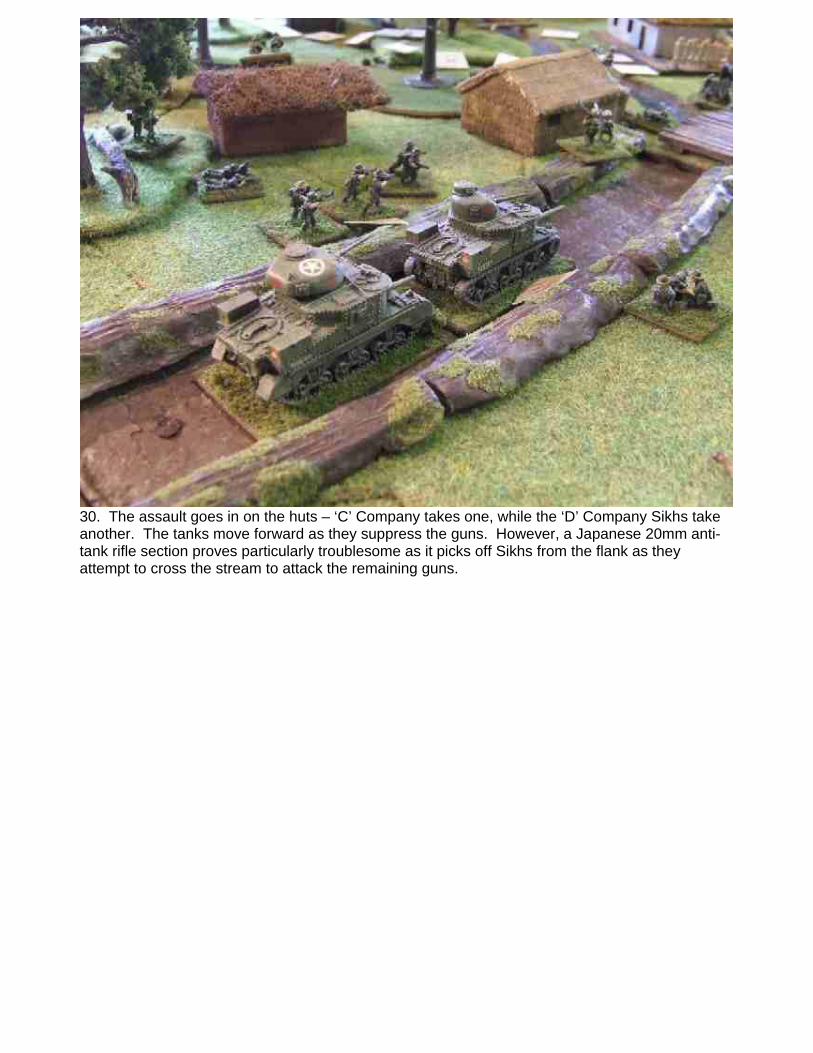
30. The assault goes in on the huts – ‘C’ Company takes one, while the ‘D’ Company Sikhs take another. The tanks move forward as they suppress the guns. However, a Japanese 20mm anti-tank rifle section proves particularly troublesome as it picks off Sikhs from the flank as they attempt to cross the stream to attack the remaining guns.
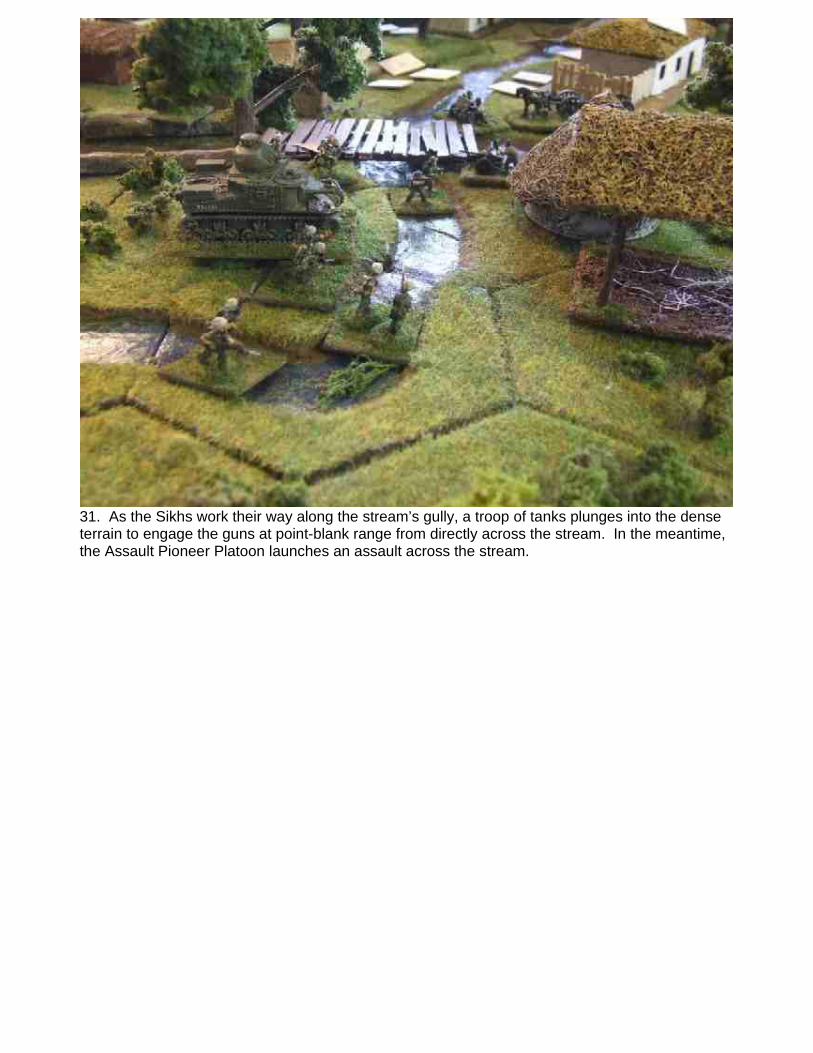
31. As the Sikhs work their way along the stream’s gully, a troop of tanks plunges into the dense terrain to engage the guns at point-blank range from directly across the stream. In the meantime, the Assault Pioneer Platoon launches an assault across the stream.
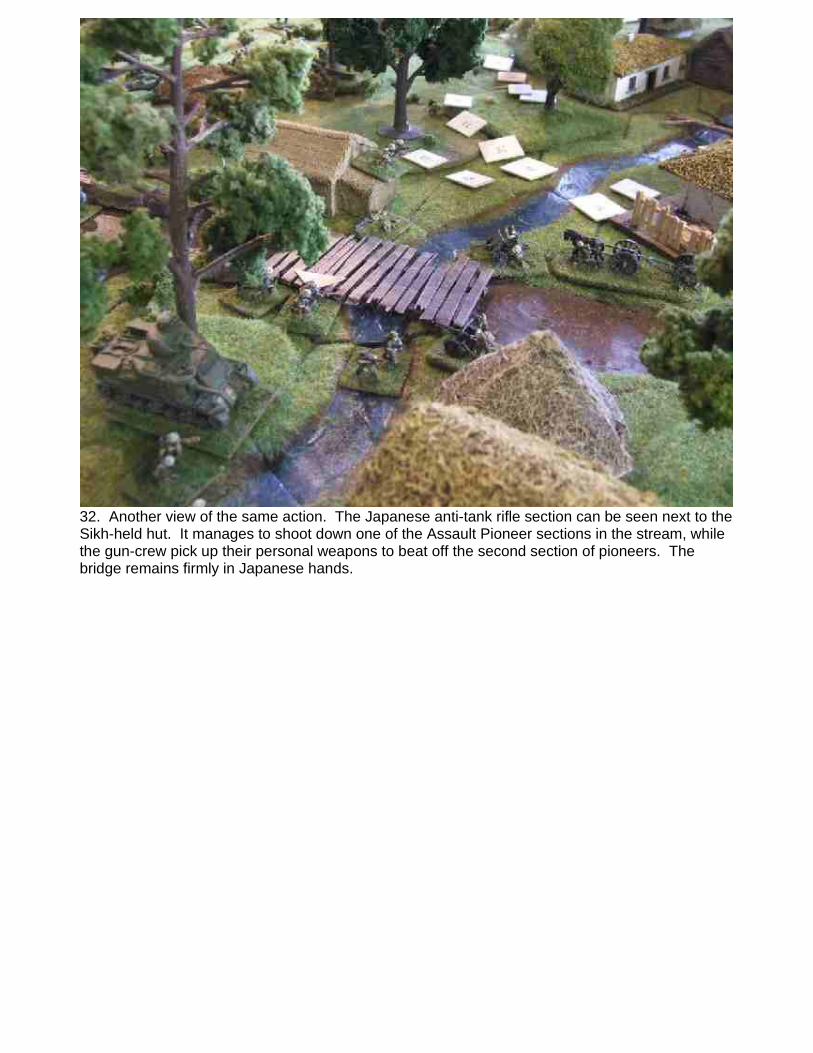
32. Another view of the same action. The Japanese anti-tank rifle section can be seen next to the Sikh-held hut. It manages to shoot down one of the Assault Pioneer sections in the stream, while the gun-crew pick up their personal weapons to beat off the second section of pioneers. The bridge remains firmly in Japanese hands.
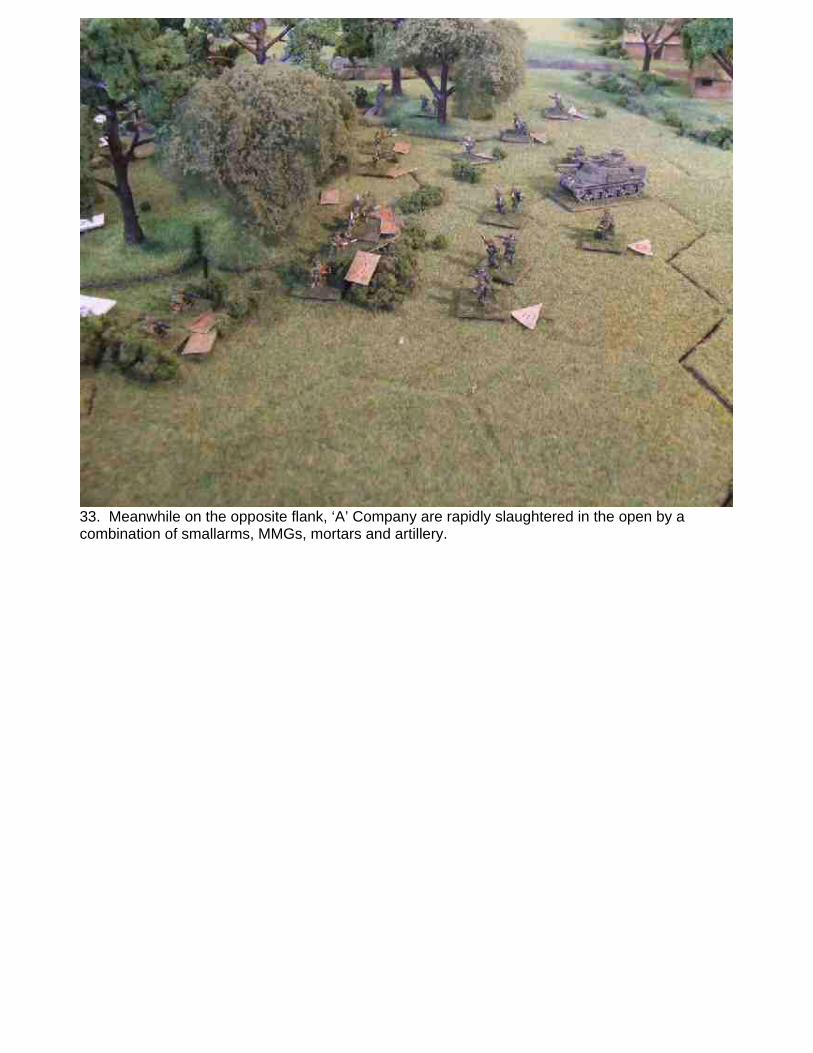
33. Meanwhile on the opposite flank, ‘A’ Company are rapidly slaughtered in the open by a combination of smallarms, MMGs, mortars and artillery.
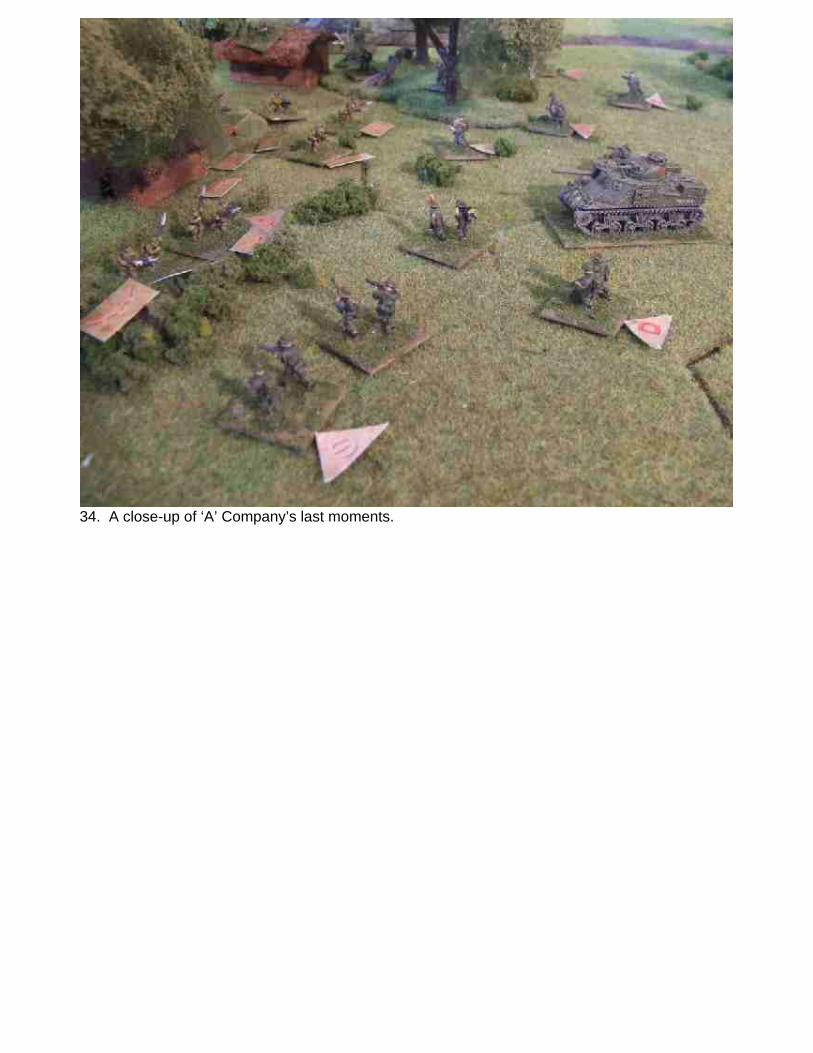
34. A close-up of ‘A’ Company’s last moments.
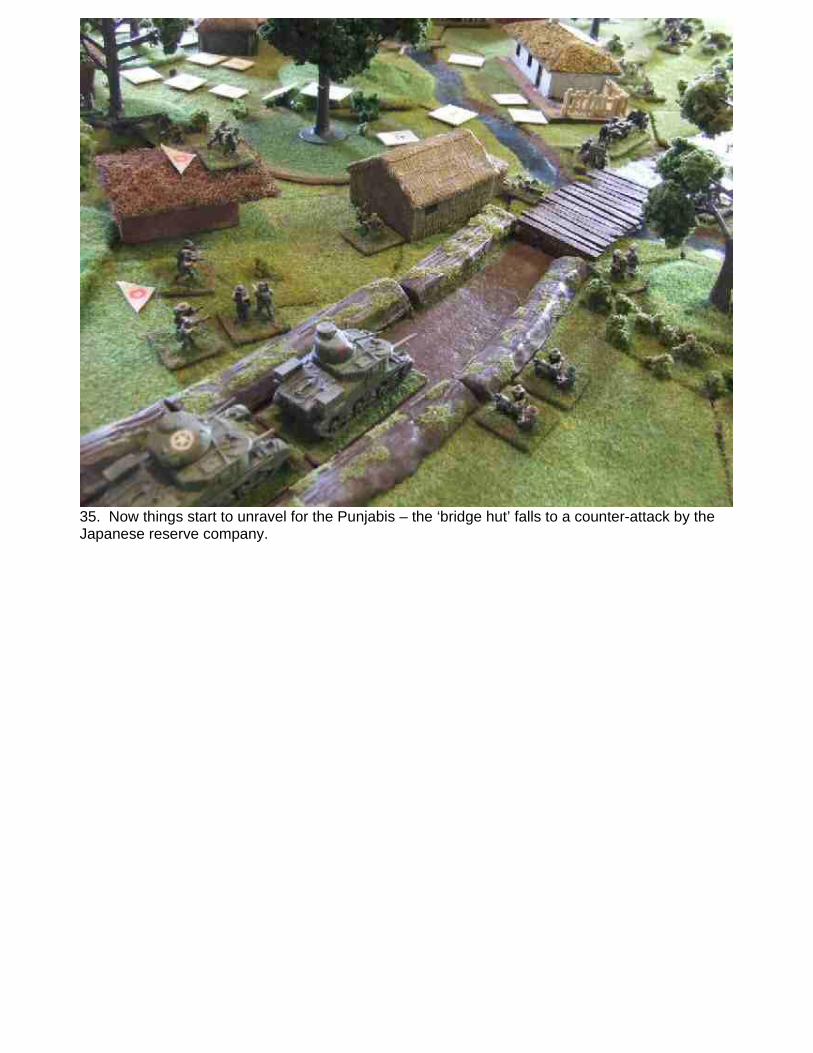
35. Now things start to unravel for the Punjabis – the ‘bridge hut’ falls to a counter-attack by the Japanese reserve company.
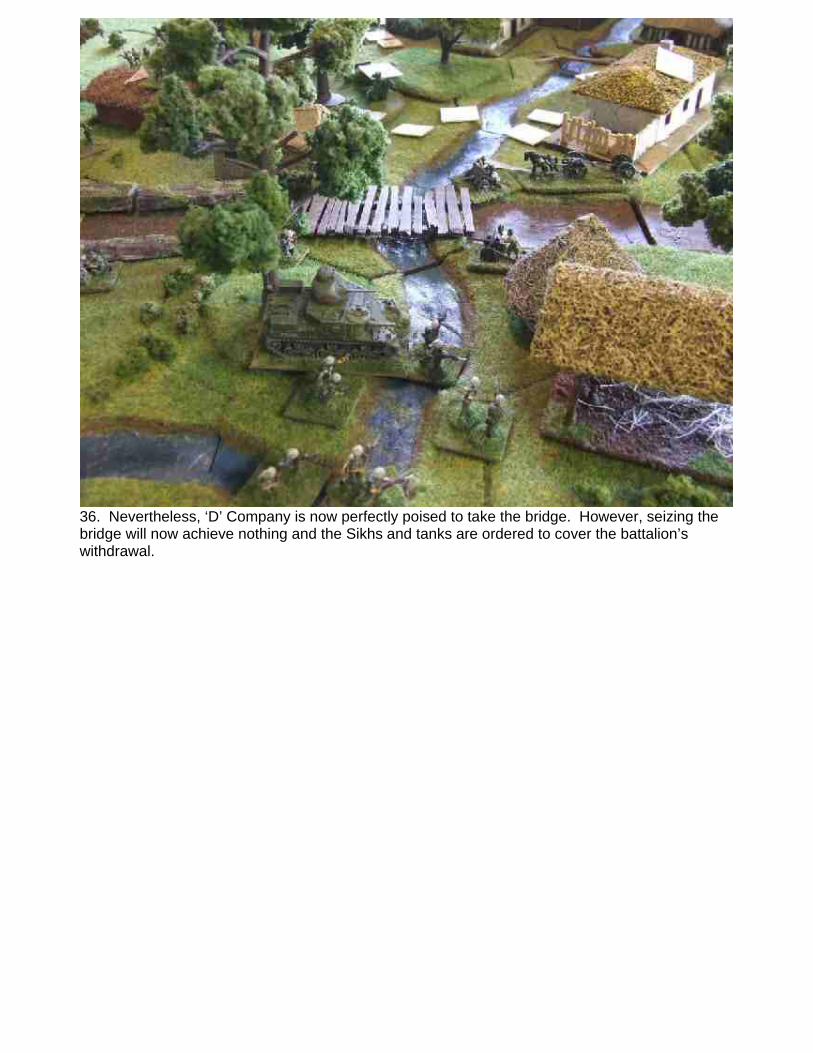
36. Nevertheless, ‘D’ Company is now perfectly poised to take the bridge. However, seizing the bridge will now achieve nothing and the Sikhs and tanks are ordered to cover the battalion’s withdrawal.
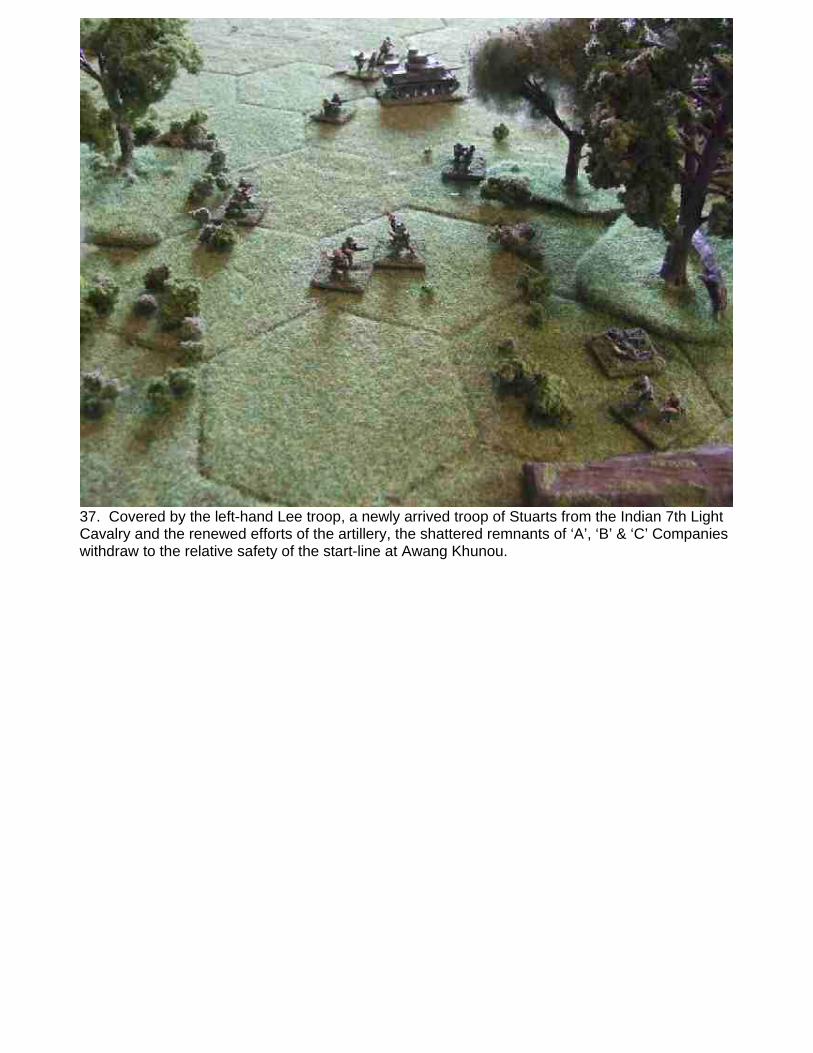
37. Covered by the left-hand Lee troop, a newly arrived troop of Stuarts from the Indian 7th Light Cavalry and the renewed efforts of the artillery, the shattered remnants of ‘A’, ‘B’ & ‘C’ Companies withdraw to the relative safety of the start-line at Awang Khunou.

38. The Lee troop and the artillery saturate the tree-line with fire as the pitiful remnants of ‘A’ Company fall back.
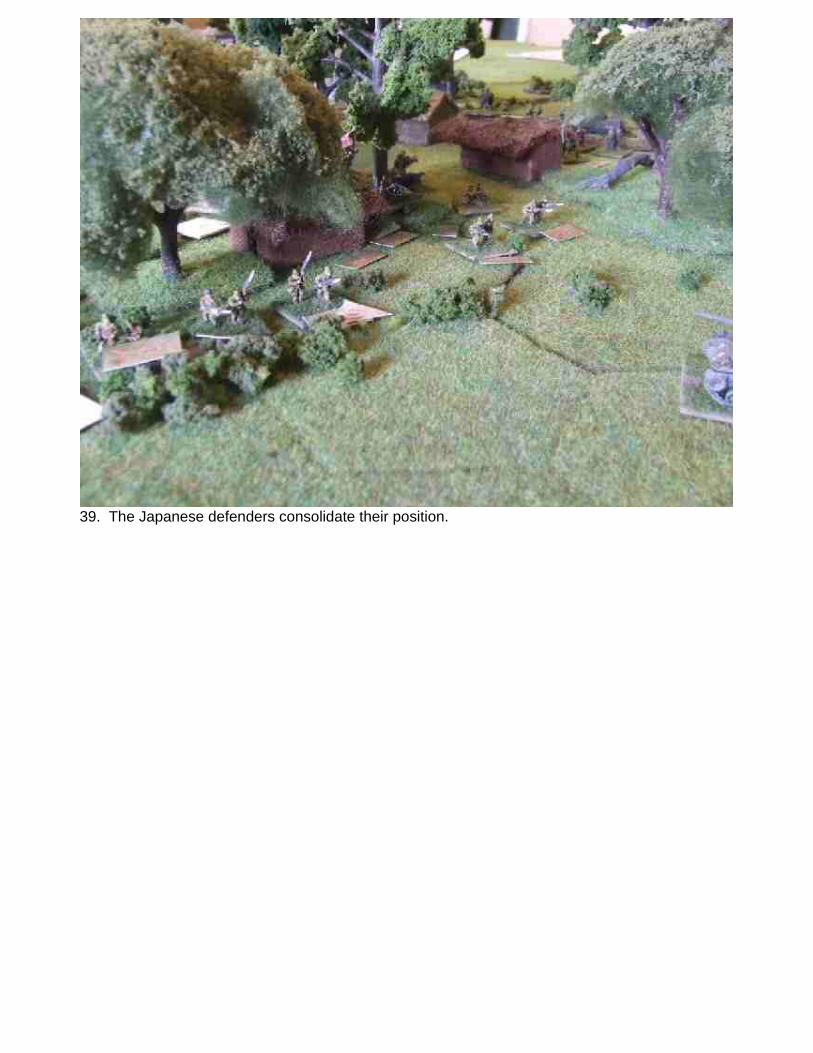
39. The Japanese defenders consolidate their position.
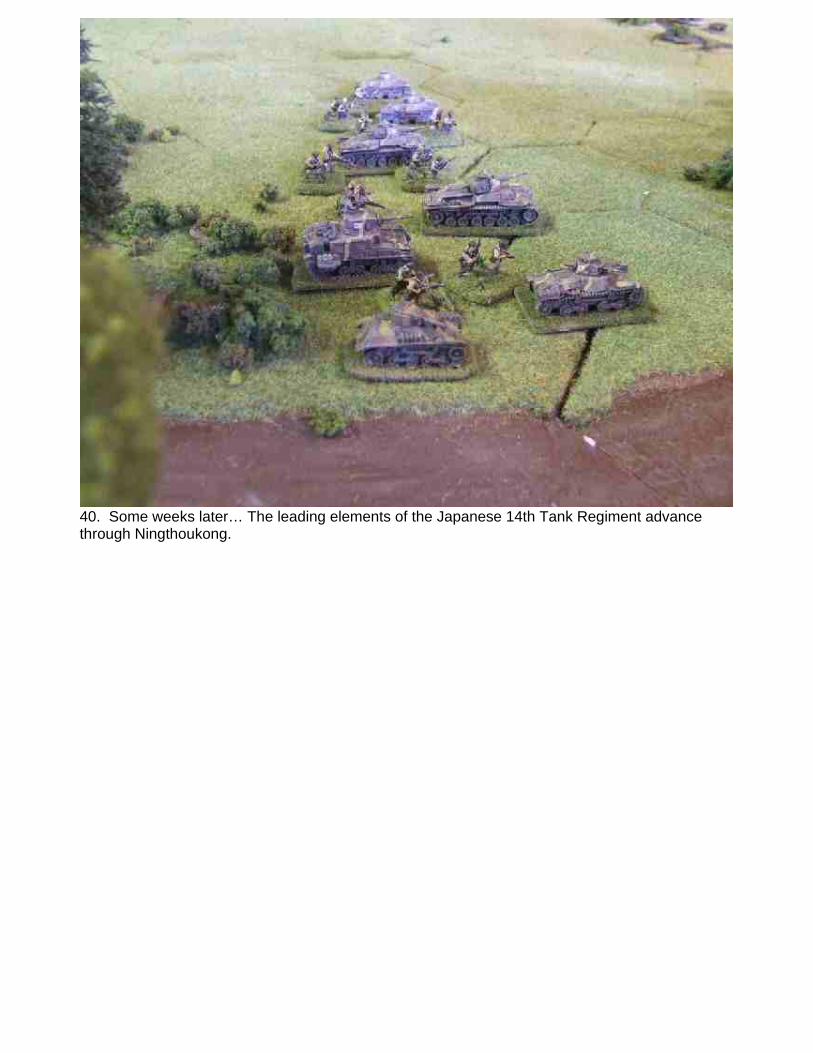
40. Some weeks later… The leading elements of the Japanese 14th Tank Regiment advance through Ningthoukong.
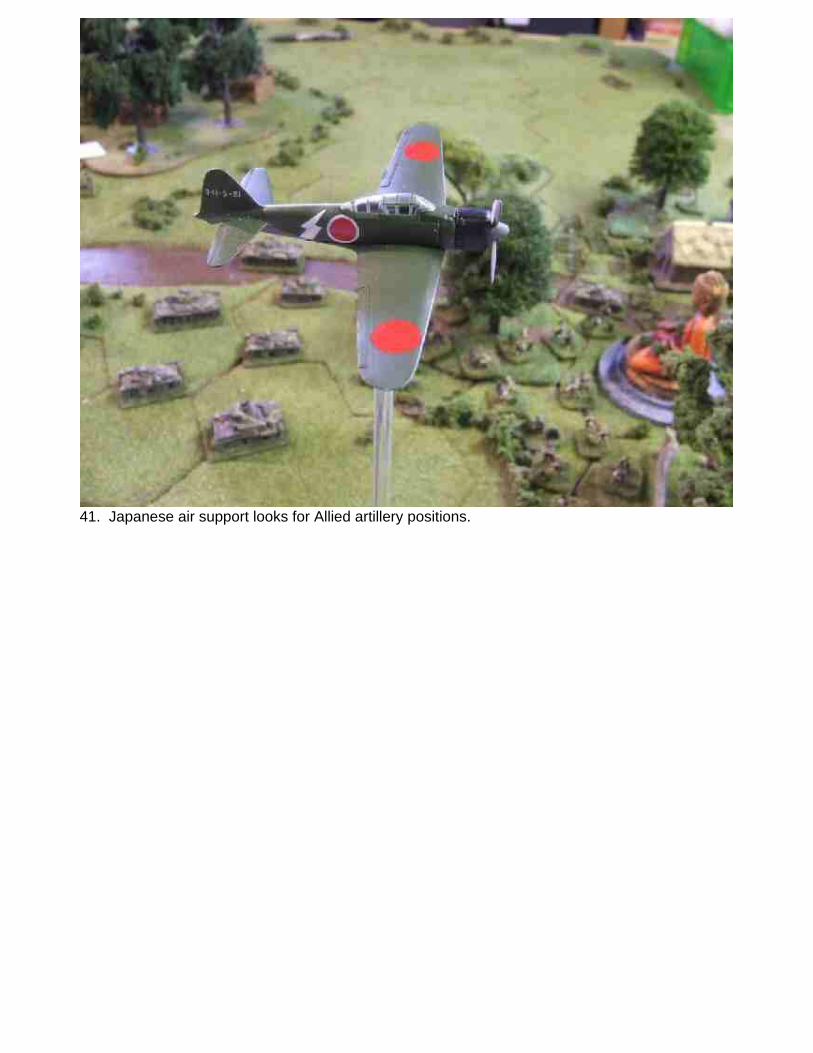
41. Japanese air support looks for Allied artillery positions.
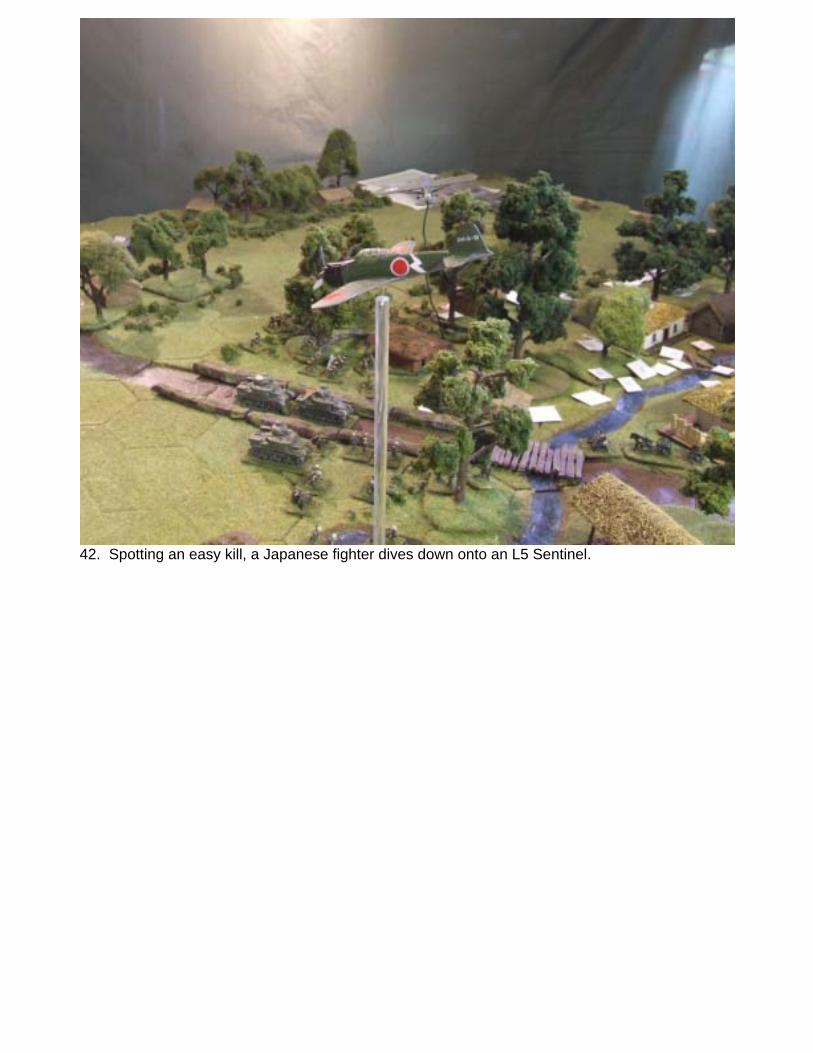
42. Spotting an easy kill, a Japanese fighter dives down onto an L5 Sentinel.