Embed Size (px)
Citation preview

Finger Tips
This Brain Break is usually easier on one side or the other. Try it out and see.
1. Stand up.
2. Make an X with your arms out in front of you.
Move your palms to face you with your fingers
up in the air. Lock your thumbs together.
3. With your index finger on your right hand, try
to touch each of the finger tips of your other
hand, one by one.
4. Now take your middle finger on your right hand
and do the same thing and touch the finger tips
of your other hand one by one.
5. Do this same process for your ring finger and
pinkie on your right hand.
6. Now do the process for your left hand index,
middle, ring and pinkie fingers.

ABC/123 Brain Break
1. Stand Up
2. Use your index finger and write a large "A" in the air out in front of you and at the same time say out loud the number "1".
3. Now use your index finger and write a large "B" in the air out in front of you and at the same time say out loud the number "2".
4. Continue writing the letters in the air and saying the numbers out loud as far as you can go or until the end of the alphabet.
Extra Challenge: Alternate saying the letter and then the number.
For another challenge, have them write the letters in the air with their weak hand.

The Crab
I call it the Crab. This is an individual Brain Break
1. Stand Up
2. Put your arms out in front of you and match
your fingers from each hand together and then
match your thumbs together.
3. Now put lower your middle fingers so that the
knuckles touch. Keep them flat against each
other.
4. Now un-touch and retouch your thumbs.
5. Now un-touch and retouch your index fingers.
6. Now un-touch and retouch your ring fingers.
7. Lastly, un-touch and retouch your pinkies.
Good luck. This one was difficult

ITSY BITSY SPIDER Energizing Brain Break
You know the old rhyme that goes "The itsy bitsy spider went up the water spout..." 1. Stand up.
2. Put your hands out in front of you.
3. Take your right hand thumb and touch it to your left
hand index finger.
4. Now take your right hand index finger and touch it to
your left hand thumb.
5. Rotate both hands to move upward so that you can
now reach your right hand thumb to your left hand
index finger. Then keep rotating your fingers and
thumbs so that you are "walking up the water spout"
6. Now do this behind your back. Try going "down the
spout" as well.
7. Once you've mastered this, then do the same process
with your index finger and your pinkie. This is tough.

Blink
This brain break takes just 45 seconds to do, and the students love it.
1. Stand Up.
2. Blink your left eye and snap your right
hand finger and thumb at the same
time.
3. Now blink your right eye and snap your
left hand finger and thumb at the same
time.
4. Go back and forth as fast as you can

The Waiter
This brain break will see how agile your arm is.
Brain Breaks are refreshing and help to get your
productivity back up to par.
1. Stand up
2. Lay a piece of paper or a spiral notebook on
the top of your right hand without grabbing it.
3. While balancing the spiral on your hand, tuck it
between your right arm and waist so that the
spiral will now be behind you.
4. Flair your arm out away from you. Again, keep
the spiral balanced on top of your hand.
5. Keep turning your arm so that the spiral will
get back to the original spot.
6. If you have mastered this, try your other hand.

Elbow to Knee Taps
Elbow to Knee Tap Patterns This is a stretching activity where you will be tapping your elbow to your knee in different patterns. 1. Stand up. 2. Hold your ears with your hands. 3. Tap your right elbow to your left knee. Tap your left elbow to your right knee. 4. You will be tapping each knee alternately using this pattern: 1, 1, 2. For instance; 1 tap (right elbow to left knee), 1 tap (left elbow to right knee), 2 taps (right elbow to left knee), and then back to 1 tap (left elbow to right knee), 1 tap (right elbow to left knee), 2 taps (left elbow to right knee). Do this as fast as you can. Be creative with your patterns. Use a pattern like 3,1,2 taps Elbow to Knee Stretch This is a stretching activity where you will touch your elbow to your knee. 1. Stand up. 2. Hold your ears with your hands. 3. Tap your right elbow to the top of your left knee. Now touch your left elbow to your right knee. That is one repetition. Do 5 repetitions. 4. Bring your left knee up and have your right elbow tap the top of your knee and then tap the side of the same knee. Now do this same thing with the other knee and elbow. Do 5 repetitions.

Hand Shake #2
You will be doing a lengthy handshake with your partner. 1. Stand up and find a partner. Decide who is A and who
is B.
2. Tap your right elbows together. Tap your left elbows
together.
3. Person A: Give a crossing over low side five to your
partner with your right hand. (right hand to right
hand) Now do a fist bump with your right hand. (A fist
bump is making a fist, and lightly touching finger
sections that are closest to the wrist) Person B: Give
a crossing over low side five to your partner with
your left hand and then do a fist bump with your left
hand.
4. Bump your right shoulders together. Bump your left
shoulders together.
5. Person A: Make an X in the air with your right arm
over your left. Person B: Make an X in the air with
your left arm over your right. Now while slapping
each other’s hands move them together back to their
correct side.
6. Now do a double fist bump. (Opposite hands will be
touching)
7. Repeat this handshake over and over as fast as you
can.

Pretzel Stretch with your Fists
You will be stretching and outlining a pretzel with your fists. 1. Stand up.
2. Put your hands clasped together in front of you
to make a fist.
3. Imagine that your fist is at one of the end
points of the pretzel. Now keeping your hands
together, draw the outline of a pretzel. You
will be stopping and reversing directions at
each end point of the pretzel. Try to do this as
fast as you can.
4. Now outline a huge pretzel that touches the
ground and stretches to over your head in the
same way as before.


Palm Tapping
Energizing Brain Break
You will be tapping your opposite hand palm while keeping a pattern.
1. Stand up.
2. Put your hands in front of you so that your fingers
are pointing straight forward and your palms are
facing up.
3. You will be repeating a tapping pattern: two taps,
three taps, one tap over and over while you
alternate hands.
4. Take your ring finger on your left hand and tap twice
on your right palm. Now take your pinkie finger on
your right hand and tap three times on your left
palm. Again take your left ring finger and tap once
on your right palm. Now we start the pattern again
and take the right pinkie and tap two times on the
left palm. And so on…
5. Sometimes it is helpful to say the words out loud.
6. Try to do this as fast as possible keeping the same
pattern.
7. If you master this then pick different fingers for each
hand.
Be creative with your patterns. Use a pattern like
2,3,1,3,2 taps

Hand Shake #1
You will be doing a lengthy handshake with your partner.
1. Stand up and find a partner. Decide who is A and
who is B.
2. Shake right hands. Shake left hands.
3. Now do a right hand fist bump, and then a left hand
fist bump. (A fist bump is making a fist, and lightly
touching finger sections that are closest to the wrist)
4. Now do a right hand hammer tap. Person A will put
their right fist out. Person B will lightly tap A with
the bottom of their fist. Now Person A will lightly
touch the bottom of their fist to person B’s fist. Now
do a left hand hammer tap.
5. Now while crossing your arms do a high ten.
6. Now do a double fist bump. (Opposite hands will be
touching)
7. Lastly do a regular high ten.
8. Repeat this handshake over and over as fast as you
can.
Be creative and make up your own handshake.

I Bet You Can't Do This!
Here are three activities that most people can’t do. All of these are done from a standing position. Students enjoy trying to do them. About 1 in 10 can do these. Put your arm out in front of you with your index finger extended. Try to spin your wrist slowly in one direction and your index finger in the opposite direction. Roll your neck in one direction while at the same time moving your tongue around the inside of your lips in the other direction. While spinning your right toe in a clockwise direction take your right hand index finger and draw the outline of a 6 in the air.

Let it RAIN
Let it Rain is a fun activity for the whole class. Everyone works together and the sound is amazing. 1. Stand up.
2. The conductor will model the class through the rain process.
3. Here is the progression that the conductor will take. Stage 1: soft circular hand rubbing Stage 2: vigorous back and forth hand rubbing Stage 3: finger snapping Stage 4: thigh tapping Stage 5: foot stomping
4. The class will follow the lead of the conductor. The conductor will take about 5-7 seconds with each stage.
5. The rain will get louder and louder getting to the last stage in which the conductor will lead the 3 separate thunder jumps. Then reverse the stages and the rain will get softer and softer.

Arm Wrap
If you can get your students up and active every 25 minutes it will help their focus and concentration. Brain Breaks are refreshing. This brain break is very spacial. Students will be amazed that they have trouble connecting their fingers together.
1. Stand Up.
2. Put your left arm straight down at your side.
3. Tuck that arm behind your back so that it is
resting on your lower back. It should be bent at
a 90 degree angle.
4. Follow these instructions while closing your
eyes.
A. Take your ring finger and try to touch your
pinkie.
B. Take your middle finger and touch your thumb.
C. Take your pinkie finger and touch your index
finger.
5. Now put your right arm behind your back and
follow A, B, C.

Inch Worm
We should try to get a brain break in every 25 minutes in our classes. Brain Breaks give students a chance to take a break from the regular routine. This is a brain break that I learned while doing physical therapy on my knee.
1. Stand up.
2. Bend down and touch the ground with your
hands. Bend your knees if you need to.
3. Start inching your hands out in front of you.
Your feet remain in place. You will be moving
your hands farther and farther out in front of
you. More and more weight will be on your
hands.
4. Once you have extended yourself as far as you
can go, keep your hands still and start inching
your legs forward until they meet your hands
again. Try to keep your knees straight.
5. Repeat.

"Twisted" Brain Break
This Brain Break will get you twisted up, but will
re-engergize you.
1. Stand up.
2. Put your hand out in front of you and clap and
miss.
3. Put your thumbs down and then put your hands
together.
4. Pull your hands inward rolling them towards you
until your hands are on top and your elbows are near
your side.
5. Roll your shoulders to stretch your back and
neck.
6. Put your right leg over your left.
7. Roll your neck clockwise. (be careful not to fall)
8. Now switch your legs and put your left leg over your
right.
9. Roll your neck counter-clockwise.
10. Spell your first name backwards.
11. Say your last name backwards.

"FIVE" Brain Break Kinesthetic Brain Breaks are something you should try to do every 25 minutes in your classes. In this Brain Break you will work with a partner. In this activity, partners will display the correct number of fingers so that both add to FIVE. 1. Stand up and find a partner. Decide who is A and who is B. 2. Face your partner. 3. Person A will put their arm out in one of the 12 clock positions. For instance, they could put their arm up directly in the air like 12 o’clock. Once their arm is out, they display a number zero to five with their fingers and thumb. 4. Now person B will put their arm out in the opposite direction as person A’s. For instance, since A was up at 12 o’clock, then person B puts their arm out straight down in the 6 o’clock position. Once their arm is out, they display the number of fingers to add to FIVE. 5. Once Person A has led for a while, switch and have person B lead. Try to have students put their arms out in all different directions like the hands of a clock. They should also use different numbers zero to five and use either arm. Students should do this activity as quickly as possible.
Extension: Have student A hold out both hands in various dirctions. Now student B will have to put both hands out at opposite directions with fingers finishing "FIVE" on both hands.

Infinity Sign (Choir Director) We should all try to get our brain and bodies moving every 25 minutes. Make an infinity symbol with your right hand out in front of you. Stop your finger on the far right side of the infinity sign. Lift your left hand to be at the far left side of the infinity sign. Now move your hands at the same time and the same pace in the same direction to continue your infinity sign. Your hands should cross the middle at the same time. This one seems easy at first. Then you try to do it when your hands are doing the infinity signs in different directions. WOW that is hard. This crosses the mid-line and really makes you think.

Figure Eight Brain Break
Brain Breaks are excellent for students to get re-focused. We should get our students up and moving every 25 minutes. Here is a brain break that your student can do with a simple spiral notebook. Take the spiral notebook and move it in a figure eight motion weaving through the legs. Of course, you want to do it as fast as possible. Also, when you get fast, you can try the opposite direction.

Thumb and Pinkie Brain Break
Brain Breaks are great to take every 25 minutes in class. This one is great for getting students to "think" about their movement. Take your left hand and have your fingers in, and your thumb up. Then take your right hand and put your thumb in and all your fingers in except your pinkie. So in other words, your thumb up and pinkie out. Now switch the roles of your hands.

Different Arm Directions
Here is a Brain Break for your class. Have your students spin their right arm in a forward circle with their arm parallel to the ground. Now have them take their left hand and make a backward circle overlapping their right hand. Their hands should overlap each other but never touch. When they have done this, tell them to start their left hand spinning and their right hand overlap the left. It is really difficult to do. Most will be able to do one or the other.

The Wave Brain Break
This activity is just what you think it is. It is creating a wave of some sort through your class. Designate a person to be the leader. Have a student stand up and take both hands from one side of their body, over their head to the other side of their body to create the "Wave". This is one part of the wave. Each student will continue to do this until all have "Waved" The leader must make sure everyone knows the order. The leader should start the "Wave" as well as direct it. Tell the class that they will need to work together to pass your (the teacher's) satisfaction. It works on all the elements that we like in a Brain Break: Crossing the mid-line, standing up, teamwork, and of course movement.

Hook Ups Brain Break
One person should Clap and miss Thumbs down Hands together Scoop the ice cream (like pictured) The other person should Point out a finger or thumb for the other person to move (don't touch the finger) Try pointing to a few fingers before switching roles This Brain Break crosses the mid-line of your body and helps both sides of your brain work together.

Rocks, Paper, Scissors, MATH
Brain Break: Rocks, Paper, Scissors, Math • You can only use the numbers 1,2,3 or 4 • You can’t use your thumb as a number • You must hold your hand flat • The first person to add the numbers together wins that round. • Have students play the best of 5 rounds.
• Variations are that one person is negative, both are negative, or multiply the numbers.
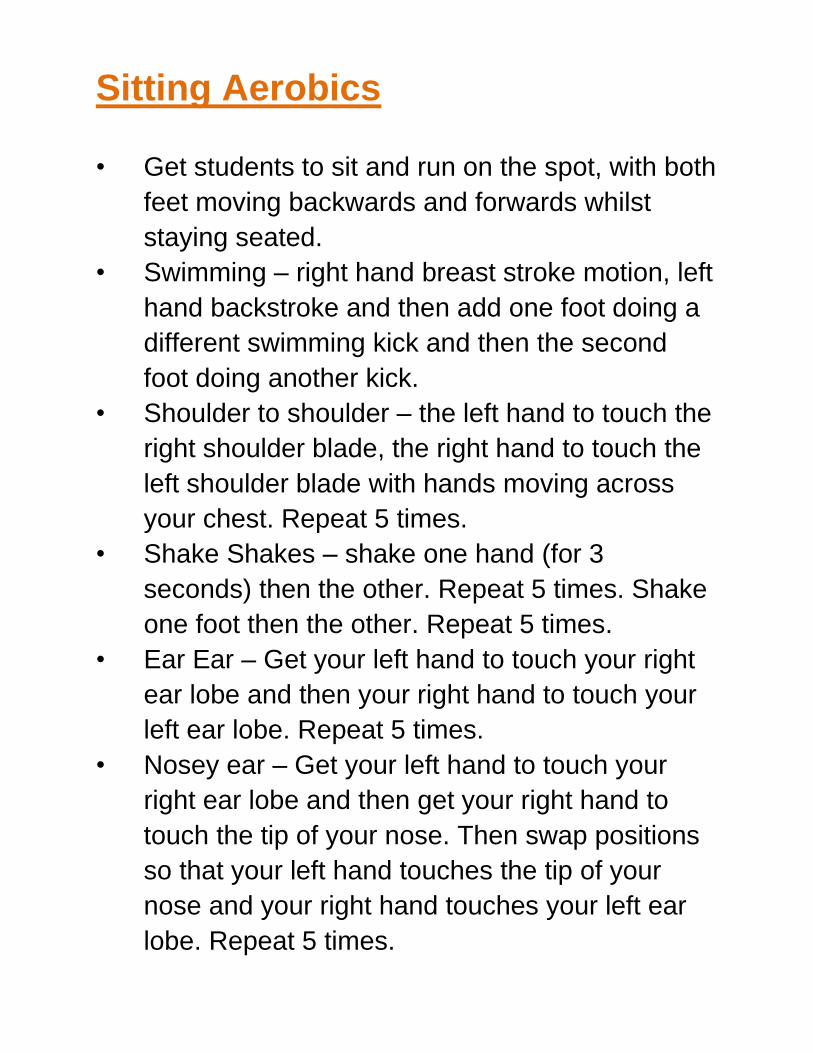
Sitting Aerobics • Get students to sit and run on the spot, with both
feet moving backwards and forwards whilst
staying seated.
• Swimming – right hand breast stroke motion, left
hand backstroke and then add one foot doing a
different swimming kick and then the second
foot doing another kick.
• Shoulder to shoulder – the left hand to touch the
right shoulder blade, the right hand to touch the
left shoulder blade with hands moving across
your chest. Repeat 5 times.
• Shake Shakes – shake one hand (for 3
seconds) then the other. Repeat 5 times. Shake
one foot then the other. Repeat 5 times.
• Ear Ear – Get your left hand to touch your right
ear lobe and then your right hand to touch your
left ear lobe. Repeat 5 times.
• Nosey ear – Get your left hand to touch your
right ear lobe and then get your right hand to
touch the tip of your nose. Then swap positions
so that your left hand touches the tip of your
nose and your right hand touches your left ear
lobe. Repeat 5 times.

Finger Aerobics • Sit face to face with partner at a desk.
• Place hands palm down on desk.
• Take it in turns to lift different fingers off
the desk
• Build up a sequence of 5 lifts (10
between you) and repeat same
sequence 5 times.
• Change routine by adding in taps, bends
and big stretches of the finger.
• One person can then become an
aerobics instructor & the other person
has to do as you demonstrate.

Figure it Out Ask students to follow these instructions:
• Sitting, rotate your right foot in a clockwise
direction.
• After ten seconds keep your foot moving and
simultaneously get your right hand to draw a
figure of 6 in the air from the top down.
• As you move your hand you will notice that your
foot reverses its direction and moves anti-
clockwise.
• This is because the control centre for the right
hand and foot are located close together on the
left side of the brain.
• When the hand moves in the opposite direction
to the foot then a short circuit or override
function operates and the foot changes
direction.
• The hand rules for survival.

Air Graphs • Give students equations of line graphs
on PowerPoint and get the whole group
to stand and show the direction of the
graph line using right and left hands.
• For example the graph y = x will be a
straight line running from bottom left to
top right and the graph y = 3 – x will be
a straight line running from top left to
bottom right.

Double Doodles / Palm to Palm • Doodle a shape in the air with one hand.
• Doodle in the air the same shape with both
hands.
• Write a word in the air using one and then
both hands.
• Join hands with a partner, palm to palm.
• One student then writes their first name in
the air using their right hand which results in
their partner following those movements
with their left hand. Partners then swap
roles.
• Both students should then write their names
simultaneously in the air palm to palm.

New Vocabulary • Practice new vocabulary and lesson terms by writing them in the air with your elbow, head, legs and hips.

Let’s make some 8’s!
Figure of 8’s:
• Draw a figure of 8 lying on its side in the air with
their writing hand – repeat this five times.
• Do the same with their non-writing hand.
• Now attempt this activity using both hands
simultaneously.
Elbow 8s:
• Draw figures of 8 with both elbows simultaneously.
• Then focus gaze on your right elbow as you turn
your upper body to the rear in a clockwise
direction, finally centering the 8 over the middle of
your tailbone.
• Repeat the exercise with your left elbow making a
figure of 8 movement with your right elbow as you
rotate.
Shoulder 8s:
• Rotating shoulders simultaneously (left and right
side) in figure of 8 rotation.
Finger tip 8s:
• Use finger tips of both hands to trace figures of 8 in
the air at the same time.
Clicking fingers 8:
• Click fingers on both hands whilst making a figure
8 shape
Alphabet Gym
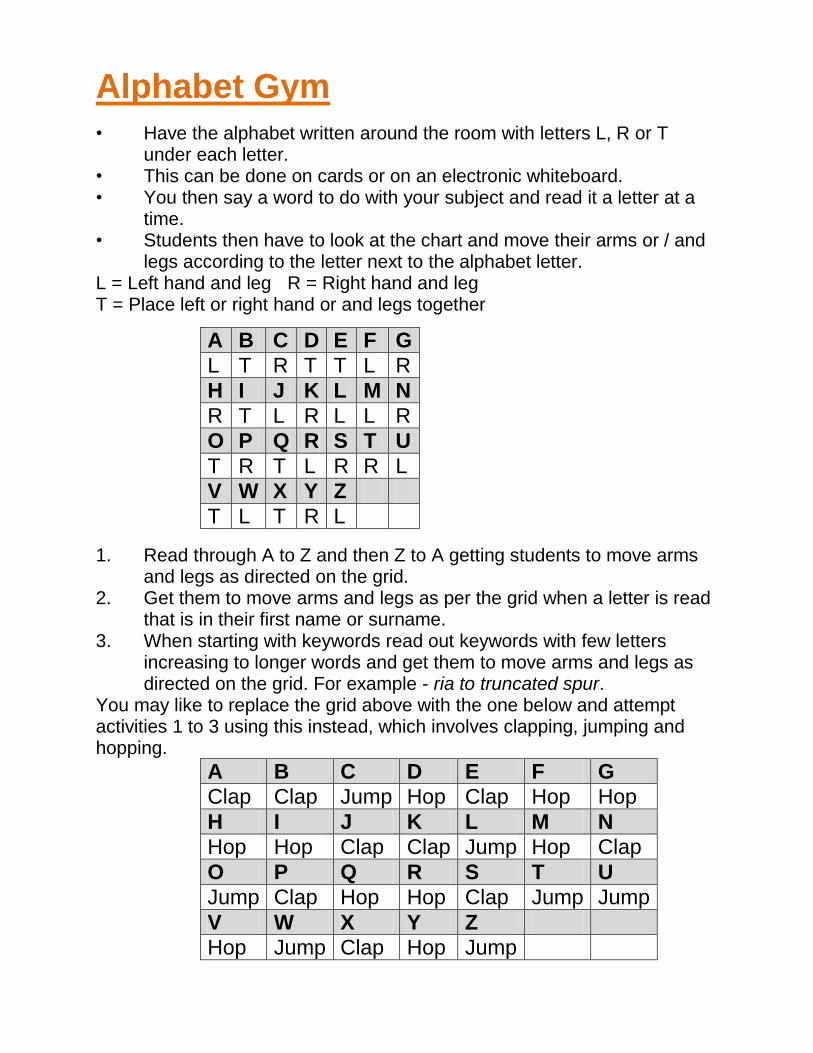
• Have the alphabet written around the room with letters L, R or T under each letter. • This can be done on cards or on an electronic whiteboard. • You then say a word to do with your subject and read it a letter at a time. • Students then have to look at the chart and move their arms or / and legs according to the letter next to the alphabet letter. L = Left hand and leg R = Right hand and leg T = Place left or right hand or and legs together
A B C D E F G
L T R T T L R
H I J K L M N
R T L R L L R
O P Q R S T U
T R T L R R L
V W X Y Z
T L T R L
1. Read through A to Z and then Z to A getting students to move arms and legs as directed on the grid. 2. Get them to move arms and legs as per the grid when a letter is read that is in their first name or surname. 3. When starting with keywords read out keywords with few letters increasing to longer words and get them to move arms and legs as directed on the grid. For example - ria to truncated spur. You may like to replace the grid above with the one below and attempt activities 1 to 3 using this instead, which involves clapping, jumping and hopping.
A B C D E F G
Clap Clap Jump Hop Clap Hop Hop
H I J K L M N
Hop Hop Clap Clap Jump Hop Clap
O P Q R S T U
Jump Clap Hop Hop Clap Jump Jump
V W X Y Z
Hop Jump Clap Hop Jump

Clever Routes
• Use pages from old road atlases for this activity.
• Students split into pairs and search for features
on a page. For example: town, village,
motorway,
• woodland, church, park.
• The first to spot a location gains a point.
• The first student to get 10 points wins.

Starter / Bridge
• What am I? Either student or teacher chooses to
be one ‘thing’ from last lesson.
• The group tries to identify the ‘thing’ by asking
questions.

Double or Quit
• Provide students with a number (either
one, two, four or eight), and get them to
keep doubling this number until they lose
count.
• The student who gets the furthest wins,
and can choose the next number!

Palindromic Numbers
• The mileage on a car shows 15951, which is a palindromic number (a number which reads the same
• forwards and backwards). • Two hours later another palindromic number
appears on the milometer. What is that number? • What speed was the driver travelling at? • Solution: • Palindromic number = 16061. • 16061 – 15951 = 110 miles covered. • 110 miles divided by 2 (number of hours) = 55
miles per hour.