Embed Size (px)
Citation preview
1
T H I N K L I T E R A C Y : C r o s s - C u r r i c u l a r A p p r o a c h e s , G r a d e s 7 - 1 2
CONTENTS READING STRATEGIES Getting Ready to Read: Anticipation Guide 2 Extending Vocabulary (Creating a Word Wall) 6
Reading Different Text Forms: Reading Graphical Texts 10 Following Instructions 14
WRITING STRATEGIES Developing & Organizing Ideas: Webbing, Mapping & More 18 Revising and Editing: Proofreading Without Partners 22 Writing For a Purpose: Using Templates: Writing A Procedure 28 ORAL COMMUNICATION Pair Work: Think/Pair/Share 32 Small Group Discussion:
Place Mat 34 Whole Class Discussion Four Corners 38
2
T H I N K L I T E R A C Y : C r o s s - C u r r i c u l a r A p p r o a c h e s , G r a d e s 7 - 1 2
R
Getting Ready to Read: Anticipation Guide
LEARNING STRATEGIES Grade 9
What we already know determines to a great extent what we will pay attention to, perceive, learn, remember, and forget (Woolfolk, 1998). An Anticipation Guide is a series of questions or statements (usually 8 to 10) related to the topic or point of view of a particular text. Students work silently to read and then agree or disagree with each statement.
Purpose • Help students to activate their prior knowledge and experience and think about the ideas they
will be reading. • Encourage students to make a personal connection with a topic or unit of work so that they can
integrate new knowledge with their background experience and prior knowledge.
Payoff Students will:
• connect their personal knowledge and experience with a curriculum topic or issue. • engage with topics, themes, and issues at their current level of understanding. • have a purpose for reading subject area text. • become familiar and comfortable with a topic before reading unfamiliar text.
Tips and Resources • An anticipation guide works best when students are required to read something that contains
unfamiliar information. The idea of the guide is to raise students’ awareness of related issues and help them make connections with what is familiar and unfamiliar about that text.
• In creating your anticipation guide, write open-ended statements that challenge students’ beliefs. Avoid using statements that are “right” and “wrong” or that ask simply for a “yes” or “no” response. You don’t want statements such as, “School cafeterias should not sell so much junk food.” Instead, write “Teenagers consume more junk food than is good for them.”
• For ideas to help craft the statements, see Student/Teacher Resource, Anticipation Guide – Sample Statements based on a student assignment in The Ontario Curriculum Exemplars, Grade 9, Guidance and Career Education, to create a newsletter for incoming Grade 8 students.
• See Student Resource, Anticipation Guide Template. • In Learning Strategies, oftentimes these less traditional texts (e.g., a newspaper article,
magazine article, government/social organization’s webpage or a brochure/pamphlet ) are more current and relevant to the students’ lives.
• NB: Teachers may use assistive technologies where appropriate.
Further Support • Put students in pairs to complete the anticipation guide if they are having trouble making
connections with the theme or topic, or if they need support with the language (e.g., English Language Learners).
• To provide an opportunity for struggling students to contribute in a more supportive situation, divide the class into small groups of four or five and ask them to tally and chart their responses before participating in a whole-class discussion.
3
T H I N K L I T E R A C Y : C r o s s - C u r r i c u l a r A p p r o a c h e s , G r a d e s 7 - 1 2
R
Getting Ready to Read: Anticipation Guide
LEARNING STRATEGIES Grade 9
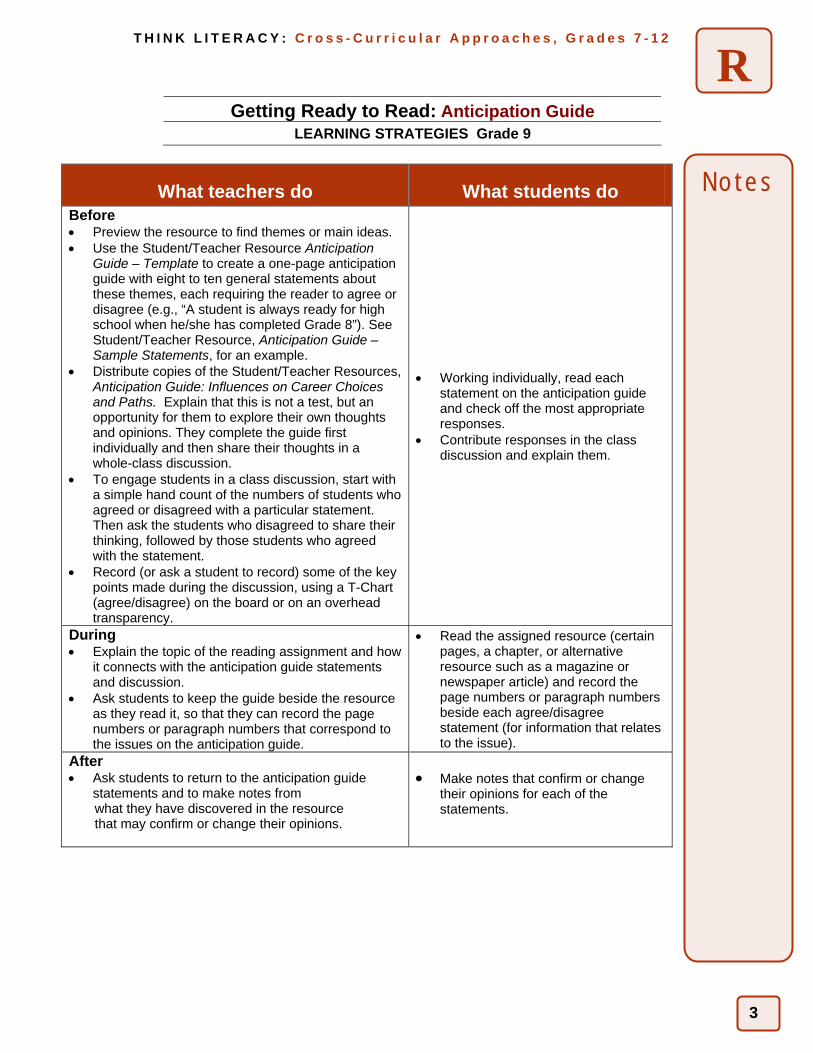
What teachers do What students do Before • Preview the resource to find themes or main ideas. • Use the Student/Teacher Resource Anticipation
Guide – Template to create a one-page anticipation guide with eight to ten general statements about these themes, each requiring the reader to agree or disagree (e.g., “A student is always ready for high school when he/she has completed Grade 8”). See Student/Teacher Resource, Anticipation Guide – Sample Statements, for an example.
• Distribute copies of the Student/Teacher Resources, Anticipation Guide: Influences on Career Choices and Paths. Explain that this is not a test, but an opportunity for them to explore their own thoughts and opinions. They complete the guide first individually and then share their thoughts in a whole-class discussion.
• To engage students in a class discussion, start with a simple hand count of the numbers of students who agreed or disagreed with a particular statement. Then ask the students who disagreed to share their thinking, followed by those students who agreed with the statement.
• Record (or ask a student to record) some of the key points made during the discussion, using a T-Chart (agree/disagree) on the board or on an overhead transparency.
• Working individually, read each statement on the anticipation guide and check off the most appropriate responses.
• Contribute responses in the class discussion and explain them.
During • Explain the topic of the reading assignment and how
it connects with the anticipation guide statements and discussion.
• Ask students to keep the guide beside the resource as they read it, so that they can record the page numbers or paragraph numbers that correspond to the issues on the anticipation guide.
• Read the assigned resource (certain pages, a chapter, or alternative resource such as a magazine or newspaper article) and record the page numbers or paragraph numbers beside each agree/disagree statement (for information that relates to the issue).
After • Ask students to return to the anticipation guide
statements and to make notes from what they have discovered in the resource that may confirm or change their opinions.
• Make notes that confirm or change their opinions for each of the statements.
Notes

4
T H I N K L I T E R A C Y : C r o s s - C u r r i c u l a r A p p r o a c h e s , G r a d e s 7 - 1 2
R Student/Teacher Resource
Anticipation Guide - Template
Before Reading Statements Page #
After Reading
1. Agree/ Disagree
A student is always ready for high school after successfully completing Grade 8.
Agree/ Disagree
2. Agree/ Disagree
Every student knows what effective writing is and always prepares to write effectively.
Agree/ Disagree
3. Agree/ Disagree
A student always listens very carefully in class.
Agree/ Disagree
4. Agree/ Disagree
A Grade 8 student is always nervous about coming to high school.
Agree/ Disagree
5. Agree/ Disagree
Every student makes friends easily in high school.
Agree/ Disagree
6. Agree/ Disagree
High school teachers are always friendly.
Agree/ Disagree
7. Agree/ Disagree
A Grade 9 student always has good tips for Grade 8 students.
Agree/ Disagree
8. Agree/ Disagree
Grade 9 students always assist Grade 8 students to succeed.
Agree/ Disagree
9. Agree/ Disagree
Be Prepared is a very useful motto to help all students be successful.
Agree/ Disagree
10. Agree/ Disagree
Mentors always help their partners.
Agree/ Disagree
• Before reading your text, consider each statement below and circle “Agree” or “Disagree” beside each statement under the heading “Before Reading”.
• Following our discussion of these statements, you will read pages 54-62 of your text noting page numbers that relate to each statement.
• When you have finished reading, consider the statements again based on any new information you may have read. Circle “Agree” or “Disagree” beside each statement under the heading “After Reading” and check to see whether your opinion has changed based on new evidence.
• For any statements that you circled “Disagree”, rewrite these statements on the back of this sheet so that they are in agreement with the text you have read.
5
T H I N K L I T E R A C Y : C r o s s - C u r r i c u l a r A p p r o a c h e s , G r a d e s 7 - 1 2
RStudent/Teacher Resource
Getting Ready to Read: Anticipation Guide
LEARNING STRATEGIES Grade 9
Before Reading Statements Page # After Reading 1. Agree/Disagree
Agree/Disagree
2. Agree/Disagree
Agree/Disagree
3. Agree/Disagree
Agree/Disagree
4. Agree/Disagree
Agree/Disagree
5. Agree/Disagree
Agree/Disagree
6. Agree/Disagree
Agree/Disagree
7. Agree/Disagree
Agree/Disagree
8. Agree/Disagree
Agree/Disagree
9. Agree/Disagree
Agree/Disagree
10. Agree/Disagree
Agree/Disagree
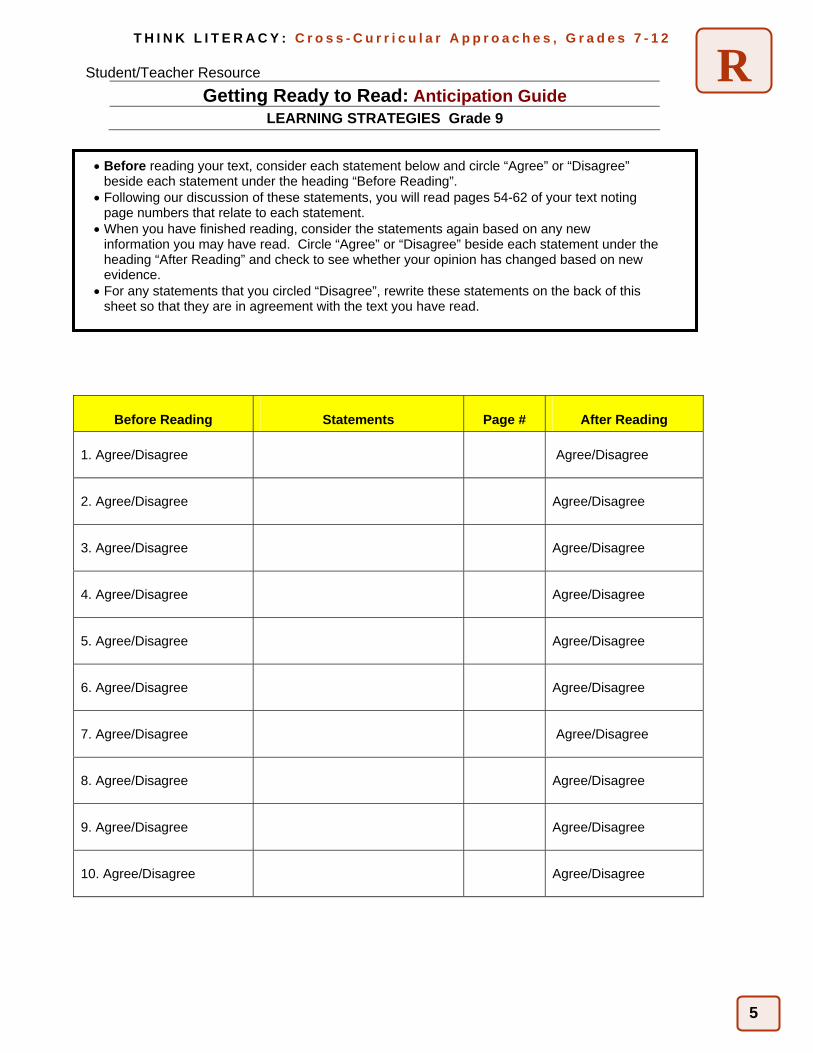
• Before reading your text, consider each statement below and circle “Agree” or “Disagree” beside each statement under the heading “Before Reading”.
• Following our discussion of these statements, you will read pages 54-62 of your text noting page numbers that relate to each statement.
• When you have finished reading, consider the statements again based on any new information you may have read. Circle “Agree” or “Disagree” beside each statement under the heading “After Reading” and check to see whether your opinion has changed based on new evidence.
• For any statements that you circled “Disagree”, rewrite these statements on the back of this sheet so that they are in agreement with the text you have read.
6
T H I N K L I T E R A C Y : C r o s s - C u r r i c u l a r A p p r o a c h e s , G r a d e s 7 - 1 2
R
Getting Ready to Read: Extending Vocabulary (Creating a Word Wall)
LEARNING STRATEGIES Grade 9
Getting Ready to Read: Extending Vocabulary (Creating a Word Wall
Students are required to learn, on average, over 2 000 words each year in various subject areas. Those who have trouble learning new words will struggle with the increasingly complex texts that they encounter in the middle and senior school years. A word wall is a wall, chalkboard, or bulletin board listing key words that will appear often in a new unit of study, printed on card stock and taped or pinned to the wall/board. The word wall is usually organized alphabetically.
Purpose • Identify unfamiliar vocabulary and create a visible reference in the classroom for words that will appear often in a topic or unit of study.
Payoff Students will: • practice skimming and scanning an assigned reading before dealing with the content in an intensive
way. • gain some familiarity with the location of information and with various elements of the text. • develop some sense of the meaning of key words before actually reading the words in context. • improve comprehension and spelling because key words remain posted in the classroom.
Tips and Resources • Skimming means to read quickly – horizontally – through the text to get a general understanding of the
content and its usefulness. • Scanning means to read quickly – vertically or diagonally – to find single words, facts, dates, names, or
details. • For directions, see Student Resource Skimming and Scanning to Preview Text. • Consider posting certain words for longer periods (e.g., words that occur frequently in the unit or
course, words that are difficult to spell, and words that students should learn to recognize on sight). • Before building the word wall, consider using the strategy Analyzing the Features of Text in Think
Literacy: Cross-Curricular Approaches, Grades 7-12, to help students become familiar with the text. − Words Words Words, pp. 70-71. − When Kids Can’t Read, What Teachers Can Do? Chapter 10. − Reaching Higher – Making Connections across the Curriculum, p. 7-8.
• NB: Teachers may use assistive technologies when appropriate.
Further Support • Provide each student with a recording sheet so that they can make their own record of the words for
further review. • For more information see:
− Student Resource, Skimming and Scanning to Preview a Text. − Teacher Resource, Creating a Word Wall.
7
T H I N K L I T E R A C Y : C r o s s - C u r r i c u l a r A p p r o a c h e s , G r a d e s 7 - 1 2
R
Student Resource Suggested Words, Terms and Concepts for Word Walls
LEARNING STRATEGIES Grade 9
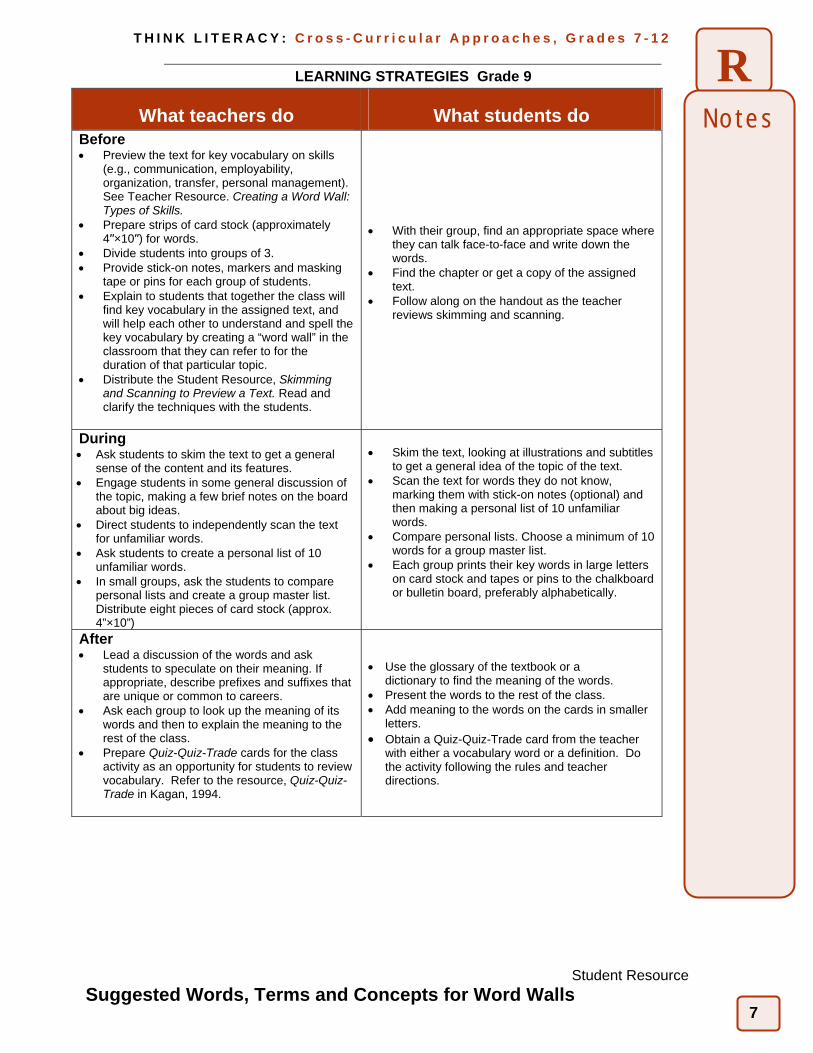
What teachers do What students do Before • Preview the text for key vocabulary on skills
(e.g., communication, employability, organization, transfer, personal management). See Teacher Resource. Creating a Word Wall: Types of Skills.
• Prepare strips of card stock (approximately 4′′×10′′) for words.
• Divide students into groups of 3. • Provide stick-on notes, markers and masking
tape or pins for each group of students. • Explain to students that together the class will
find key vocabulary in the assigned text, and will help each other to understand and spell the key vocabulary by creating a “word wall” in the classroom that they can refer to for the duration of that particular topic.
• Distribute the Student Resource, Skimming and Scanning to Preview a Text. Read and clarify the techniques with the students.
• With their group, find an appropriate space where they can talk face-to-face and write down the words.
• Find the chapter or get a copy of the assigned text.
• Follow along on the handout as the teacher reviews skimming and scanning.
During • Ask students to skim the text to get a general
sense of the content and its features. • Engage students in some general discussion of
the topic, making a few brief notes on the board about big ideas.
• Direct students to independently scan the text for unfamiliar words.
• Ask students to create a personal list of 10 unfamiliar words.
• In small groups, ask the students to compare personal lists and create a group master list. Distribute eight pieces of card stock (approx. 4”×10”)
• Skim the text, looking at illustrations and subtitles to get a general idea of the topic of the text.
• Scan the text for words they do not know, marking them with stick-on notes (optional) and then making a personal list of 10 unfamiliar words.
• Compare personal lists. Choose a minimum of 10 words for a group master list.
• Each group prints their key words in large letters on card stock and tapes or pins to the chalkboard or bulletin board, preferably alphabetically.
After • Lead a discussion of the words and ask
students to speculate on their meaning. If appropriate, describe prefixes and suffixes that are unique or common to careers.
• Ask each group to look up the meaning of its words and then to explain the meaning to the rest of the class.
• Prepare Quiz-Quiz-Trade cards for the class activity as an opportunity for students to review vocabulary. Refer to the resource, Quiz-Quiz-Trade in Kagan, 1994.
• Use the glossary of the textbook or a dictionary to find the meaning of the words. • Present the words to the rest of the class. • Add meaning to the words on the cards in smaller
letters. • Obtain a Quiz-Quiz-Trade card from the teacher
with either a vocabulary word or a definition. Do the activity following the rules and teacher directions.
Notes
8
T H I N K L I T E R A C Y : C r o s s - C u r r i c u l a r A p p r o a c h e s , G r a d e s 7 - 1 2
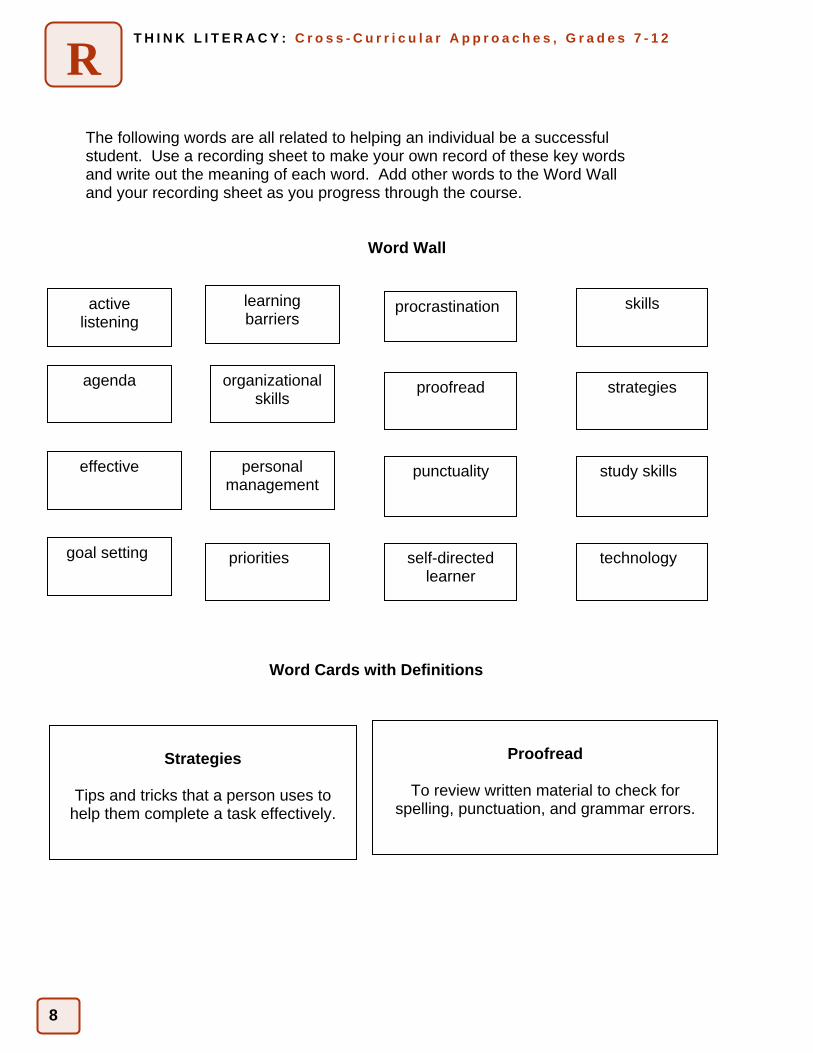
R The following words are all related to helping an individual be a successful student. Use a recording sheet to make your own record of these key words and write out the meaning of each word. Add other words to the Word Wall and your recording sheet as you progress through the course.
Word Wall
Word Cards with Definitions
active listening
agenda
learning barriers
procrastination skills
effective
strategies proofread organizational skills
study skills punctuality personal management
goal setting priorities self-directed learner
technology
Strategies
Tips and tricks that a person uses to
help them complete a task effectively.
Proofread
To review written material to check for
spelling, punctuation, and grammar errors.
9
T H I N K L I T E R A C Y : C r o s s - C u r r i c u l a r A p p r o a c h e s , G r a d e s 7 - 1 2
R
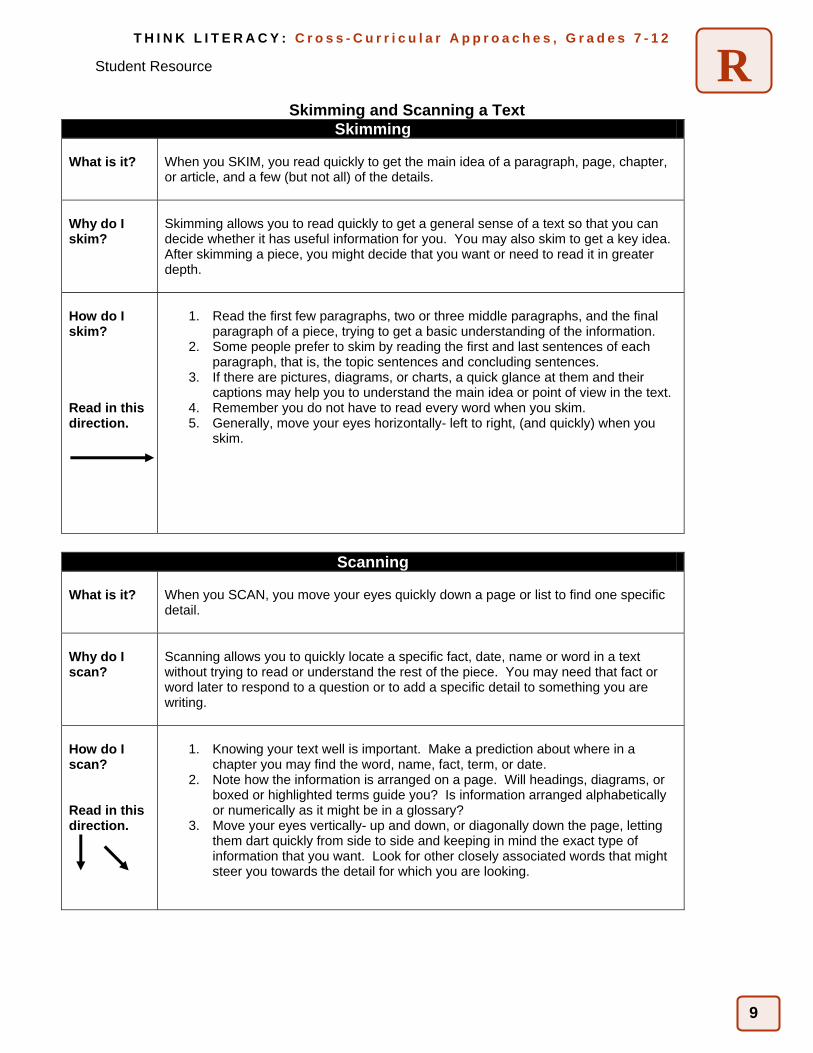
Skimming and Scanning a Text Skimming
What is it?
When you SKIM, you read quickly to get the main idea of a paragraph, page, chapter, or article, and a few (but not all) of the details.
Why do I skim?
Skimming allows you to read quickly to get a general sense of a text so that you can decide whether it has useful information for you. You may also skim to get a key idea. After skimming a piece, you might decide that you want or need to read it in greater depth.
How do I skim? Read in this direction.
1. Read the first few paragraphs, two or three middle paragraphs, and the final
paragraph of a piece, trying to get a basic understanding of the information. 2. Some people prefer to skim by reading the first and last sentences of each
paragraph, that is, the topic sentences and concluding sentences. 3. If there are pictures, diagrams, or charts, a quick glance at them and their
captions may help you to understand the main idea or point of view in the text. 4. Remember you do not have to read every word when you skim. 5. Generally, move your eyes horizontally- left to right, (and quickly) when you
skim.
Scanning
What is it?
When you SCAN, you move your eyes quickly down a page or list to find one specific detail.
Why do I scan?
Scanning allows you to quickly locate a specific fact, date, name or word in a text without trying to read or understand the rest of the piece. You may need that fact or word later to respond to a question or to add a specific detail to something you are writing.
How do I scan? Read in this direction.
1. Knowing your text well is important. Make a prediction about where in a
chapter you may find the word, name, fact, term, or date. 2. Note how the information is arranged on a page. Will headings, diagrams, or
boxed or highlighted terms guide you? Is information arranged alphabetically or numerically as it might be in a glossary?
3. Move your eyes vertically- up and down, or diagonally down the page, letting them dart quickly from side to side and keeping in mind the exact type of information that you want. Look for other closely associated words that might steer you towards the detail for which you are looking.
Student Resource
10
T H I N K L I T E R A C Y : C r o s s - C u r r i c u l a r A p p r o a c h e s , G r a d e s 7 - 1 2
R
Reading Different Text Forms: Reading Graphical Texts
LEARNING STRATEGIES Grade 9
Graphical text forms (e.g., diagrams, photographs, drawings, sketches, graphs, schedules, maps, charts, timelines, and tables) are intended to communicate information in a concise format and illustrate how one piece of information is related to another. Providing students with an approach to reading graphical text also helps them to become effective readers.
Purpose • Become familiar with the elements and features of graphical texts used in any course. • Explore a process for reading graphical texts using a range of strategies for before, during, and after
reading.
Payoff Students will: • become more efficient at 'mining' graphical texts for information and meaning. • practise essential reading strategies and apply them to different course-related materials.
Tips and Resources • Often graphical texts provide excellent learning formats for Grade 9 students. Charts, graphs,
diagrams etc. supplement the main text and provide clues to the important concepts in the text. • Teach students how to use the features of graphical texts to acquire information and understanding. • These skills are crucial for meeting guidance and career education expectations in Learning
Strategies and other courses. Encourage students to be mindful of the features of graphical texts before deciphering actual information. These features may include: - print features (e.g., typeface and size of type, bullets, titles, headings, subheadings, italics); - organizational features (e.g., tables of contents, legends, keys, pronunciation guides, labels); - design features (e.g., colour, shape, line, placement, balance, focal point). Design features may
also include images; - organizational patterns (e.g., sequential, categorical, and explanatory).
• Teachers may choose a variety of graphical text samples so that students may practise assessing features (e.g., a bar graph presenting statistical data, a table showing rows and columns, a diagram or graphic organizer showing connecting ideas). This practice may be completed by using random examples from an existing textbook or by providing photocopies. Students could then circle, underline or highlight the features of the graphical texts to secure their understanding.
• As an alternative, teachers may use the suggested activity as a way to assist students in understanding the features of graphical text.
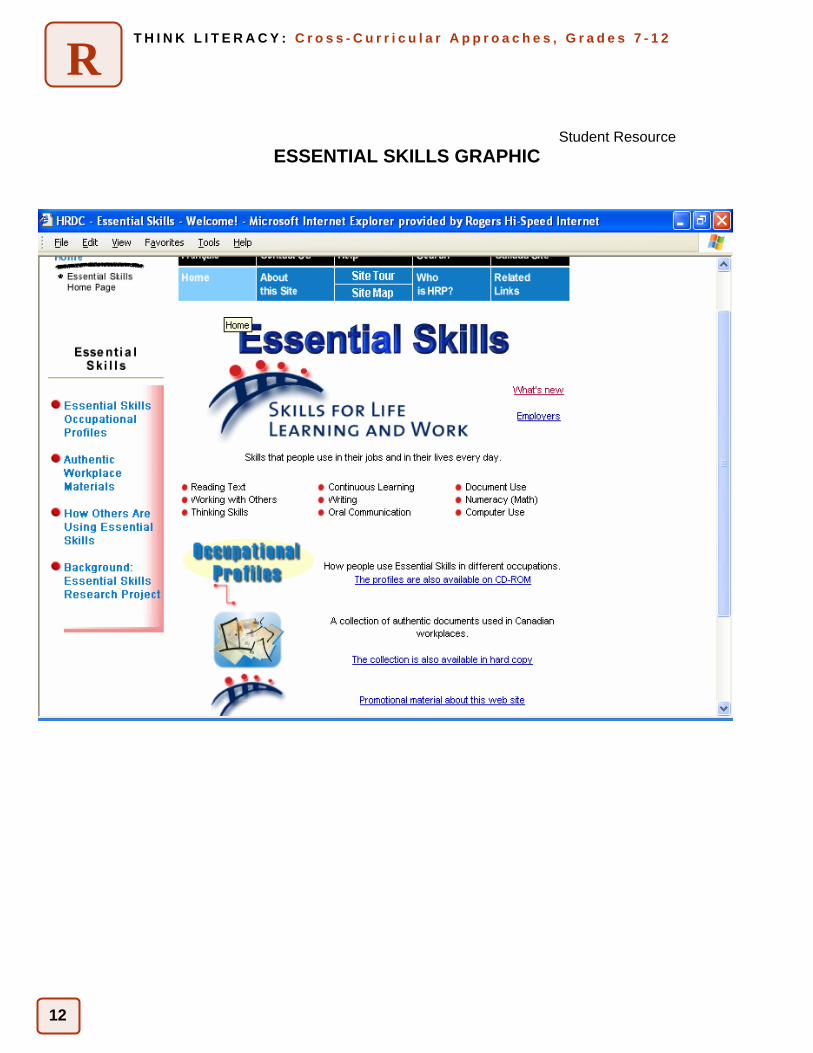
• See: Student Resource, Essential Skills Web Site, Human Resources and Skills Development Canada. Tips for Reading Graphical Texts. www.hrsdc.gc.ca/en/hip/hrp/essential_skills/essential_skills_index.shtml.
NB: Teachers will use assistive technologies as required.
Further Support • Provide students with an advance organizer to guide them as they read a particular text. This might
be a series of prompts to guide them through the reading task. • Click on the Ontario Skills Passport web site for an understanding of the relevance of essential skills.
(http://skills.edu.gov.on.ca).
11
T H I N K L I T E R A C Y : C r o s s - C u r r i c u l a r A p p r o a c h e s , G r a d e s 7 - 1 2
R
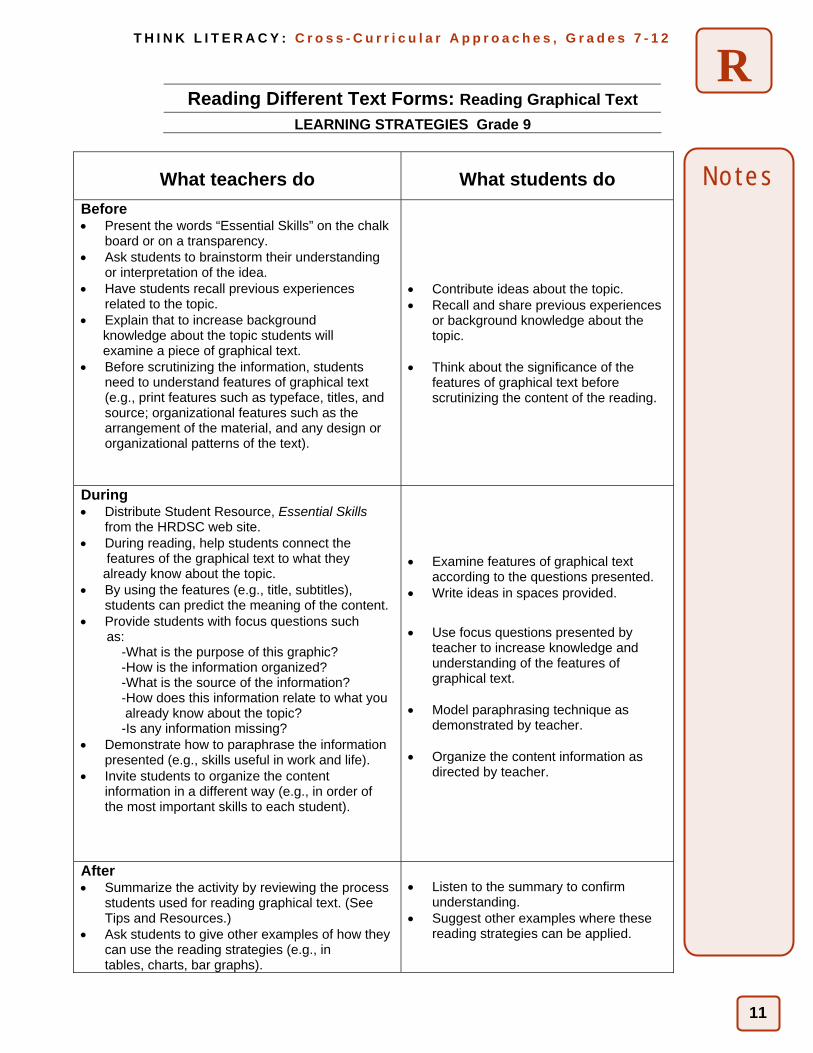
Reading Different Text Forms: Reading Graphical Text
LEARNING STRATEGIES Grade 9
What teachers do What students do Before • Present the words “Essential Skills” on the chalk
board or on a transparency. • Ask students to brainstorm their understanding
or interpretation of the idea. • Have students recall previous experiences
related to the topic. • Explain that to increase background knowledge about the topic students will examine a piece of graphical text. • Before scrutinizing the information, students
need to understand features of graphical text (e.g., print features such as typeface, titles, and source; organizational features such as the arrangement of the material, and any design or organizational patterns of the text).
• Contribute ideas about the topic. • Recall and share previous experiences
or background knowledge about the topic.
• Think about the significance of the
features of graphical text before scrutinizing the content of the reading.
During • Distribute Student Resource, Essential Skills
from the HRDSC web site. • During reading, help students connect the features of the graphical text to what they already know about the topic. • By using the features (e.g., title, subtitles),
students can predict the meaning of the content. • Provide students with focus questions such as:
-What is the purpose of this graphic? -How is the information organized? -What is the source of the information? -How does this information relate to what you already know about the topic? -Is any information missing?
• Demonstrate how to paraphrase the information presented (e.g., skills useful in work and life).
• Invite students to organize the content information in a different way (e.g., in order of the most important skills to each student).
• Examine features of graphical text according to the questions presented.
• Write ideas in spaces provided.
• Use focus questions presented by
teacher to increase knowledge and understanding of the features of graphical text.
• Model paraphrasing technique as
demonstrated by teacher. • Organize the content information as
directed by teacher.
After • Summarize the activity by reviewing the process
students used for reading graphical text. (See Tips and Resources.)
• Ask students to give other examples of how they can use the reading strategies (e.g., in tables, charts, bar graphs).
• Listen to the summary to confirm understanding.
• Suggest other examples where these reading strategies can be applied.
Notes
12
T H I N K L I T E R A C Y : C r o s s - C u r r i c u l a r A p p r o a c h e s , G r a d e s 7 - 1 2
R Student Resource
ESSENTIAL SKILLS GRAPHIC
13
T H I N K L I T E R A C Y : C r o s s - C u r r i c u l a r A p p r o a c h e s , G r a d e s 7 - 1 2
R Teacher/Student Resource
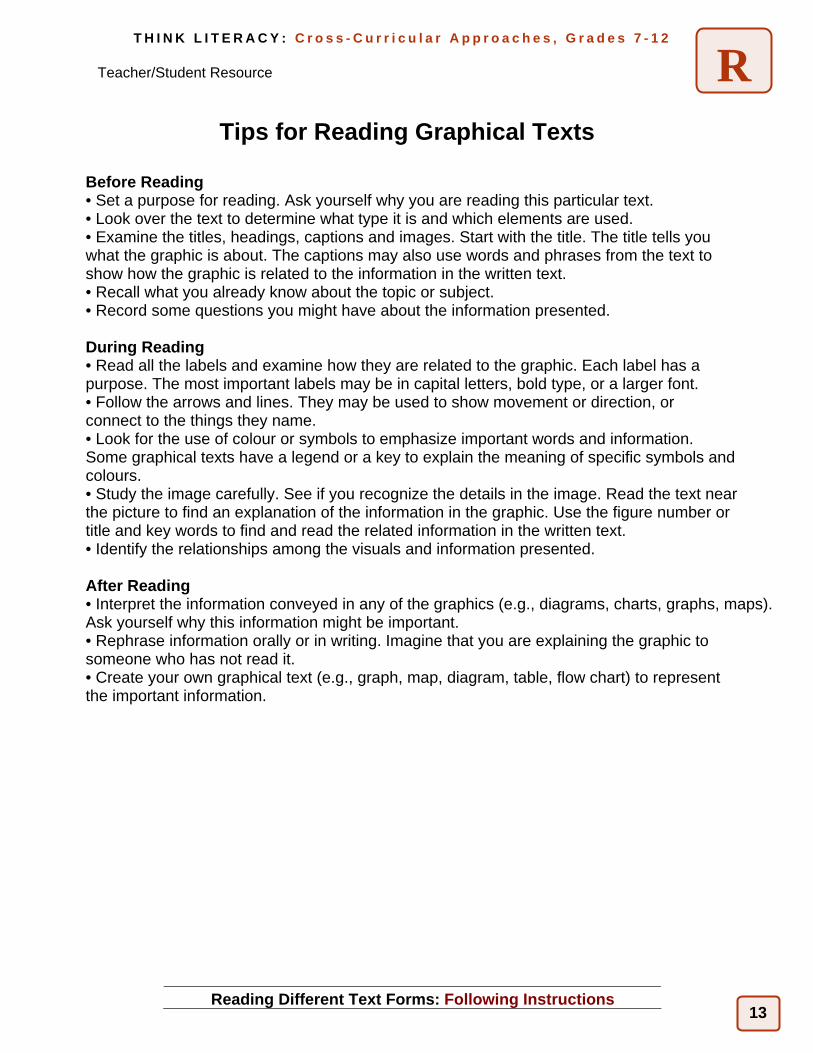
Tips for Reading Graphical Texts
Before Reading • Set a purpose for reading. Ask yourself why you are reading this particular text. • Look over the text to determine what type it is and which elements are used. • Examine the titles, headings, captions and images. Start with the title. The title tells you what the graphic is about. The captions may also use words and phrases from the text to show how the graphic is related to the information in the written text. • Recall what you already know about the topic or subject. • Record some questions you might have about the information presented.
During Reading • Read all the labels and examine how they are related to the graphic. Each label has a purpose. The most important labels may be in capital letters, bold type, or a larger font. • Follow the arrows and lines. They may be used to show movement or direction, or connect to the things they name. • Look for the use of colour or symbols to emphasize important words and information. Some graphical texts have a legend or a key to explain the meaning of specific symbols and colours. • Study the image carefully. See if you recognize the details in the image. Read the text near the picture to find an explanation of the information in the graphic. Use the figure number or title and key words to find and read the related information in the written text. • Identify the relationships among the visuals and information presented.
After Reading • Interpret the information conveyed in any of the graphics (e.g., diagrams, charts, graphs, maps). Ask yourself why this information might be important. • Rephrase information orally or in writing. Imagine that you are explaining the graphic to someone who has not read it. • Create your own graphical text (e.g., graph, map, diagram, table, flow chart) to represent the important information.
Reading Different Text Forms: Following Instructions
14
T H I N K L I T E R A C Y : C r o s s - C u r r i c u l a r A p p r o a c h e s , G r a d e s 7 - 1 2
R
LEARNING STRATEGIES Grade 9
Students are expected to read and follow instructions in every subject area. This strategy asks students toexamine different types of instructions, their features and elements, and how the features, language and organizational patterns can be used to help the reader understand and complete a task.
Purpose • Provide students with strategies for reading, interpreting and following instructions to complete a
specific task. • Understand how instructions are organized.
Payoff Students will:
• identify and develop a process and purposes for reading instructions.
Tips and Resources • Instructions give detailed step-by-step information about a process or a procedure (e.g.
directions, recipes, experiments, manuals, tests). They are sometimes called procedures or “how to” documents. Most instructions use organizational patterns, language, and features (e.g., diagrams and illustrations, bold or italic type, headings, numbers, lists) to help the reader identify the task and the best way to complete it; however, some instructions are complicated without any features to help the reader determine the sequence of steps.
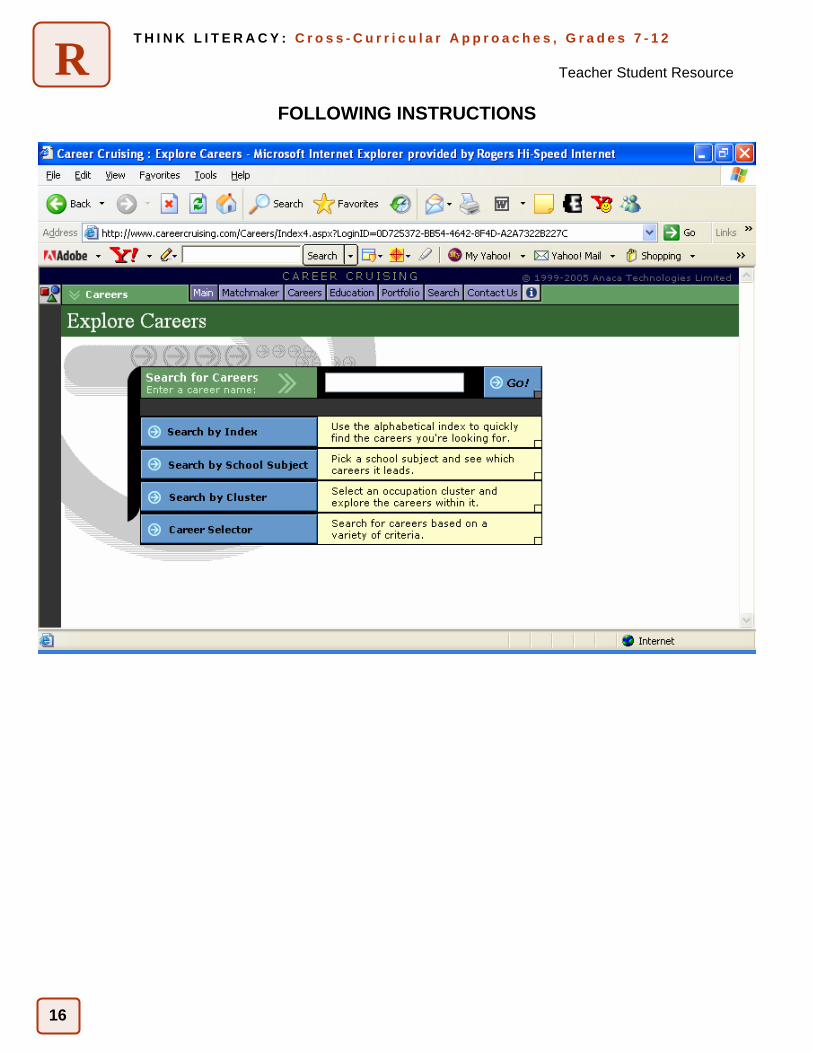
• Research into careers can be done on the Career Cruising web site and the instructions help students to find and research an occupation, an apprenticeship or postsecondary programs using categories (e.g., index, school subject, cluster, career selector) Refer to www.careercruising.com and use your school username and password. Click on “careers” on the toolbar. This brings you to Explore Careers.
- If you do not know your school’s username and password email: [email protected].
- For a helpful tour of the Career Cruising web site click on: http://www.careercruising.com/newmedia/docs/canadian/GuidedTourofCareerCruisingCan.doc
Further Support • Provide students with a list of typical signal words and task prompts and suggestions/strategies
for responding to them (e.g., explain, list, summarize, give reasons for, select, choose, support). • Provide students with flow charts and timelines to help track successful completion of instructions.• Create a class framework for reading instructions such as:
- Preview - Highlight and annotate. - Think aloud and visualize - Reread - Go step-by-step - Read the diagrams
- Action buttons - Ask questions.
• Have students read a set of instructions that has irrelevant or repeated information, or is poorly organized (e.g., you can create this by inserting sentences into or omitting sentences from a sample you already have). Have students identify the irrelevant or repetitious information and sentences, and highlight the sections on their working copy.
15
T H I N K L I T E R A C Y : C r o s s - C u r r i c u l a r A p p r o a c h e s , G r a d e s 7 - 1 2
R
Reading Different Text Forms: Following Instructions
LEARNING STRATEGIES Grade 9
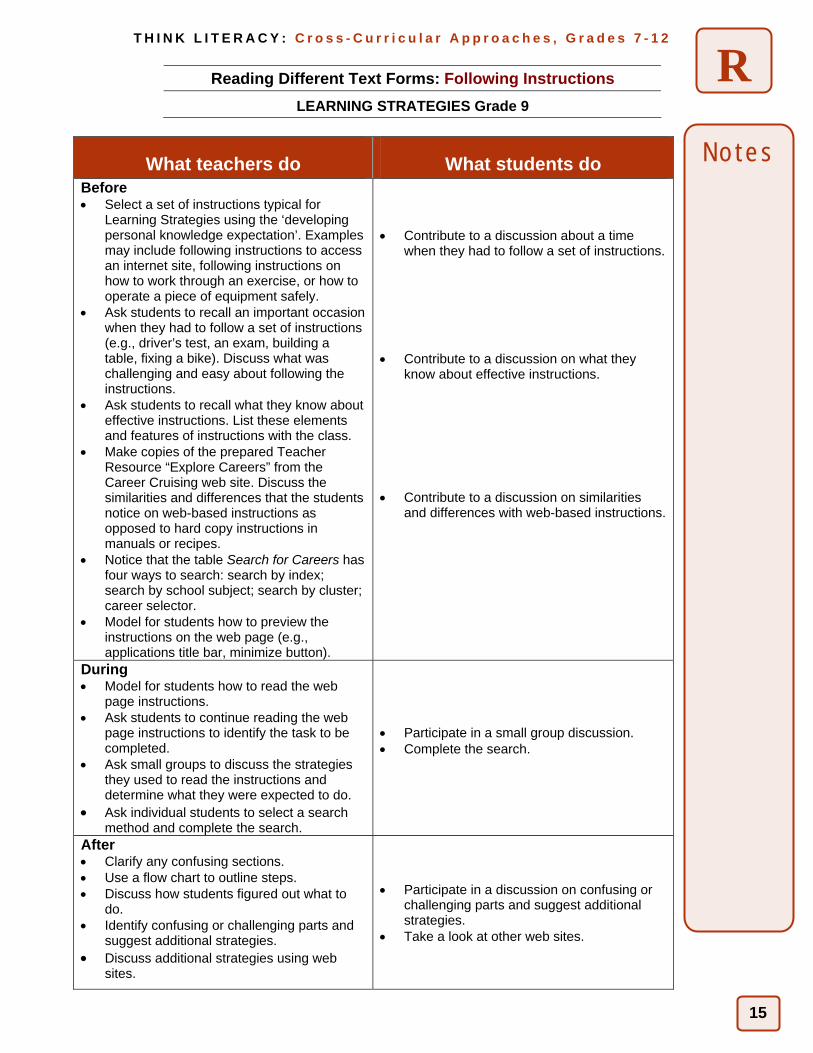
What teachers do What students do Before • Select a set of instructions typical for
Learning Strategies using the ‘developing personal knowledge expectation’. Examples may include following instructions to access an internet site, following instructions on how to work through an exercise, or how to operate a piece of equipment safely.
• Ask students to recall an important occasion when they had to follow a set of instructions (e.g., driver’s test, an exam, building a table, fixing a bike). Discuss what was challenging and easy about following the instructions.
• Ask students to recall what they know about effective instructions. List these elements and features of instructions with the class.
• Make copies of the prepared Teacher Resource “Explore Careers” from the Career Cruising web site. Discuss the similarities and differences that the students notice on web-based instructions as opposed to hard copy instructions in manuals or recipes.
• Notice that the table Search for Careers has four ways to search: search by index; search by school subject; search by cluster; career selector.
• Model for students how to preview the instructions on the web page (e.g., applications title bar, minimize button).
• Contribute to a discussion about a time
when they had to follow a set of instructions. • Contribute to a discussion on what they
know about effective instructions. • Contribute to a discussion on similarities
and differences with web-based instructions.
During • Model for students how to read the web
page instructions. • Ask students to continue reading the web
page instructions to identify the task to be completed.
• Ask small groups to discuss the strategies they used to read the instructions and determine what they were expected to do.
• Ask individual students to select a search method and complete the search.
• Participate in a small group discussion. • Complete the search.
After • Clarify any confusing sections. • Use a flow chart to outline steps. • Discuss how students figured out what to
do. • Identify confusing or challenging parts and
suggest additional strategies. • Discuss additional strategies using web
sites.
• Participate in a discussion on confusing or challenging parts and suggest additional strategies.
• Take a look at other web sites.
Notes
16
T H I N K L I T E R A C Y : C r o s s - C u r r i c u l a r A p p r o a c h e s , G r a d e s 7 - 1 2
R Teacher Student Resource
FOLLOWING INSTRUCTIONS

17
T H I N K L I T E R A C Y : C r o s s - C u r r i c u l a r A p p r o a c h e s , G r a d e s 7 - 1 2
R
18
T H I N K L I T E R A C Y : C r o s s - C u r r i c u l a r A p p r o a c h e s , G r a d e s 7 - 1 2
W
Developing & Organizing Ideas: Webbing, Mapping & More
LEARNING STRATEGIES Grade 9
Effective writers use different strategies to sort the ideas and information they have gathered in order to make
connections, identify relationships, and determine possible directions and forms for their writing. This strategy gives students the opportunity to reorganize, regroup, sort, categorize, classify and cluster their notes.
Purpose • Identify relationships and make connections among ideas and information. • Select ideas and information for possible topics and subtopics.
Payoff Students will: • model critical and creative thinking strategies. • learn a variety of strategies that can be used throughout the writing process. • reread notes, gathered information and writing that are related to a specific writing task. • organize ideas and information to focus the writing task.
Tips and Resources • Strategies for webbing and mapping include:
- Clustering – looking for similarities among ideas, information or things, and grouping them according to characteristics. - Comparing – identifying similarities among ideas information or things. - Contrasting – identifying differences among ideas, information or things. - Generalizing – describing the overall picture based on the ideas and information presented. - Outlining – organizing main ideas, information, and supporting details based on their relationship to each other. - Relating – showing how events, situations, ideas and information are connected. - Sorting – arranging or separating into types, kinds, sizes, etc. - Trend-spotting – identifying things that generally look or behave the same.
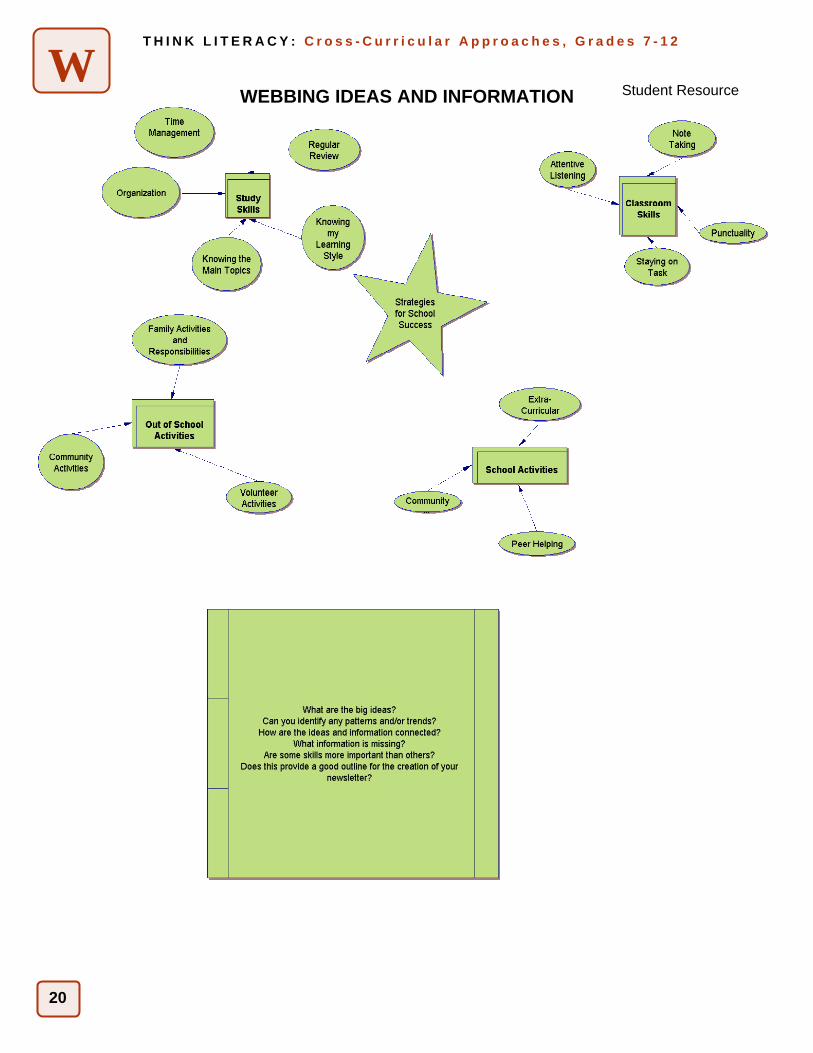
• See Student/Teacher Resource, Webbing Ideas and Information. NB: Teachers will use assistive technologies as required (e.g., Inspiration or Smart Ideas).
Further Support • Provide students with sample graphic organizers that guide them in sorting and organizing their
information and notes [e.g., cluster (webs), sequence (flow charts), compare (Venn diagram)]. • Have students create a variety of graphic organizers that they have successfully used for different writing
tasks. Create a class collection for students to refer to and use. • Provide students with access to markers, highlighters, scissors, and glue for marking and manipulating
their gathered ideas and information. • Select a familiar topic (perhaps a topic for review). Have students form discussion groups. Ask students to
recall what they already know about the topic, and ask questions that they still have about the topic. Taking turns, students record one idea or question on a stick-on note and place it in the middle of the table.
• Encourage students to build on the ideas of others. After students have contributed everything they can recall about the topic, groups sort and organize their stick-on notes into meaningful clusters on chart paper. Ask students to discuss connections and relationships, and identify possible category labels.
19
T H I N K L I T E R A C Y : C r o s s - C u r r i c u l a r A p p r o a c h e s , G r a d e s 7 - 1 2
W
Developing & Organizing Ideas: Webbing, Mapping & More
LEARNING STRATEGIES Grade 9
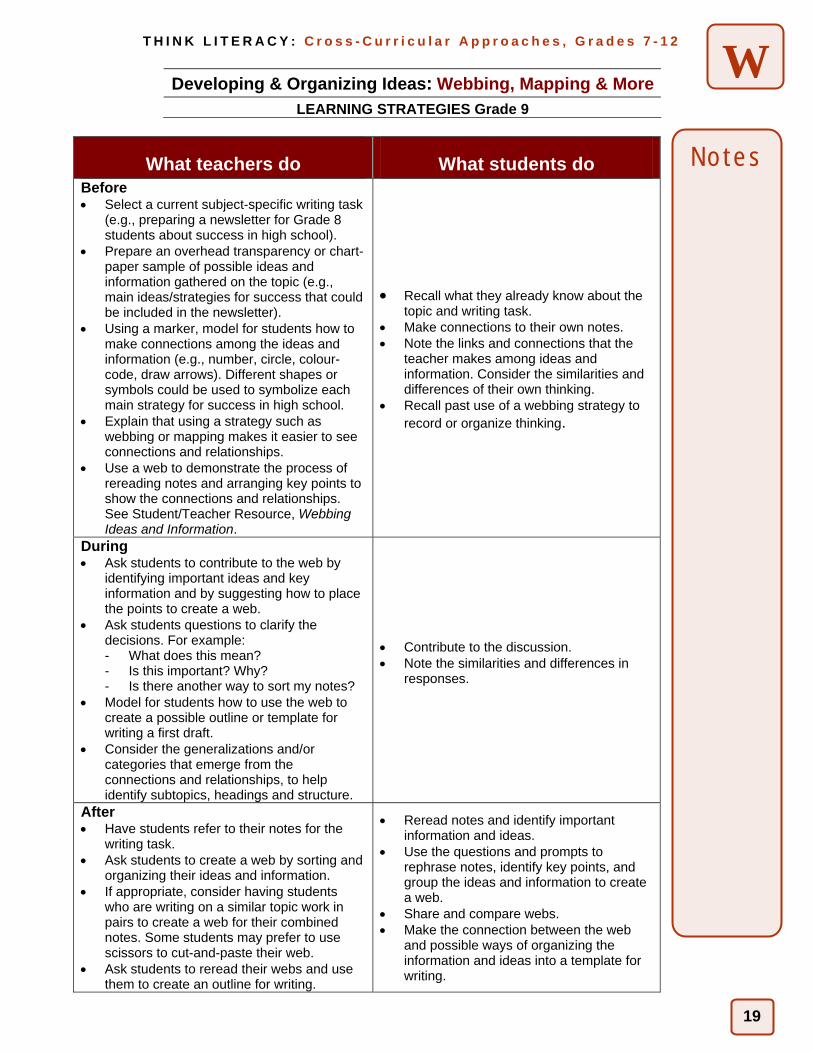
What teachers do What students do Before • Select a current subject-specific writing task
(e.g., preparing a newsletter for Grade 8 students about success in high school).
• Prepare an overhead transparency or chart-paper sample of possible ideas and information gathered on the topic (e.g., main ideas/strategies for success that could be included in the newsletter).
• Using a marker, model for students how to make connections among the ideas and information (e.g., number, circle, colour-code, draw arrows). Different shapes or symbols could be used to symbolize each main strategy for success in high school.
• Explain that using a strategy such as webbing or mapping makes it easier to see connections and relationships.
• Use a web to demonstrate the process of rereading notes and arranging key points to show the connections and relationships. See Student/Teacher Resource, Webbing Ideas and Information.
• Recall what they already know about the topic and writing task.
• Make connections to their own notes. • Note the links and connections that the
teacher makes among ideas and information. Consider the similarities and differences of their own thinking.
• Recall past use of a webbing strategy to record or organize thinking.
During • Ask students to contribute to the web by
identifying important ideas and key information and by suggesting how to place the points to create a web.
• Ask students questions to clarify the decisions. For example: - What does this mean? - Is this important? Why? - Is there another way to sort my notes?
• Model for students how to use the web to create a possible outline or template for writing a first draft.
• Consider the generalizations and/or categories that emerge from the connections and relationships, to help identify subtopics, headings and structure.
• Contribute to the discussion. • Note the similarities and differences in
responses.
After • Have students refer to their notes for the
writing task. • Ask students to create a web by sorting and
organizing their ideas and information. • If appropriate, consider having students
who are writing on a similar topic work in pairs to create a web for their combined notes. Some students may prefer to use scissors to cut-and-paste their web.
• Ask students to reread their webs and use them to create an outline for writing.
• Reread notes and identify important information and ideas.
• Use the questions and prompts to rephrase notes, identify key points, and group the ideas and information to create a web.
• Share and compare webs. • Make the connection between the web
and possible ways of organizing the information and ideas into a template for writing.
Notes
20
T H I N K L I T E R A C Y : C r o s s - C u r r i c u l a r A p p r o a c h e s , G r a d e s 7 - 1 2
W WEBBING IDEAS AND INFORMATION
Student Resource
21
T H I N K L I T E R A C Y : C r o s s - C u r r i c u l a r A p p r o a c h e s , G r a d e s 7 - 1 2
W
22
T H I N K L I T E R A C Y : C r o s s - C u r r i c u l a r A p p r o a c h e s , G r a d e s 7 - 1 2
W
Revising and Editing: Proofreading Without Partners
LEARNING STRATEGIES Grade 9
Students can build independence as writers when they develop strategies for proofreading their own work. Reading backwards, one word at a time is a classic journalist’s strategy for being able to see individual words and identify spelling errors. Reading backwards sentence by sentence will help students identify syntax and punctuation errors. Finally, reading from front to back slowly will help students read for meaning. Purpose • Turn student writing into isolated ideas and sentences so that students recognize their own errors.
Payoff Students will: • check work before it is submitted for assessment and/or evaluation. • find mistakes without a partner.
Tips and Resources • Reading backwards can be used as an answer checking strategy in a variety of situations (e.g., a test or
journal response, an information project, a lab report). In the sample presented, a section of a newsletter is displayed. Students can practice the skill of proofreading by reading to find the errors.
• In the suggested activity teachers first provide a sample of an article from the school newsletter or any other newsletter that would be appropriate.
• Using the Student Resource, students try out the “backwards reading” strategy in the sample Newsletter article provided. Students then compare their findings to a corrected sample, Student Resource, Sample Newsletter Article - Corrected.
• Students are then invited to practise writing their own article for a newsletter or other assigned task and proofread their own work.
• A computer lab for word processing would be an effective location for this lesson. • See also Student Resource, Instructions for Reading Backwards. • NB: Teachers will use assistive technologies as required.
Further Support • Start with small 2 to 3 sentence answers before moving to paragraphs and then longer texts. • Put students in pairs to read each other’s work backwards, attempting to match a stronger student with a
struggling student or an English Language Learner.
23
T H I N K L I T E R A C Y : C r o s s - C u r r i c u l a r A p p r o a c h e s , G r a d e s 7 - 1 2
W
Revising & Editing: Proofreading Without Partners
LEARNING STRATEGIES Grade 9
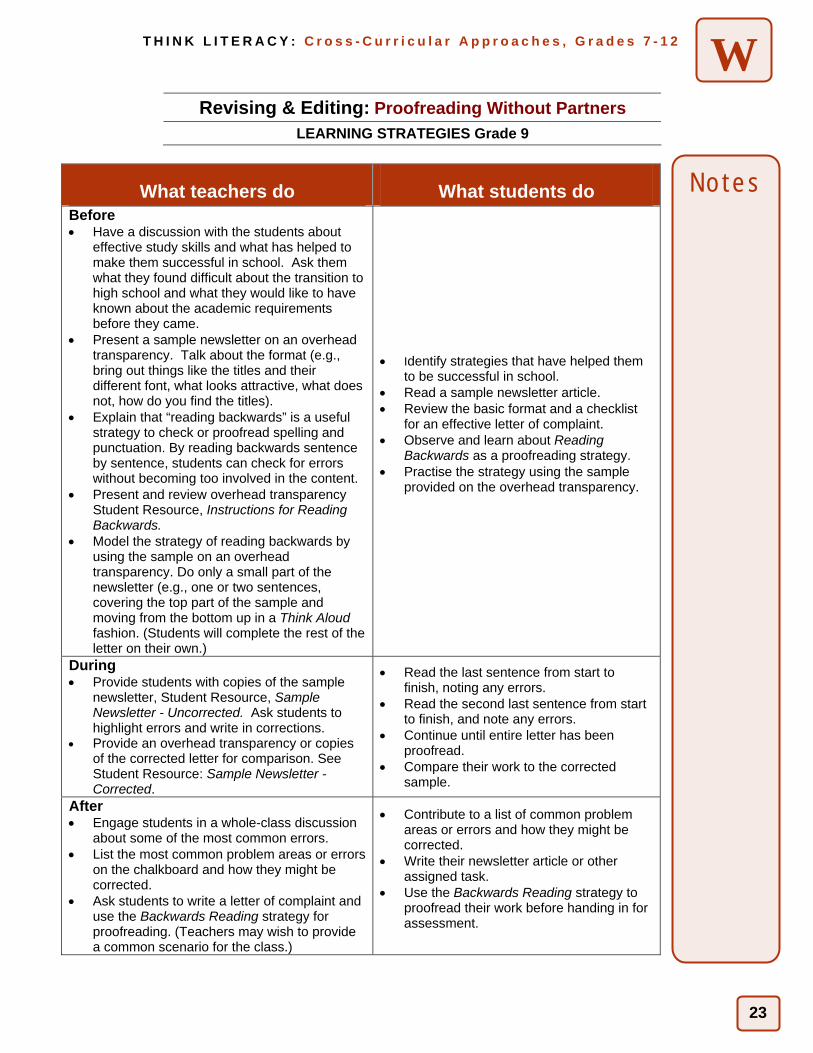
What teachers do What students do Before • Have a discussion with the students about
effective study skills and what has helped to make them successful in school. Ask them what they found difficult about the transition to high school and what they would like to have known about the academic requirements before they came.
• Present a sample newsletter on an overhead transparency. Talk about the format (e.g., bring out things like the titles and their different font, what looks attractive, what does not, how do you find the titles).
• Explain that “reading backwards” is a useful strategy to check or proofread spelling and punctuation. By reading backwards sentence by sentence, students can check for errors without becoming too involved in the content.
• Present and review overhead transparency Student Resource, Instructions for Reading Backwards.
• Model the strategy of reading backwards by using the sample on an overhead transparency. Do only a small part of the newsletter (e.g., one or two sentences, covering the top part of the sample and moving from the bottom up in a Think Aloud fashion. (Students will complete the rest of the letter on their own.)
• Identify strategies that have helped them to be successful in school.
• Read a sample newsletter article. • Review the basic format and a checklist
for an effective letter of complaint. • Observe and learn about Reading
Backwards as a proofreading strategy. • Practise the strategy using the sample
provided on the overhead transparency.
During • Provide students with copies of the sample
newsletter, Student Resource, Sample Newsletter - Uncorrected. Ask students to highlight errors and write in corrections.
• Provide an overhead transparency or copies of the corrected letter for comparison. See Student Resource: Sample Newsletter - Corrected.
• Read the last sentence from start to finish, noting any errors.
• Read the second last sentence from start to finish, and note any errors.
• Continue until entire letter has been proofread.
• Compare their work to the corrected sample.
After • Engage students in a whole-class discussion
about some of the most common errors. • List the most common problem areas or errors
on the chalkboard and how they might be corrected.
• Ask students to write a letter of complaint and use the Backwards Reading strategy for proofreading. (Teachers may wish to provide a common scenario for the class.)
• Contribute to a list of common problem areas or errors and how they might be corrected.
• Write their newsletter article or other assigned task.
• Use the Backwards Reading strategy to proofread their work before handing in for assessment.
Notes

24
T H I N K L I T E R A C Y : C r o s s - C u r r i c u l a r A p p r o a c h e s , G r a d e s 7 - 1 2
W Instructions for Reading Backwards
Unless directed otherwise, work quietly to proofread your own work. Follow these instructions:
1. To proof for spelling…
• Begin with the last word of your draft.
• Read backwards word by word checking each for correct spelling.
2. To proof for sentence structure, punctuation, grammar and phrasing…
• Begin with the last sentence of your draft and read that sentence from start to finish to find any errors.
• Read the second-last sentence from start to finish and note any
errors.
• Continue reading each sentence until you have reached the beginning of your piece of writing.
3. To proof for overall tone and meaning…
• Read from the beginning to the end, checking for meaning and flow.
4. Correct your errors.
• Ask another student or the teacher for help if you have a problem you can’t solve yourself.
Student Resource

25
T H I N K L I T E R A C Y : C r o s s - C u r r i c u l a r A p p r o a c h e s , G r a d e s 7 - 1 2
W Sample Newsletter Article- Uncorrected
Strategies for Successful Learning
There are many strategies for wheb it comes to making learning easyer. Some important Ones include how to make good nots and goal setting During your hi school years you will kopy many nots, witch is why knowing how to make good nots is important. Wen the teacher begins talking you should be lisening for key points to right down. When copying down nots you can draw diagrams to help illustrate the ideas so you have a visual way to understand the topic. Also
you should be able to right down the not as accurately as possibal and neatly so it is easy to understand and read when it comes to reviewing. After your finished writing the not down your lerning does’nt stop there. To make sure you understand it well, reread your not that nite so if you have any questshins, you can ask the teacher the nest day. This will also help to refresh your memry of what you have jist learnt.Another strategie is goal-setting. This a very important factory for geing successful in high school. When you make goals, you have a cleer idea of where you want to be going. You can lie out what needs to be done to achieve it. Goal setting is a proces. You gradually compleat each part until you’ve got it all done and have ackomplised the goal you set.
“The most important ting about goals is having one.” -Geoggrey F. Albert
Tips on Studying and Test Taking Establish a regular time for styding and keep to your skedule! Once a habit is started, its eazy to amintain. If you get tired of stdying alone get together with freins and study. Lerning together is mor fun than learning alone. When taking a test, read ovr all of the questuns first. Then spend time of the more fifficult ones. Start studying for tests erly. Cramming leads to stress and stress infterferes with memory.
Student Resource

26
T H I N K L I T E R A C Y : C r o s s - C u r r i c u l a r A p p r o a c h e s , G r a d e s 7 - 1 2
WSample Newsletter Article- Corrected
Strategies for Successful Learning
There are many strategies for making learning easier. Some important ones include how to make good notes and goal setting. During your high school years you will copy many notes, which is why knowing how to make good notes is important. When the teacher begins talking you should be listening for key points to write down. When copying down notes you can draw diagrams to help illustrate the ideas so you have a visual way to understand the topic. Also
you should be able to write down the note as accurately as possible and neatly so it is easy to understand and read when it comes to reviewing. After you’re finished writing the note down, your learning doesn’t stop there. To make sure you understand it well, reread your note that night so if you have any questions, you can ask the teacher the next day. This will also help to refresh your memory of what you have just learned. Another strategy is goal-setting. This is a very important strategy for being successful in high school. When you make goals, you have a clear idea of where you want to be going. You can plan out what needs to be done to achieve it. Goal setting is a process. You gradually complete each part until you’ve got it all done and have accomplished the goal you set.
“The most important thing about goals is having one.”
-Geoffrey F. Albert
Tips on Studying and Test Taking Establish a regular time for studying and keep to your schedule! Once a habit is started, it is easy to maintain. If you get tired of studying alone, get together with friends and study. Learning together is more fun than learning alone. When taking a test, read over all of the questions first. Then spend time on the more difficult ones. Start studying for tests early. Cramming leads to stress and stress interferes with memory.
Student Resource
27
T H I N K L I T E R A C Y : C r o s s - C u r r i c u l a r A p p r o a c h e s , G r a d e s 7 - 1 2
W
28
T H I N K L I T E R A C Y : C r o s s - C u r r i c u l a r A p p r o a c h e s , G r a d e s 7 - 1 2
W
Writing for a Purpose: Using Templates
LEARNING STRATEGIES Grade 9
When students can get the “picture” of a form of writing in their heads, they feel more confident about creating the final product. A template or framework is a skeletal structure for a writing form that allows students to organize their thoughts and researched information in order to write a first draft.
Purpose • Provide students with a template to scaffold their understanding of a form of writing and help them
organize information before drafting the piece.
Payoff Students will:
• learn the common expectations for the form and component of a particular writing assignment. • organize their writing and ensure that it meets the requirements of the assignment.
Tips and Resources • To help students understand how to construct a writing assignment, they may first need to
deconstruct an example of that assignment. The same template that is used for structuring student writing can be used initially to analyze examples of a writing form. For instance, before having students use the template to write in a specific form, give them an example of the same kind of writing and have them use the template to identify the example’s main idea, supporting details, transitional sentences, etc. Using the template to deconstruct a piece of writing before writing their own version gives students an exemplar from which to work when they begin their own writing. This activity can also be done in pairs or in small groups.
• Consider using examples from the Ontario Curriculum Exemplars. • See the explanations and templates for writing a business template, in the following resources:
- Student/Teacher Resource, Writing a Procedure; - Student Resource, Template for Writing a Procedure.
• There are numerous opportunities for application of this strategy in GLS/GLE Learning Strategies course planning. A computer lab for word processing is an effective place to carry out this activity.
• This strategy may be used in conjunction with brainstorming, Think/Pair/Share and other similar strategies.
• NB: Teachers should use assistive technologies where appropriate.
Further Support • The template may be used to assist students to demonstrate a procedure to a classmate or the whole
class with the steps required for that procedure. • Students may take turns using the template to instruct their peers on the procedures for a variety of
topics of interest to this group (e.g., programming a VCR, accessing a chat group, buying a snow board).
29
T H I N K L I T E R A C Y : C r o s s - C u r r i c u l a r A p p r o a c h e s , G r a d e s 7 - 1 2
W
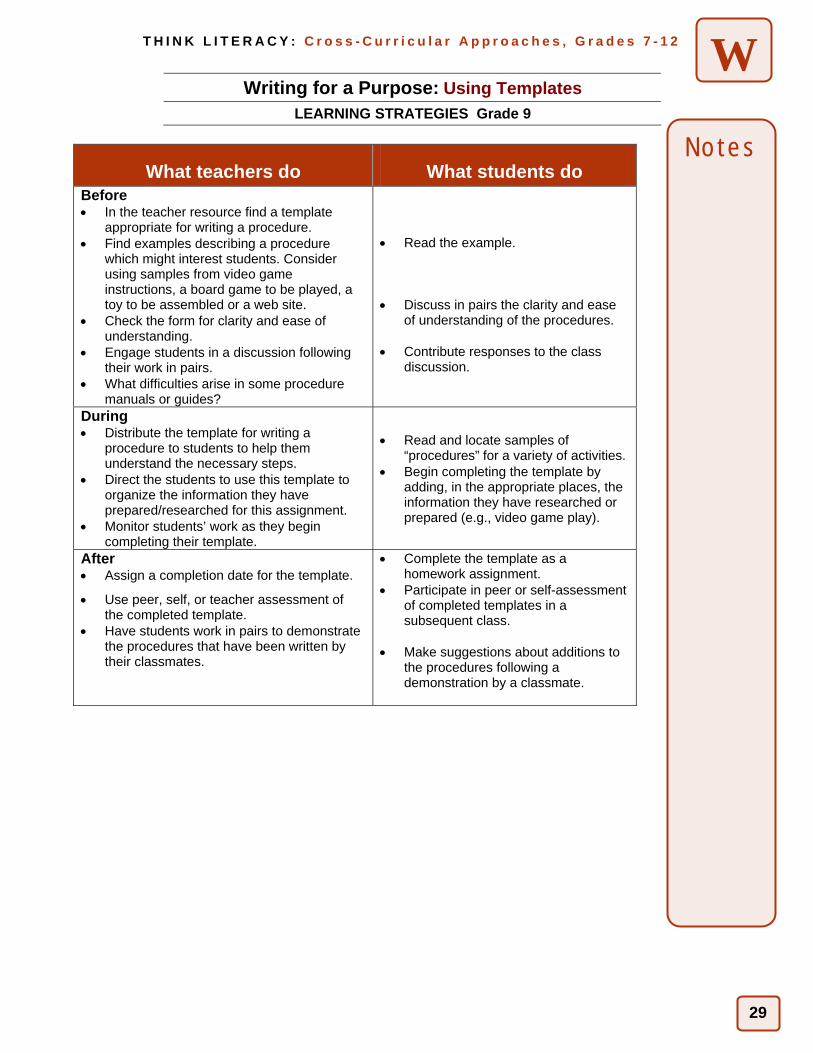
Writing for a Purpose: Using Templates
LEARNING STRATEGIES Grade 9
What teachers do What students do Before • In the teacher resource find a template
appropriate for writing a procedure. • Find examples describing a procedure
which might interest students. Consider using samples from video game instructions, a board game to be played, a toy to be assembled or a web site.
• Check the form for clarity and ease of understanding.
• Engage students in a discussion following their work in pairs.
• What difficulties arise in some procedure manuals or guides?
• Read the example. • Discuss in pairs the clarity and ease
of understanding of the procedures. • Contribute responses to the class
discussion.
During • Distribute the template for writing a
procedure to students to help them understand the necessary steps.
• Direct the students to use this template to organize the information they have prepared/researched for this assignment.
• Monitor students’ work as they begin completing their template.
• Read and locate samples of “procedures” for a variety of activities.
• Begin completing the template by adding, in the appropriate places, the information they have researched or prepared (e.g., video game play).
After • Assign a completion date for the template.
• Use peer, self, or teacher assessment of the completed template.
• Have students work in pairs to demonstrate the procedures that have been written by their classmates.
• Complete the template as a homework assignment.
• Participate in peer or self-assessment of completed templates in a subsequent class.
• Make suggestions about additions to
the procedures following a demonstration by a classmate.
Notes
30
T H I N K L I T E R A C Y : C r o s s - C u r r i c u l a r A p p r o a c h e s , G r a d e s 7 - 1 2
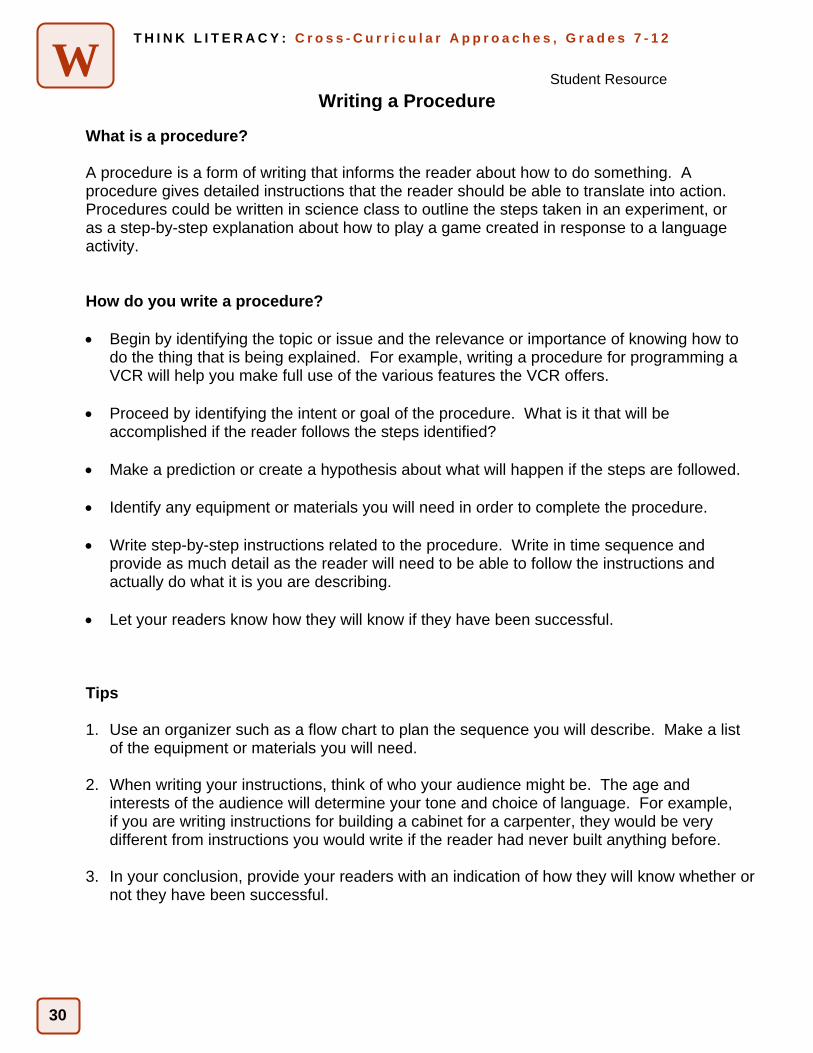
W Writing a Procedure
What is a procedure?
A procedure is a form of writing that informs the reader about how to do something. A procedure gives detailed instructions that the reader should be able to translate into action. Procedures could be written in science class to outline the steps taken in an experiment, or as a step-by-step explanation about how to play a game created in response to a language activity.
How do you write a procedure?
• Begin by identifying the topic or issue and the relevance or importance of knowing how to do the thing that is being explained. For example, writing a procedure for programming a VCR will help you make full use of the various features the VCR offers.
• Proceed by identifying the intent or goal of the procedure. What is it that will be
accomplished if the reader follows the steps identified?
• Make a prediction or create a hypothesis about what will happen if the steps are followed.
• Identify any equipment or materials you will need in order to complete the procedure.
• Write step-by-step instructions related to the procedure. Write in time sequence and provide as much detail as the reader will need to be able to follow the instructions and actually do what it is you are describing.
• Let your readers know how they will know if they have been successful. Tips
1. Use an organizer such as a flow chart to plan the sequence you will describe. Make a list
of the equipment or materials you will need.
2. When writing your instructions, think of who your audience might be. The age and interests of the audience will determine your tone and choice of language. For example, if you are writing instructions for building a cabinet for a carpenter, they would be very different from instructions you would write if the reader had never built anything before.
3. In your conclusion, provide your readers with an indication of how they will know whether or
not they have been successful.
Student Resource
31
T H I N K L I T E R A C Y : C r o s s - C u r r i c u l a r A p p r o a c h e s , G r a d e s 7 - 1 2
W
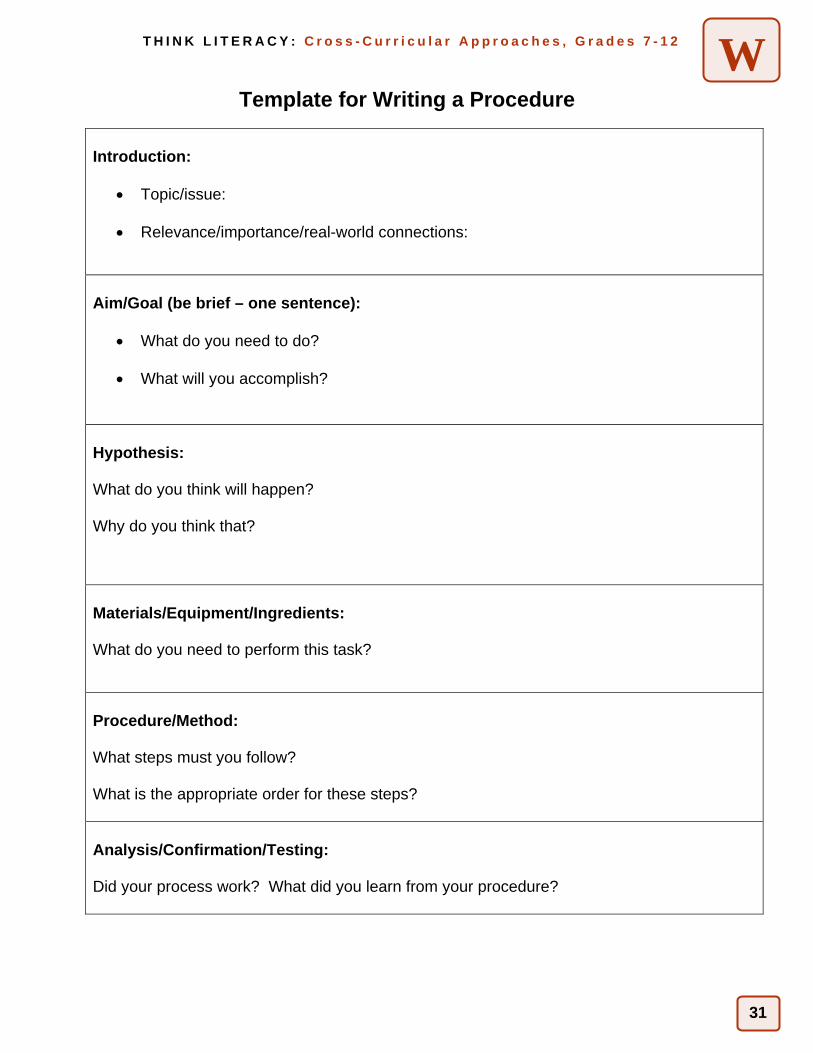
Template for Writing a Procedure
Introduction:
• Topic/issue:
• Relevance/importance/real-world connections: Aim/Goal (be brief – one sentence):
• What do you need to do?
• What will you accomplish? Hypothesis: What do you think will happen? Why do you think that?
Materials/Equipment/Ingredients: What do you need to perform this task? Procedure/Method: What steps must you follow? What is the appropriate order for these steps? Analysis/Confirmation/Testing: Did your process work? What did you learn from your procedure?
32
T H I N K L I T E R A C Y : C r o s s - C u r r i c u l a r A p p r o a c h e s , G r a d e s 7 - 1 2
O
Pair Work: Think/Pair/Share
LEARNING STRATEGIES Grade 9
In this strategy, students individually consider a problem and then discuss their ideas with a partner.
Purpose • Encourage students to think about a question, issue, or reading and then refine their understanding
through discussion with a partner.
Payoff Students will: • reflect on subject content. • deepen understanding of an issue or topic through clarification and rehearsal with a partner. • develop skills for group discussion, such as listening actively, disagreeing respectfully, and rephrasing ideas for clarity.
Tips and Resources • Use Think/Pair/Share in all Guidance and Career Education subject areas for almost any topic (e.g., in
Learning Strategies, discuss the relationship between being organized and success). • Use it to help students with their in-class reading. Ask them to read a chapter, think about the
ideas, and then take turns retelling the information to a partner. • Use it at any point during a lesson, for very brief intervals or in a longer time frame. • Increase the amount of time devoted to Think/Pair/Share, depending on the complexity of the reading or
question being considered. This strategy can be used for relatively simple questions and for ones that require more sophisticated thinking skills, such as hypothesizing or evaluating.
• Take time to ensure that all students understand the stages of the process and what is expected of them. • Review the skills that students need to participate effectively in Think/Pair/Share, such as good listening,
turn-taking, respectful consideration of different points of view, asking for clarification, and rephrasing ideas.
• After students share in pairs, consider switching partners and continuing the exchange of ideas. • See other strategies, including Take Five and Discussion Web for ways to build on the Think/Pair/Share
strategy. NB: Teachers should use assistive technologies where appropriate.
Further Support • Some students may benefit from a discussion with the teacher to articulate their ideas before moving on to
share with a partner. • Newspapers, magazines or newsletters often have examples of two different points of view on a single
topic.
33
T H I N K L I T E R A C Y : C r o s s - C u r r i c u l a r A p p r o a c h e s , G r a d e s 7 - 1 2
O
What teachers do What students do
Before • Have students read a selection or prepare a topic,
question, or prompt for a planned Think/Pair/Share activity. Examples of questions might include:
• “Why is it important to do research?” − “Is it important to do research on occupations
before choosing one?” − “What does job shadowing do to assist students
to understand the world of work?” − “Why should a student volunteer in a sector that
interests them?” − “How does a student know what resources and
web sites are helpful in career education planning?”
− “What community agencies in your neighborhood offer free services?”
− “What work habits are expected of students in their summer jobs?” OR…
• Choose a “teachable moment” during the class where the process of reflection and shared discussion would bring deeper understanding, and insert a brief Think/Pair/Share activity into the lesson at that point.
• In either case, review listening, speaking, group-role, and small group discussion skills presented in the Communication unit. These can be directly applied to the Think/Pair/Share activity.
• Consider the social and academic goals for the Think/Pair/Share activity, and plan for pairing of
particular learners that would further those goals.
• Read the chapter or section if the Think/Pair/Share is based on information and ideas from a reading selection.
• Look up any words that may need defining, using a dictionary or ask a student or the teacher
During • Set clear expectations regarding the focus of thinking and
sharing to be done. • Ask students to spend several minutes thinking about and
writing down ideas. • Put students in pairs to share and clarify their ideas and
understanding. • Monitor students’ dialogue by circulating and listening.
• Formulate thoughts and ideas, writing them down as necessary to prepare for sharing with a partner.
• Practise good active listening skills when working in pairs, using techniques such as paraphrasing what the other has said, asking for clarification and orally clarifying their own ideas.
After • Call upon some pairs to share their learning and ideas with
the class. • Possibly extend the Think/Pair/Share with a further partner.
(i.e., students swap partners and exchange ideas again). • Consider adding a journal writing activity as a productive
follow-up to a Think/Pair/Share activity. • The journal writing activity could be linked to reporting on
the communication process developed in the Communication unit (i.e., how group members performed their roles, how small-group discussion was facilitated, or how a conflict in their group was resolved).
• Pinpoint any information that is still unclear after the pair discussion, and ask the class and teacher for clarification.
Pair Work: Think/Pair/Share
LEARNING STRATEGIES Grade 9
Notes
34
T H I N K L I T E R A C Y : C r o s s - C u r r i c u l a r A p p r o a c h e s , G r a d e s 7 - 1 2
O
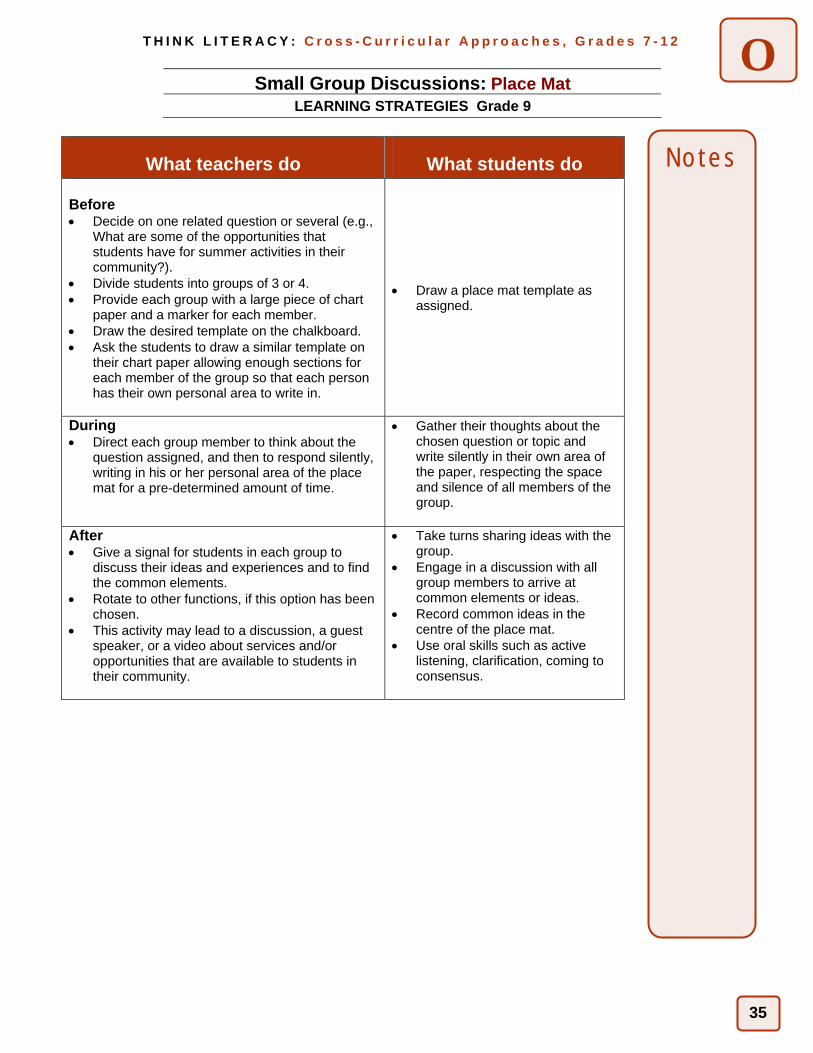
Small Group Discussion: Place Mat
LEARNING STRATEGIES Grade 9
In this easy-to-use strategy, students are divided into small groups gathered around a piece of chart paper. First, students individually think about a question and write down their ideas on their own section of the chart paper. Then students share ideas to discover common elements that can be written in the centre of the chart paper.
Purpose • Give all students an opportunity to share ideas and learn from each other in a cooperative small group
discussion.
Payoff Students will: • have an opportunity to reflect and participate. • have fun interacting with others and extending their learning while accomplishing the task.
Tips and Resources • This strategy can be used with a wide variety of questions and prompts in a variety of applications for GLS
Learning Strategies or any of the other Guidance and Career Education courses (e.g., as an introduction to the course and/or unit and individual expectations, as a way to activate the sharing of background knowledge among students, as a way to stimulate the sharing of ideas and opinions).
• Groups of 2 or 4 are ideal, but the approach can also work with up to 7 students in a group. • Large pieces of chart paper and markers are required. • One question or issue may be assigned to all groups in a class situation or several questions or issues for
simultaneous consideration may be assigned (e.g., all groups may be asked to explore community agencies that might assist in finding summer and/or student employment). Students may also be asked to investigate other opportunities for students in the summer (e.g., volunteering, taking special certification courses such as Drivers’ Education, Safe Boating Certificate, CPR or Emergency First Aid). In the latter suggestion, groups then rotate through the other functions until all have been explored.
• The Place Mat process may be timed. • Place mat templates exist in a variety of forms (e.g., four squares with a centre square or circle, a half-sun
form with a half-circle at the bottom of the page with sections radiating above, or a half circle at the top and radiating sections extending downwards).
• This strategy can be used to explain how government, community agencies, and charitable organizations assist students in finding meaningful summer activity.
• See Student/Teacher Resource, Place Mat Template. • See Teacher Resources for Place Mat Template – Example. • NB: Teachers should use assistive technologies where appropriate.
Further Support • Careful consideration for the composition of the groups is important. Choose various methods of arranging
the groups. • Some students may benefit from being able to “pass” during group sharing.
35
T H I N K L I T E R A C Y : C r o s s - C u r r i c u l a r A p p r o a c h e s , G r a d e s 7 - 1 2
O
Small Group Discussions: Place Mat
LEARNING STRATEGIES Grade 9
What teachers do What students do Before • Decide on one related question or several (e.g.,
What are some of the opportunities that students have for summer activities in their community?).
• Divide students into groups of 3 or 4. • Provide each group with a large piece of chart
paper and a marker for each member. • Draw the desired template on the chalkboard. • Ask the students to draw a similar template on
their chart paper allowing enough sections for each member of the group so that each person has their own personal area to write in.
• Draw a place mat template as assigned.
During • Direct each group member to think about the
question assigned, and then to respond silently, writing in his or her personal area of the place mat for a pre-determined amount of time.
• Gather their thoughts about the chosen question or topic and write silently in their own area of the paper, respecting the space and silence of all members of the group.
After • Give a signal for students in each group to
discuss their ideas and experiences and to find the common elements.
• Rotate to other functions, if this option has been chosen.
• This activity may lead to a discussion, a guest speaker, or a video about services and/or opportunities that are available to students in their community.
• Take turns sharing ideas with the group.
• Engage in a discussion with all group members to arrive at common elements or ideas.
• Record common ideas in the centre of the place mat.
• Use oral skills such as active listening, clarification, coming to consensus.
Notes
36
T H I N K L I T E R A C Y : C r o s s - C u r r i c u l a r A p p r o a c h e s , G r a d e s 7 - 1 2
O Student/Teacher Resource
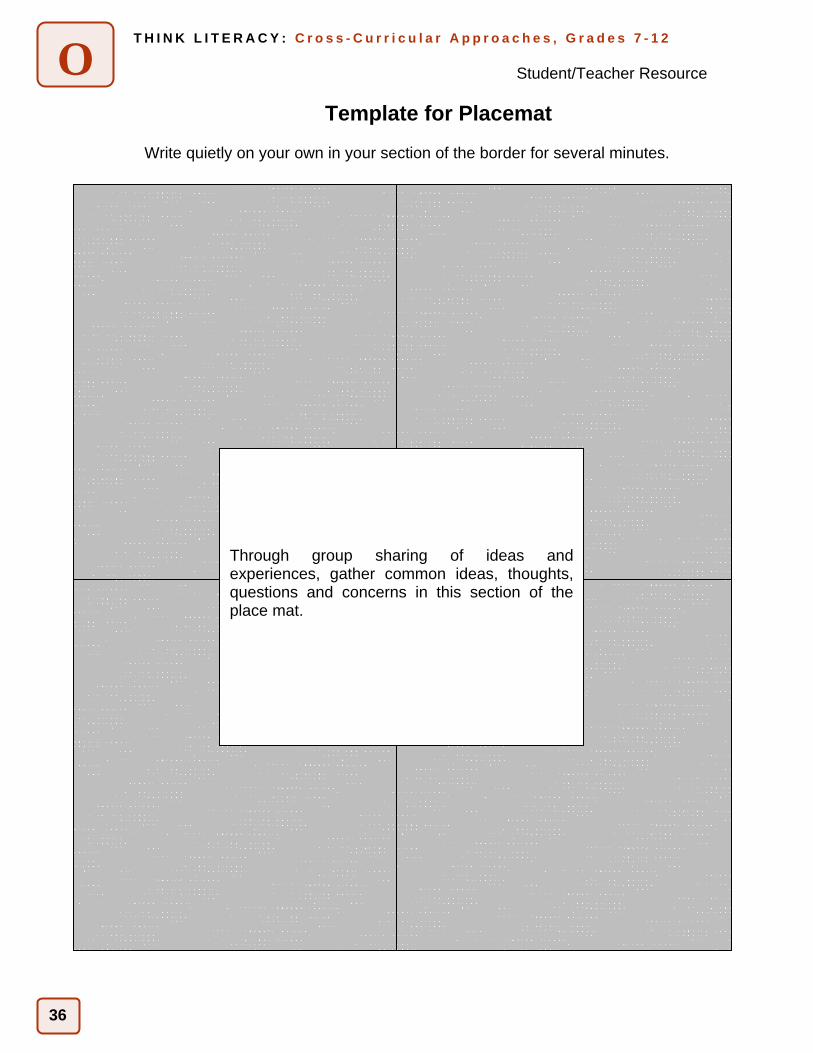
Template for Placemat
Write quietly on your own in your section of the border for several minutes.
Through group sharing of ideas and experiences, gather common ideas, thoughts, questions and concerns in this section of the place mat.

37
T H I N K L I T E R A C Y : C r o s s - C u r r i c u l a r A p p r o a c h e s , G r a d e s 7 - 1 2
O Teacher Resource
Place Mat Template – Example
One of the major decisions that teenagers face each summer is that of deciding what they are going to do. Will they get a job, do volunteer work, go on an exchange? What options exist for students in our community?
Students may choose to find a summer job. Students may choose to do volunteer work.
Waiters/Waitresses Nursing Homes Sales Clerks Yard Work for Seniors Camp Counsellors Humane Society
Students may choose to do an exchange Students may choose to go to summer
school.
Summer study/travel programs Make-Up Courses Be a host to an international Reach Ahead Courses exchange student General Interest/Hobby Courses Summer international aid volunteer programs
There are a variety of options for students for summer activities. The option chosen probably depends on what a student’s interests are and the opportunities that they are able to participate in.
38
T H I N K L I T E R A C Y : C r o s s - C u r r i c u l a r A p p r o a c h e s , G r a d e s 7 - 1 2
O
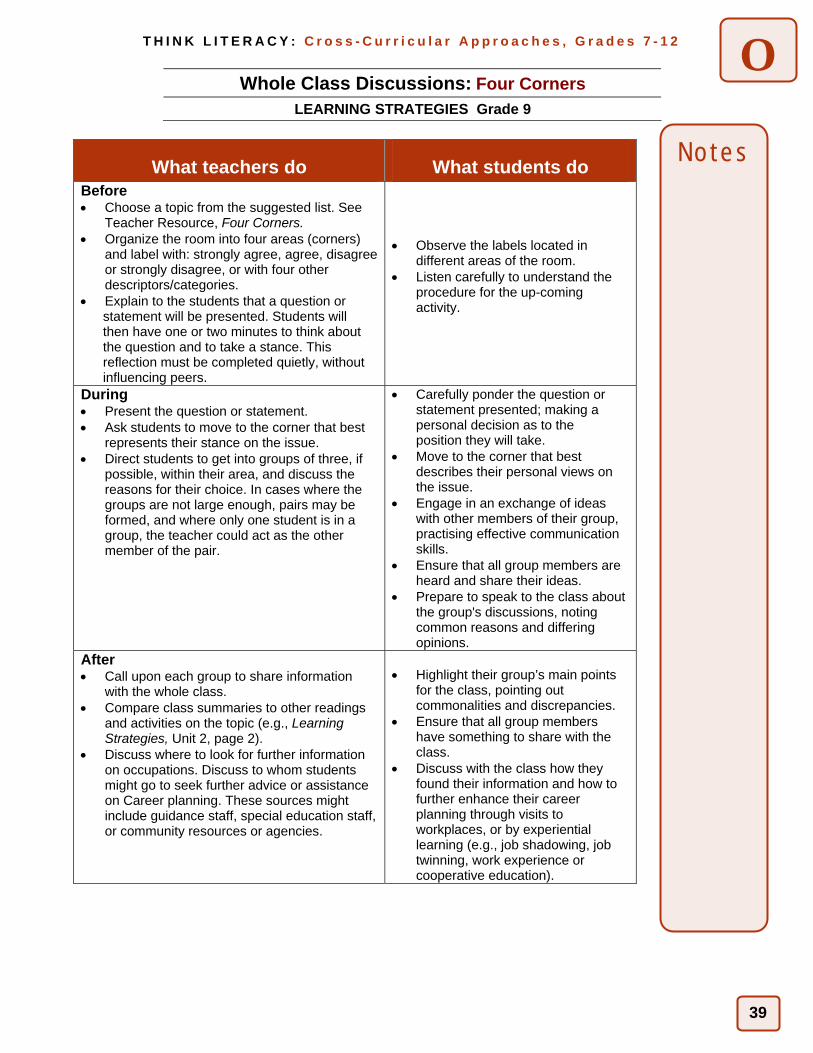
Whole Class Discussions: Four Corners
LEARNING STRATEGIES Grade 9
In this strategy, students individually consider an issue and move to an area in the room where they join others who share their ideas. The advantage of this strategy is that it is flexible and can be used for many topics, questions, and different areas in Learning Strategies.
Purpose • Encourage critical thinking. • Encourage an exchange of ideas in small groups. • Facilitate whole-class discussions of these ideas.
Payoff Students will: • make up their minds on an issue. • speak freely in a relaxed environment. • think creatively and critically.
Tips and Resources • Encourage students to make up their own minds concerning the issue. • Questions or statements need to have the potential for varying degrees of opinion. • There are several variations of this strategy:
- Consider using more than four areas for a response – even six responses can work well with various questions.
- Try using only two responses; draw a line dividing the room. Ask students to stand on one side of the line or the other, depending on their decision.
- Vary the approach by creating a value line. Ask students to rank themselves by lining up in a single line of a continuum; from strongly agree to strongly disagree. This will make student exchanges a necessity so that students can discover exactly where they fit along the line.
• Use the suggested activity as an introduction to the study of self-concept and identity to assess what students already know and understand.
• Class summaries may be compared to other readings and activities on the topic (e.g., learning styles). • Students will decide where to access additional information or assistance. These resources might include
the guidance department, special education staff, or community resources or agencies. • See topic suggestions in the Teacher Resource, Four Corners. • A variety of learning strategies or career-related questions or statements can be used. NB: Teachers should use assistive technologies where appropriate.
Further Support
• The teacher may need to encourage some students and promote equal responses in groups. • The teacher may choose a corner which is not populated to encourage creative or divergent thinking.
39
T H I N K L I T E R A C Y : C r o s s - C u r r i c u l a r A p p r o a c h e s , G r a d e s 7 - 1 2
O
Whole Class Discussions: Four Corners
LEARNING STRATEGIES Grade 9
What teachers do What students do Before • Choose a topic from the suggested list. See
Teacher Resource, Four Corners. • Organize the room into four areas (corners)
and label with: strongly agree, agree, disagree or strongly disagree, or with four other descriptors/categories.
• Explain to the students that a question or statement will be presented. Students will then have one or two minutes to think about the question and to take a stance. This reflection must be completed quietly, without influencing peers.
• Observe the labels located in different areas of the room.
• Listen carefully to understand the procedure for the up-coming activity.
During • Present the question or statement. • Ask students to move to the corner that best
represents their stance on the issue. • Direct students to get into groups of three, if
possible, within their area, and discuss the reasons for their choice. In cases where the groups are not large enough, pairs may be formed, and where only one student is in a group, the teacher could act as the other member of the pair.
• Carefully ponder the question or statement presented; making a personal decision as to the position they will take.
• Move to the corner that best describes their personal views on the issue.
• Engage in an exchange of ideas with other members of their group, practising effective communication skills.
• Ensure that all group members are heard and share their ideas.
• Prepare to speak to the class about the group's discussions, noting common reasons and differing opinions.
After • Call upon each group to share information
with the whole class. • Compare class summaries to other readings
and activities on the topic (e.g., Learning Strategies, Unit 2, page 2).
• Discuss where to look for further information on occupations. Discuss to whom students might go to seek further advice or assistance on Career planning. These sources might include guidance staff, special education staff, or community resources or agencies.
• Highlight their group’s main points
for the class, pointing out commonalities and discrepancies.
• Ensure that all group members have something to share with the class.
• Discuss with the class how they found their information and how to further enhance their career planning through visits to workplaces, or by experiential learning (e.g., job shadowing, job twinning, work experience or cooperative education).
Notes
40
T H I N K L I T E R A C Y : C r o s s - C u r r i c u l a r A p p r o a c h e s , G r a d e s 7 - 1 2
O
Whole Class Discussions: Four Corners
LEARNIING STRATEGIES Grade 9
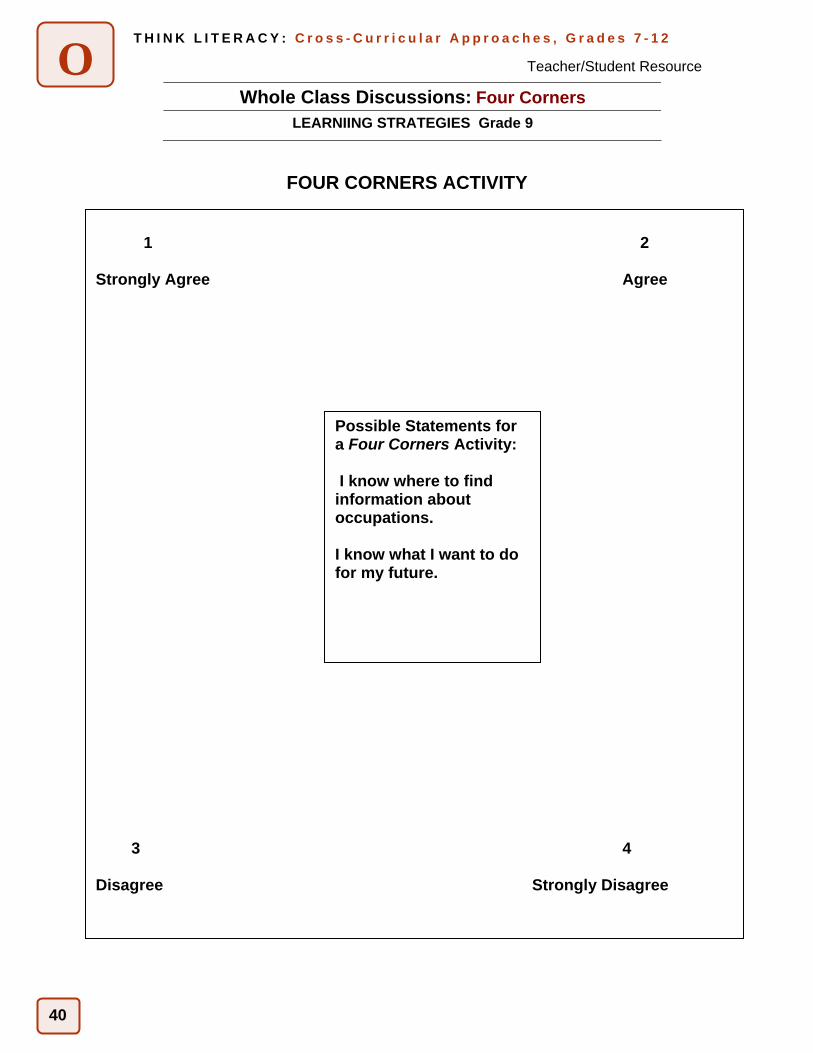
FOUR CORNERS ACTIVITY
Teacher/Student Resource
1 2
Strongly Agree Agree 3 4 Disagree Strongly Disagree
Possible Statements for a Four Corners Activity: I know where to find information about occupations. I know what I want to do for my future.